Pasatiempo's "new" back nine is now complete after a two-phase restoration and the Alister MacKenzie course now has two complete nines with restored features
Pasatiempo’s two-phased restoration is now complete when the back nine opened for play in late 2024. Restoration consultant Jim Urbina aimed to re-introduce the original Alister MacKenzie design intent — he got awfully close!
Original Architect: Alister MacKenzie (1929) Restorative Architect: Tom Doak (2007), Jim Urbina (2023-2024)
Notable Championships Played: 1982 U.S. Women’s Amateur 2004 U.S. Senior Women’s Amateur Western Intercollegiate (since 1947)
For photos of the newly restored front nine holes, please refer to the original Golf Course Nerd post on Pasatiempo from April 2024 (Link)
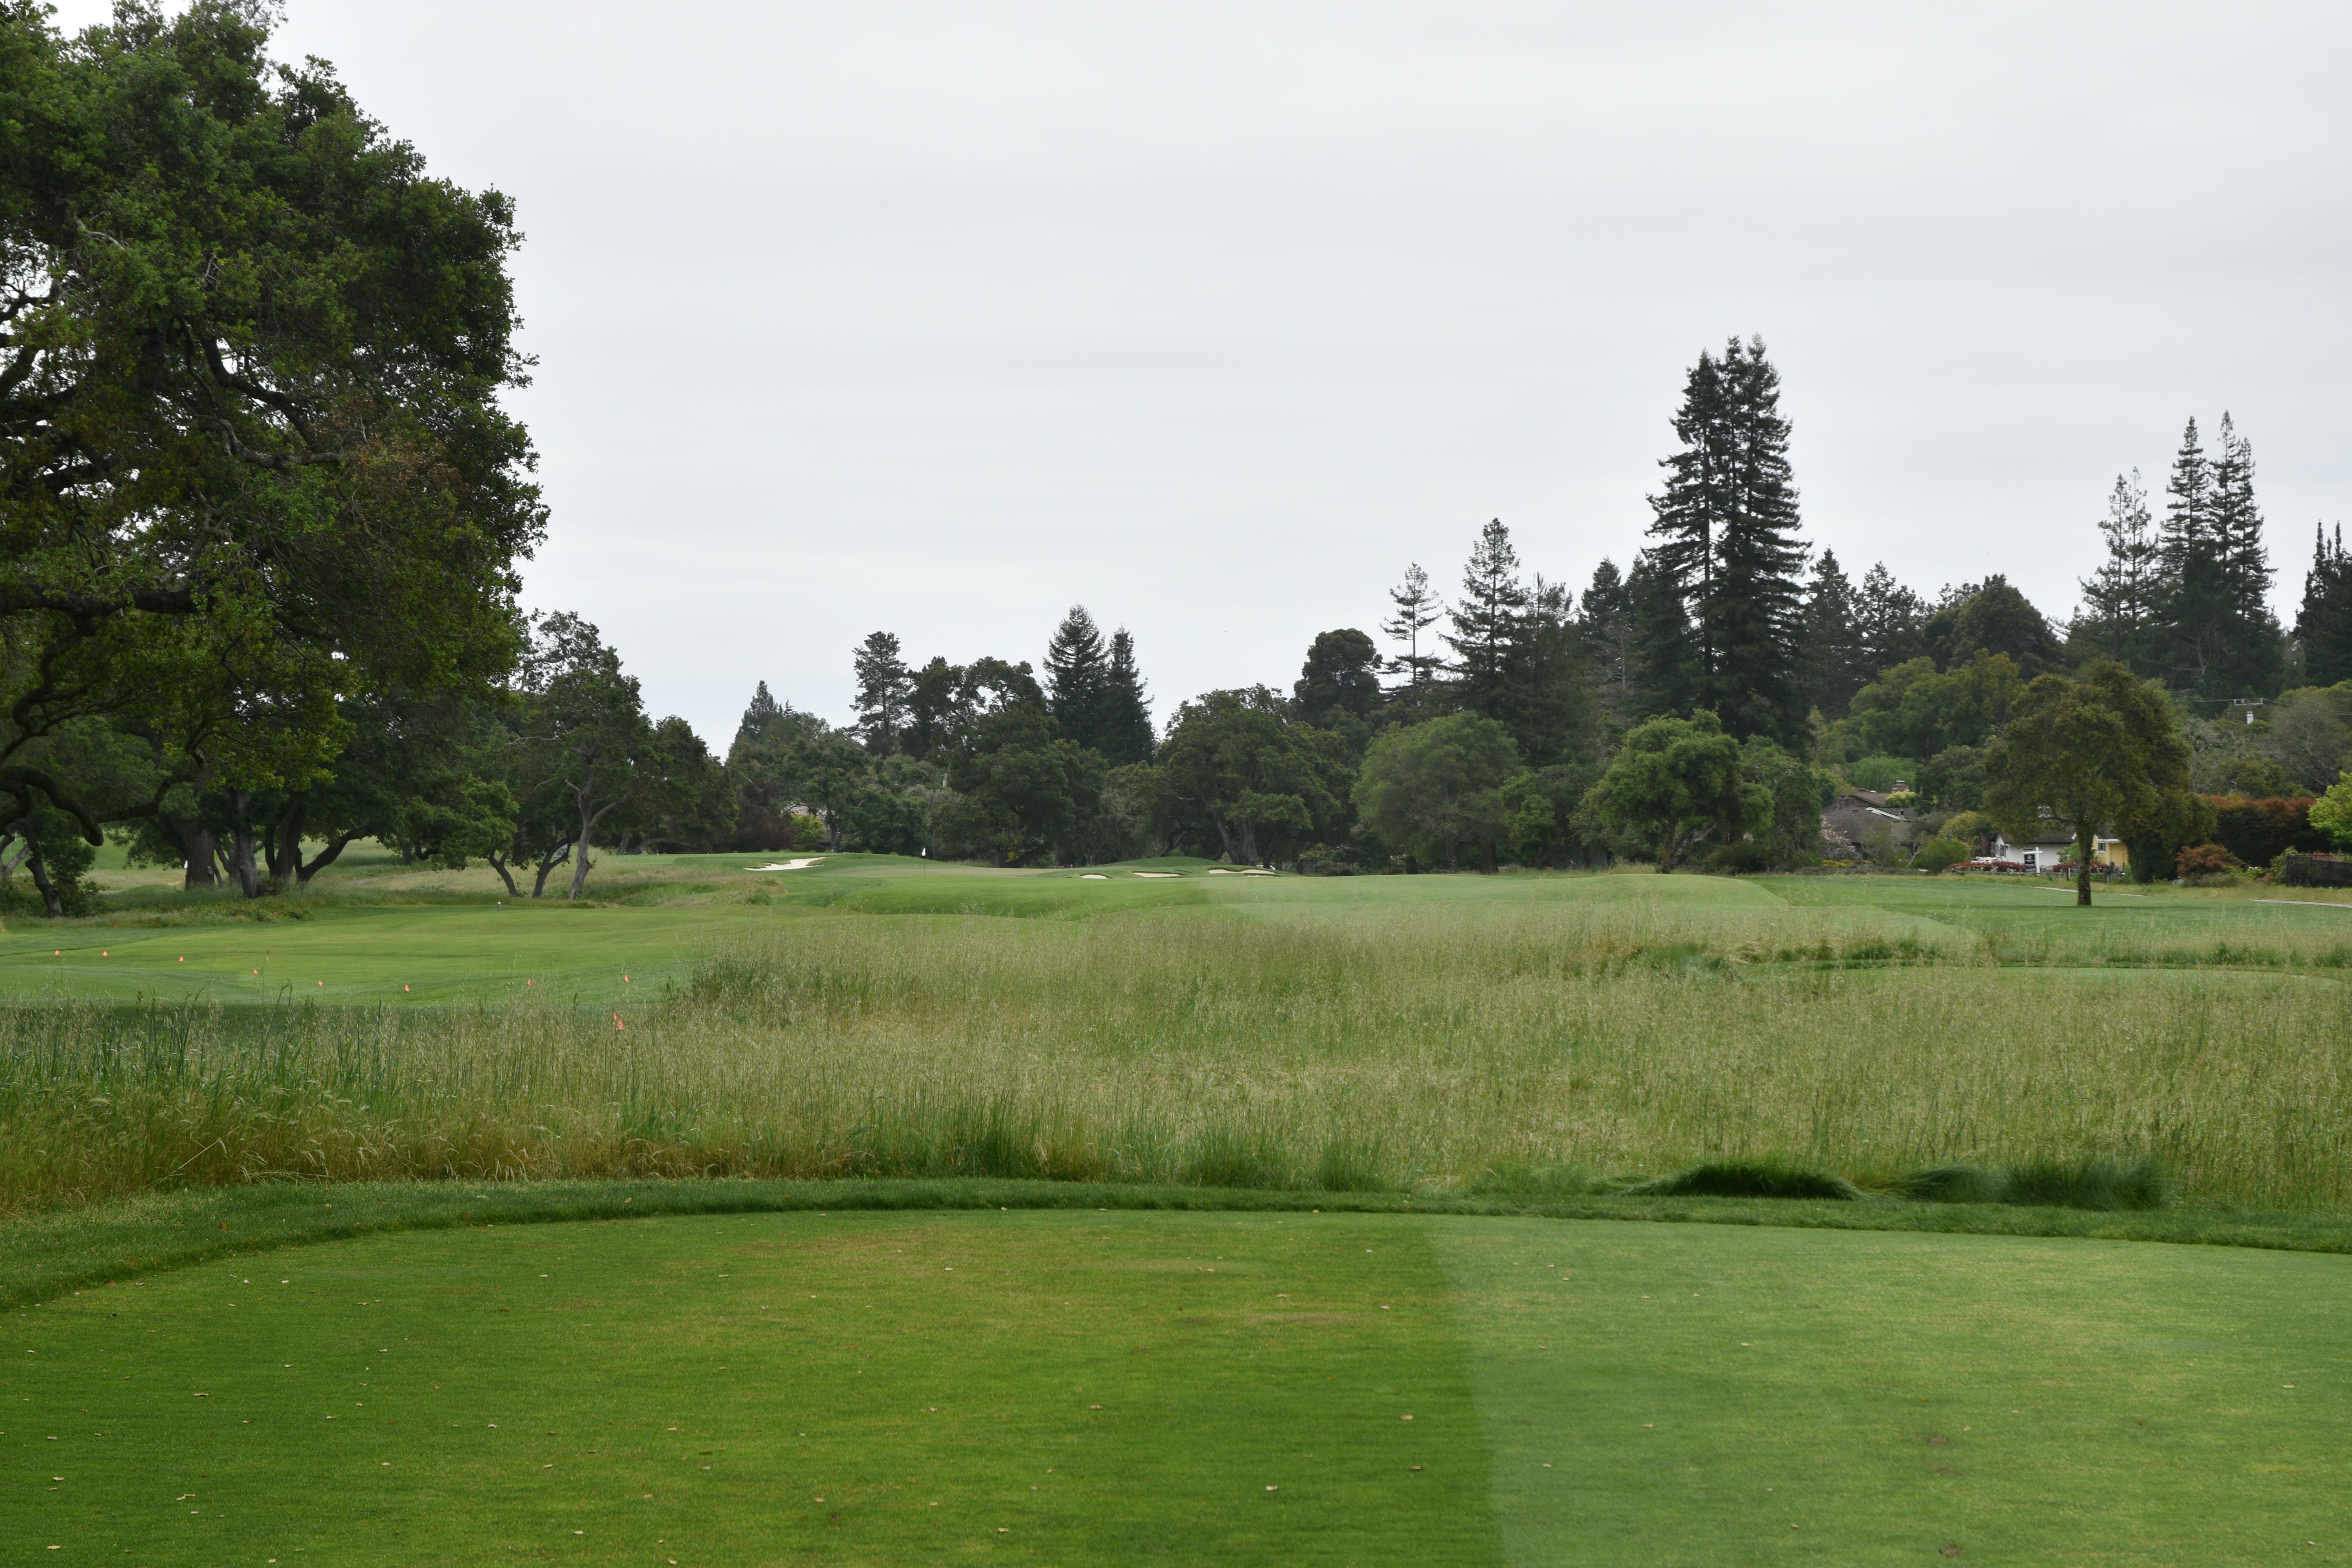
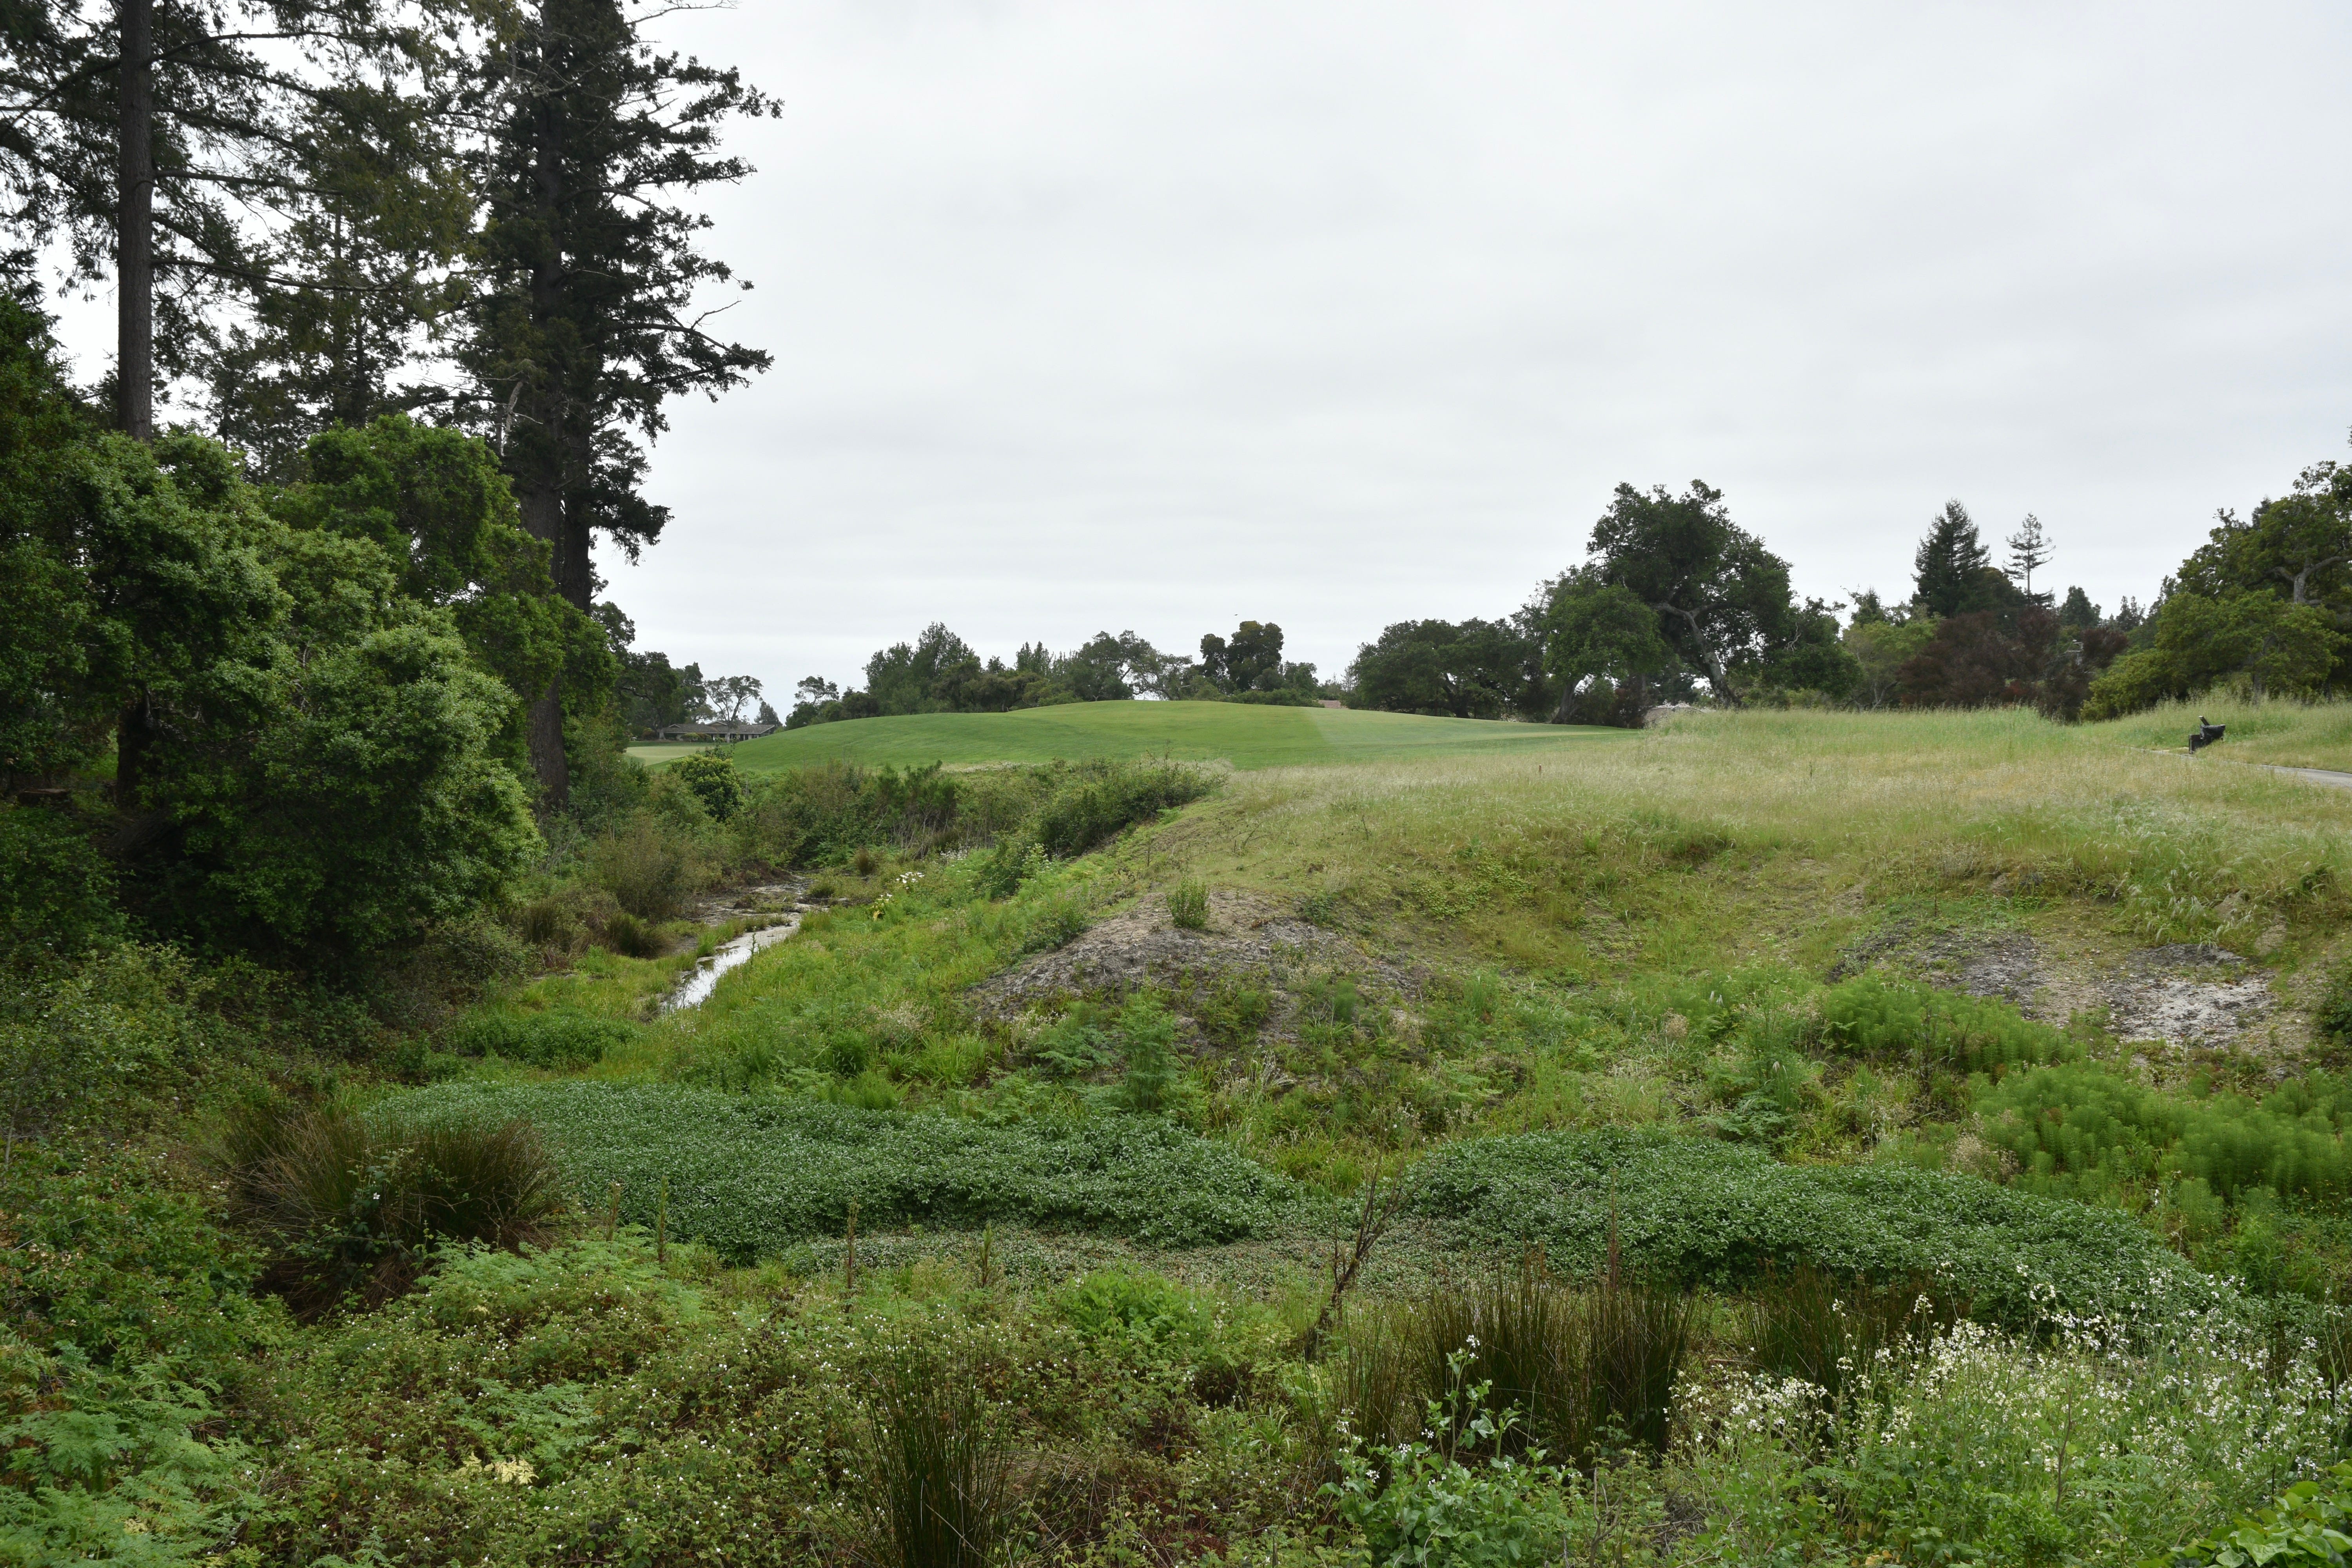
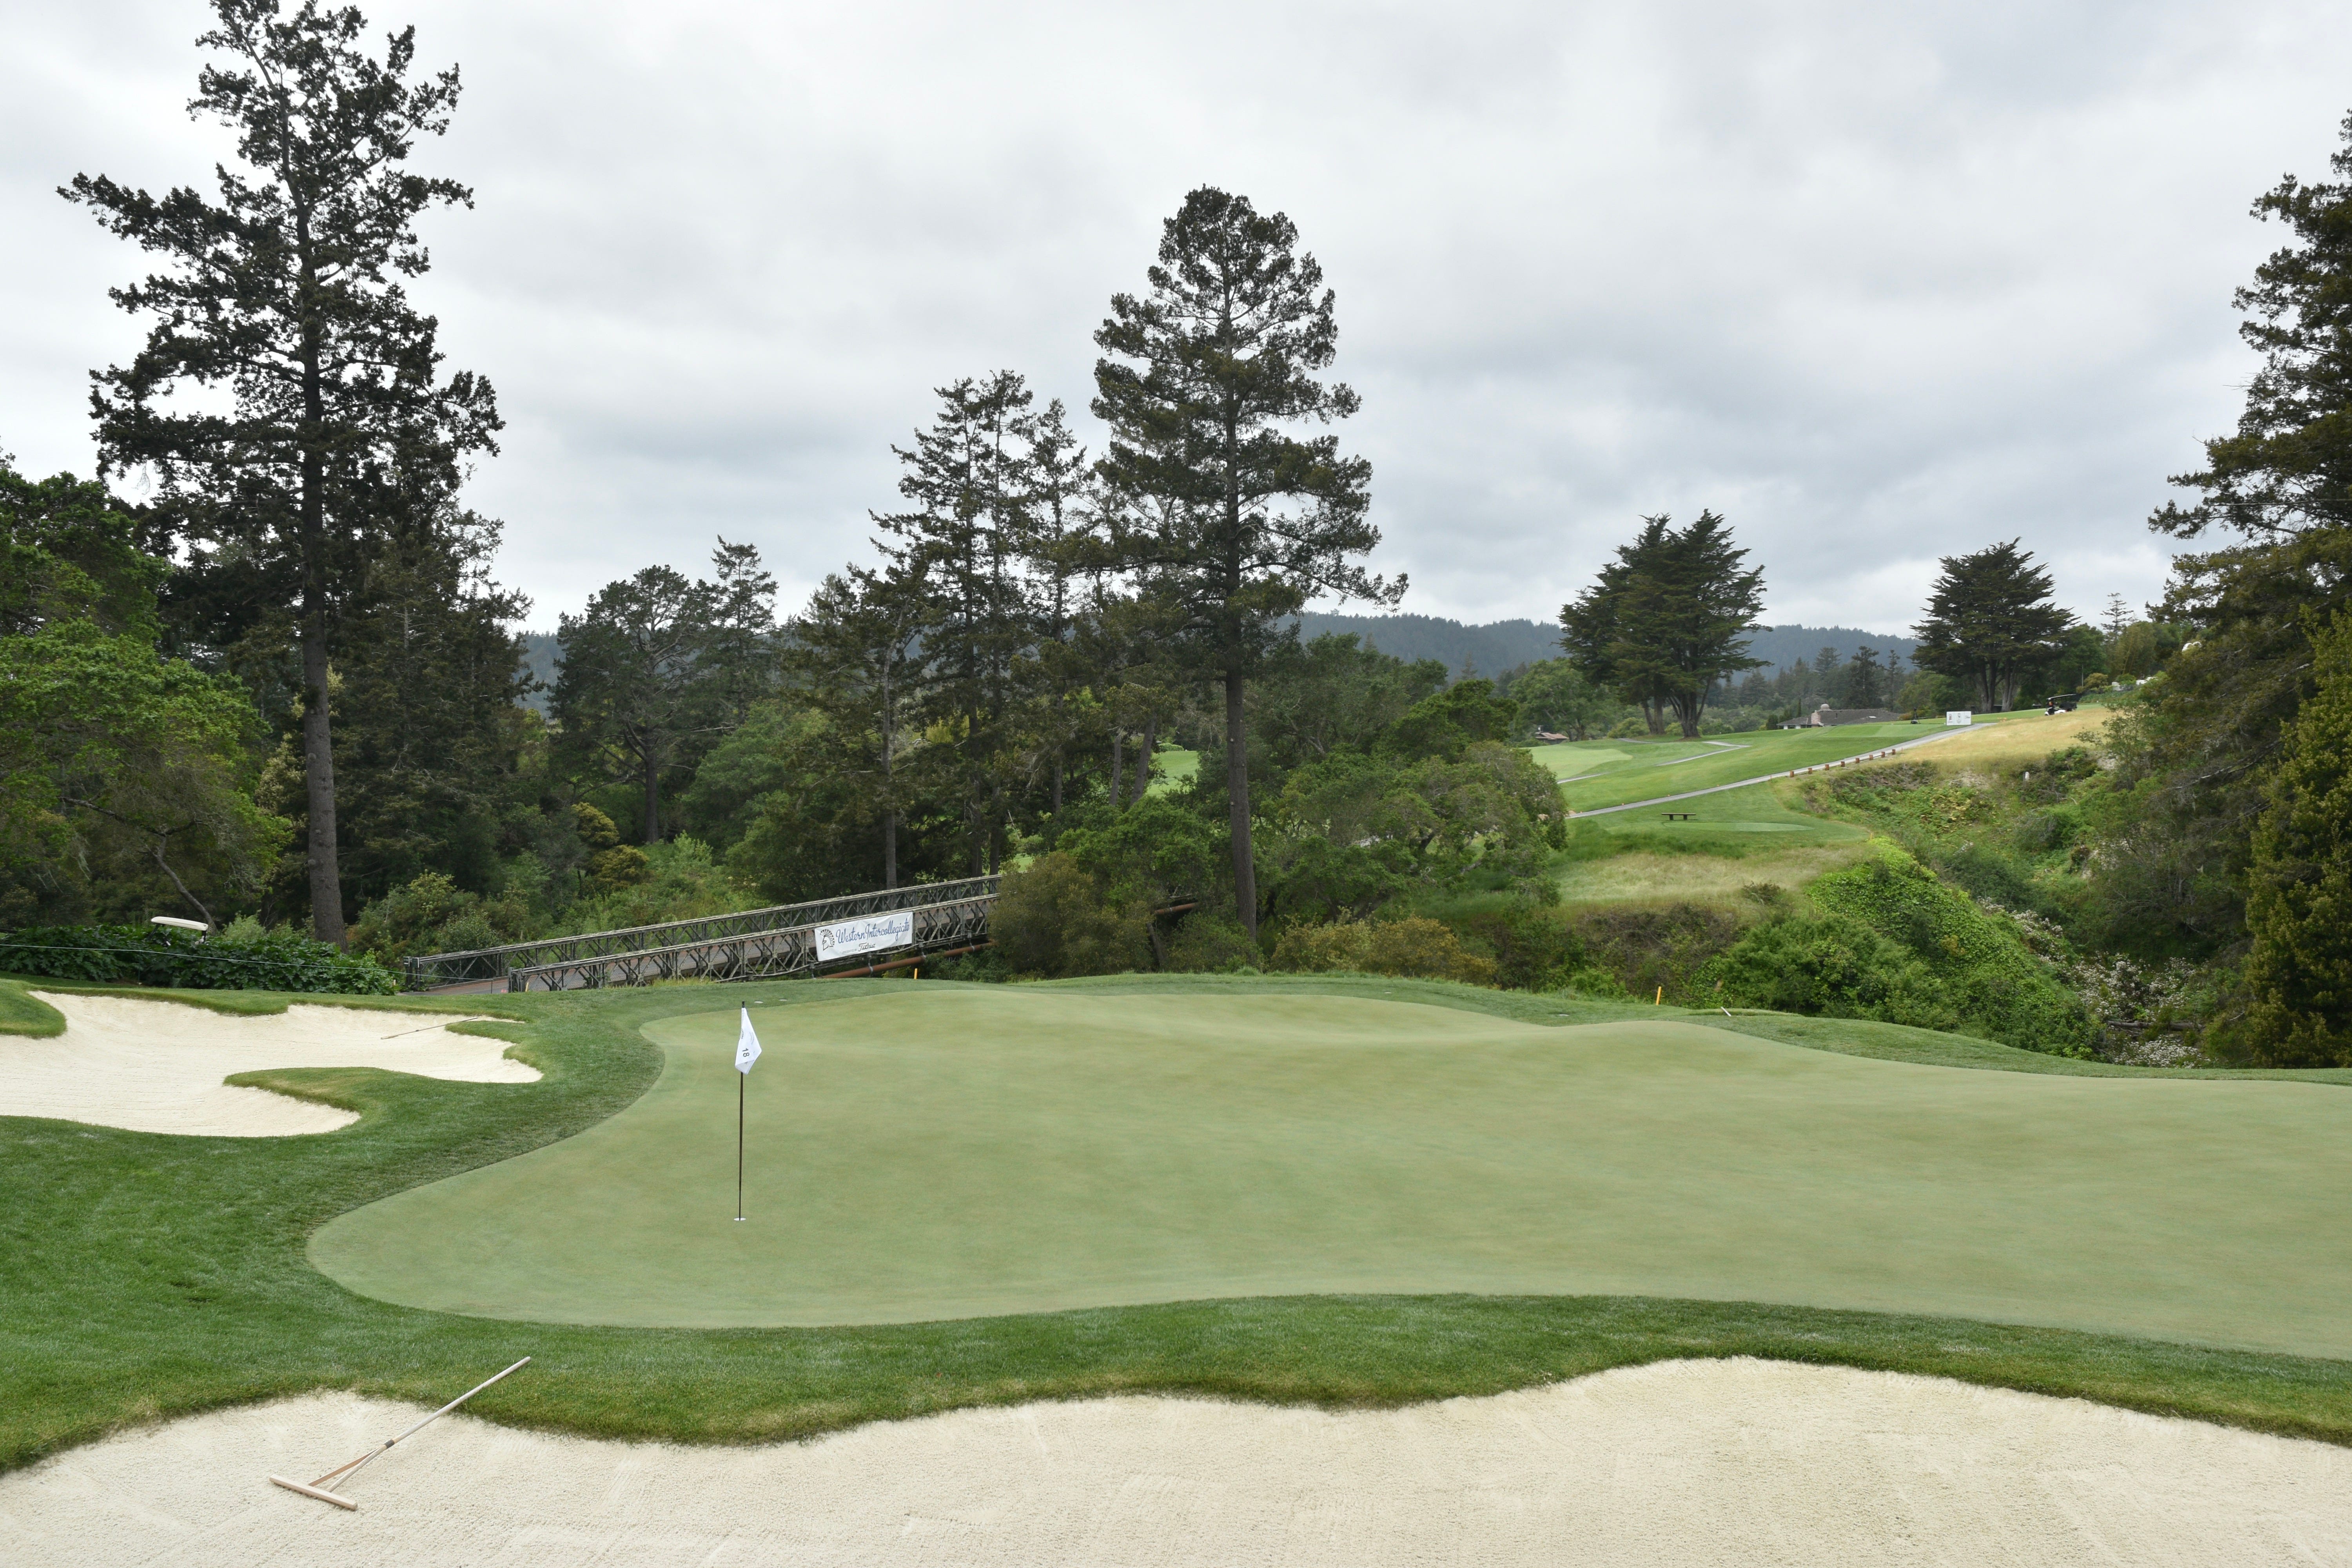
Hole 10: Par 4, 437 Yards
The 10th hole green is a microcosm of the entire restoration project — Re-establish the shaping, nooks, and nuanced features of the original Alister MacKenzie greens
The 10th hole tee shot is still iconic and amazing. Thankfully it was not altered (and for good reason). Don’t fix what is not broke!
The 10th tee shot from the back tee — Carrying the barranca isn’t the problem but staying committed to a line off the tee is the primary challenge. The tee shot has an awkward orientation and the tendency is to want to pull the shot left (there is out of bounds there)
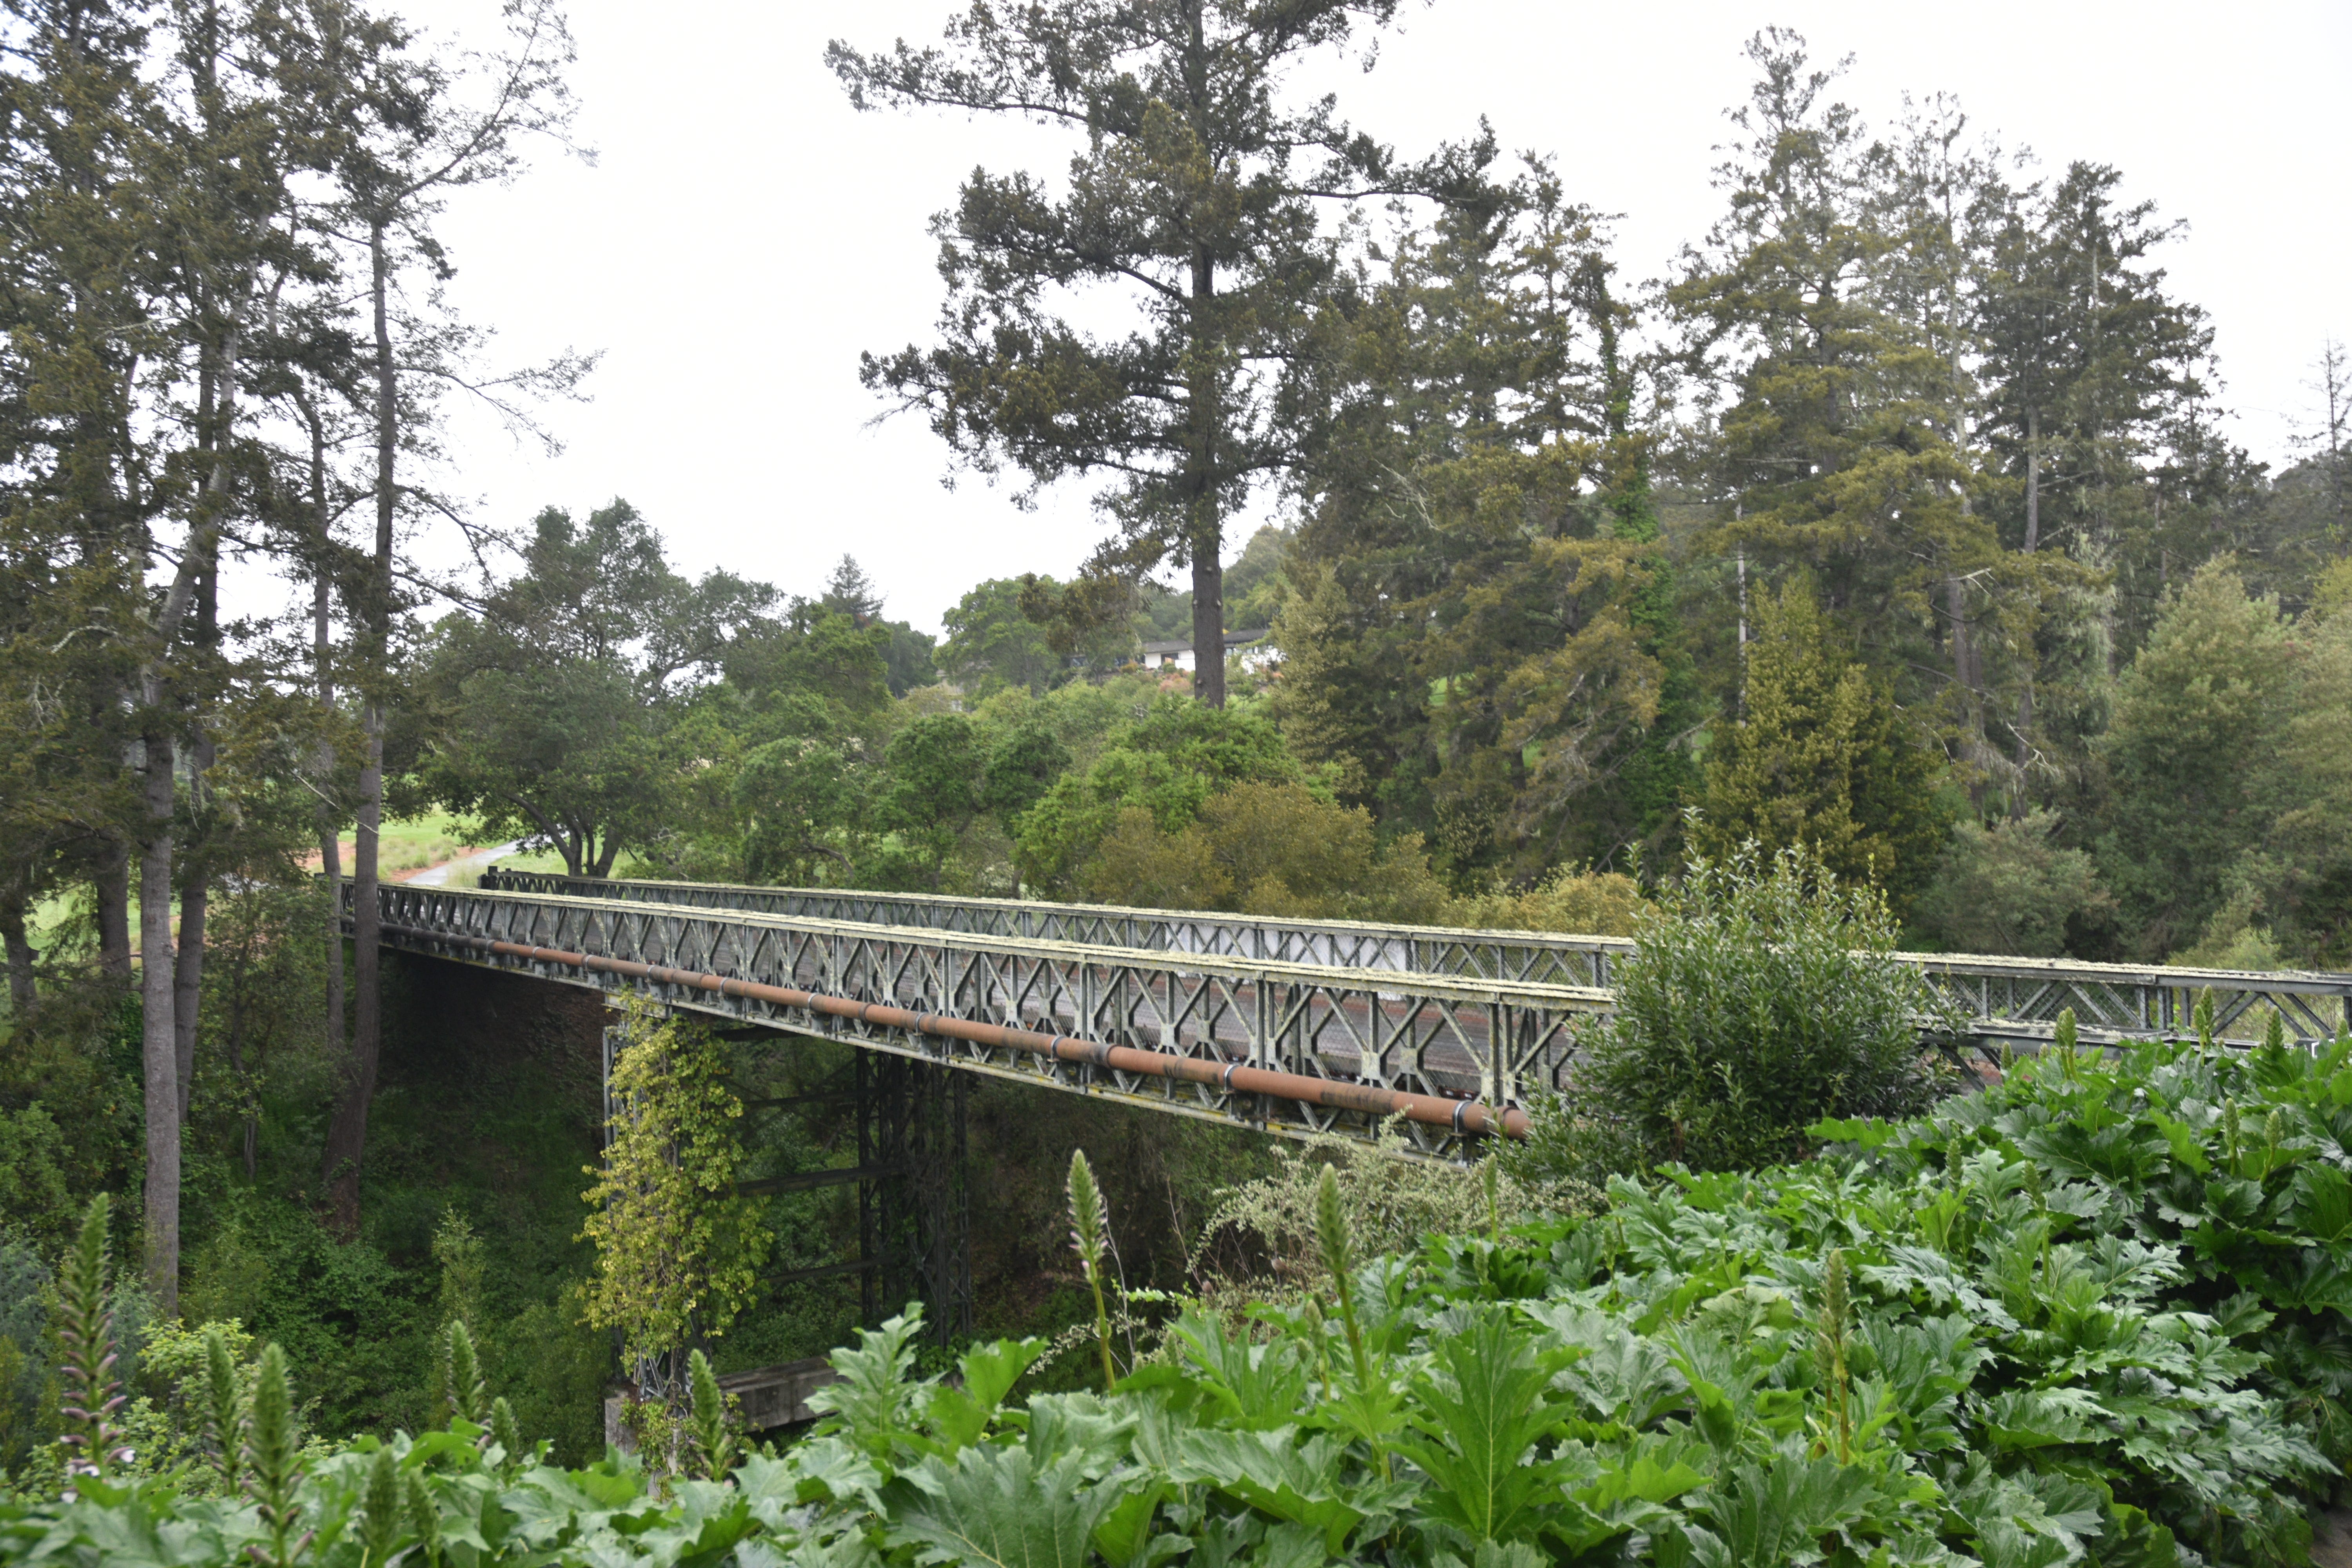
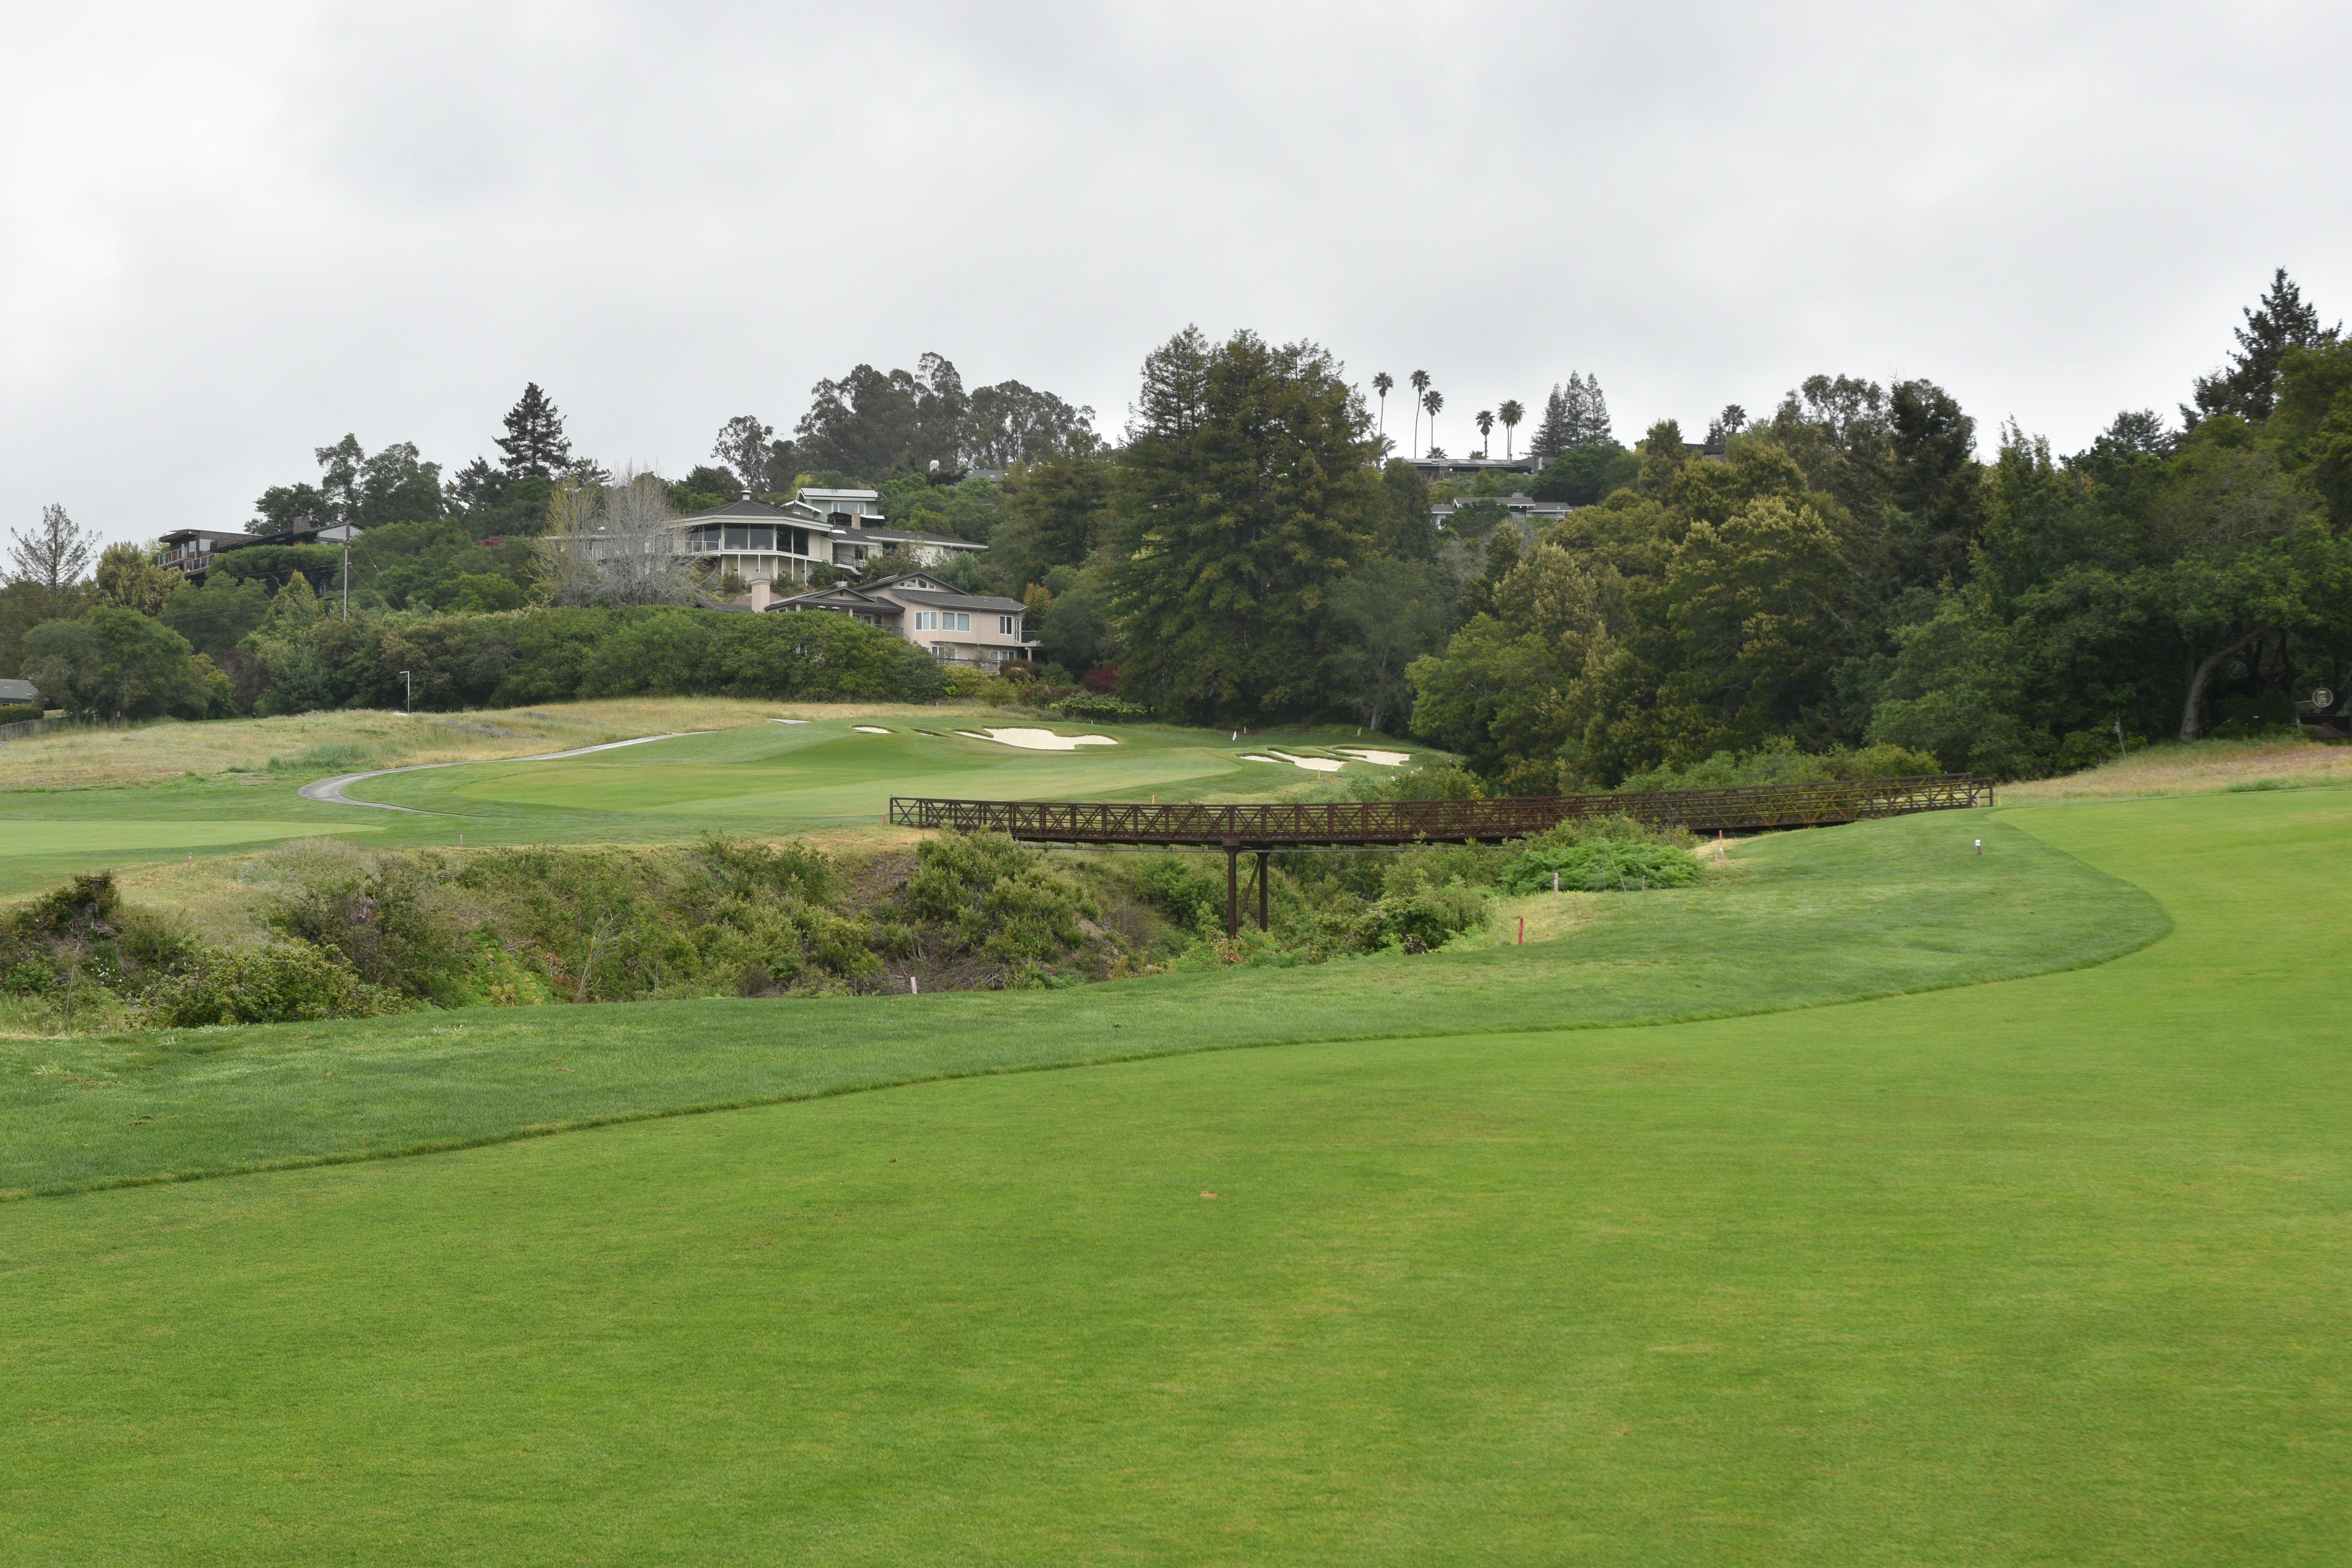
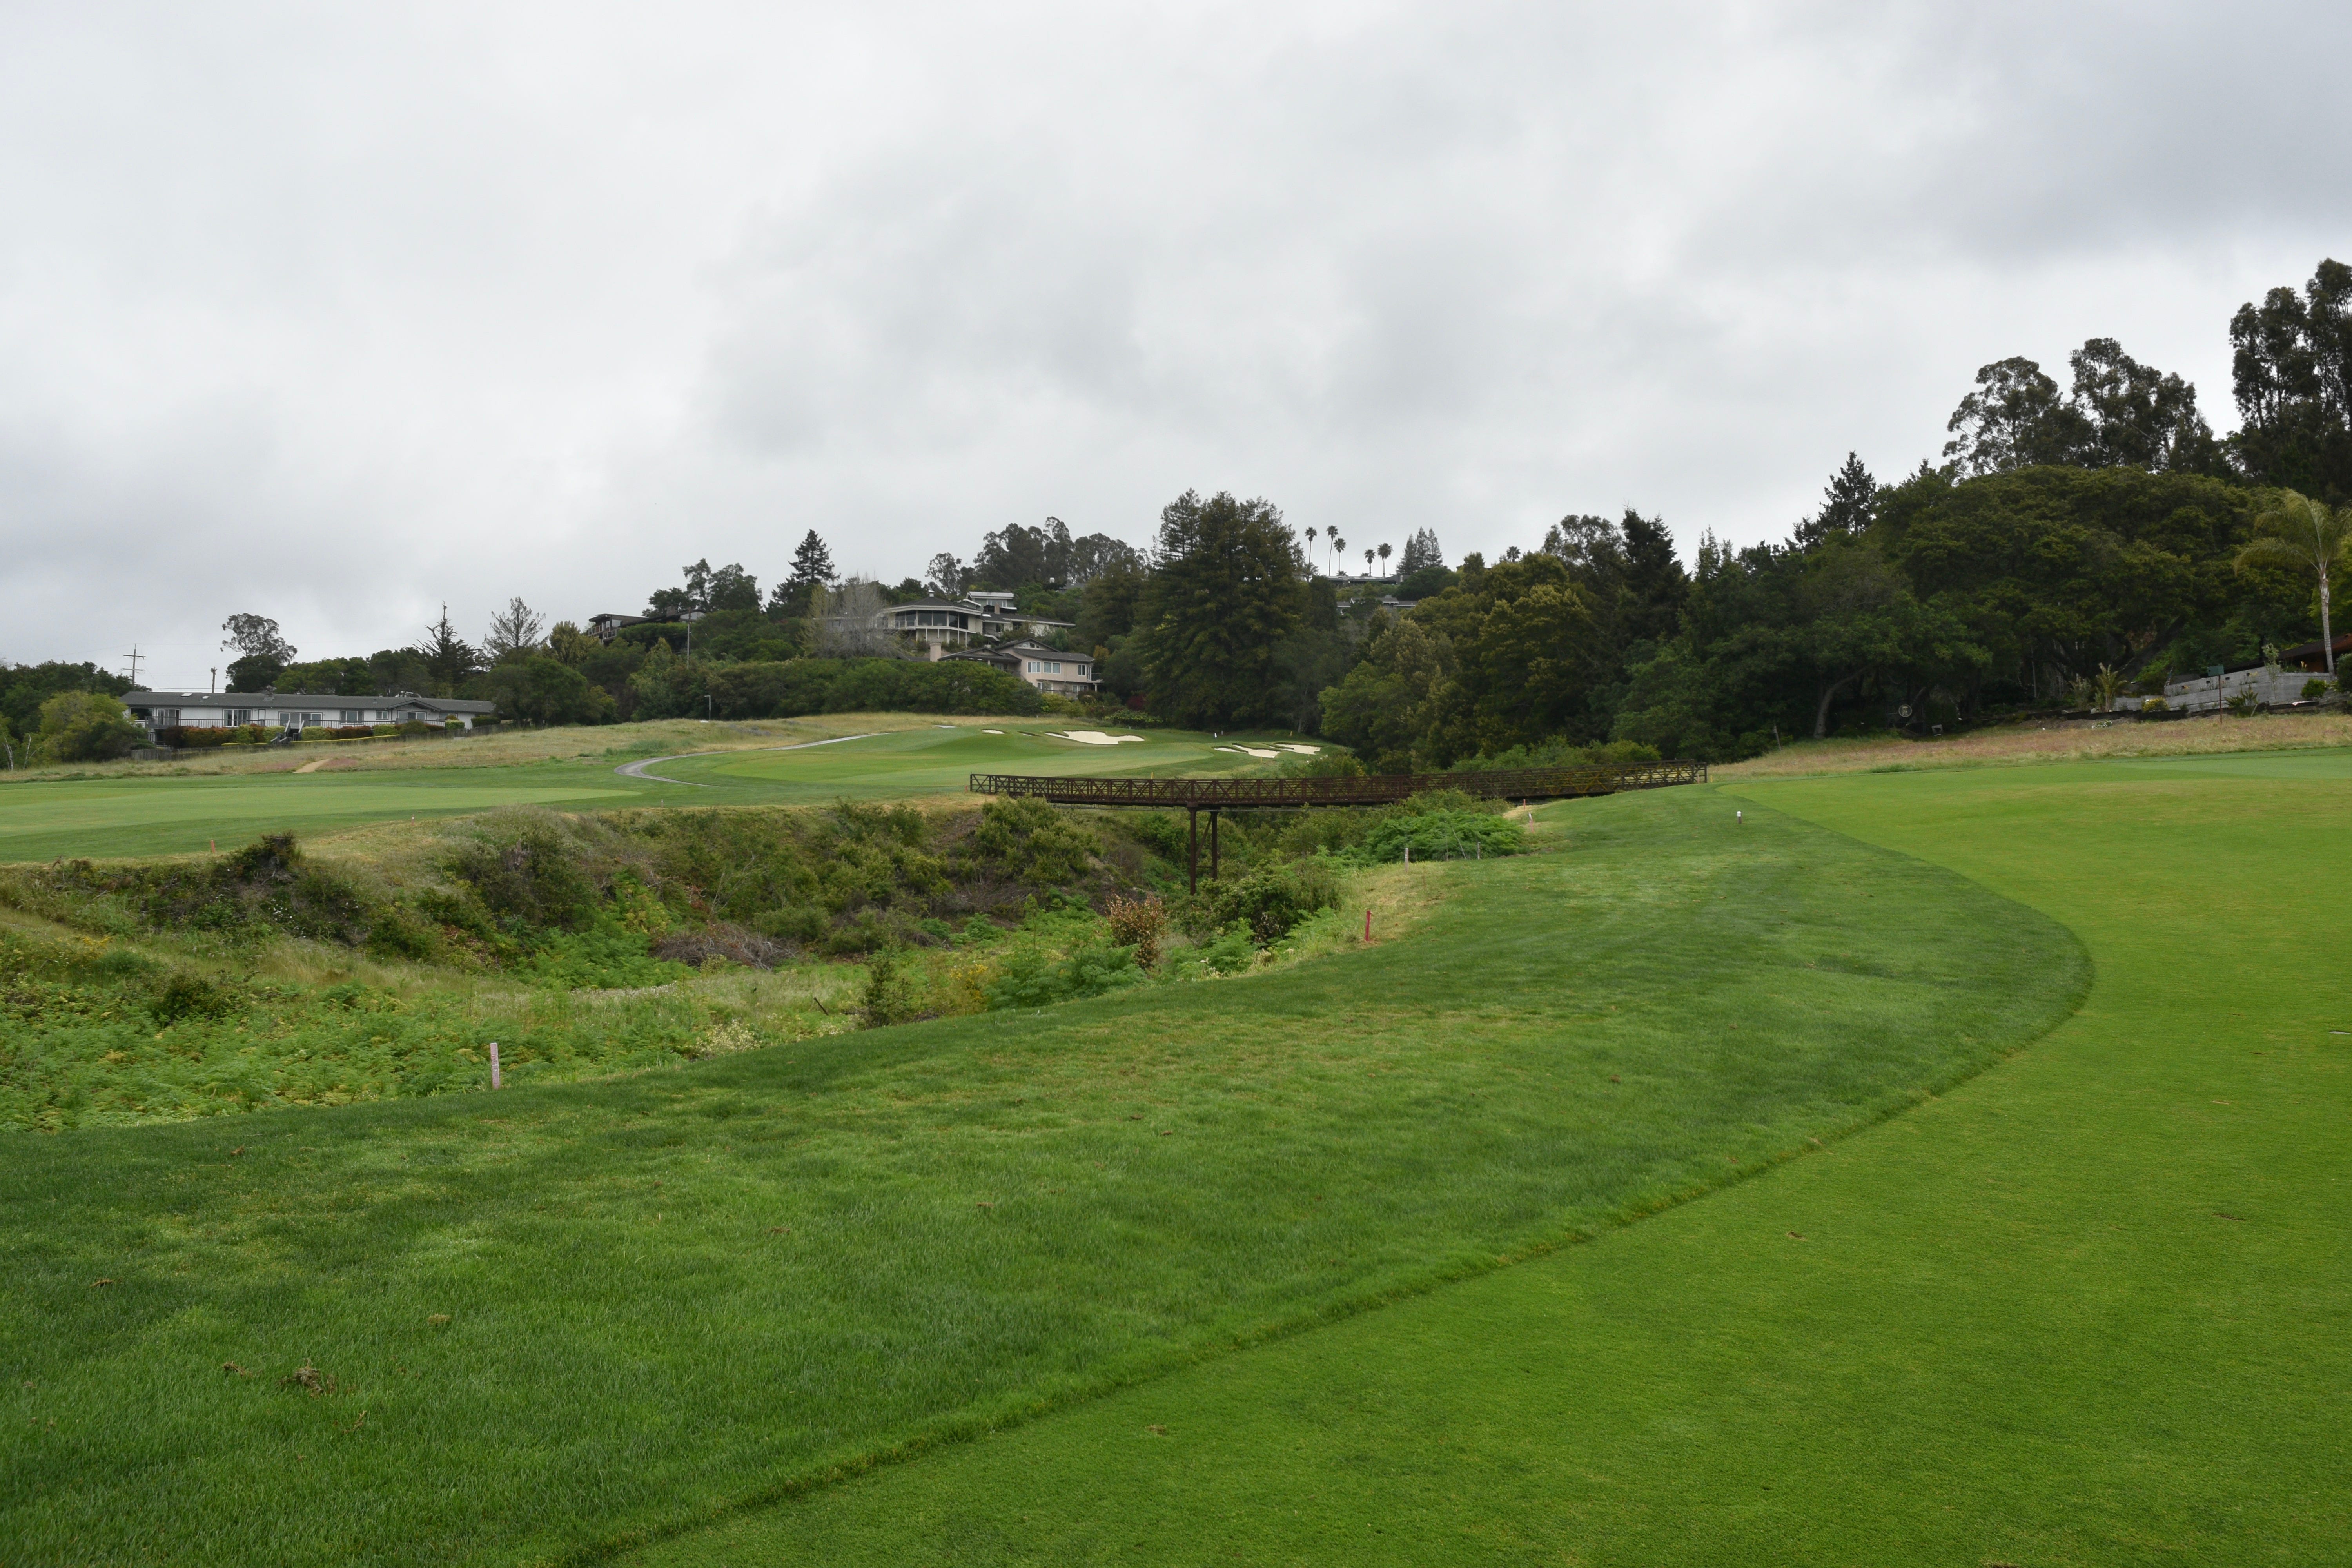
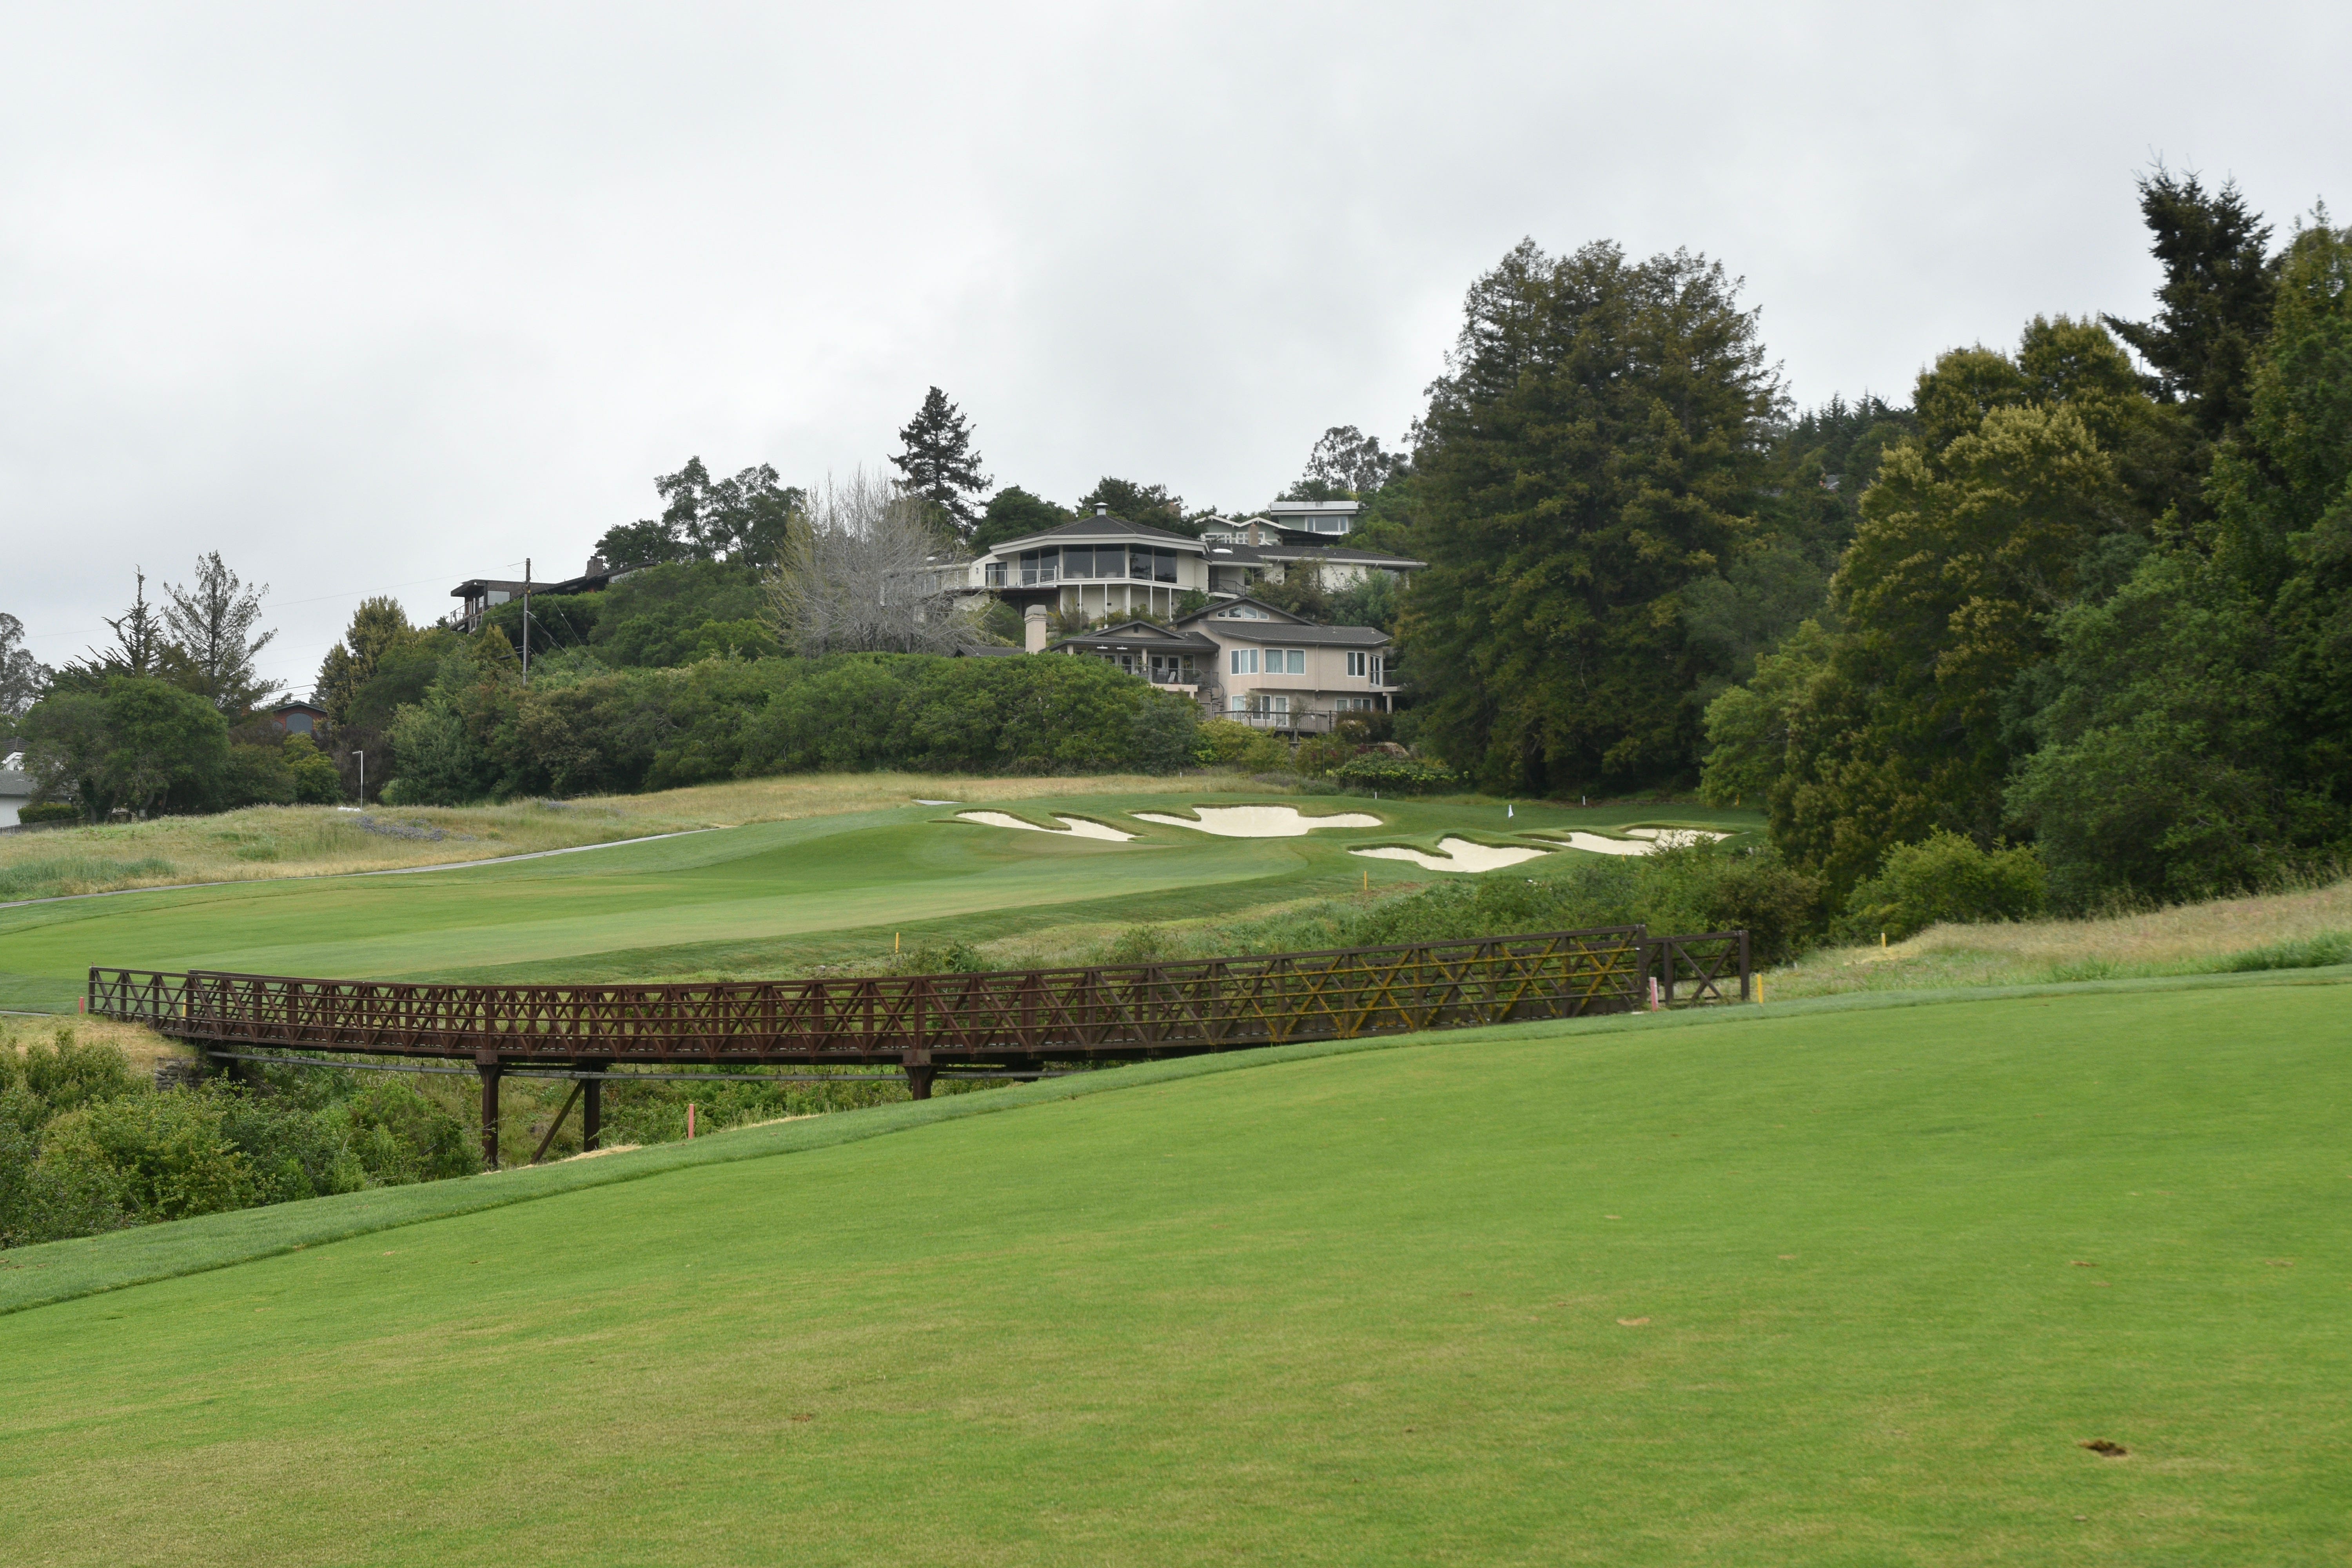
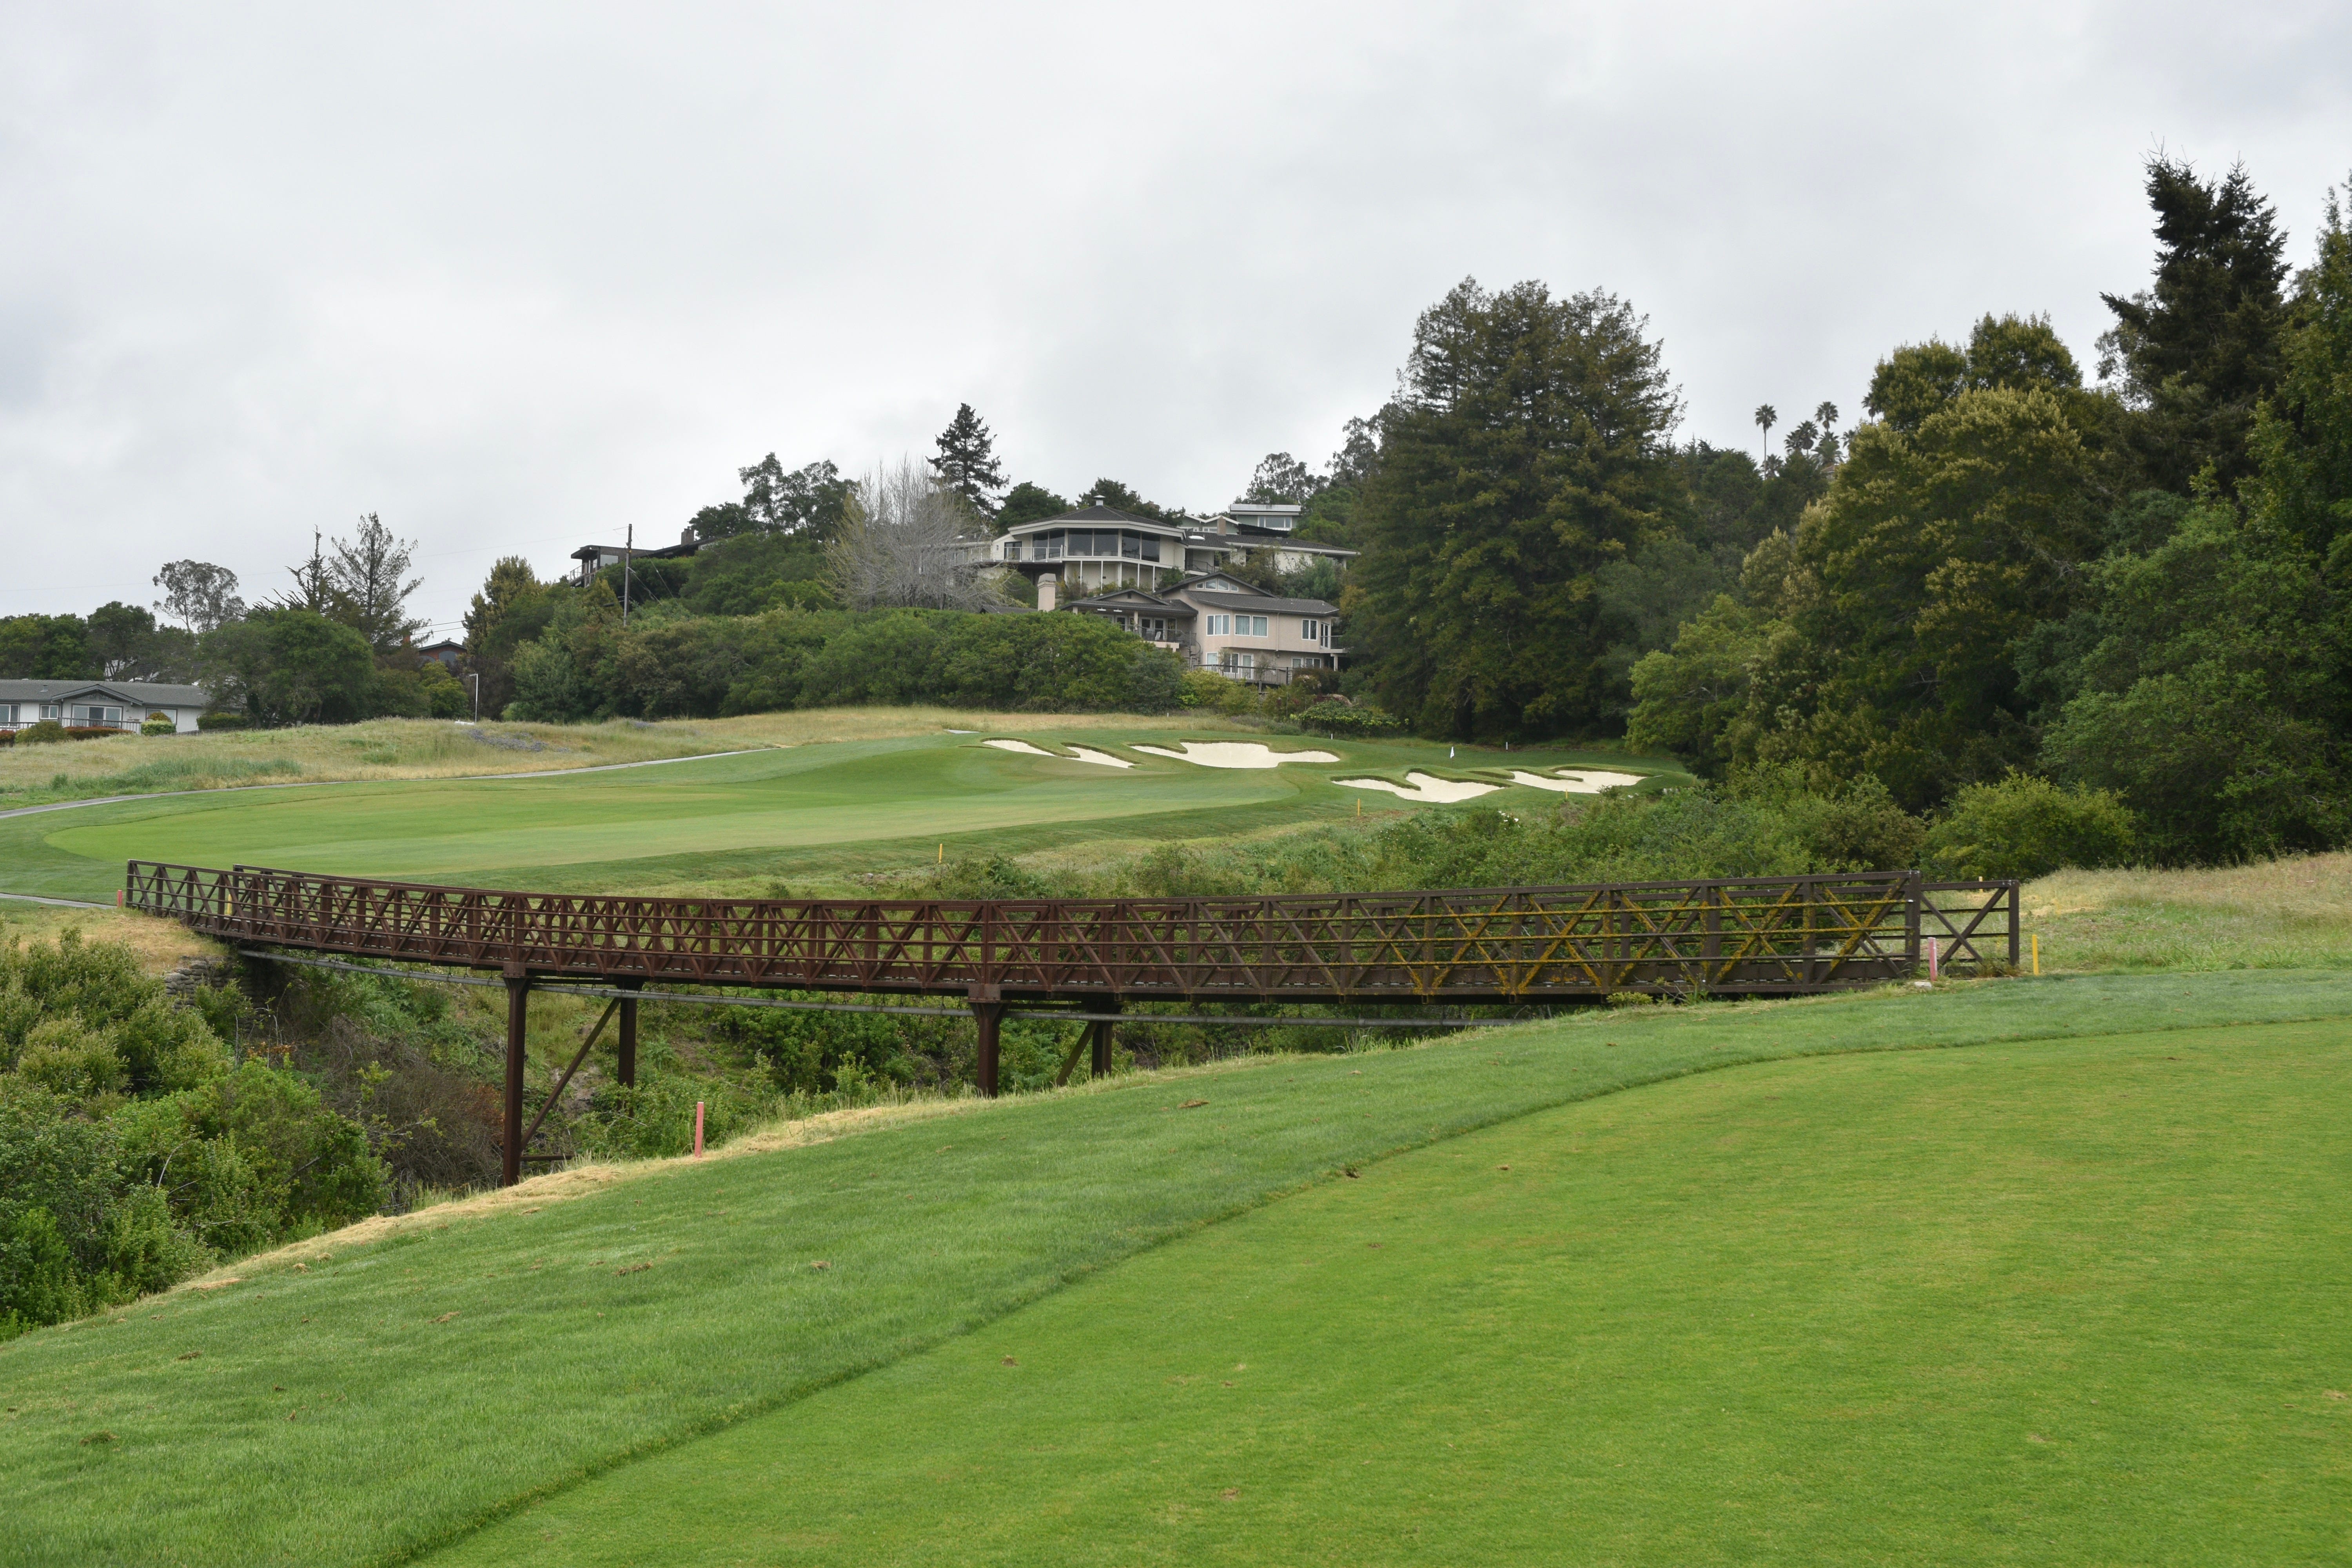
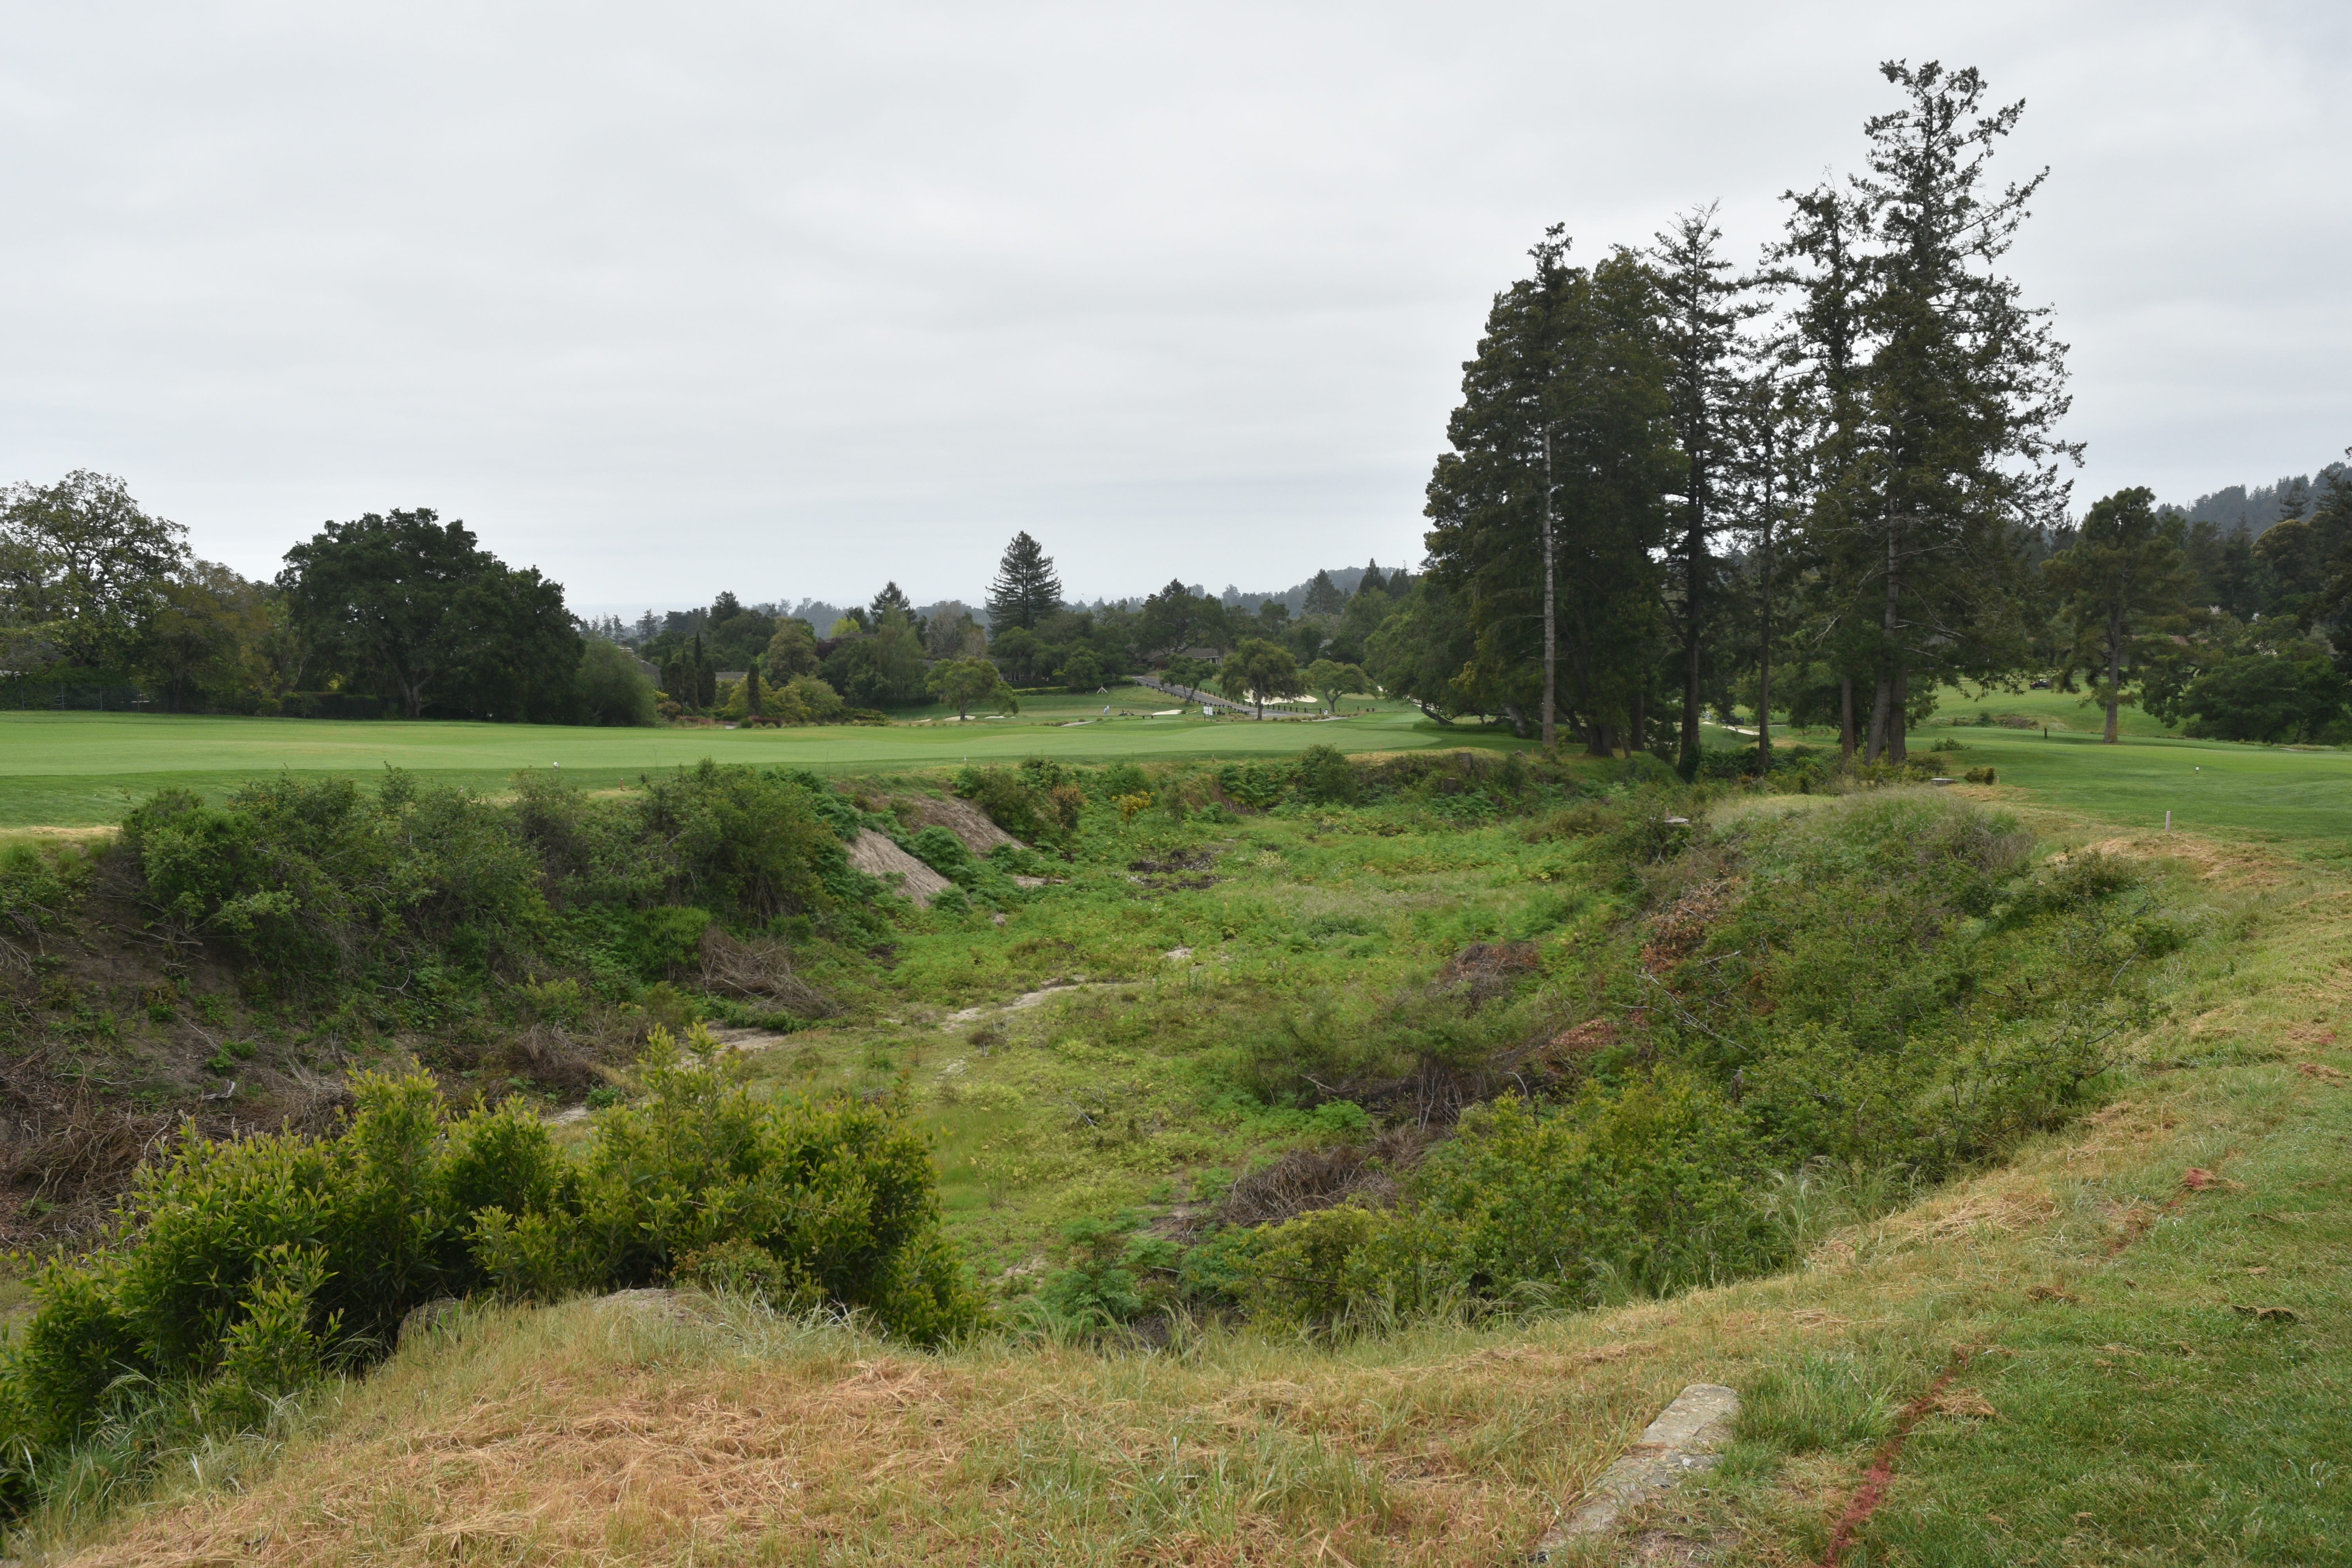
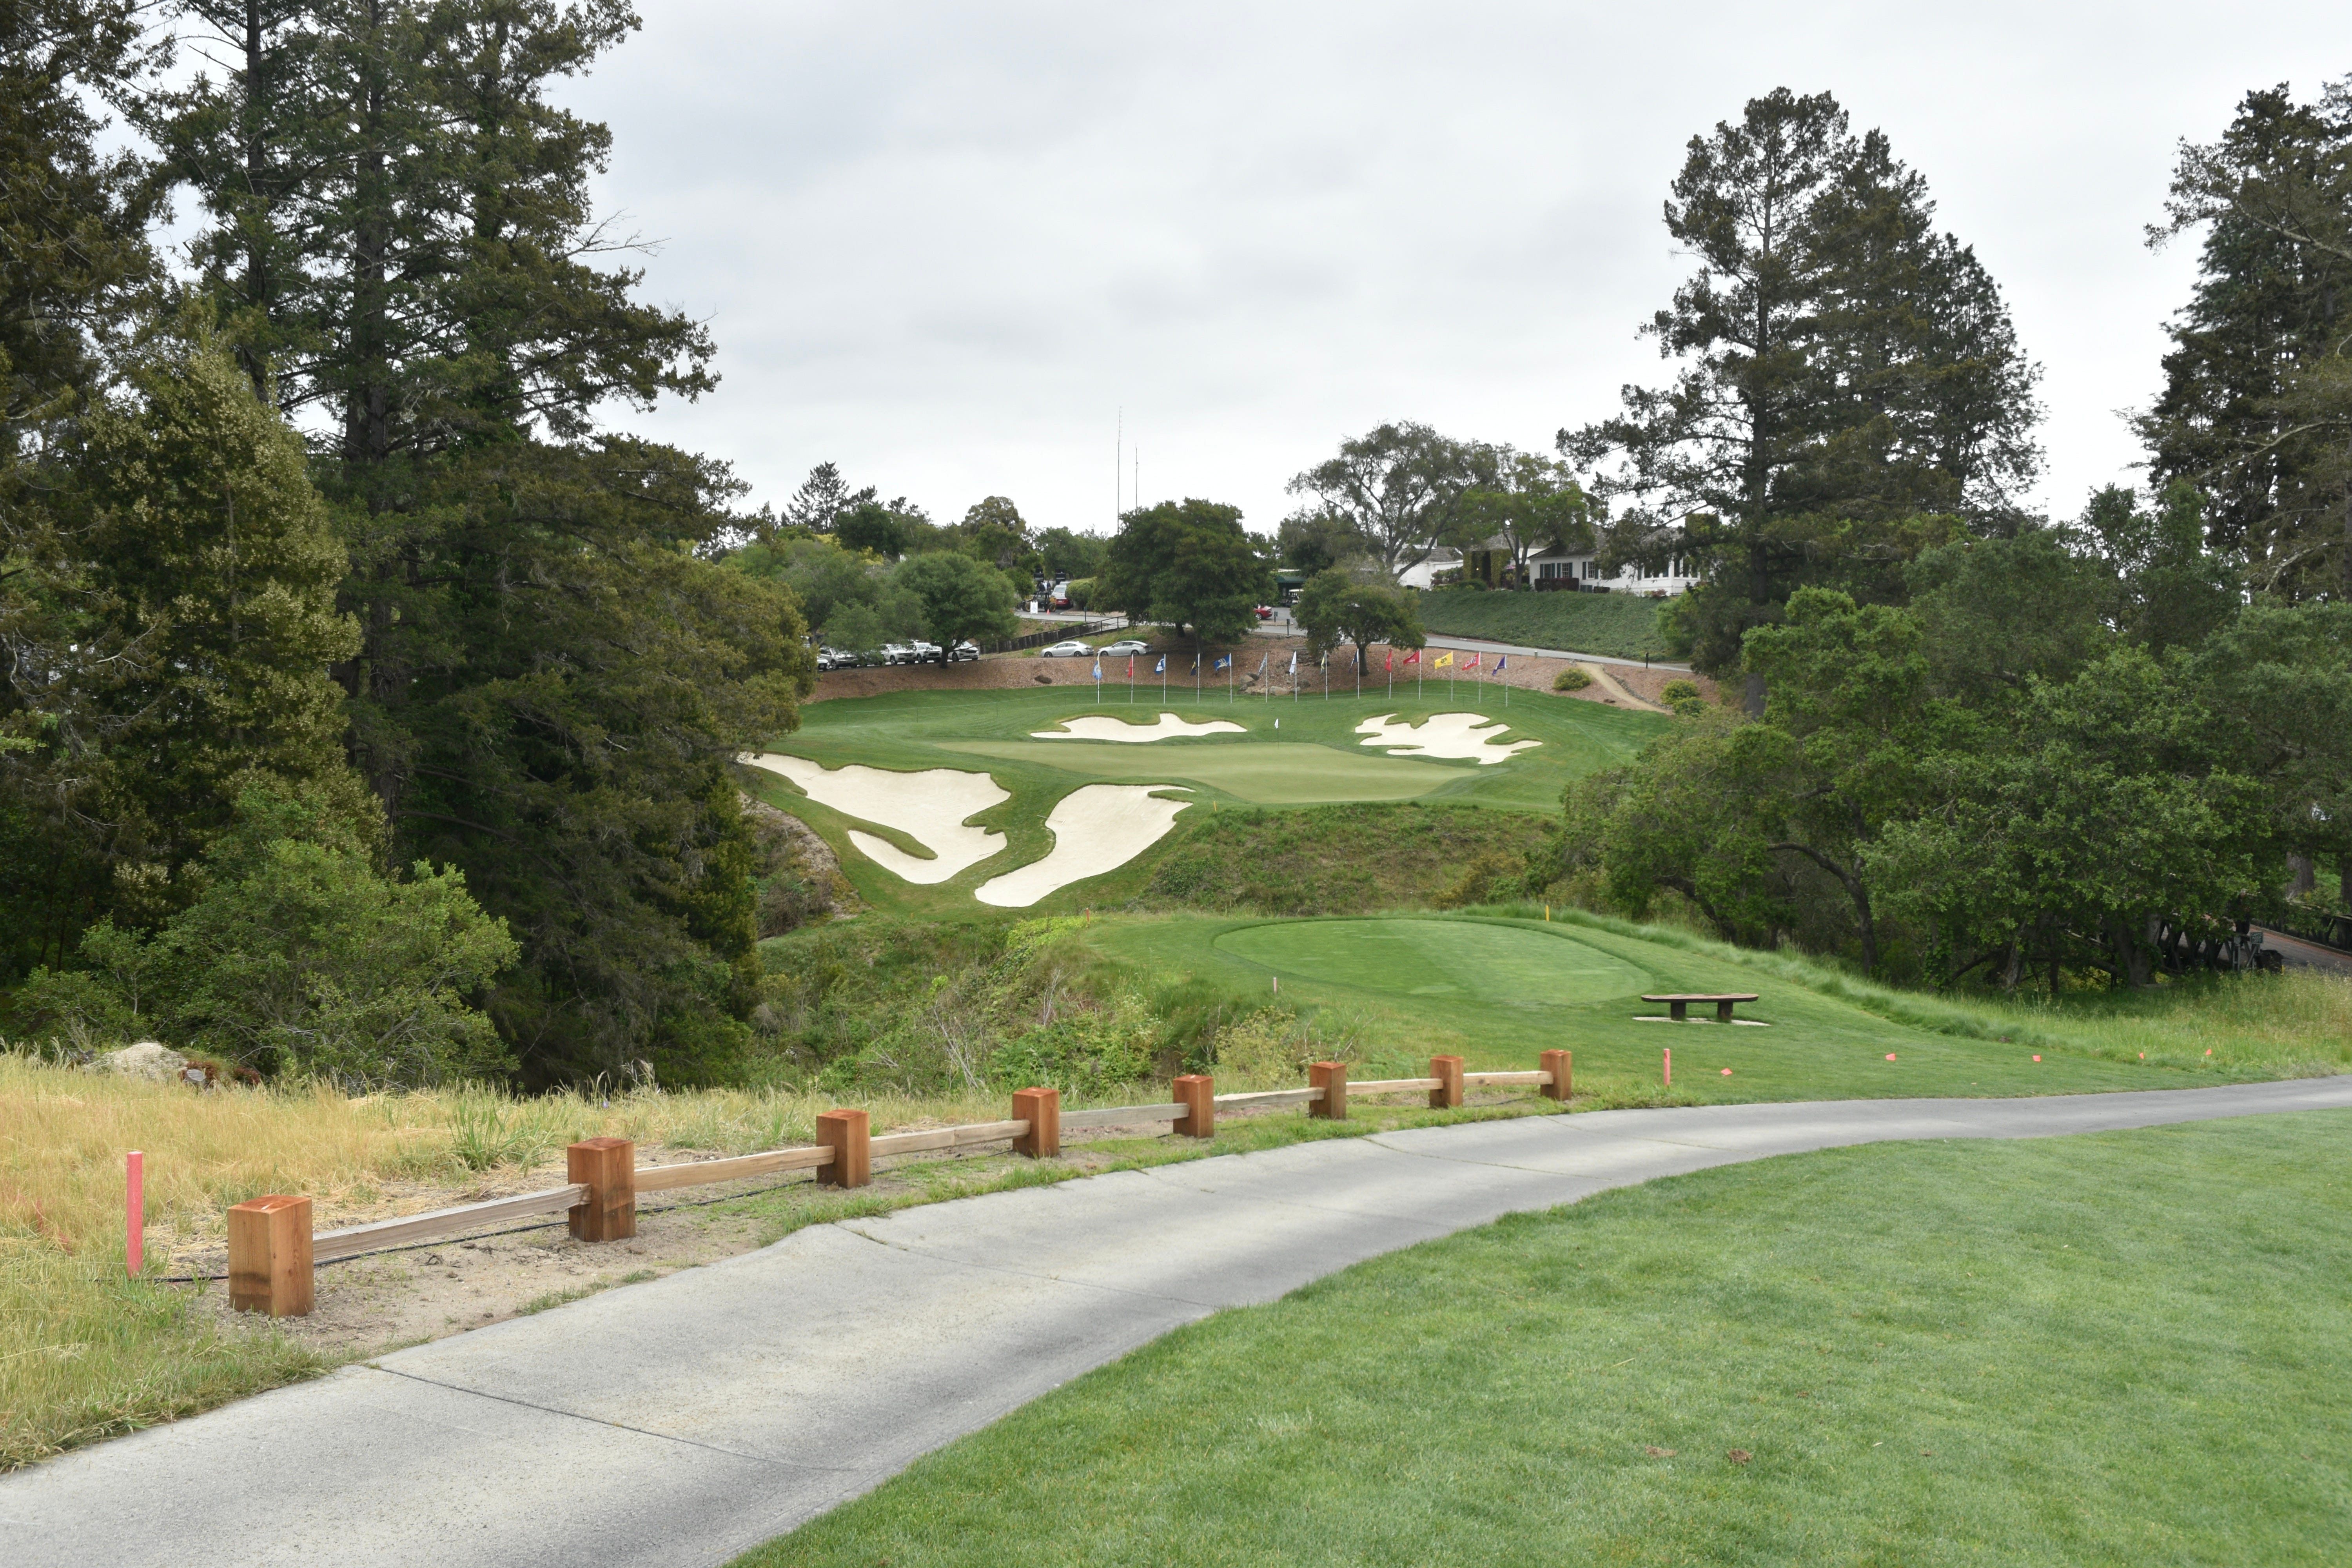
The first bridge of the back nine transporting golfers over the famed barranca
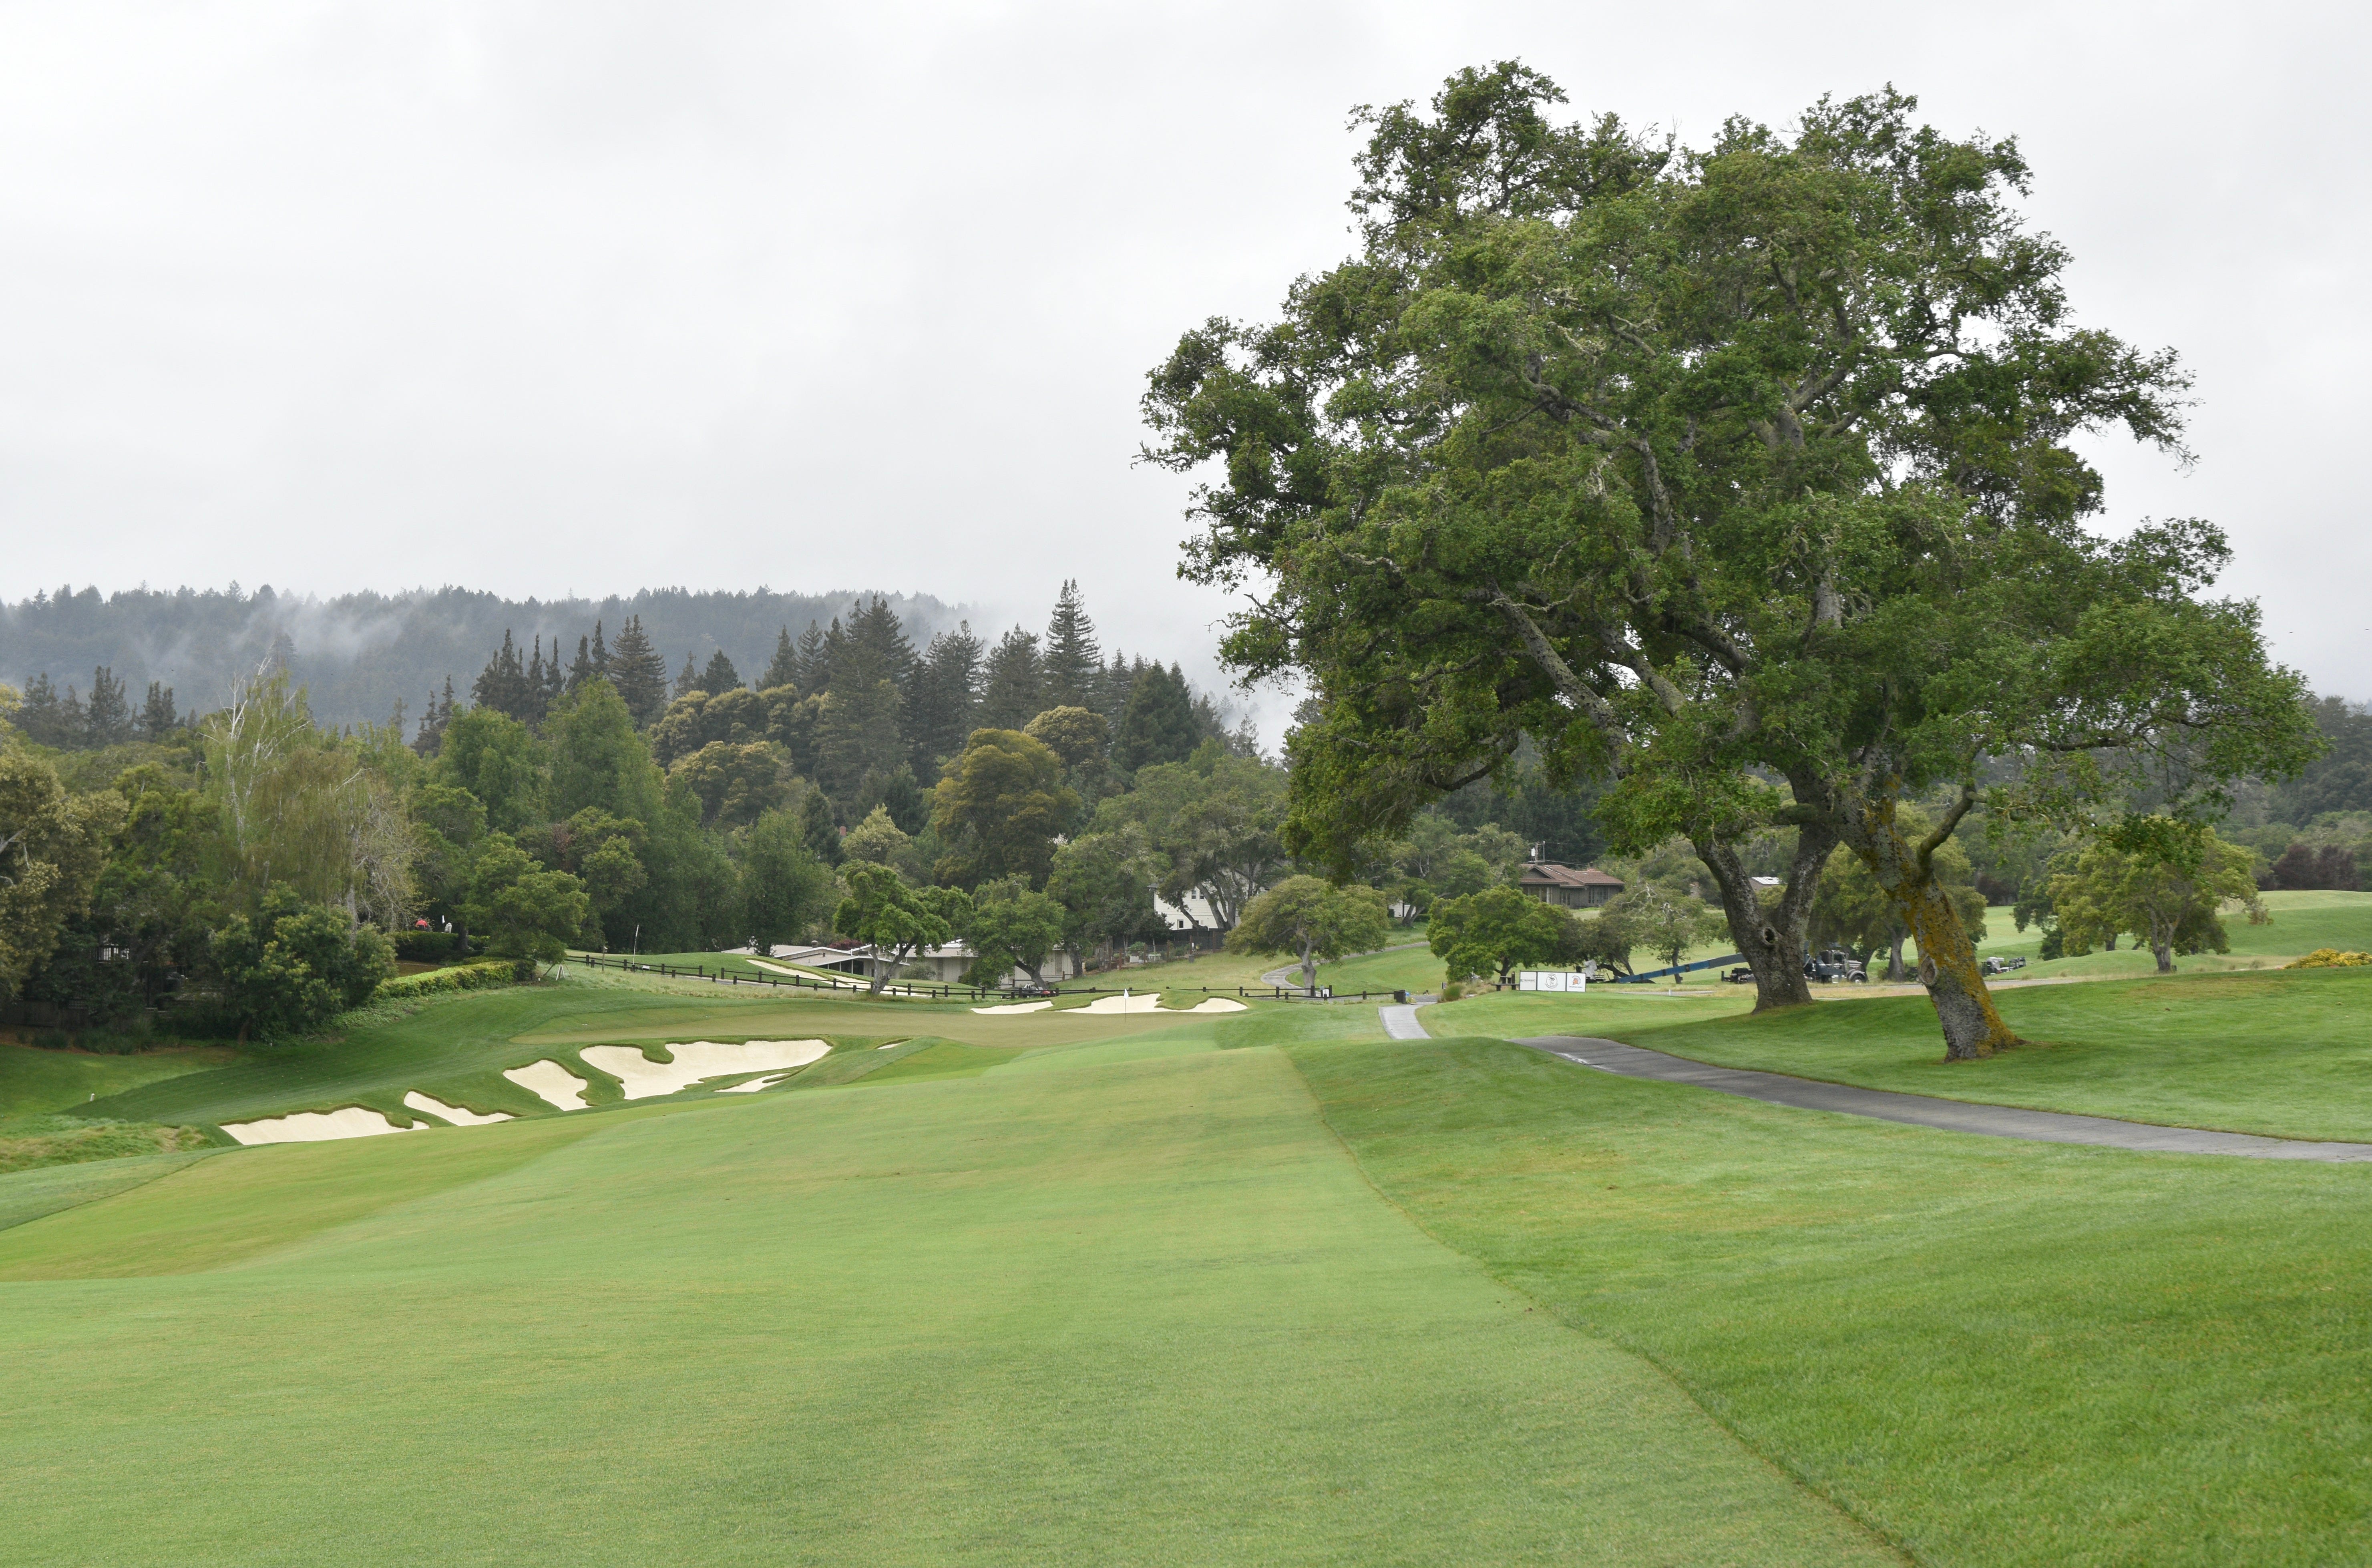
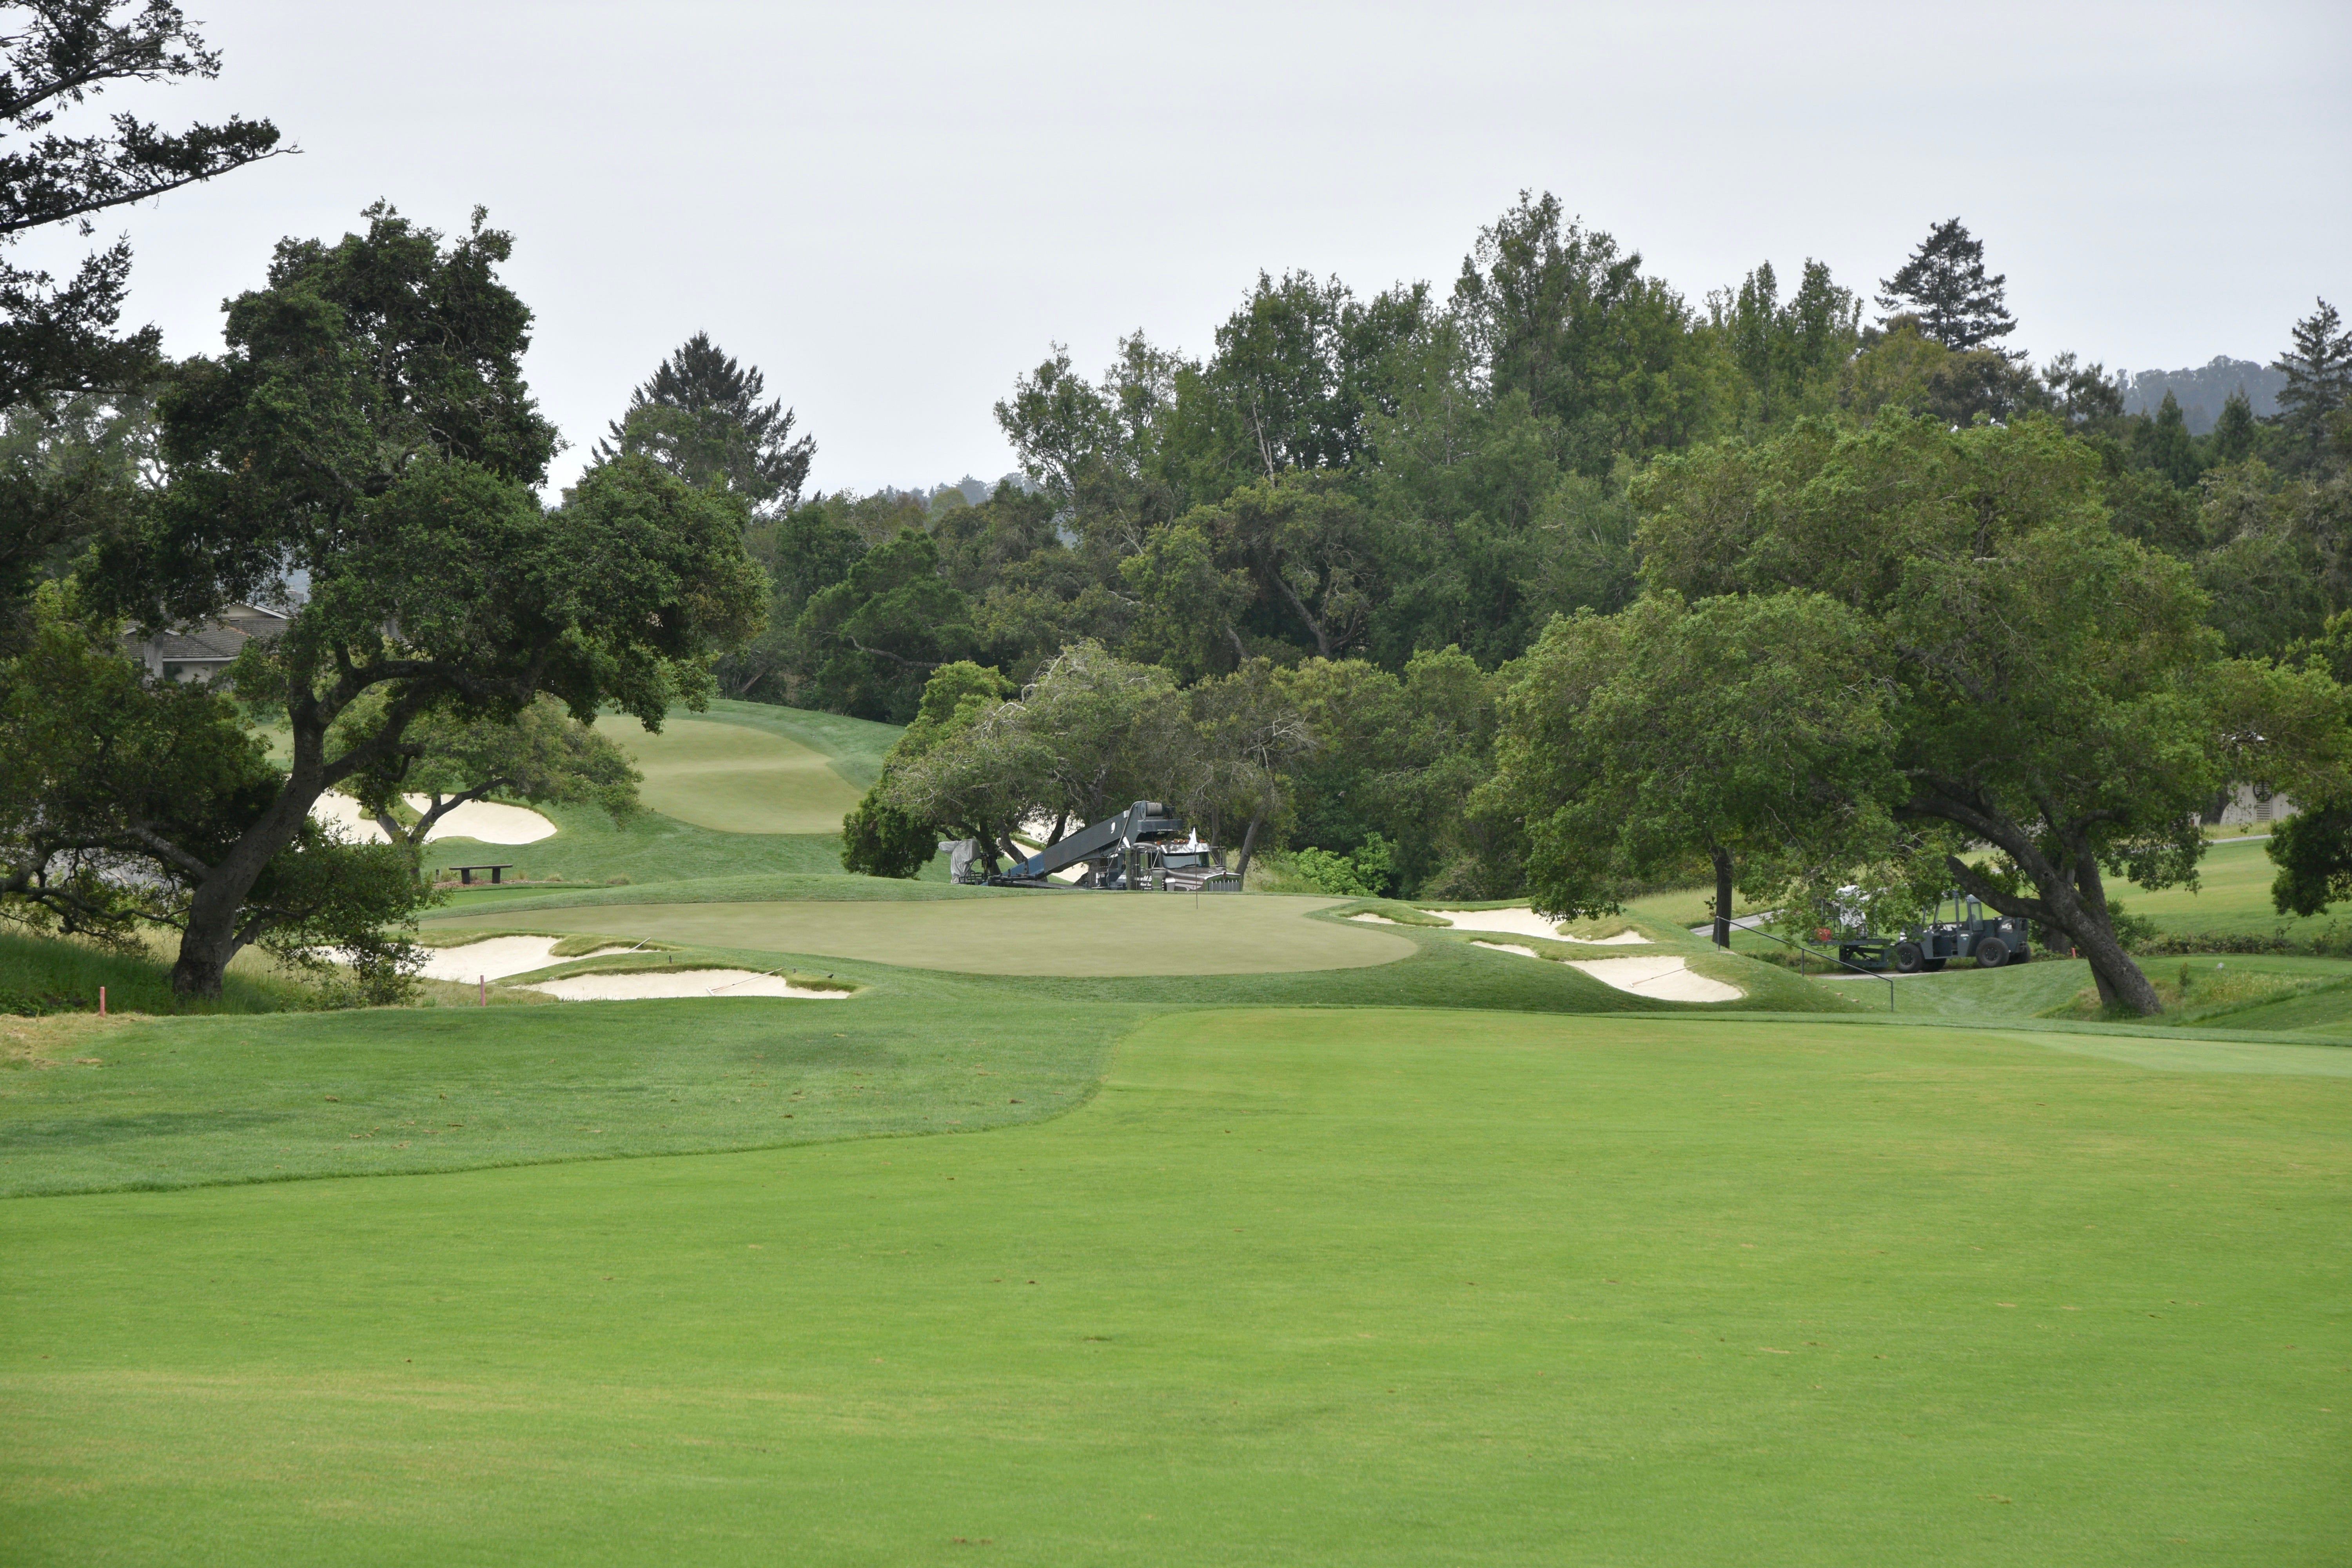
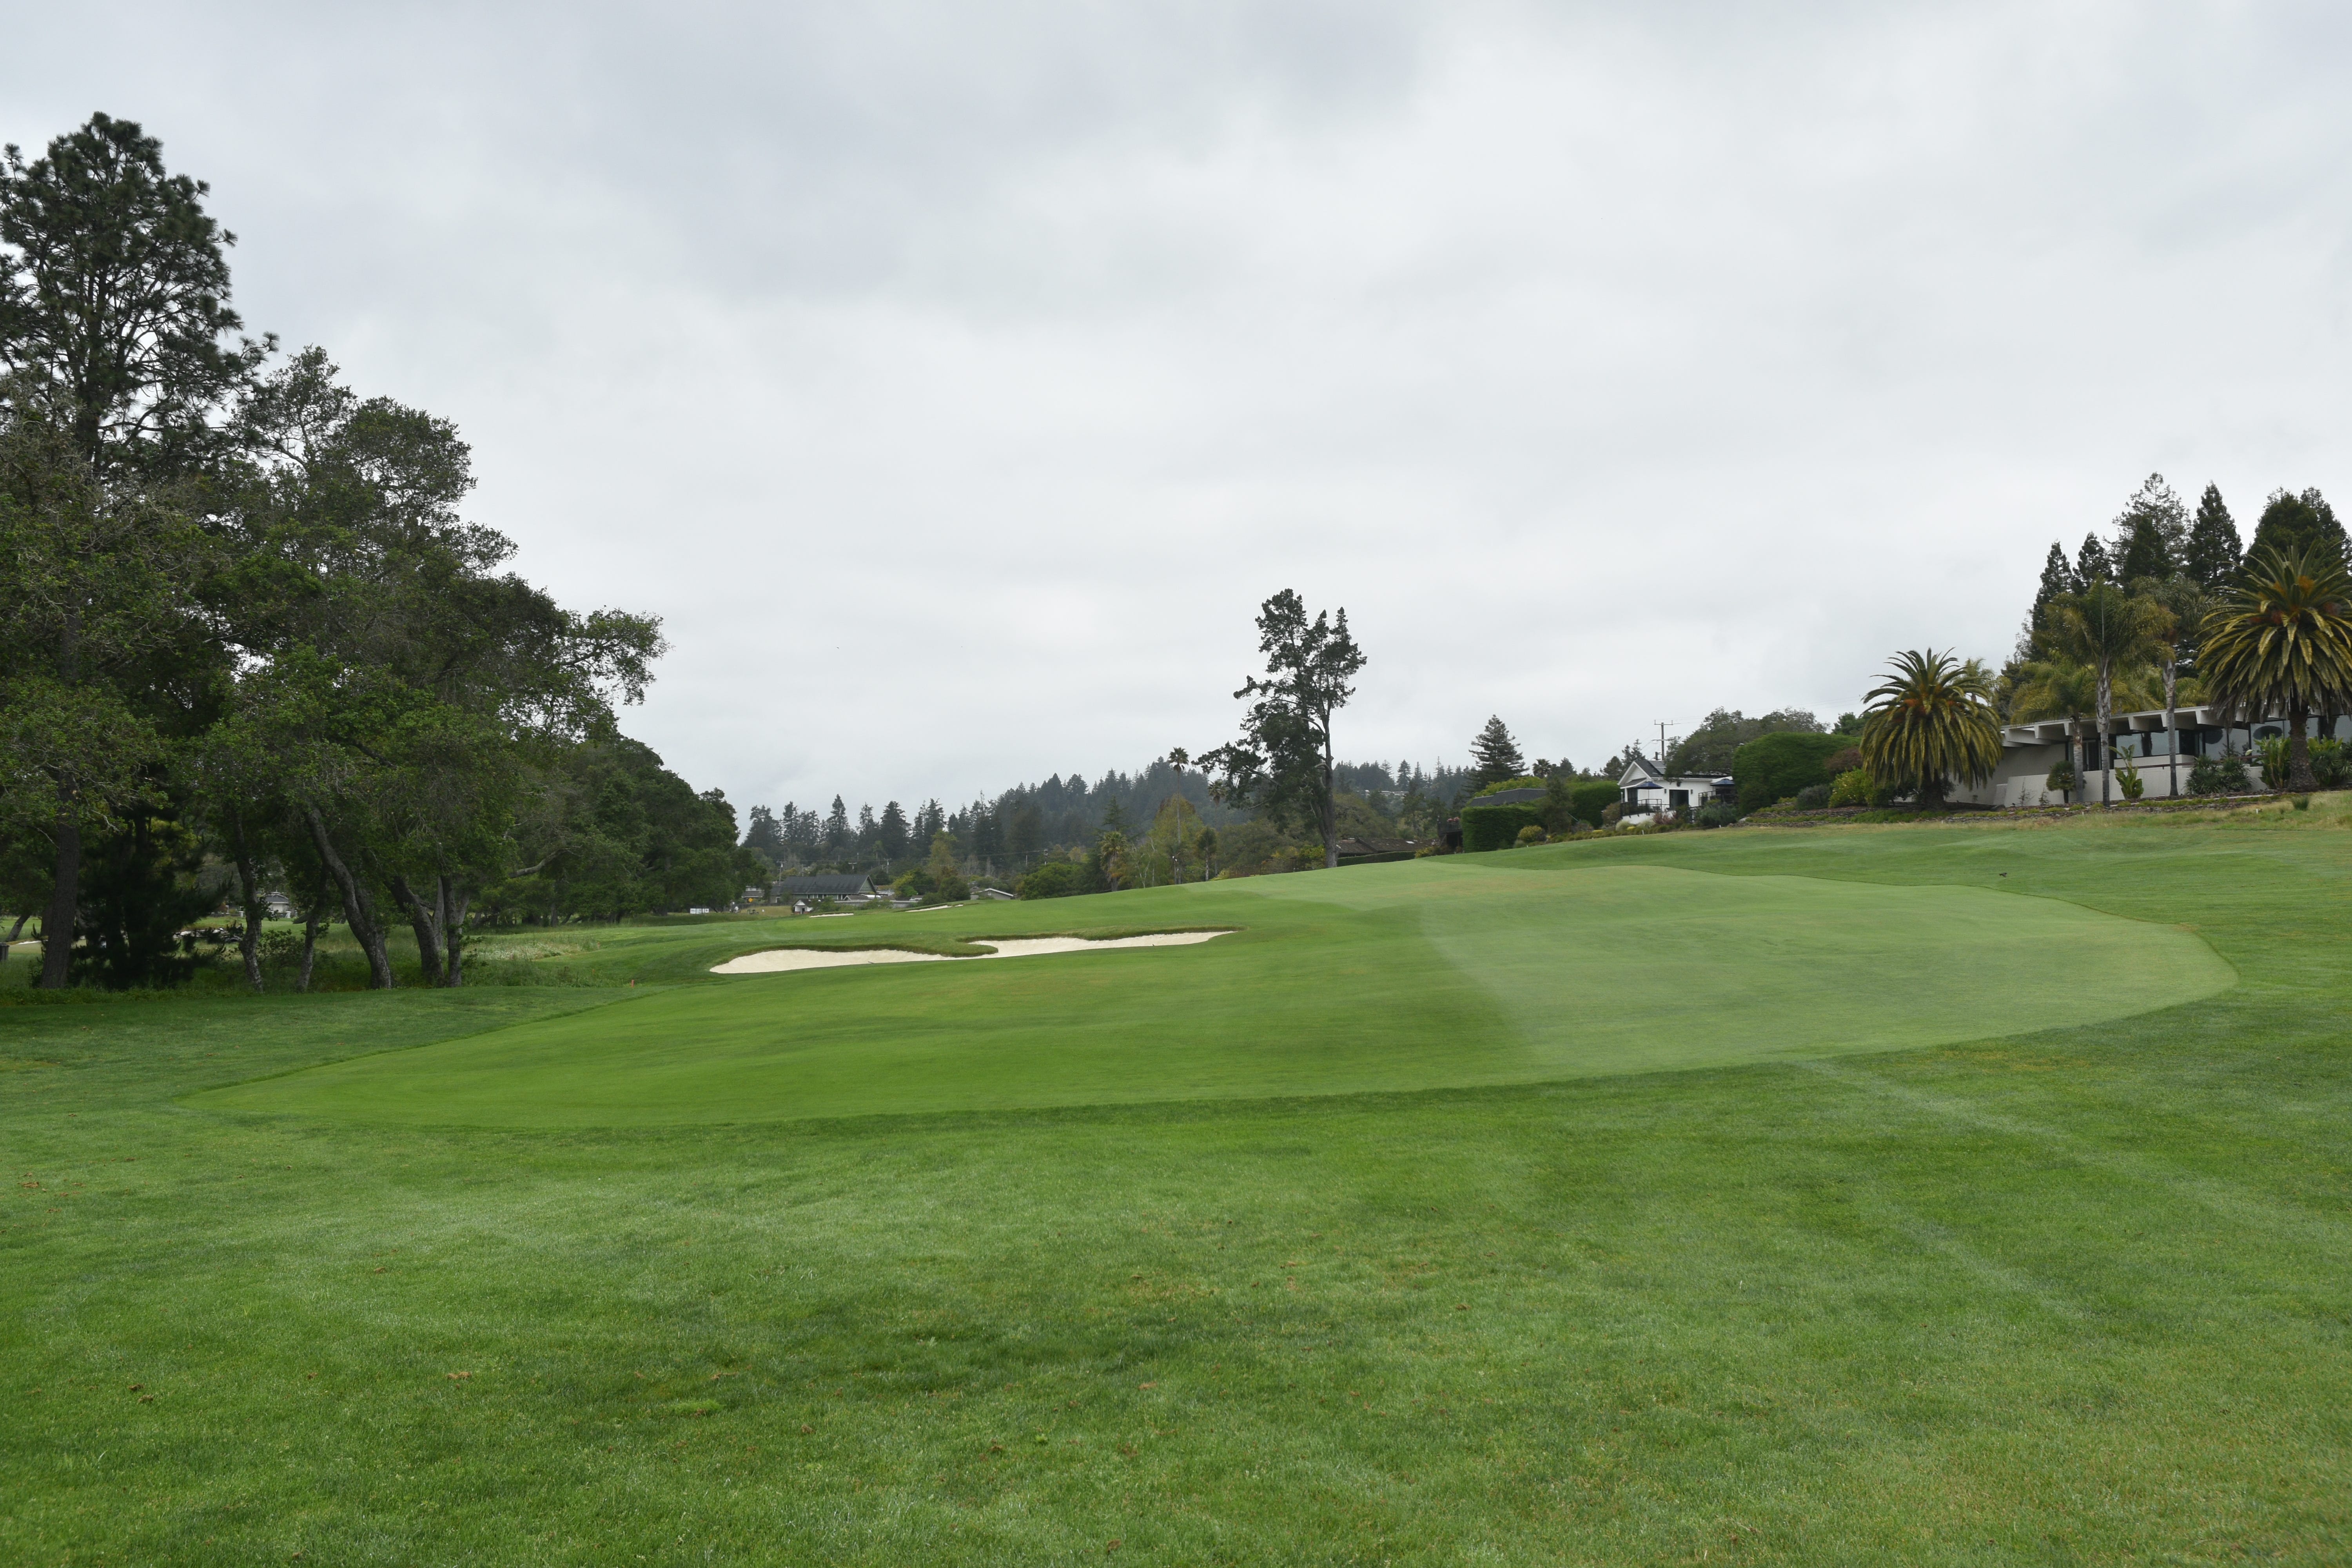
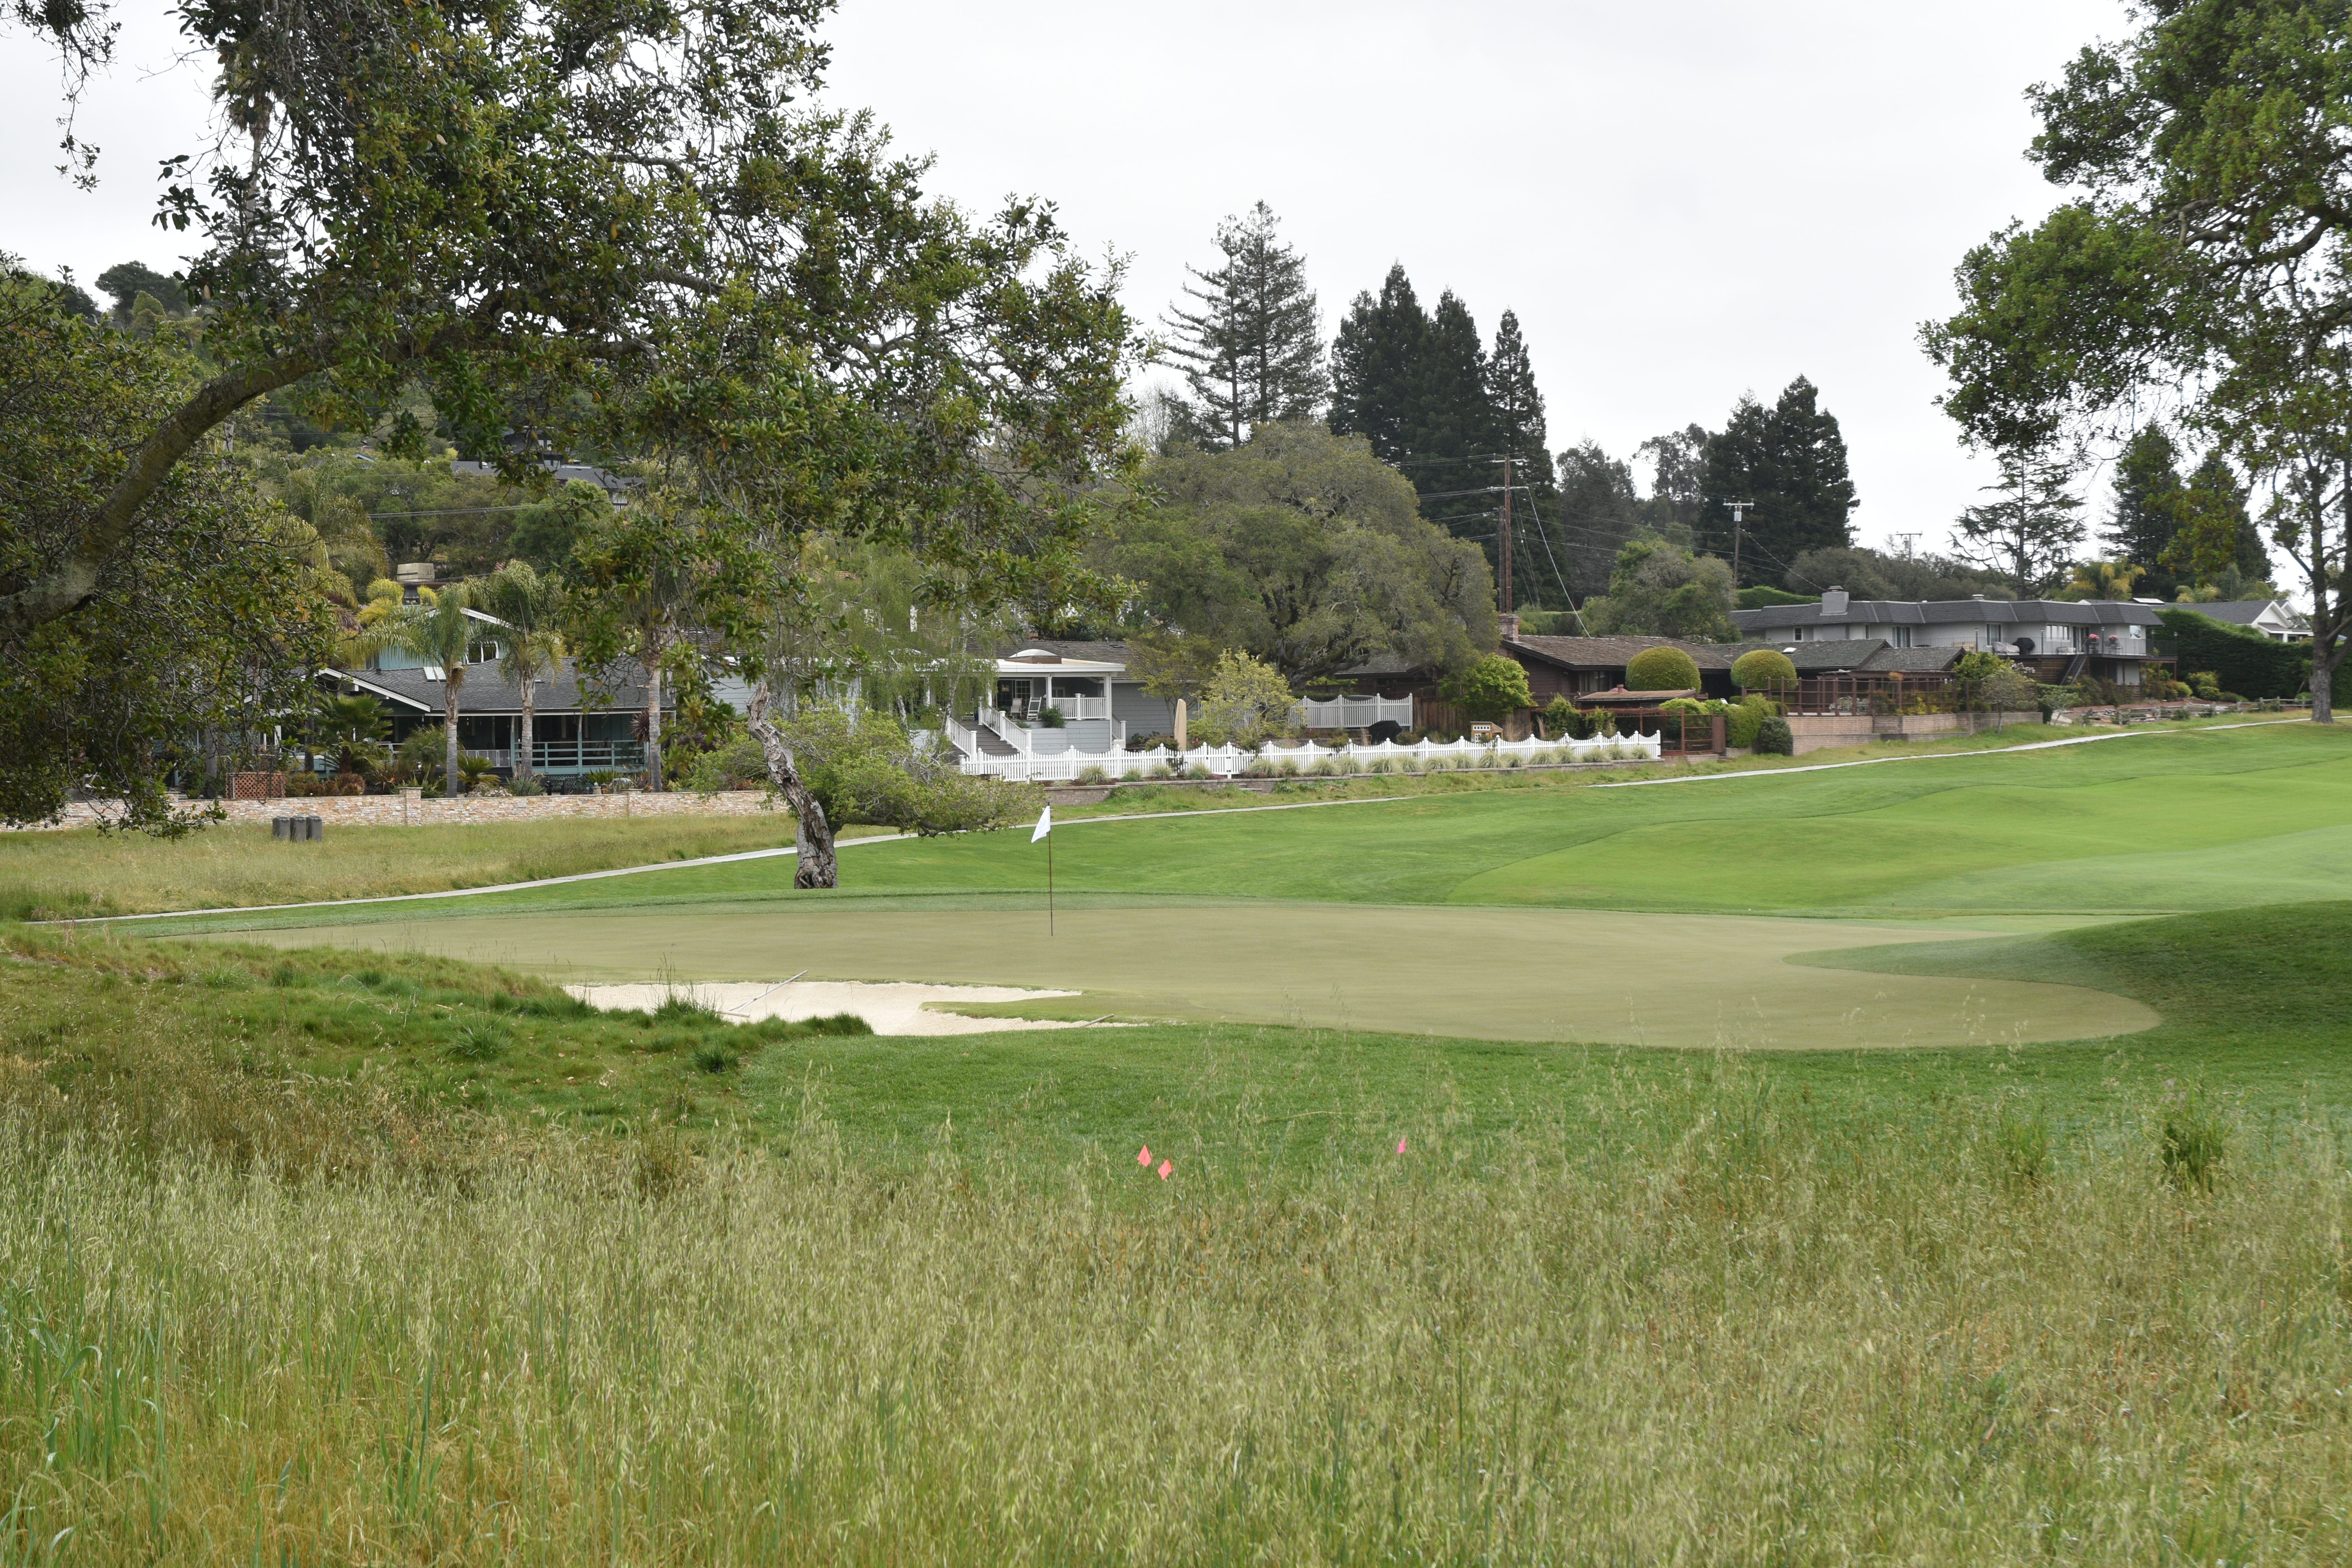
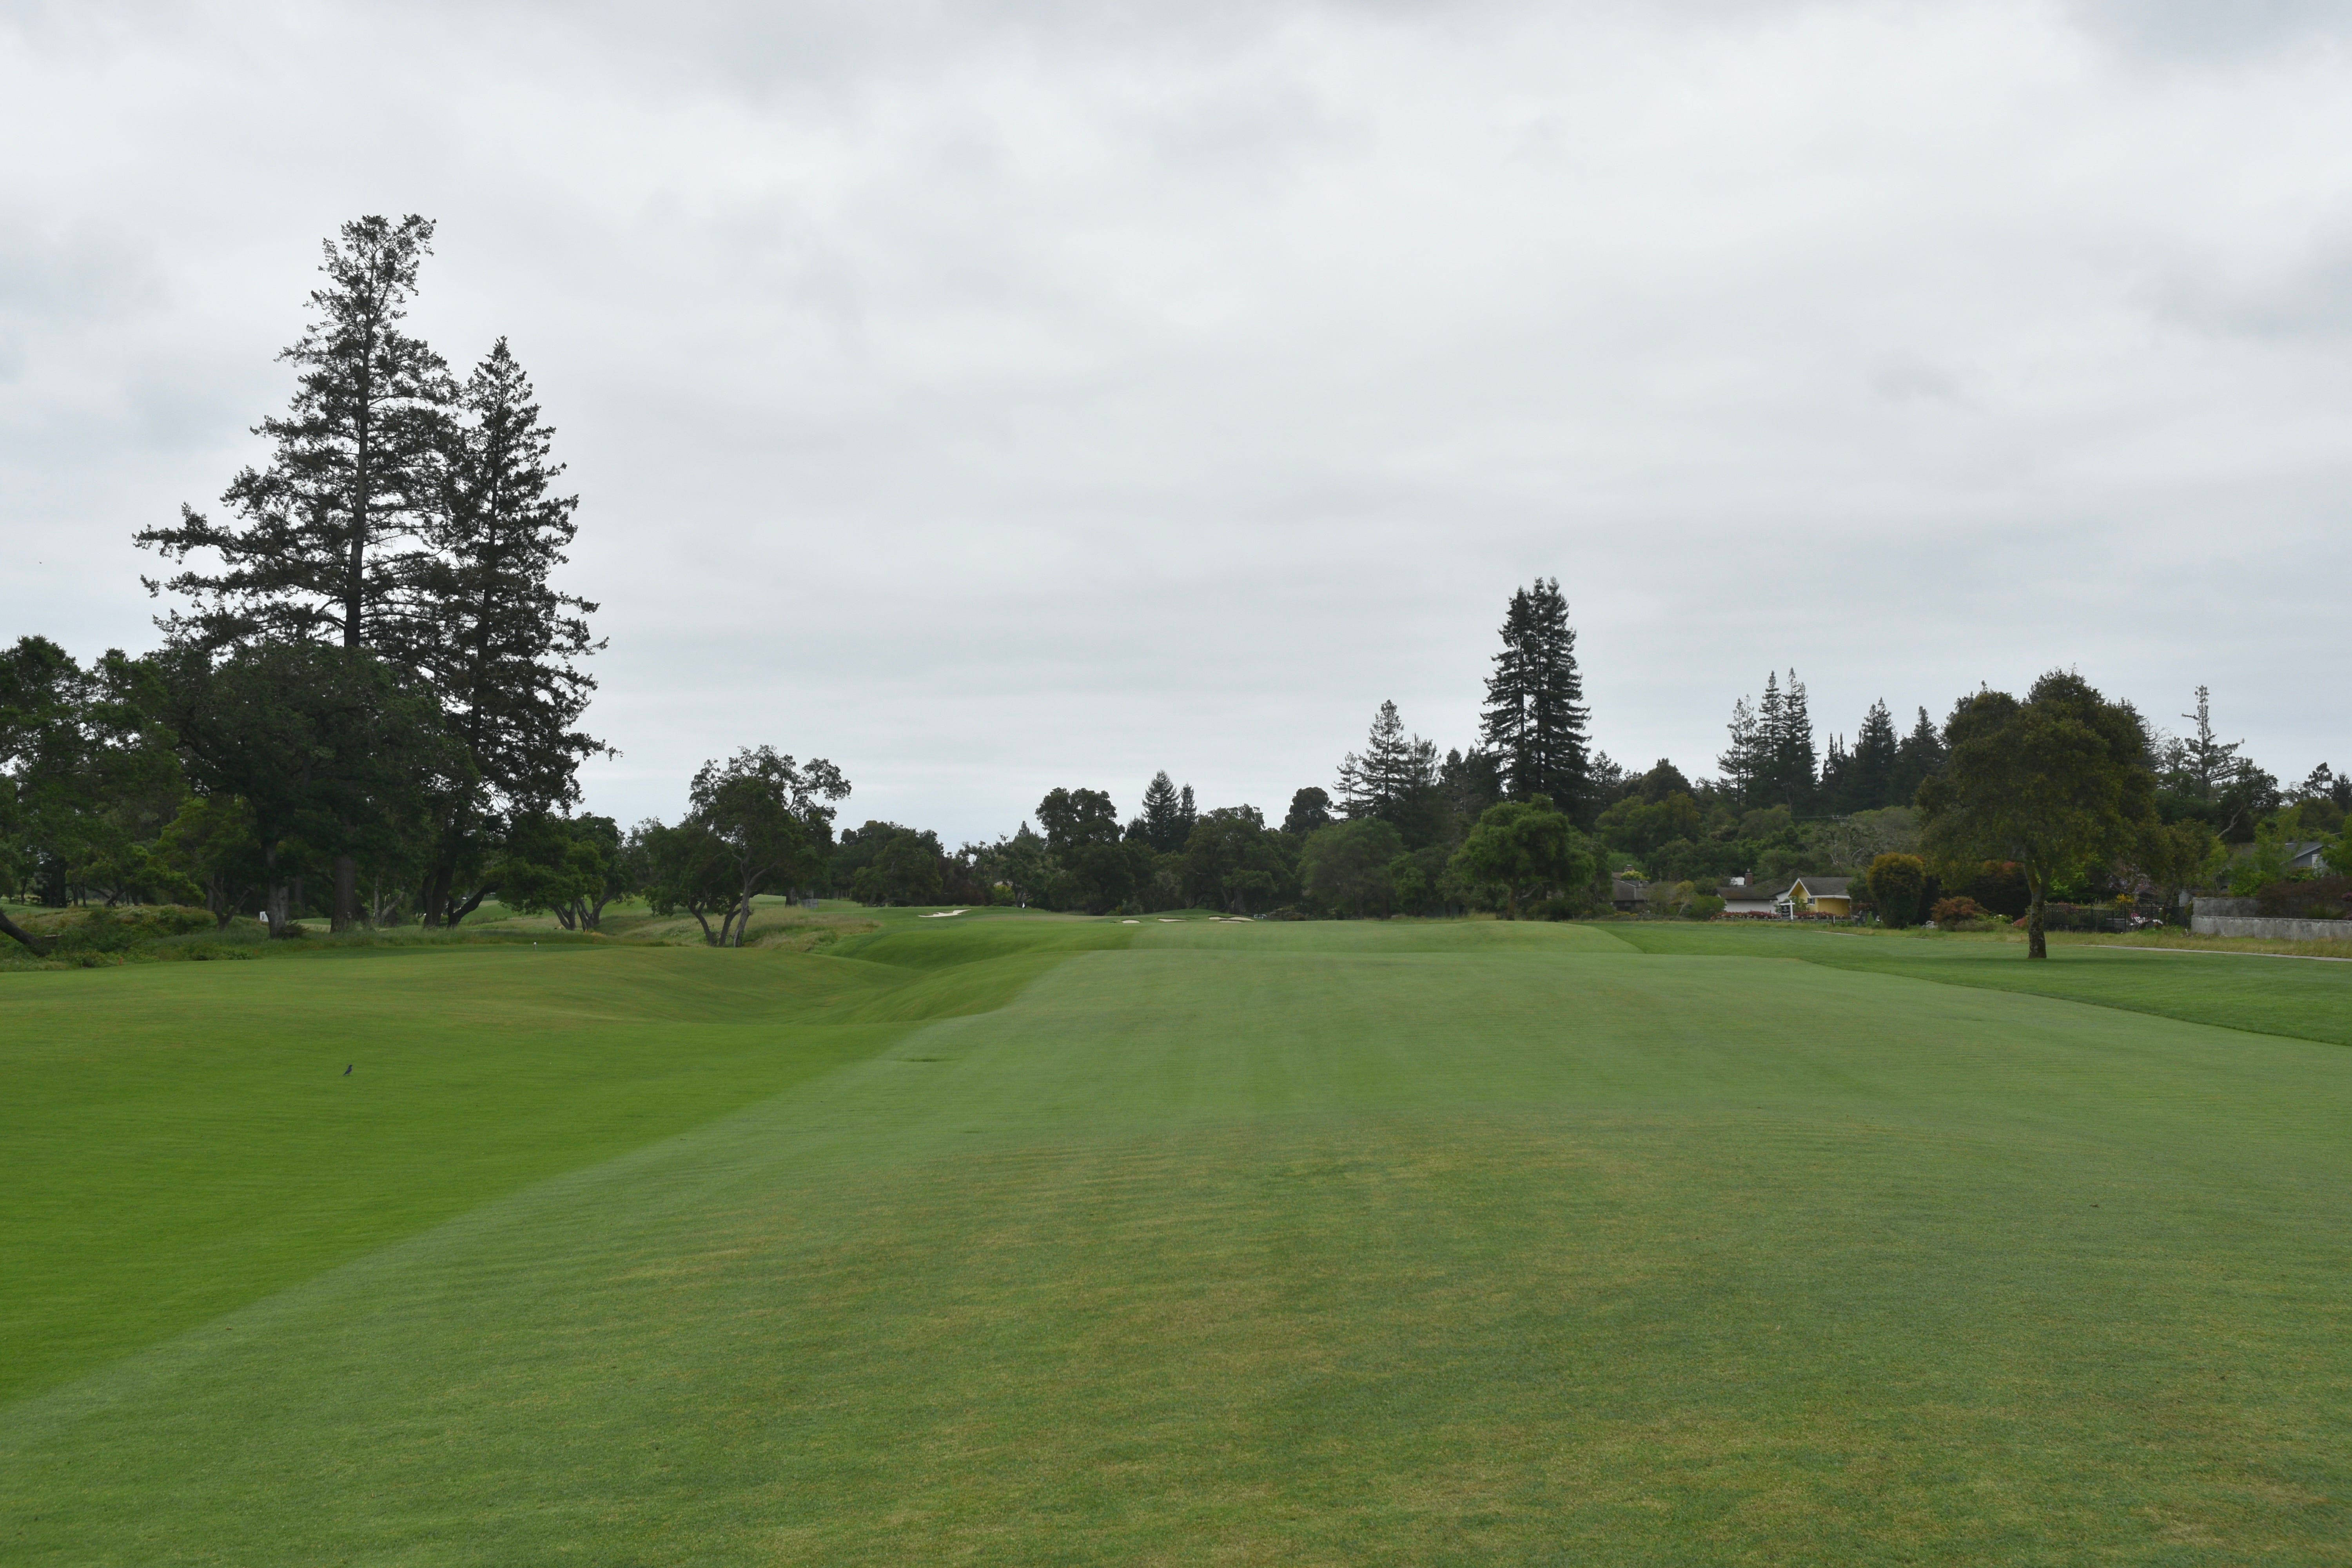
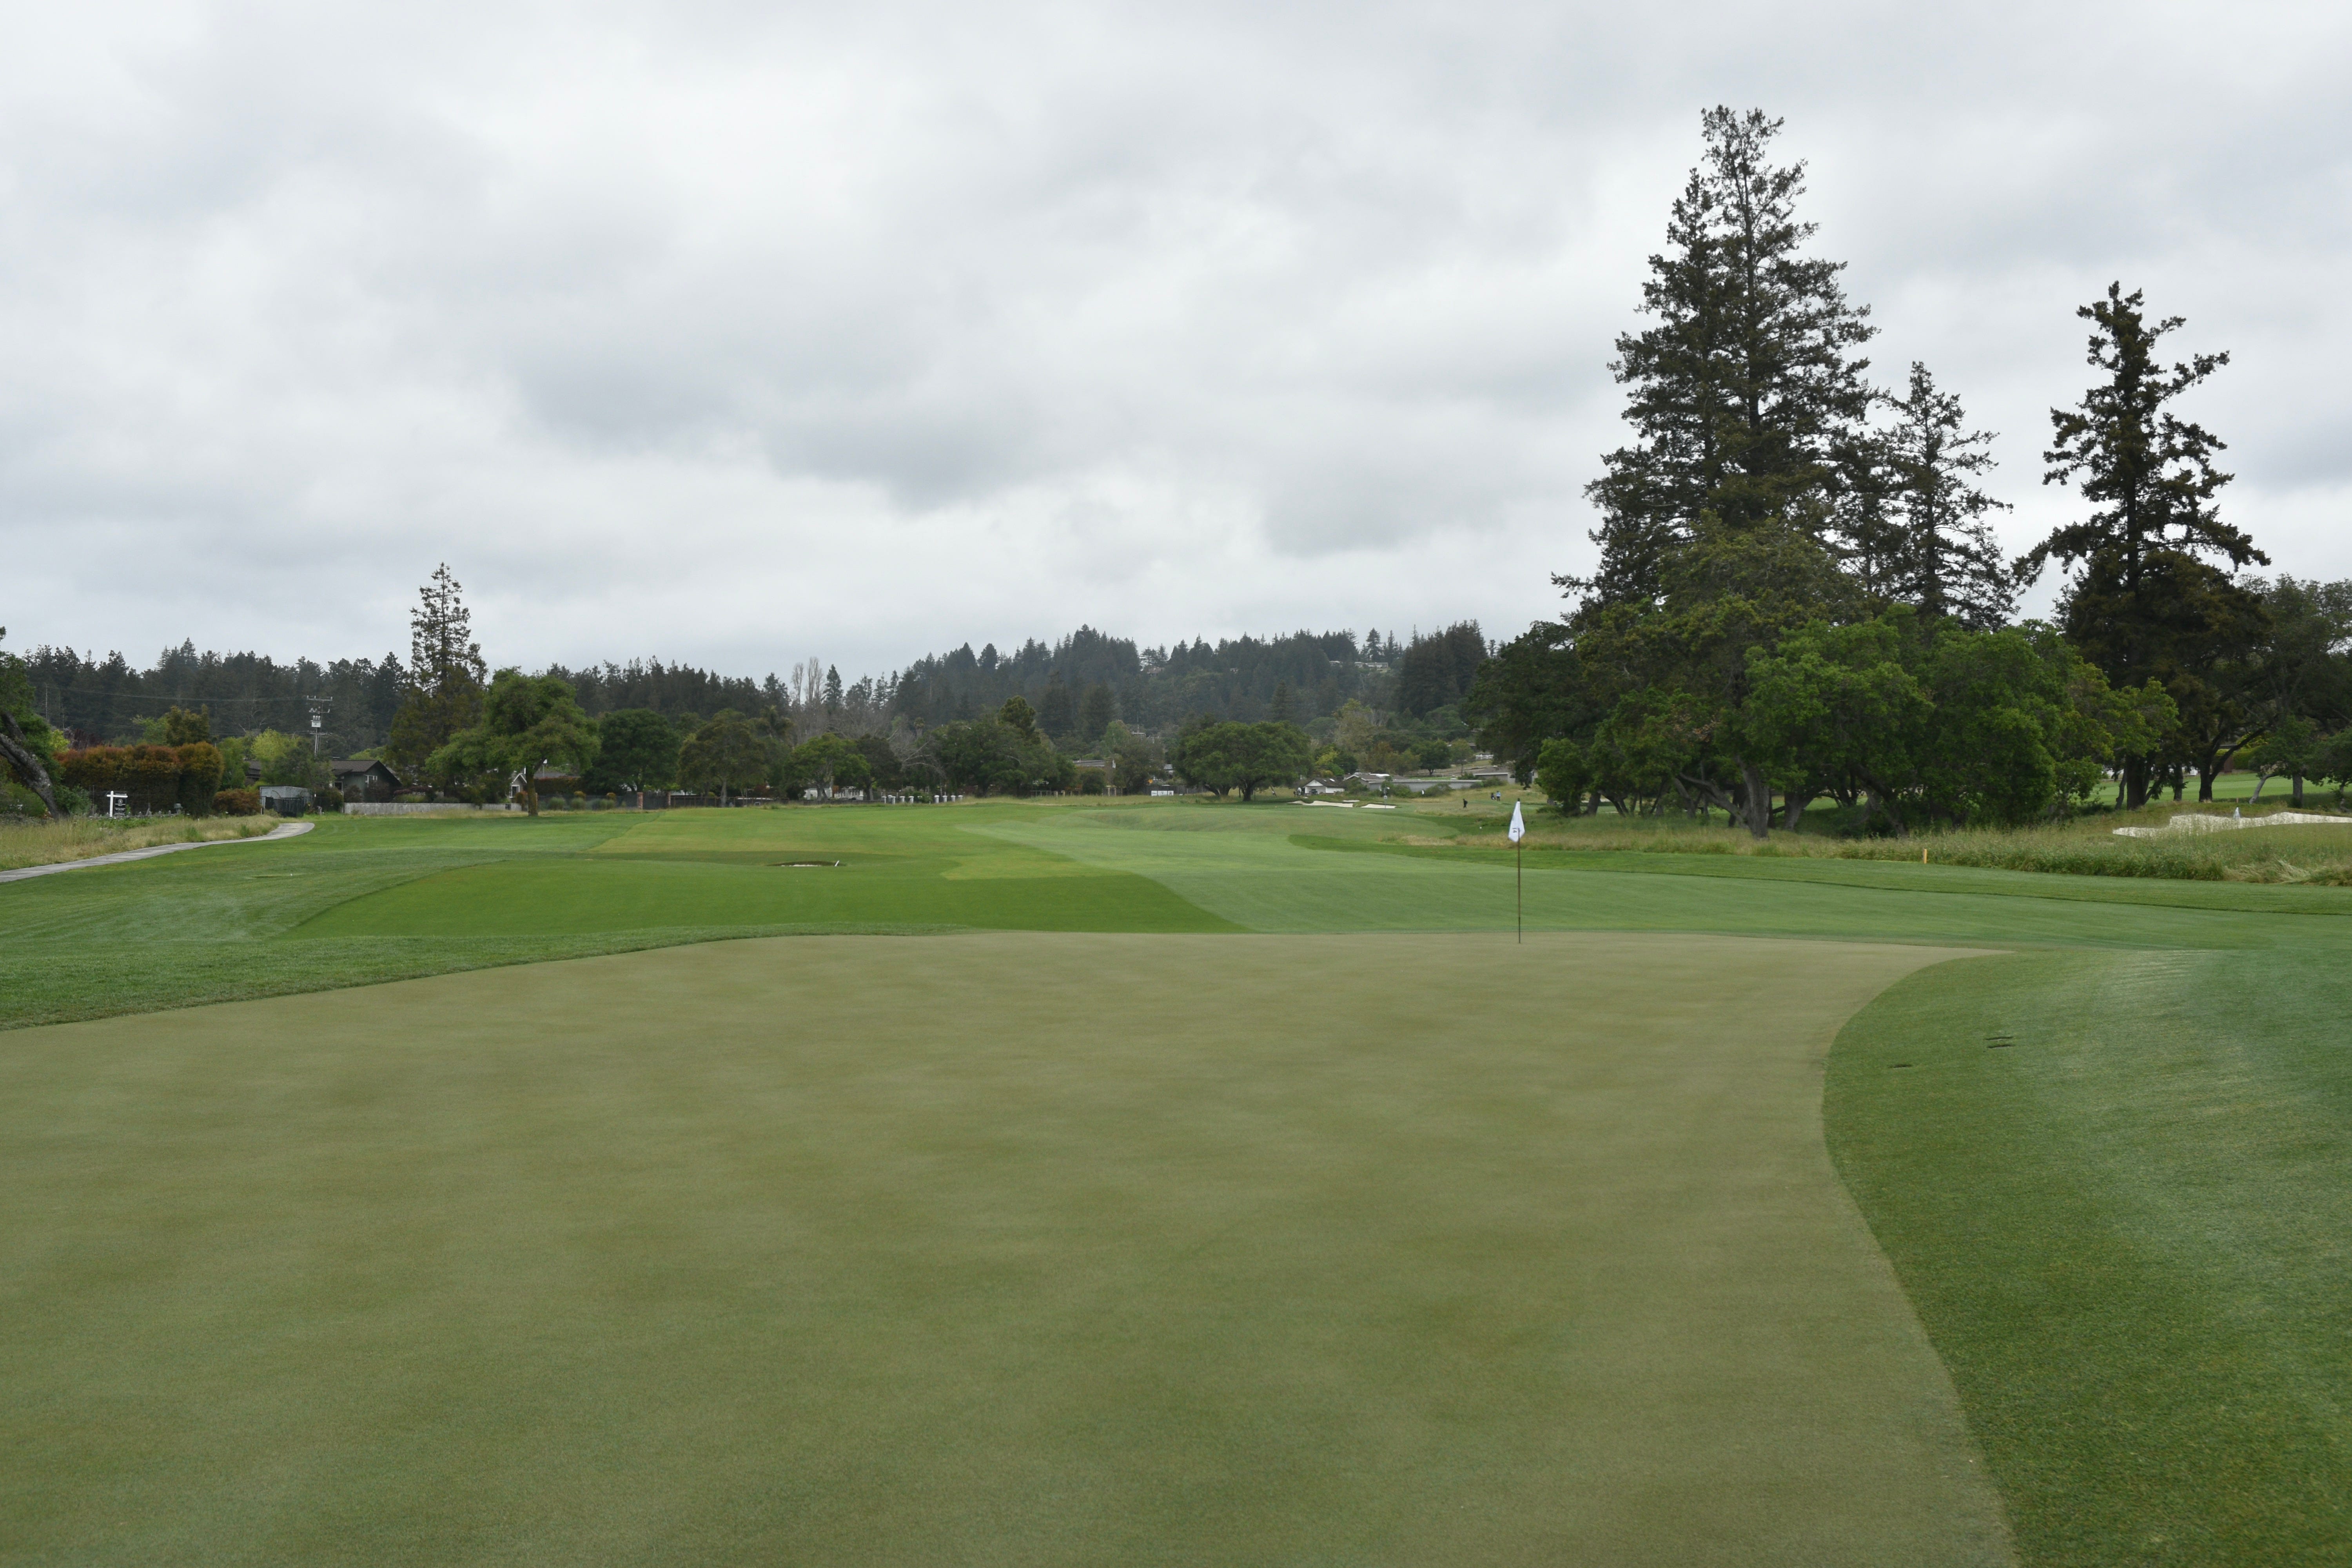
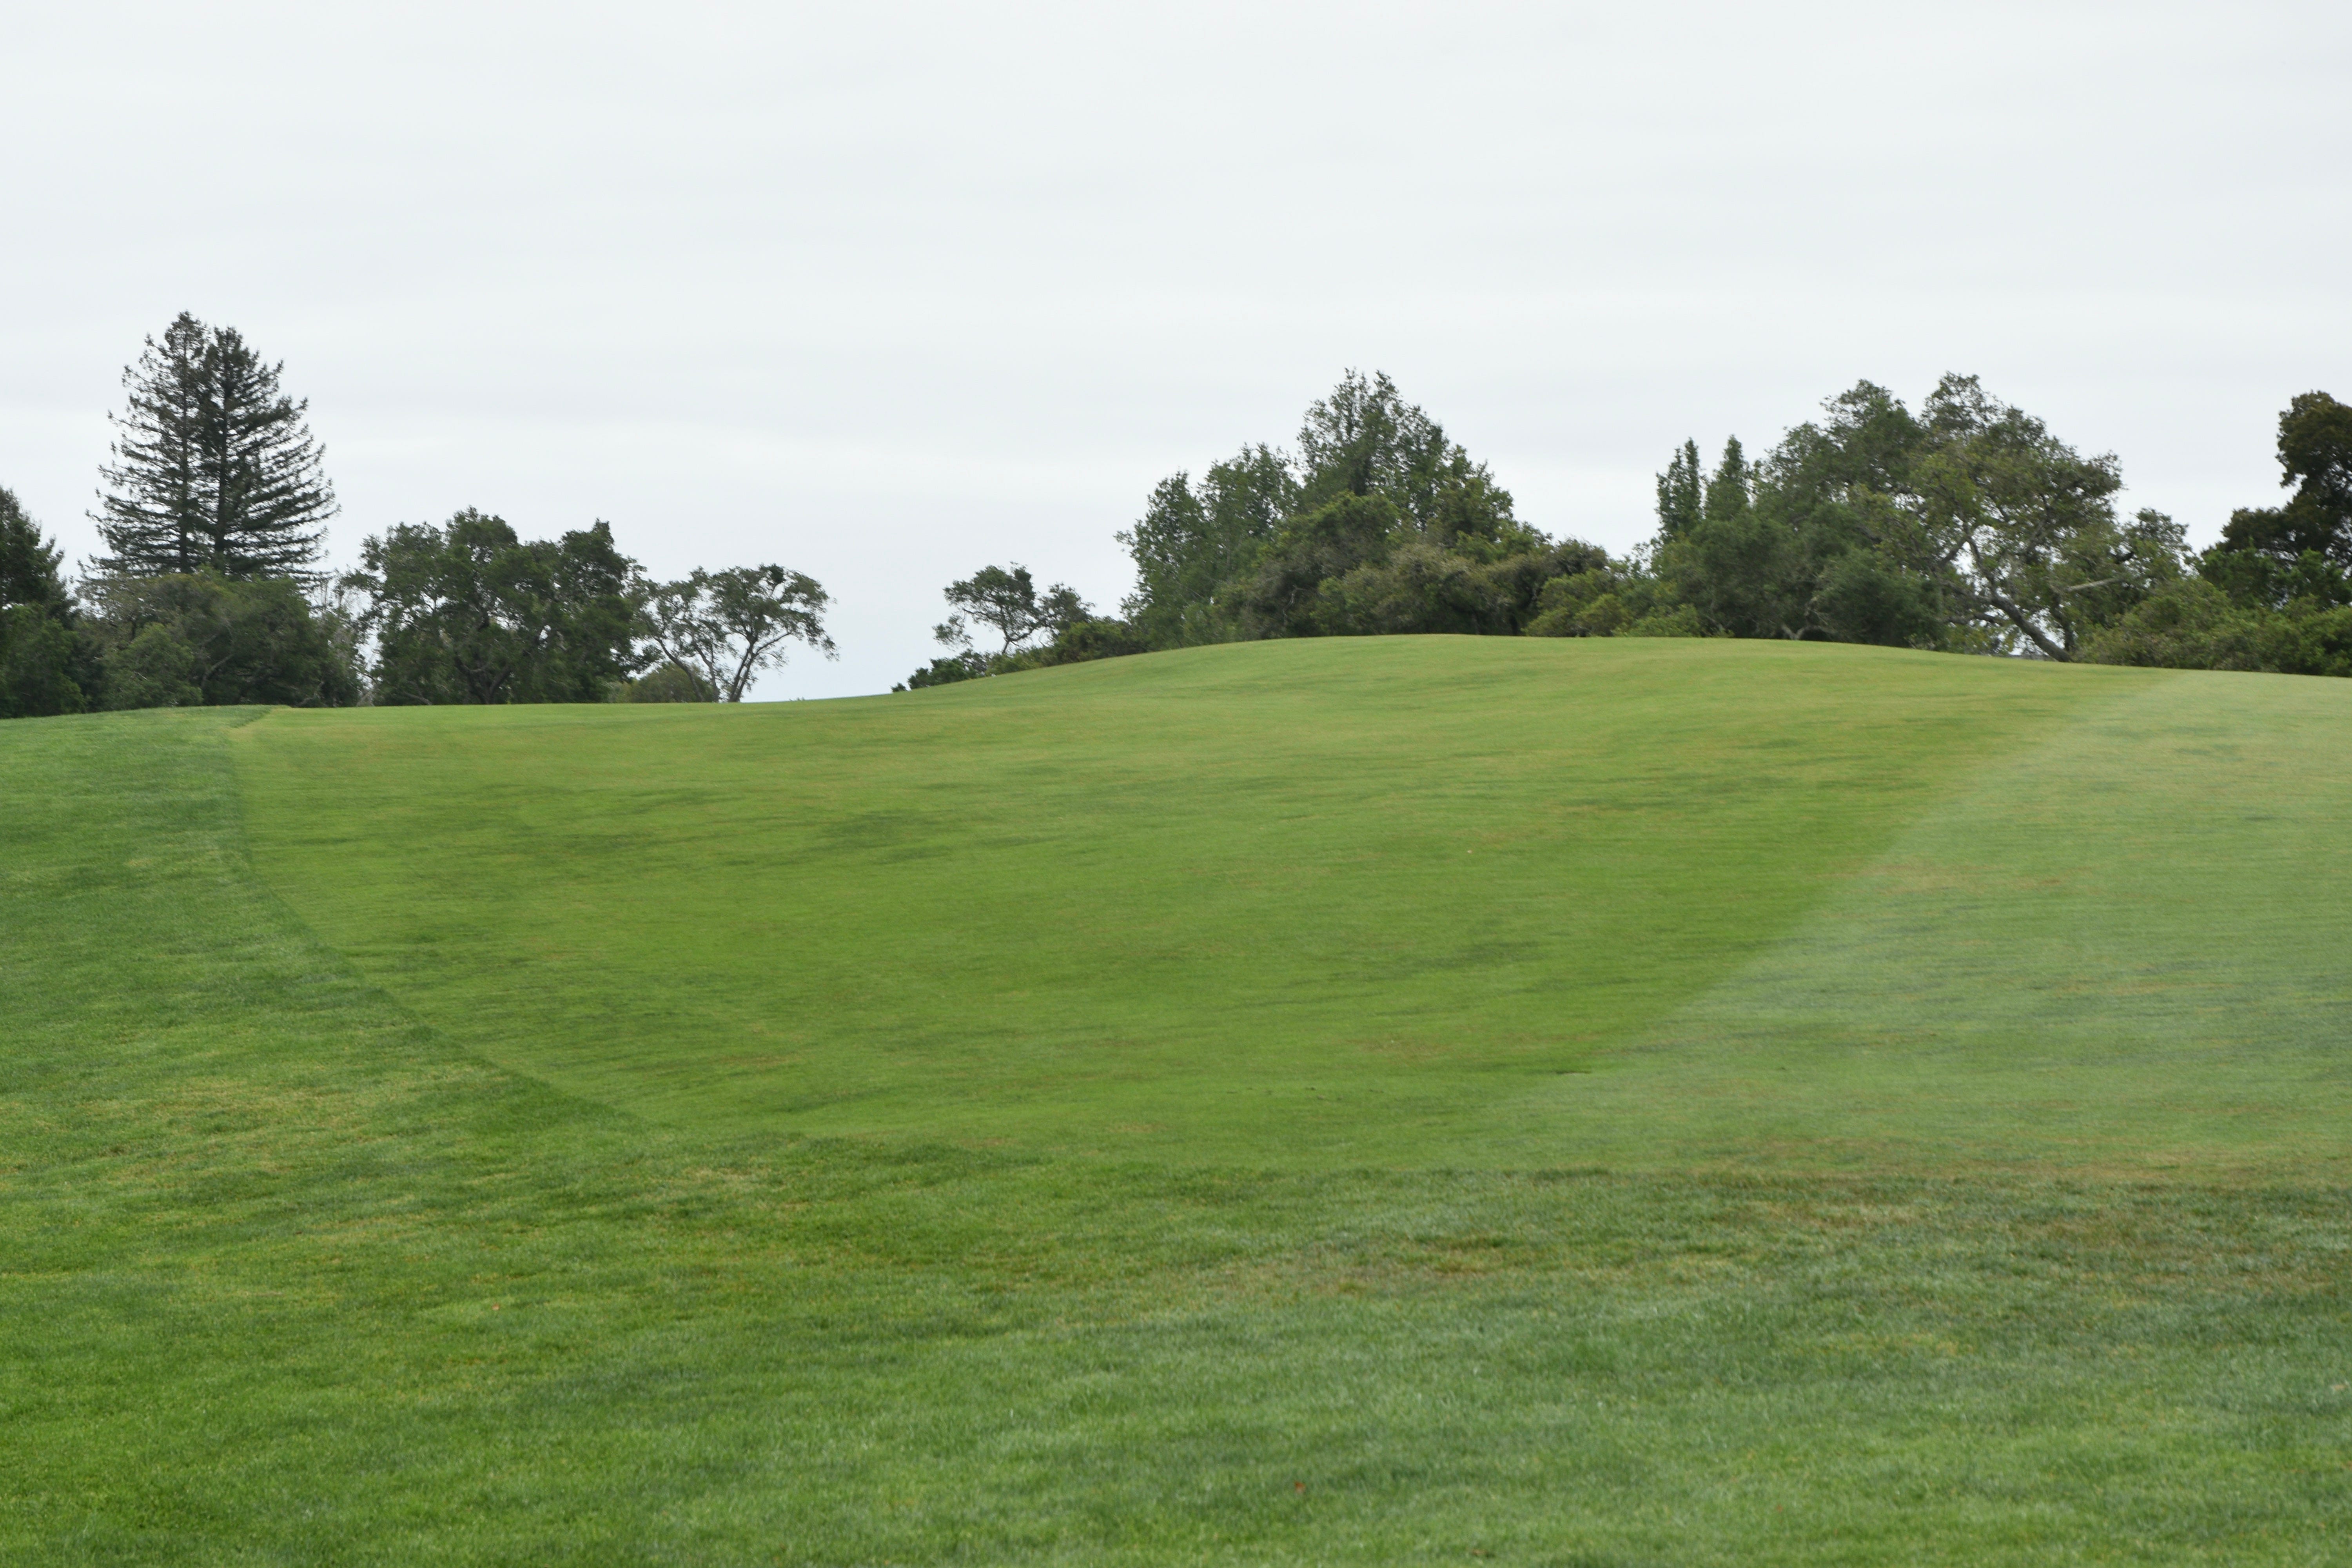
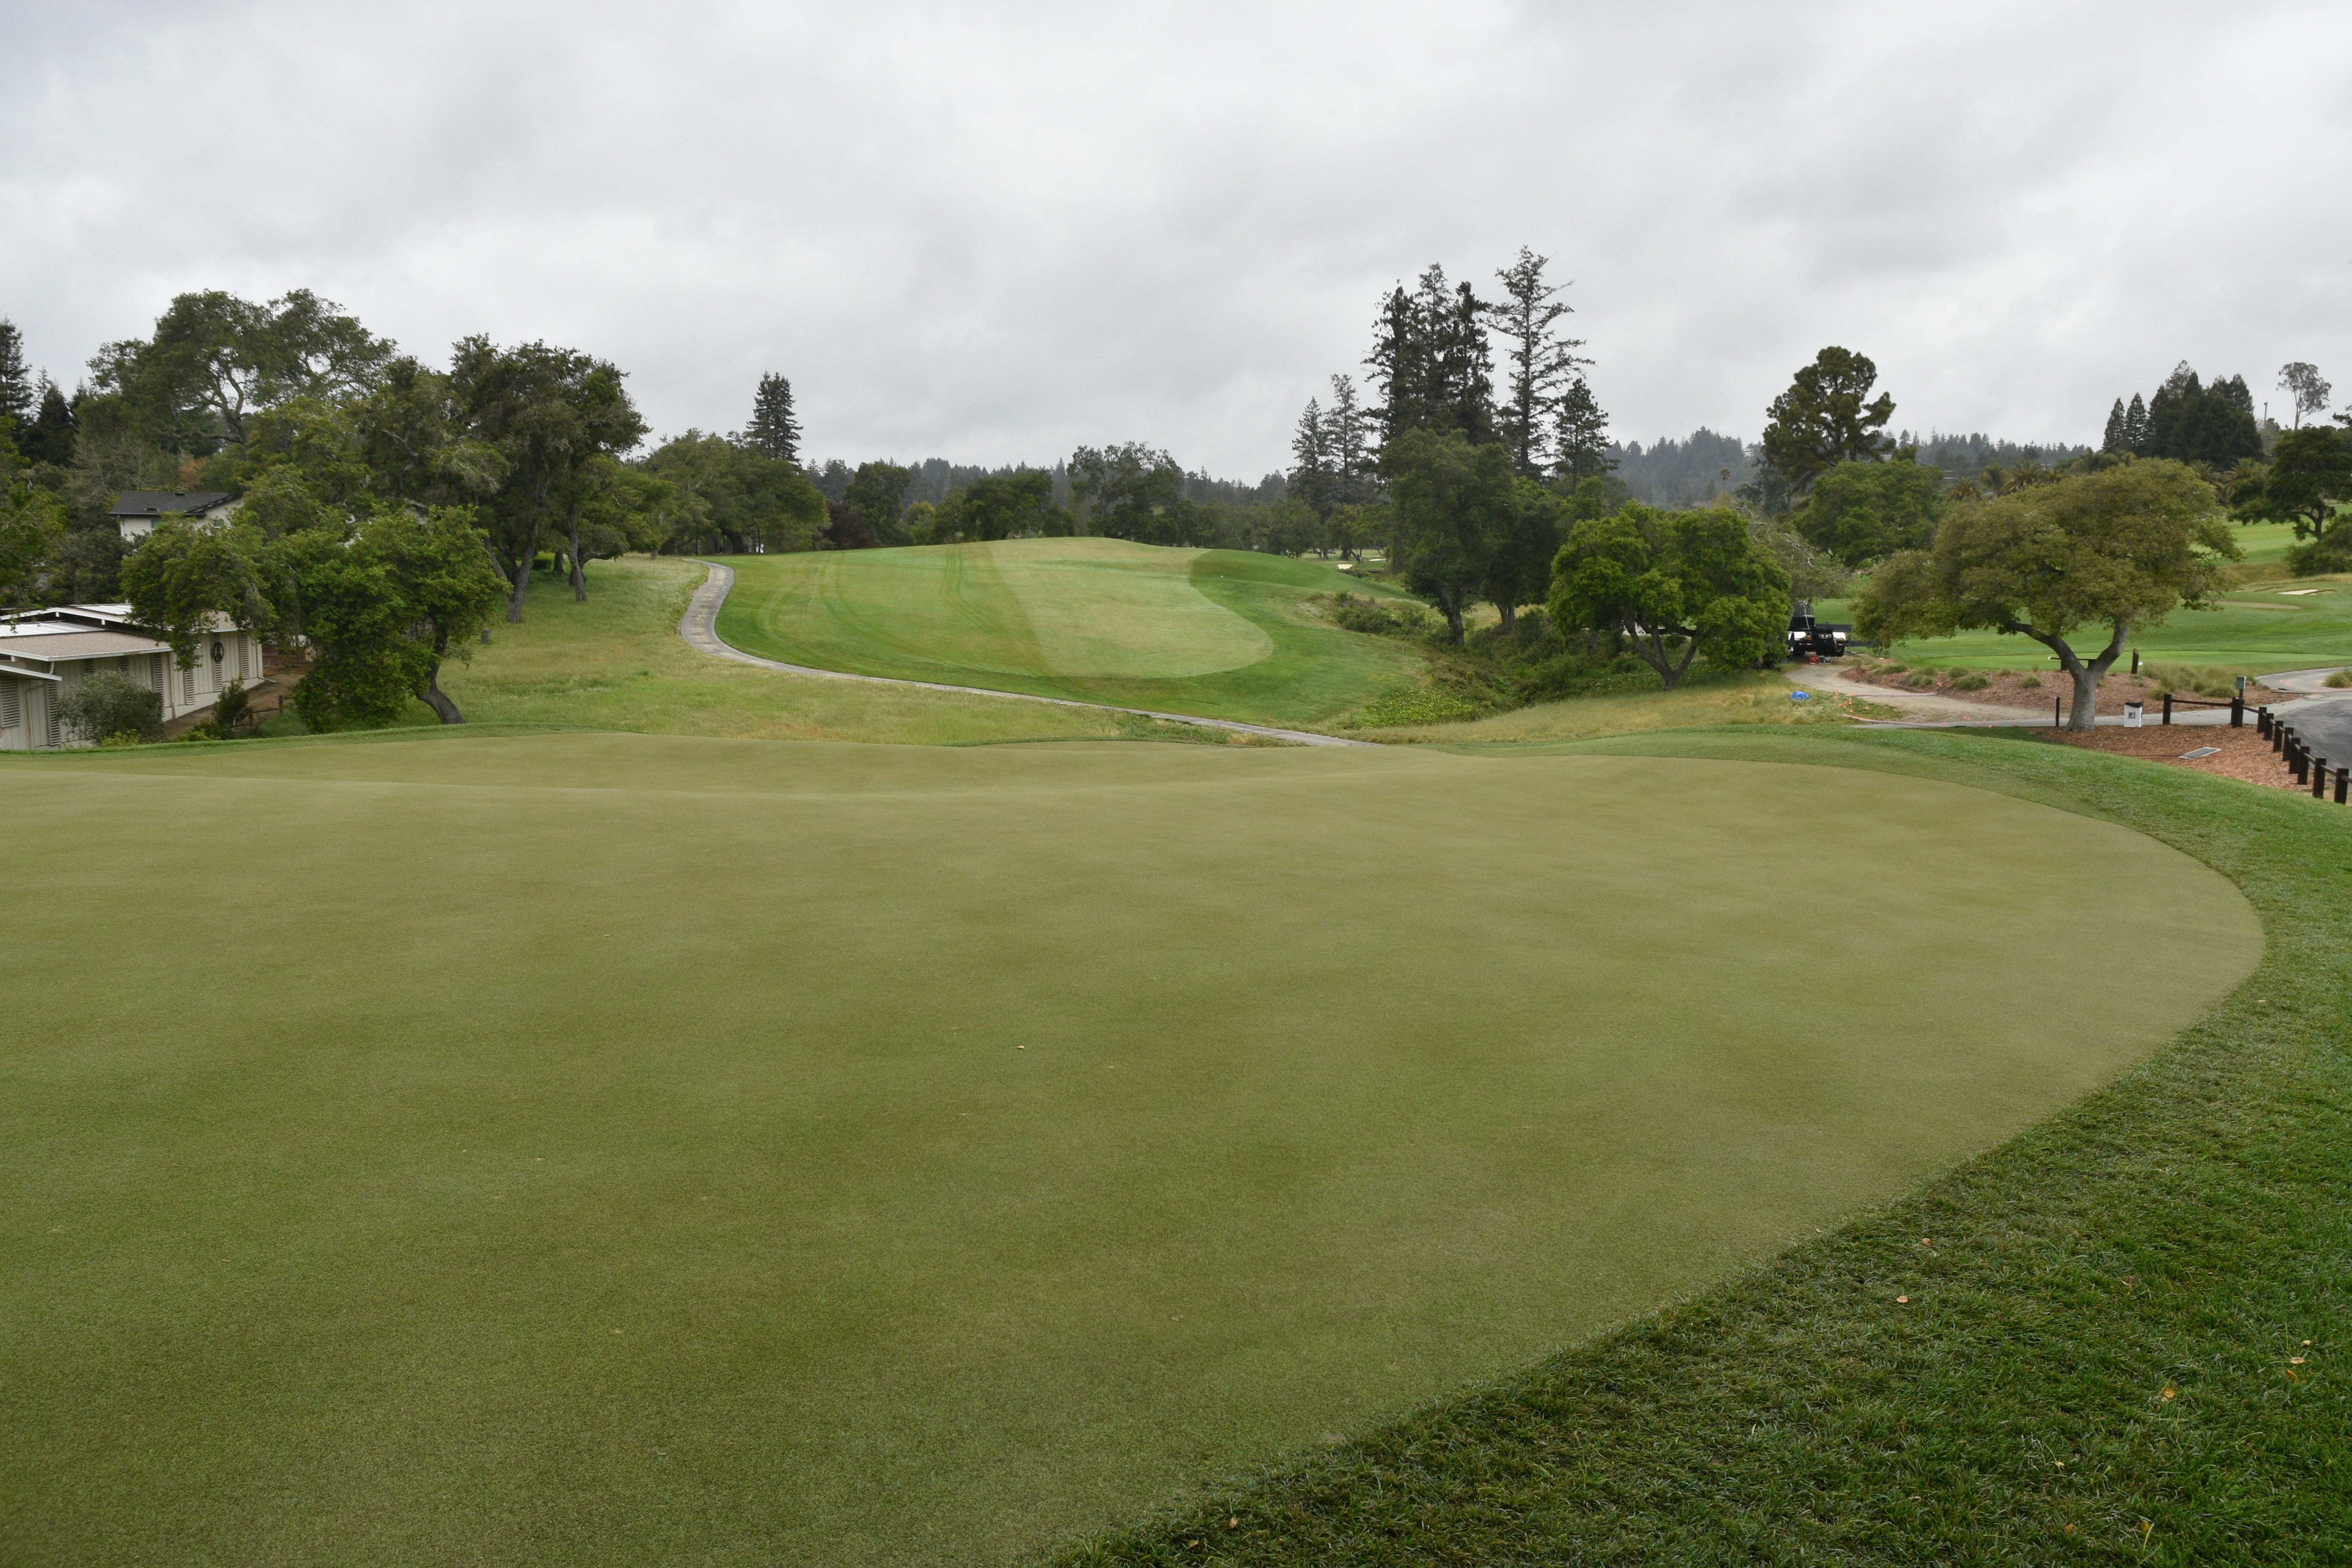
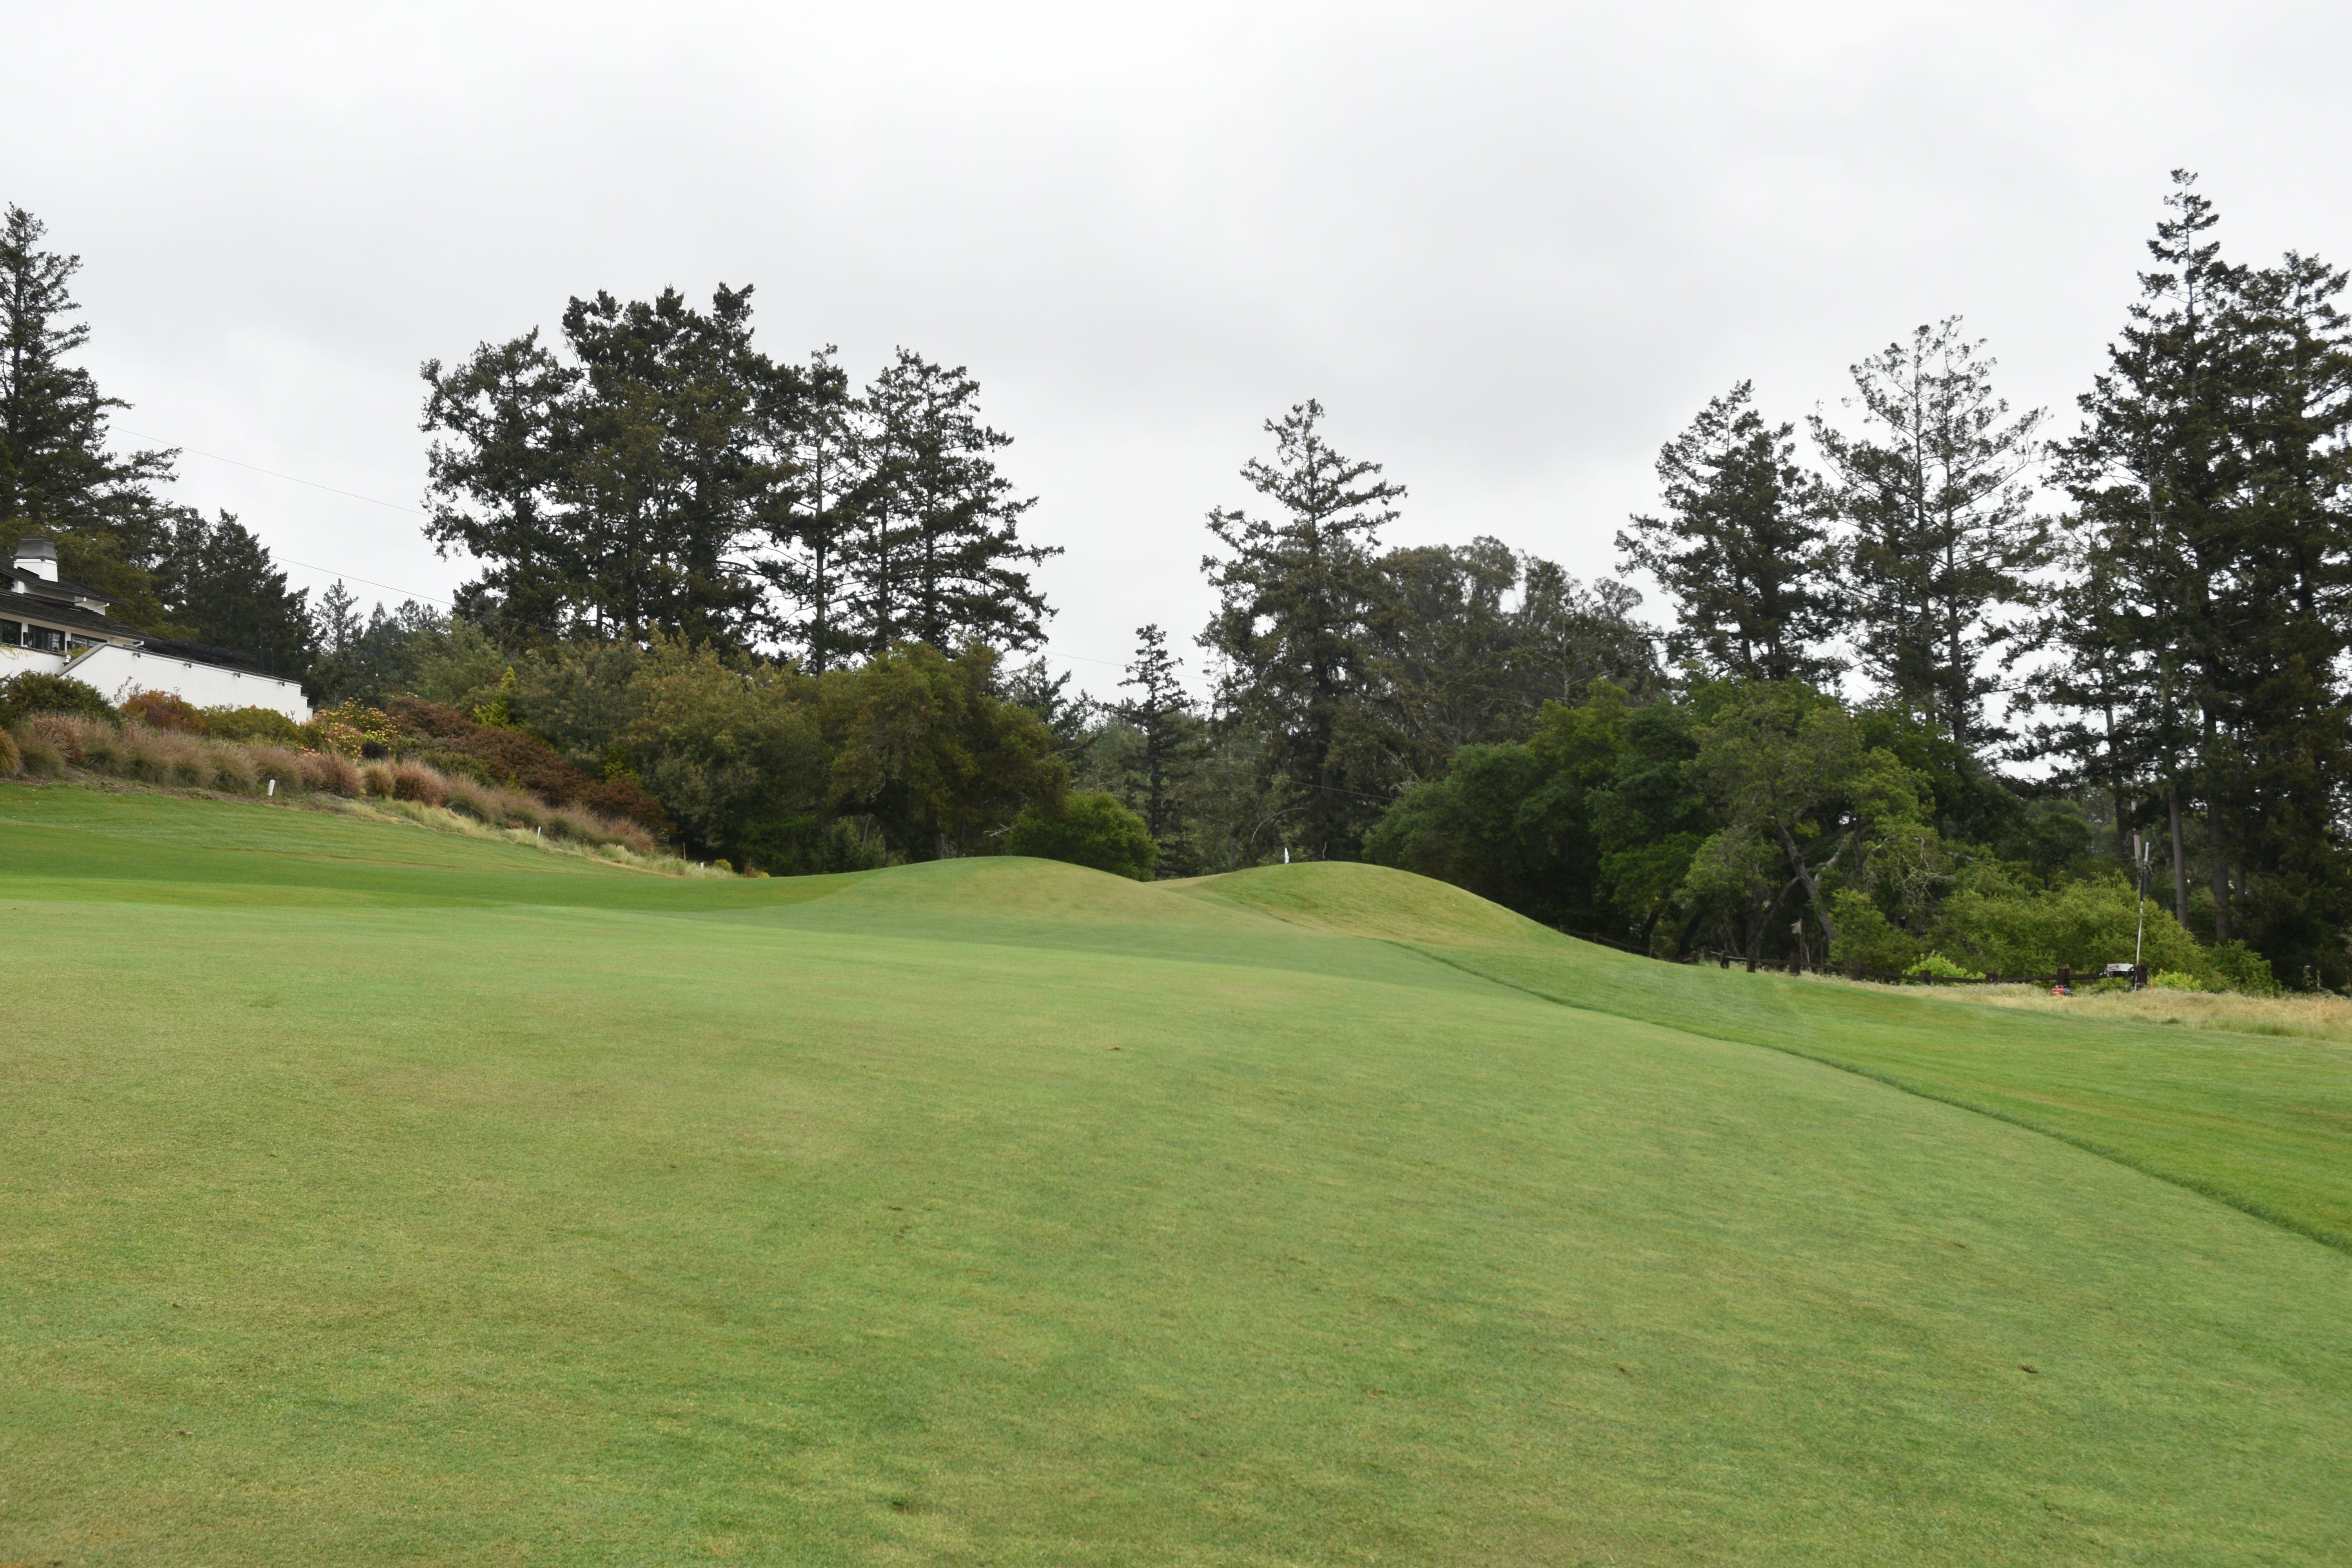
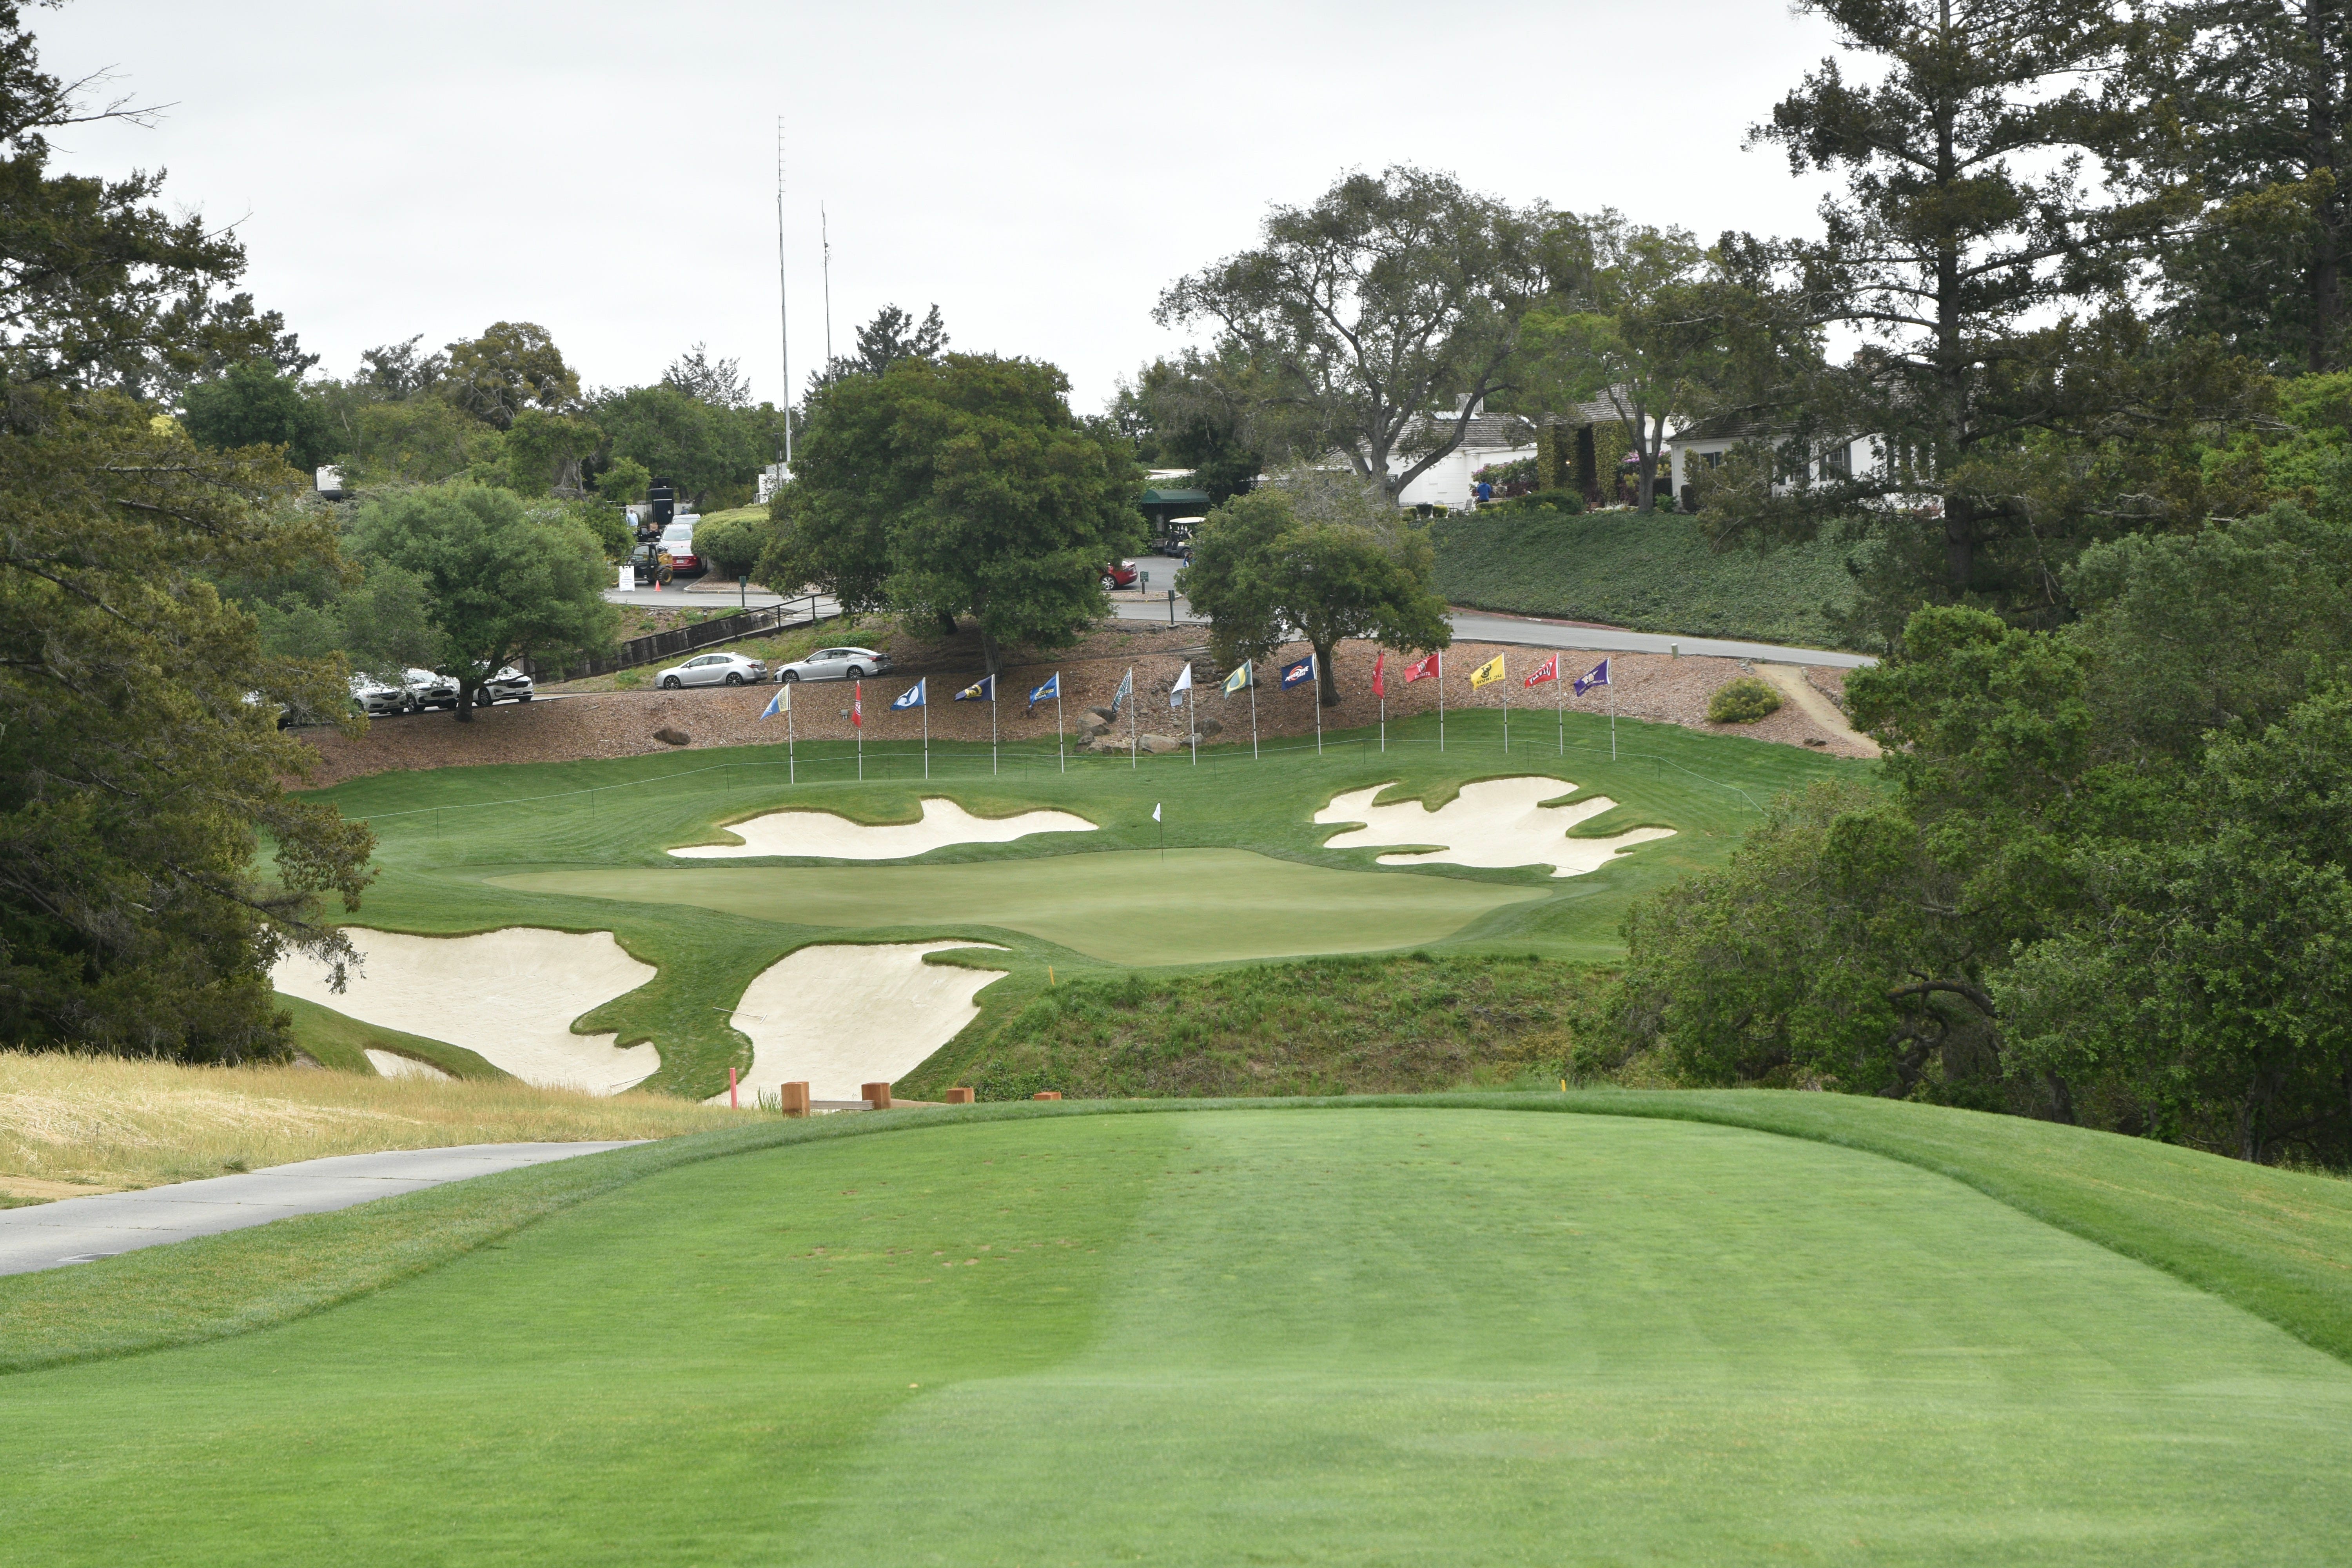
The 10th hole approach from the right hand side at the top of the fairway ridge
The 10th hole approach from the top of the fairway ridge — the green has been altered (or rather refined) and showcases Jim Urbina’s attention to detail as he expanded the green pad and restored the back left tongue section to the green
A view of the 10th hole approach from the left side of the fairway
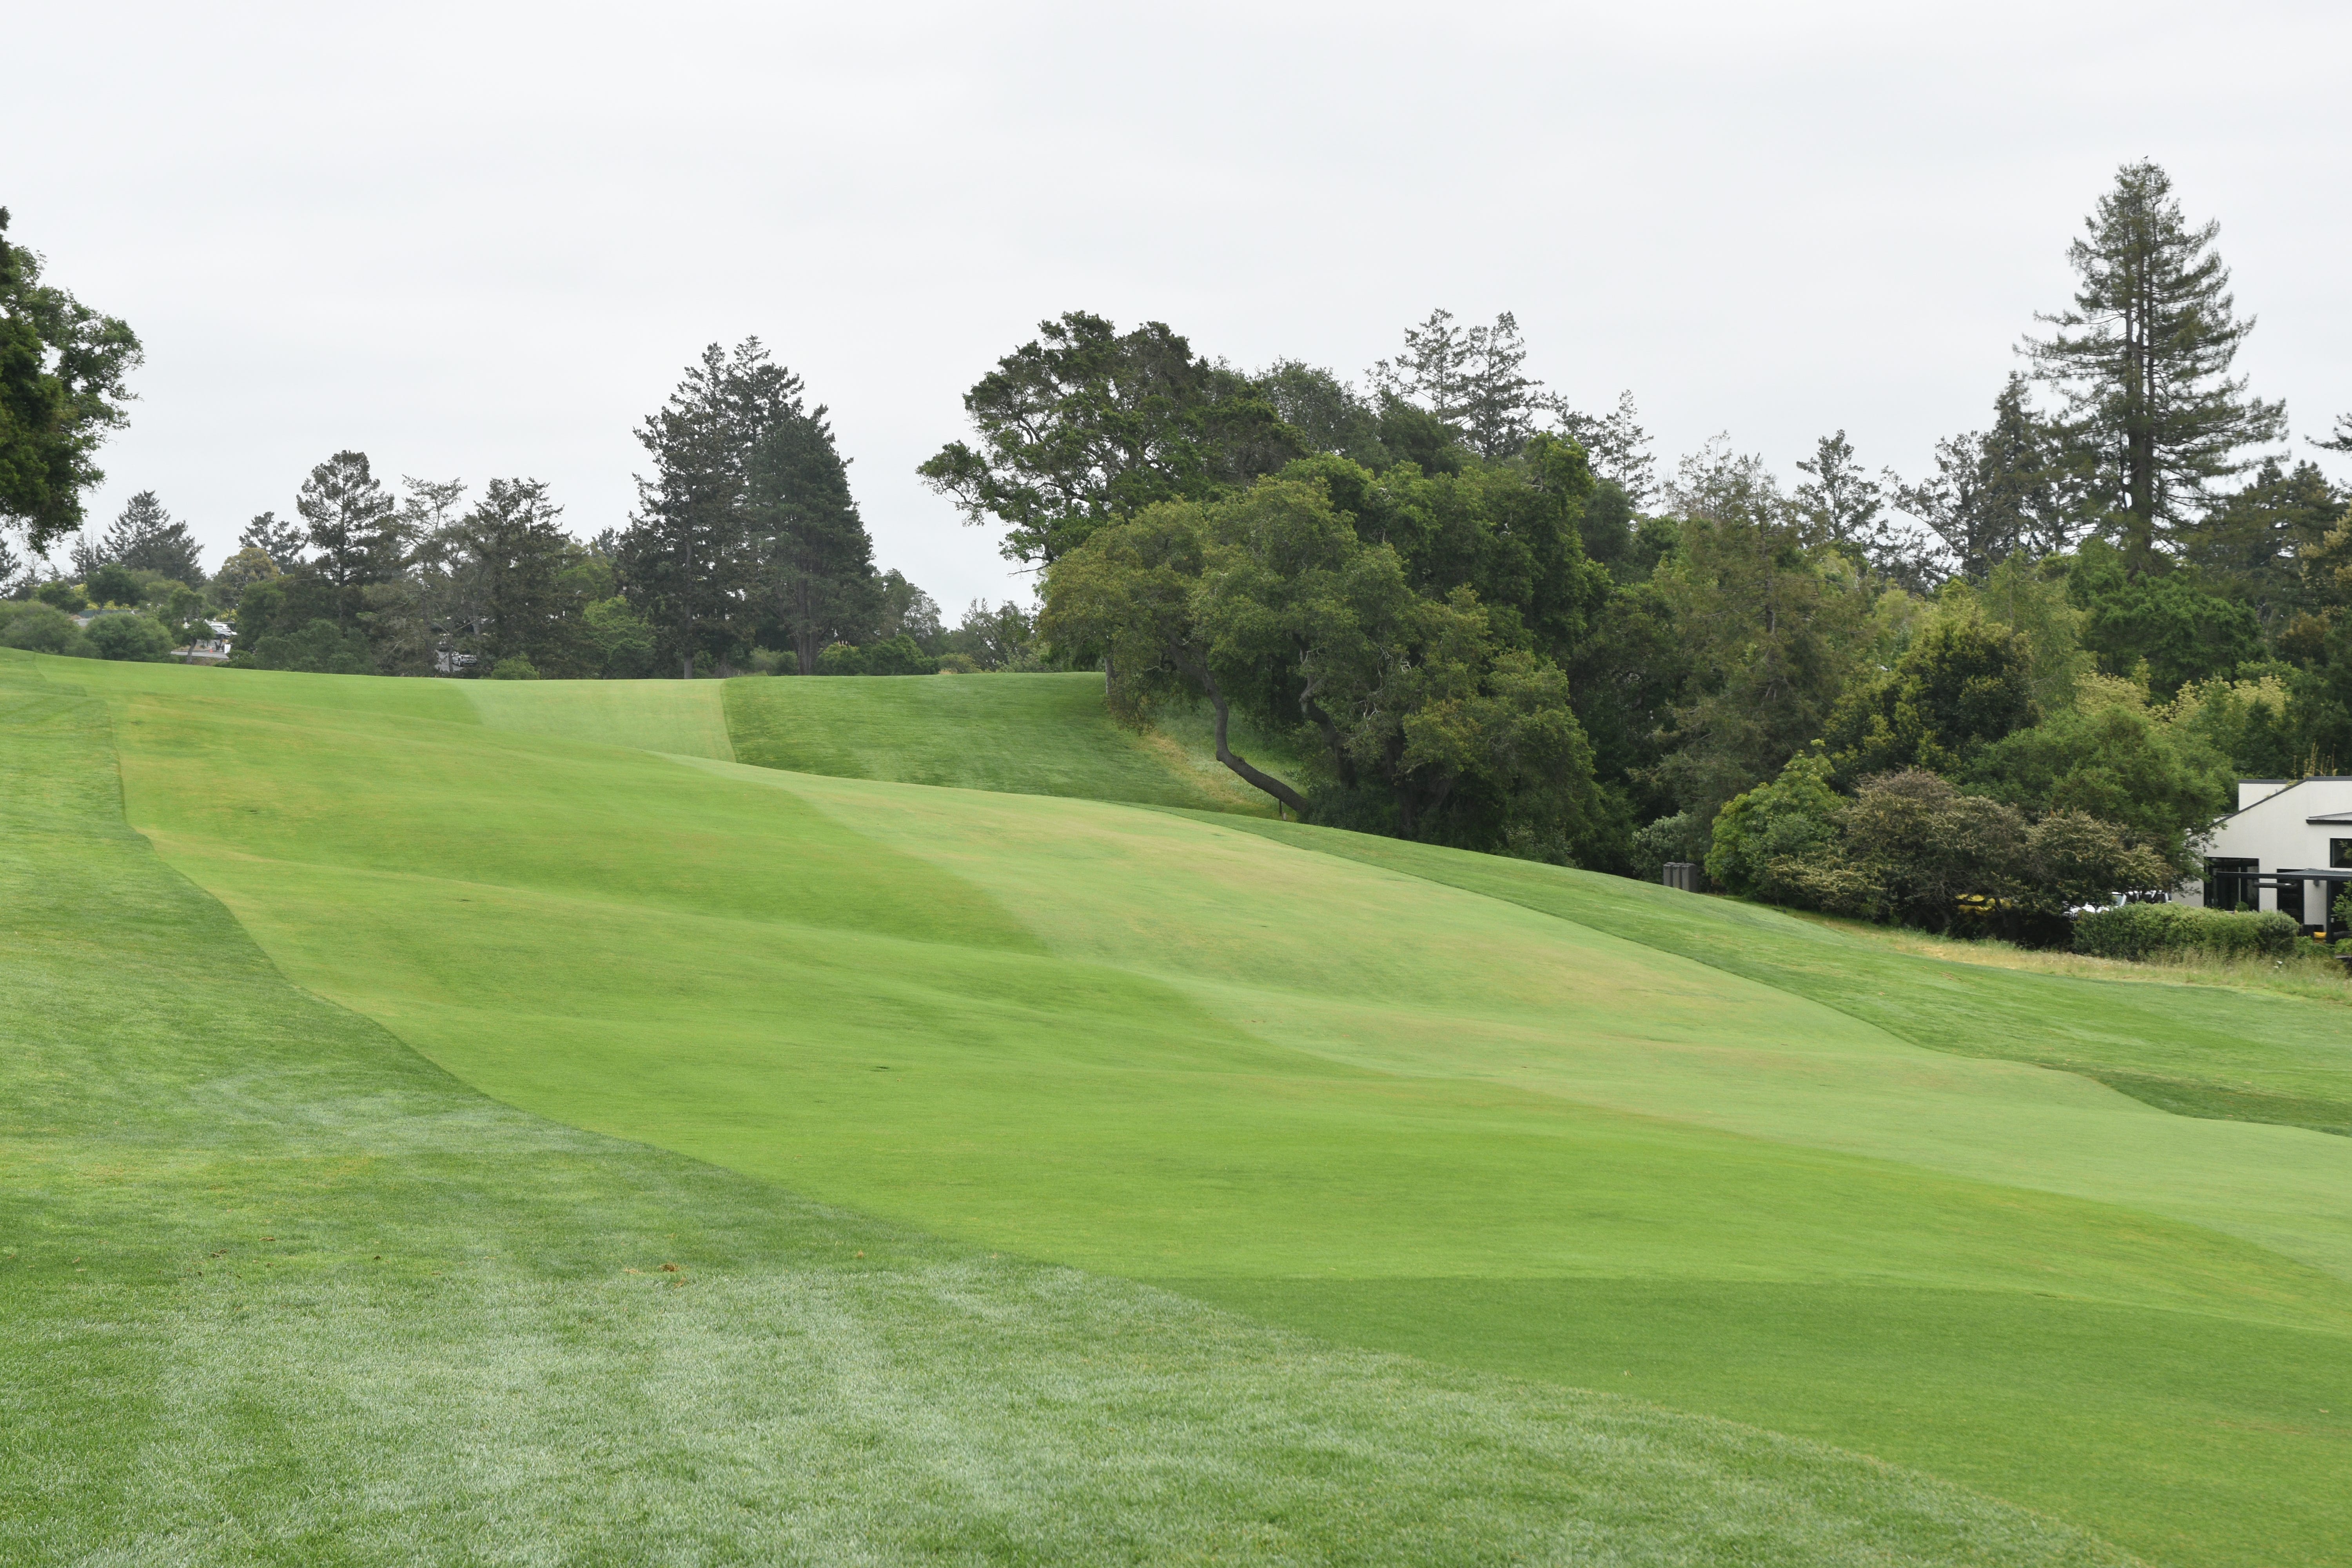
Looking back towards the fairway showcases how dramatic the slope is once cresting the fairway ridge as the fairway dips down and slopes from right to left
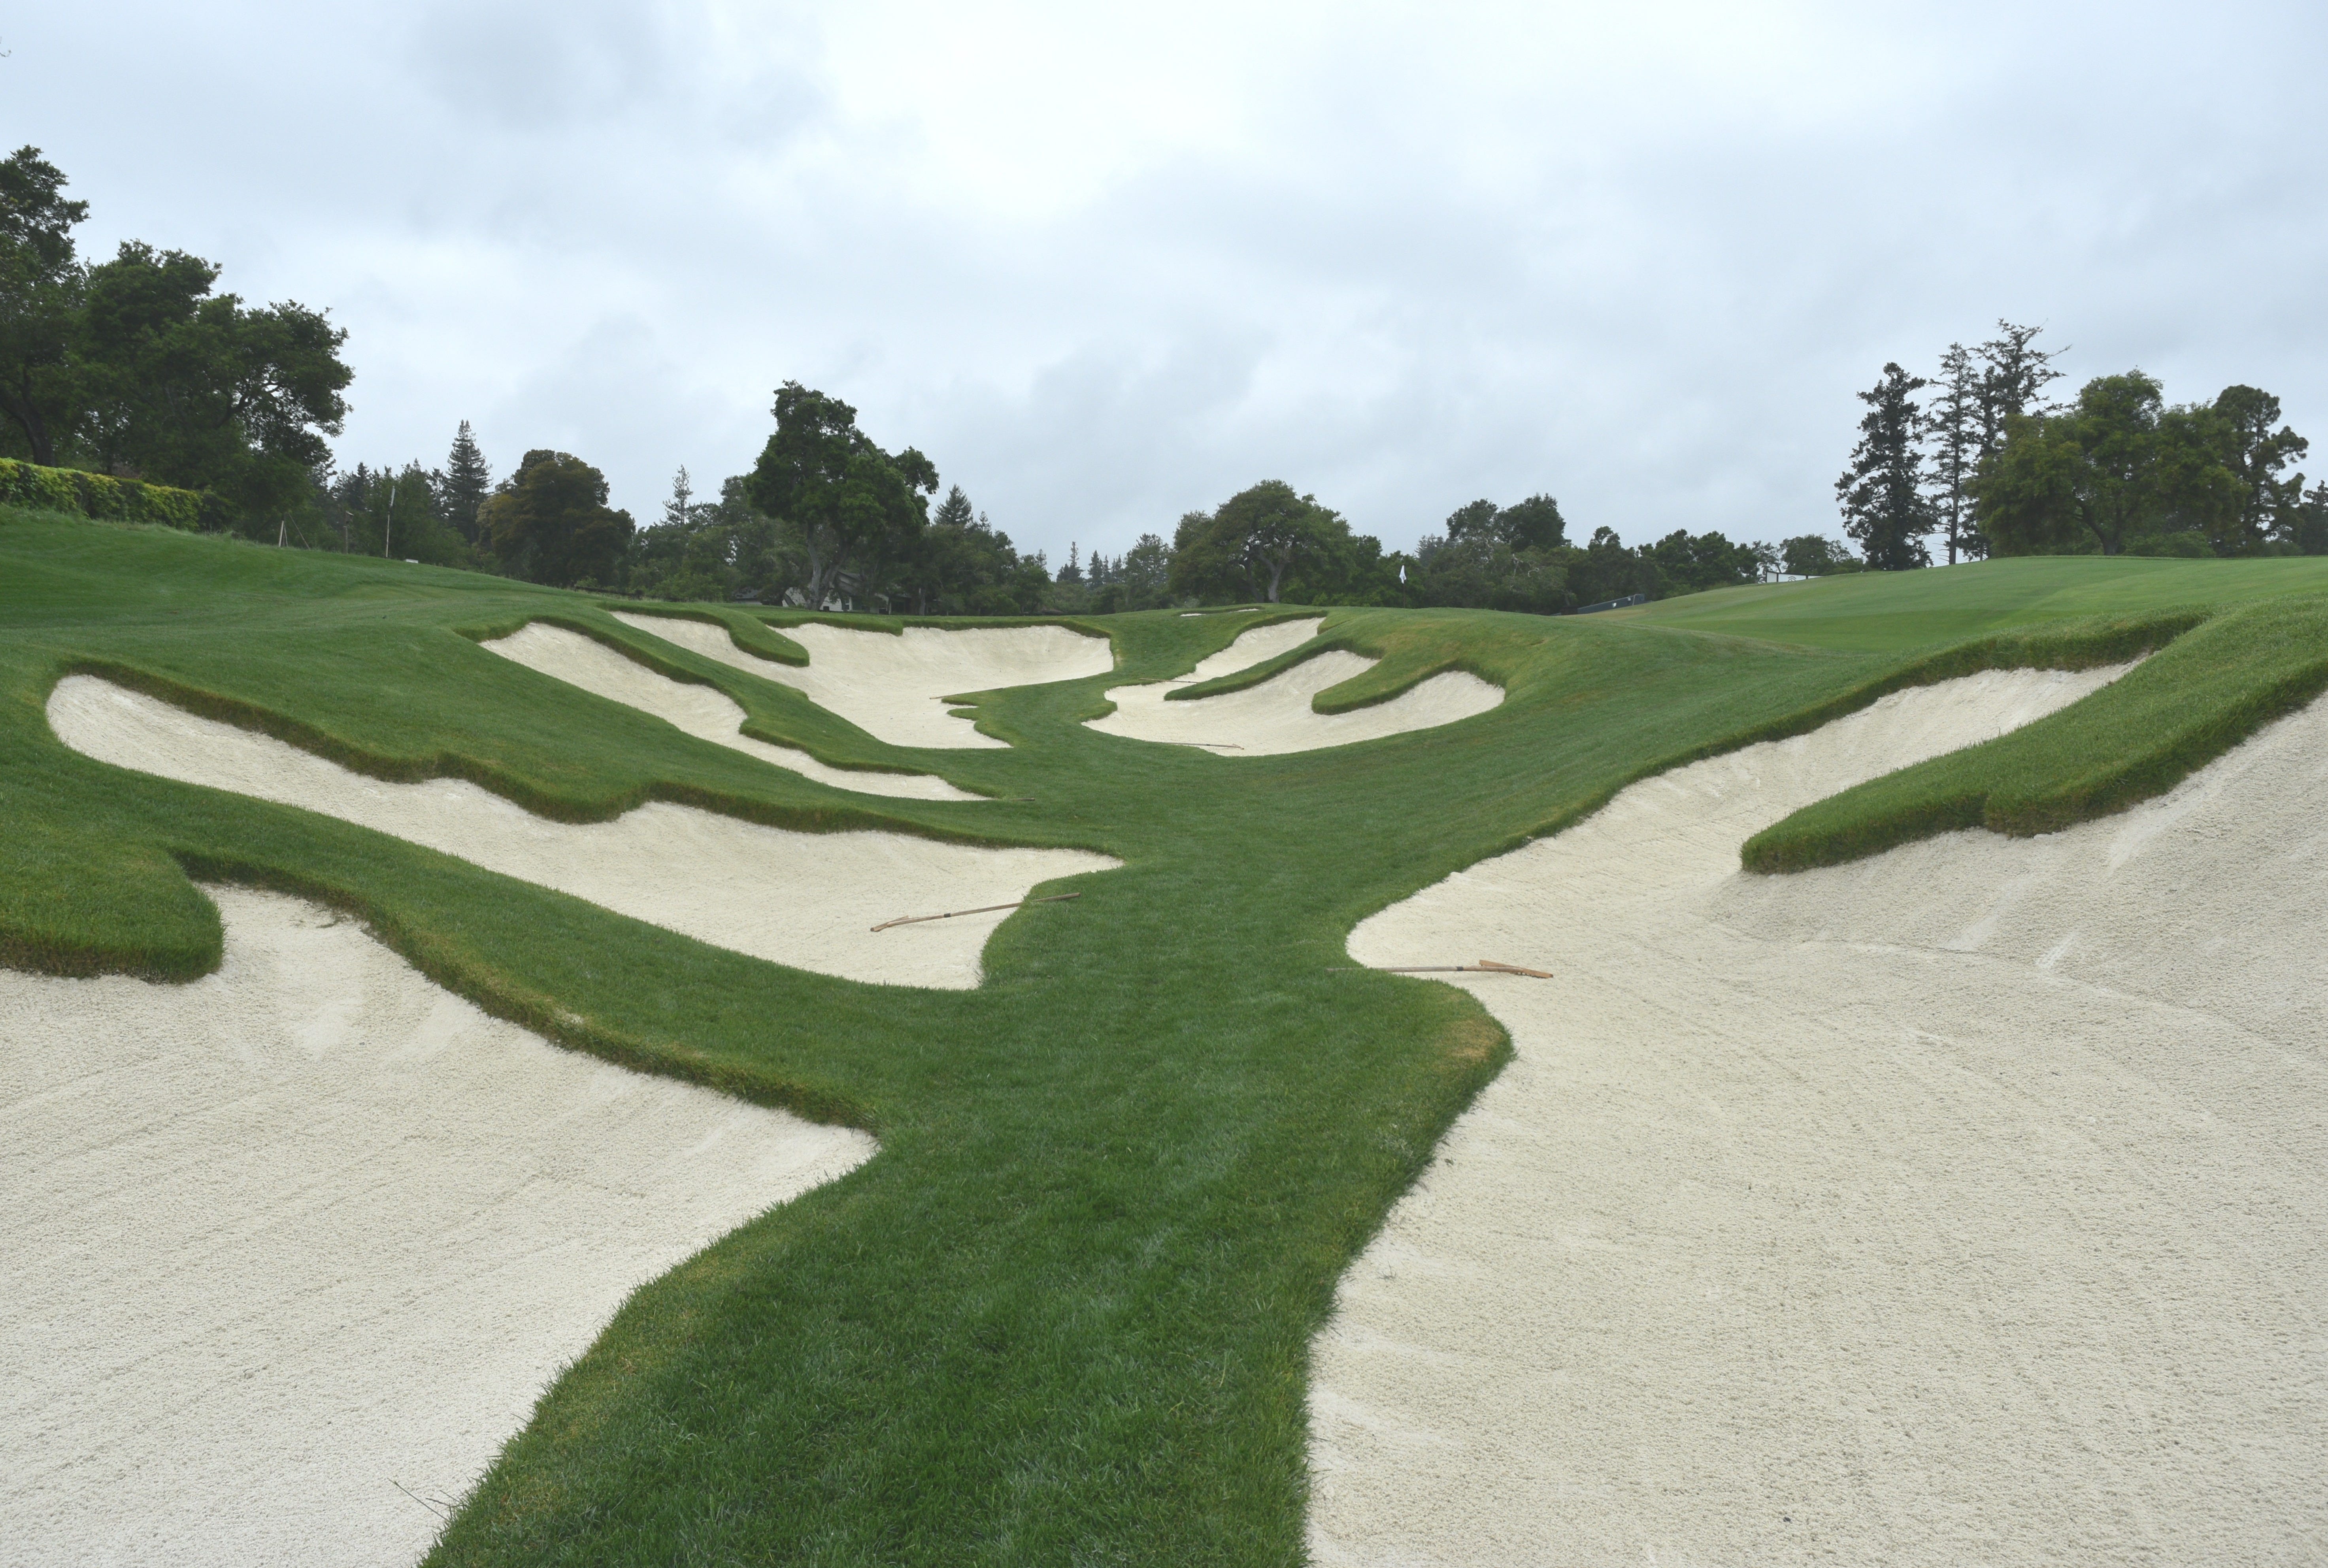
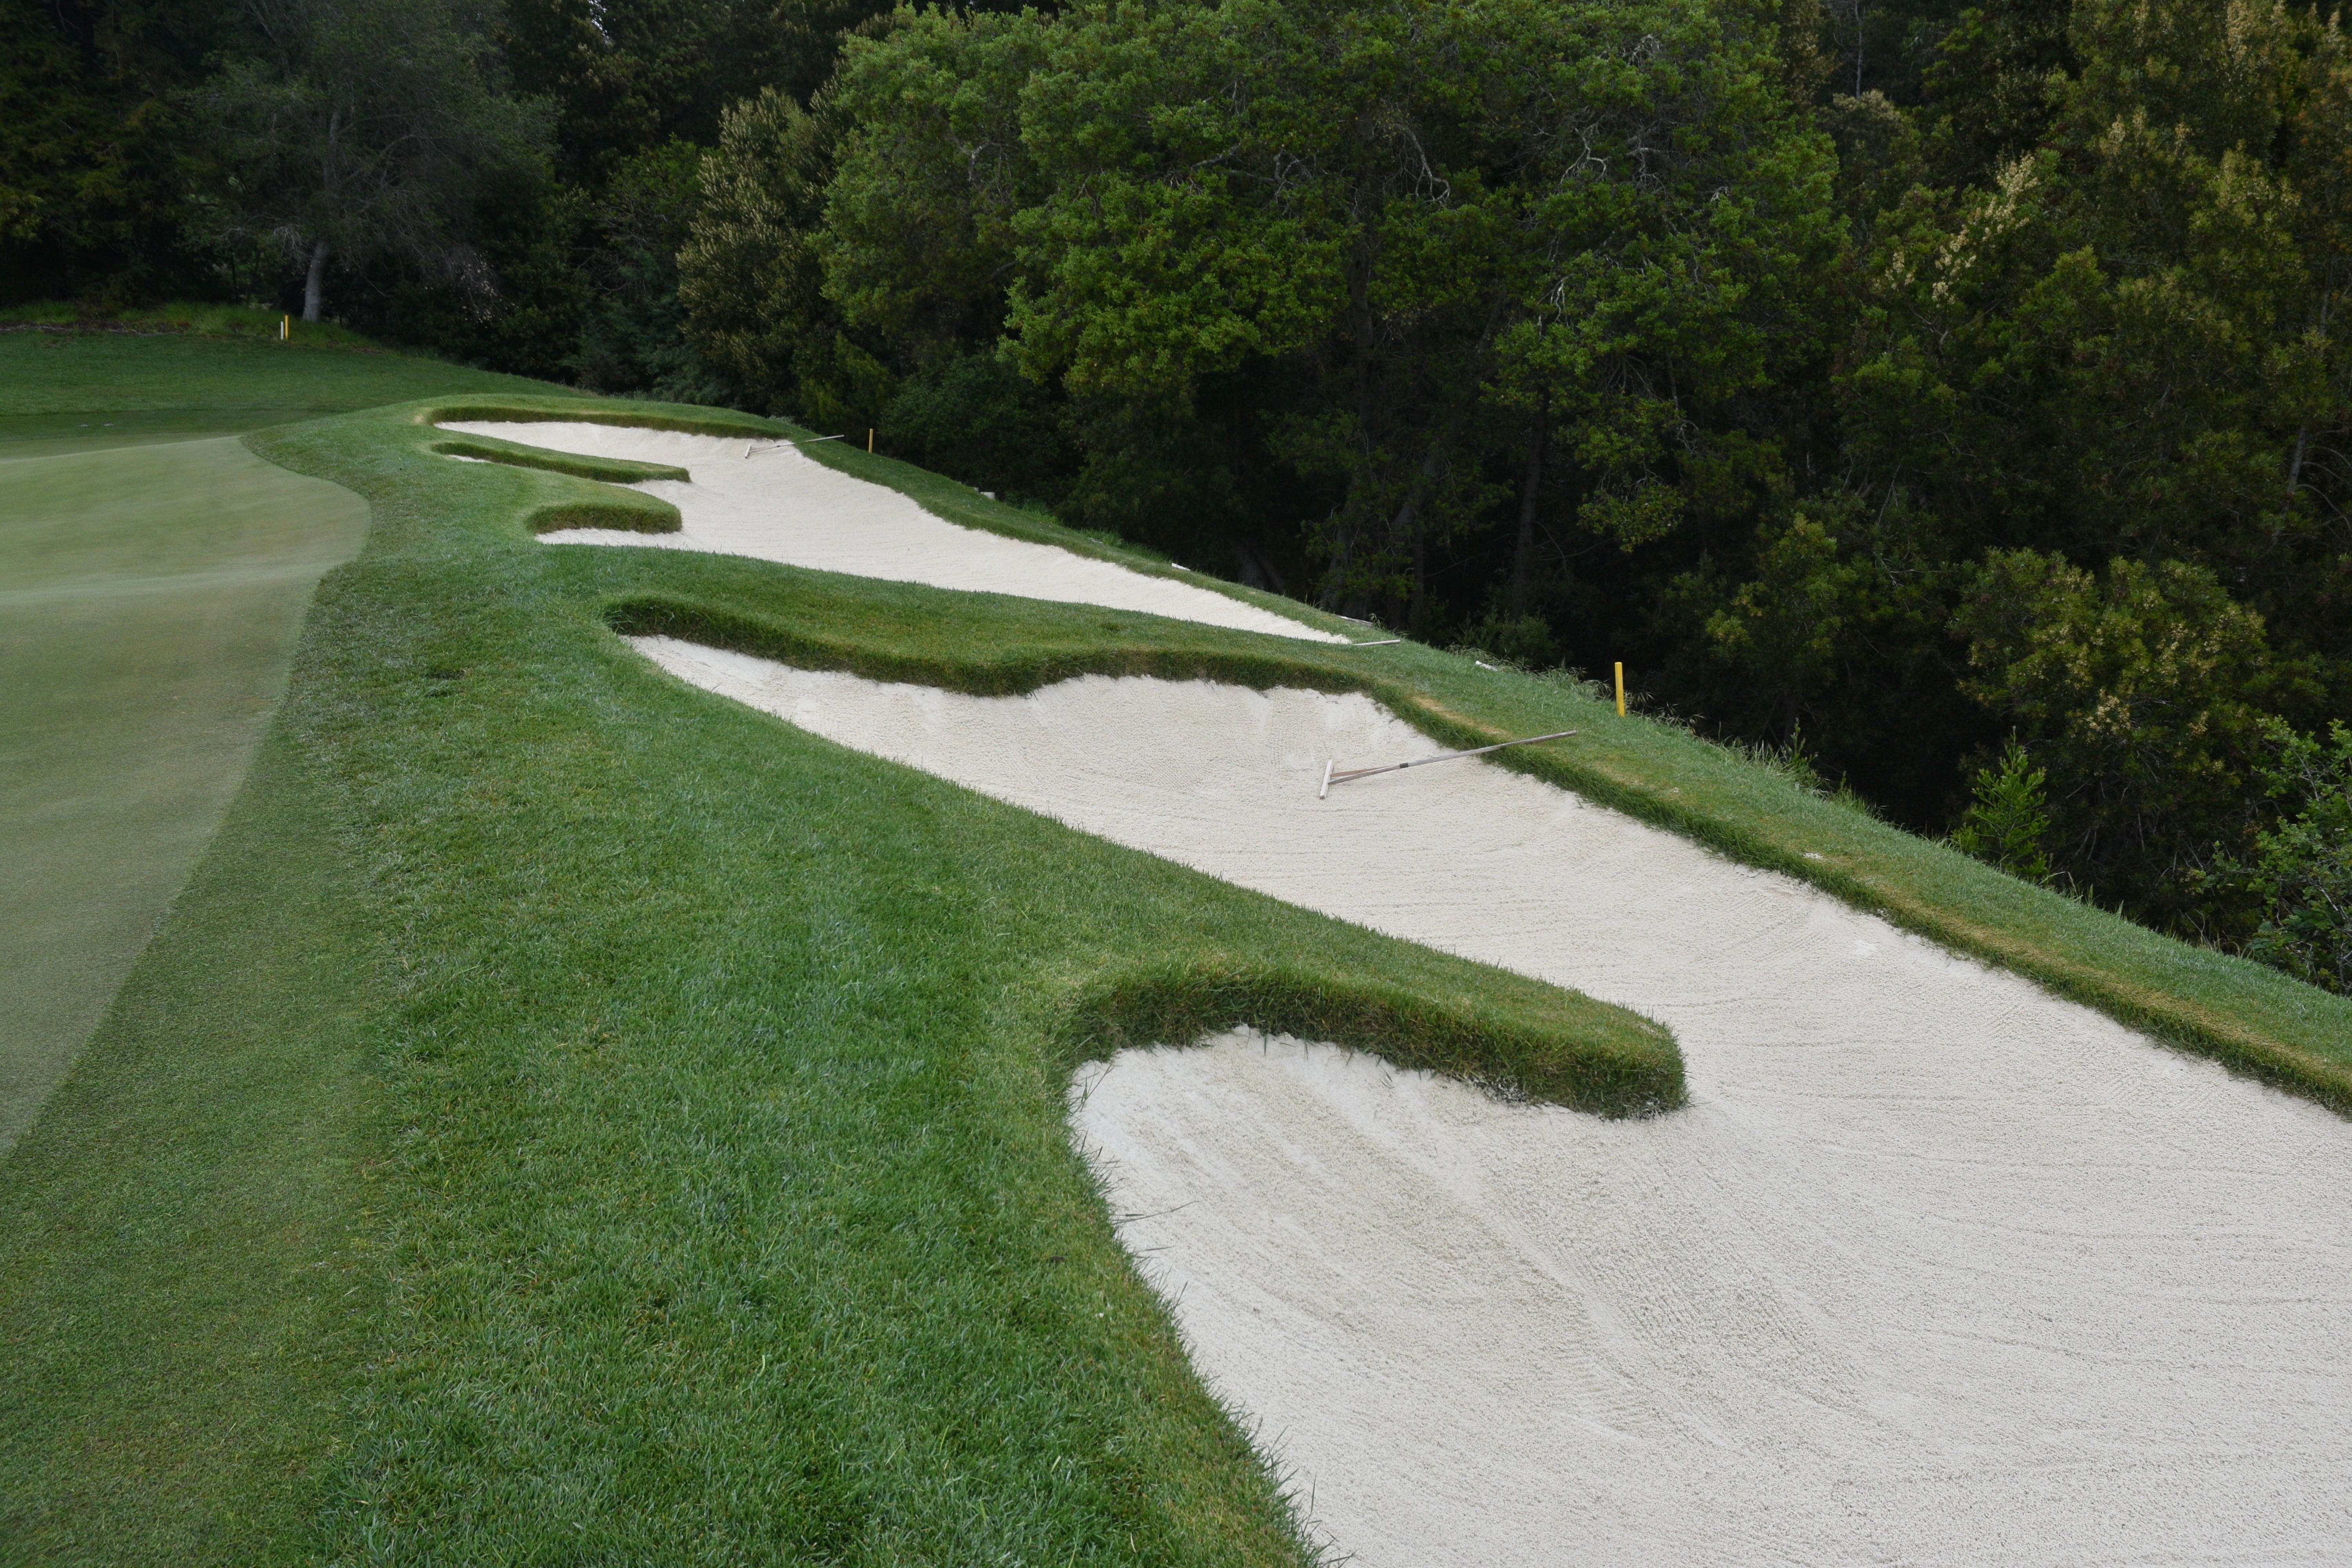
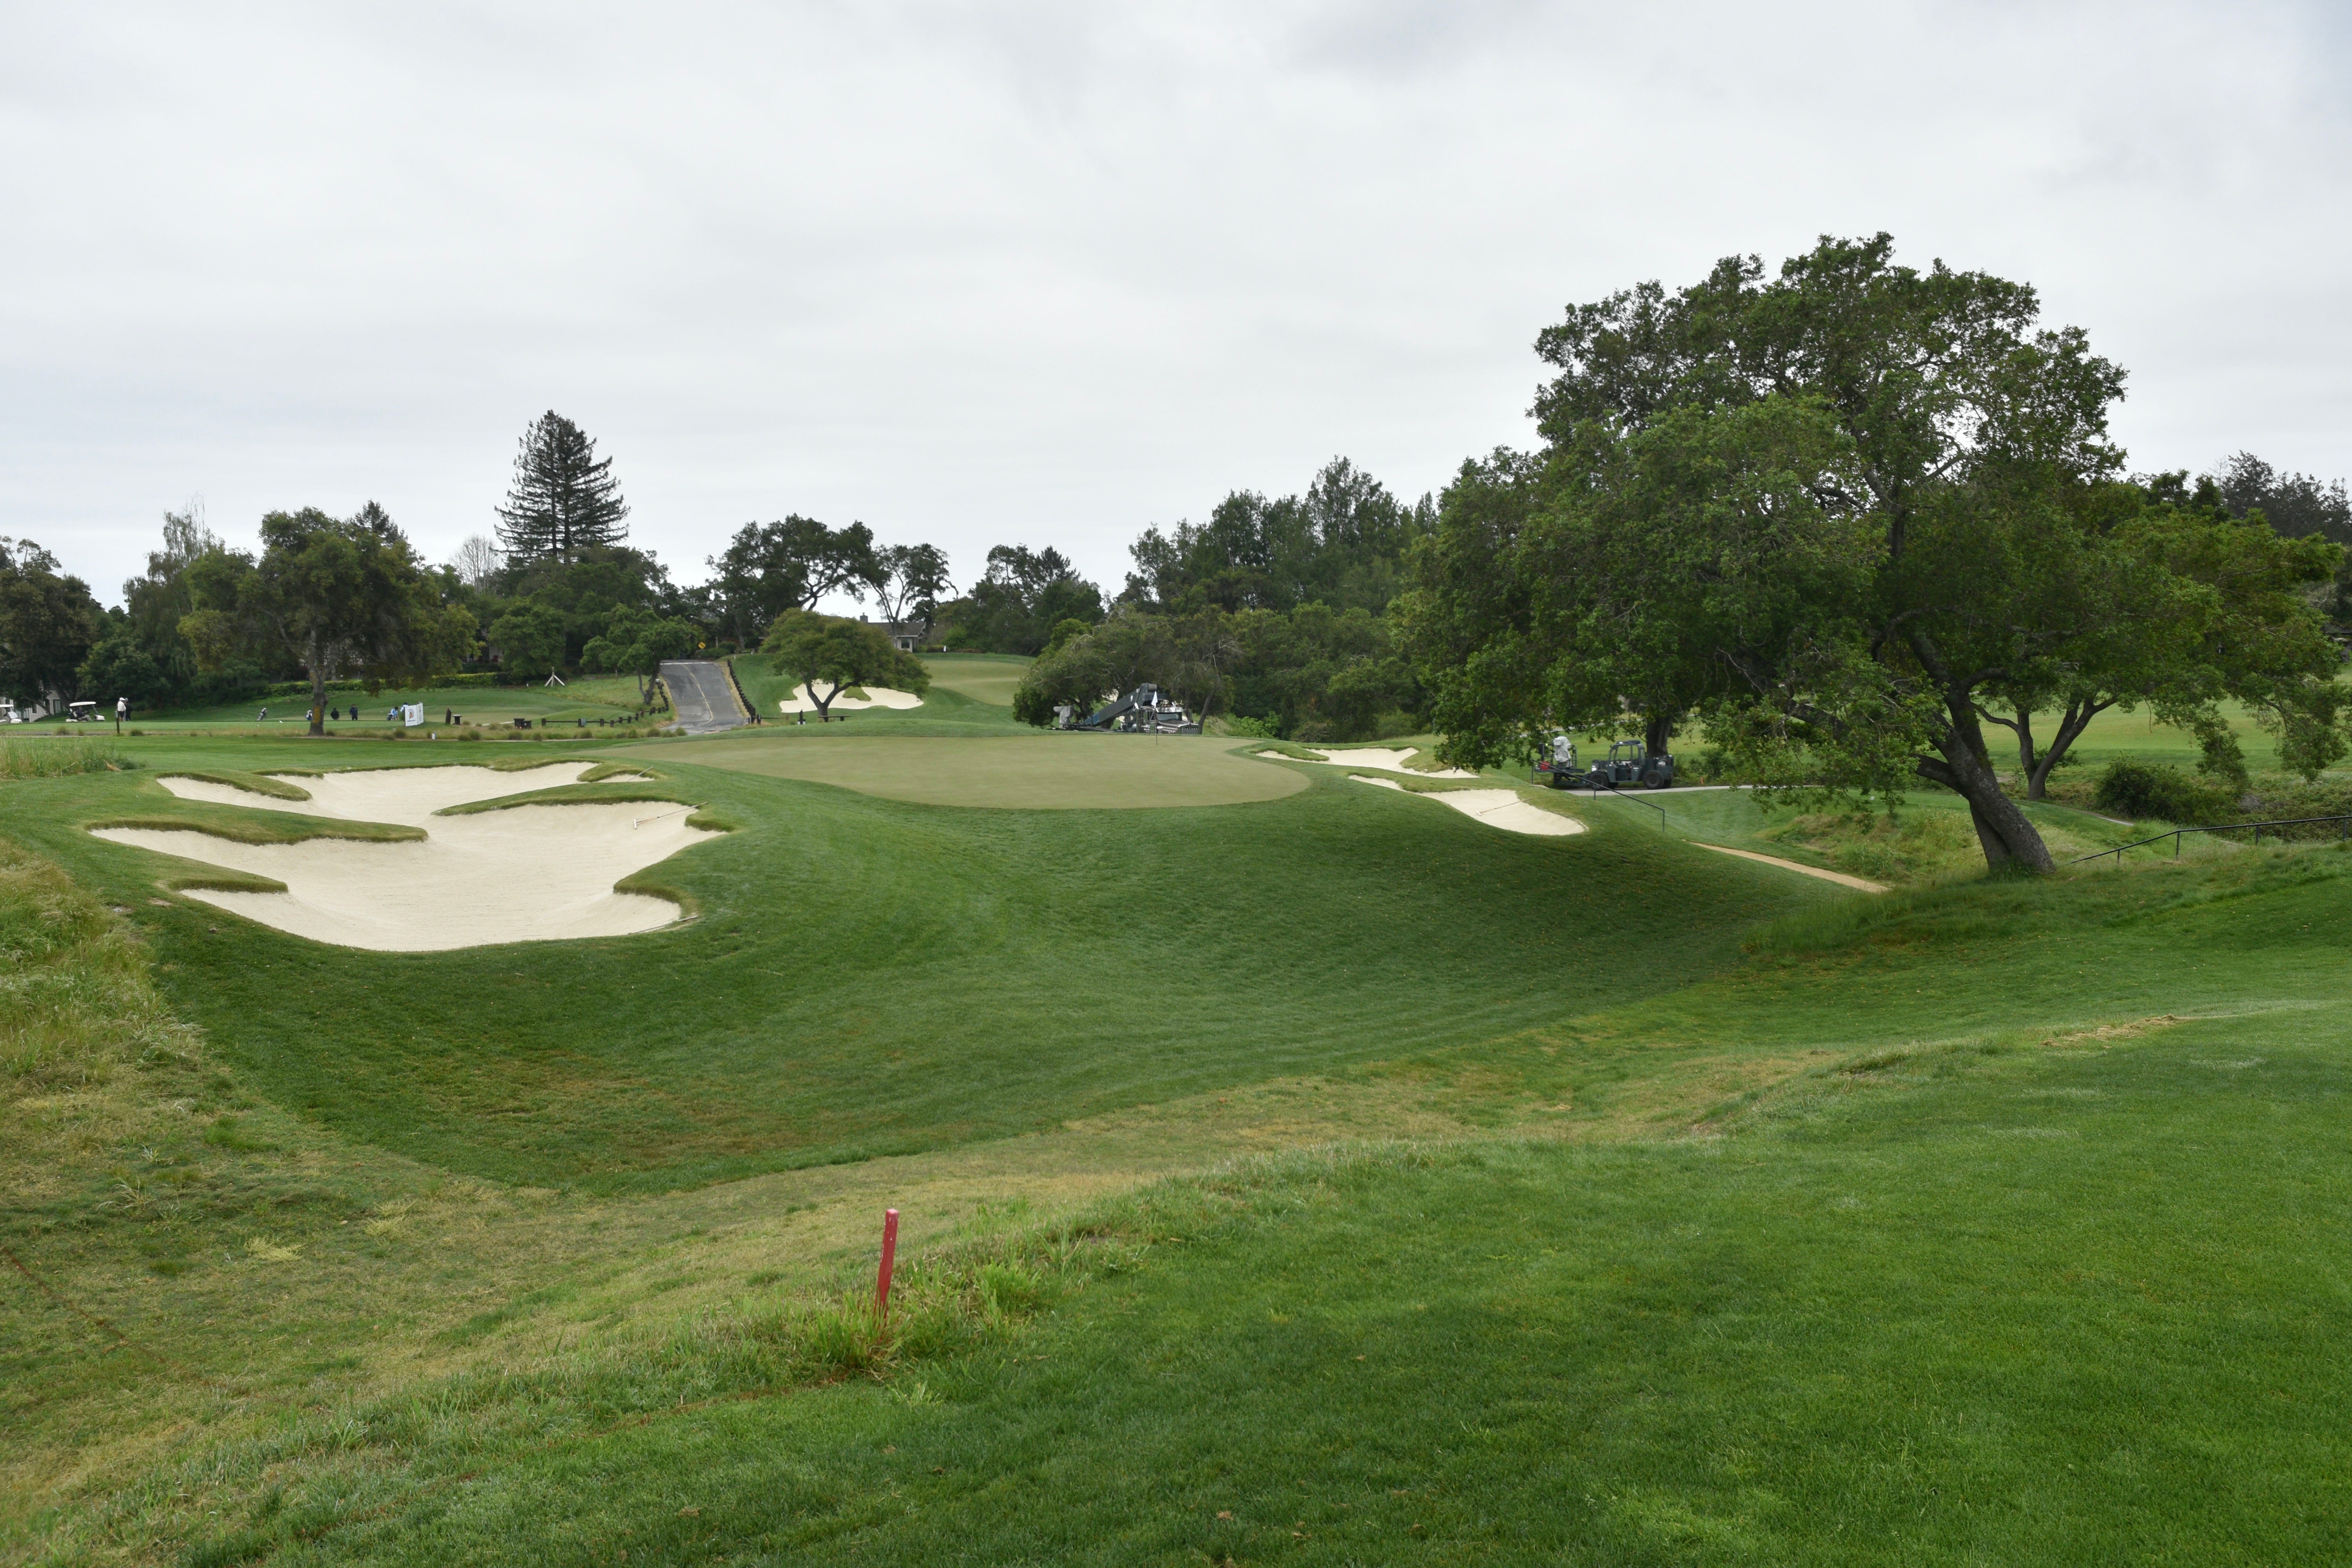
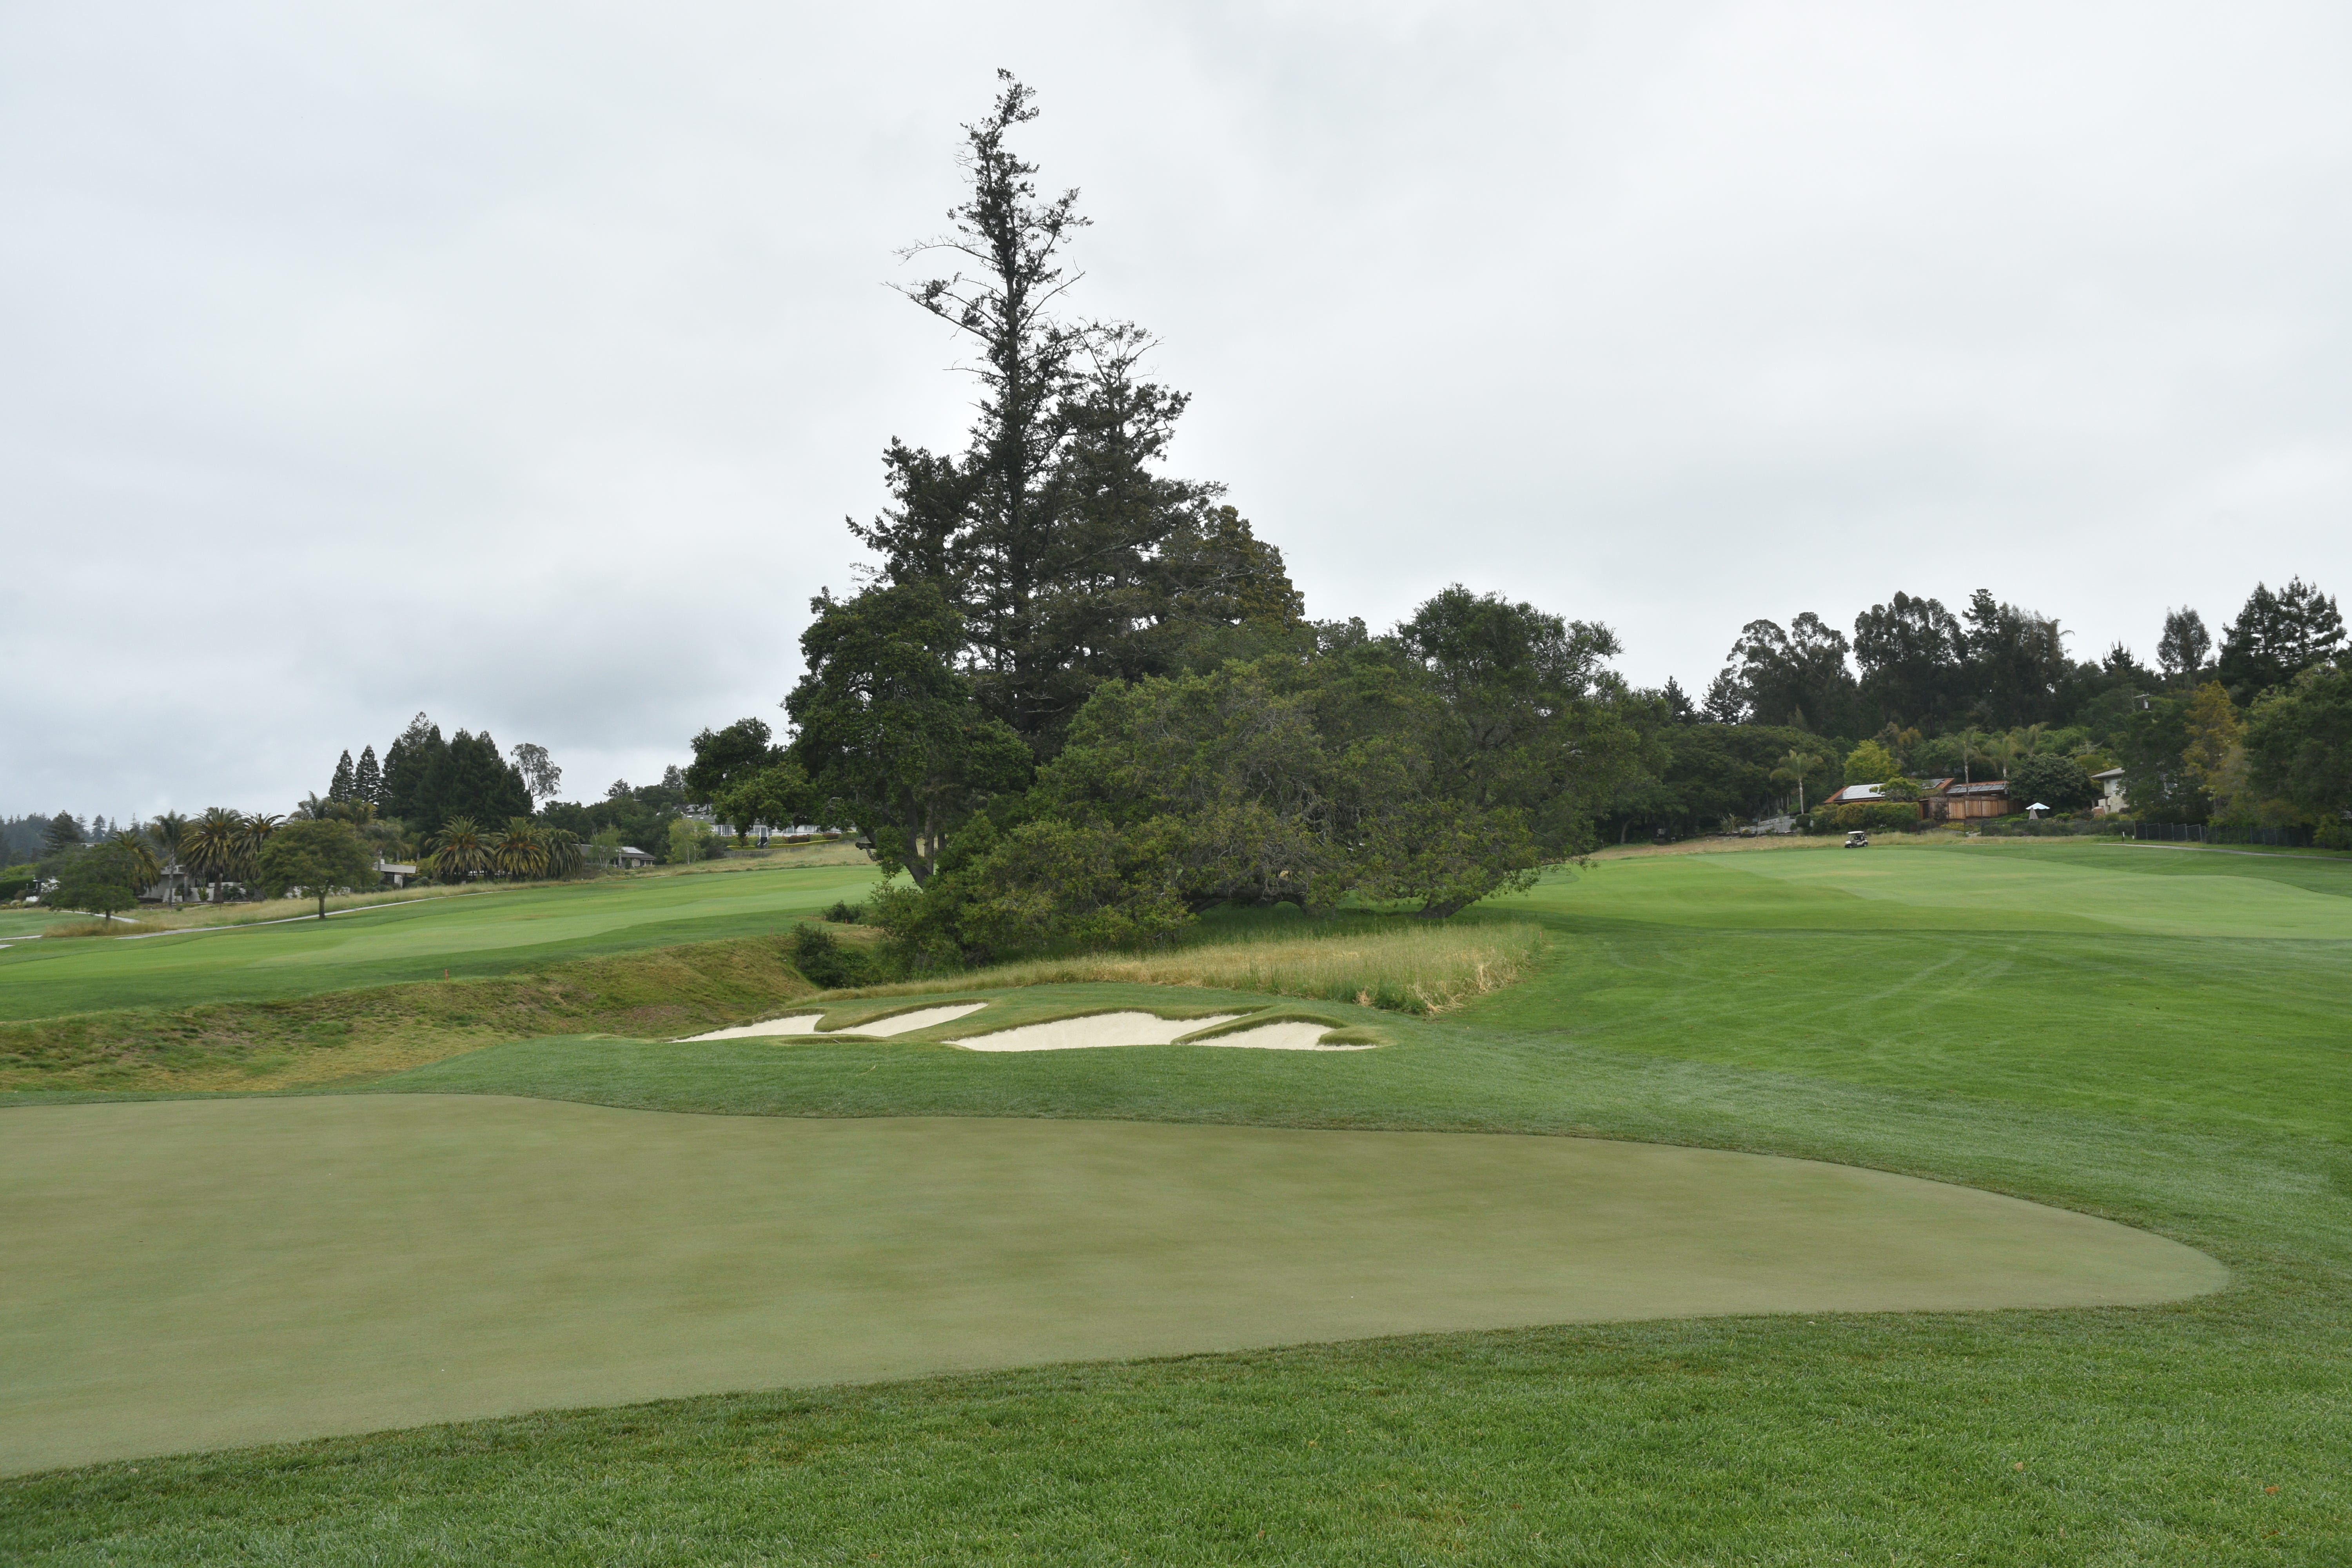
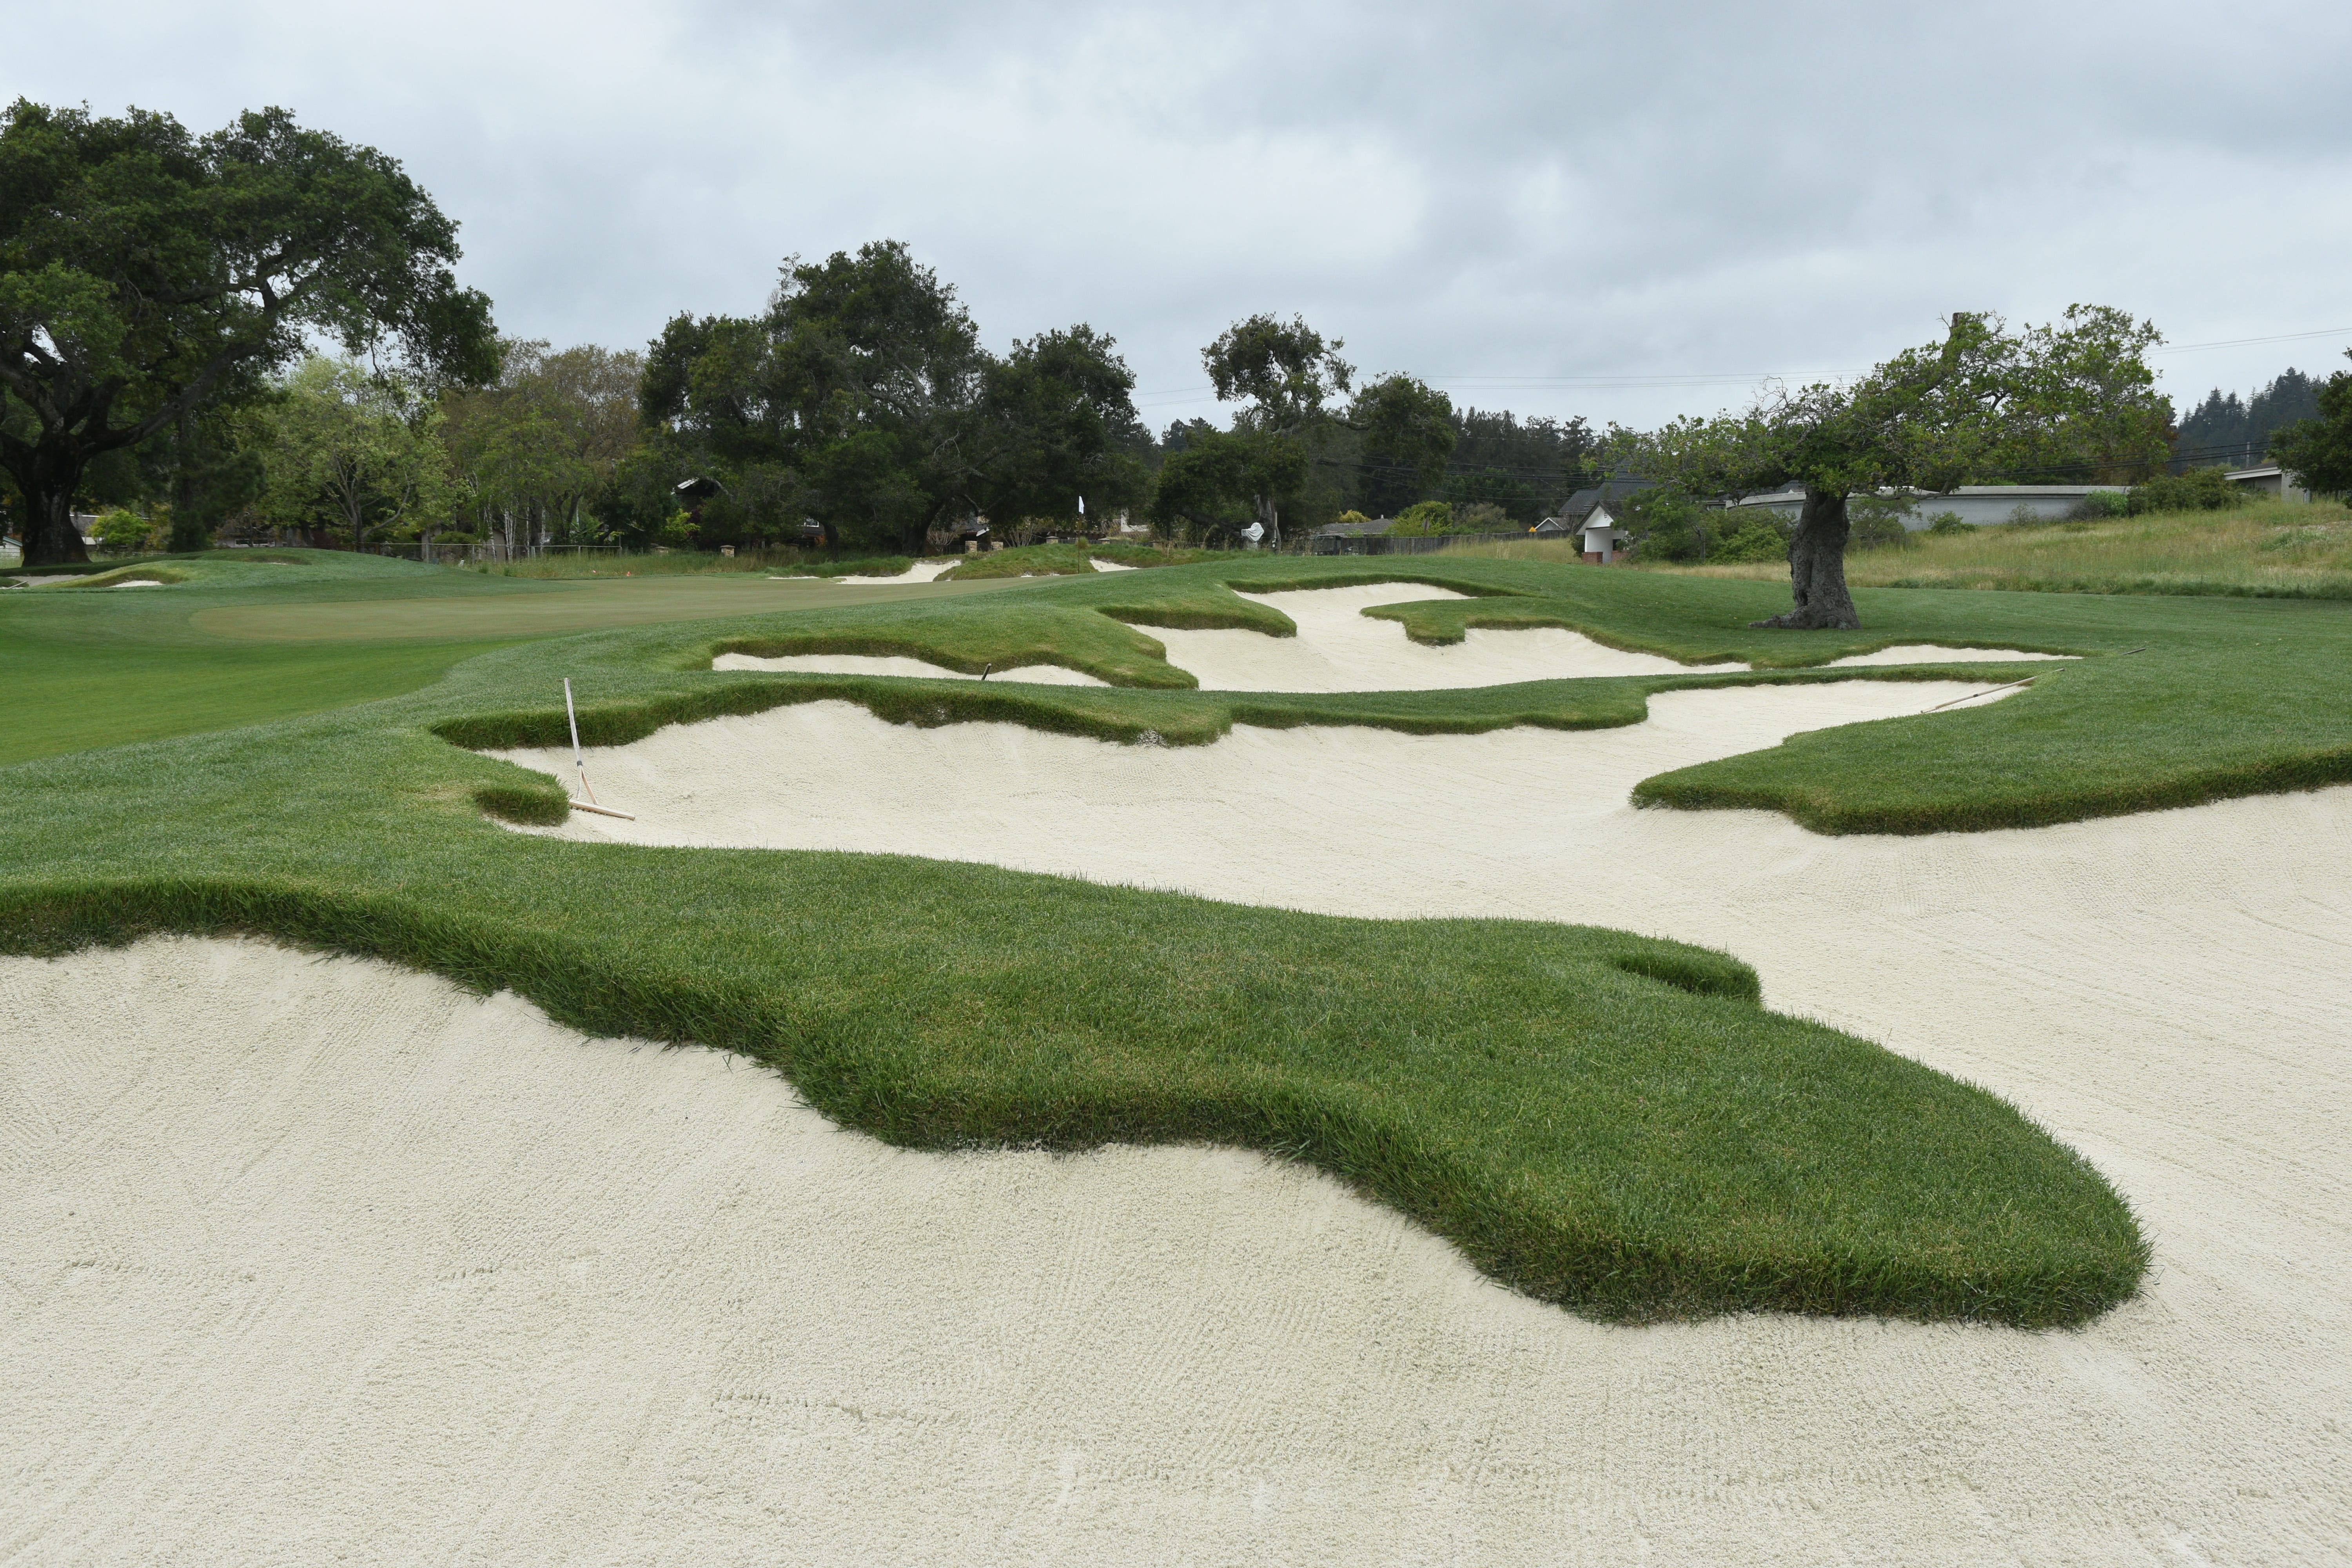
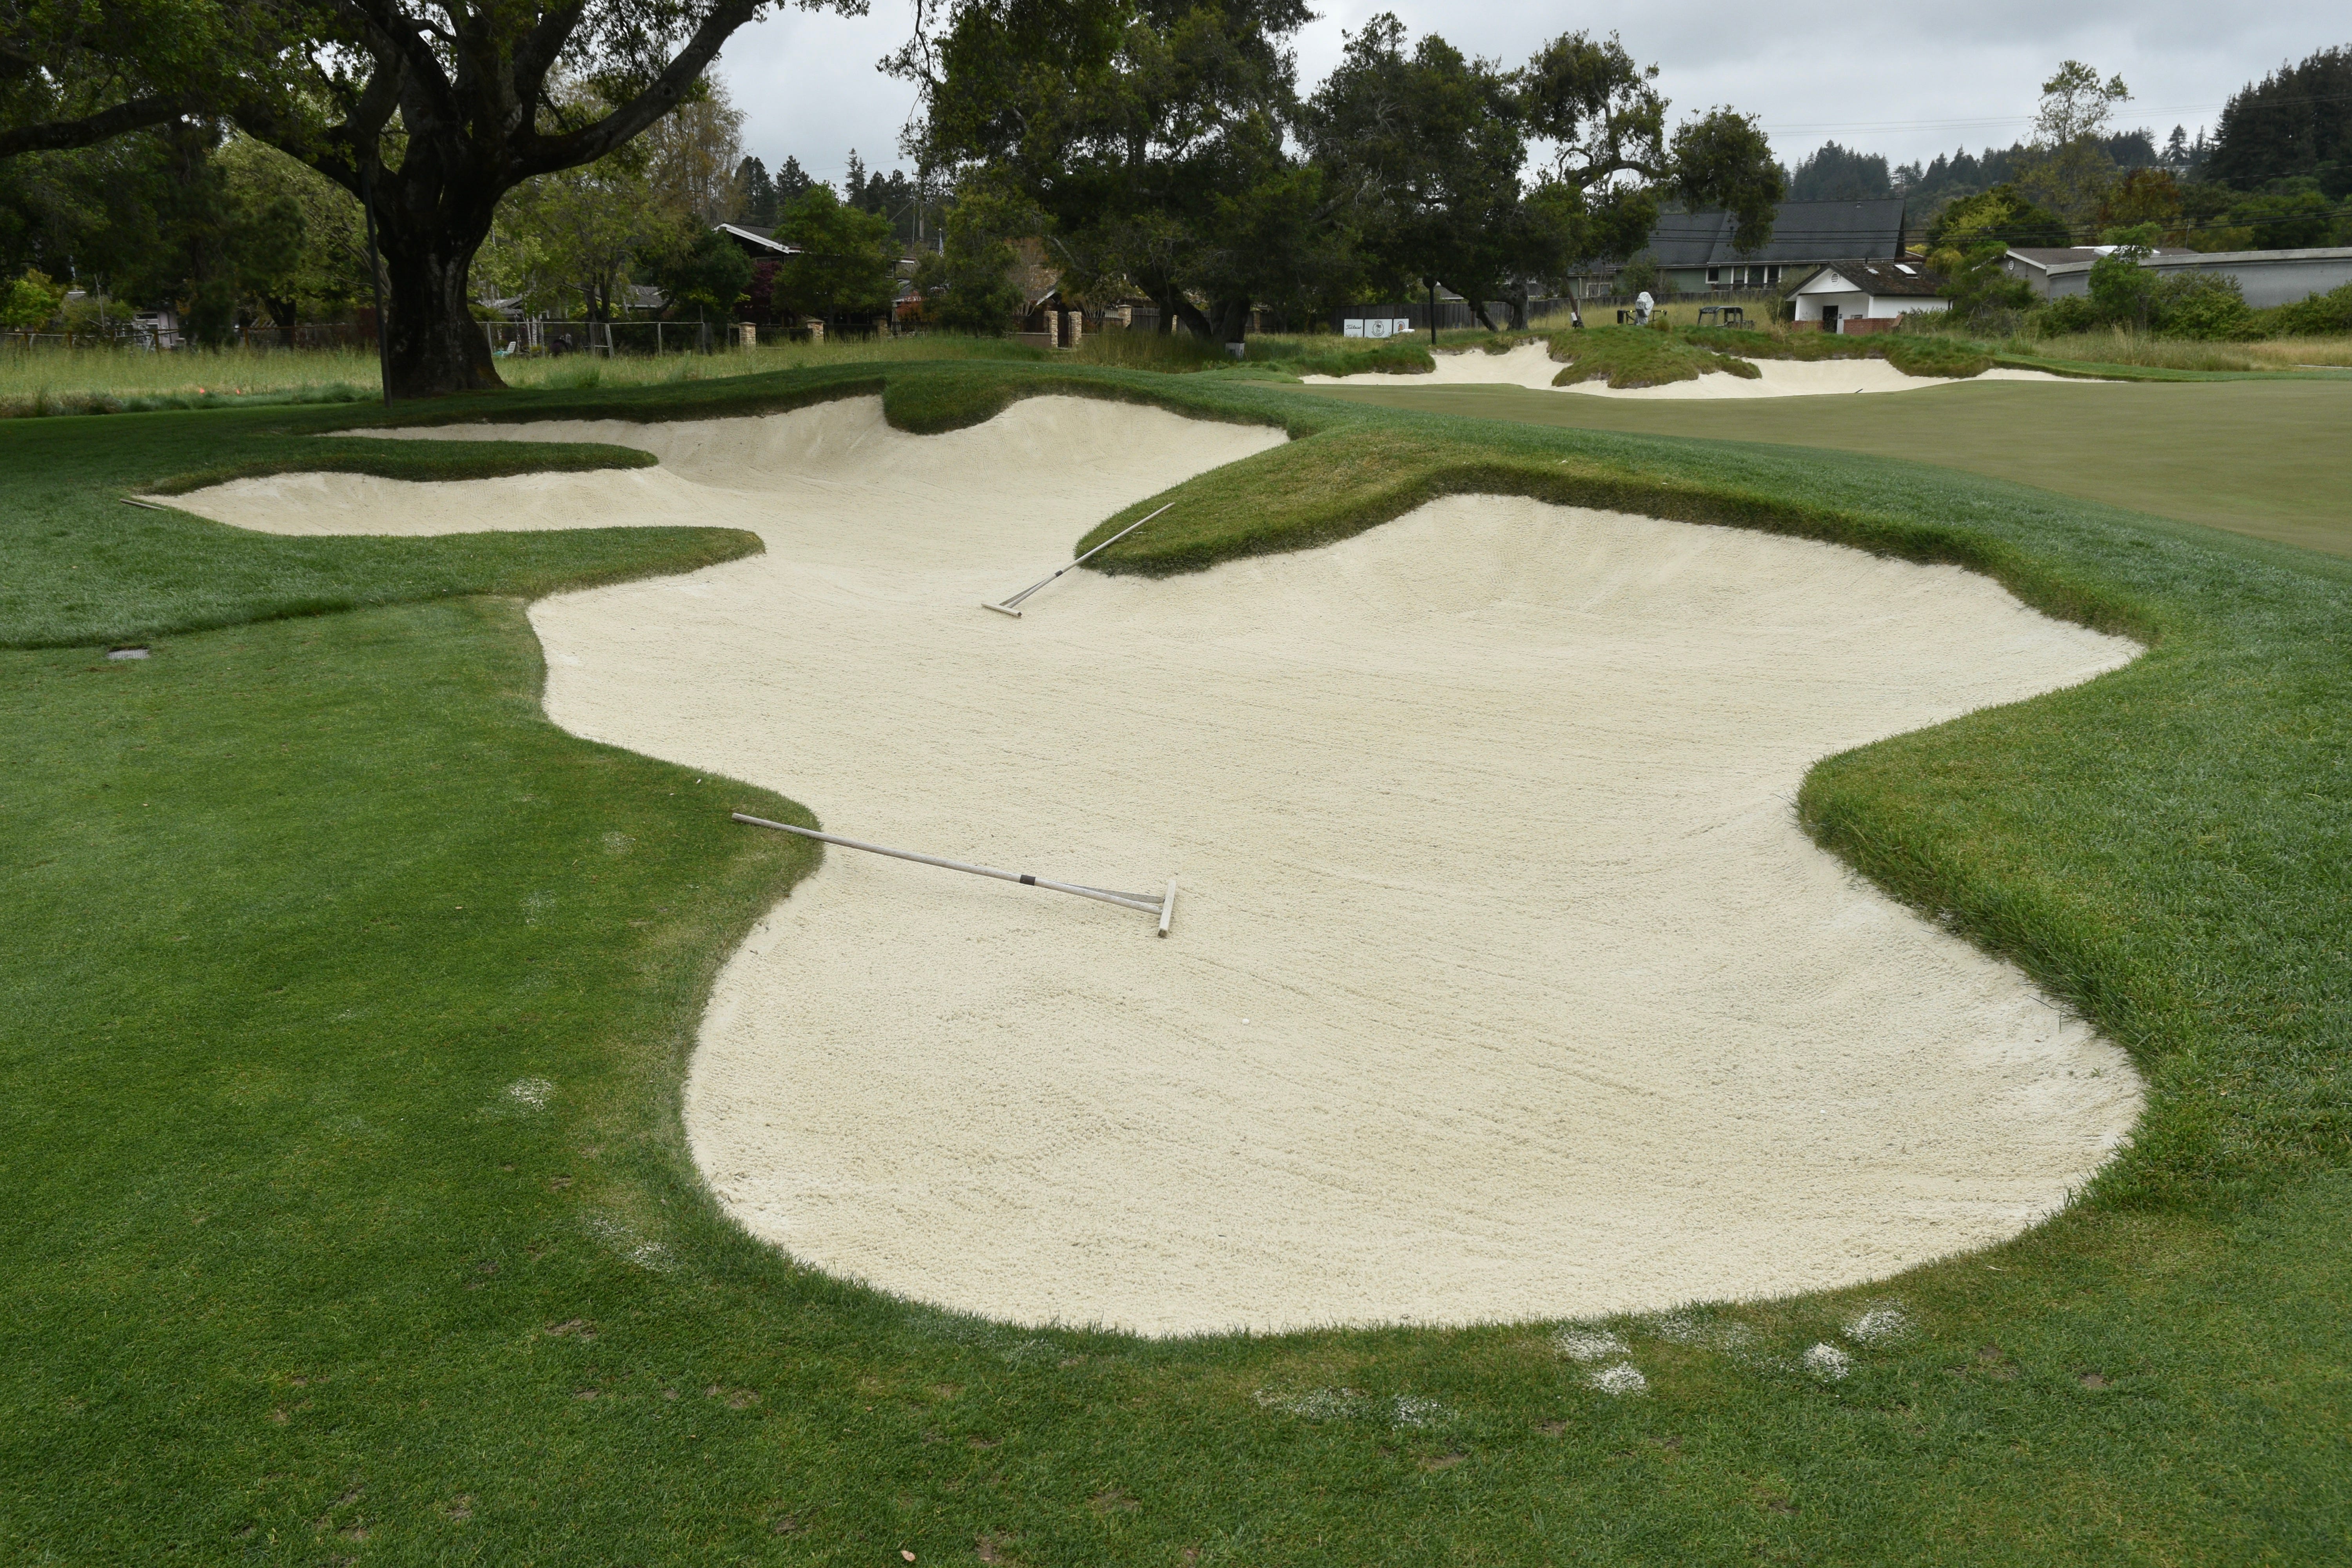
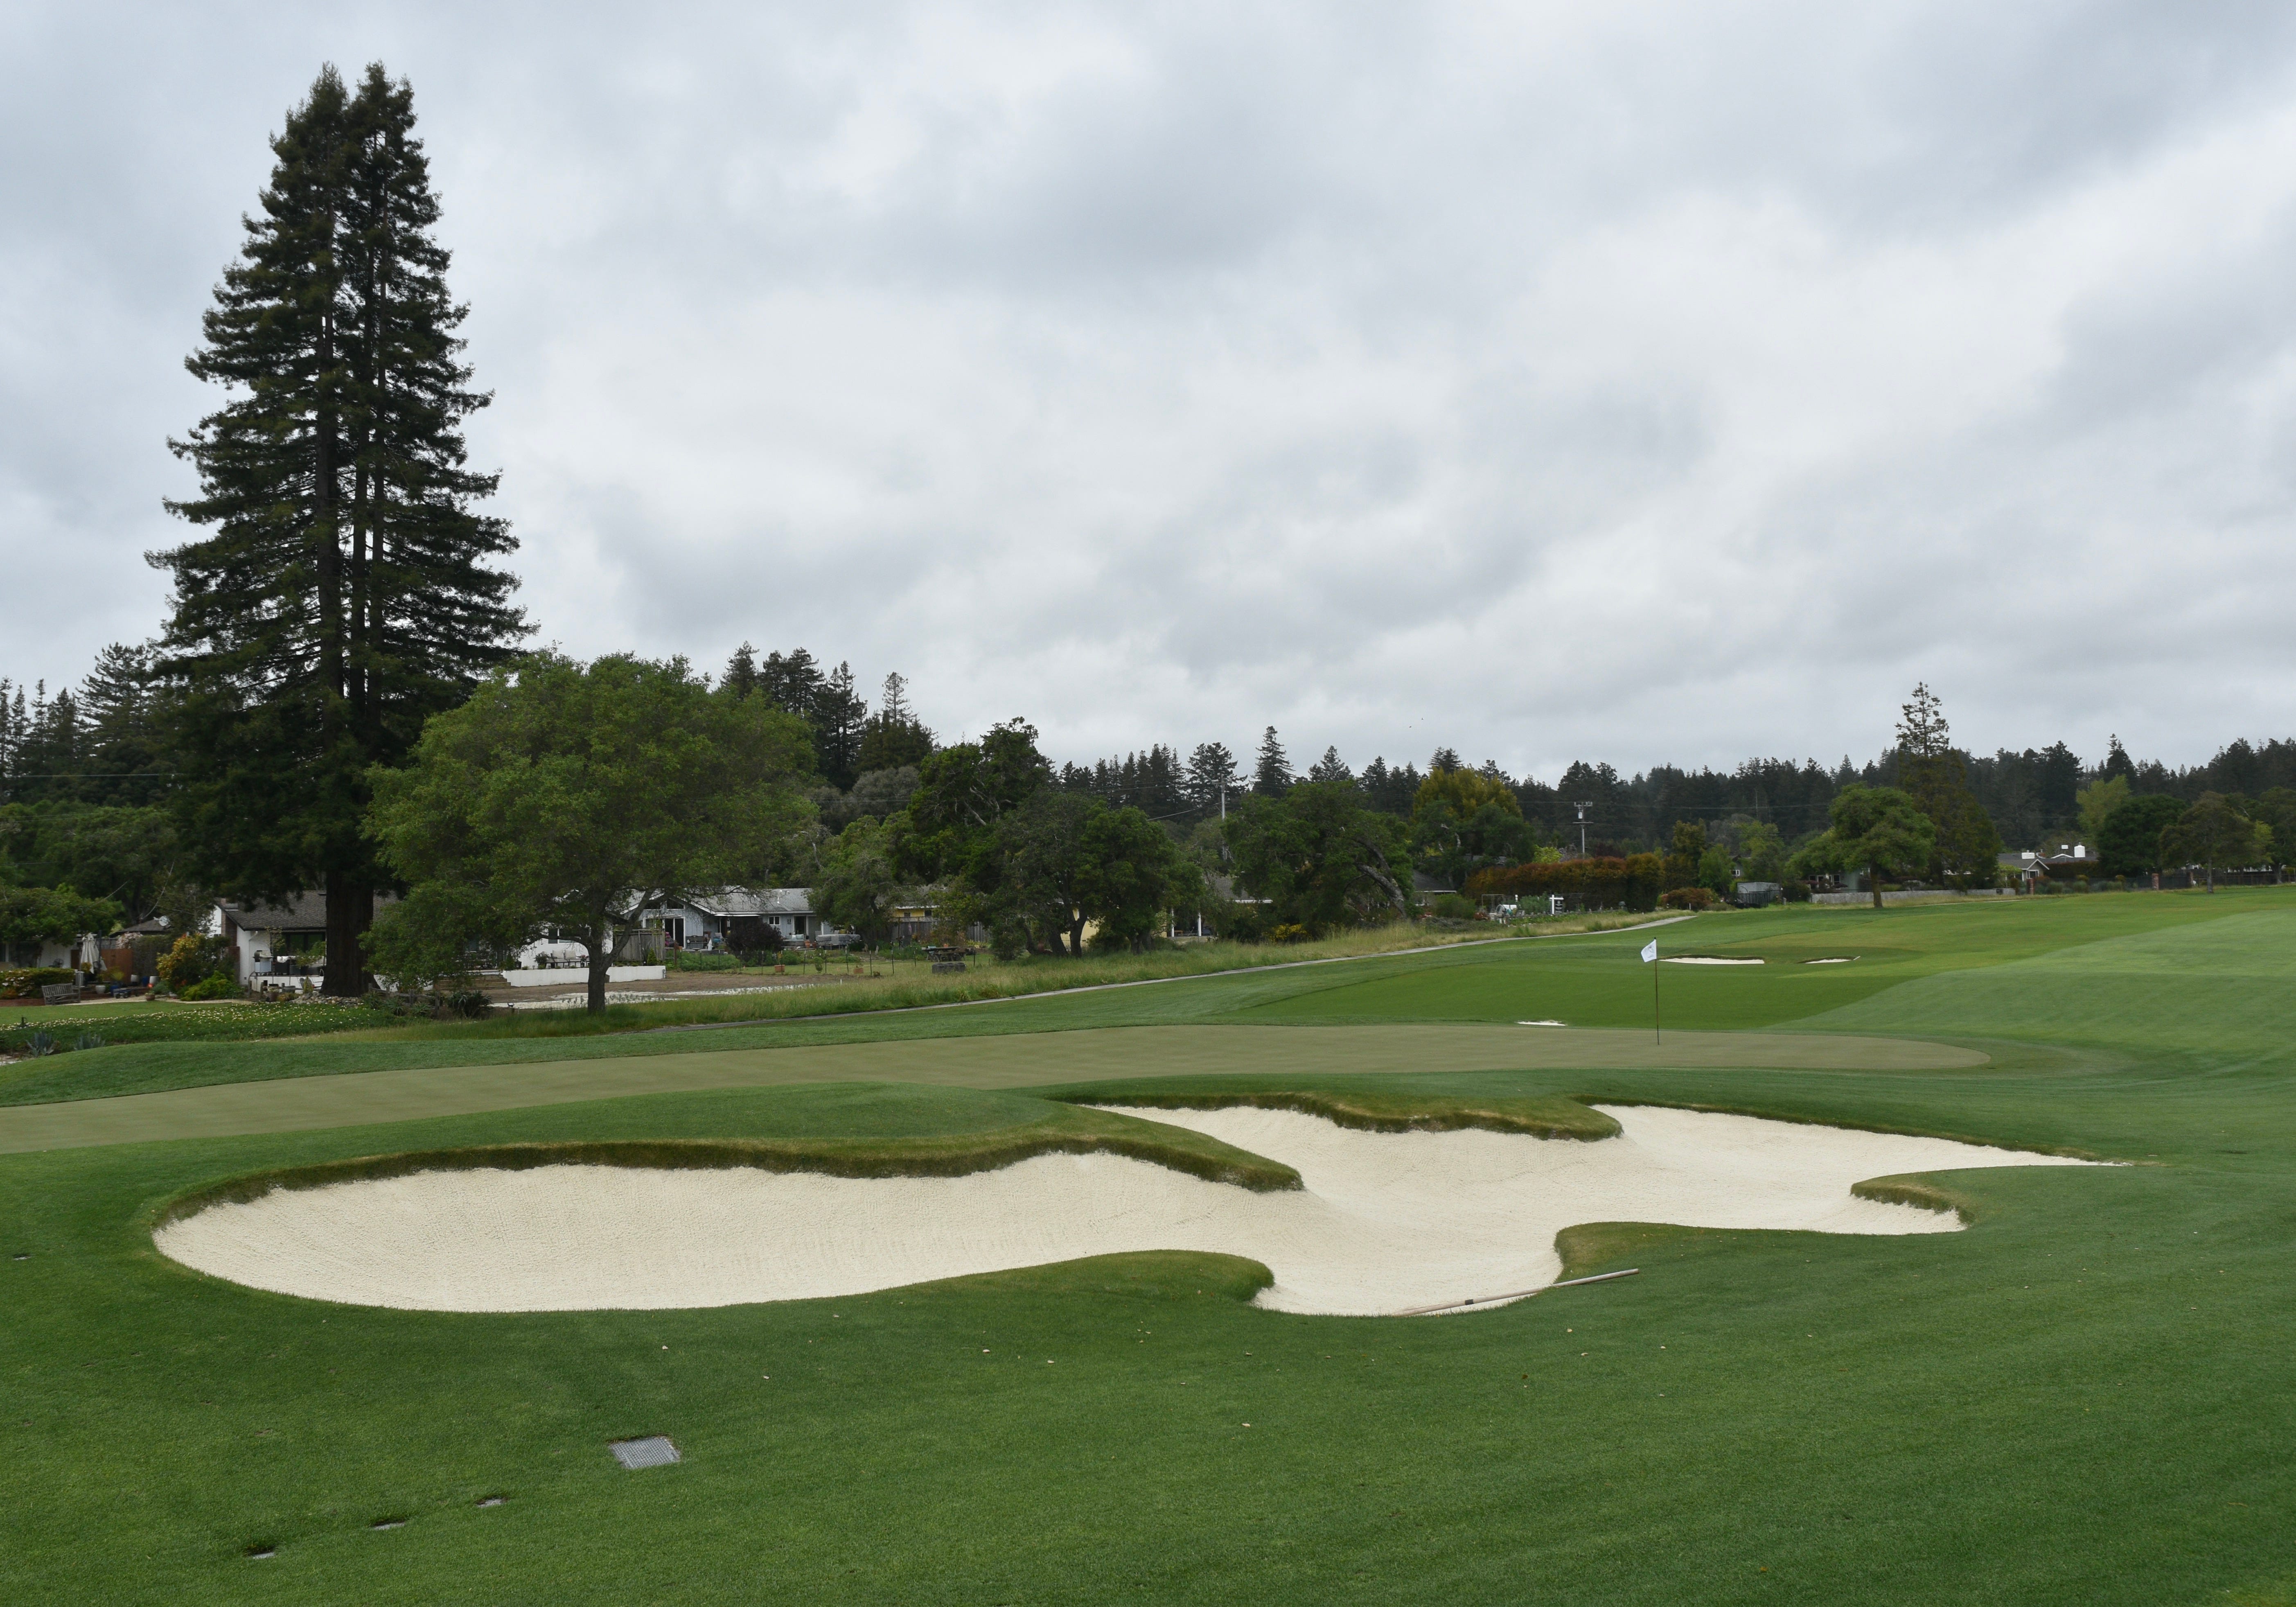
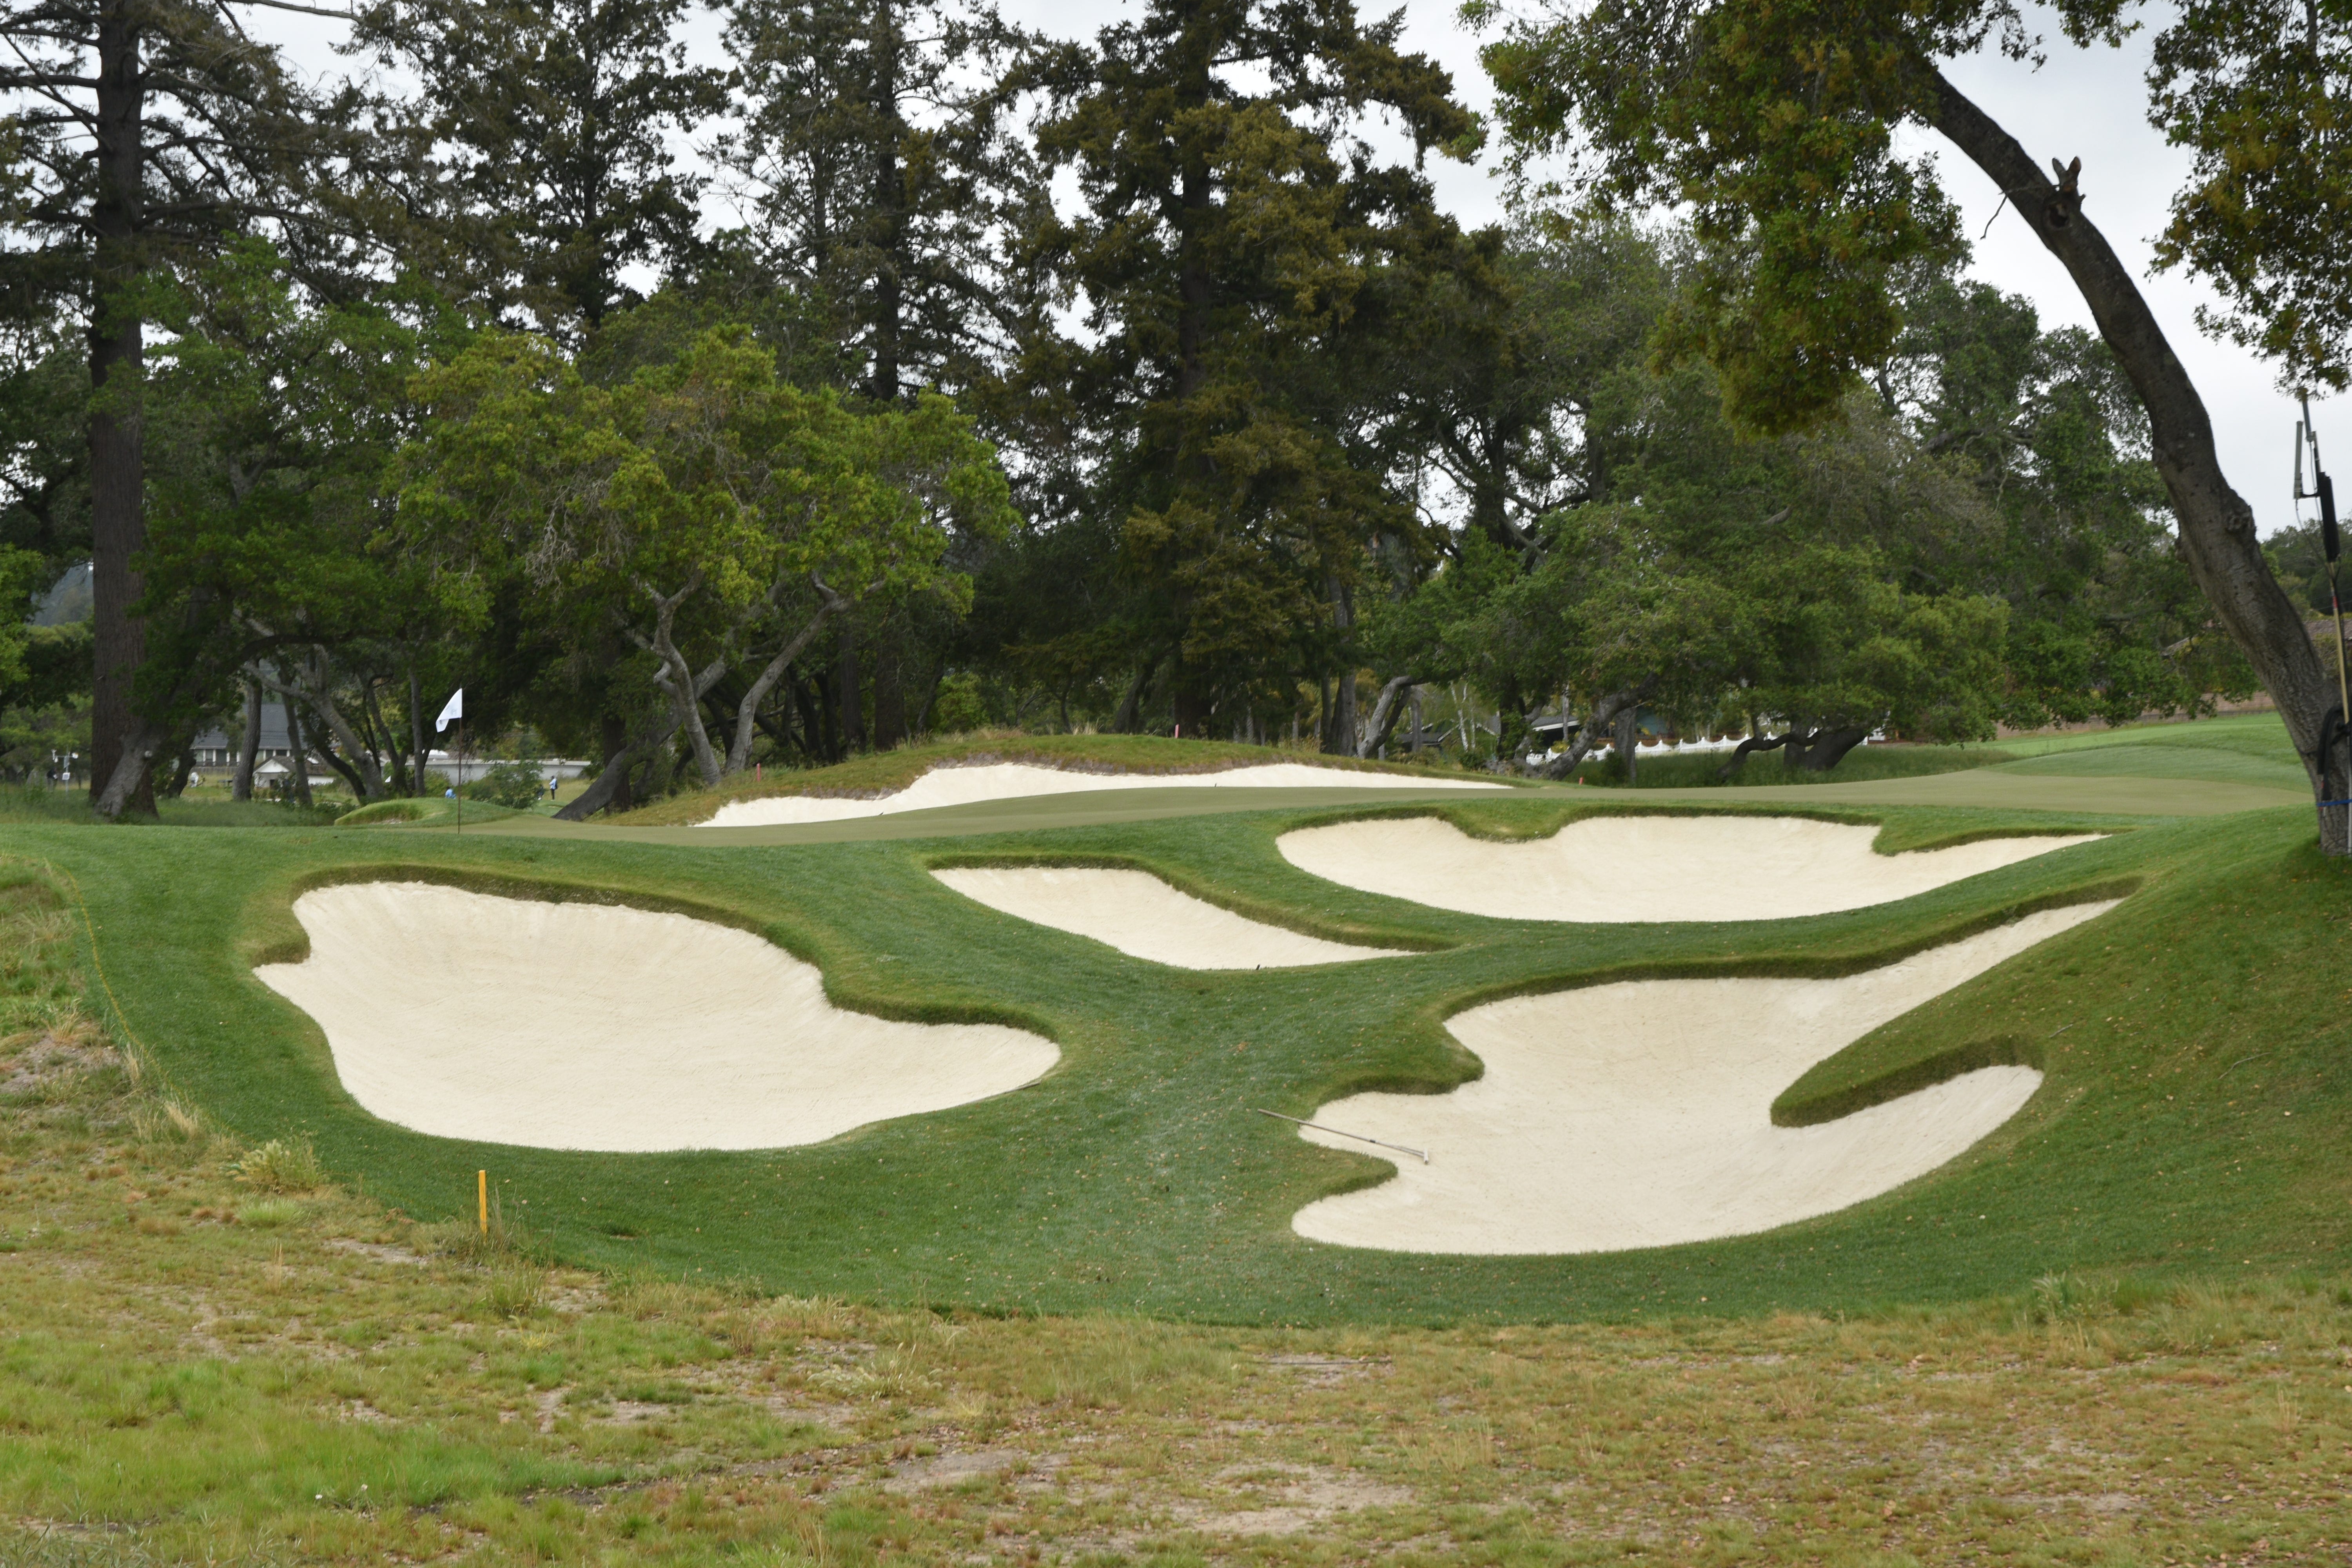
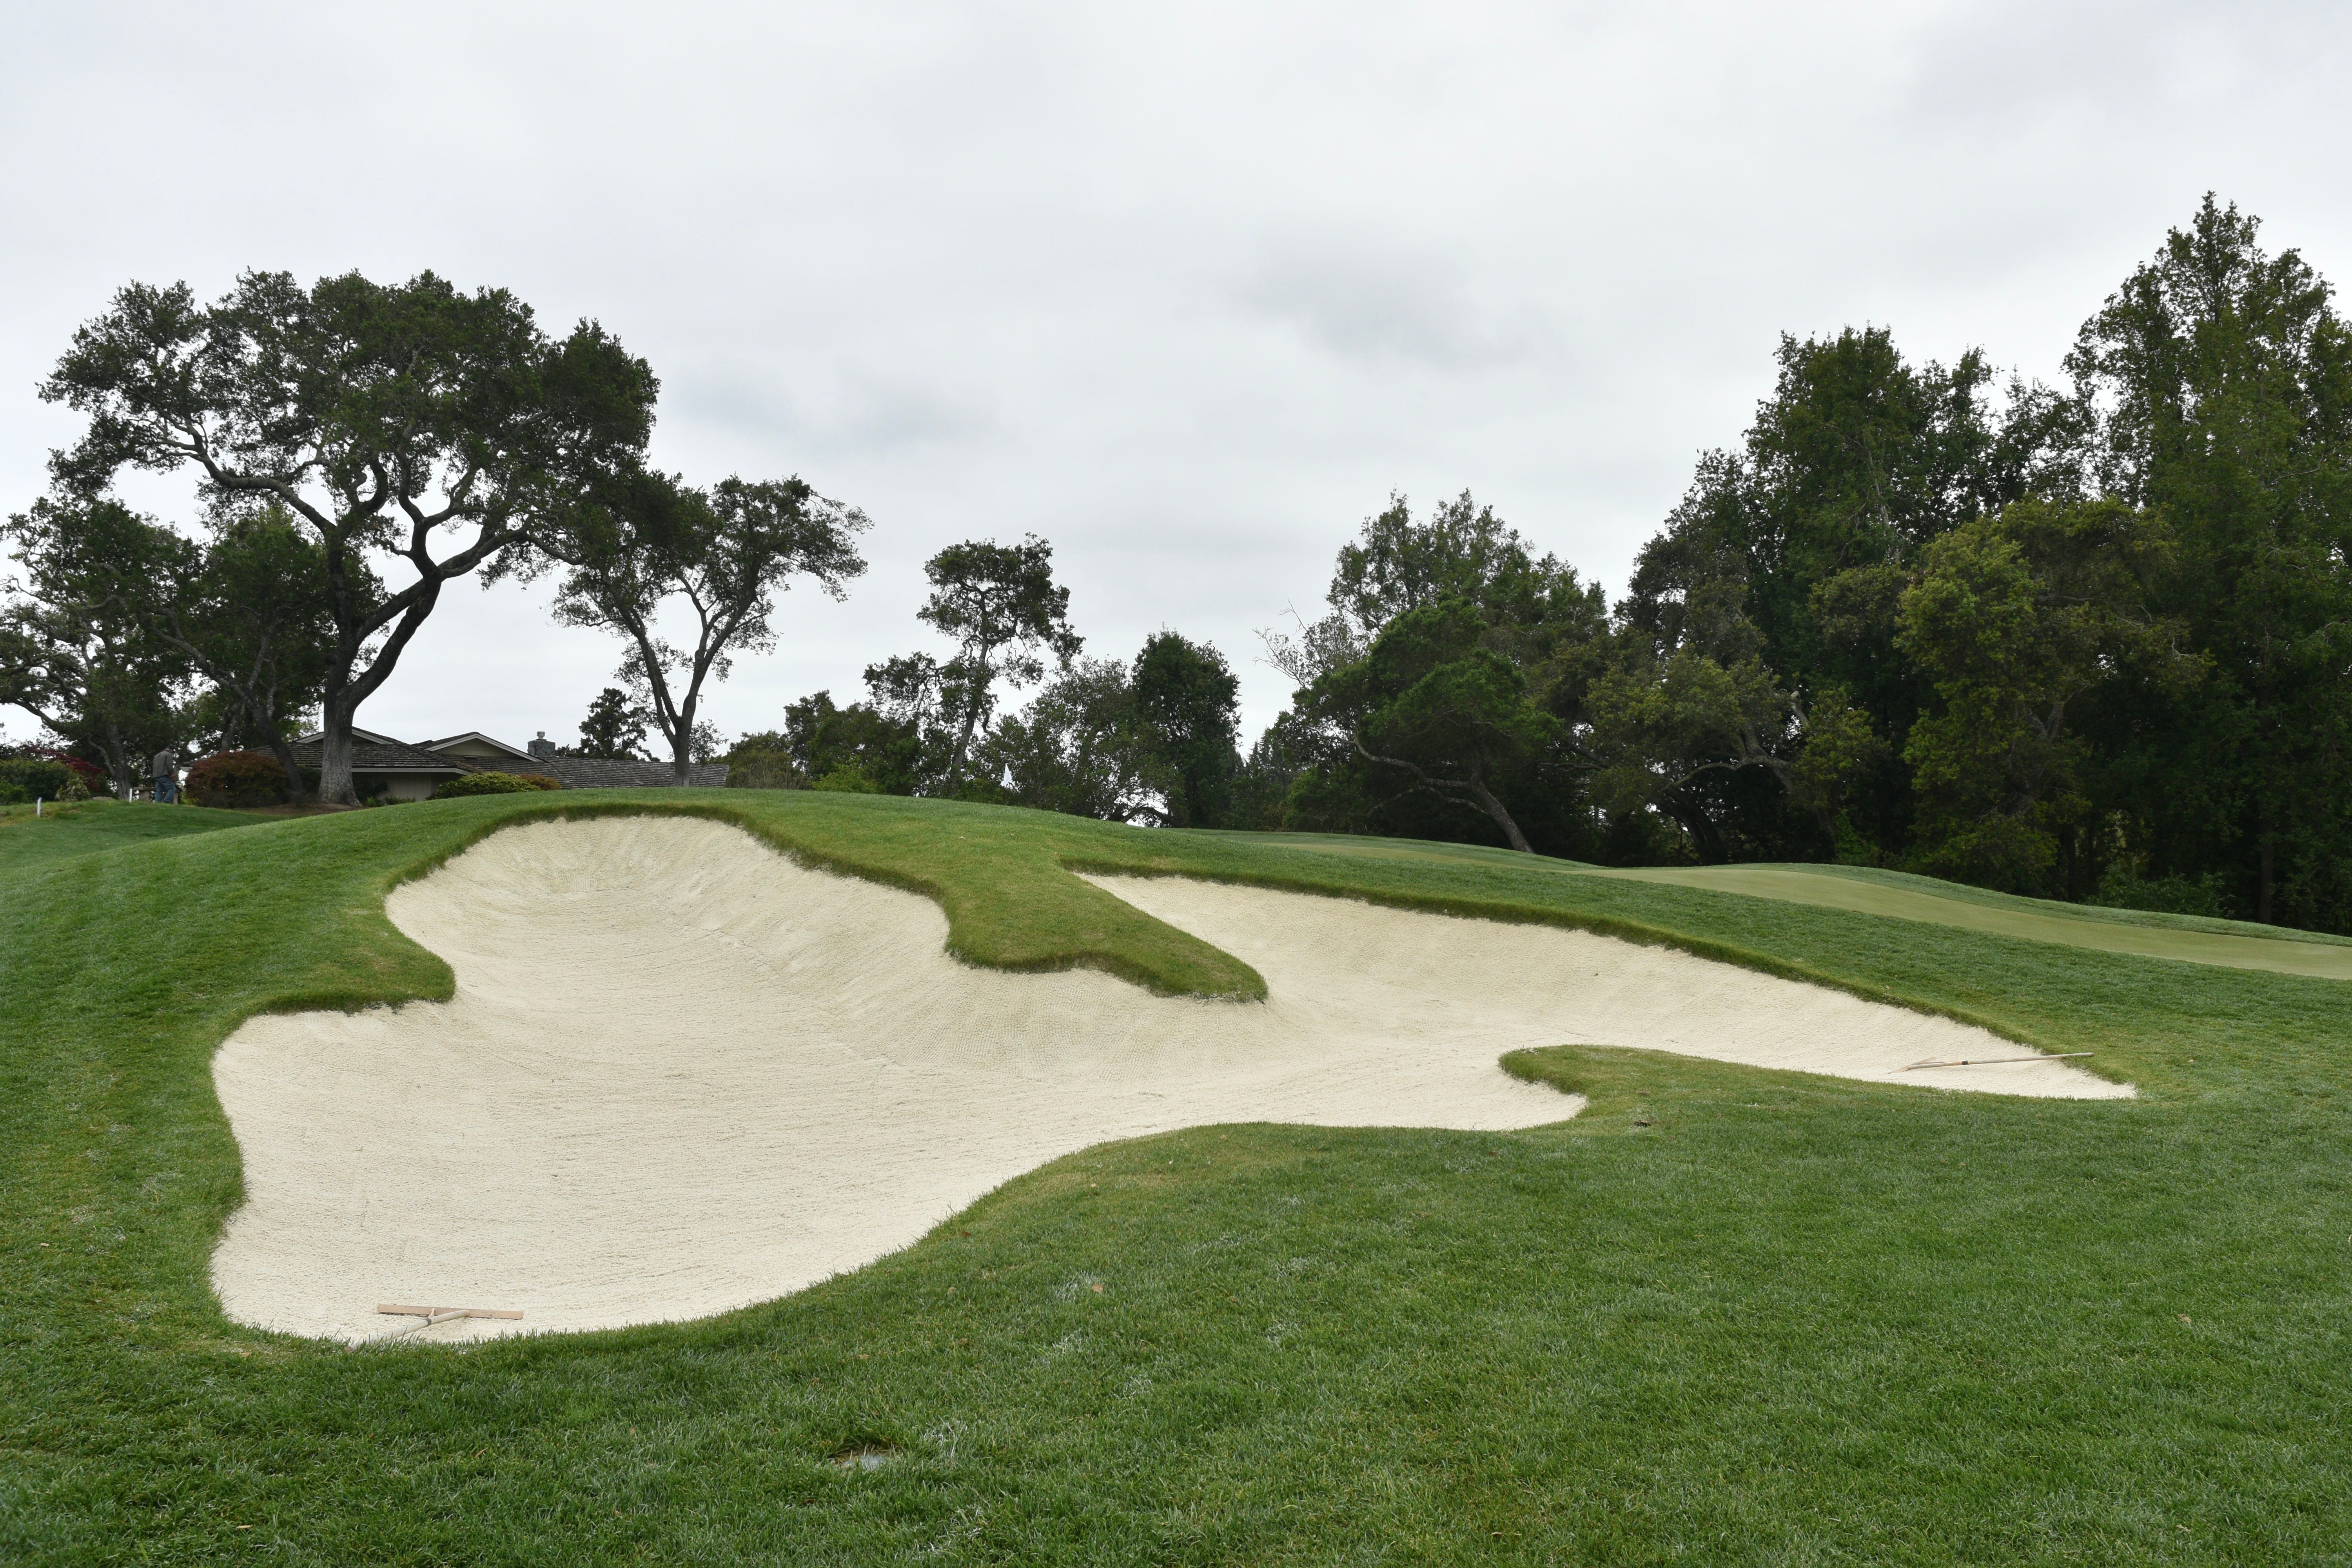
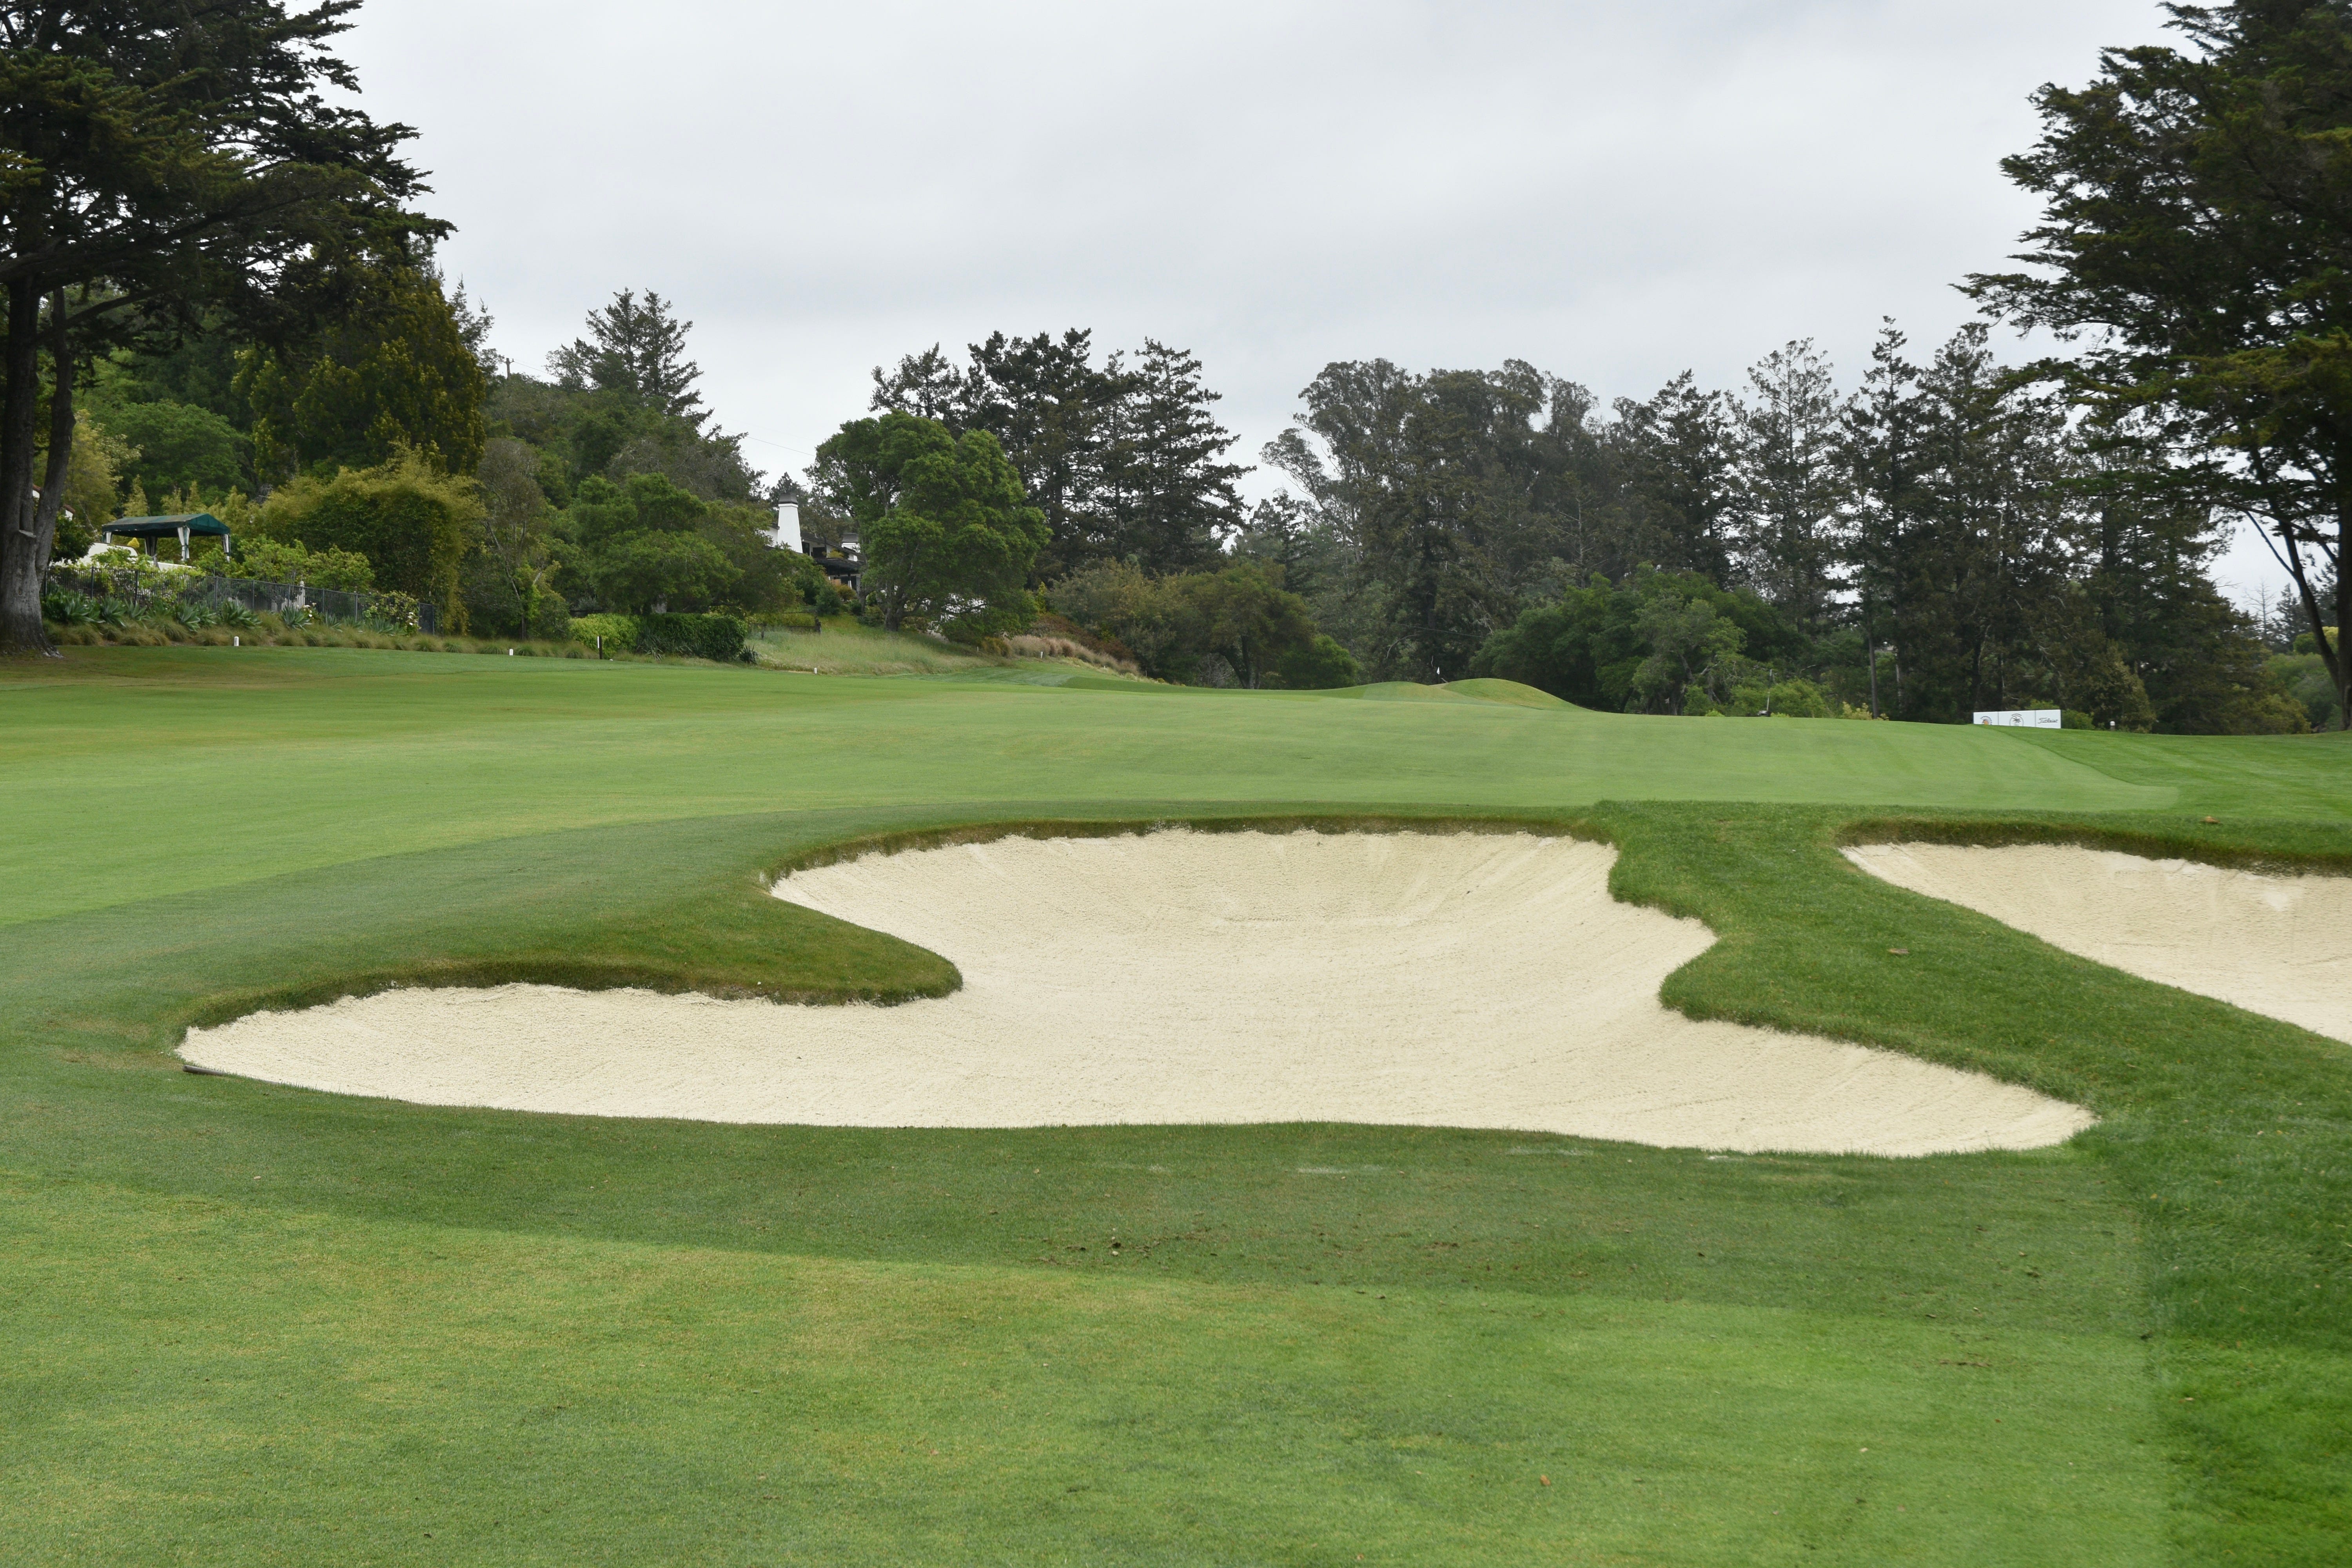
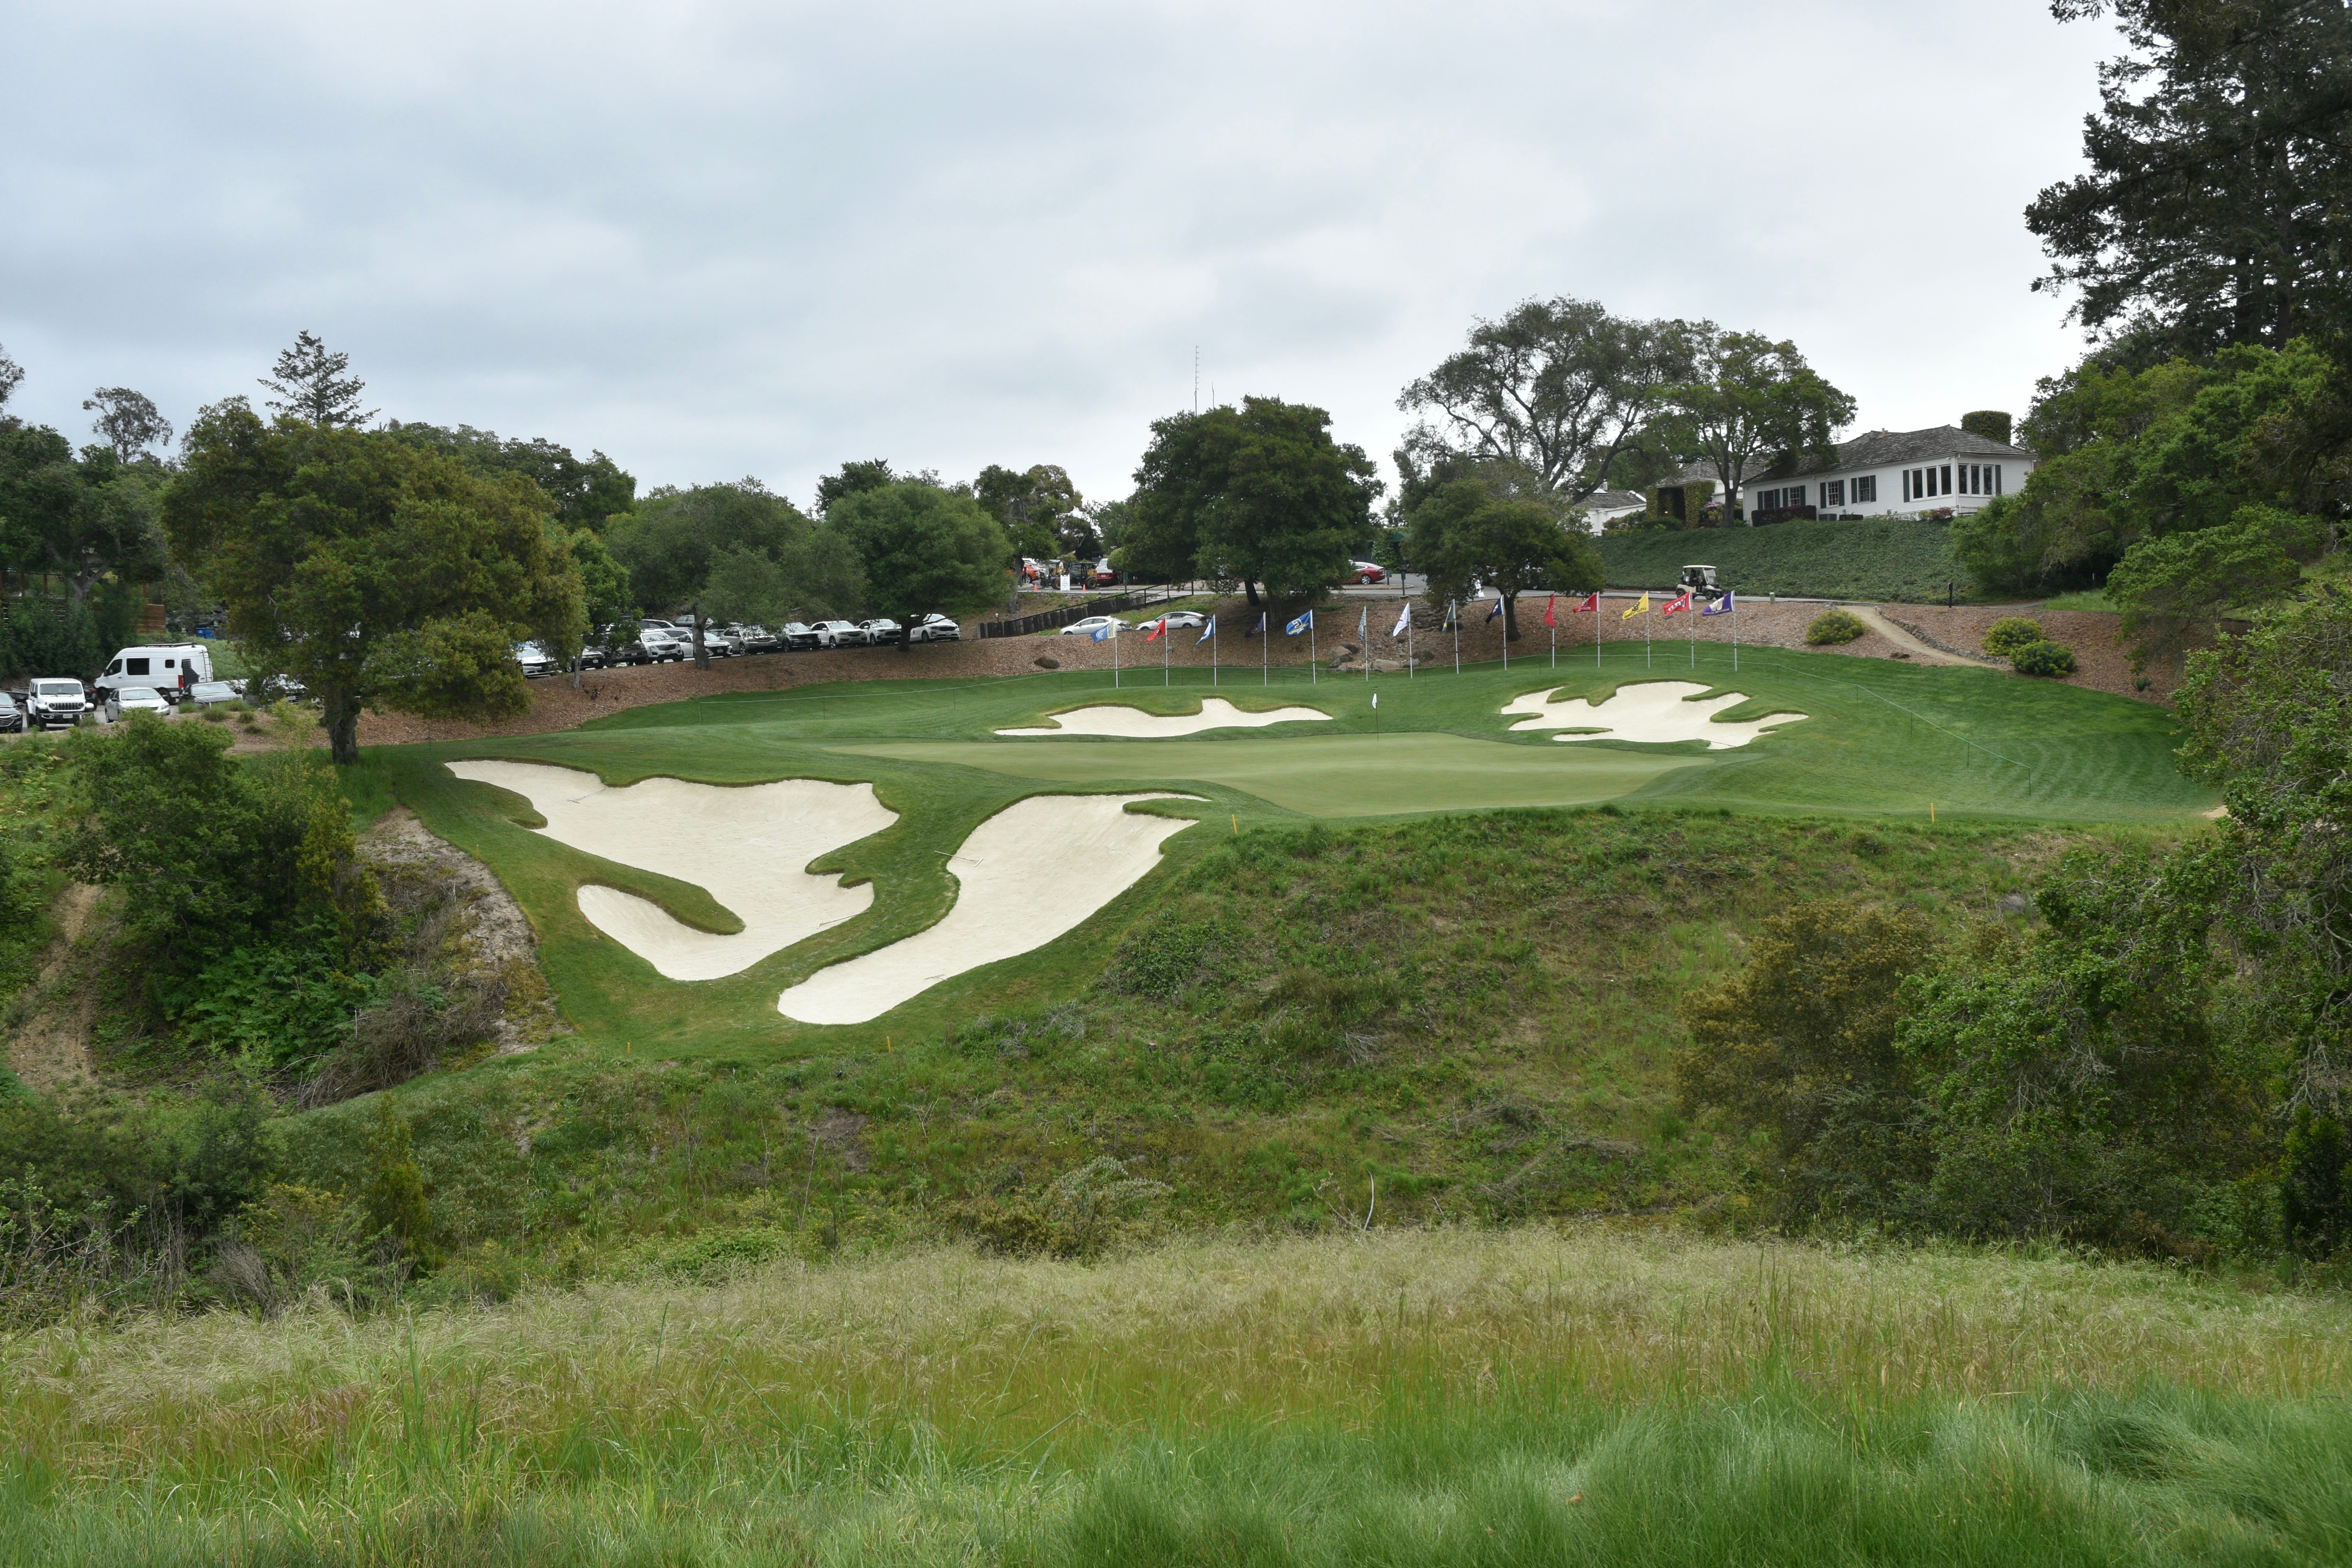
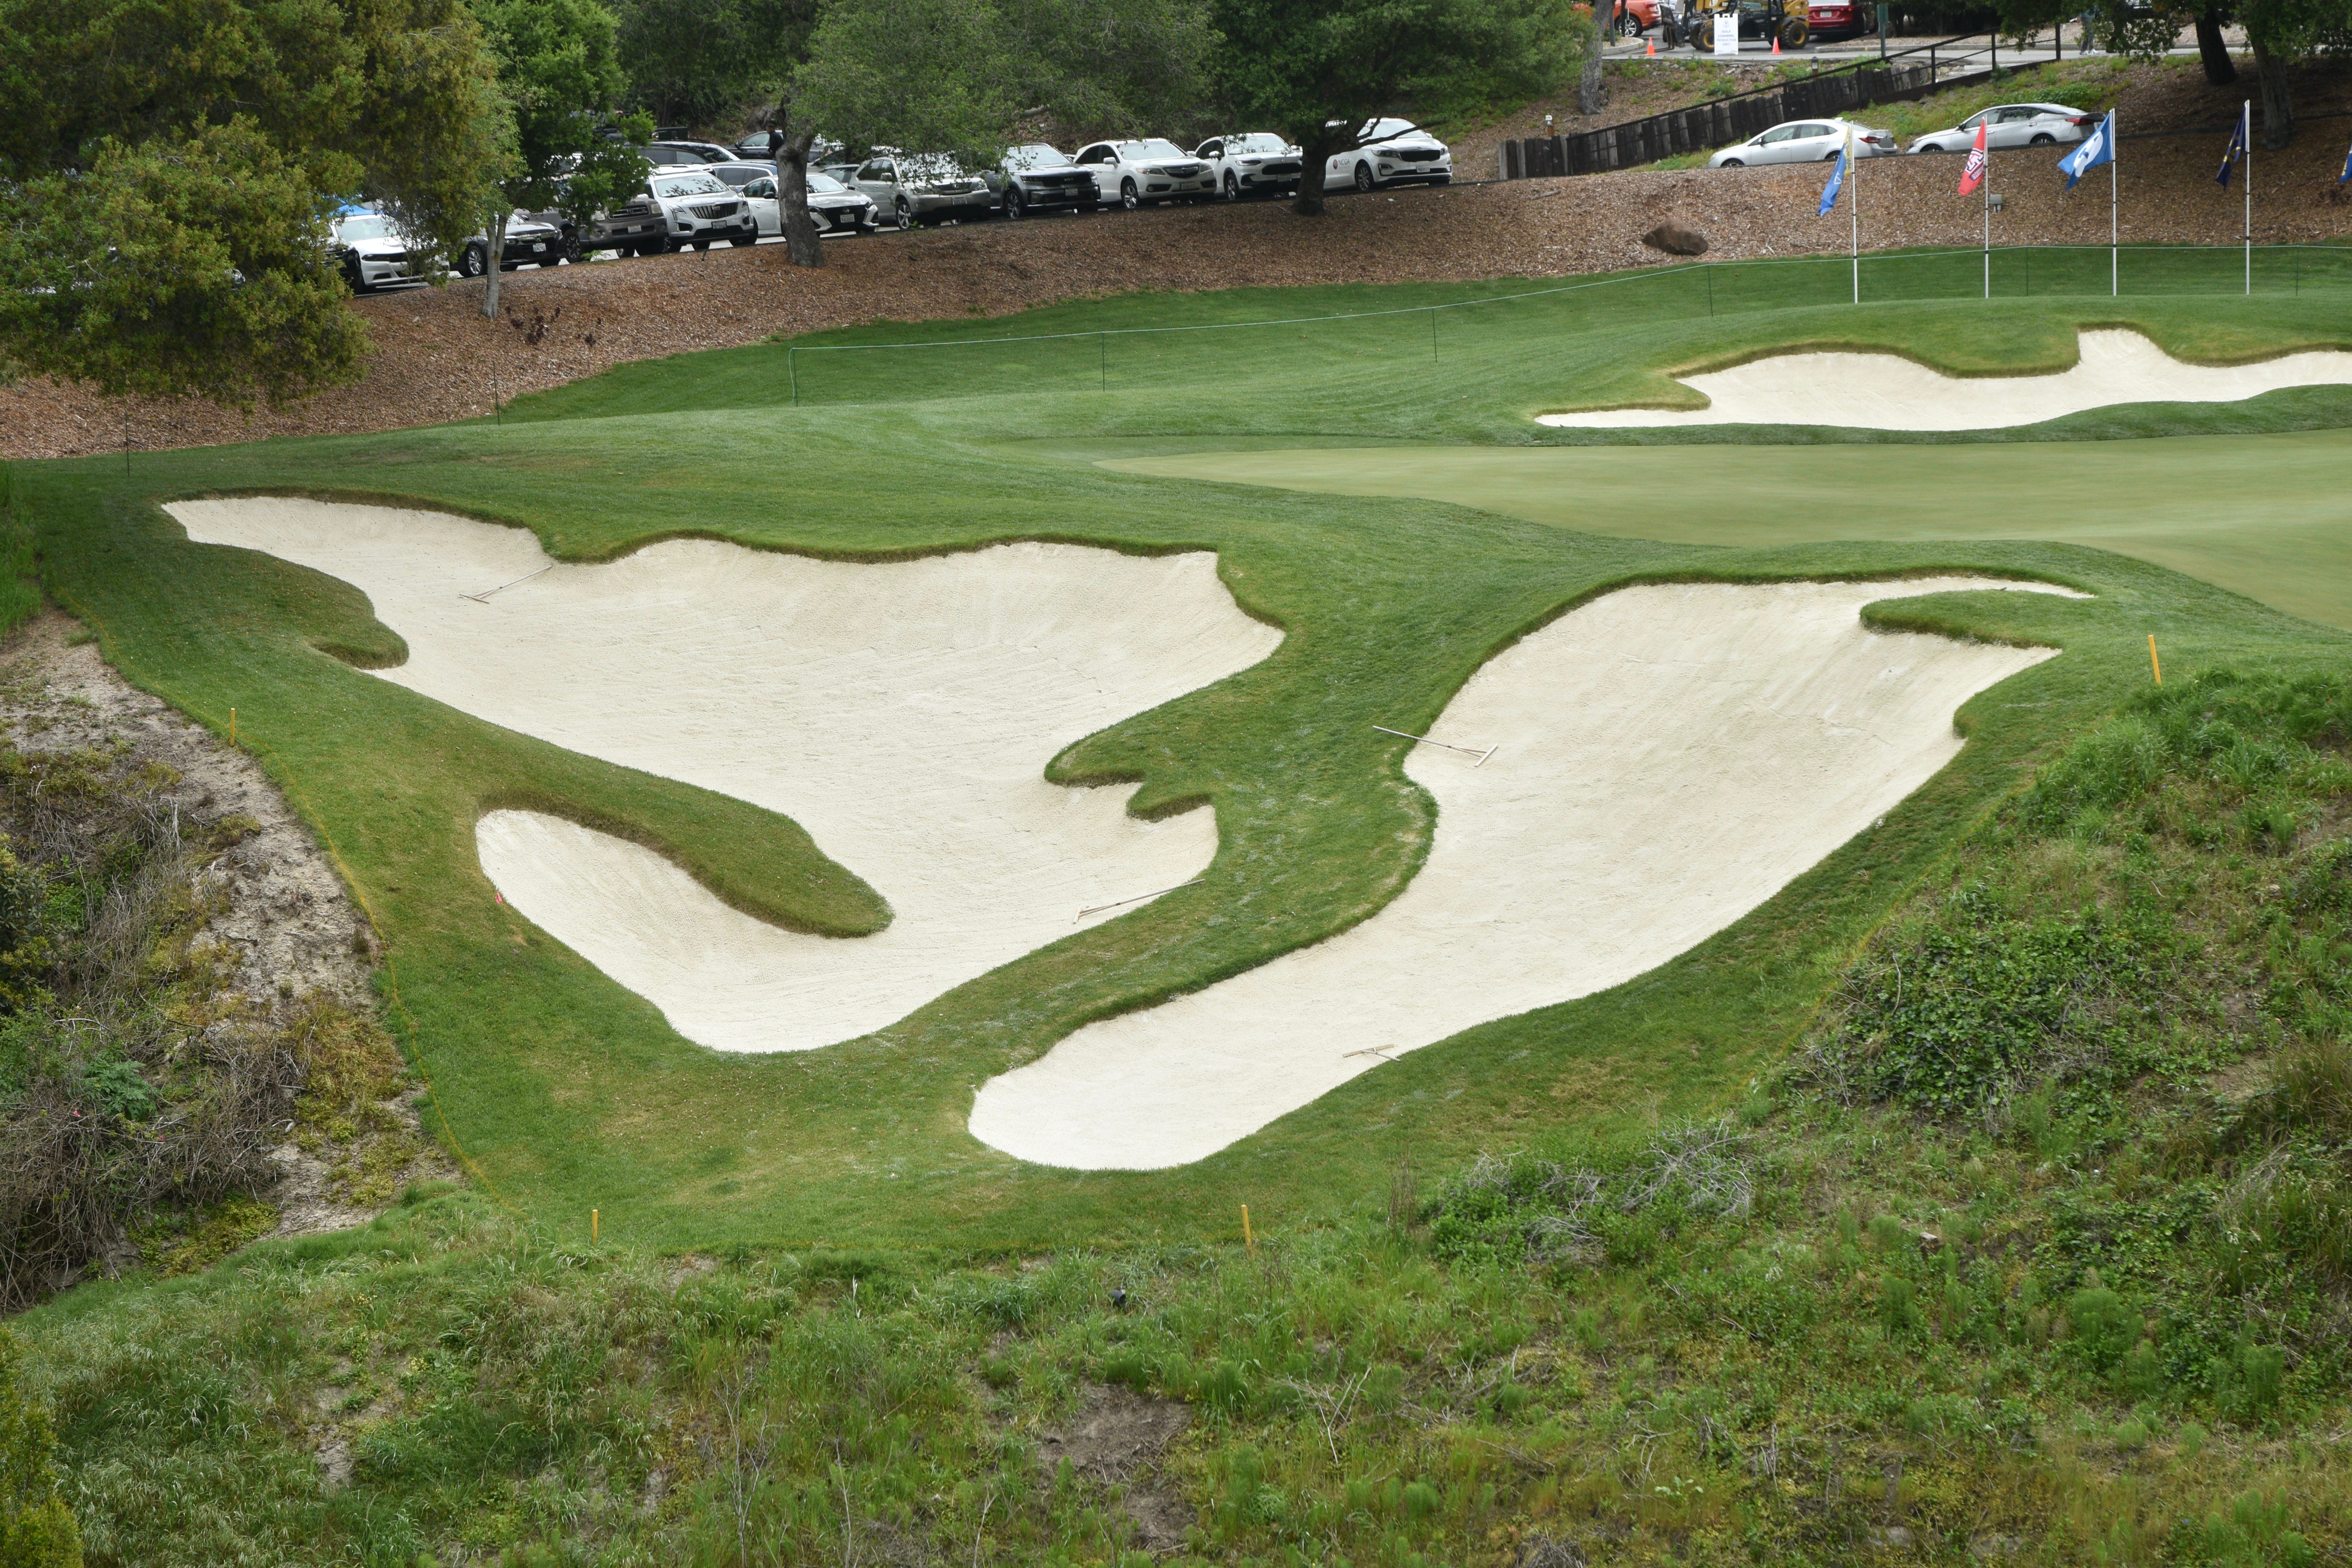
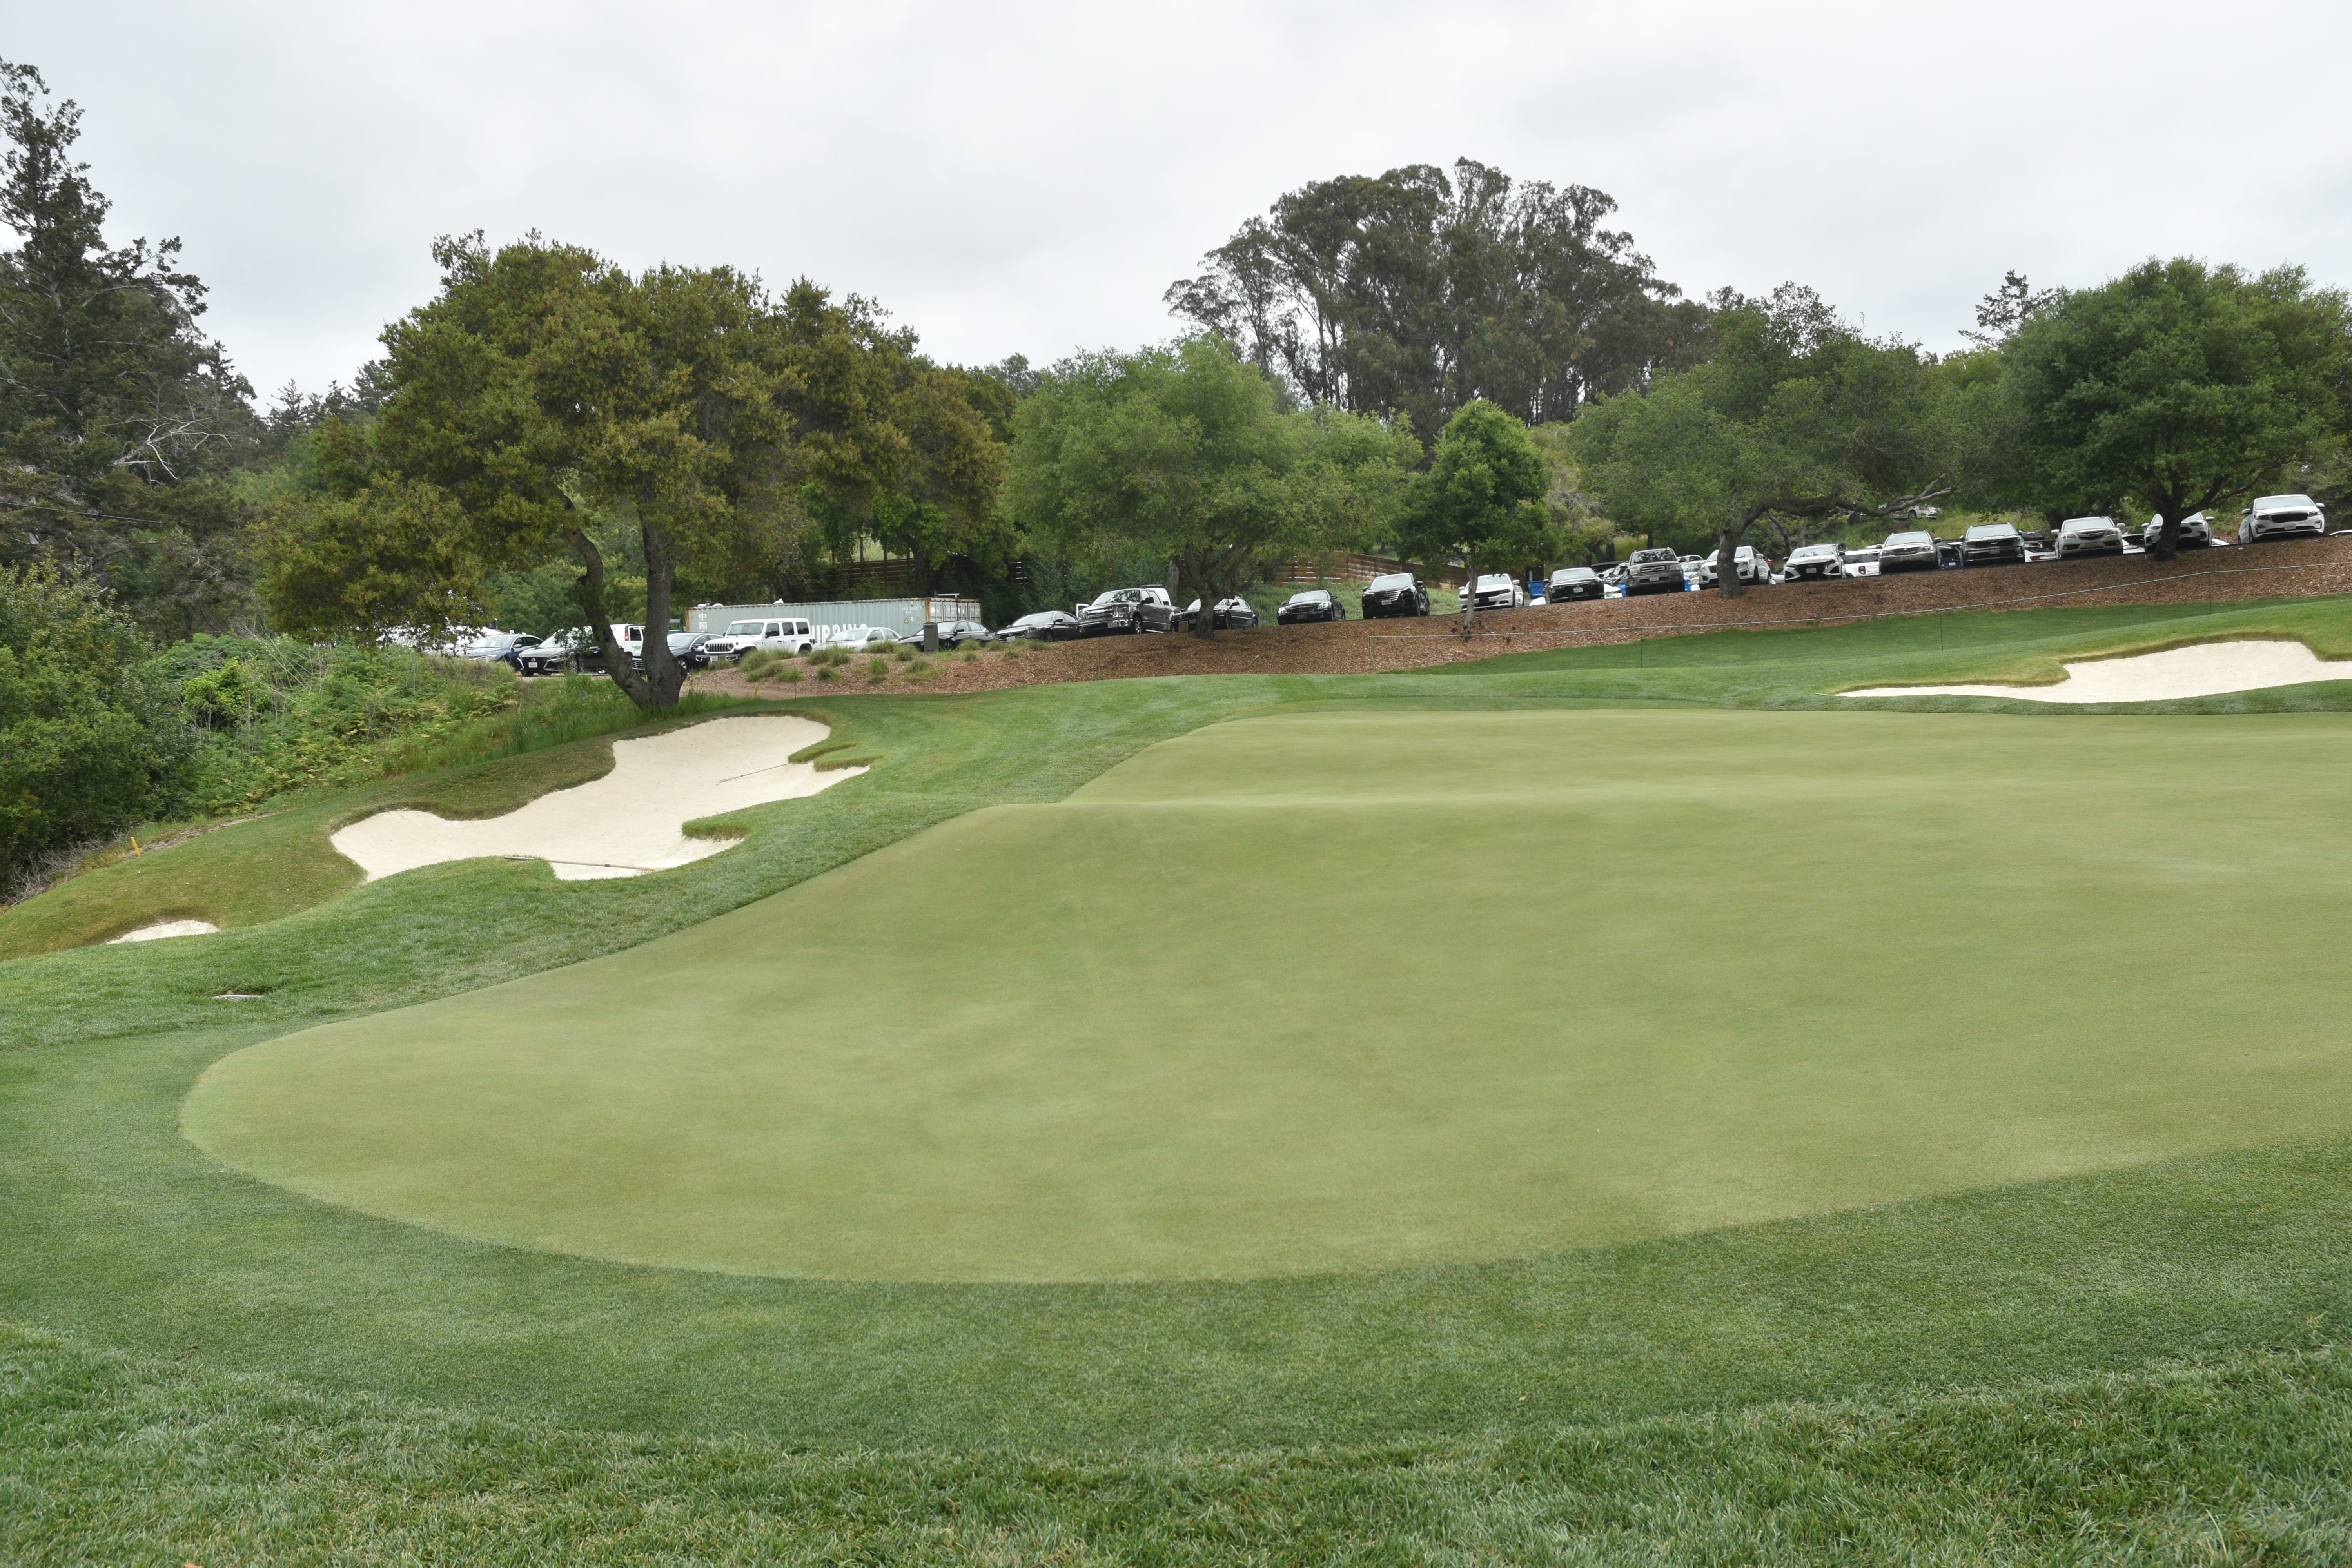
The 10th hole left green side bunkers. There was once a small tree right in the middle of this bunker cluster, but probably a little detail worth omitting during the restoration
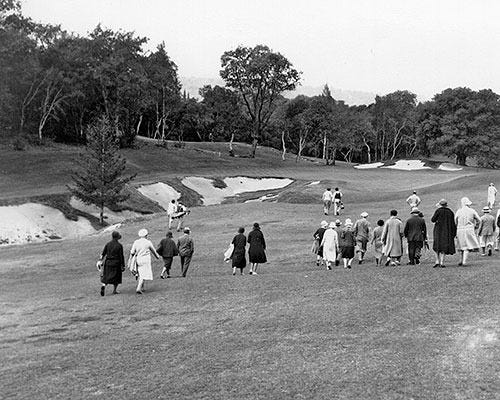
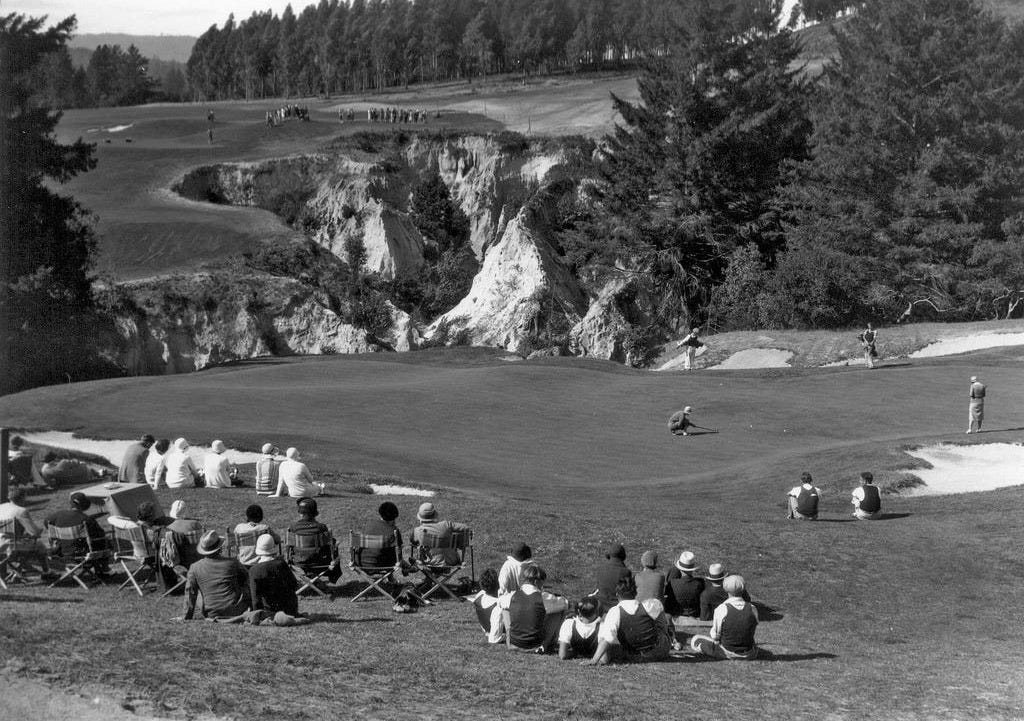
What the 10th hole green originally looked like when the course first opened
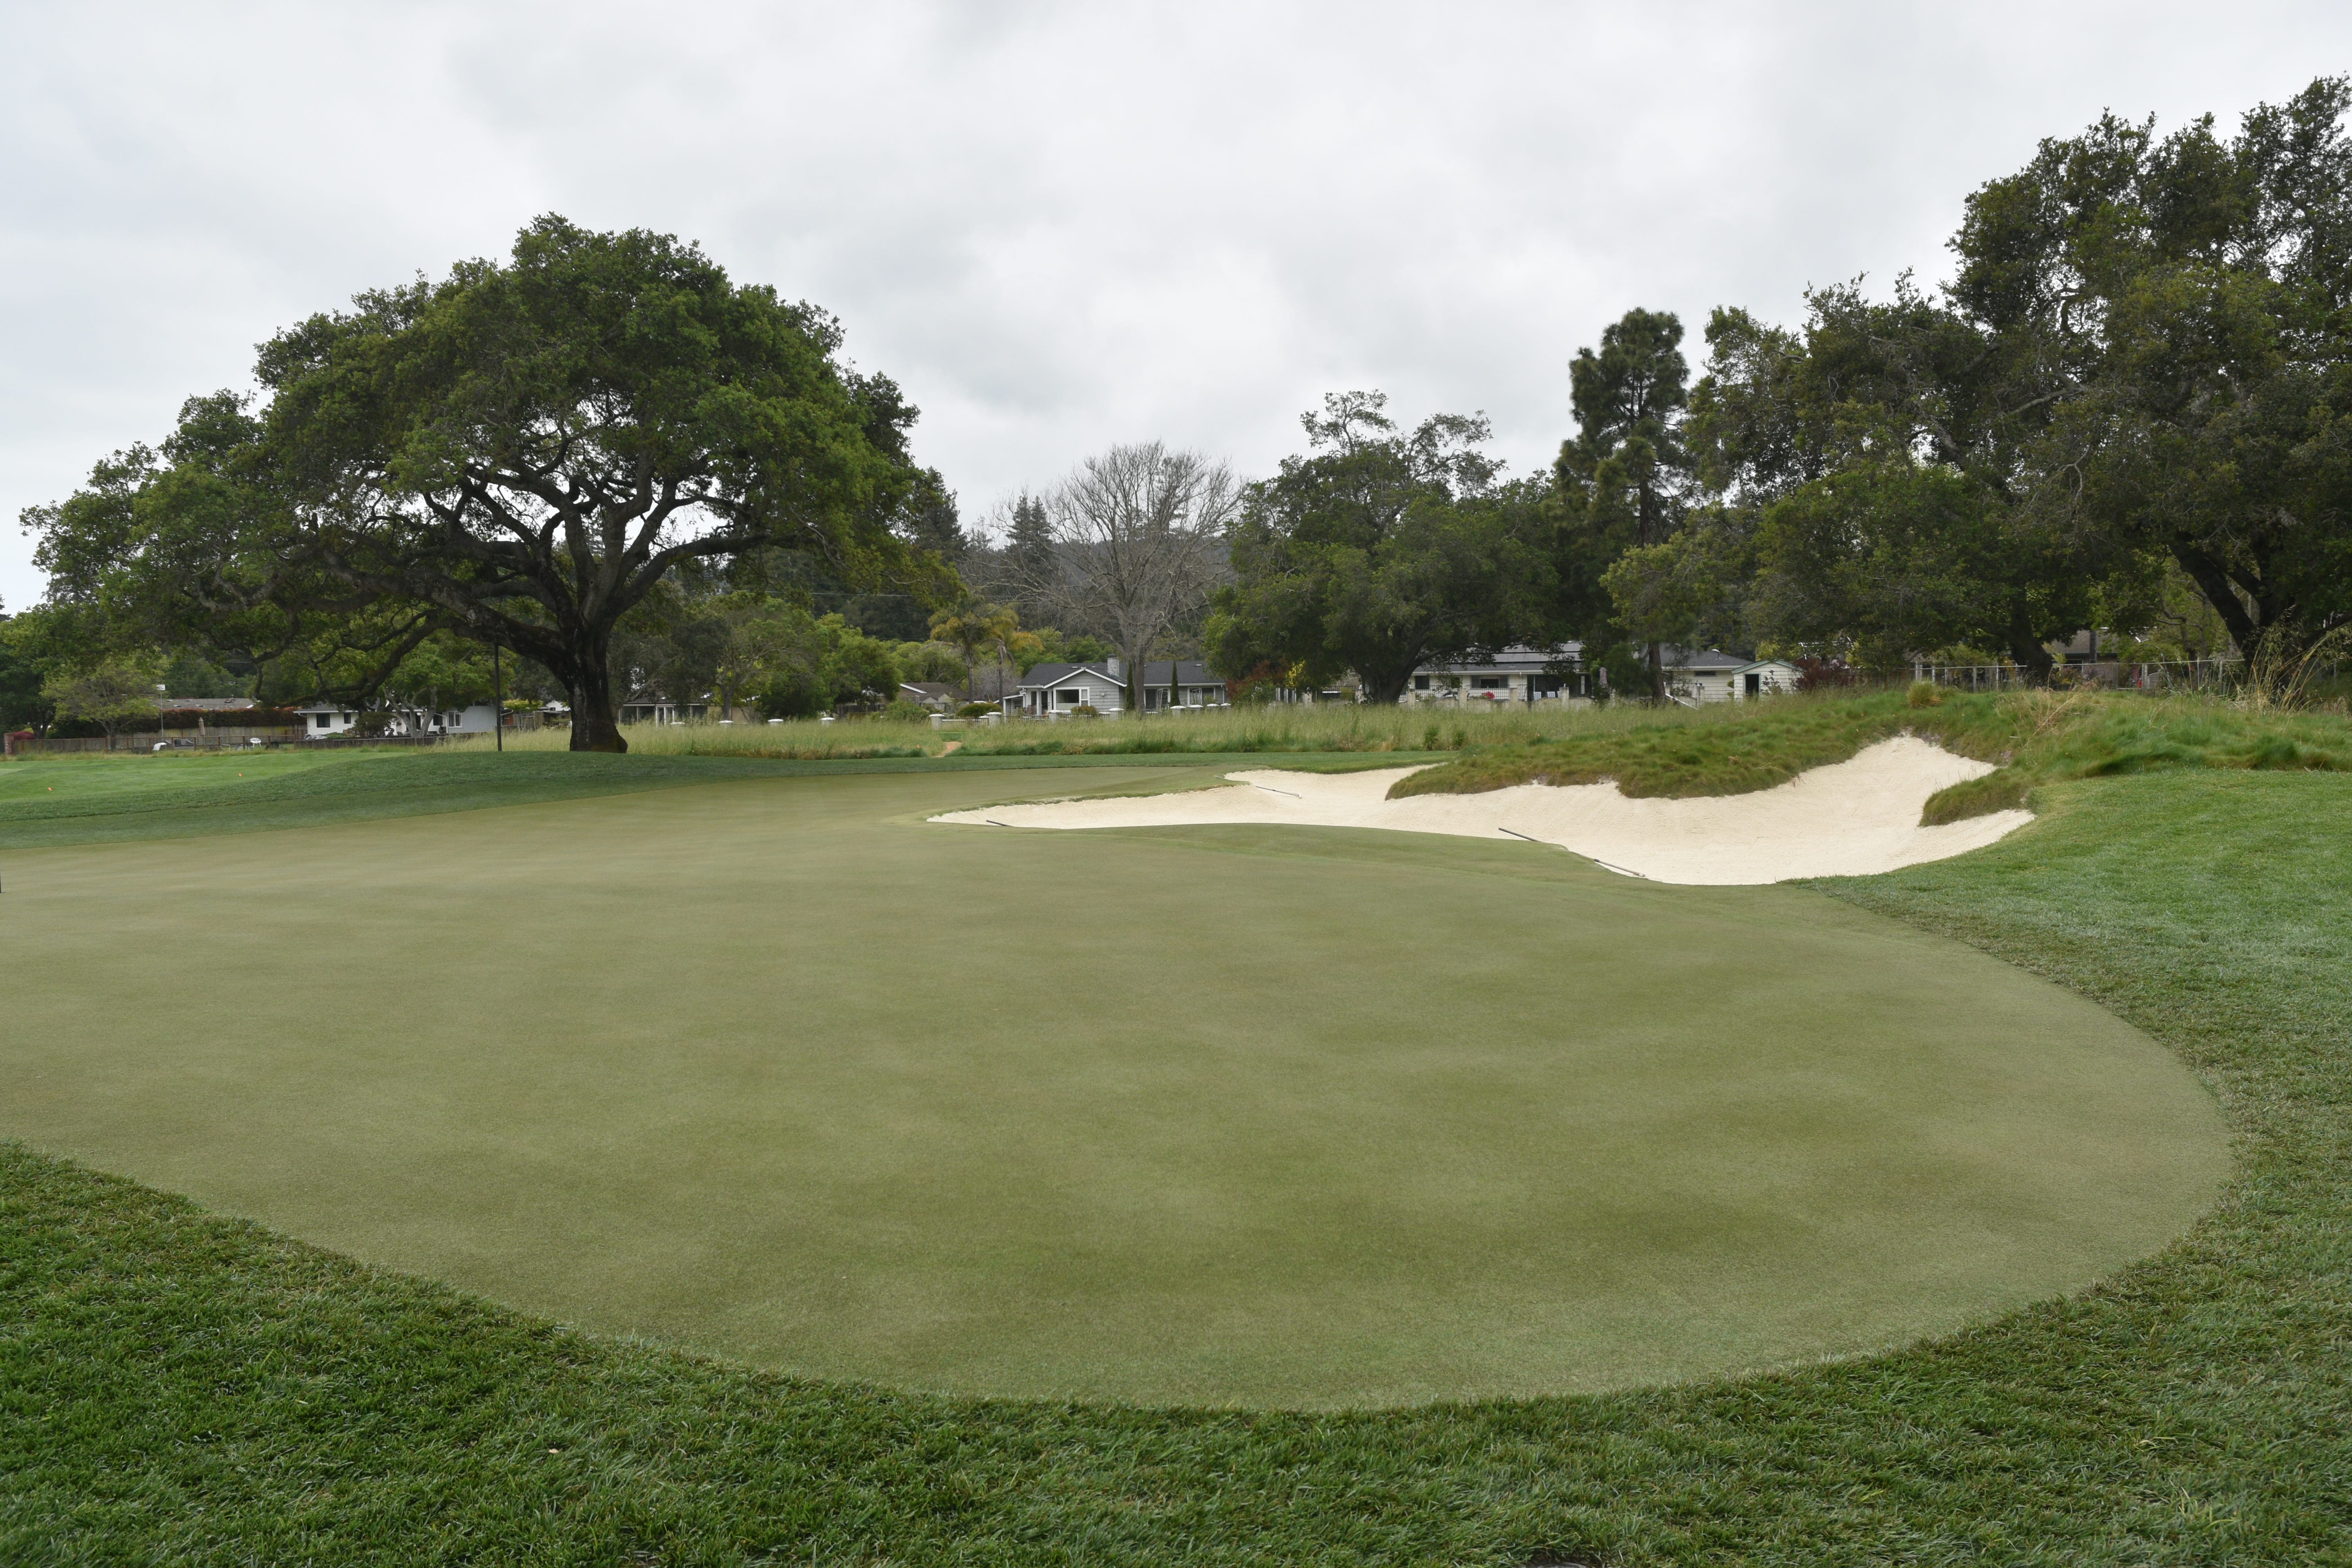
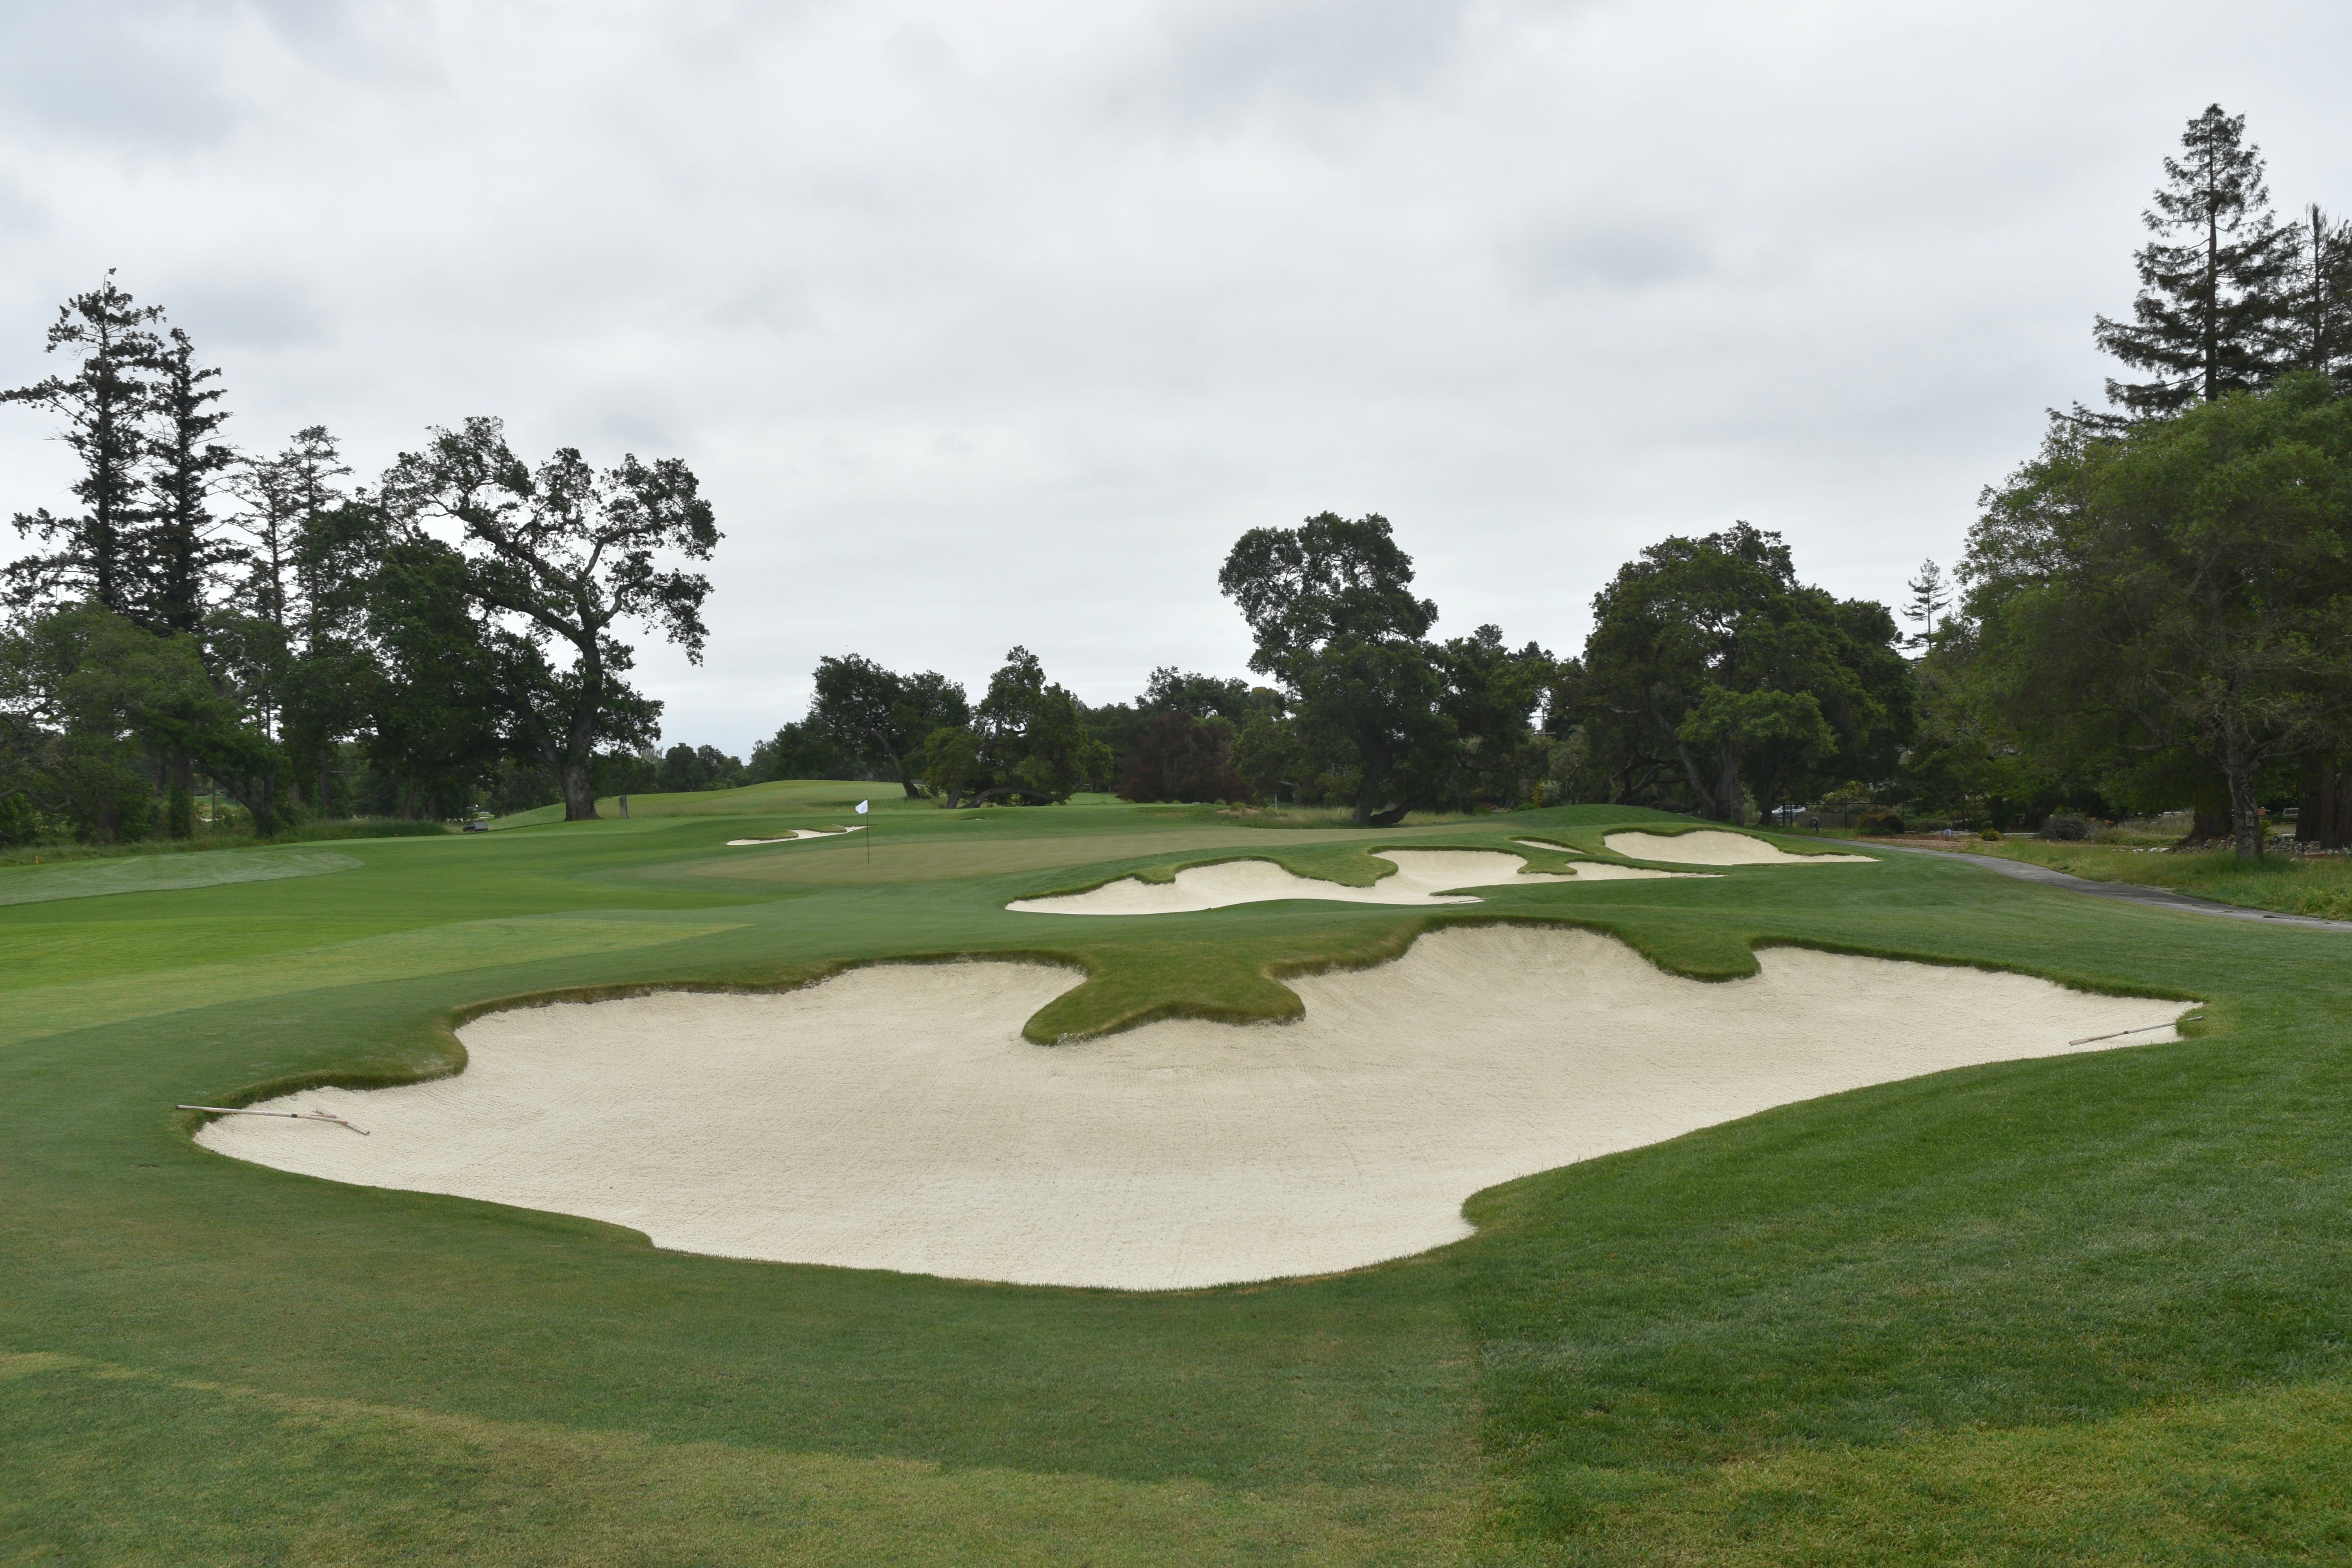
The 10th hole green side bunker cluster from a ground level view
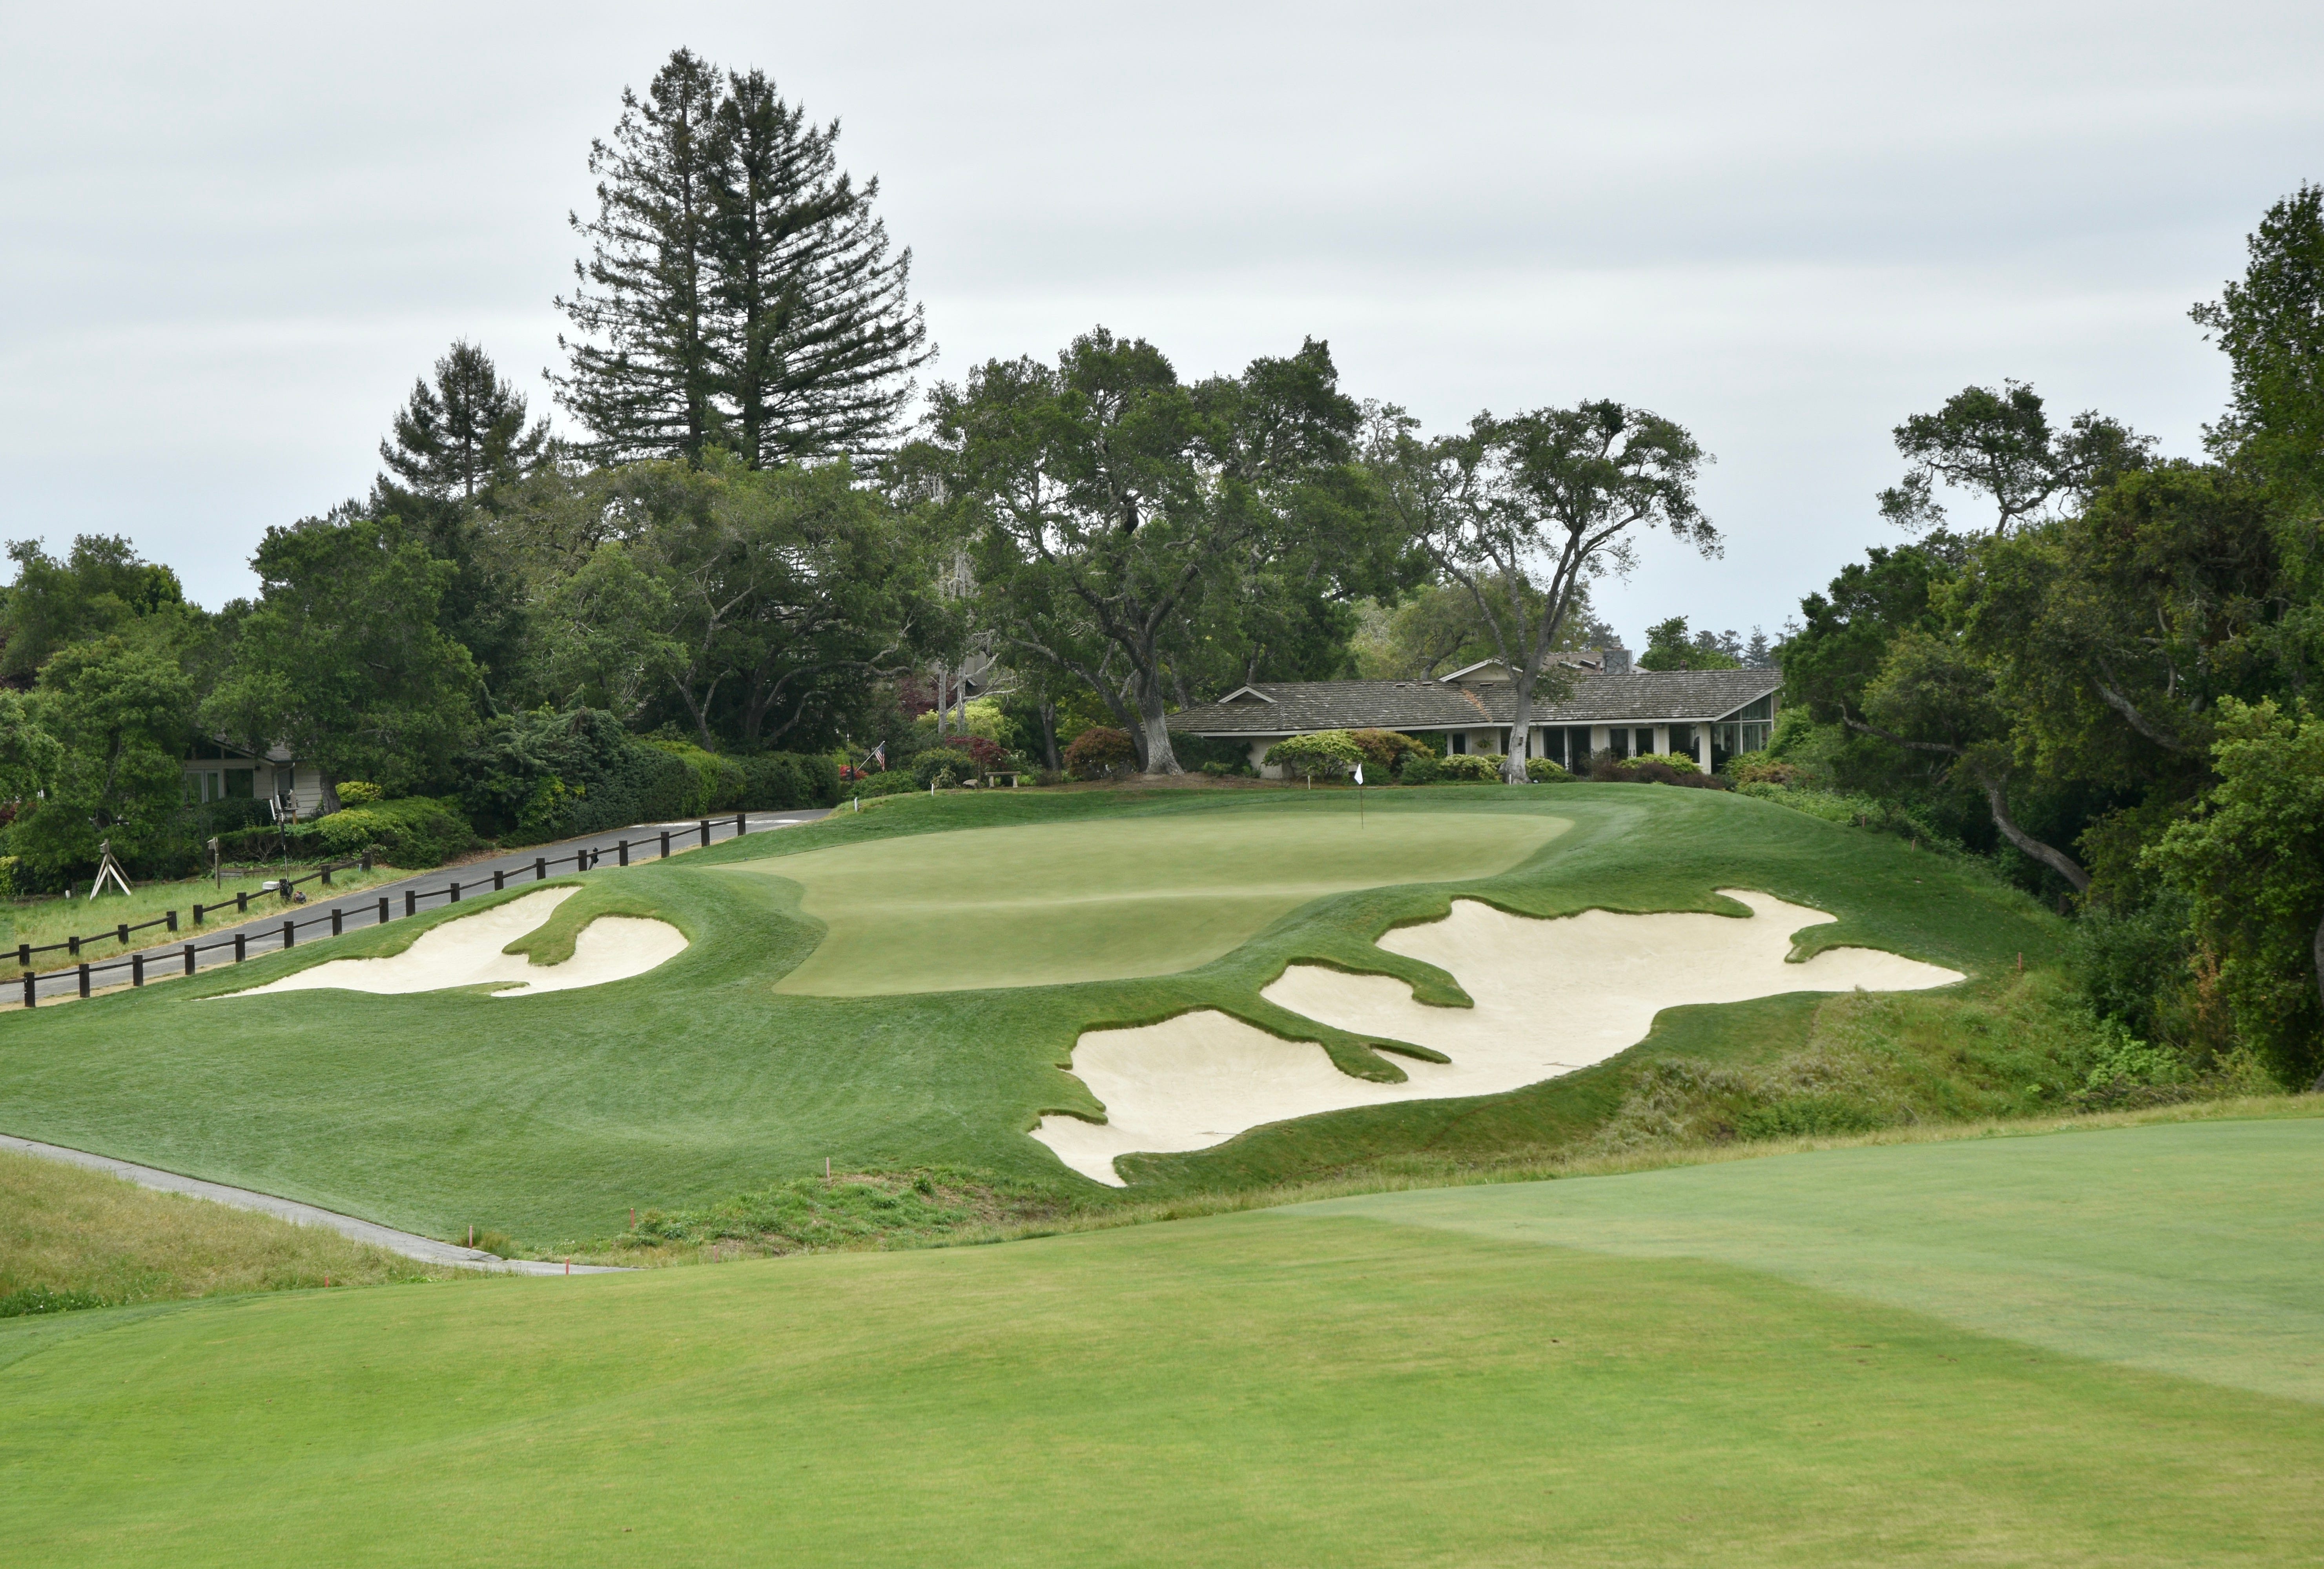
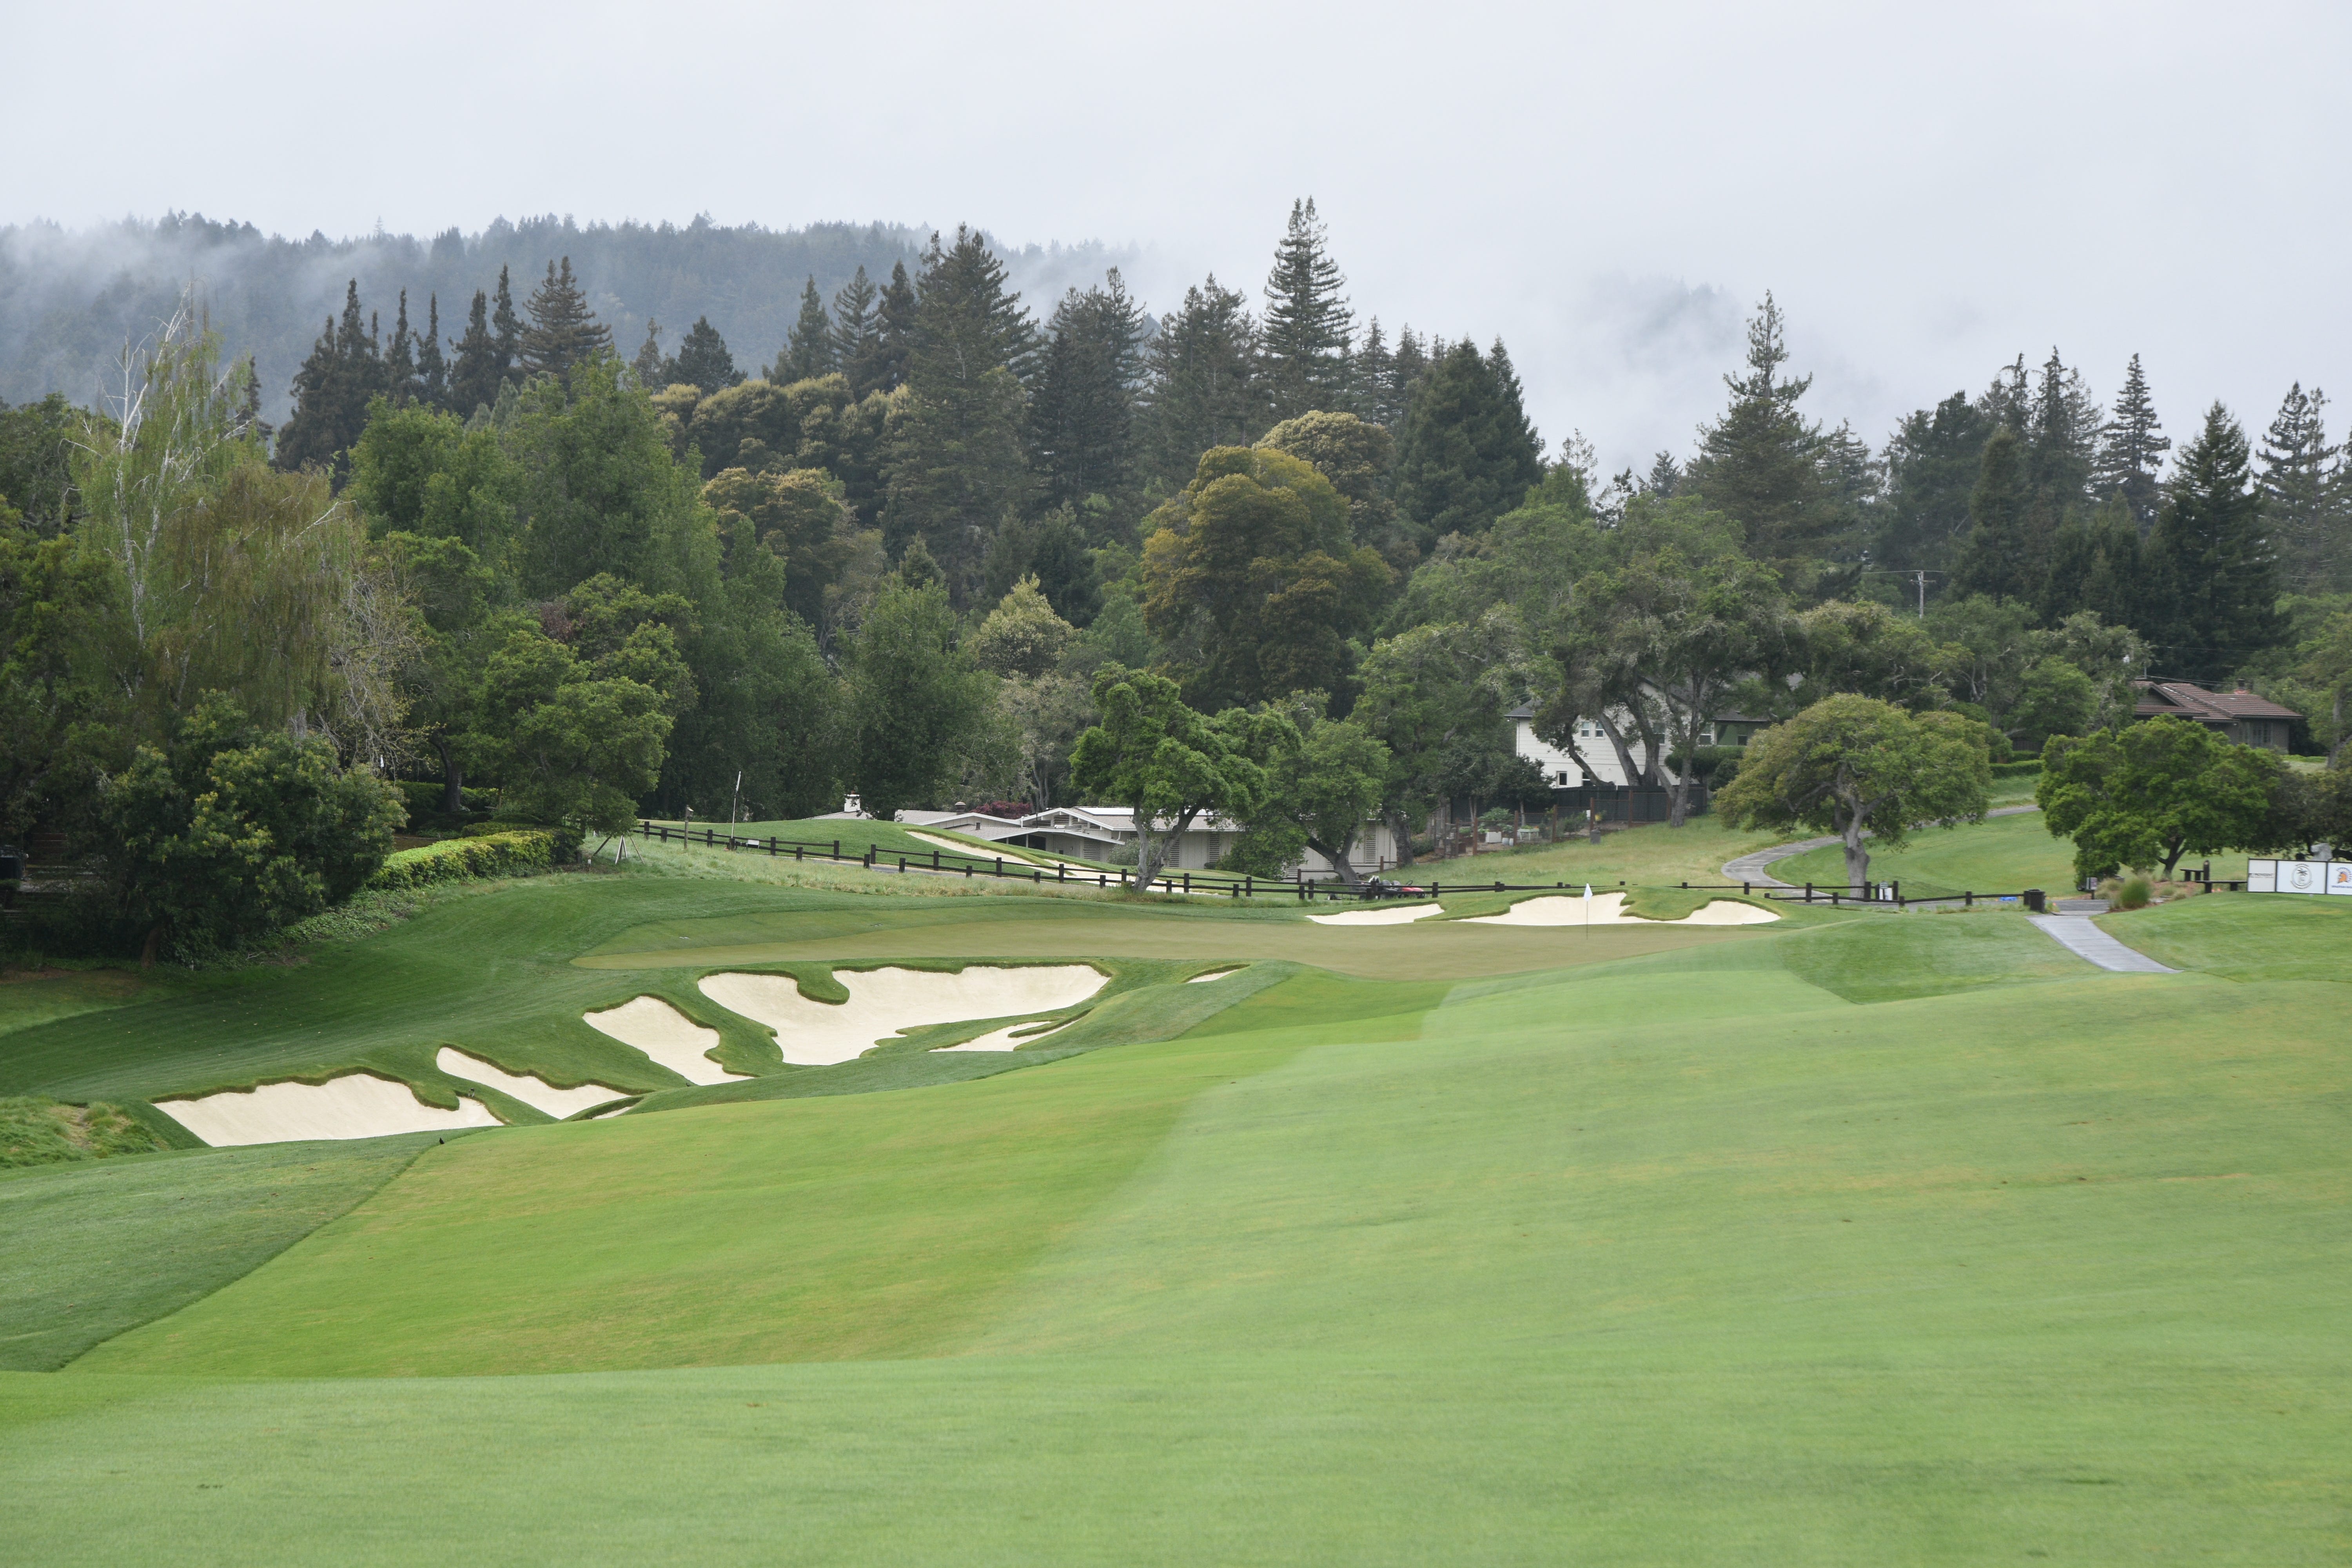
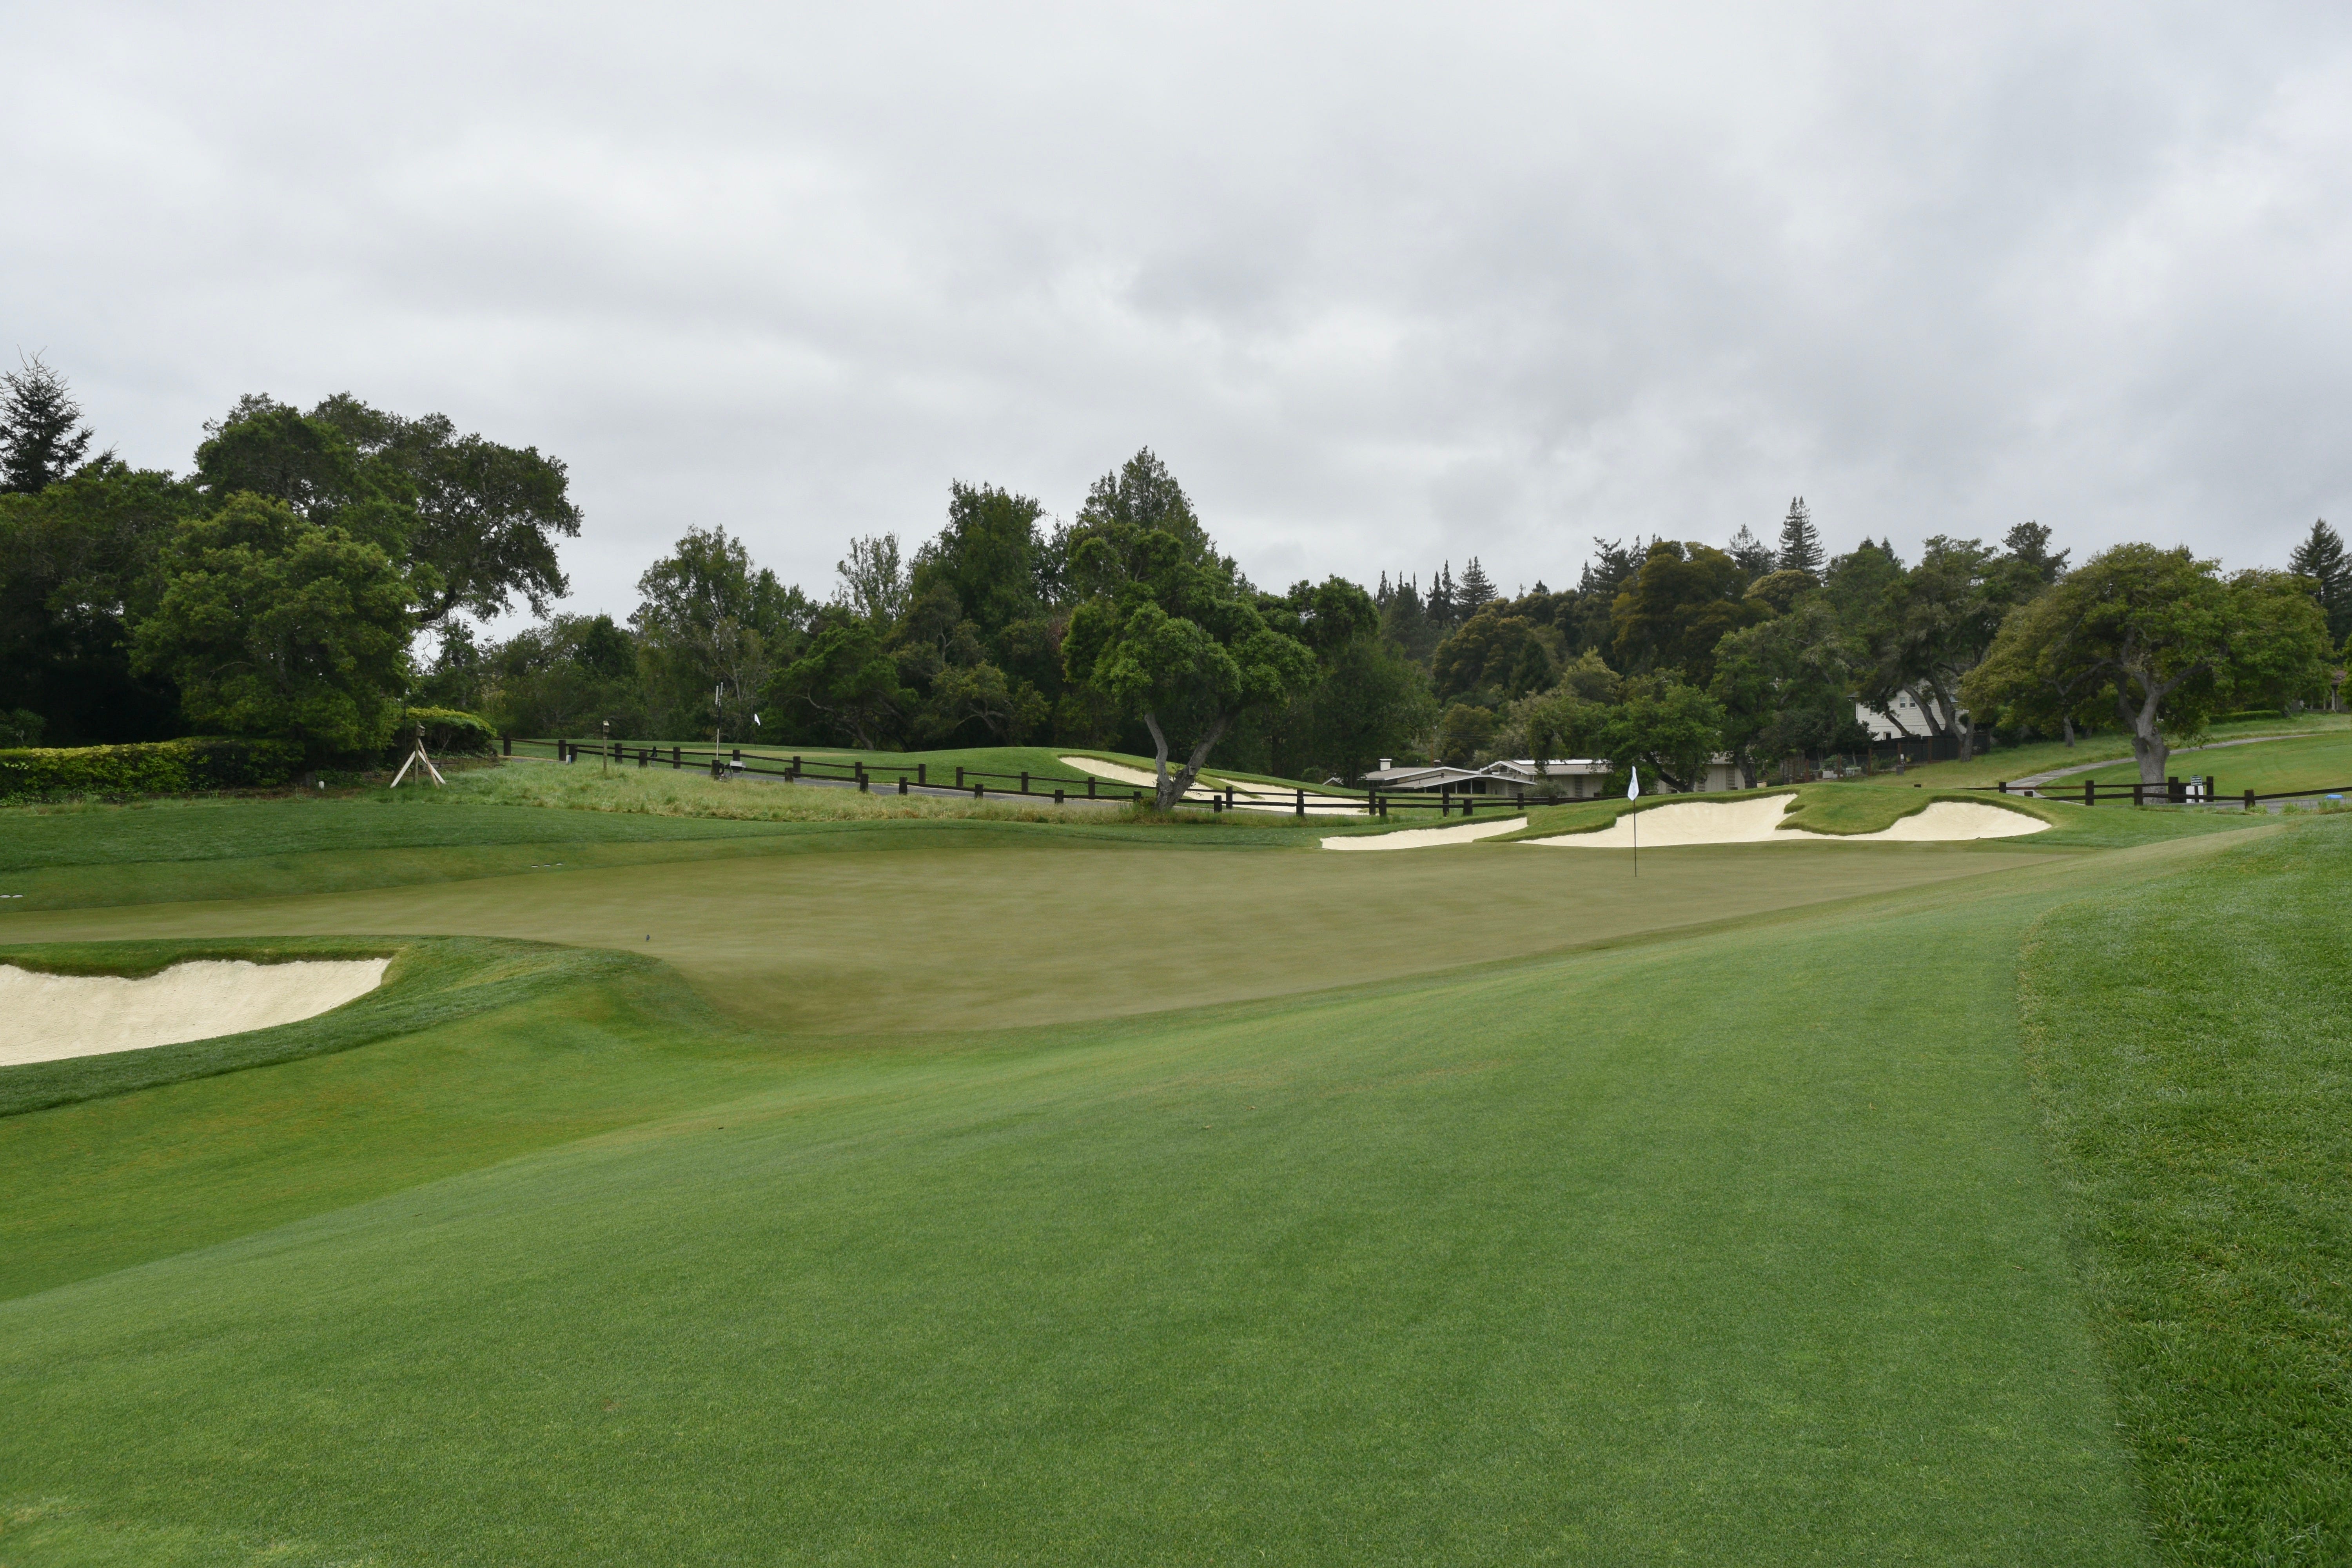
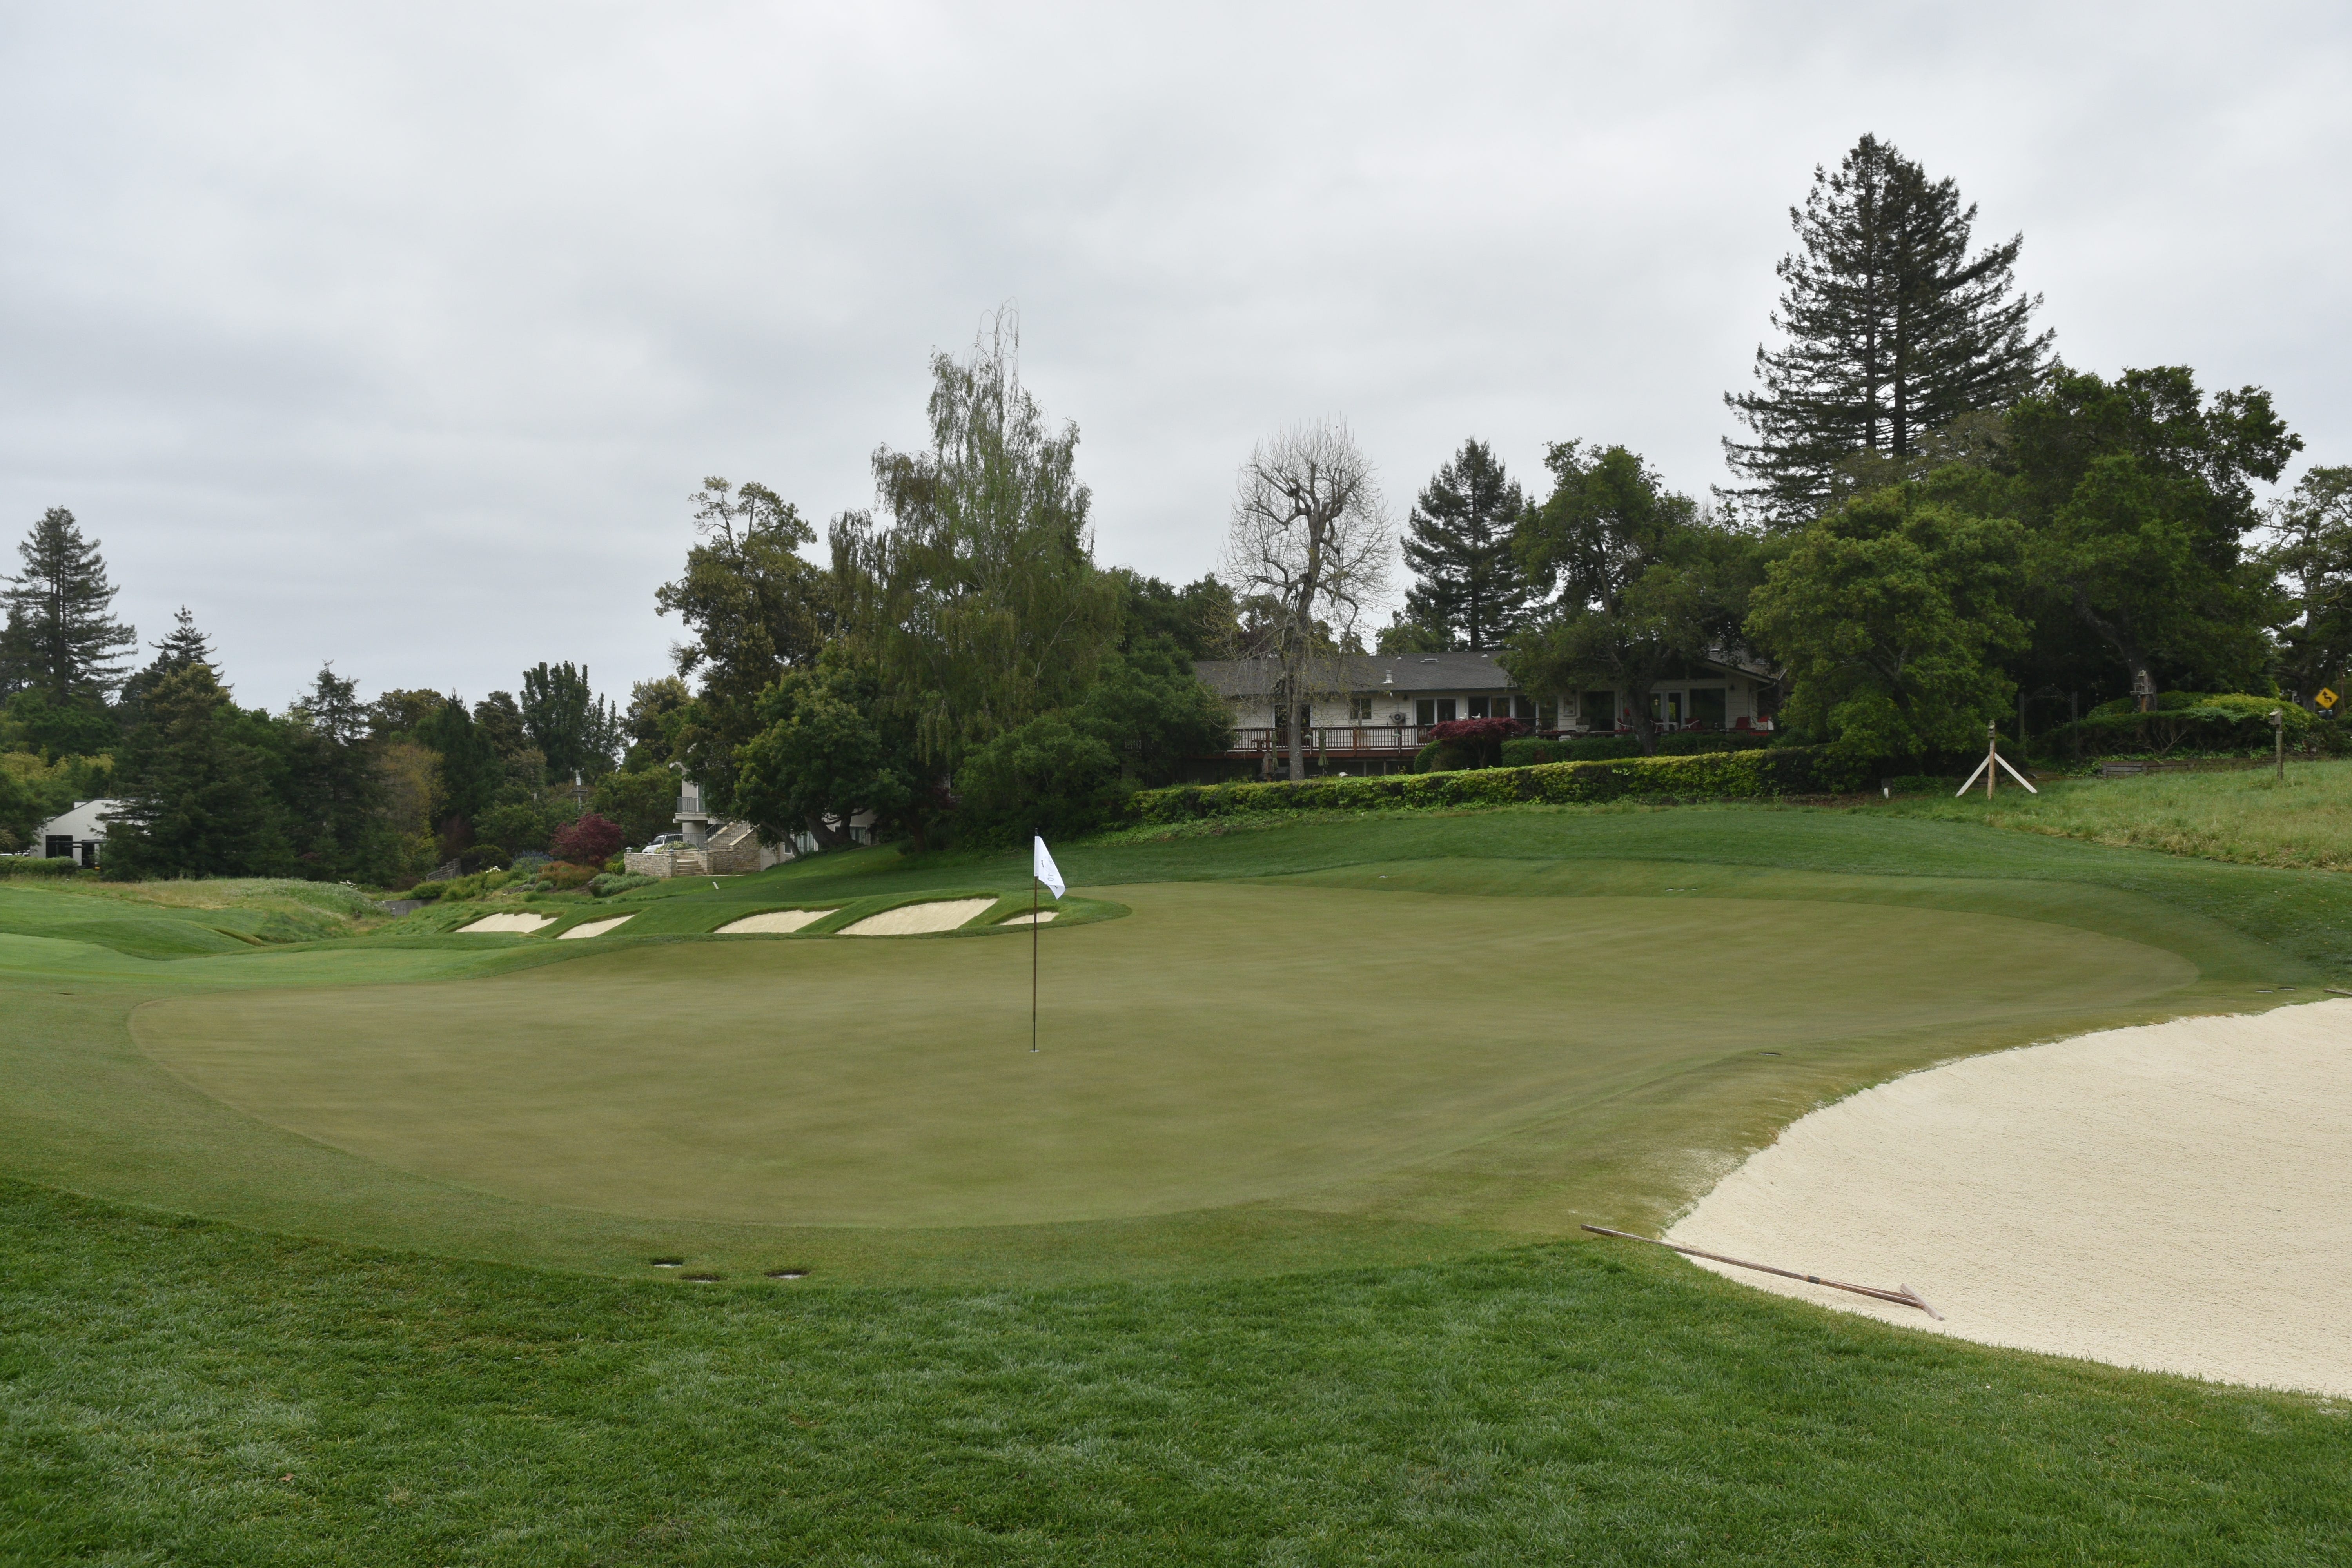
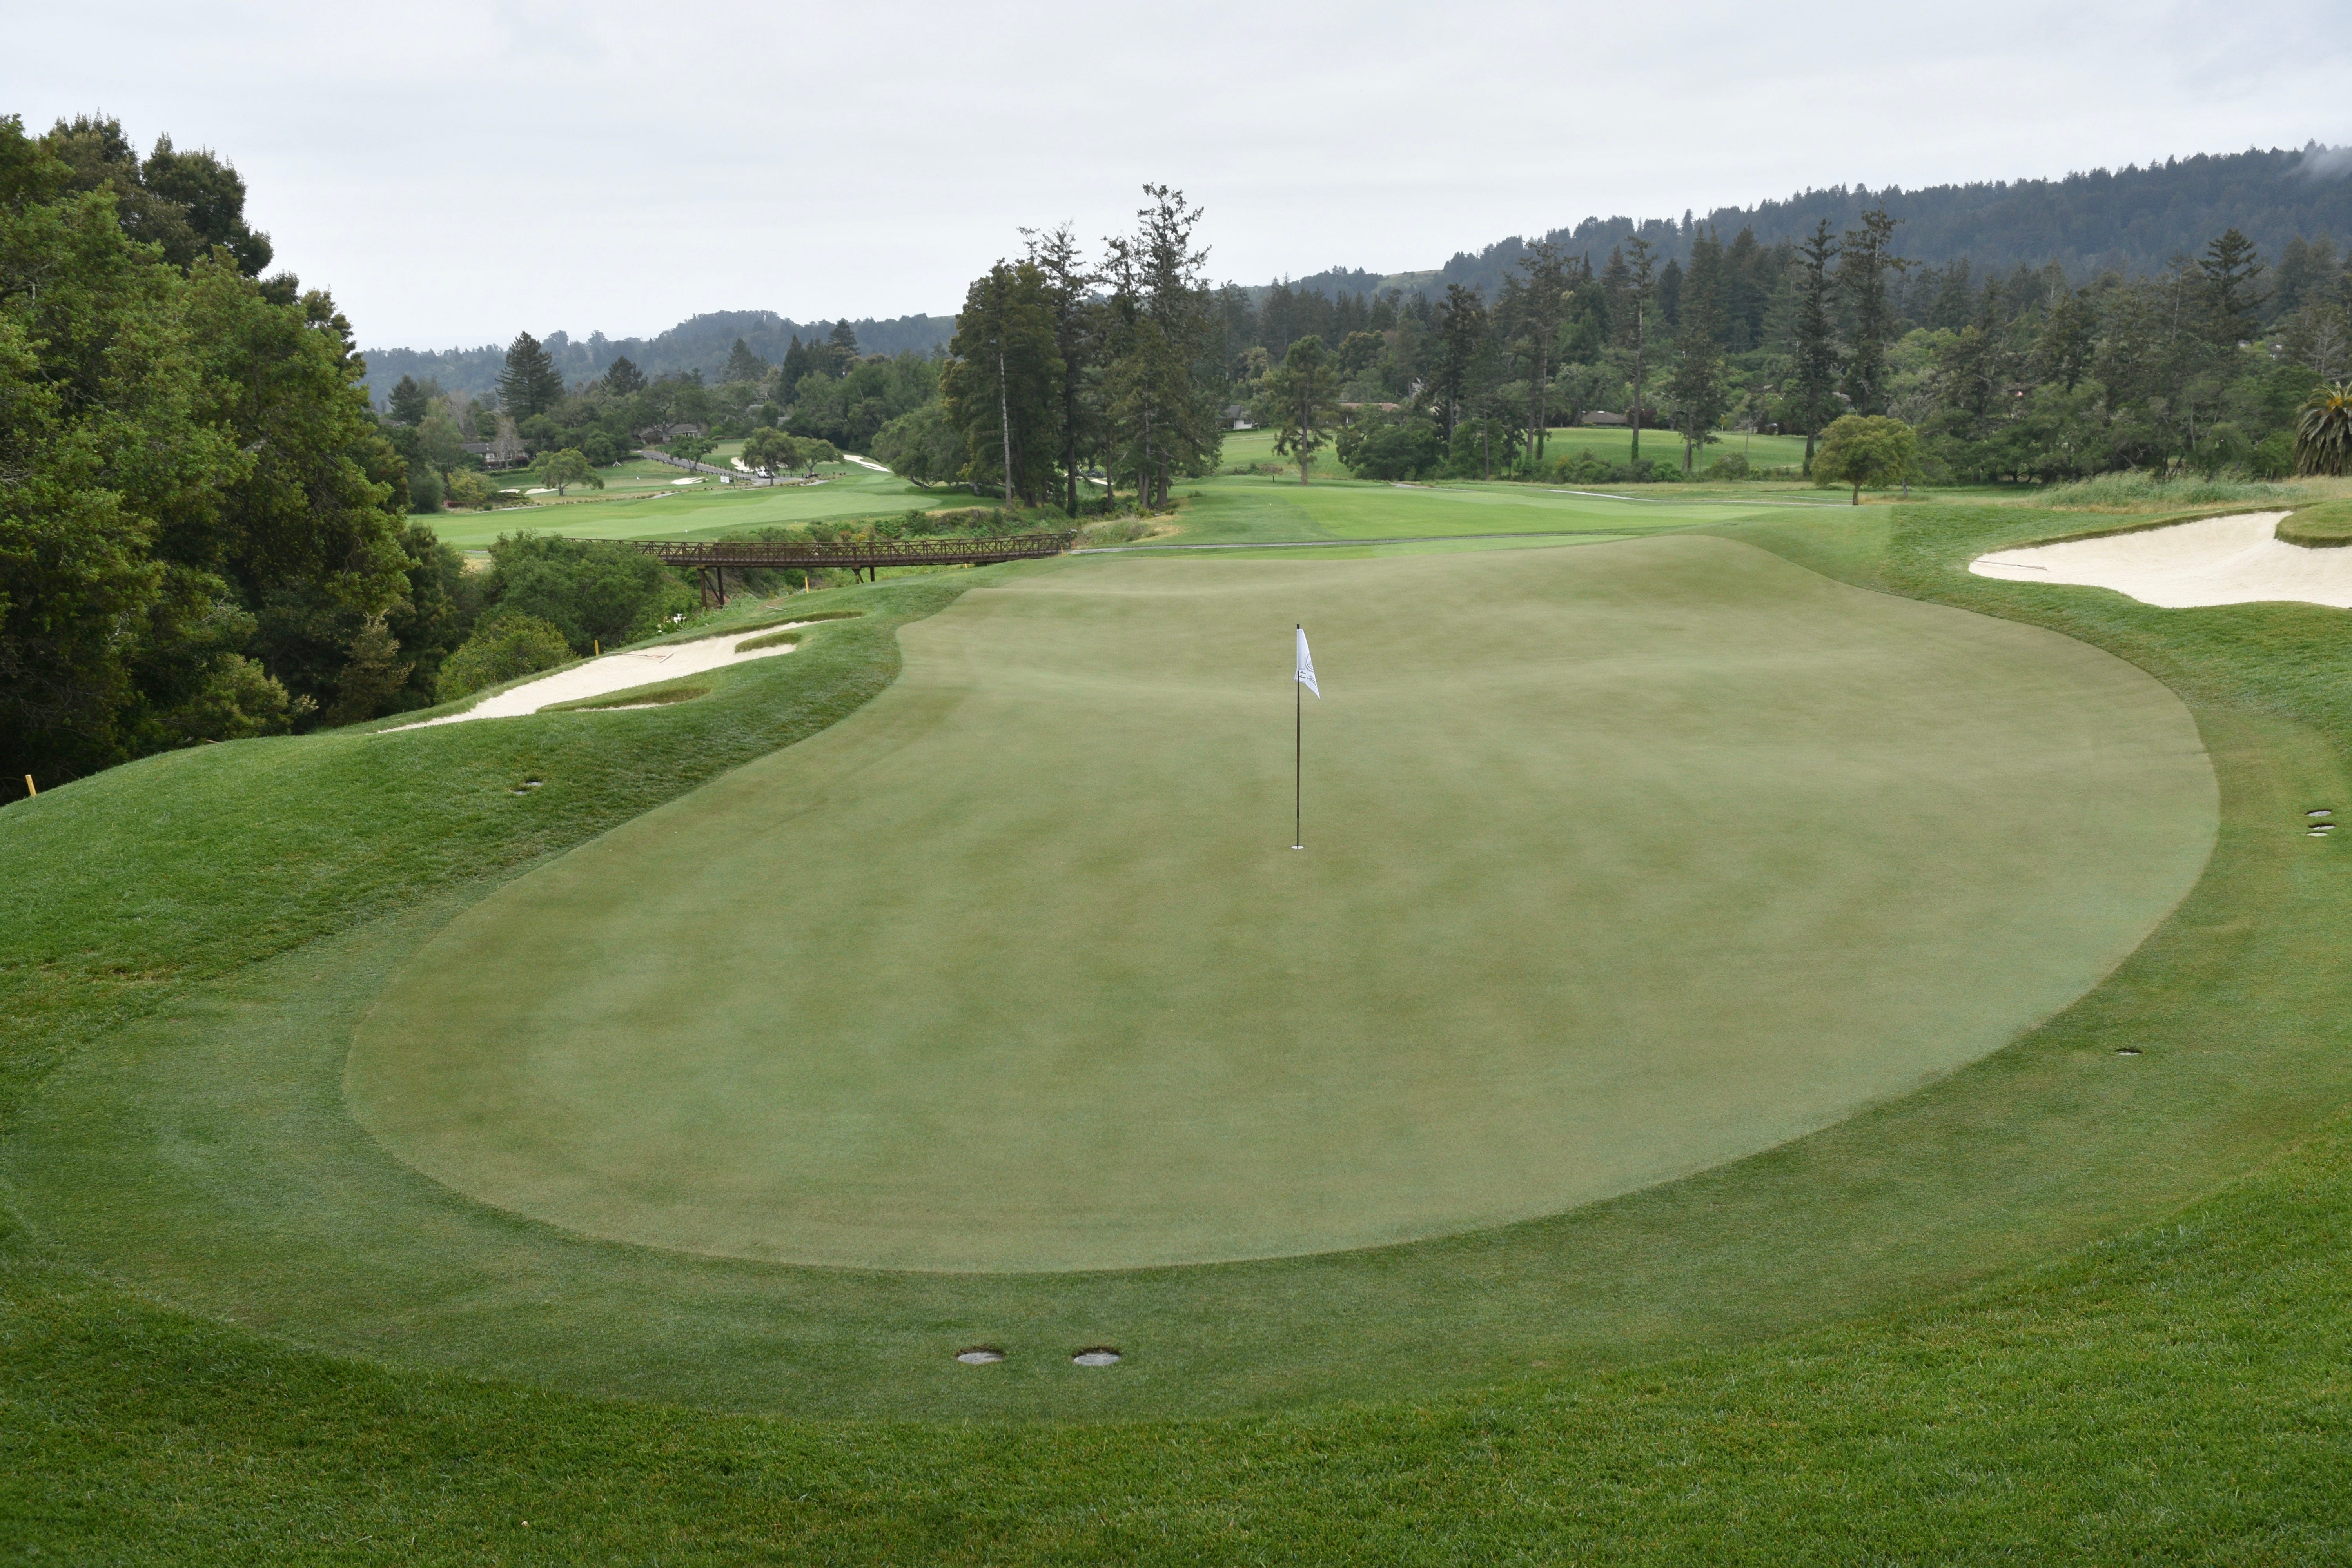
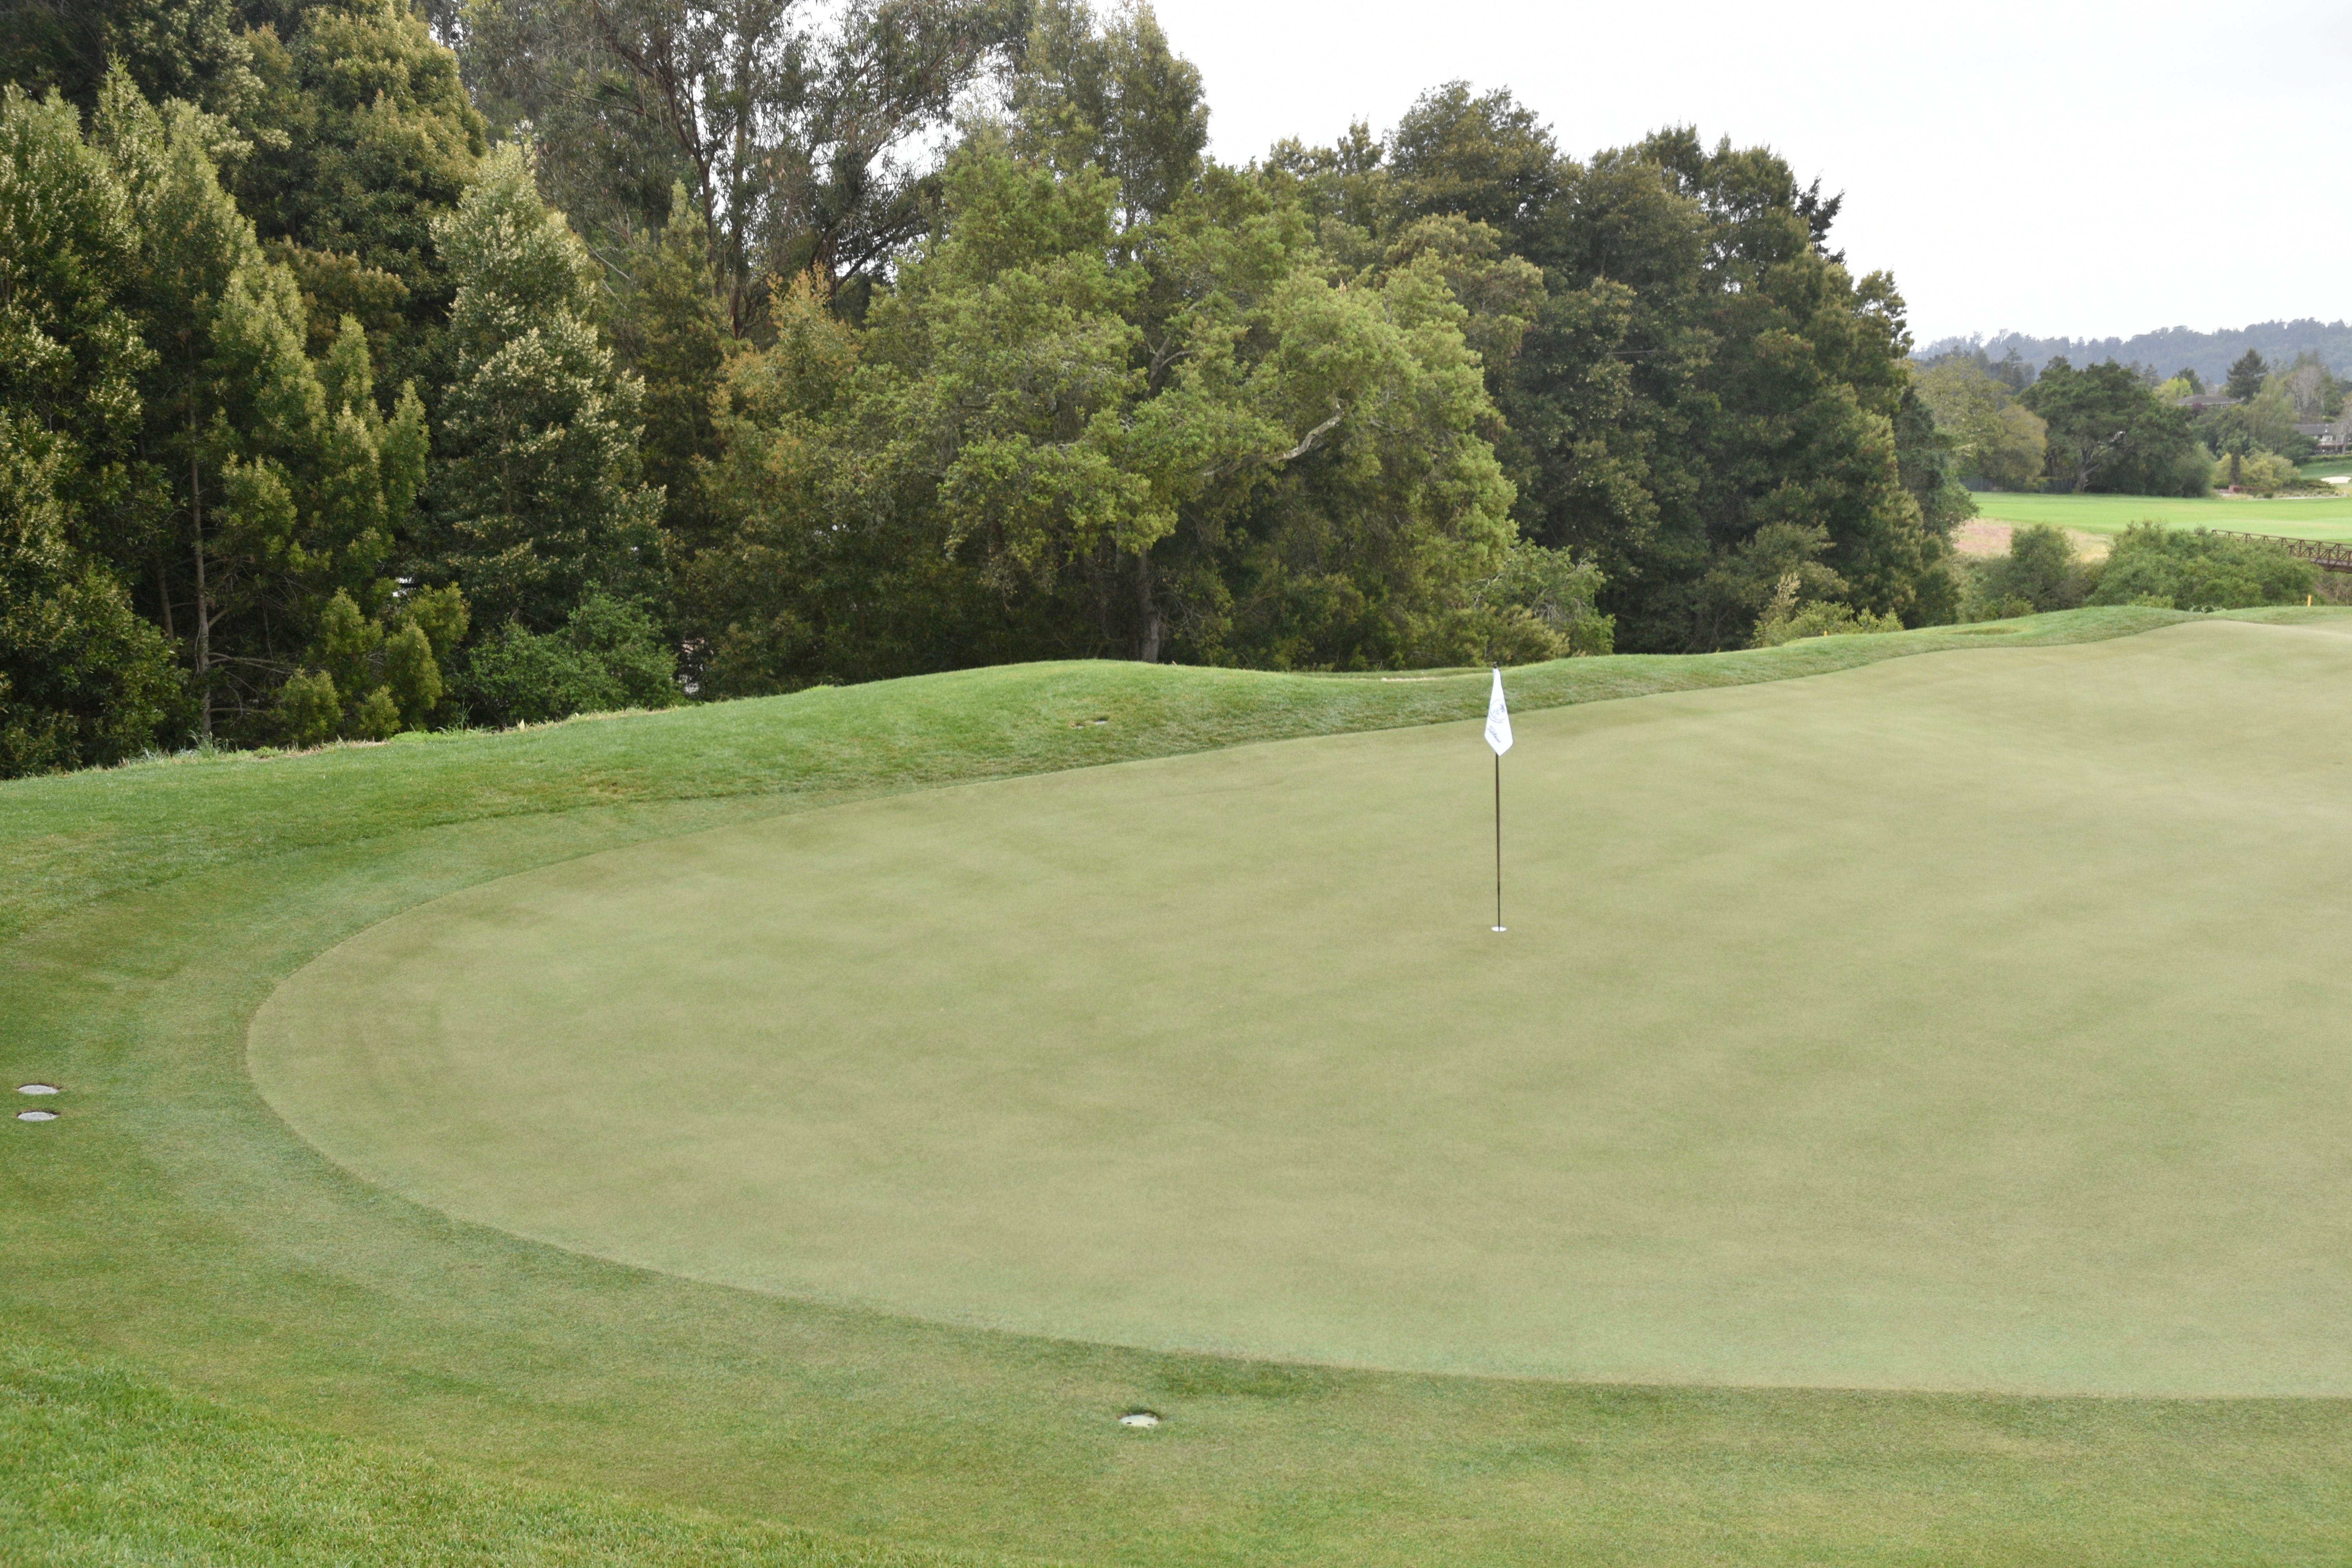
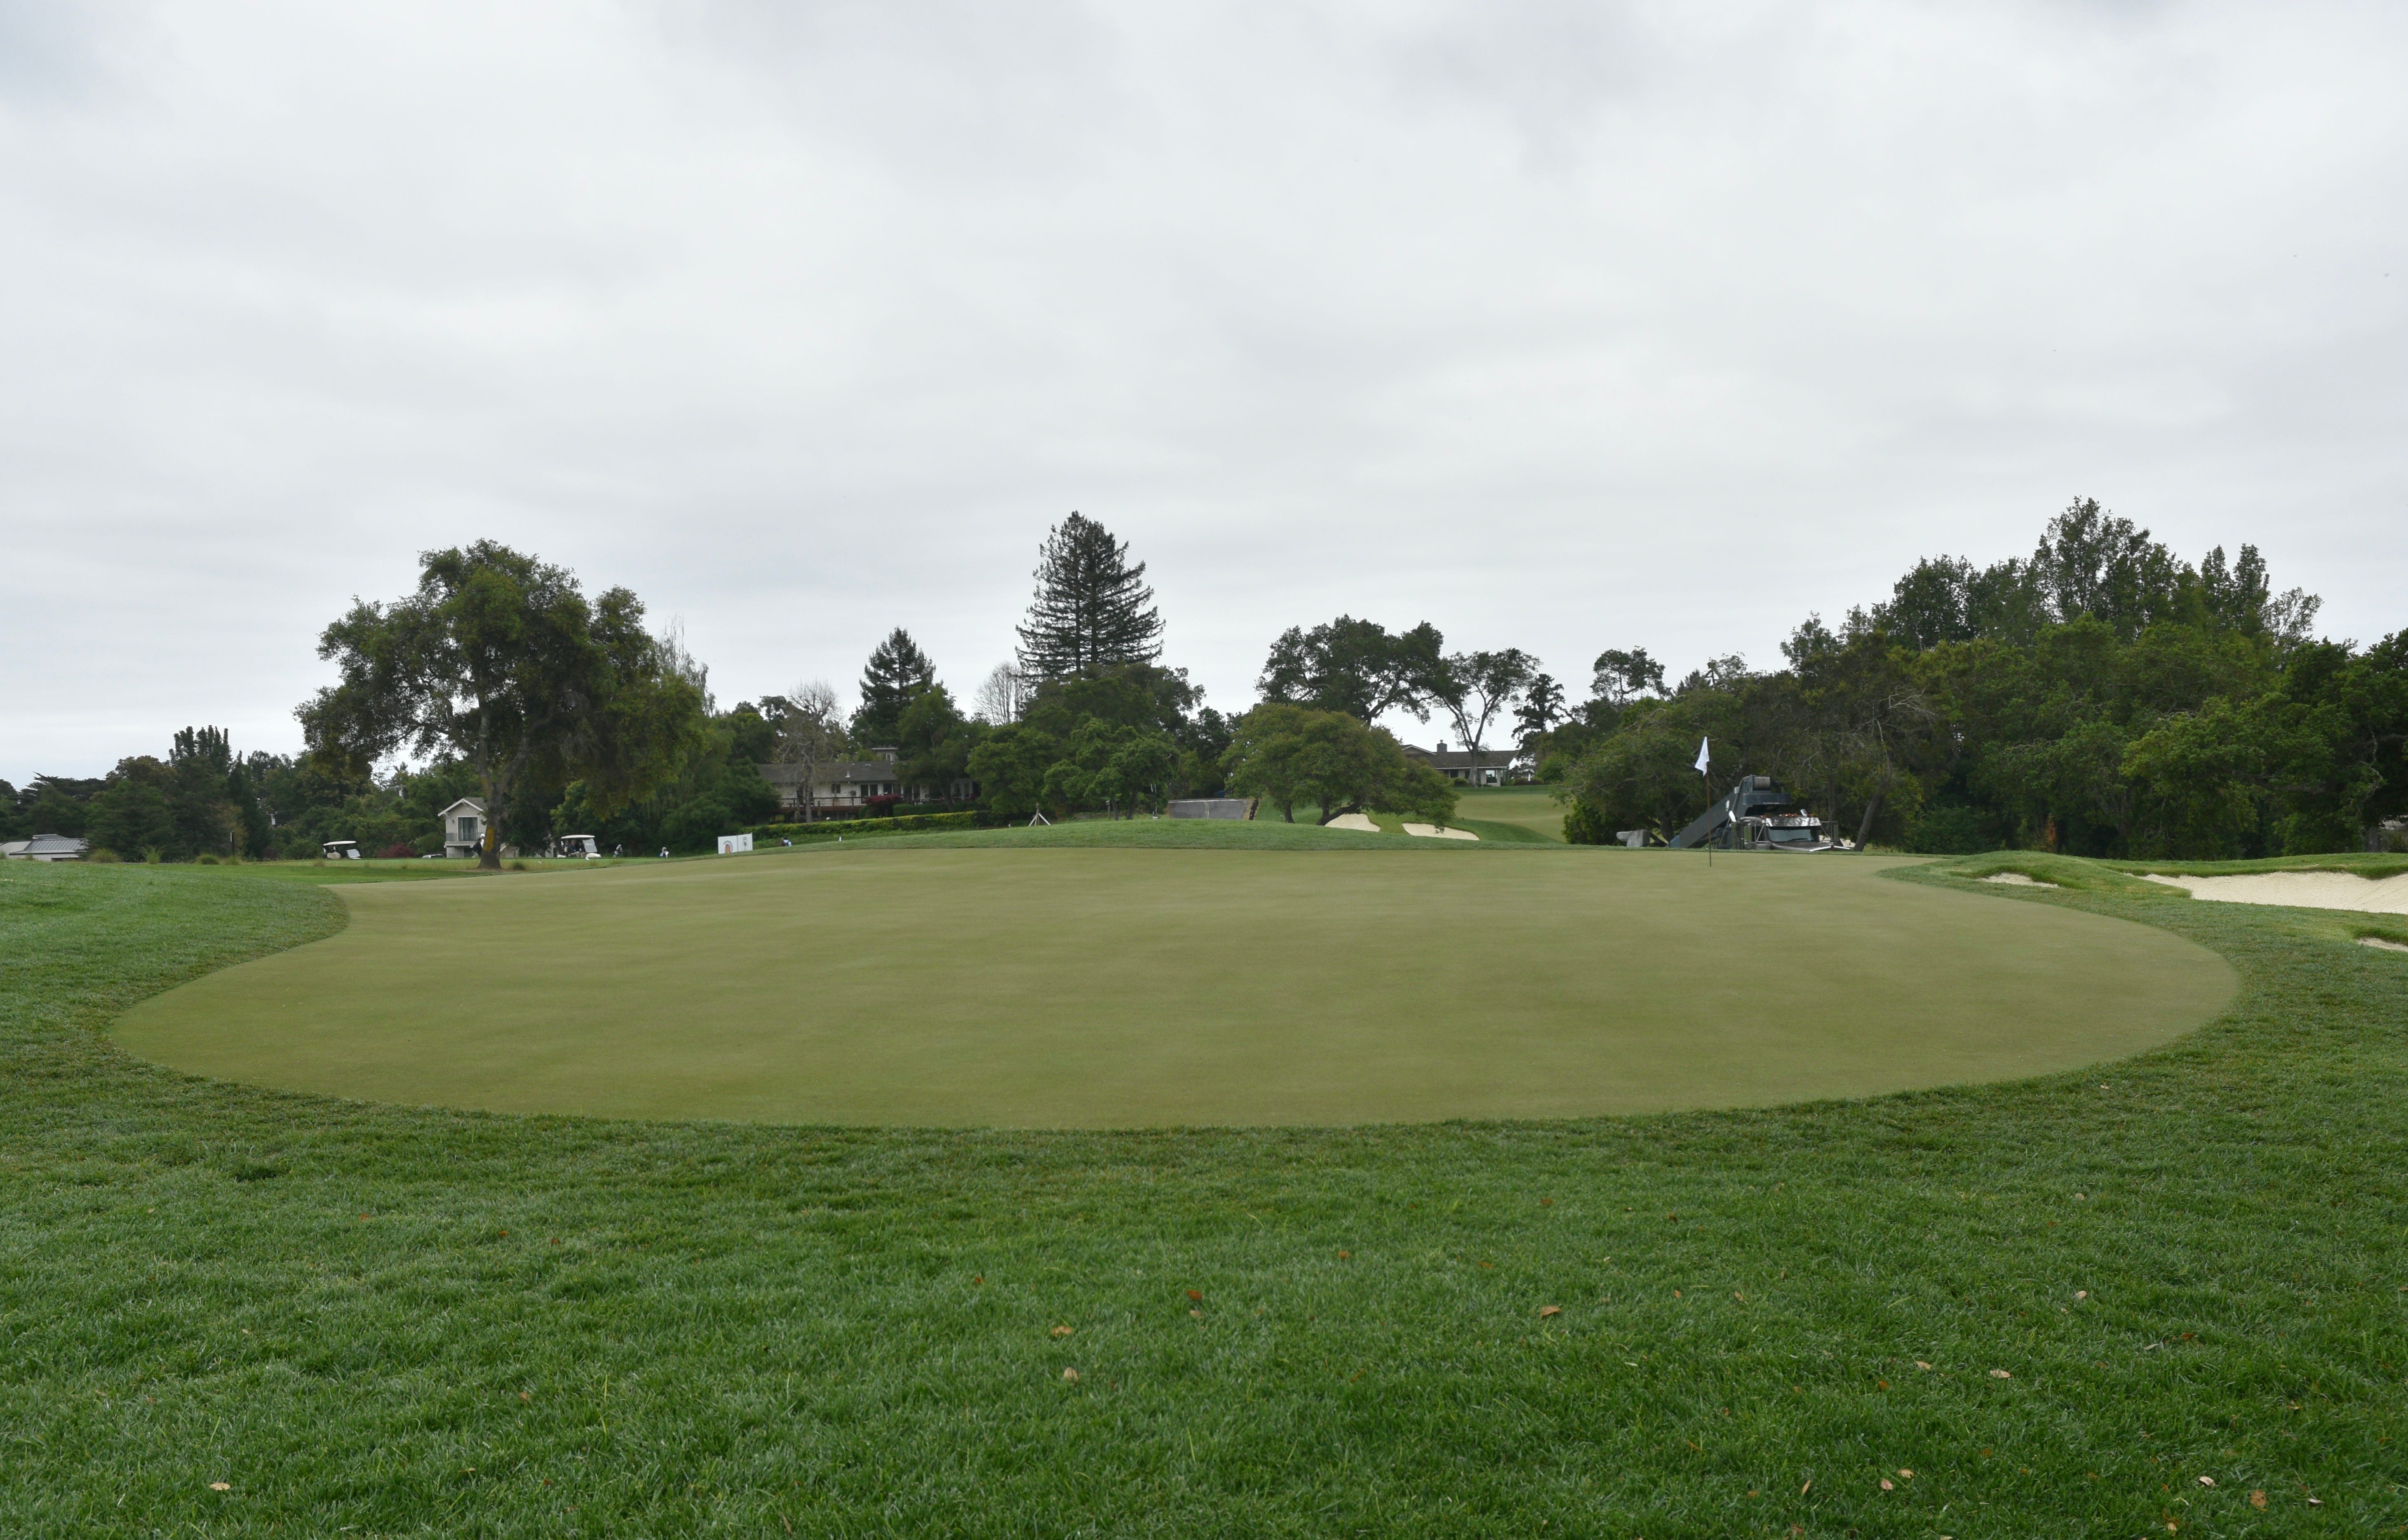
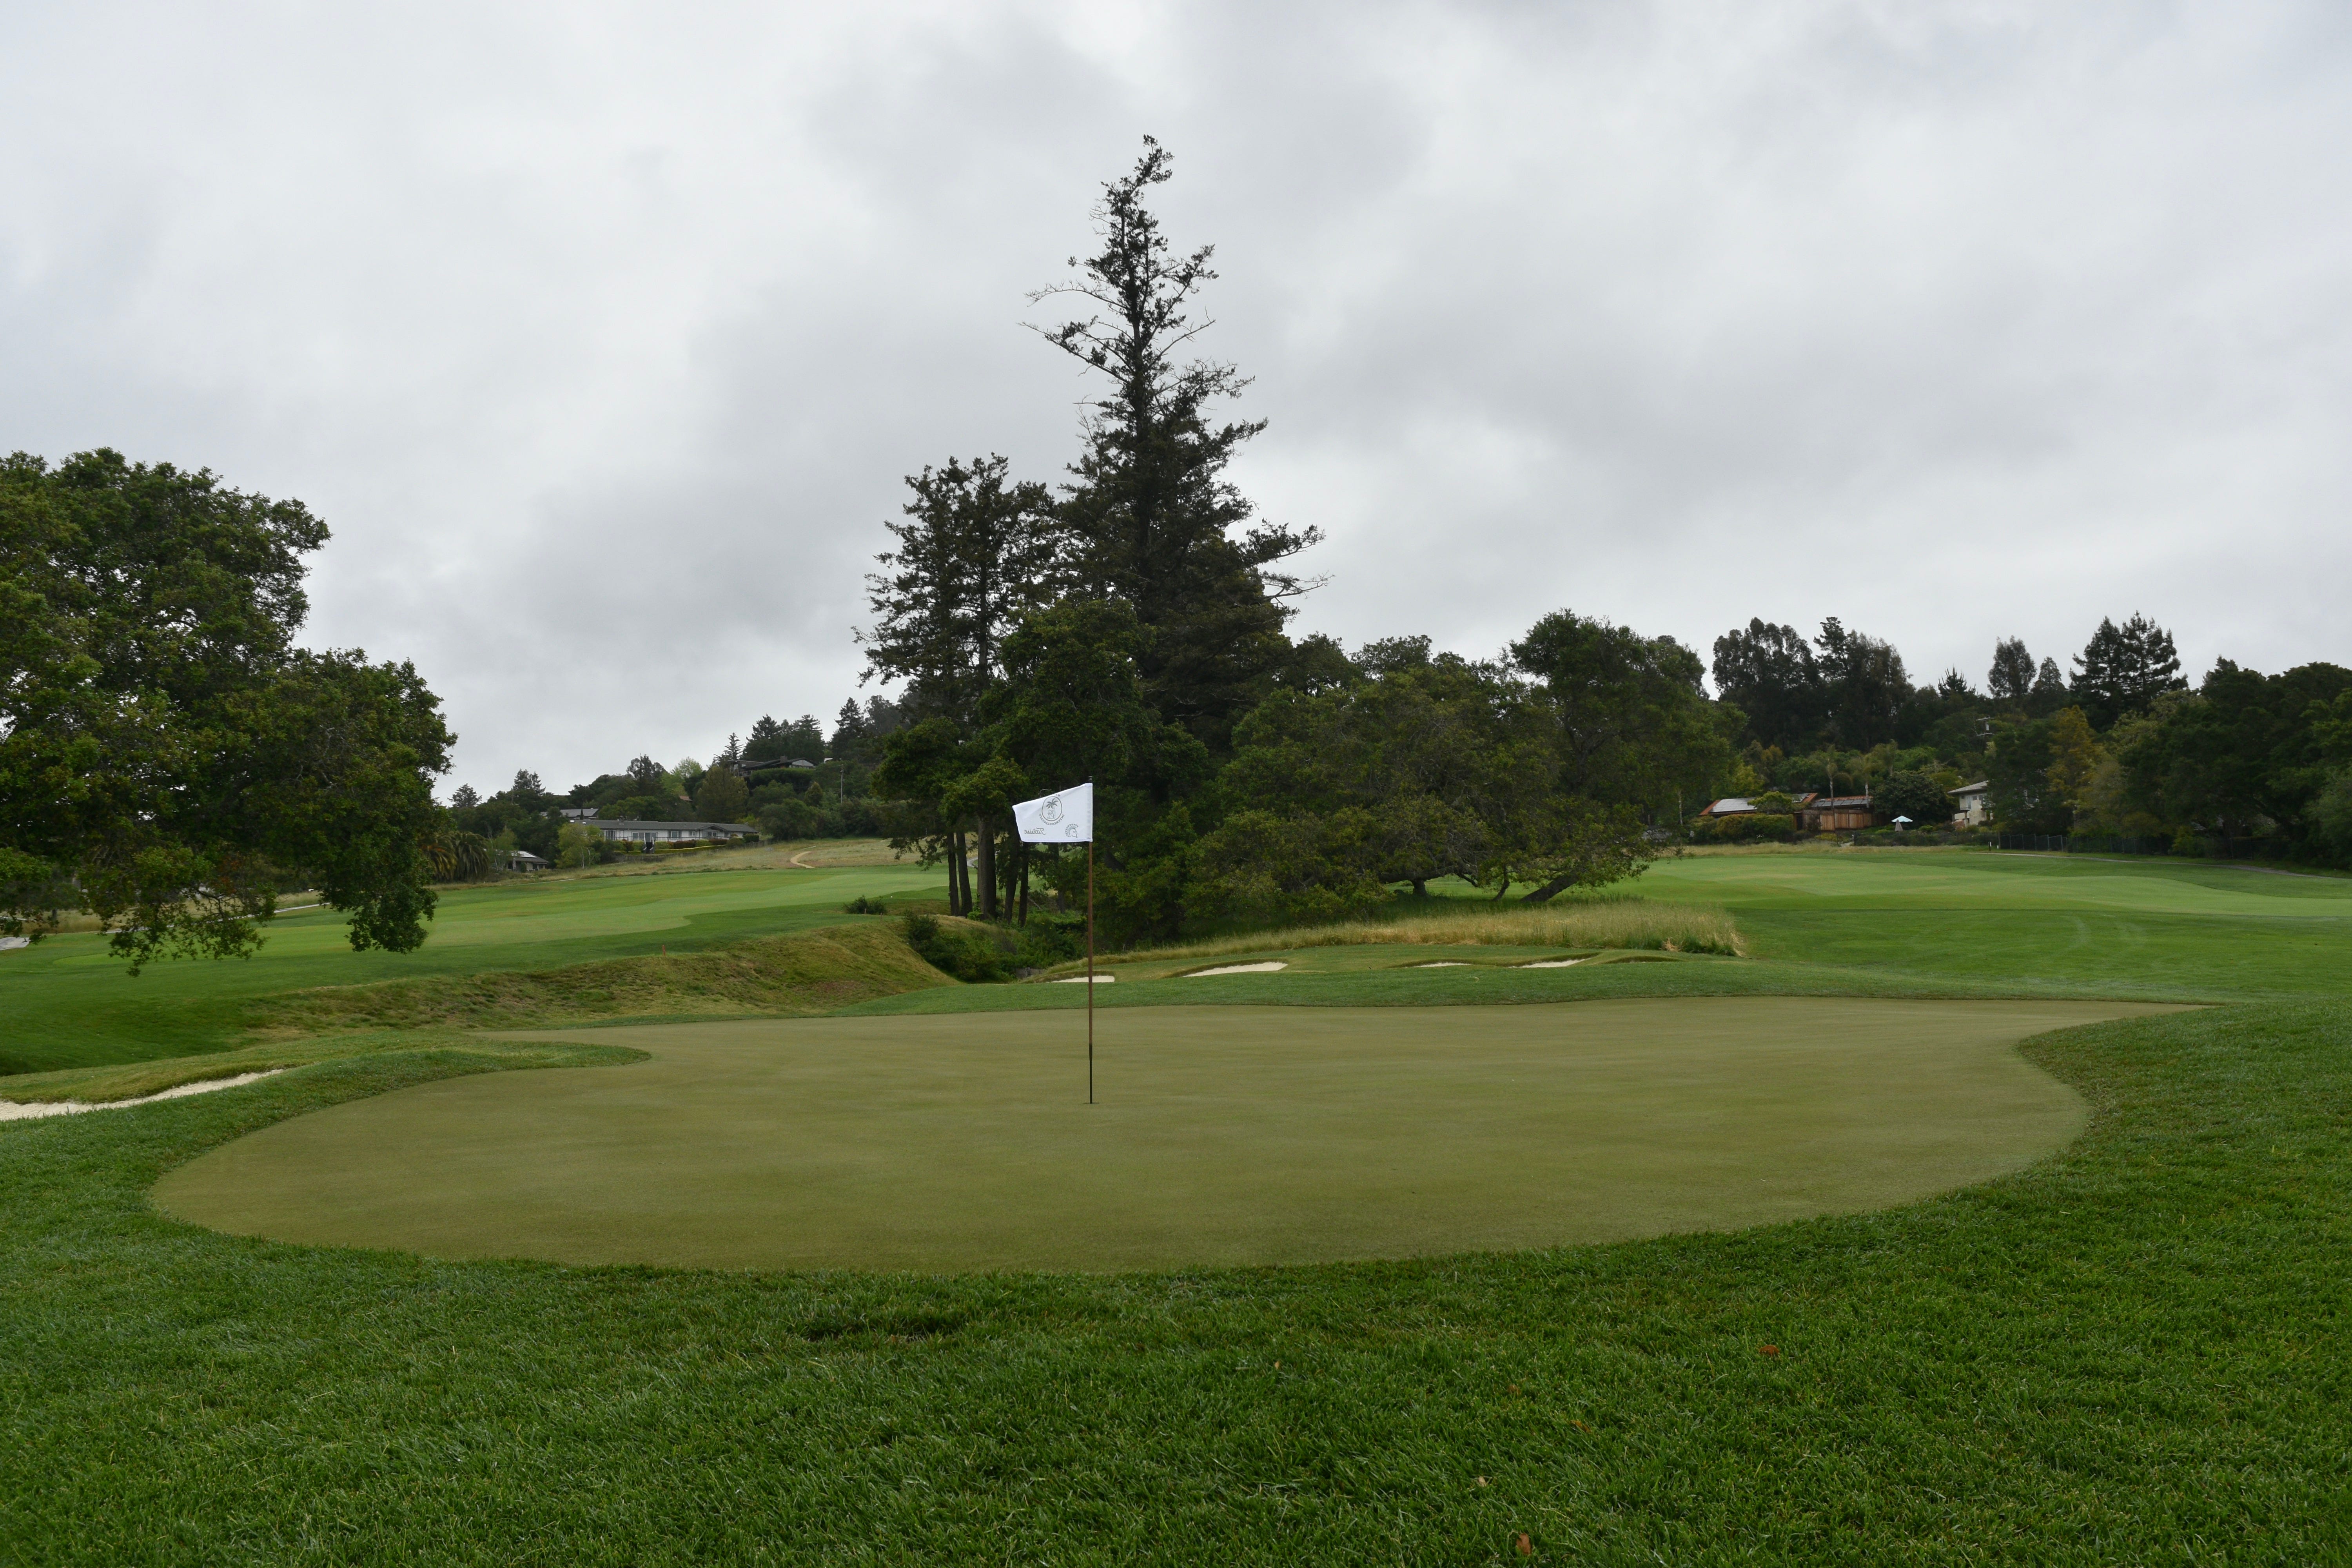
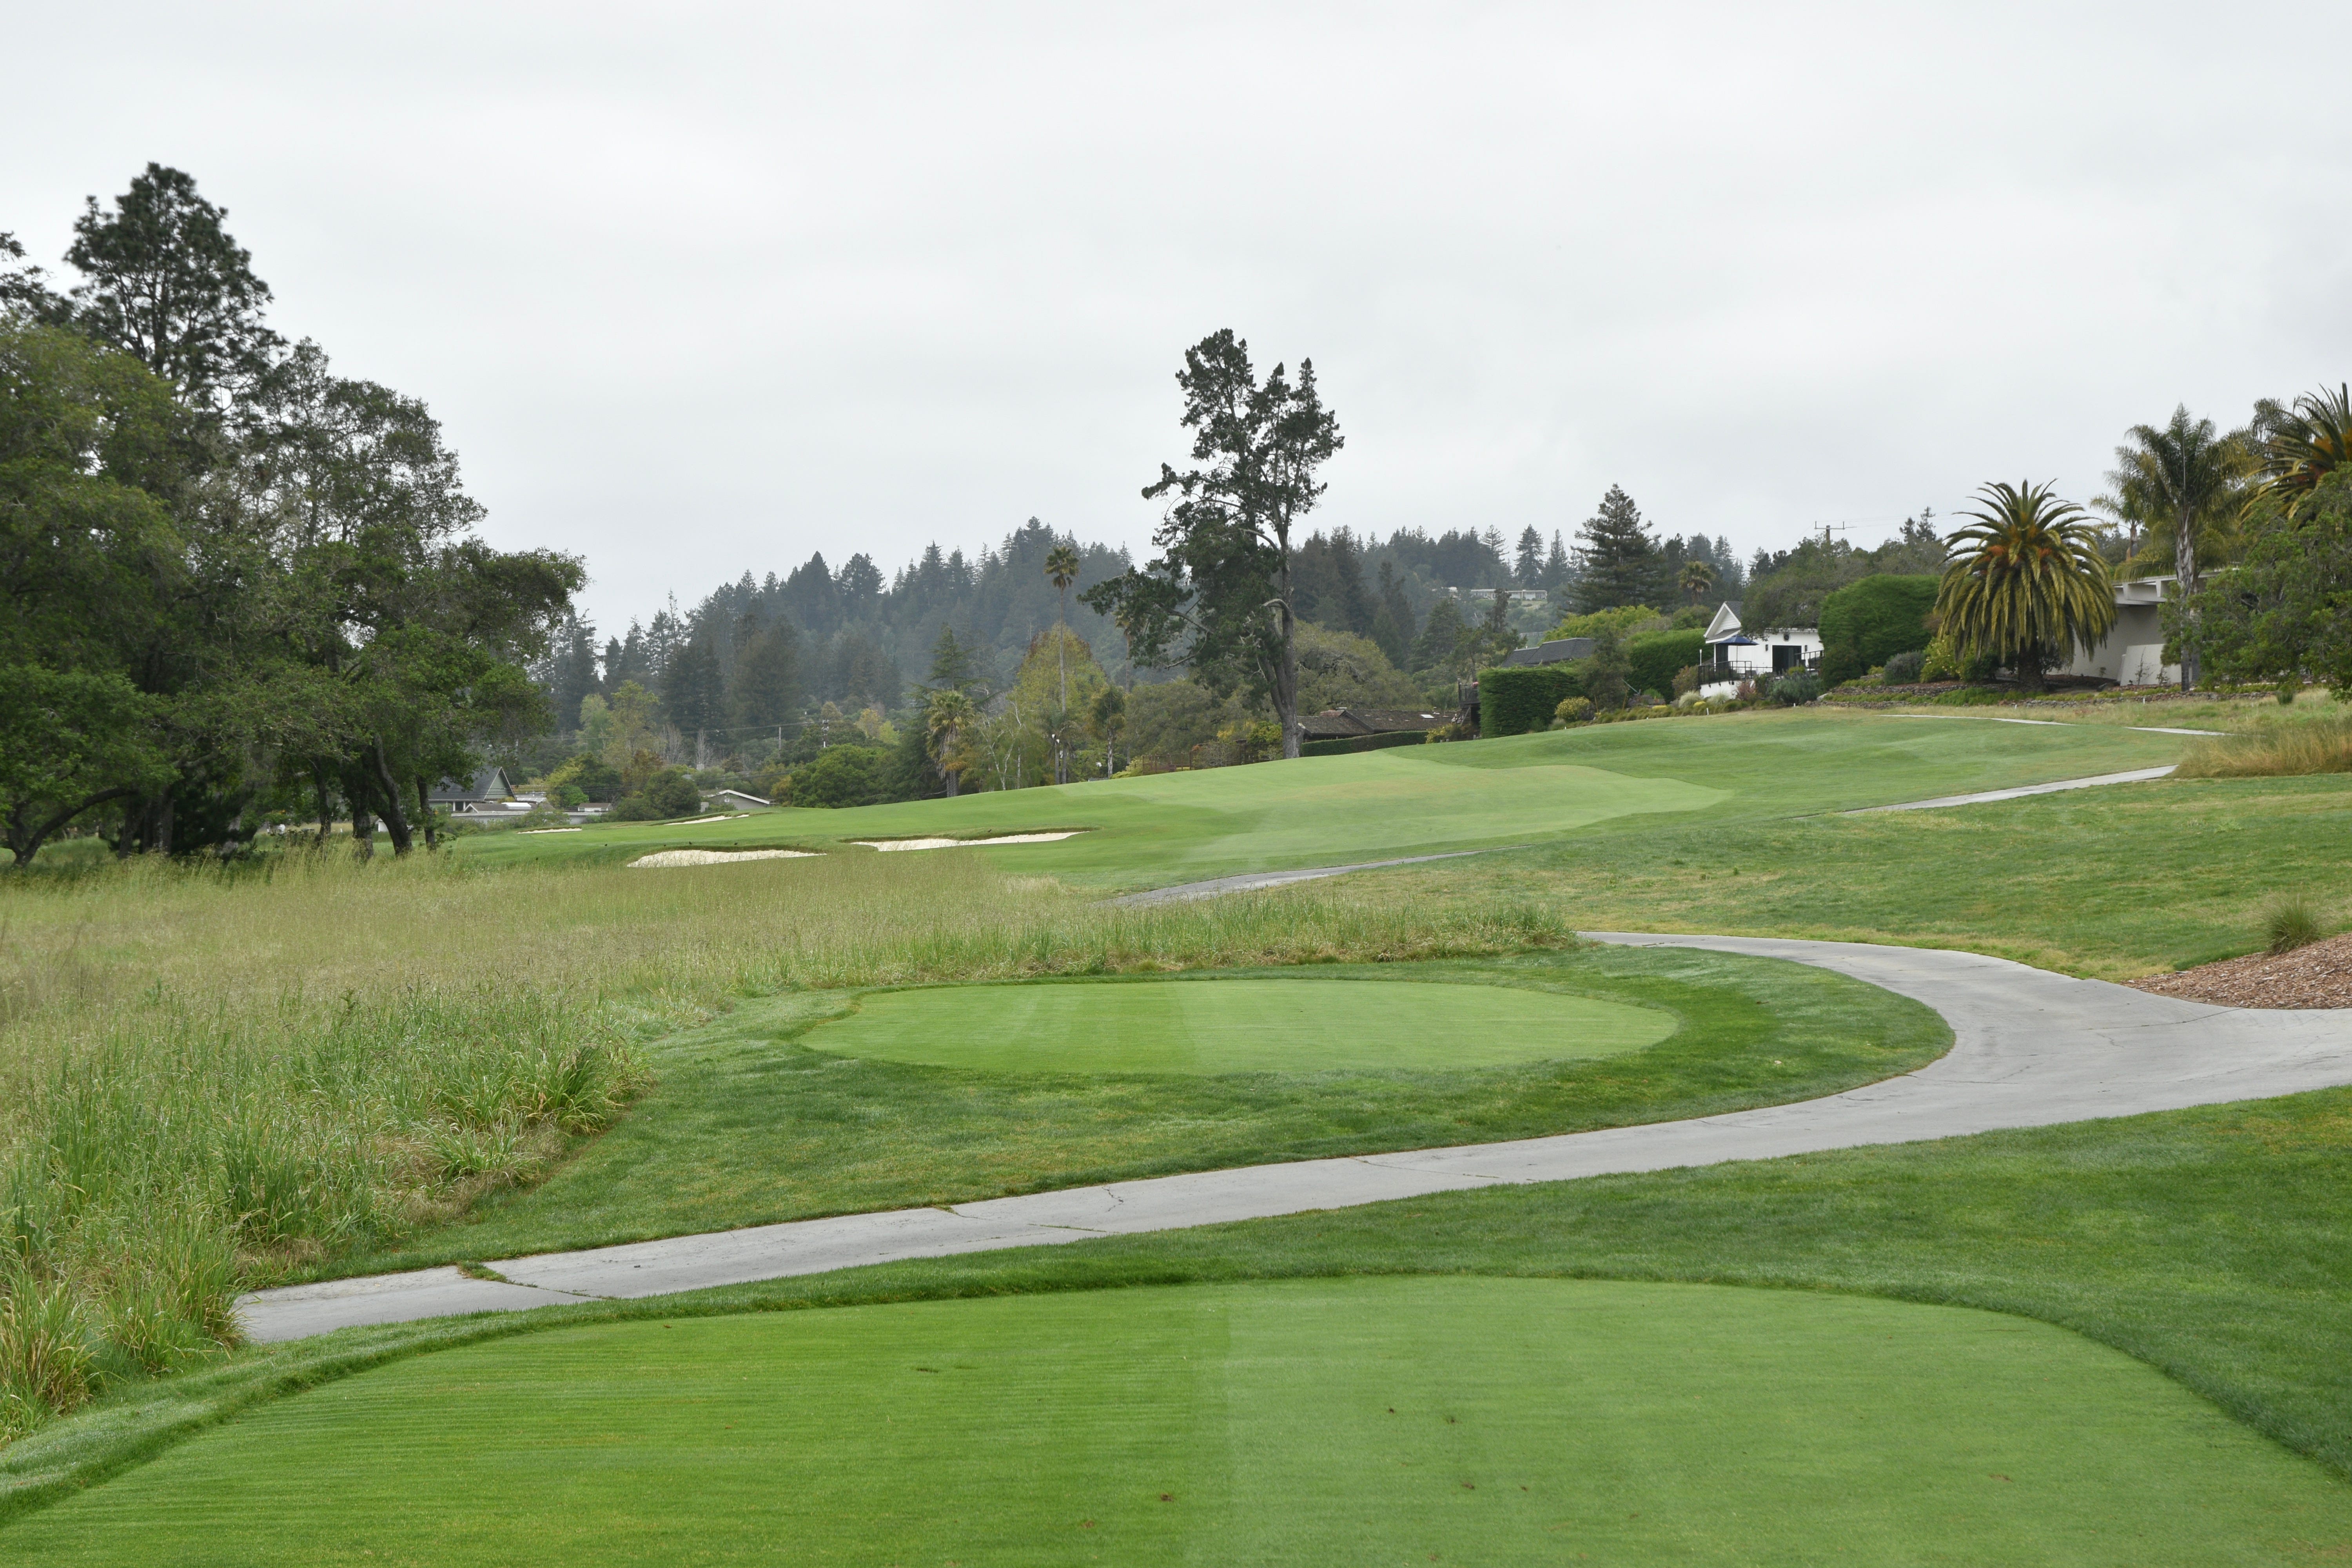
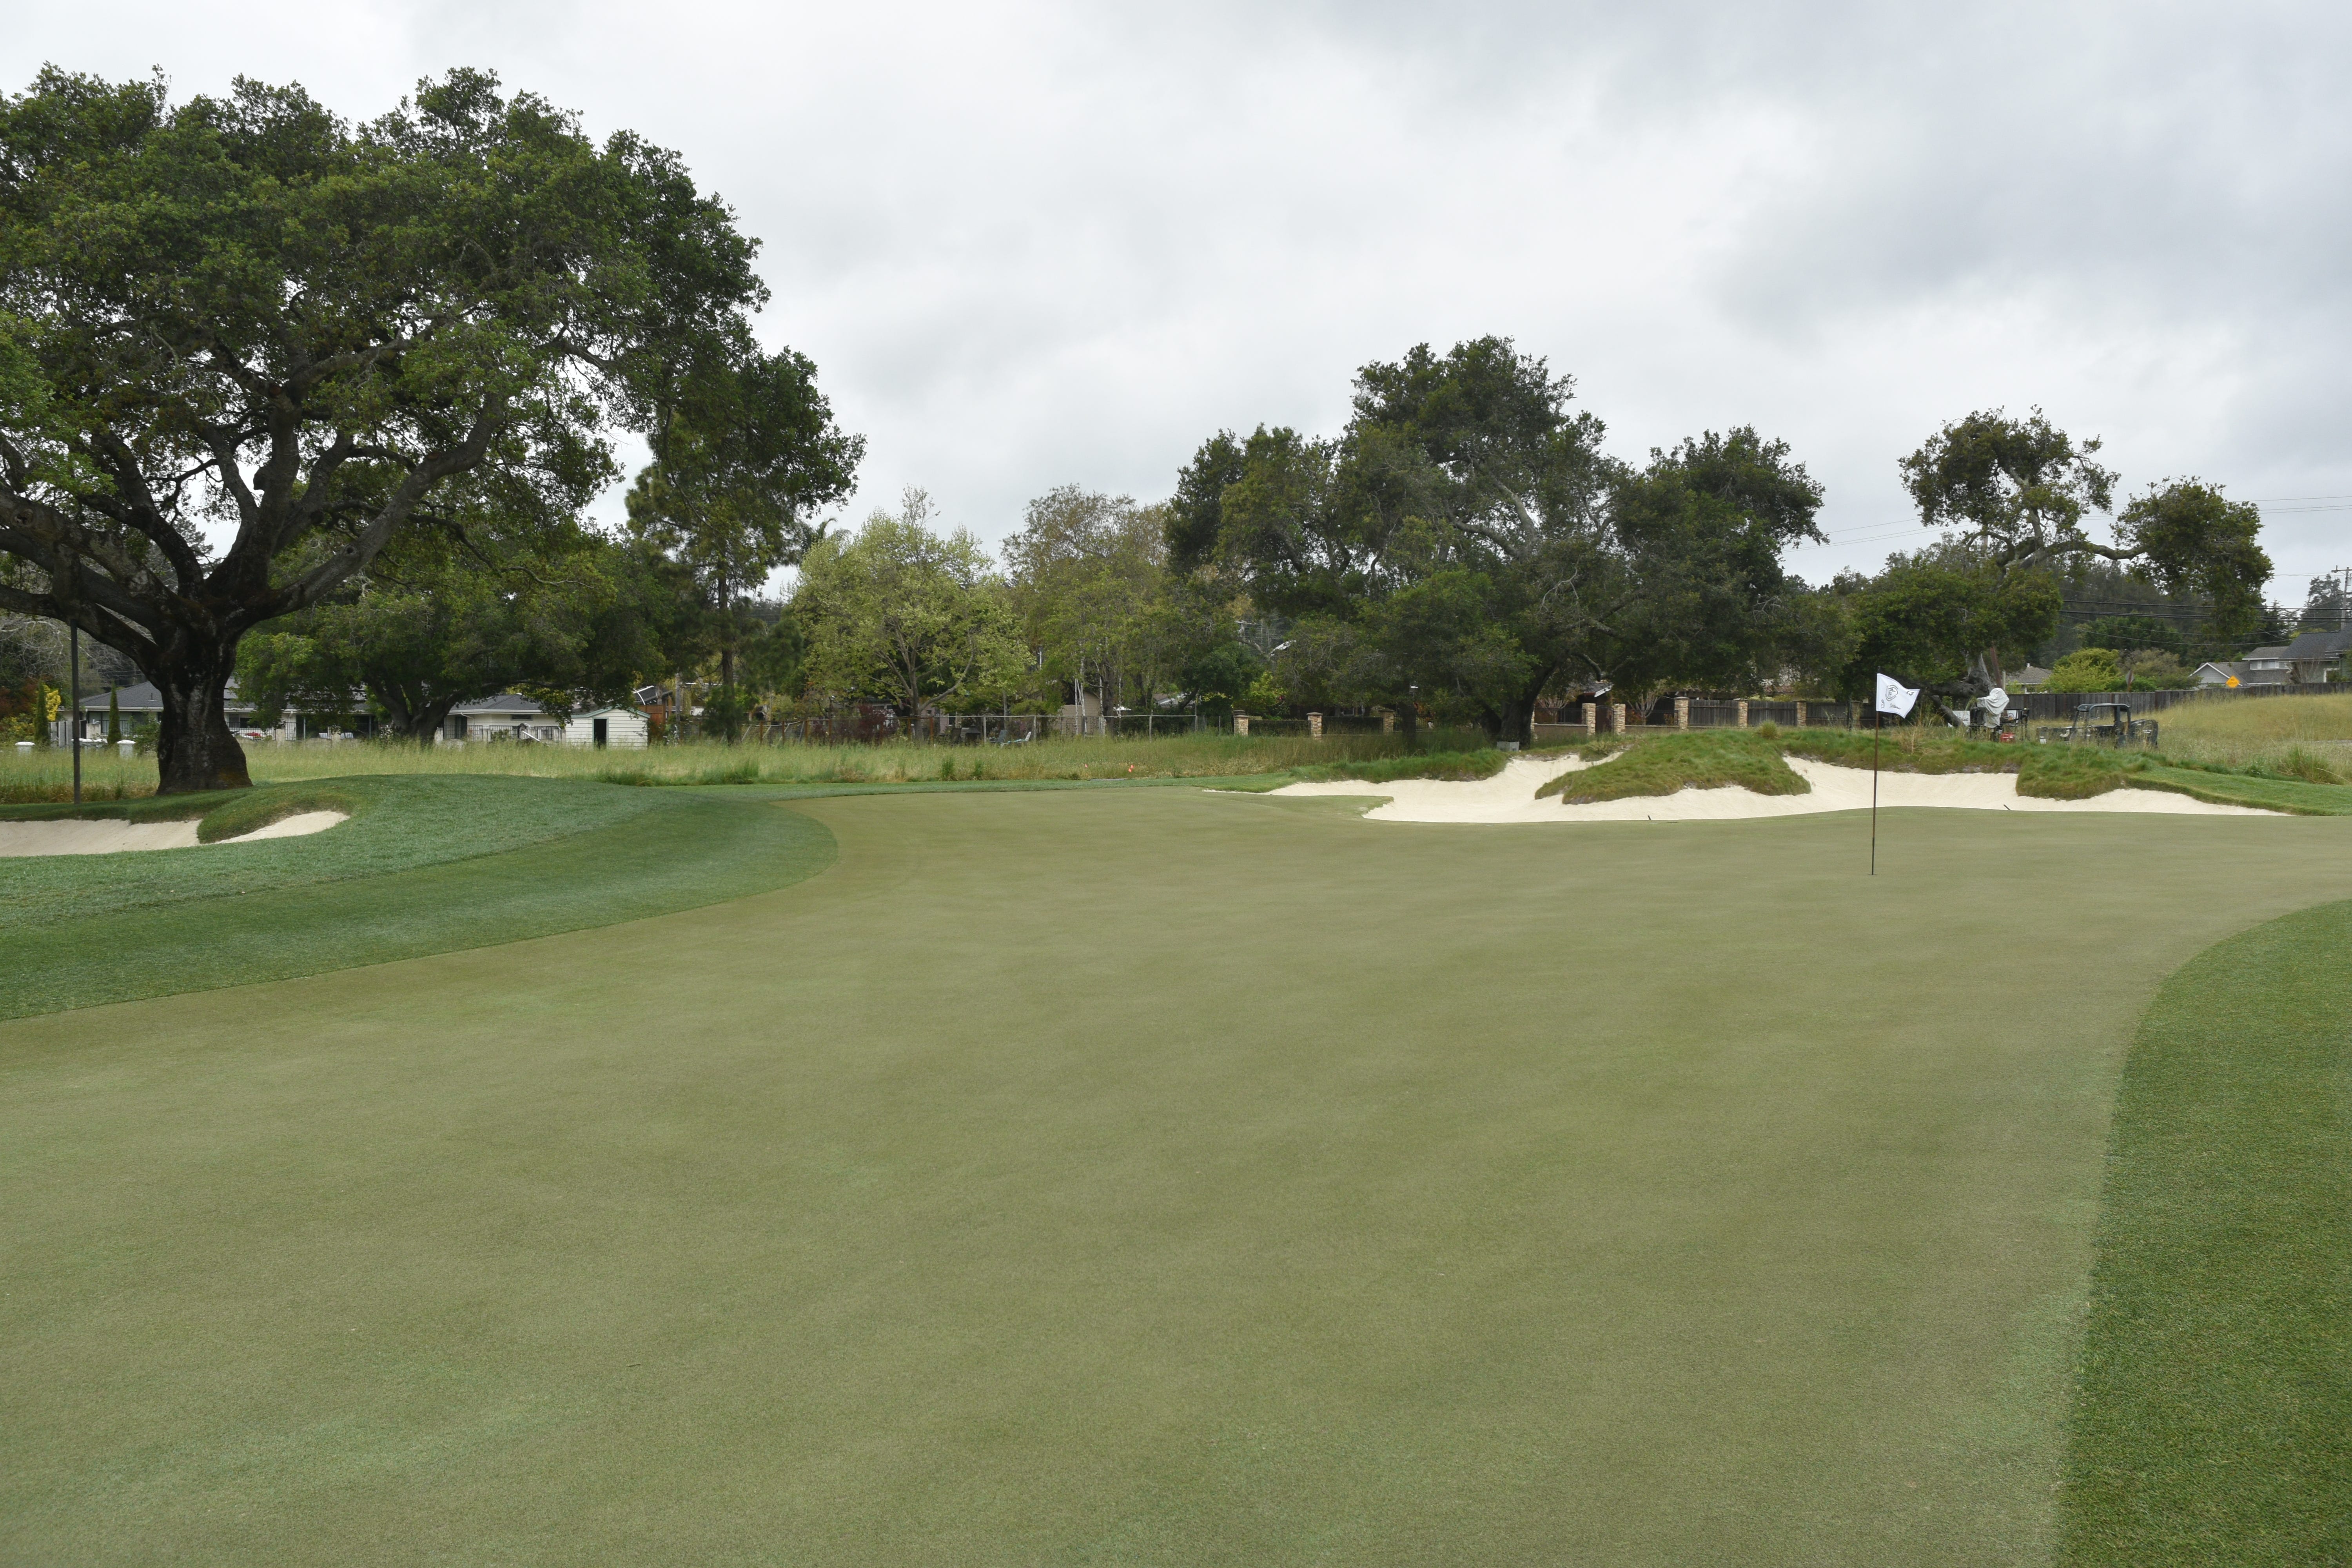
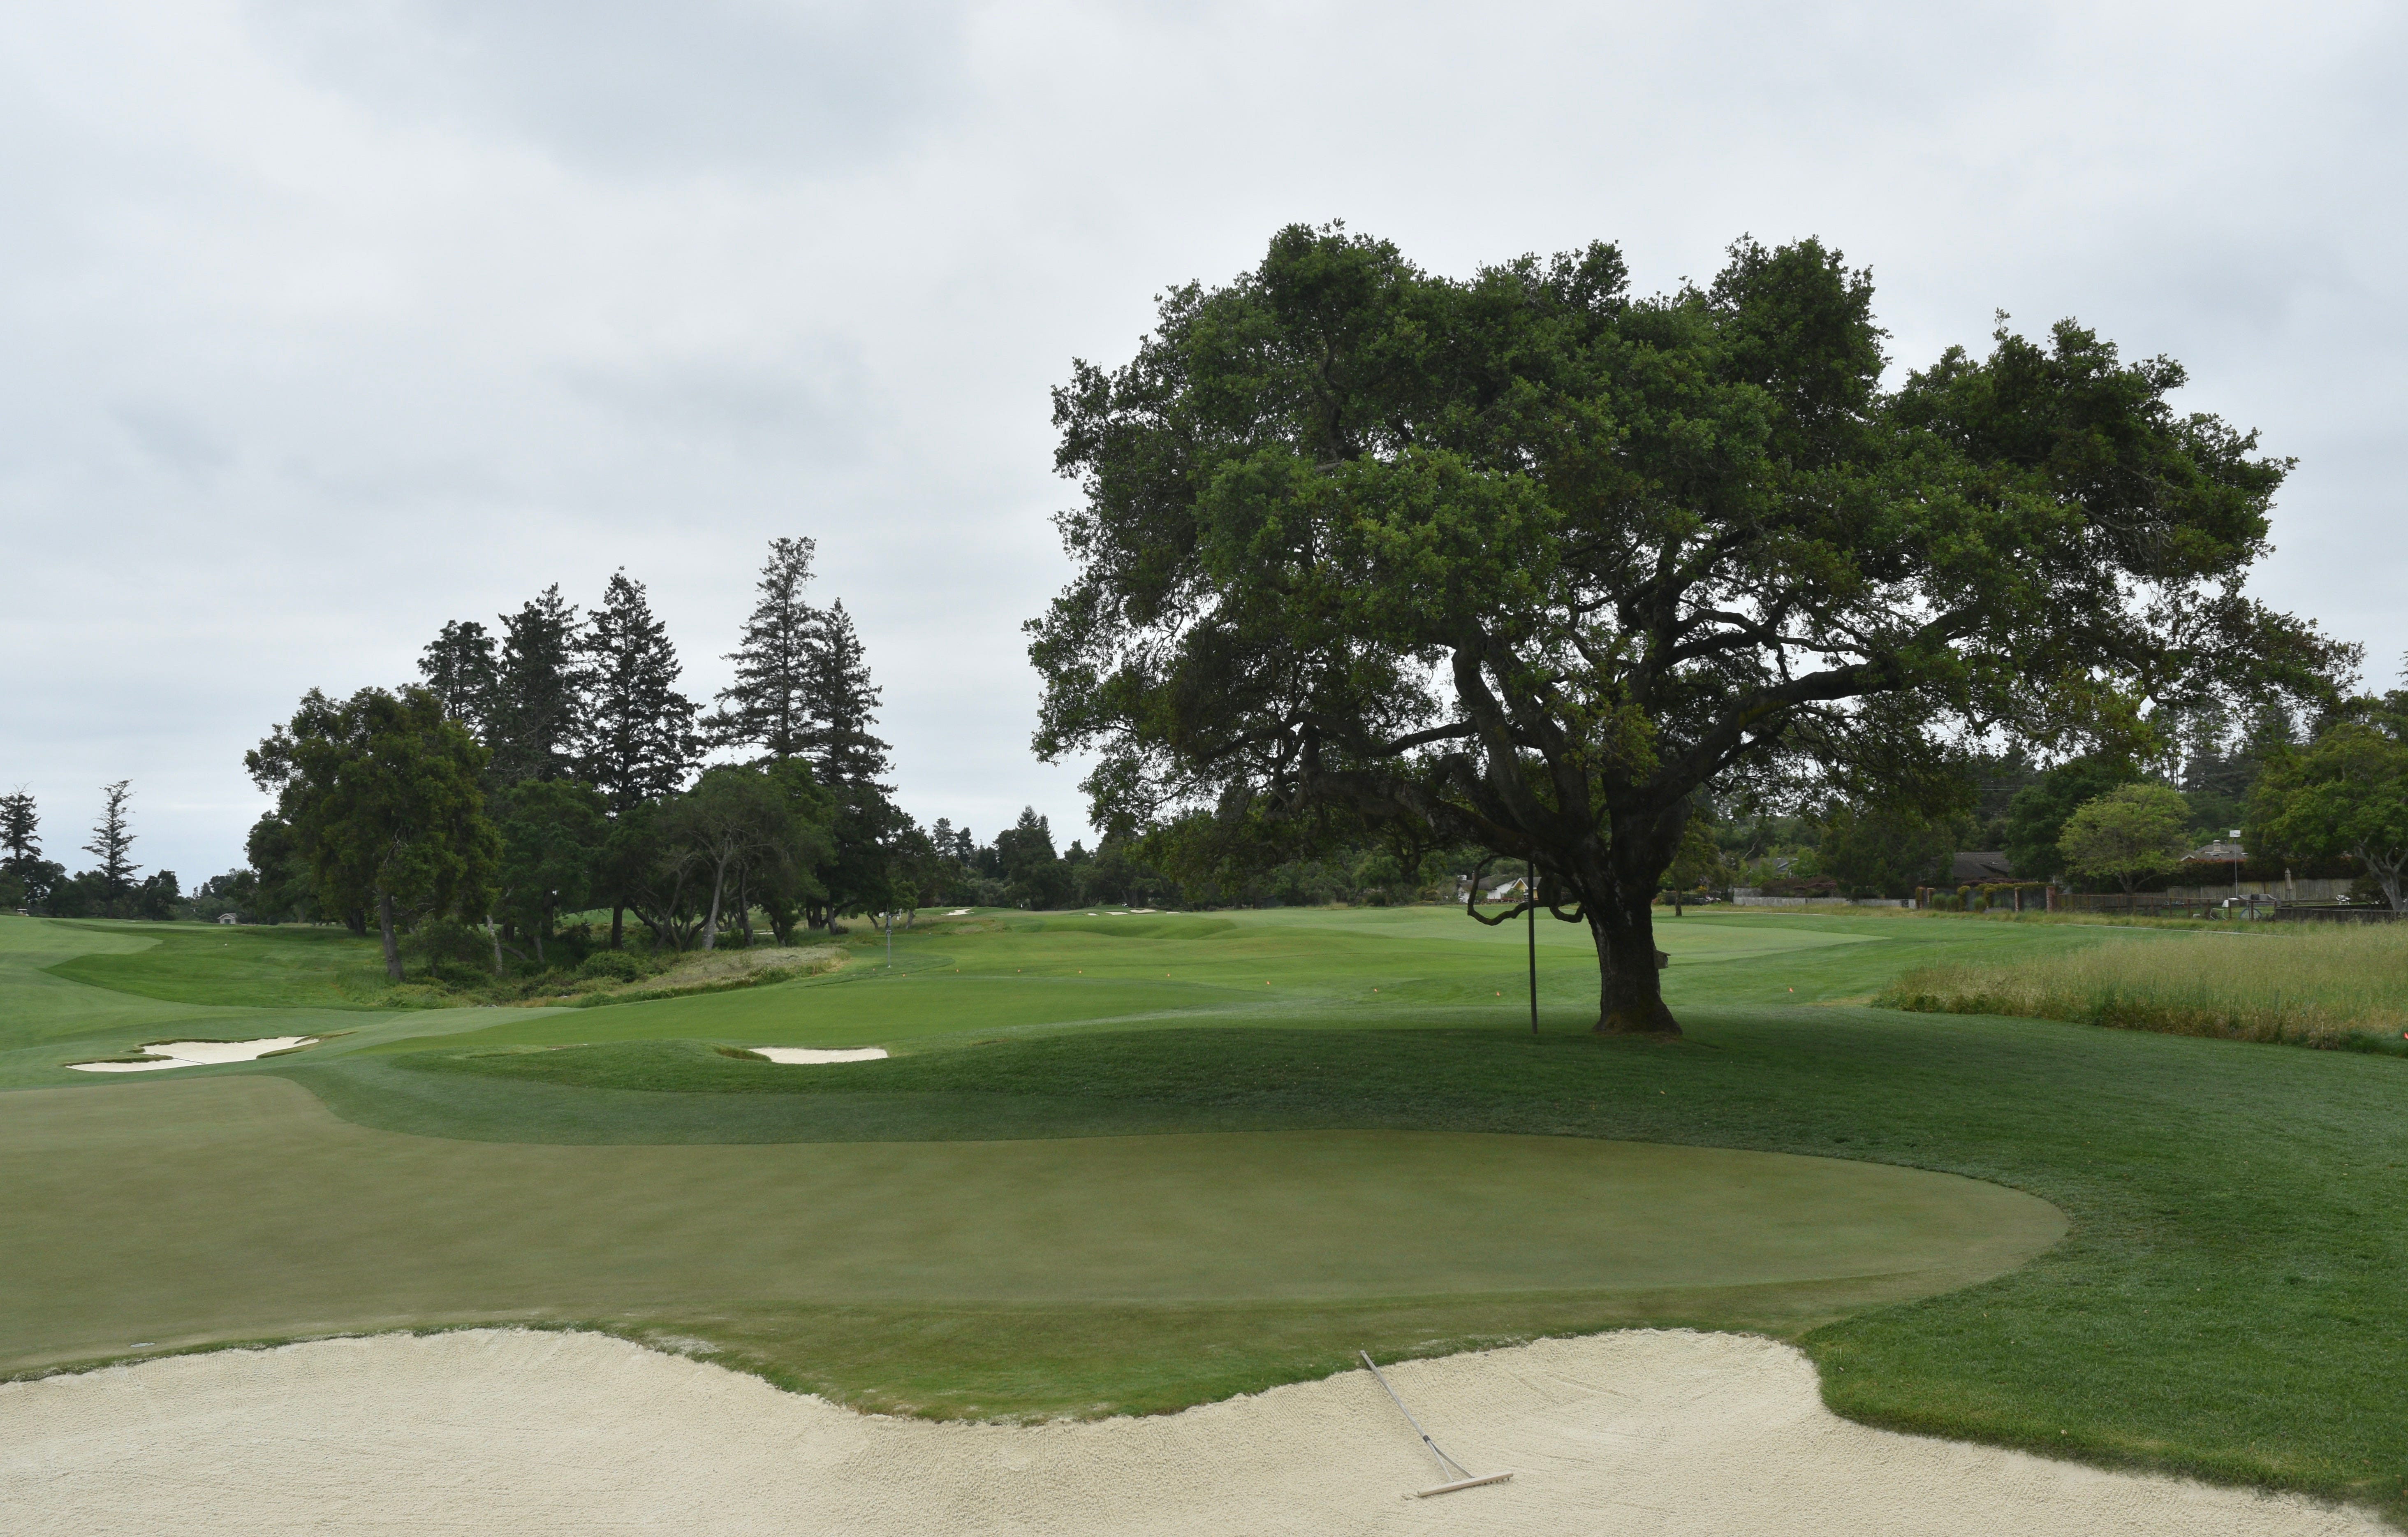
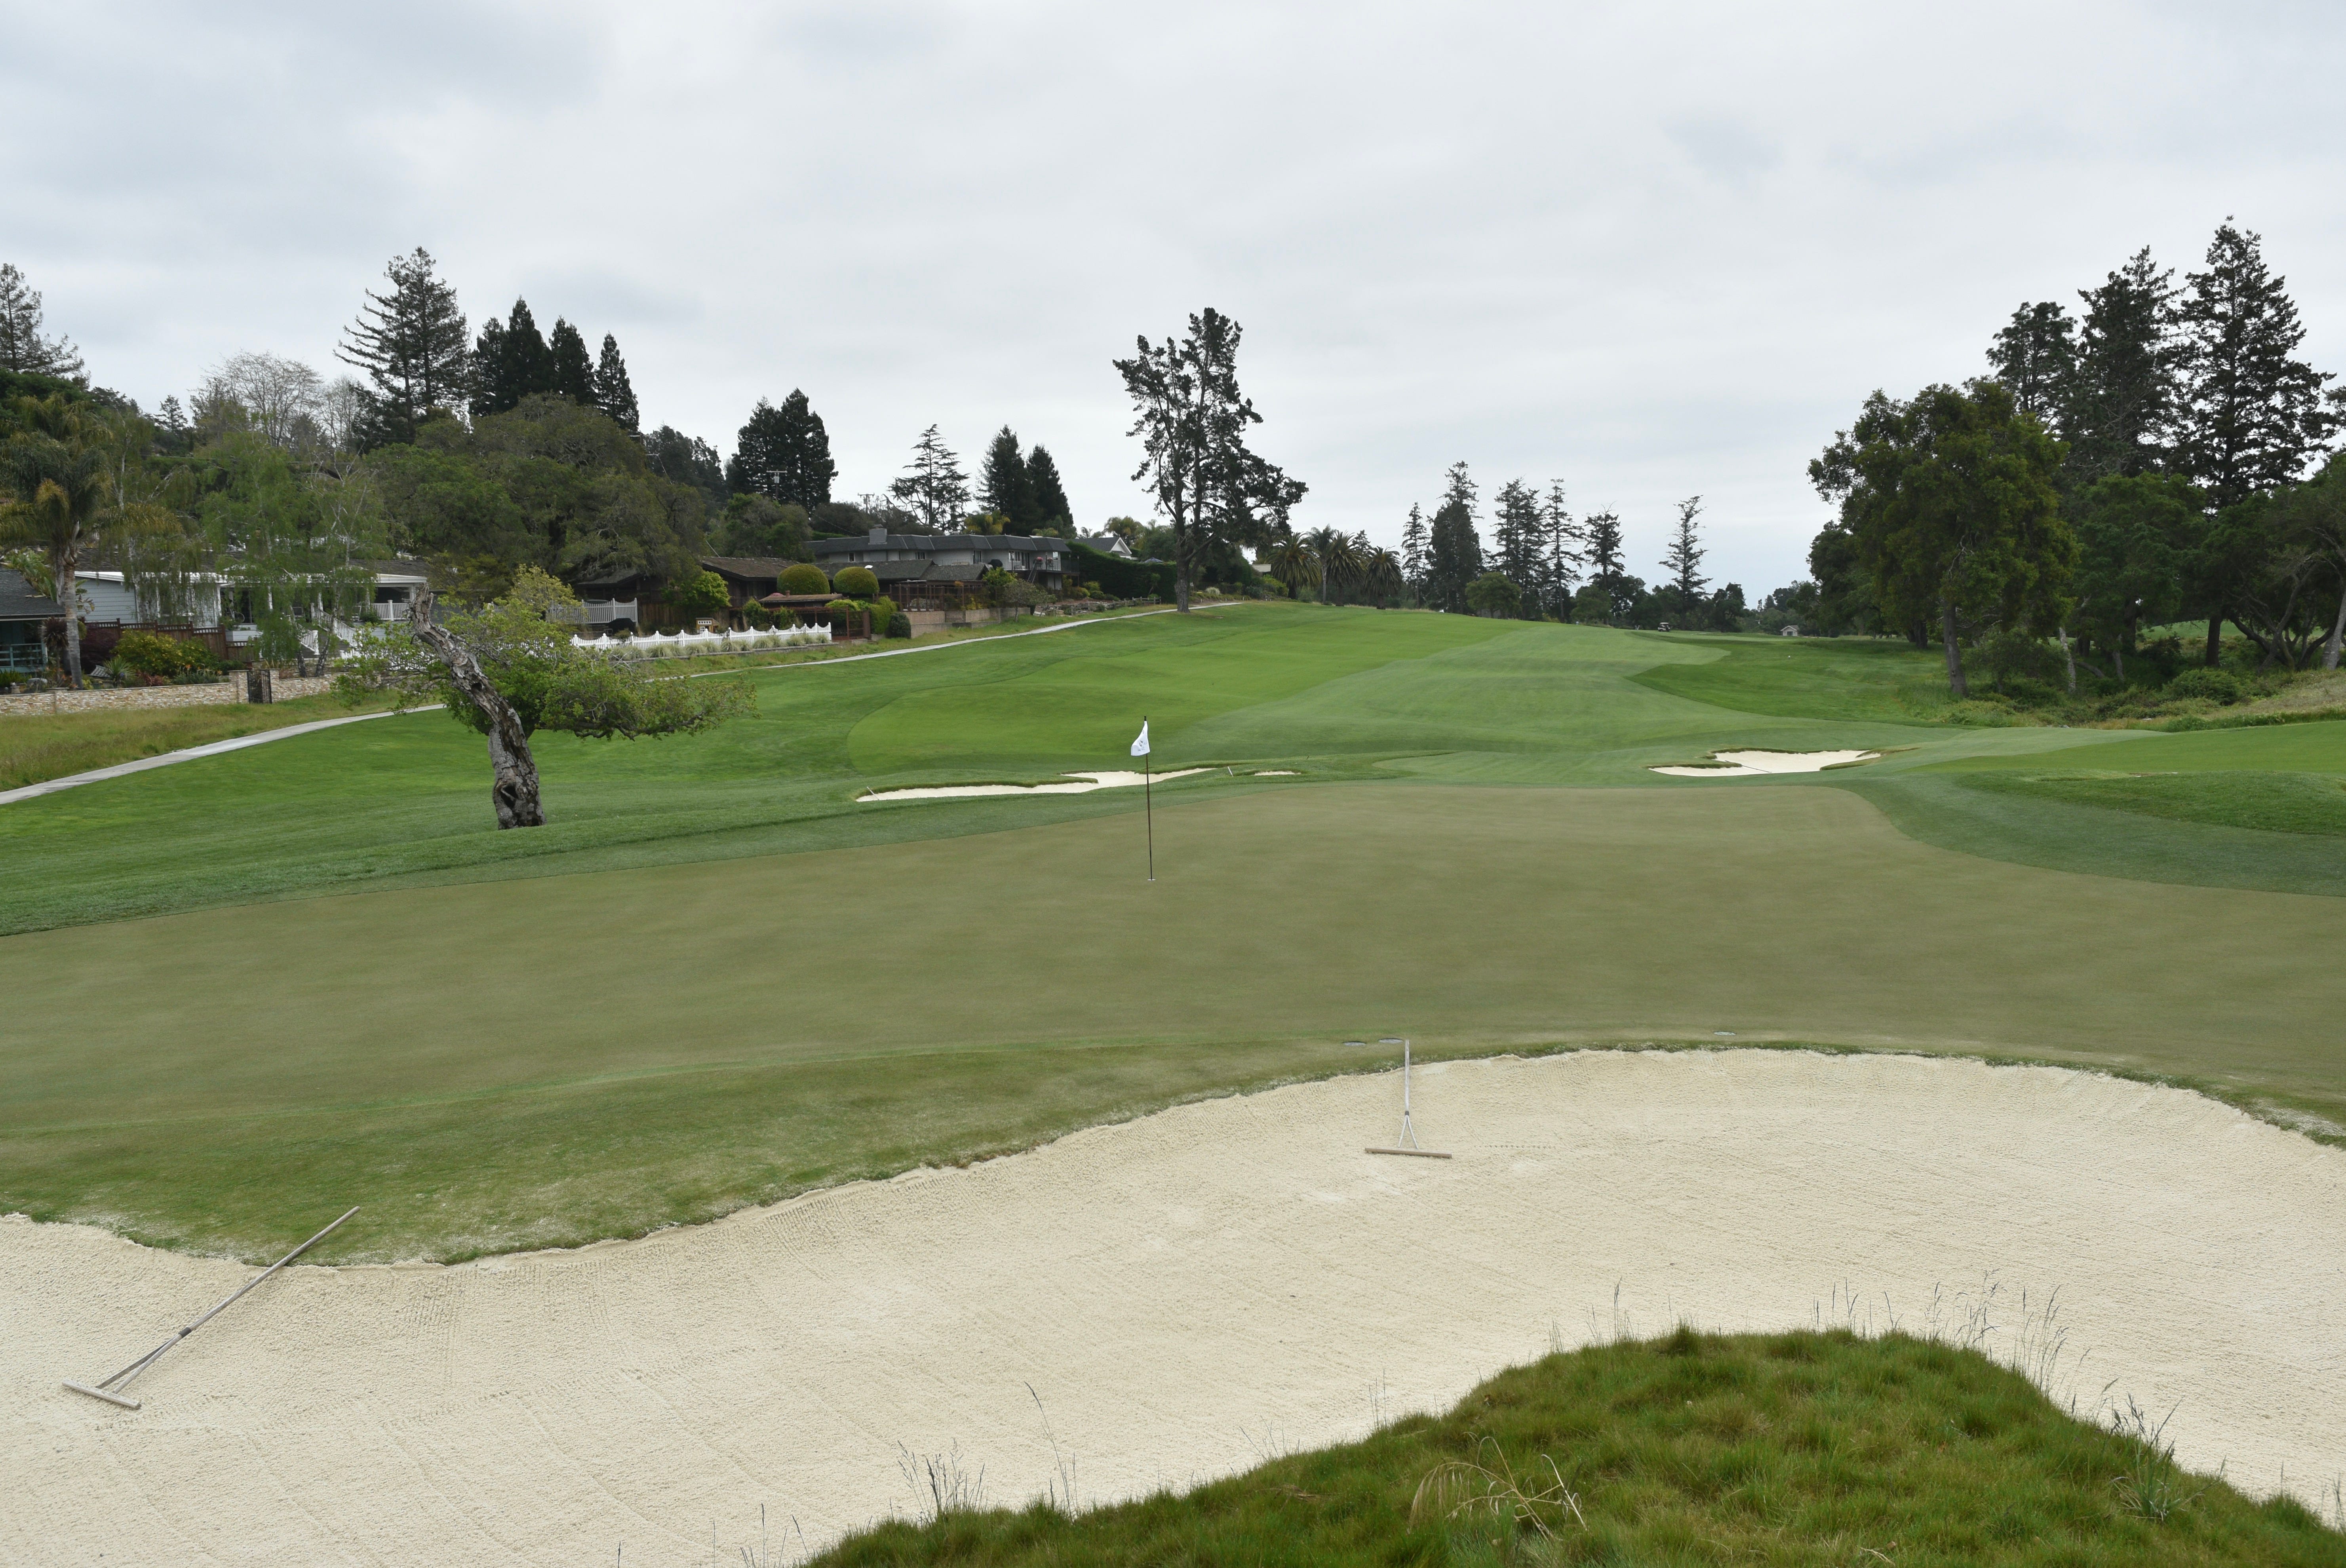
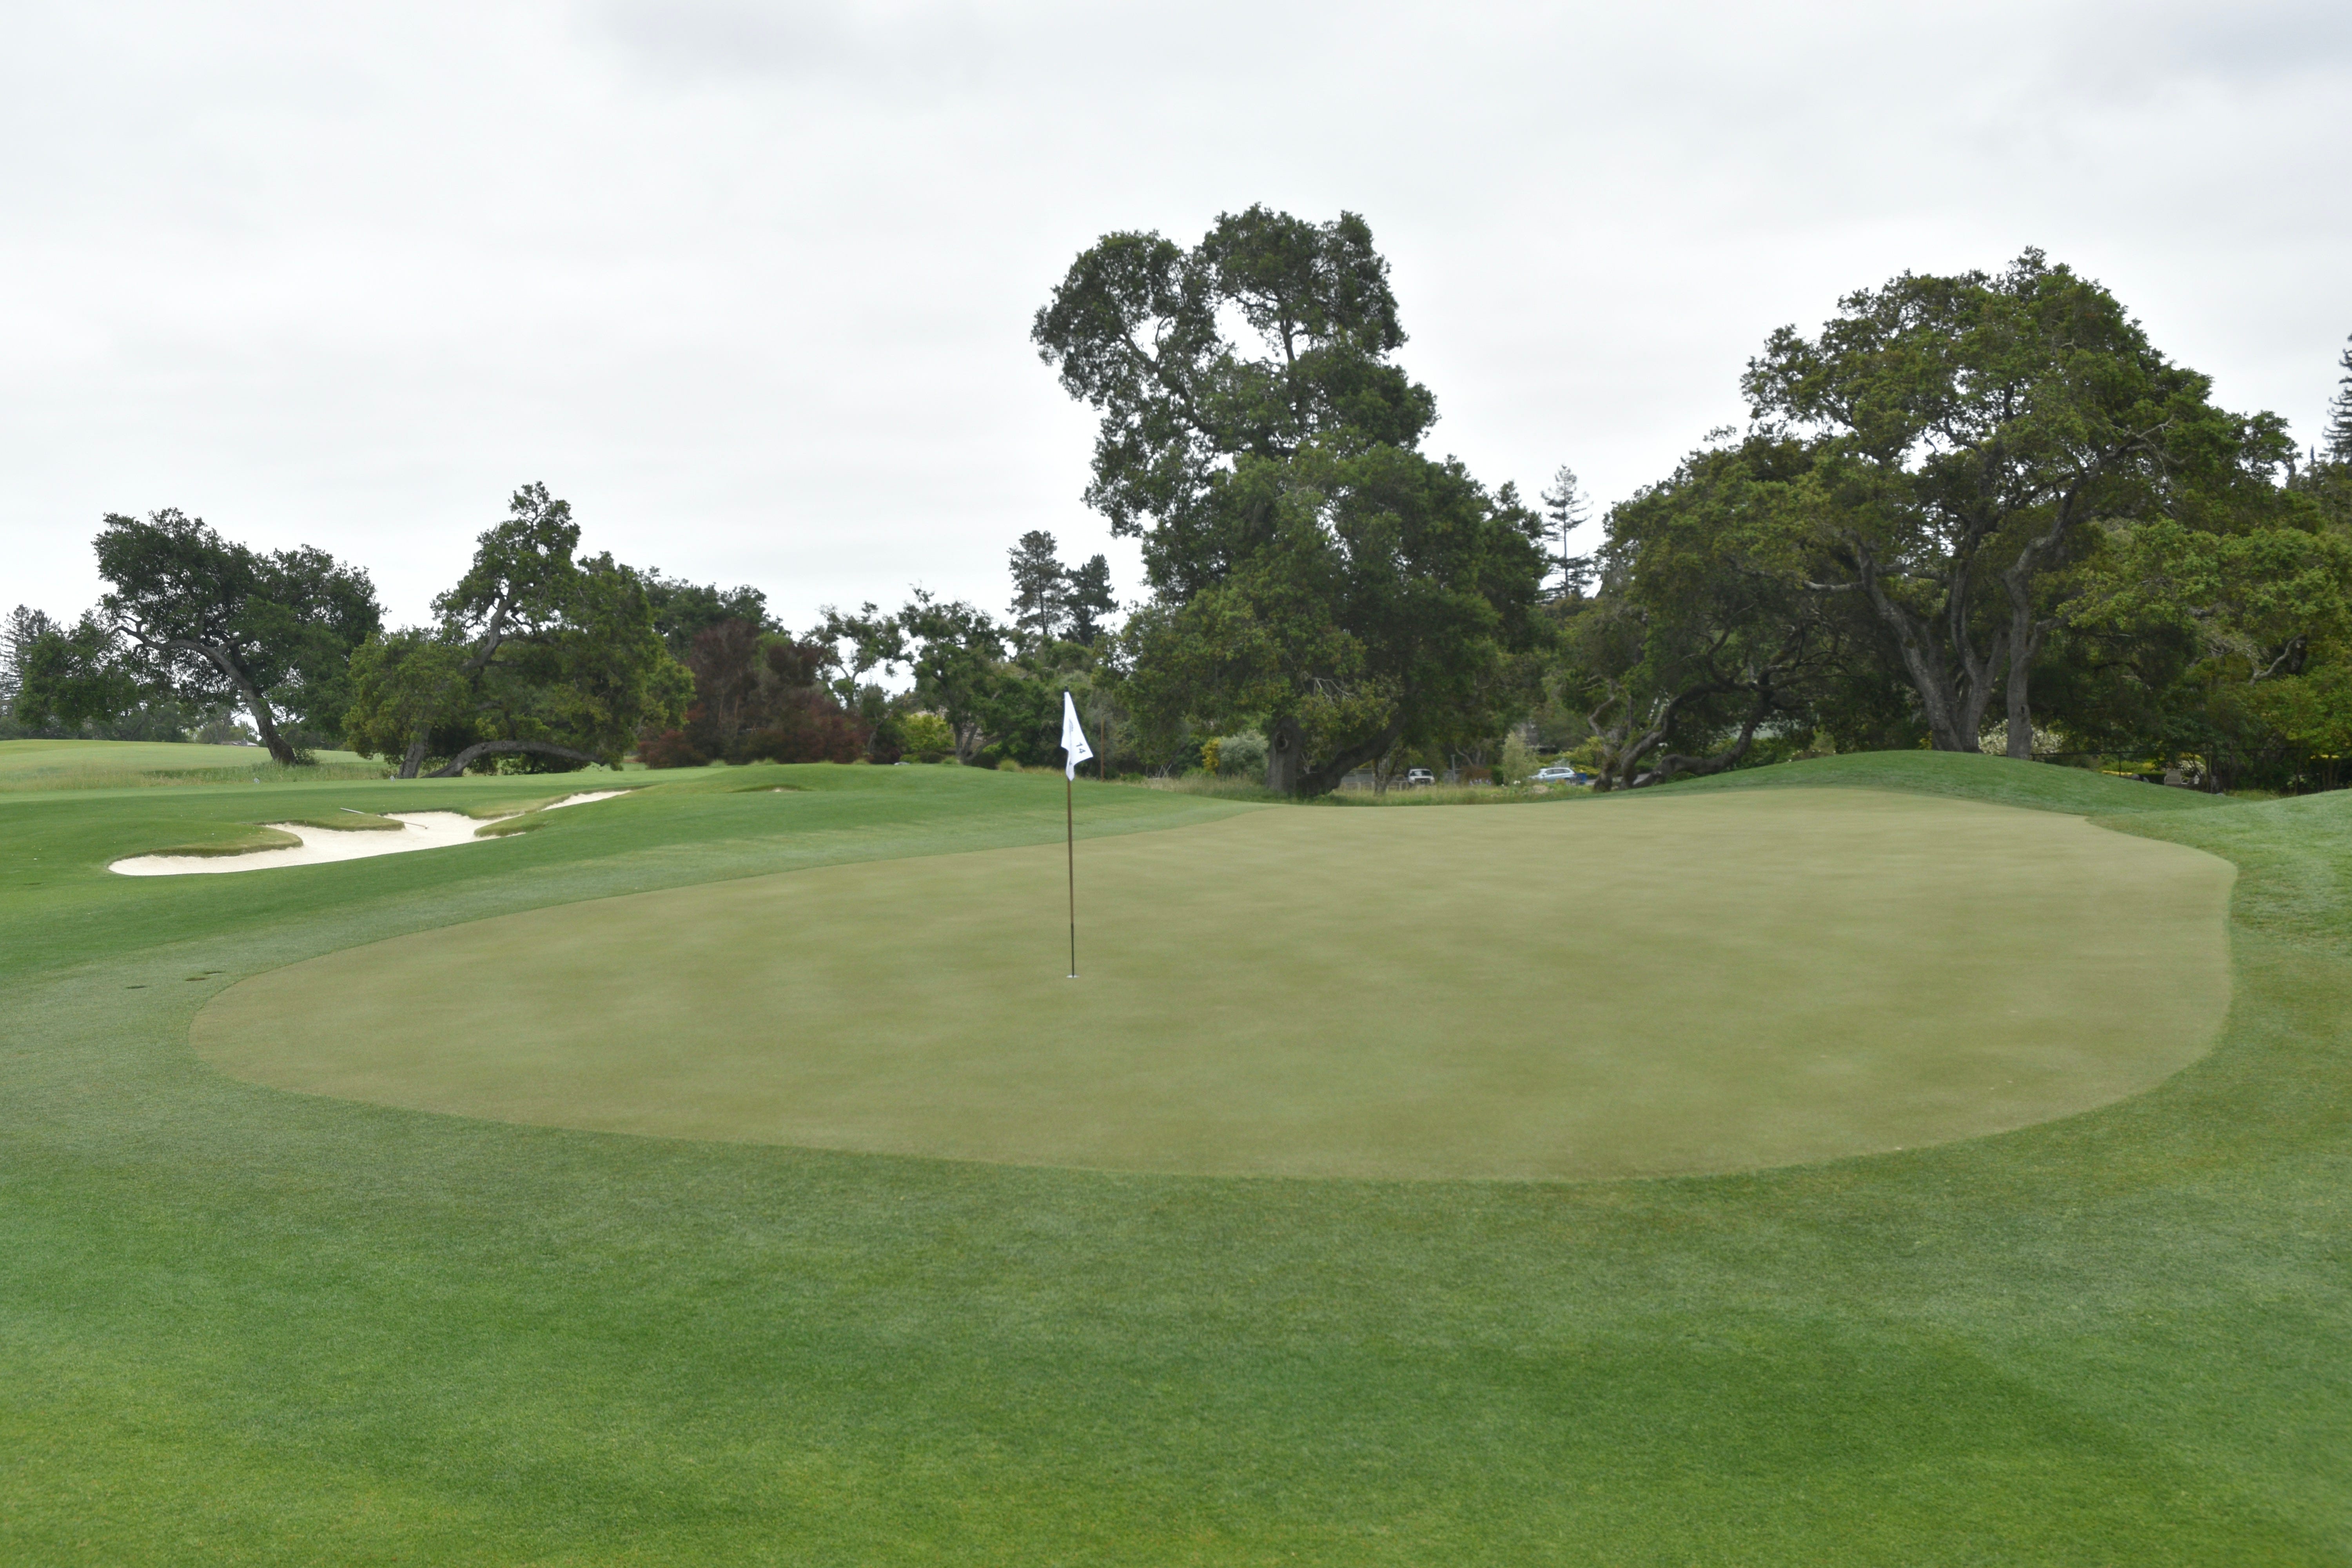
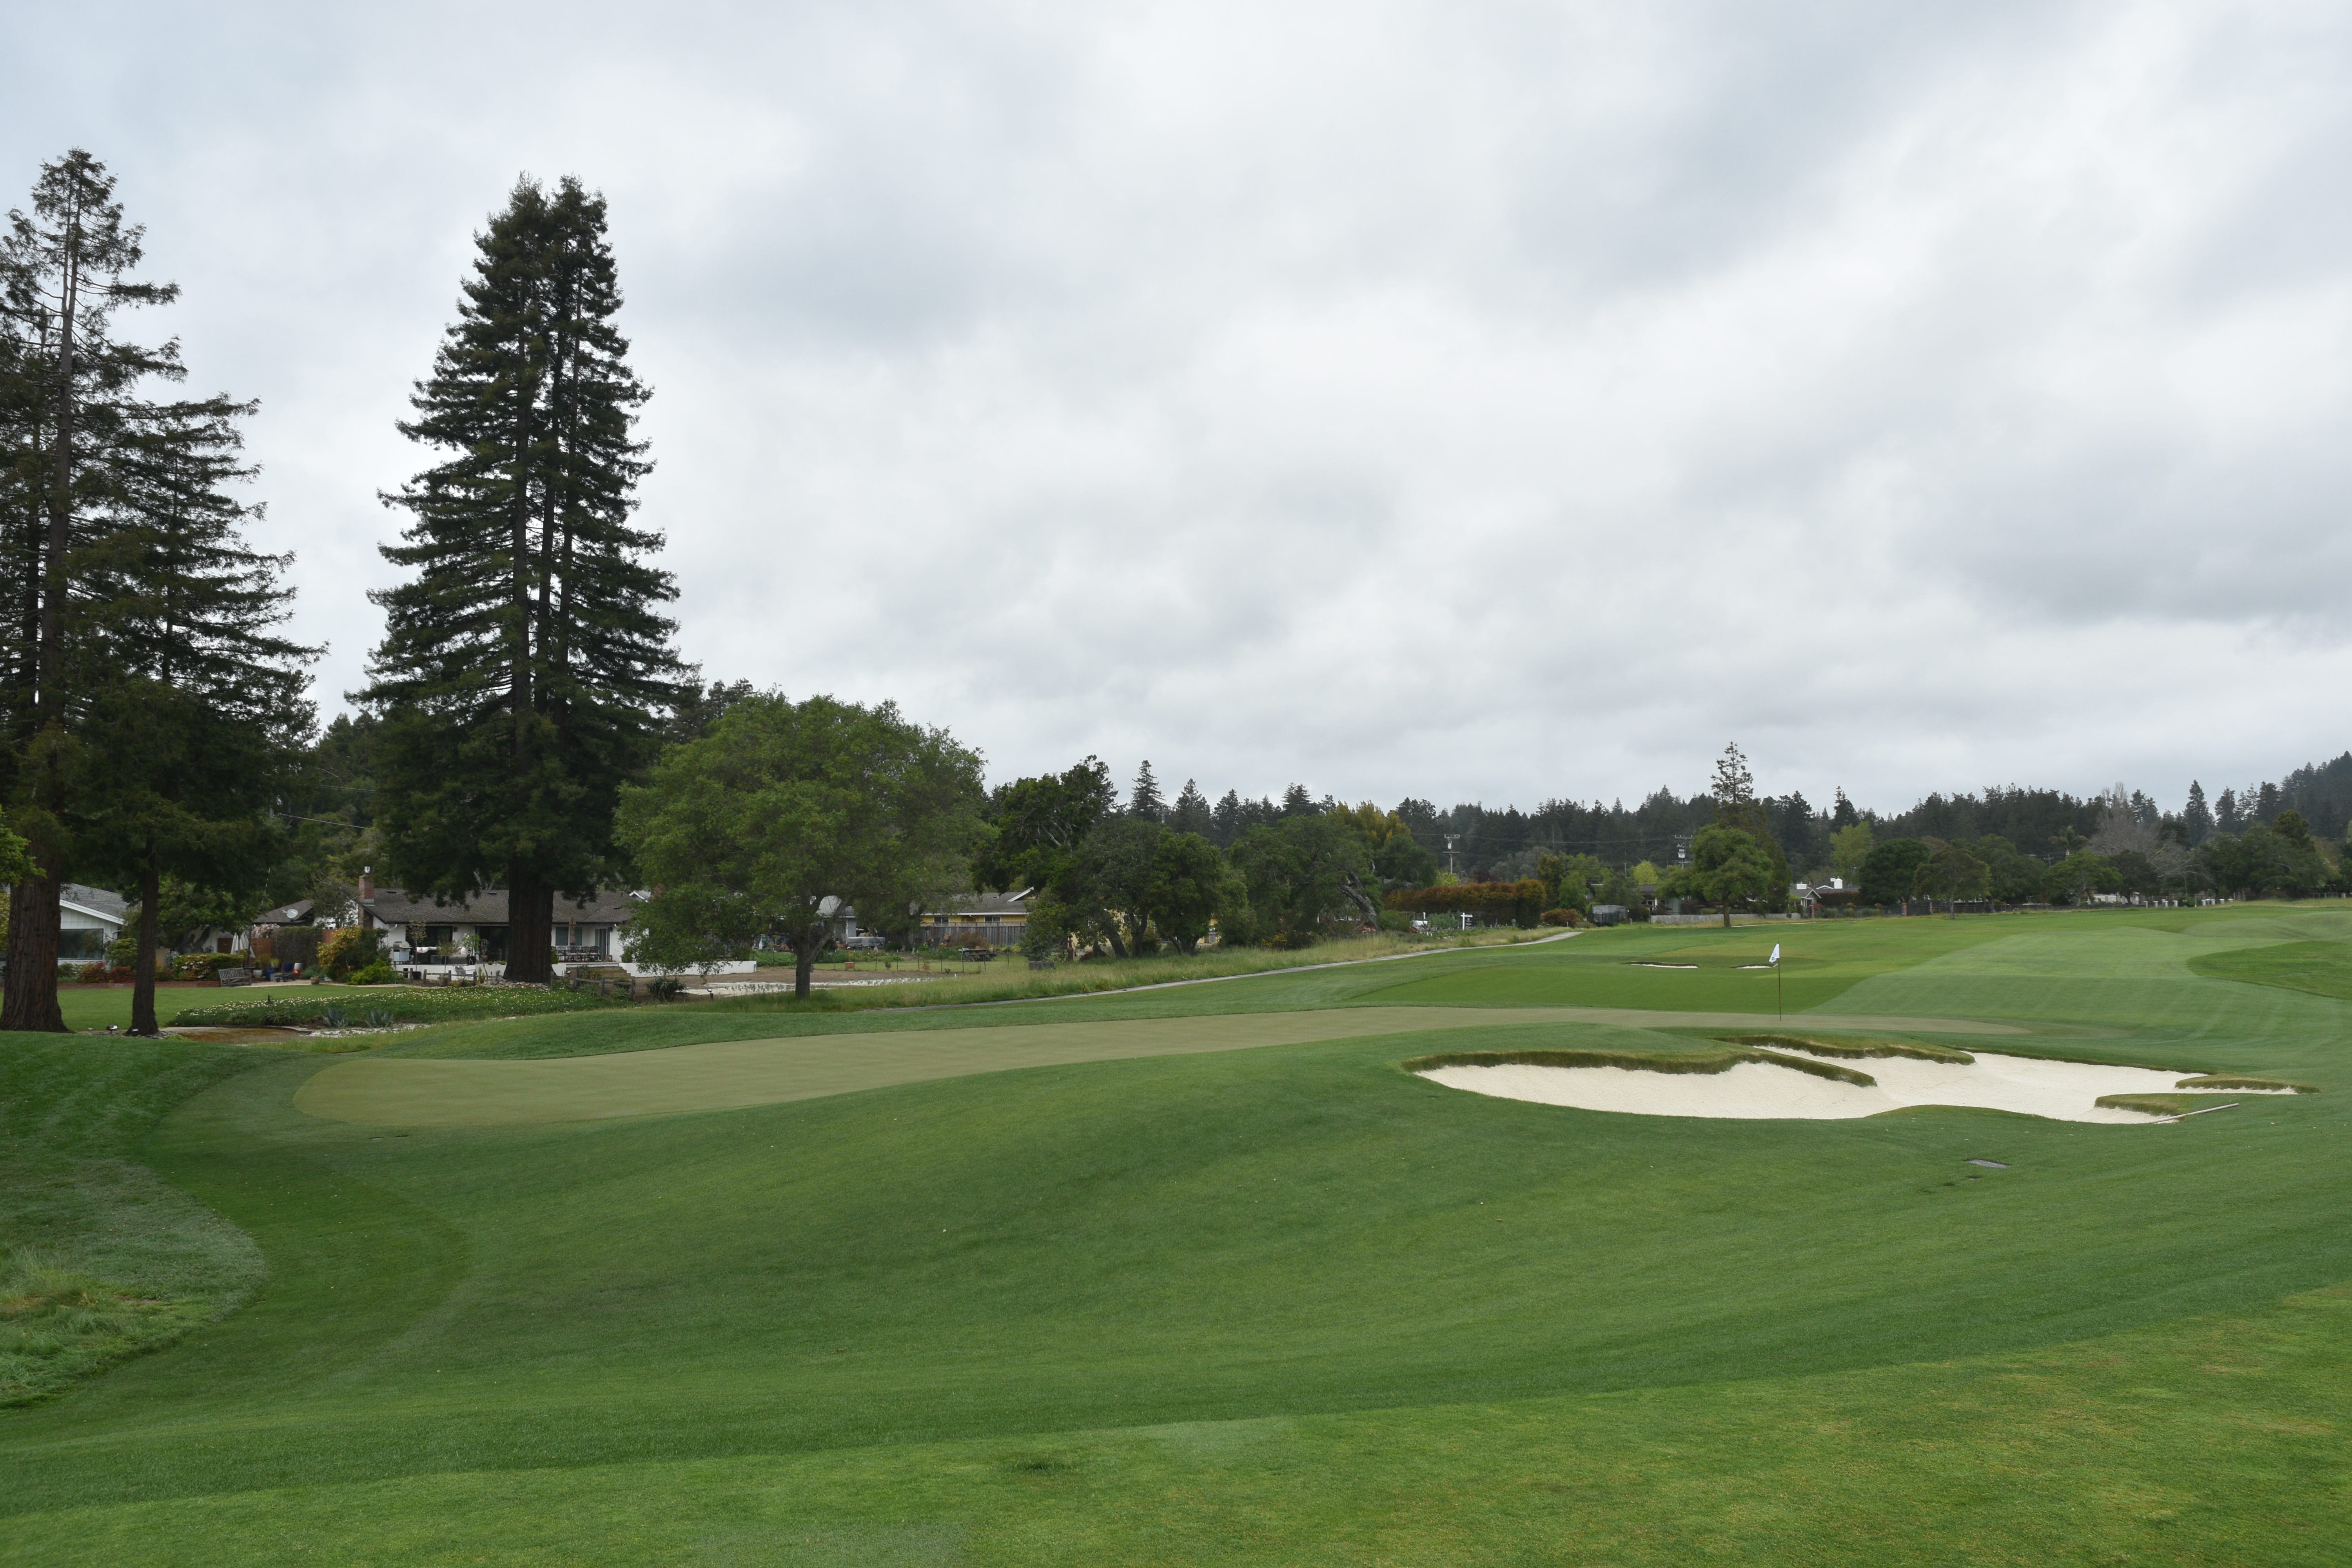
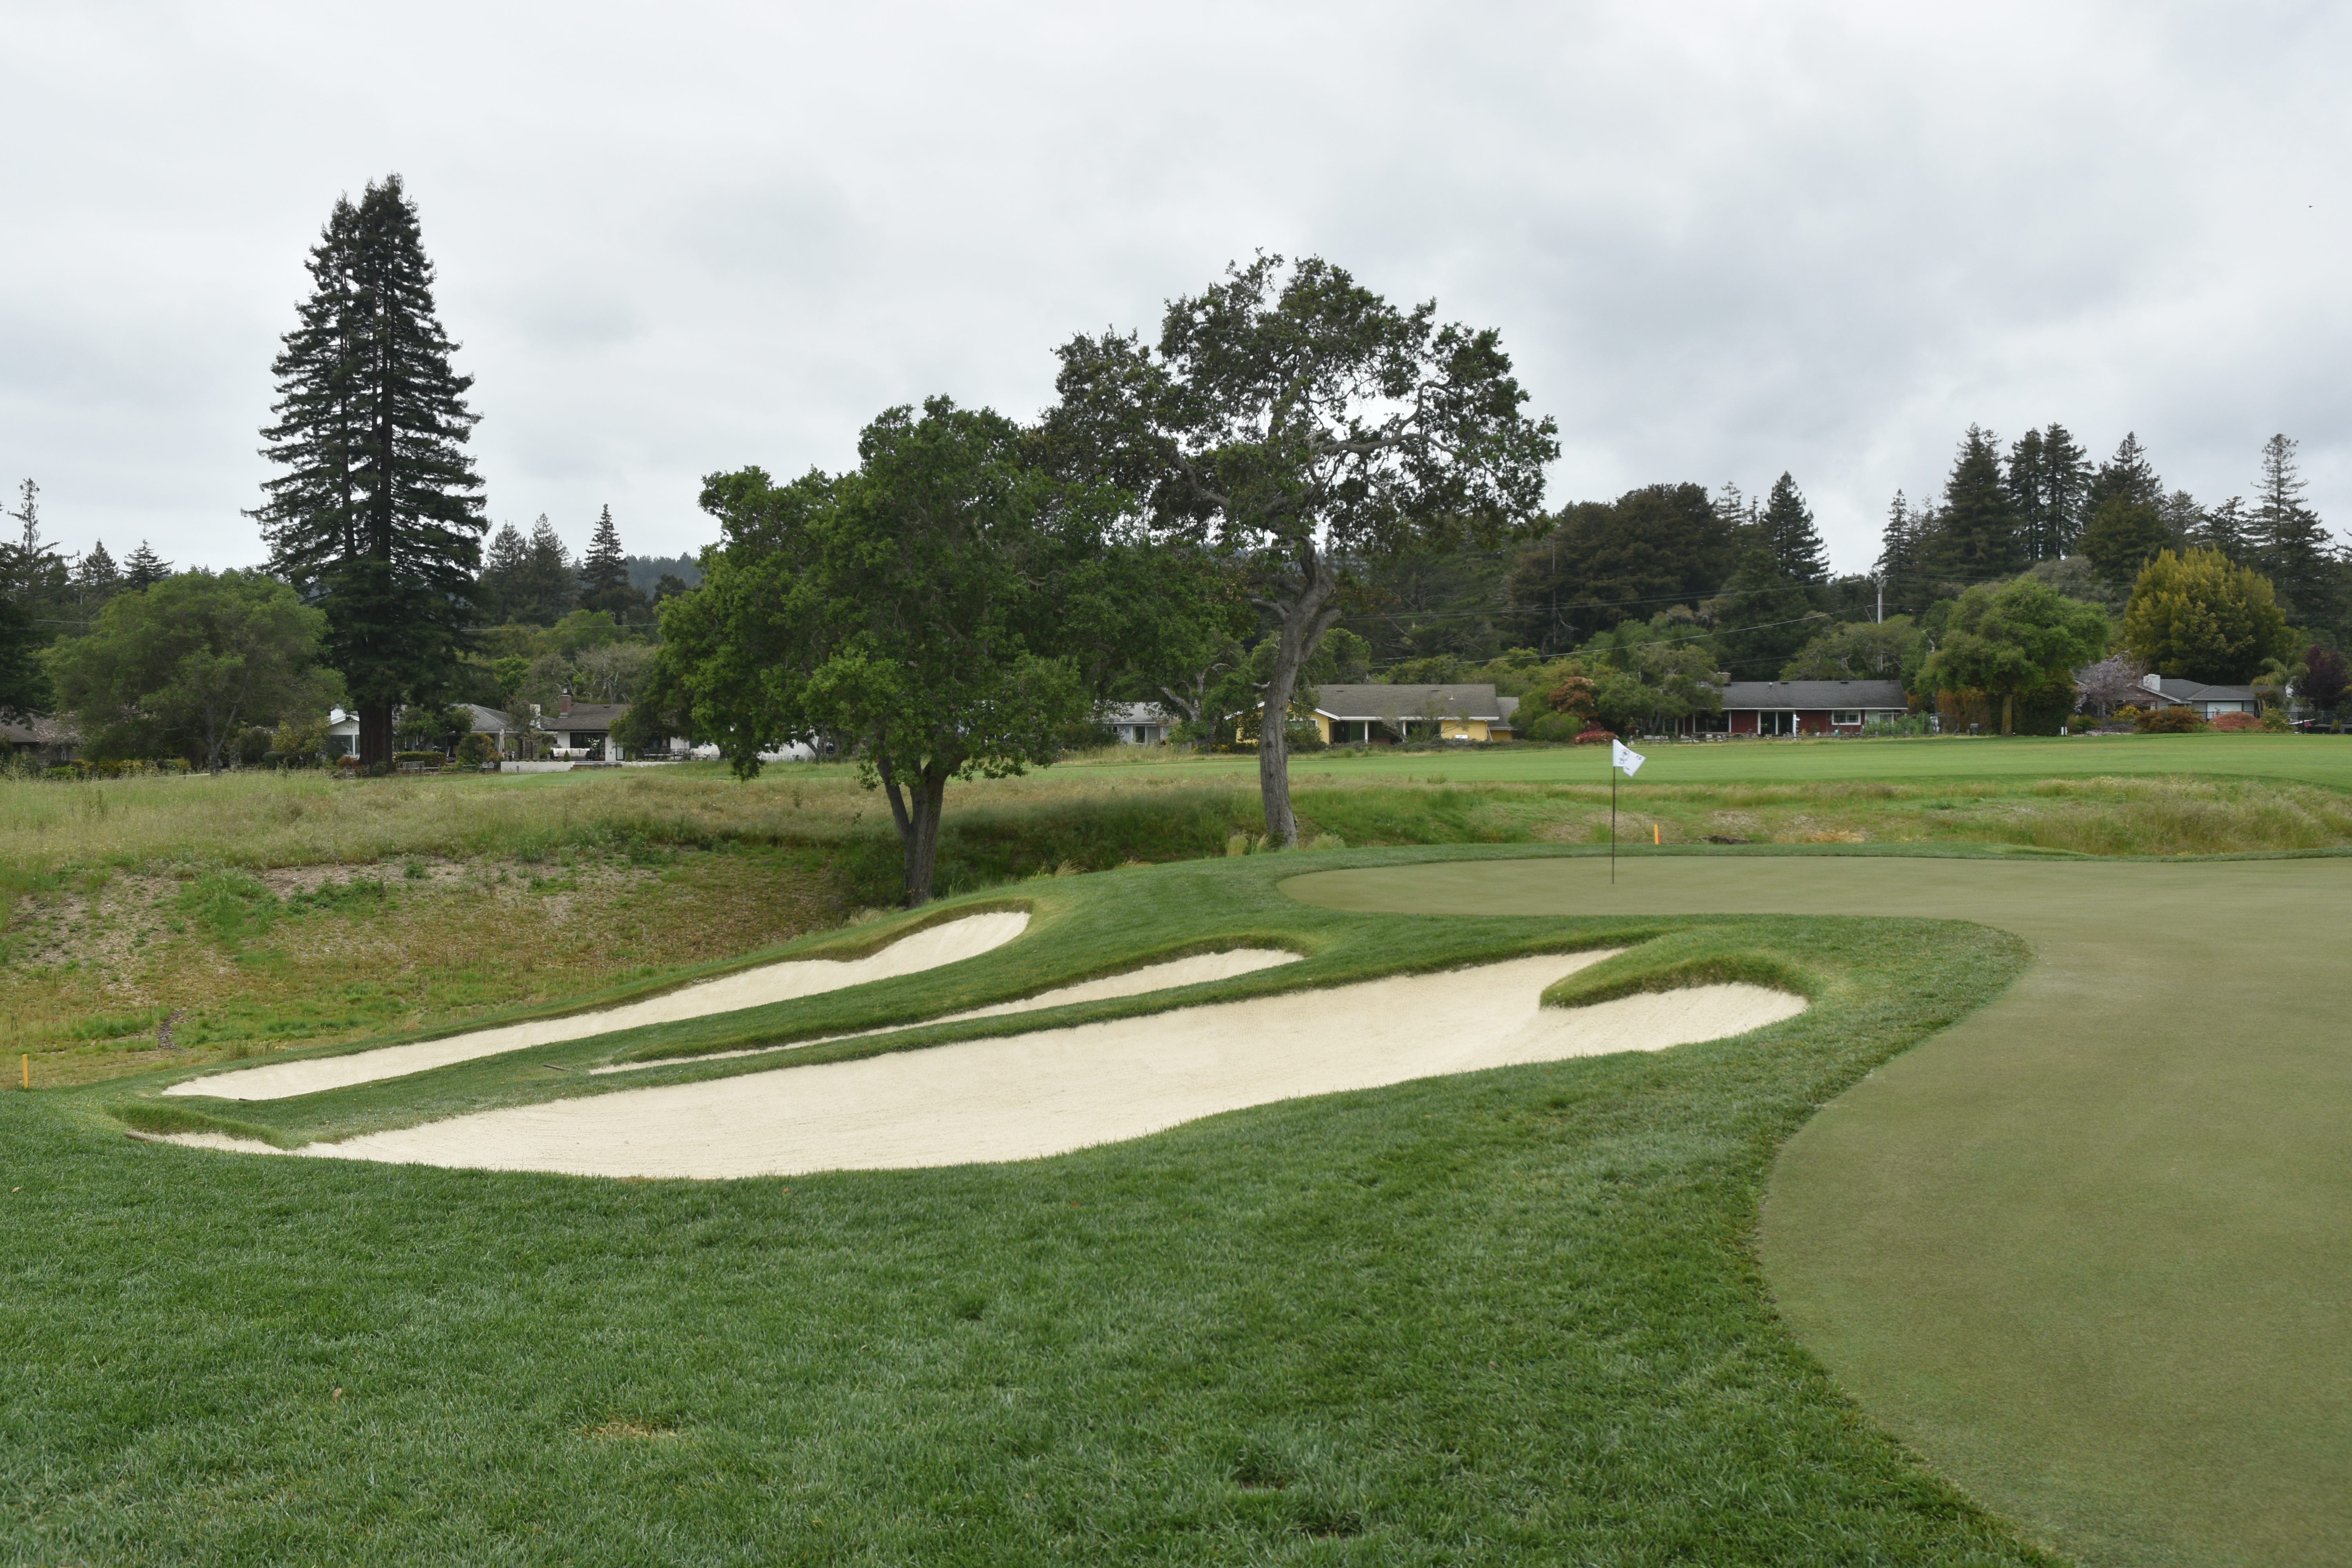
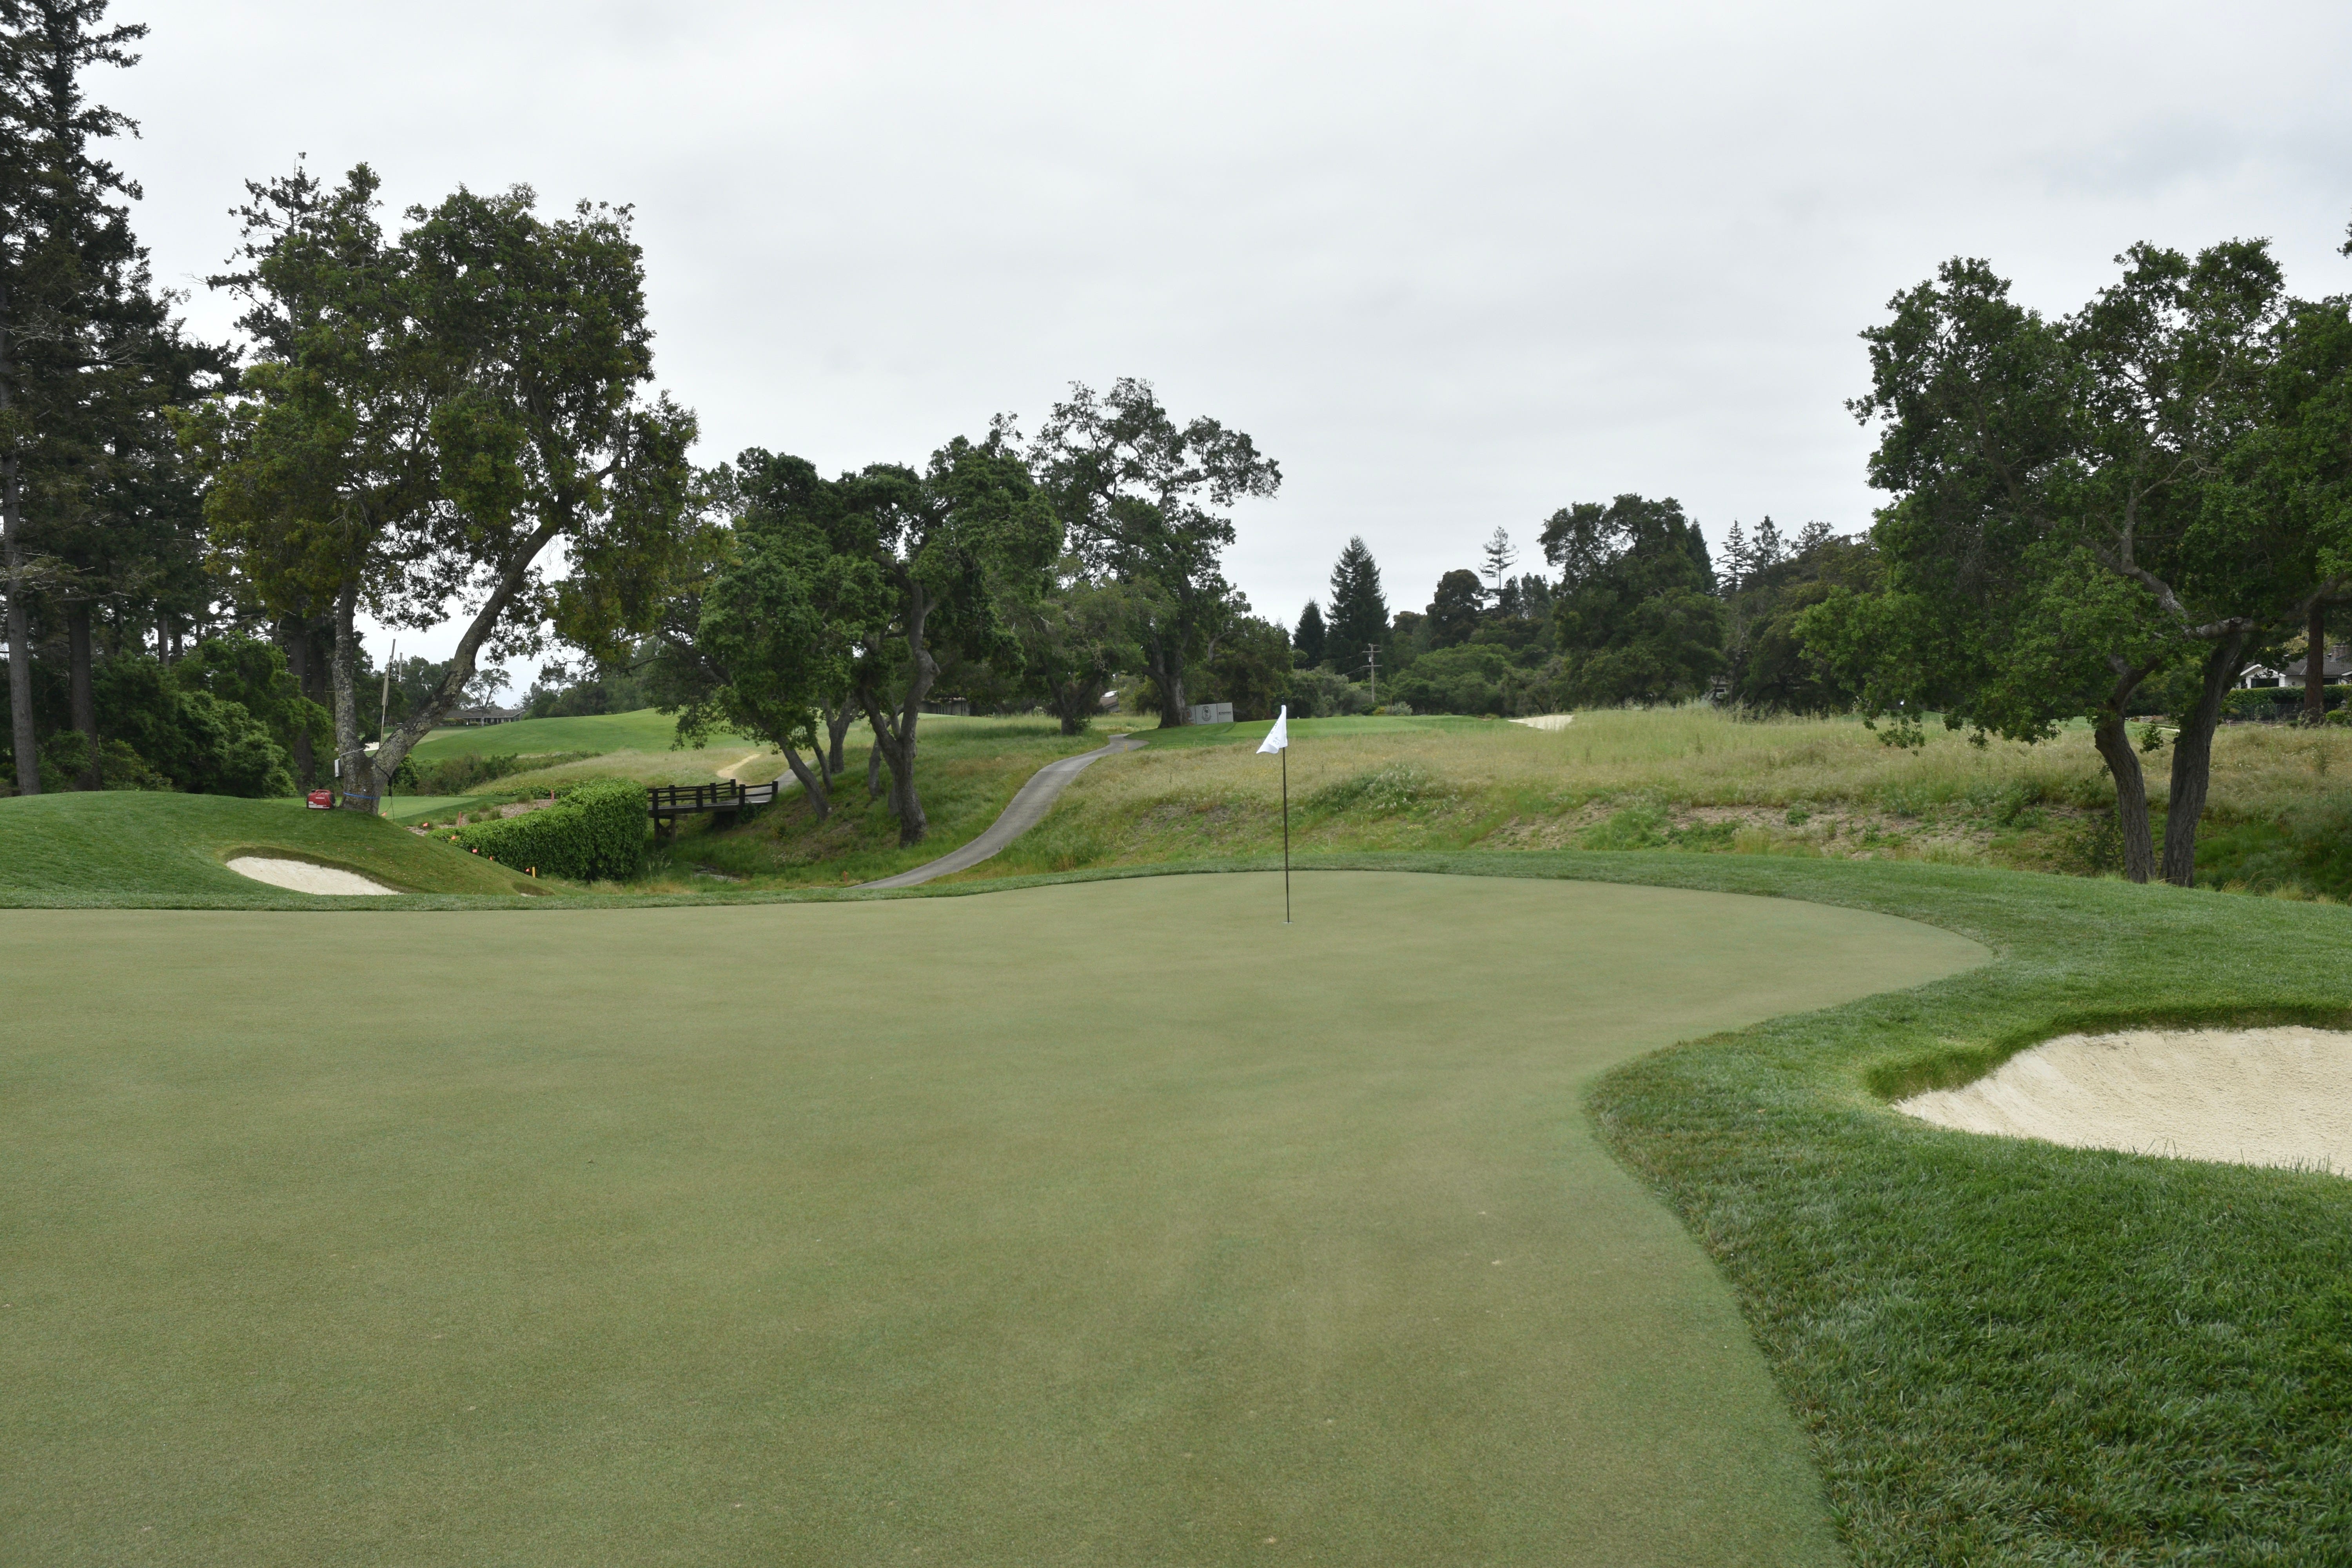
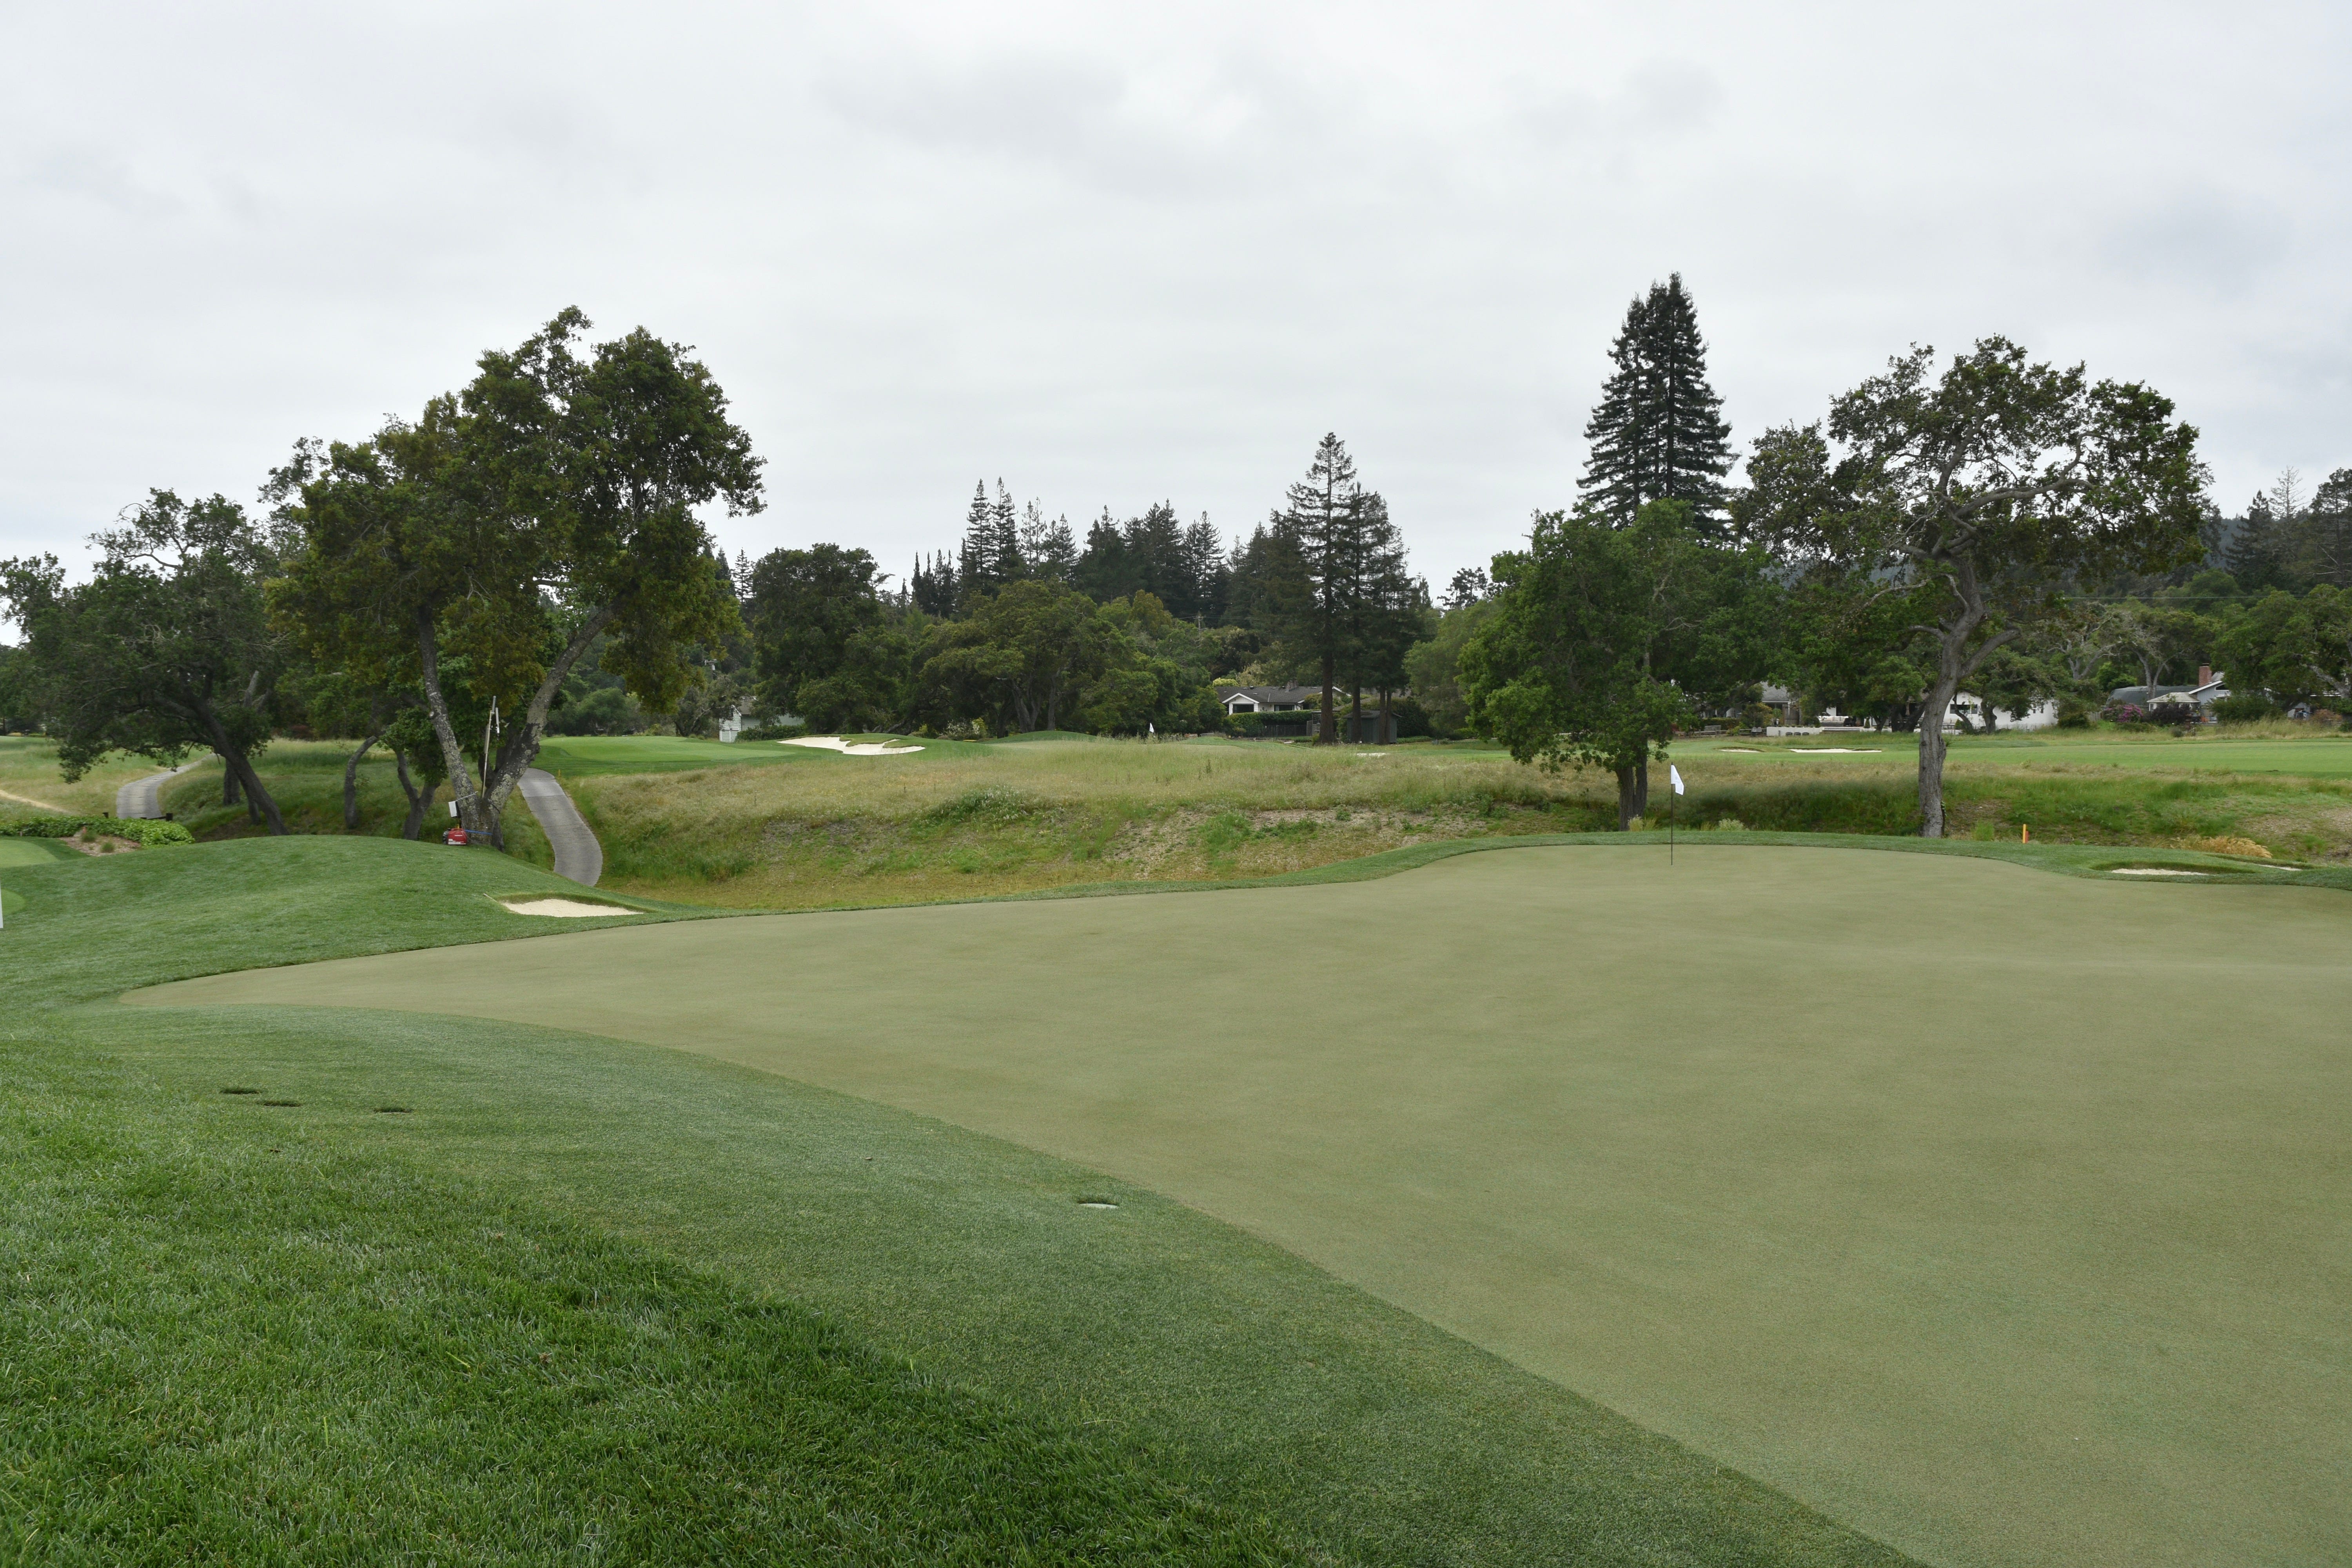
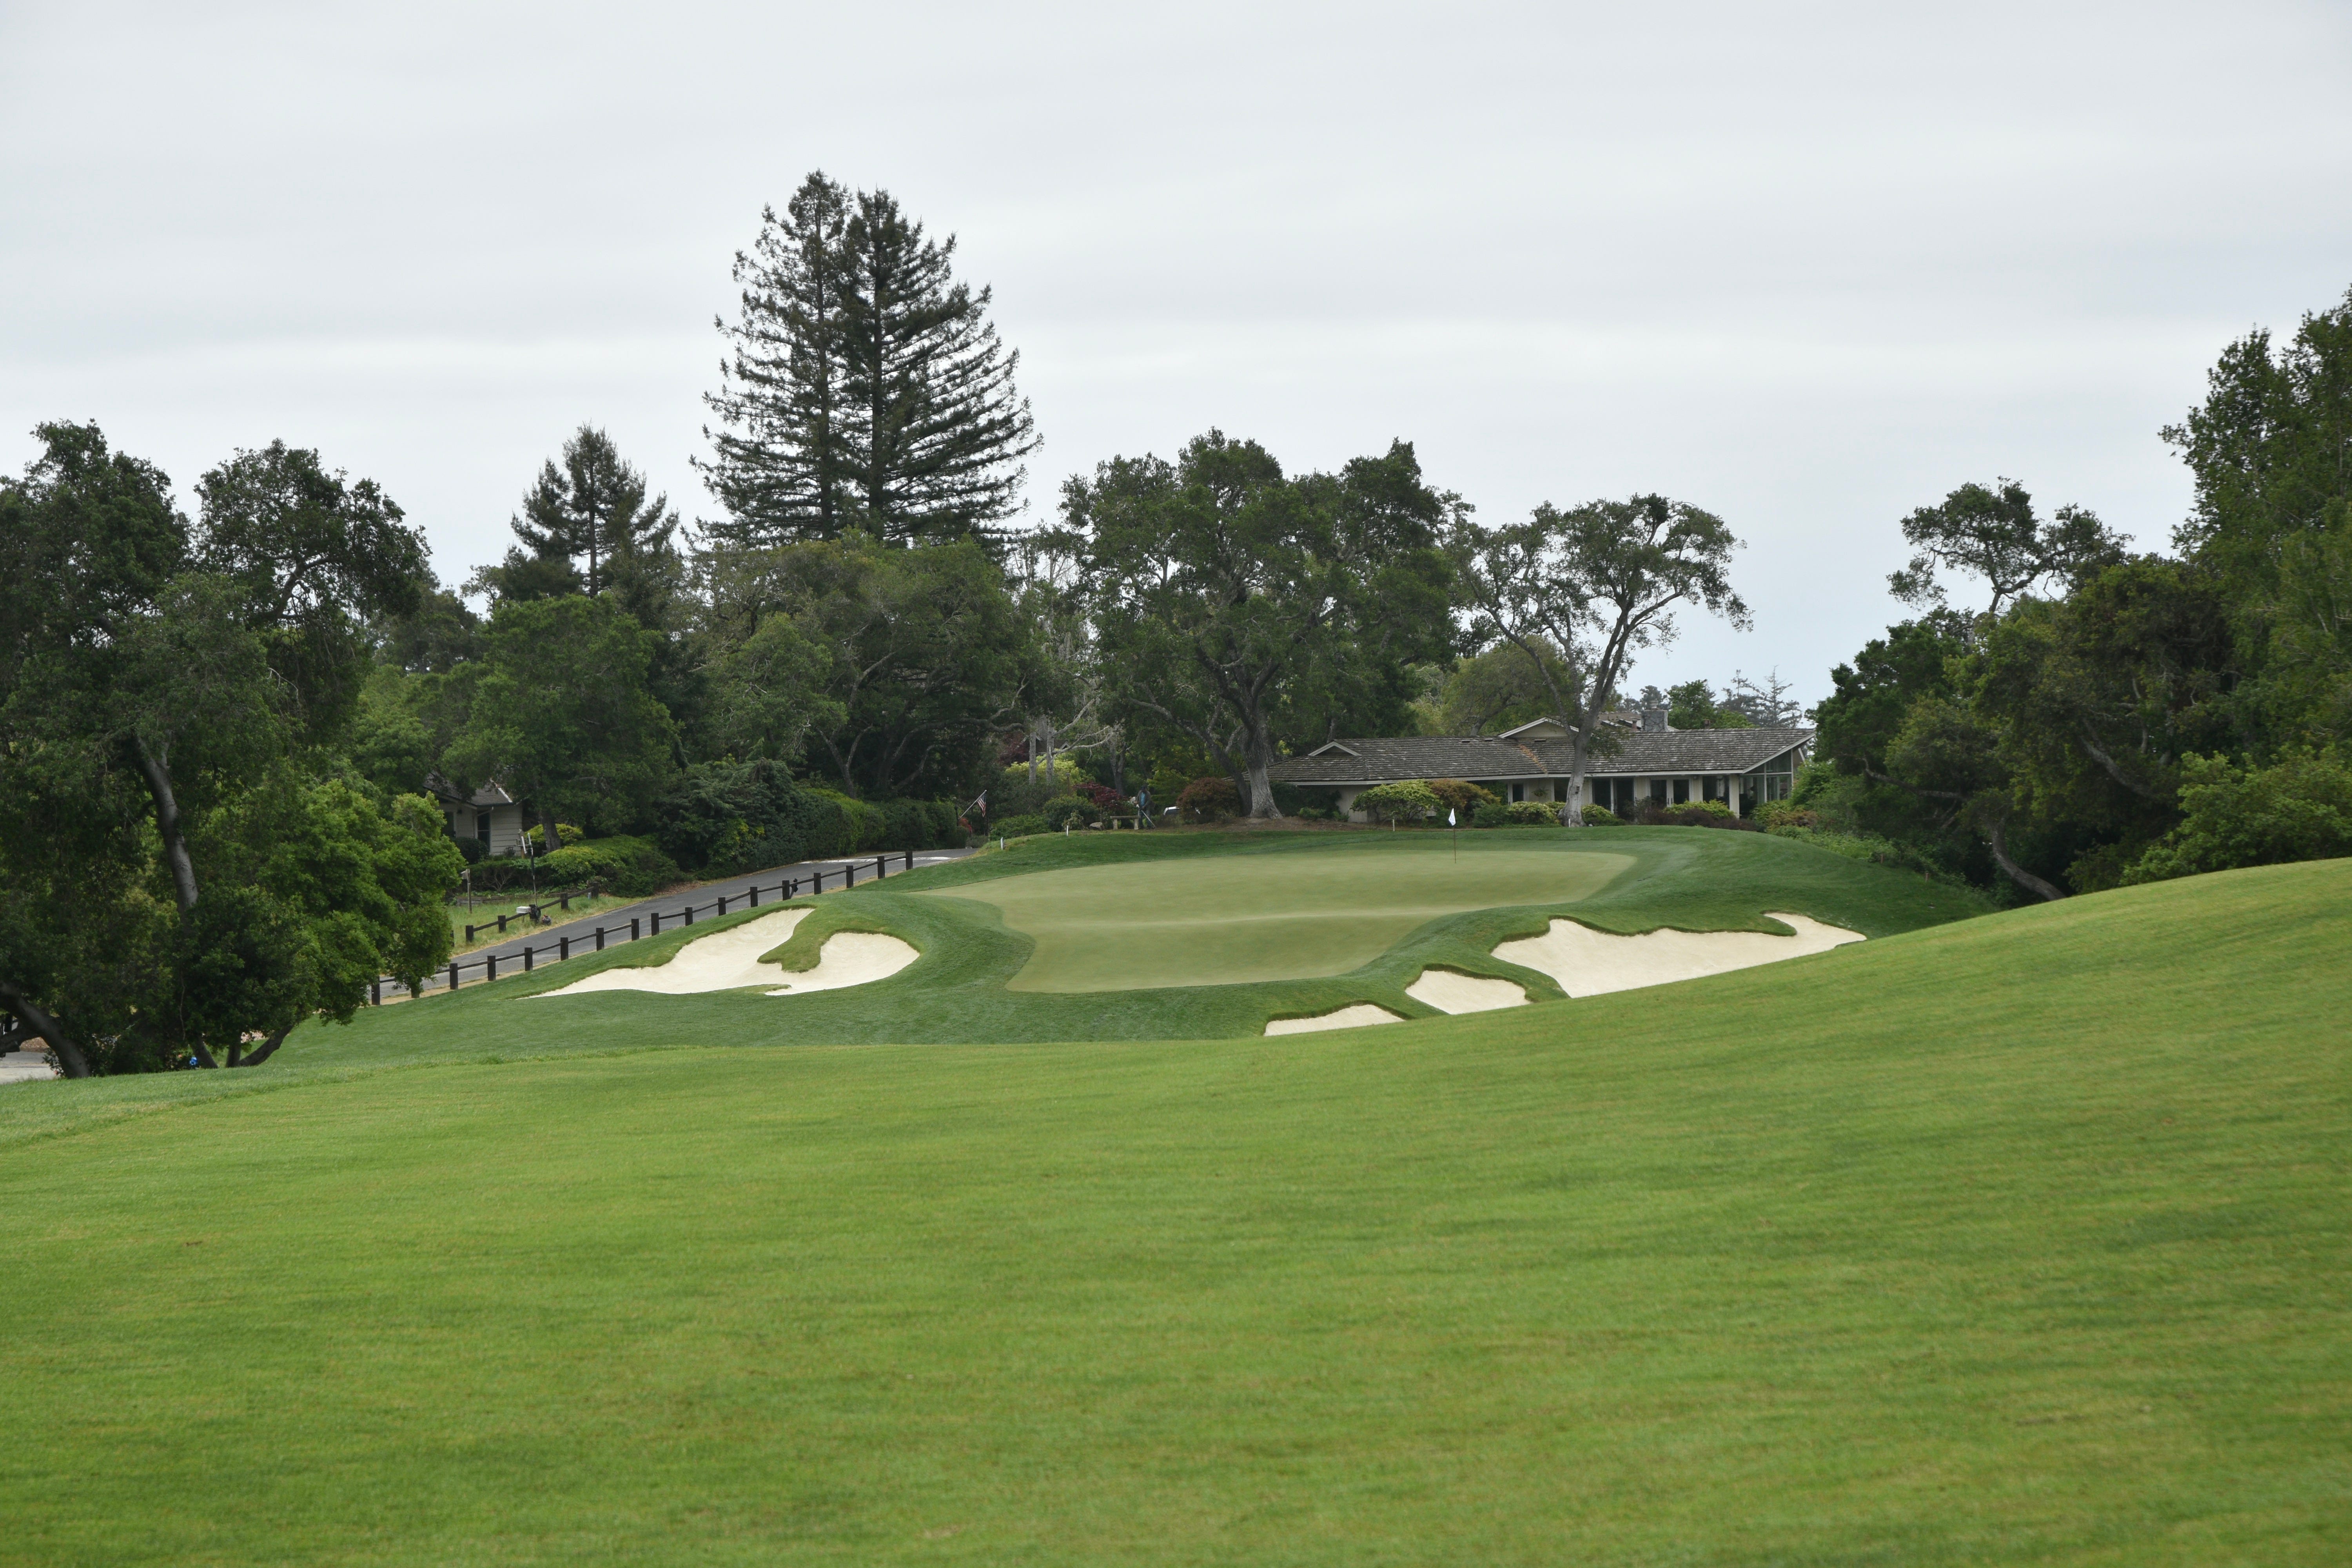
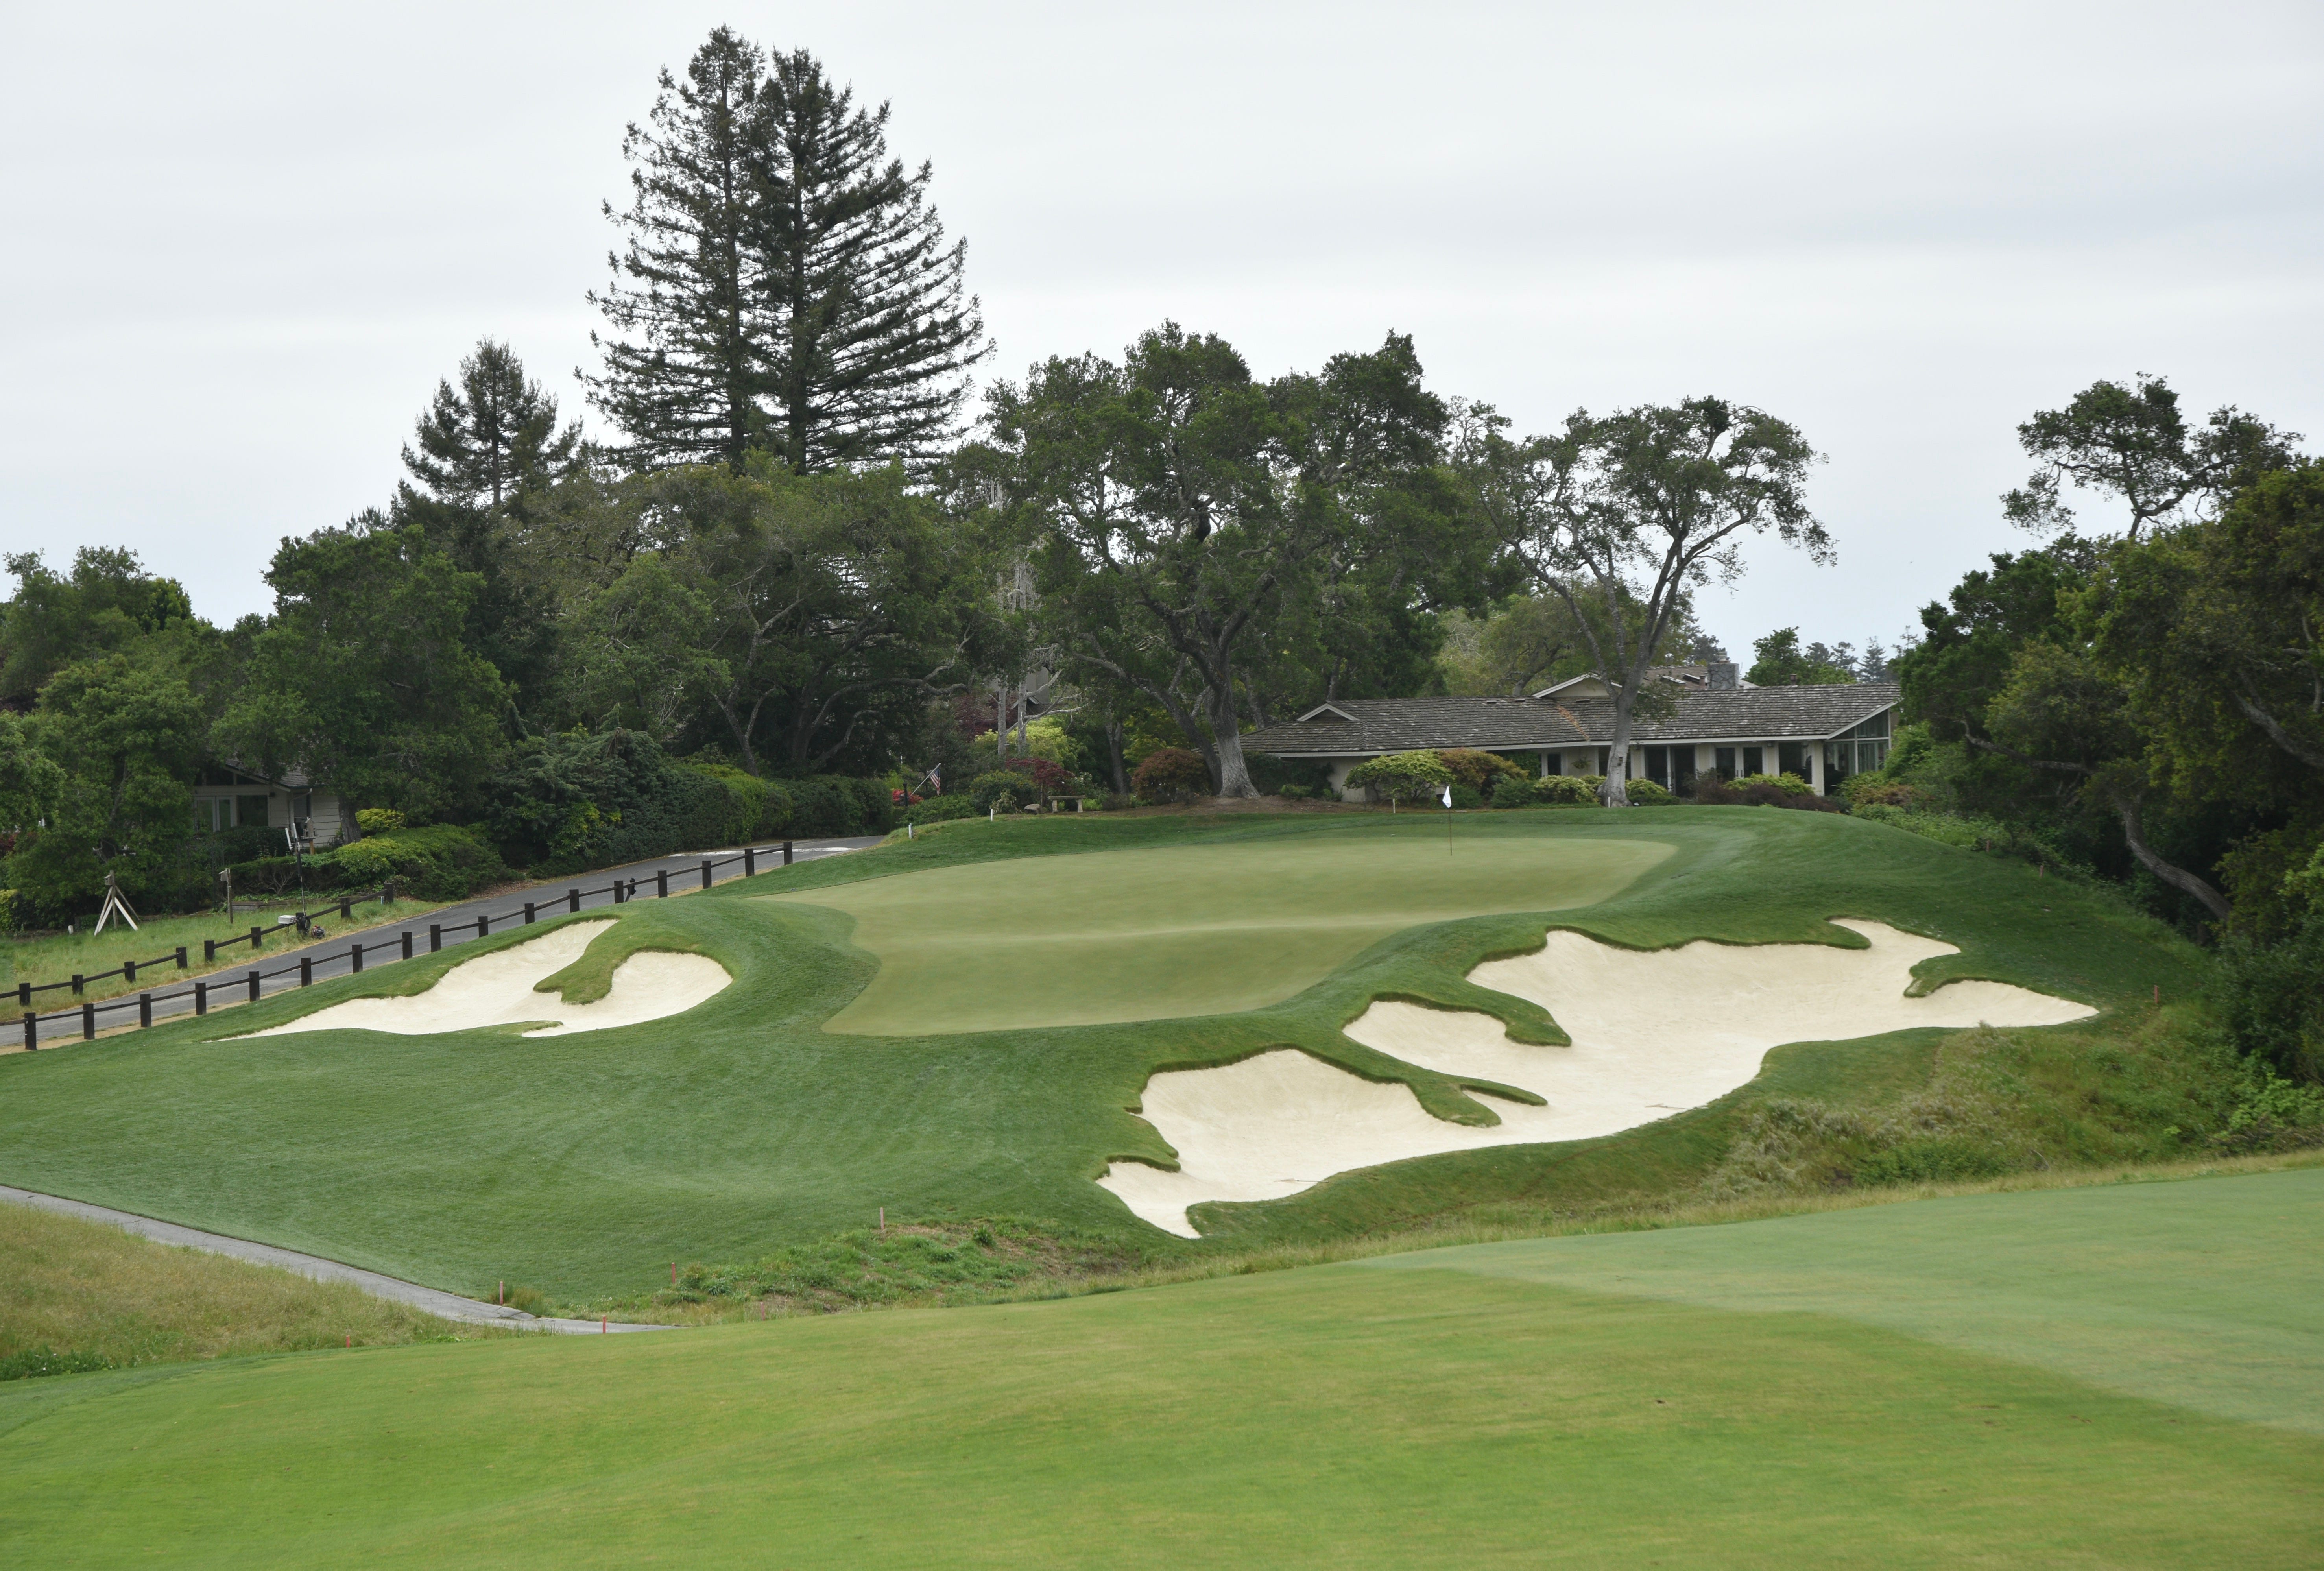
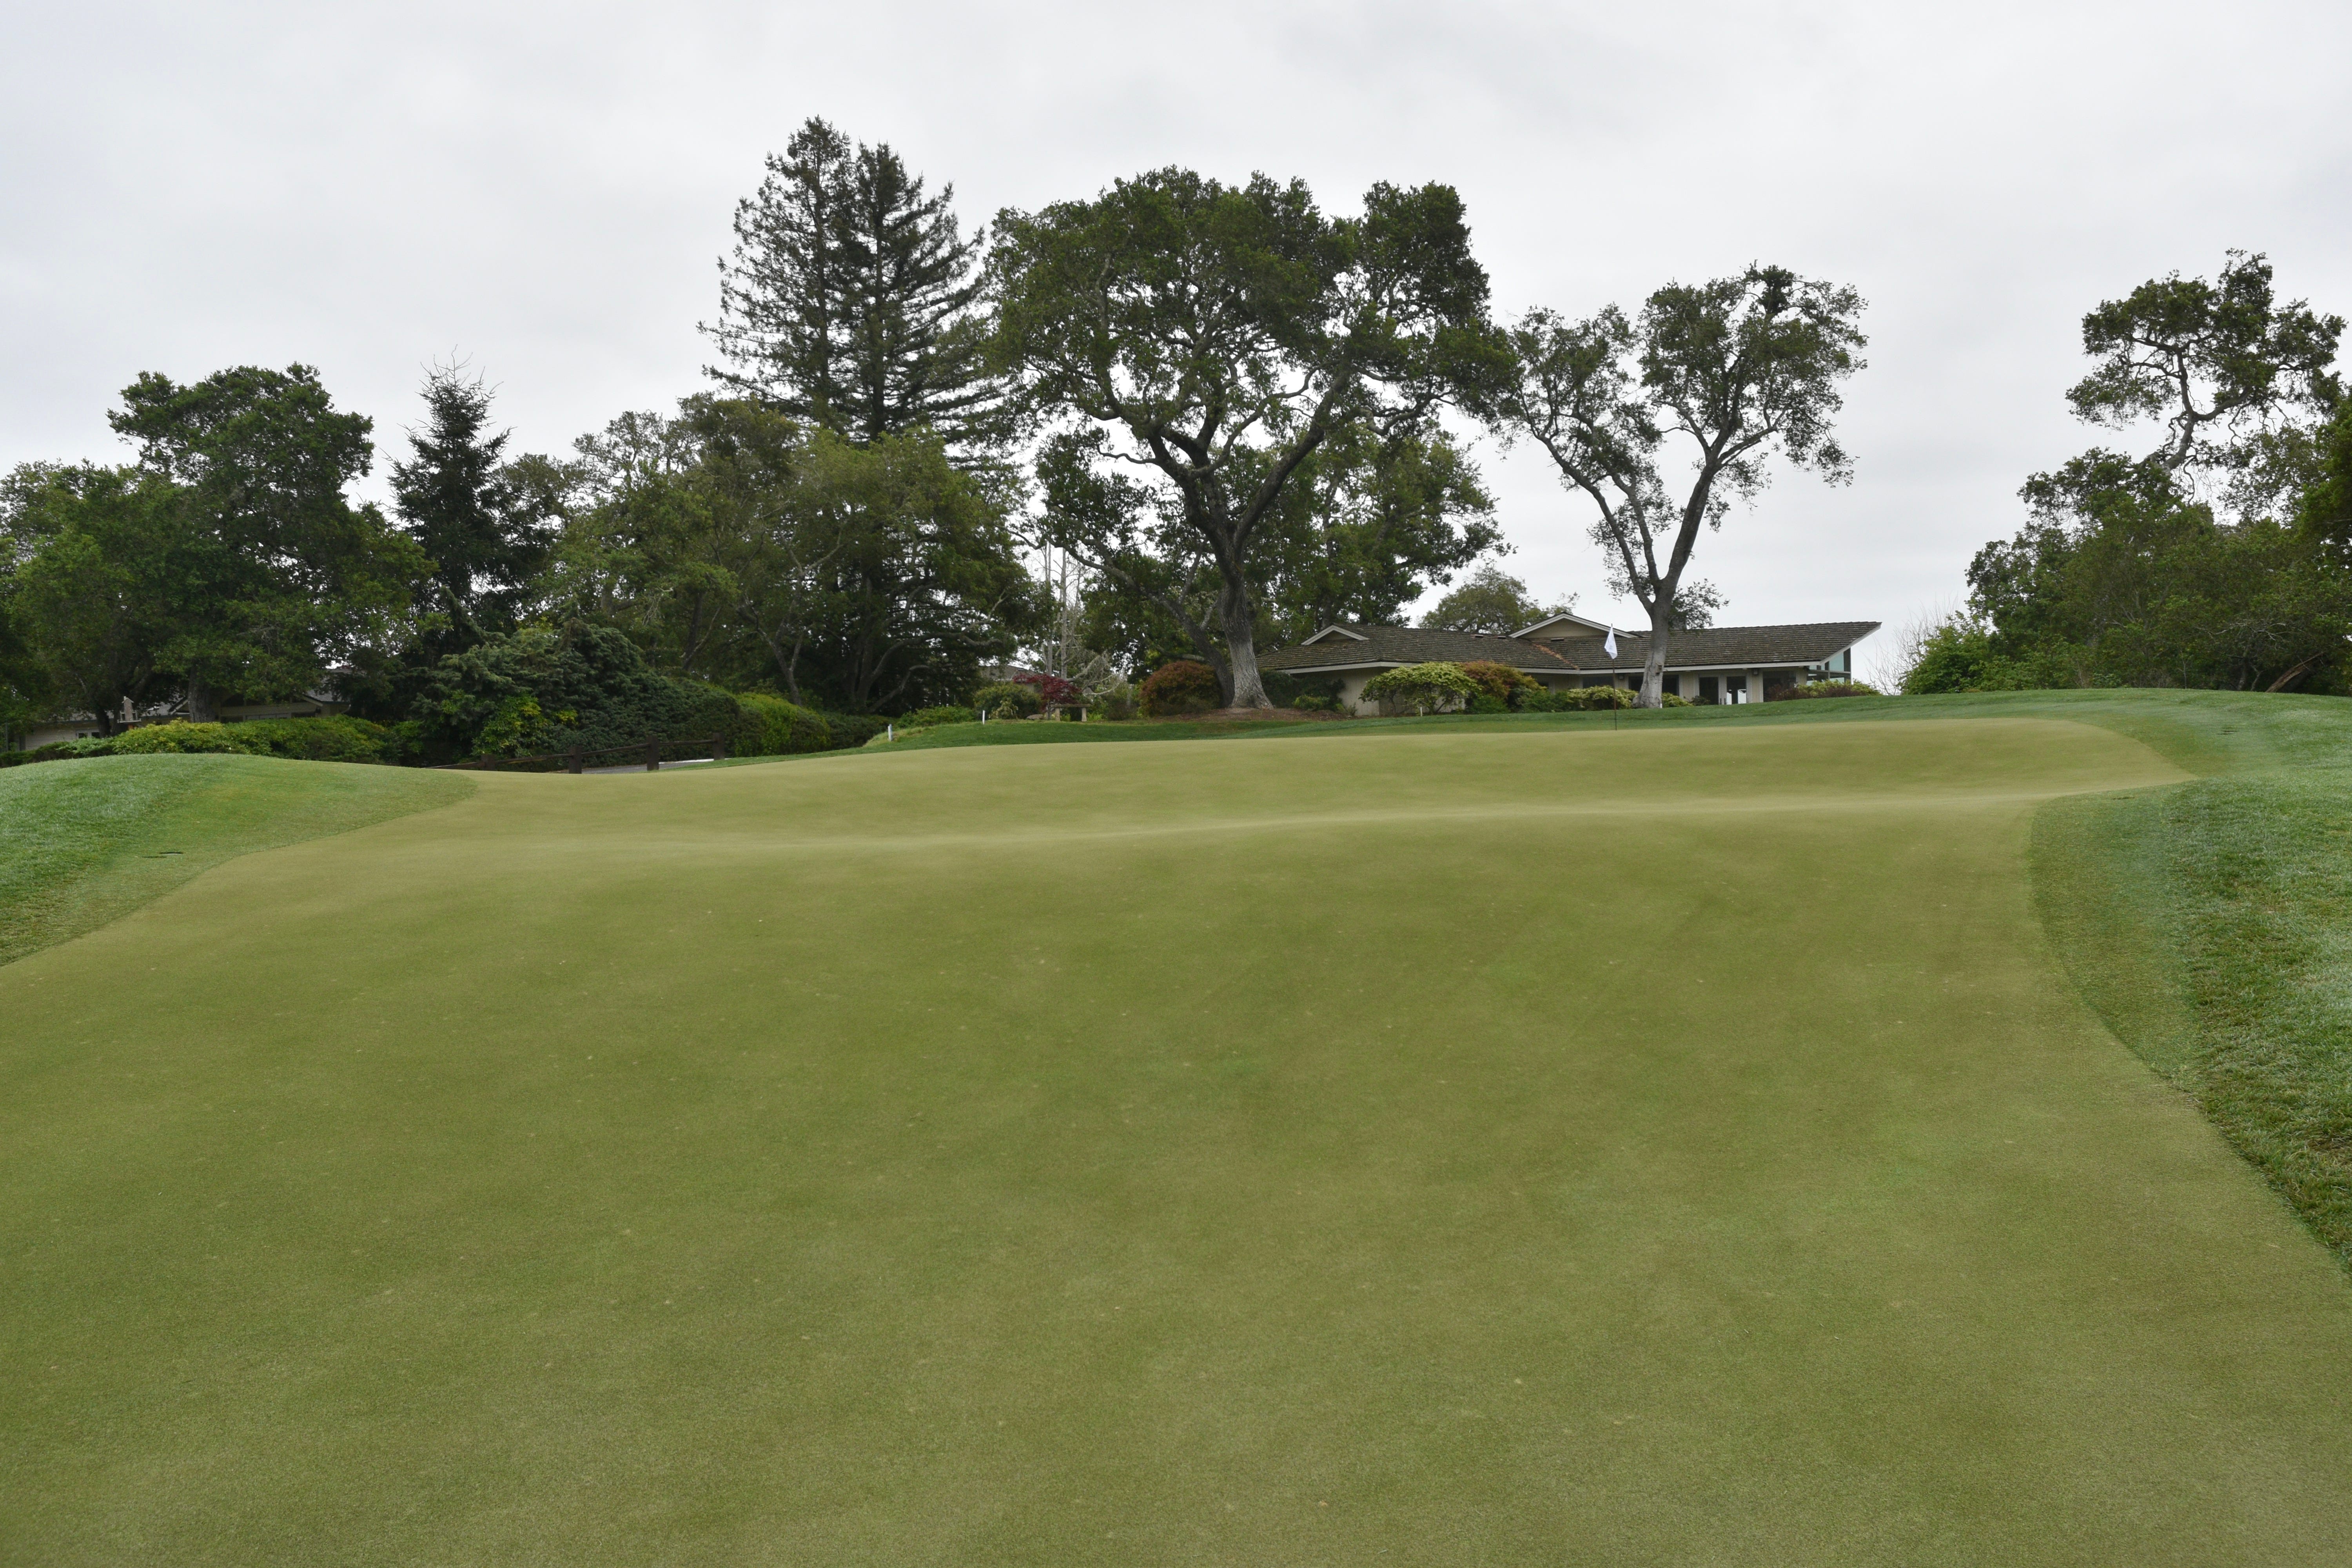
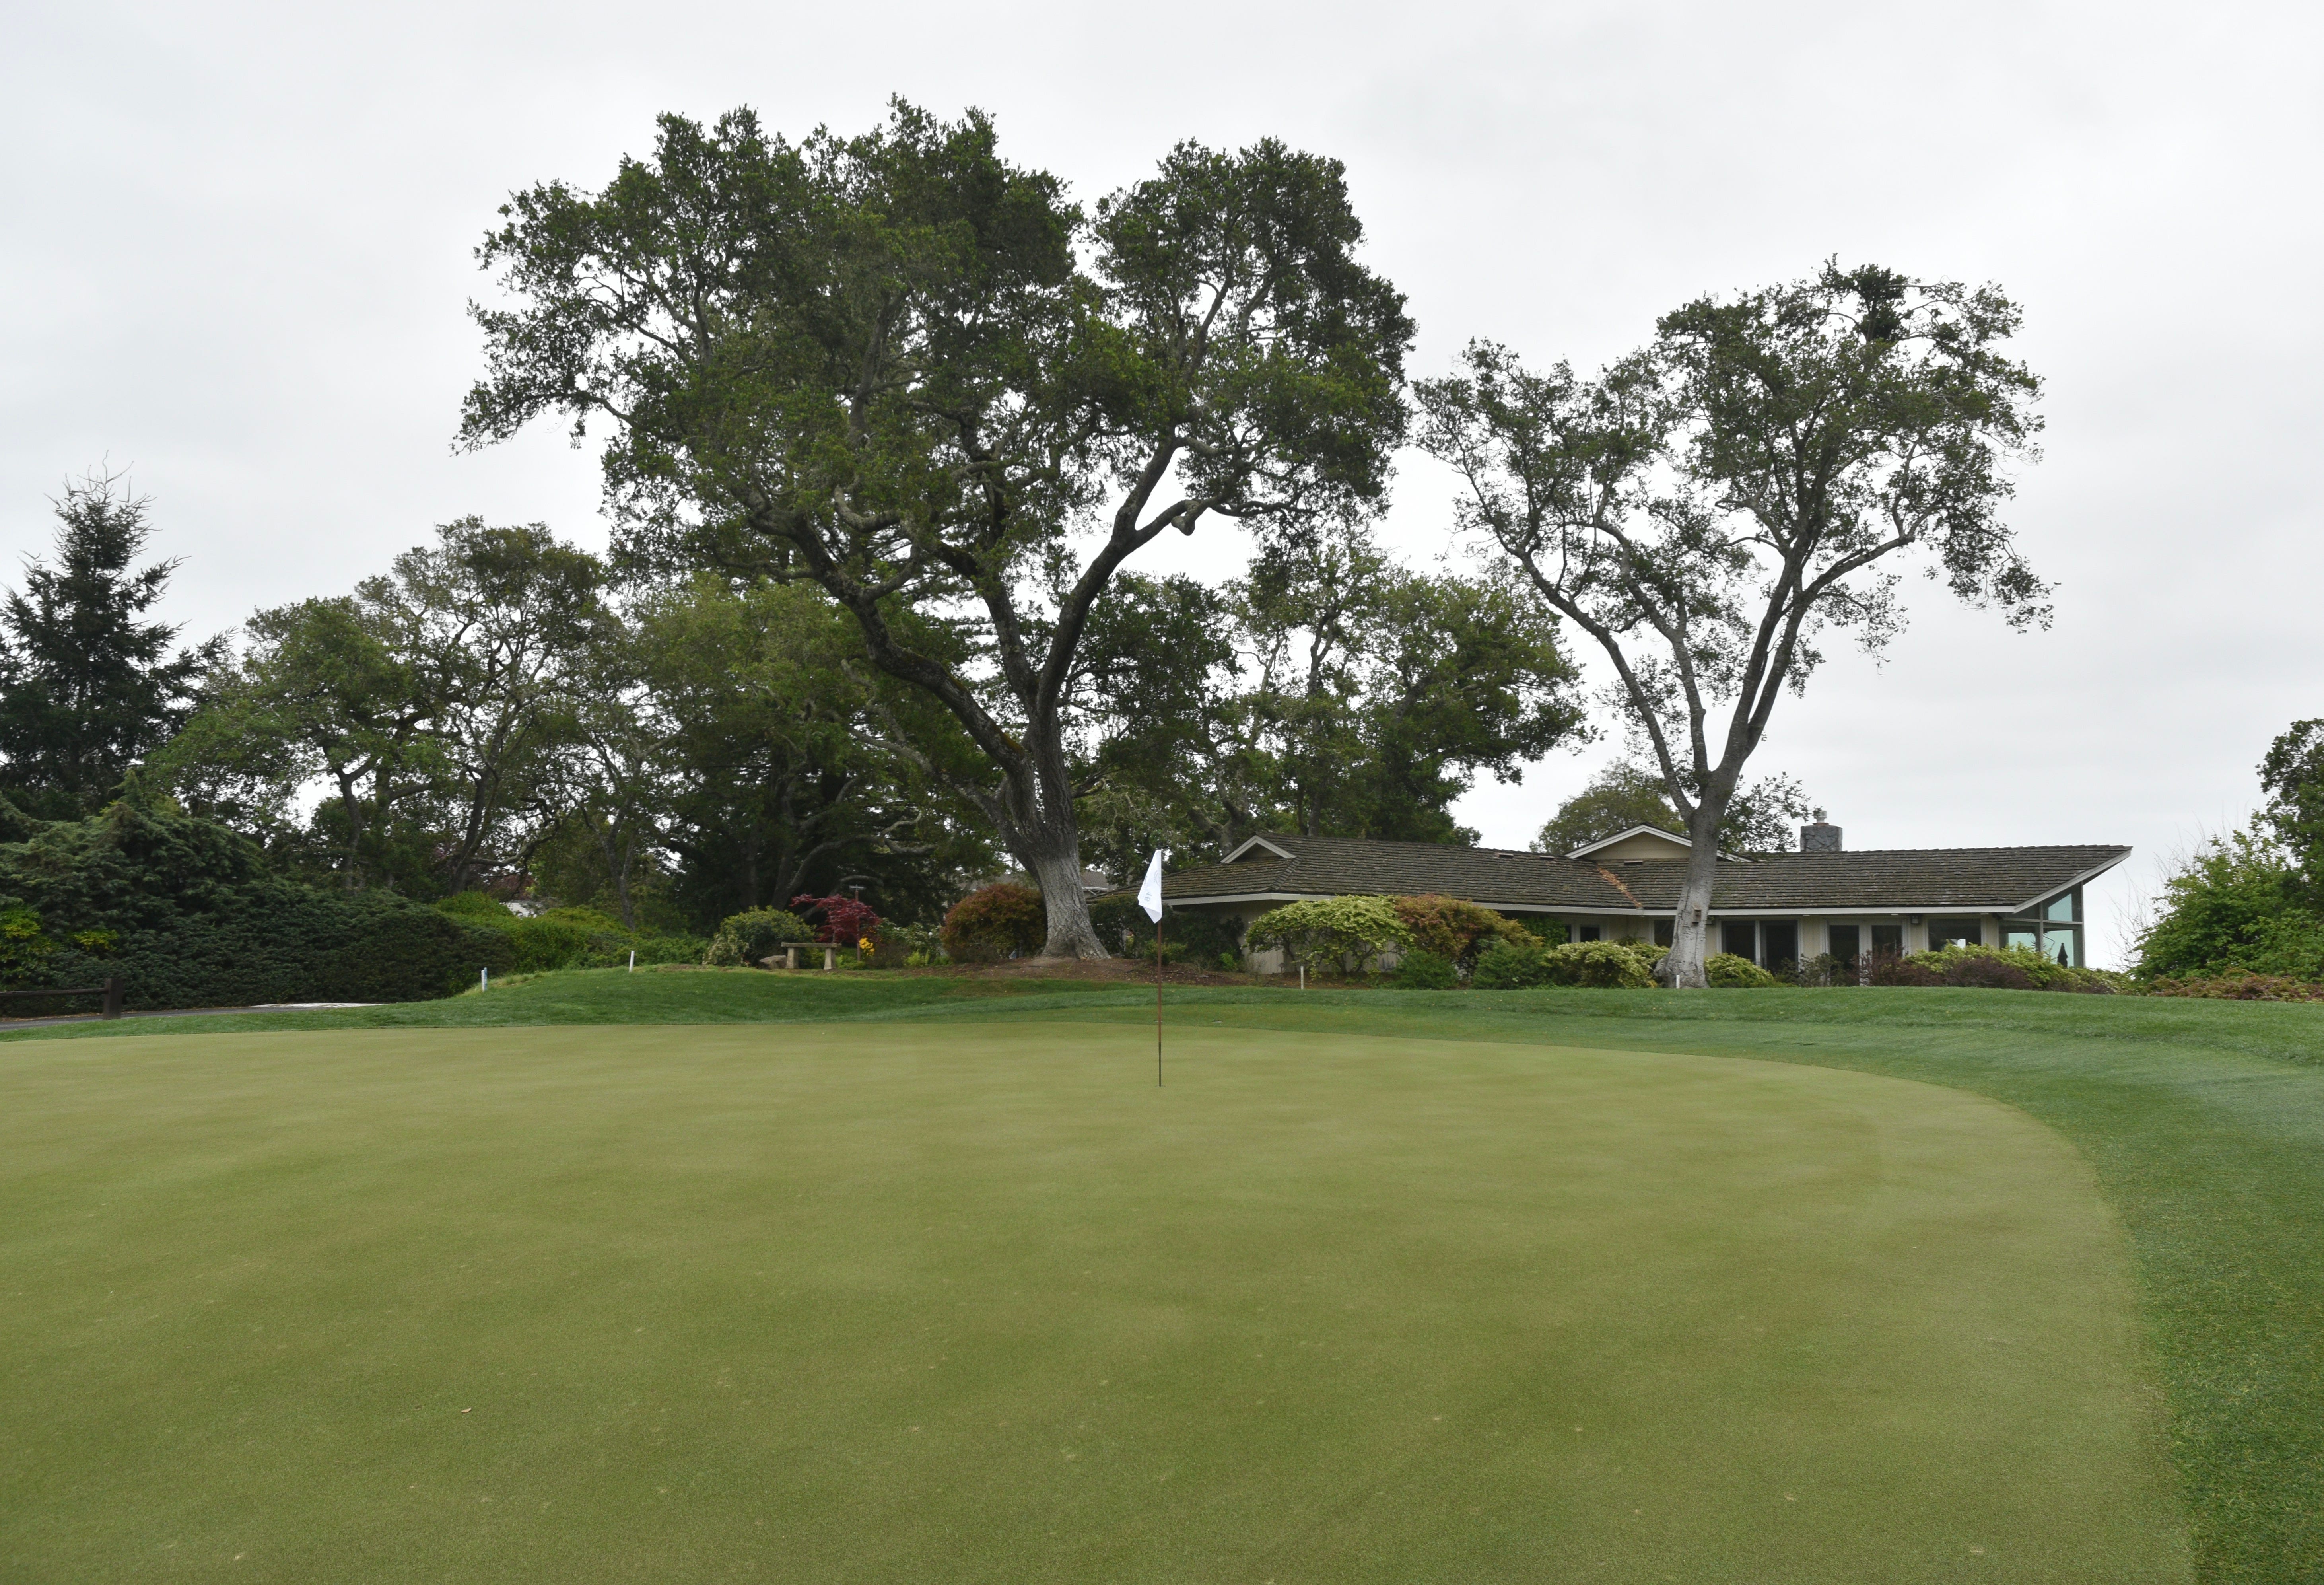
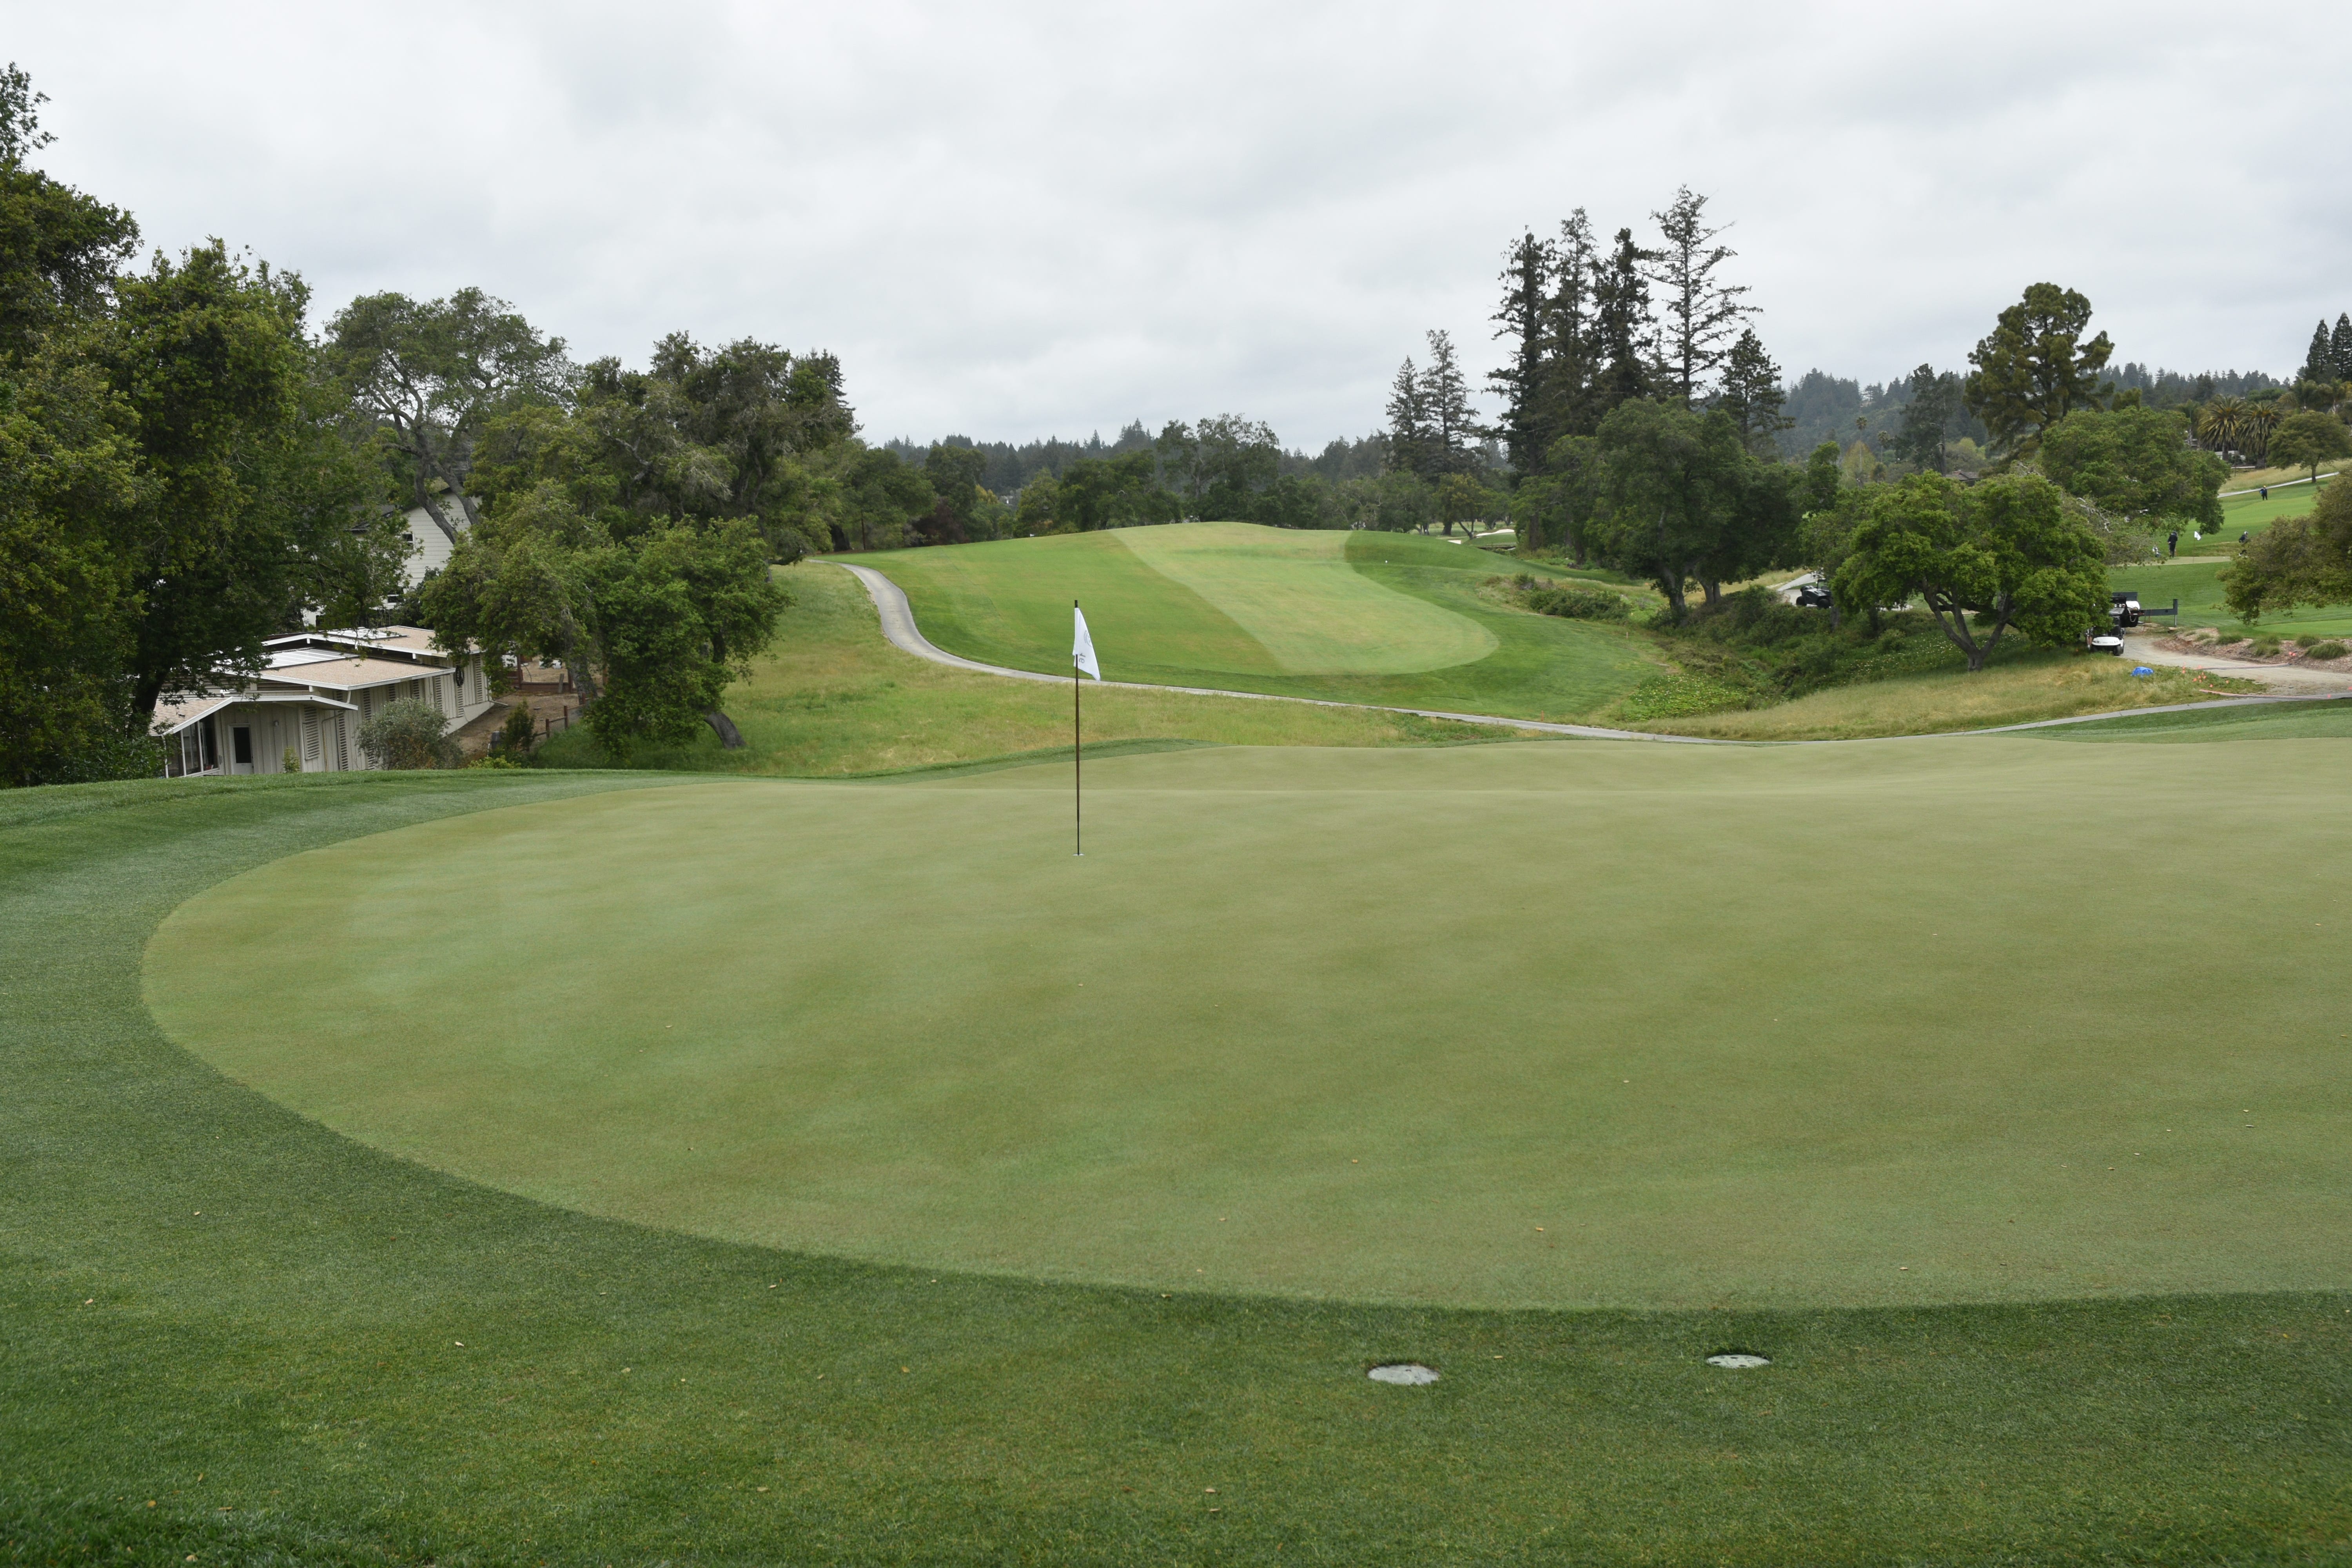
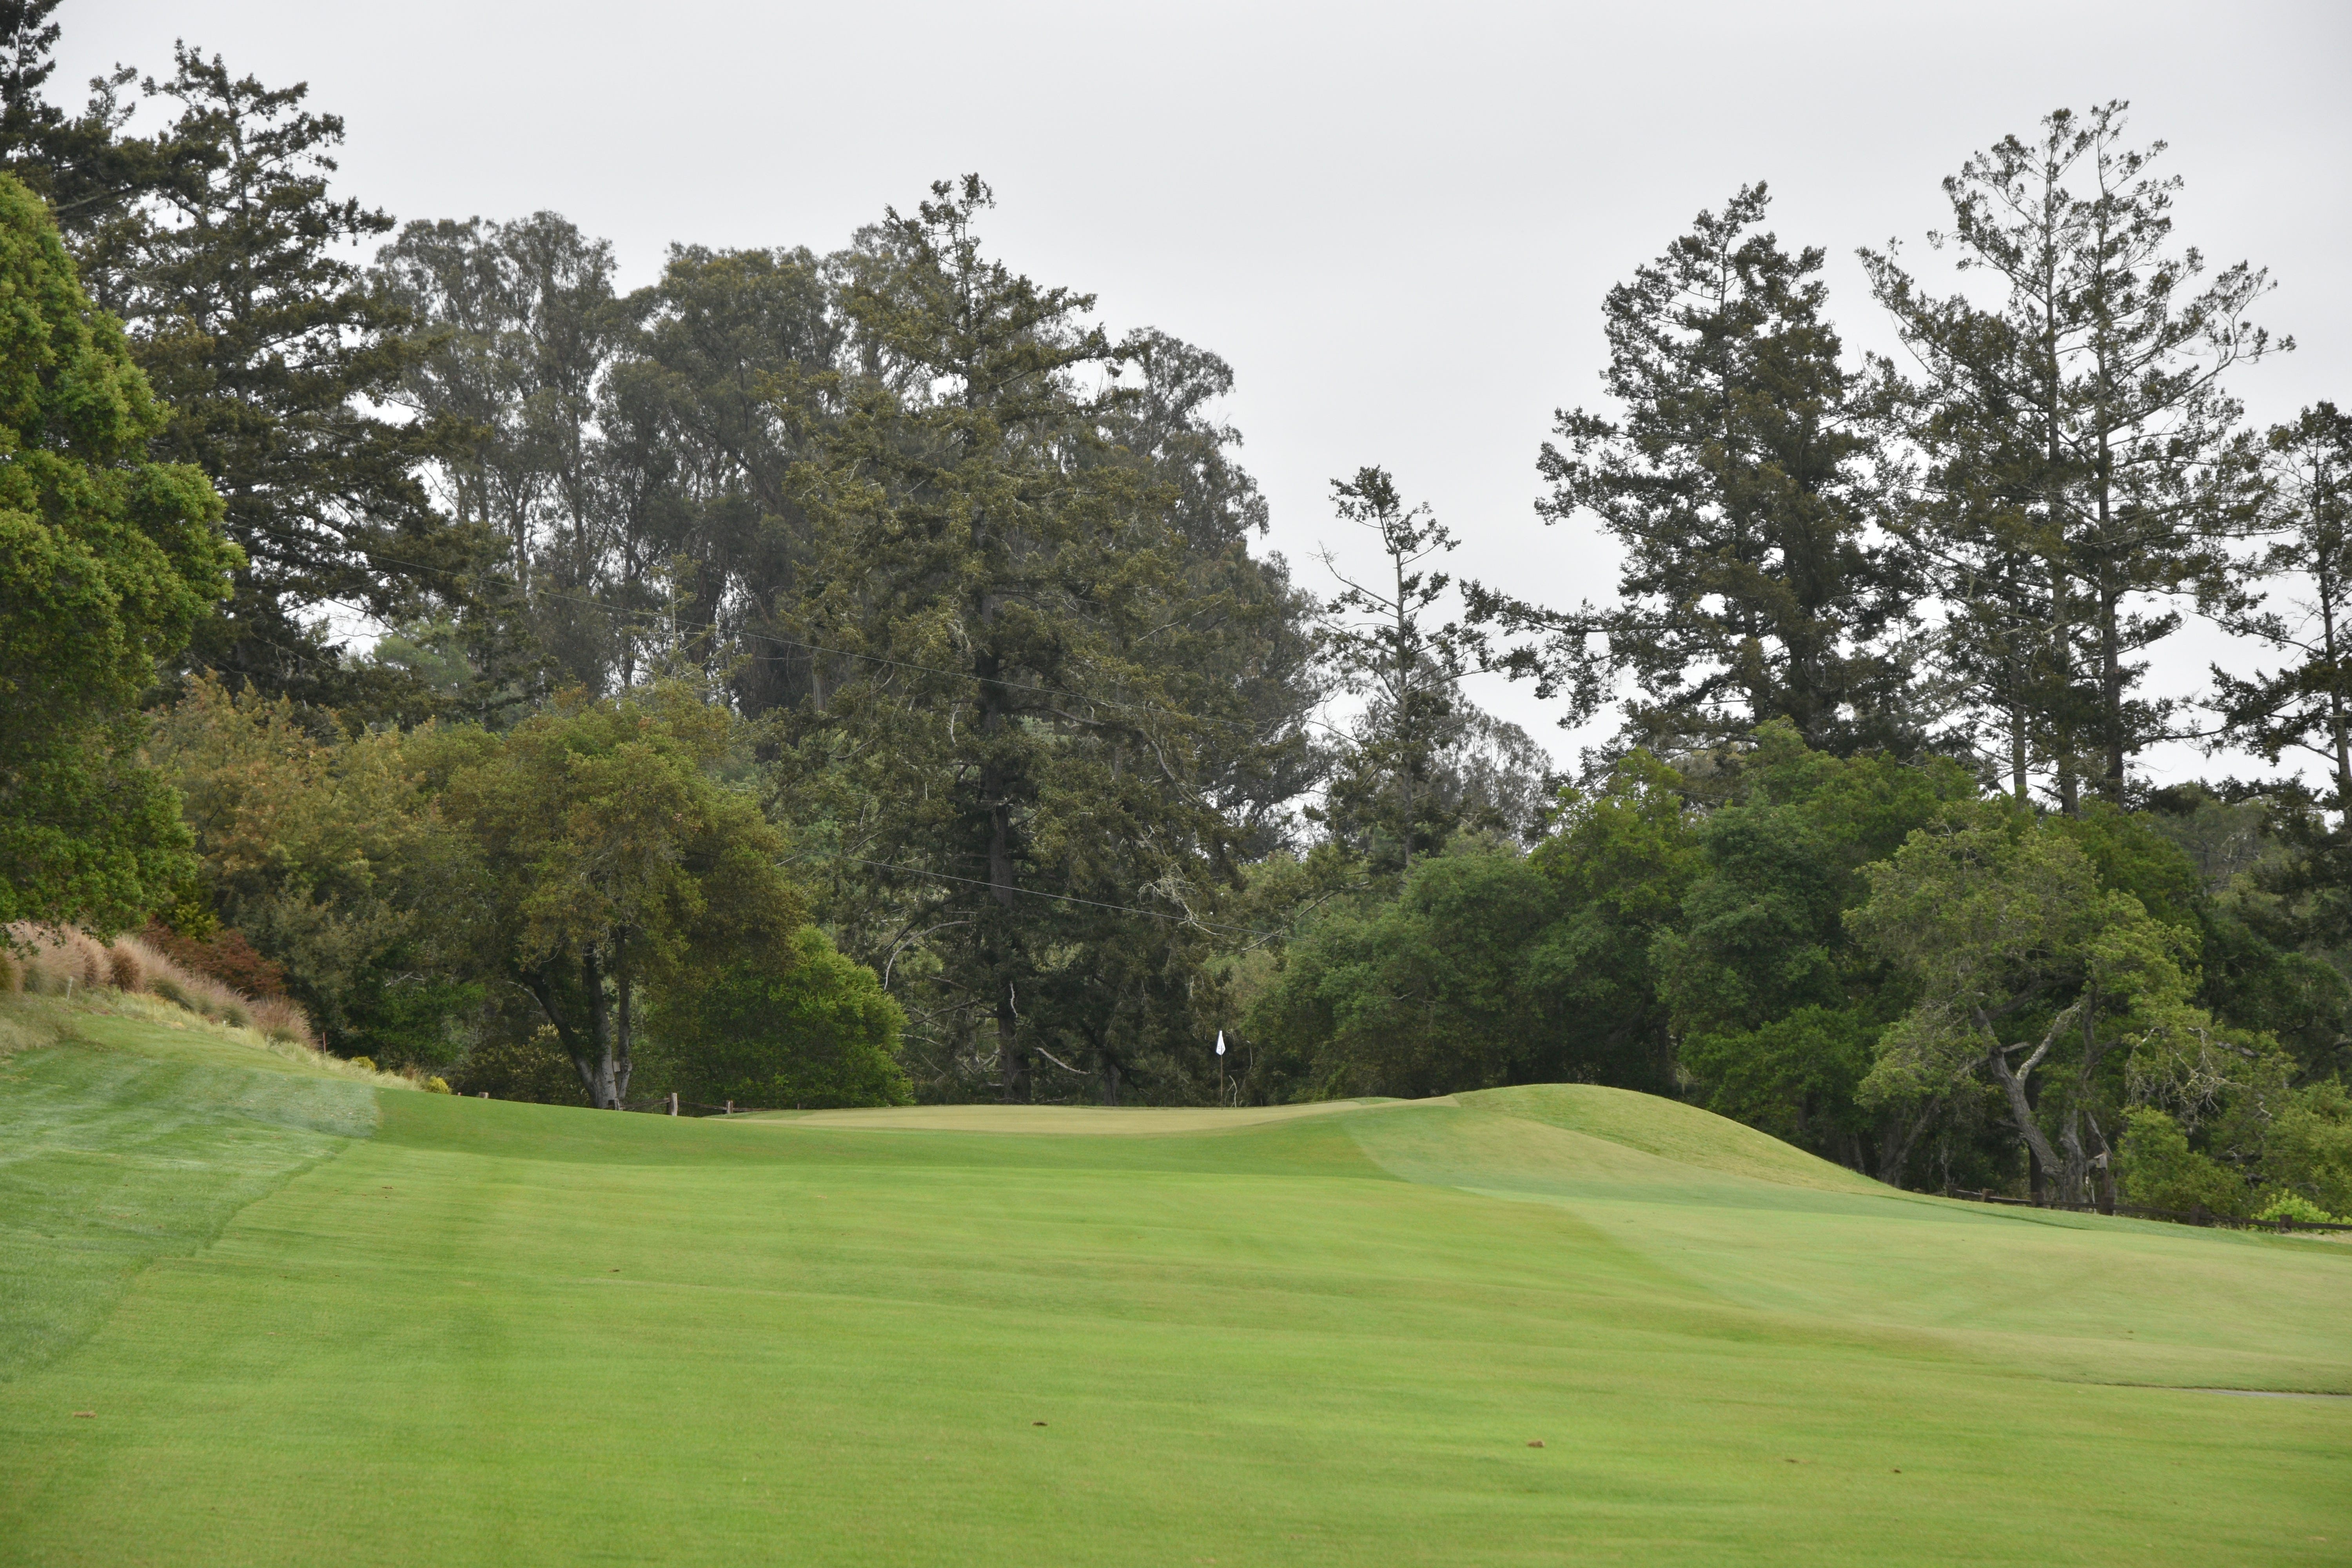
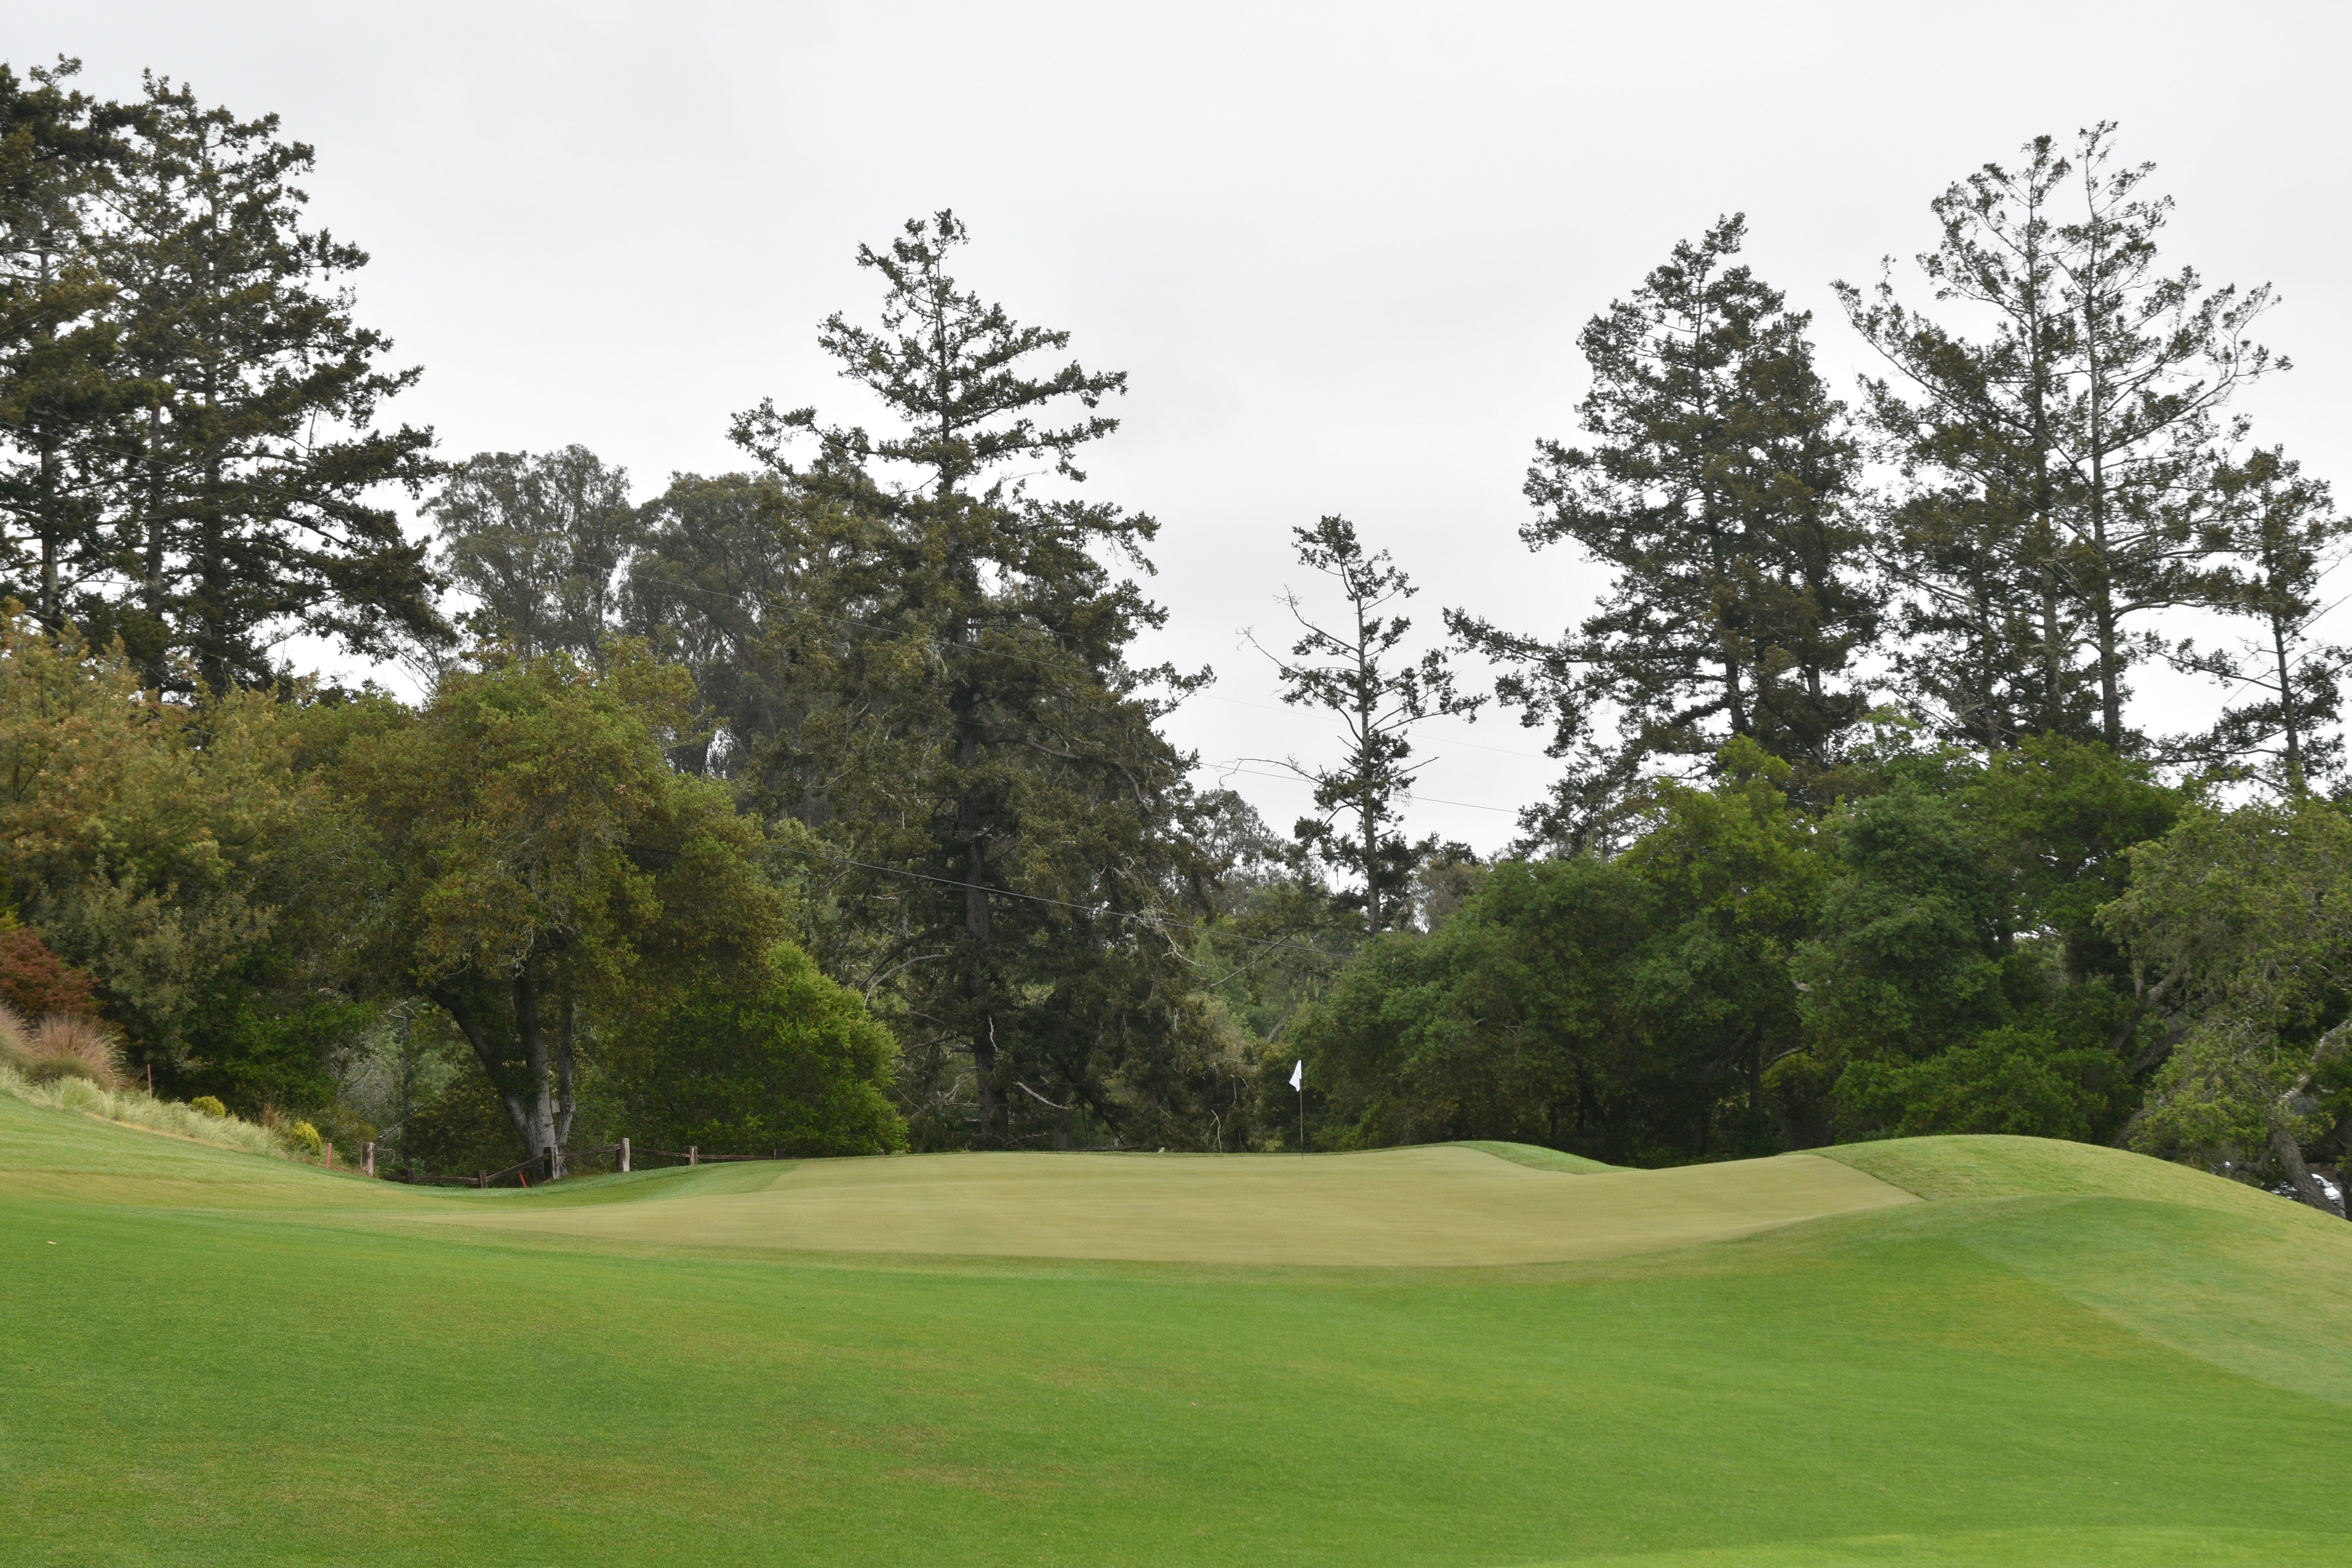
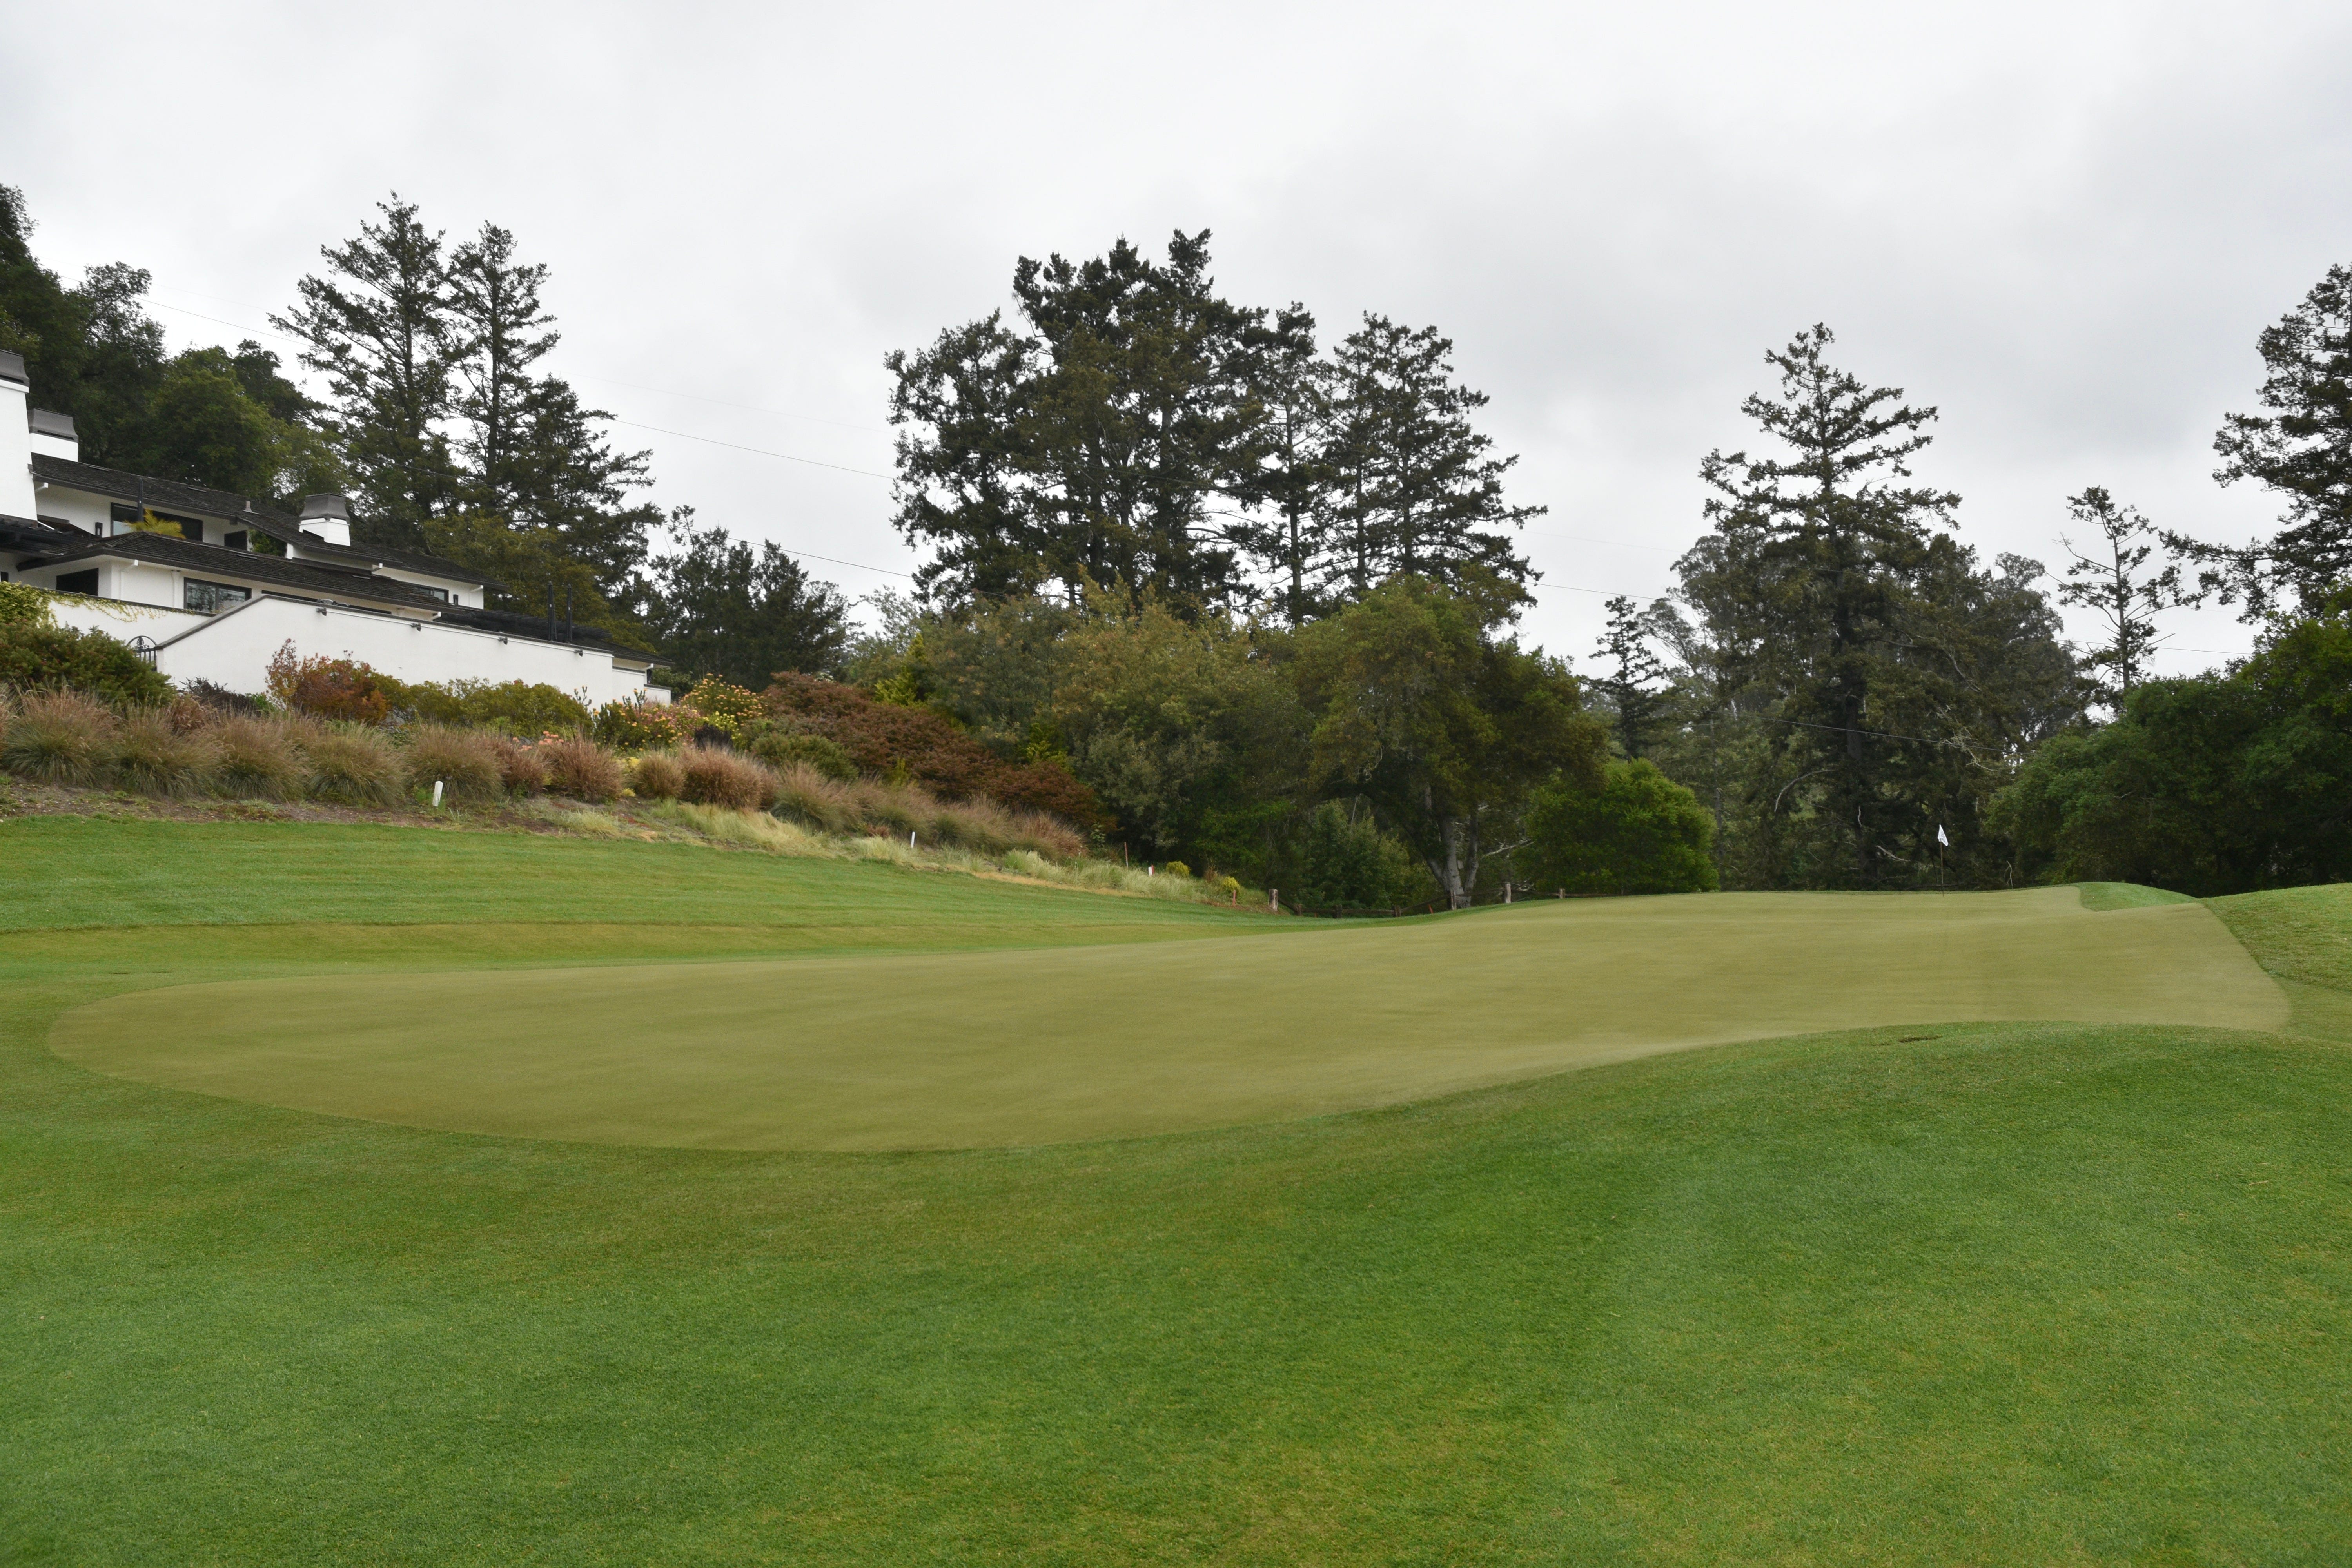
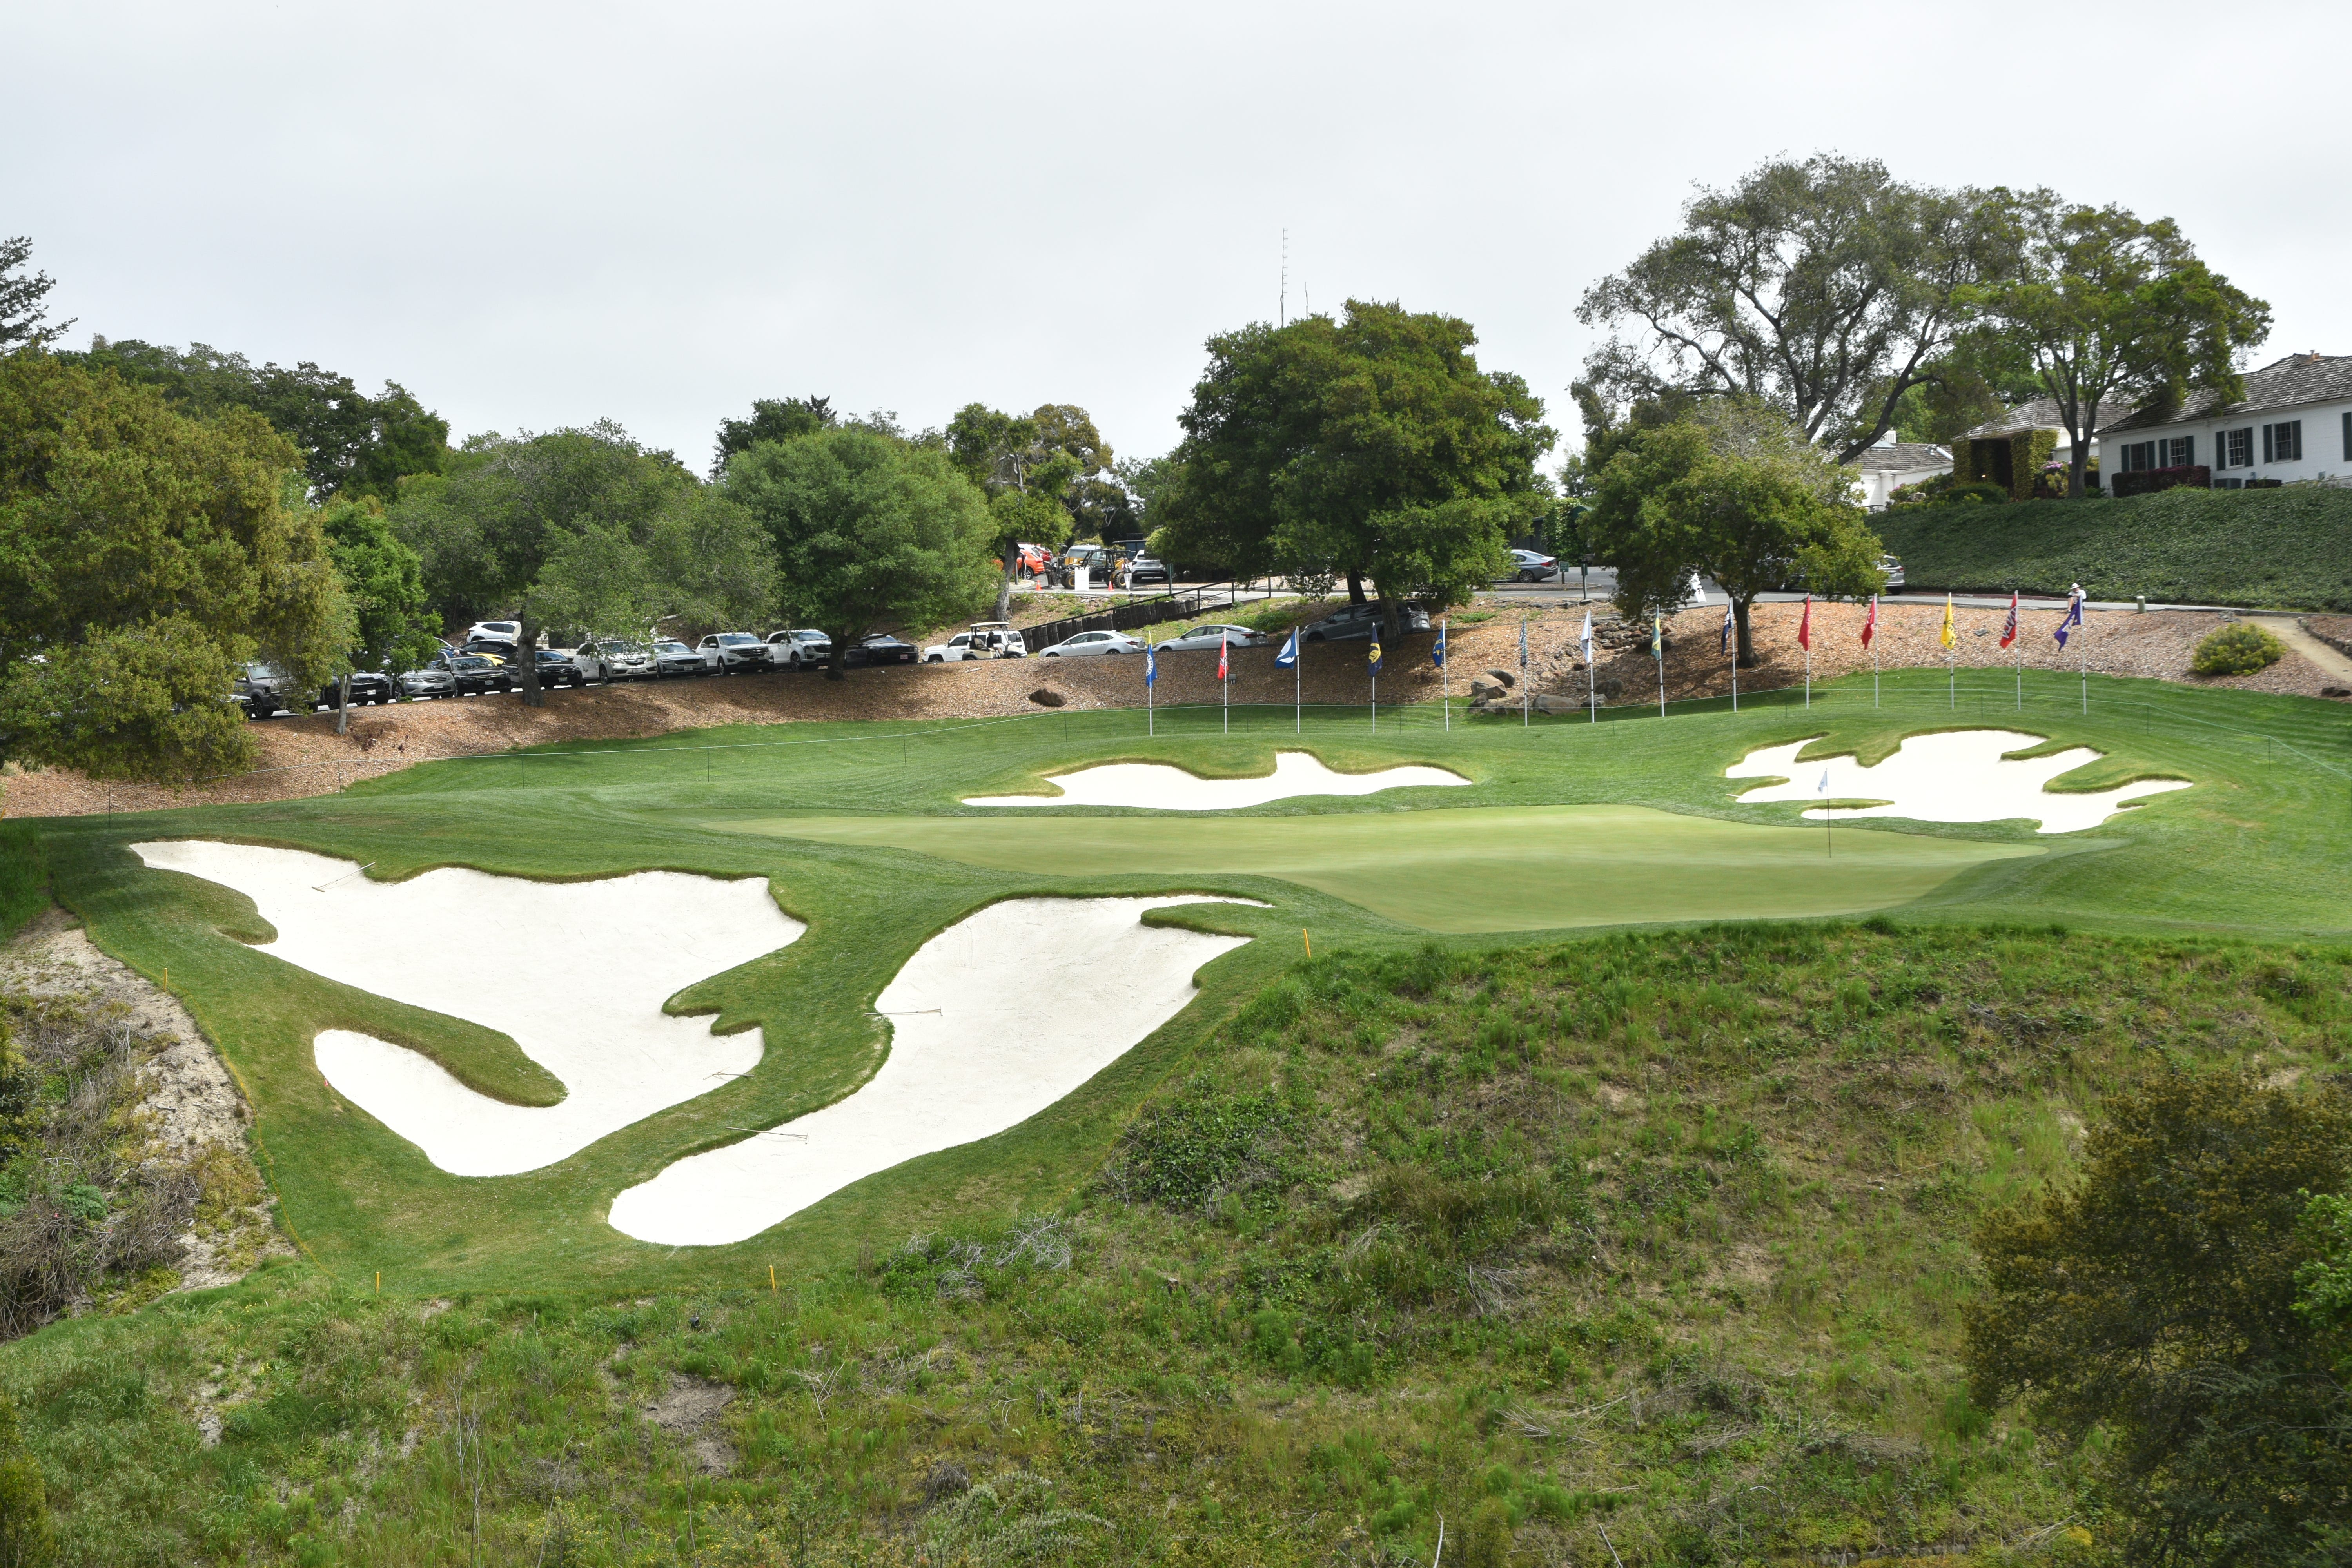
The 10th hole green viewed from the front right — the green’s ridges and slopes are now more defined than before the restoration. This is one sexy looking green now
The 10th hole green viewed from the right — Approach shots properly struck can slingshot across the green from right to left as the prevailing slope can release a ball towards a left pin without hitting directly at it. This is a hallmark of MacKenzie-designed golf courses
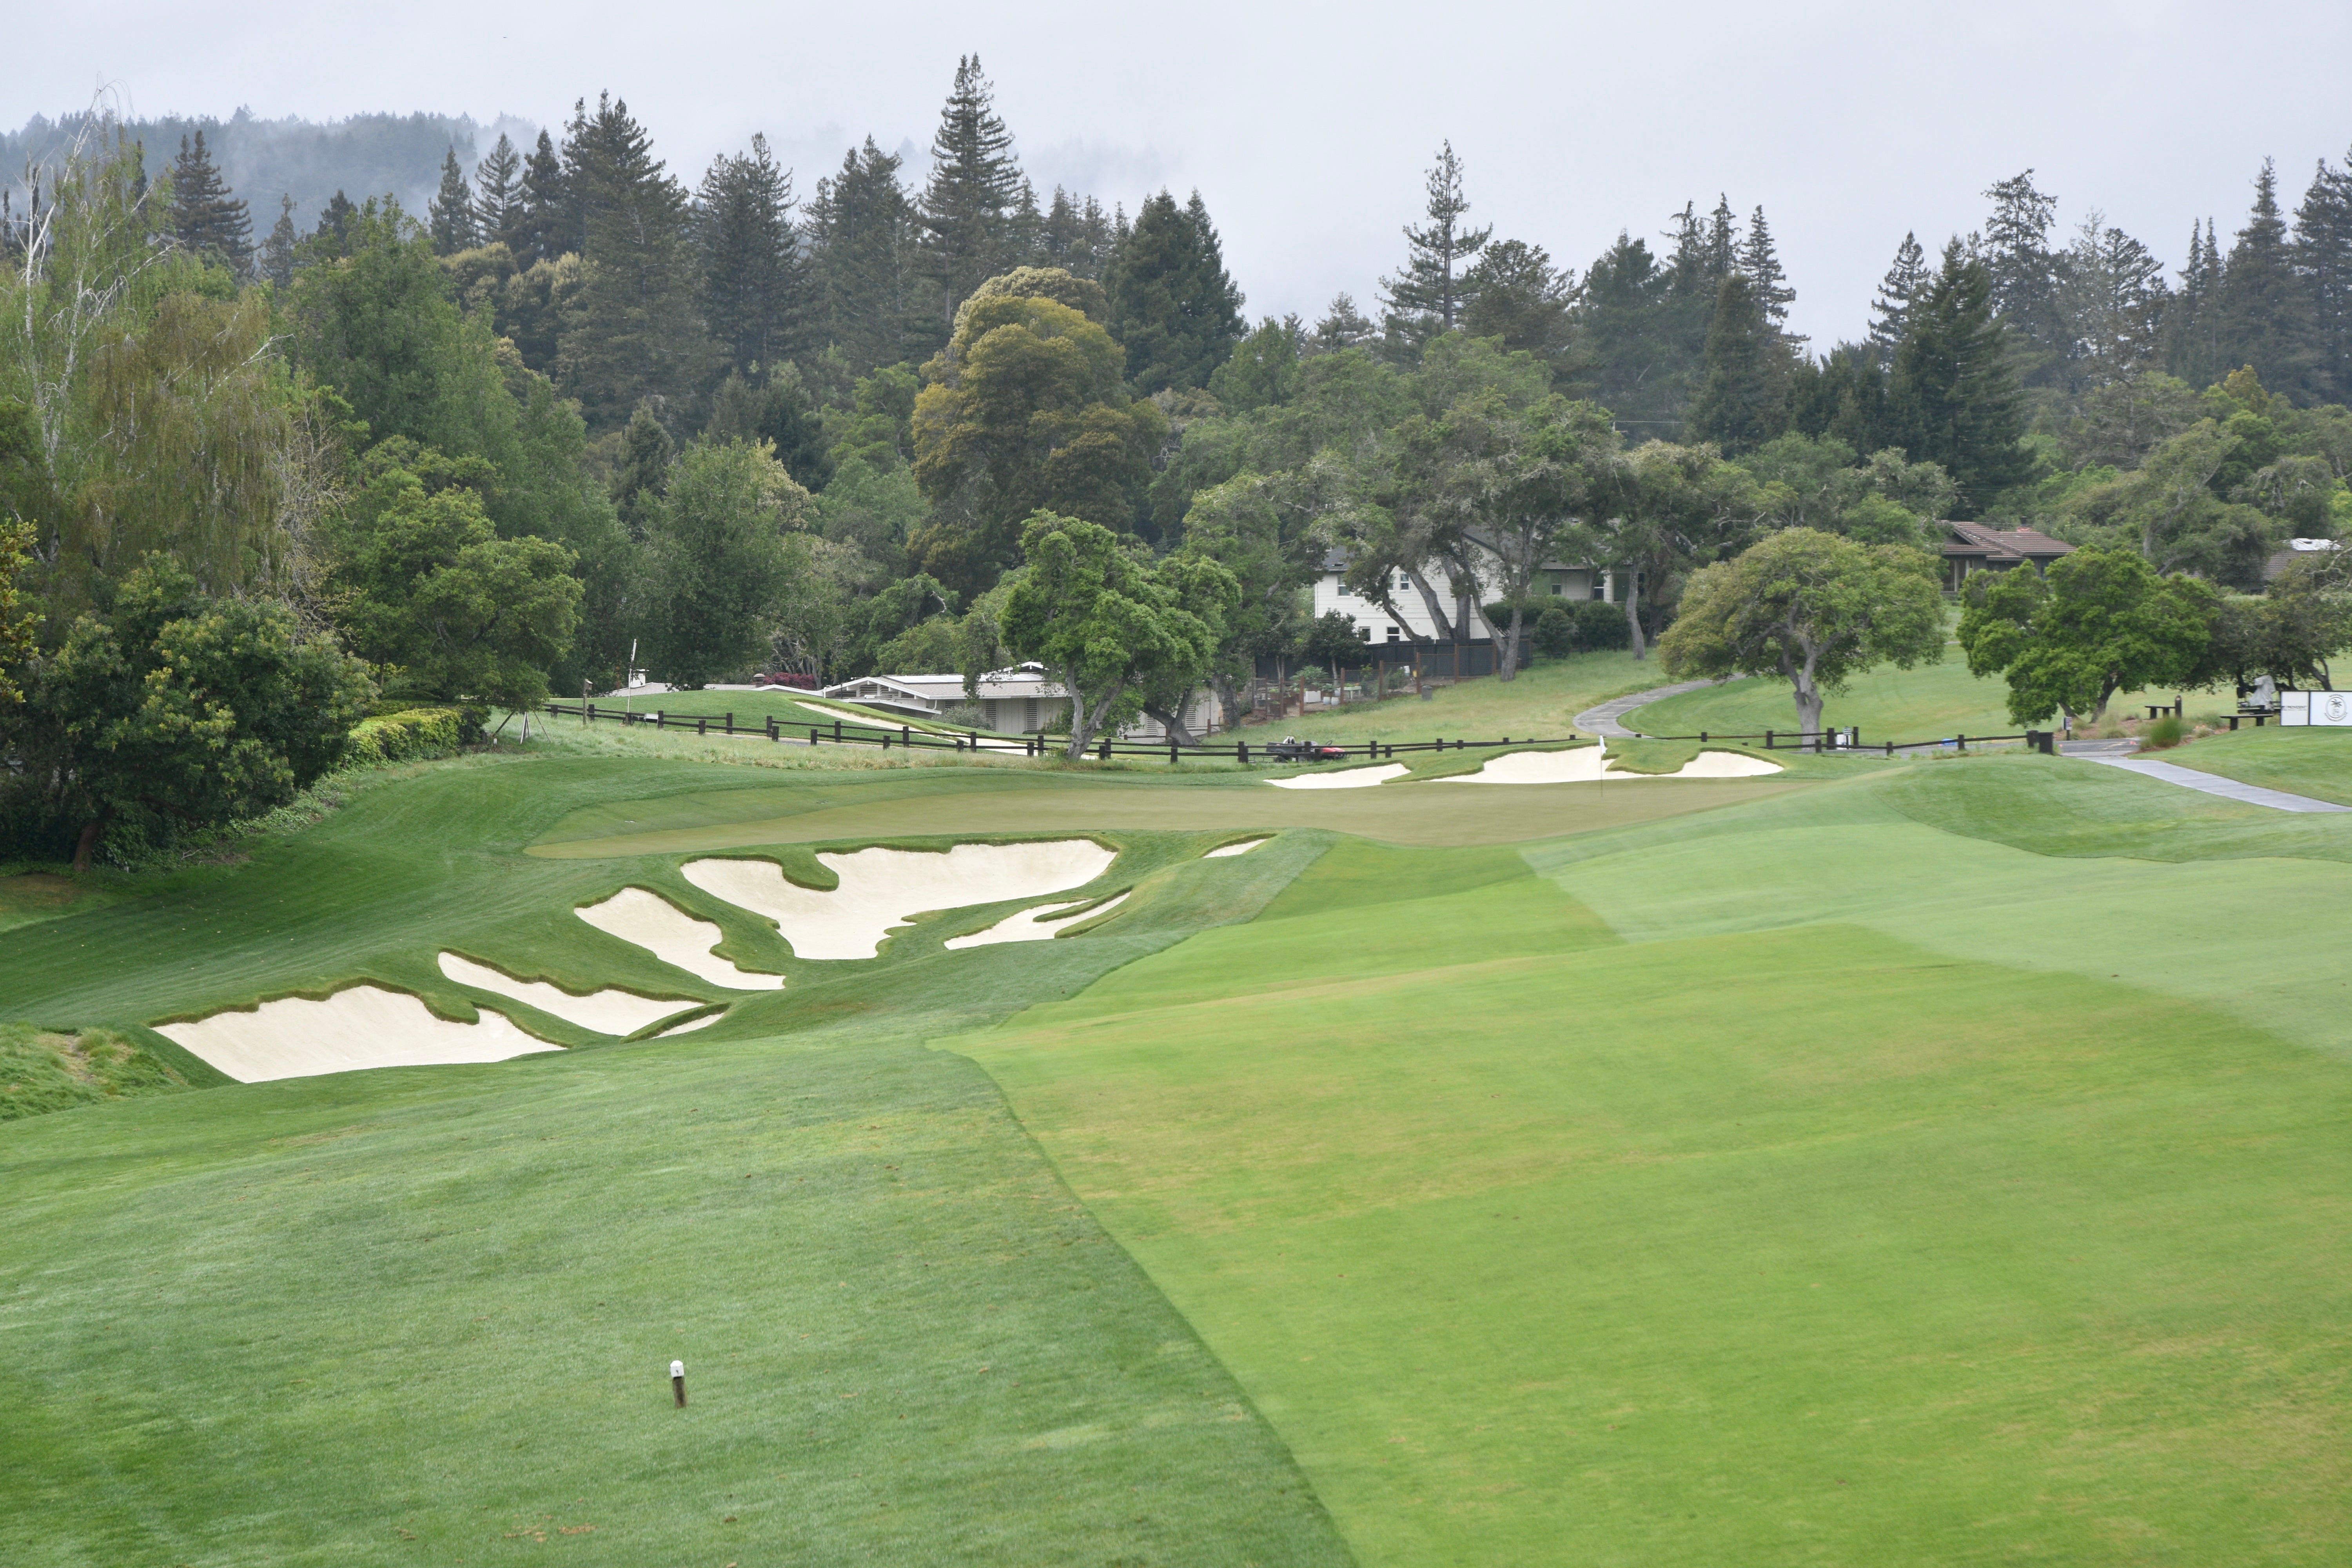
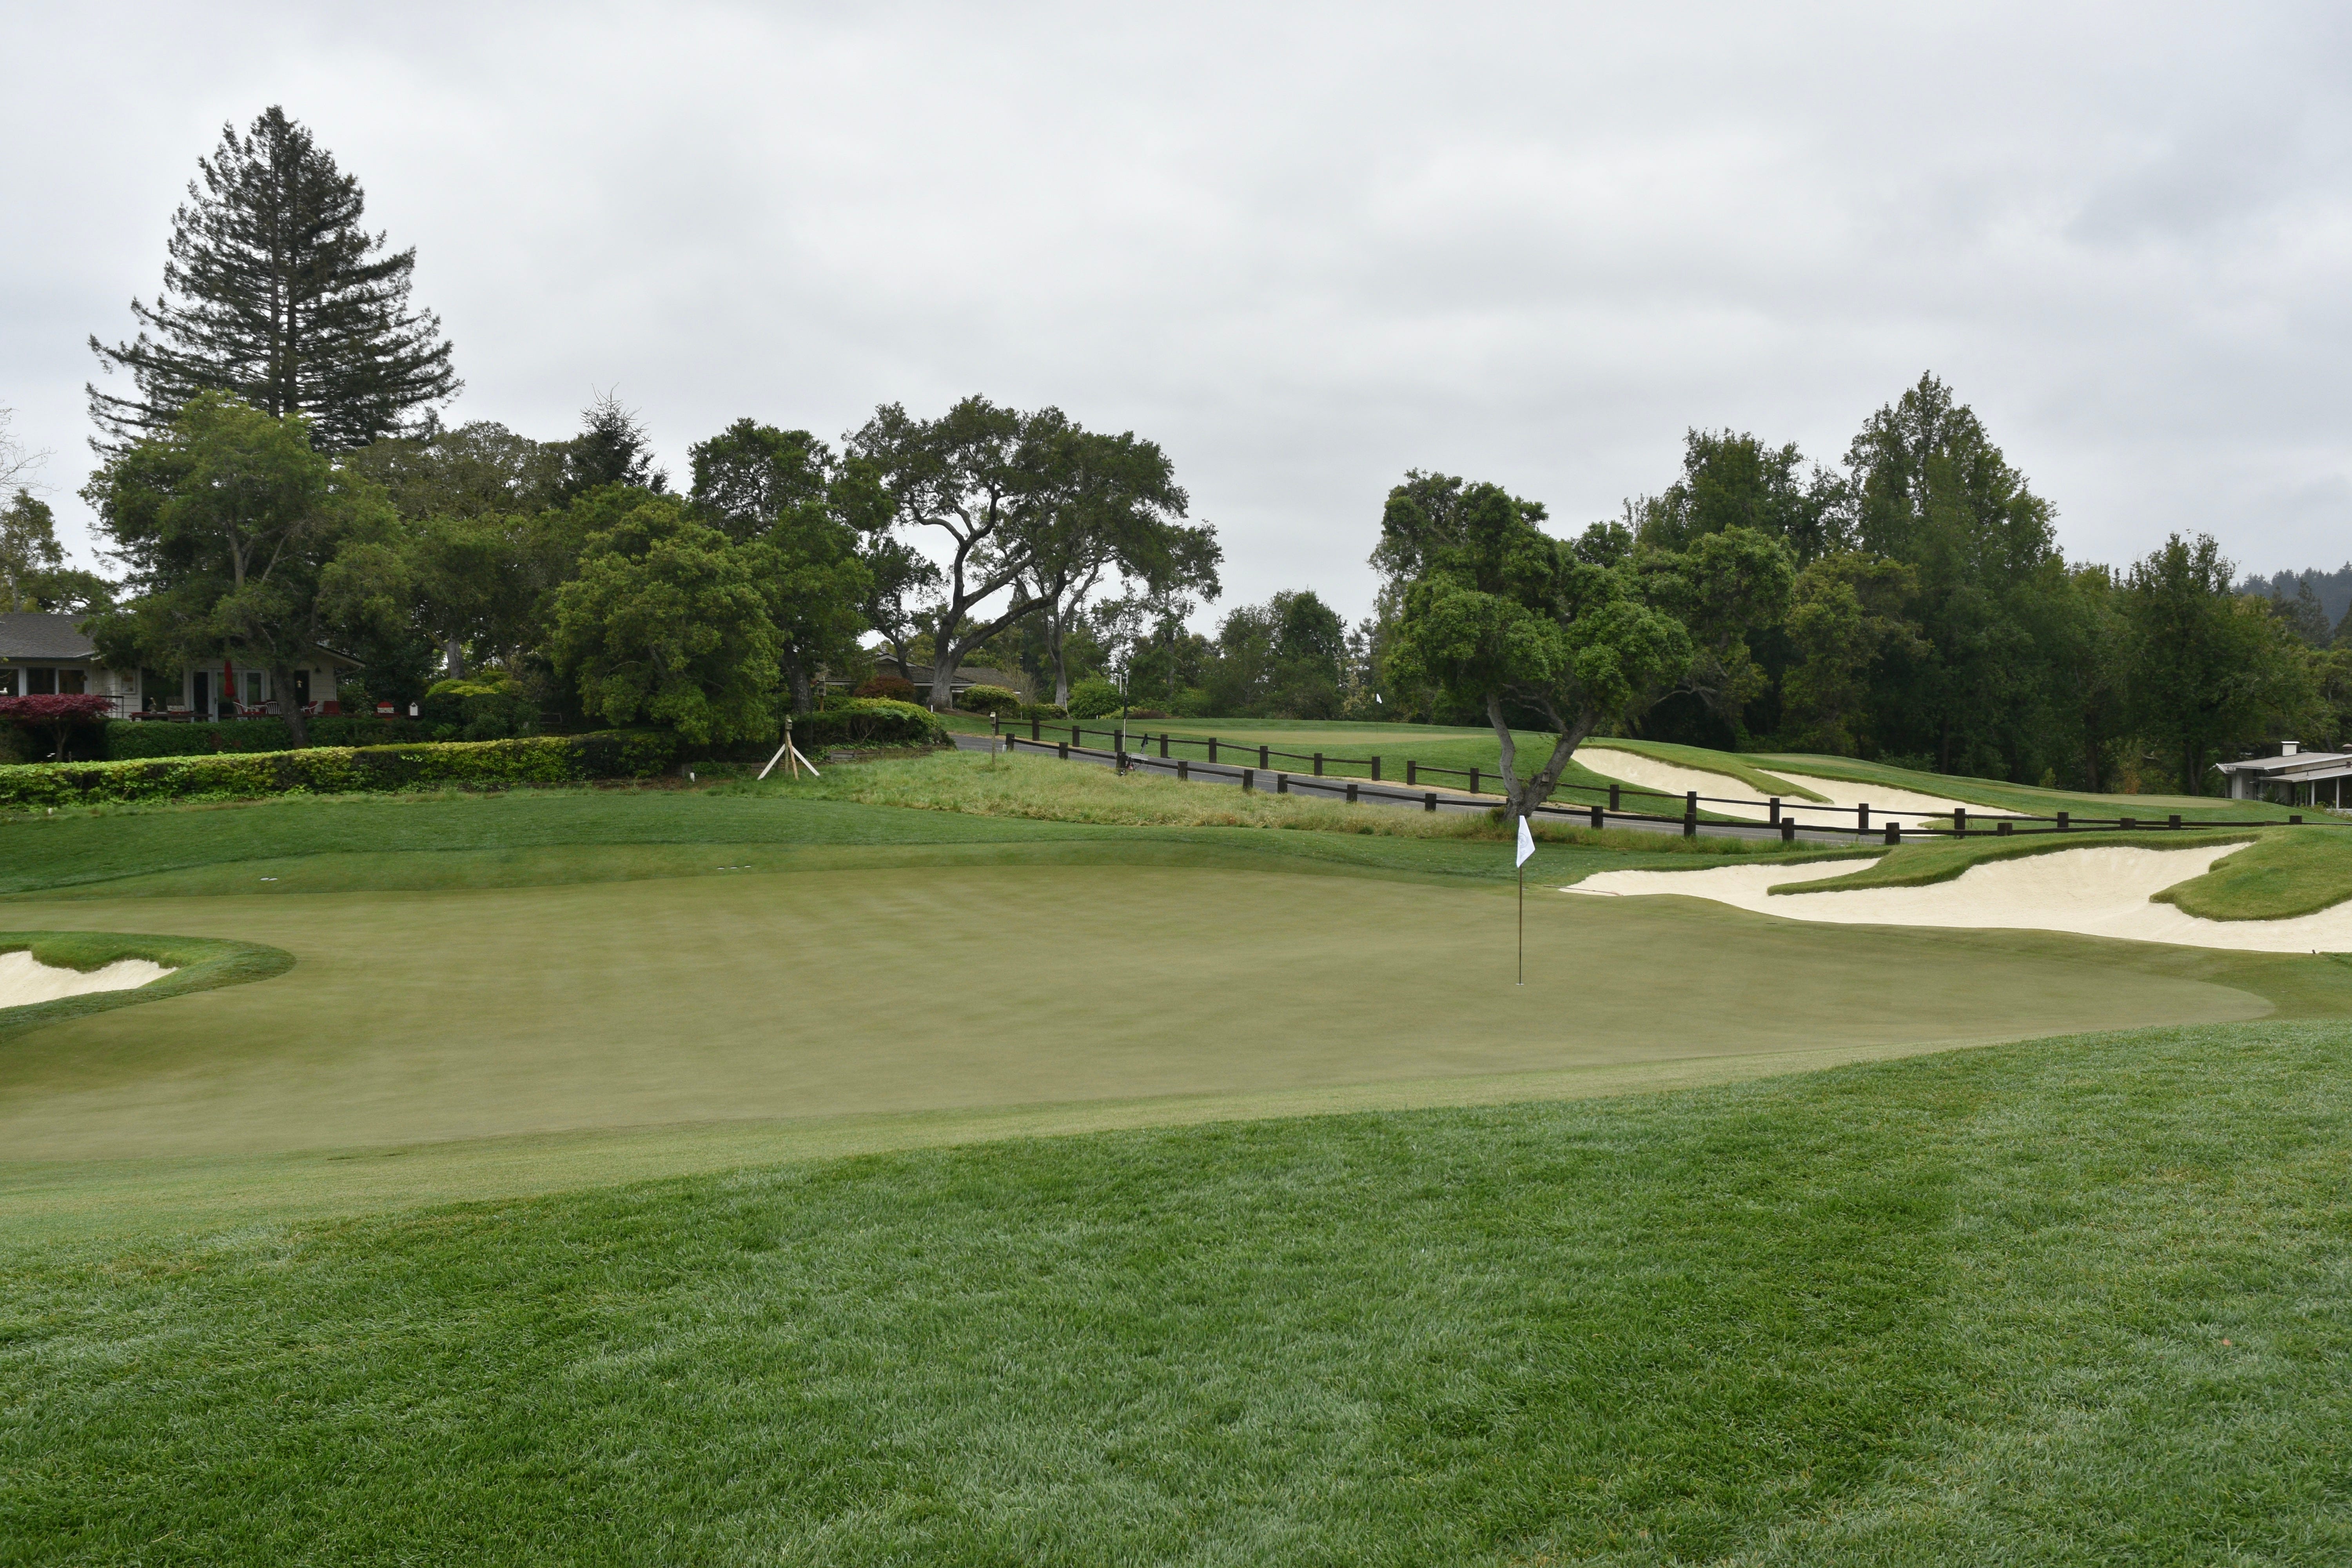
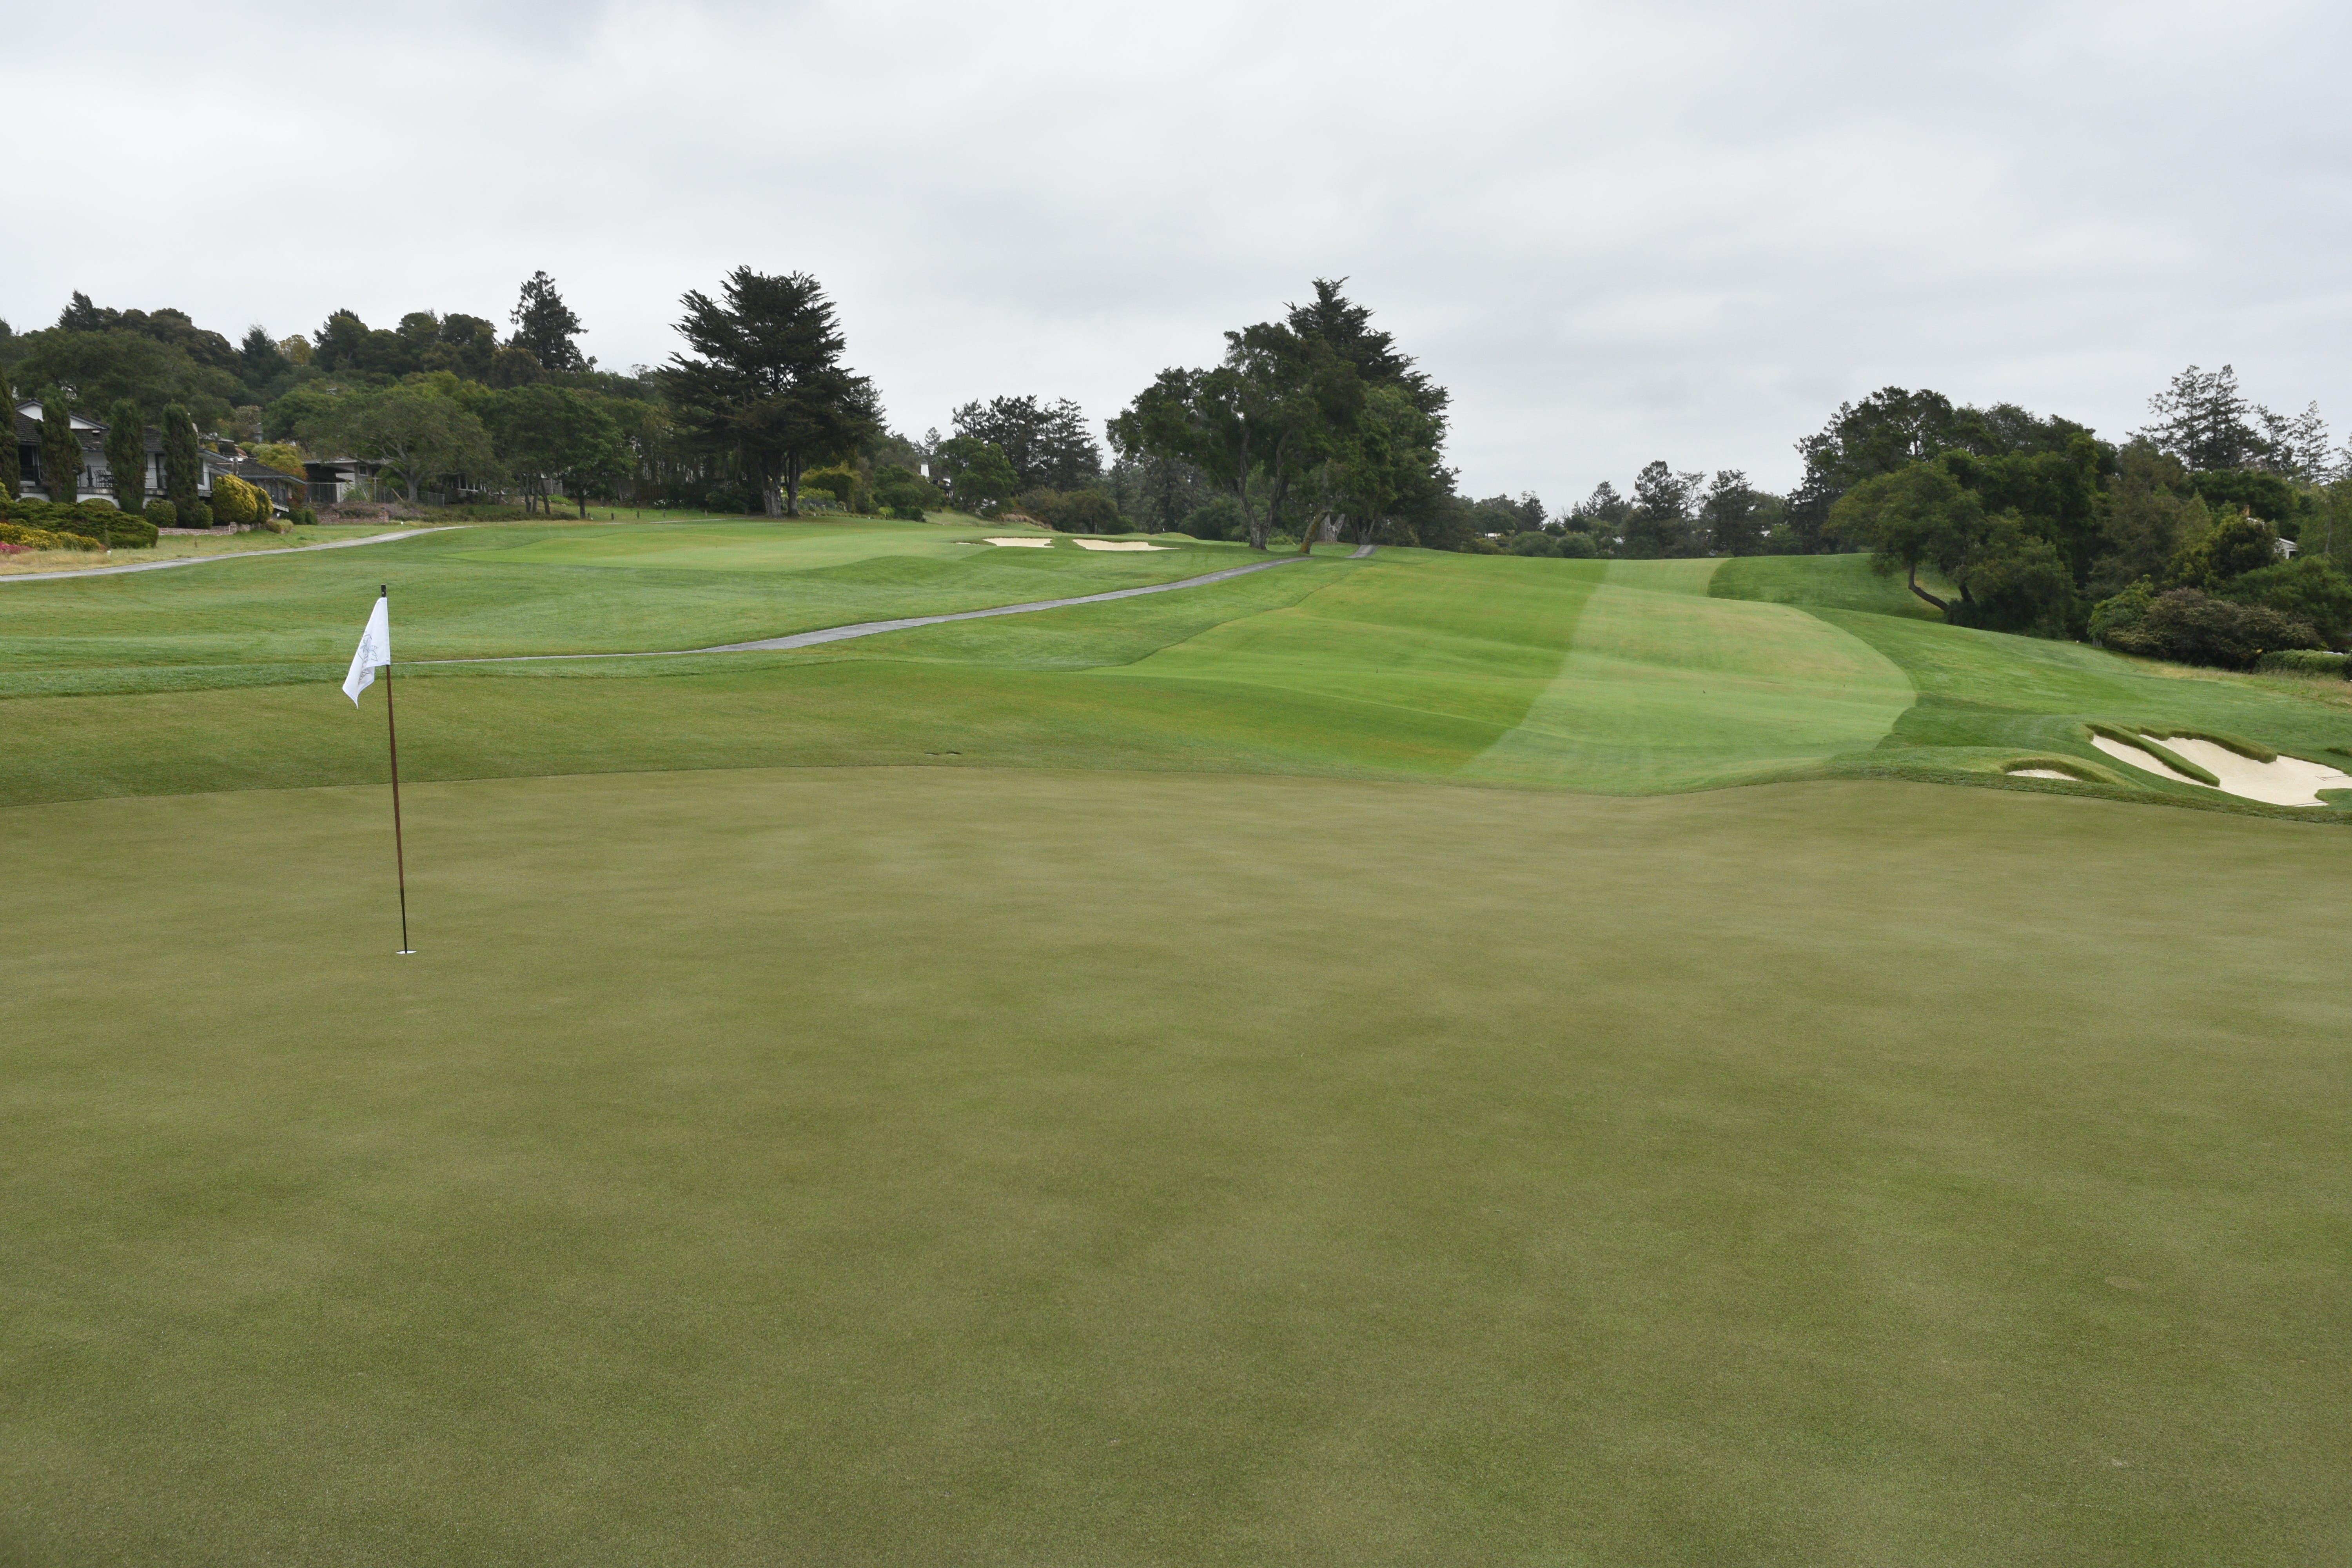
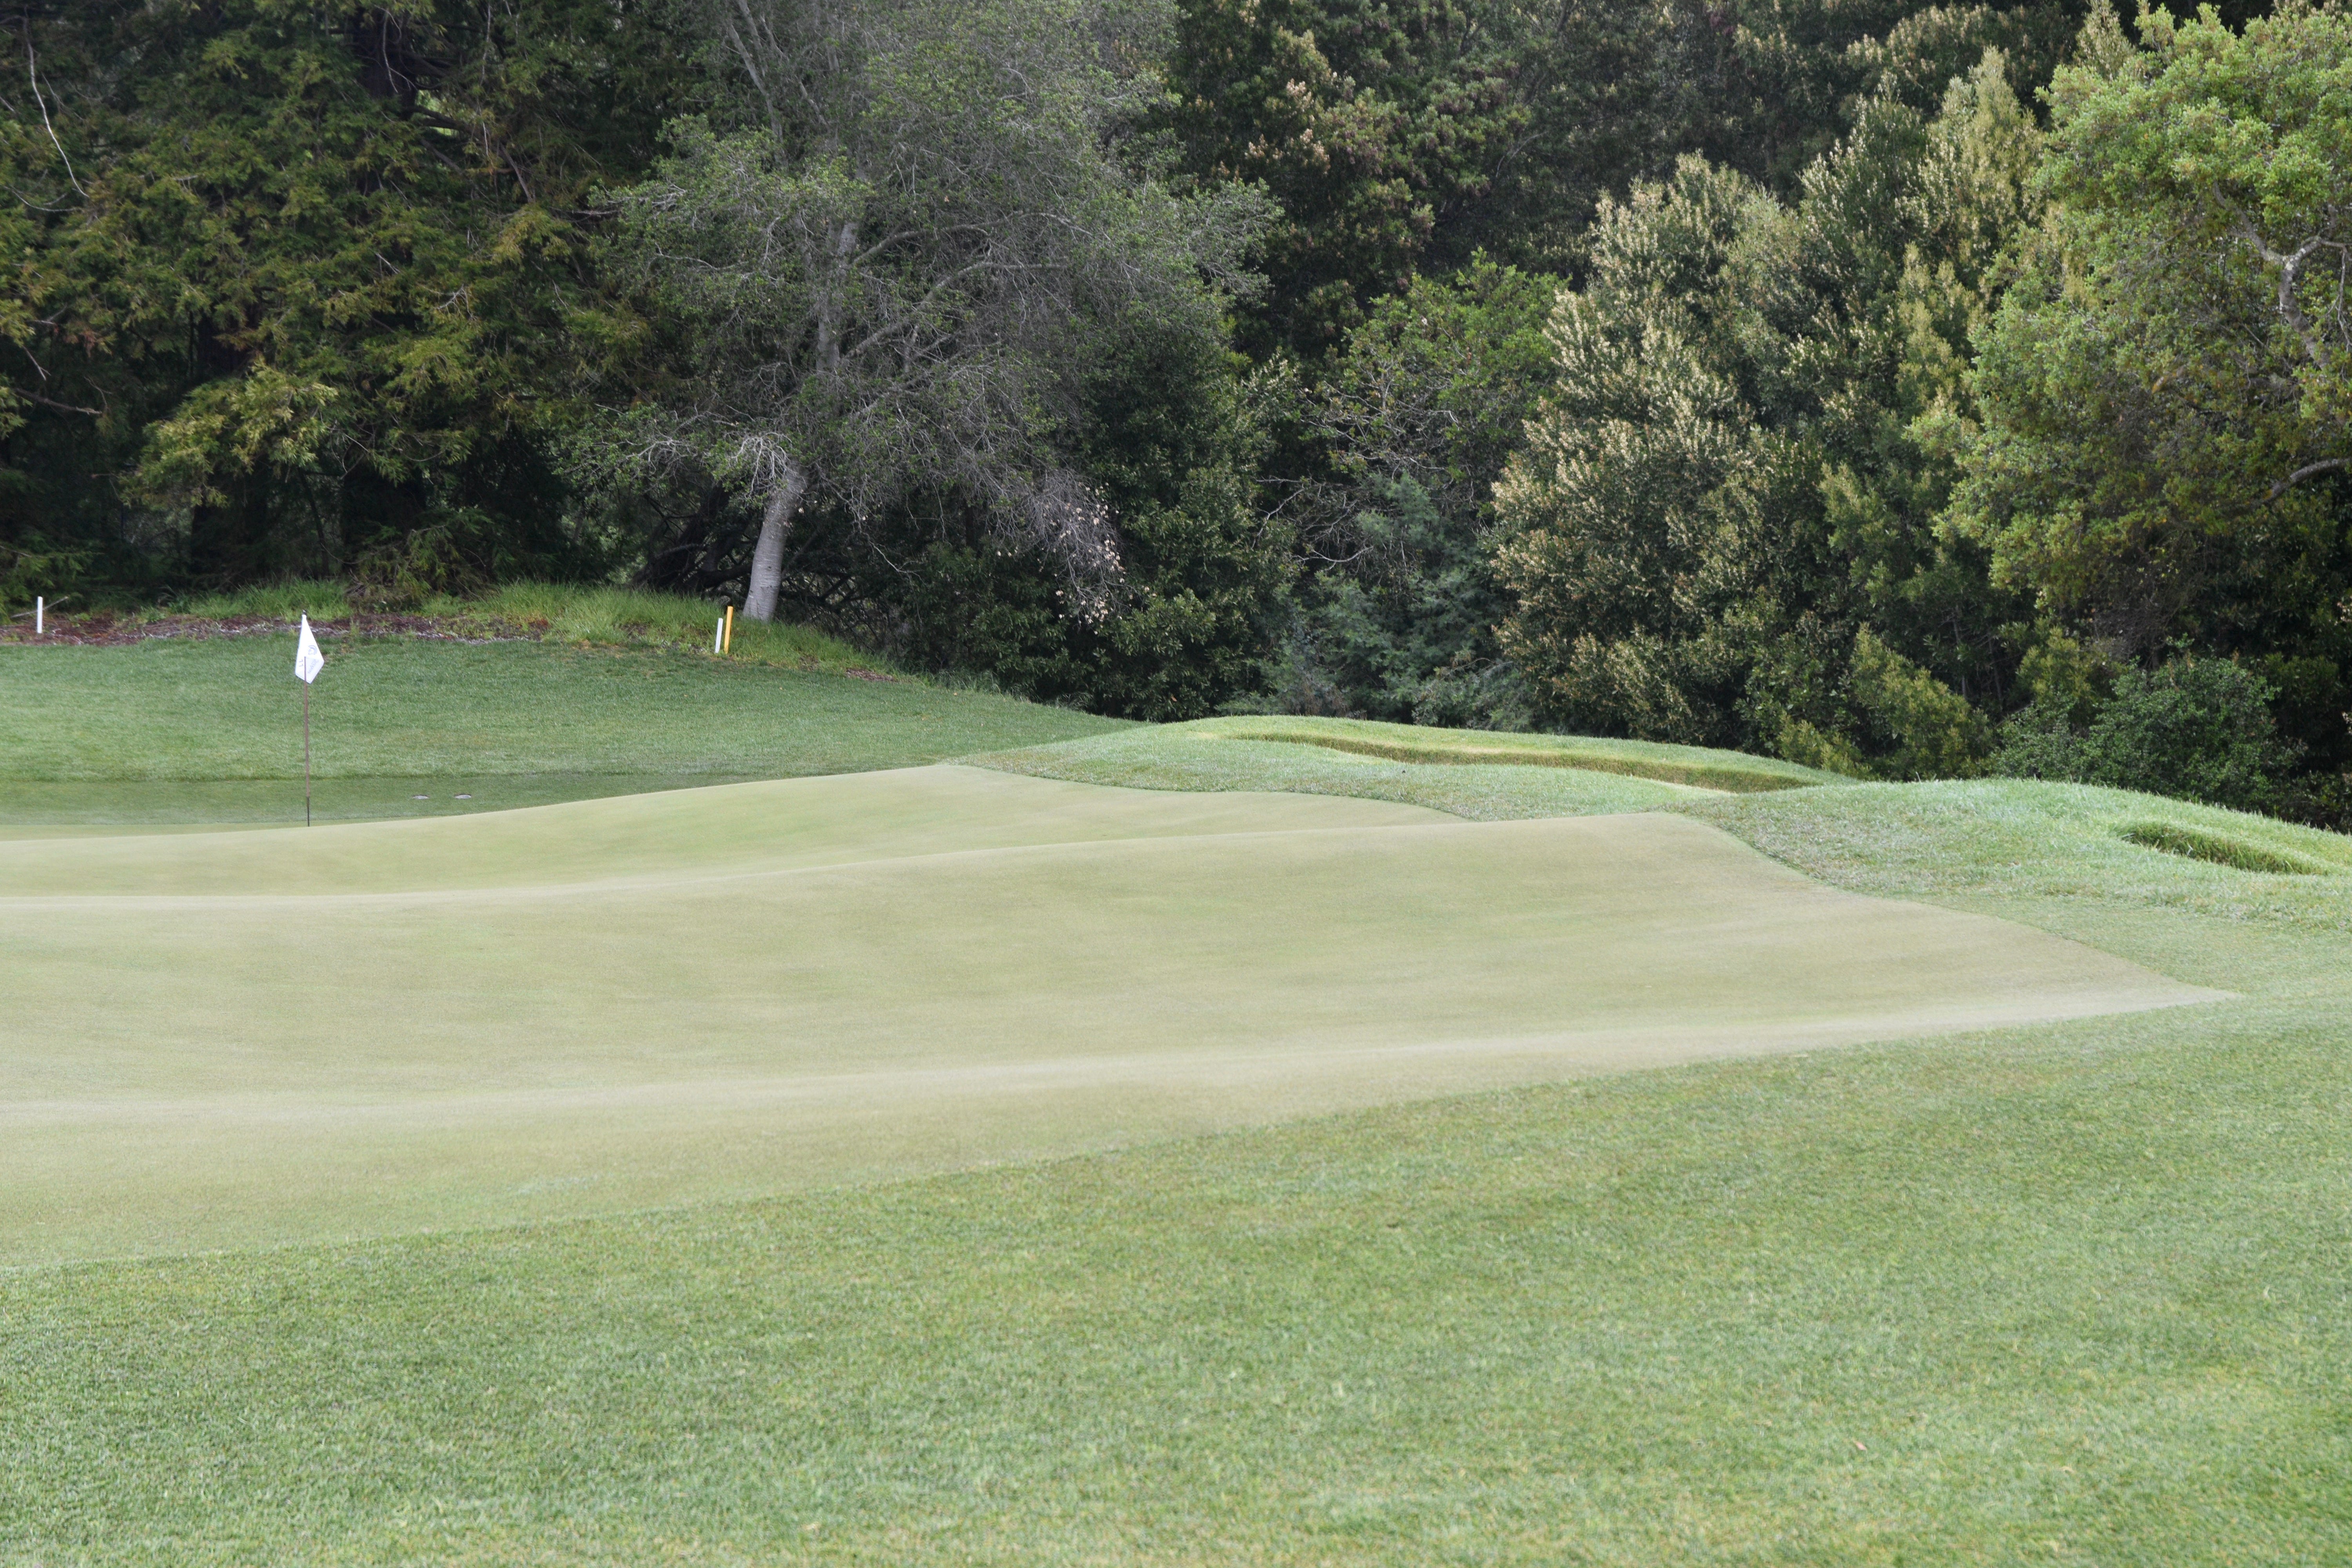
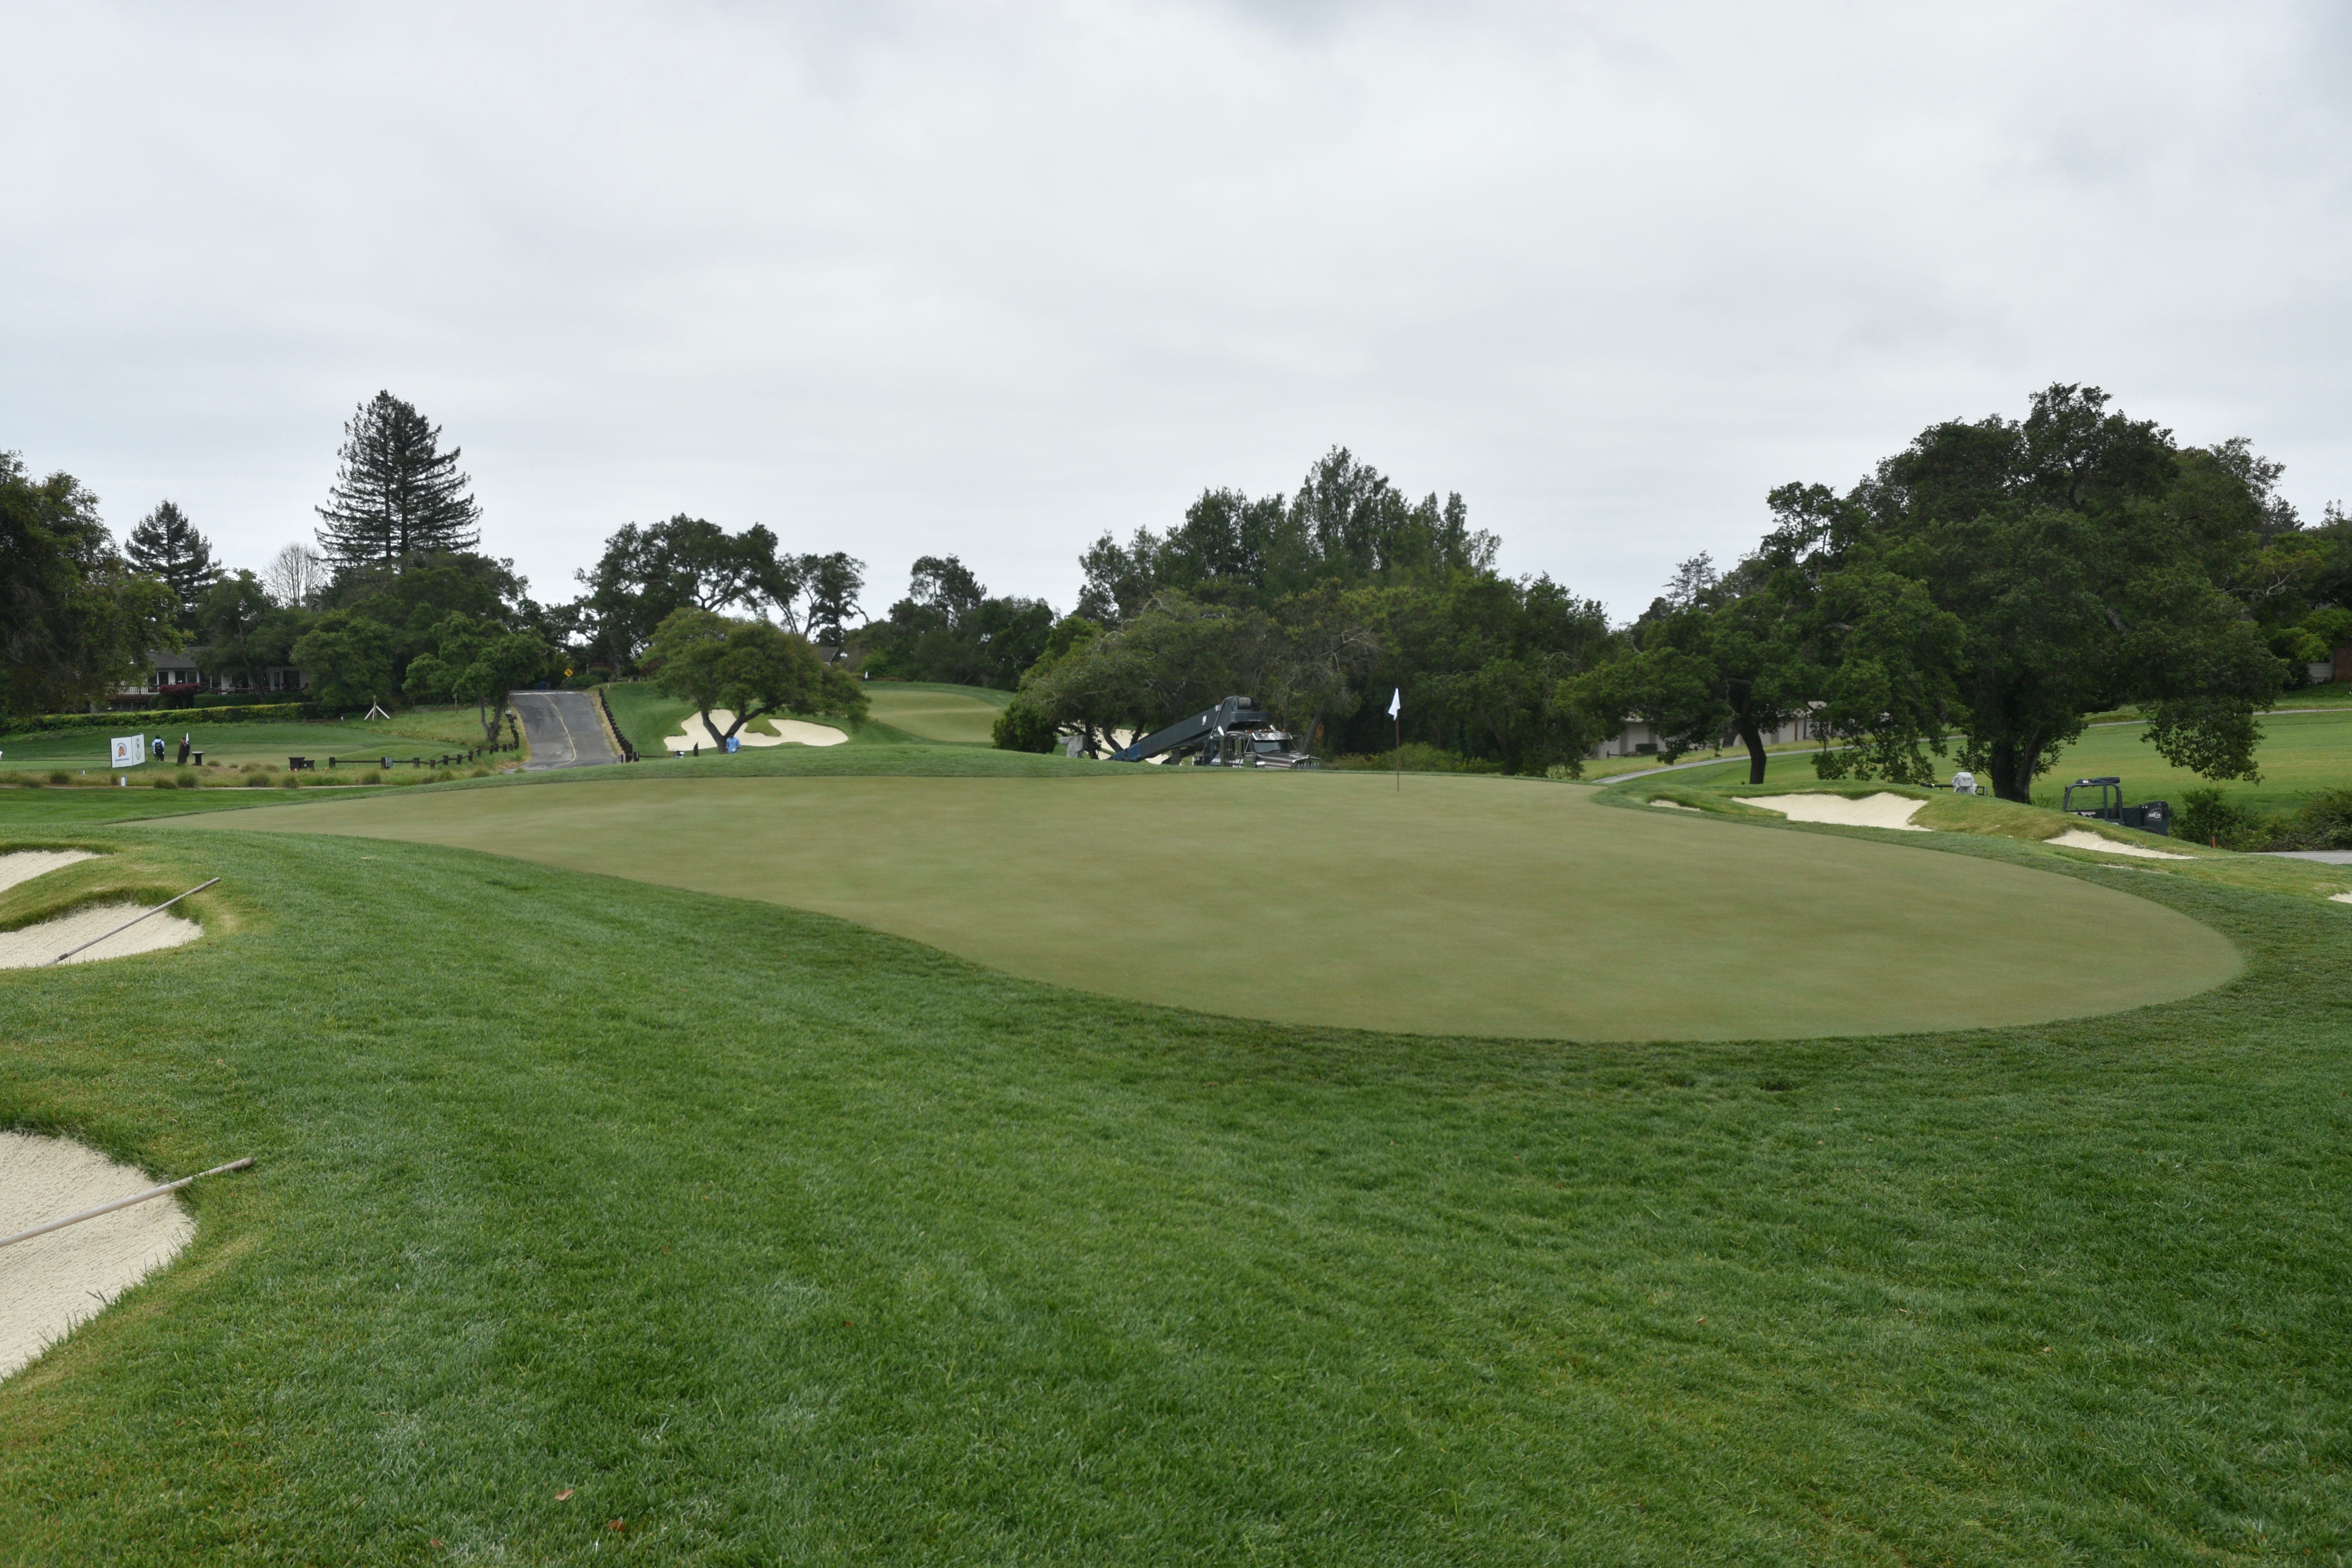
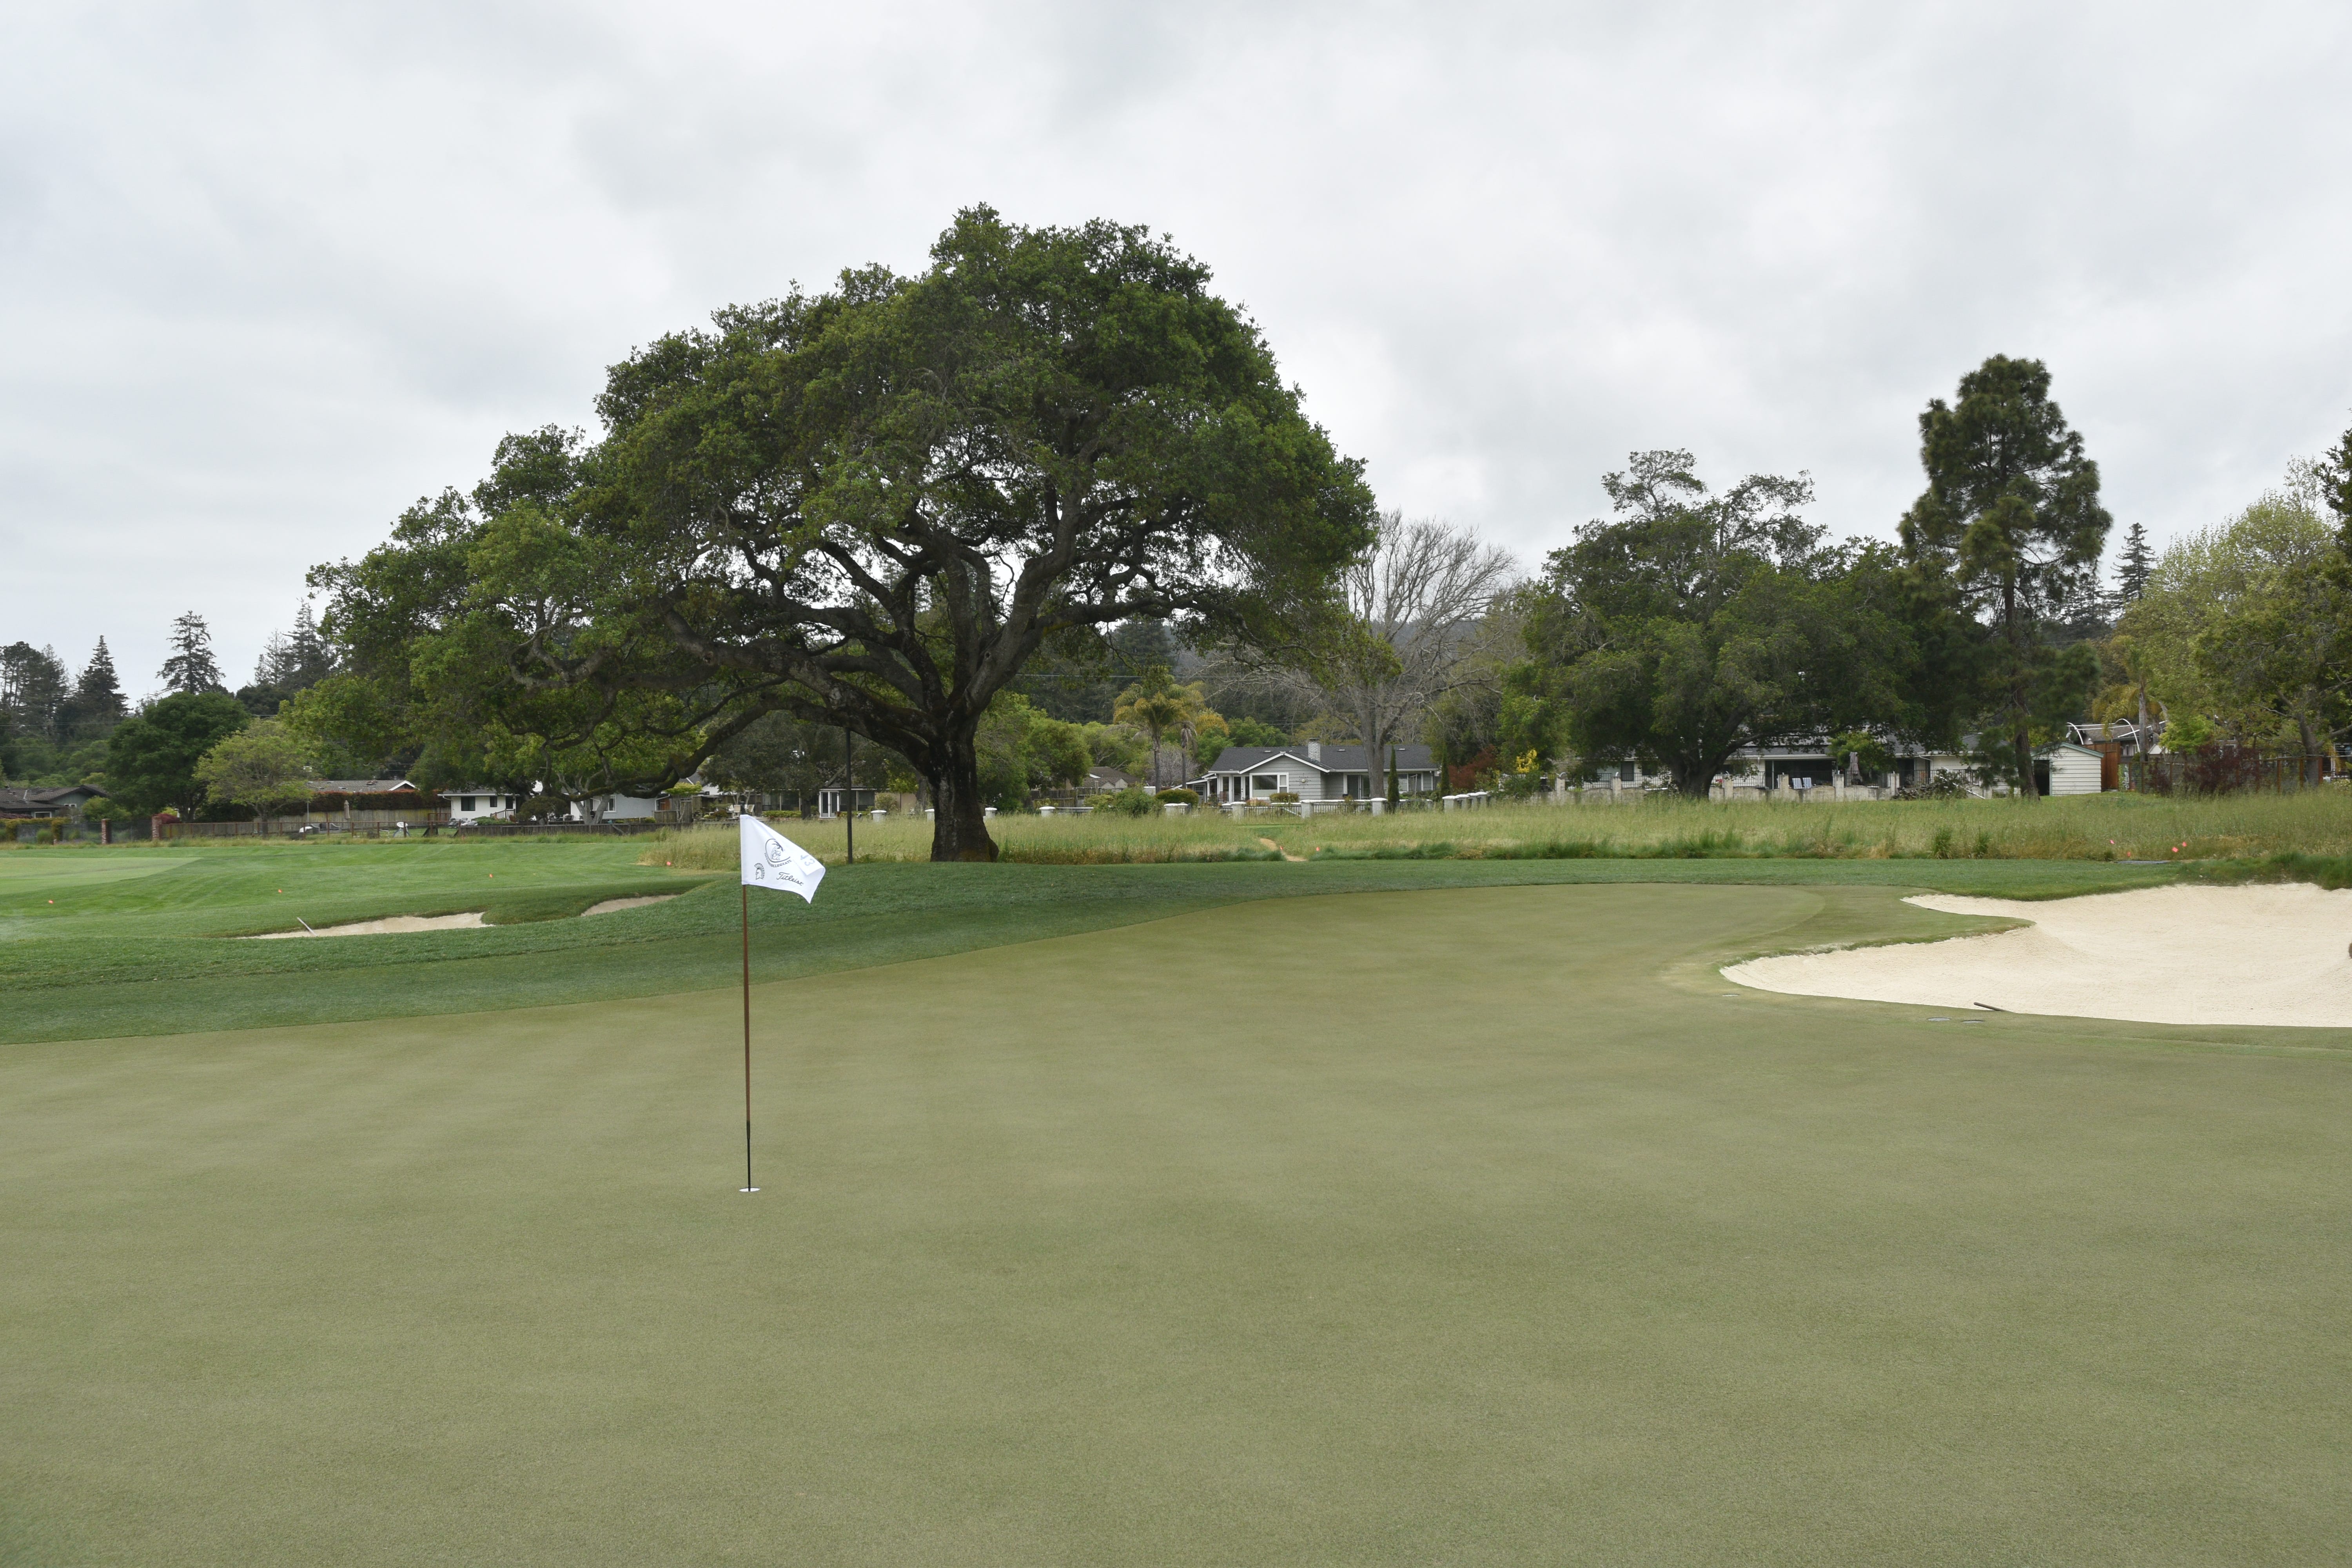
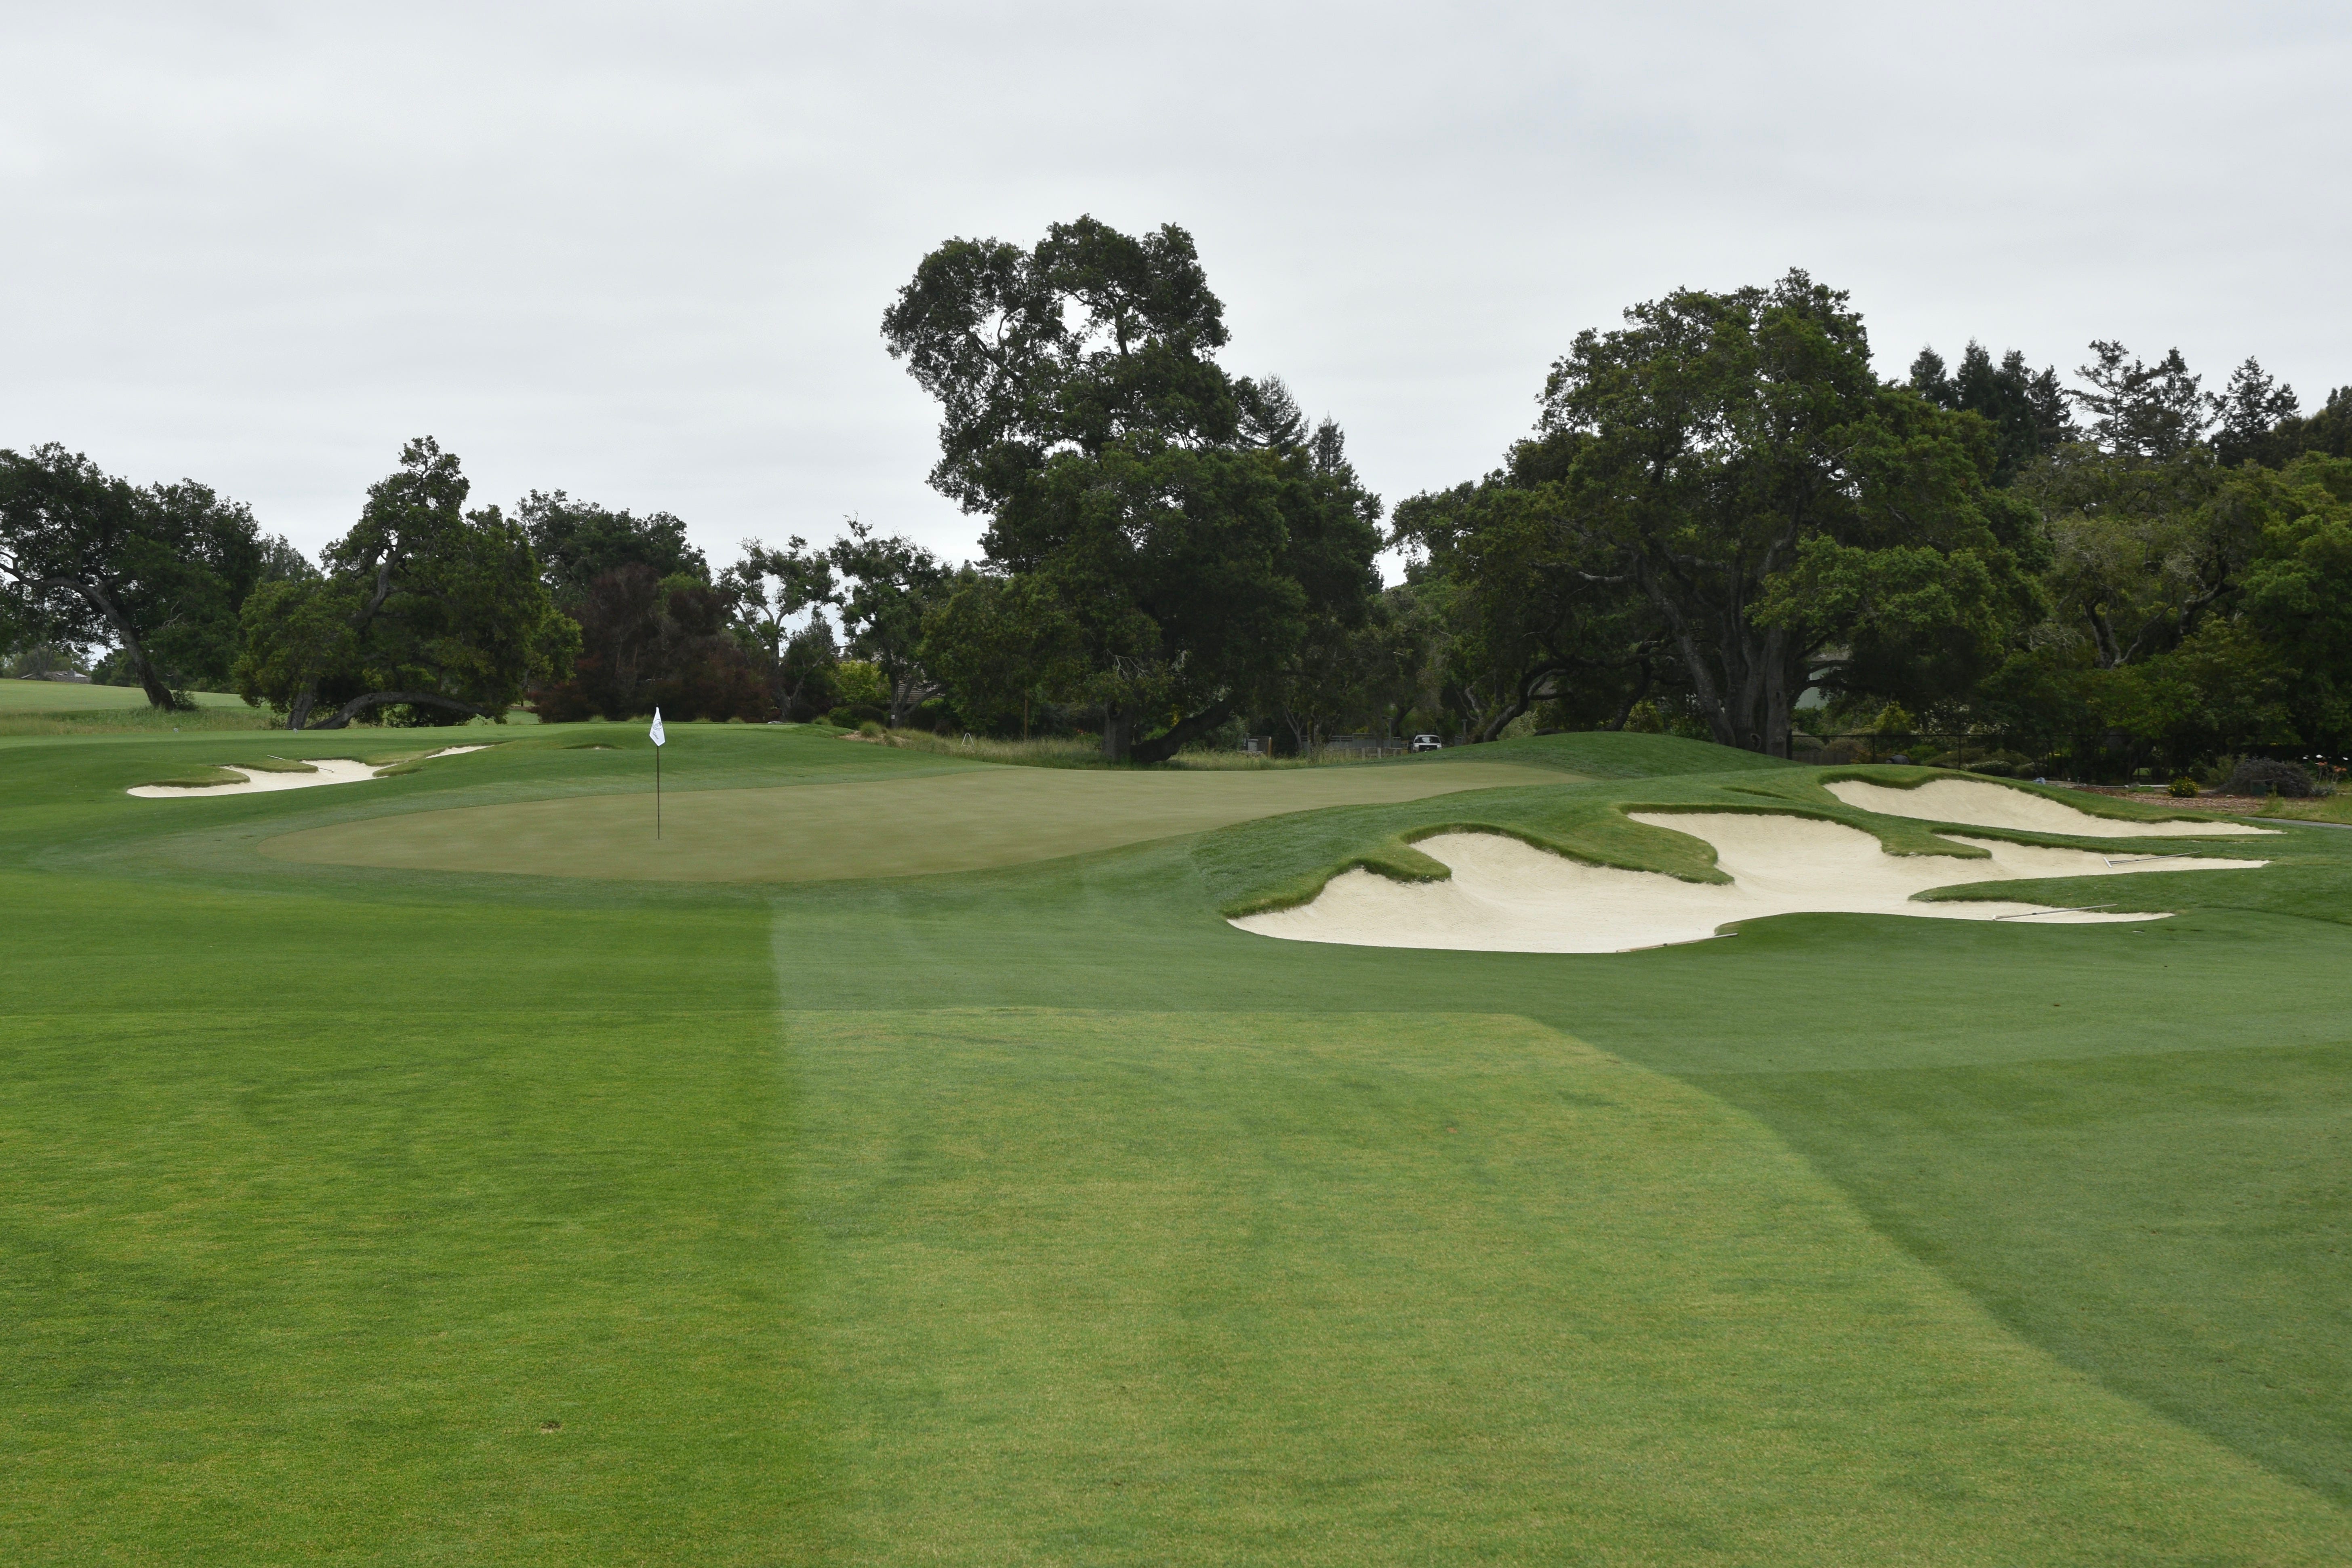
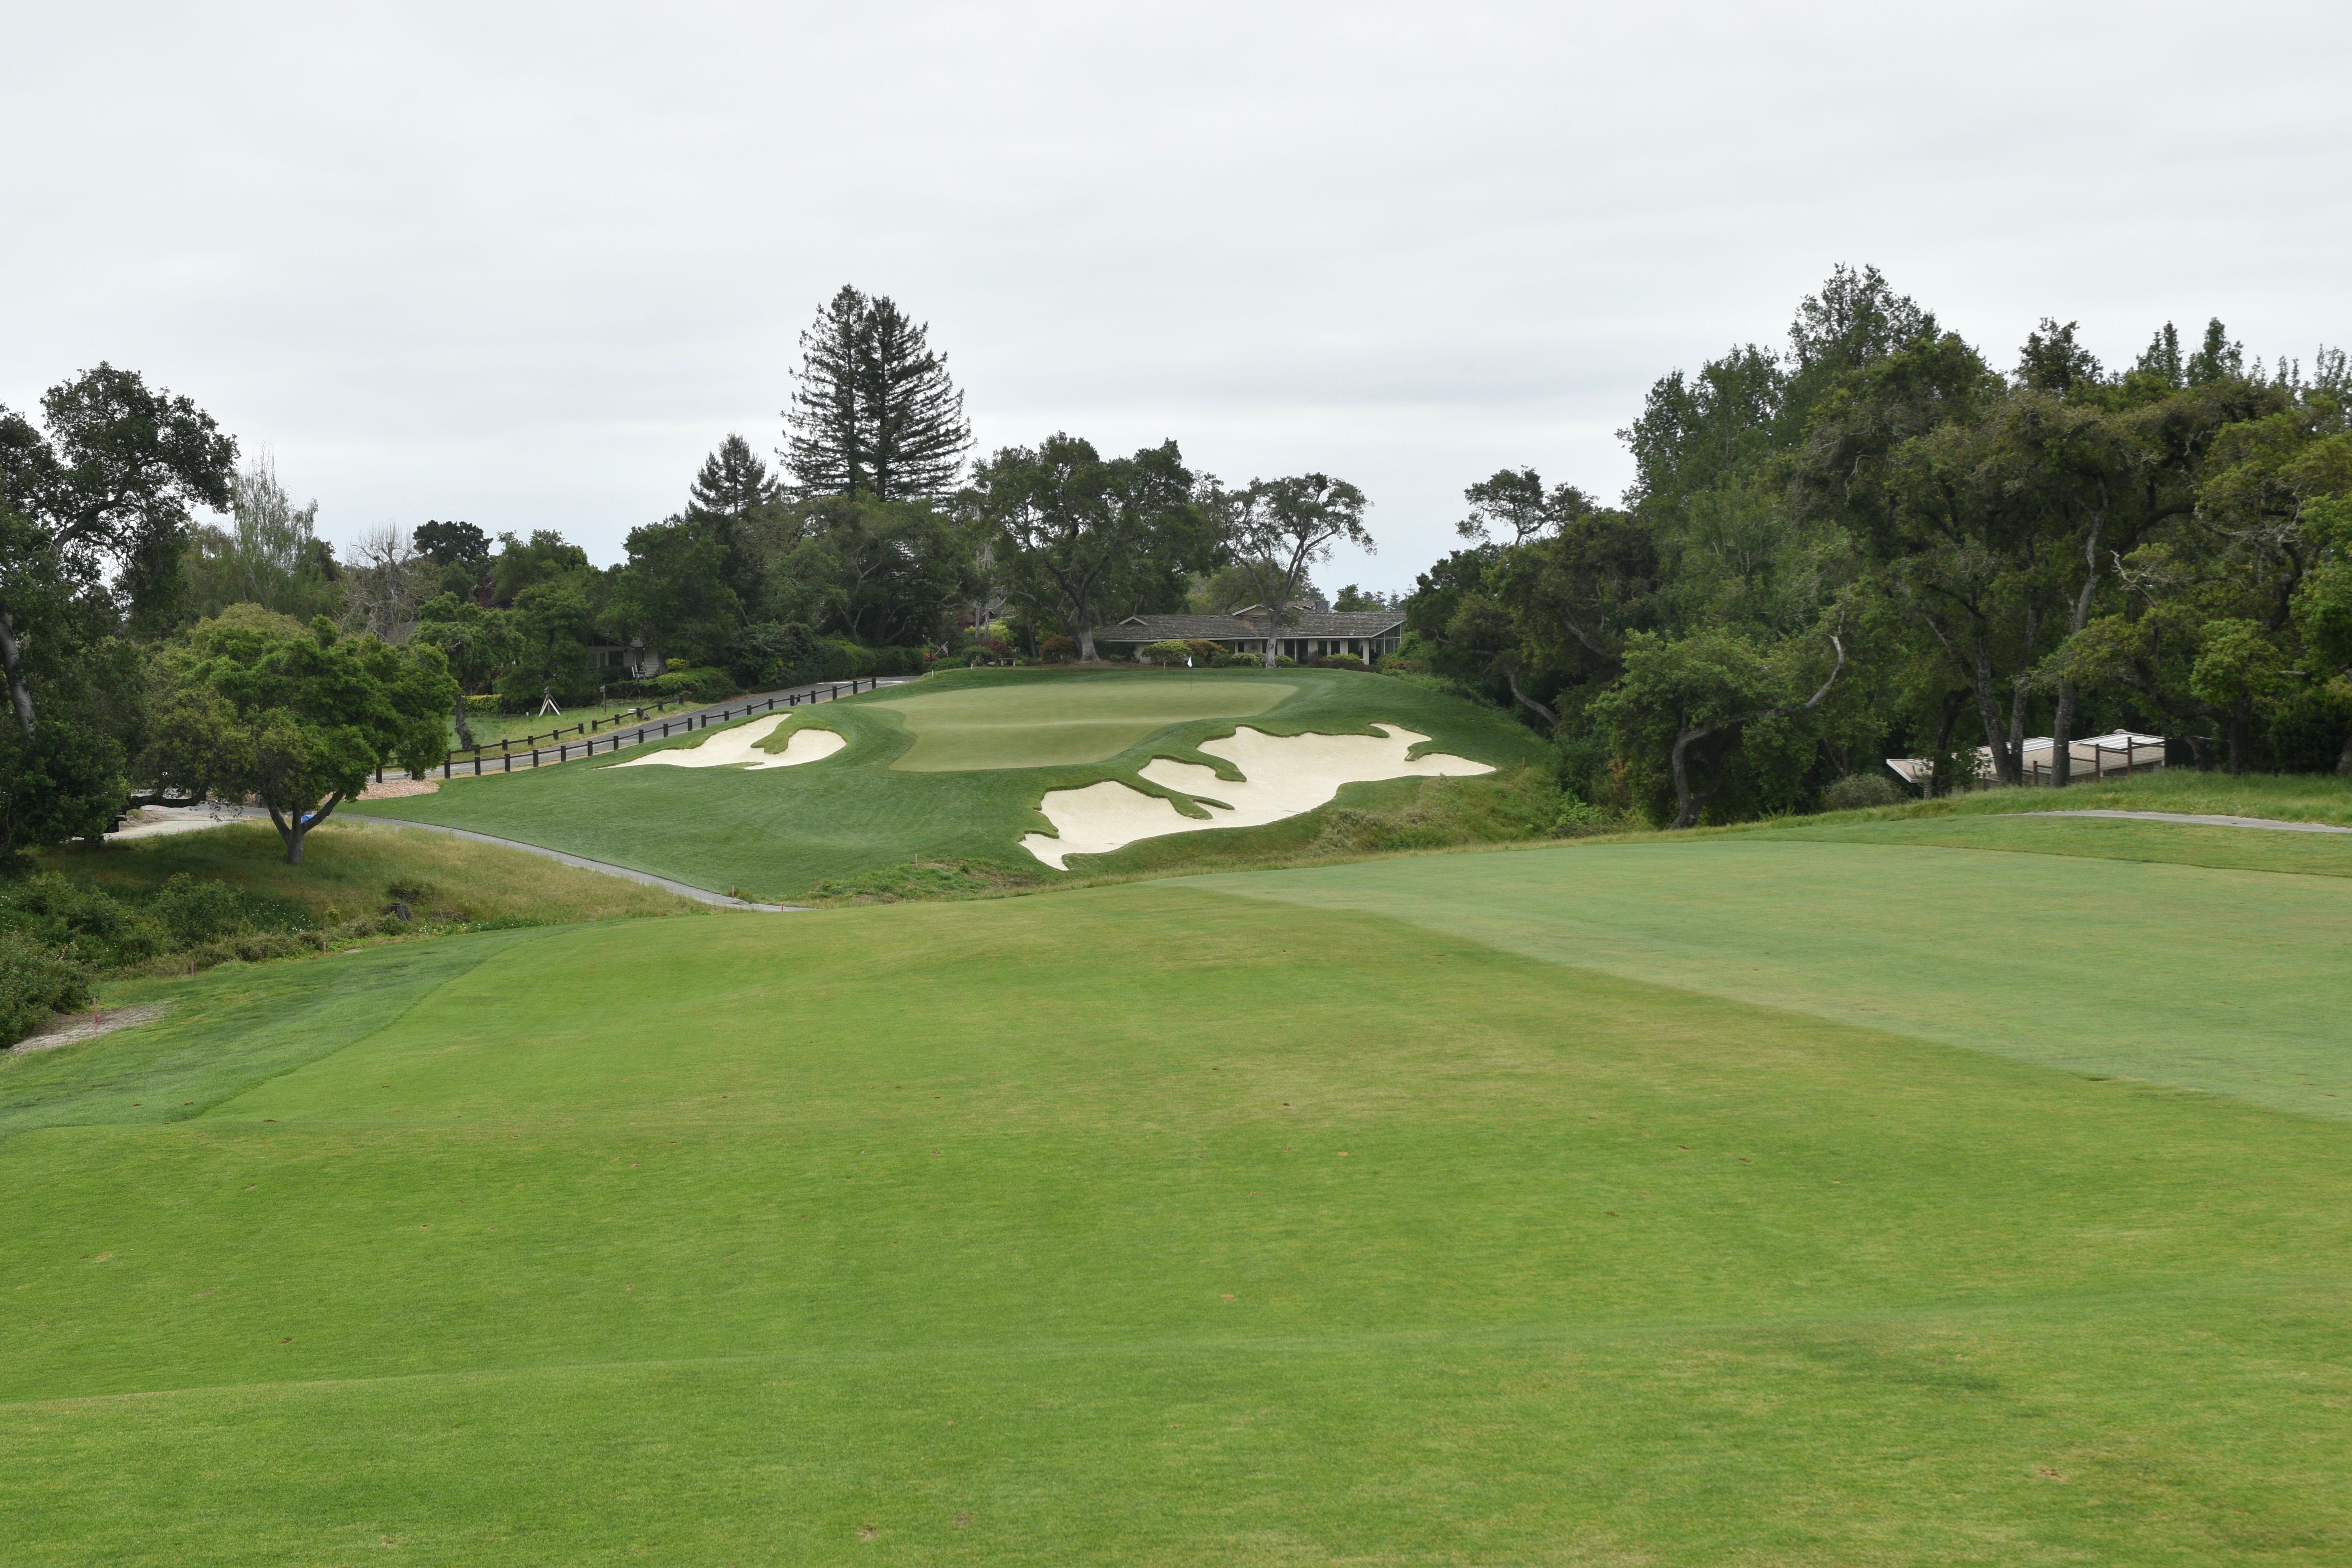
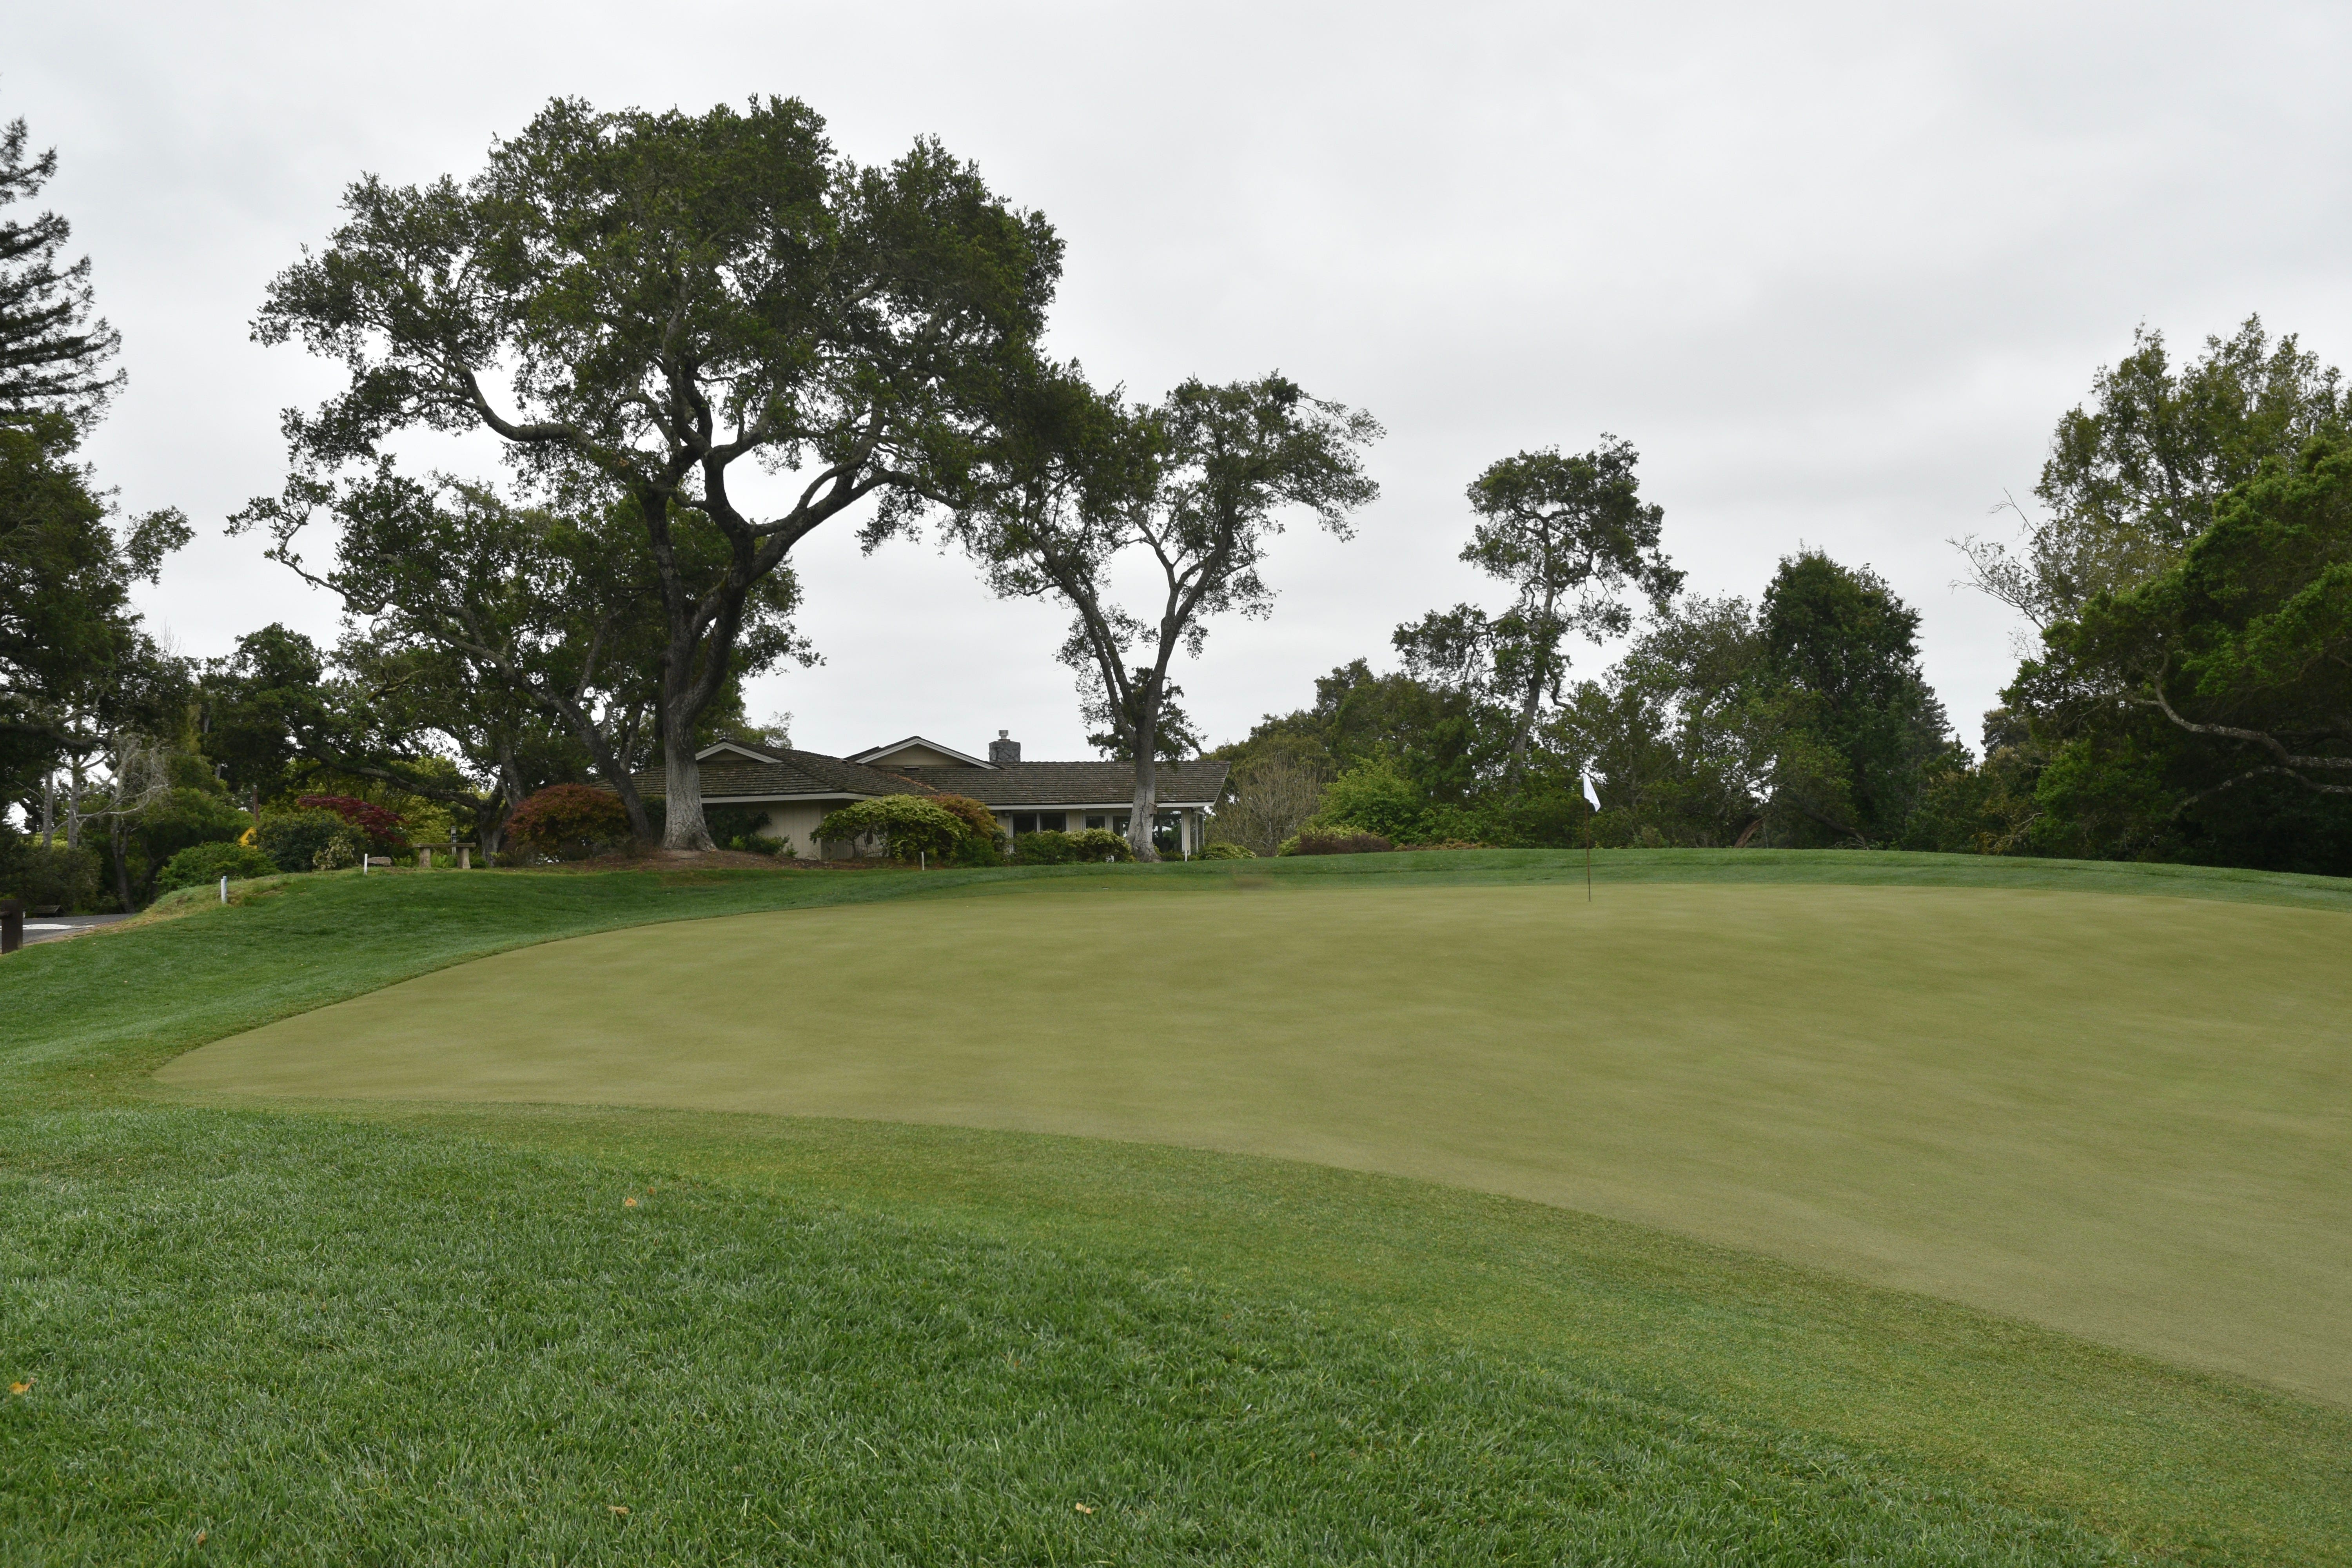
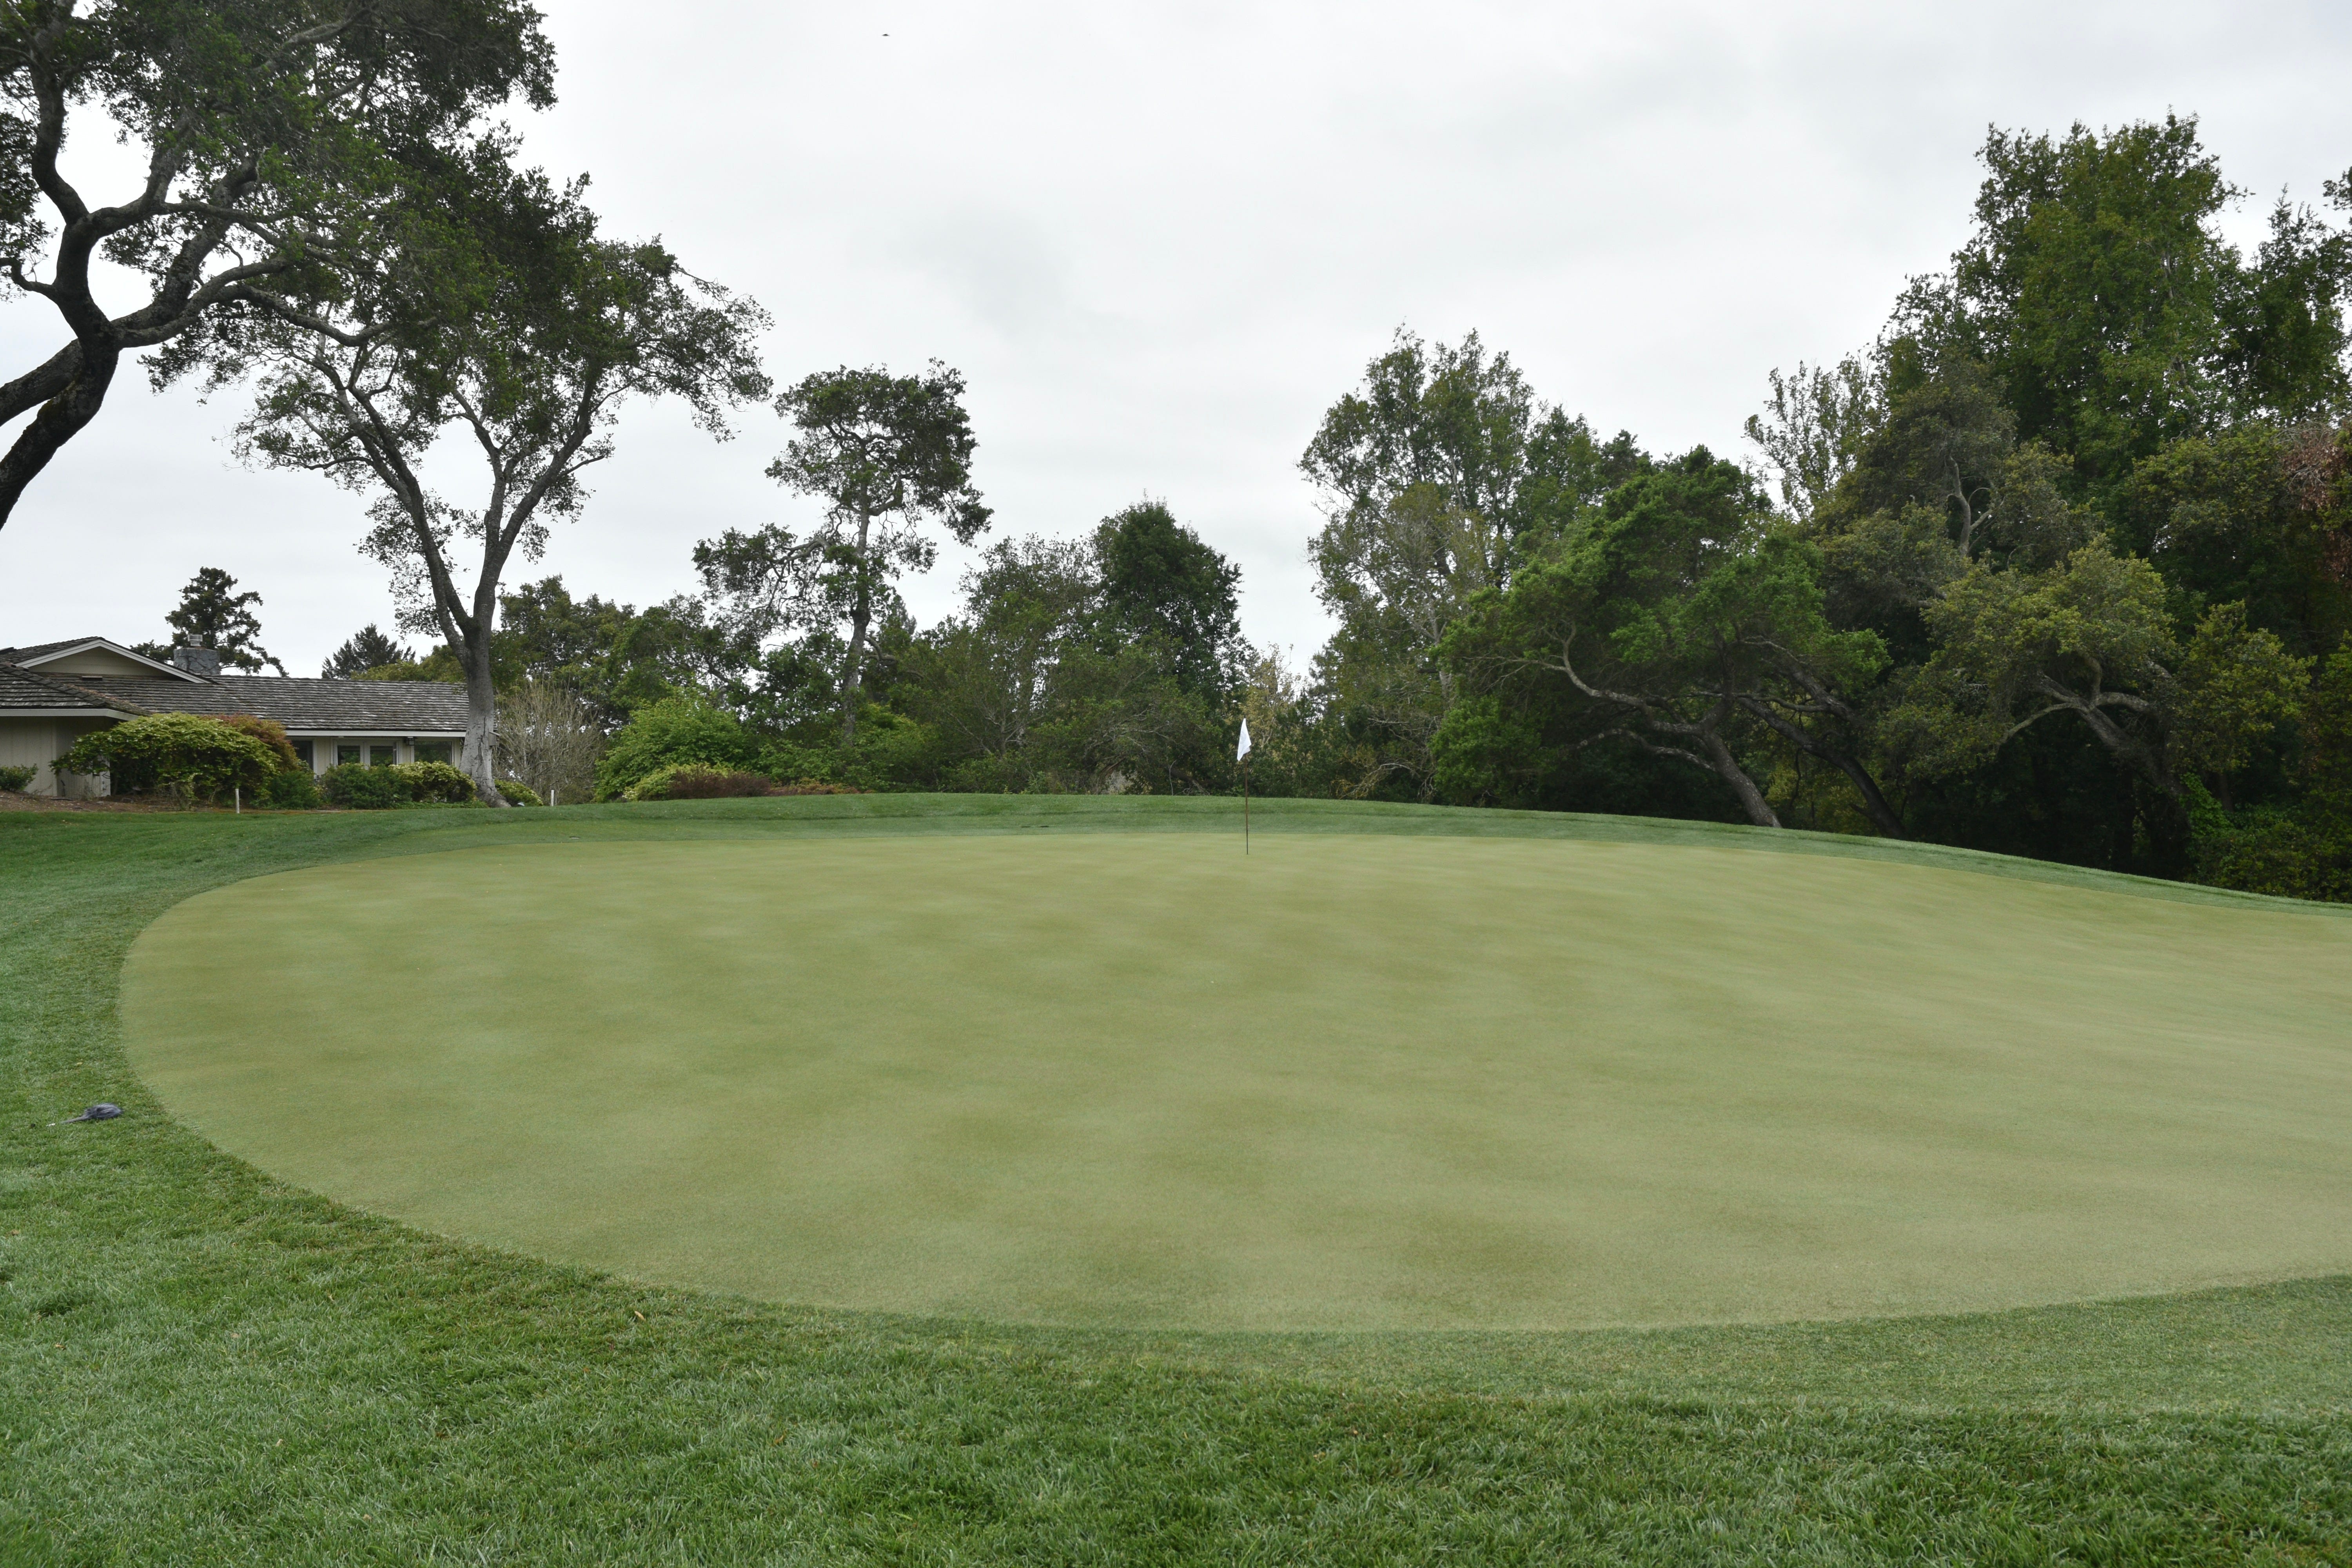
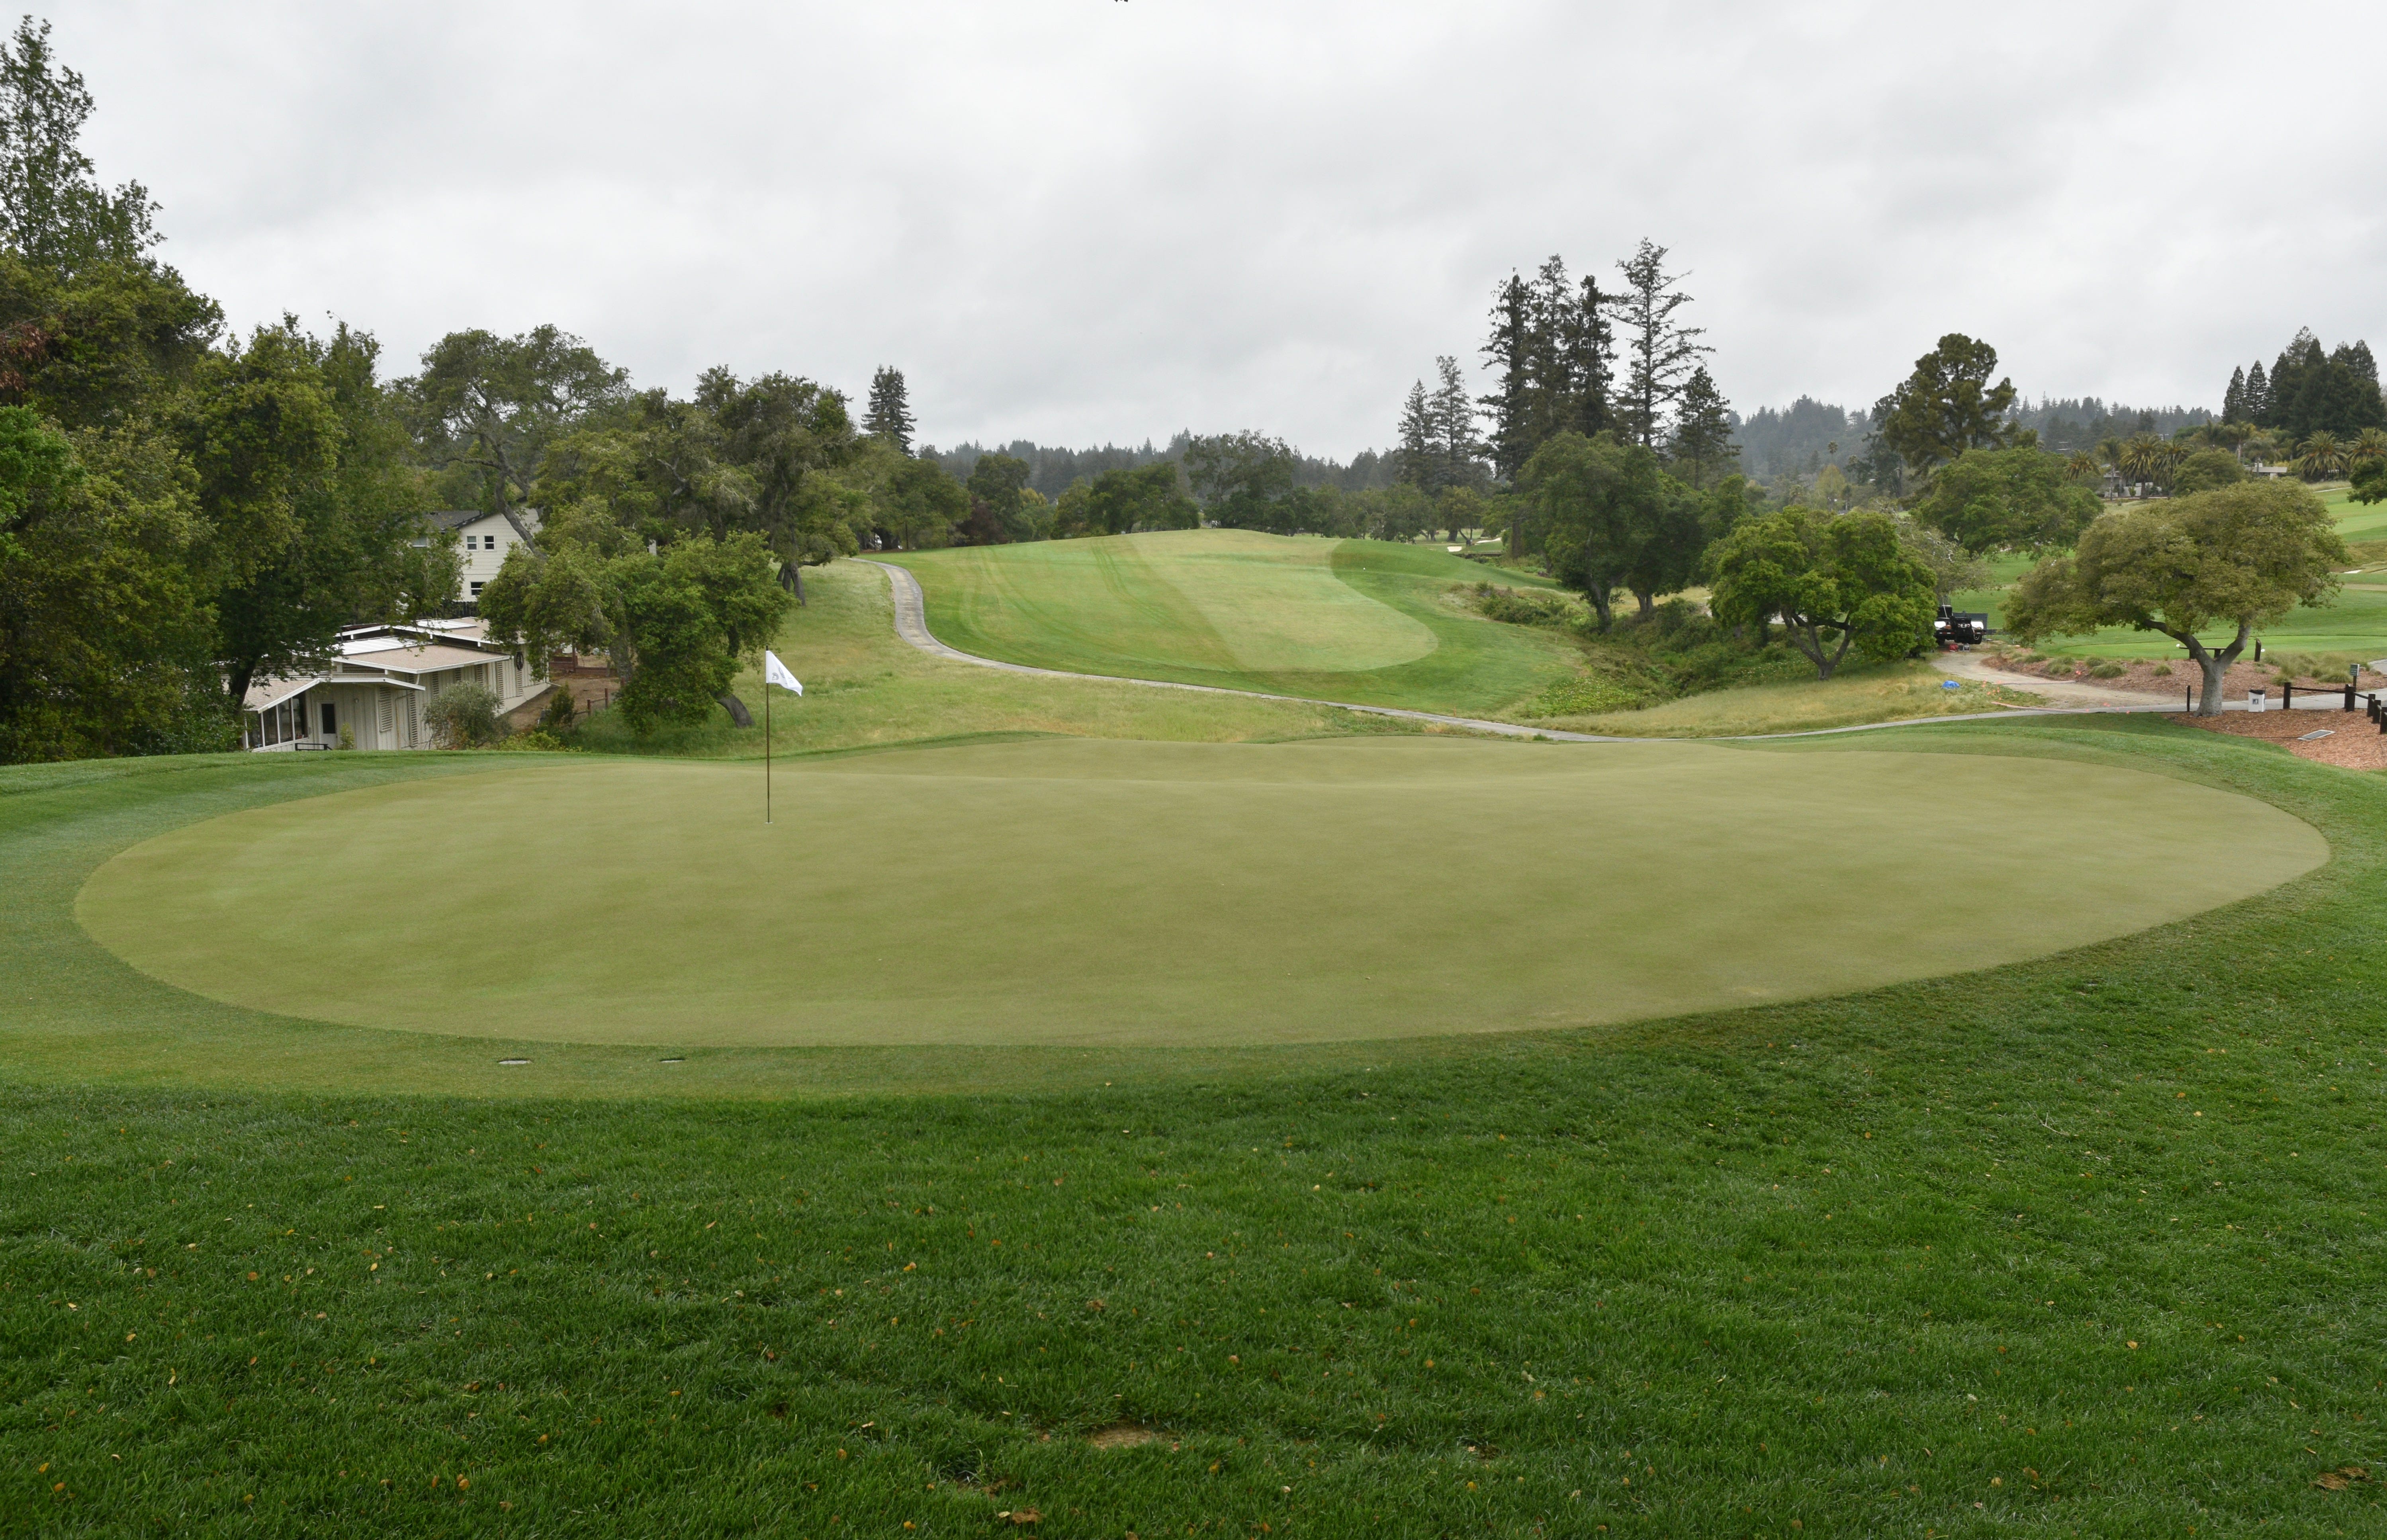
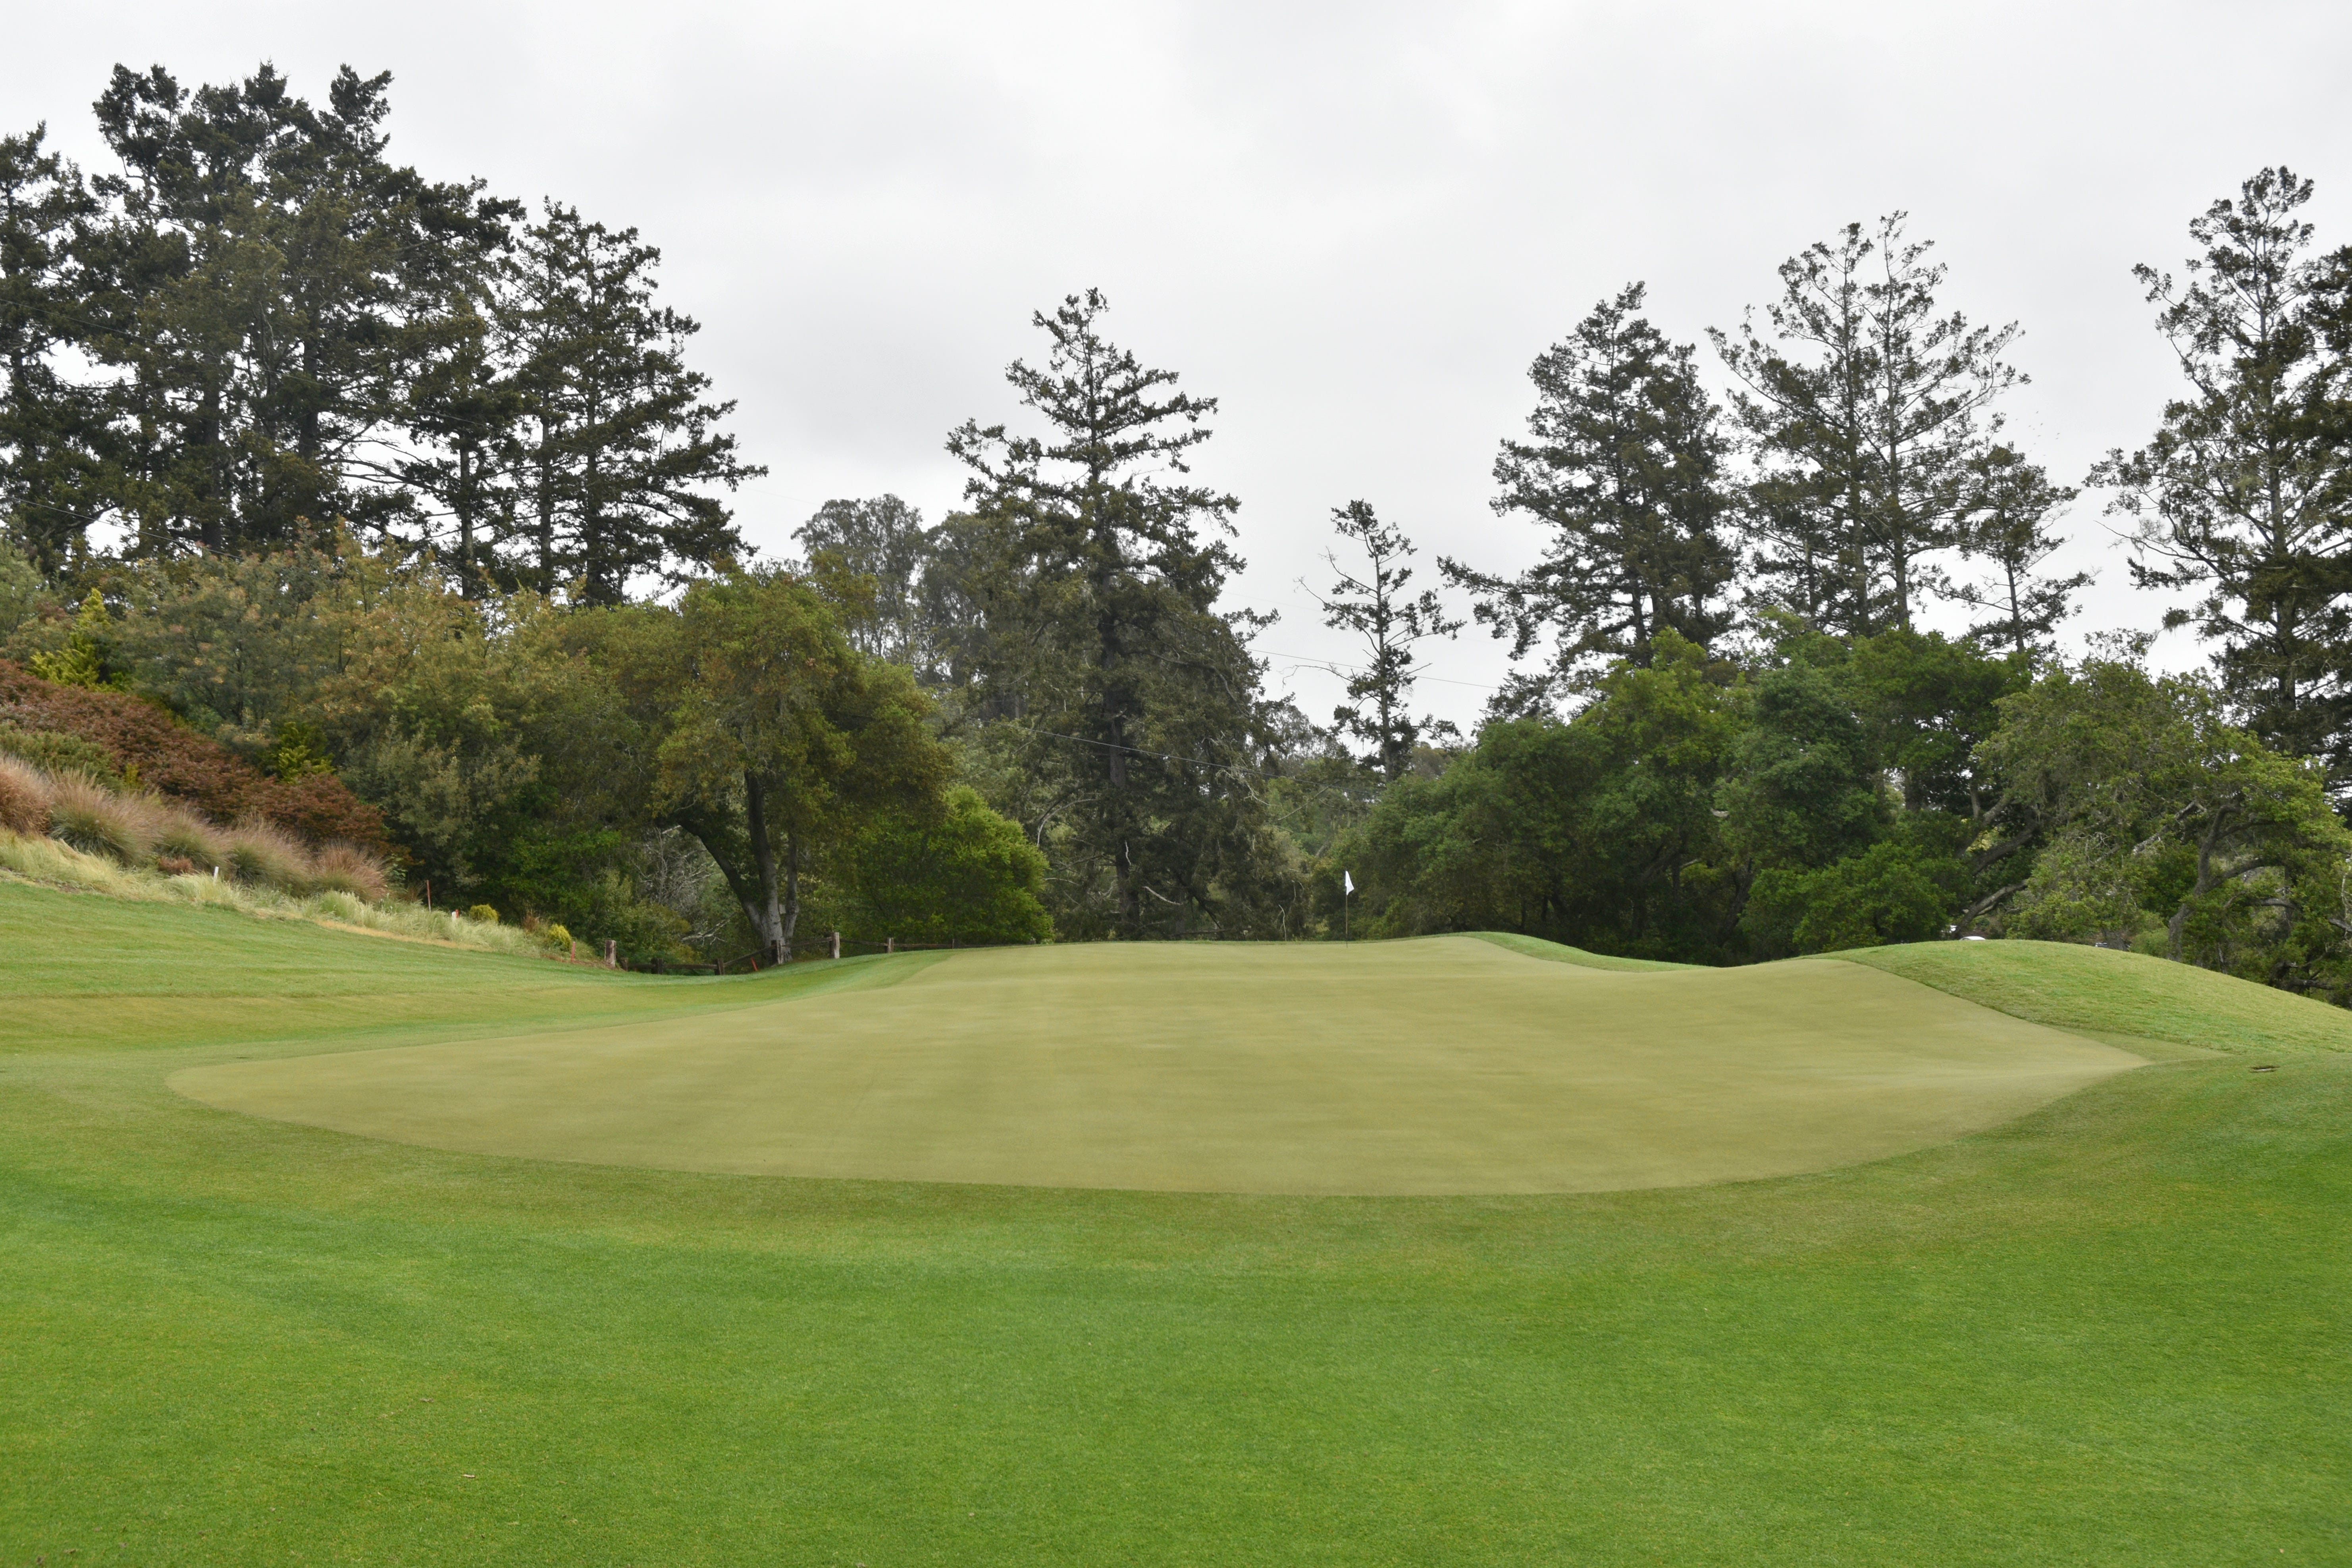
The 10th hole green viewed from the back right
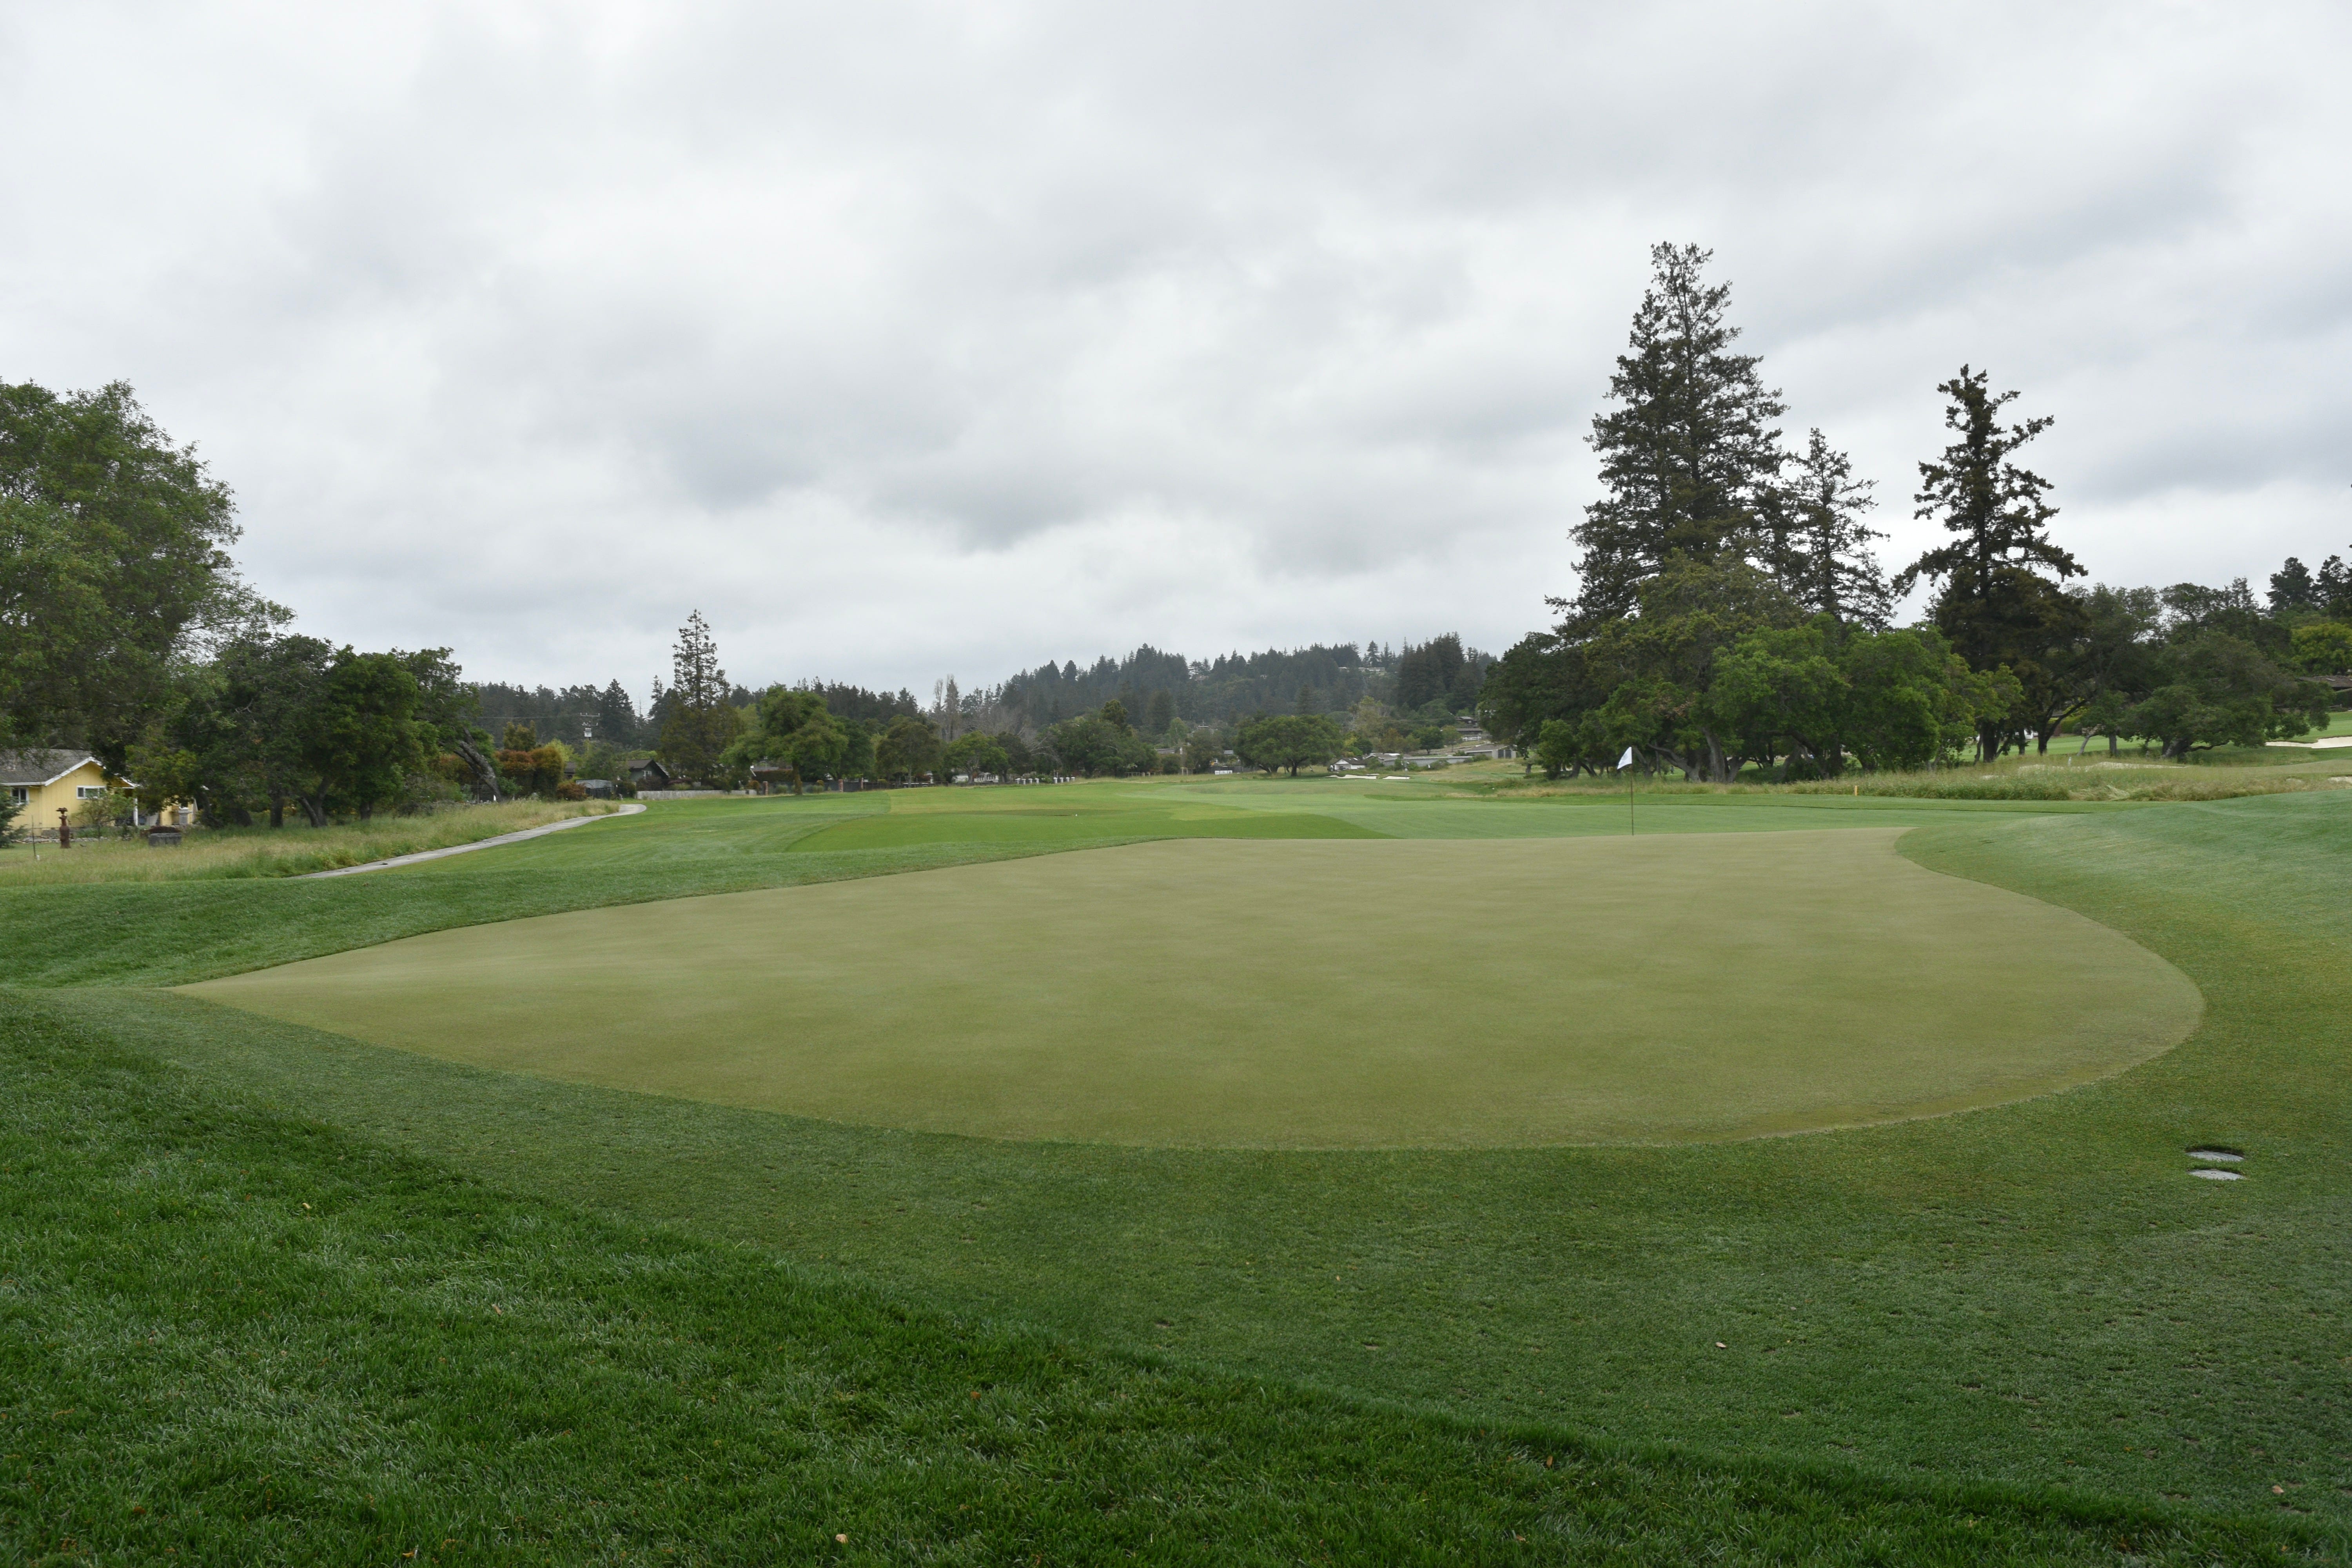
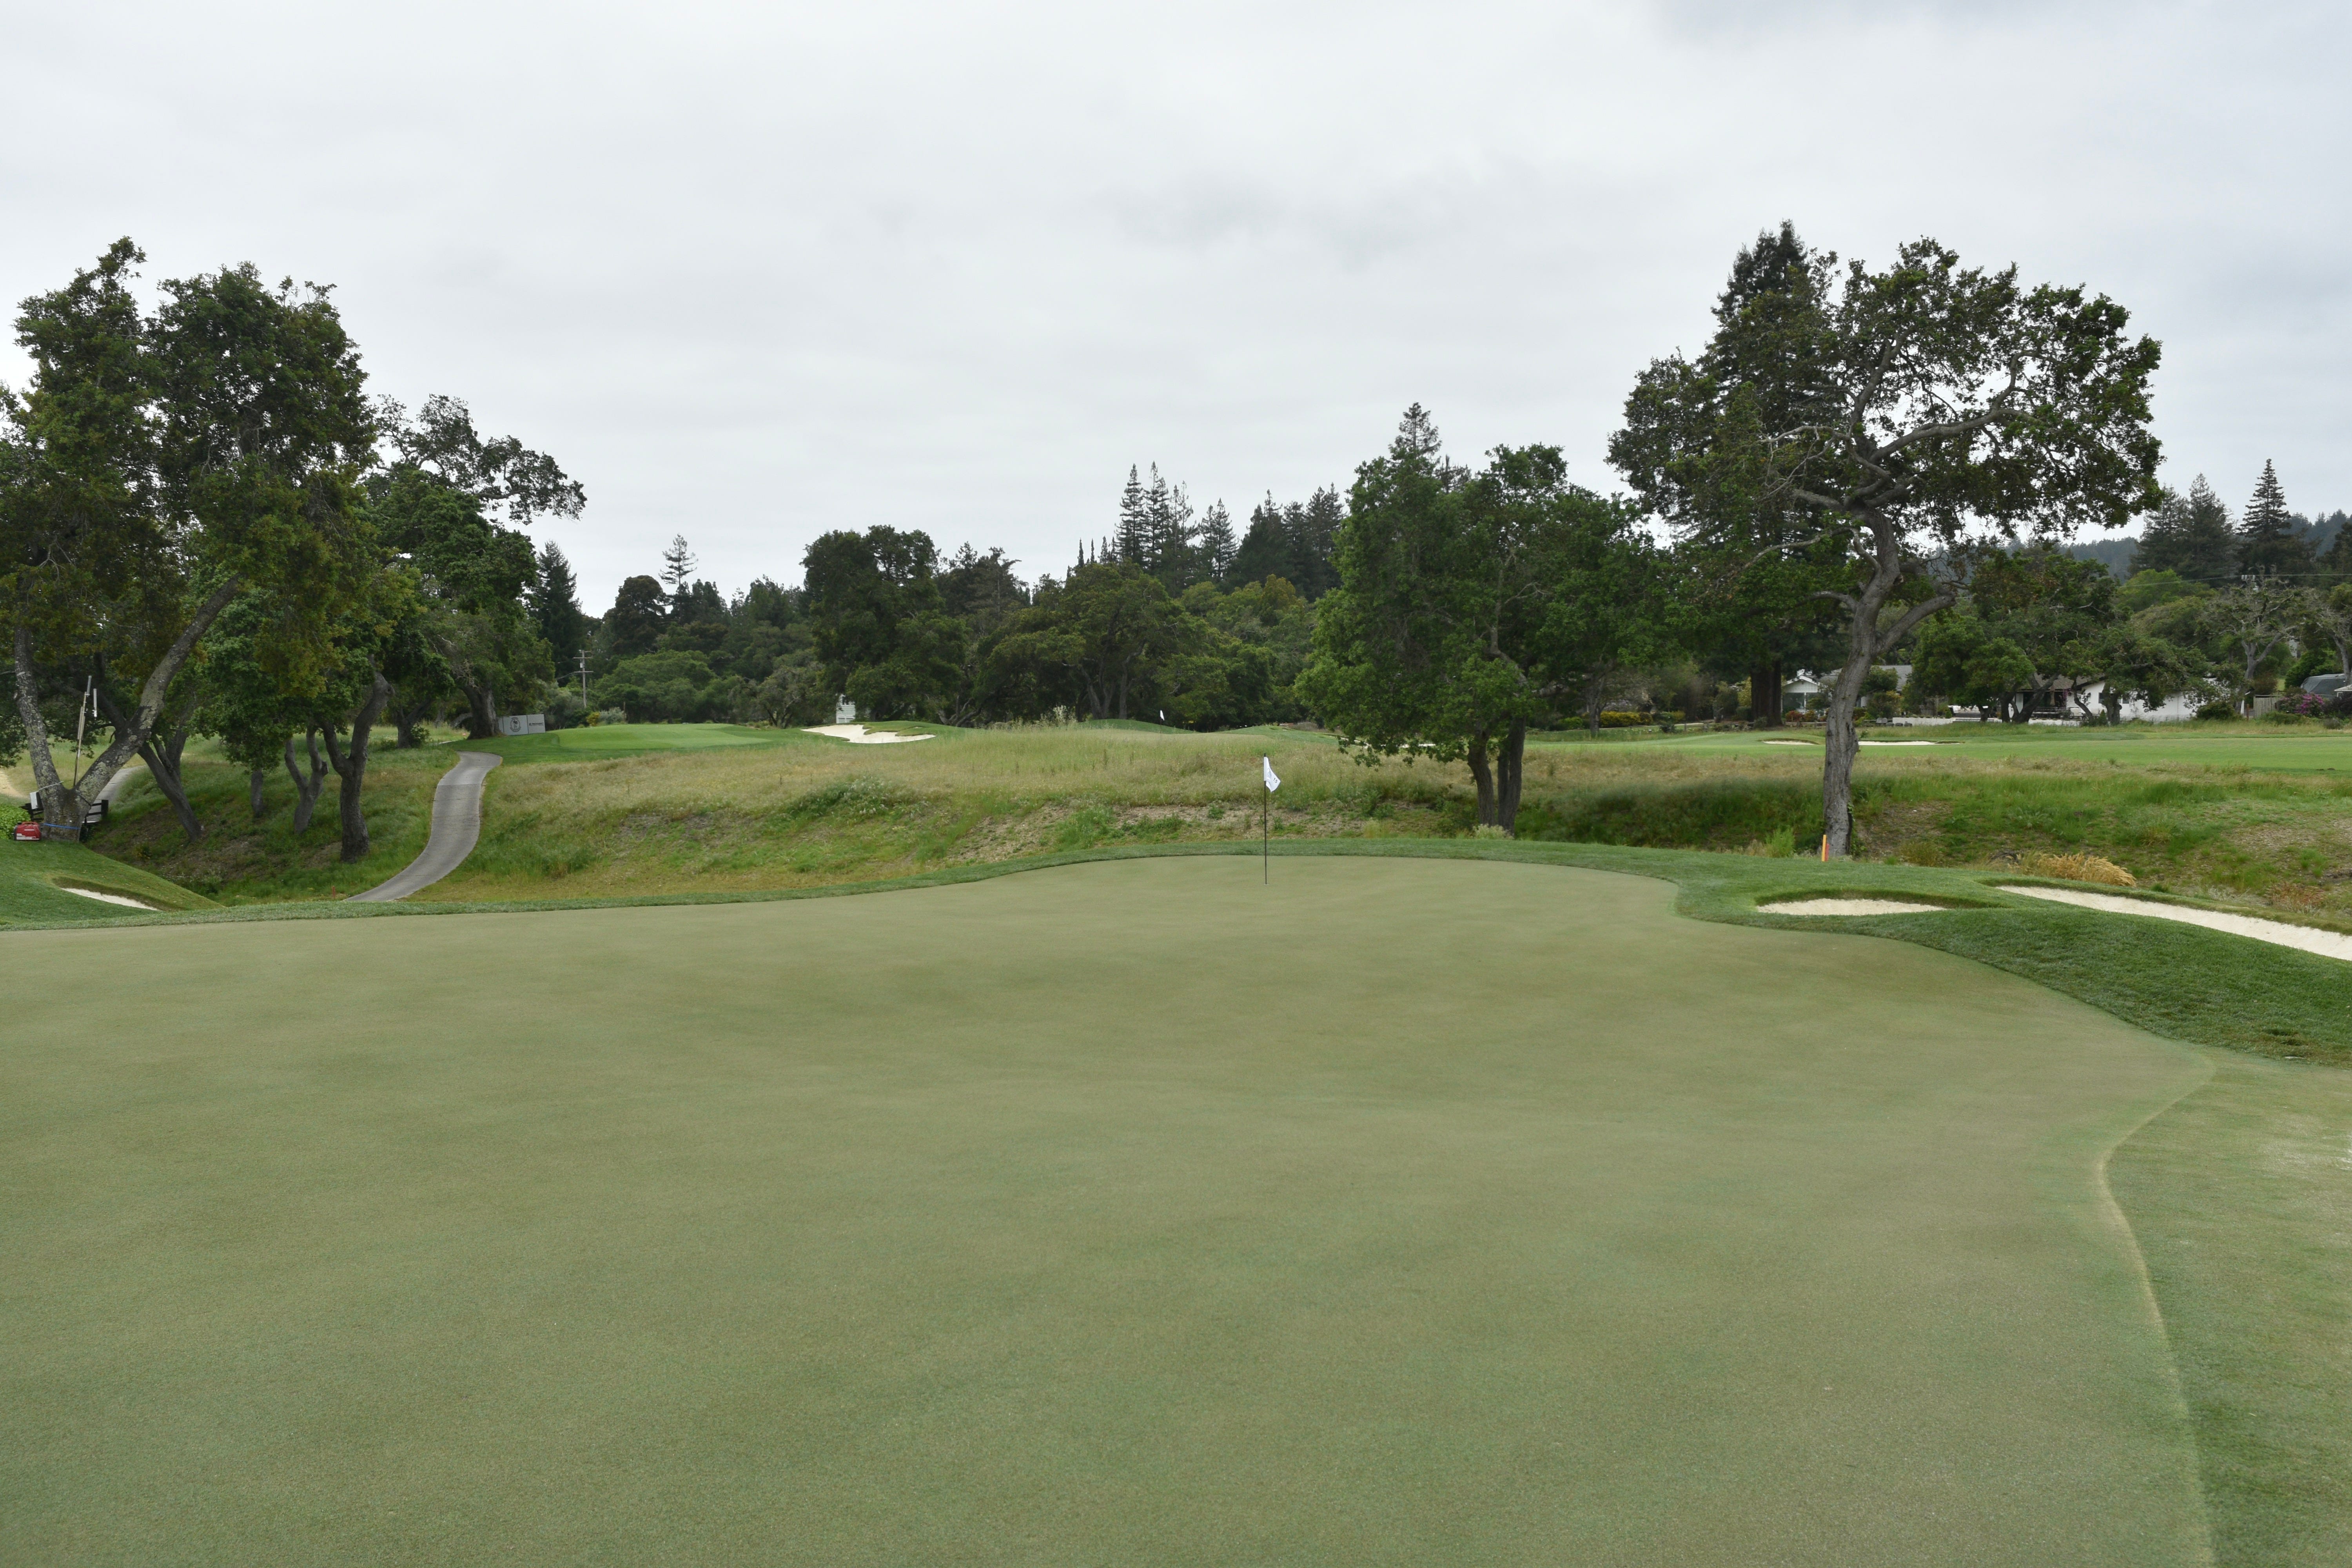
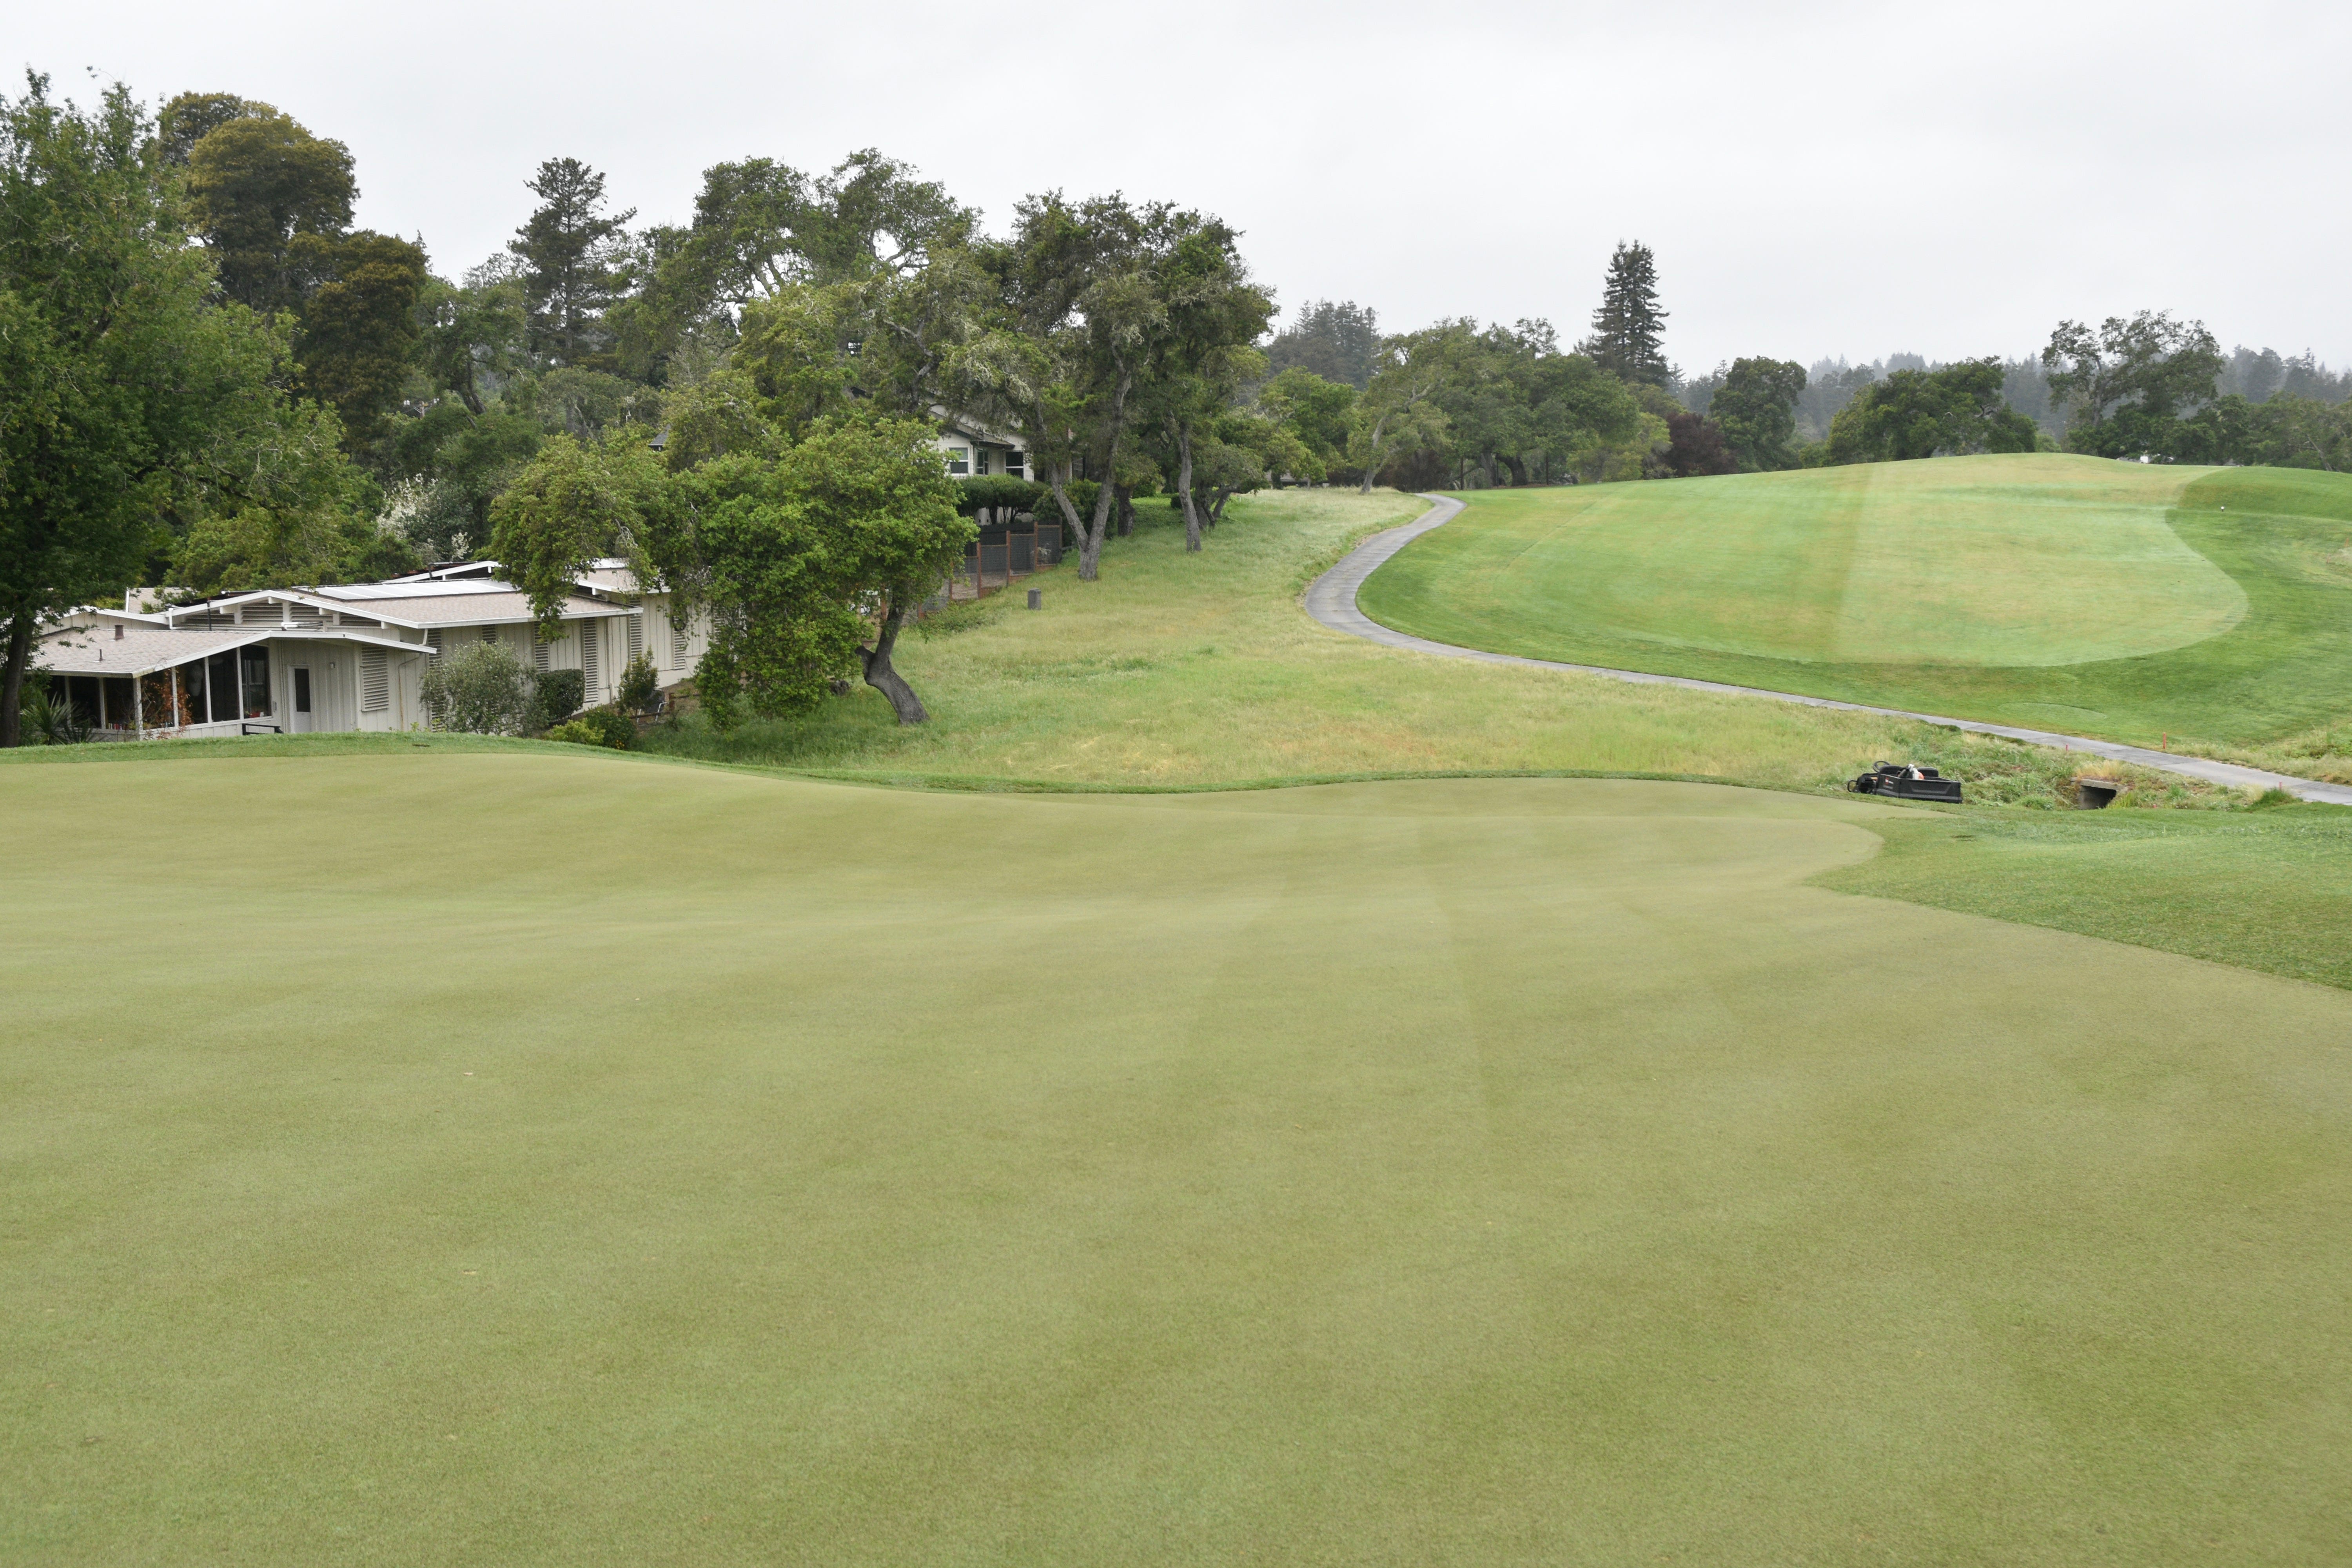
Additional views of the 10th hole green from behind
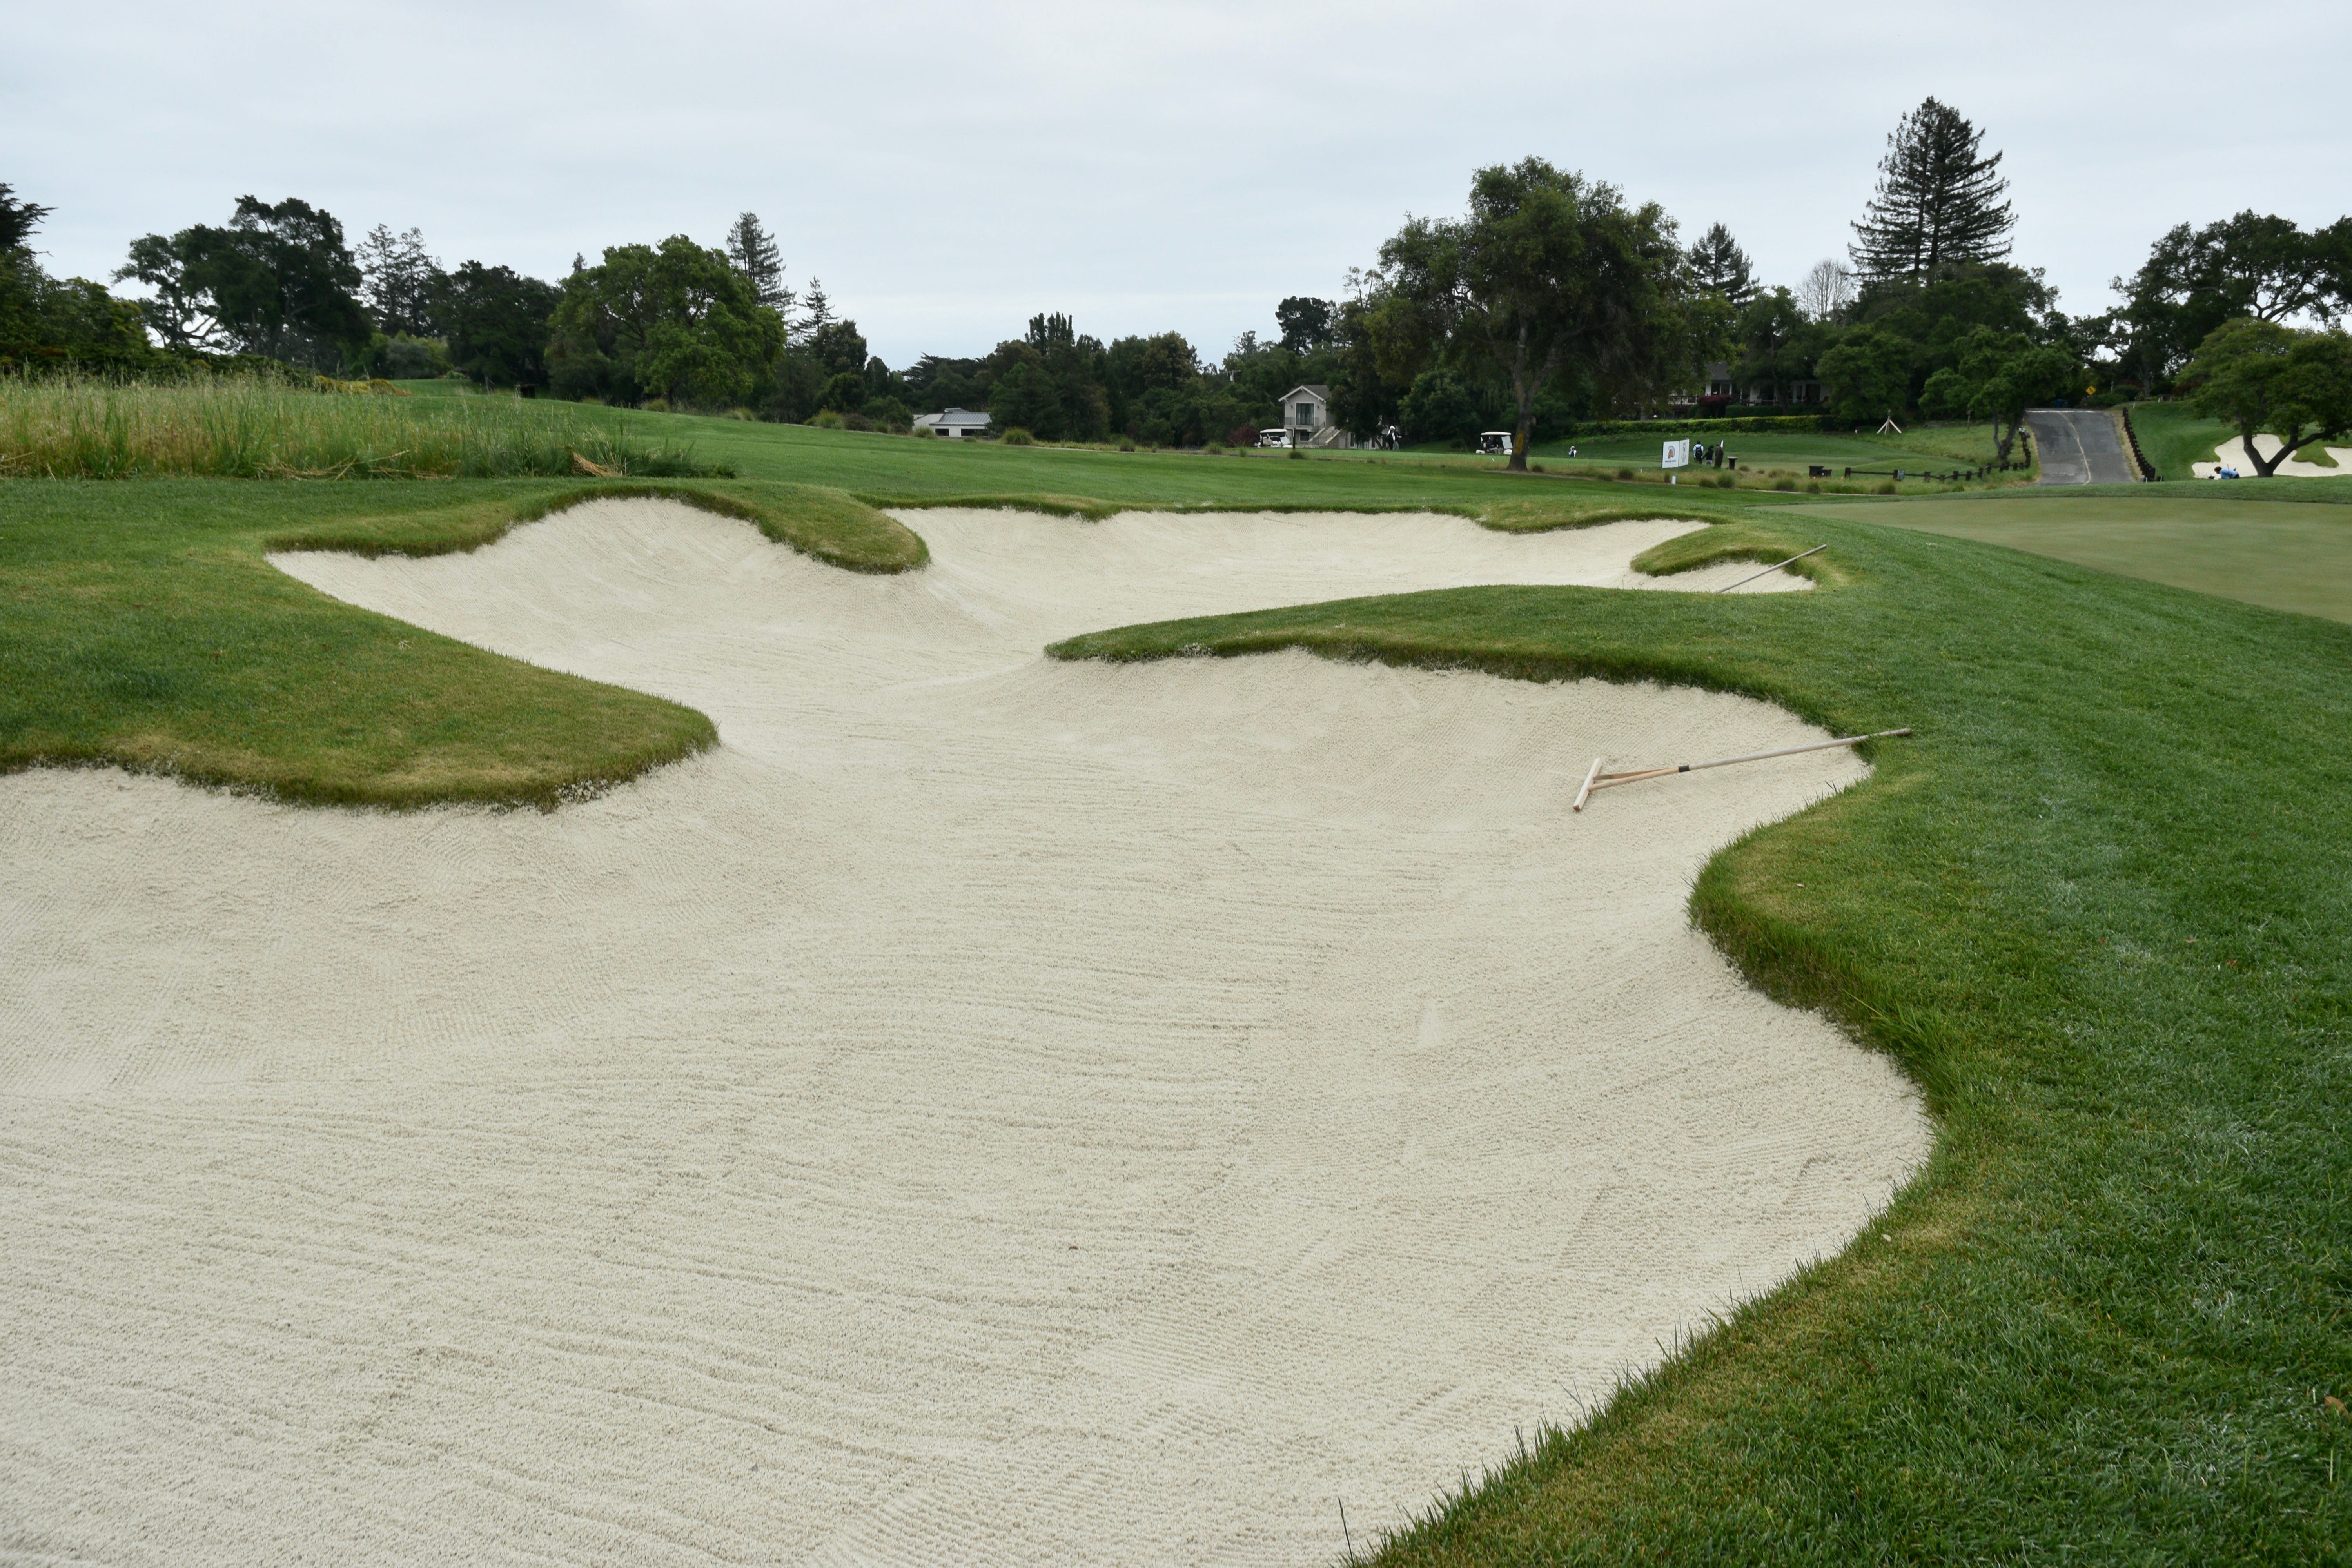
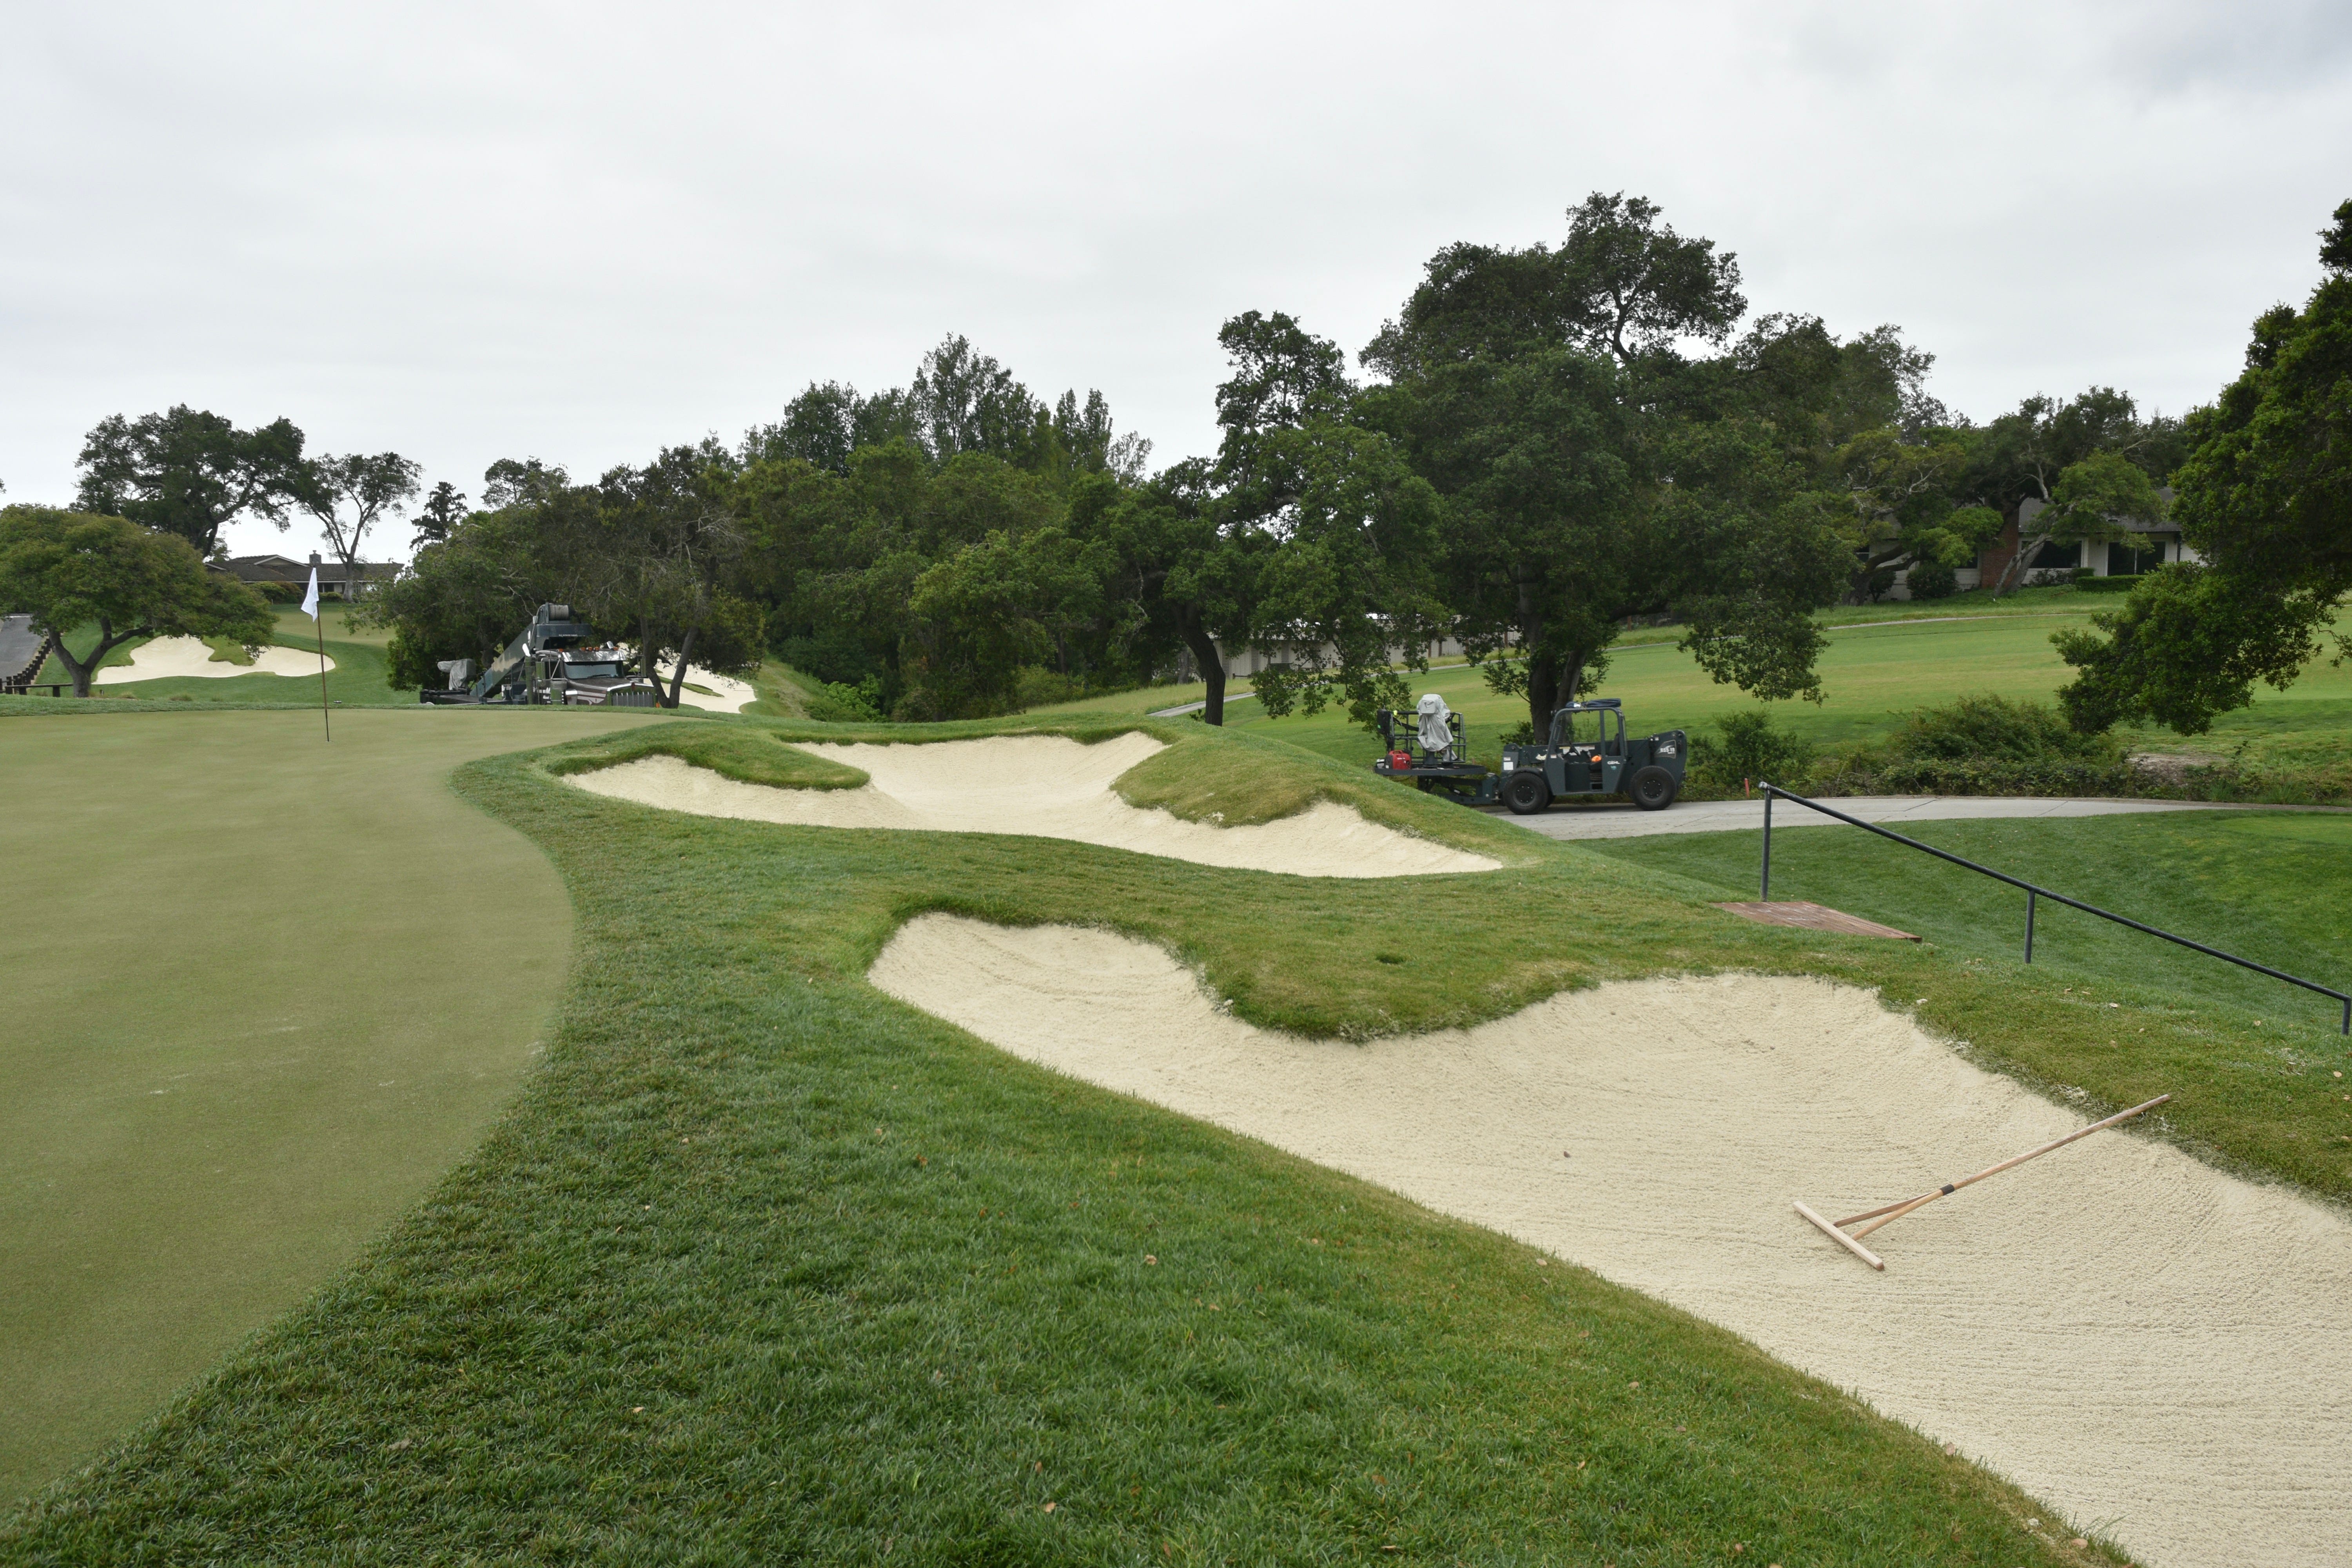
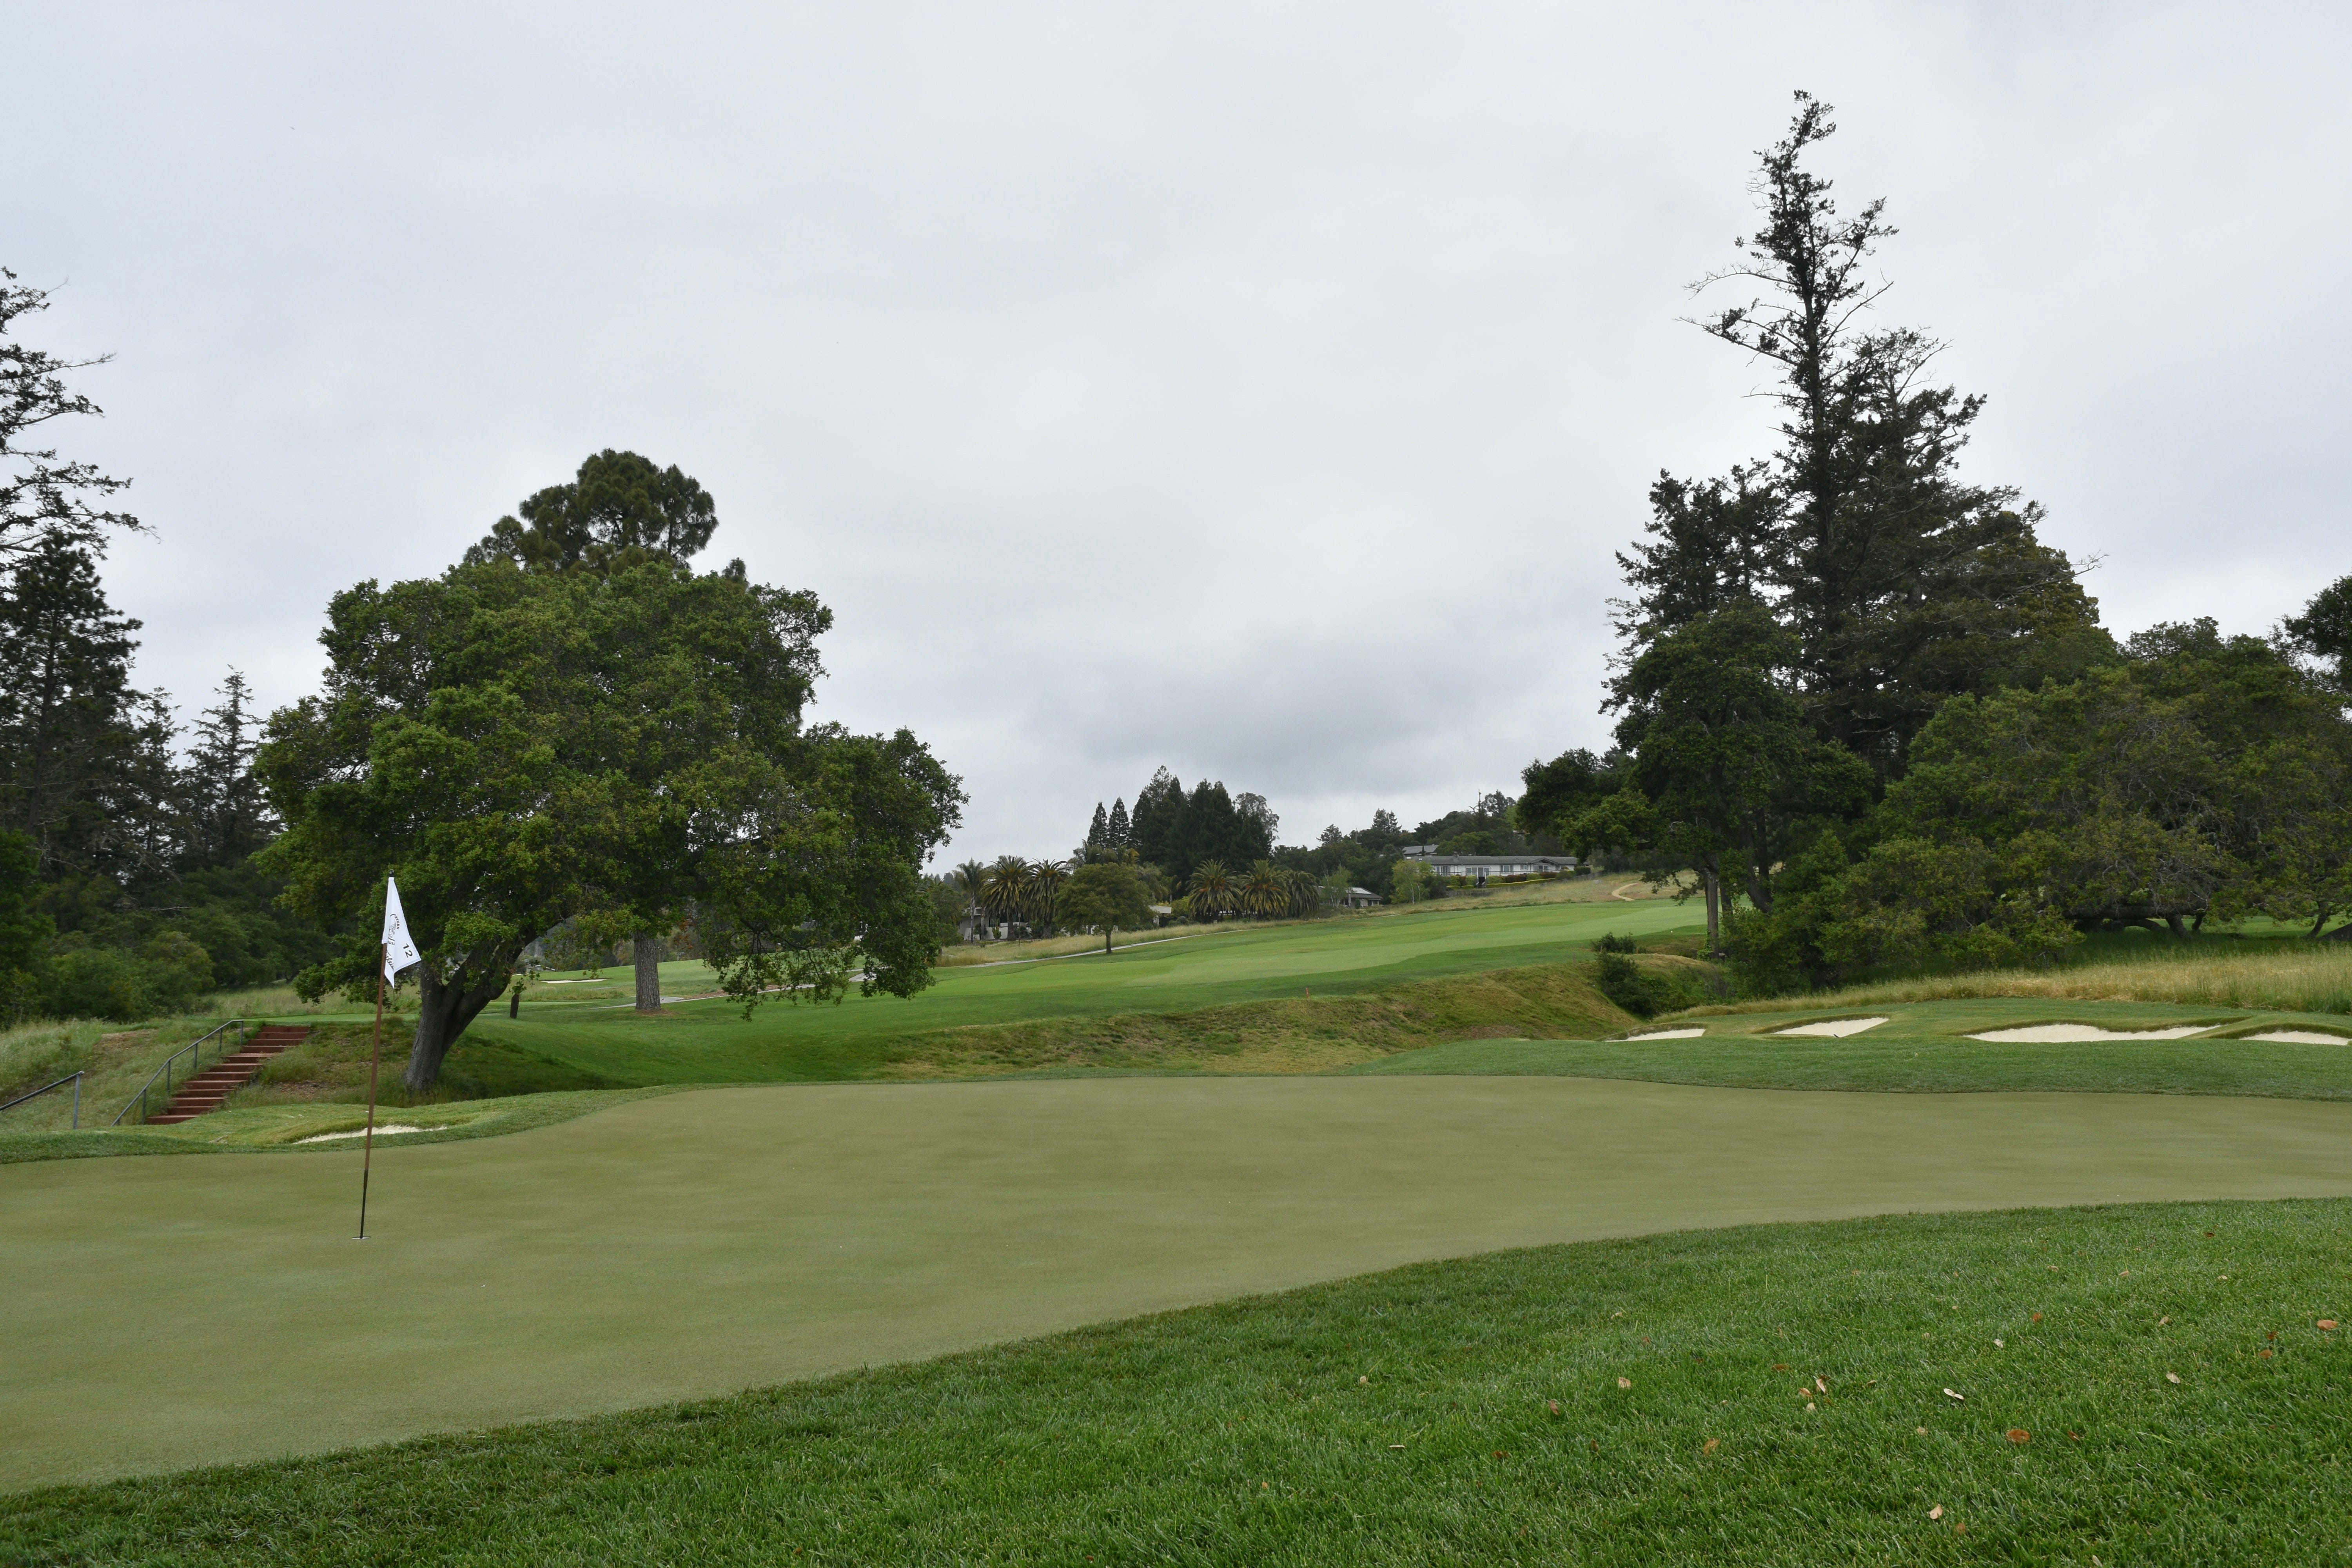
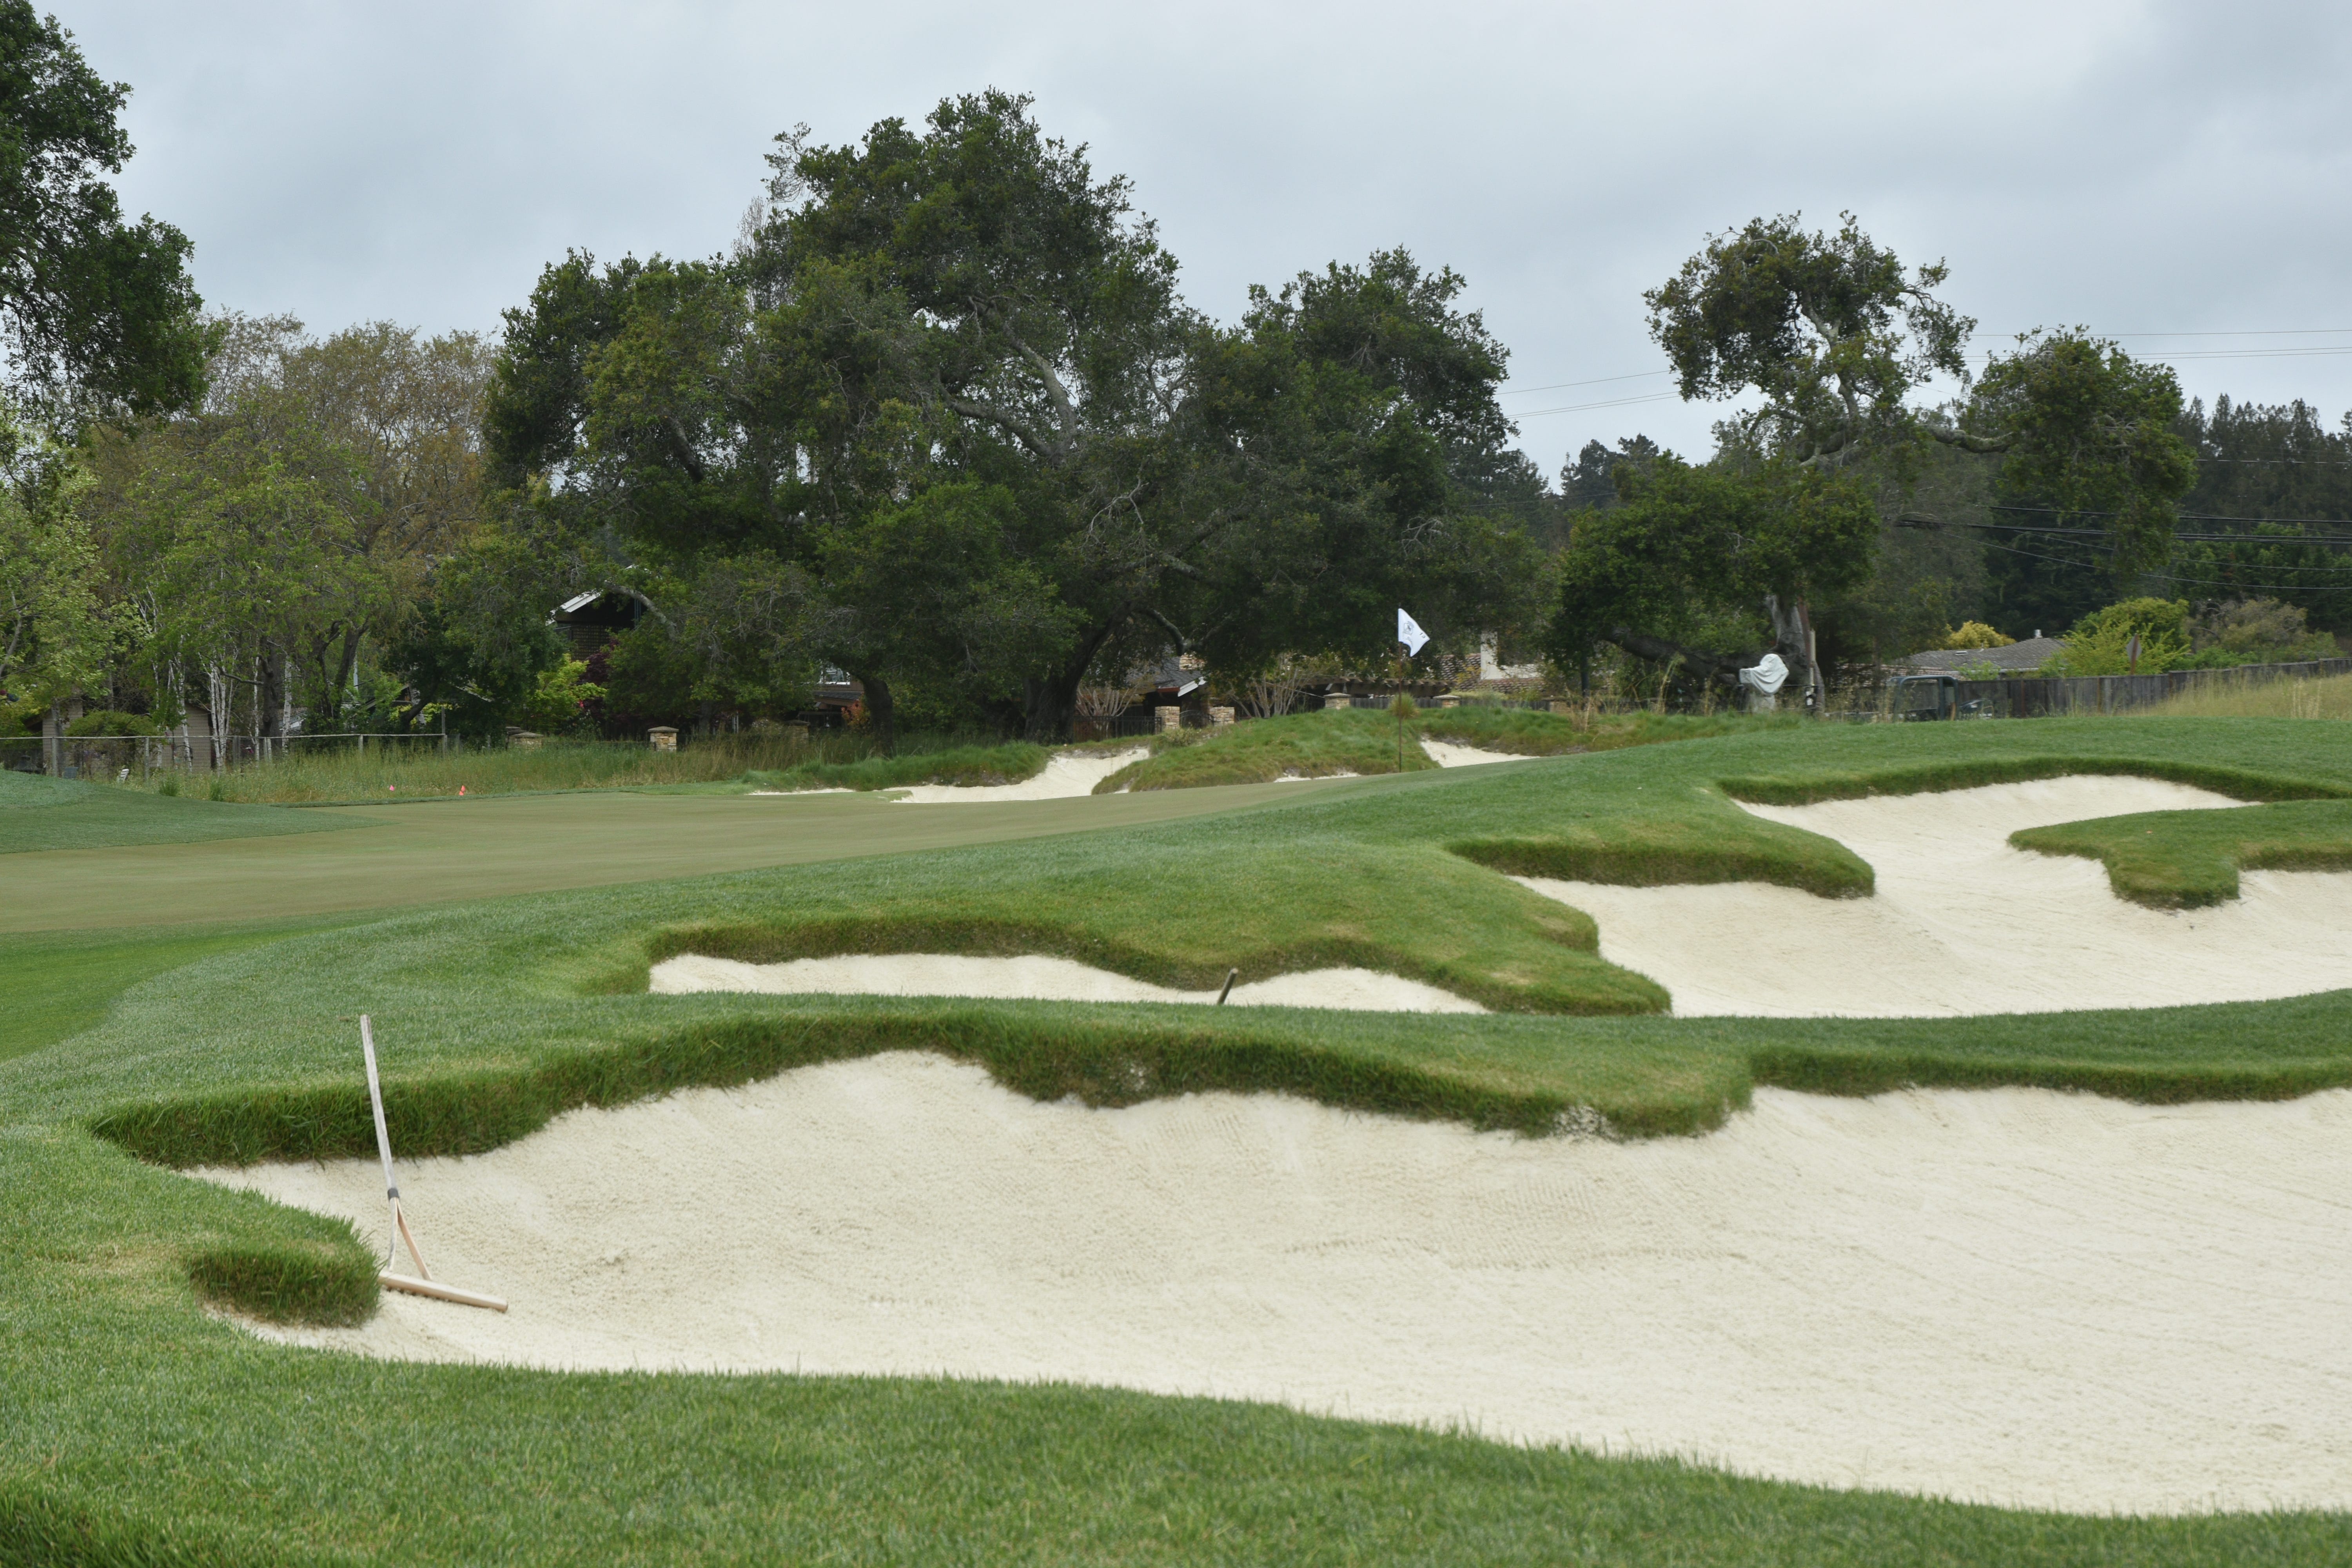
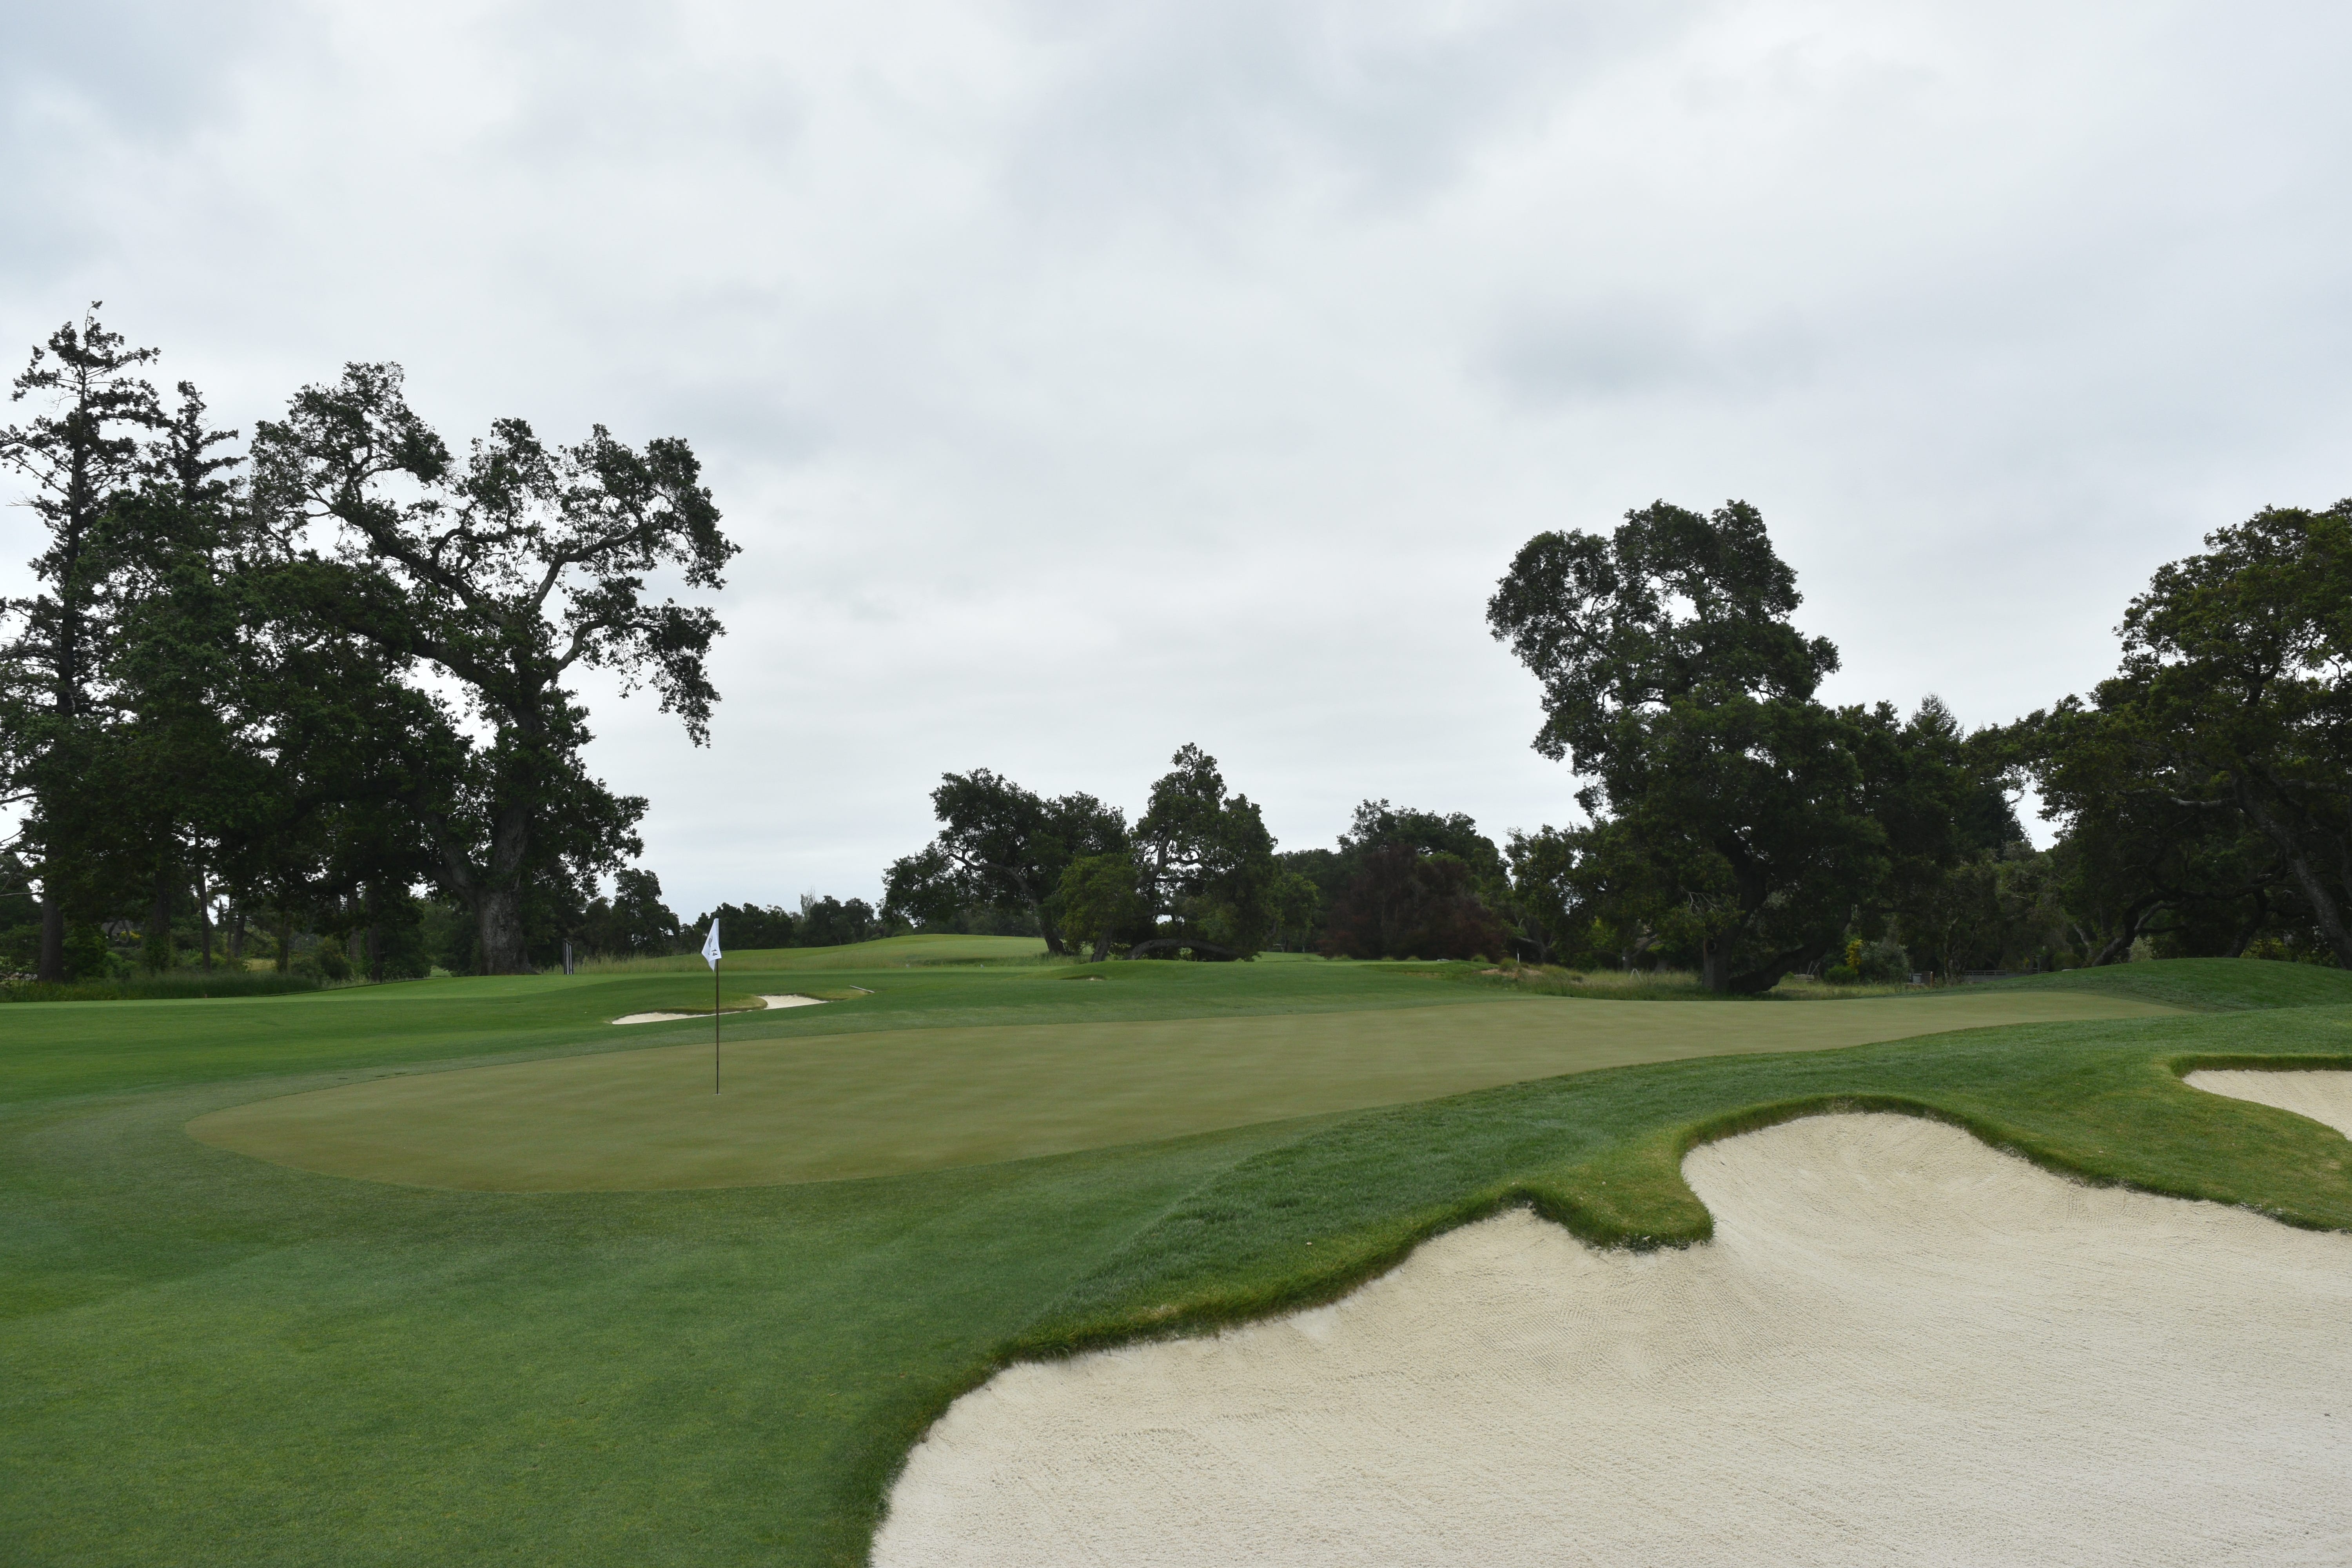
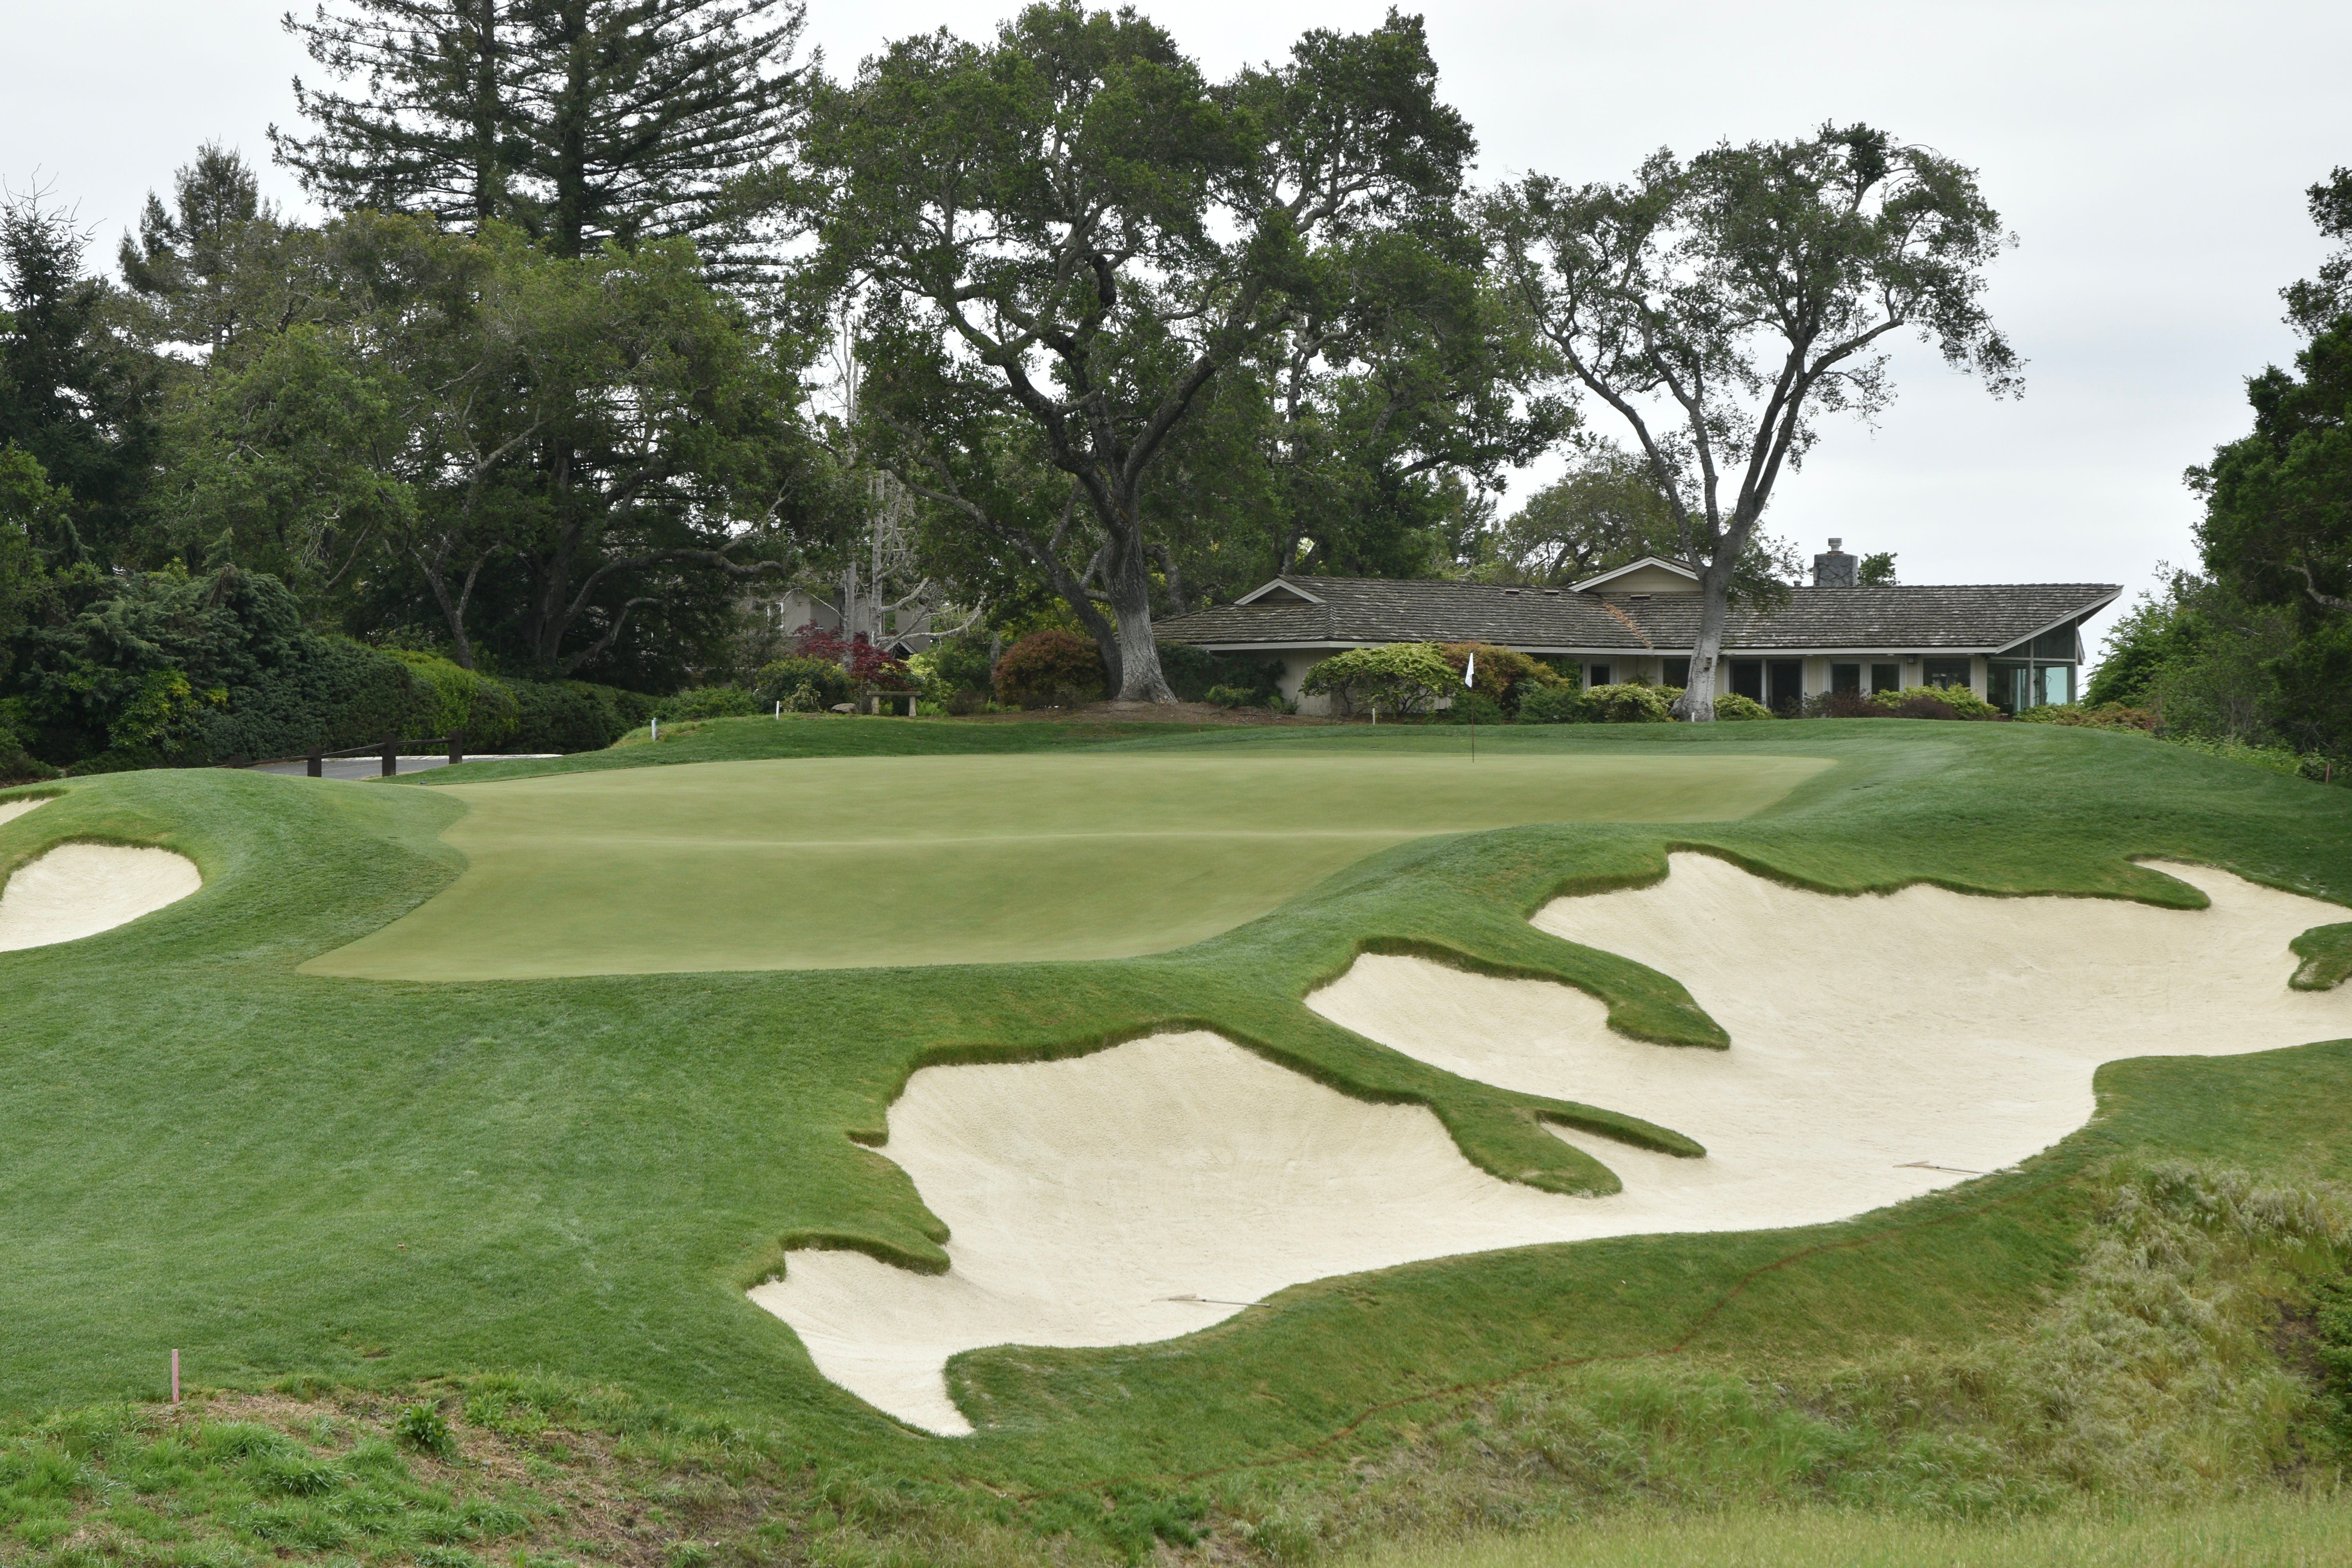
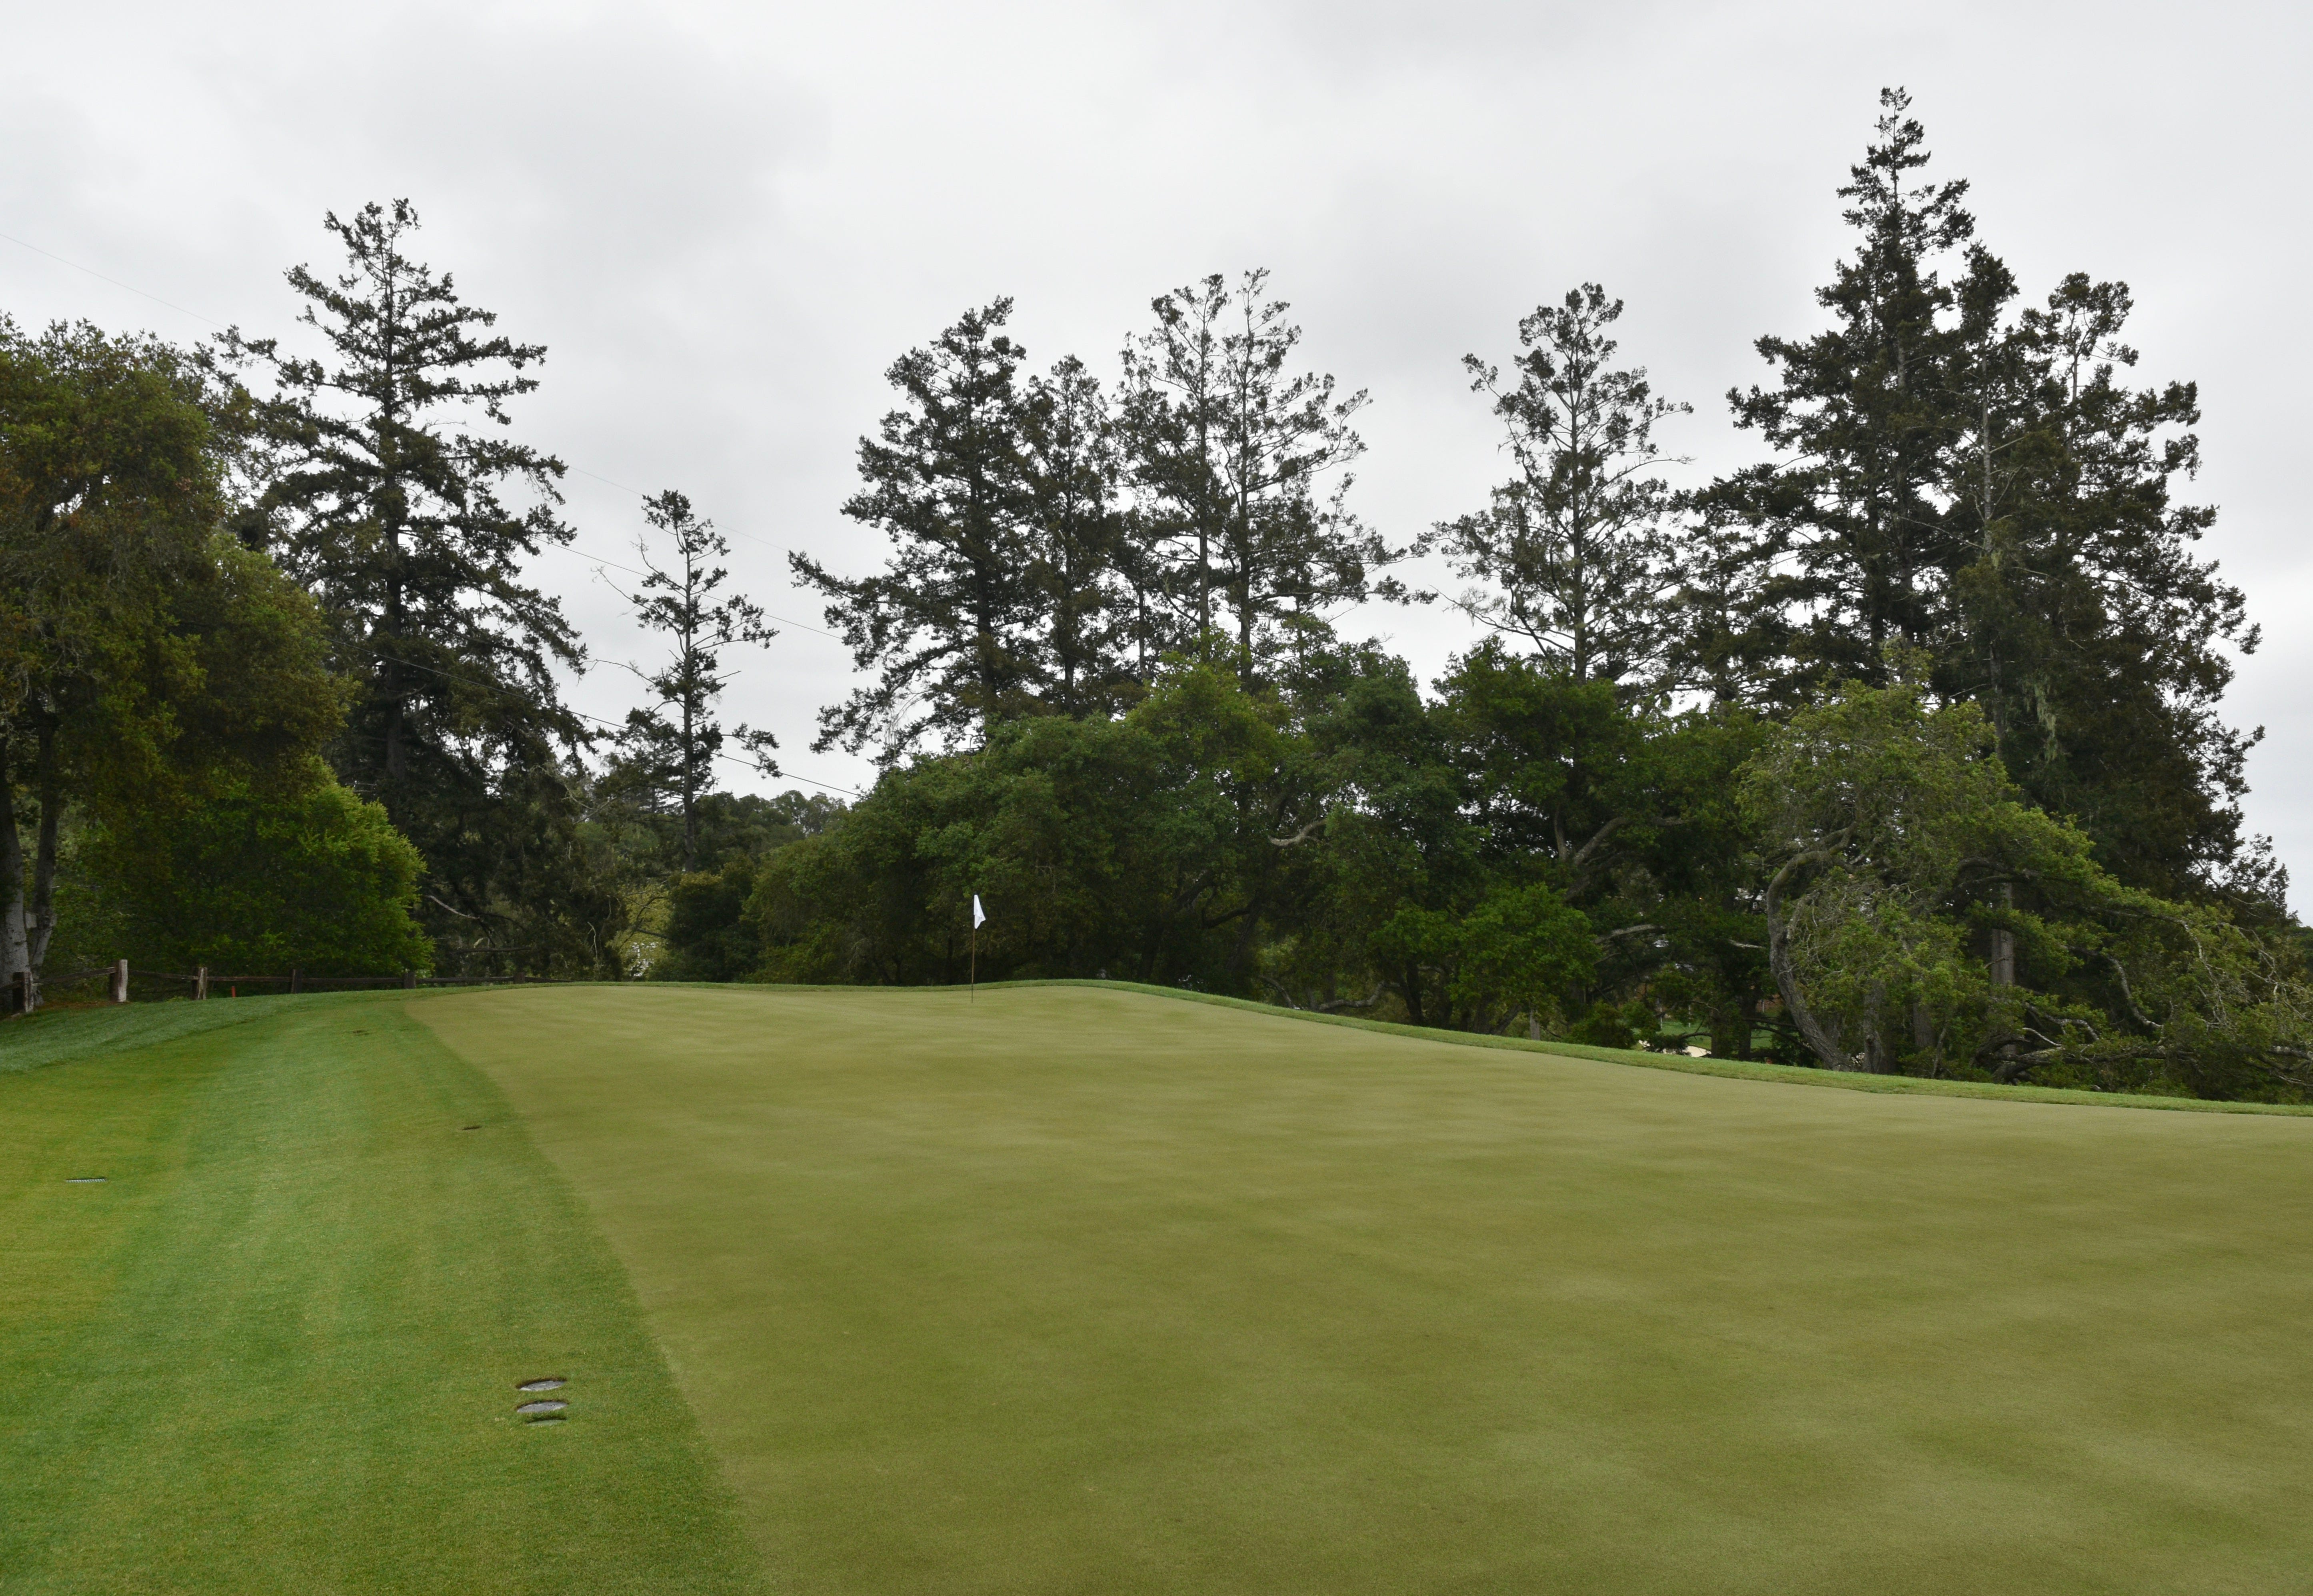
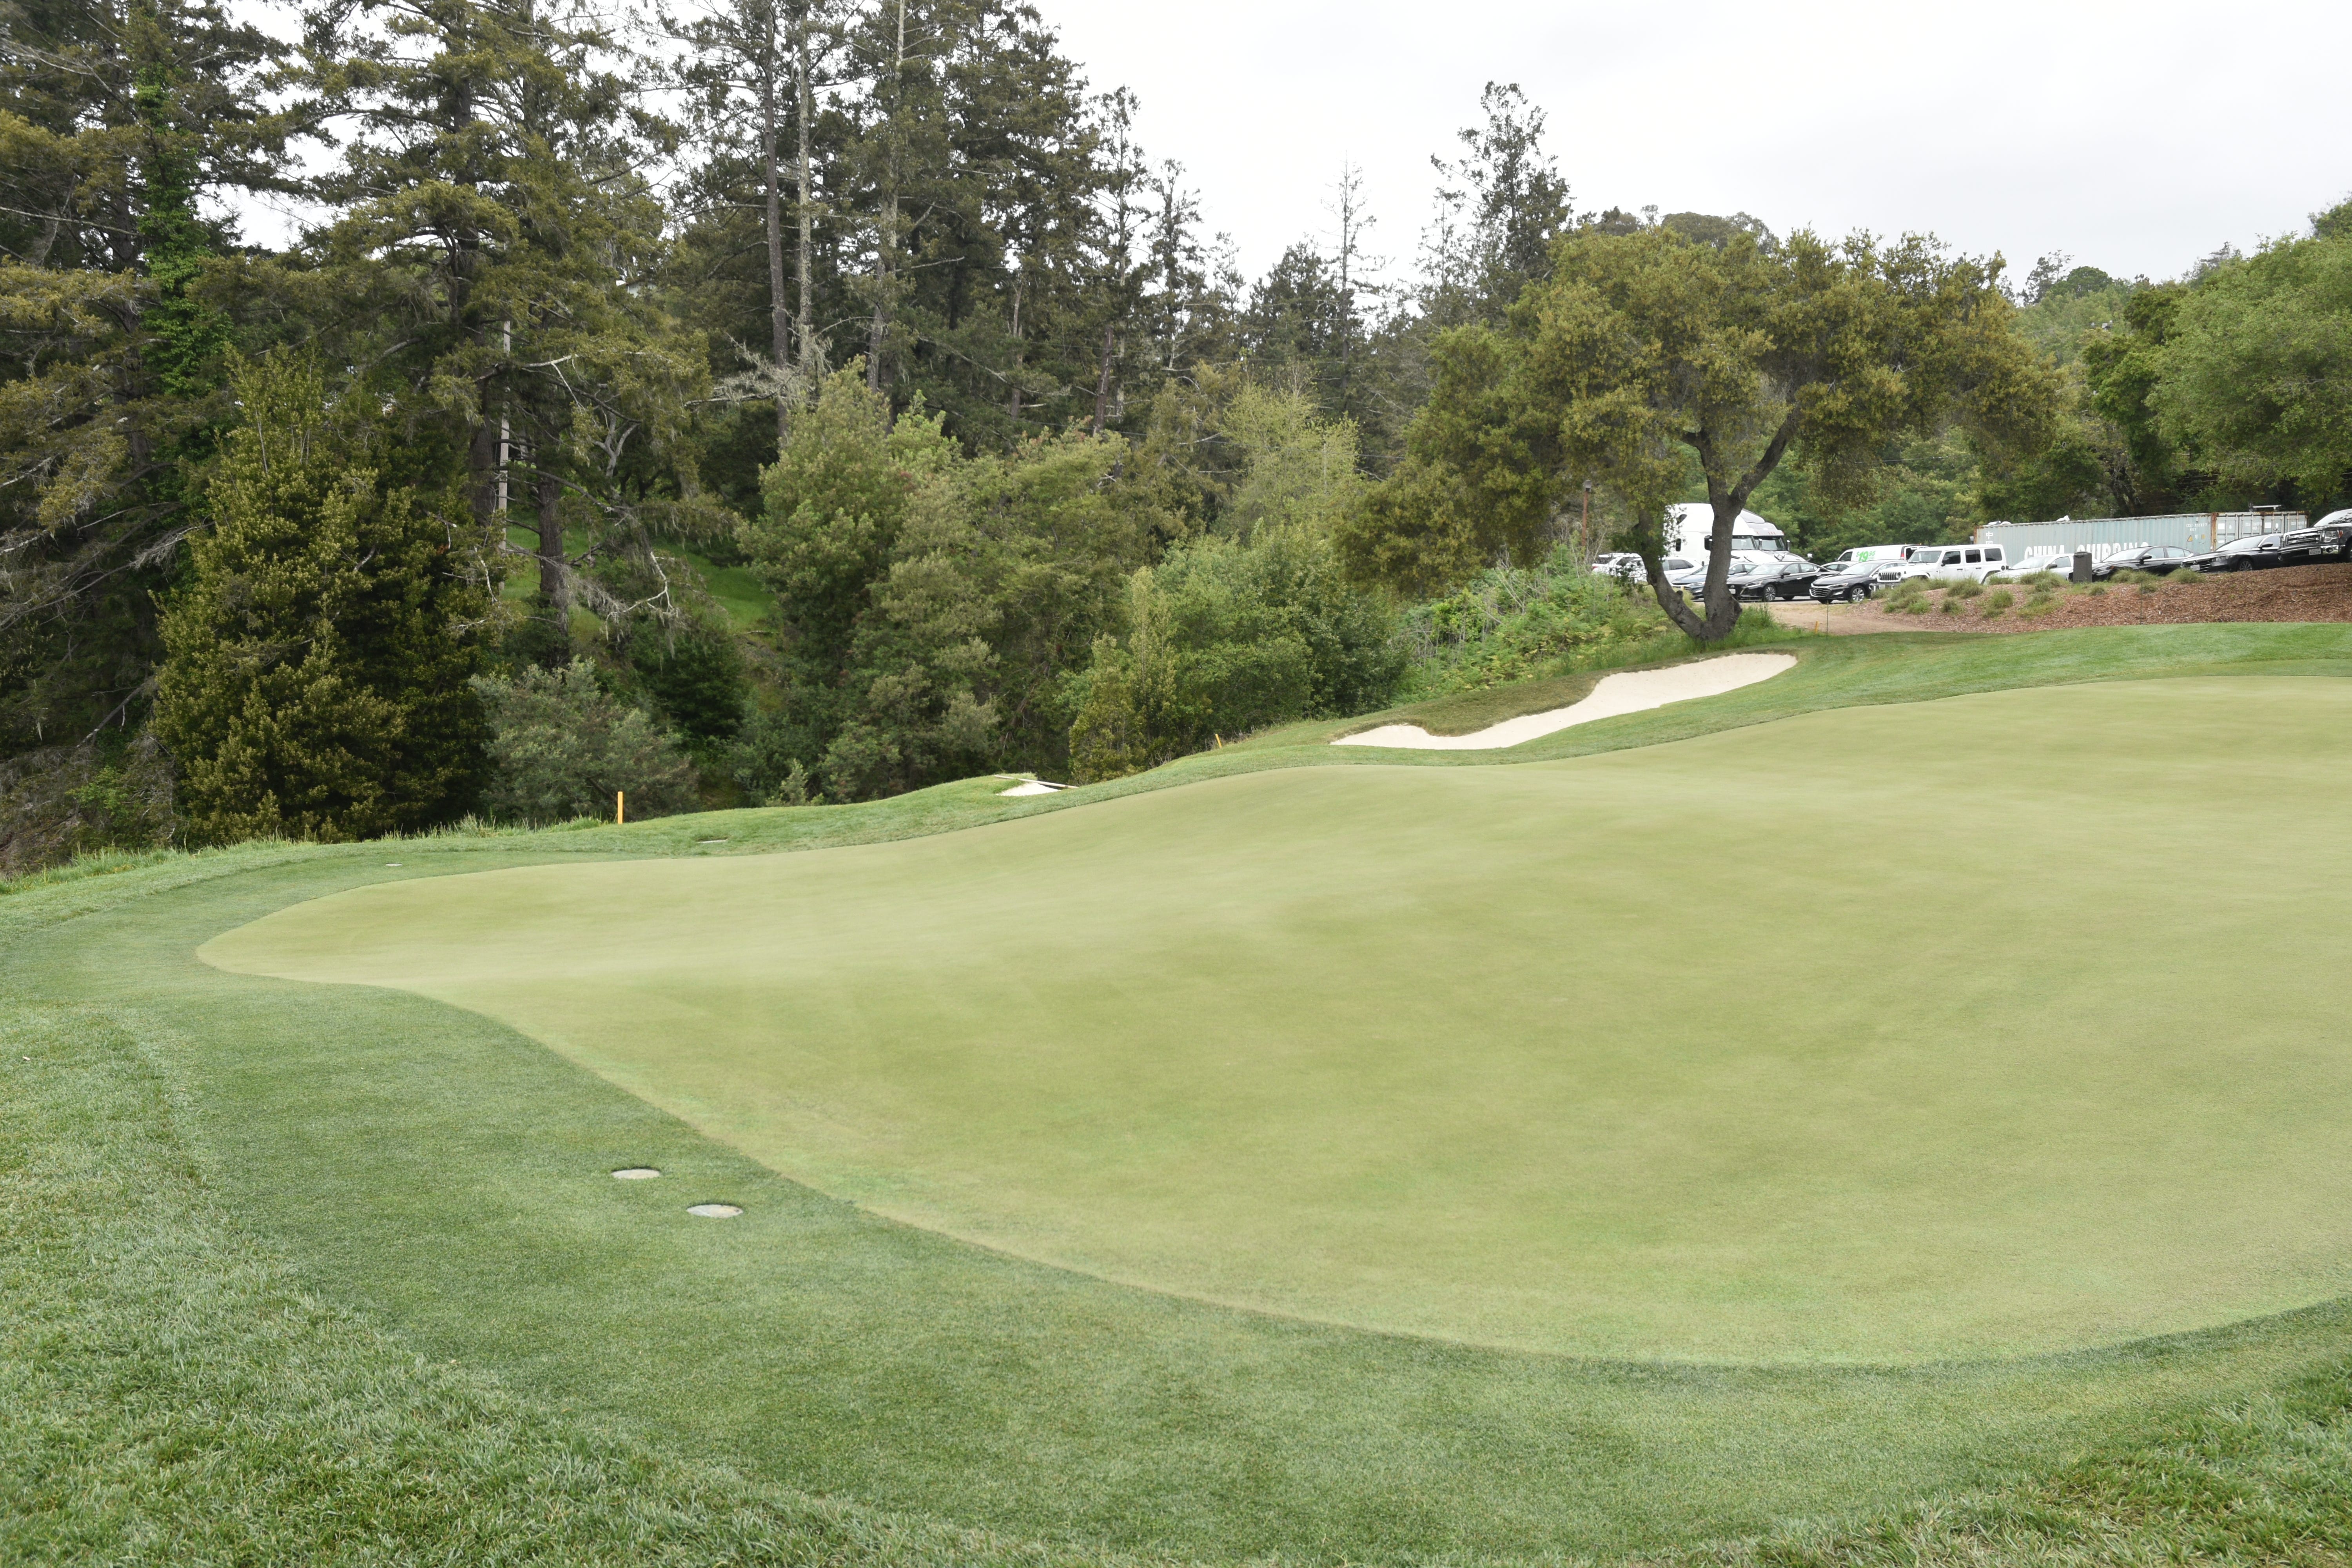
The newly restored left tongue section of the 10th green — masterfully done by Jim Urbina and reclaims a new spicy hole location
The new left tongue of the 10th green viewed from the front — the fringe shelf area surrounding the back left section is sloped enough to feed balls down onto the green. A player can get at the pin by utilizing the slopes
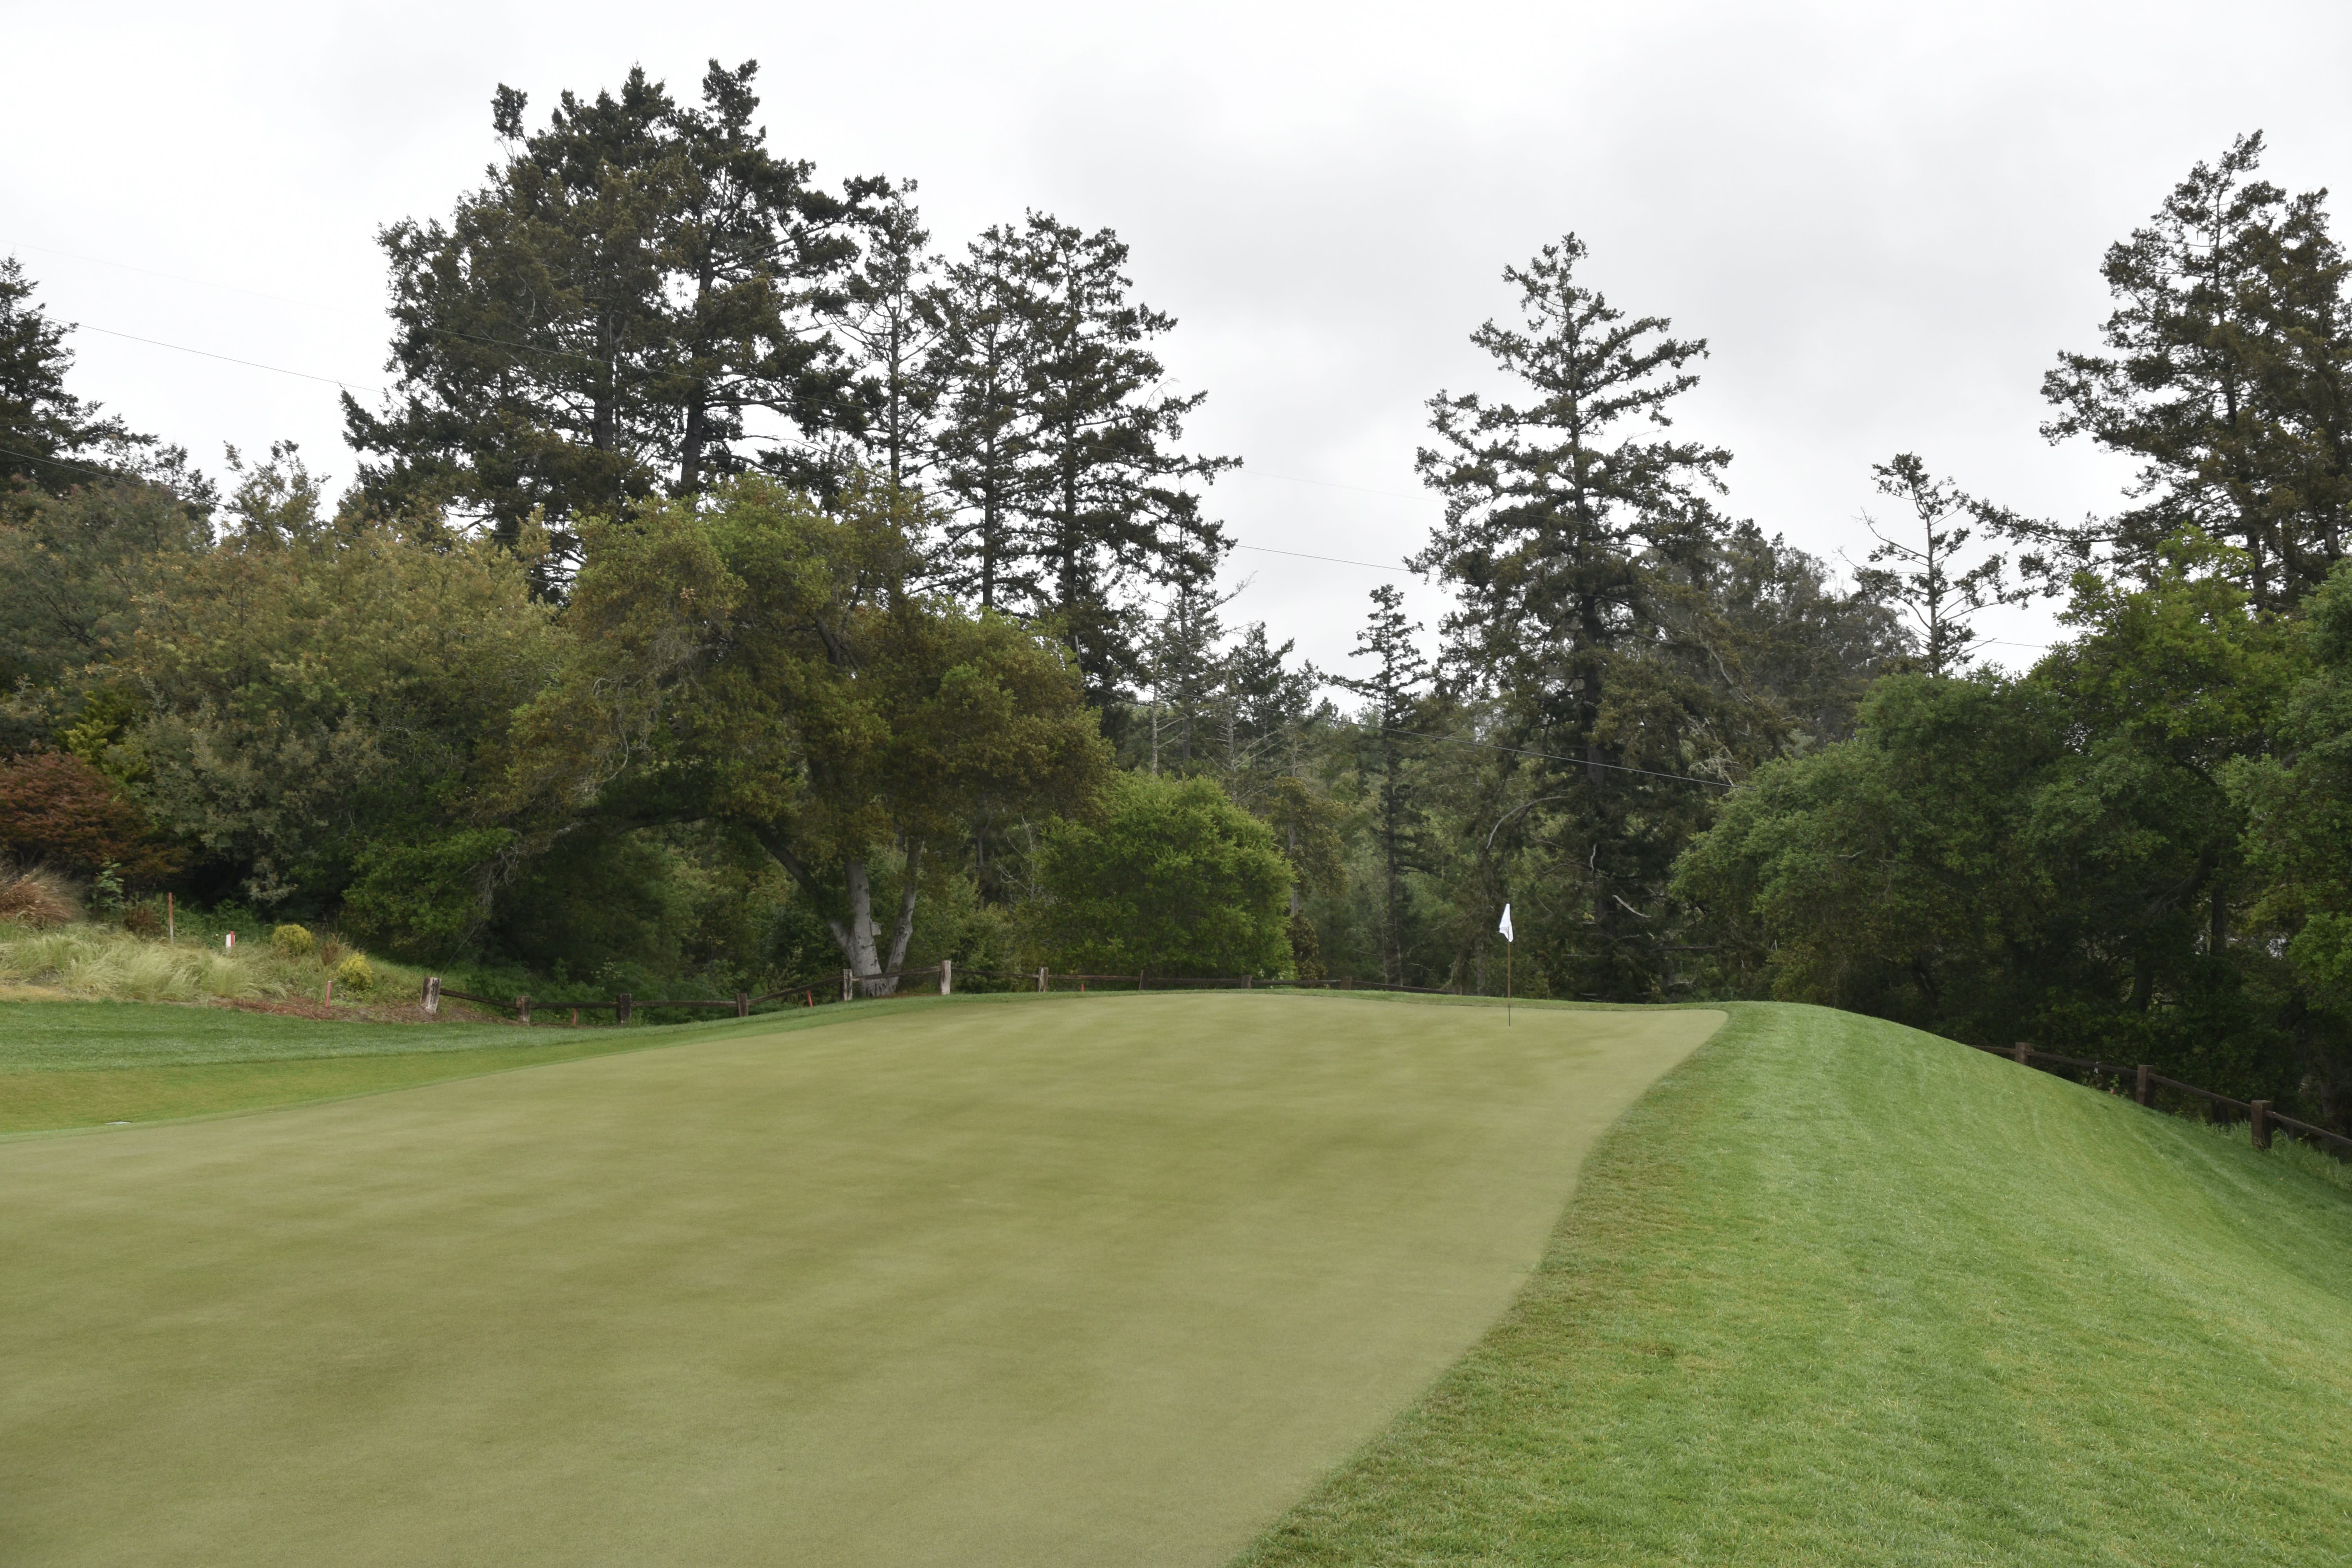
The left tongue section of the 10th green viewed from the back left
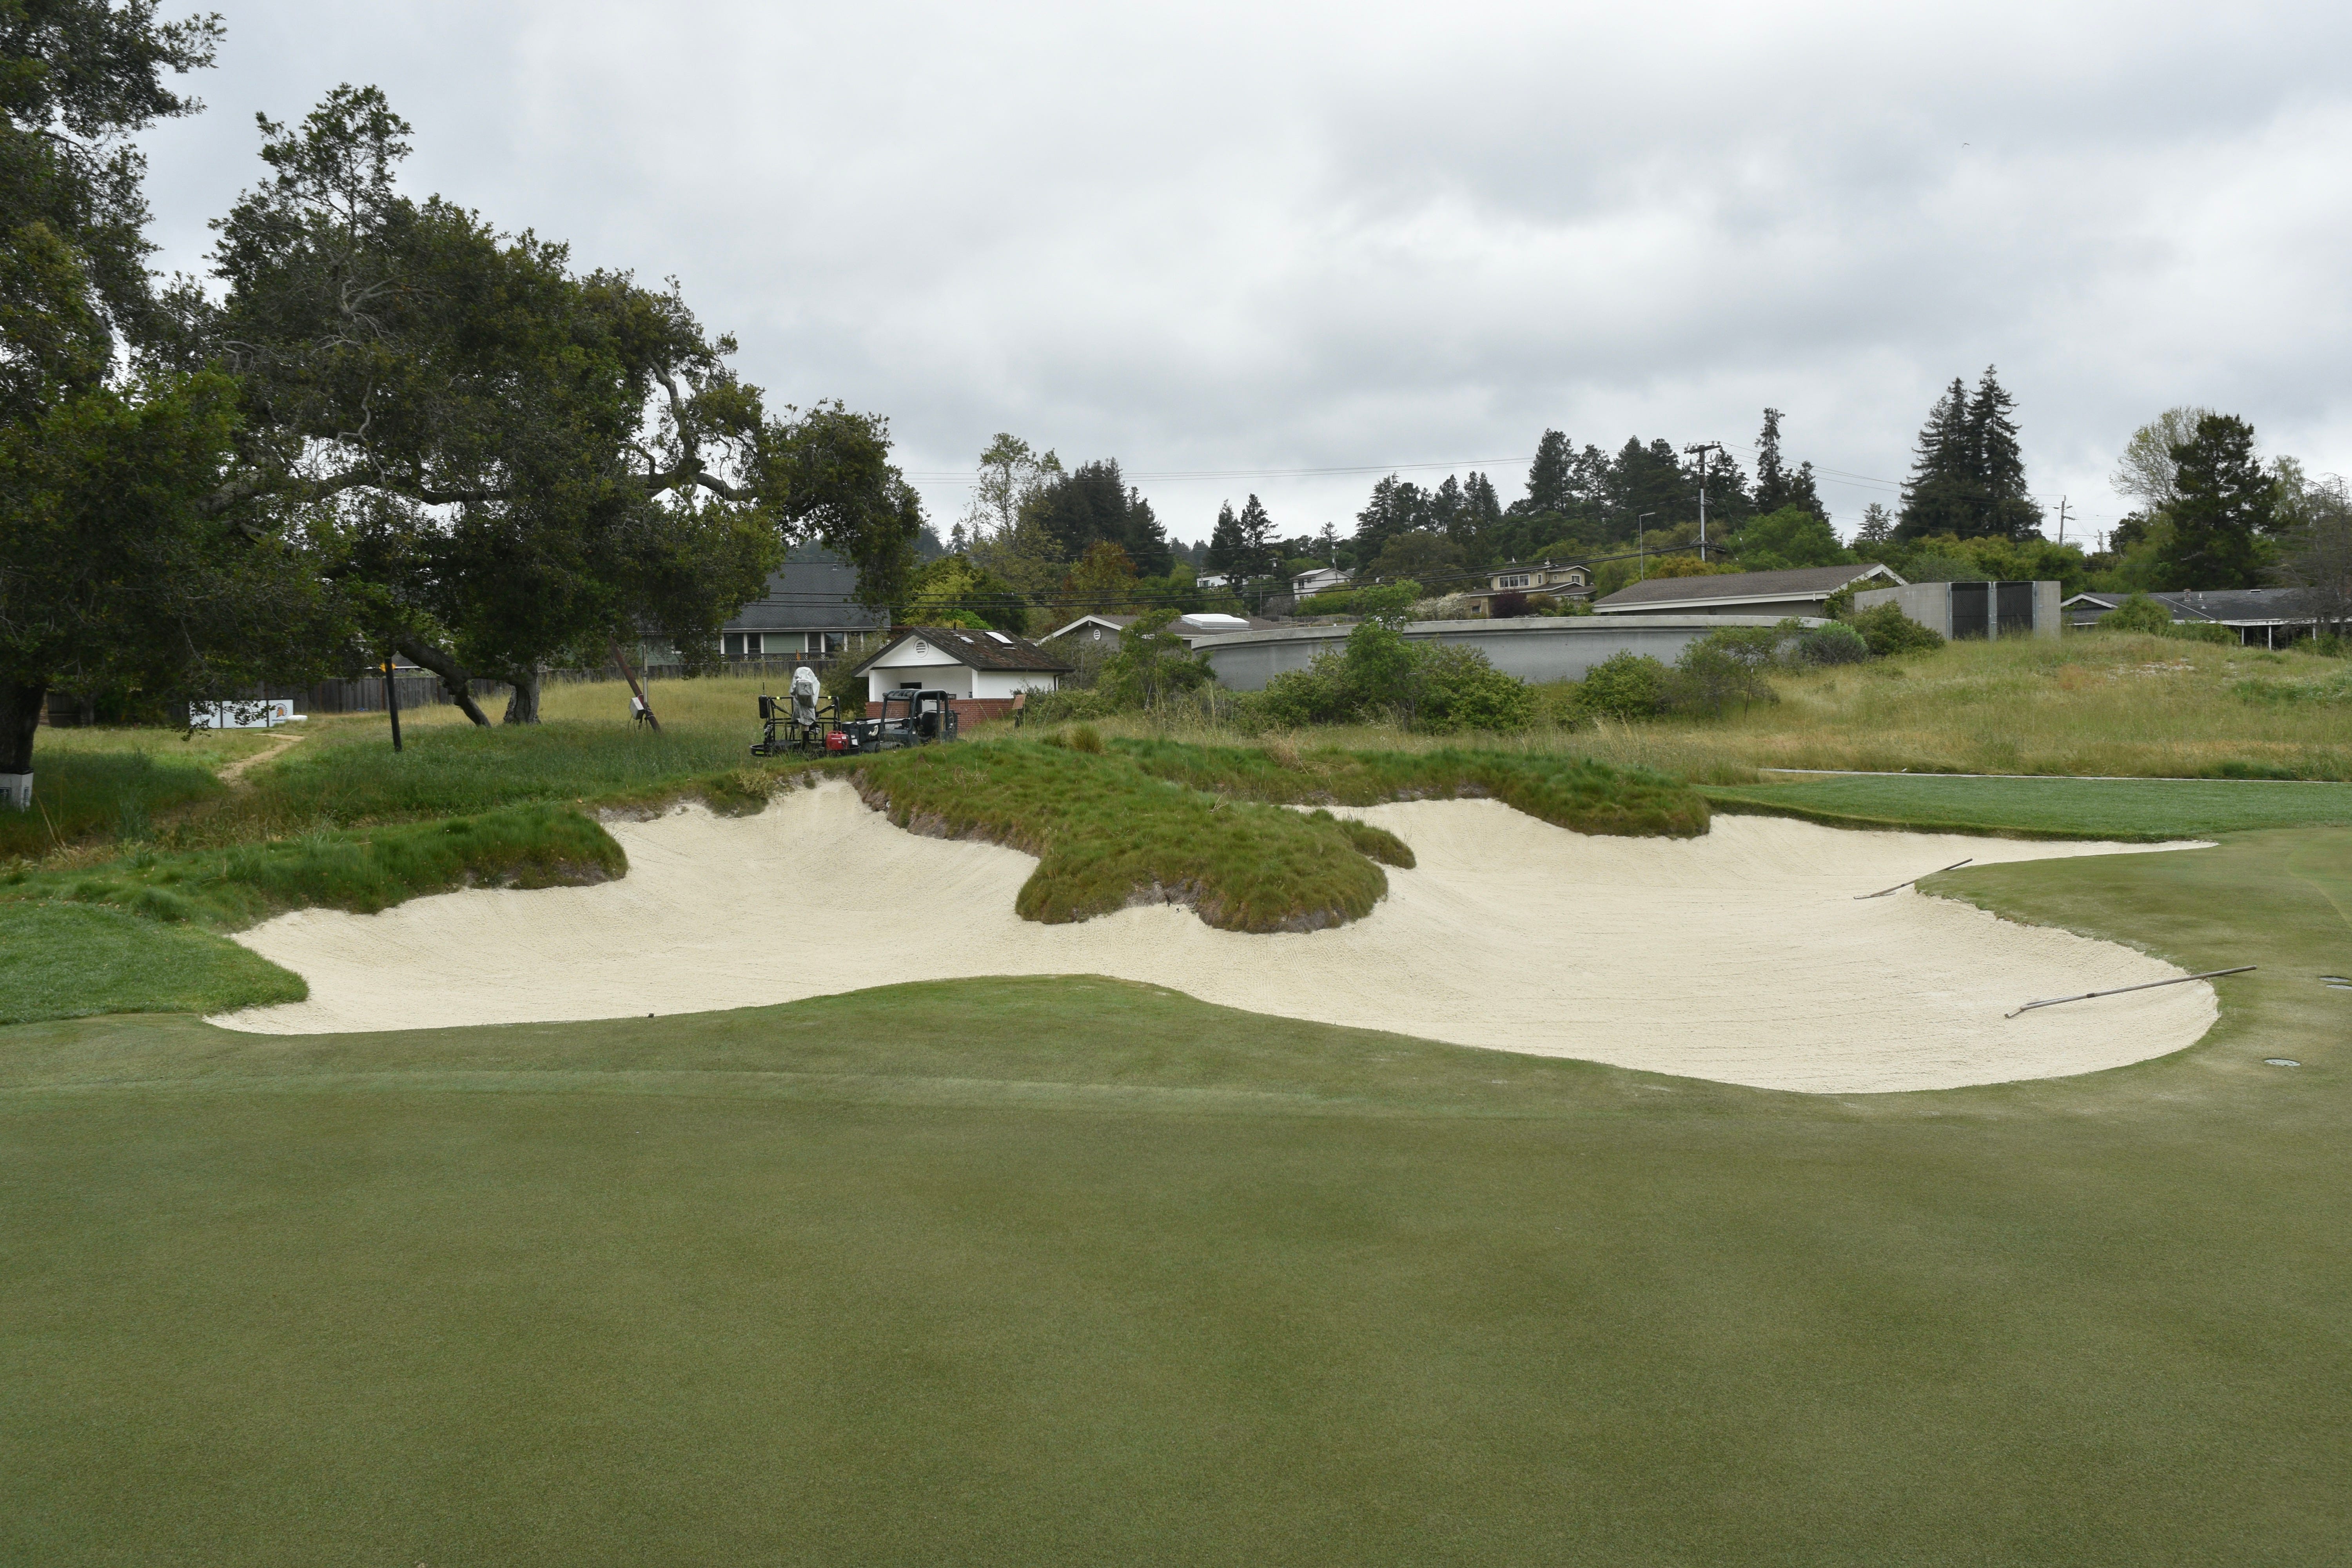
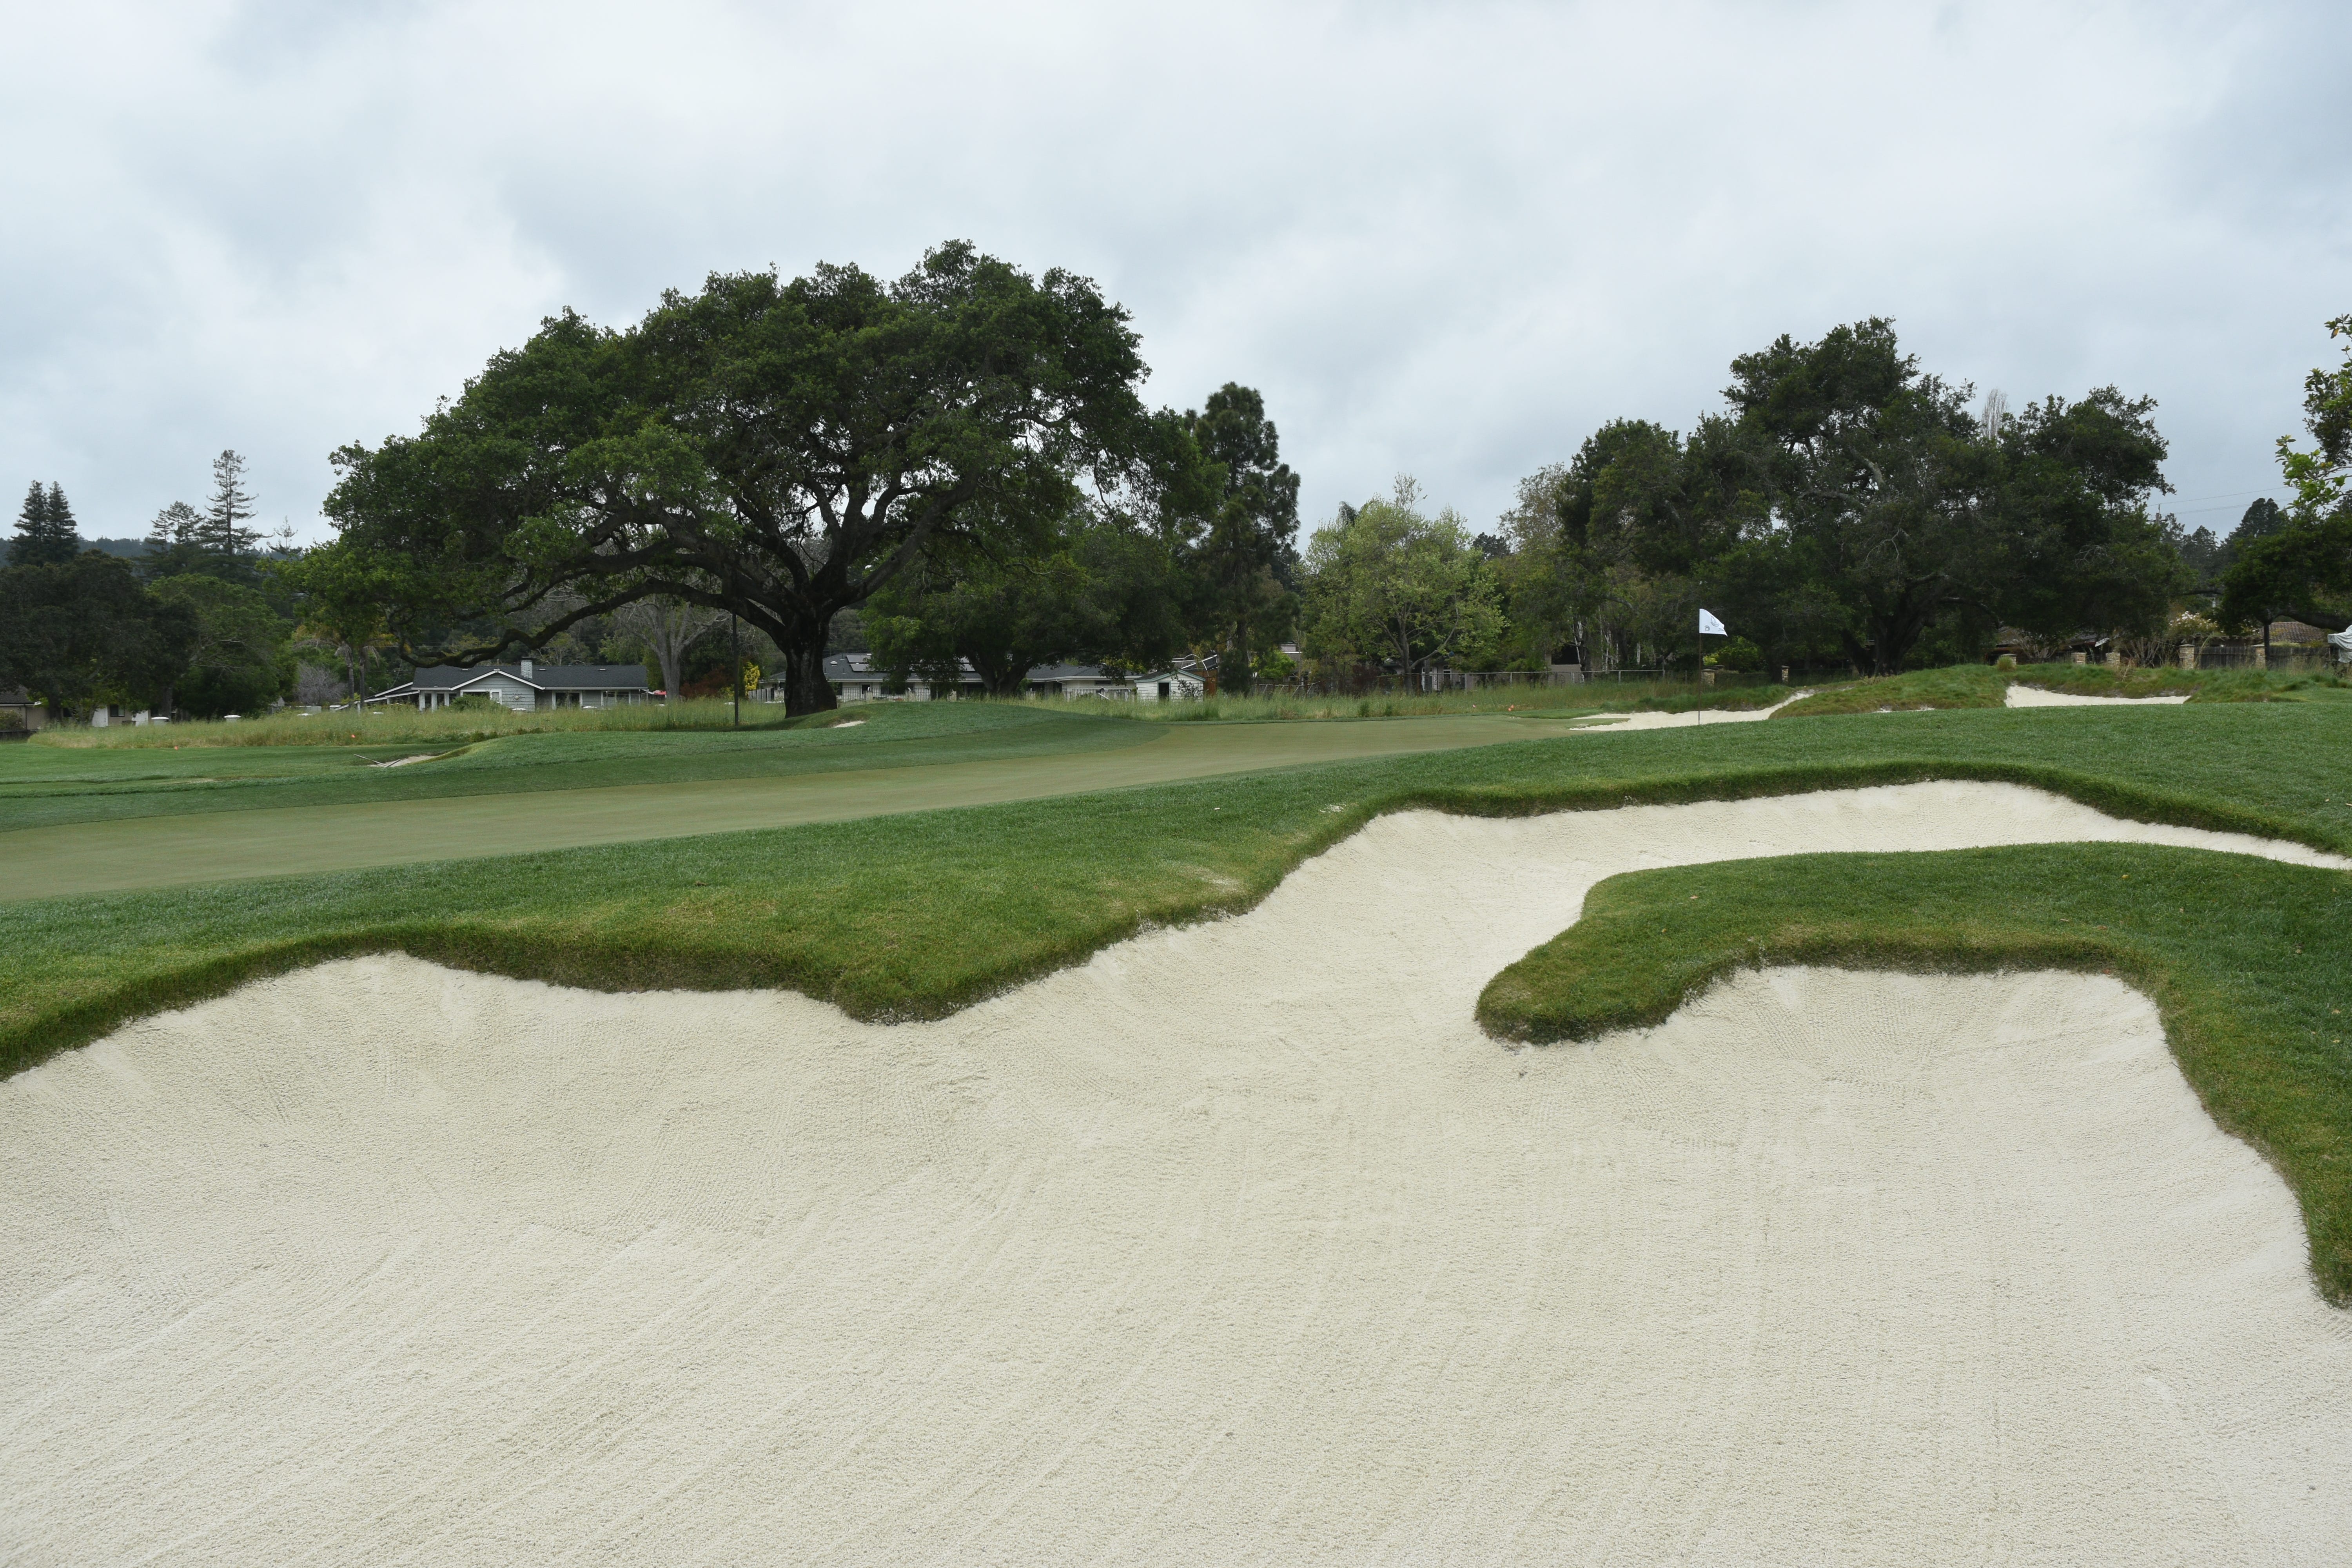
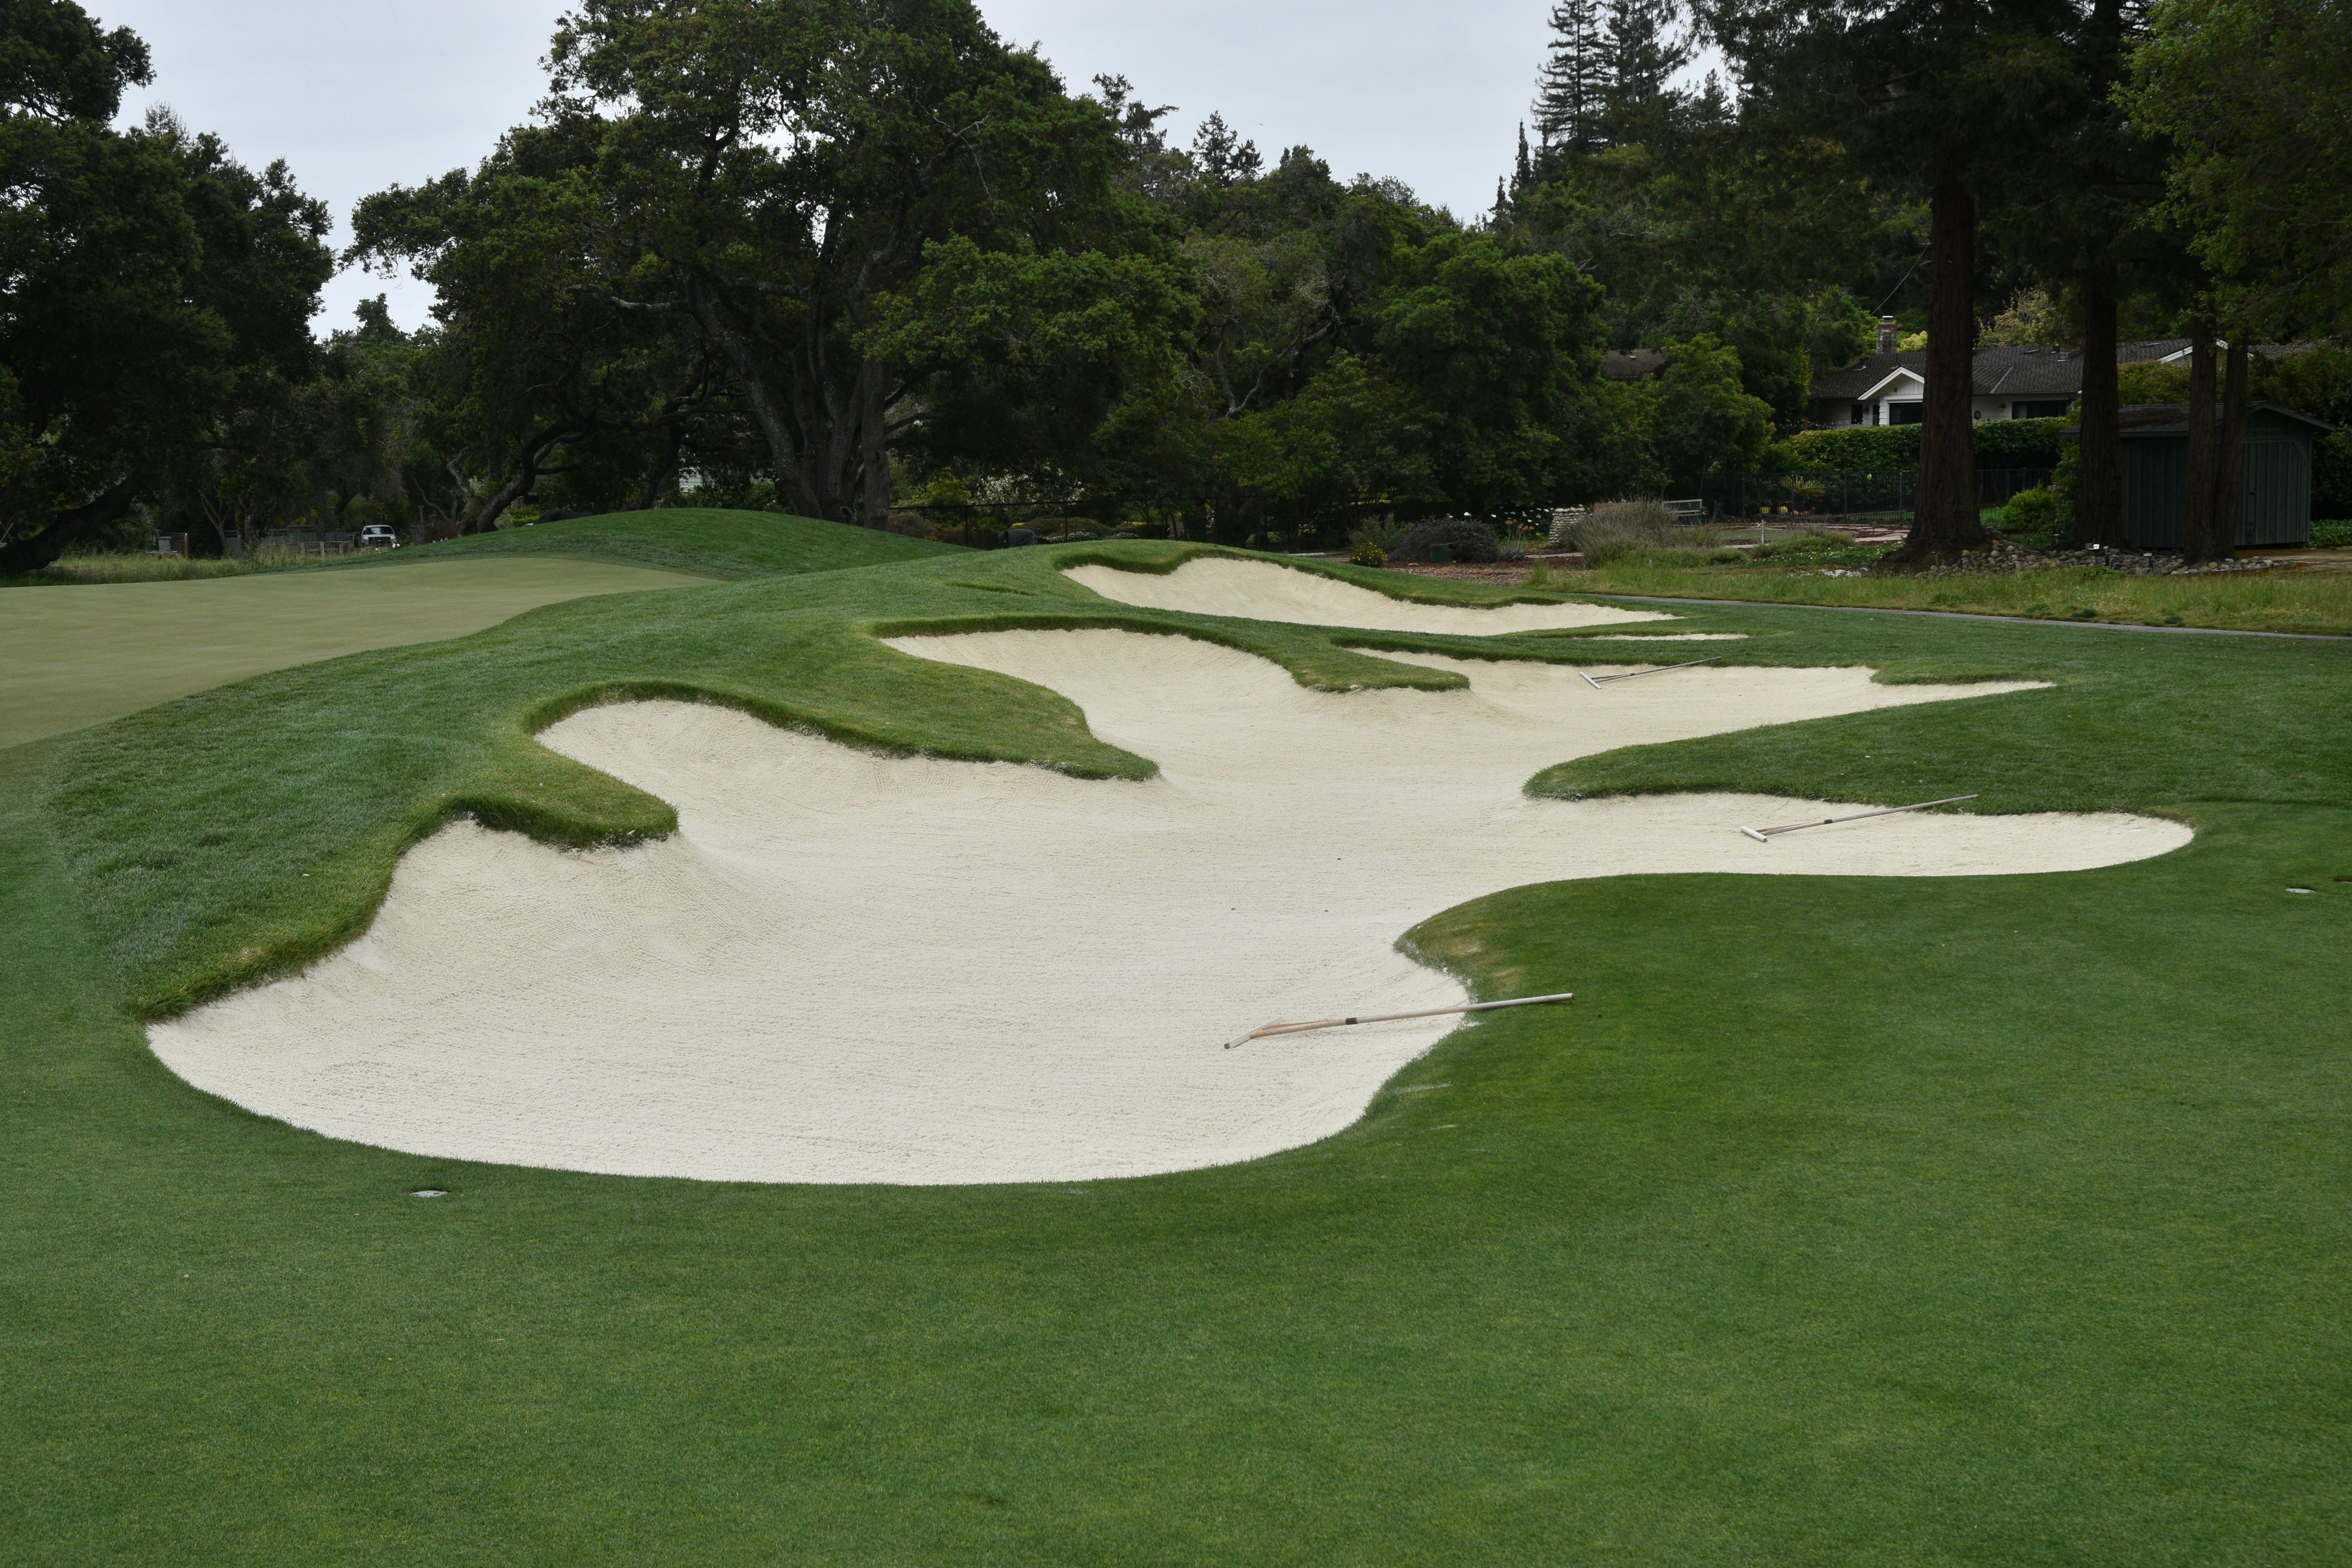
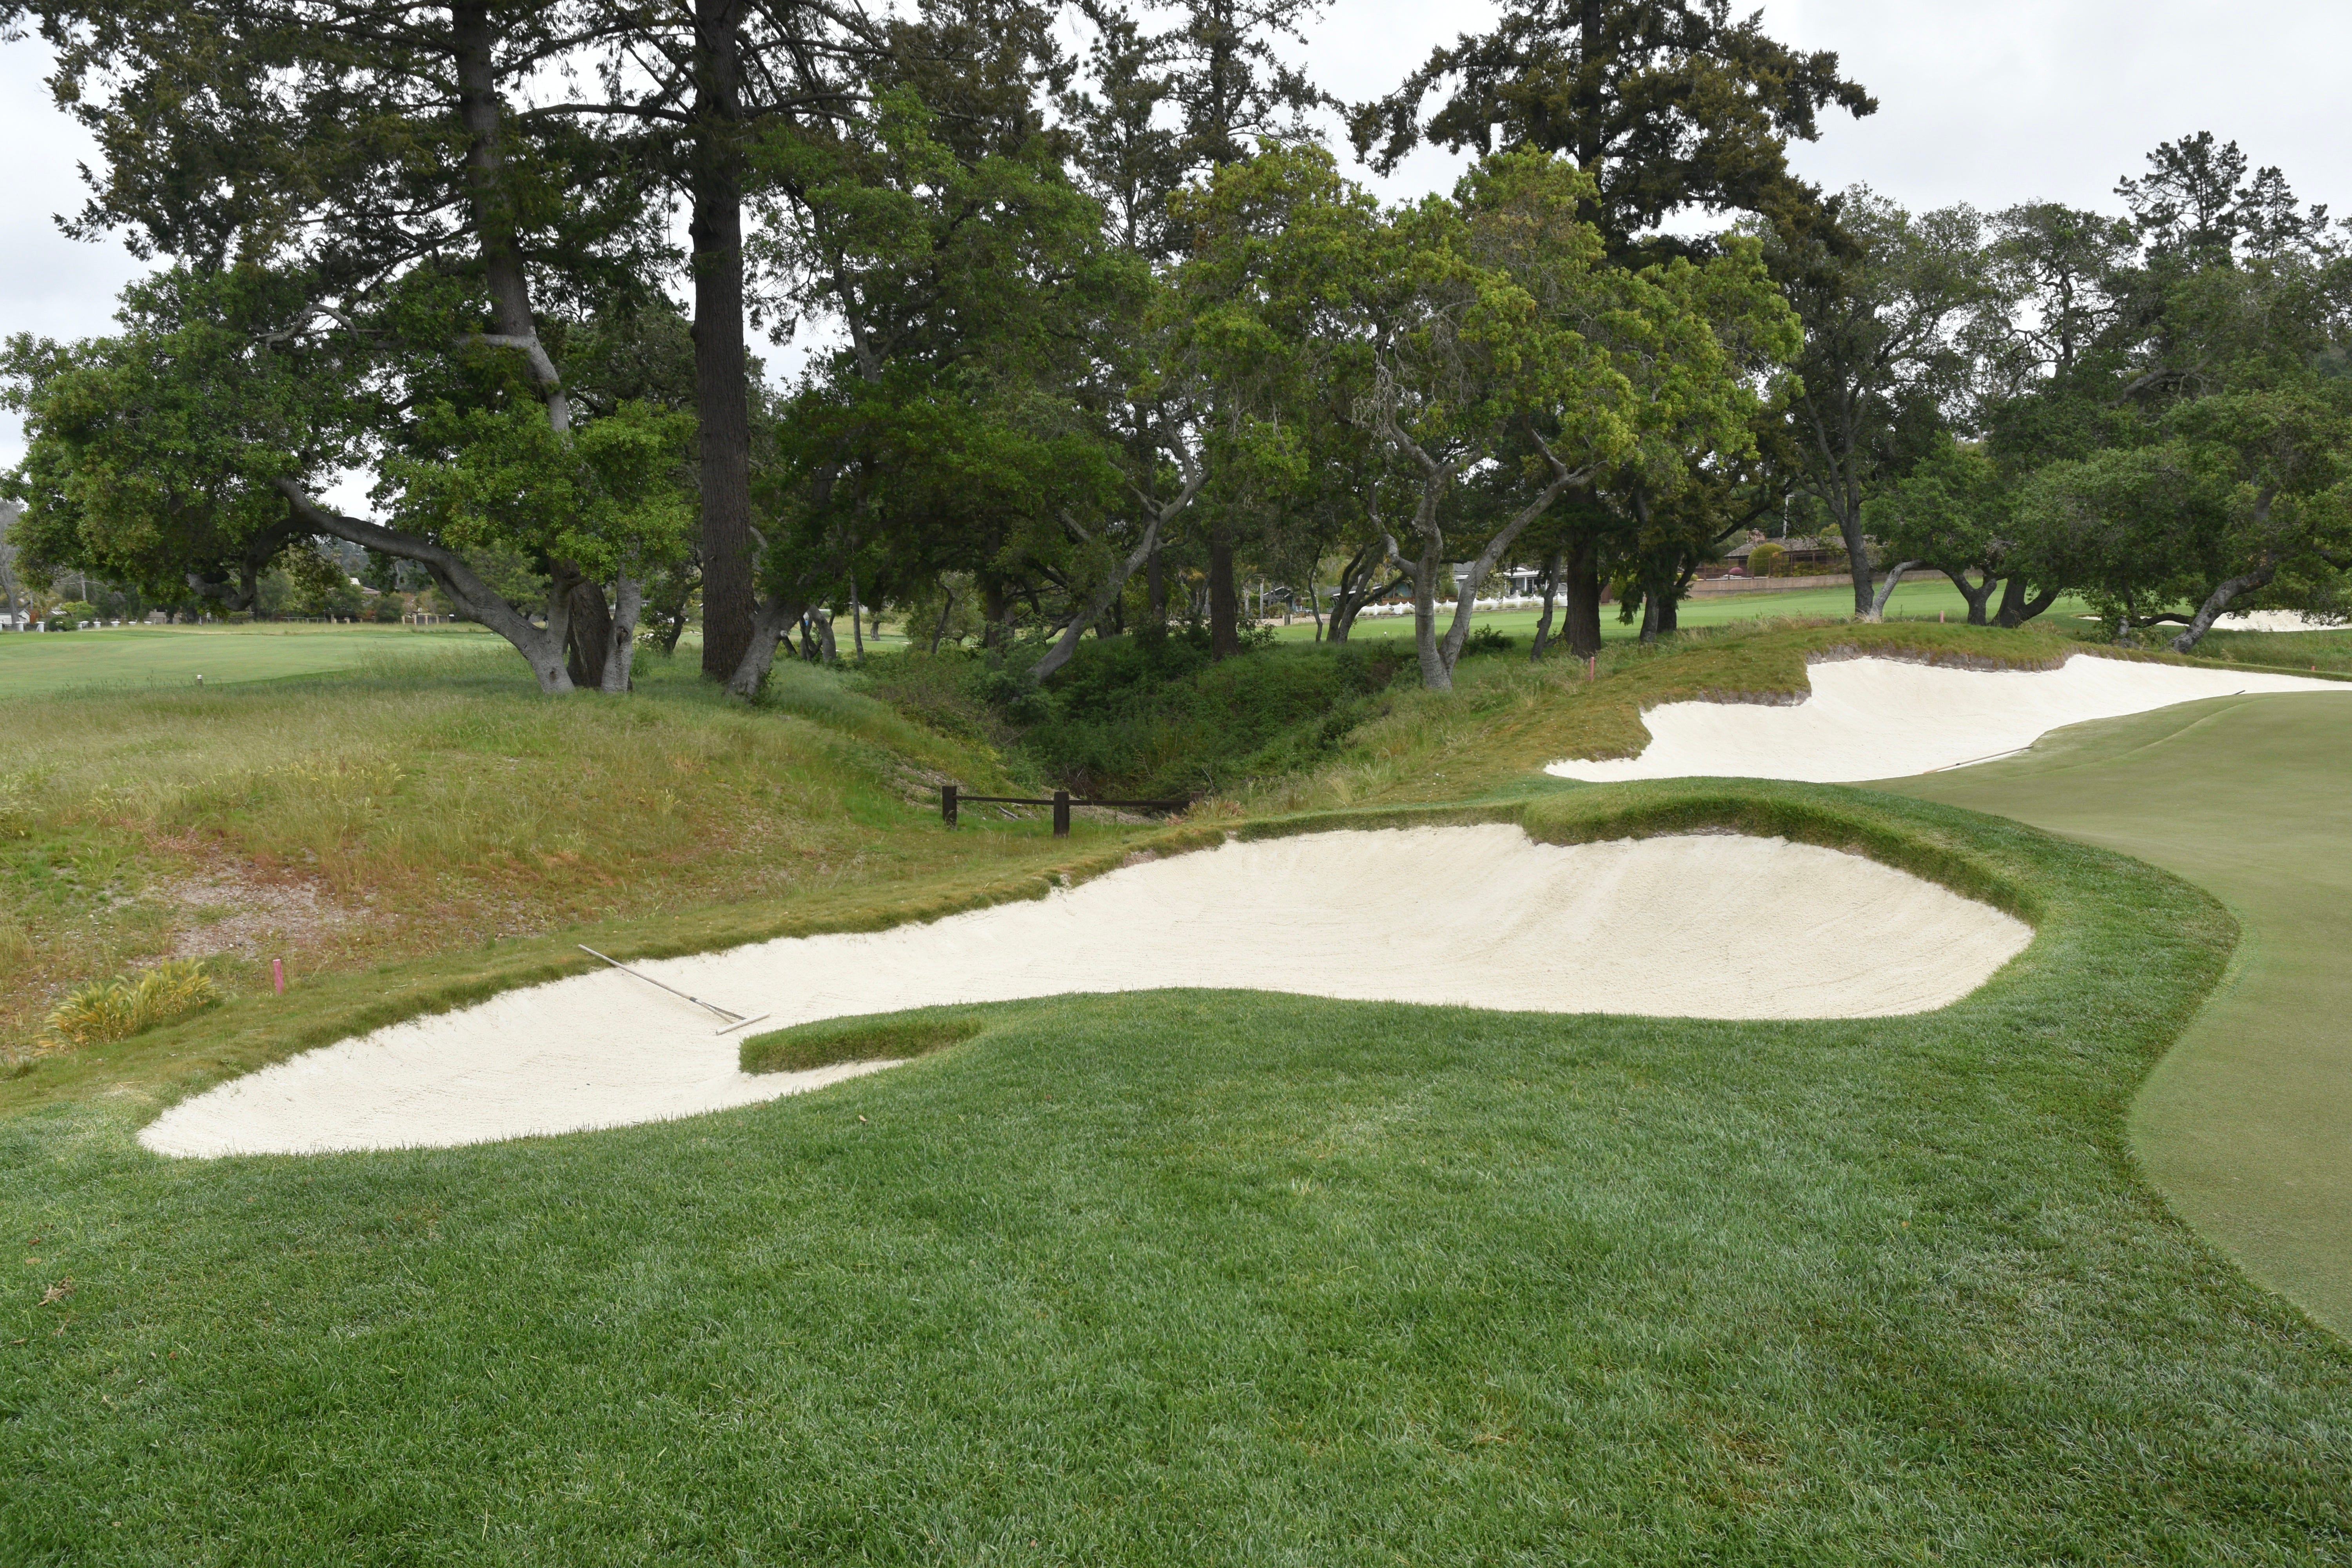
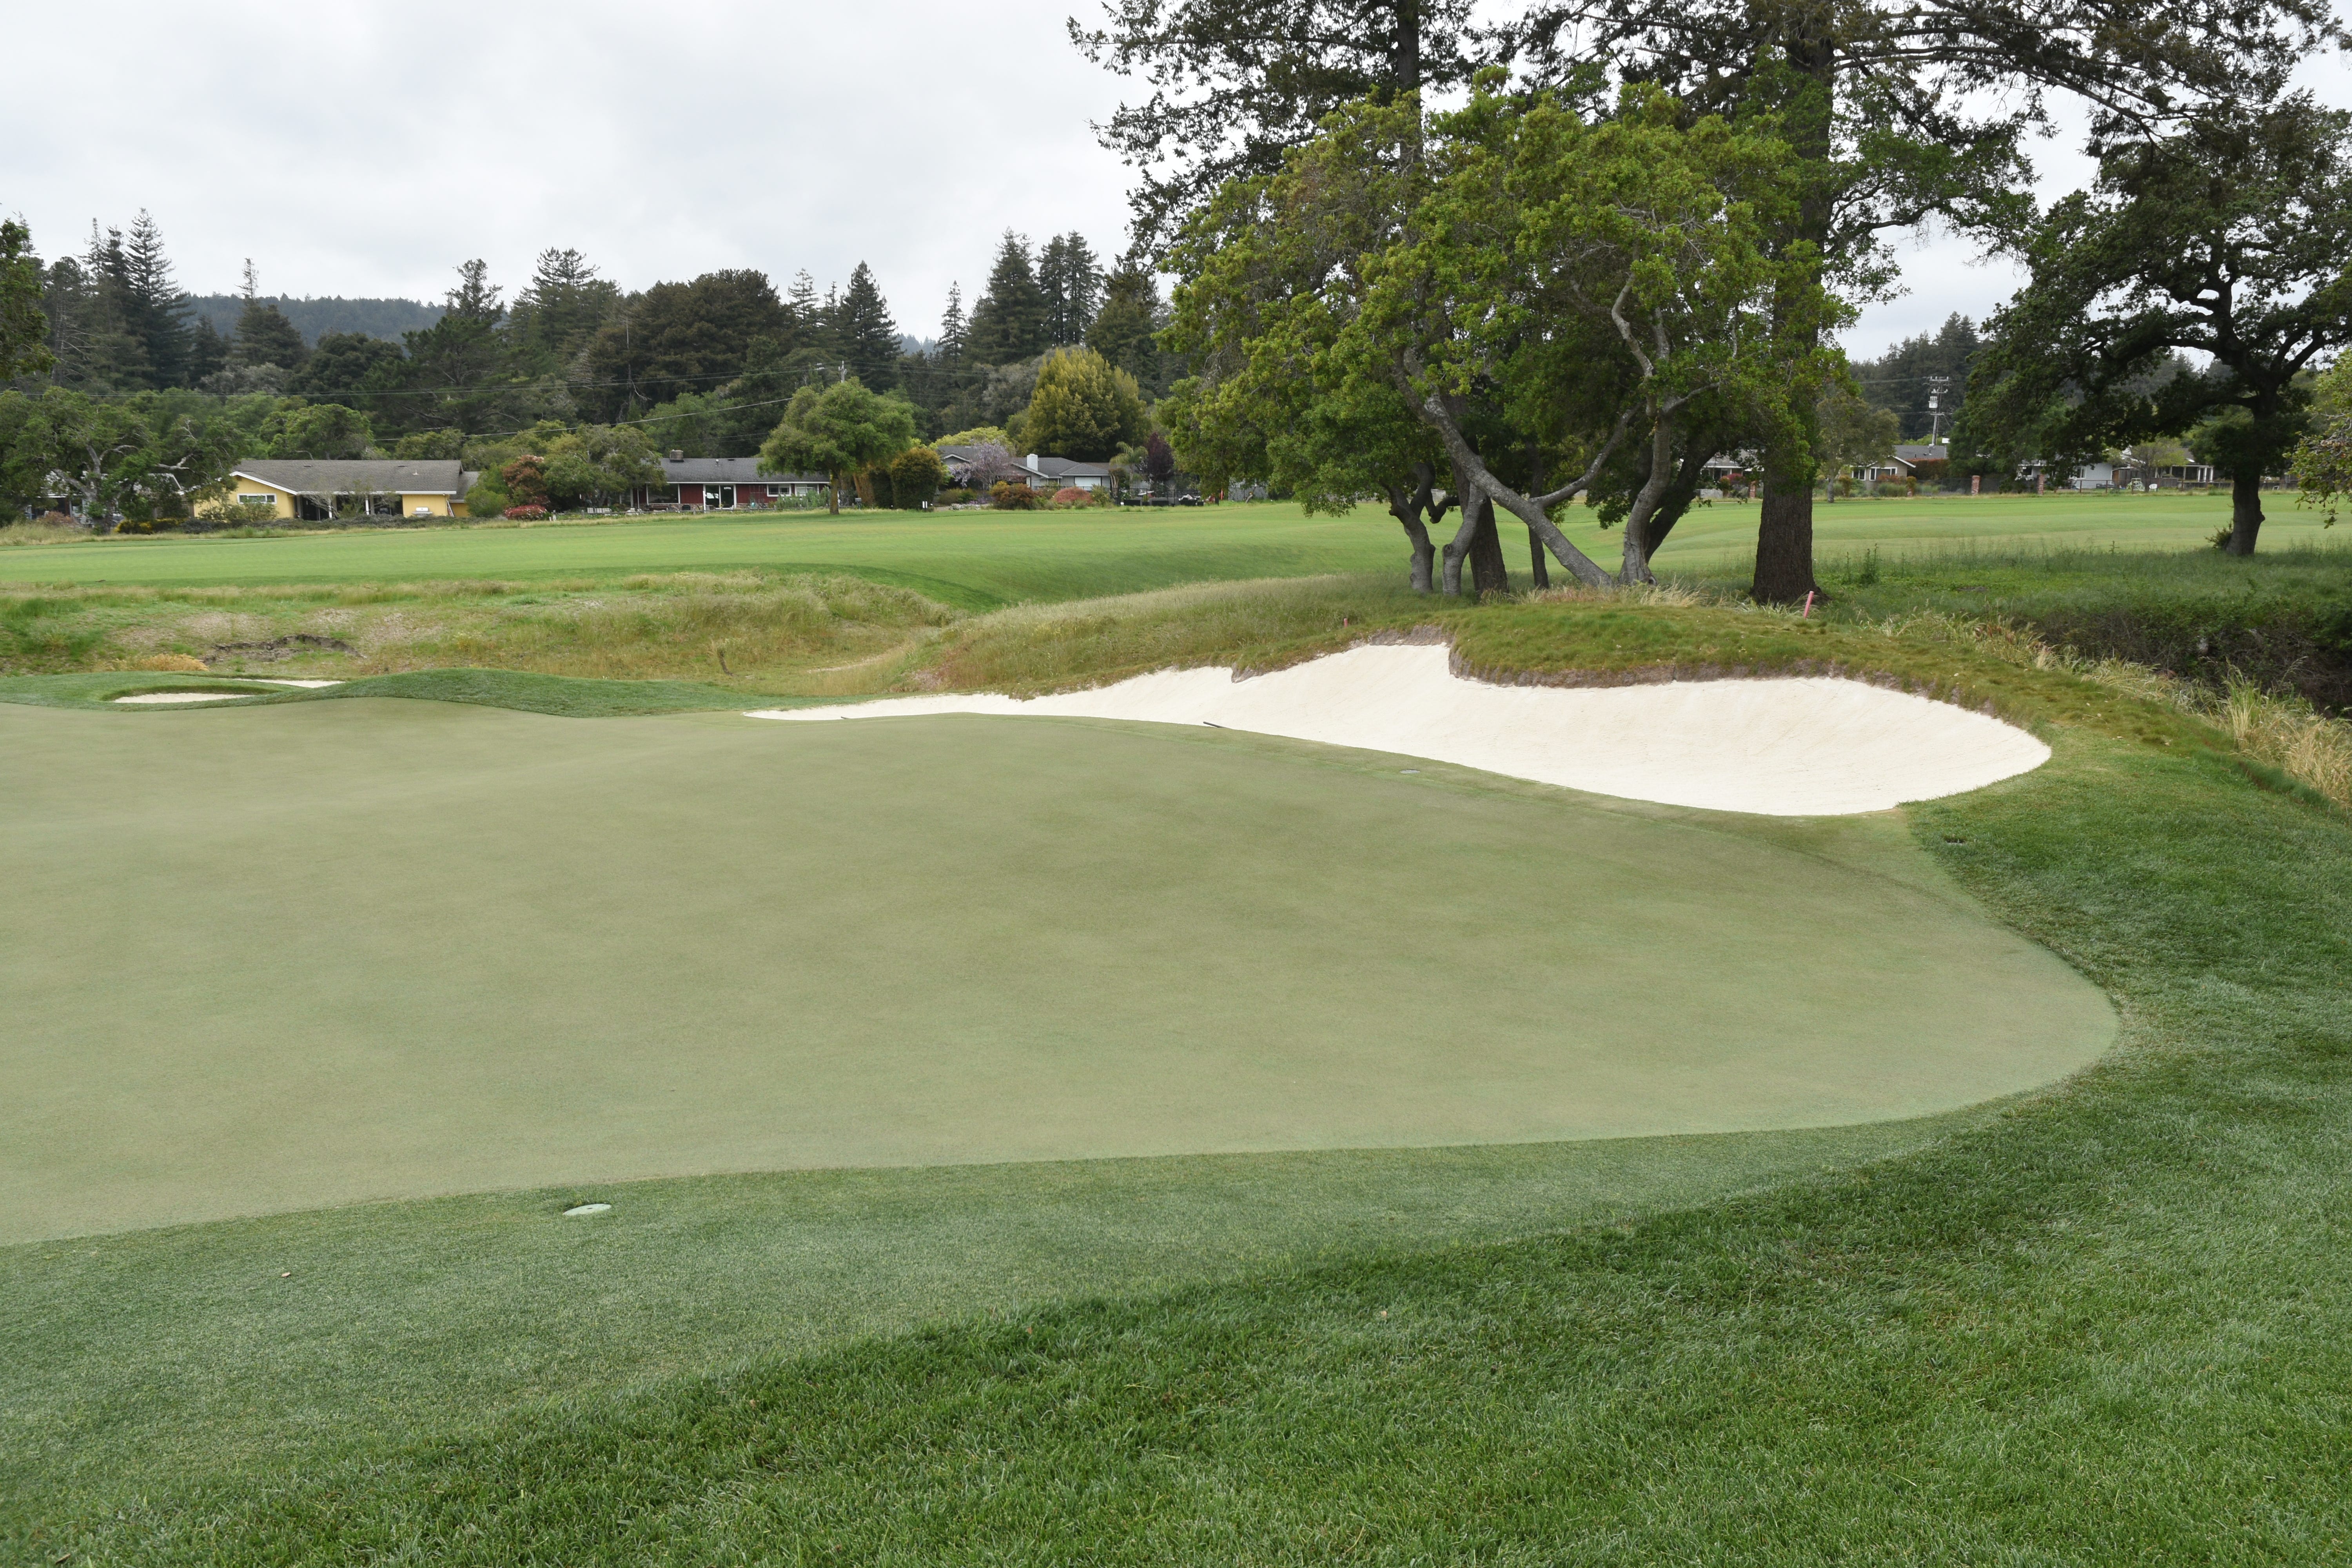
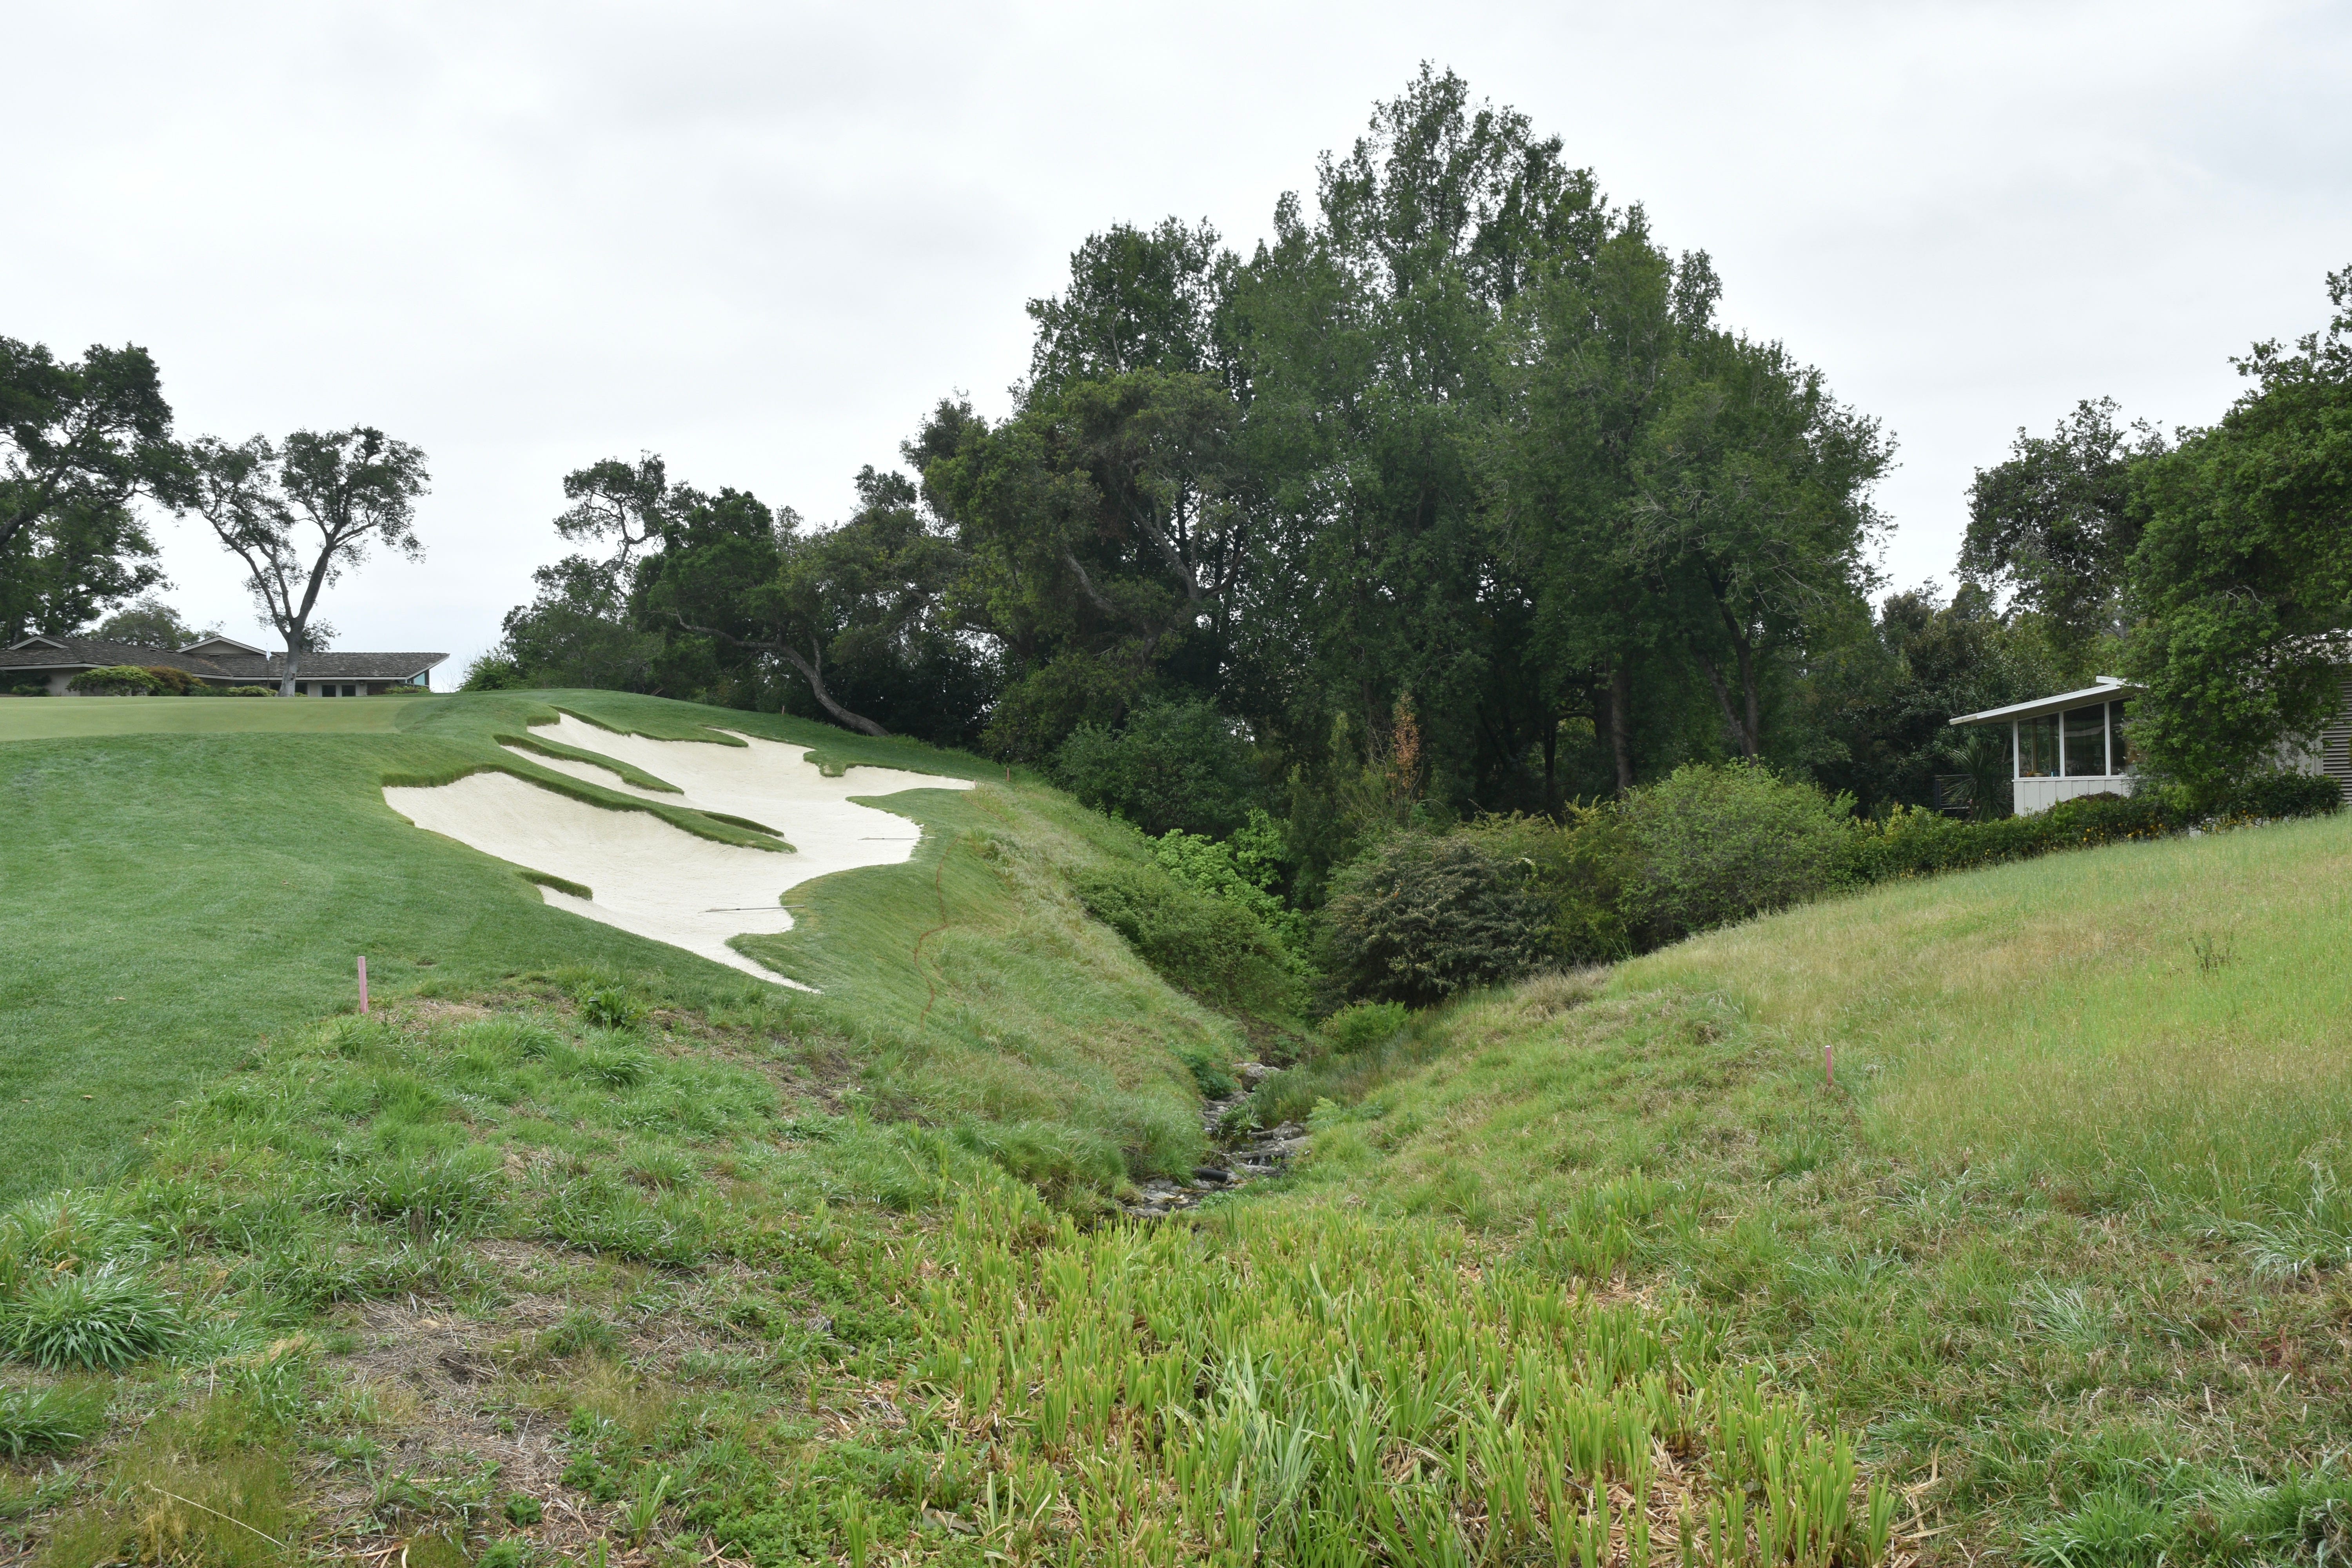
A closer look at the back green side bunker of the 10th hole
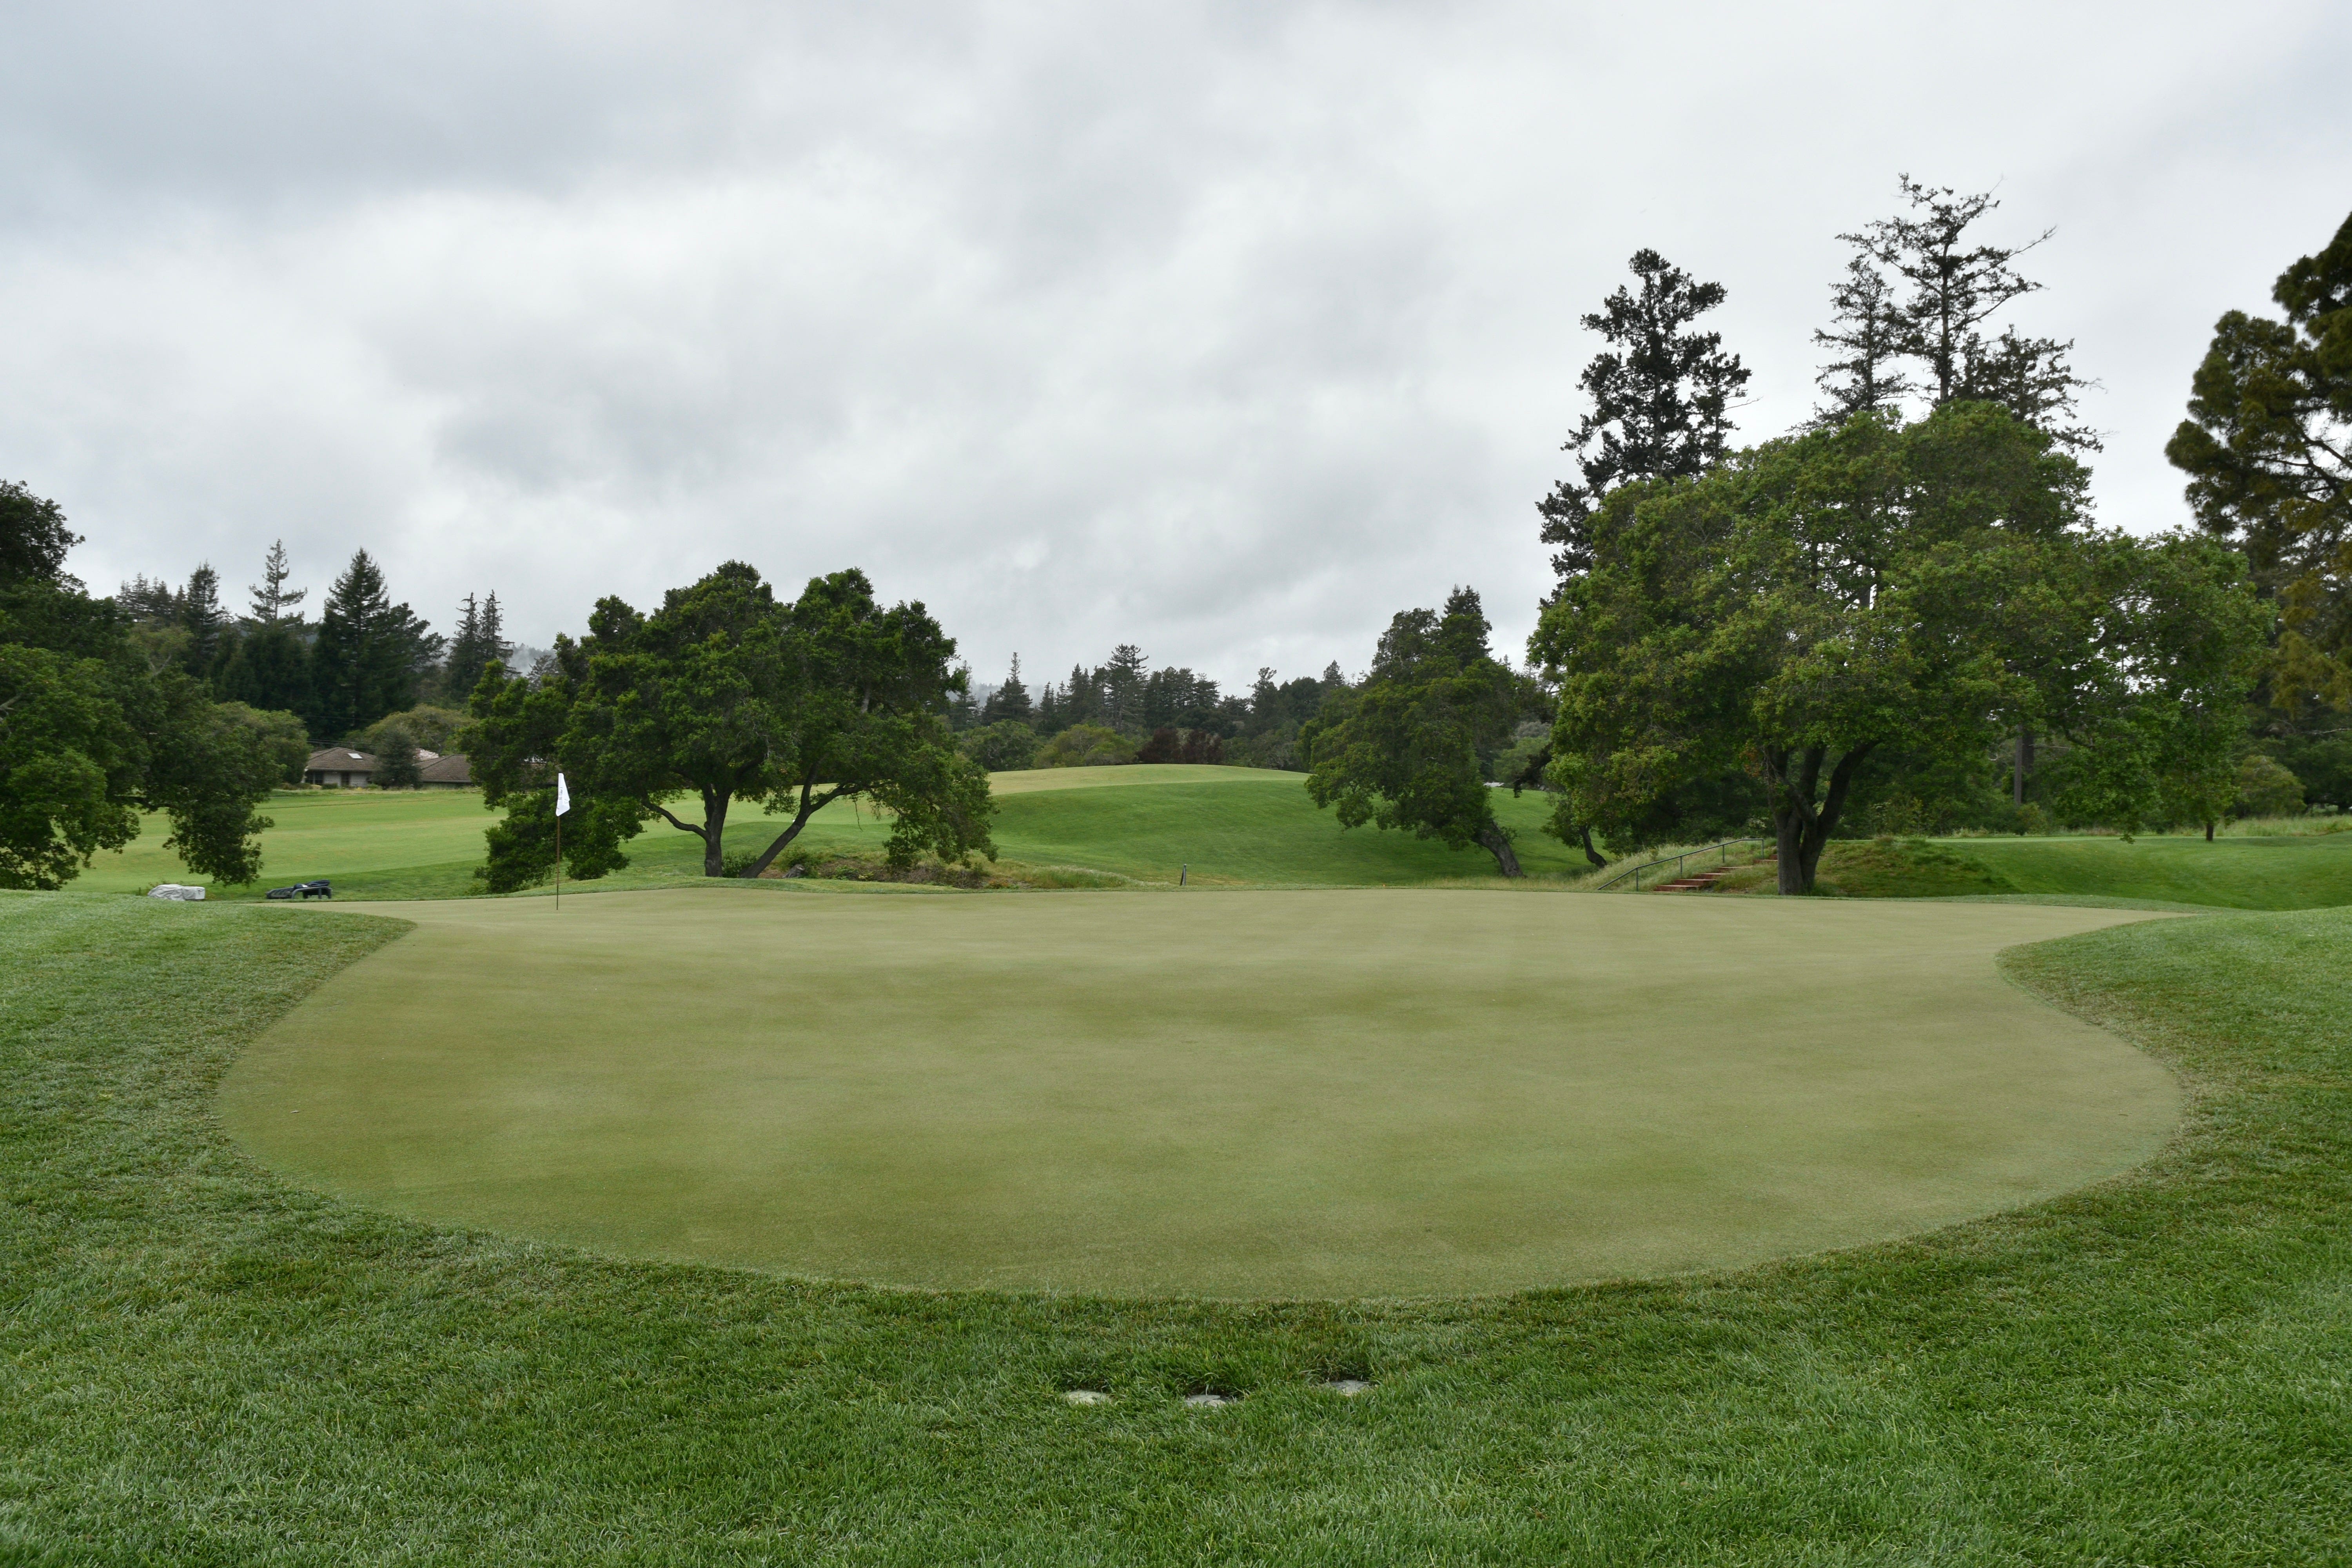
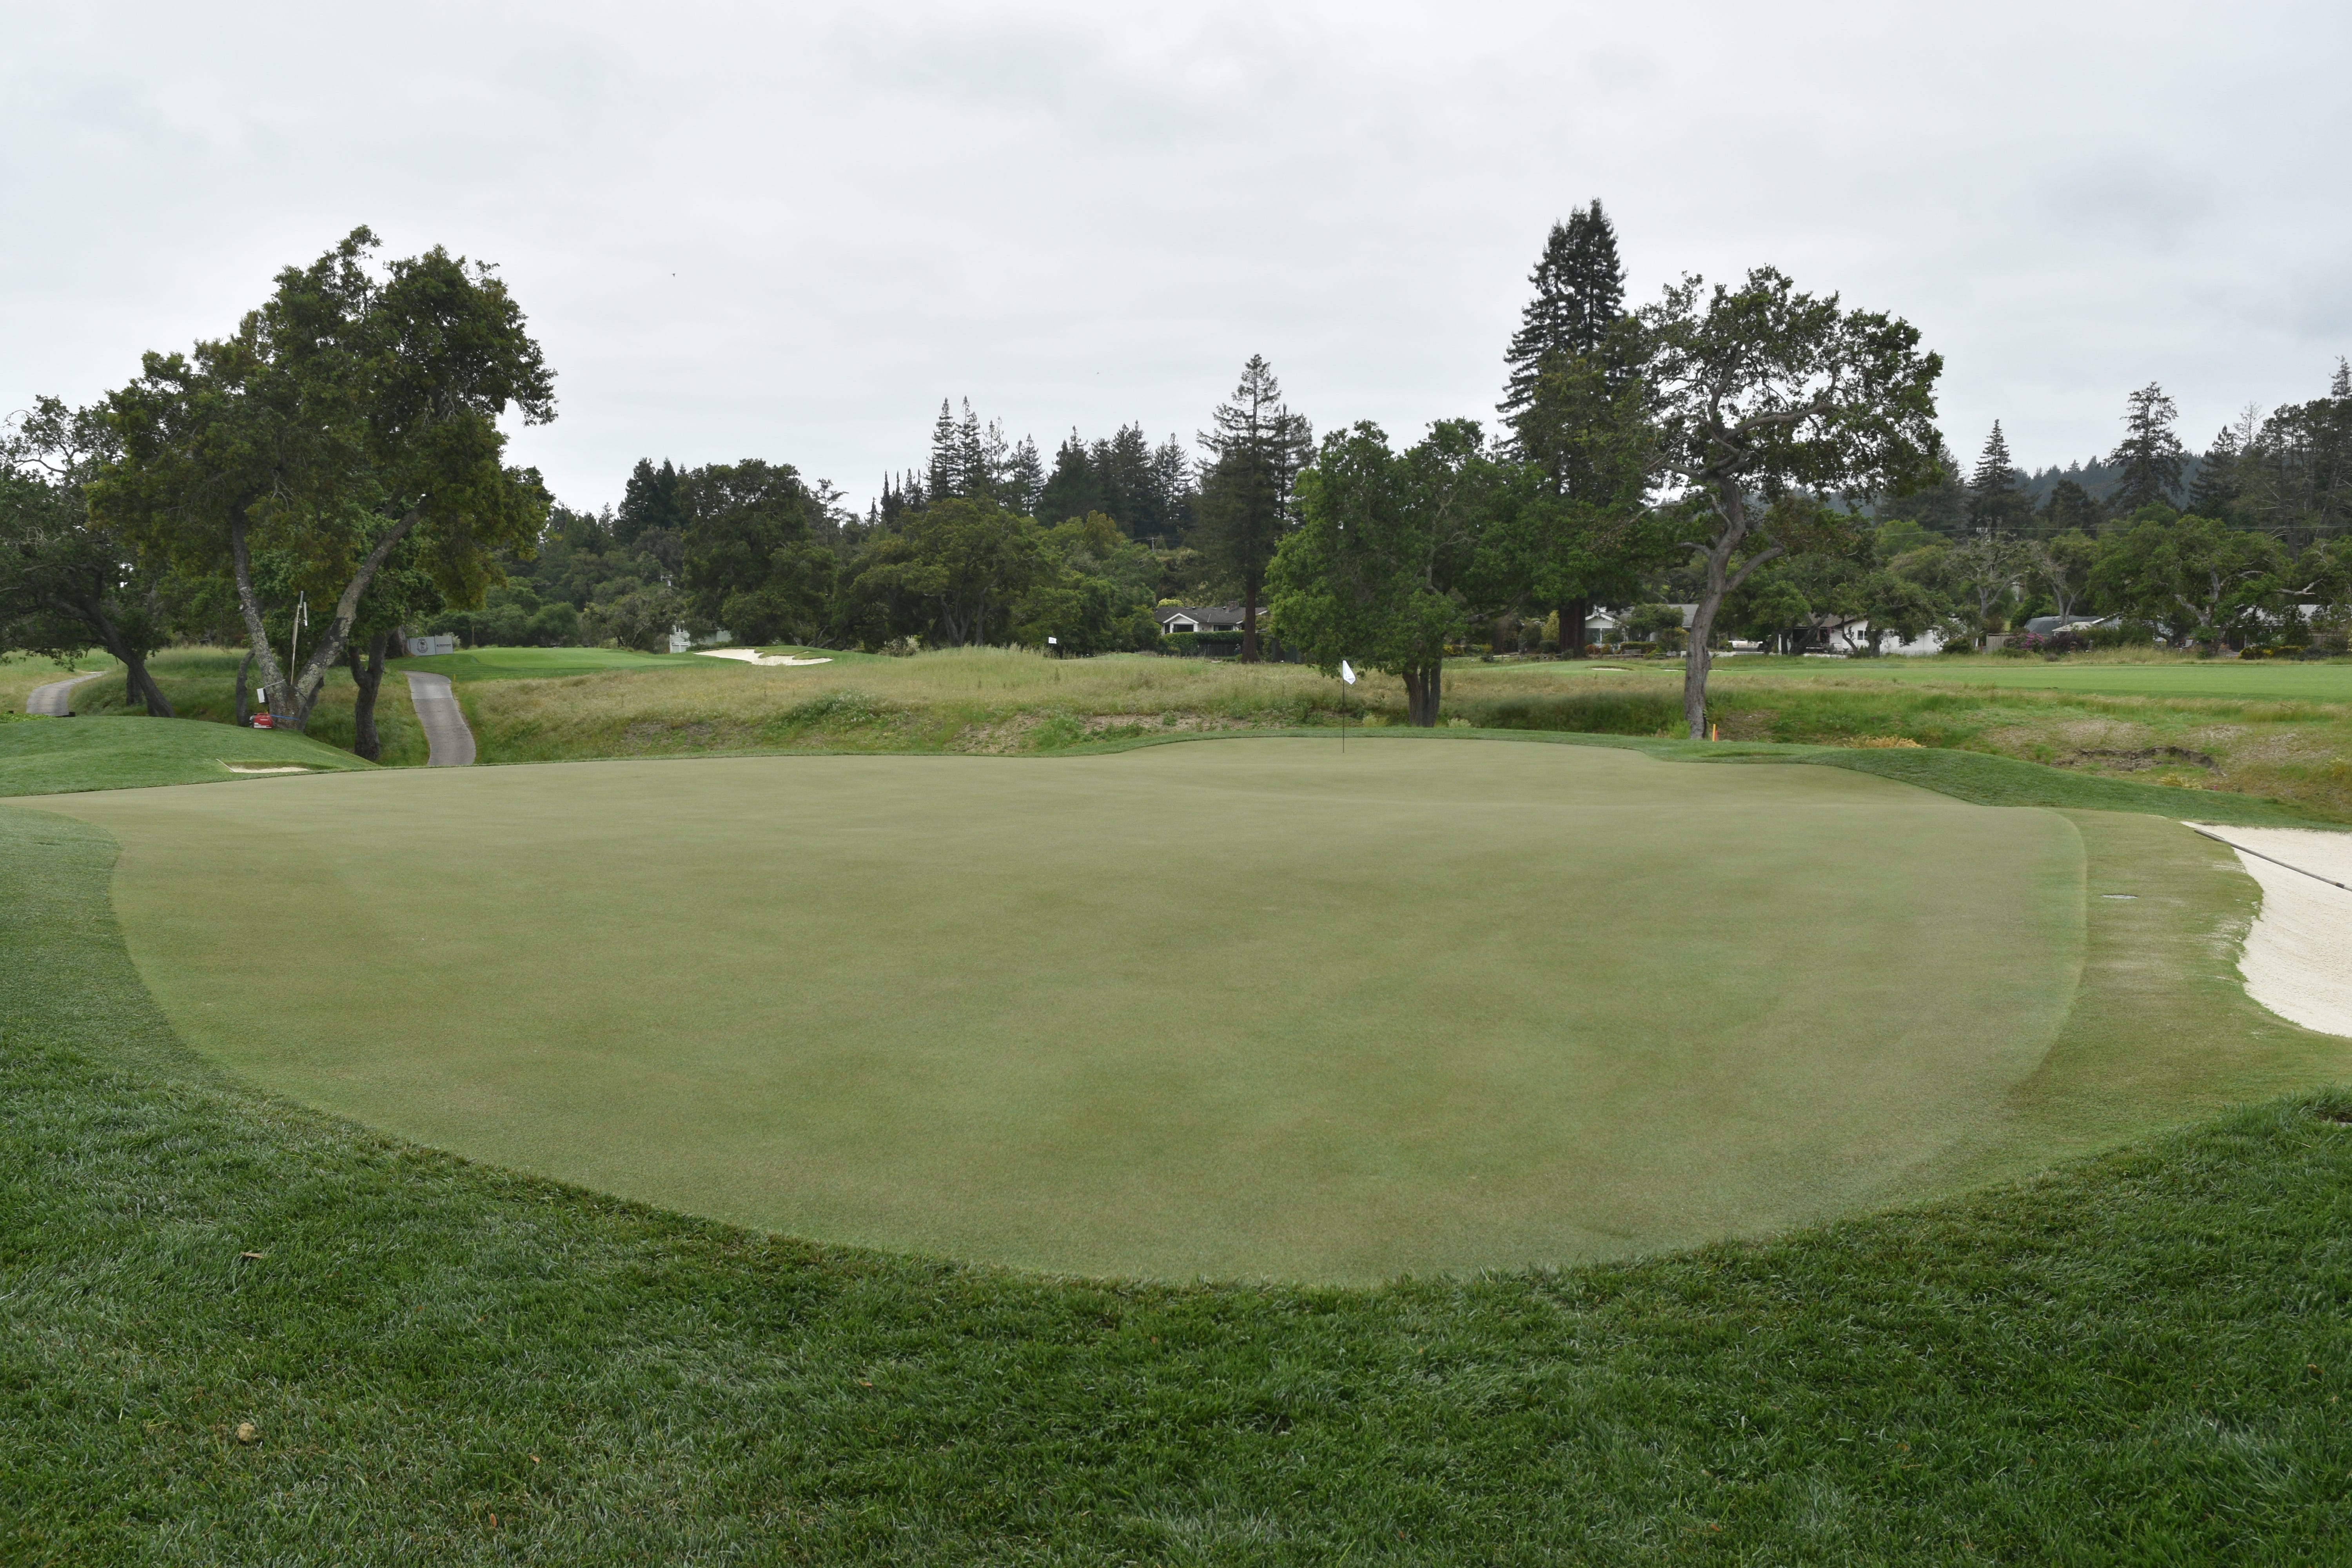
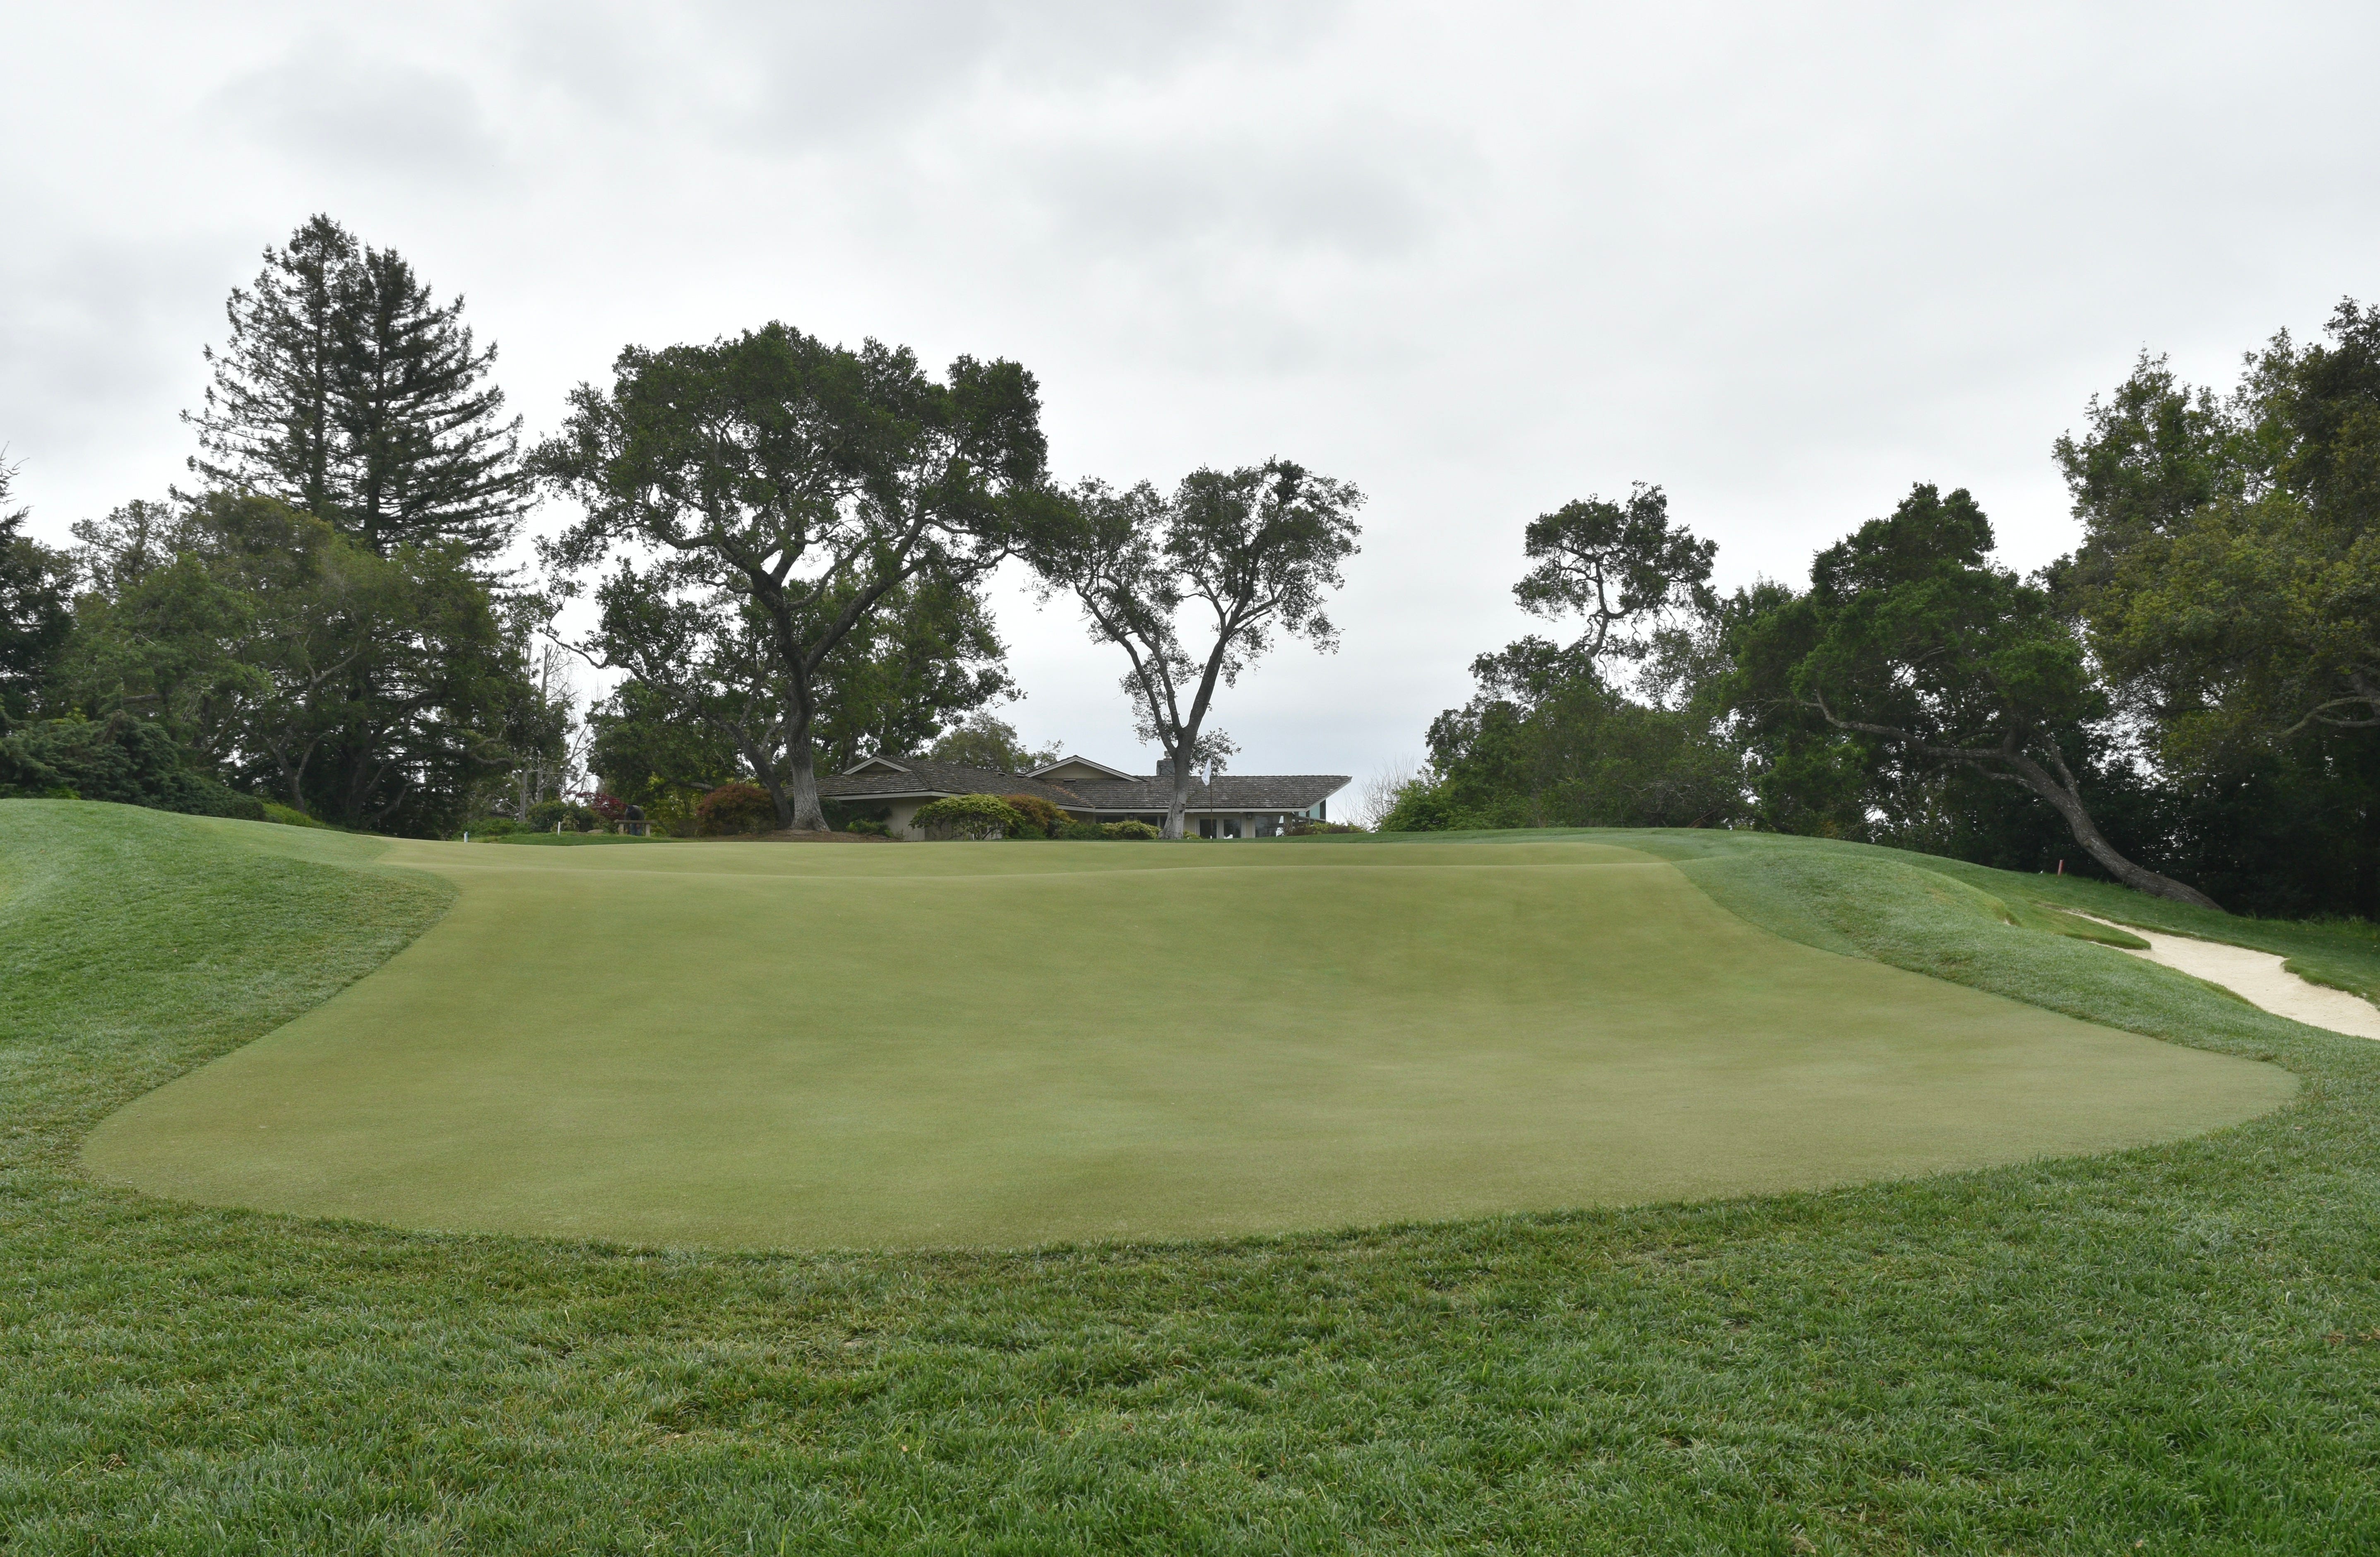
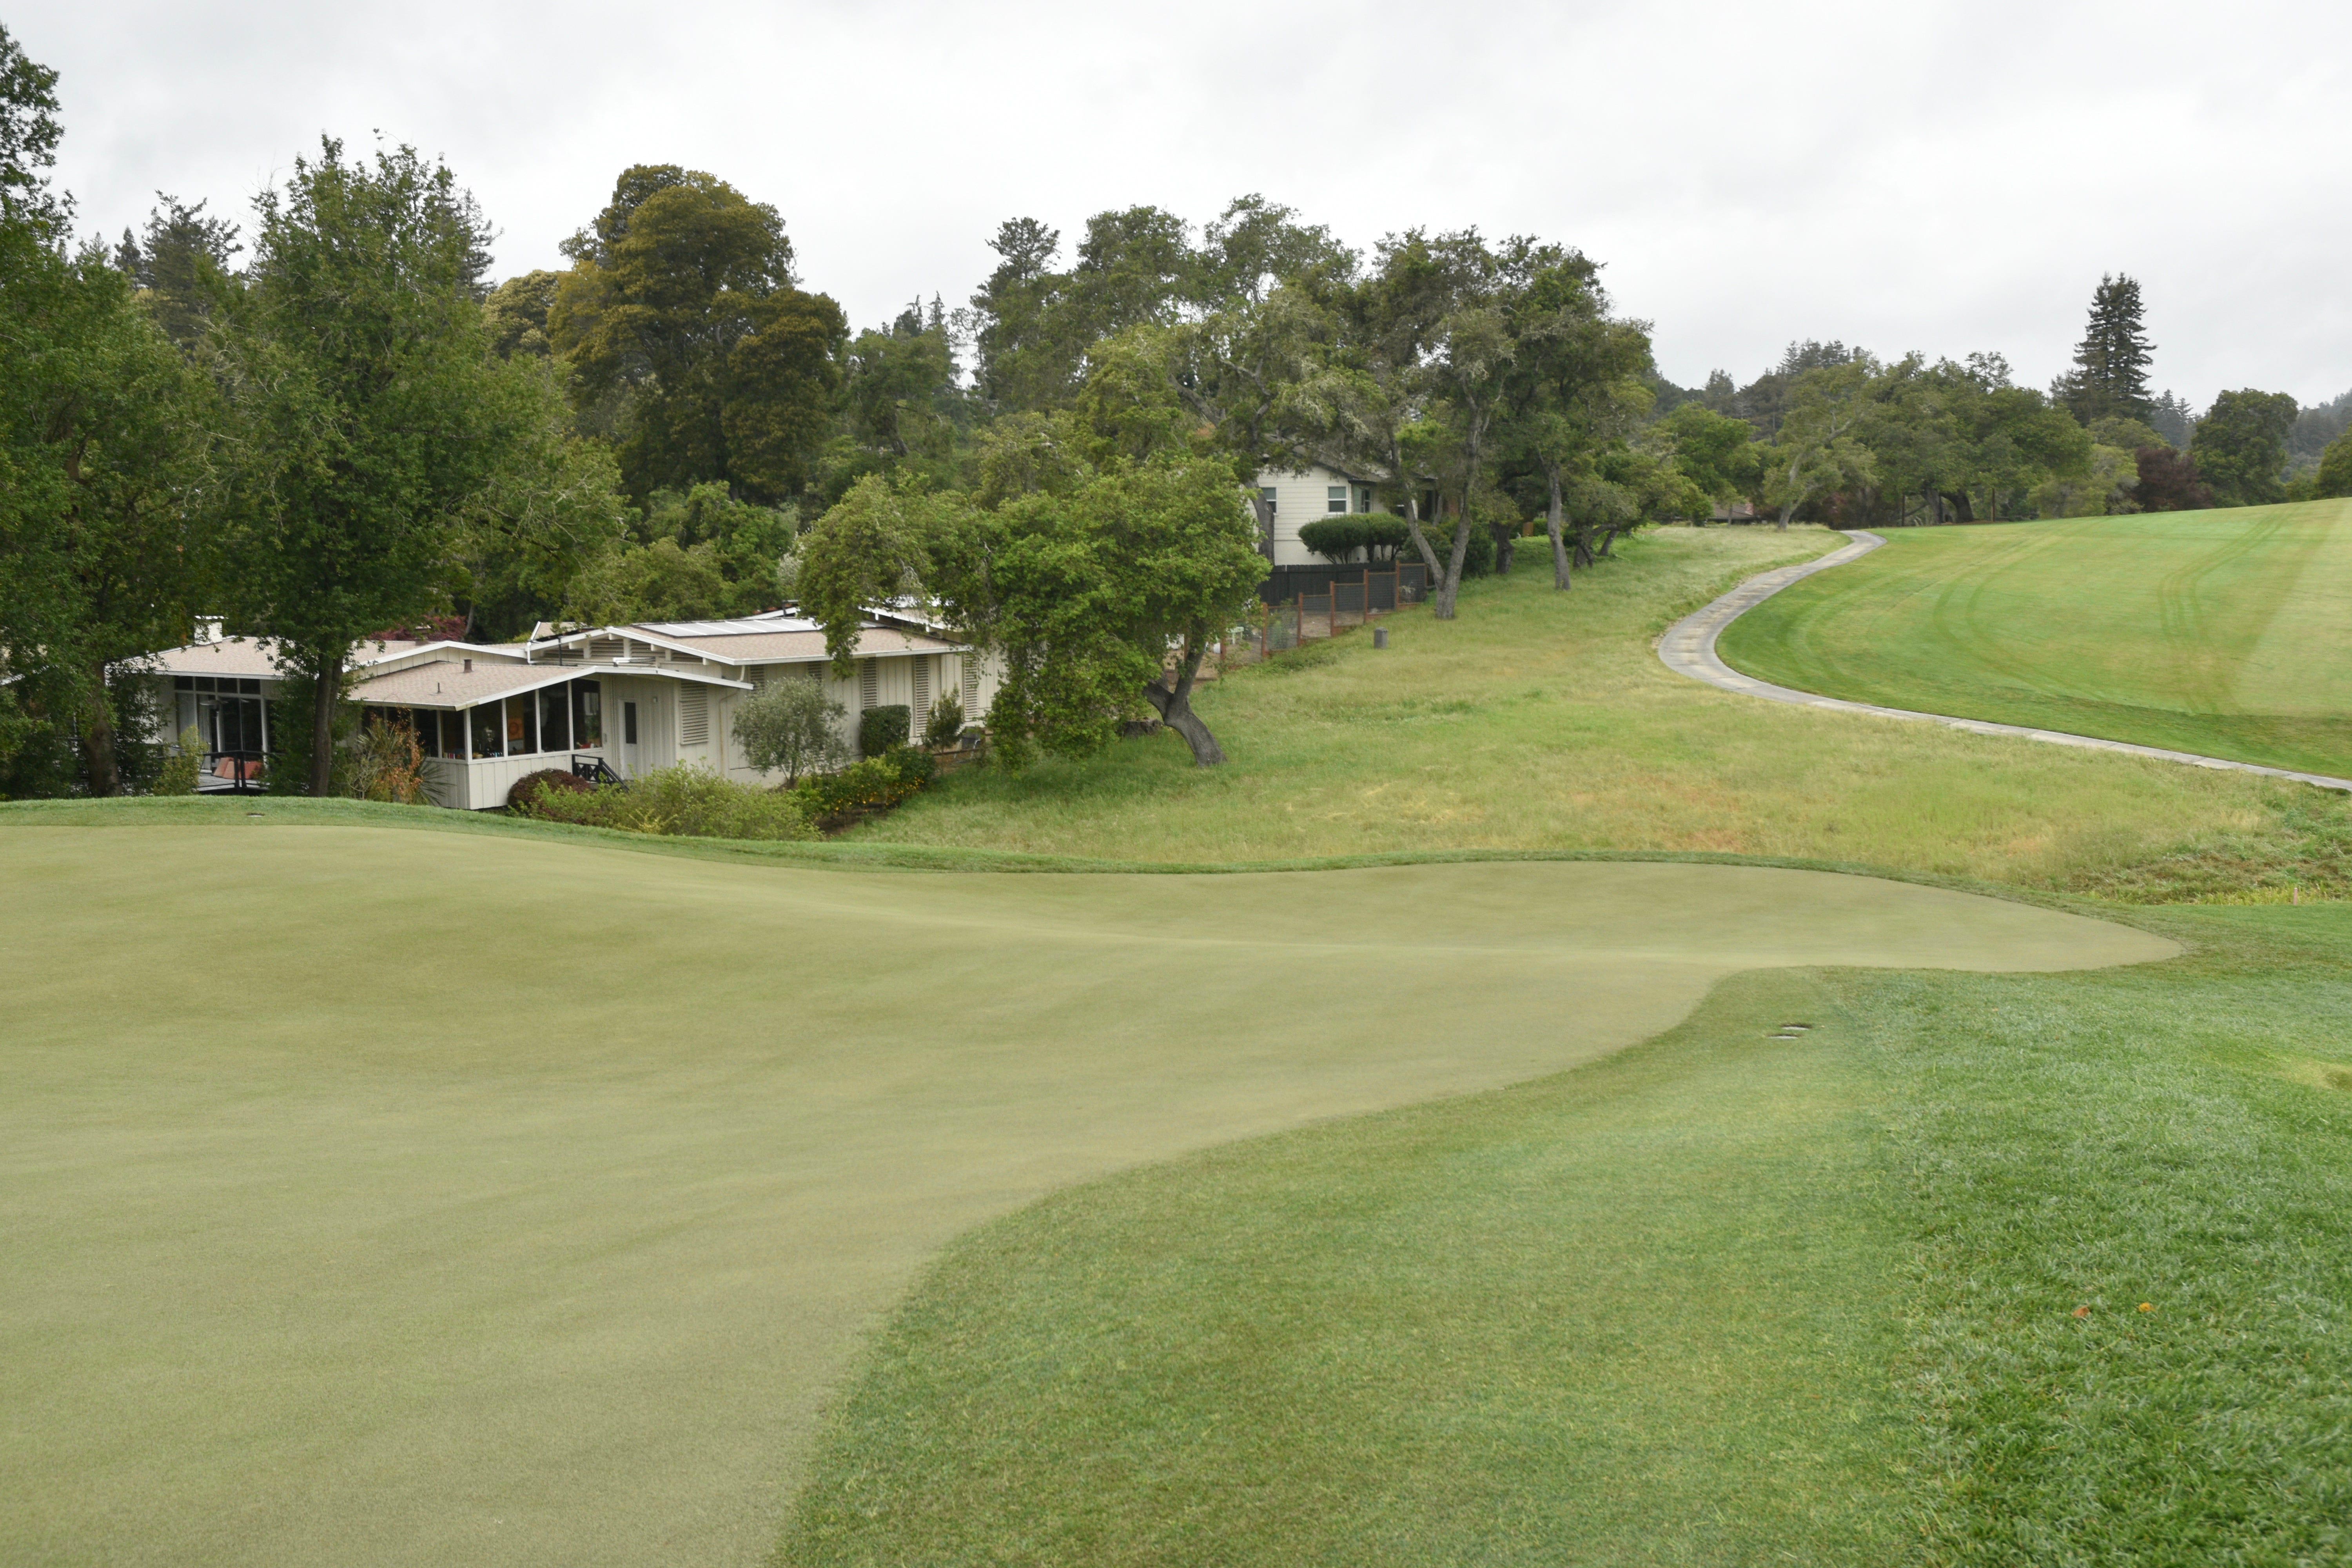
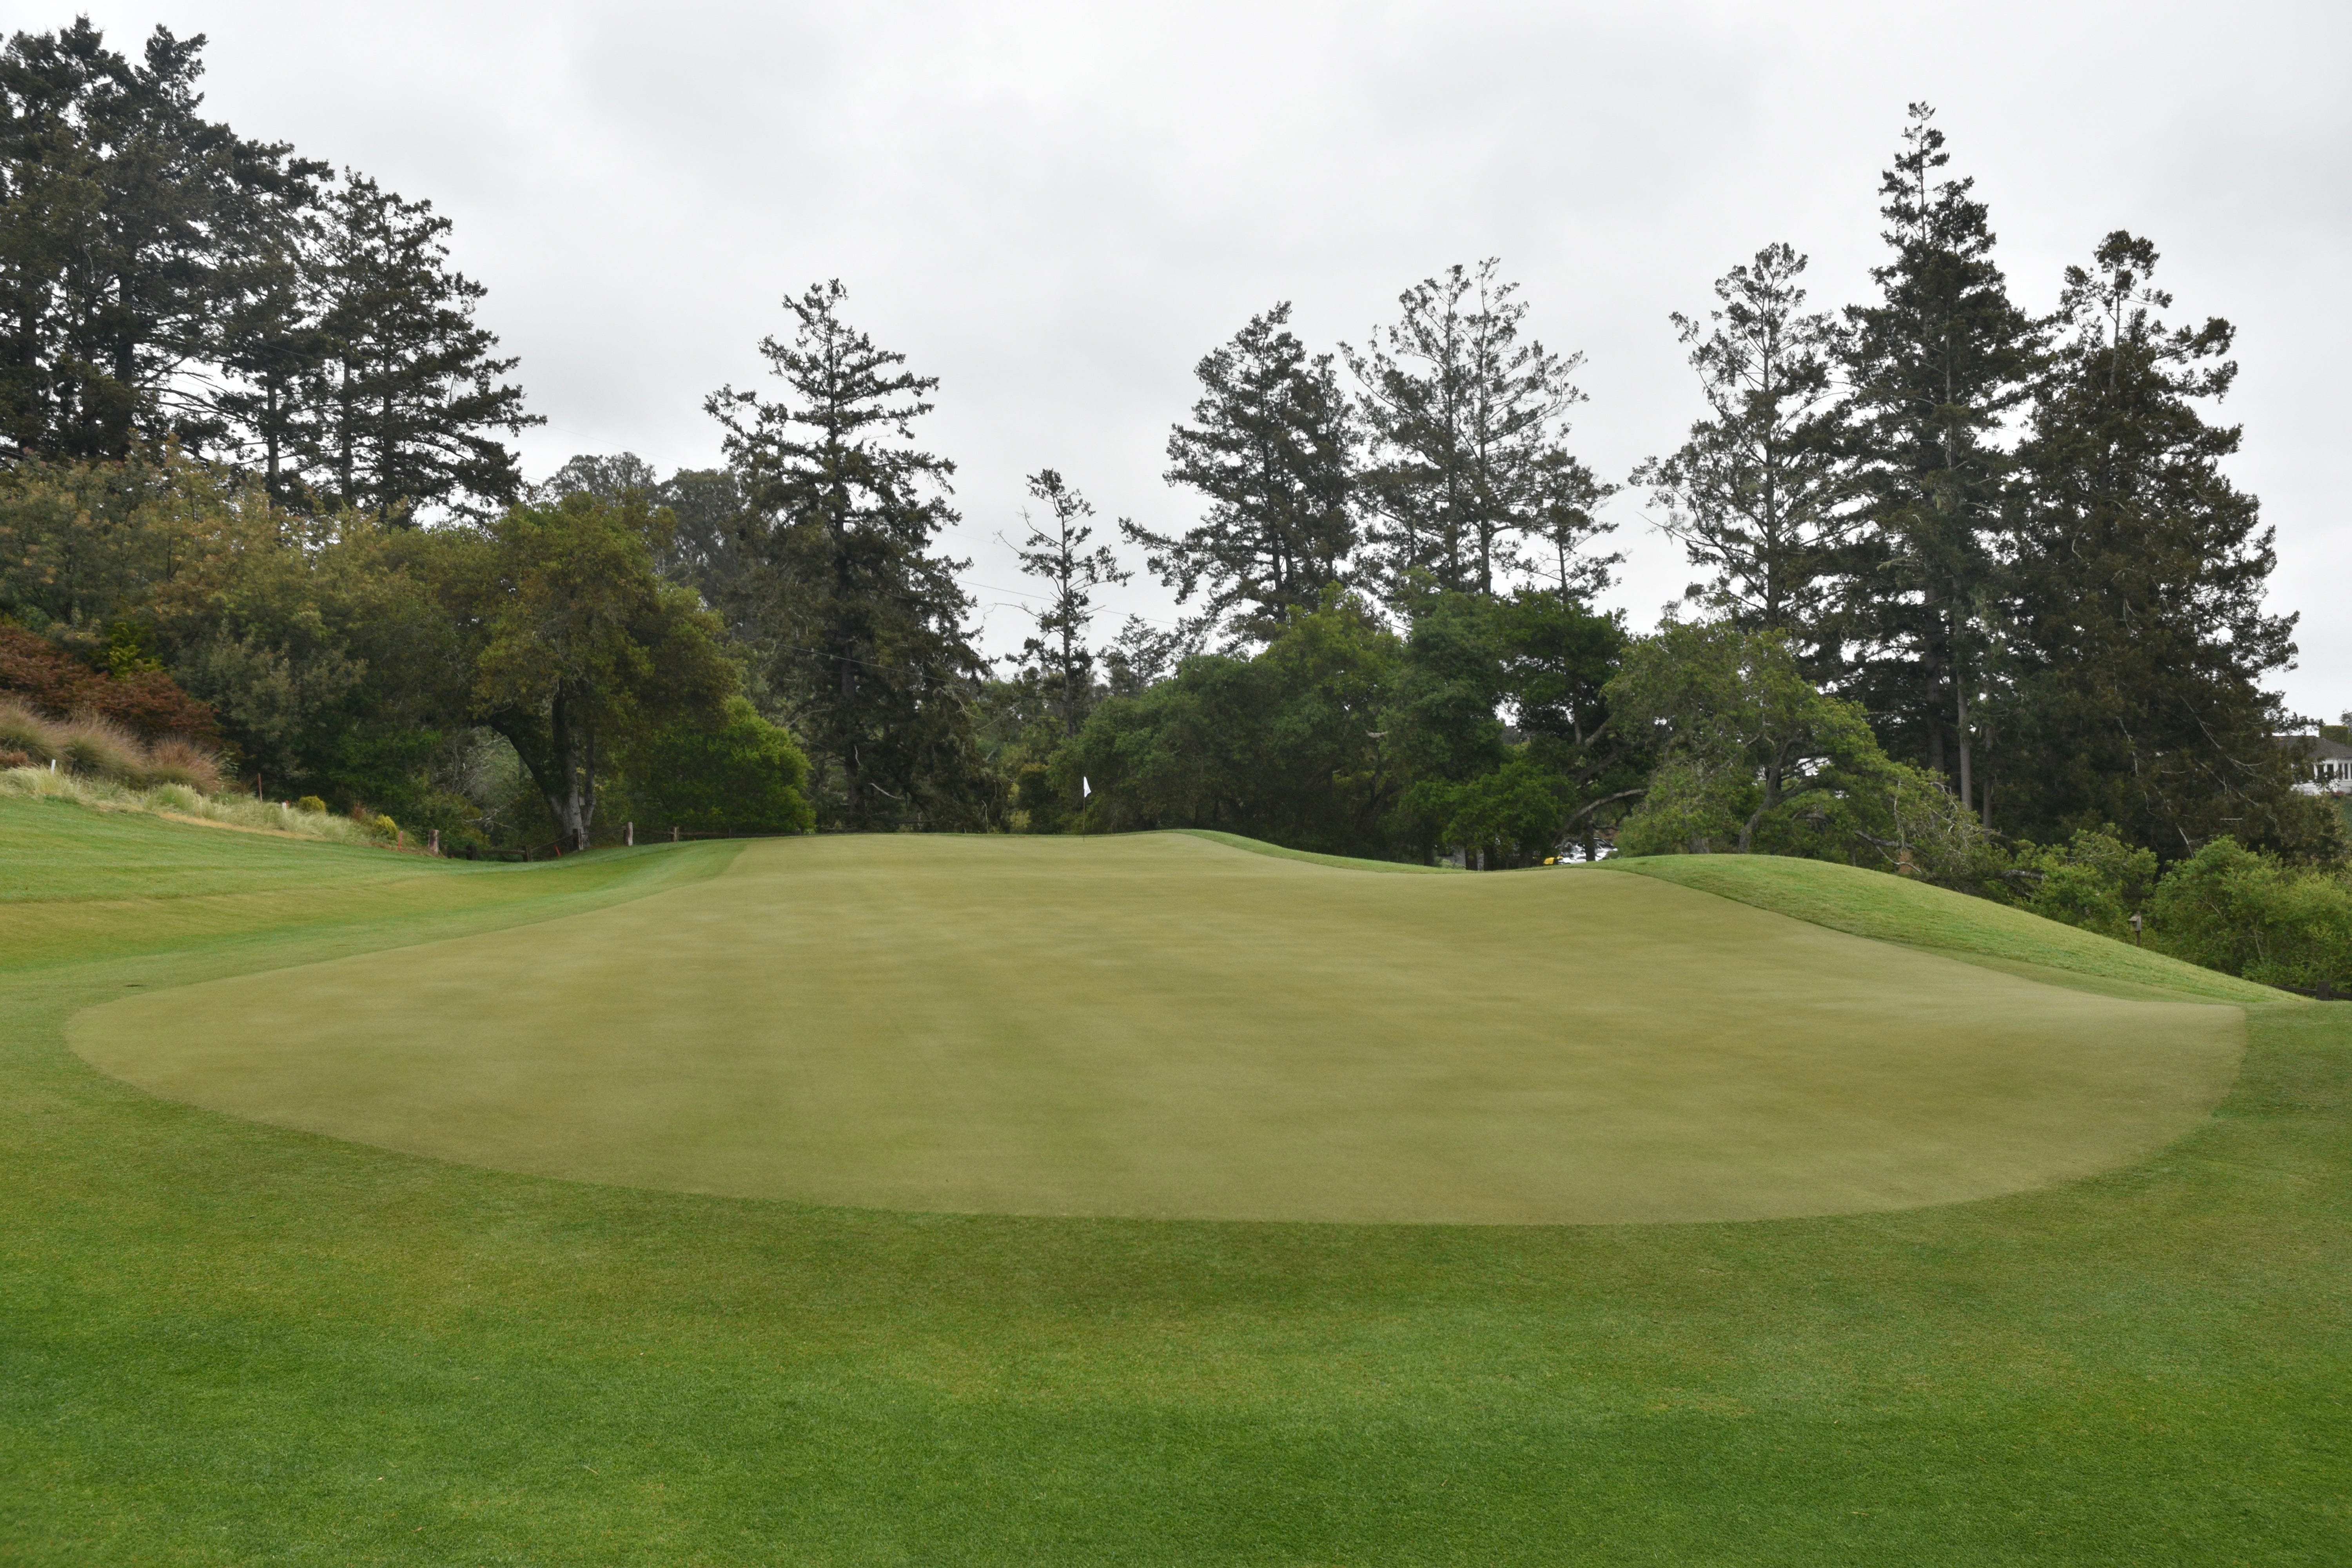
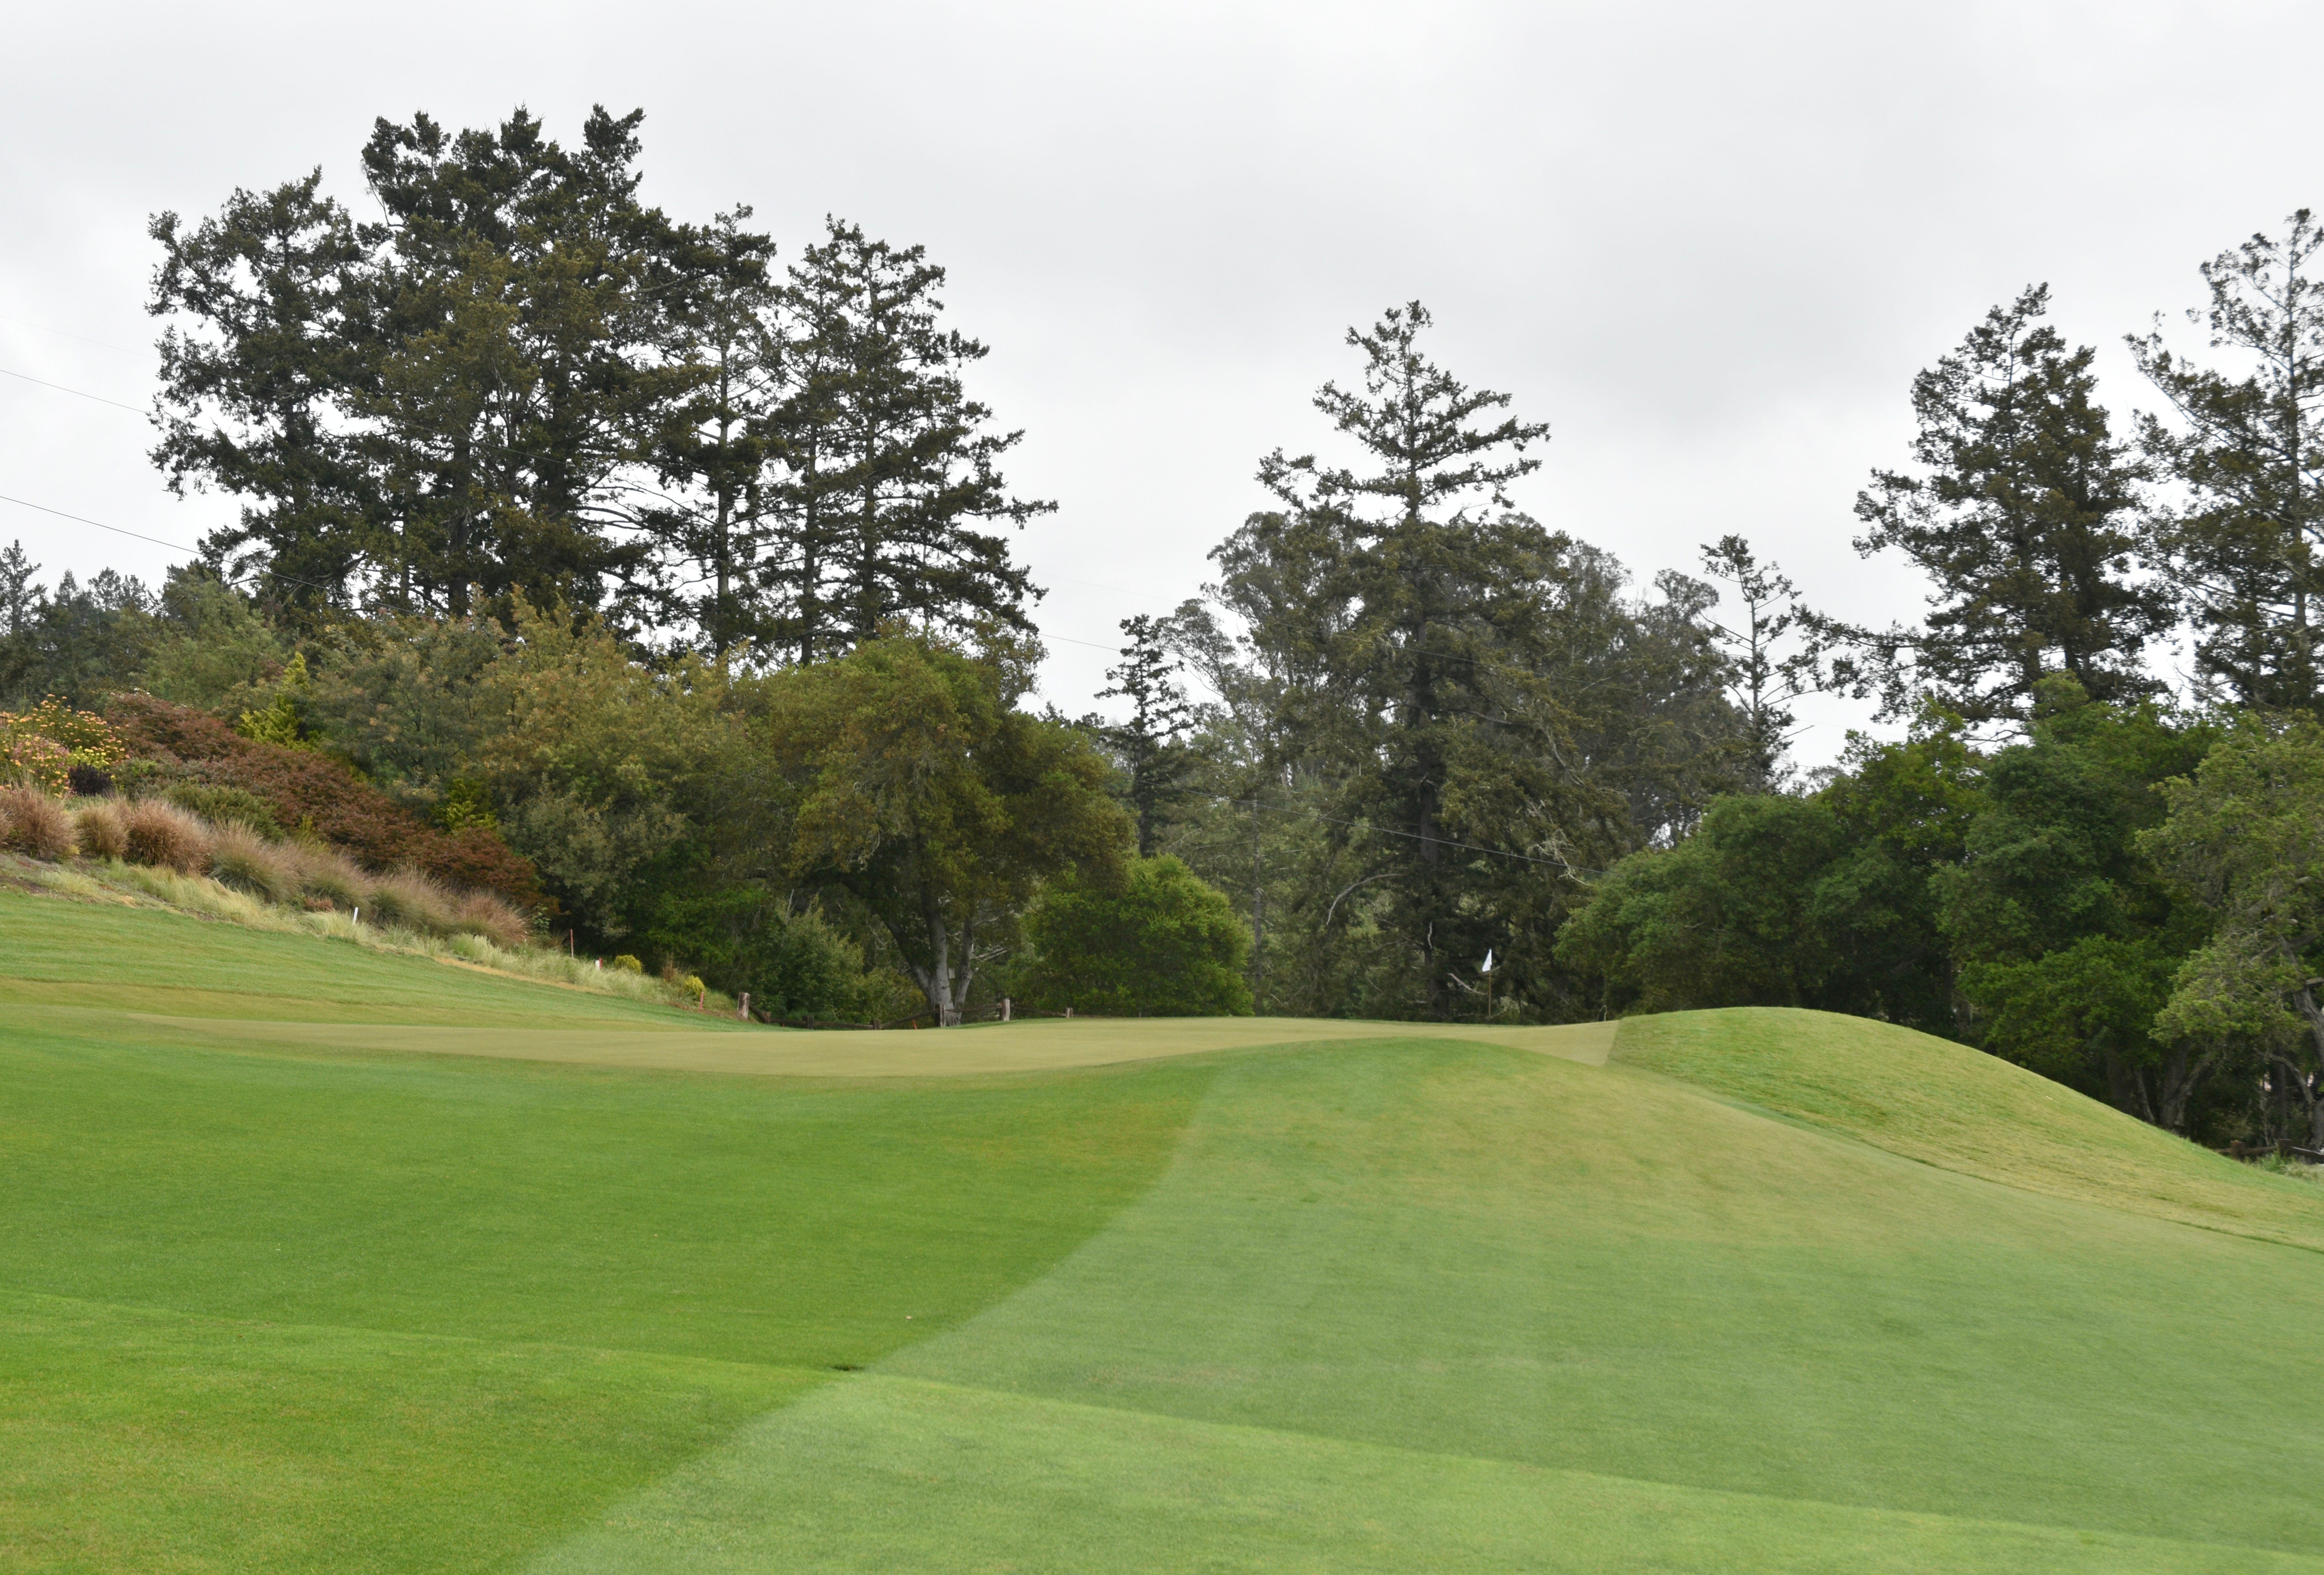
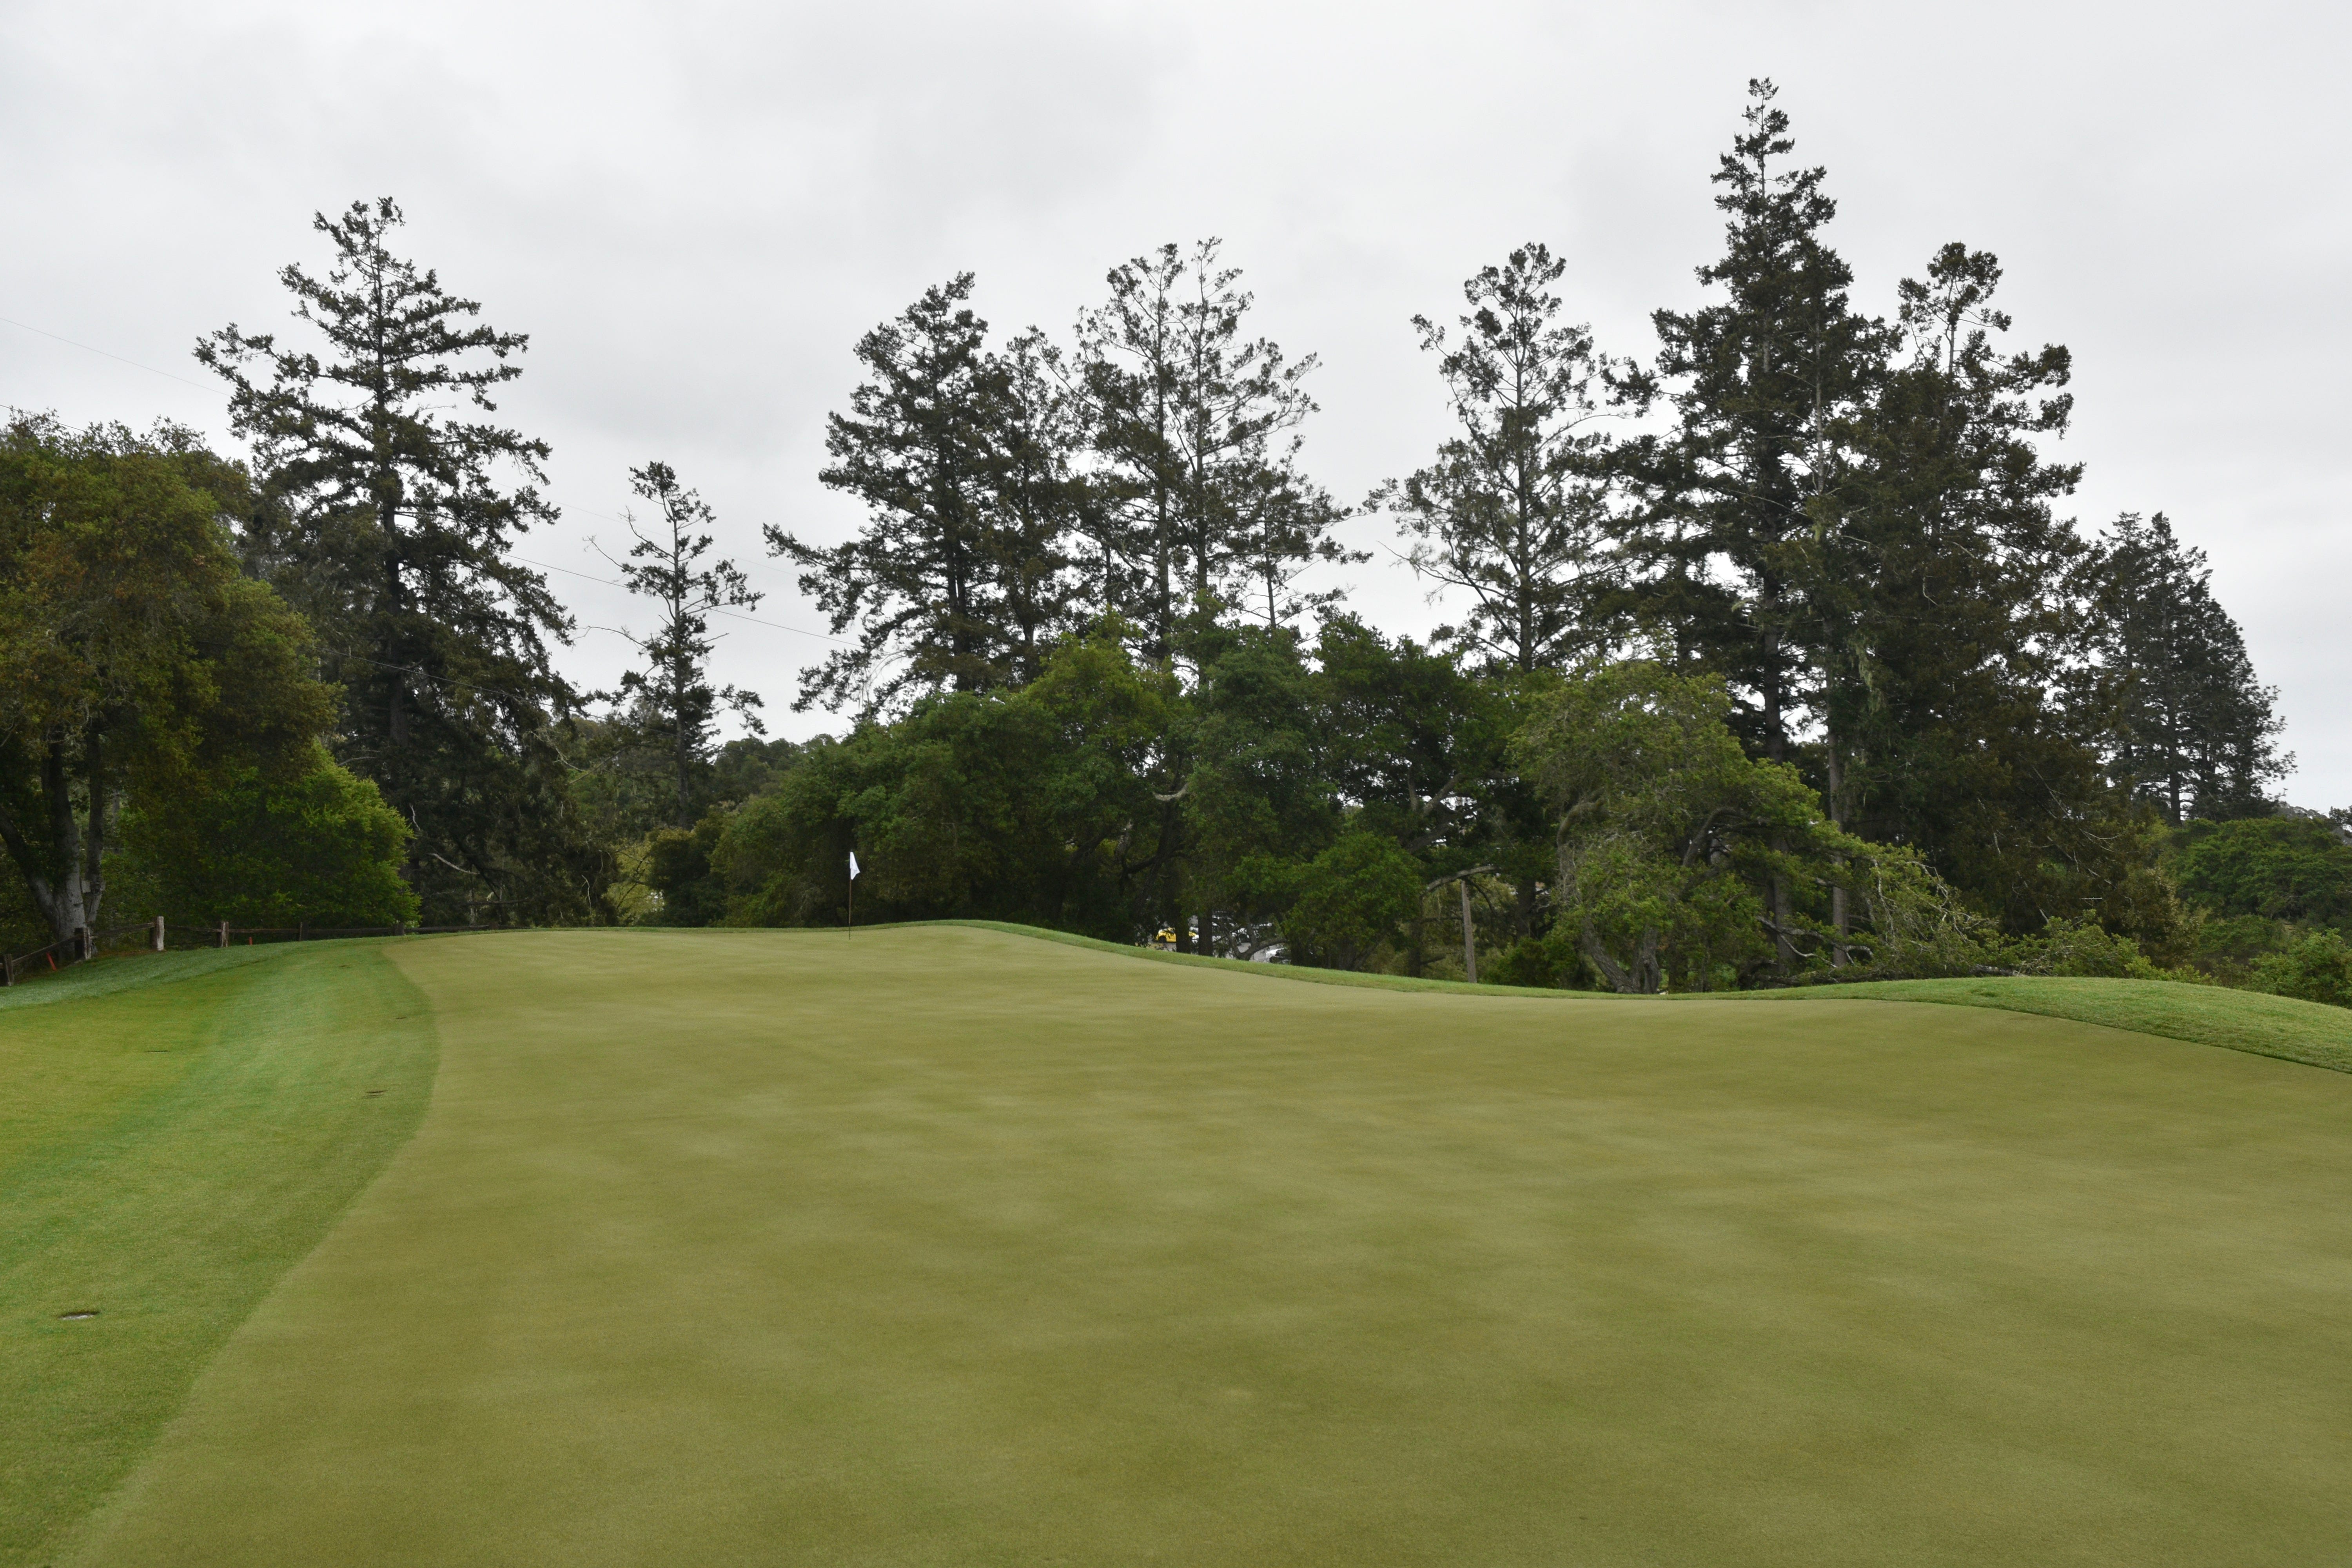
The 10th hole green viewed from behind
Hole 11: Par 4, 390 Yards
The 11th hole was always difficult for perhaps the wrong reasons with a green that was frankly too small and too severely sloped for the approach required — Urbina expanded the green pad to a more appropriate size while maintaining the integrity of the challenge. He also added back some interesting undulations that make the green more menacing than its previous iteration
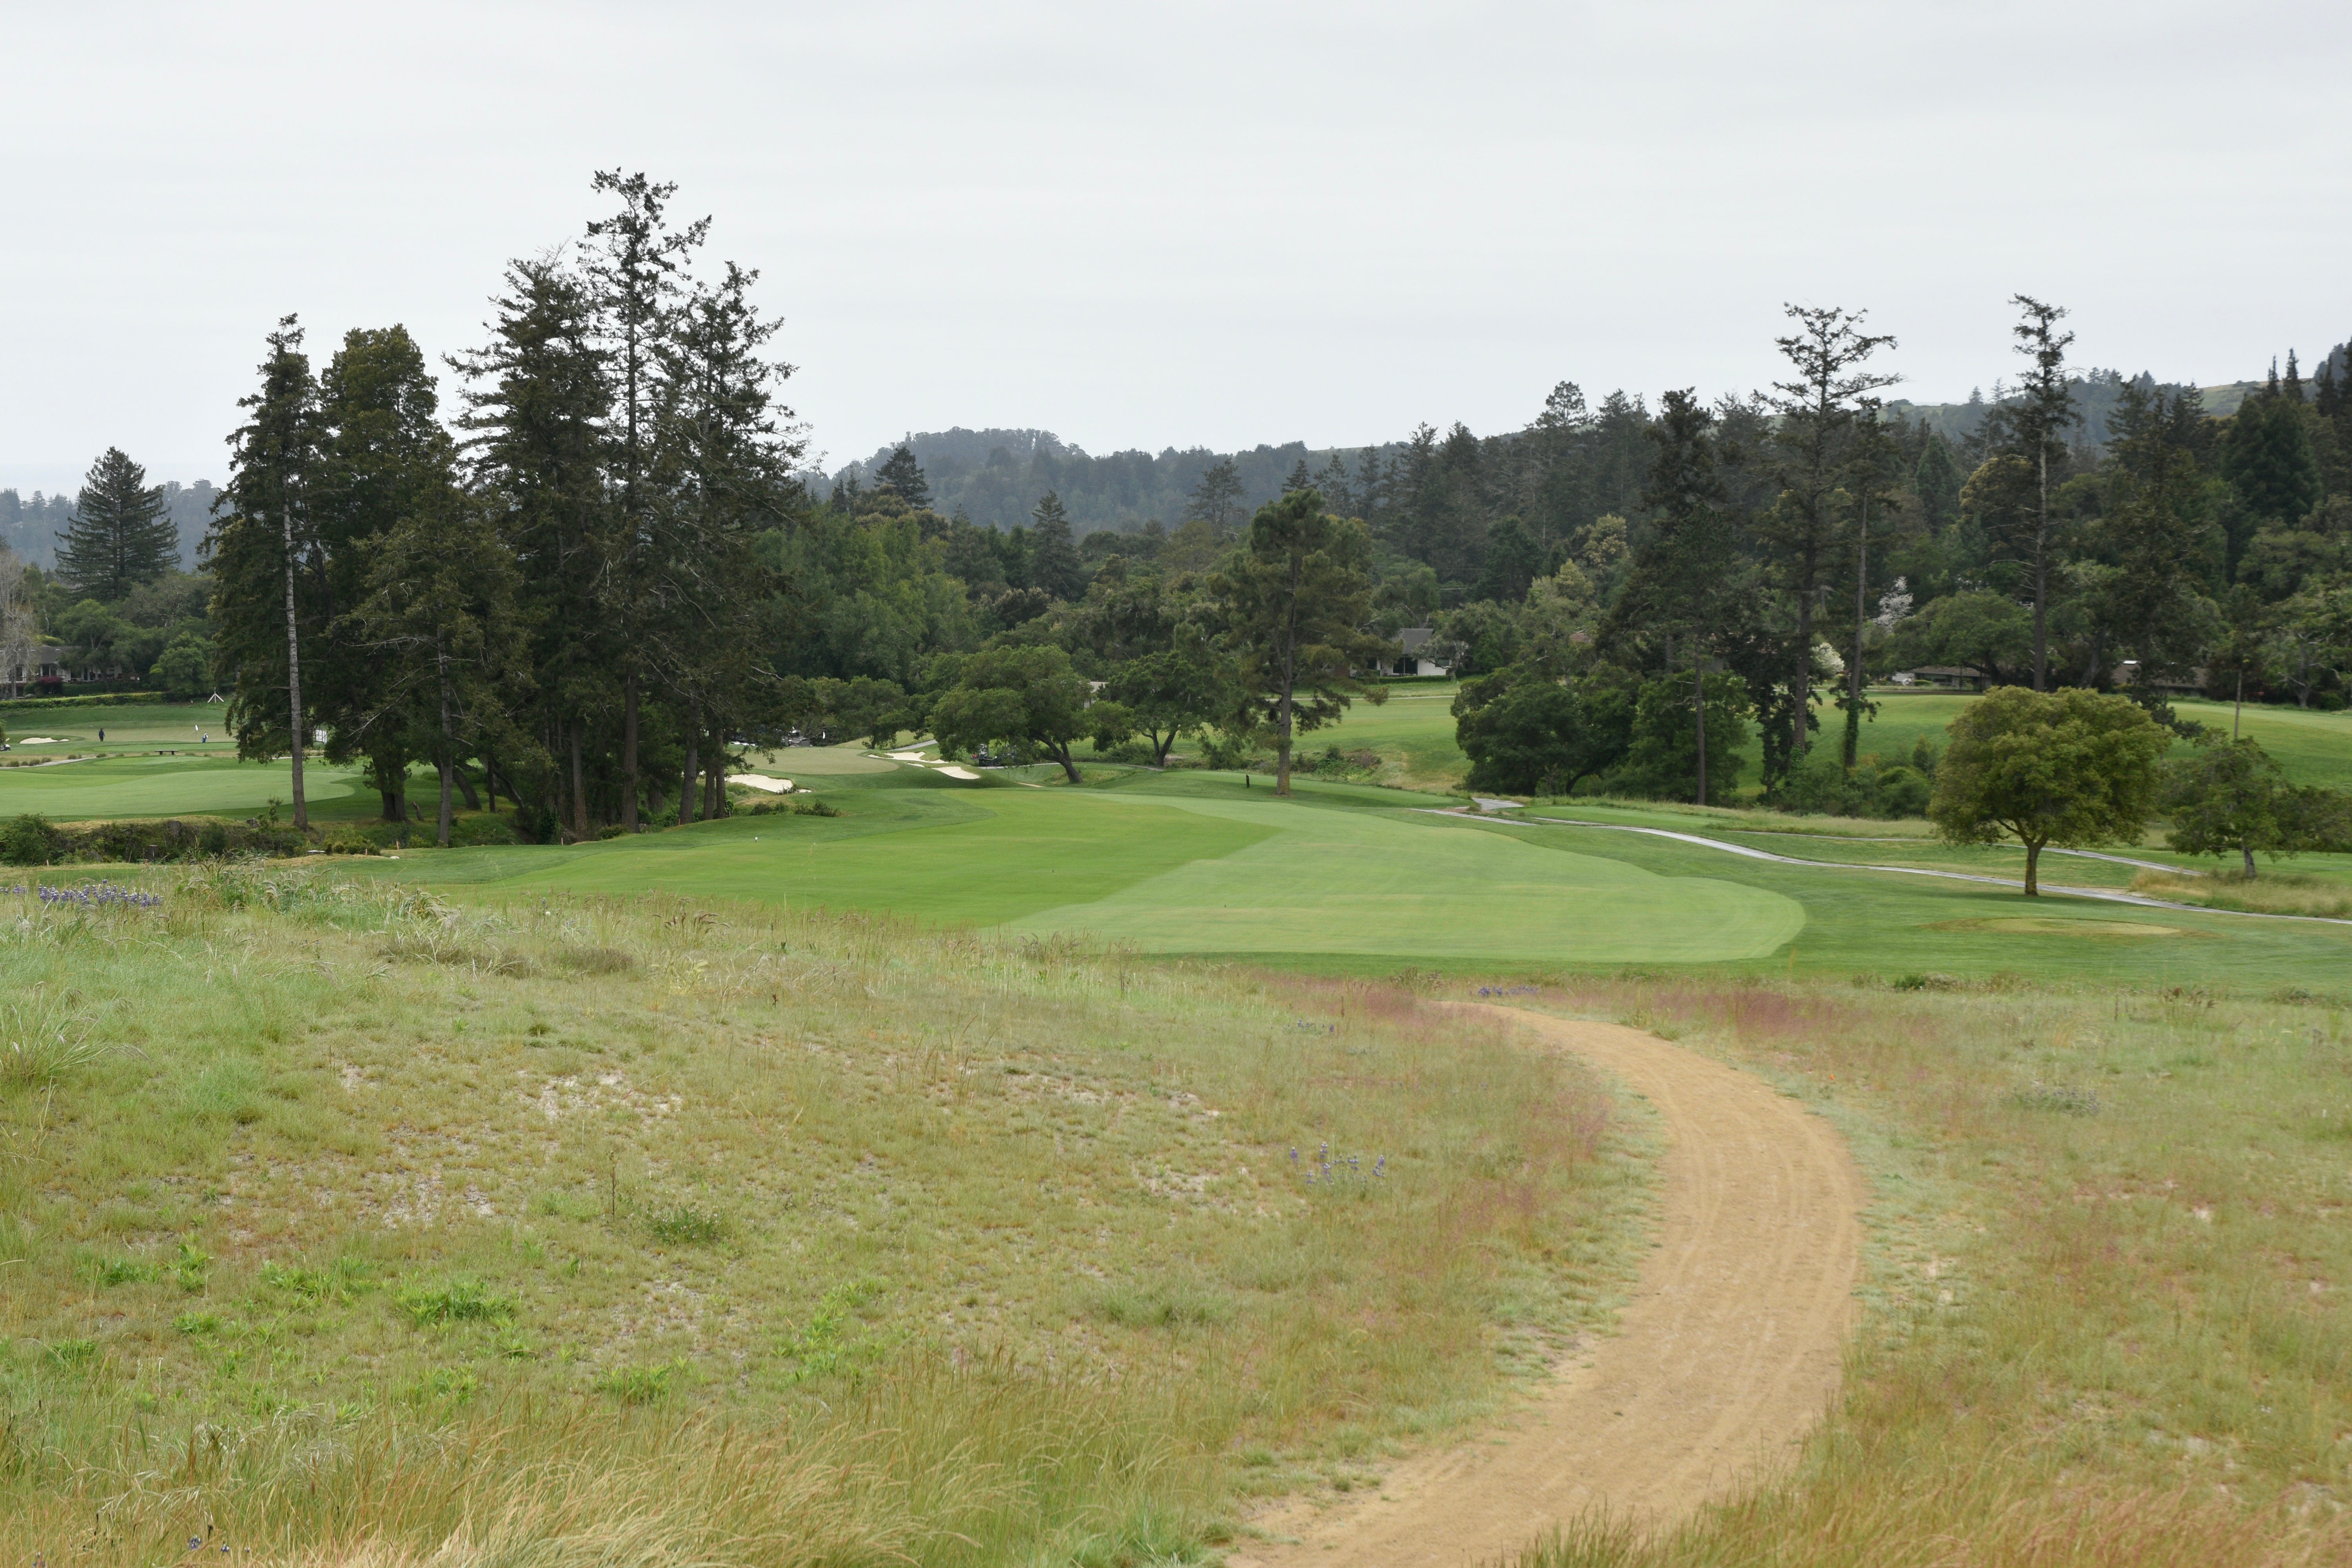
The 11th hole tee shot from the back tee — the dramatic elevation change of over 100 feet from tee to green is disguised cleverly on this hole that looks innocuous but is certainly not!
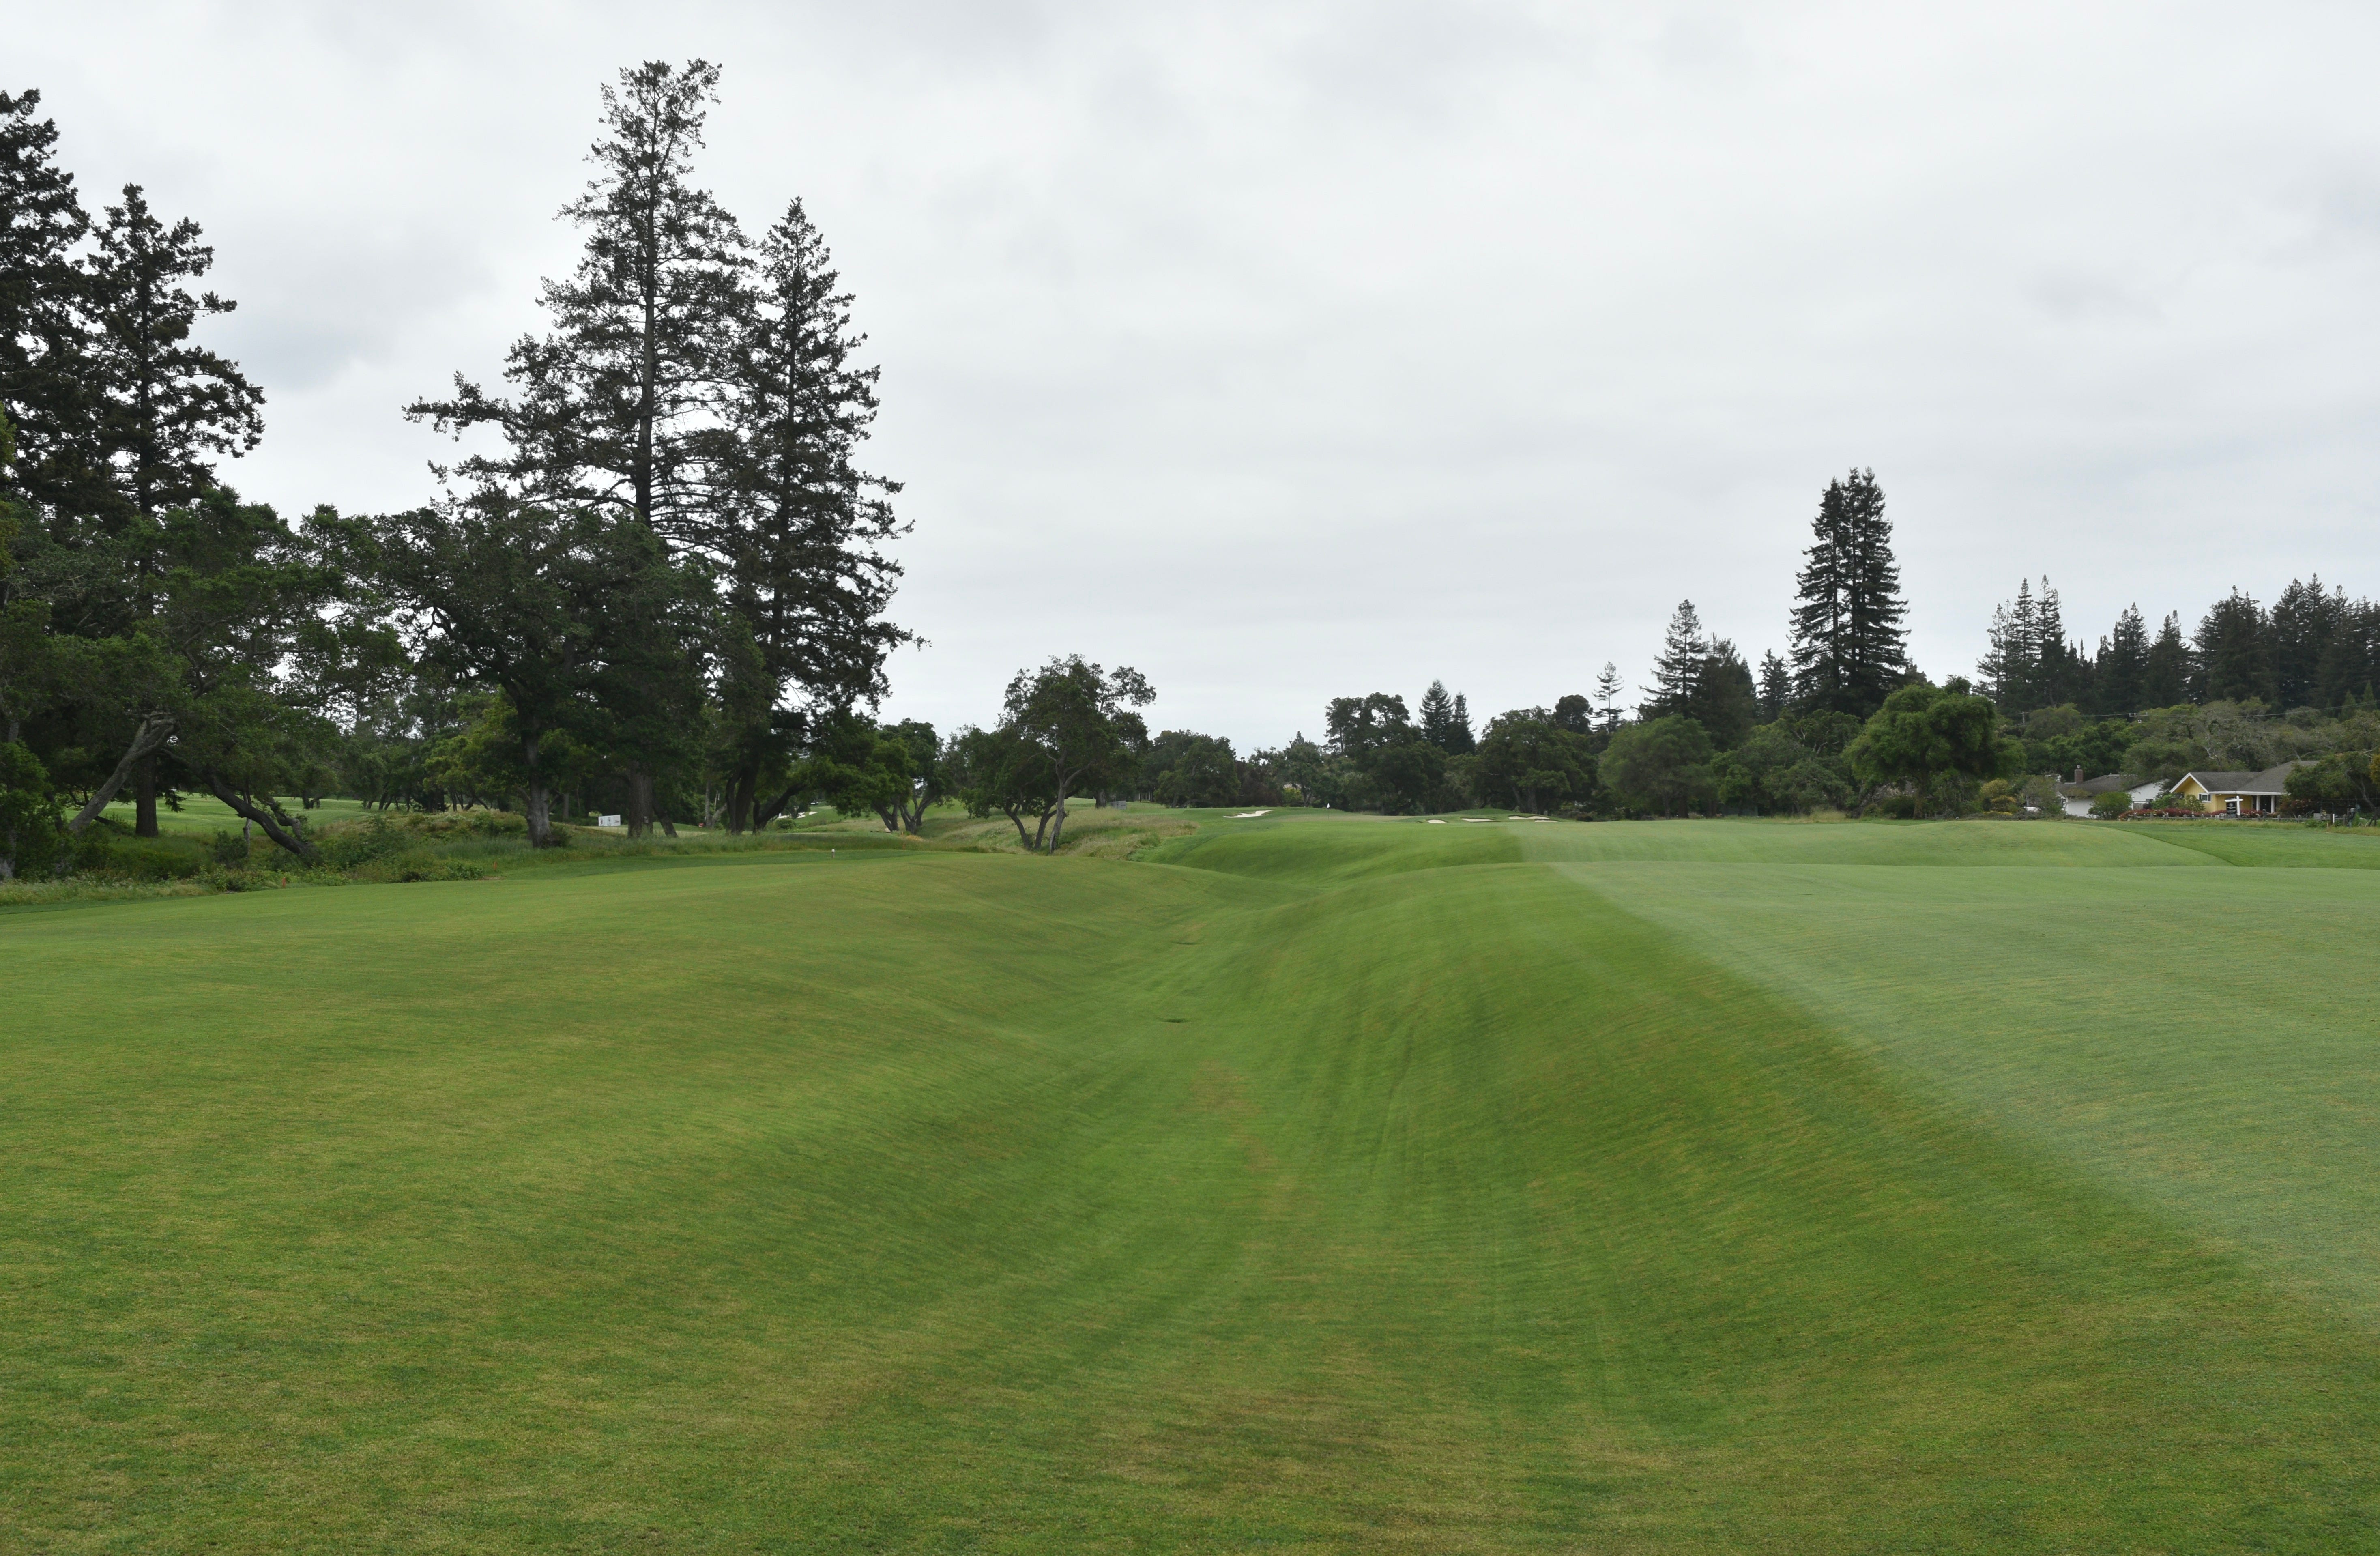
The 11th hole fairway. A player needs to make some critical strategic decisions on the placement of the tee shot
Laying up to the left section of the 11th hole fairway is the conservative play and provides a fairly open angle to the green but the approach distance is uncomfortably longer
Challenging the end of the 11th hole fairway by getting as close to the barranca is ideal to get the best approach angle and more favorable distance to the green
Bail too far right on the 11th hole fairway and the angle becomes less favorable and the approach shot becomes more challenging
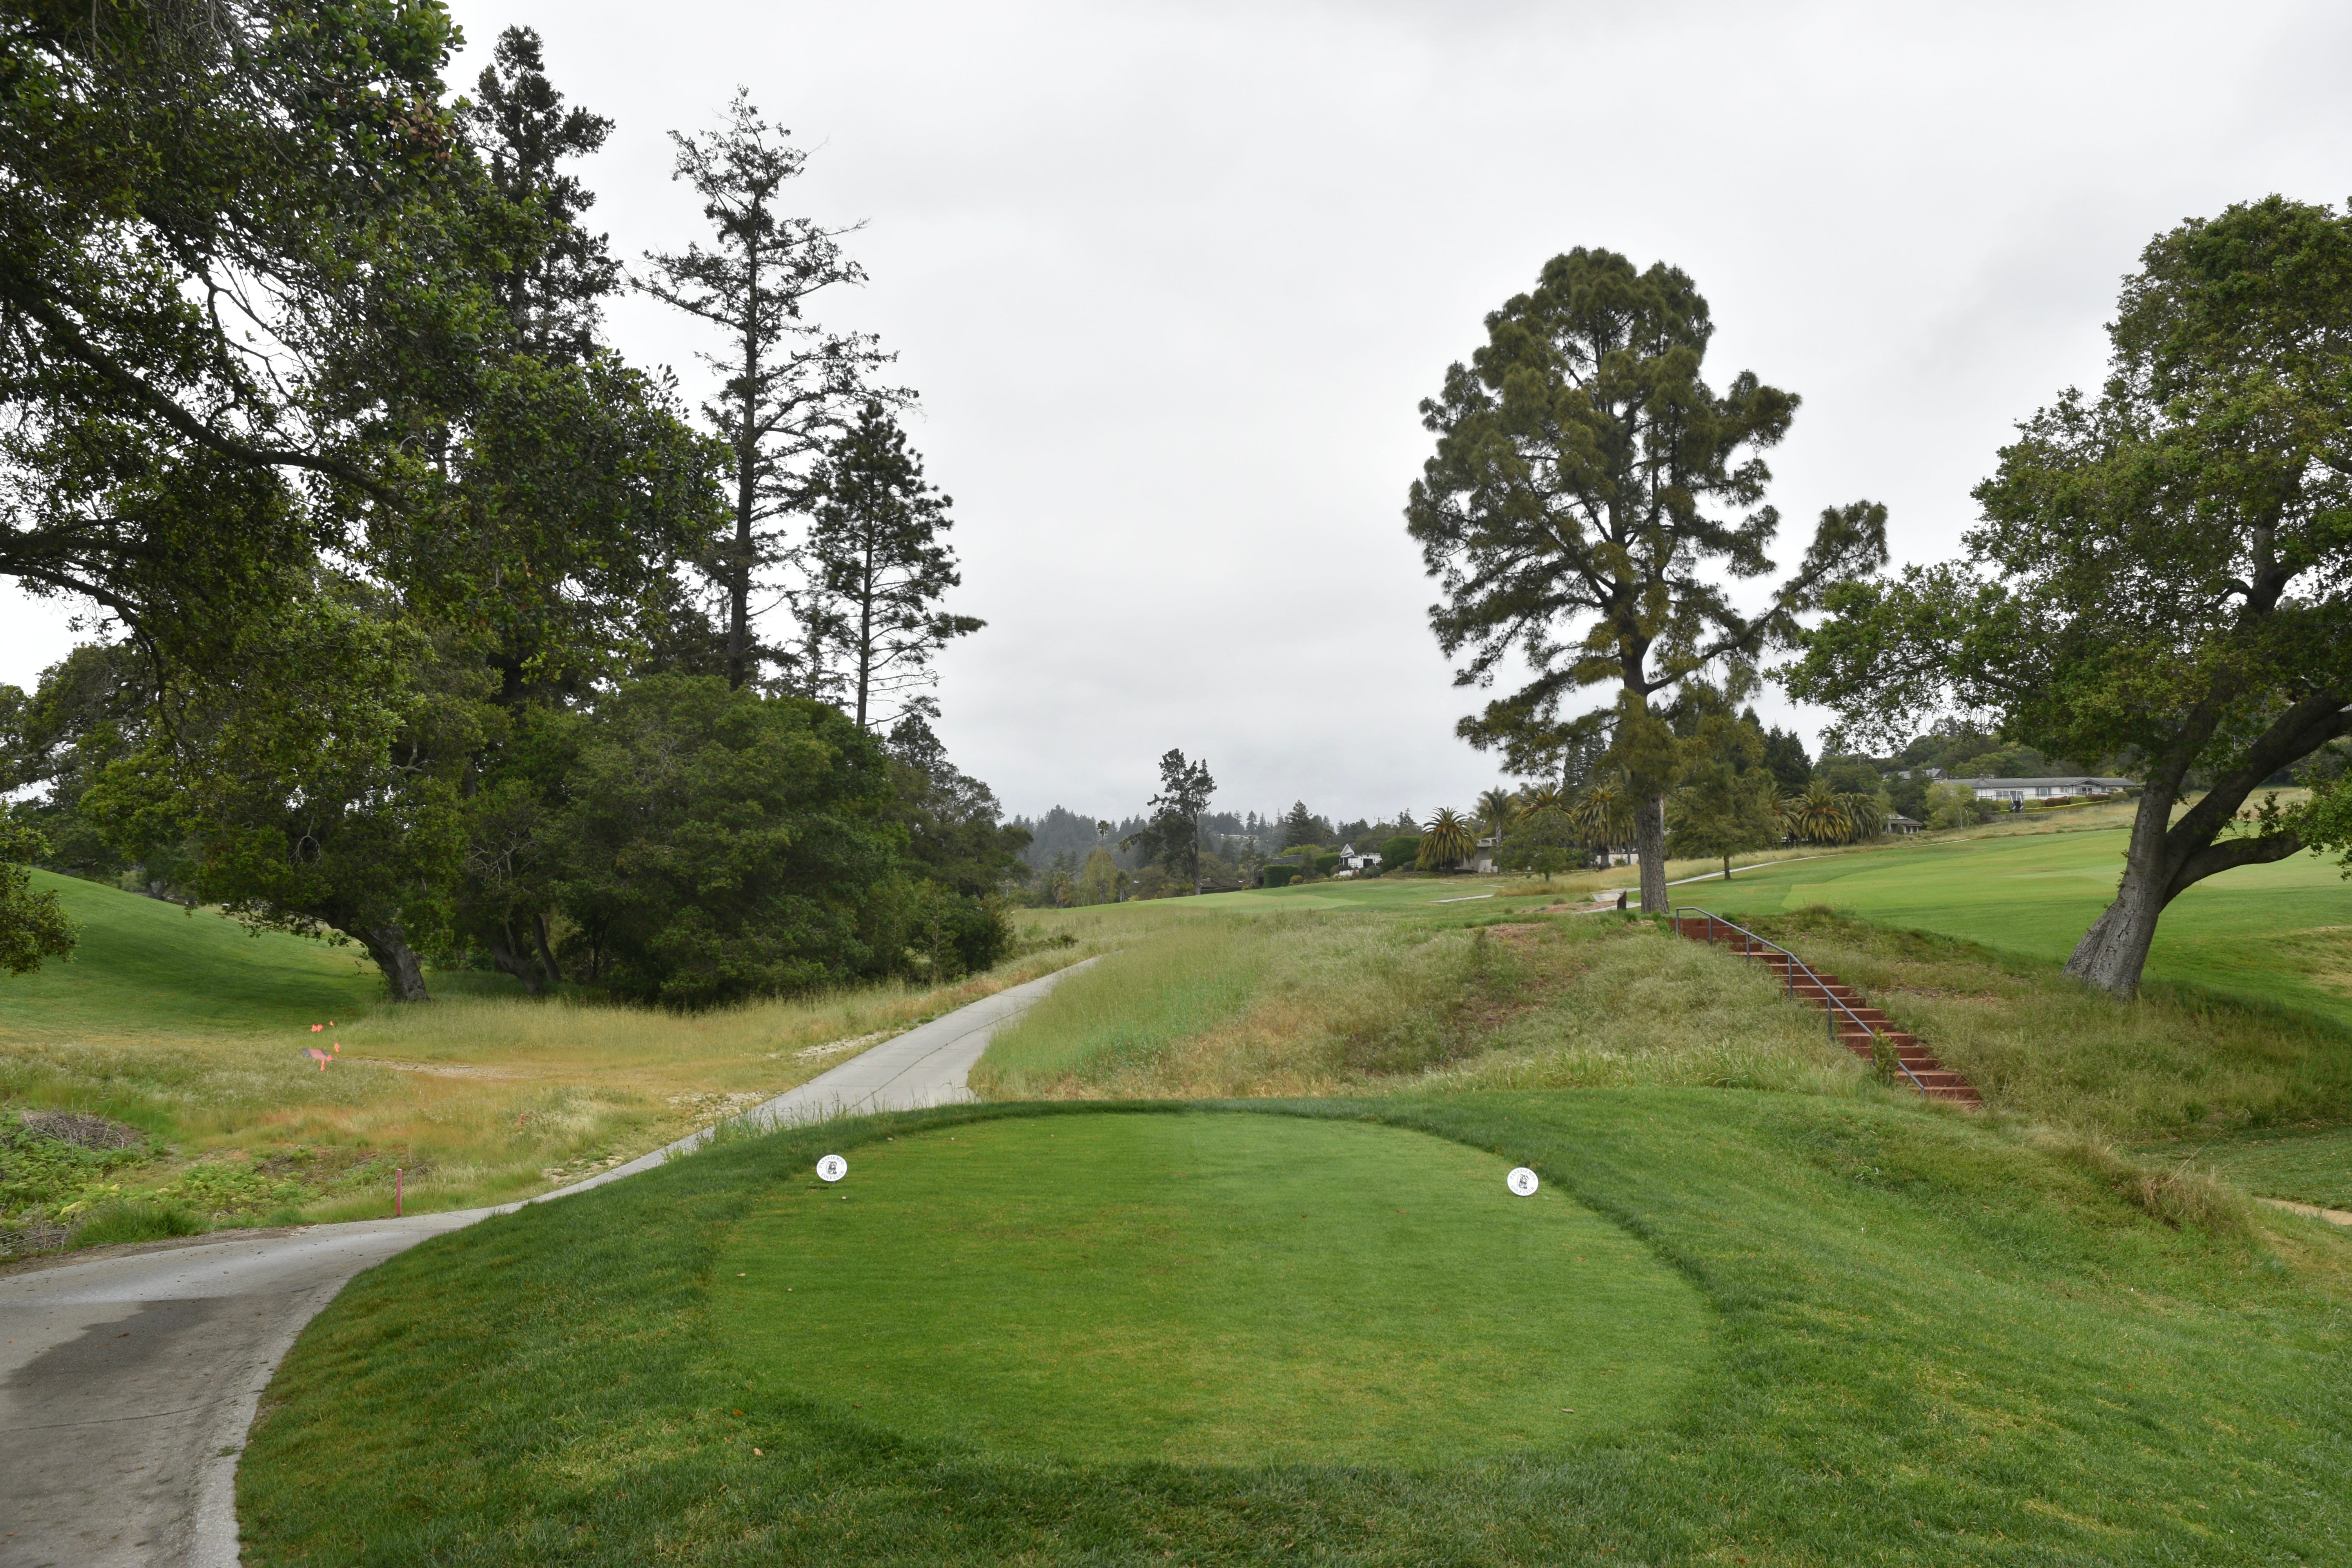
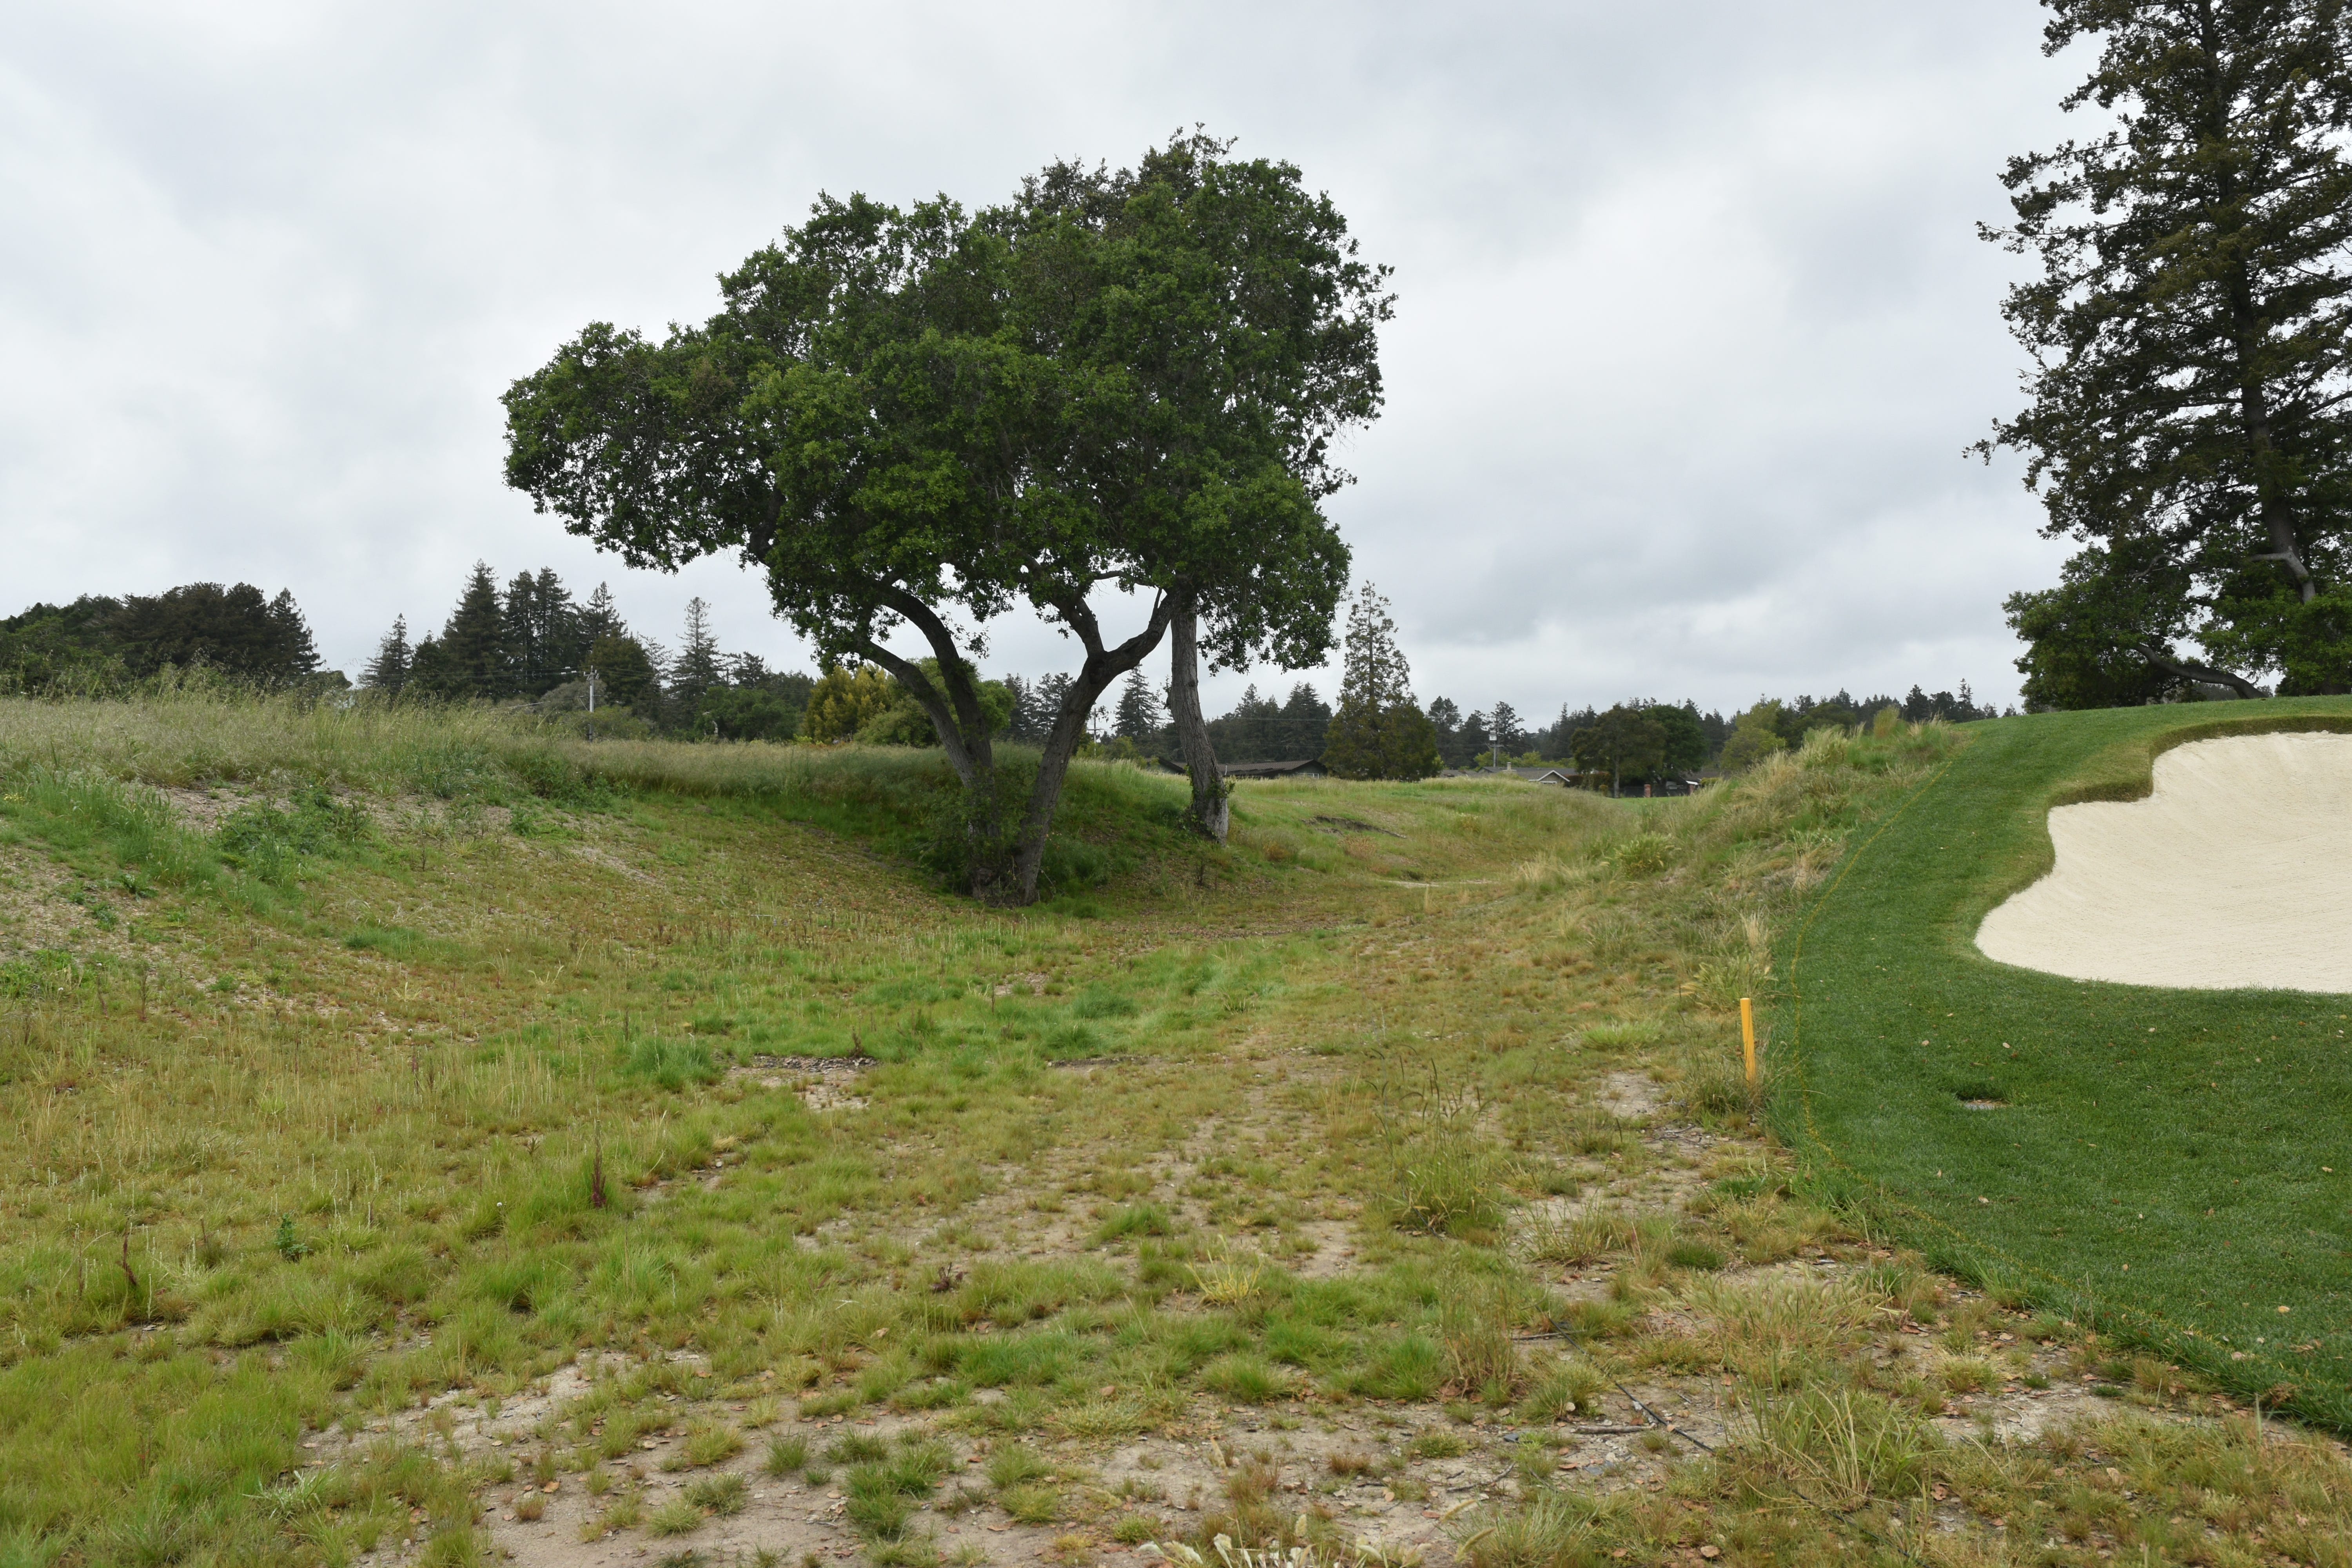
The 11th hole bridge to get across the barranca
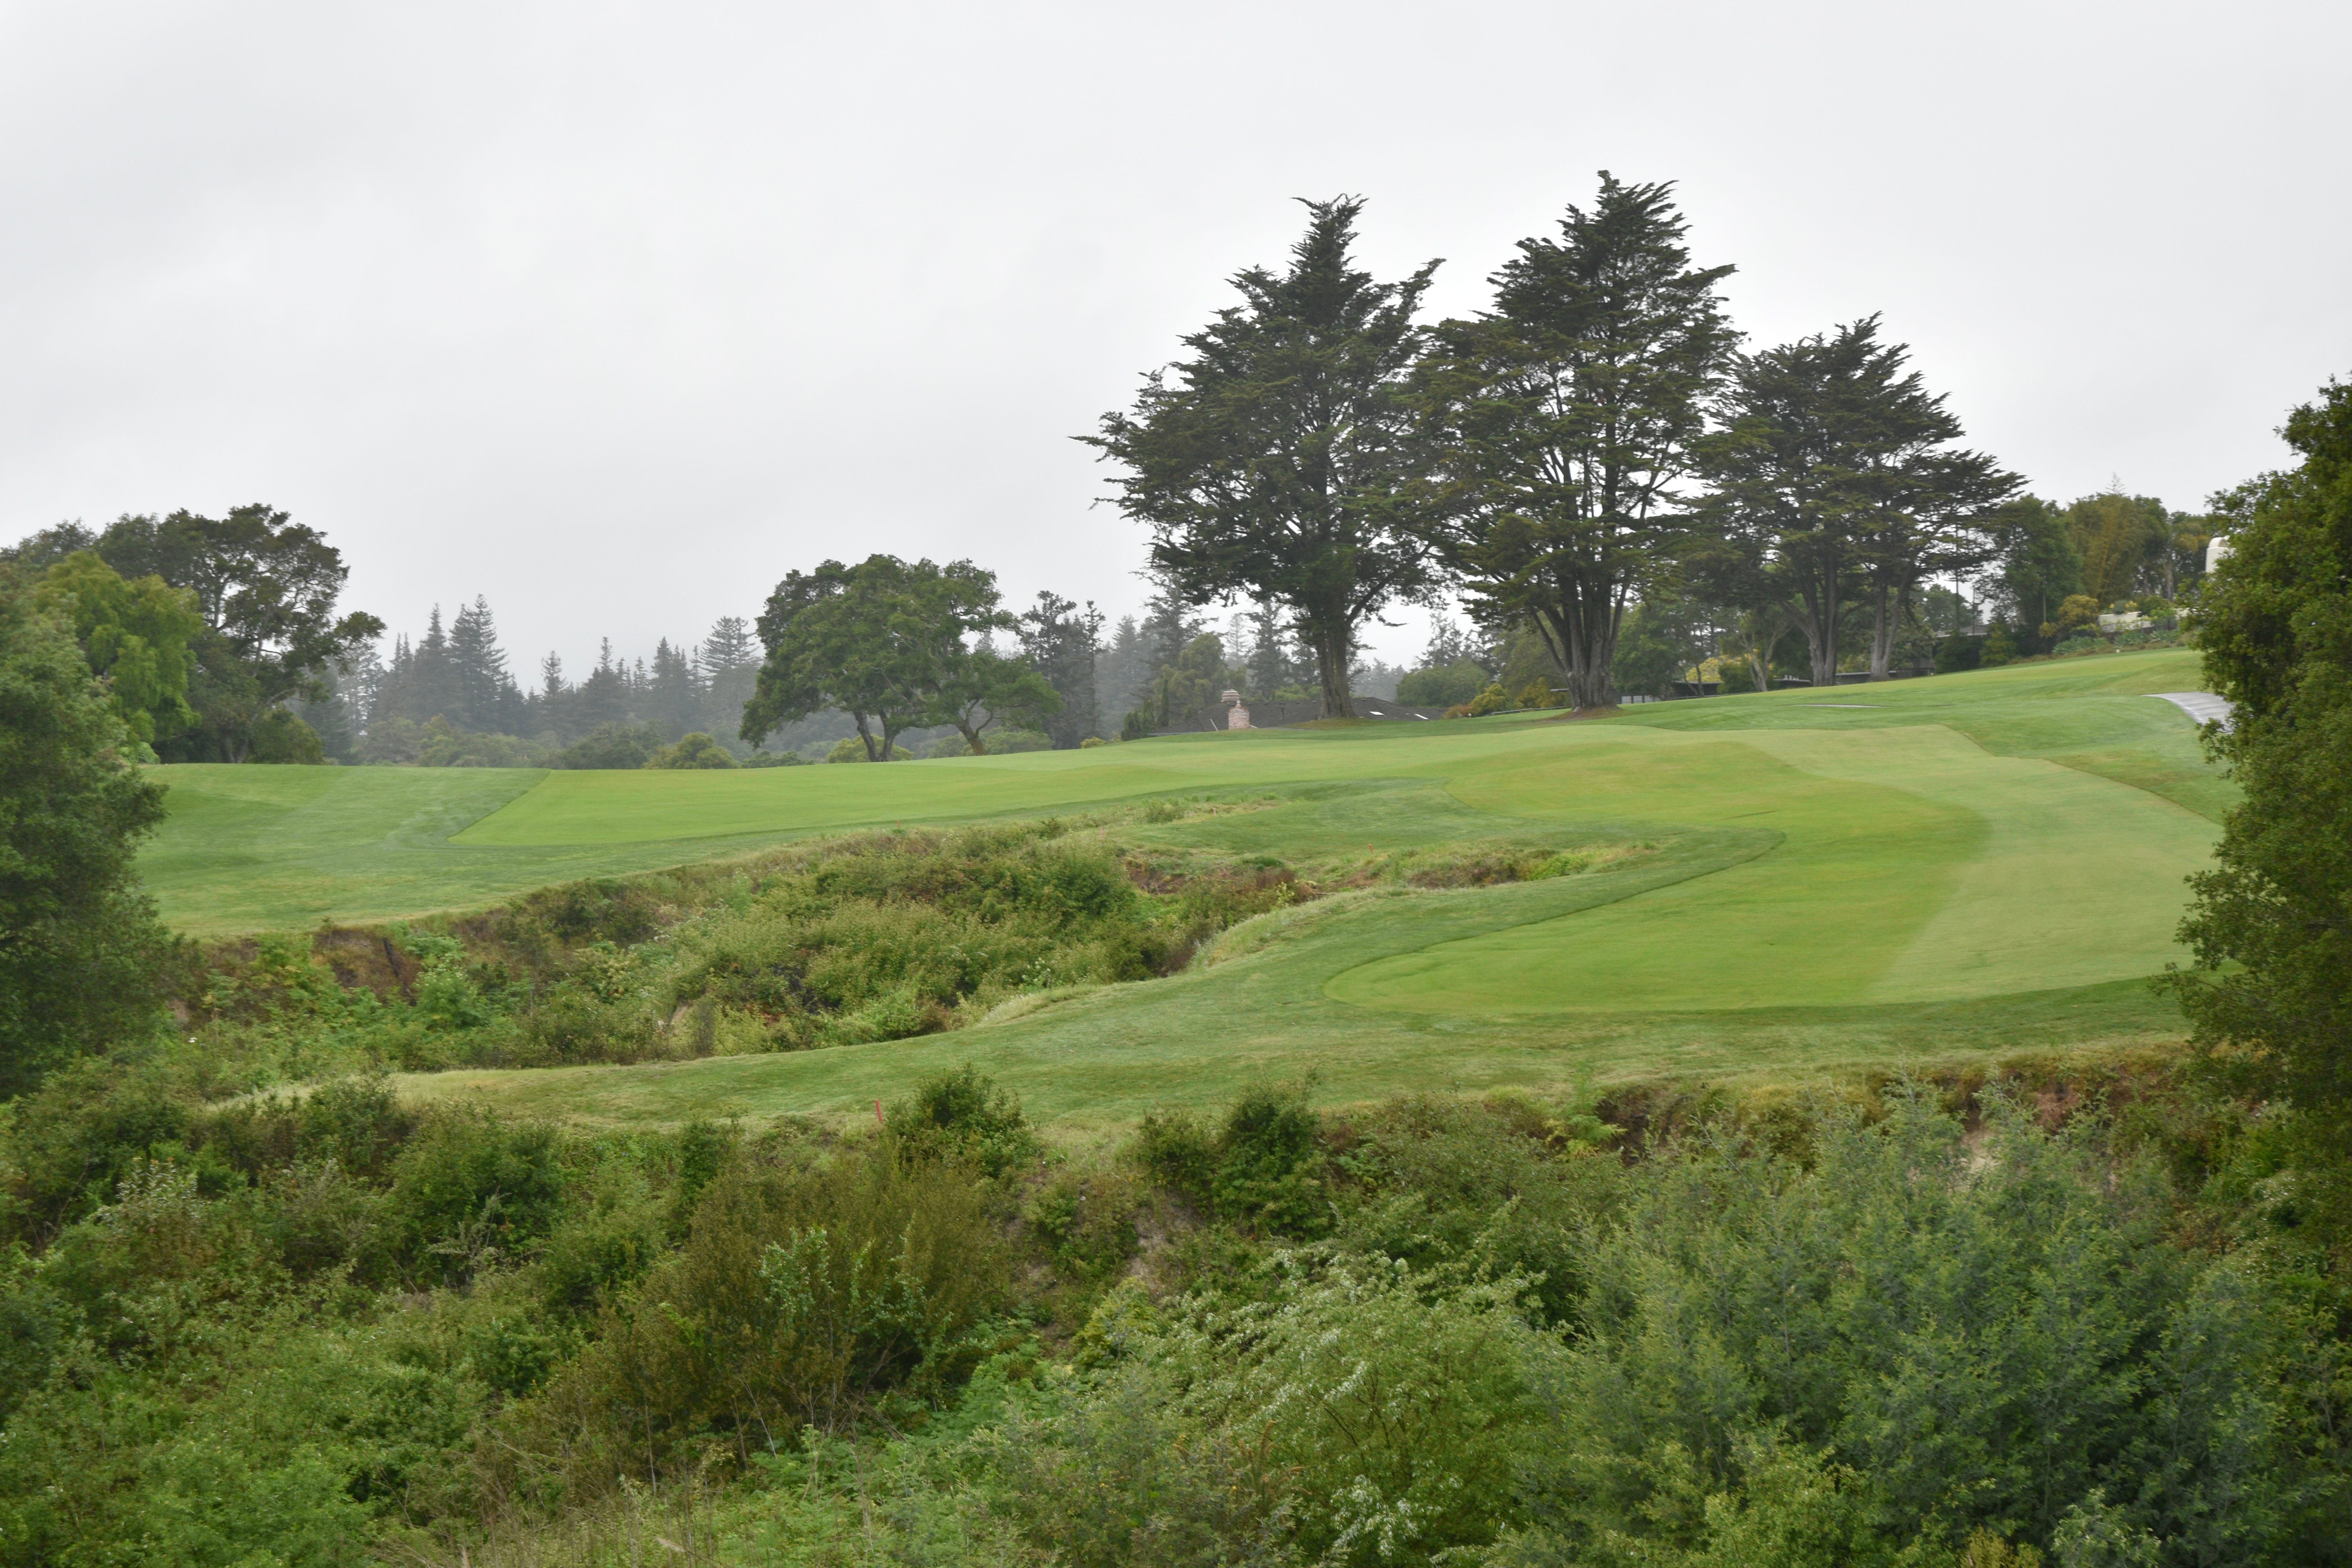
A look back at the barranca that bisects the 11th hole
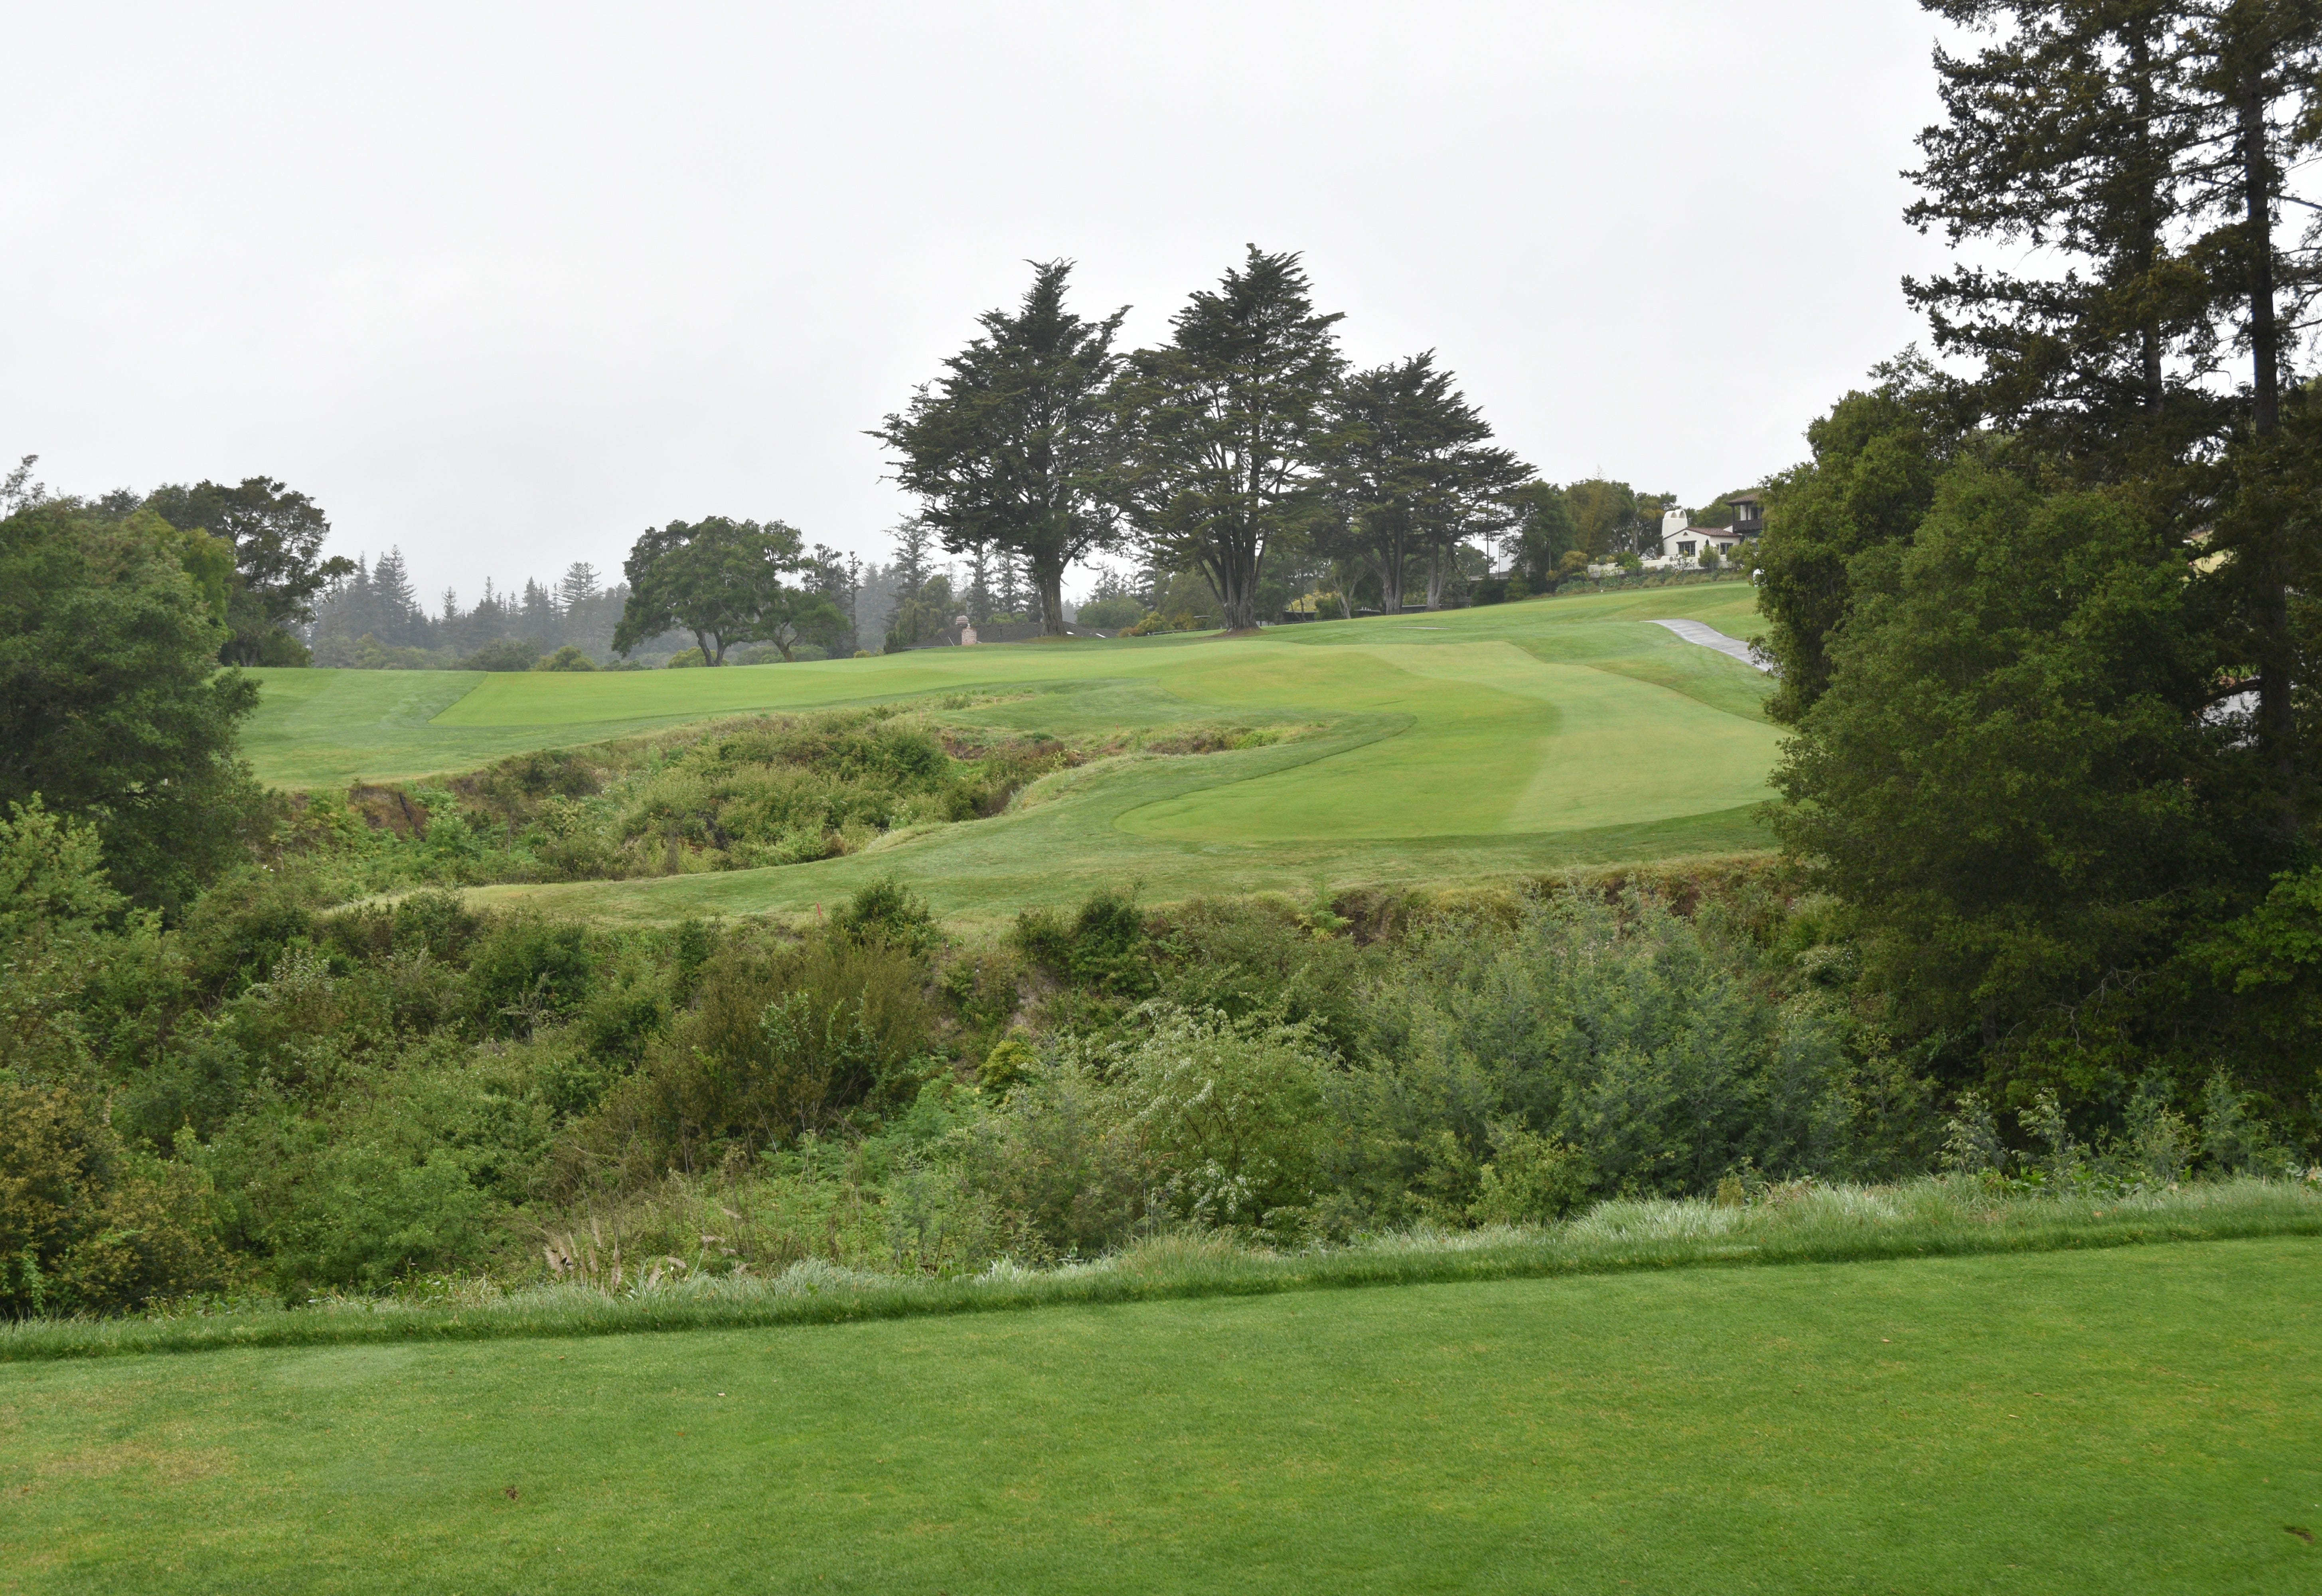
The 11th hole fairway resumes once across the barranca — the walk is severely uphill and a player is usually huffing and puffing to reach the green!
The new 11th hole green is where much of the dramatic transformation occurred from the Urbina restoration — the green now looks more intimidating. Approach shots need to reach the green or else a player can watch helplessly as his ball rolls down the fairway
Previously, the 11th hole green had a more simpler orientation that stair stepped gradually to the back section. Now there are multiple sections that give off a multiple stair step dynamic to this green
A closer look at the new undulations of the 11th hole green
Urbina also expanded the green pad which was an appropriate move. The previous 11th hole green was too small for the approach shot required and was too much of a hit-and-hope situation. The new green has more room to hit into, but that doesn’t mean getting off the green will be any easier
The 11th hole green viewed from the front left
The 11th hole green viewed from the middle right
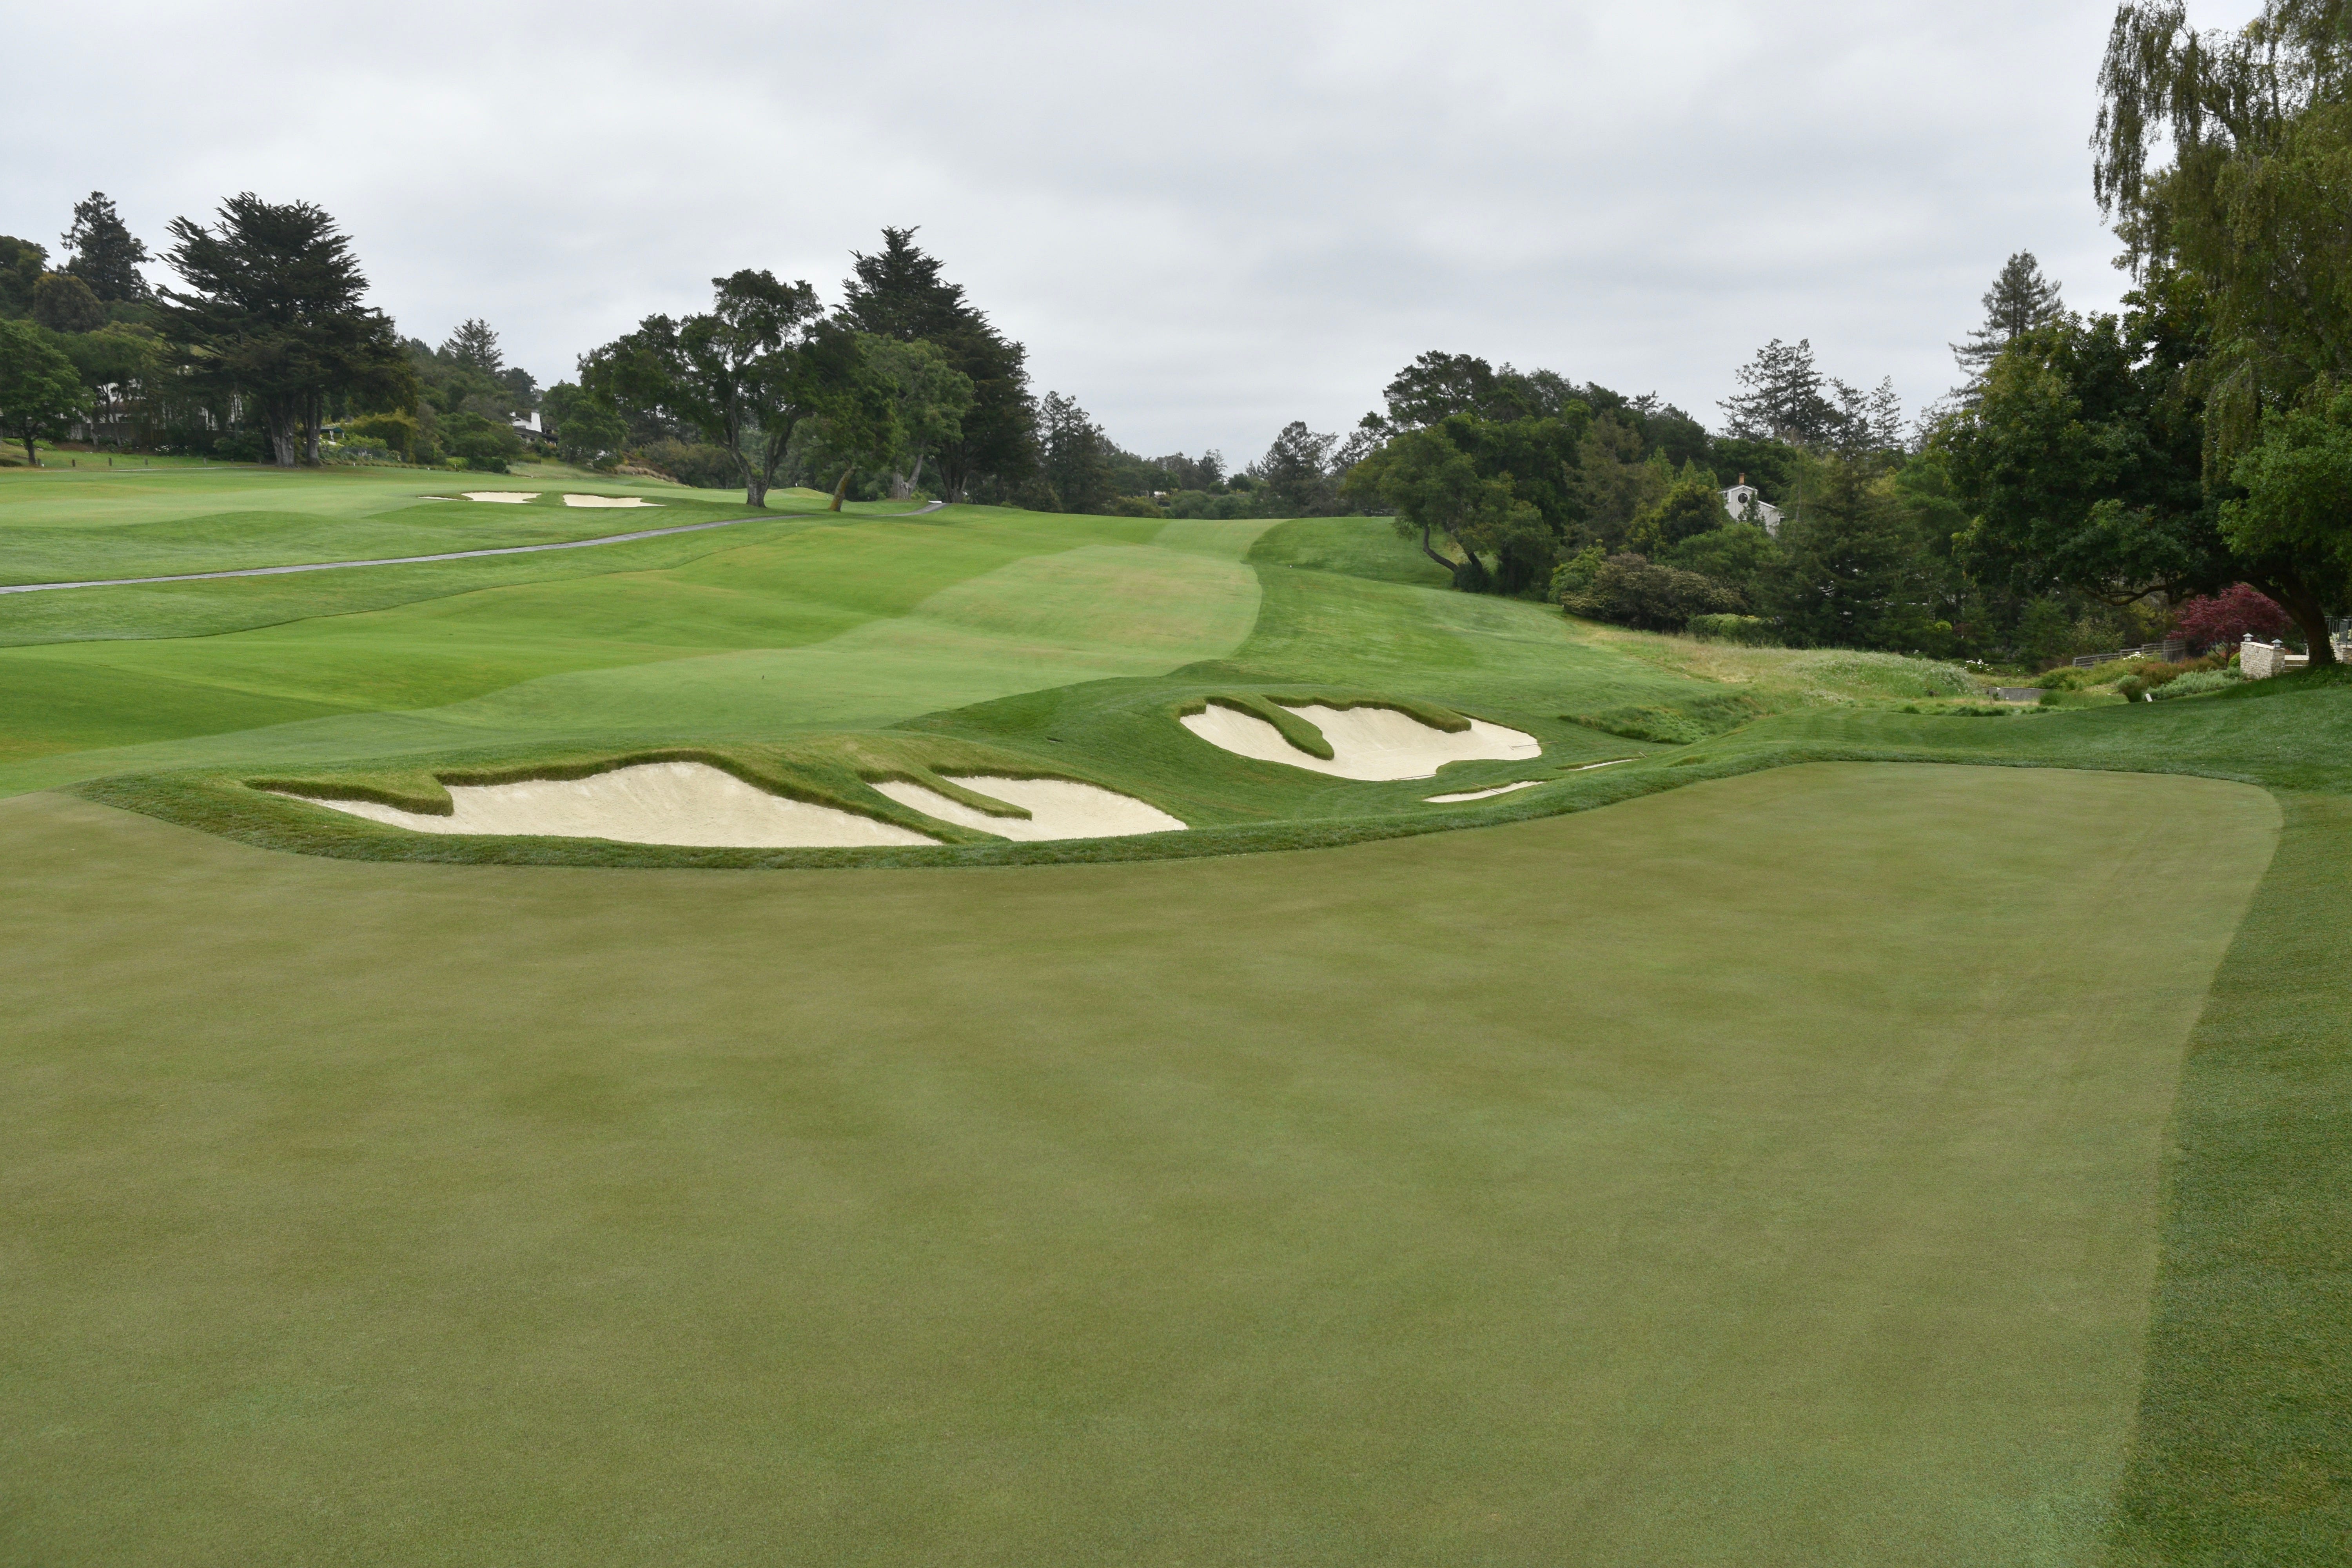
A closer look at the back left green side bunkers of the 11th hole
The right green side bunkers of the 11th hole. Overshoot these bunkers entirely and a player will find himself in a hazard area and ball that is likely unsalvageable
The back right section of the 11th green
The 11th hole green viewed from behind — the new stair step undulations can be clearly seen in this photo
The 11th hole has always been a beast at Pasatiempo — Still challenging but now more of a fair and realistic challenge
Hole 12: Par 4, 371 Yards
The 12th hole is a subtle gem that can punish careless shots if a player is not careful
The 12th hole tee shot from the back tee — Much is unchanged on this hole where much of the renovation was done around the green
The 12th hole tee shot is tricky because there is a tendency to pull it left into the trees and barranca with being up so high from the tee. Bailing out to the right just makes the approach shot longer and more difficult. The effective target is much more narrower than it appears
The 12th hole fairway — the fairway is reverse-banked and tee ball placement is highly dependent on where the pin is located
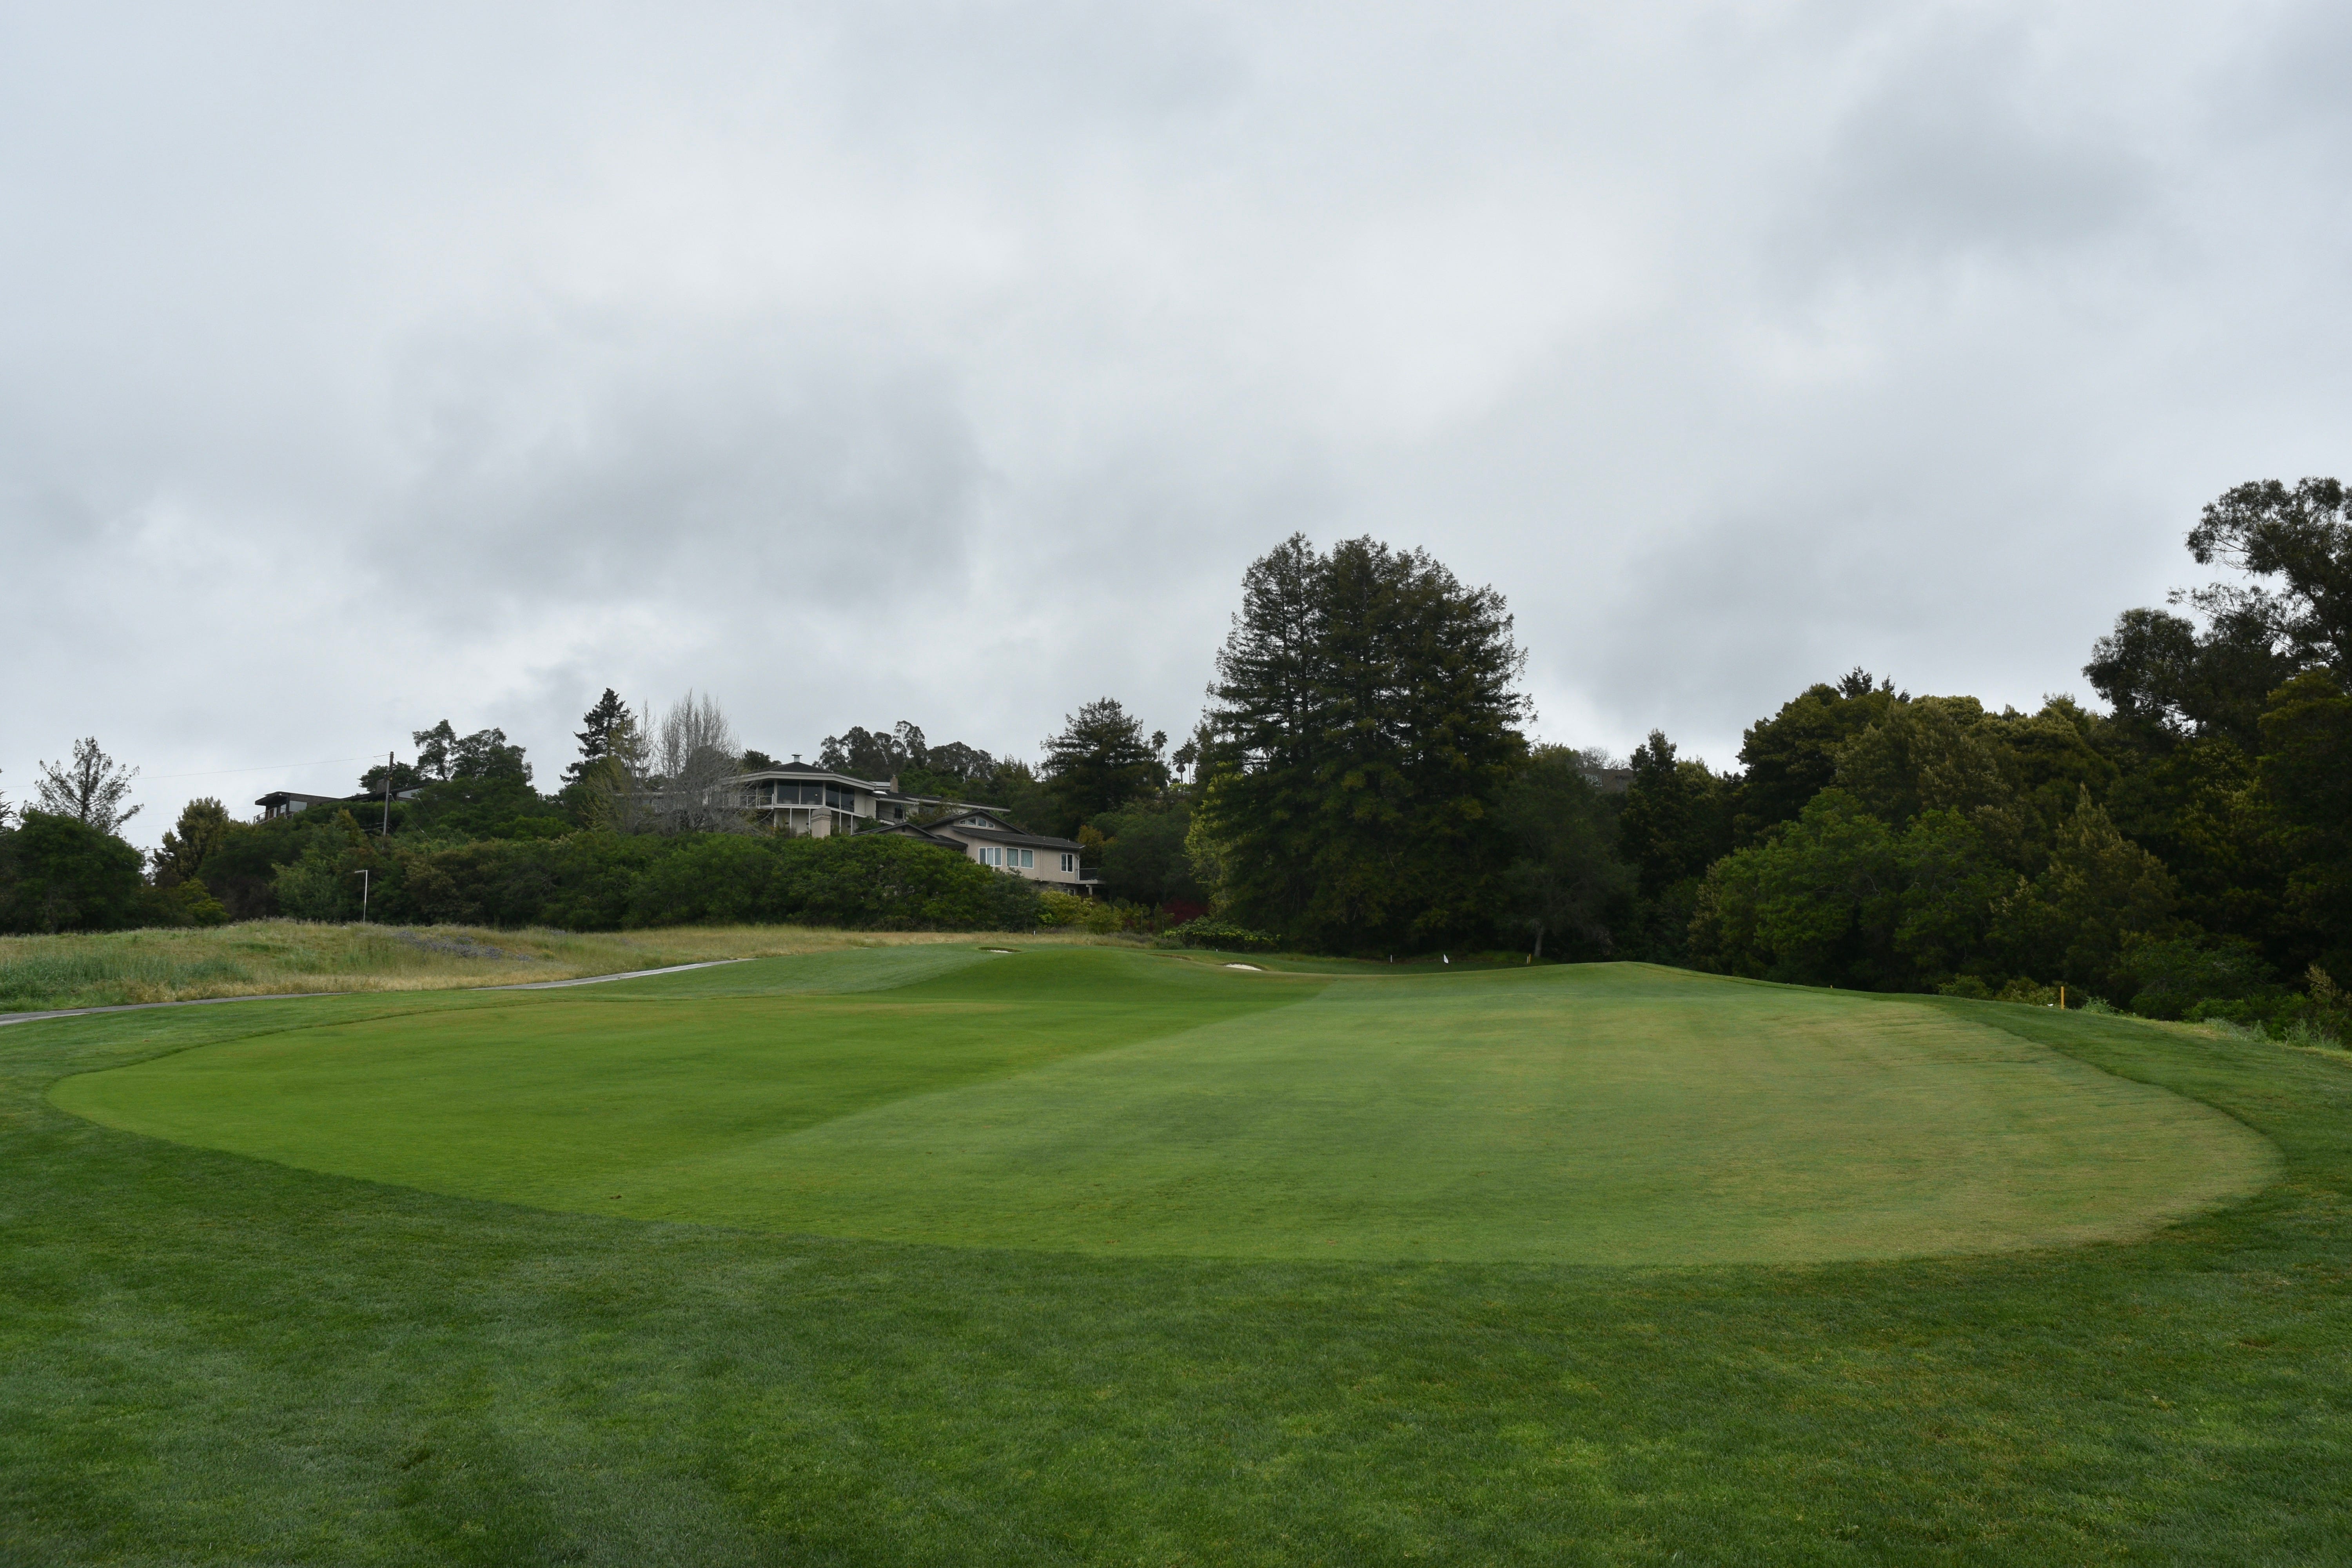
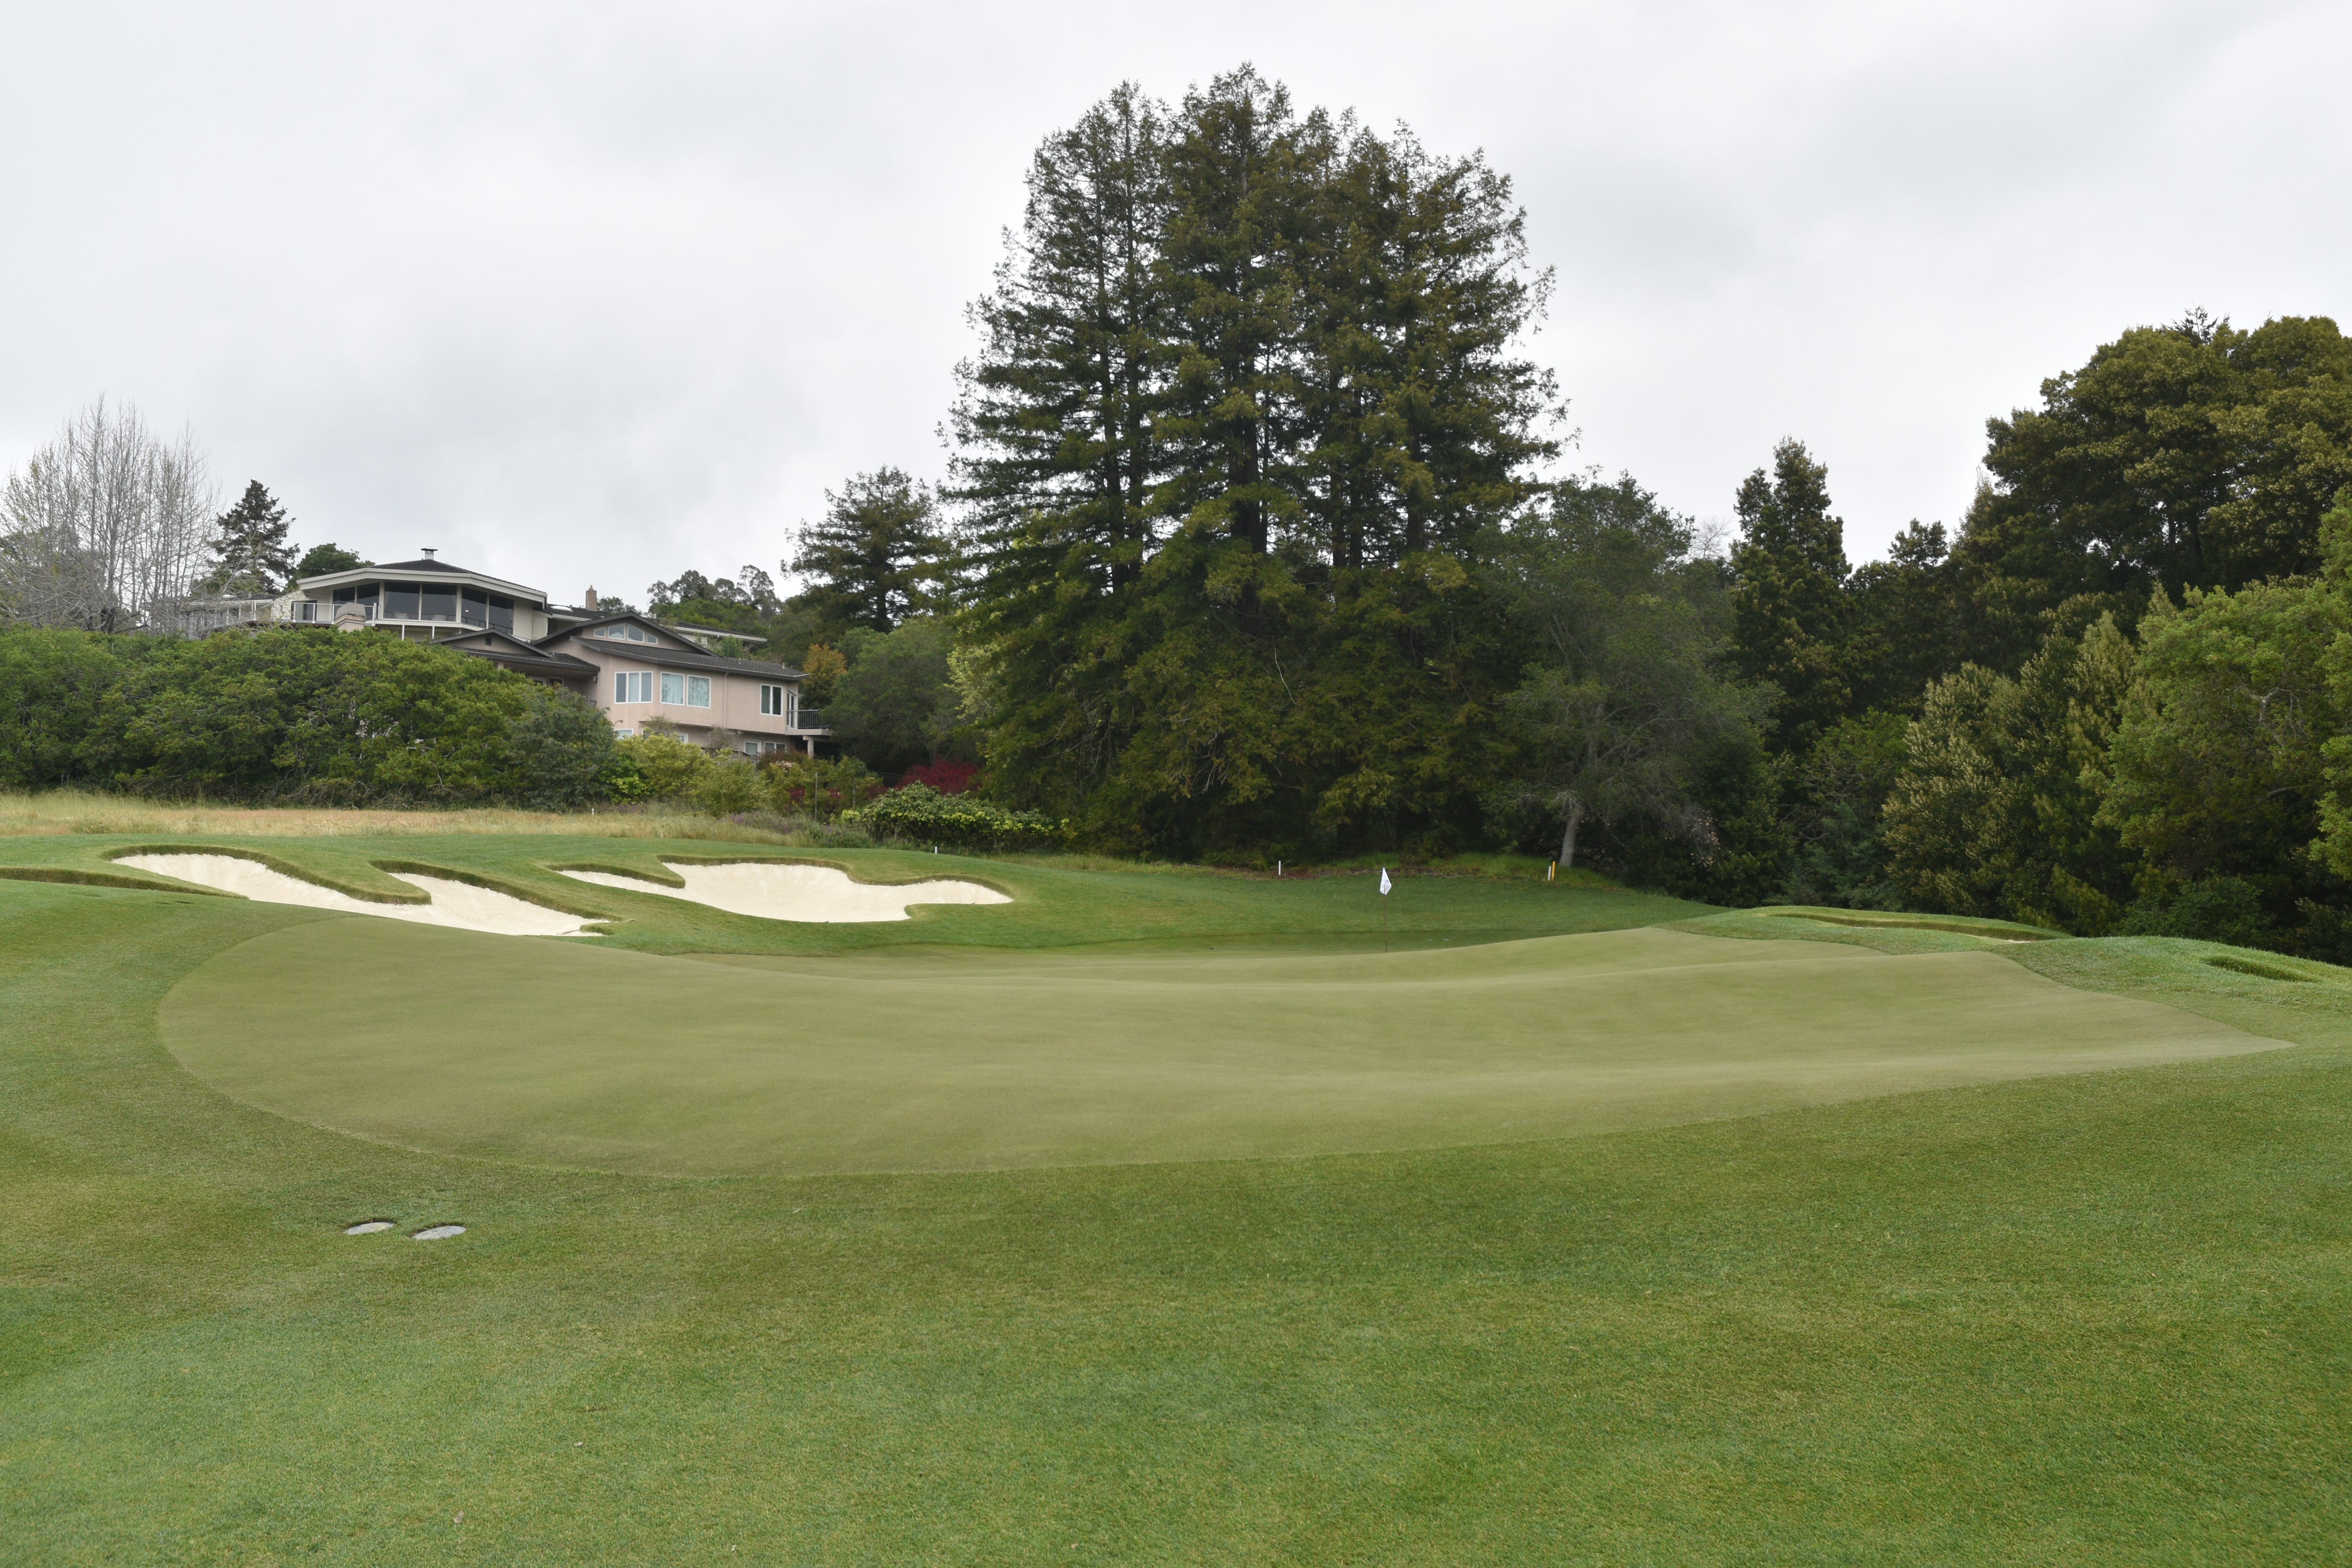
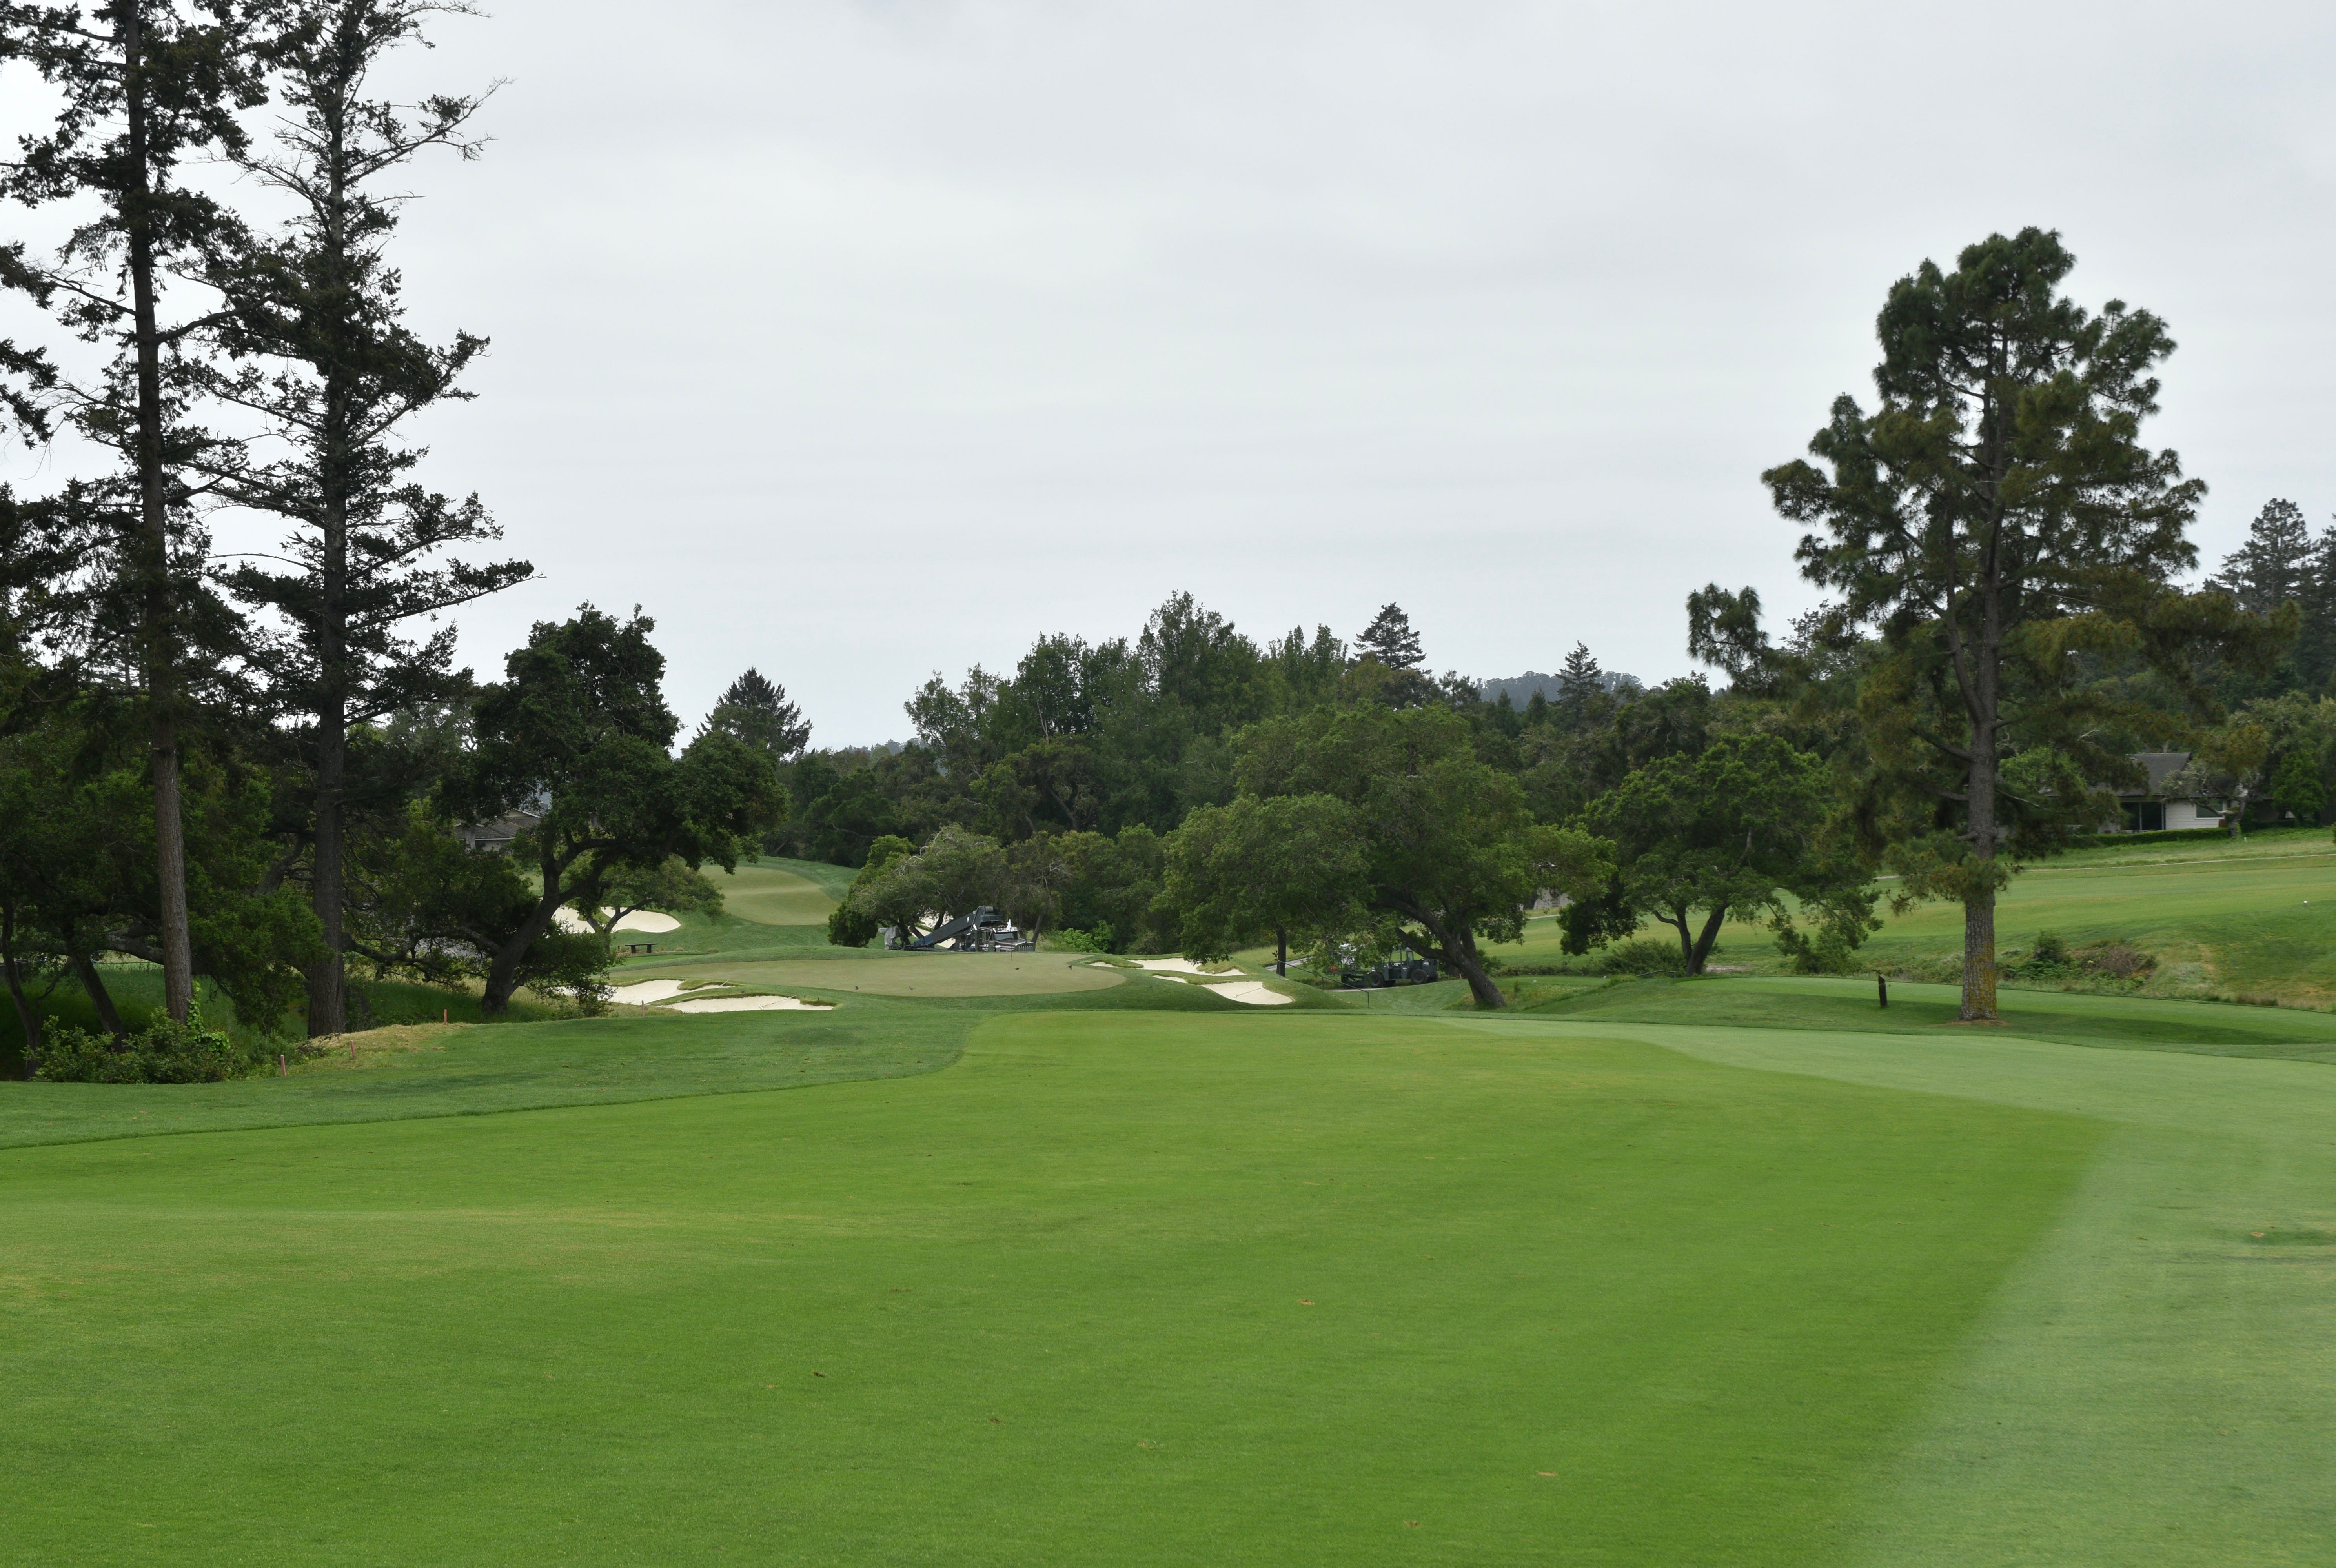
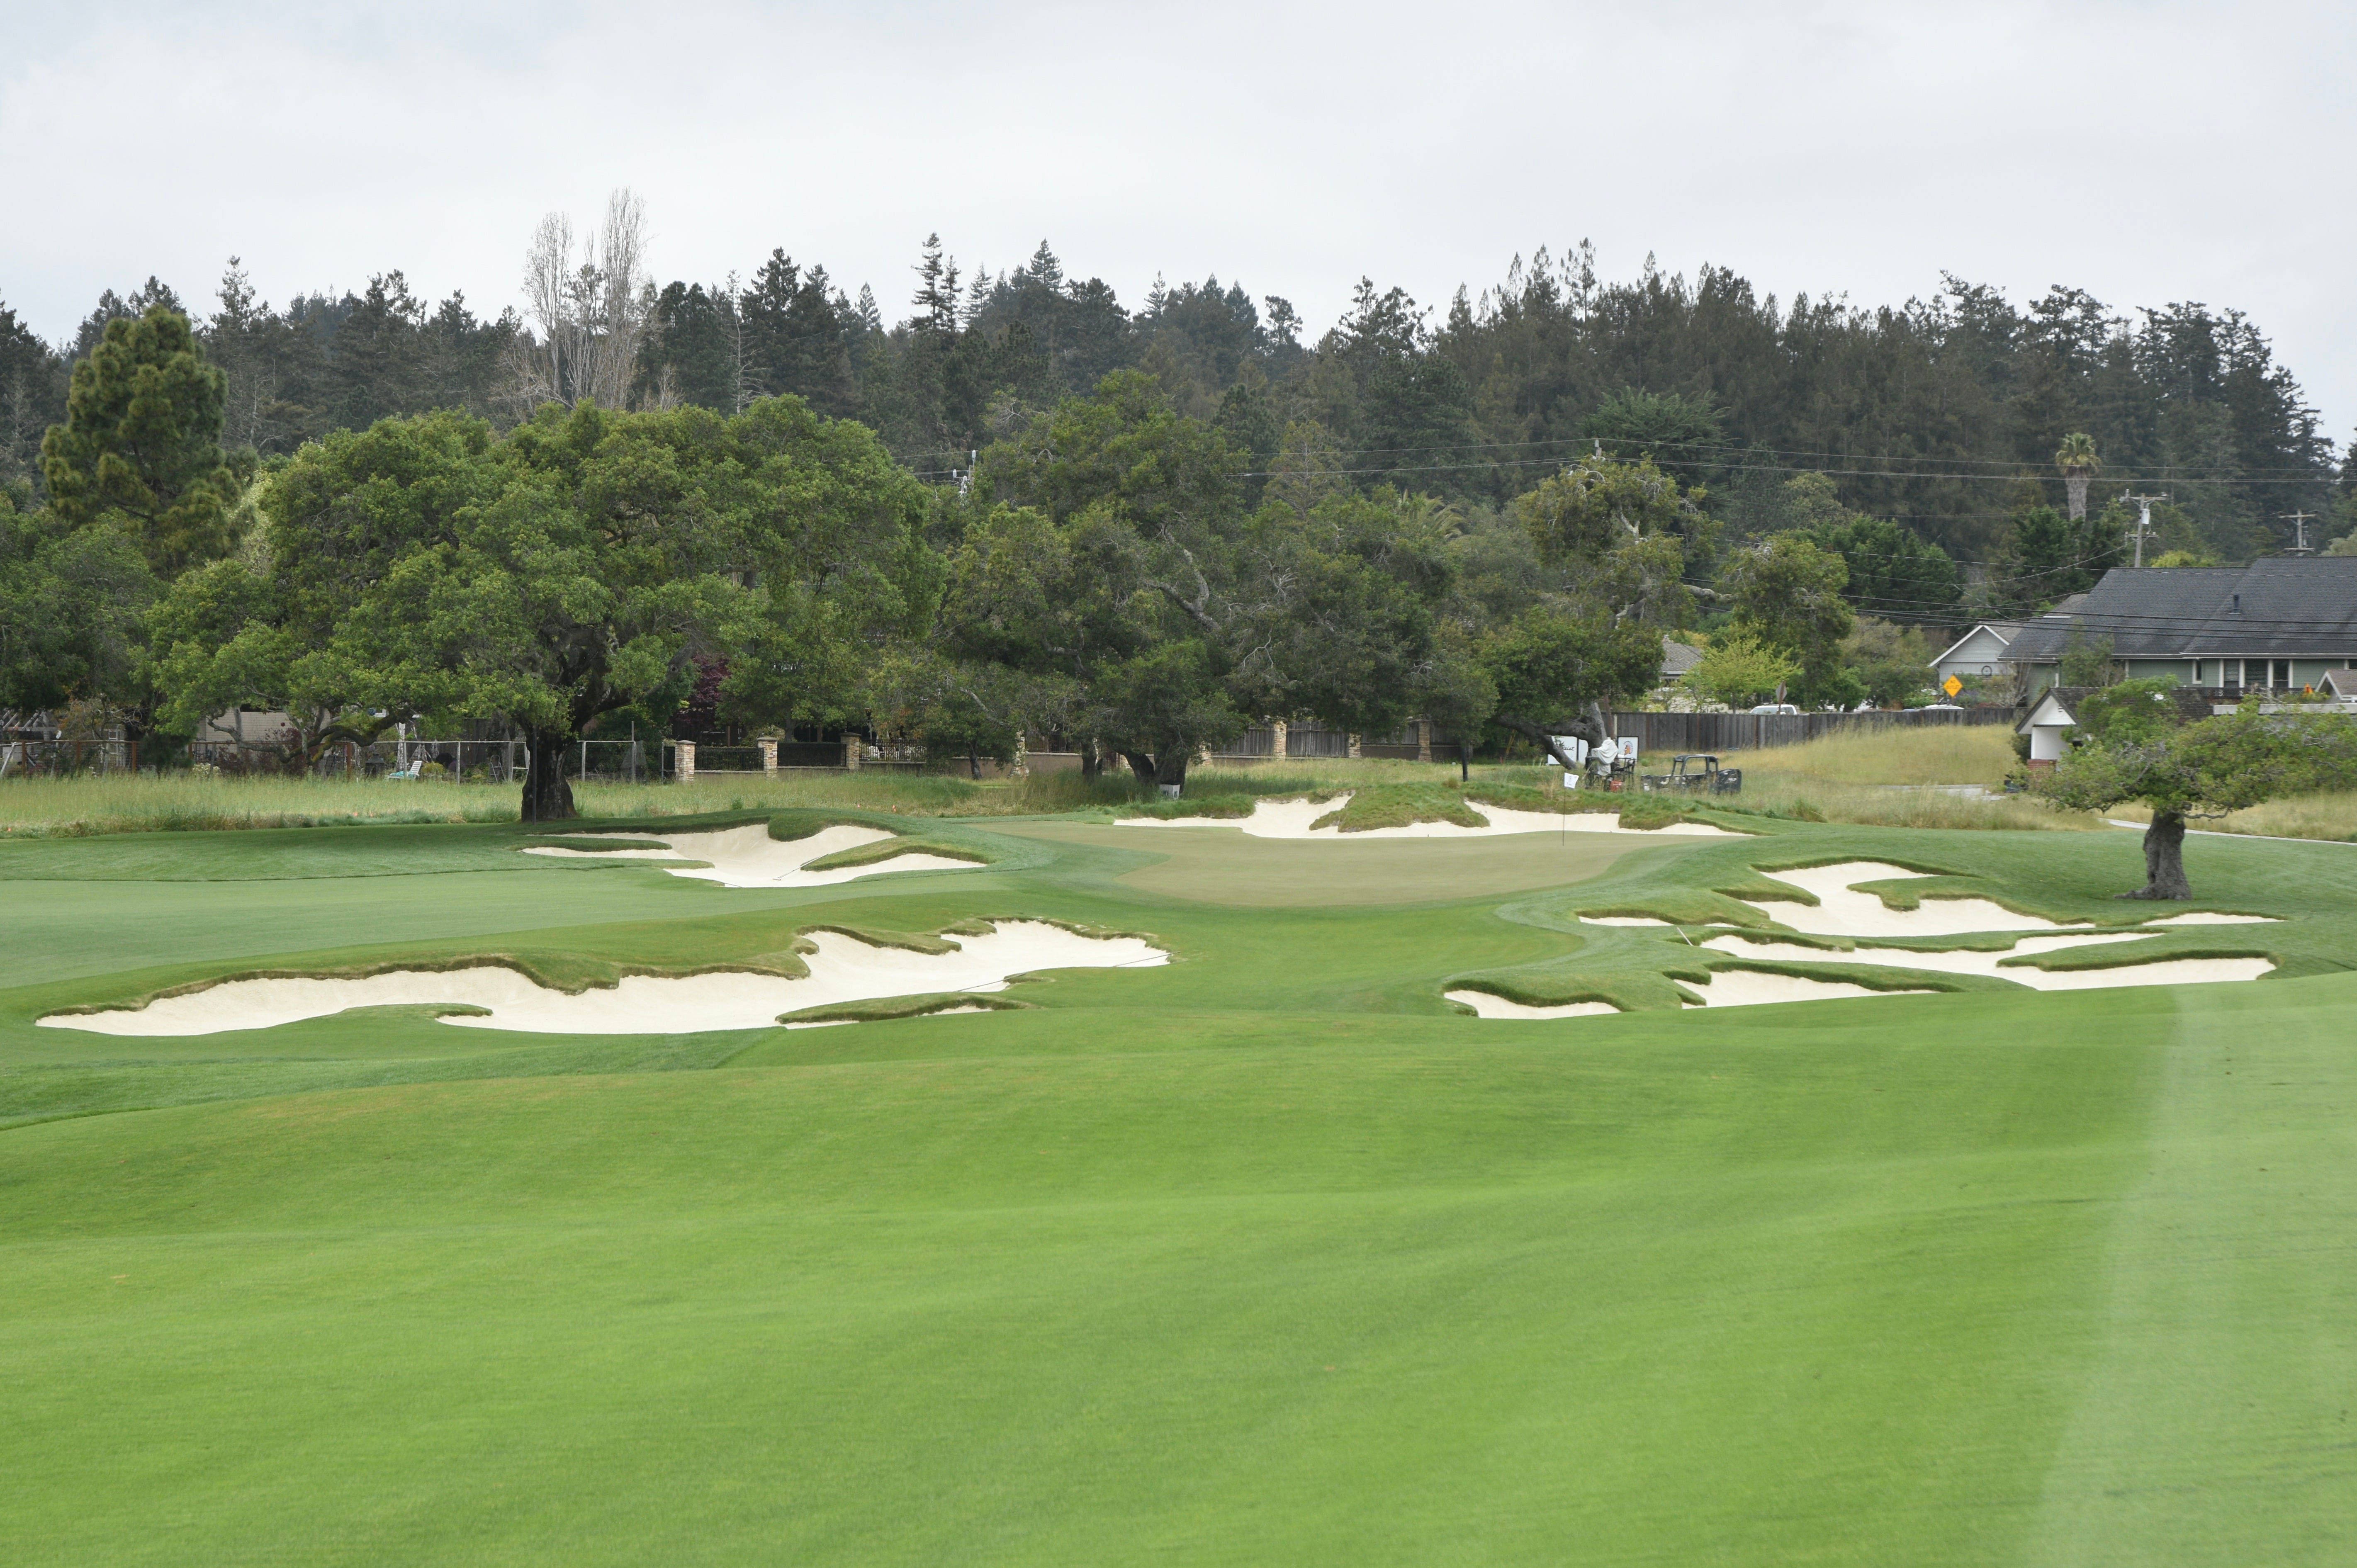
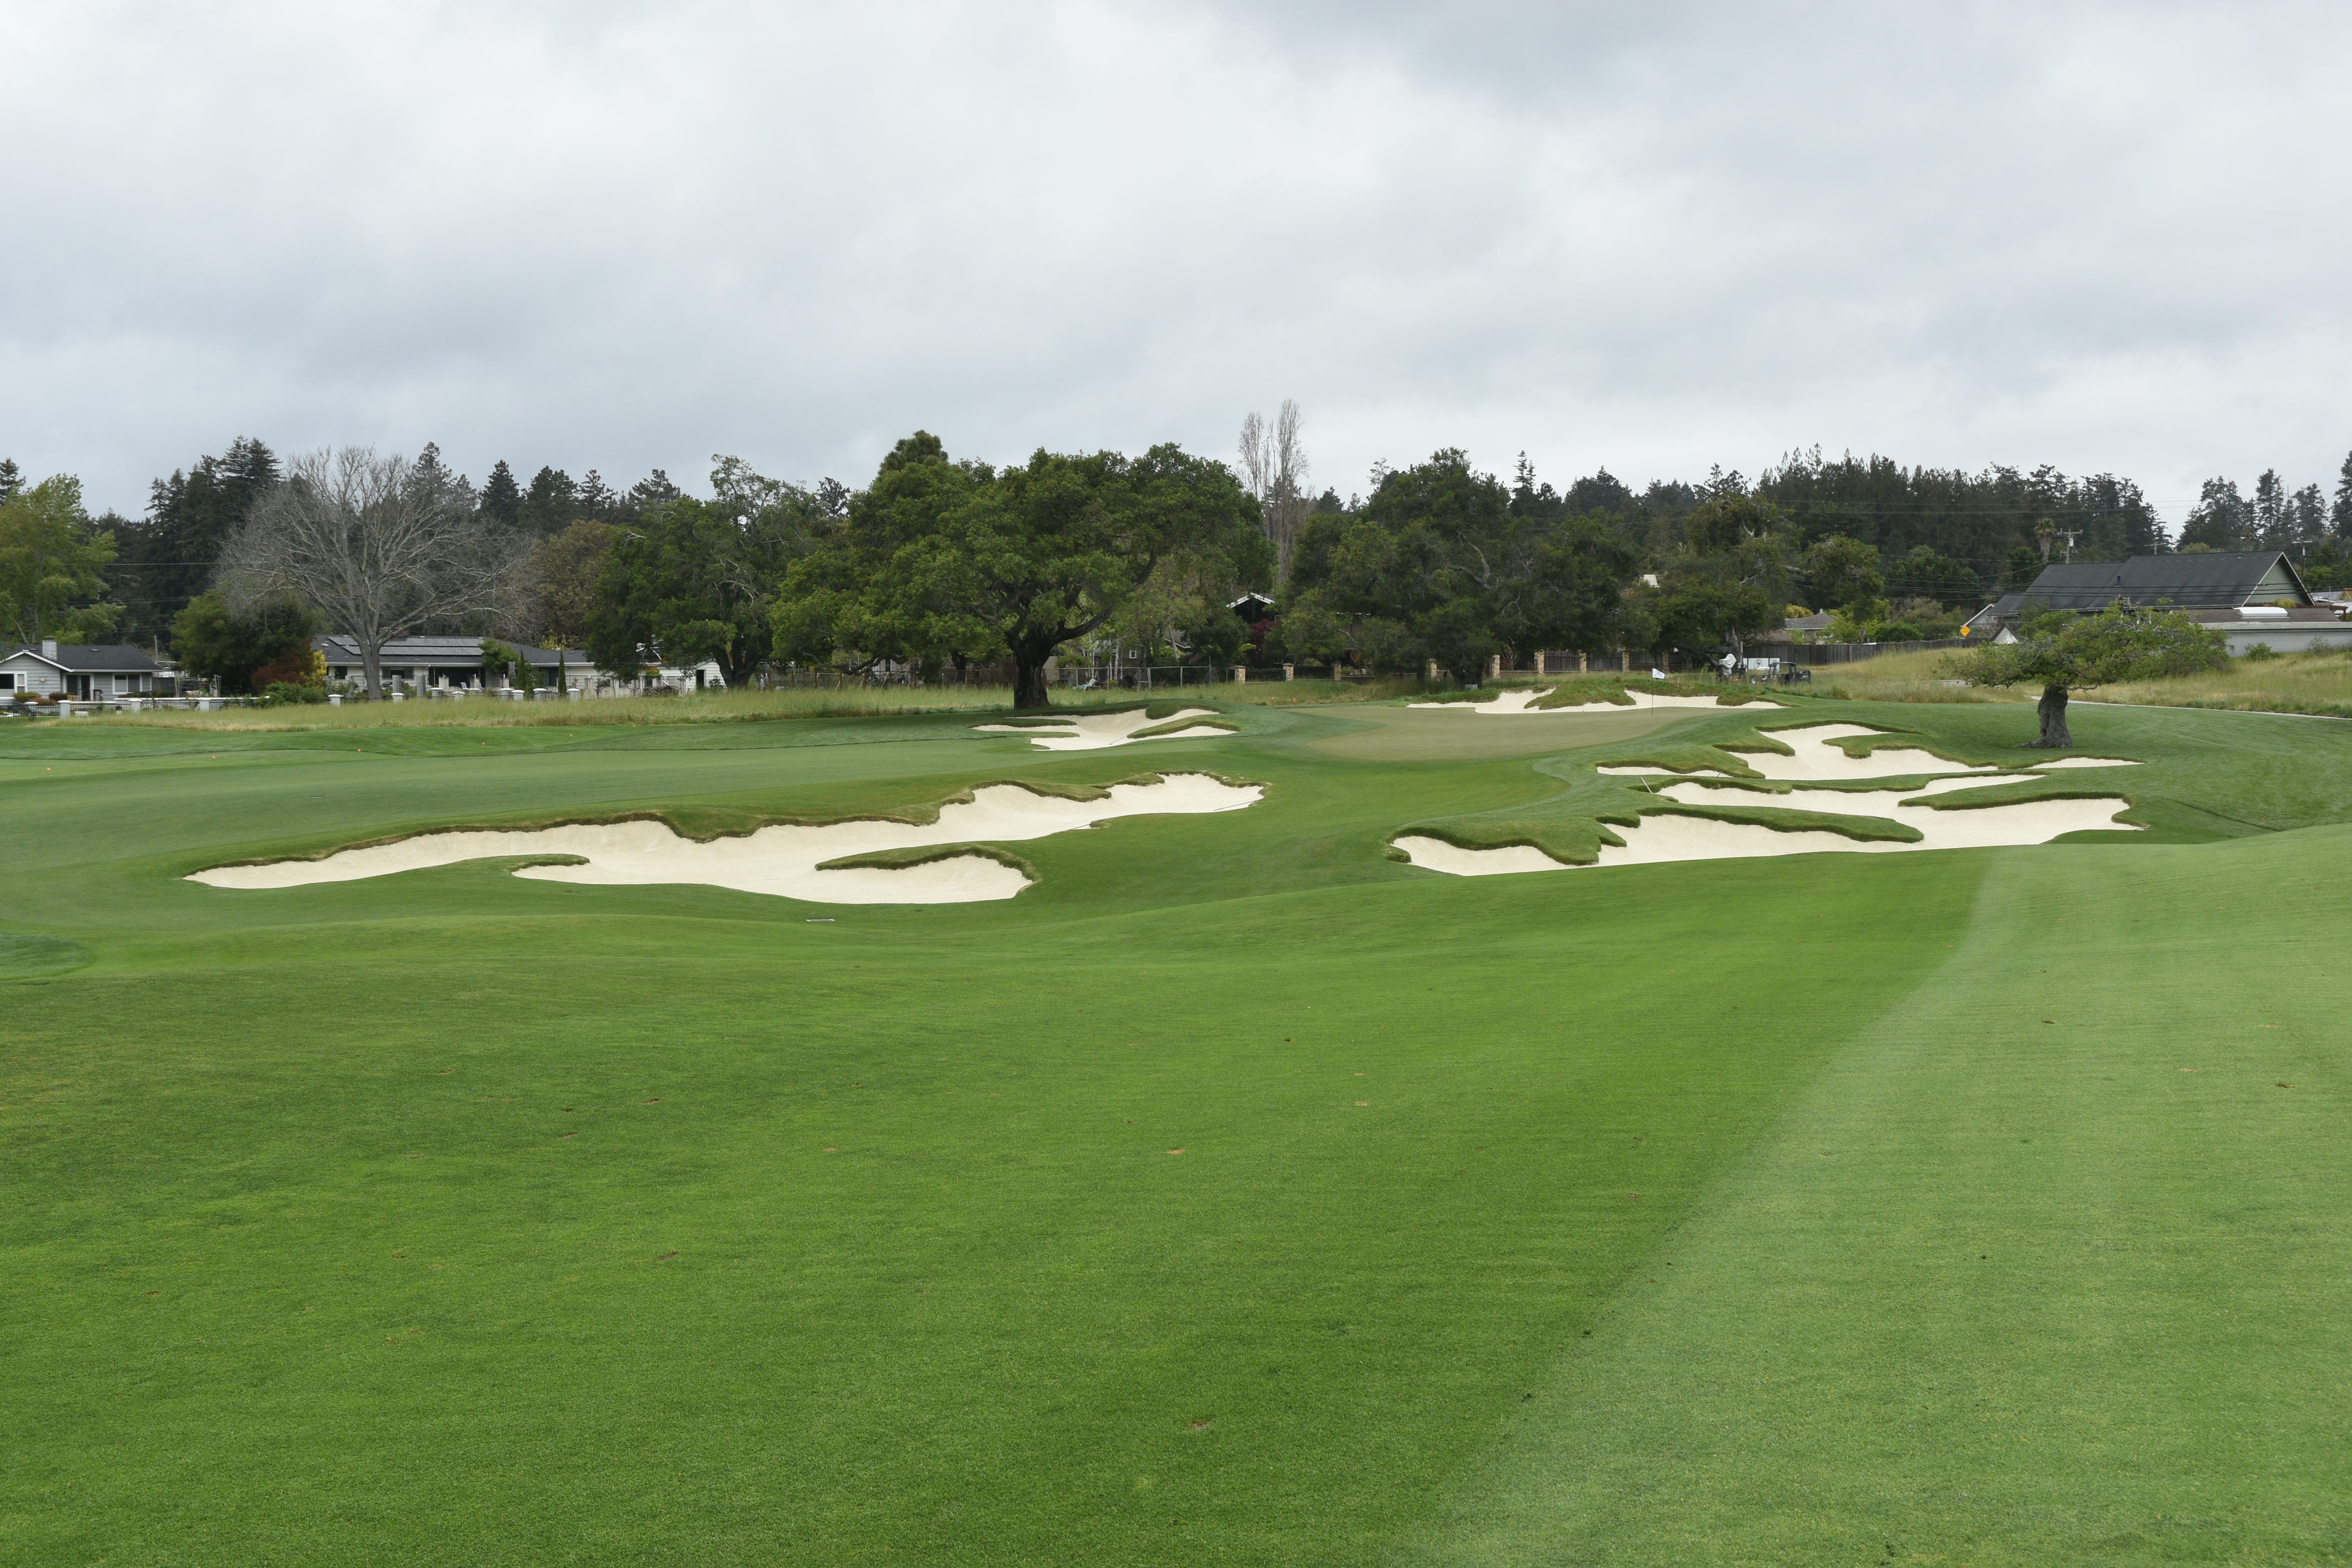
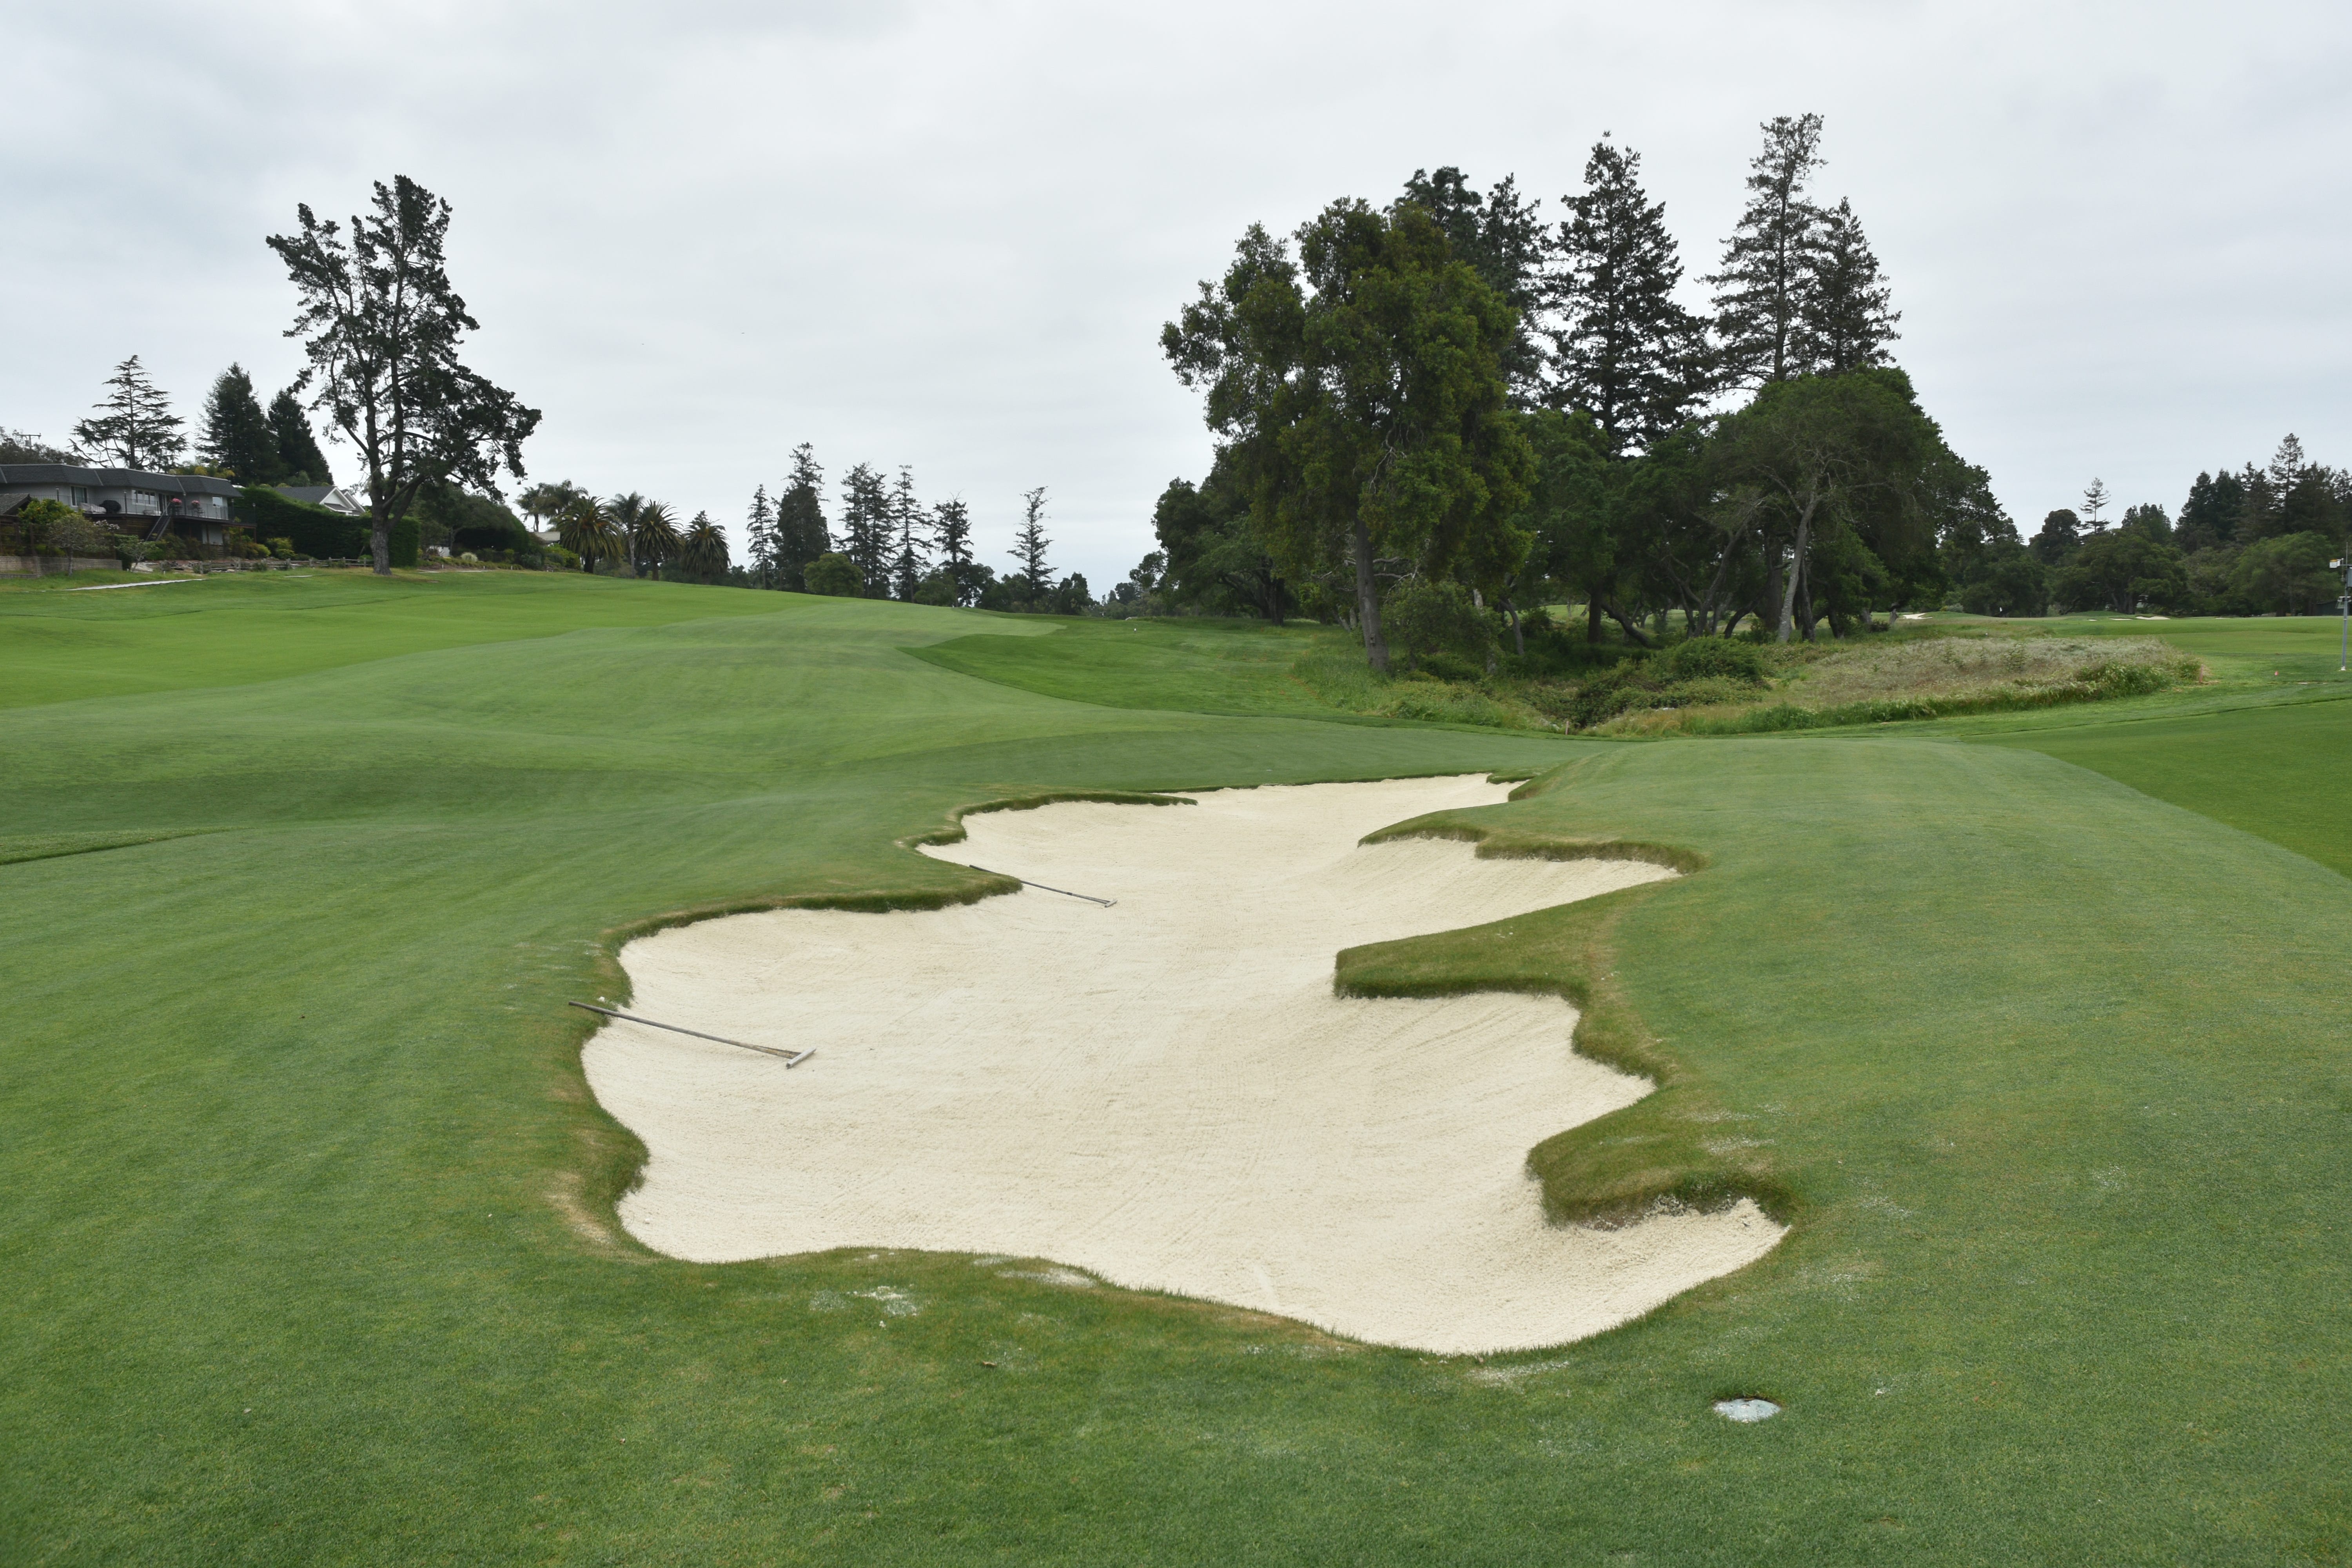
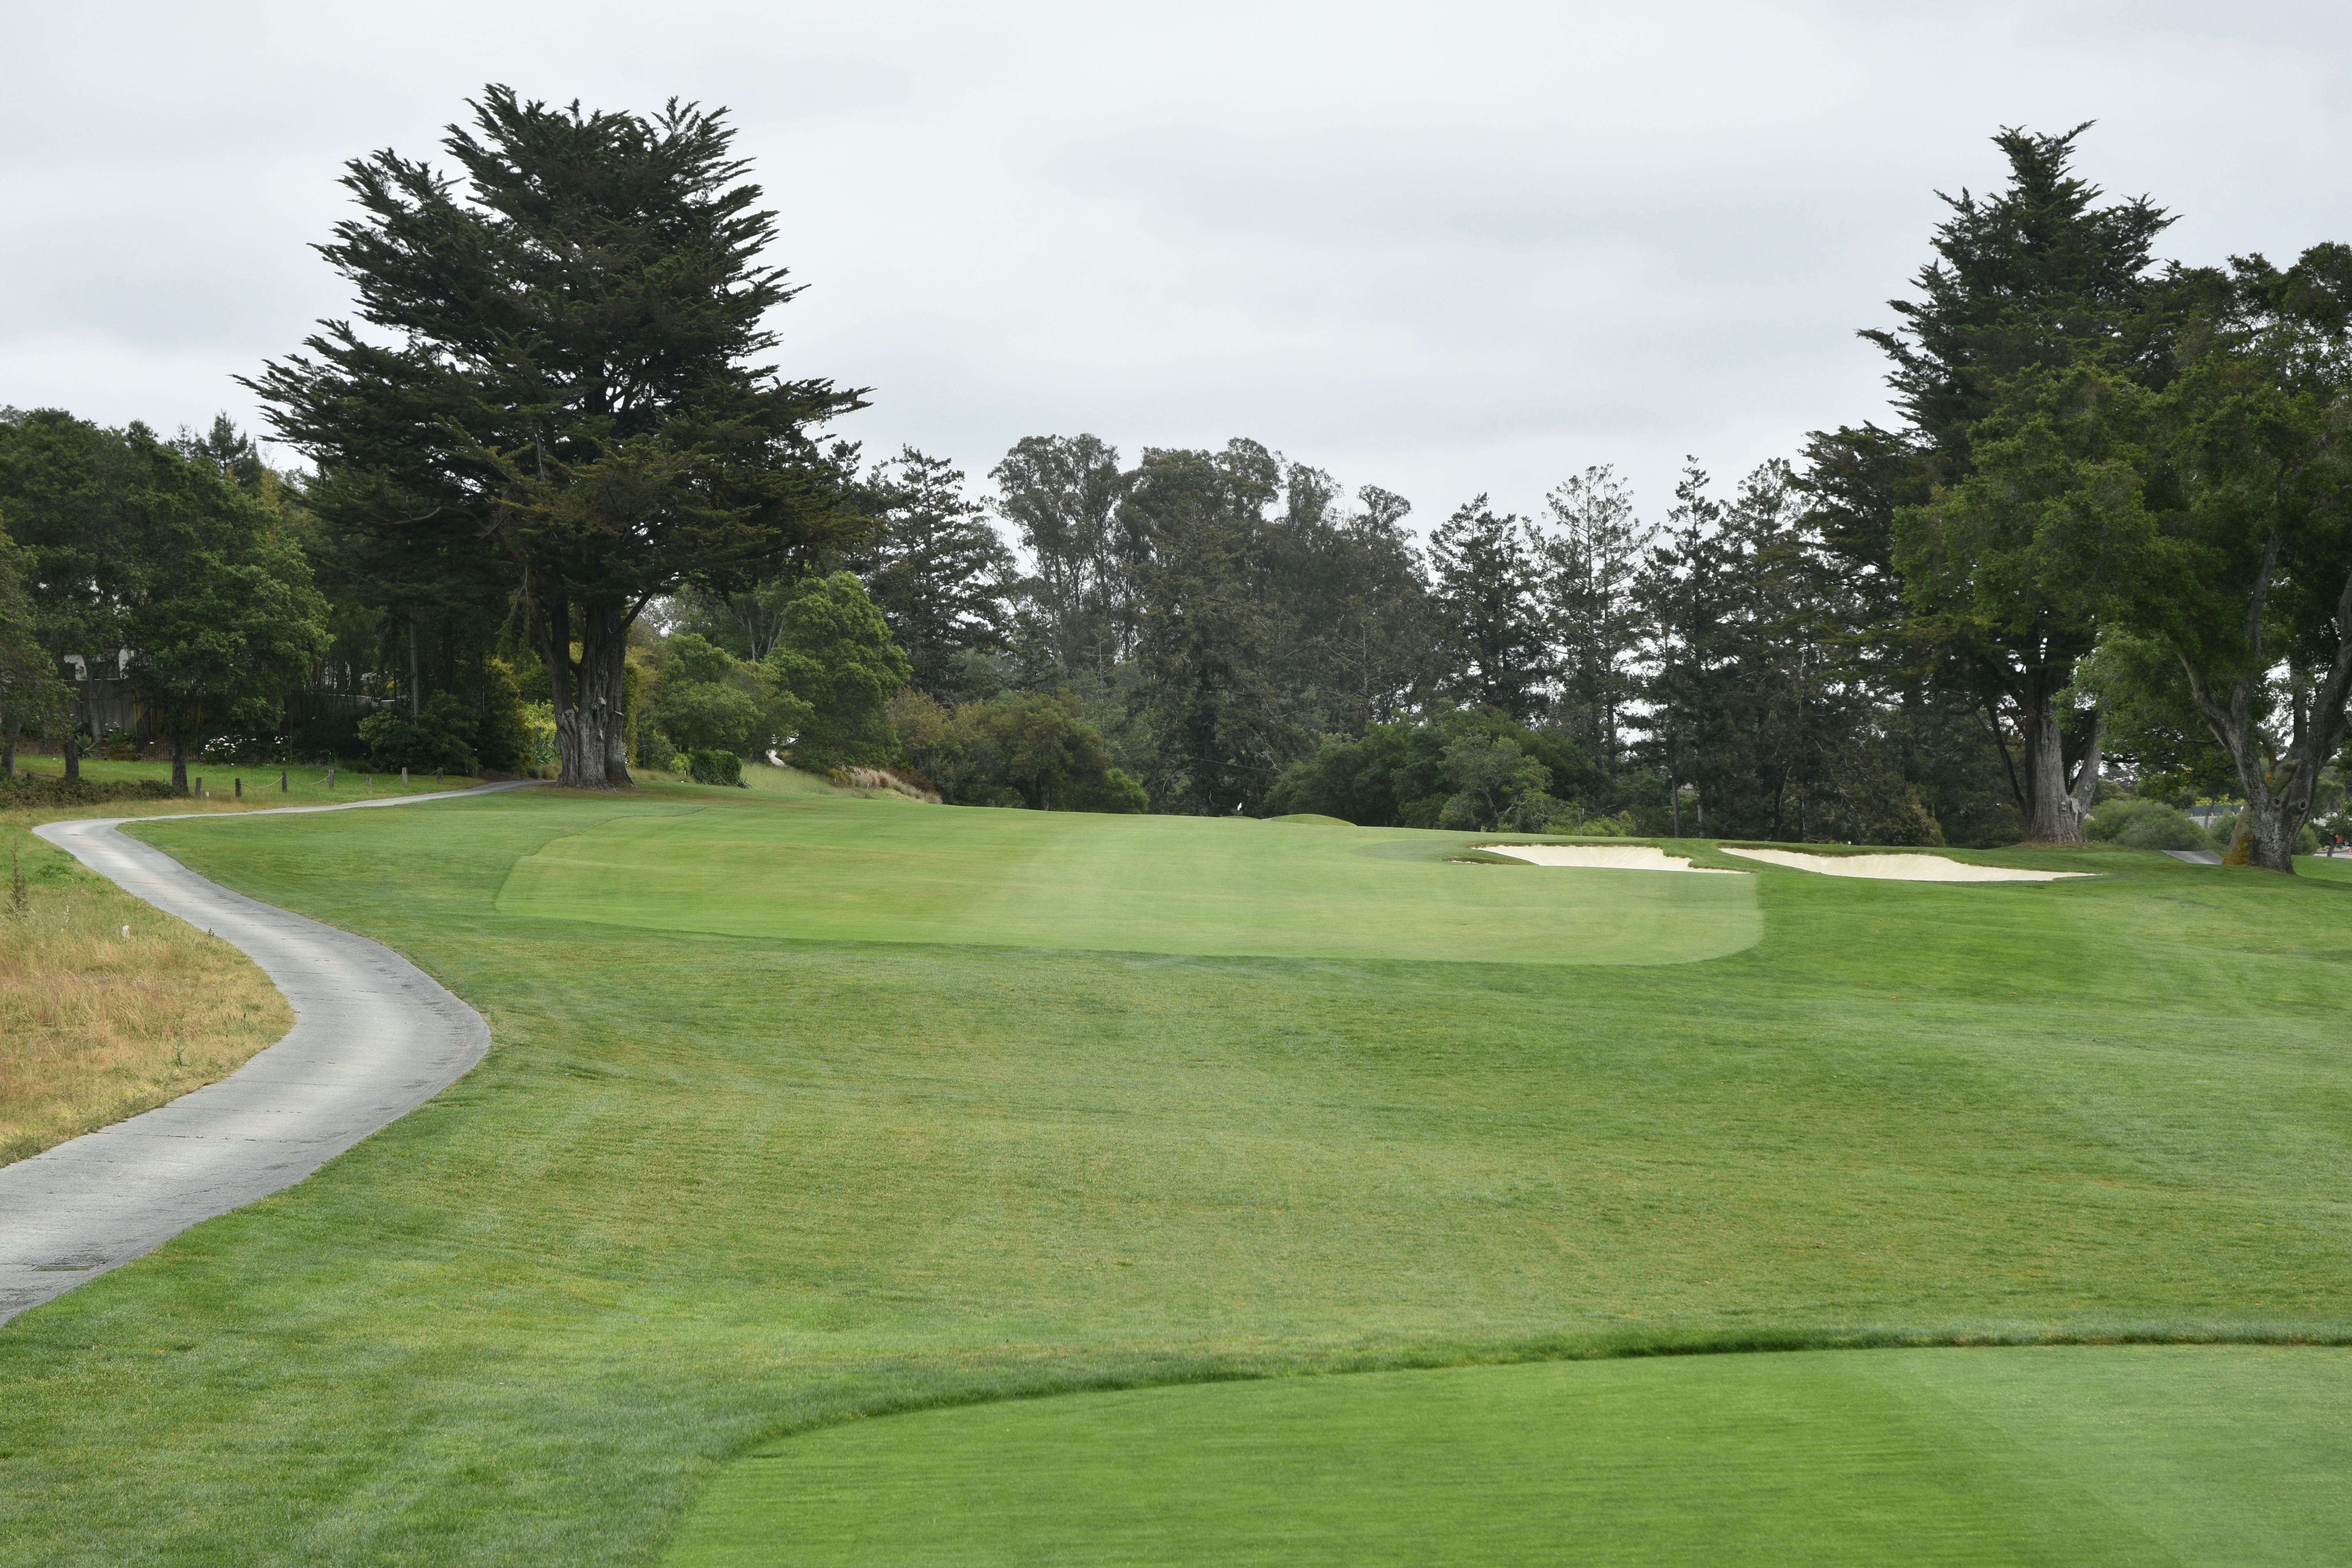
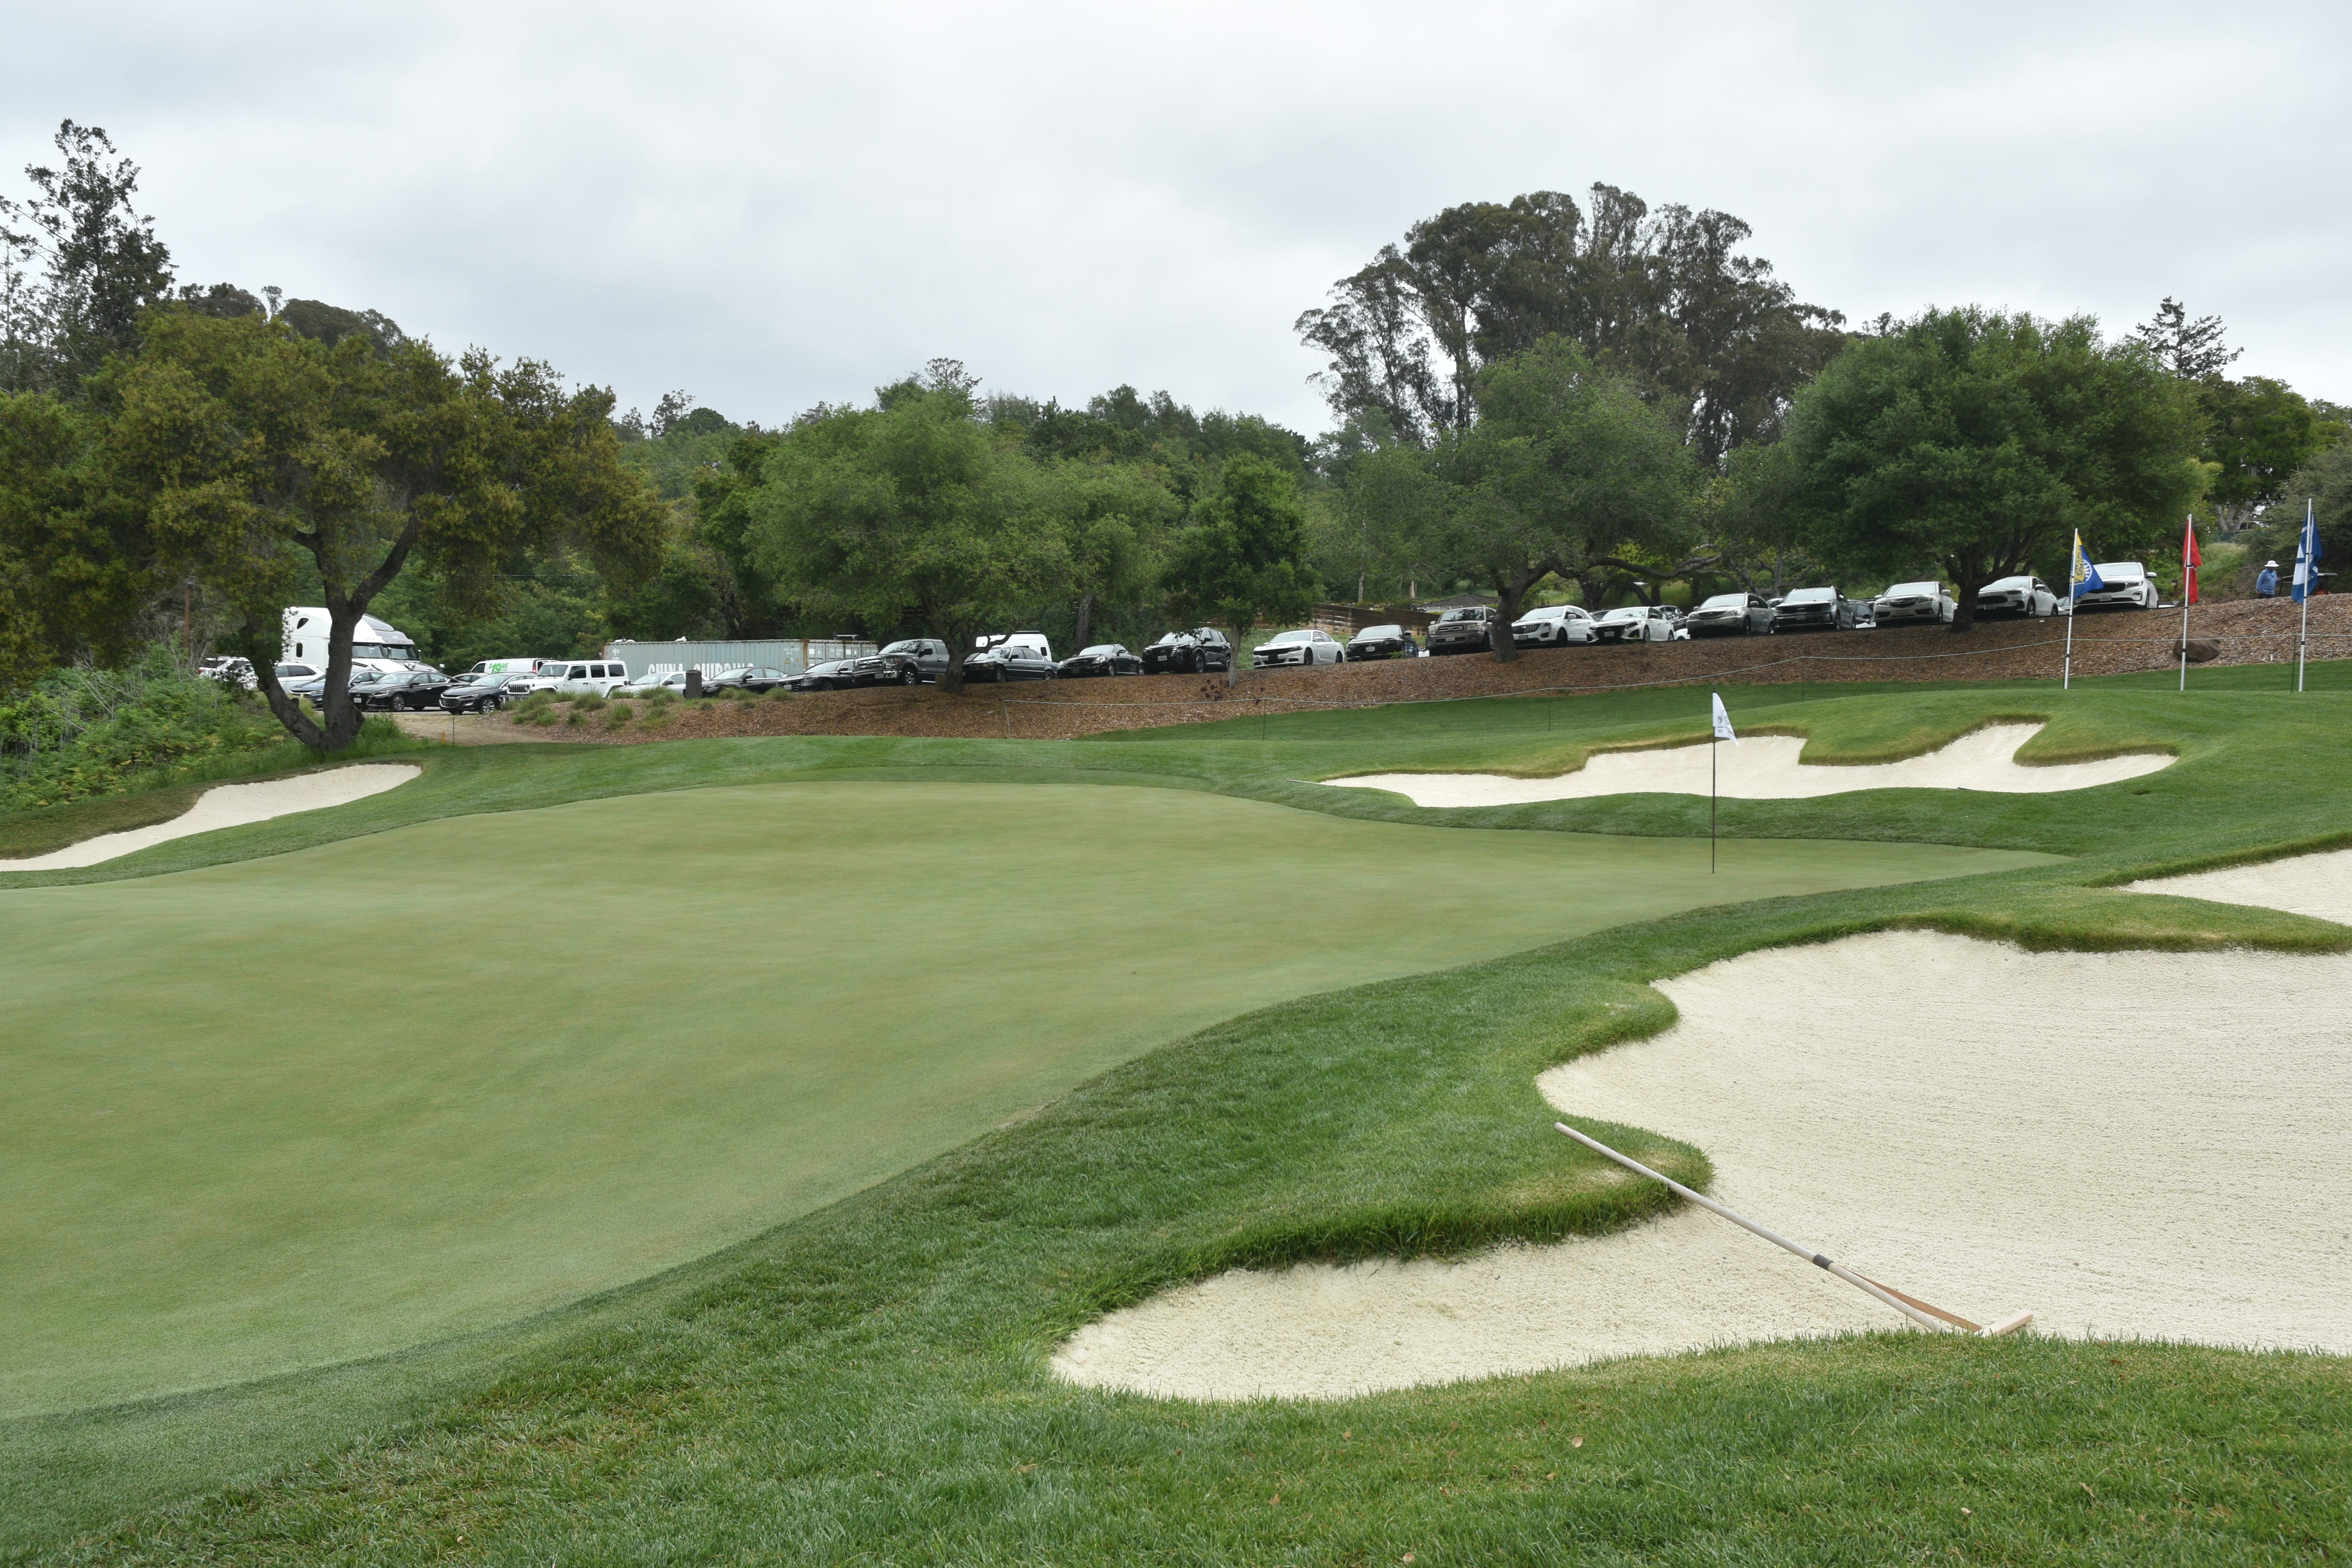
The 12th hole approach from 150 yards away to an angled green with three distinct sections
The 12th hole green is protected in the front by a gully which is a extension of the barranca. It really comes into play if a player is not in the fairway for the approach. While the gully has been cleaned out, the maintenance staff will most likely grow this area out to make it a true hazard
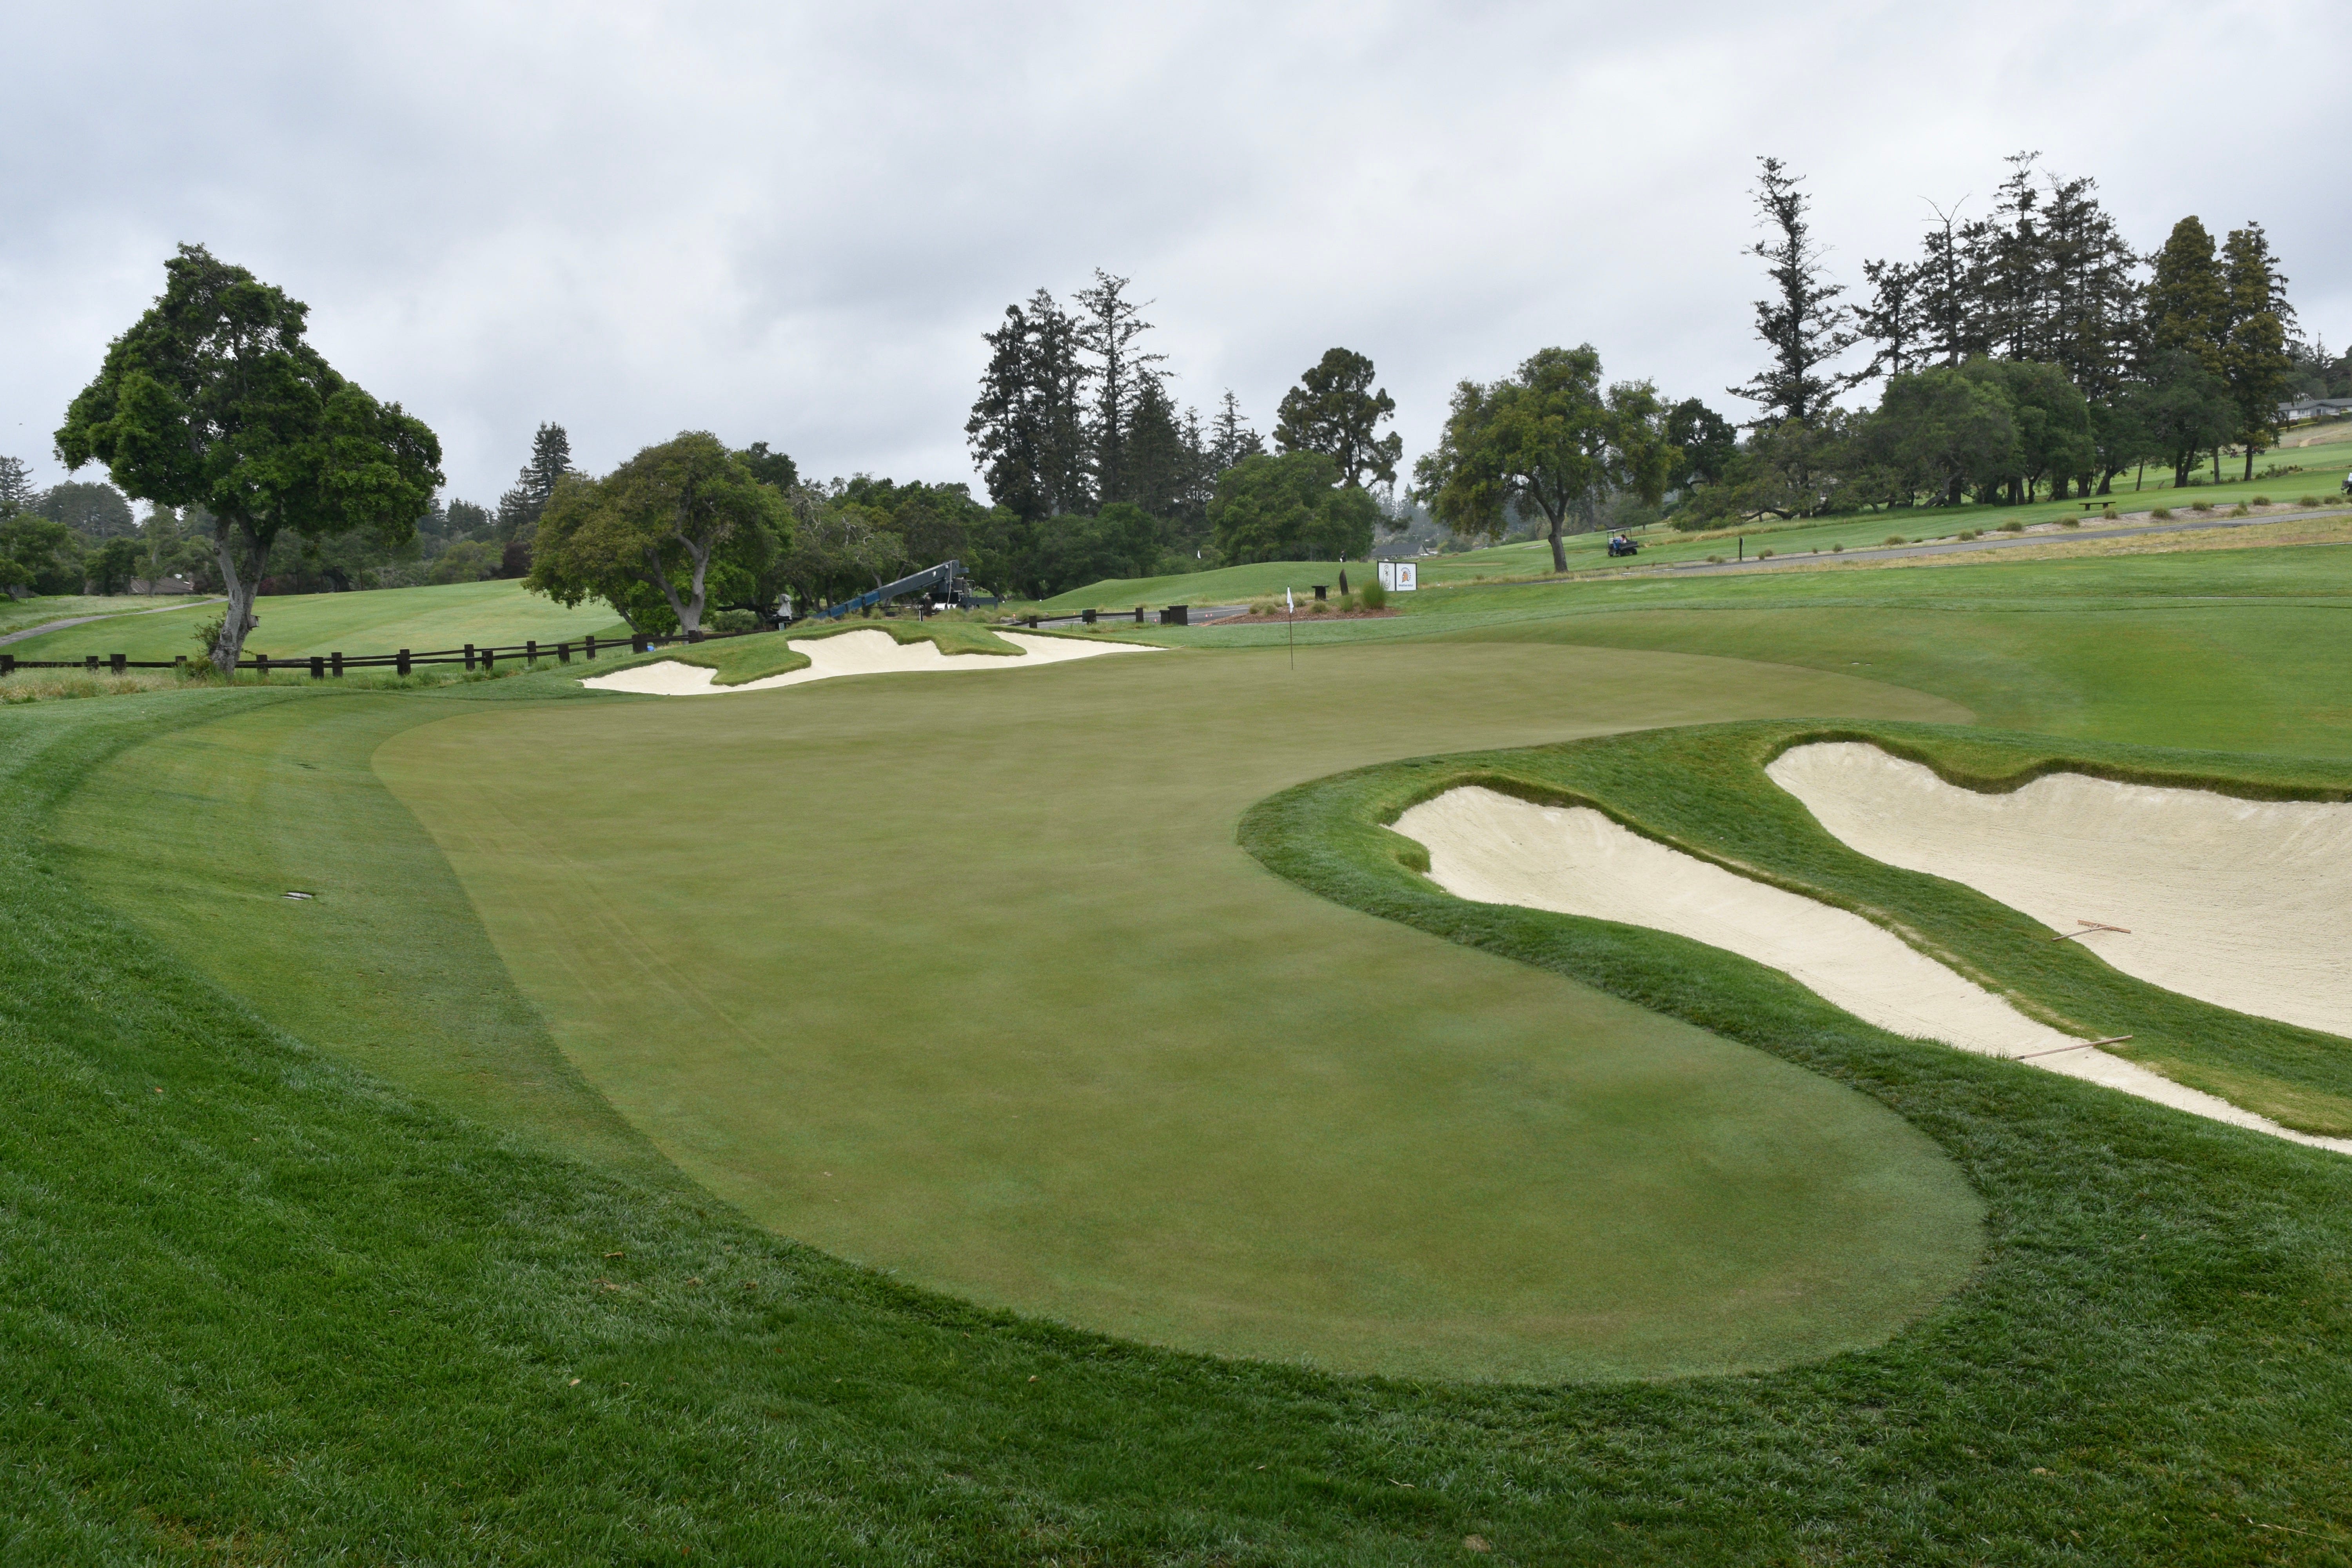
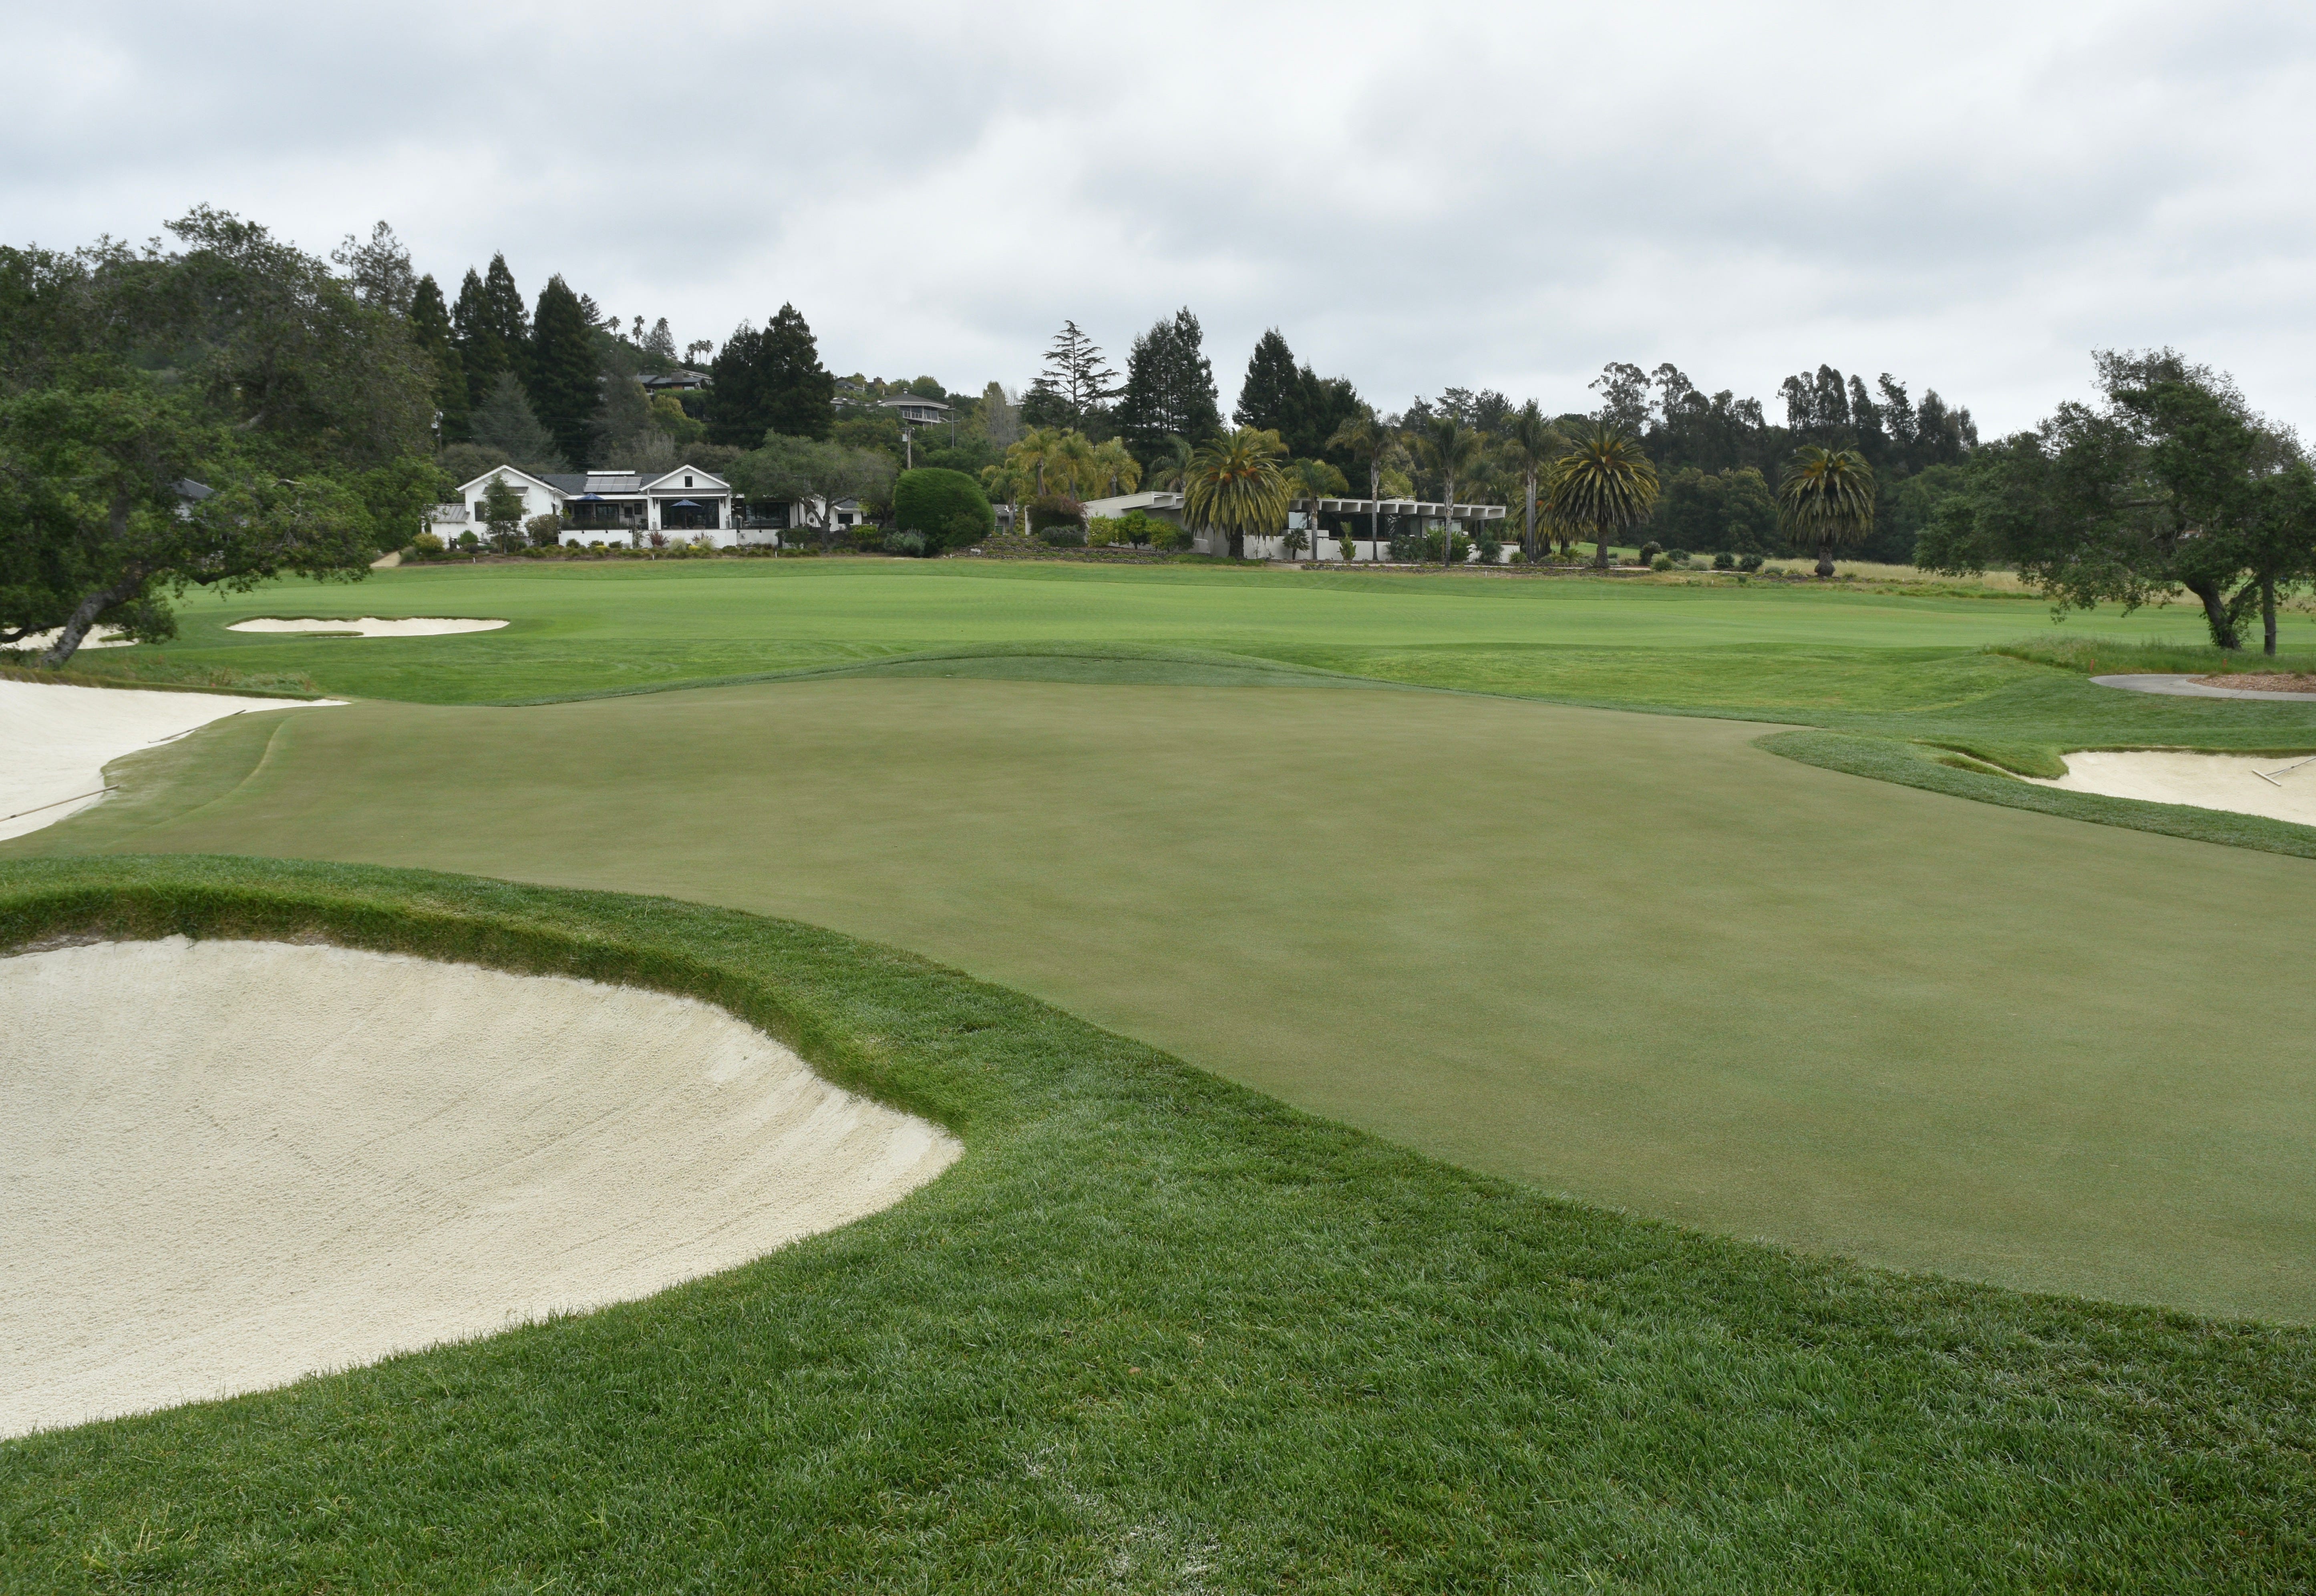
The 12th hole green viewed from the front right — the green has three distinct sections with narrow tongues that can be used to tuck hole locations
The left green side bunker of the 12th hole
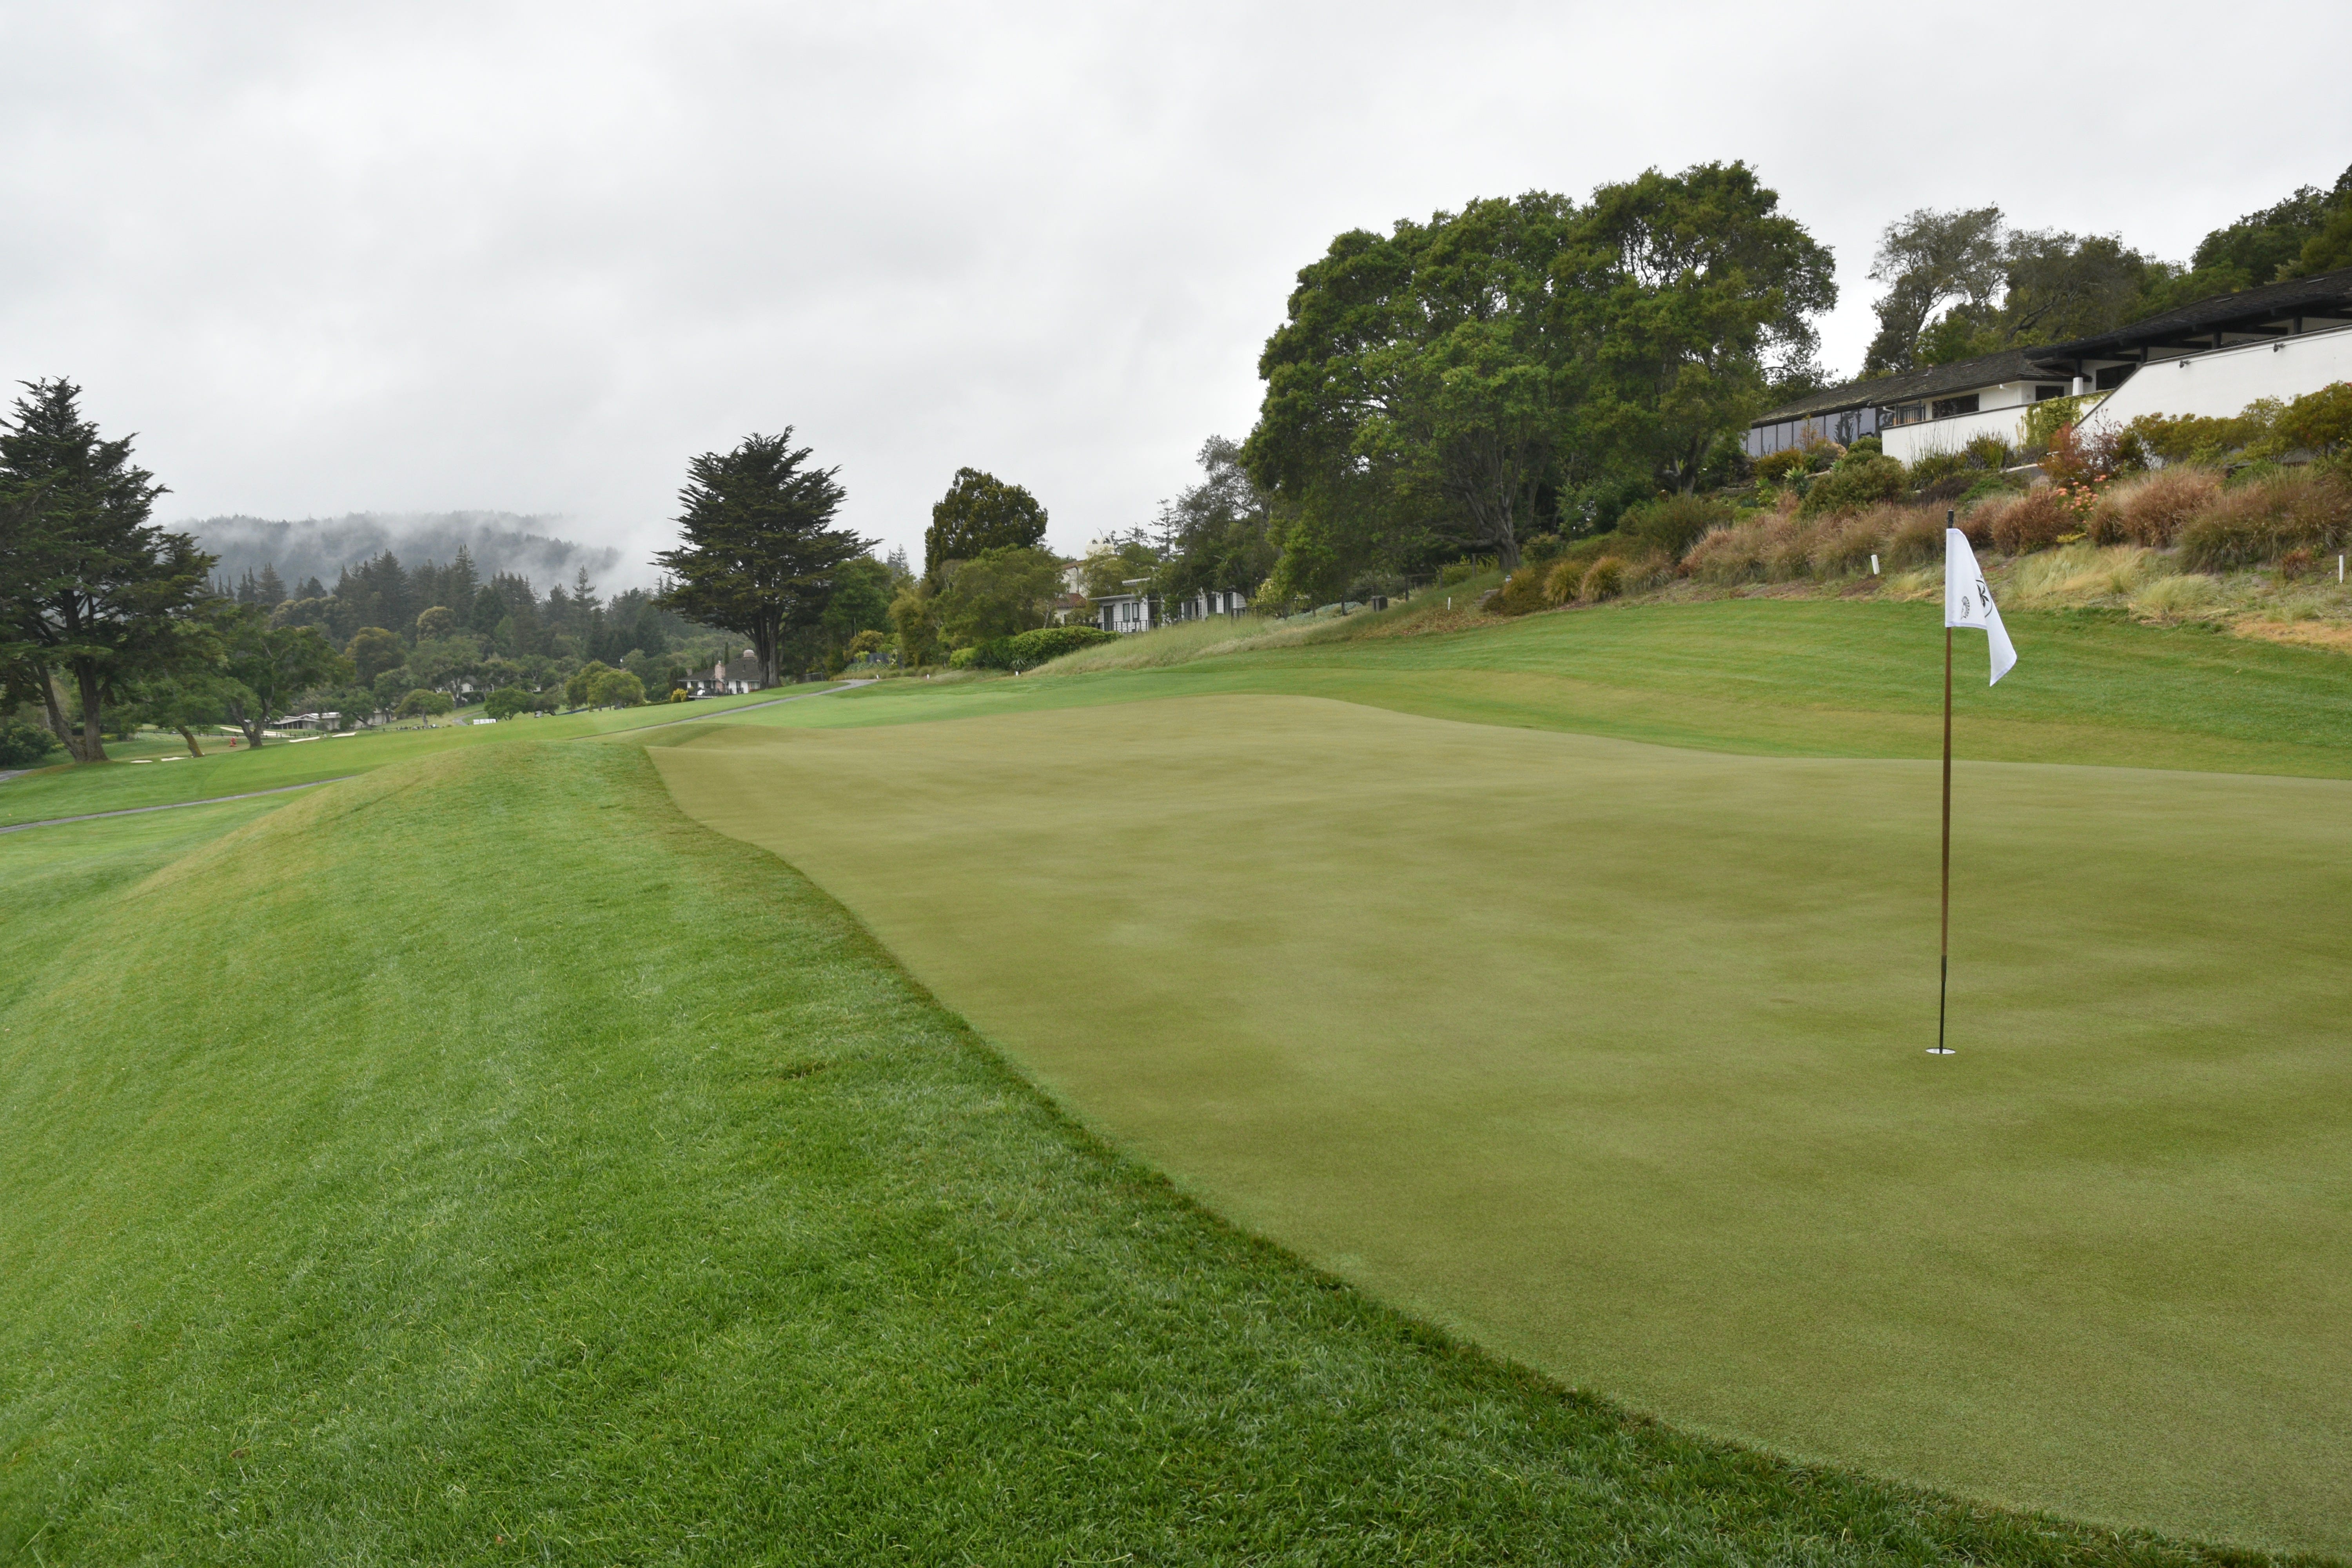
The 12th hole green viewed from the front
The right green side bunkers of the 12th hole
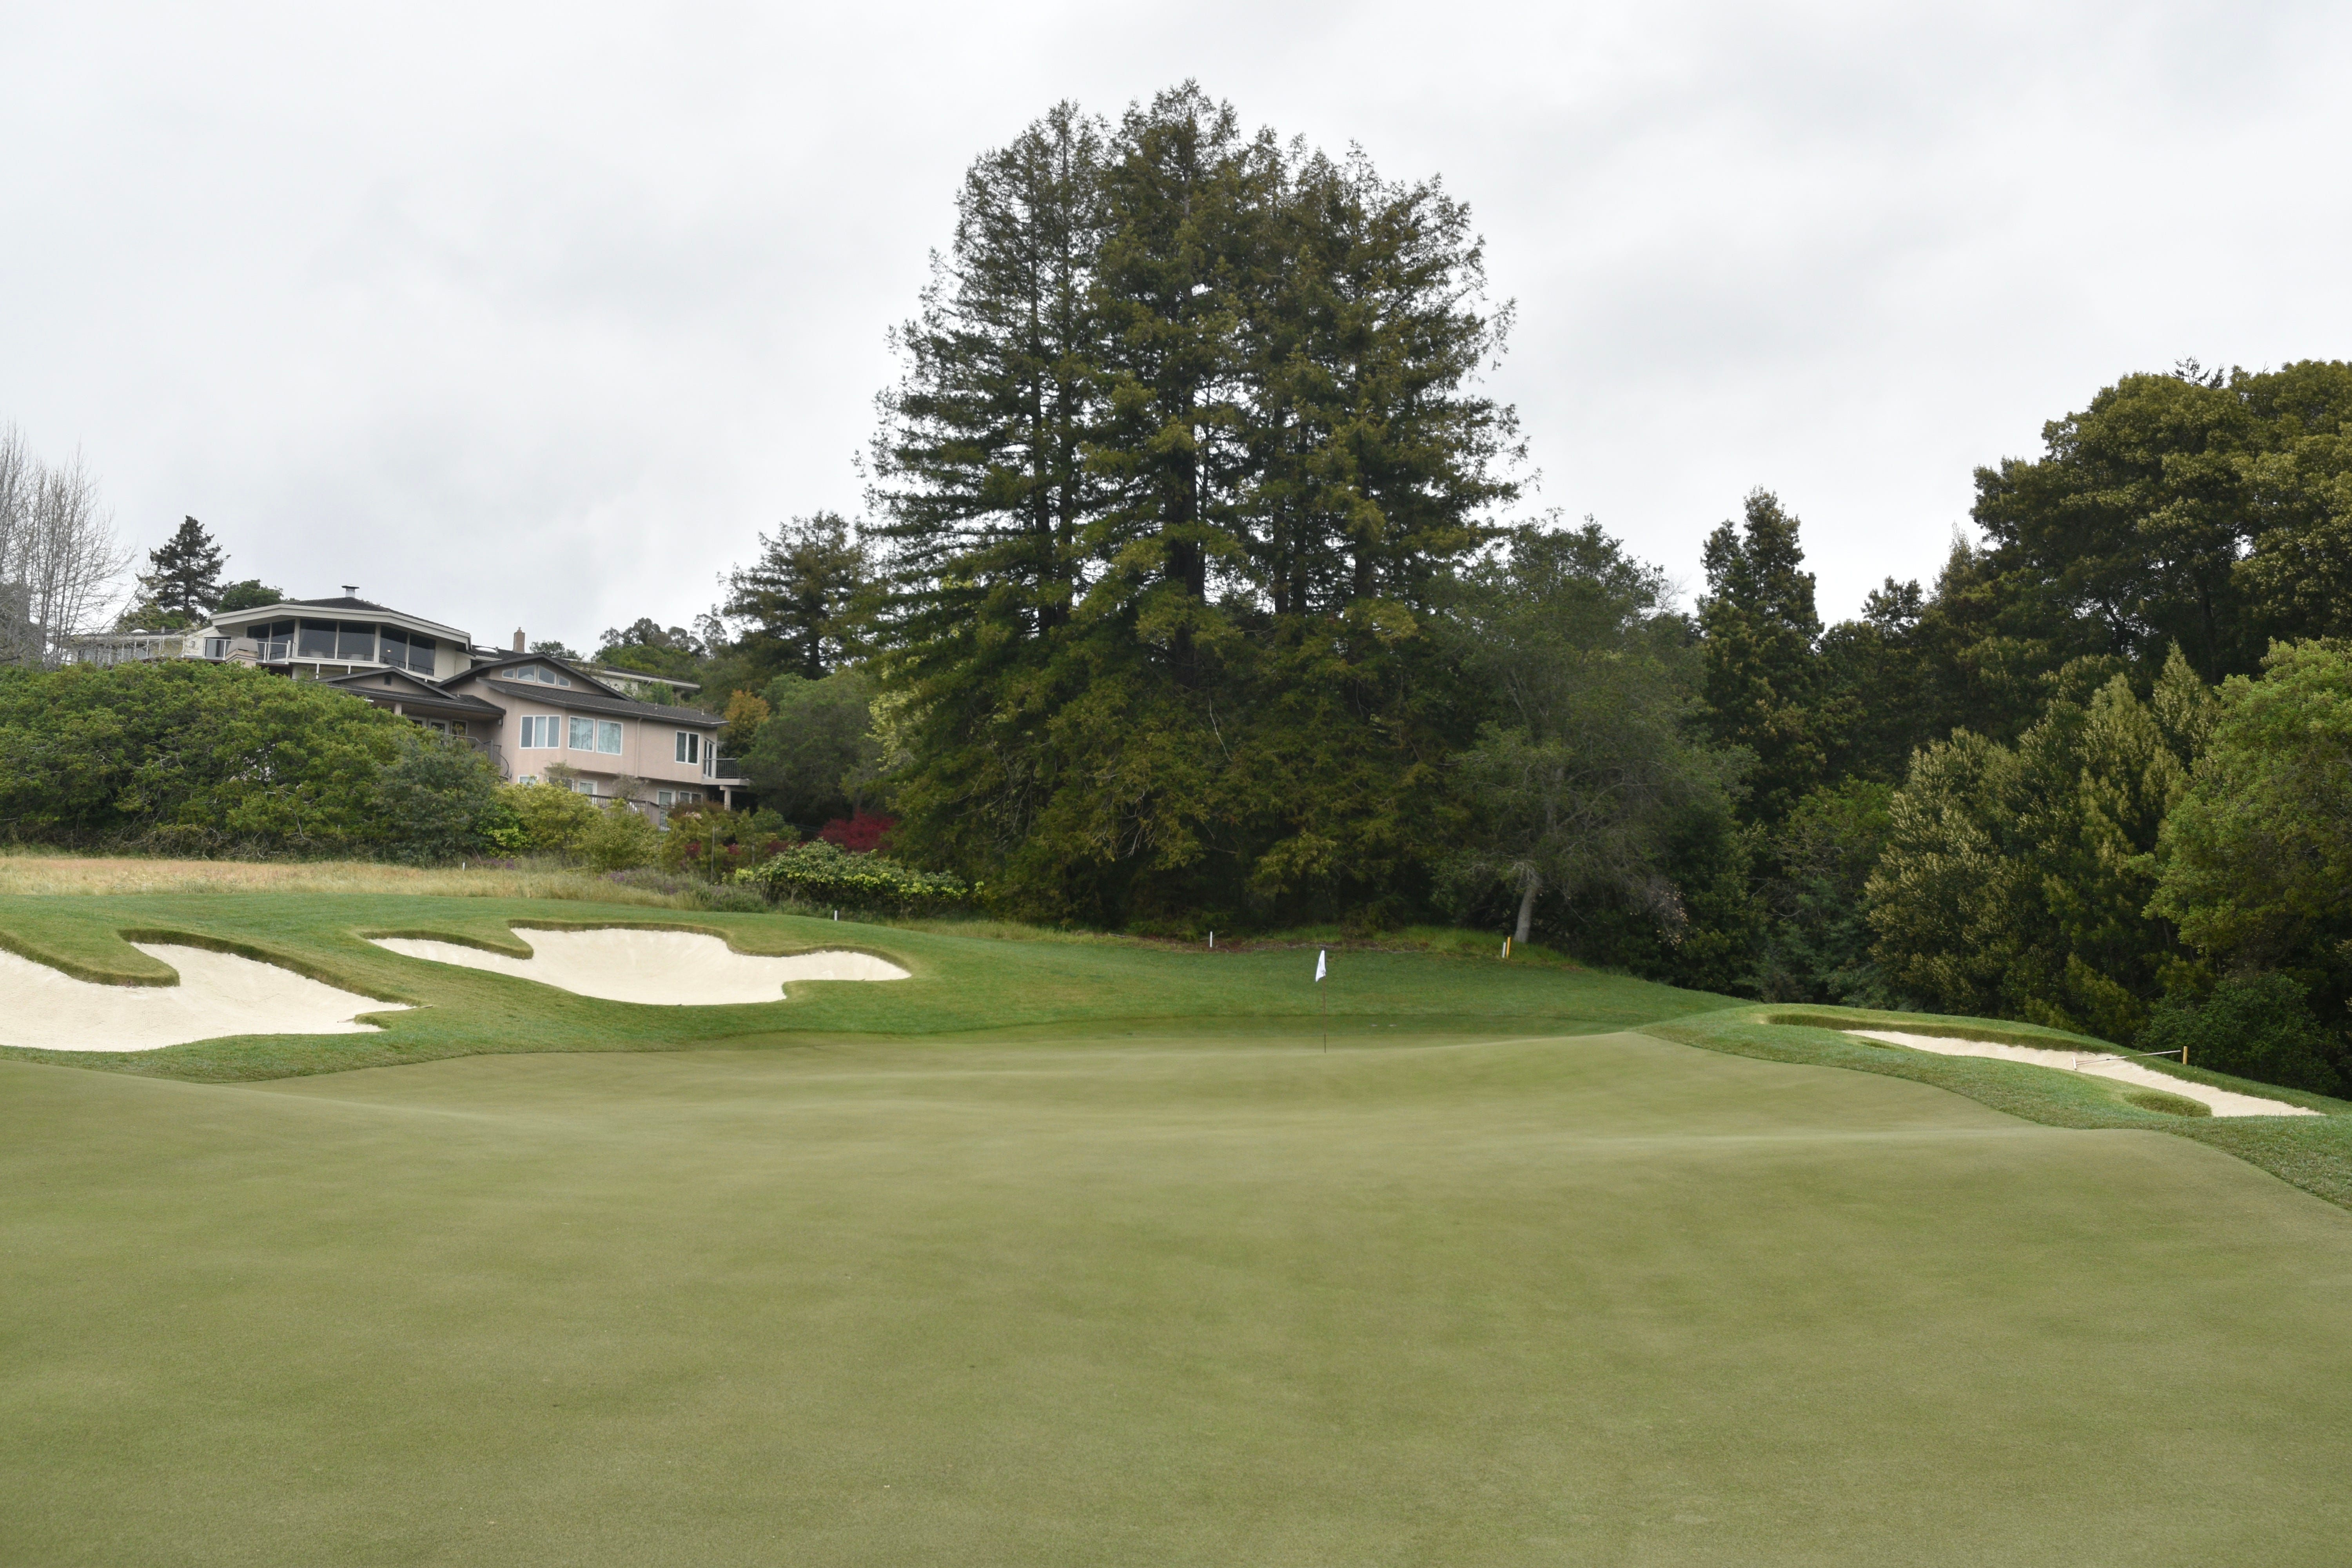
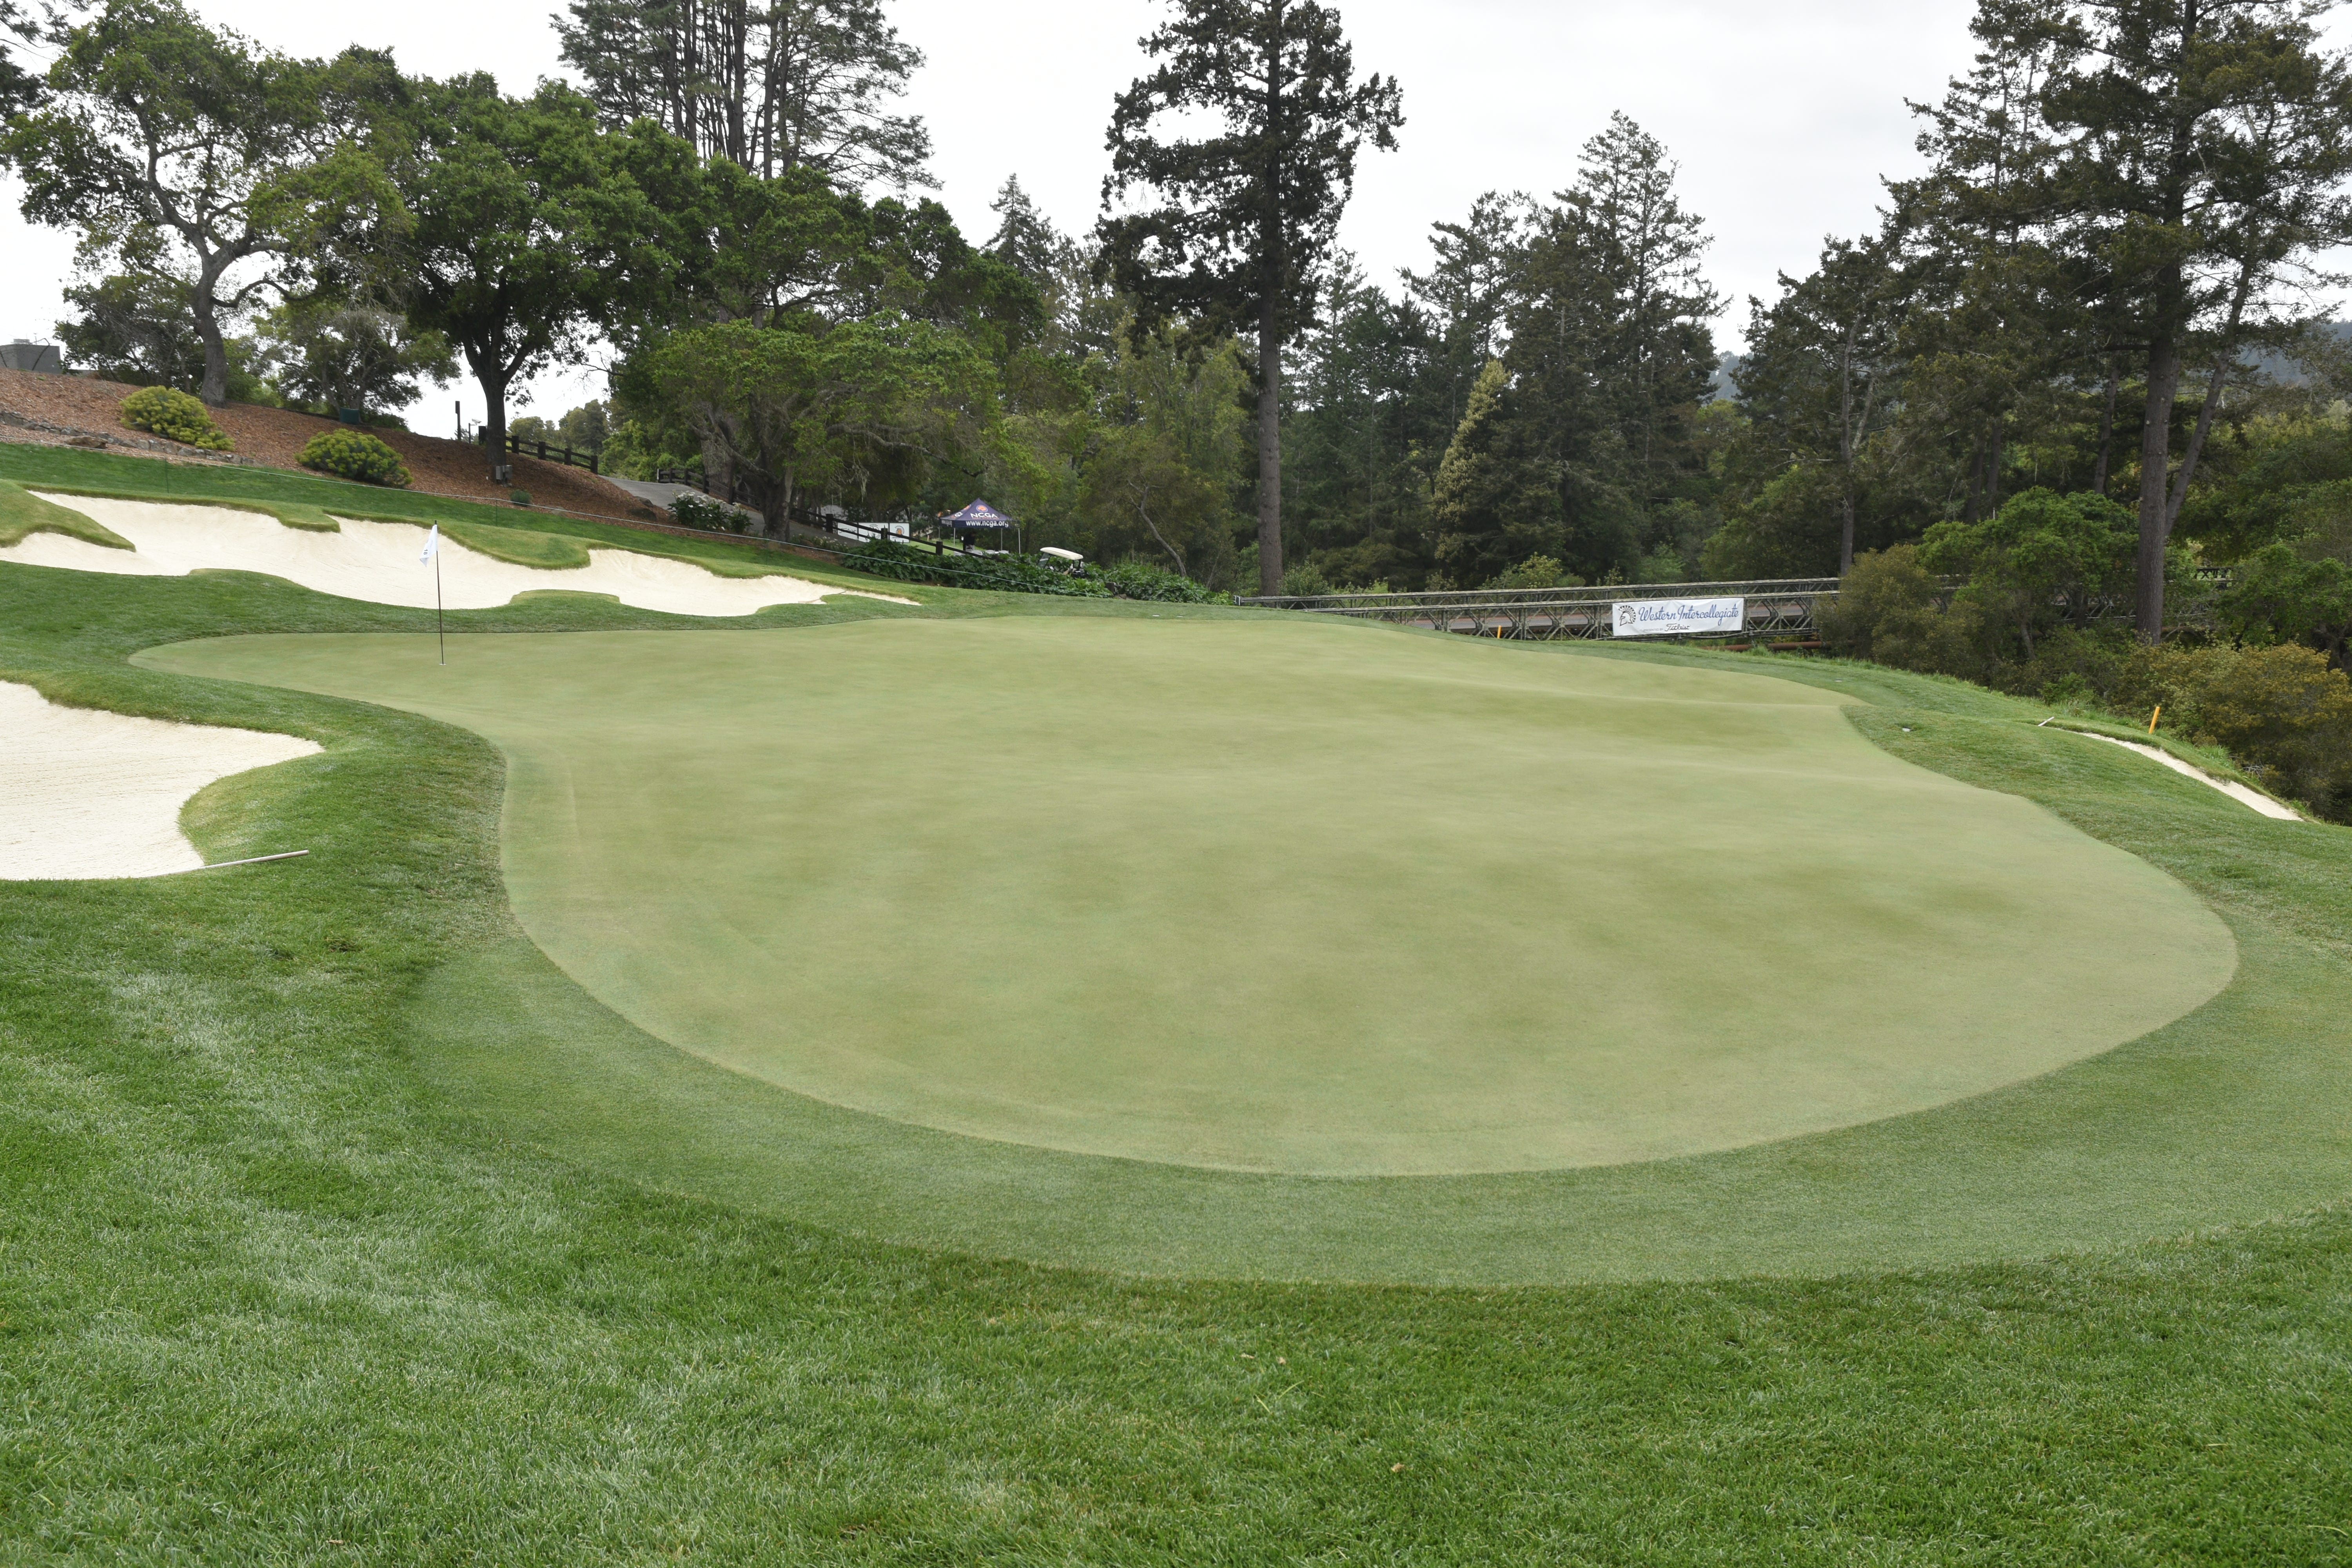
The toughest hole location to access on the 12th hole green is the back left tongue
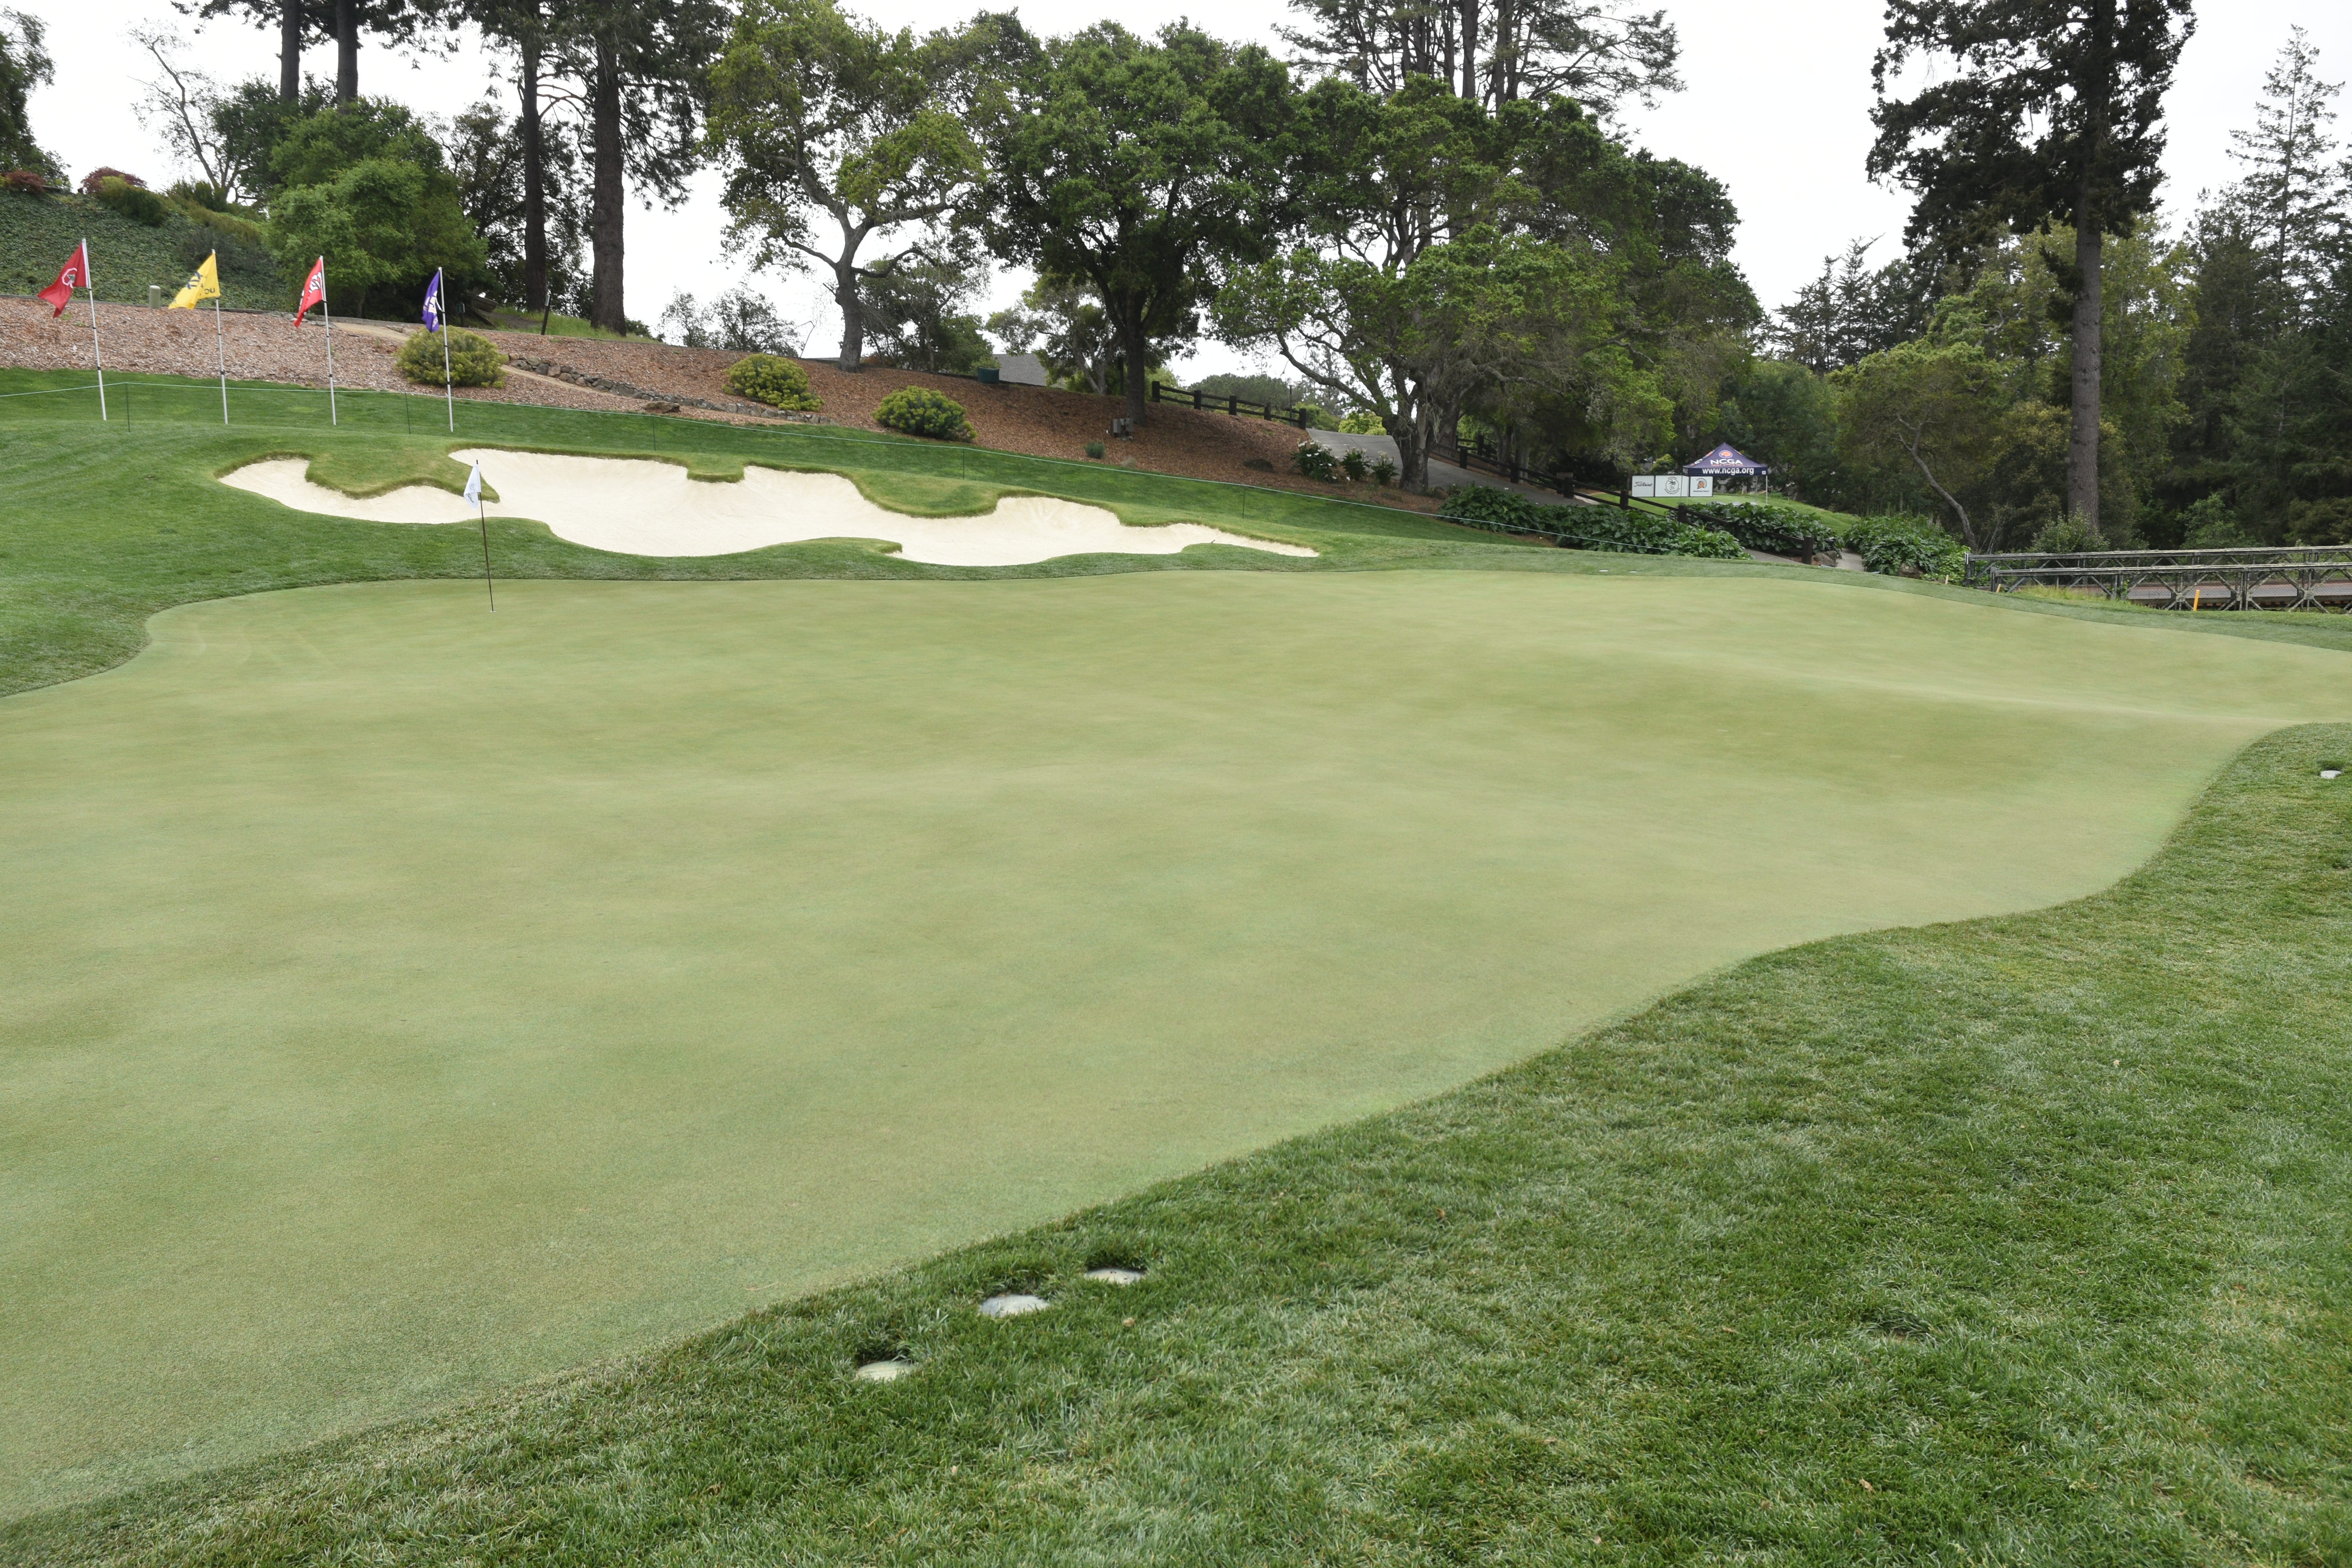
The back left tongue section of the 12th hole green viewed from the back left
The back right tongue section of the 12th hole green
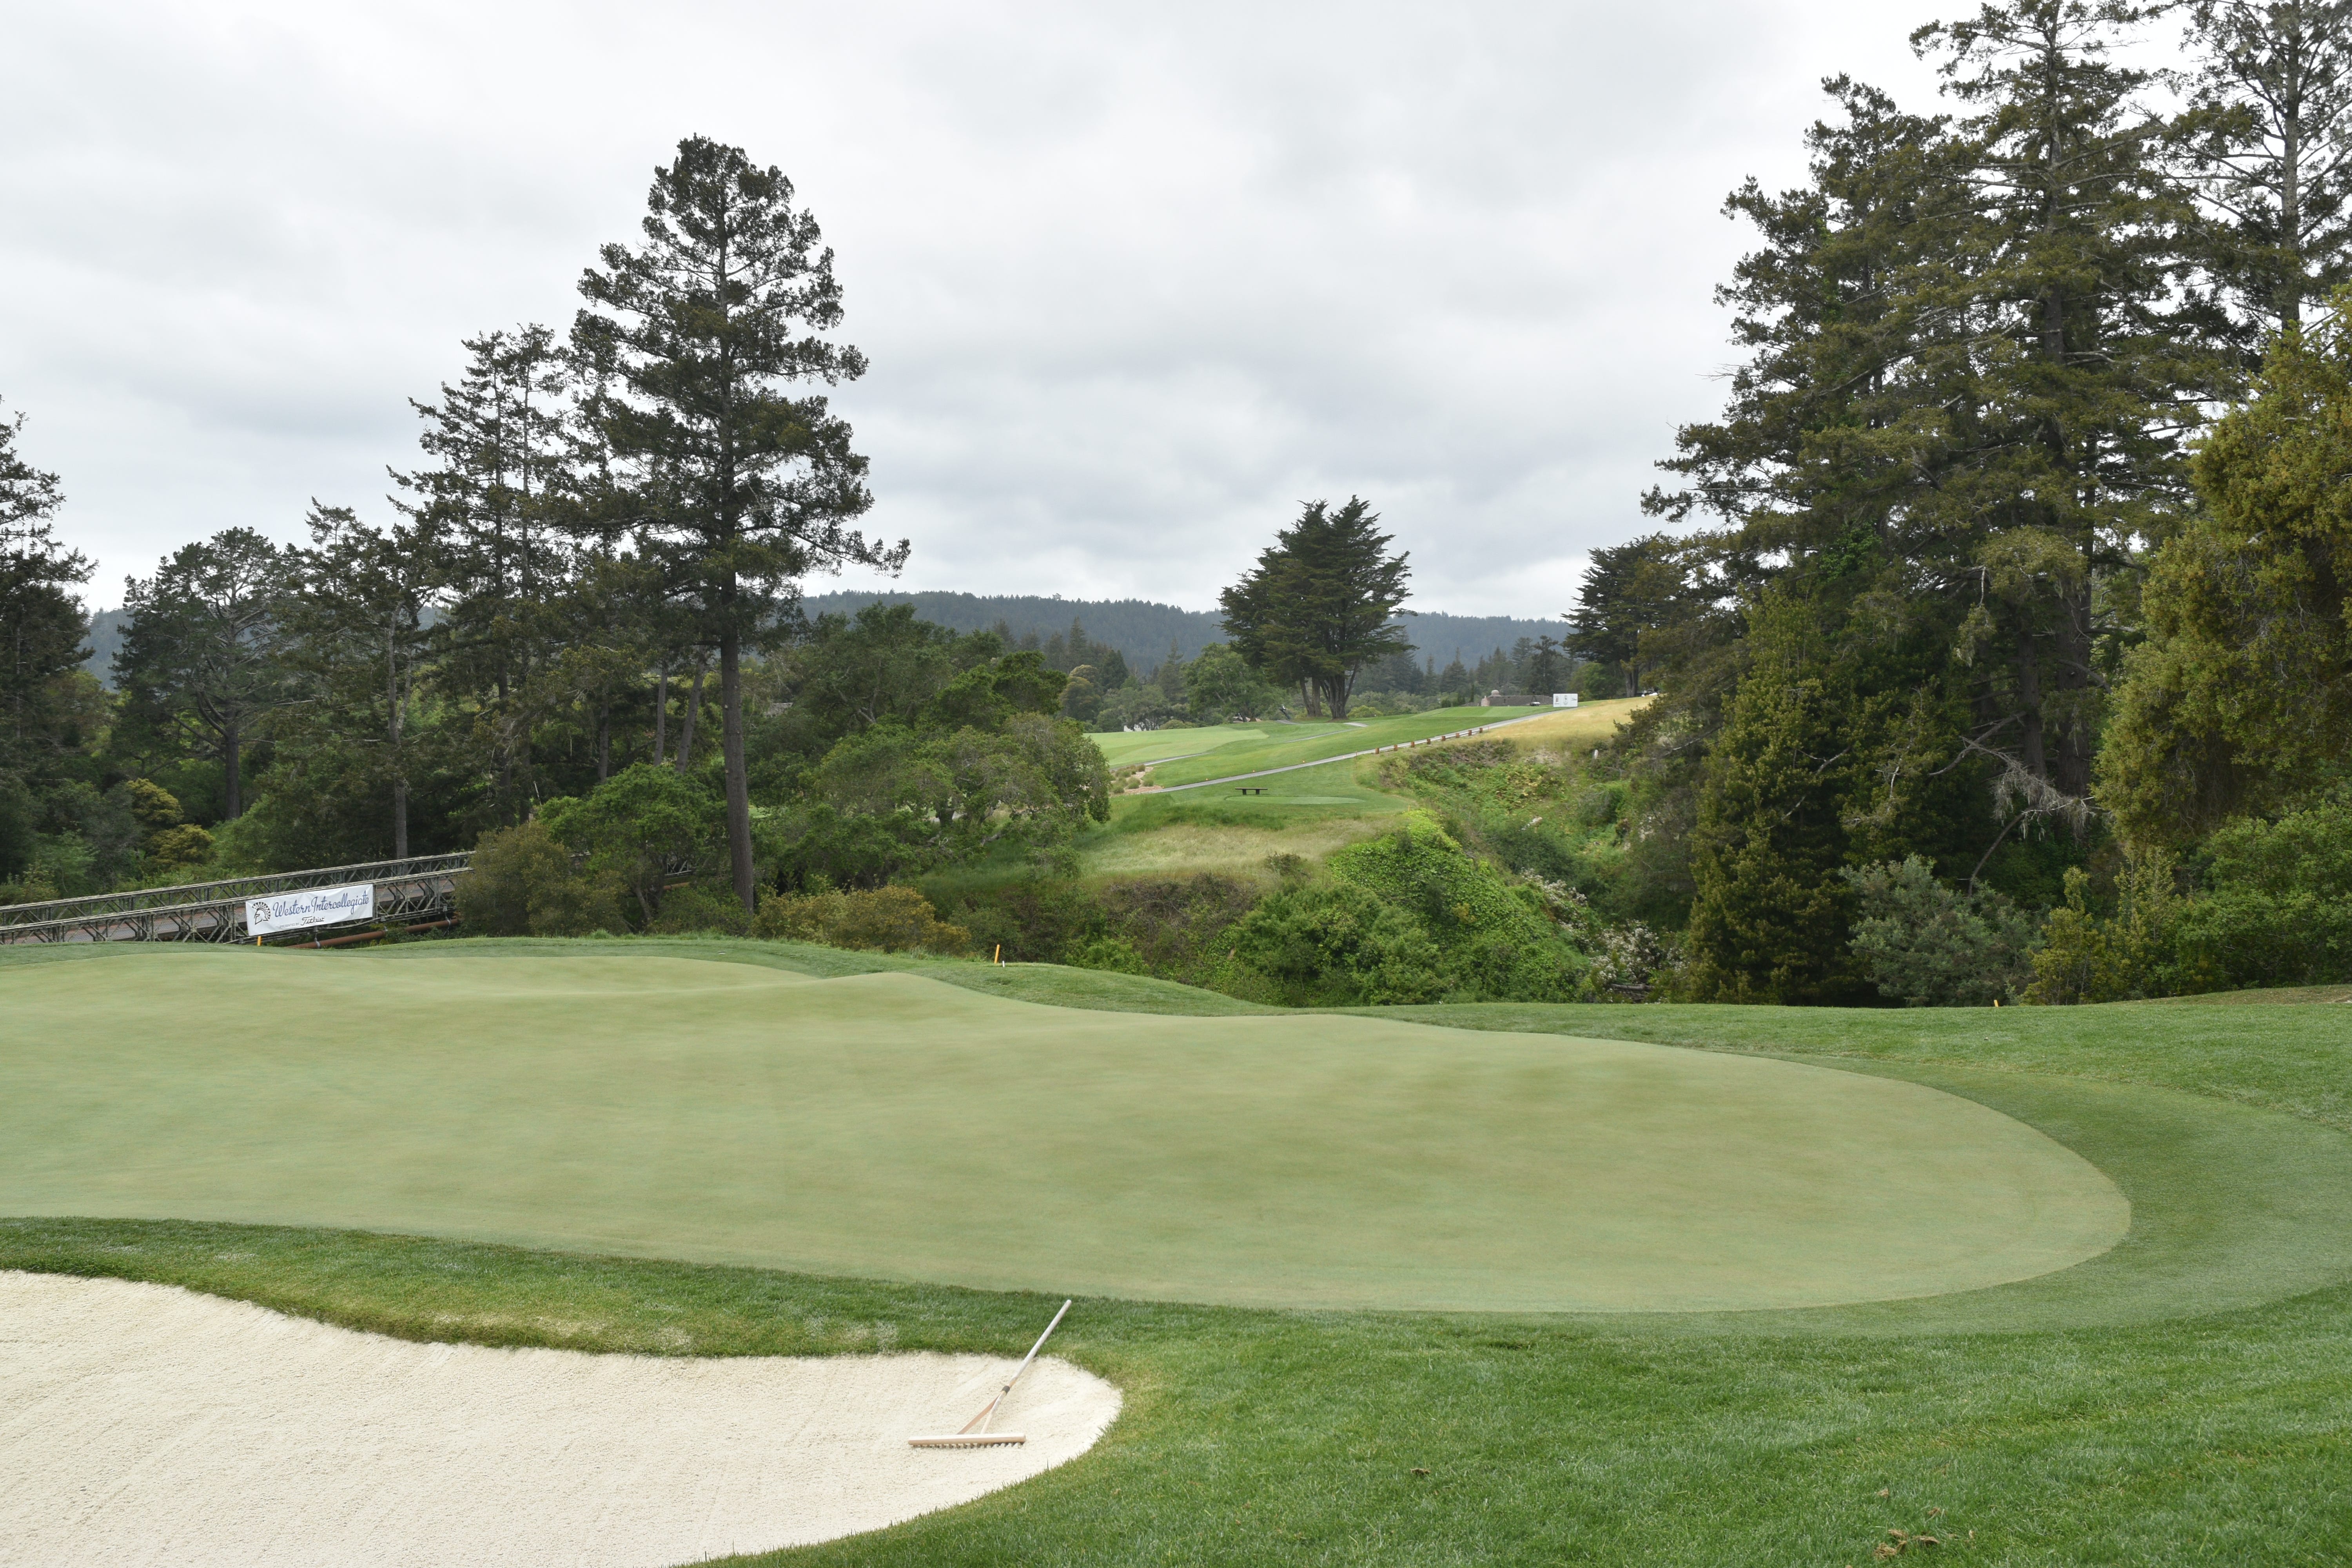
The 12th hole green viewed from behind
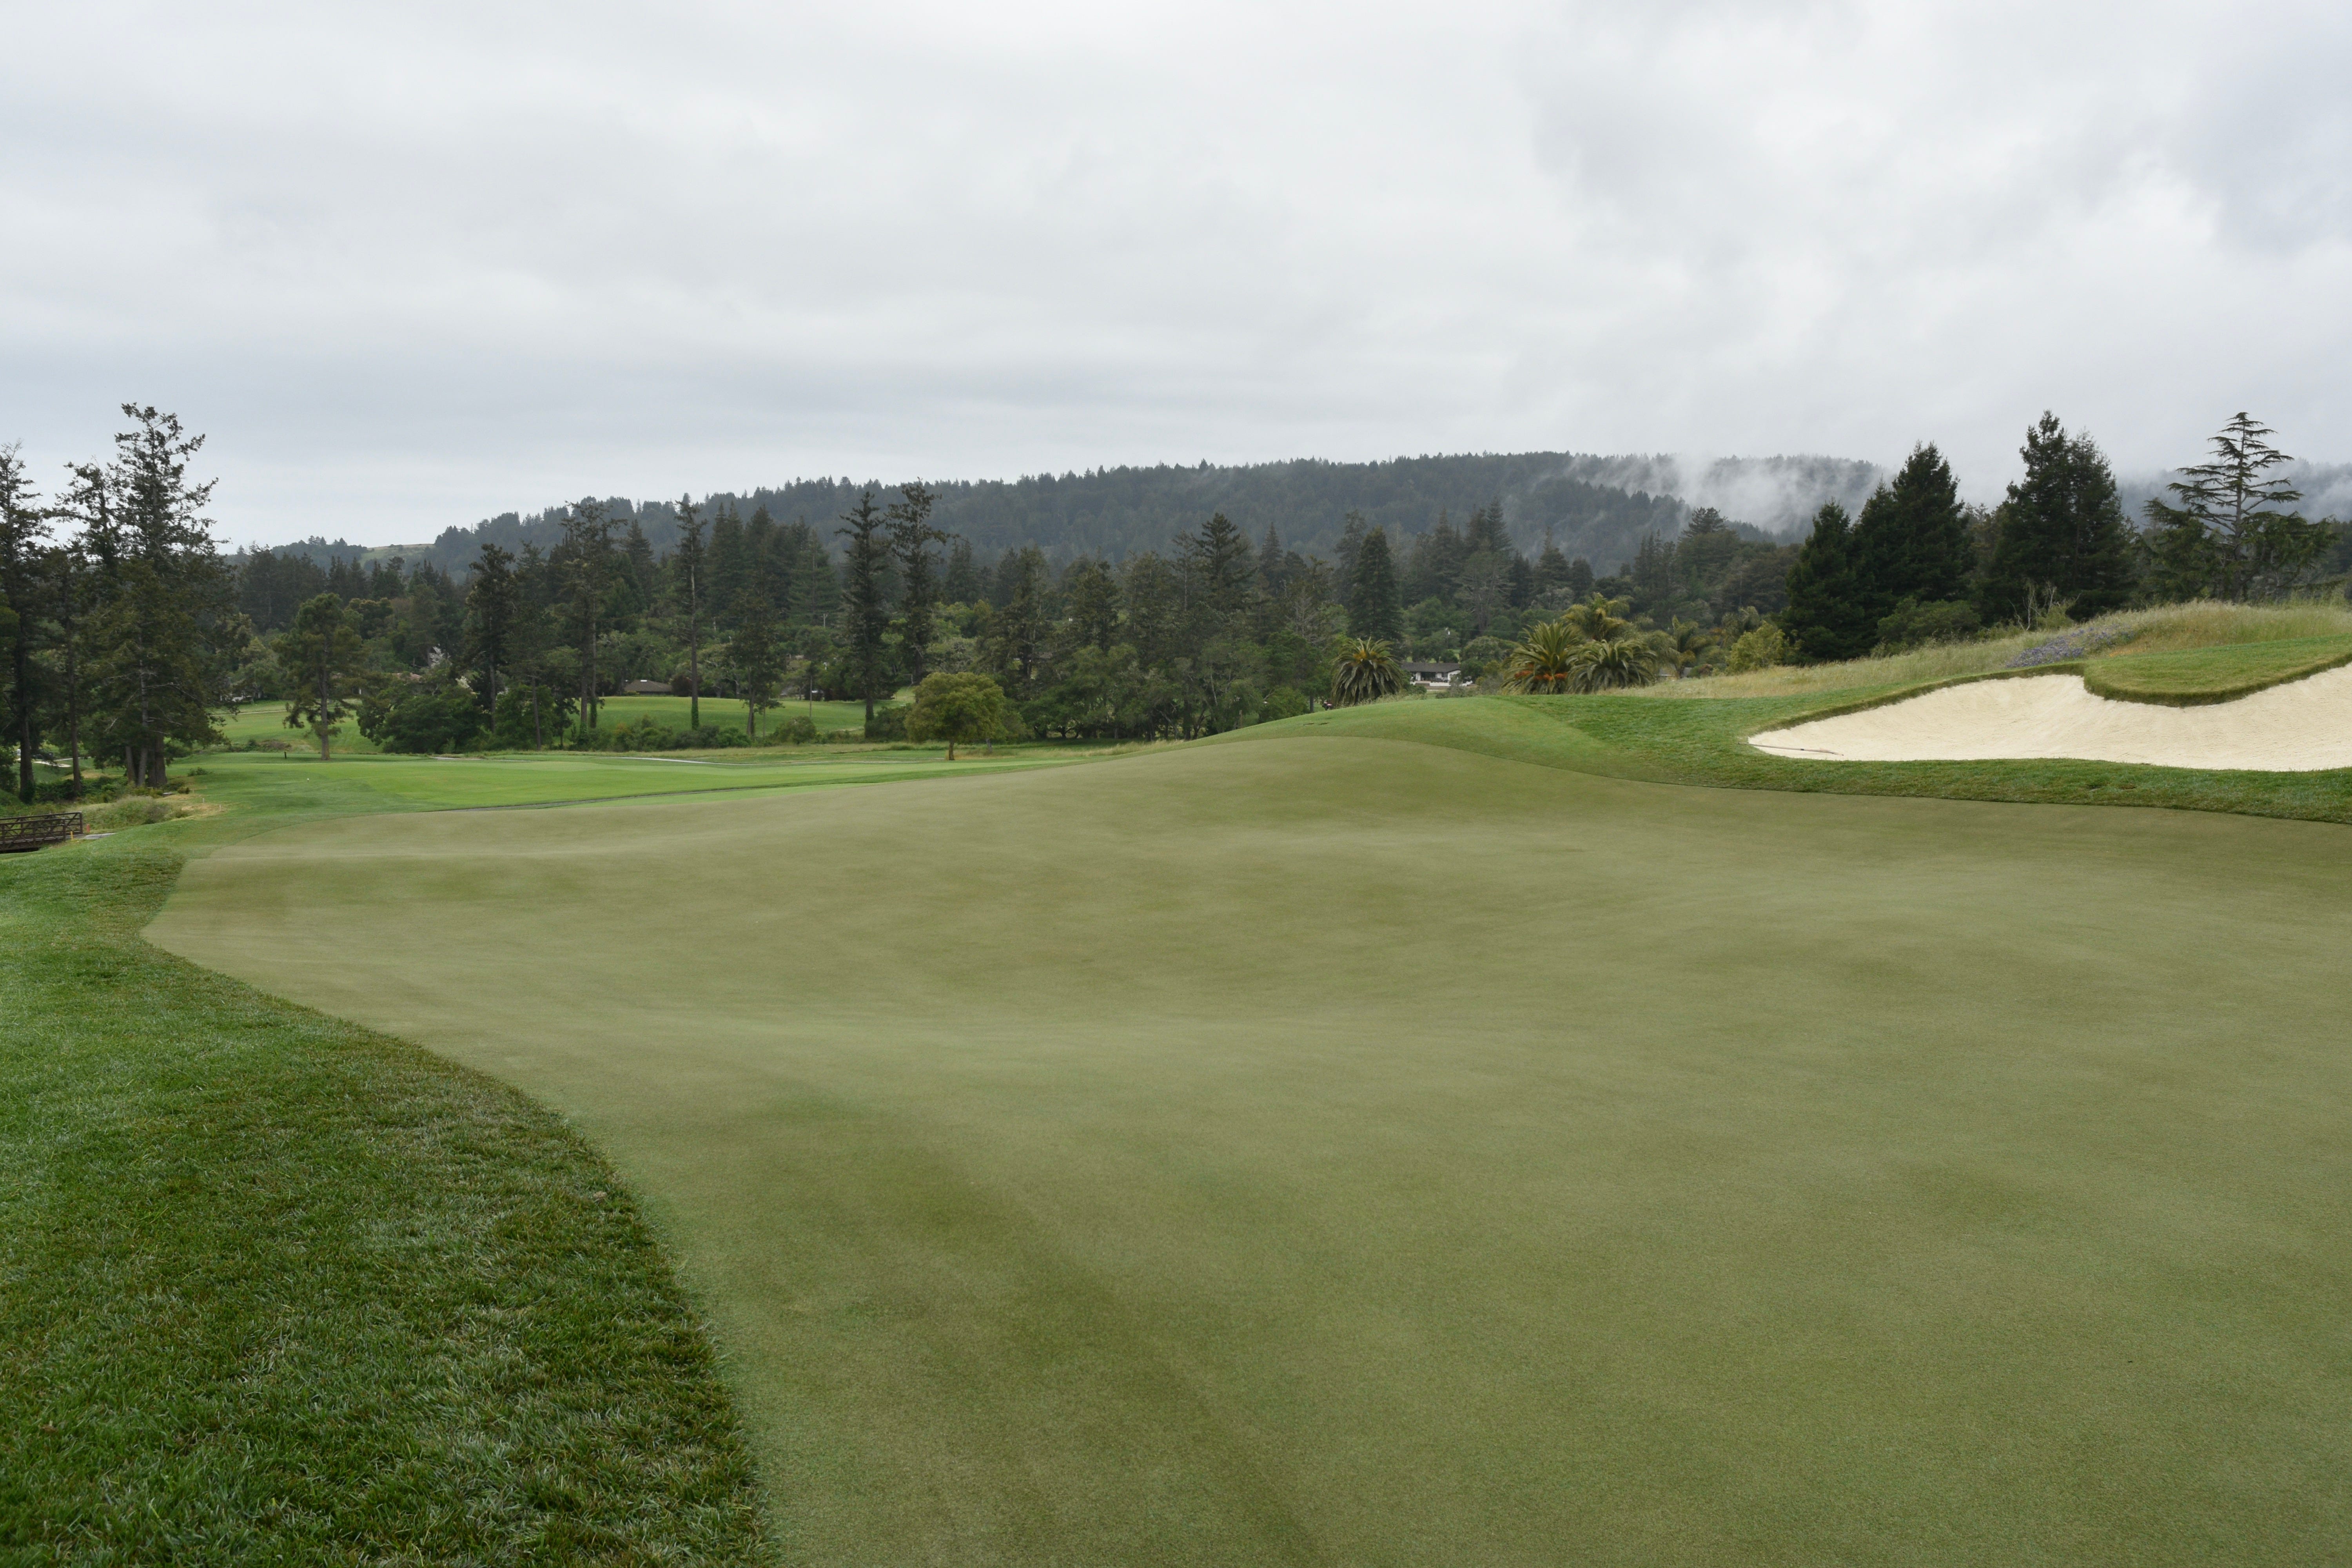
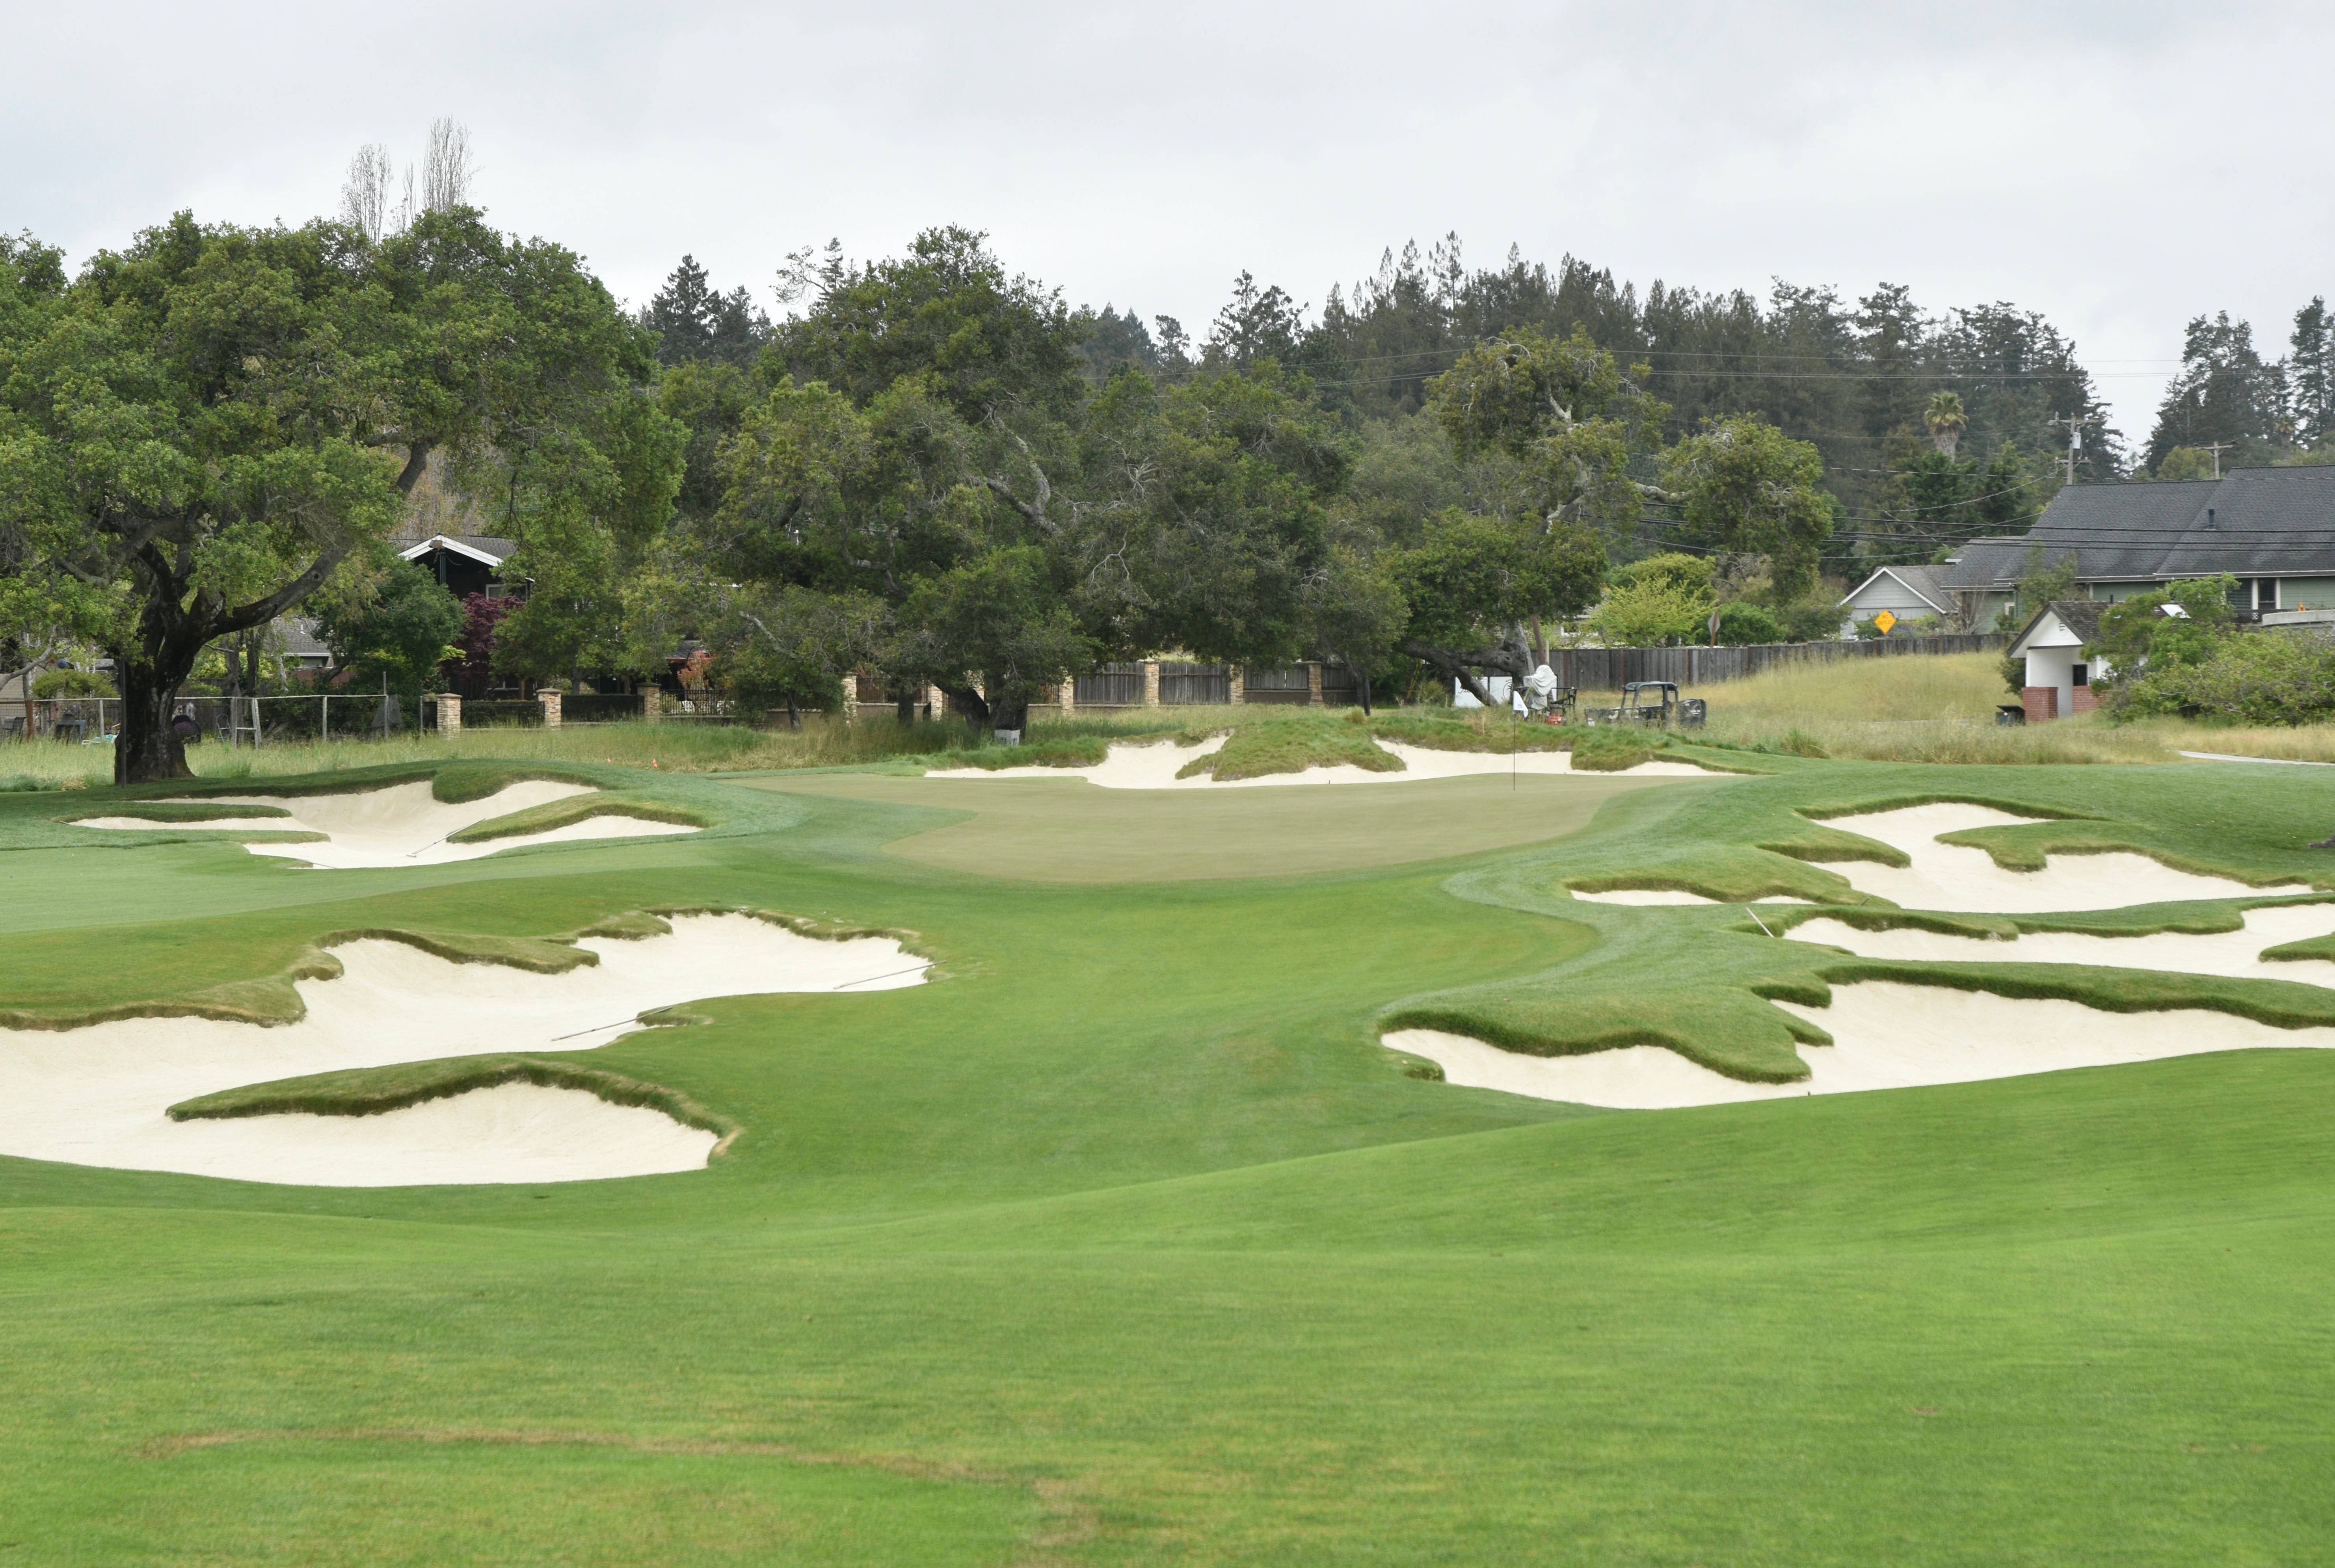
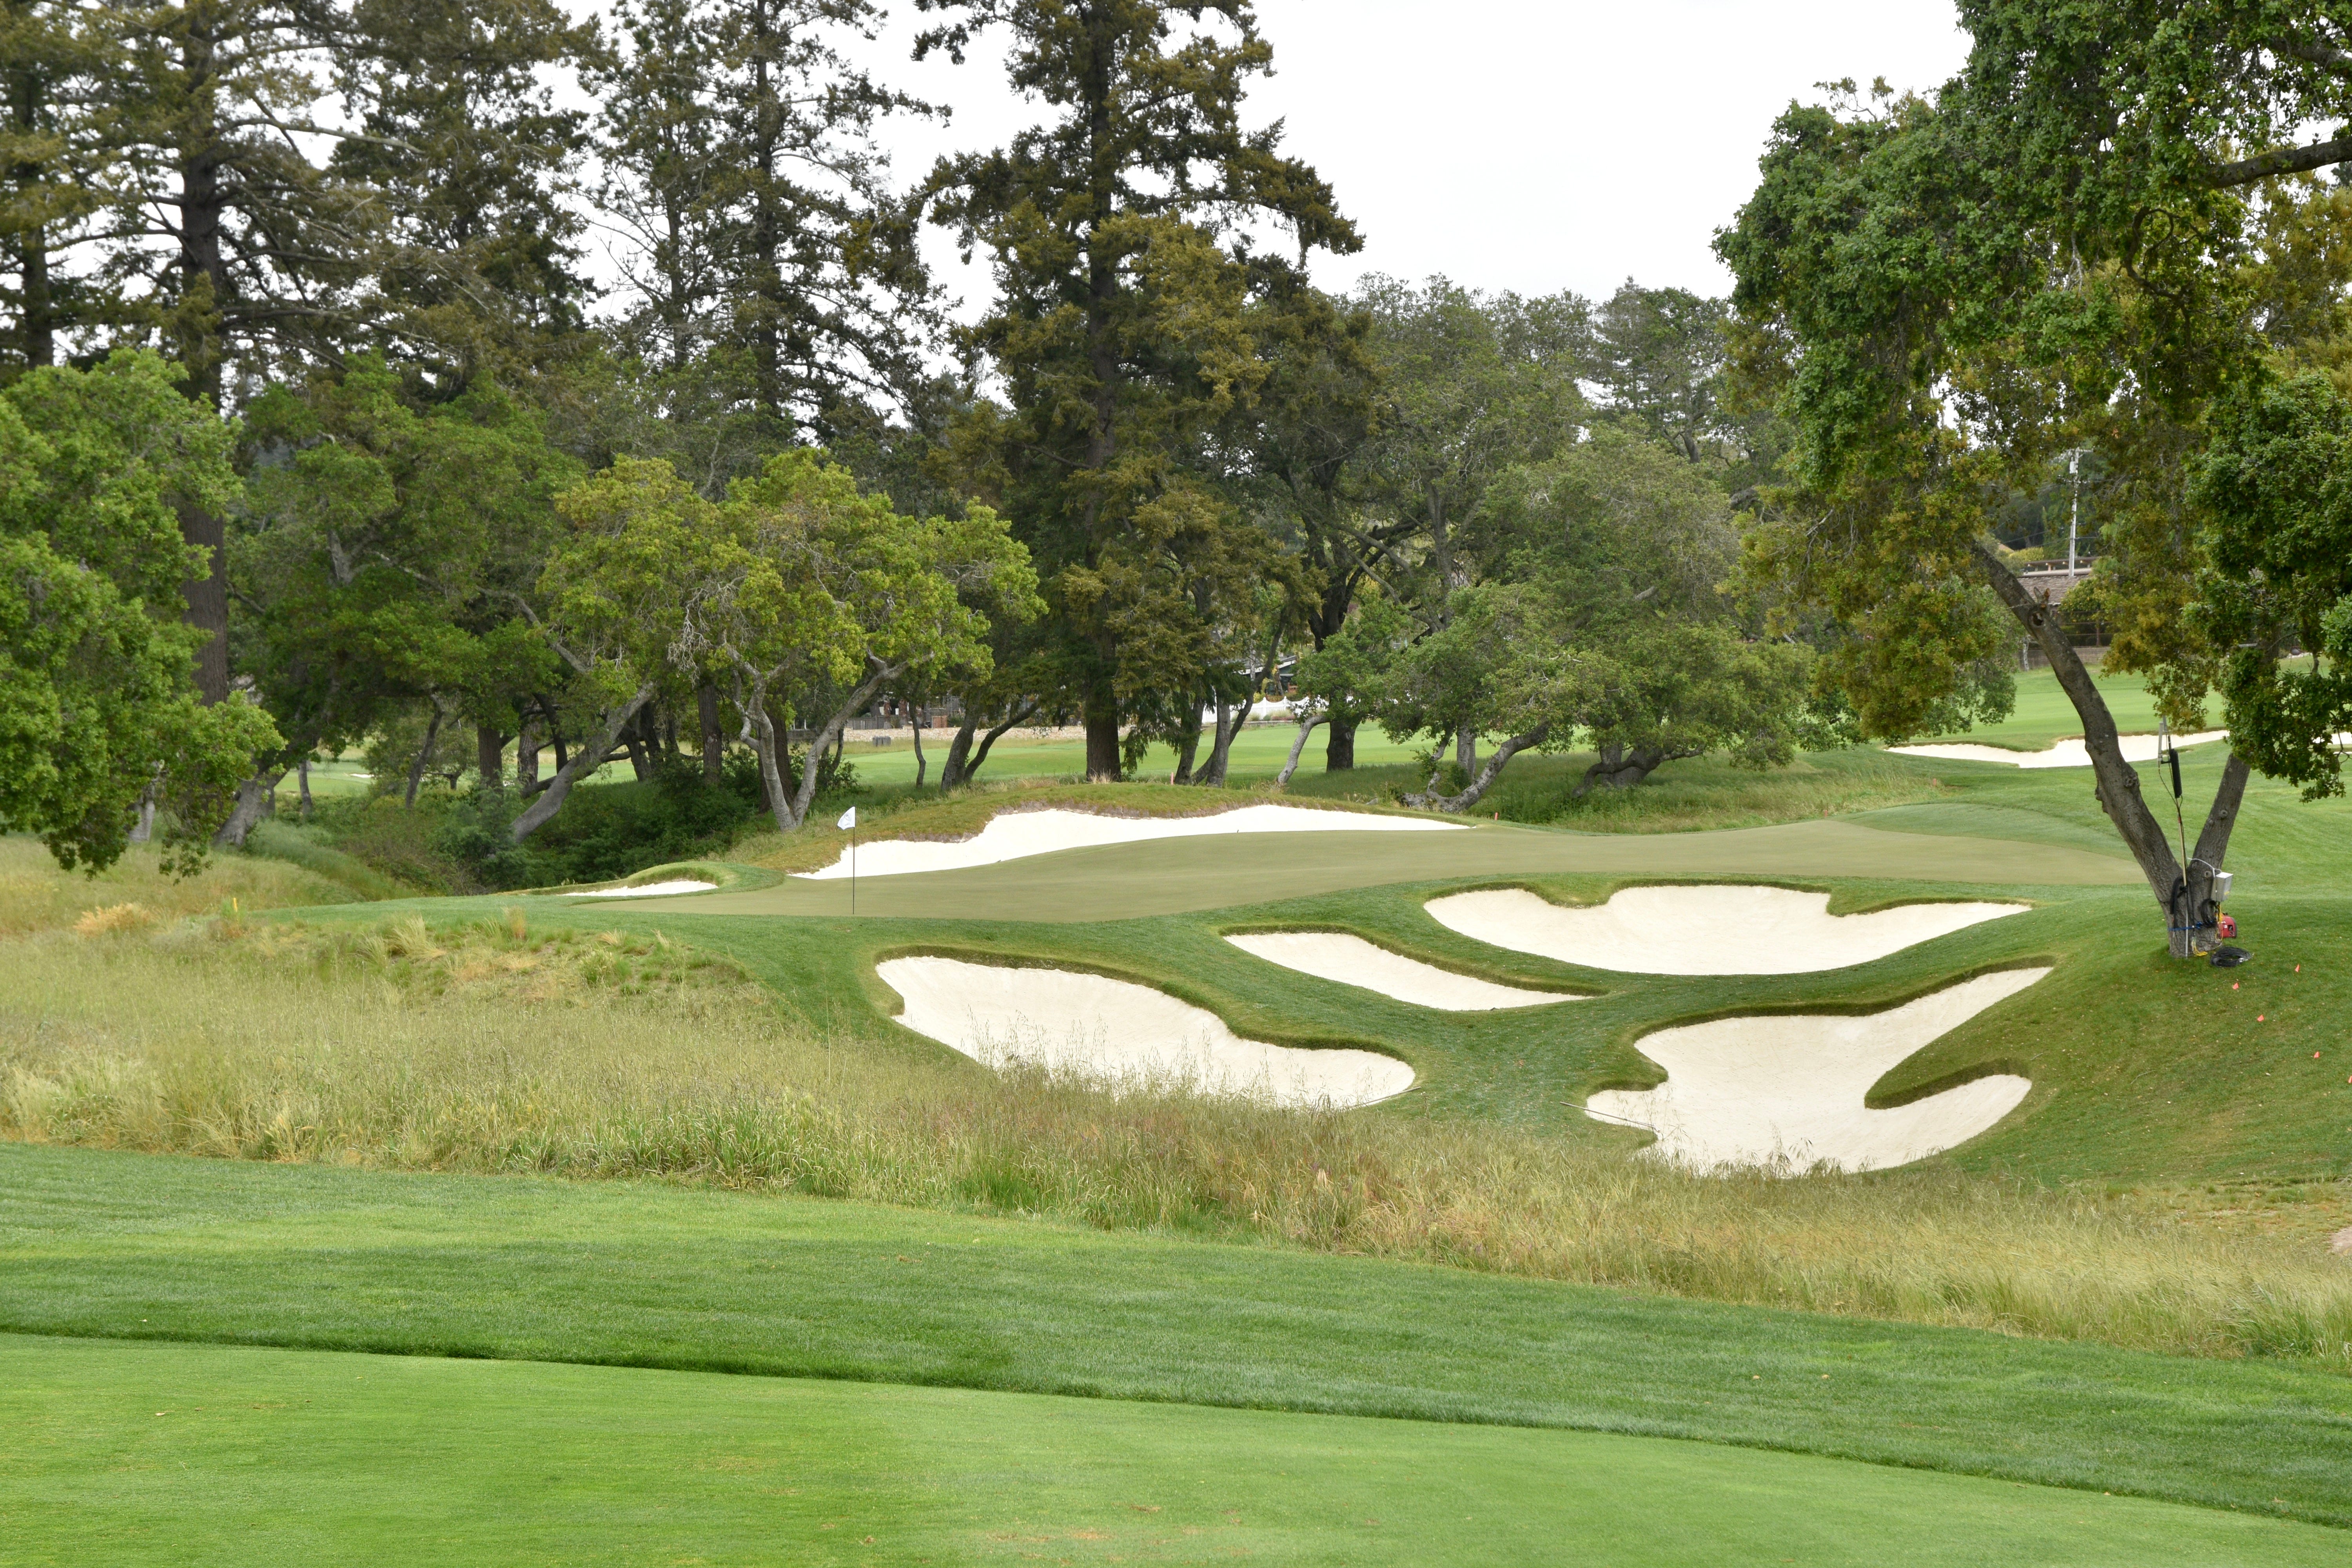
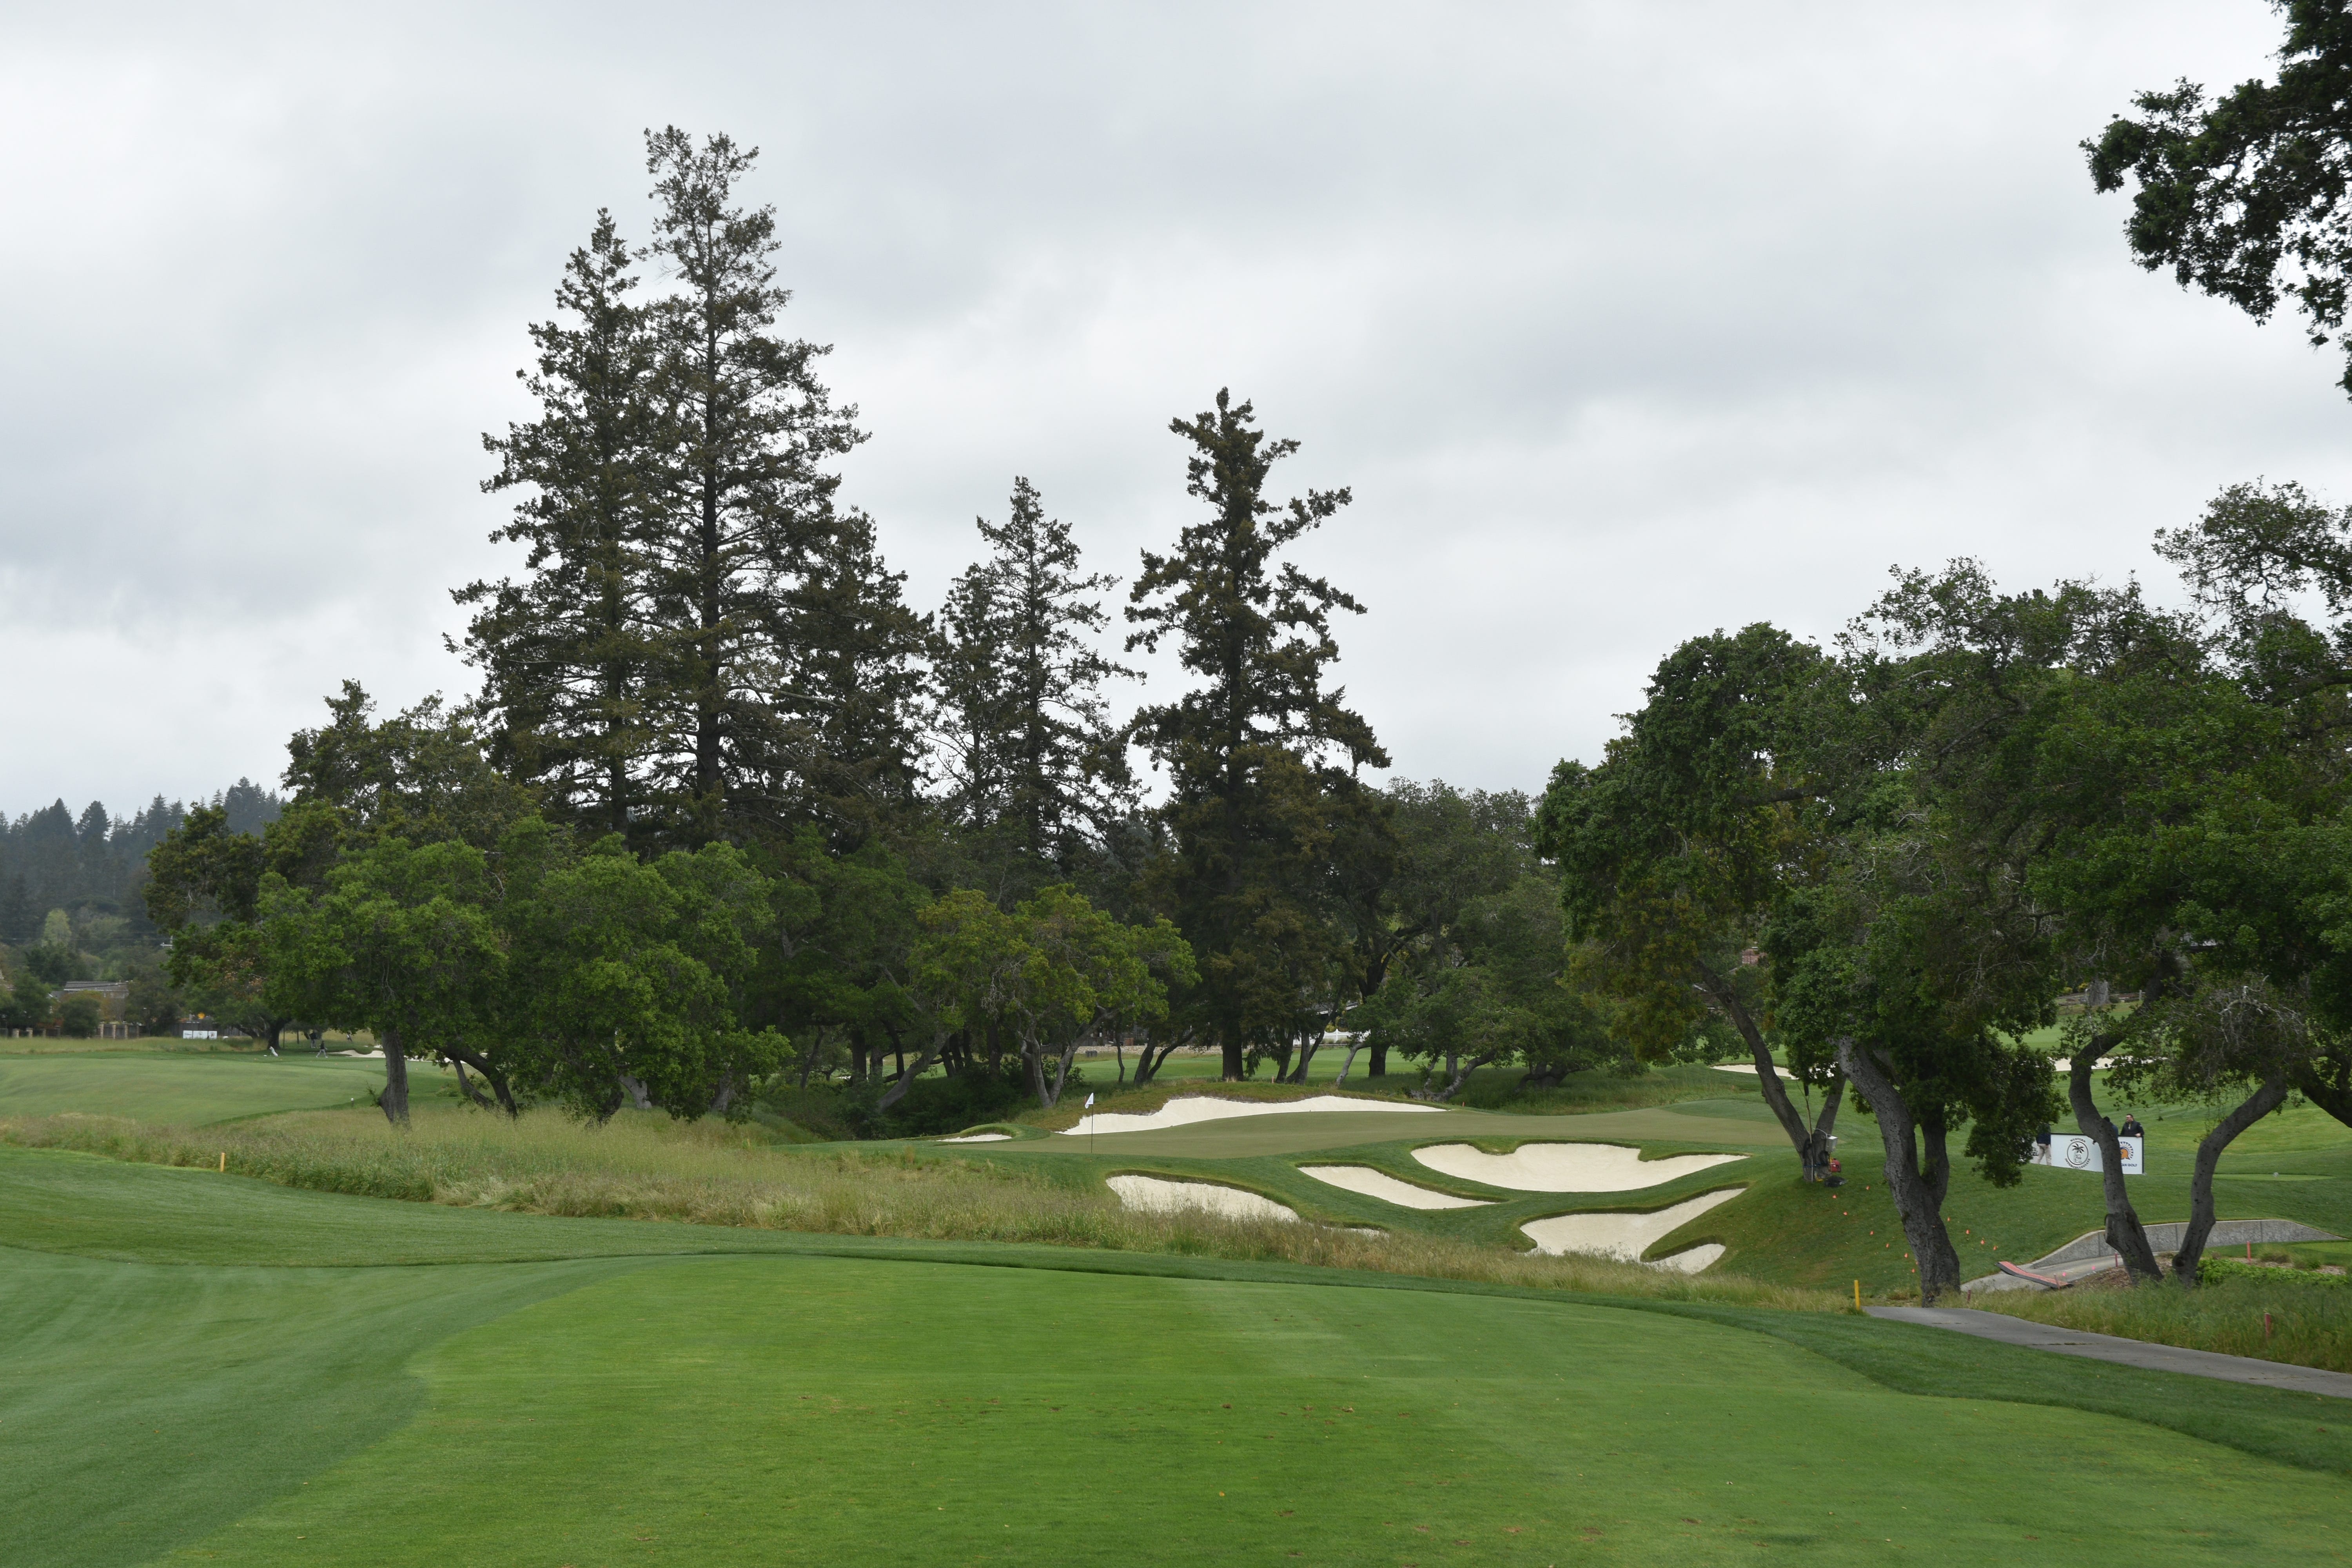
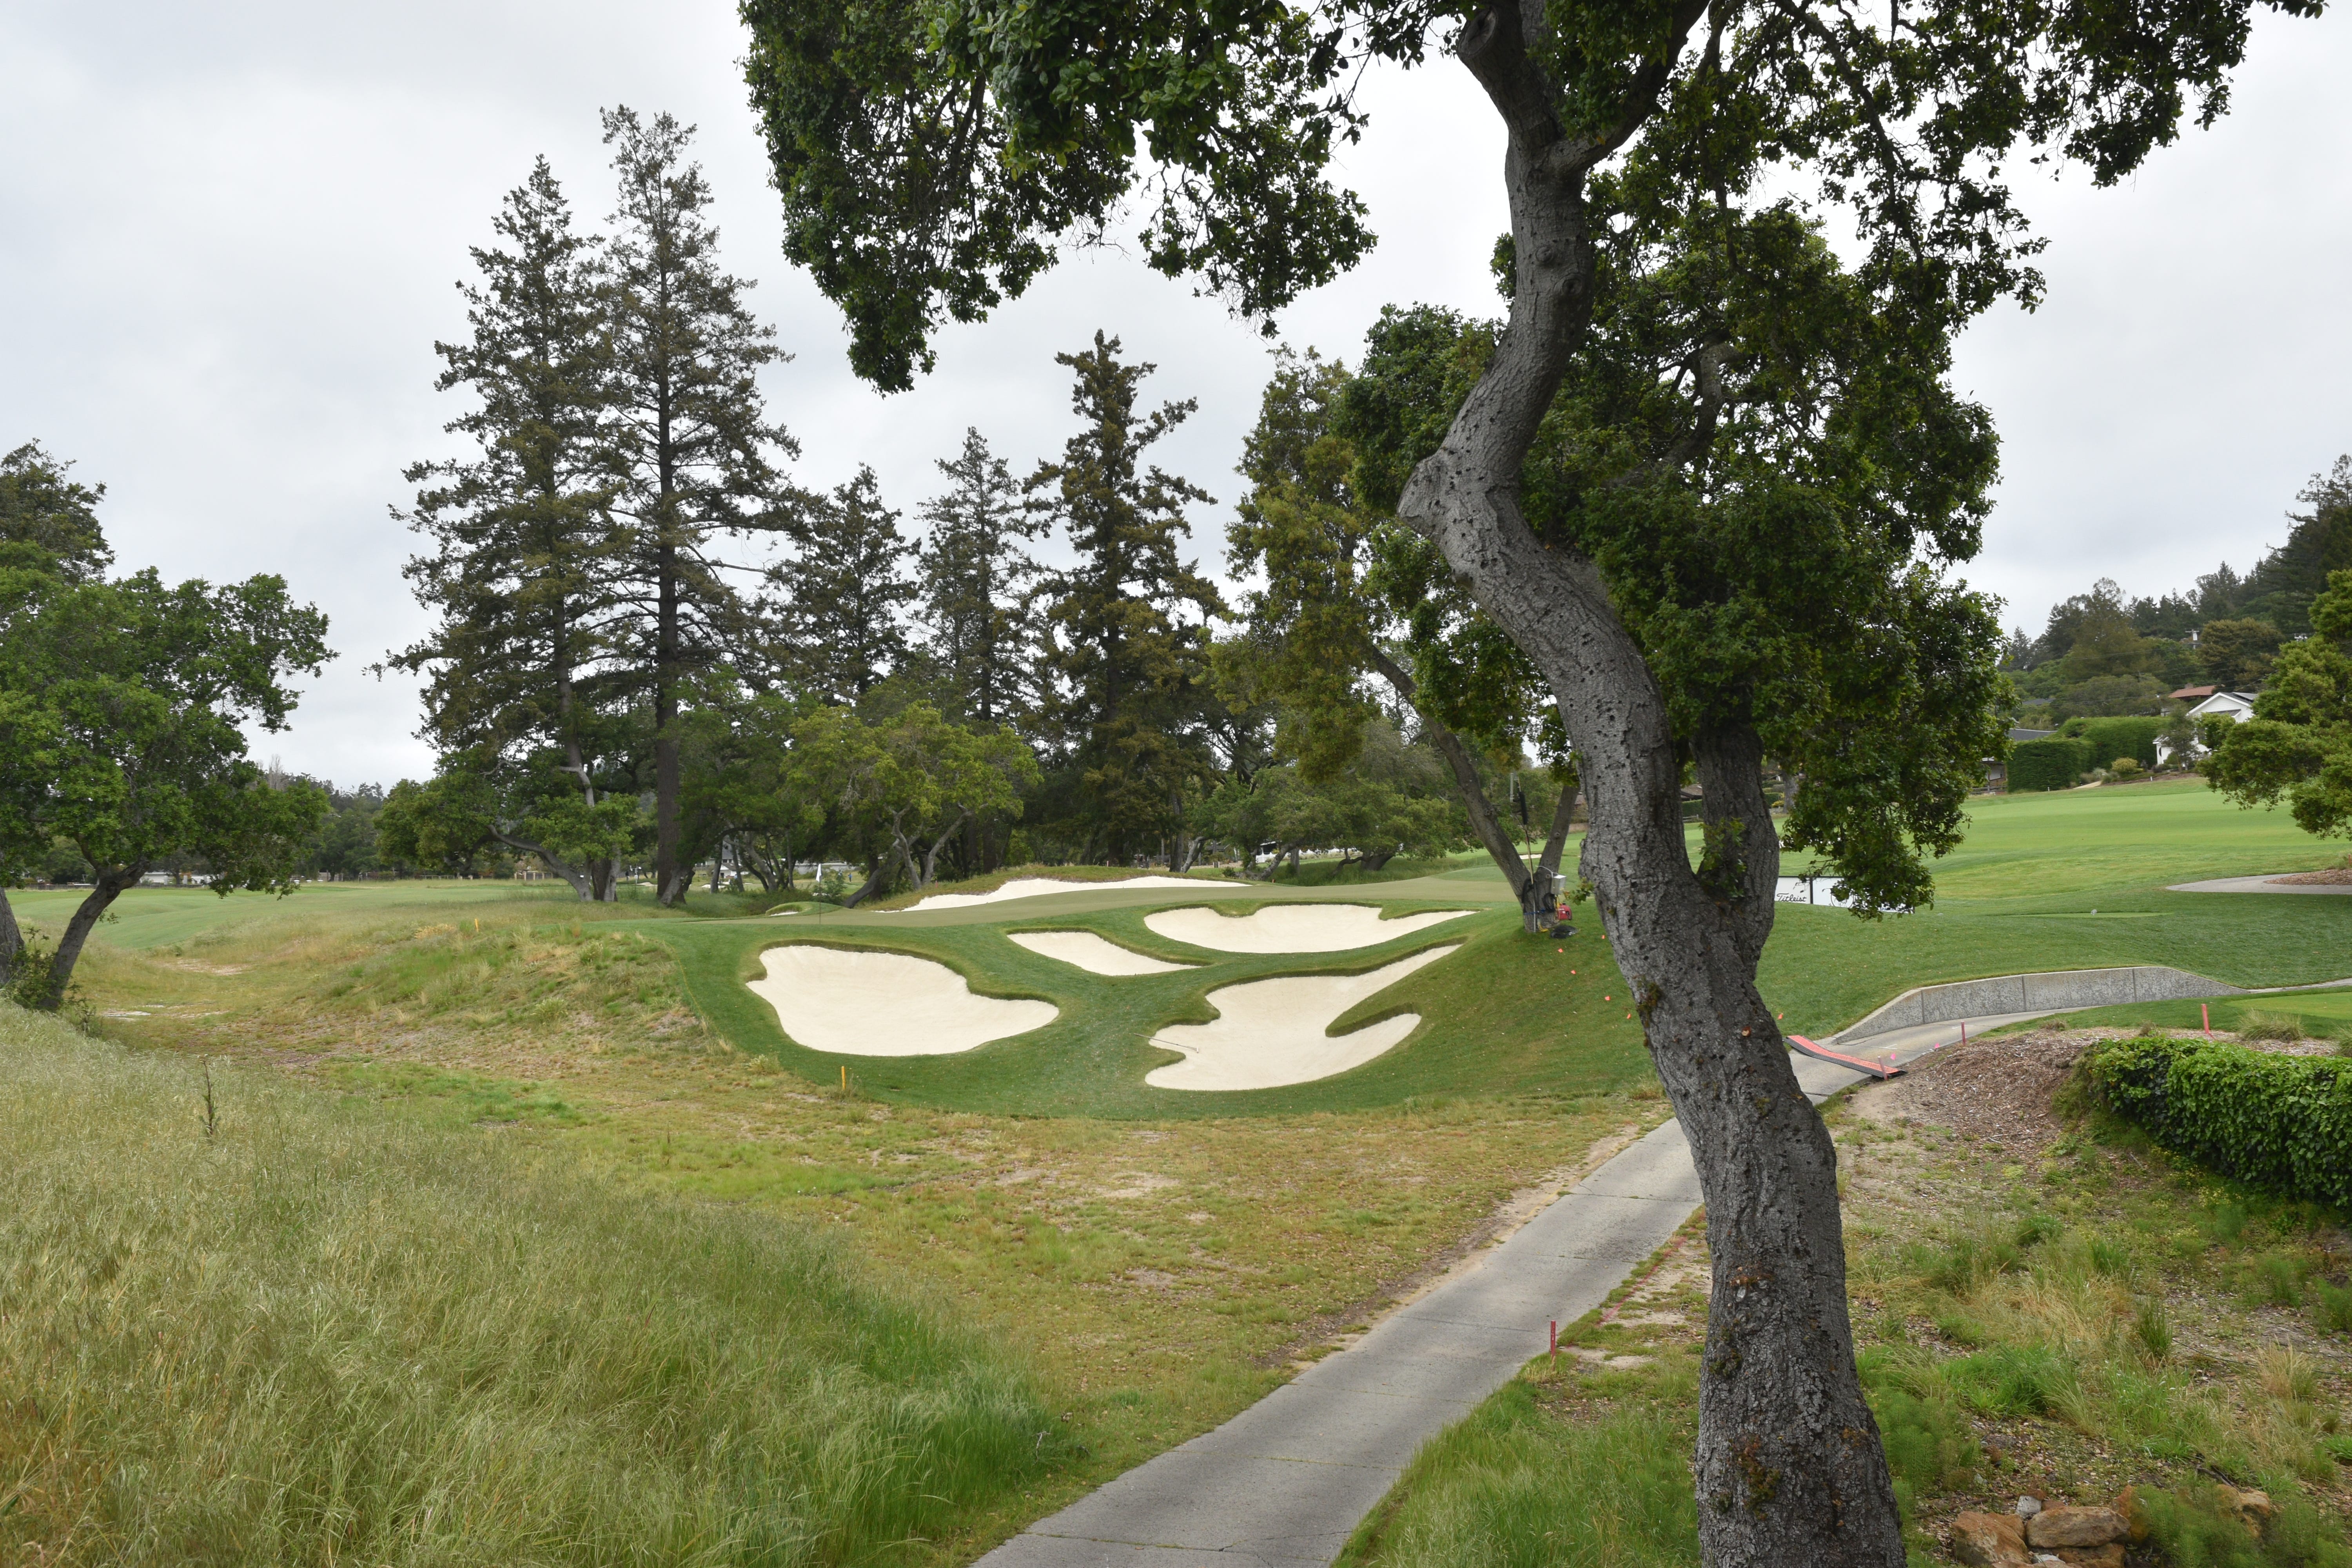
Hole 13: Par 5, 532 Yards
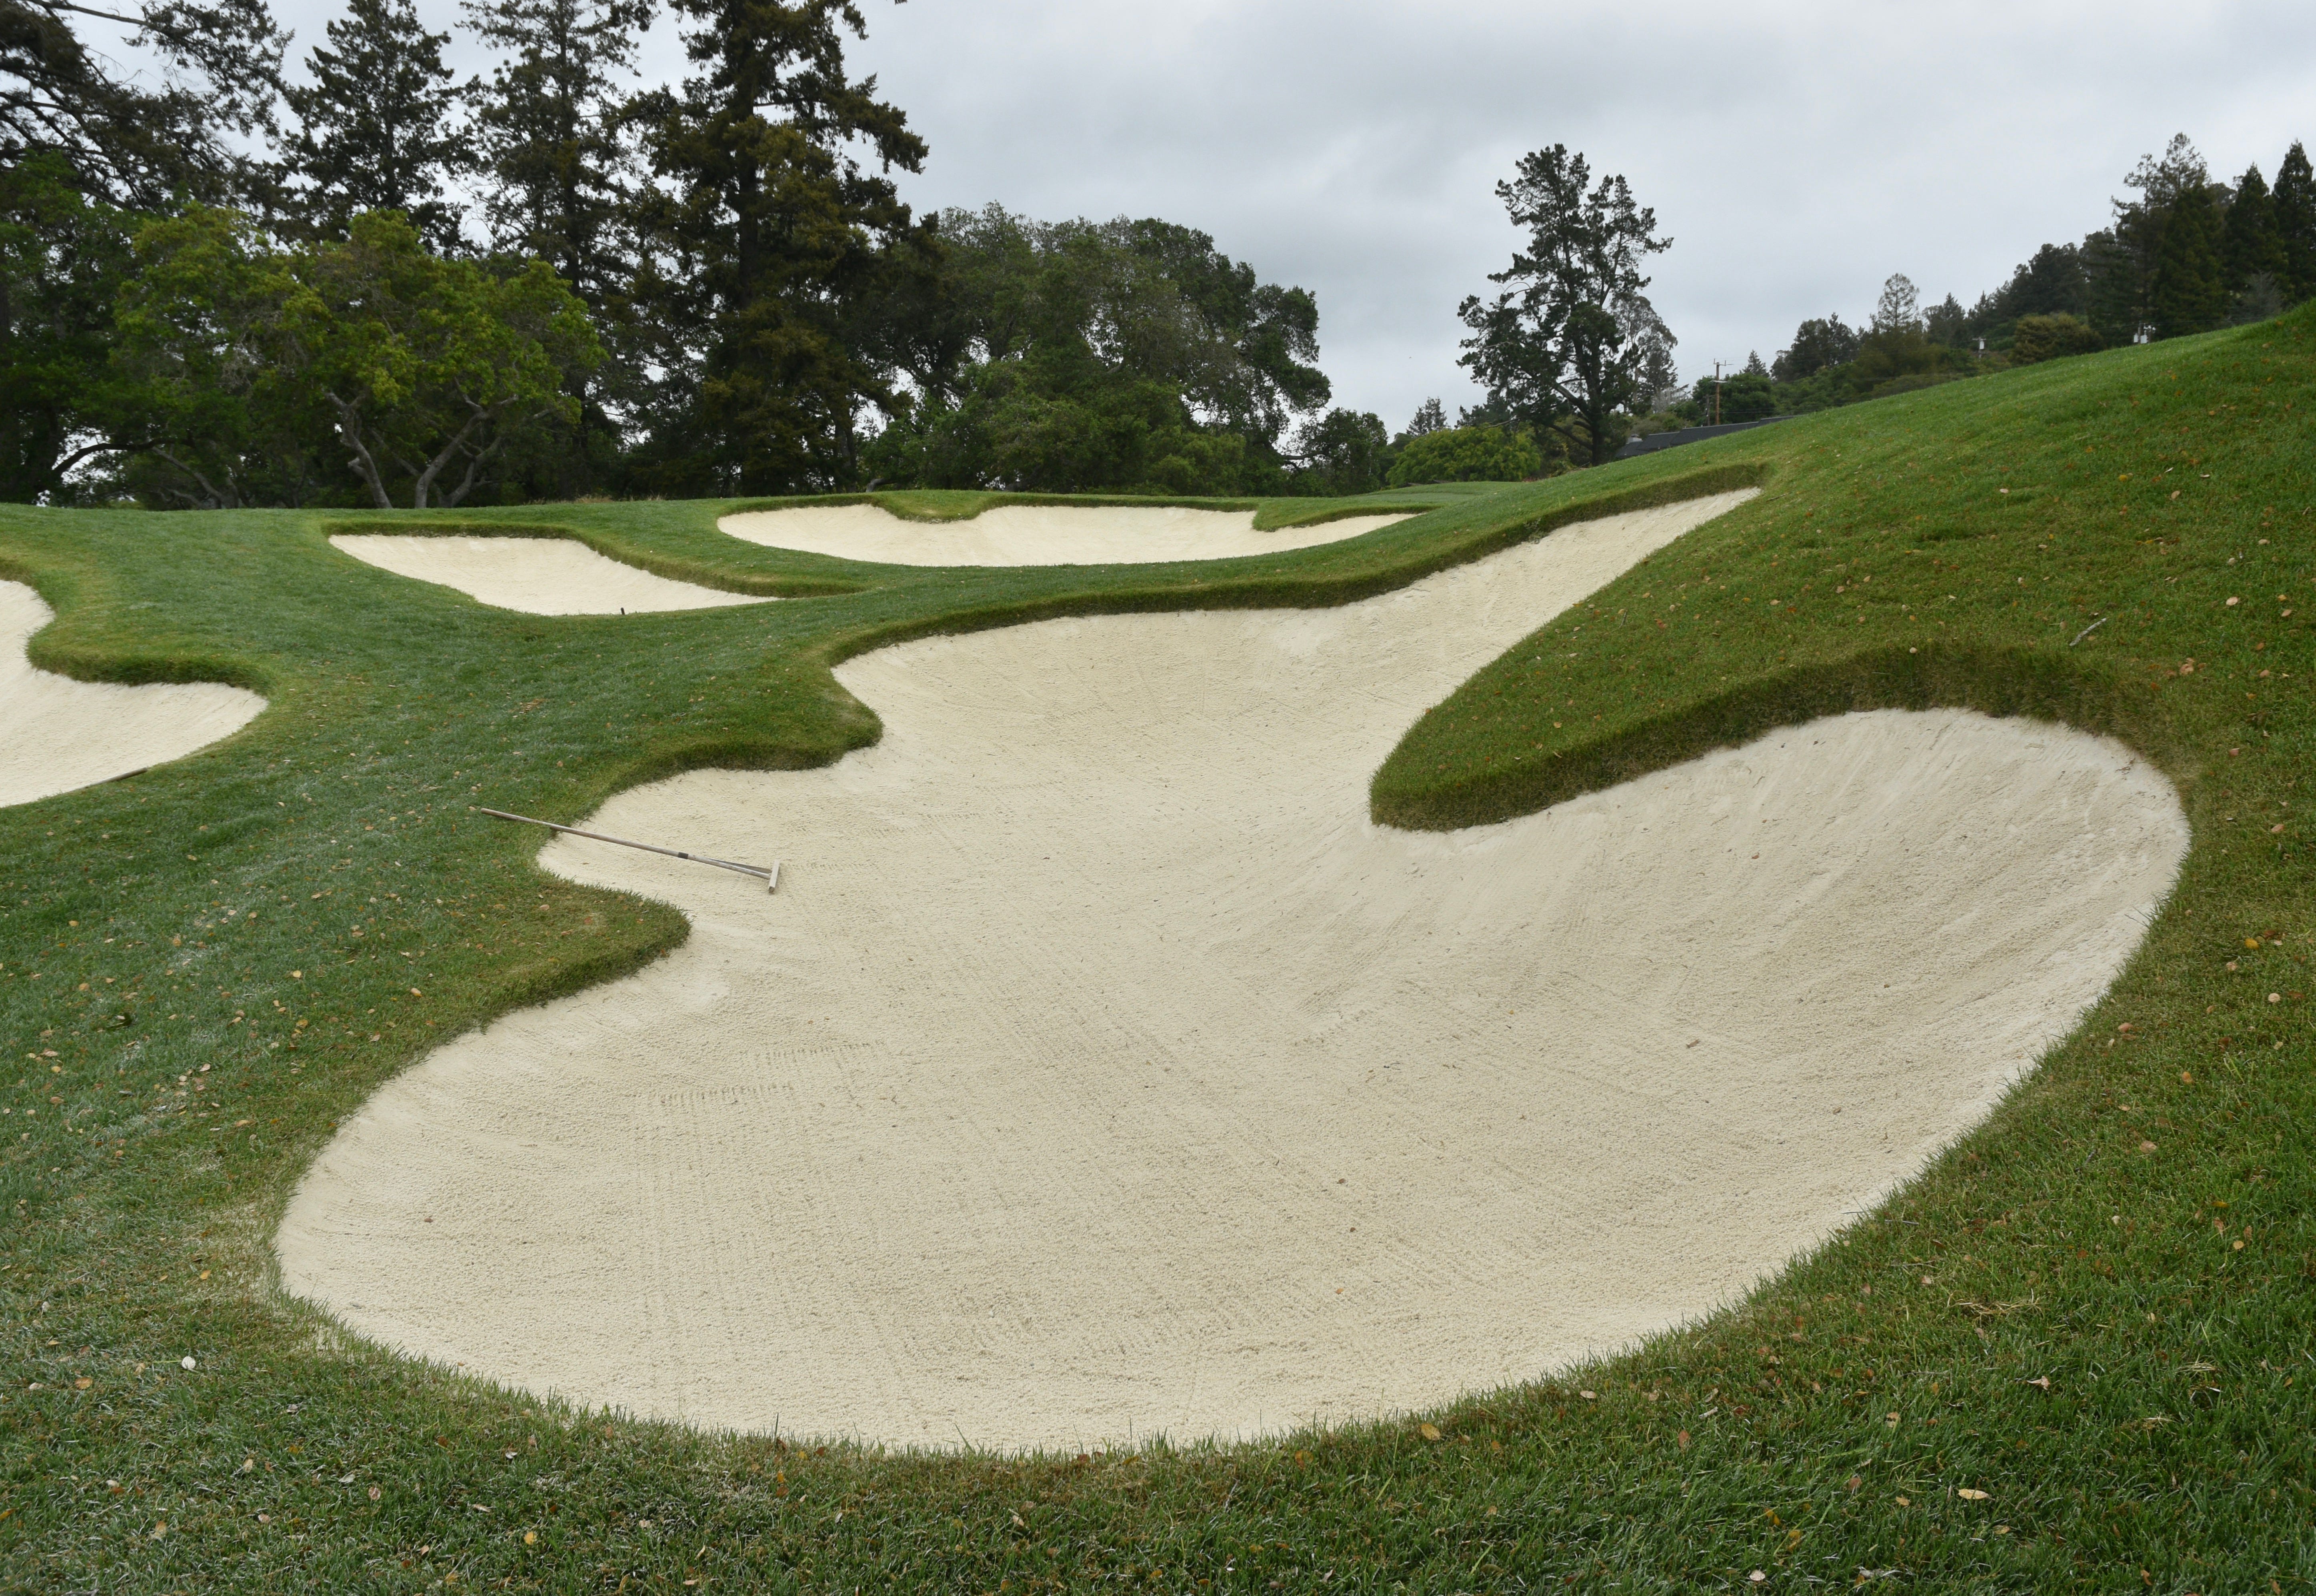
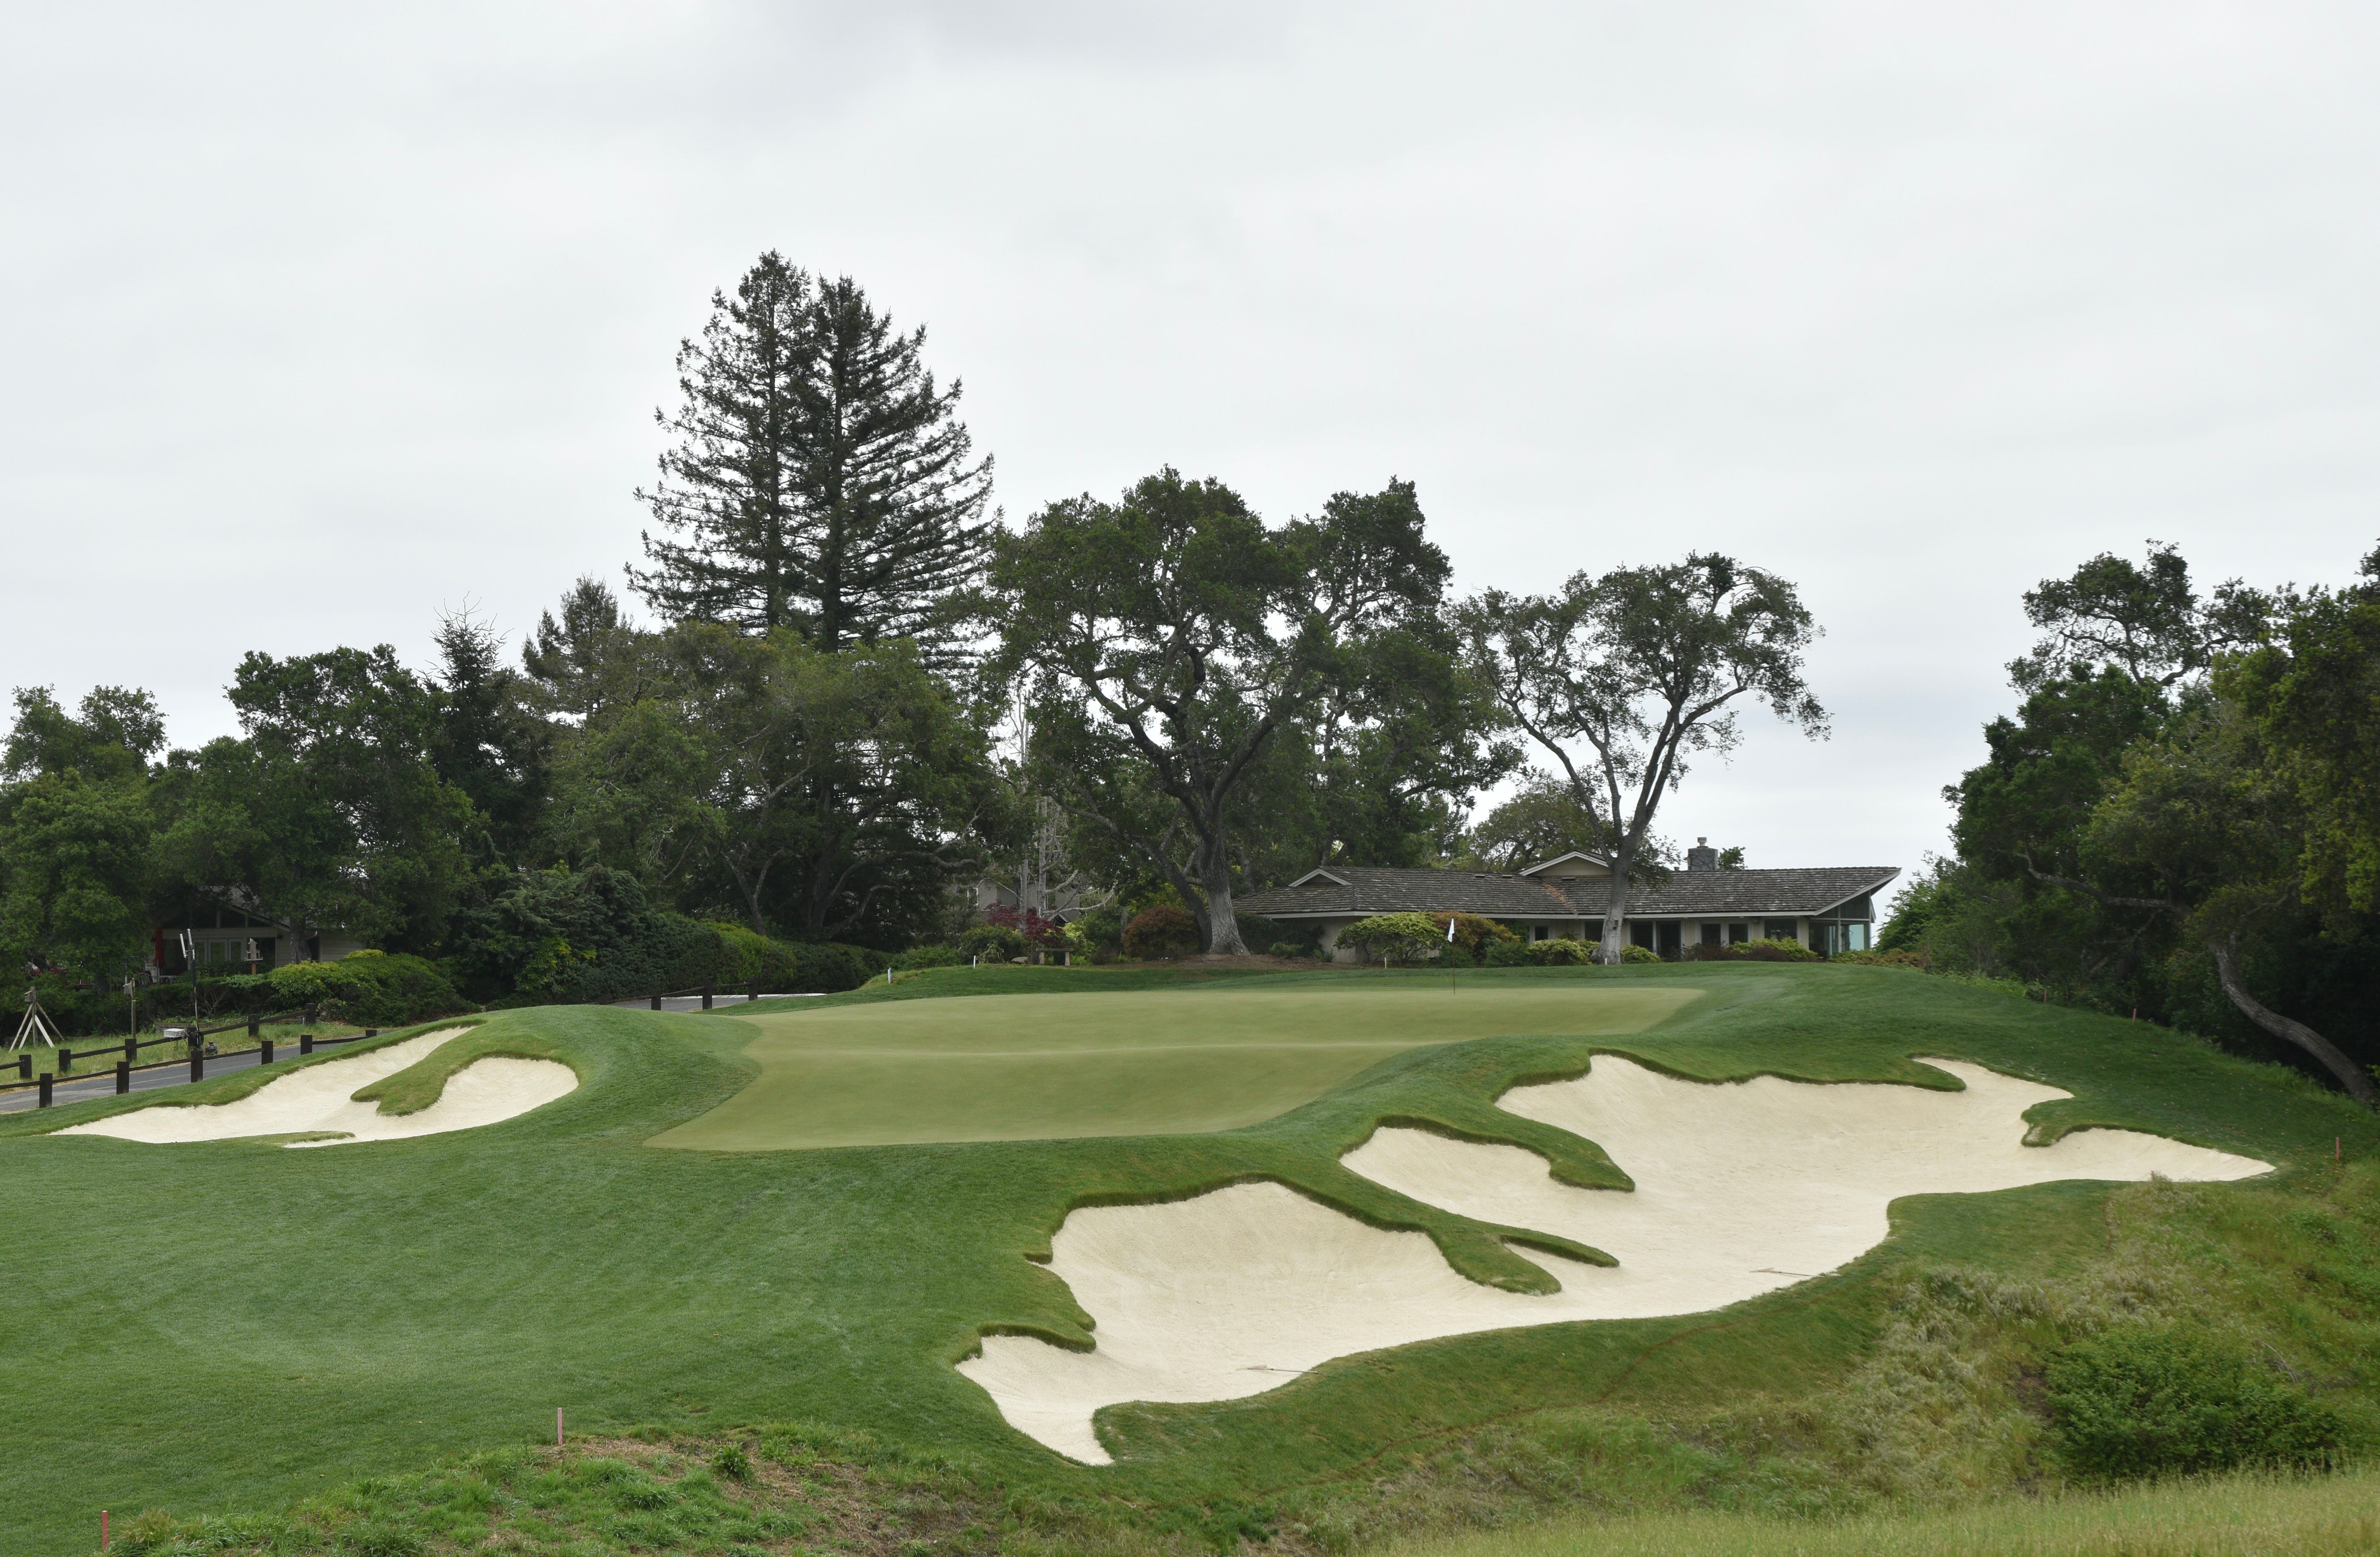
The 13th hole is one of Pasatiempo’s iconic holes with the artful MacKenzie bunkers guarding the green. Urbina didn’t change much here other than updating the shaping of the bunkers and refining the shaping of the green pad
The 13th hole tee shot from the back tee
The 13th hole tee shot from the middle teeing ground
The 13th hole tee shot is generous but not without danger. The barranca hugs the left side and out of bounds looms for those that bail too far to the right
The beginning of the 13th hole fairway
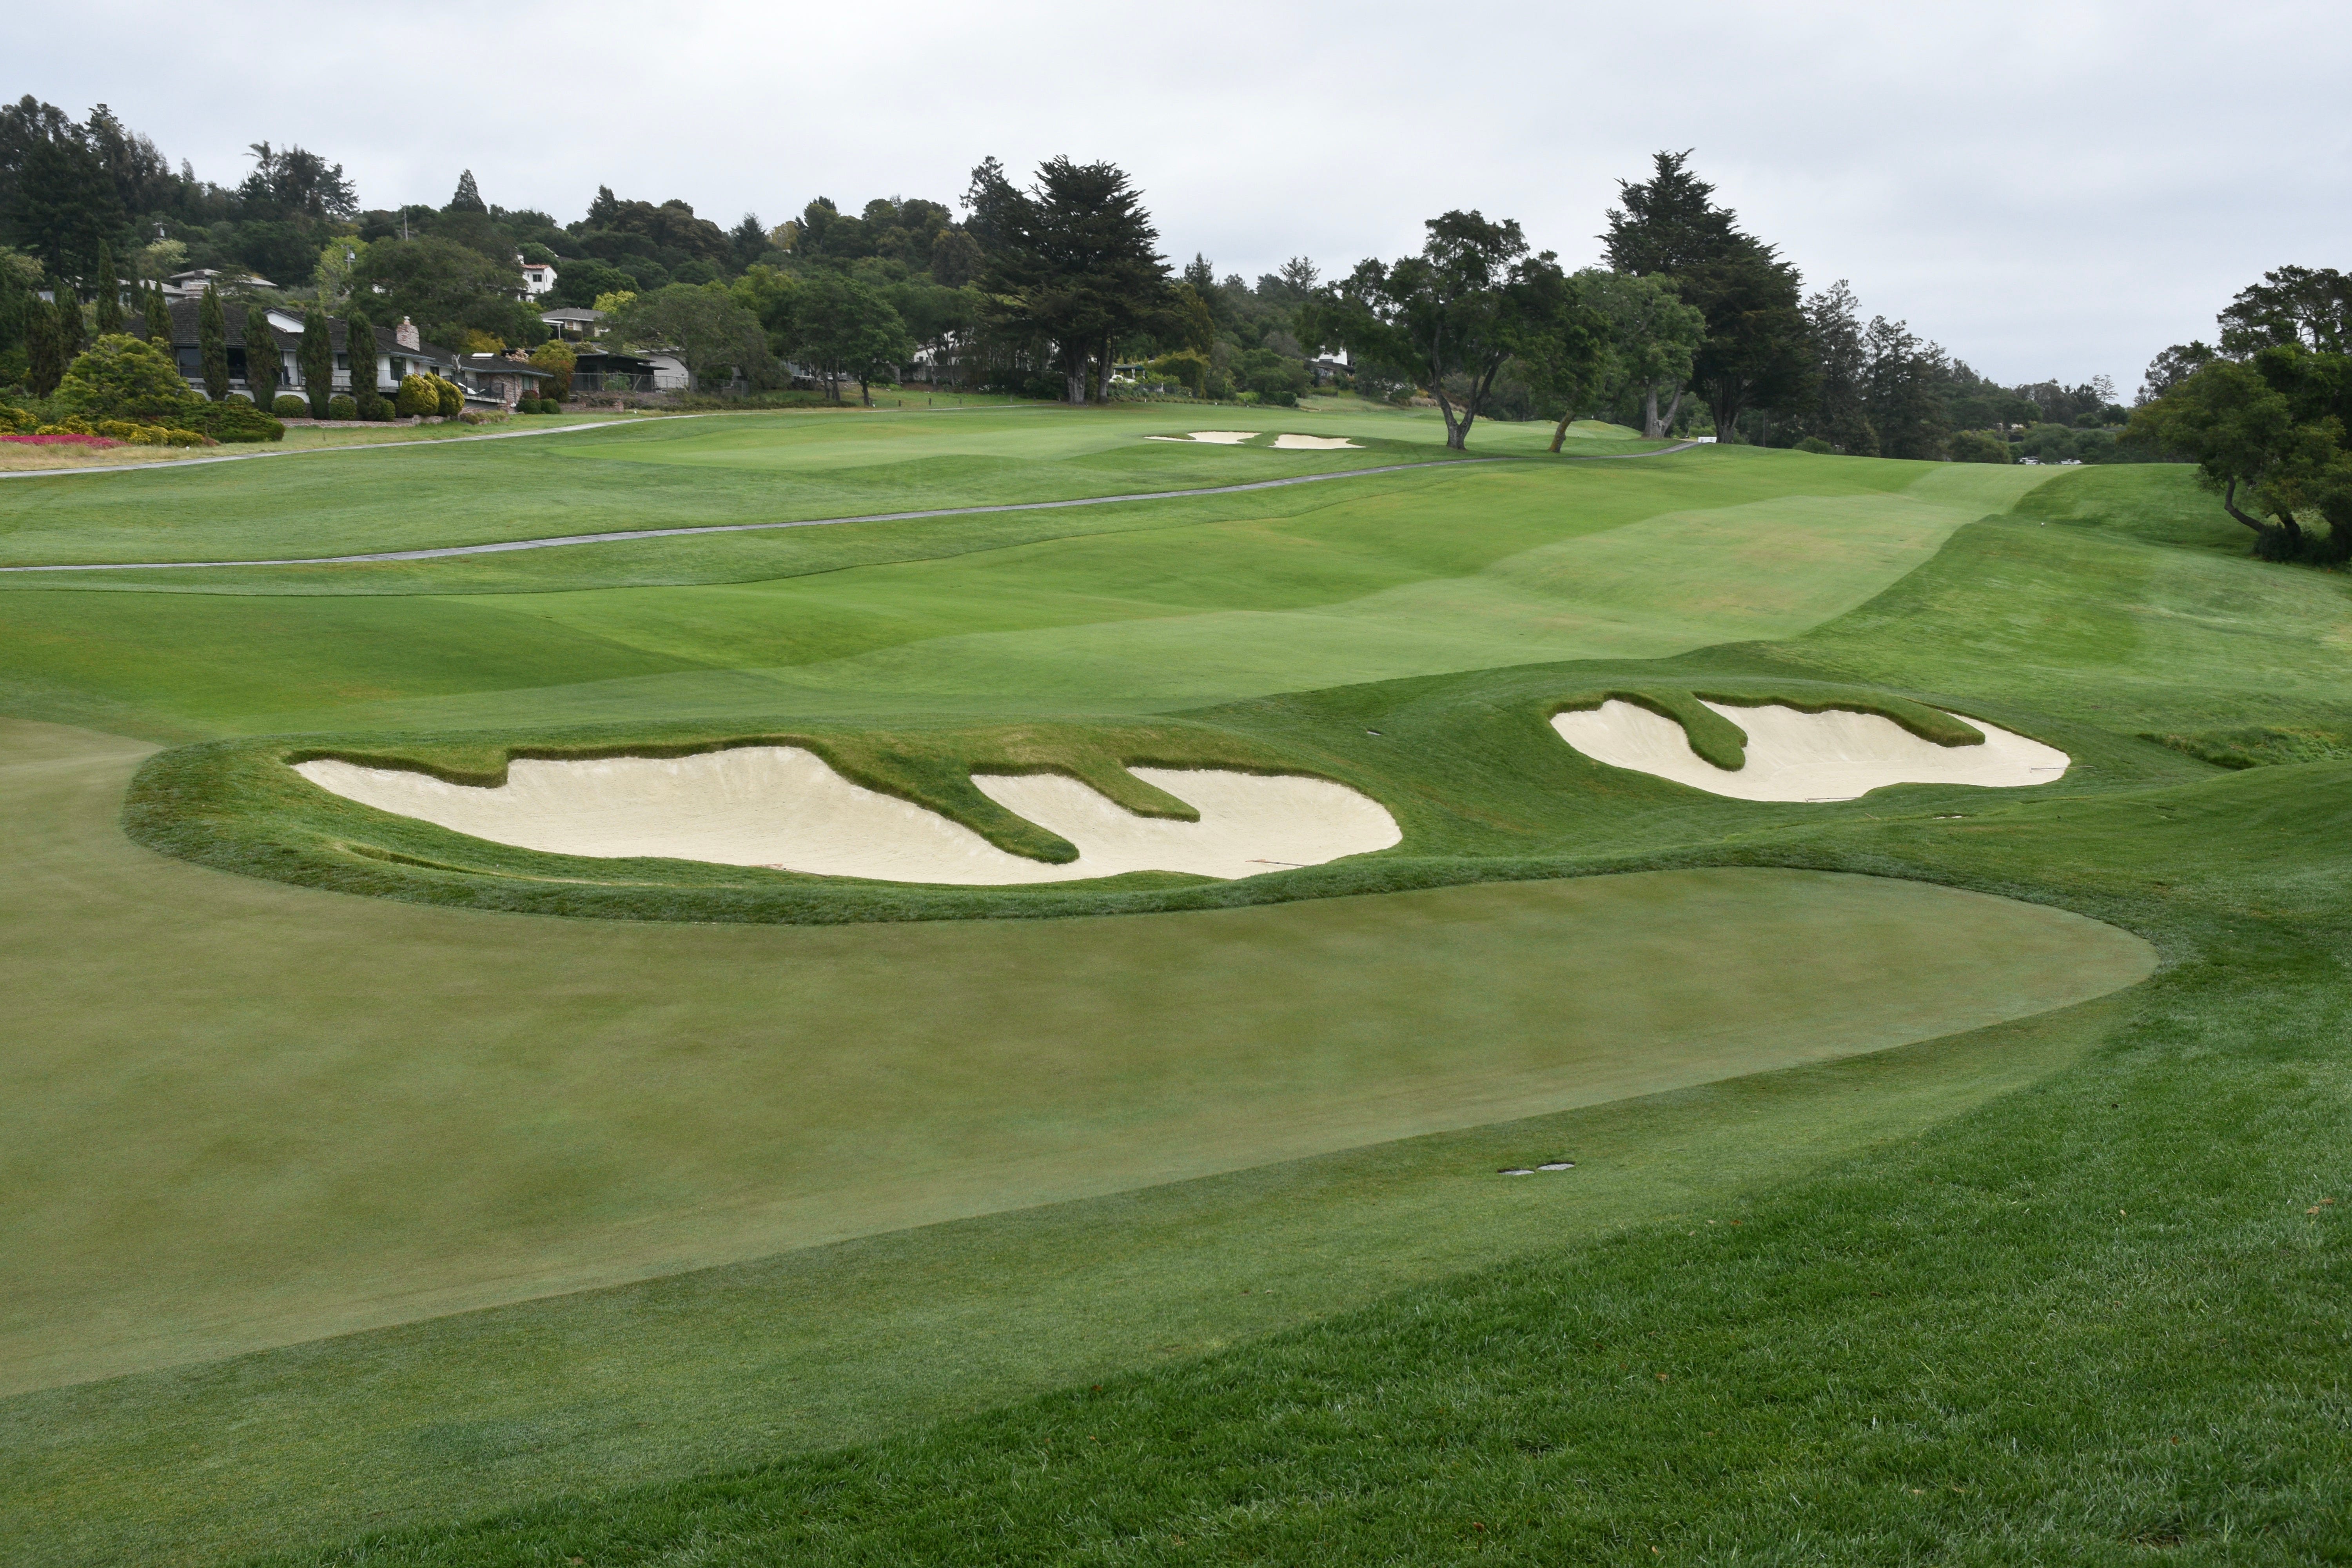
A closer look at the series of left fairway bunkers of the 13th hole
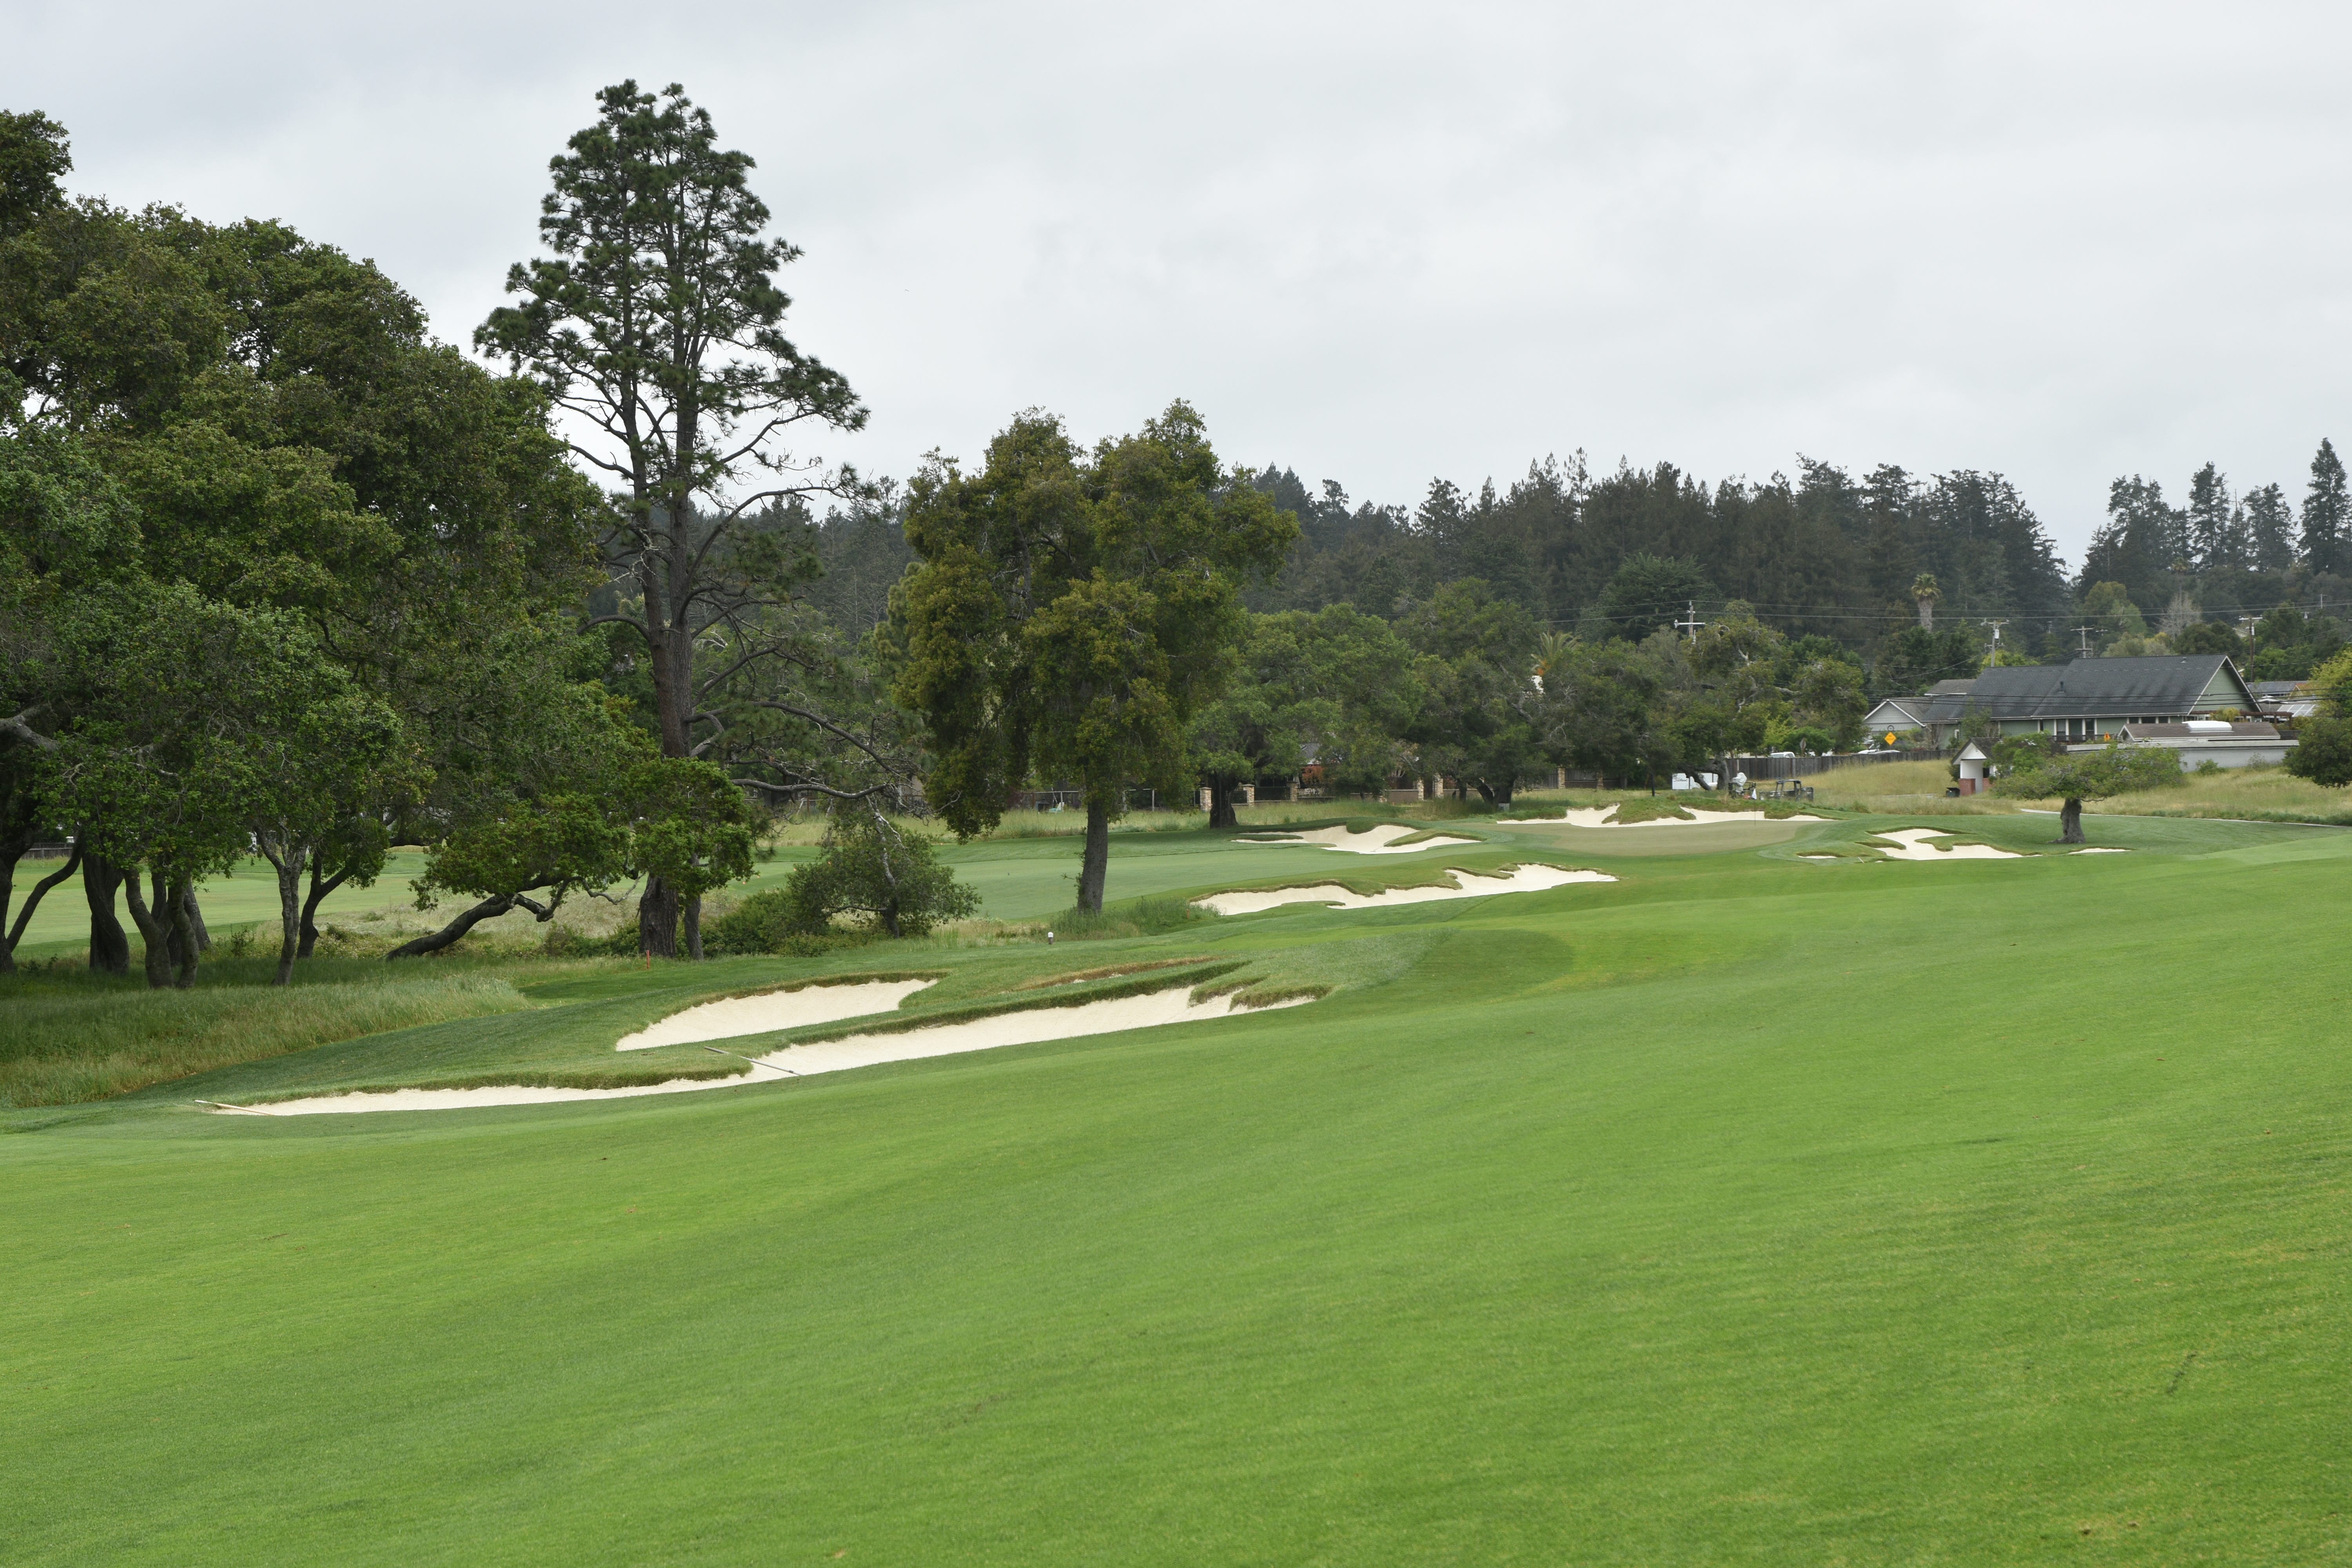
Once over the crest of the 13th hole fairway, the magnificent 13th hole green becomes visible out in the distance
The 13th hole approach — A player needs to be mindful of where to lay up depending on the hole location of the day. Pins can become virtually inaccessible if not approaching this green from the proper angle
The artful MacKenzie cluster of bunkers that move from left to right. According to Urbina, these bunkers were meant to be an extension of the barranca hugging the 13th hole on the left
A closer look at the 13th hole approach with the cluster of MacKenzie bunkers obscuring the approach shot
MacKenzie’s mastery of camouflage is in full display with the bunkers on the right of the 13th hole green. What appears to be one large bunker on the right is actually two distinct bunkers
The left central bunker of the 13th hole that guards the approach and wreaks havoc with the layup strategy
Various angles of the the left central fairway bunker of the 13th hole
The first right green side bunker of the 13th hole — ending up in here is a serious mistake!
Missing the 13th hole green on the right comes with peril
Looking back towards the 13th hole fairway from the green. The barranca can be seen on the right
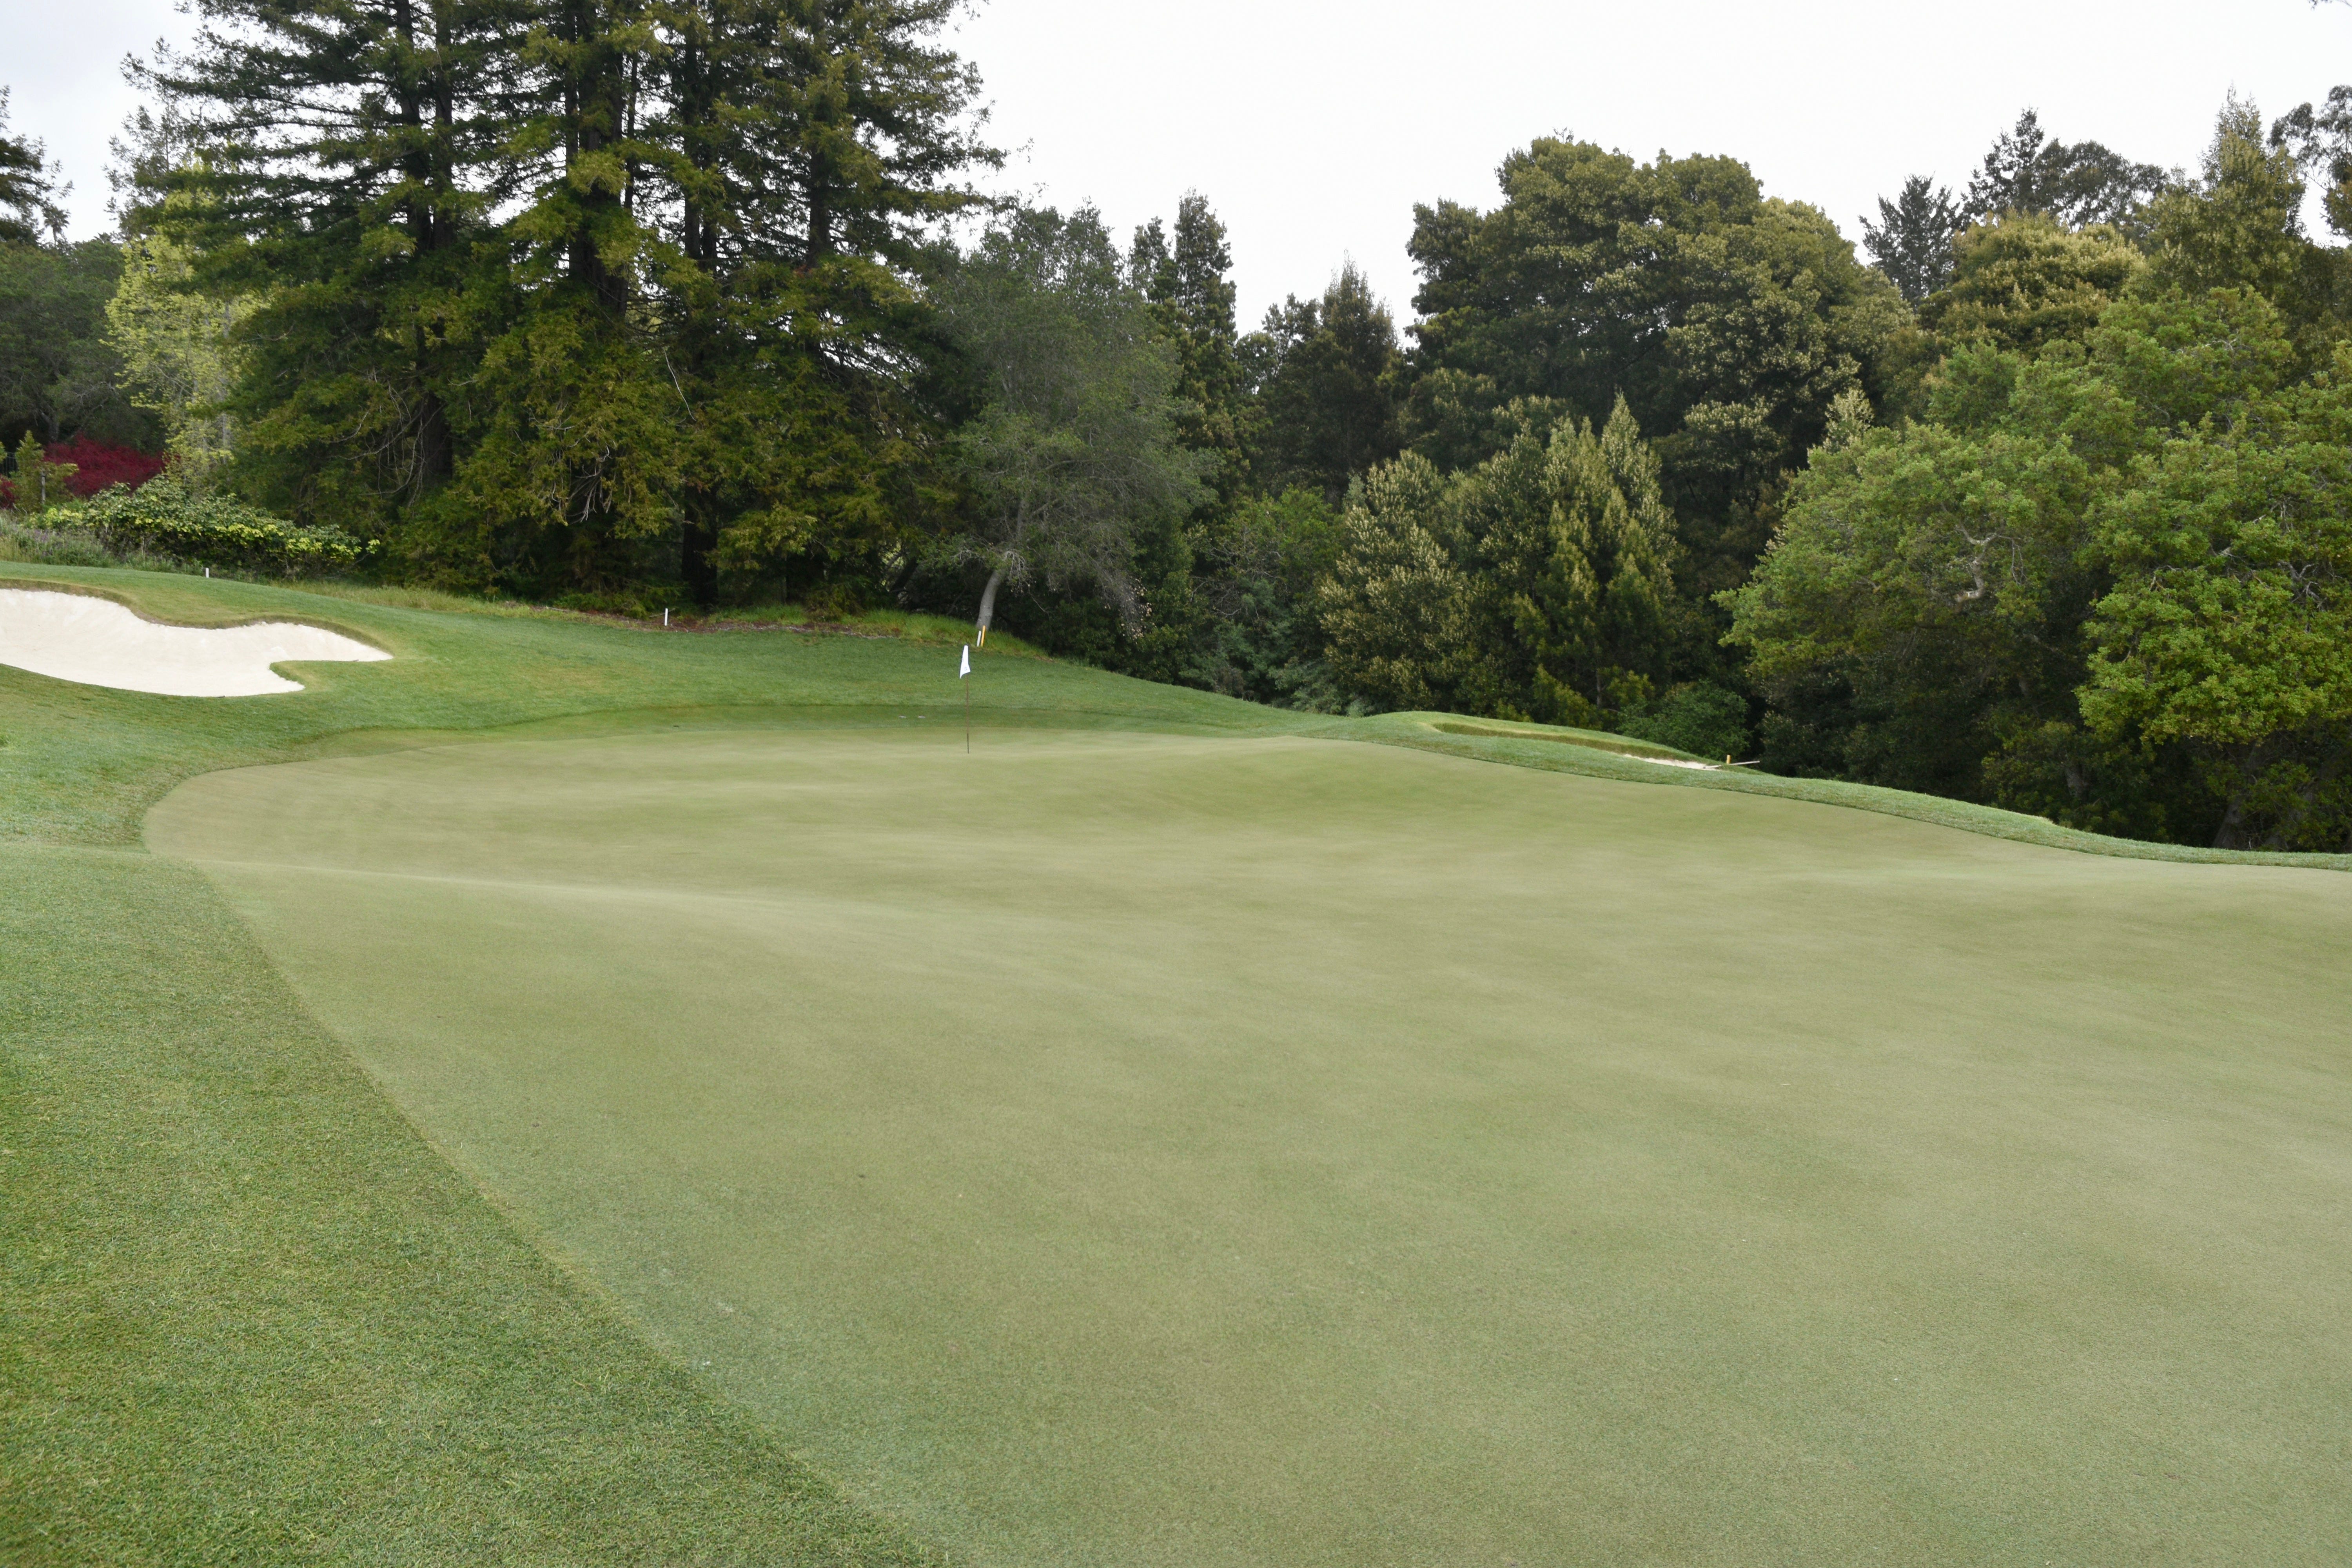
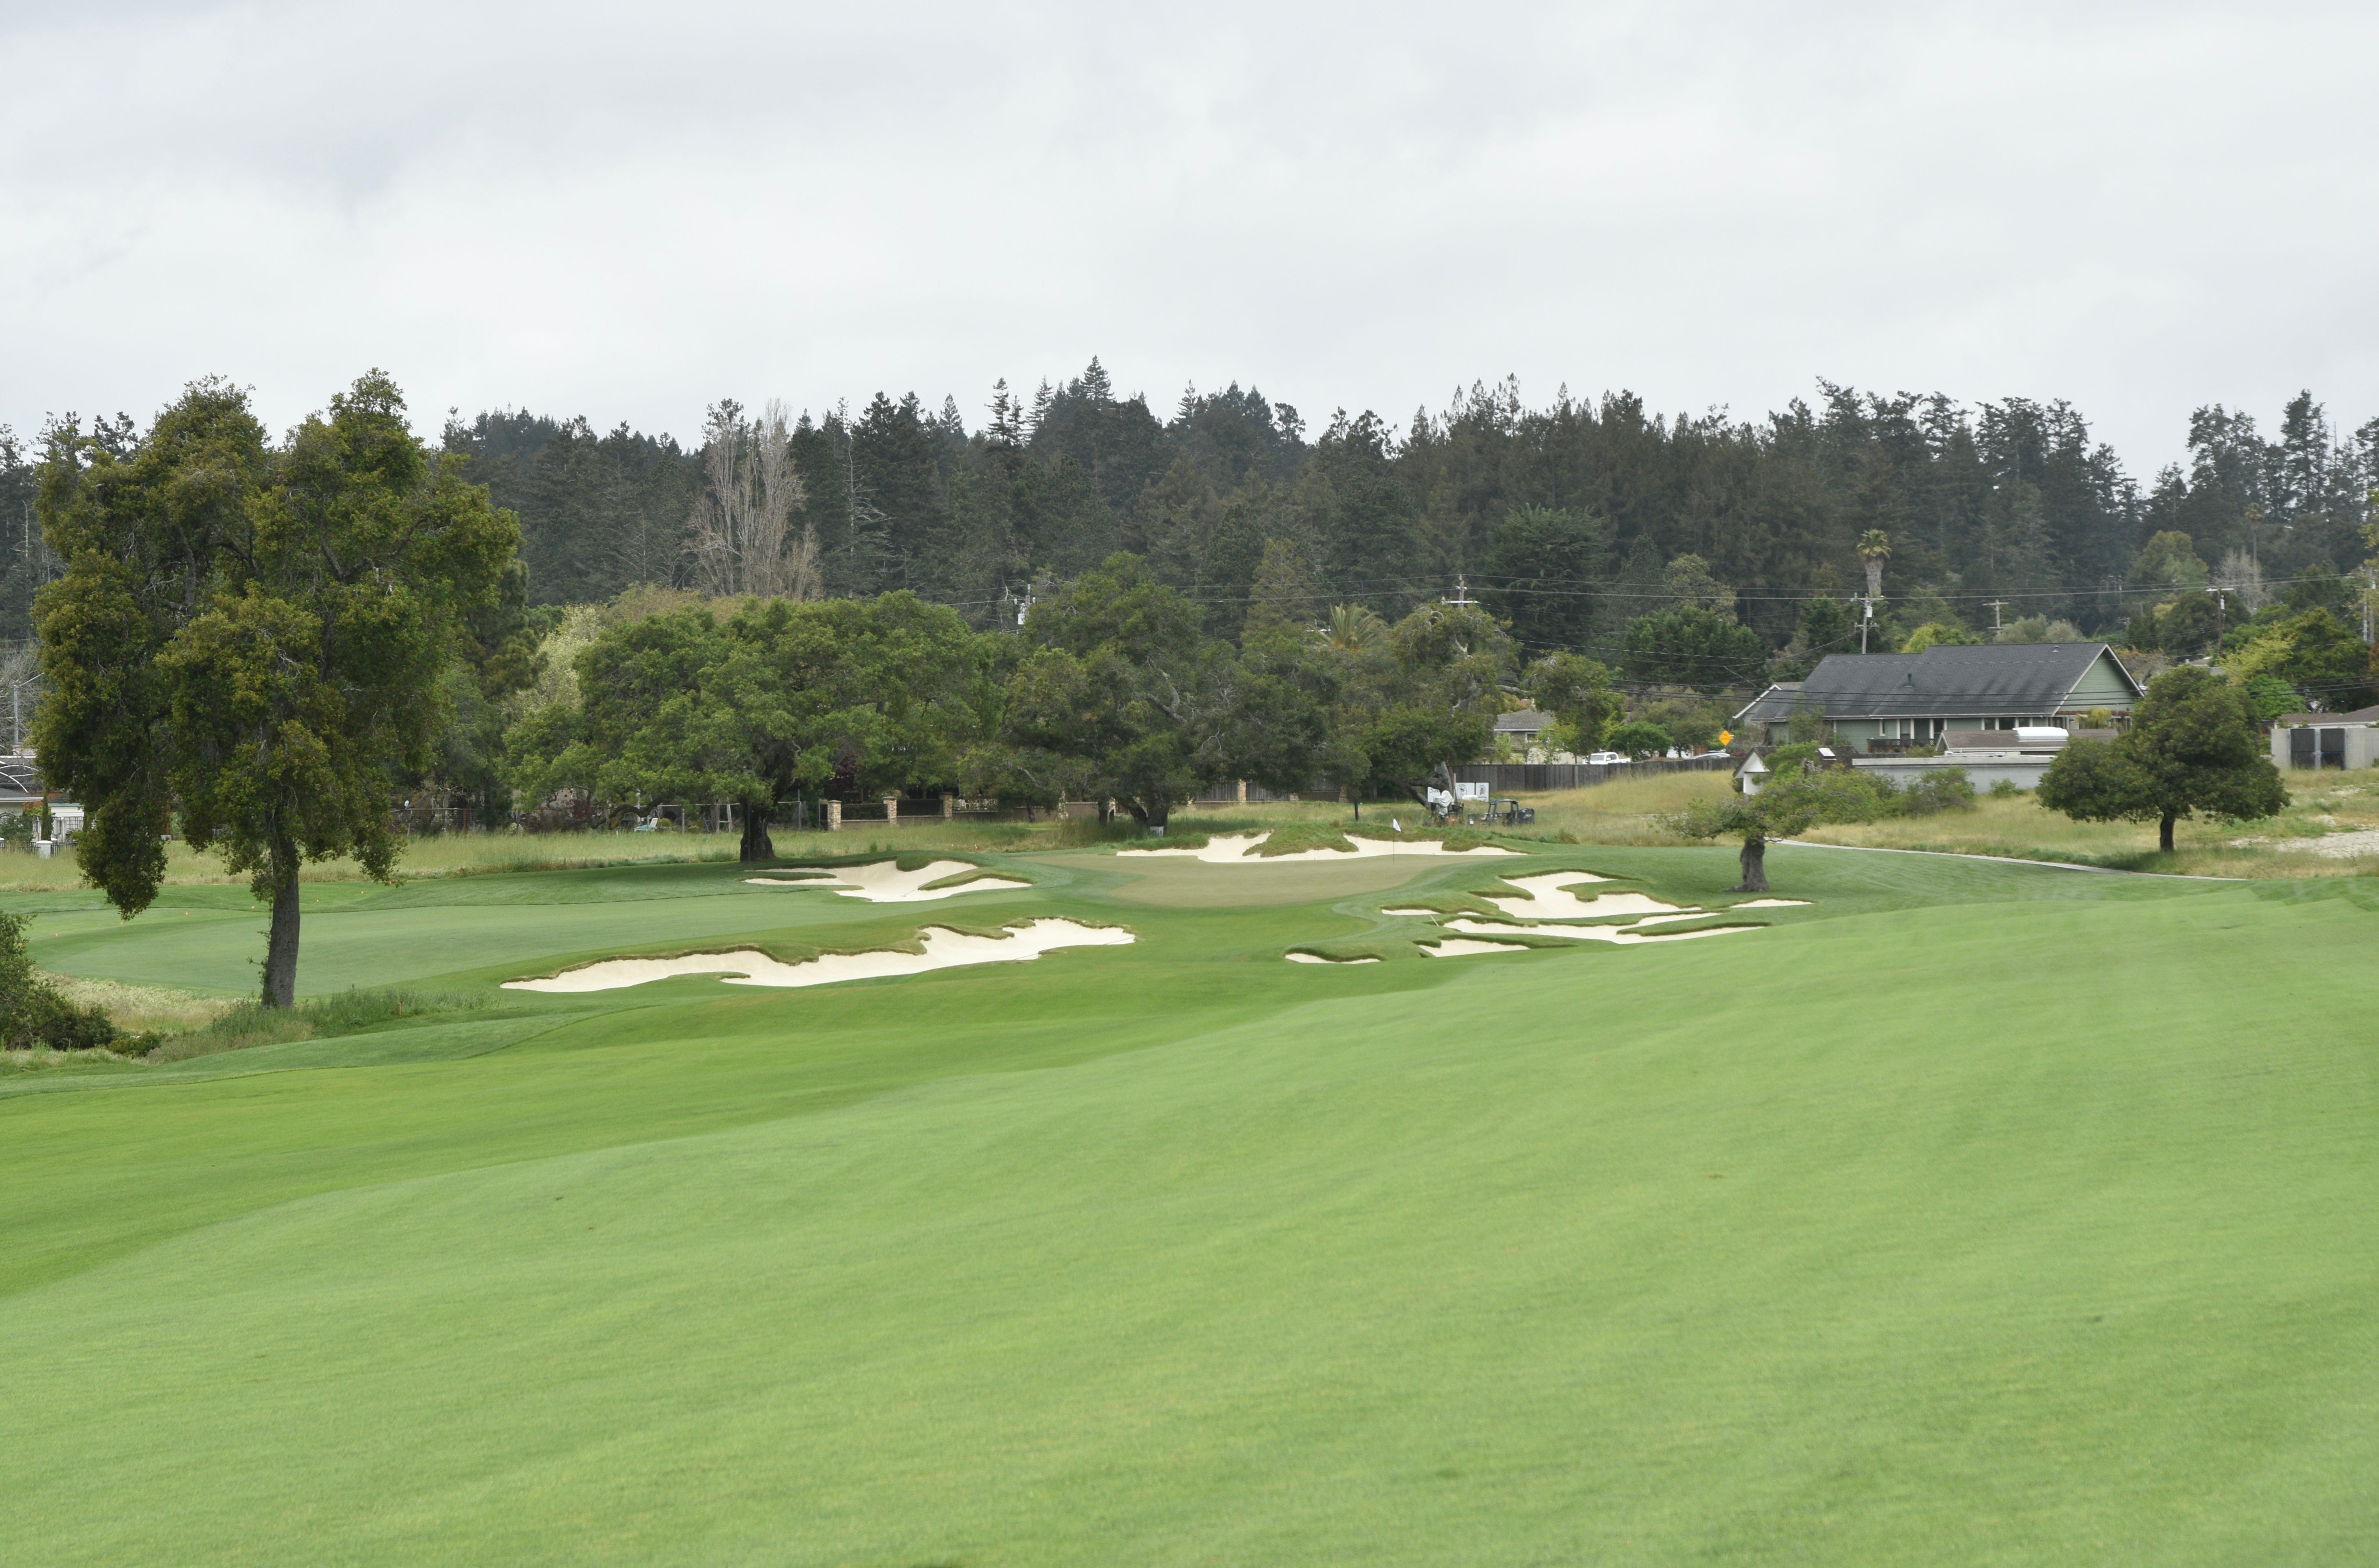
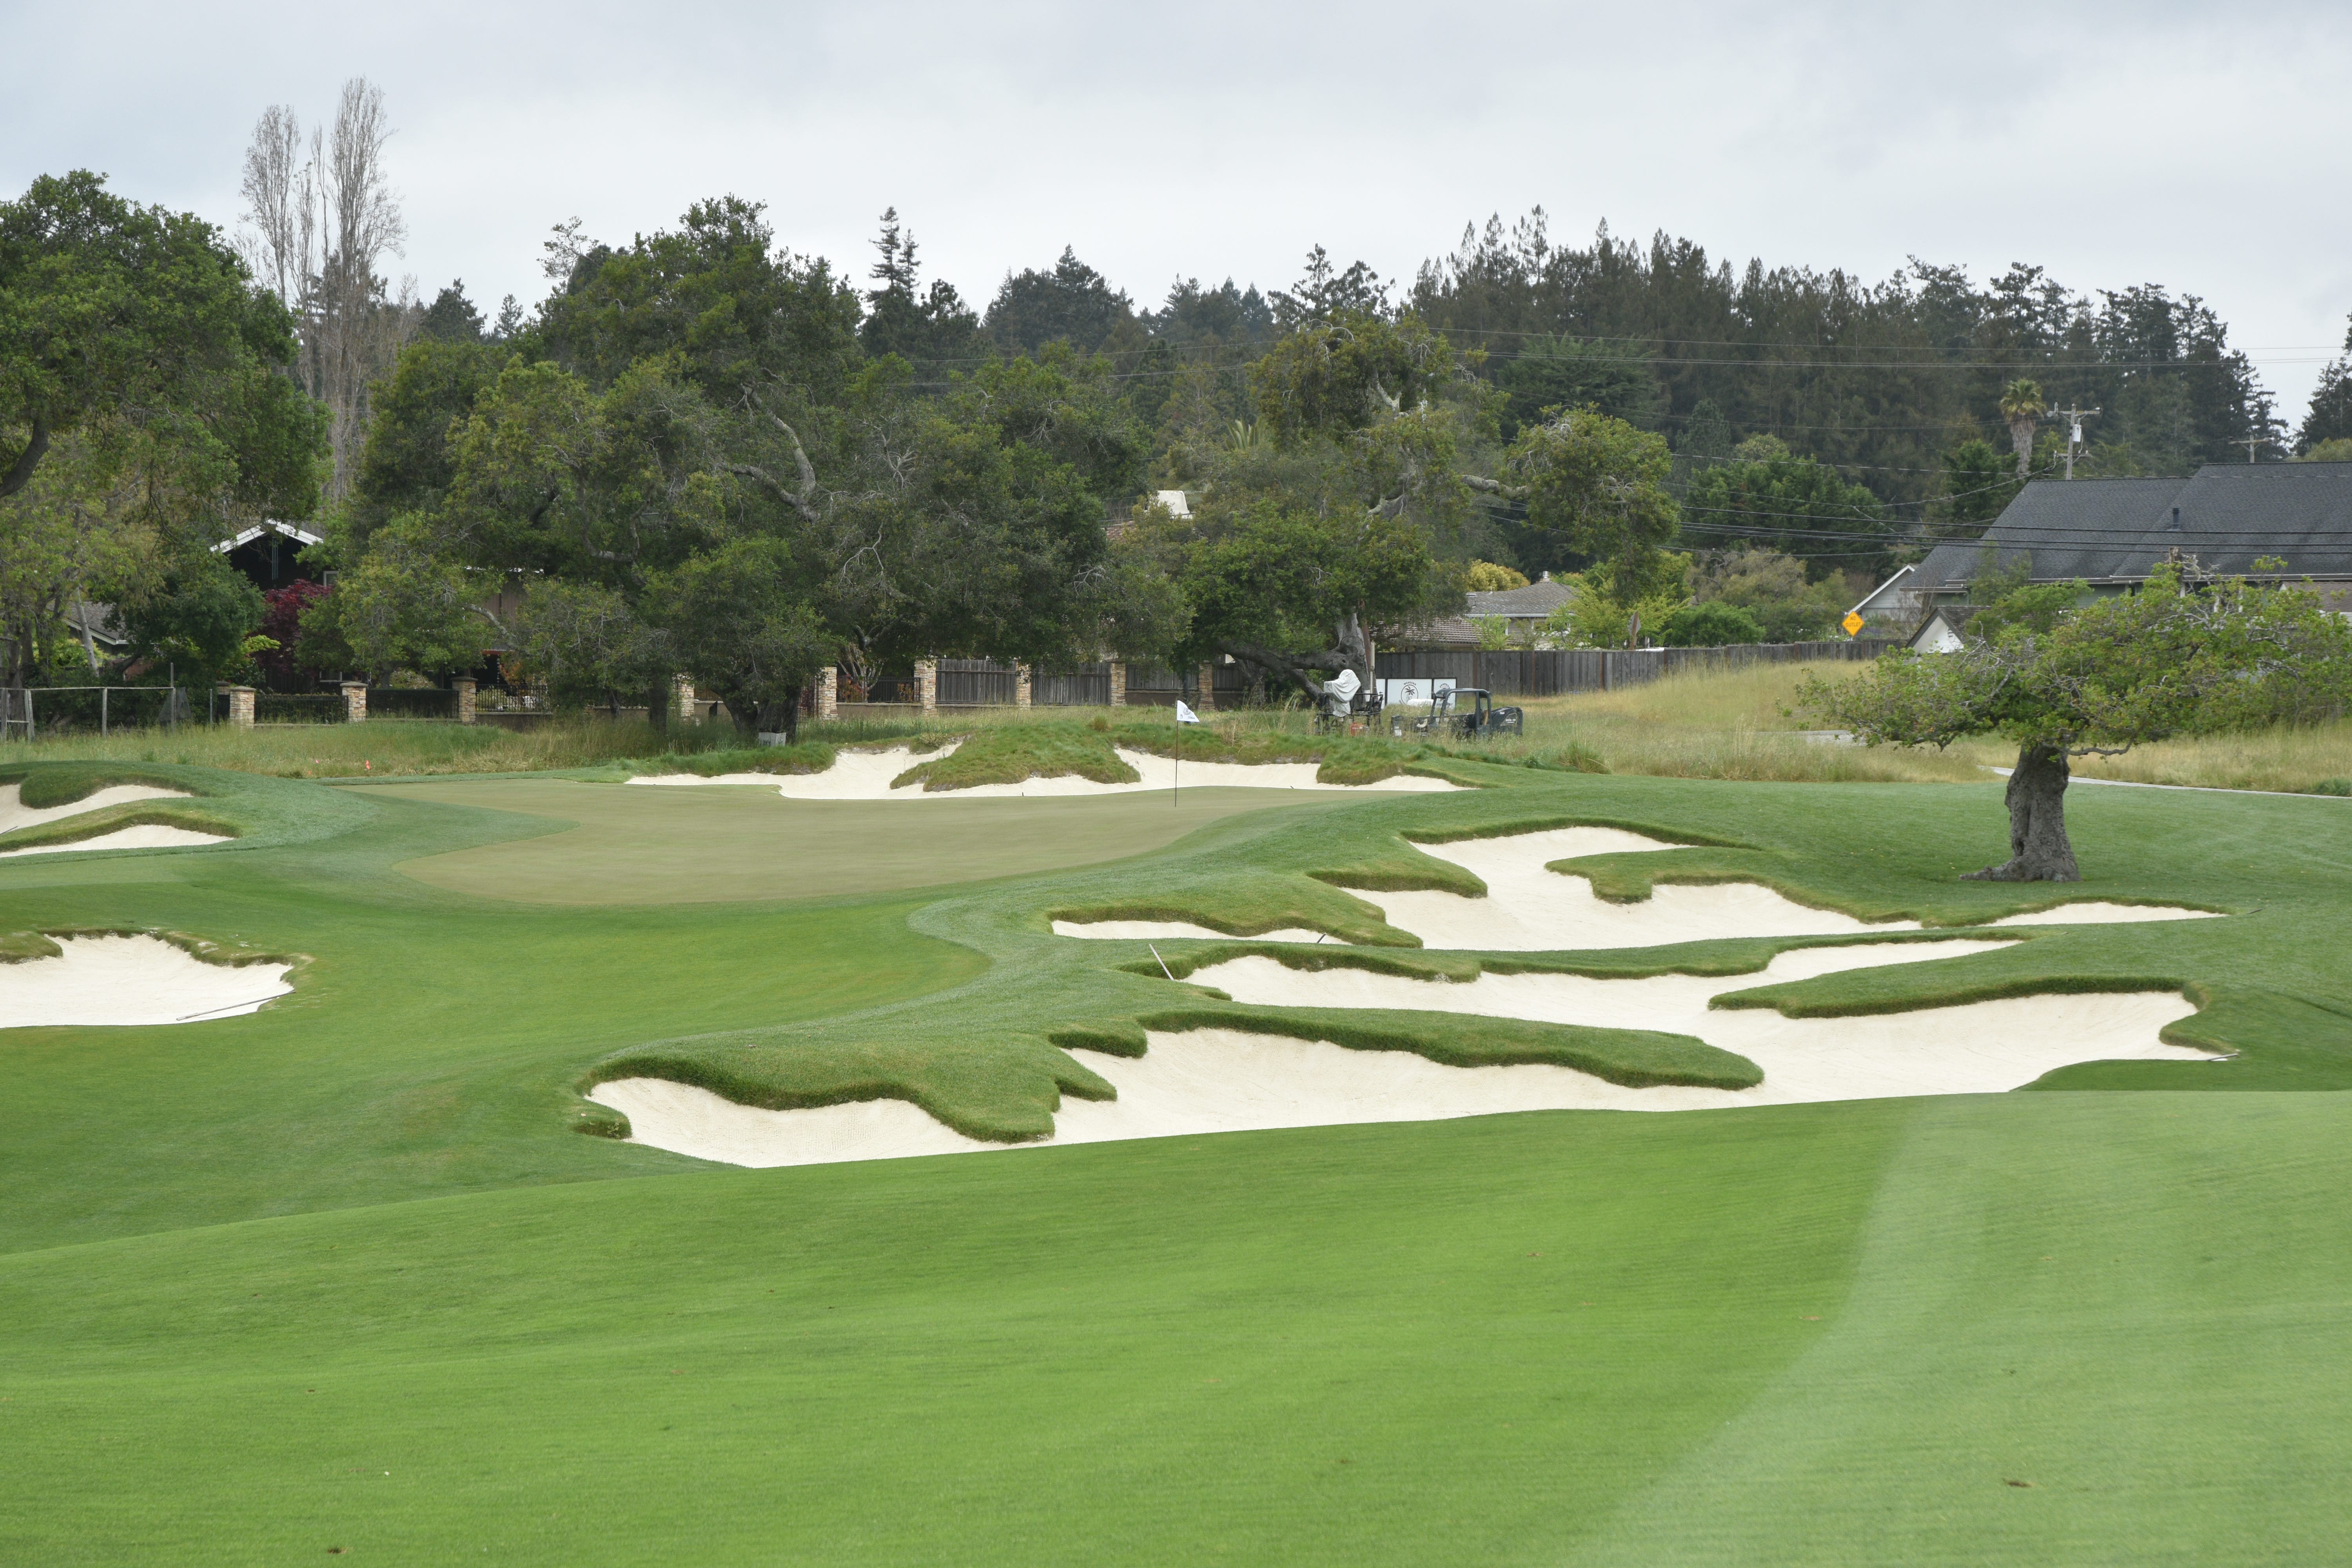
The 13th hole green viewed from the front — the green has an elongated T-shape, and the angle of approach is critical depending on where the hole location is
Another vantage point of the 13th hole green from the front right — the back left tongue is visible and tucked behind the left green side bunker and a large oak tree
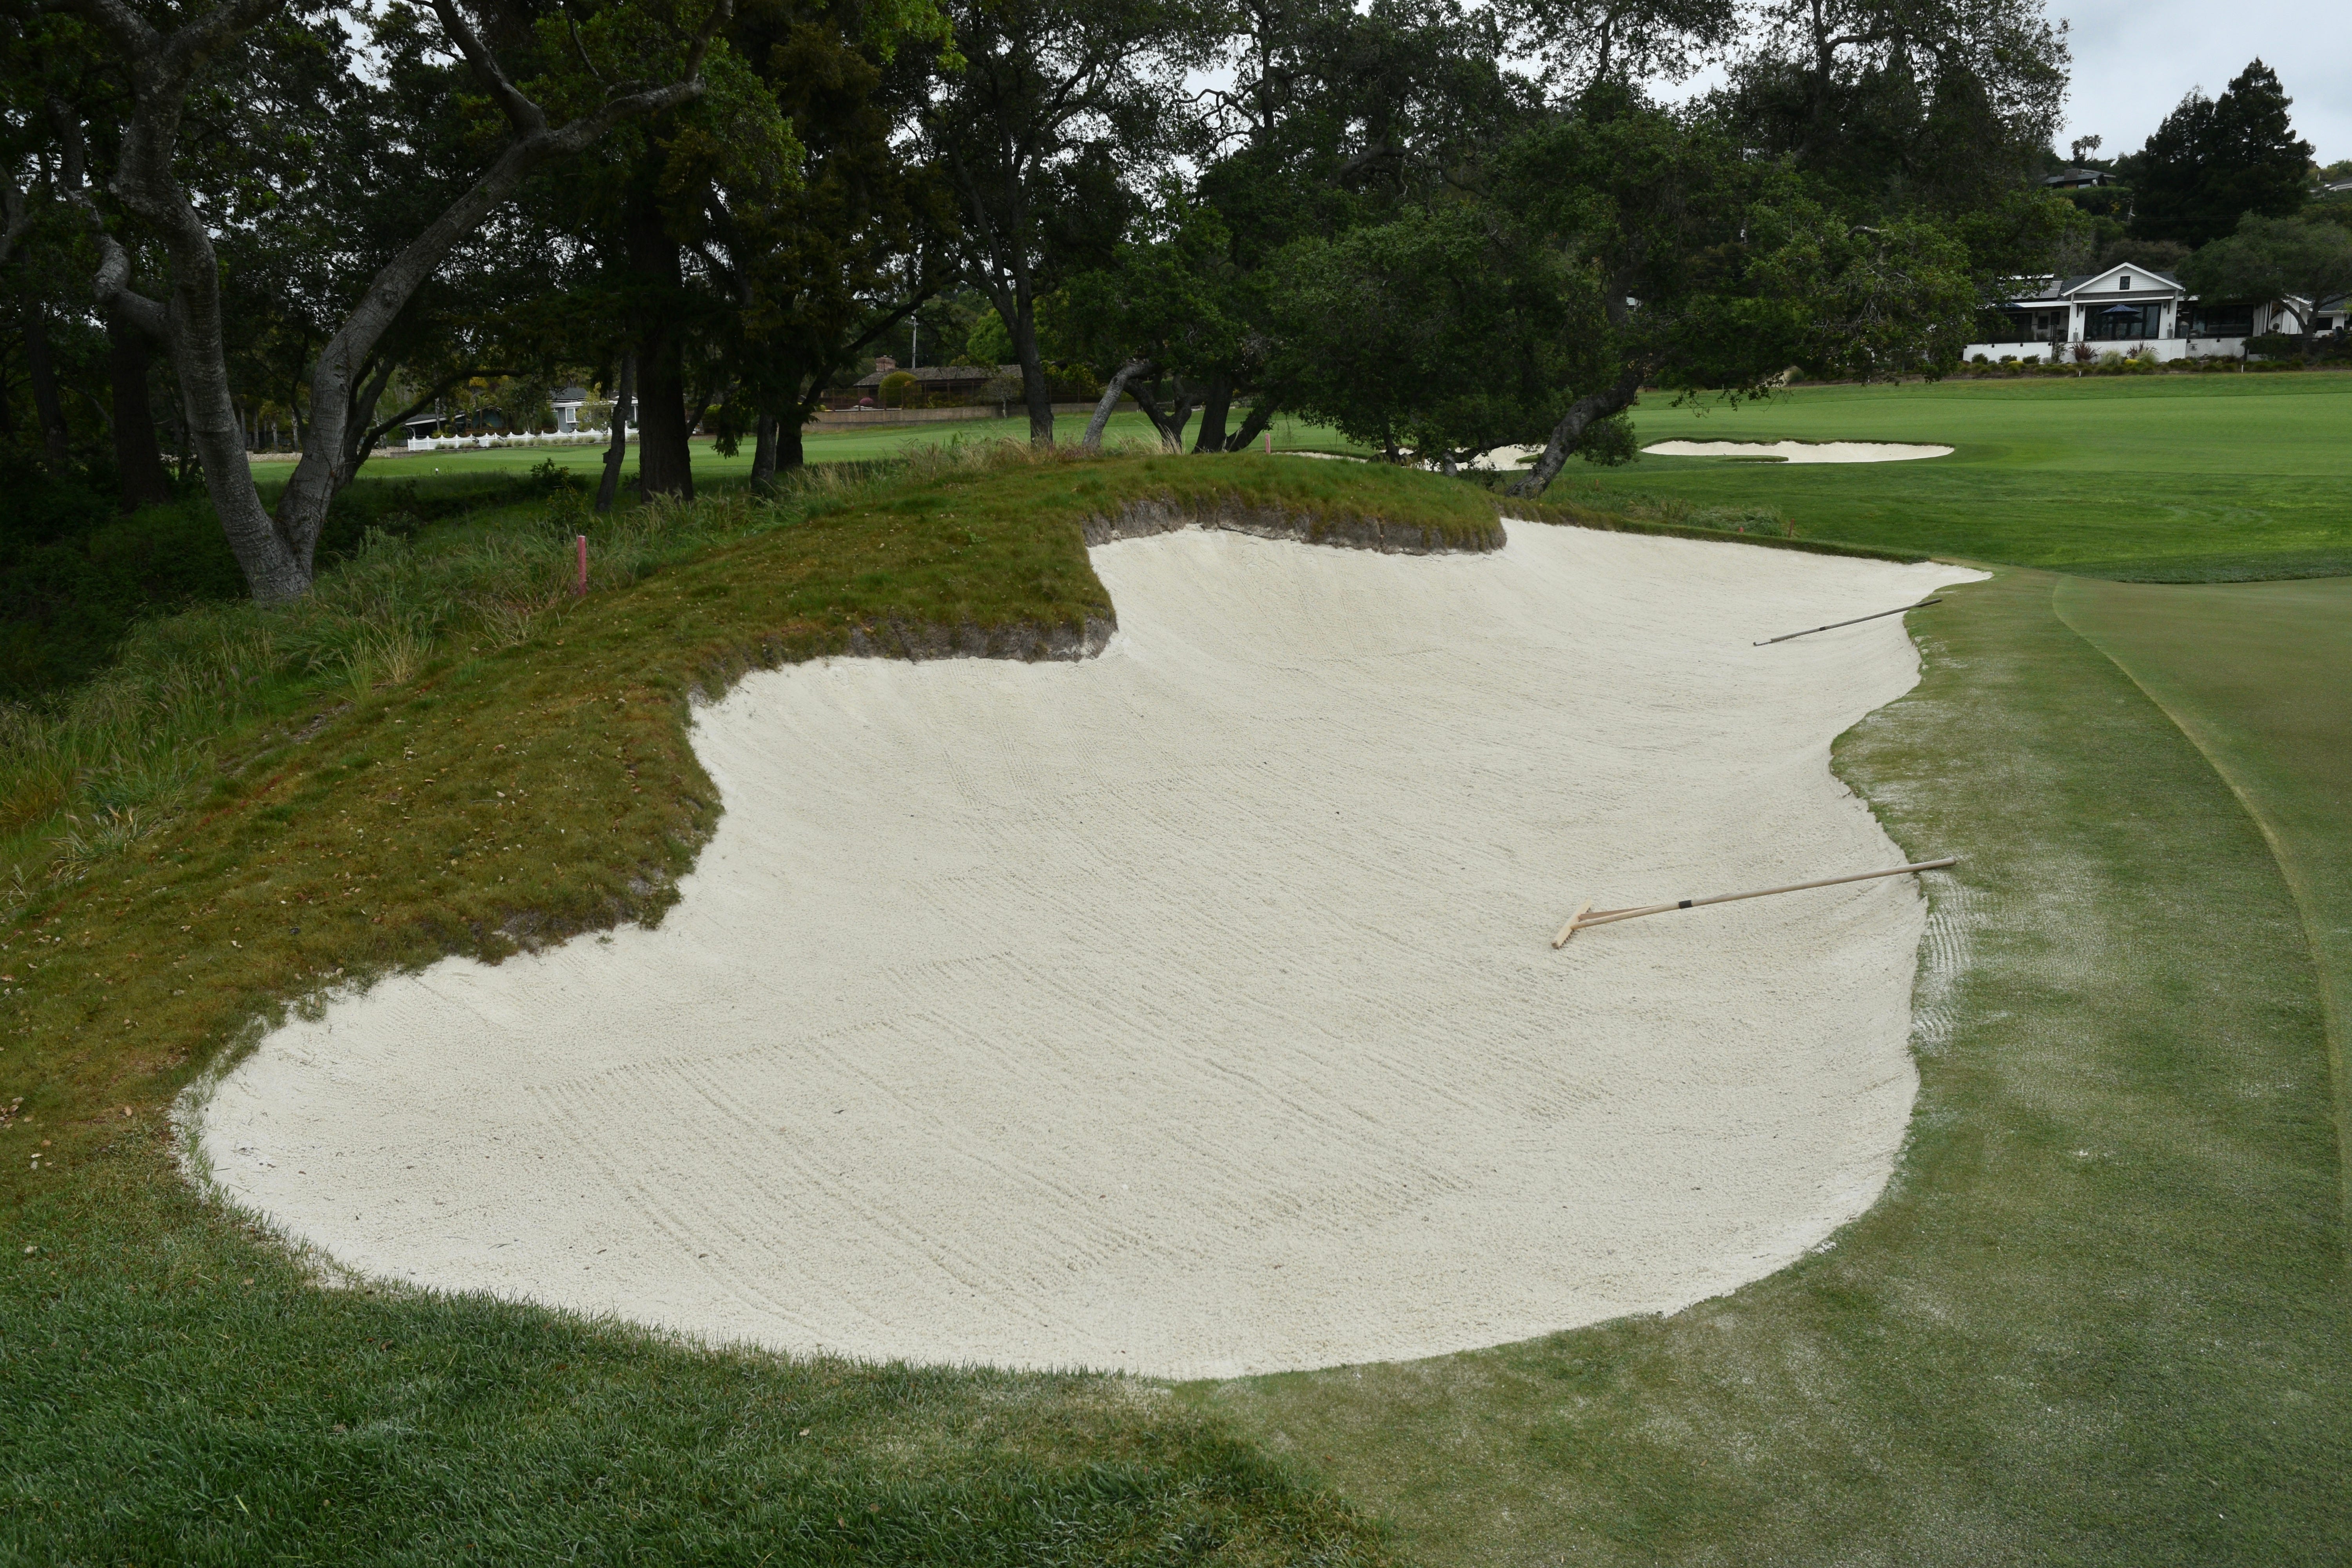
The large left green side bunker of the 13th hole
The 13th hole green viewed from the back left — the back left tongue section is one of the trickiest sections to access without the proper angle. Urbina actually sharpened the shape of this back left tongue section to make it more narrower than it was previously
The back green side bunker of the 13th hole — the front entry of the bunker is closely shaven to allow balls to easily run into it. Technically, players can putt out of this bunker if they choose to
The photo shows the severity of the canted angle of the back left tongue section of the 13th hole green. Not only do players have to contend with two bunkers but also an overhanging oak tree
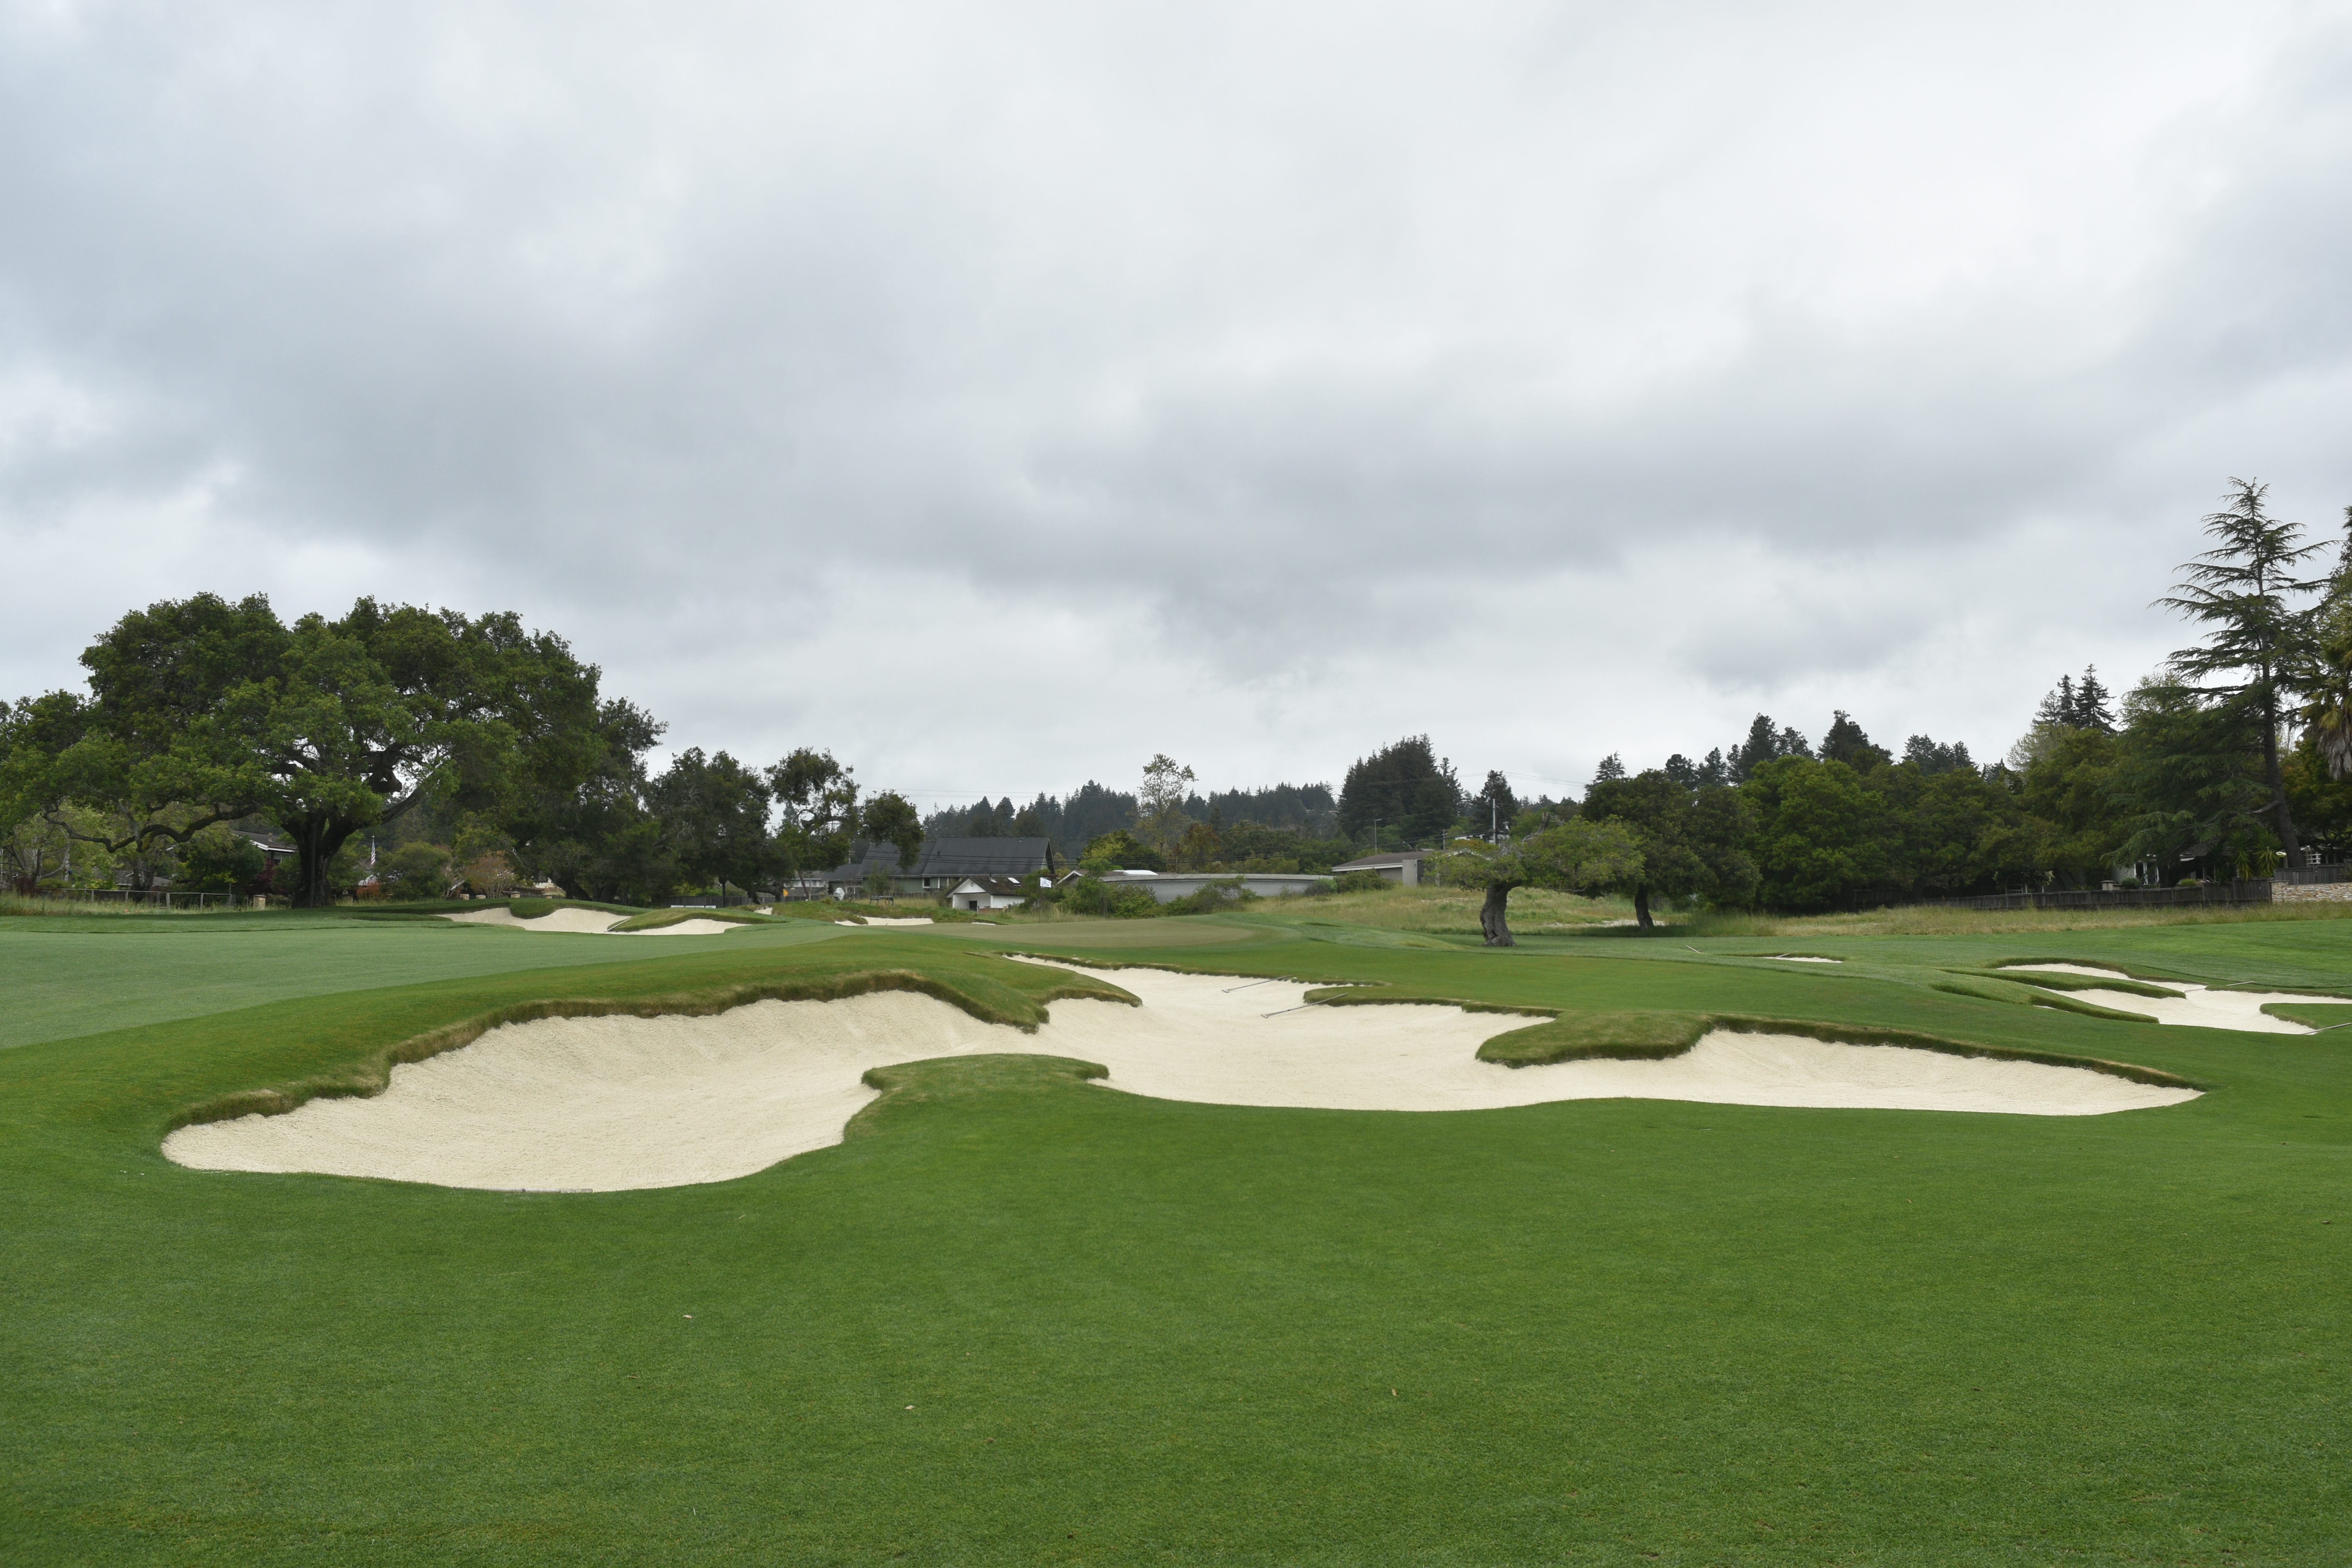
The 13th hole green viewed from the middle right
The right green side bunker of the 13th hole. Not an easy bunker to recover from
The back right tongue section of the 13th hole green. Much more easier to access than the challenging back left tongue section
The 13th hole green viewed from behind
The 13th hole green viewed from the 14th hole tee
Hole 14: Par 4, 426 Yards
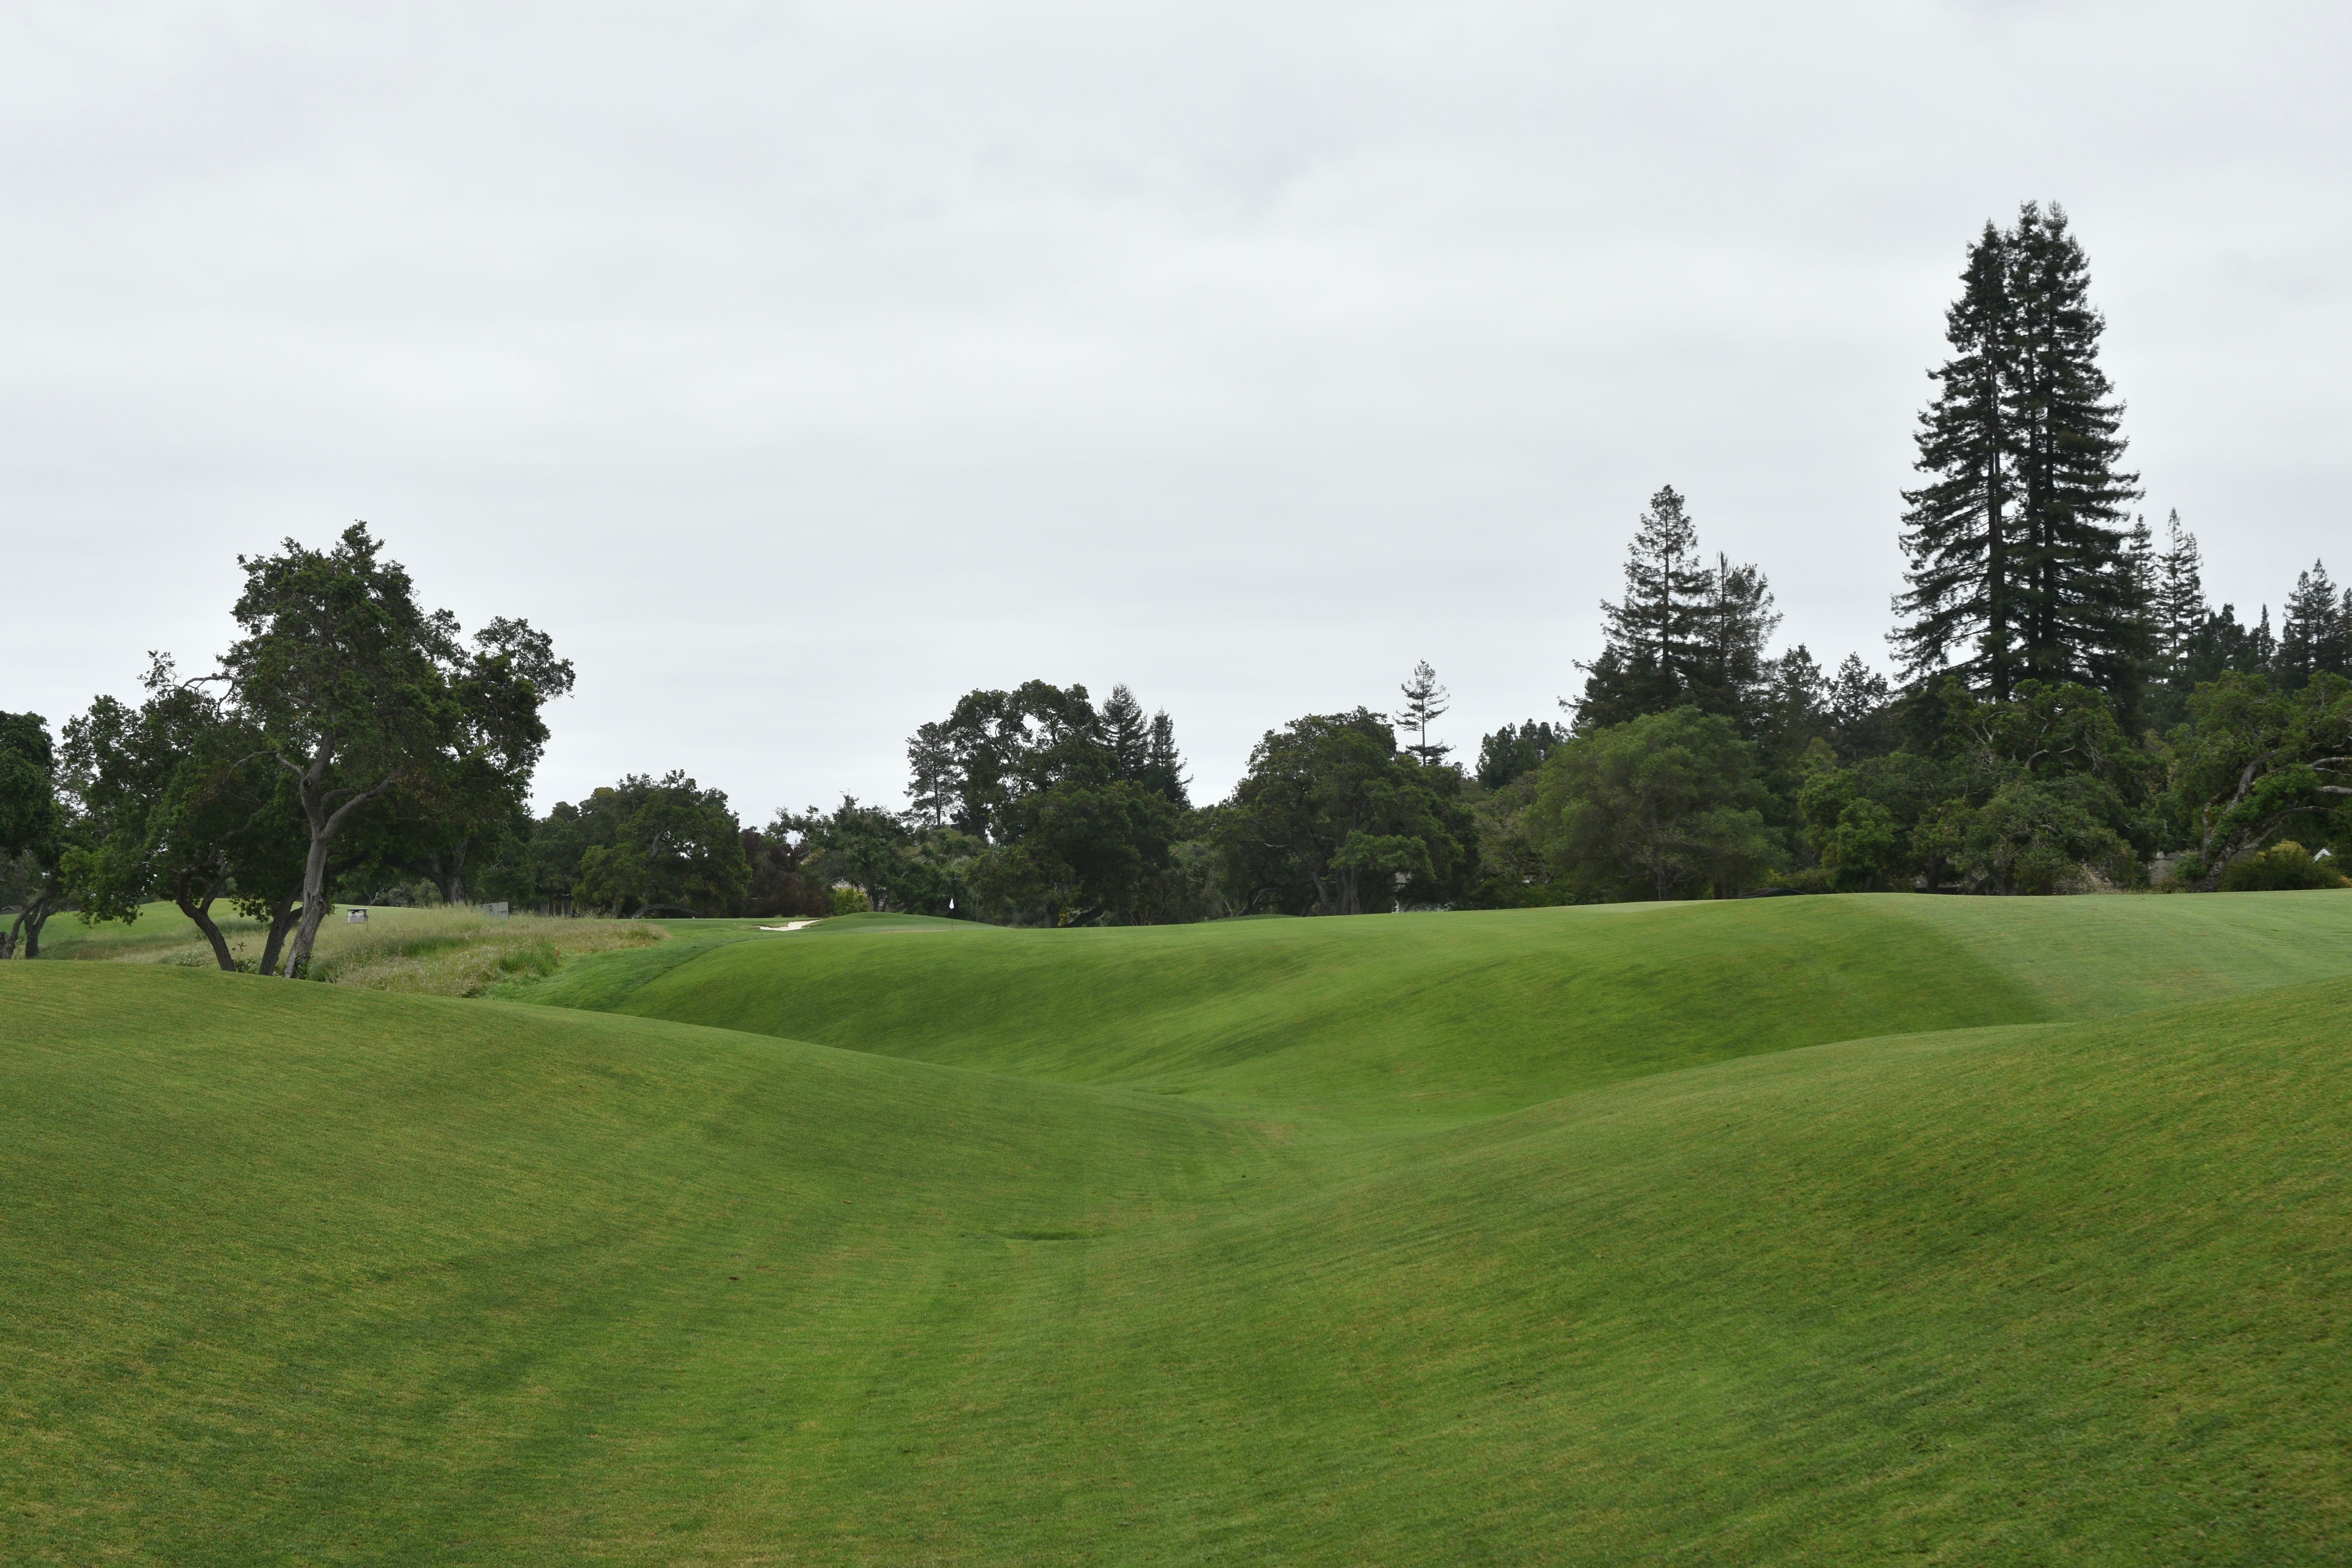
The 14th hole at Pasatiempo has one of the most unique features with the large swale within the fairway
The 14th hole tee shot from the back tee — there is a dilemma a player faces with the tee shot given. the large swale to contend with
The 14th hole tee shot from the middle teeing ground
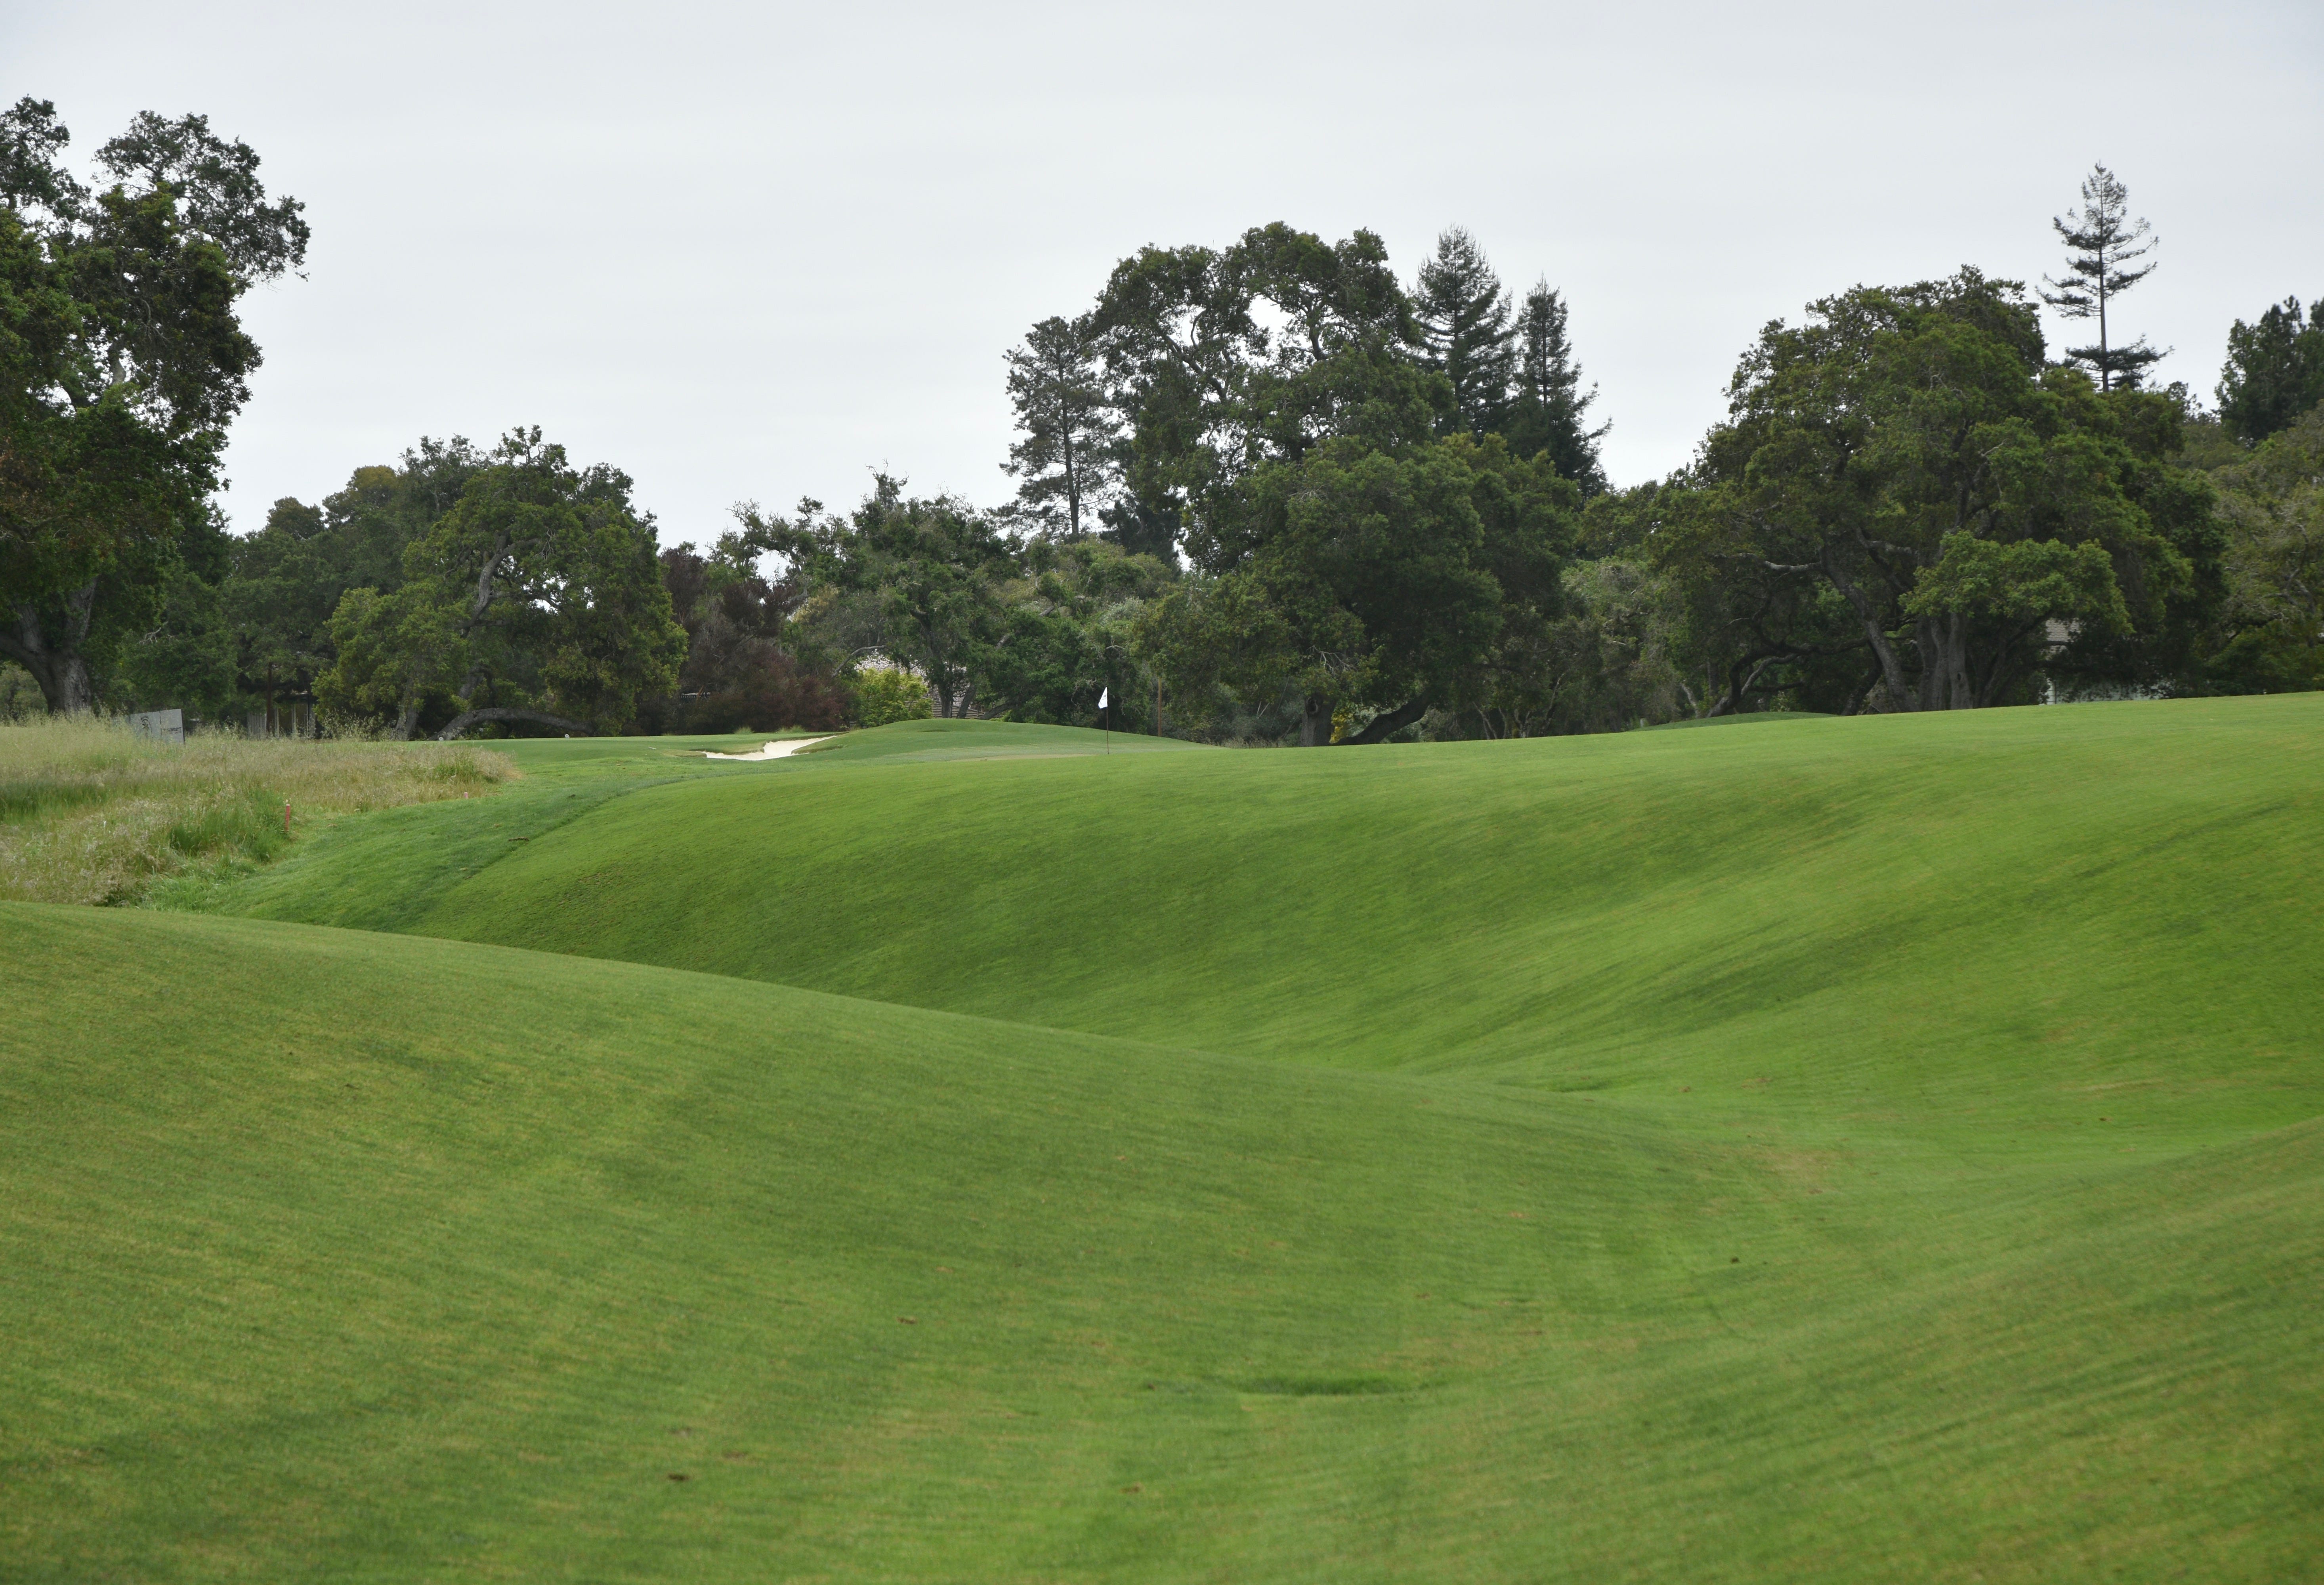
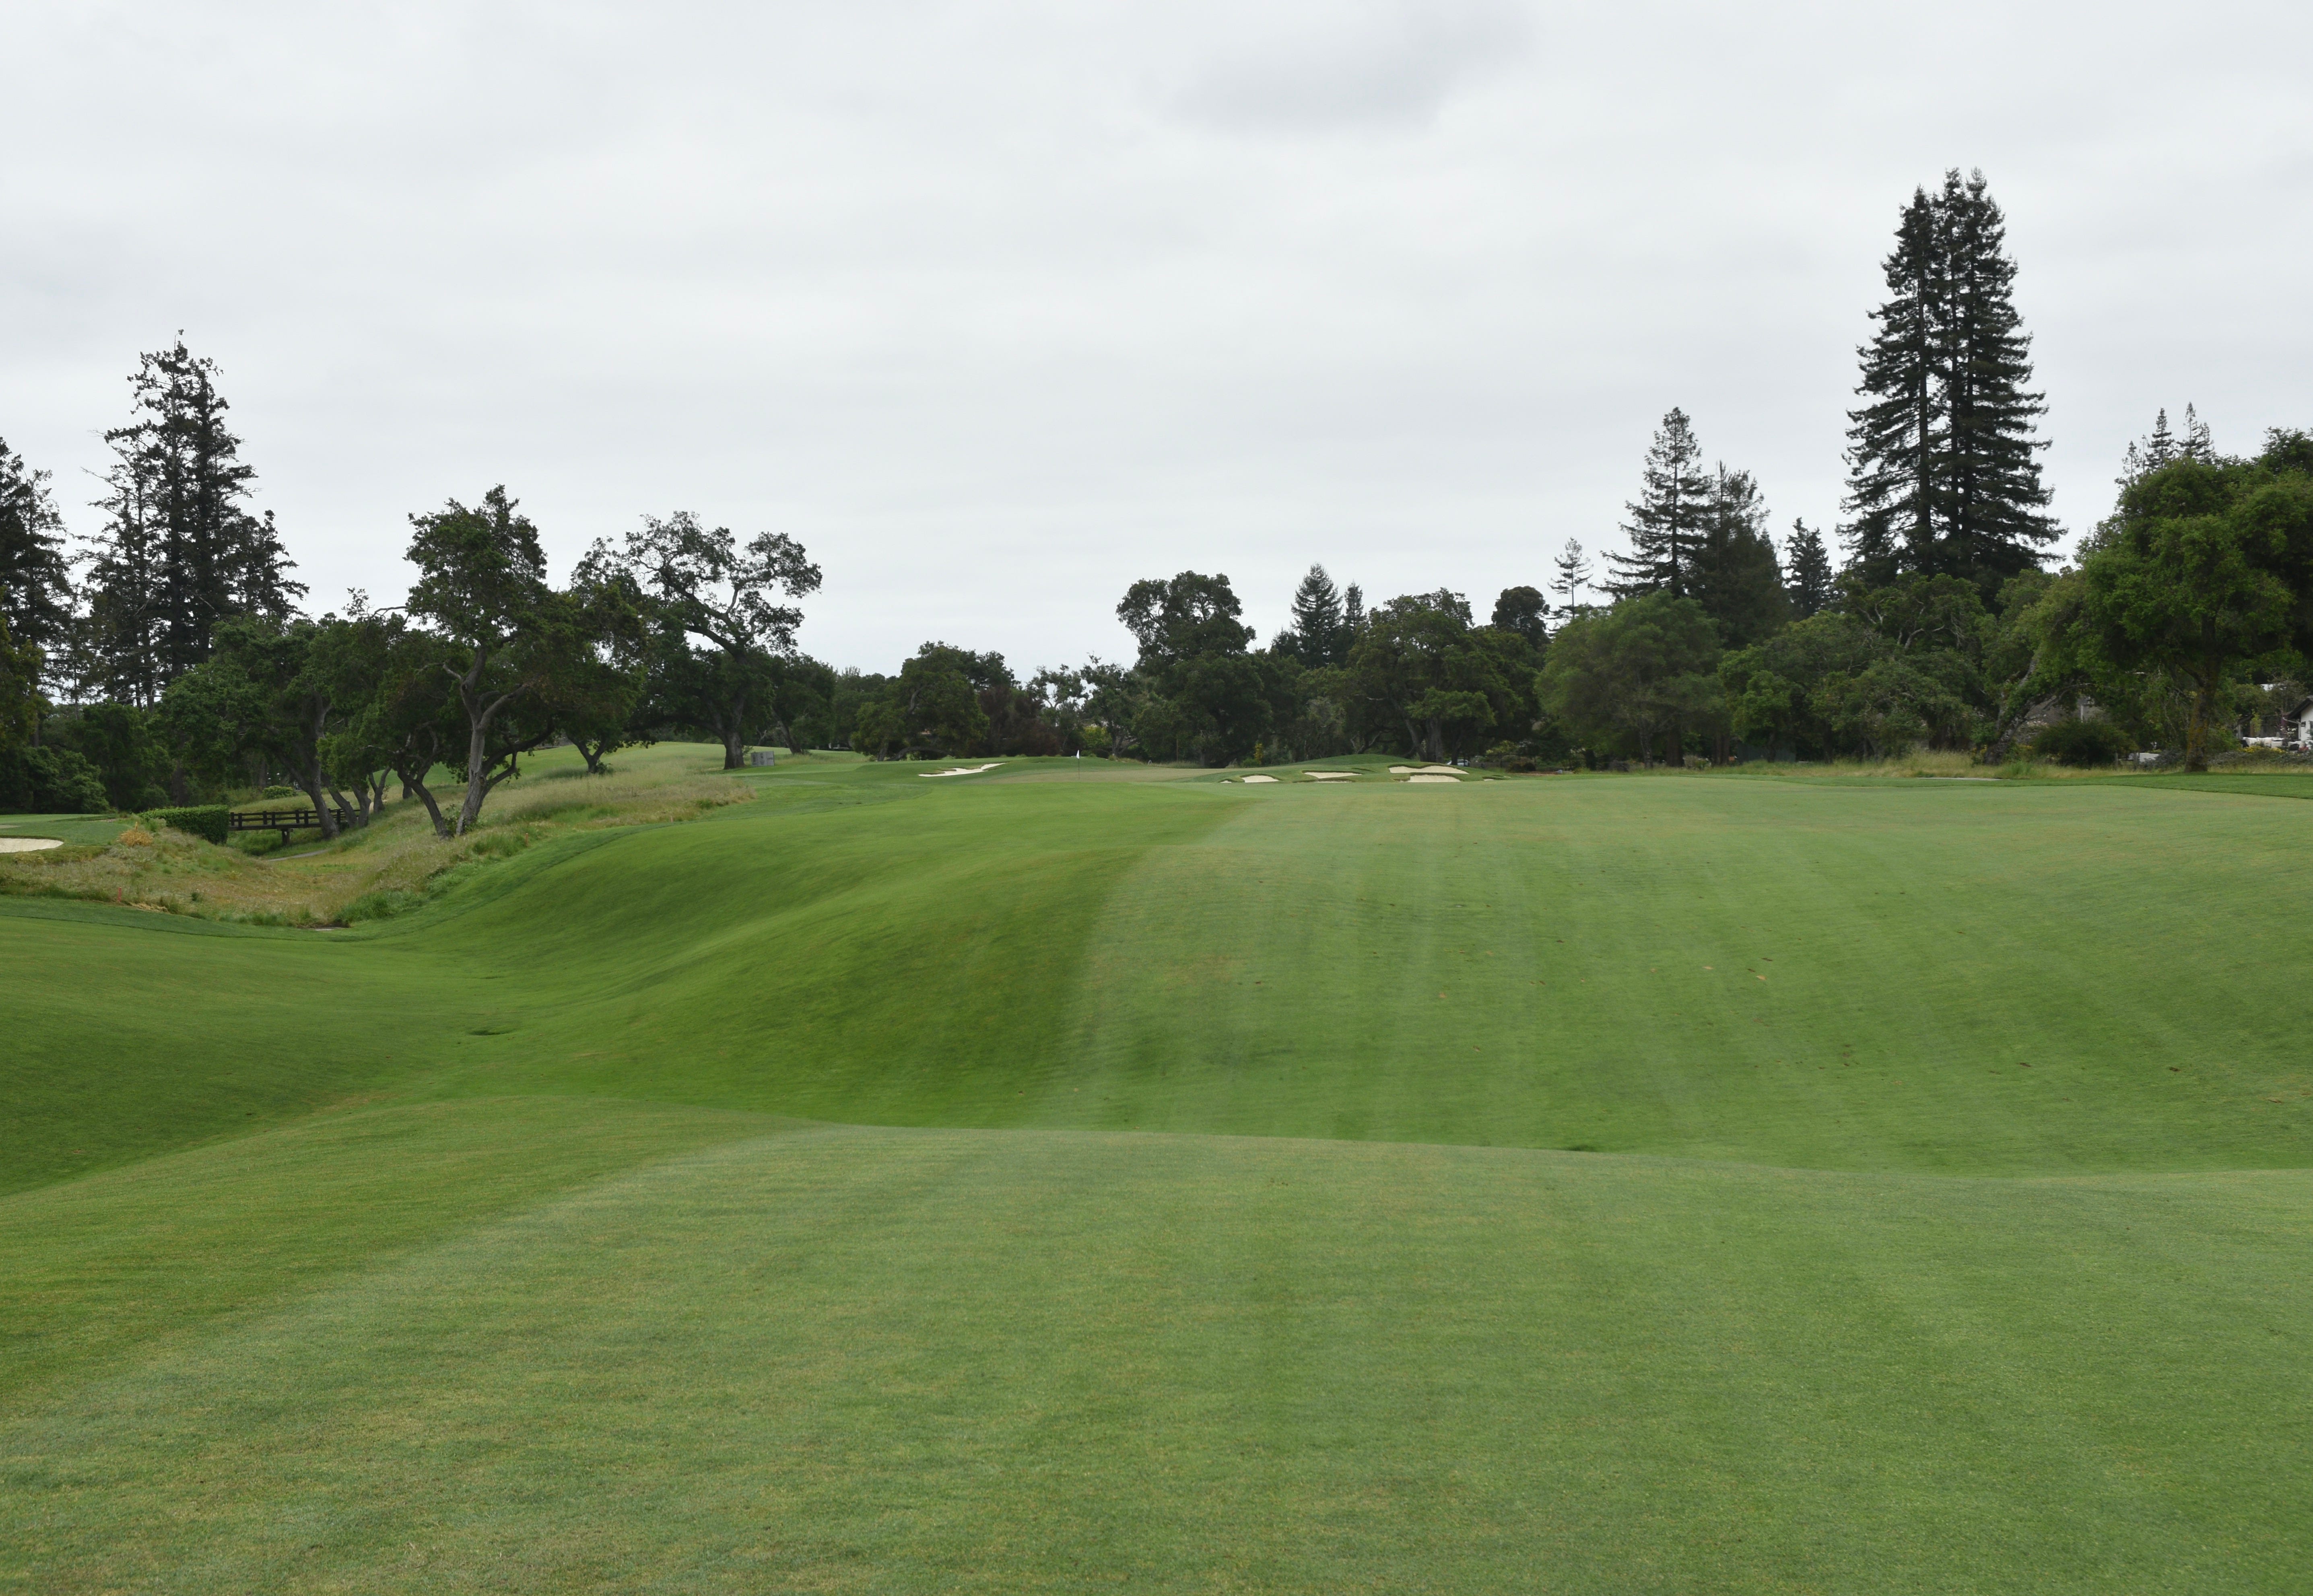
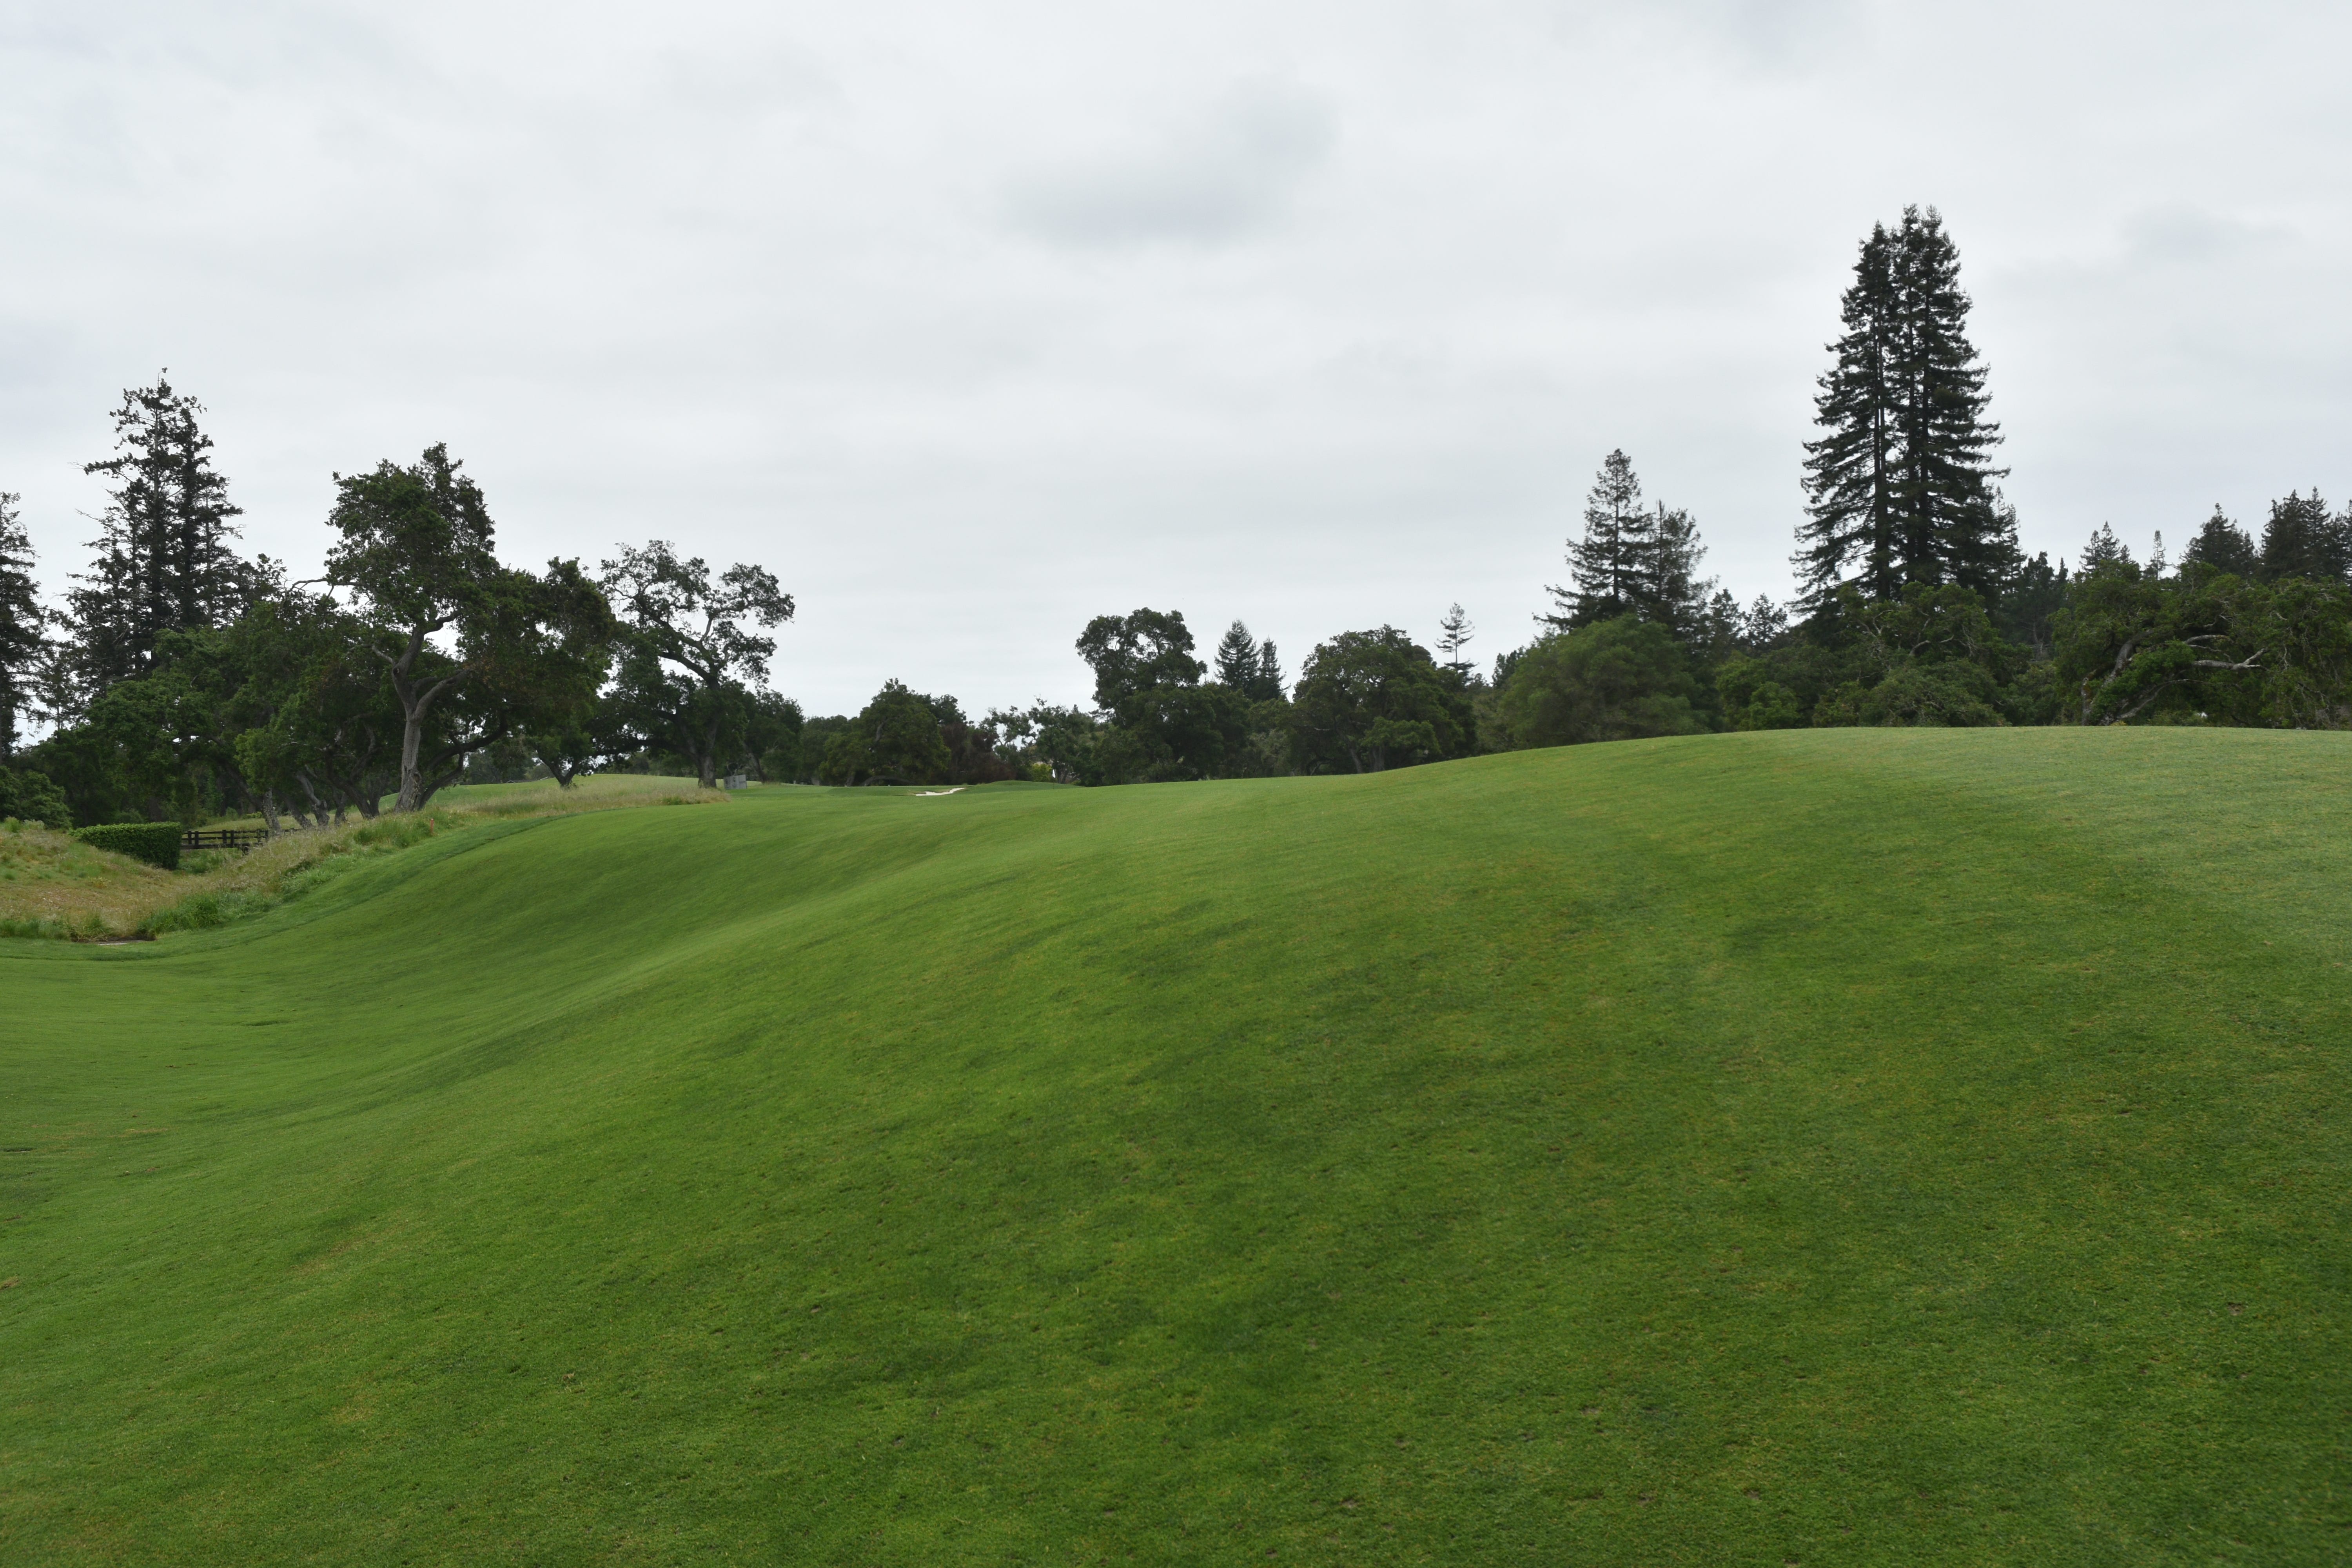
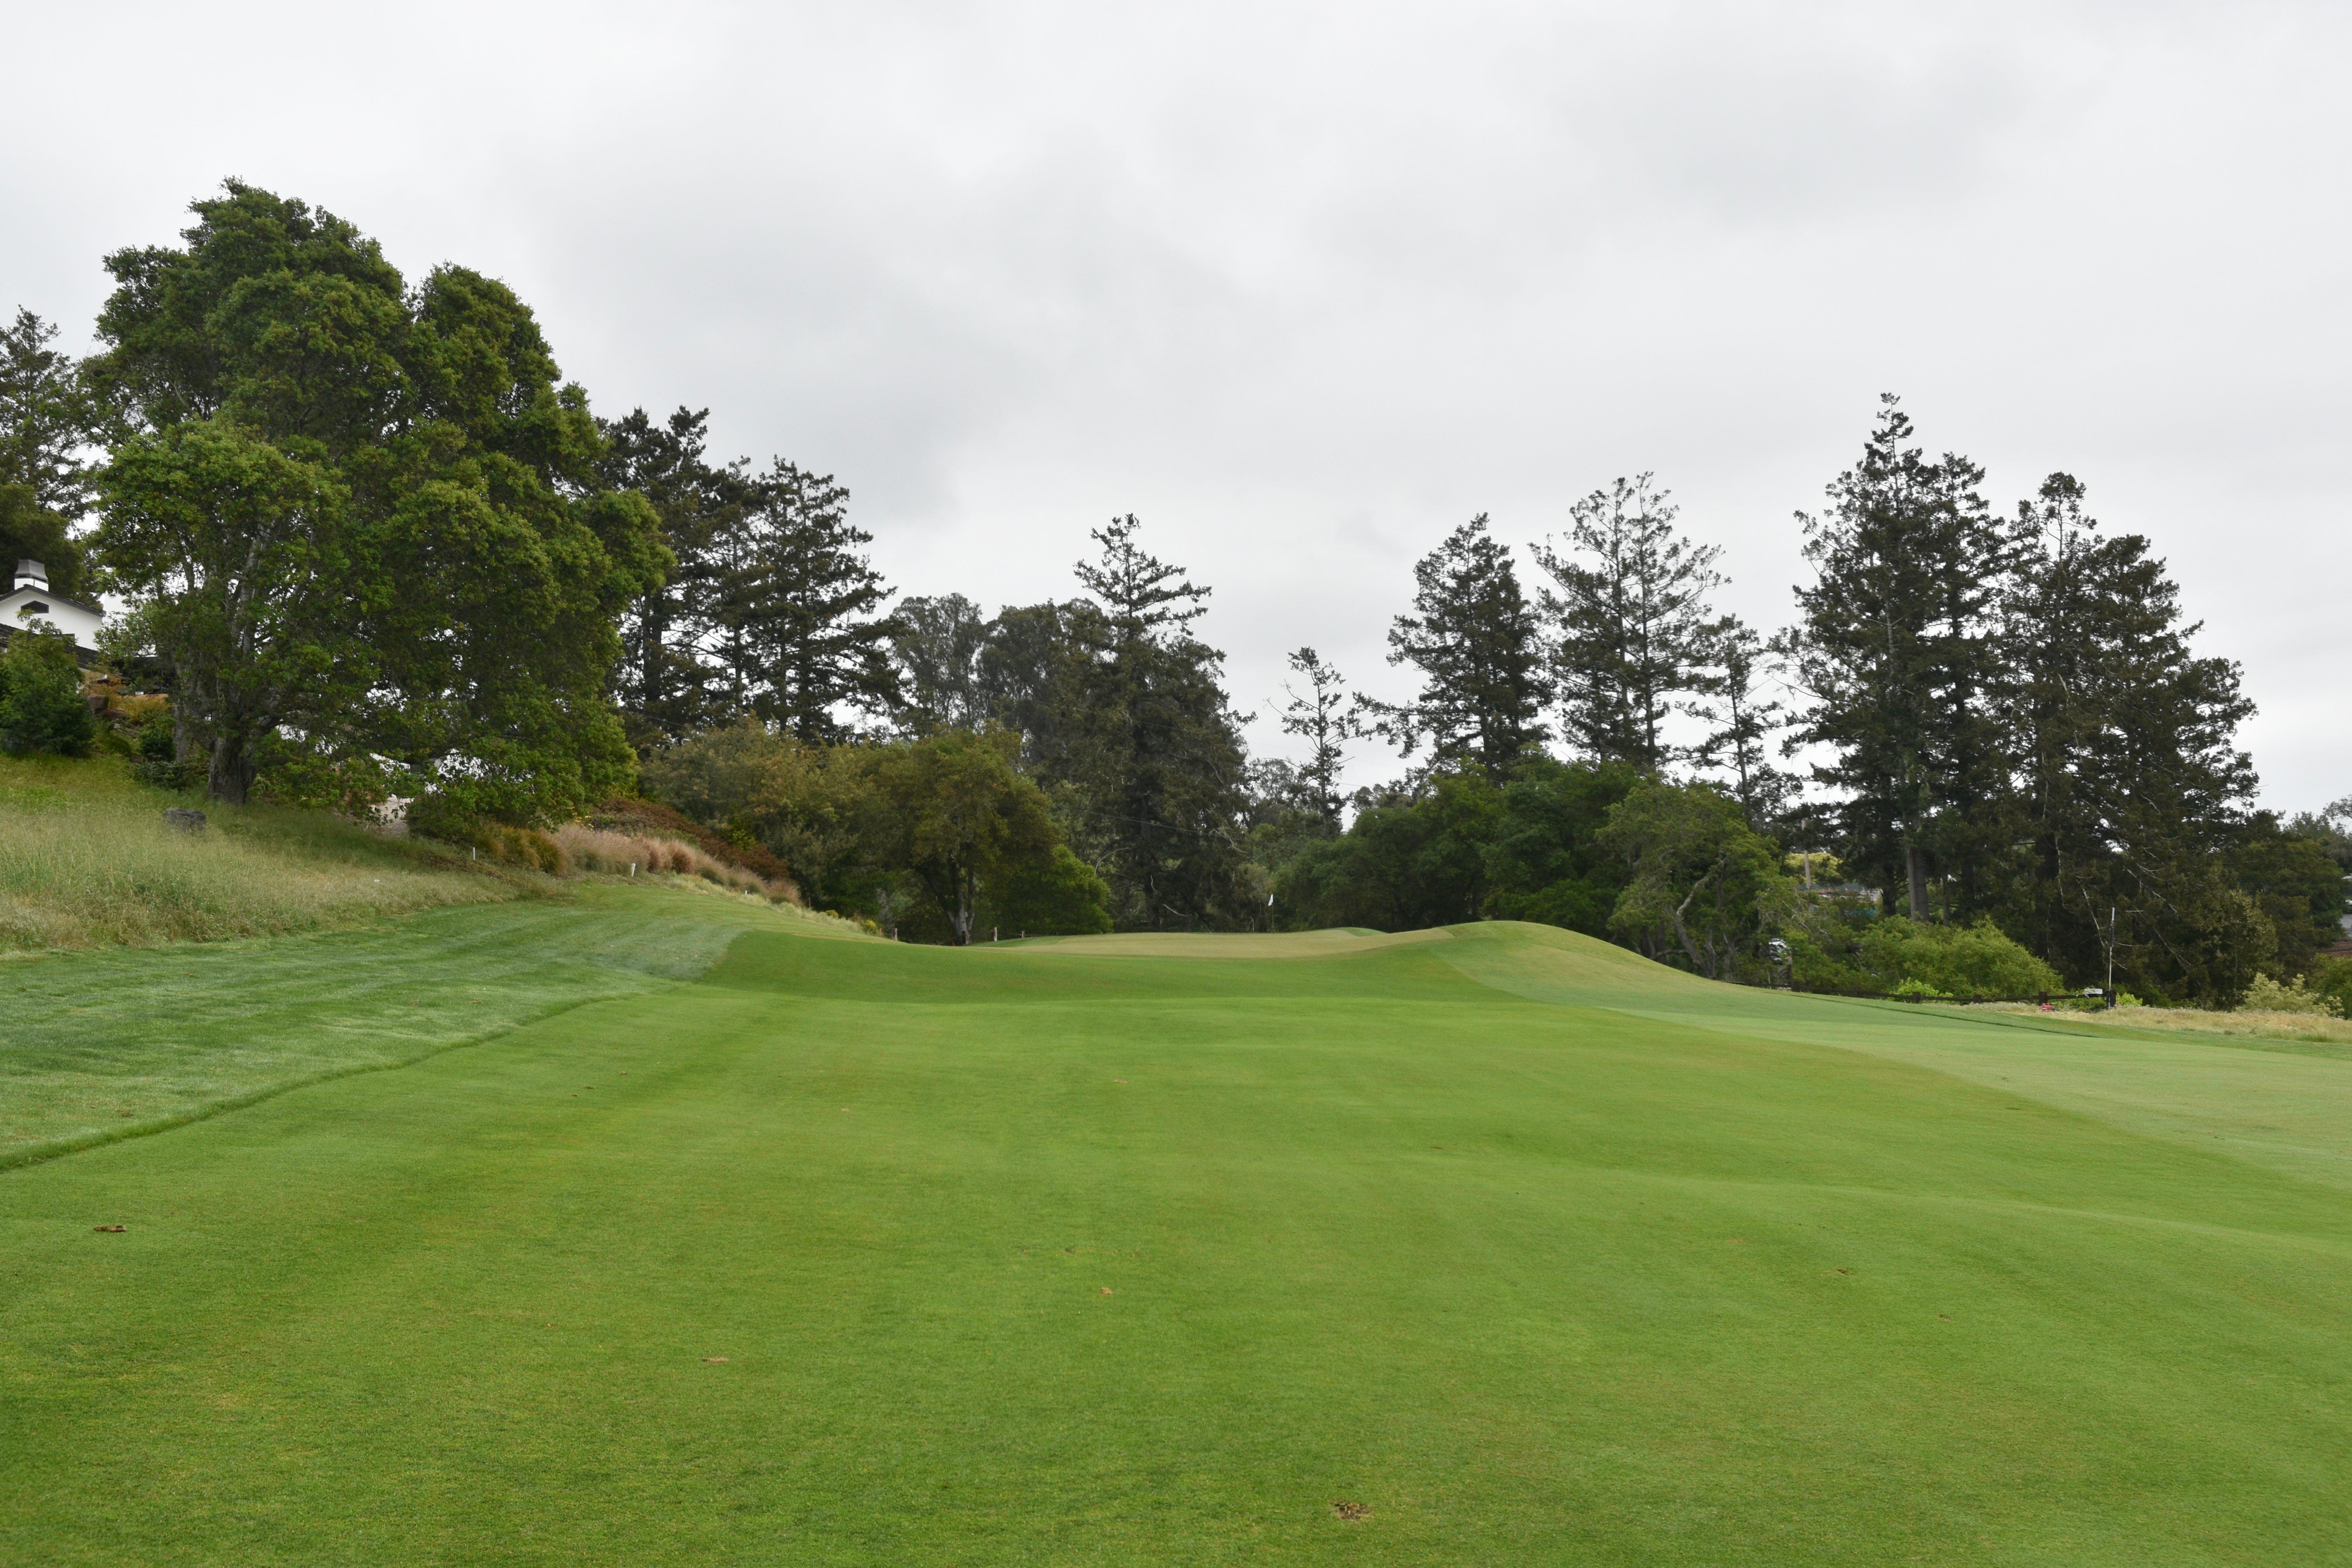
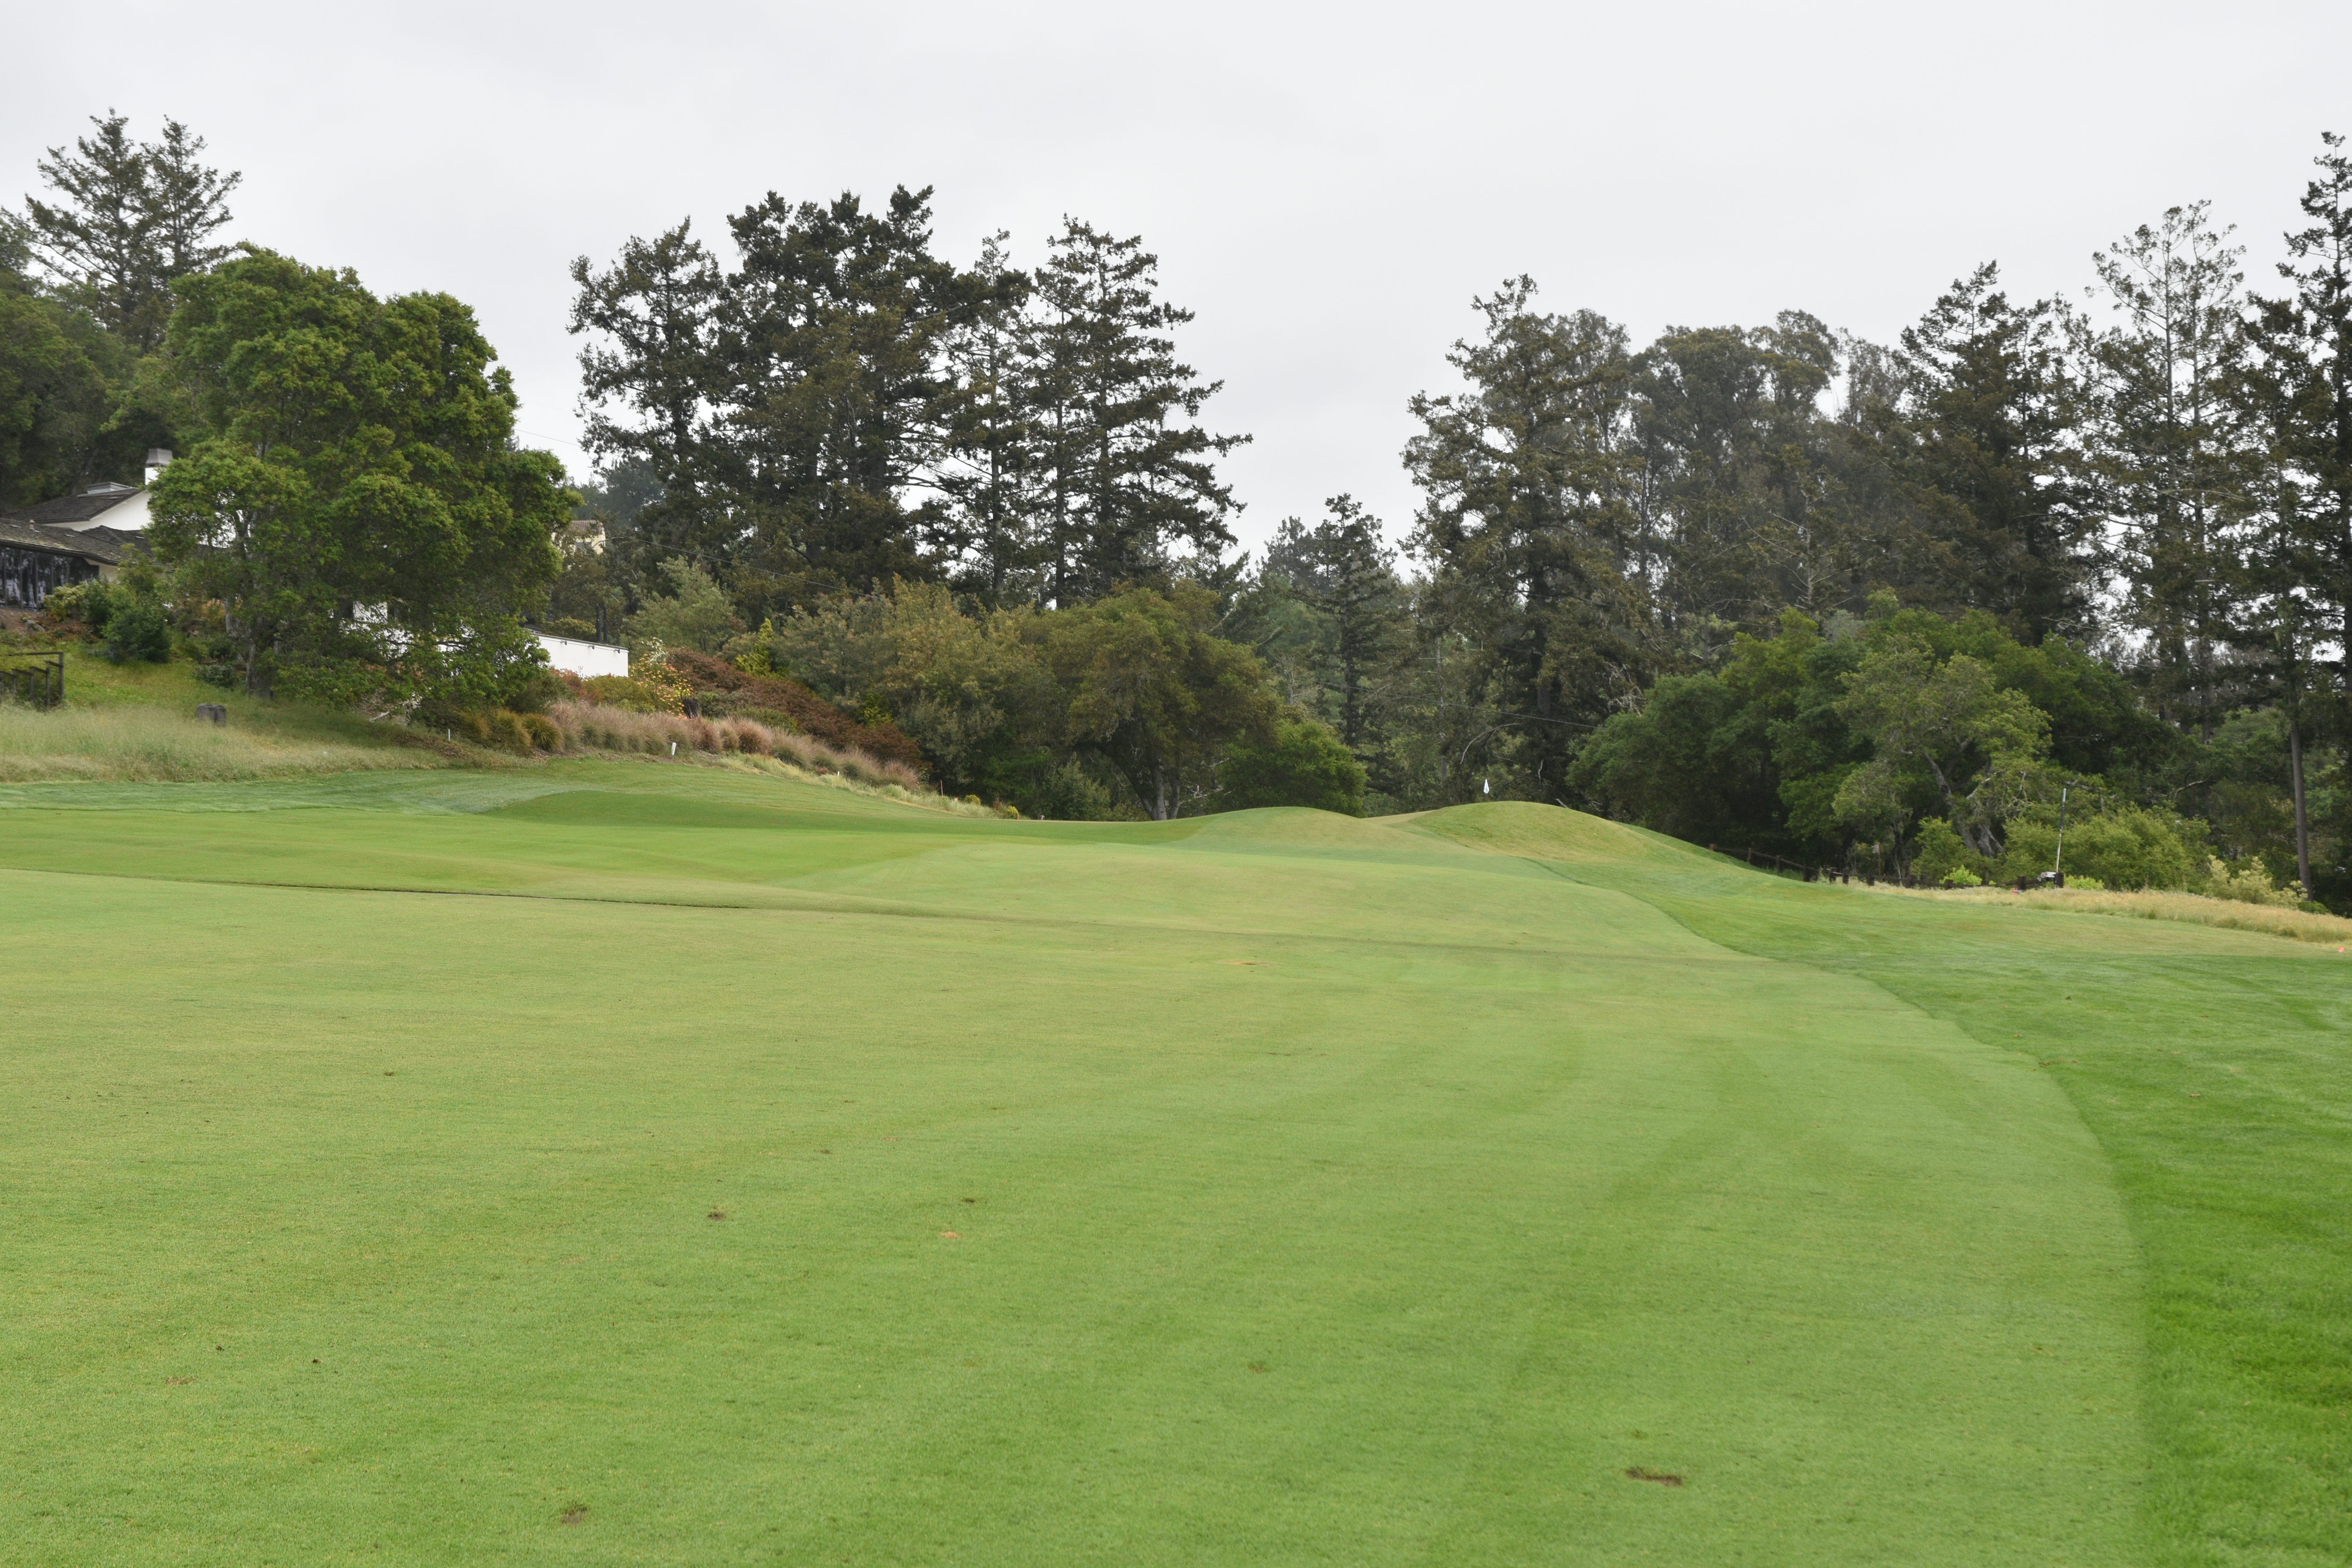
Once reaching the 14th hole fairway, the large swale begins to present itself starting on the left side of the fairway. While this fairway looks generous at first, the best landing area is actually a smaller target in reality
The large swale that is nearly 6 to 8 feet deep cuts into the left section of the 14th hole fairway and also cuts though the center. To clear the center swale entirely, a drive of over 270 yards from the tips is required to clear it completely
A look back at the swale in the 14th hole fairway
The dilemma once in the swale is that it obscures the approach shot where barely the top of the flagstick is visible (or not visible at all)
Try to lay up short of the swale may be an interesting choice in order to have a view of the 14th hole green, but then leaves a longer shot into the green
The large swale acts almost like a magnet and it is very easy for tee shots to find it. Longer players who can carry a tee shot over 270 yards have a definite advantage on the 14th hole
For players who can carry the center swale, a clear view of the 14th hole green on the approach shot is the reward
The 14th hole approach shot from 100 yards away
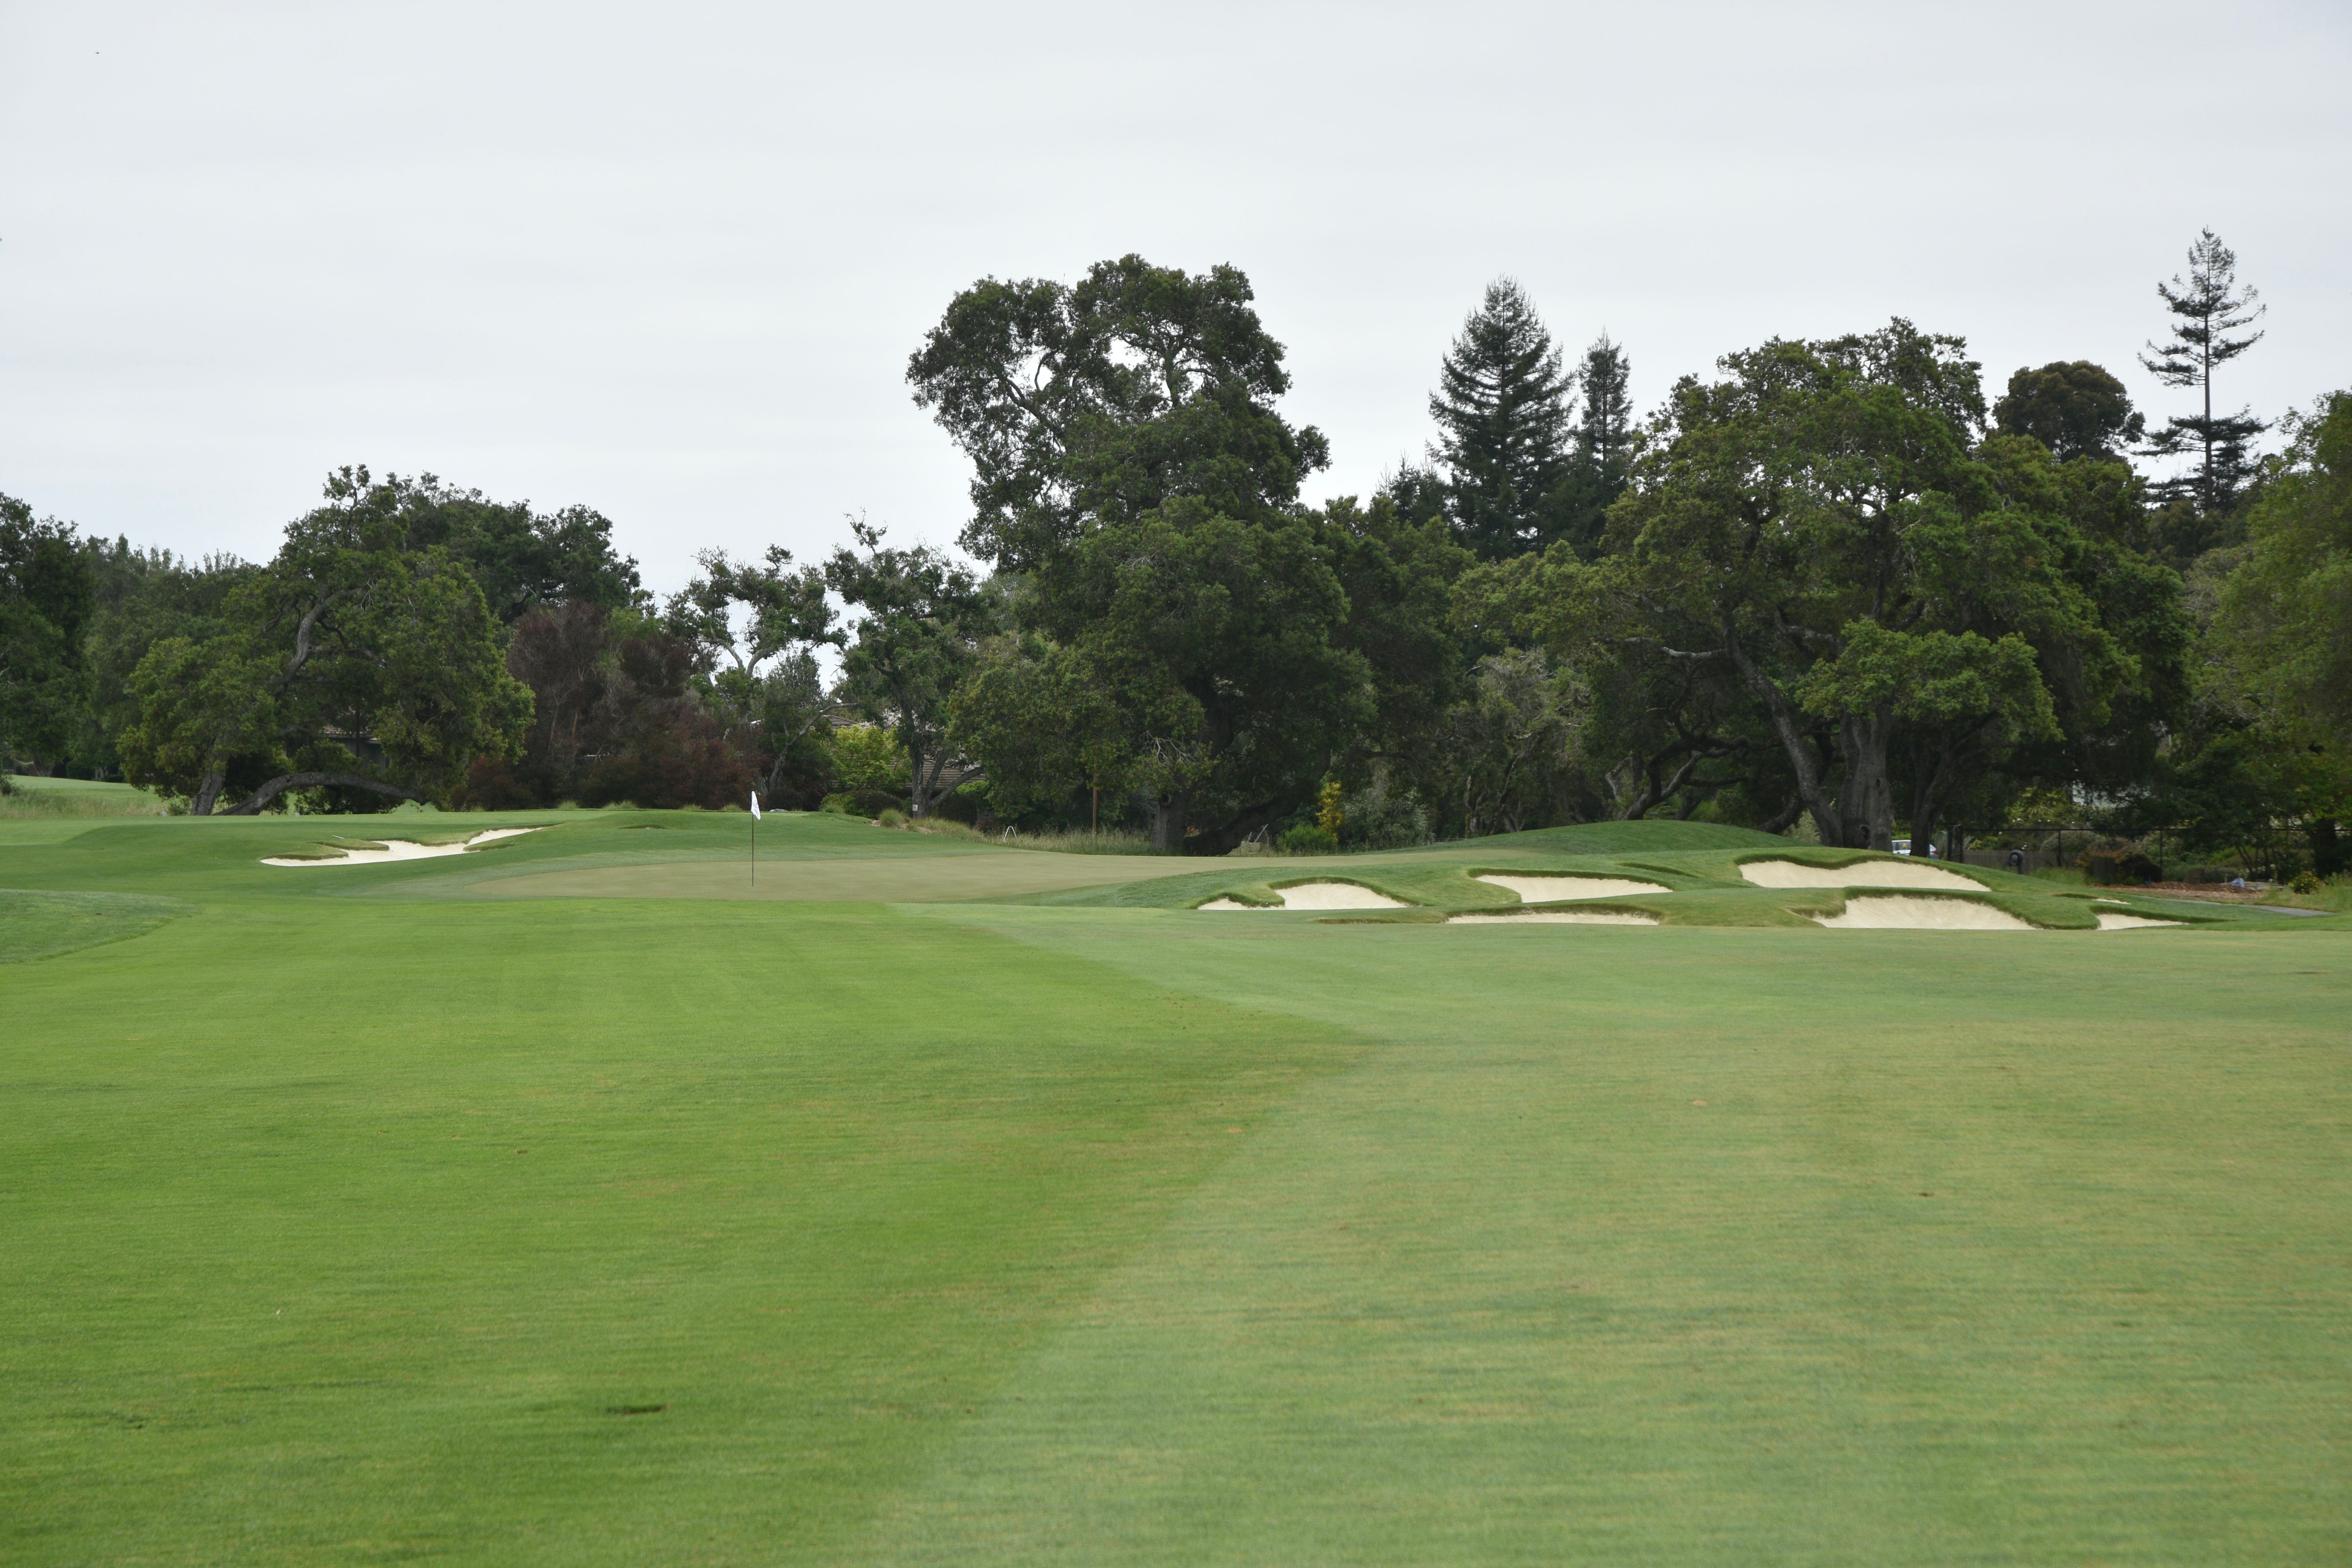
There is a fairway bunker 60 yards short of the green. When looking at this bunker from the center of the fairway, it appears as if it is next to the green. This is another great example of the camouflage technique of MacKenzie
The 14th hole green sits at an angle and the depth perception to gauge proper distance on this green tends to be tricky
A closer look at the 14th hole green from the right
The two right green side bunkers of the 14th hole
The 14th hole green viewed from the front
The left green side bunker of the 14th hole doesn’t quite huge the green closely and creates a closely mown pitching area just left of the green
The 14th hole green viewed from the back left
Another vantage point of the left green side bunker of the 14th hole
The 14th hole green viewed from behind
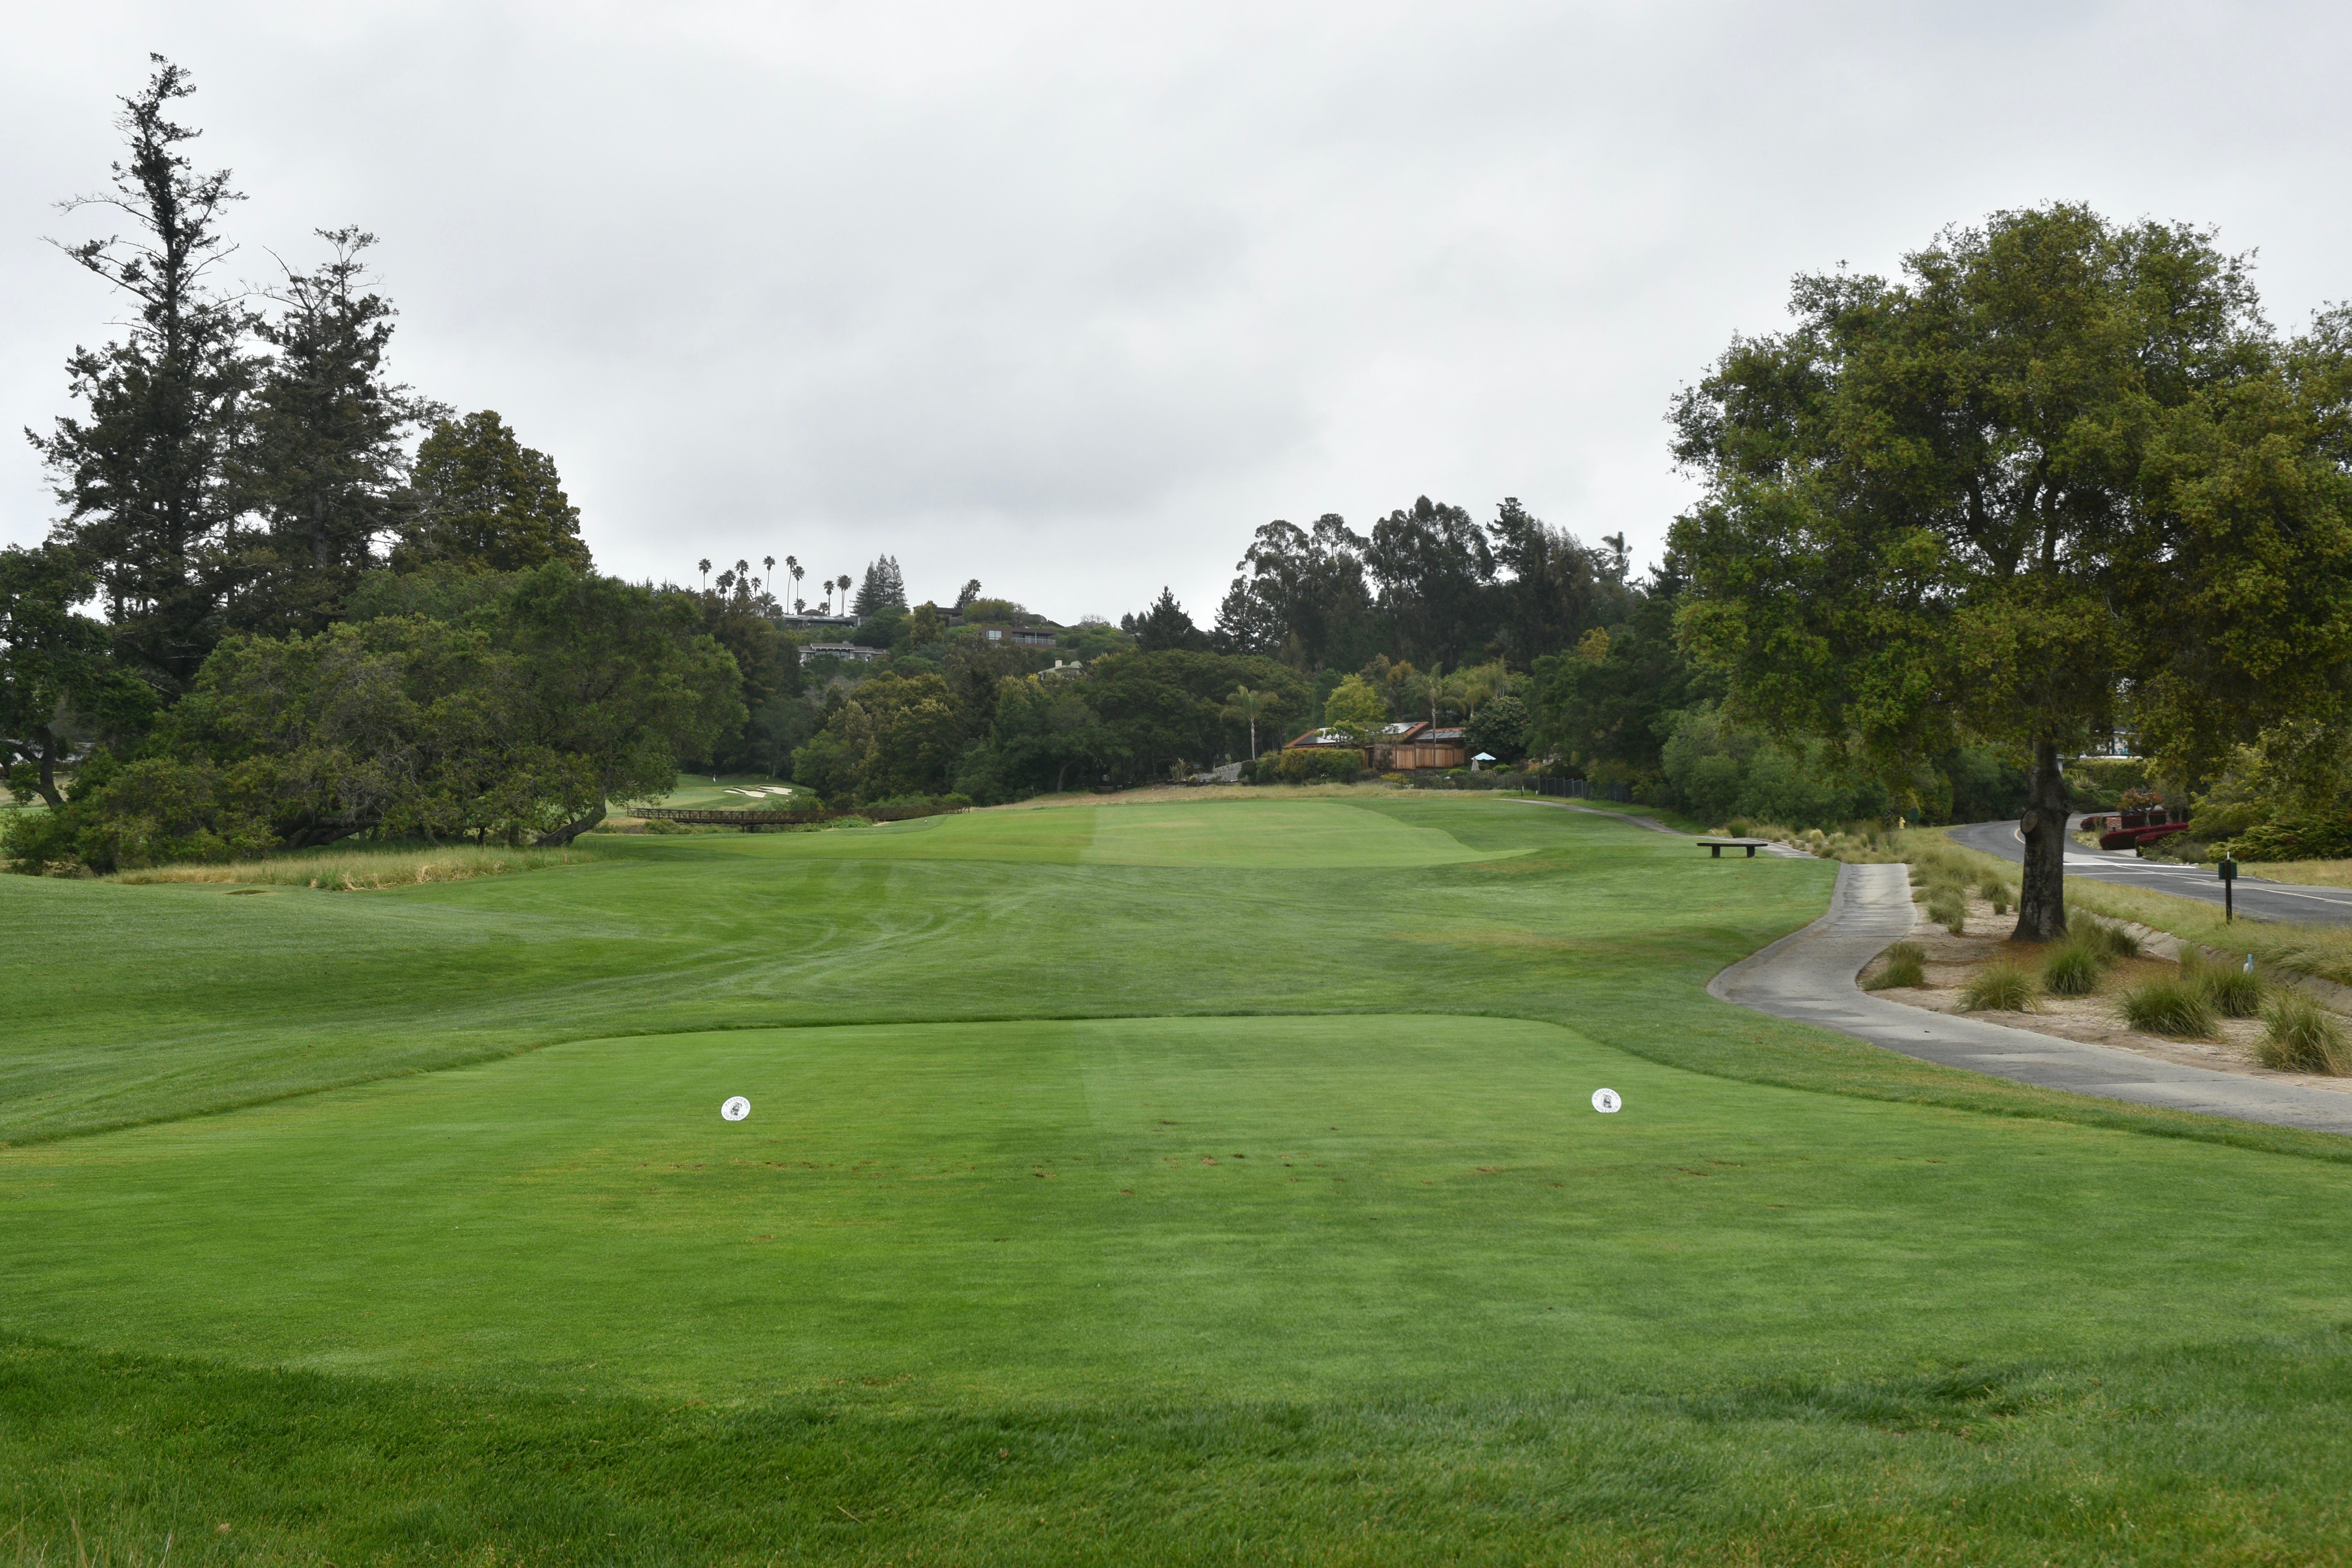
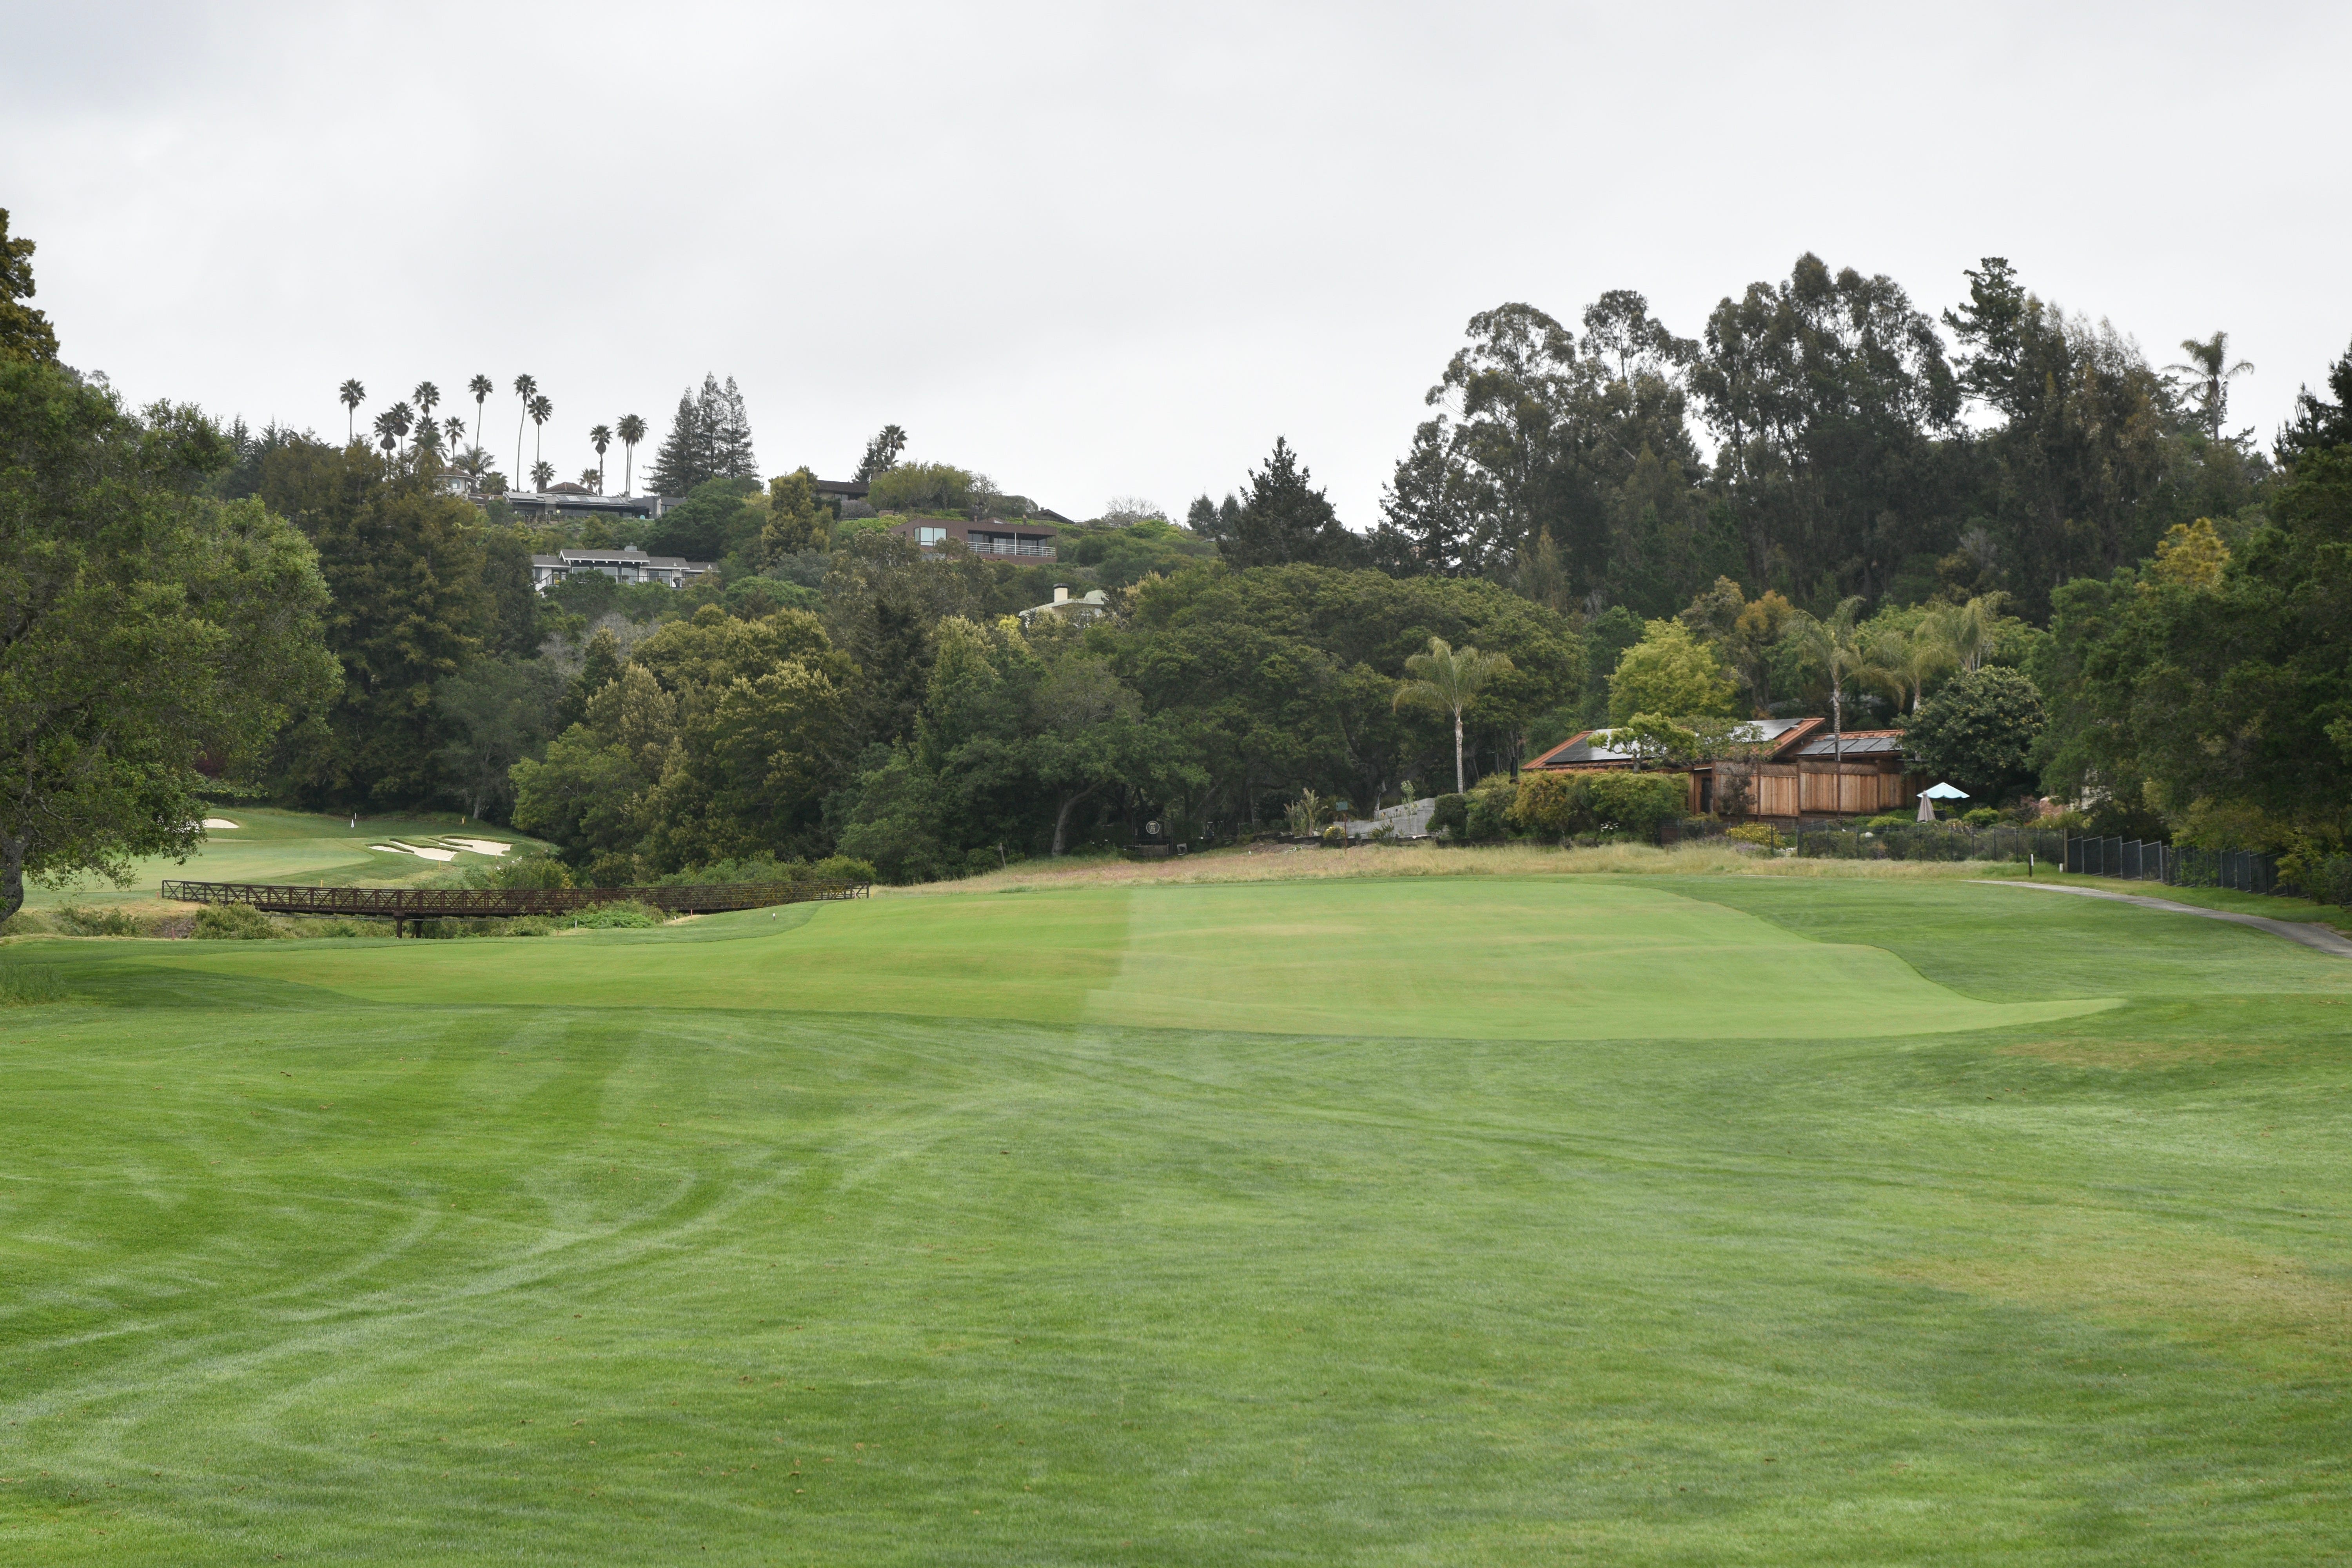
The 14th hole green viewed from the 15th hole tee box
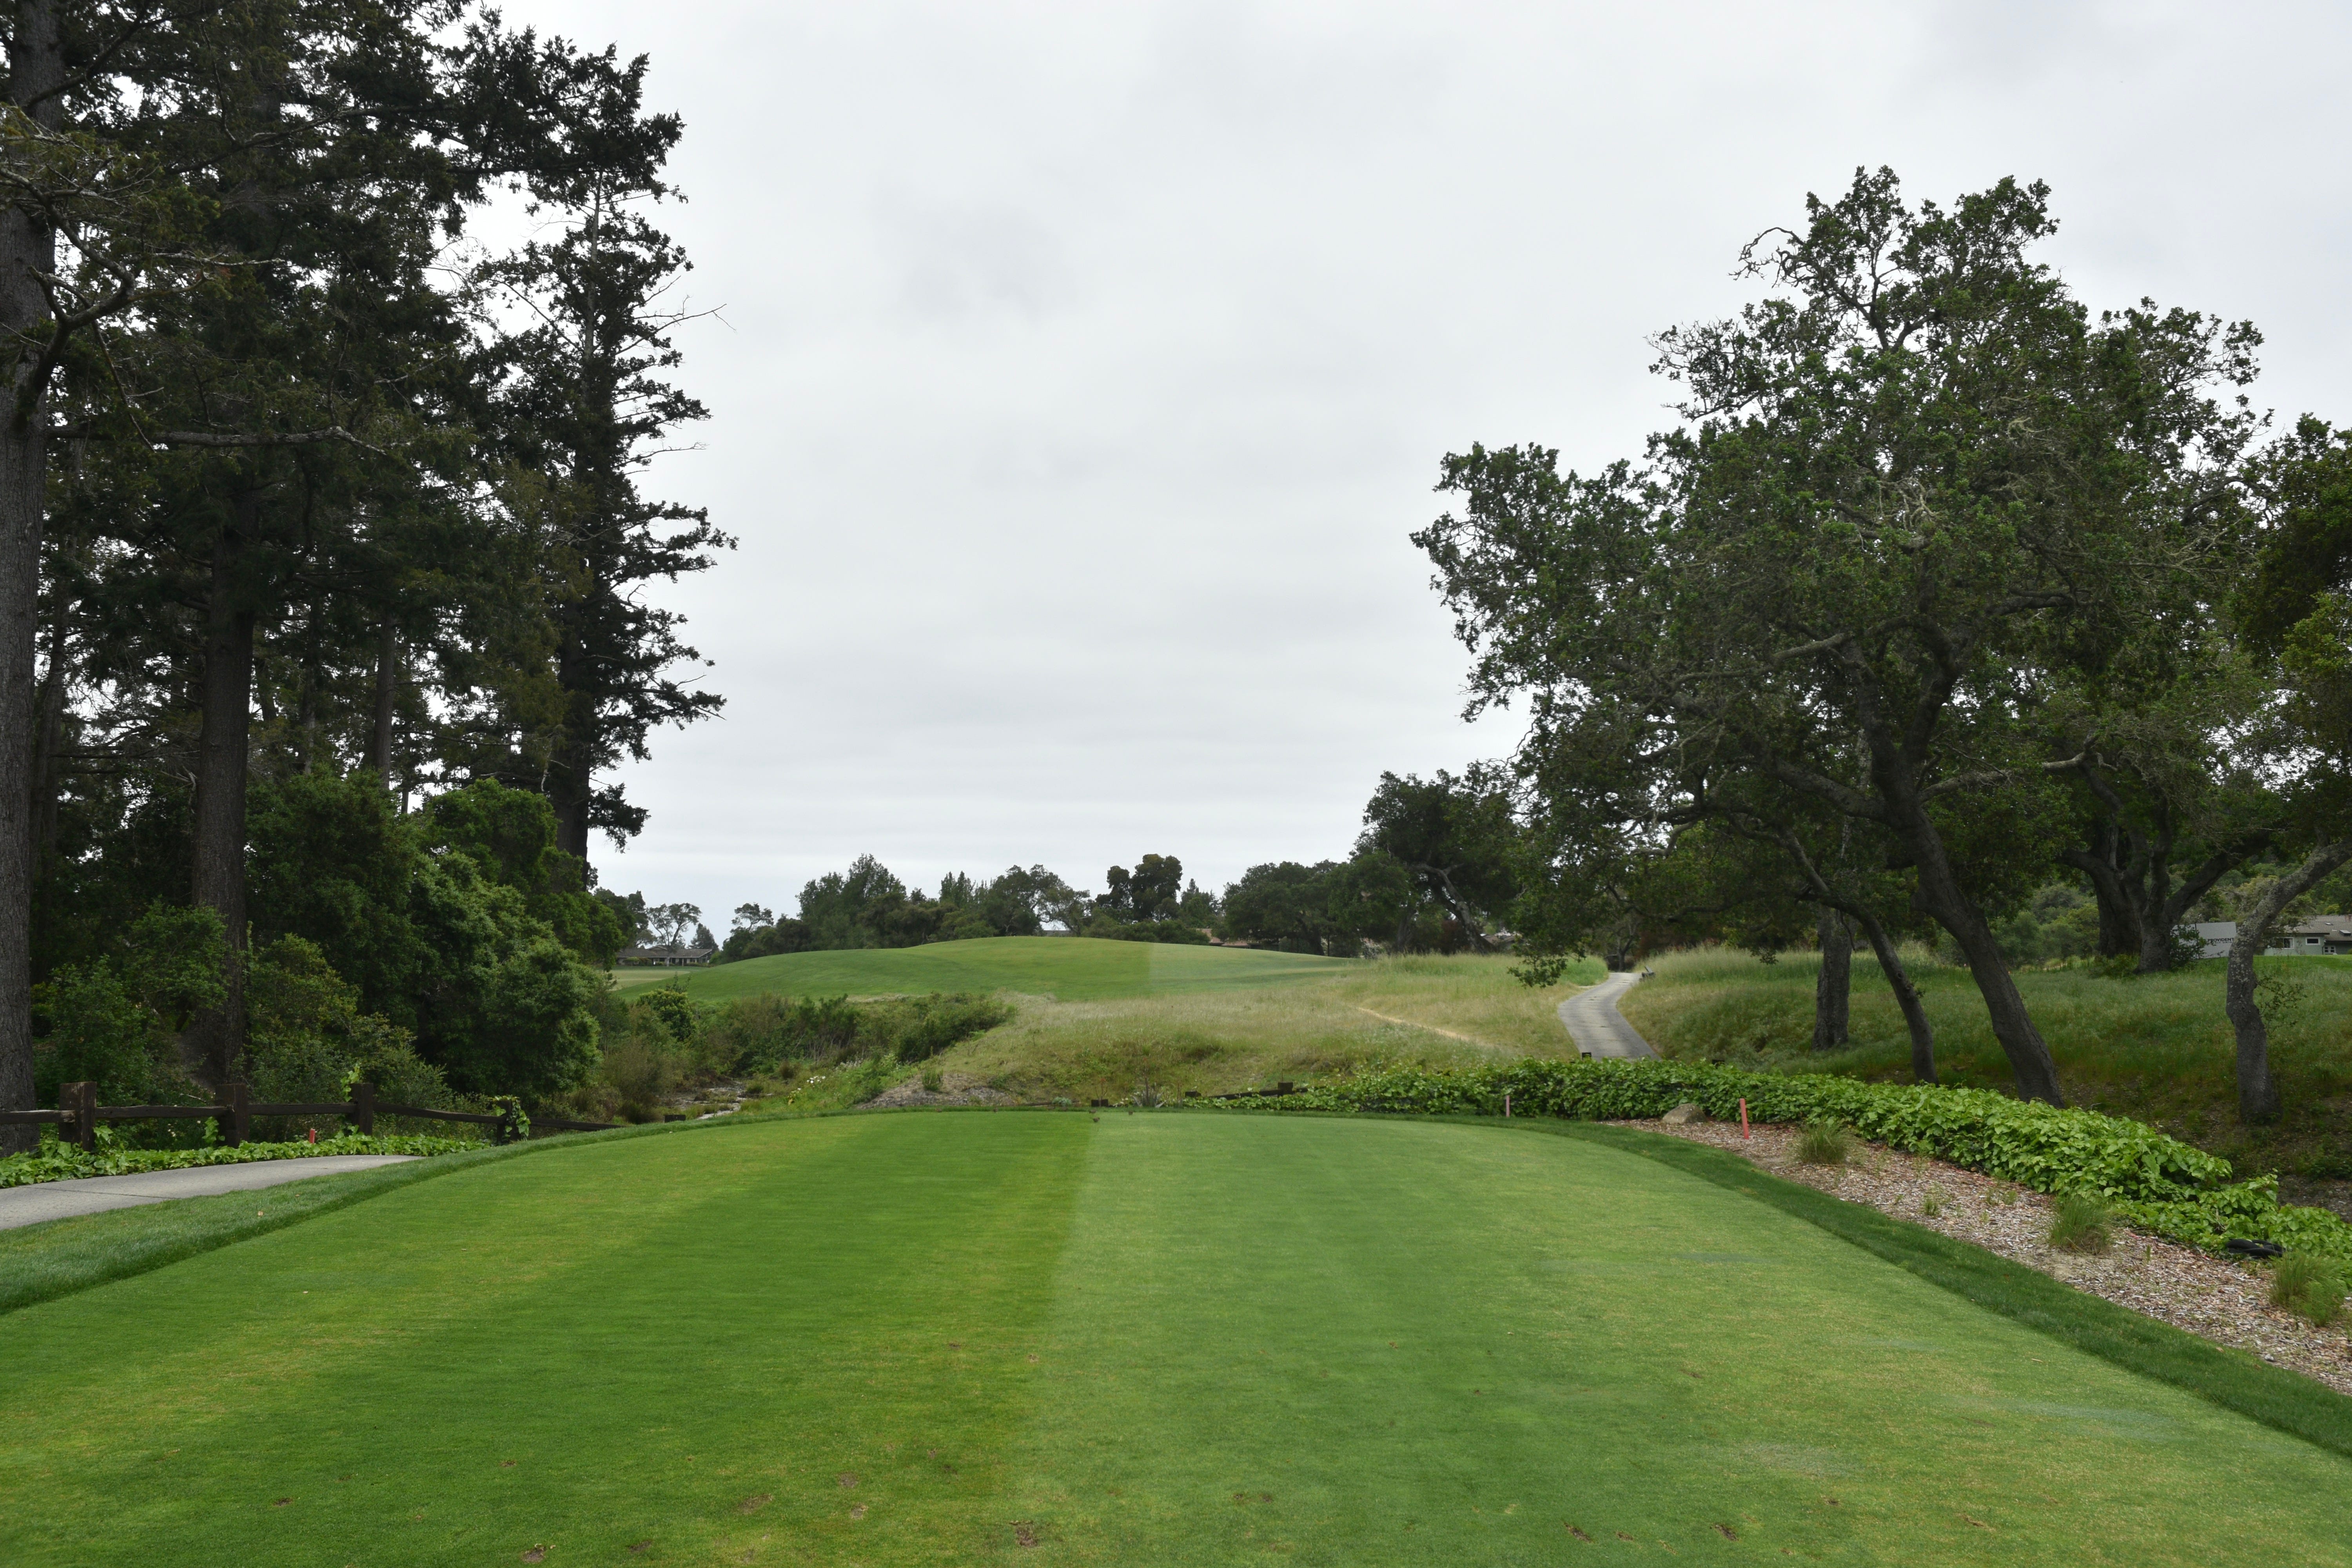
Hole 15: Par 3, 142 Yards
The 15th hole is one of the most quaint but devilish holes at Pasatiempo. This is the one hole where the Chief Golf Nerd isn’t super thrilled with the work Urbina did. The Chief Golf Nerd prefers the previous version that Tom Doak did back in 2007
One of the significant changes Urbina made to the 15th hole is clearing out select trees and a lot of shrubs that surrounded this green to open up more space
Walking down towards the 15th hole green from the tee
The Chief Golf Nerd isn’t too happy with these re-shaped front bunkers guarding the 15th hole green. The previous 2007 shaping of the bunkers looked a lot more intimate and appropriate for this hole. These kind of stick out like sore thumbs
Much of the shrubbery and native area was cleared out left of the 15th hole green
A closer look at the cluster of bunkers guarding the front of the 15th hole green
The 15th hole green viewed from the front left — Urbina expanded this green pad significantly and added more swales and undulations. It also helped add more hole locations which is a benefit for everyday play. Before the restoration, this hole was rather restrictive for a player who really only had one option of hitting to the middle of the green, hence creating a narrow set of potential outcomes. Opening up the aerial space and green pad allows for more variety (and potentially wider) range of outcomes
A look back towards the front green side bunkers of the 15th hole from the front right of the green
One of the back left green side bunkers of the 15th hole
The 15th hole green viewed from the back left looking towards the middle right of the green
The back green side bunker of the 15th hole — this bunker tends to get a lot of action
The front right left section of the 15th hole green
Another vantage point of the middle and front section of the 15th hole green
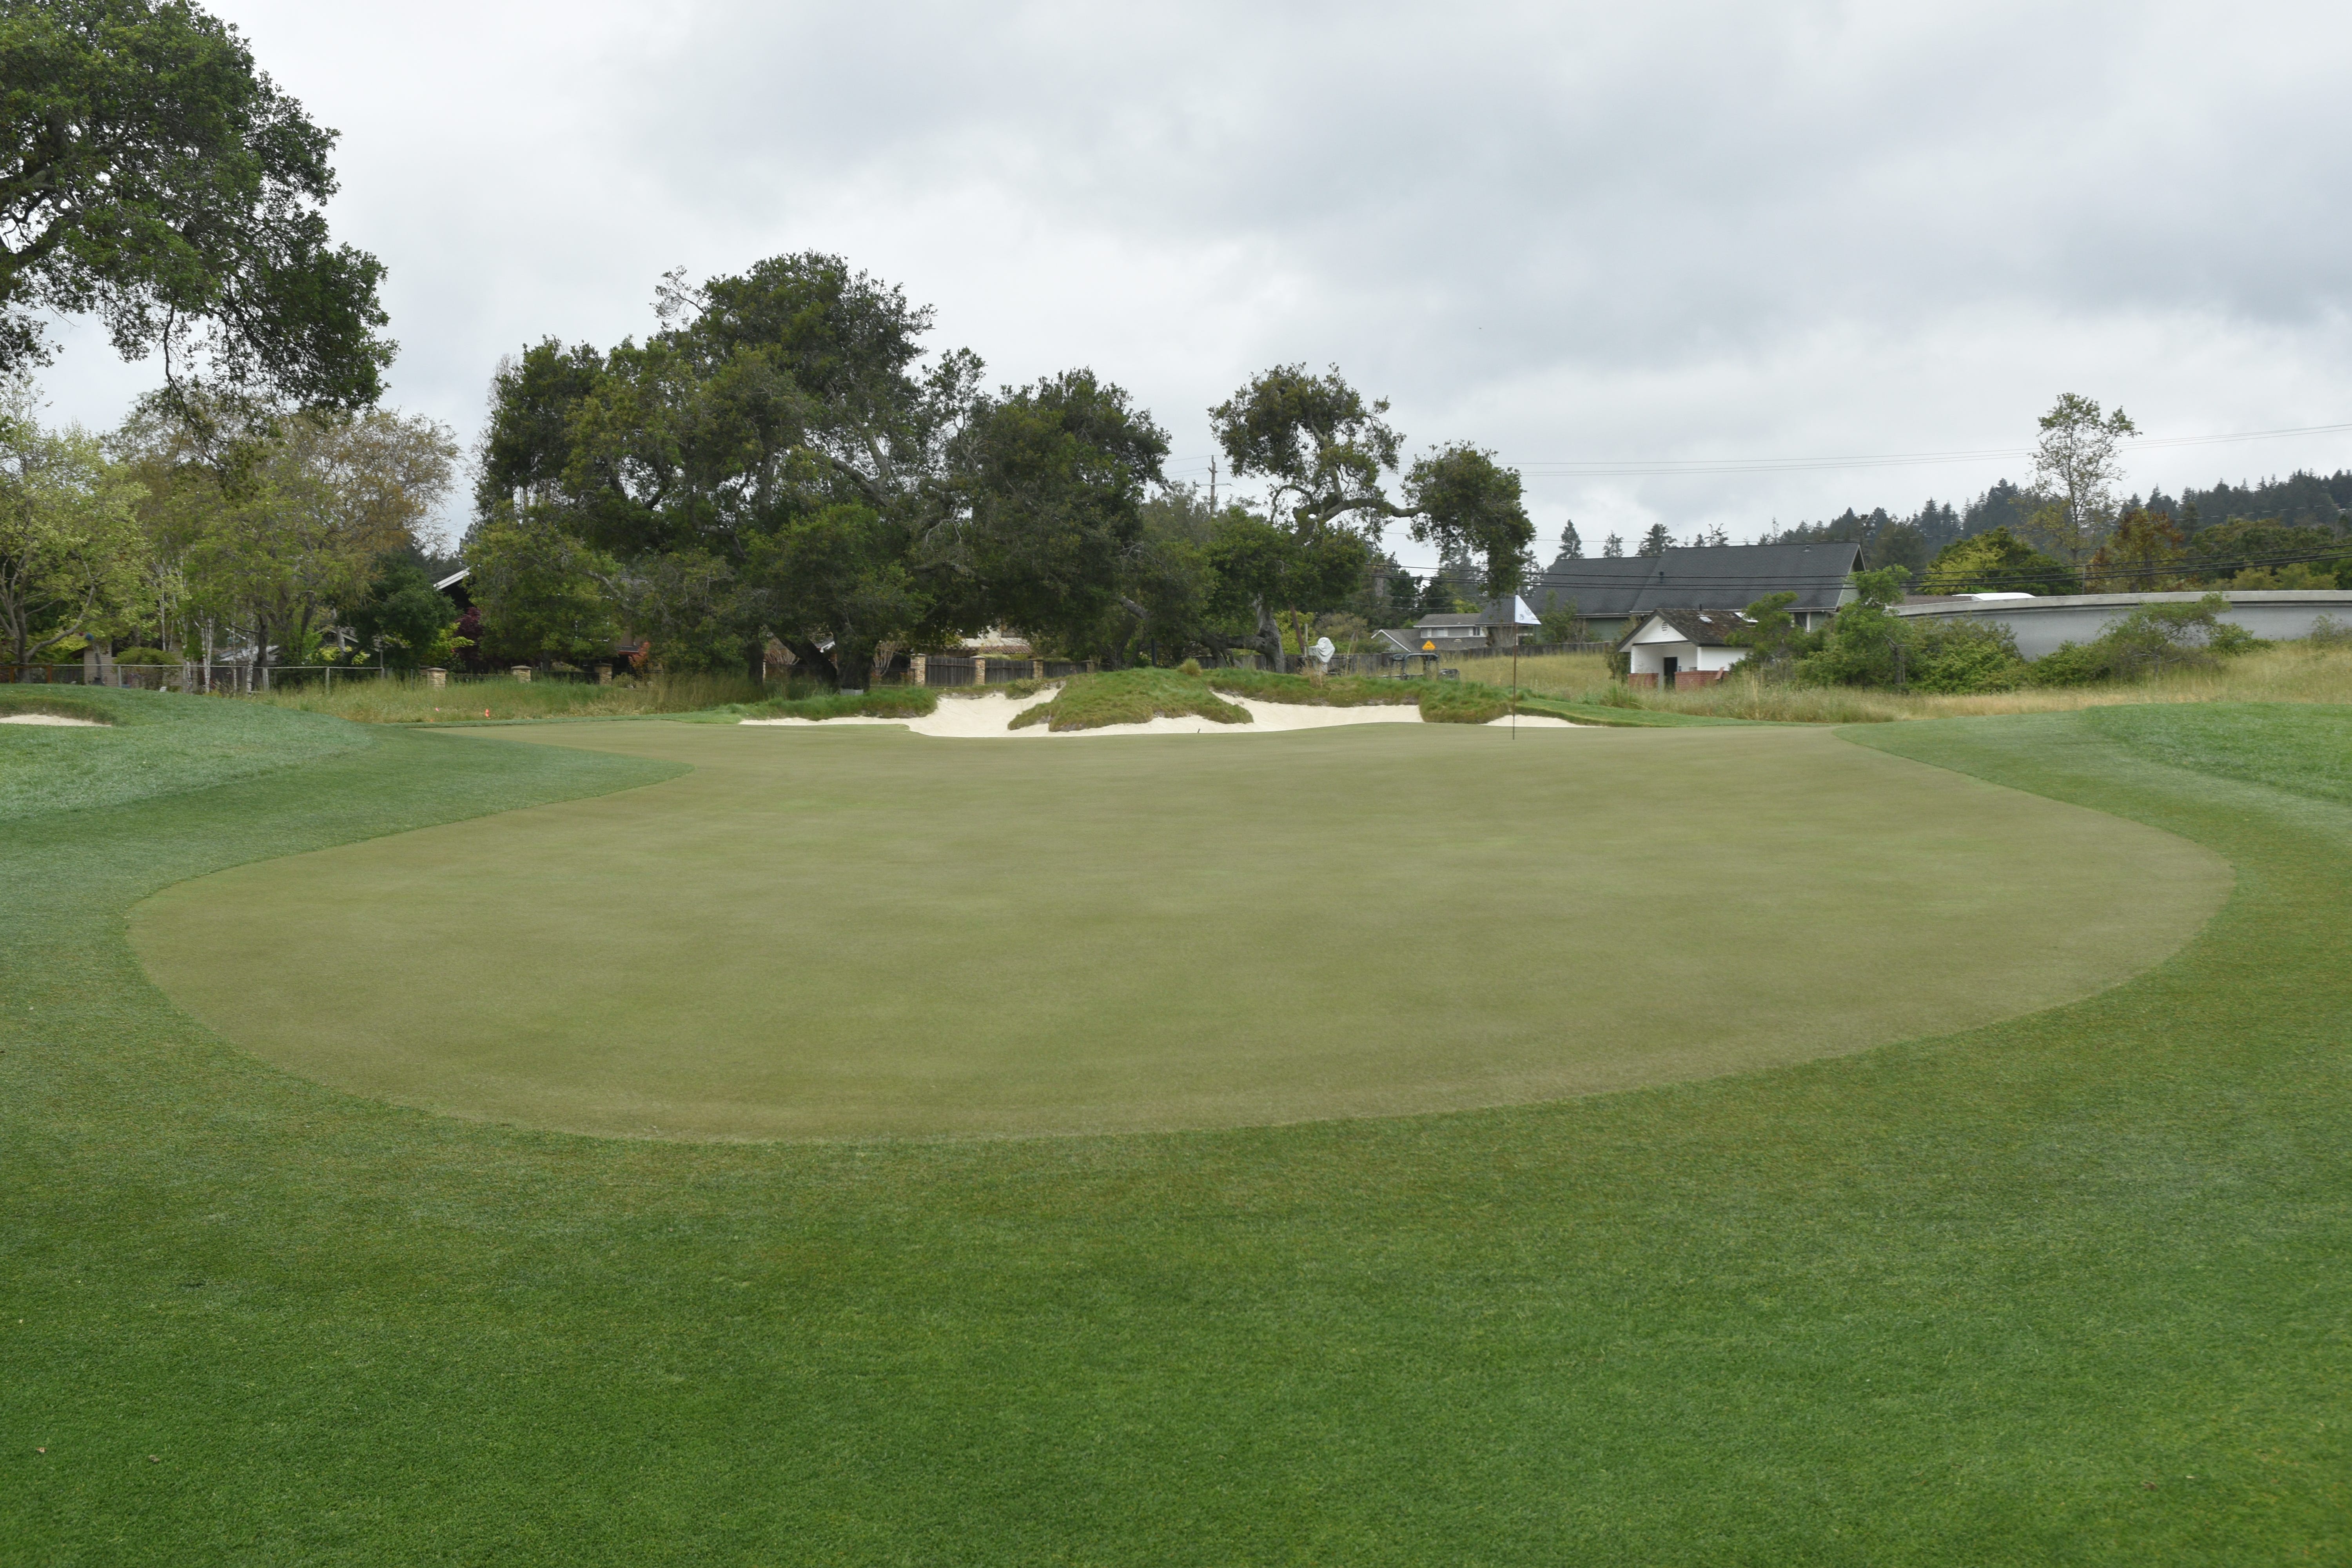
The 15th hole green viewed from the back right — the toughest hole locations on this green are the front right and back right
The back right section of the 15th hole green — balls tend to release towards the back of the green so players need to be mindful of not going directly at the hole location when it is placed here
The front right section of the 15th hole green (shown here on the left) is another difficult hole location
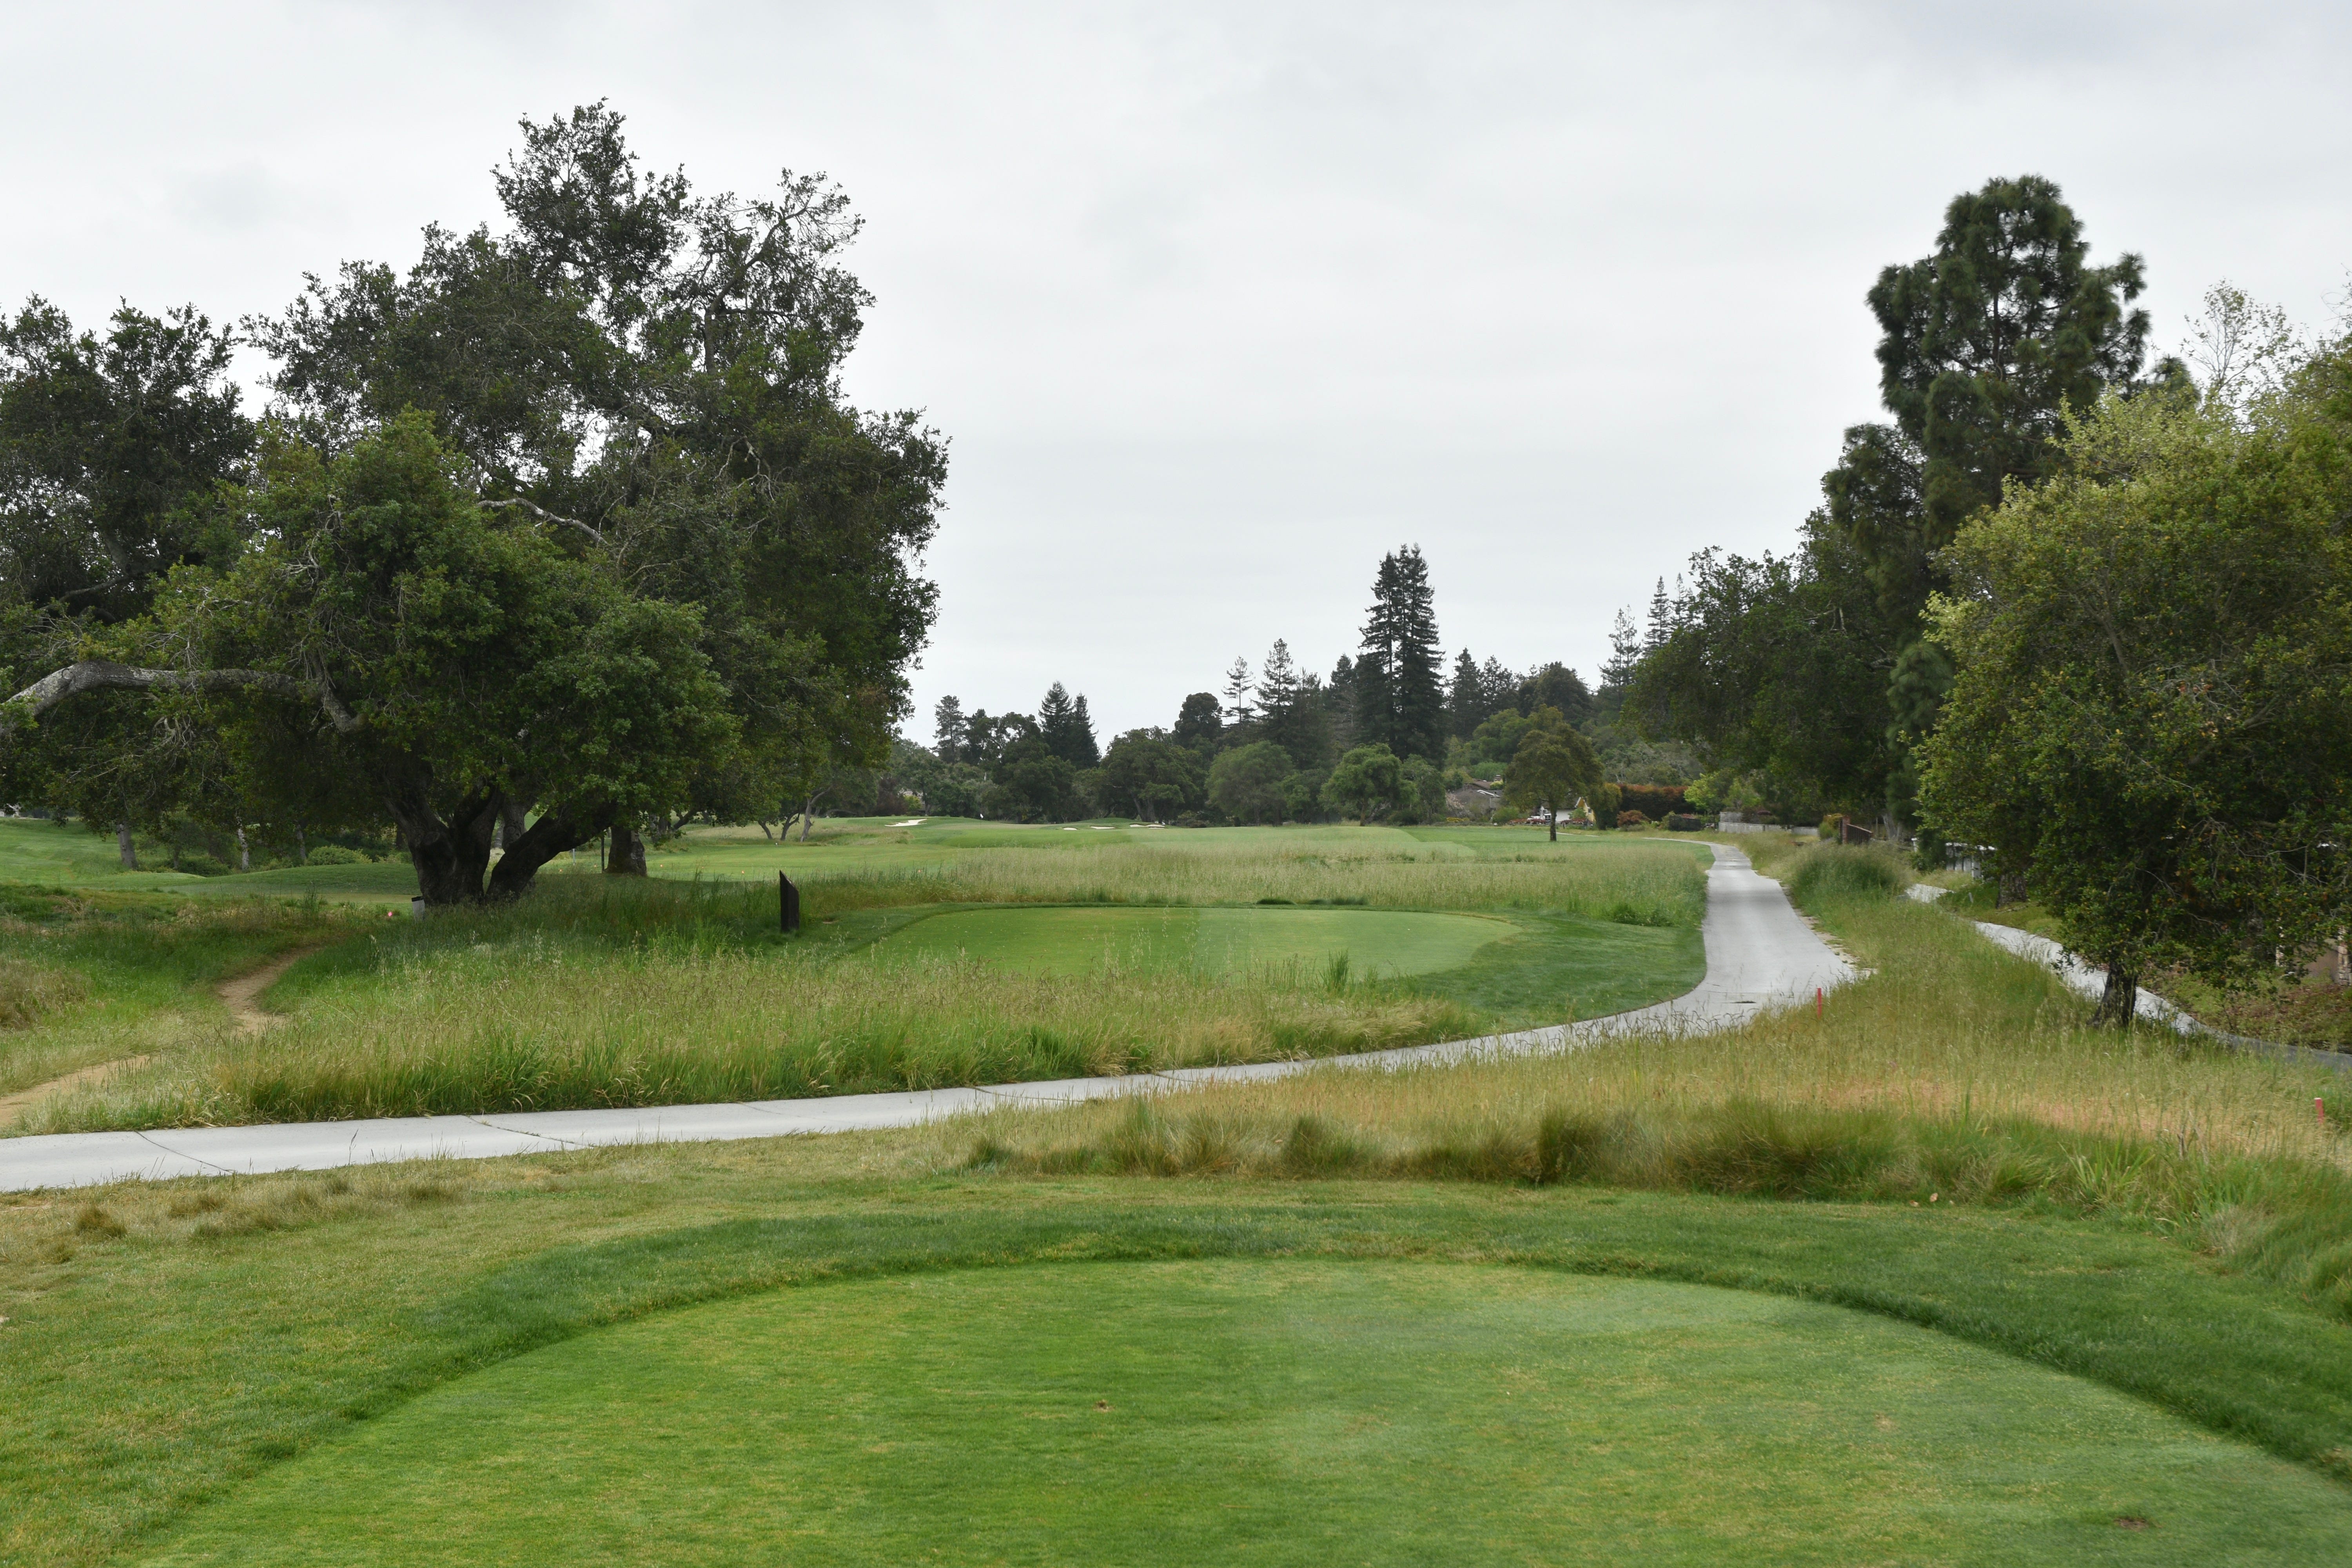
The 15th hole green viewed from the 13th hole fairway
Hole 16: Par 4, 392 Yards
The famed and iconic 16th hole green at Pasatiempo. Alister MacKenzie has claimed this is his favorite green design
The 16th hole tee shot from the back tee
The 16th hole tee shot is a tricky one — the shot is blind and it is difficult to pick out a line with the weirdly-shaped mound out in the distance. The fairway actually moves towards the left so it is paramount to pick an appropriate line off the tee
The 16th hole tee shot requires a carry over the barranca and wet area
The orientation of the 16th hole fairway is awkward and requires a committed shot off the tee. This mounding really makes it uncomfortable for the player and you can’t really see the landing area
Once cresting the top of the fairway mound, the 16th hole green reveals itself
The 16th hole approach from 150 yards
The 16th hole approach from 100 yards — Urbina gave a lot of attention to detail to get the green pad just right and had to make some slight modifications to factor in today’s green speeds
The undulations of the 16th hole green are now more pronounced and distinct
A lot of players are surprised there is a running water hazard in front of the 16th hole green. This area is typically not immediately visible from the fairway
A closer look at the massive right green side bunker of the 16th hole
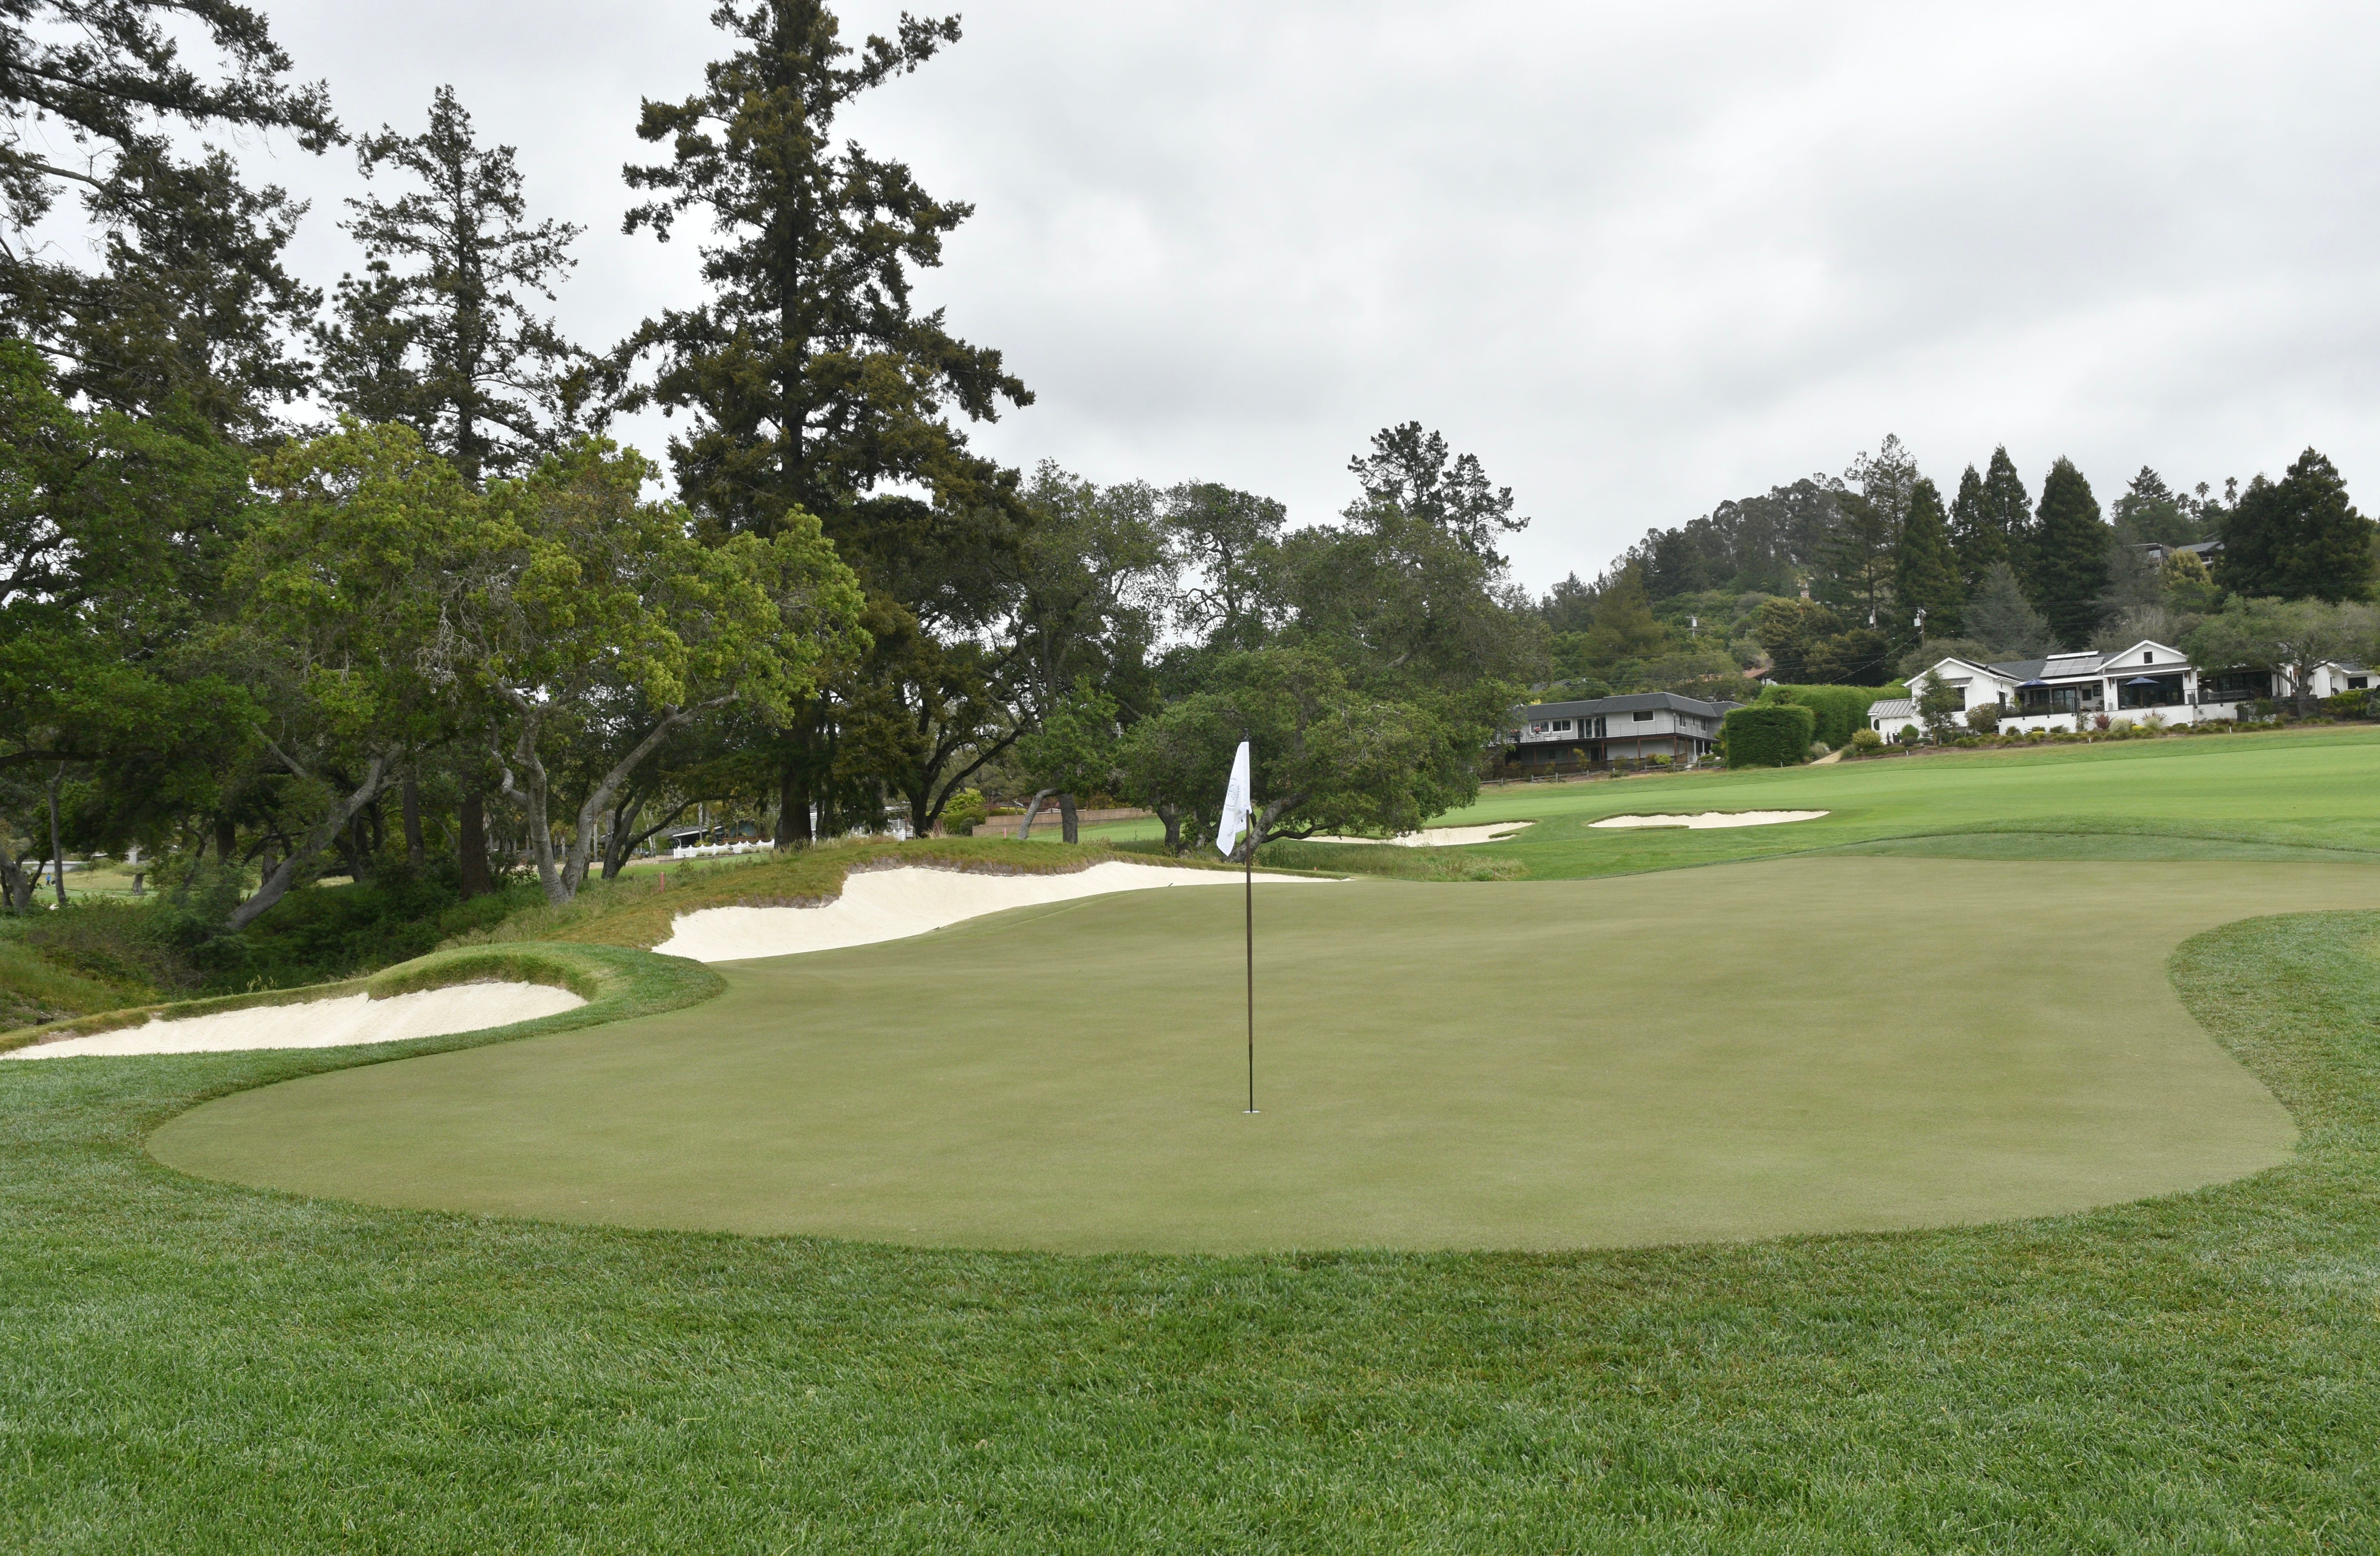
The 16th hole green viewed from the front — Urbina was able to restore the green to handle a front pin position on the front tongue of the green. This was not logistically possible with the previous green
The 16th hole green stair steps up to various levels
A closer look at the undulations of the 16th green
The right green side bunker of the 16th hole
A look back towards the lower levels of the 16th hole green from the middle left
A look at what is arguable the toughest hole location on the 16th green — the middle left. There are stories of college coaches specifically asking the Pasatiempo staff not to place a pin here during the Western Intercollegiate to not embarrass the players!
The back right shelf of the 16th hole green
The back left shelf of the 16th hole green
Another vantage point of the 16th hole green viewed from the middle left
The 16th hole green viewed from the back middle left
The 16th hole green viewed from the back right
The 16th hole green viewed from behind — An incredible hole!
Hole 17: Par 4, 372 Yards
The 17th hole at Pasatiempo is typically the bastard child and the weakest hole on the course. However, I really like what Urbina did to this hole during the restoration which showcases his attention to detail. He re-established some subtle features that make this hole much more strategic than it first appears
The 17th hole tee shot may seem straightforward at first glance but the placement of the tee shot is actually very critical on this hole
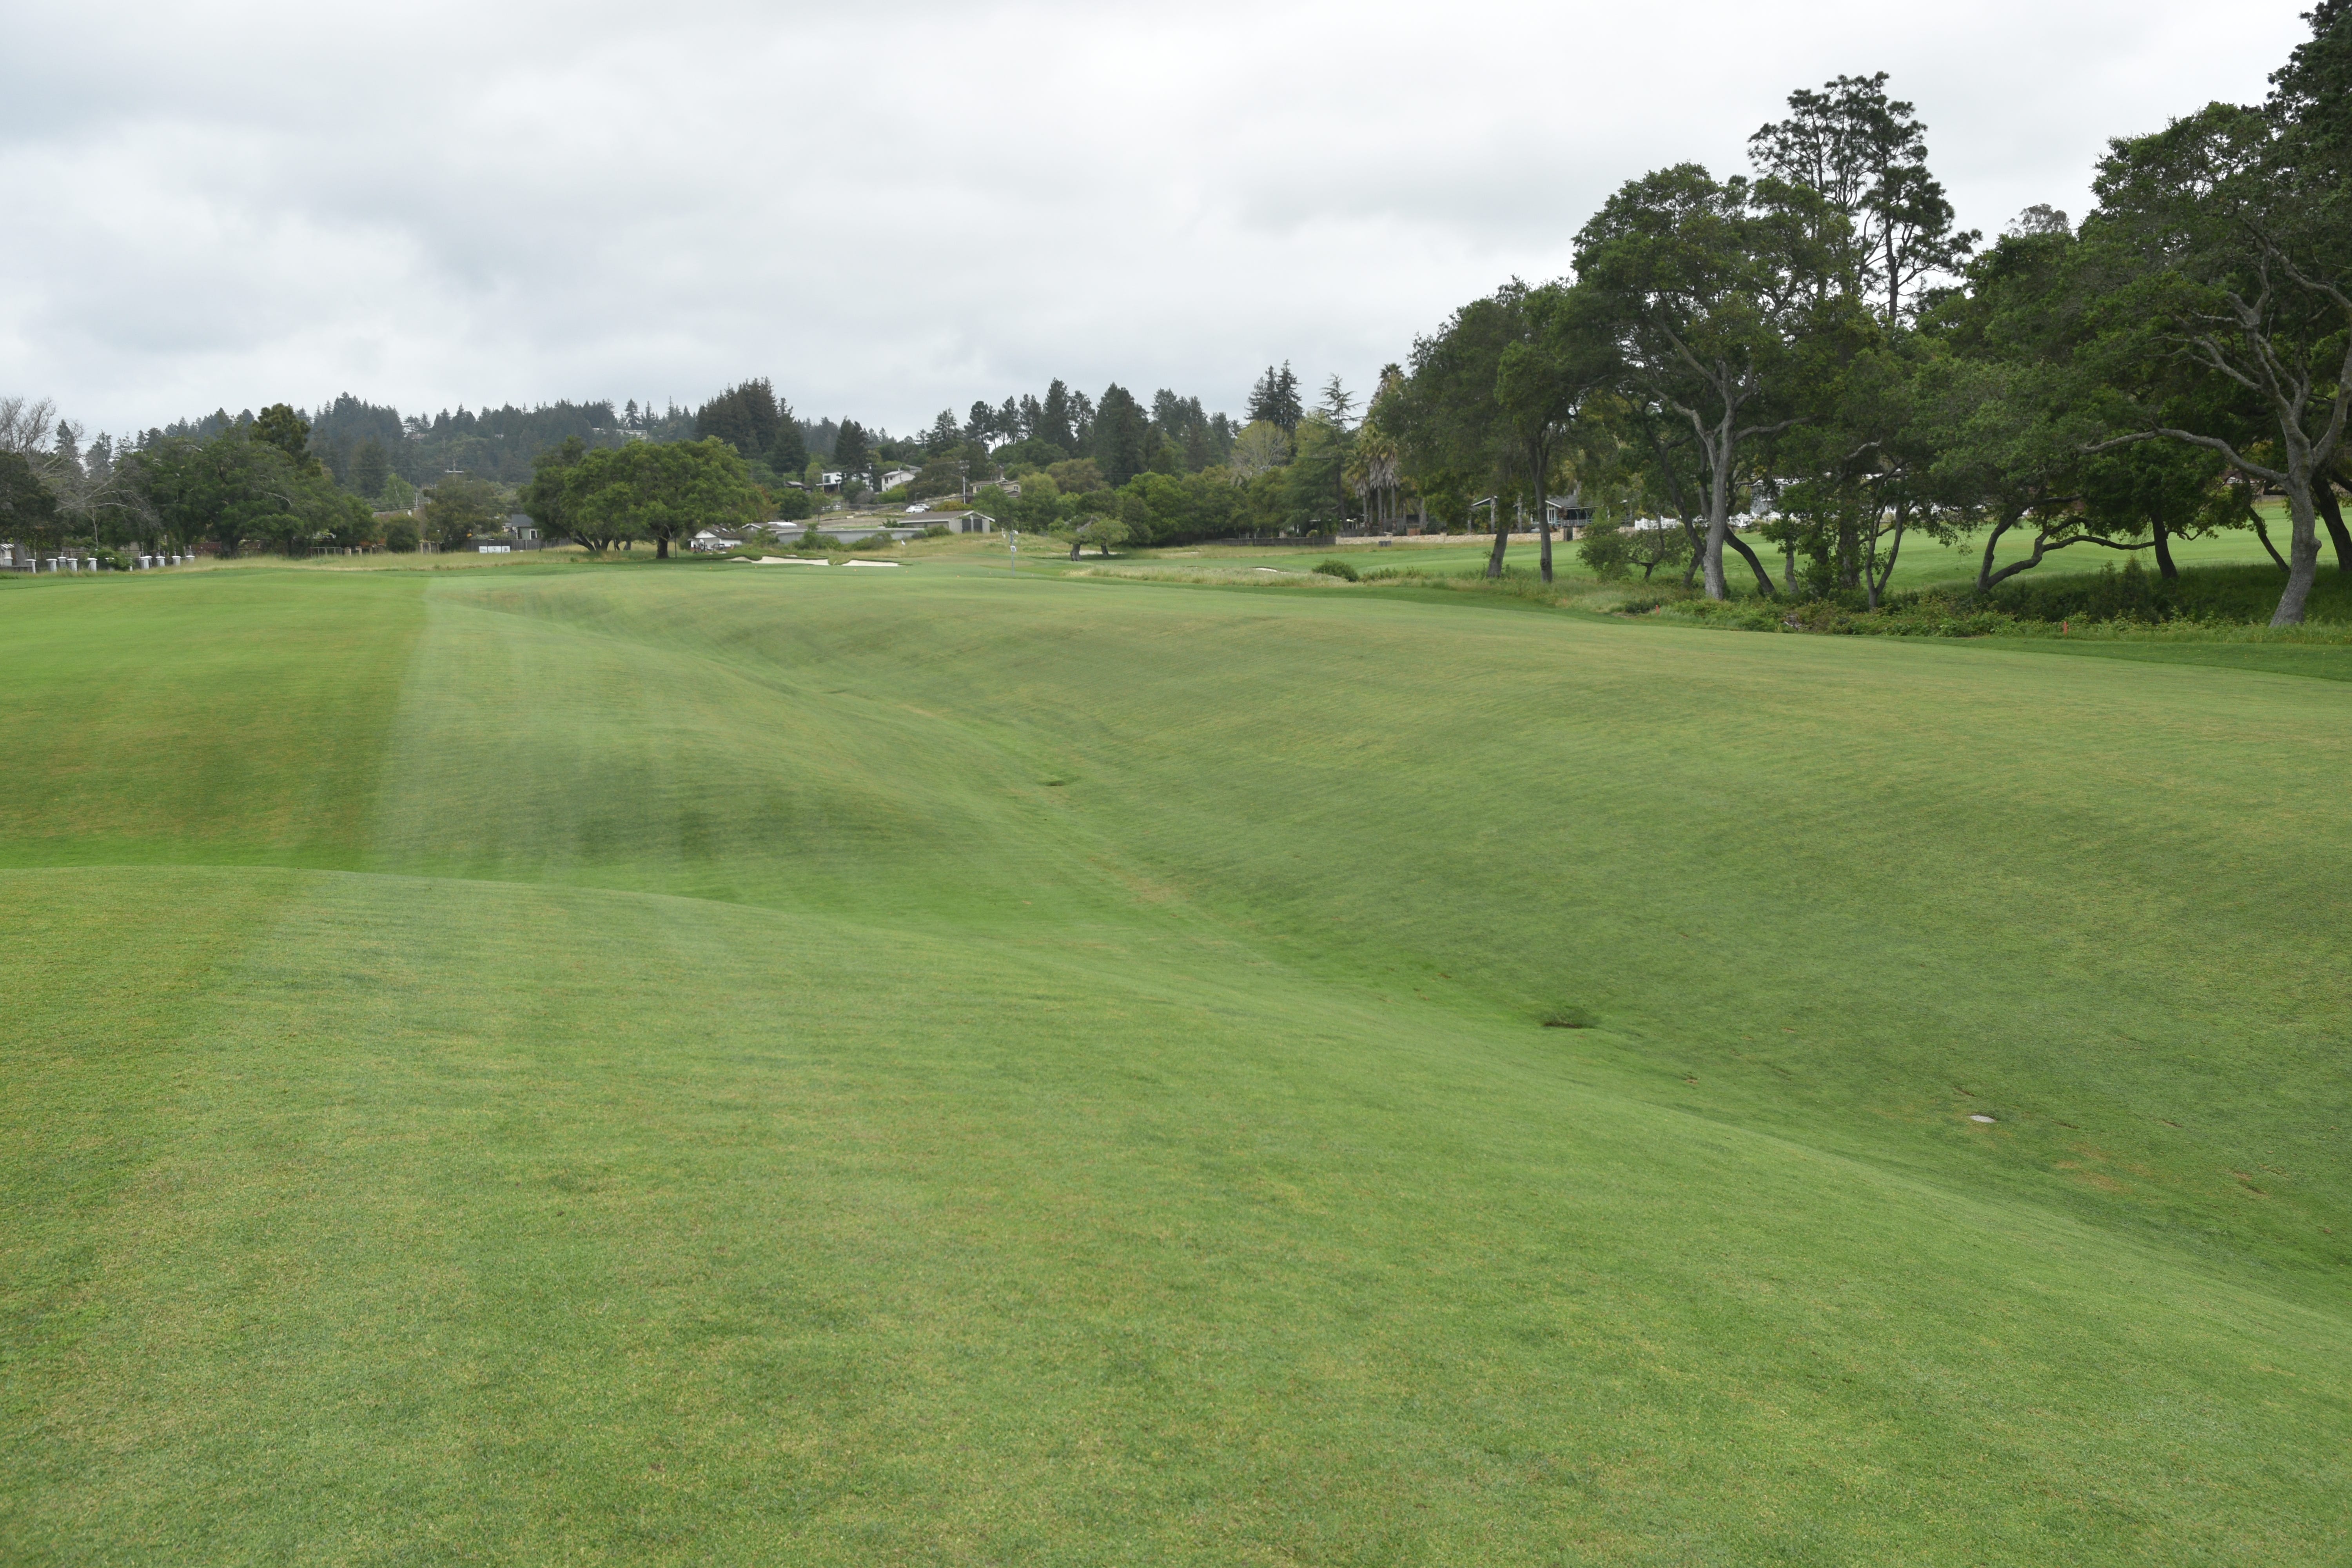
The 17th hole fairway with the two fairway bunkers guarding the right side
The two right fairway bunkers of the 17th hole
A closer look at the first right fairway bunker of the 17th hole
A player needs to favor the left side of the fairway for the clearest approach to the green
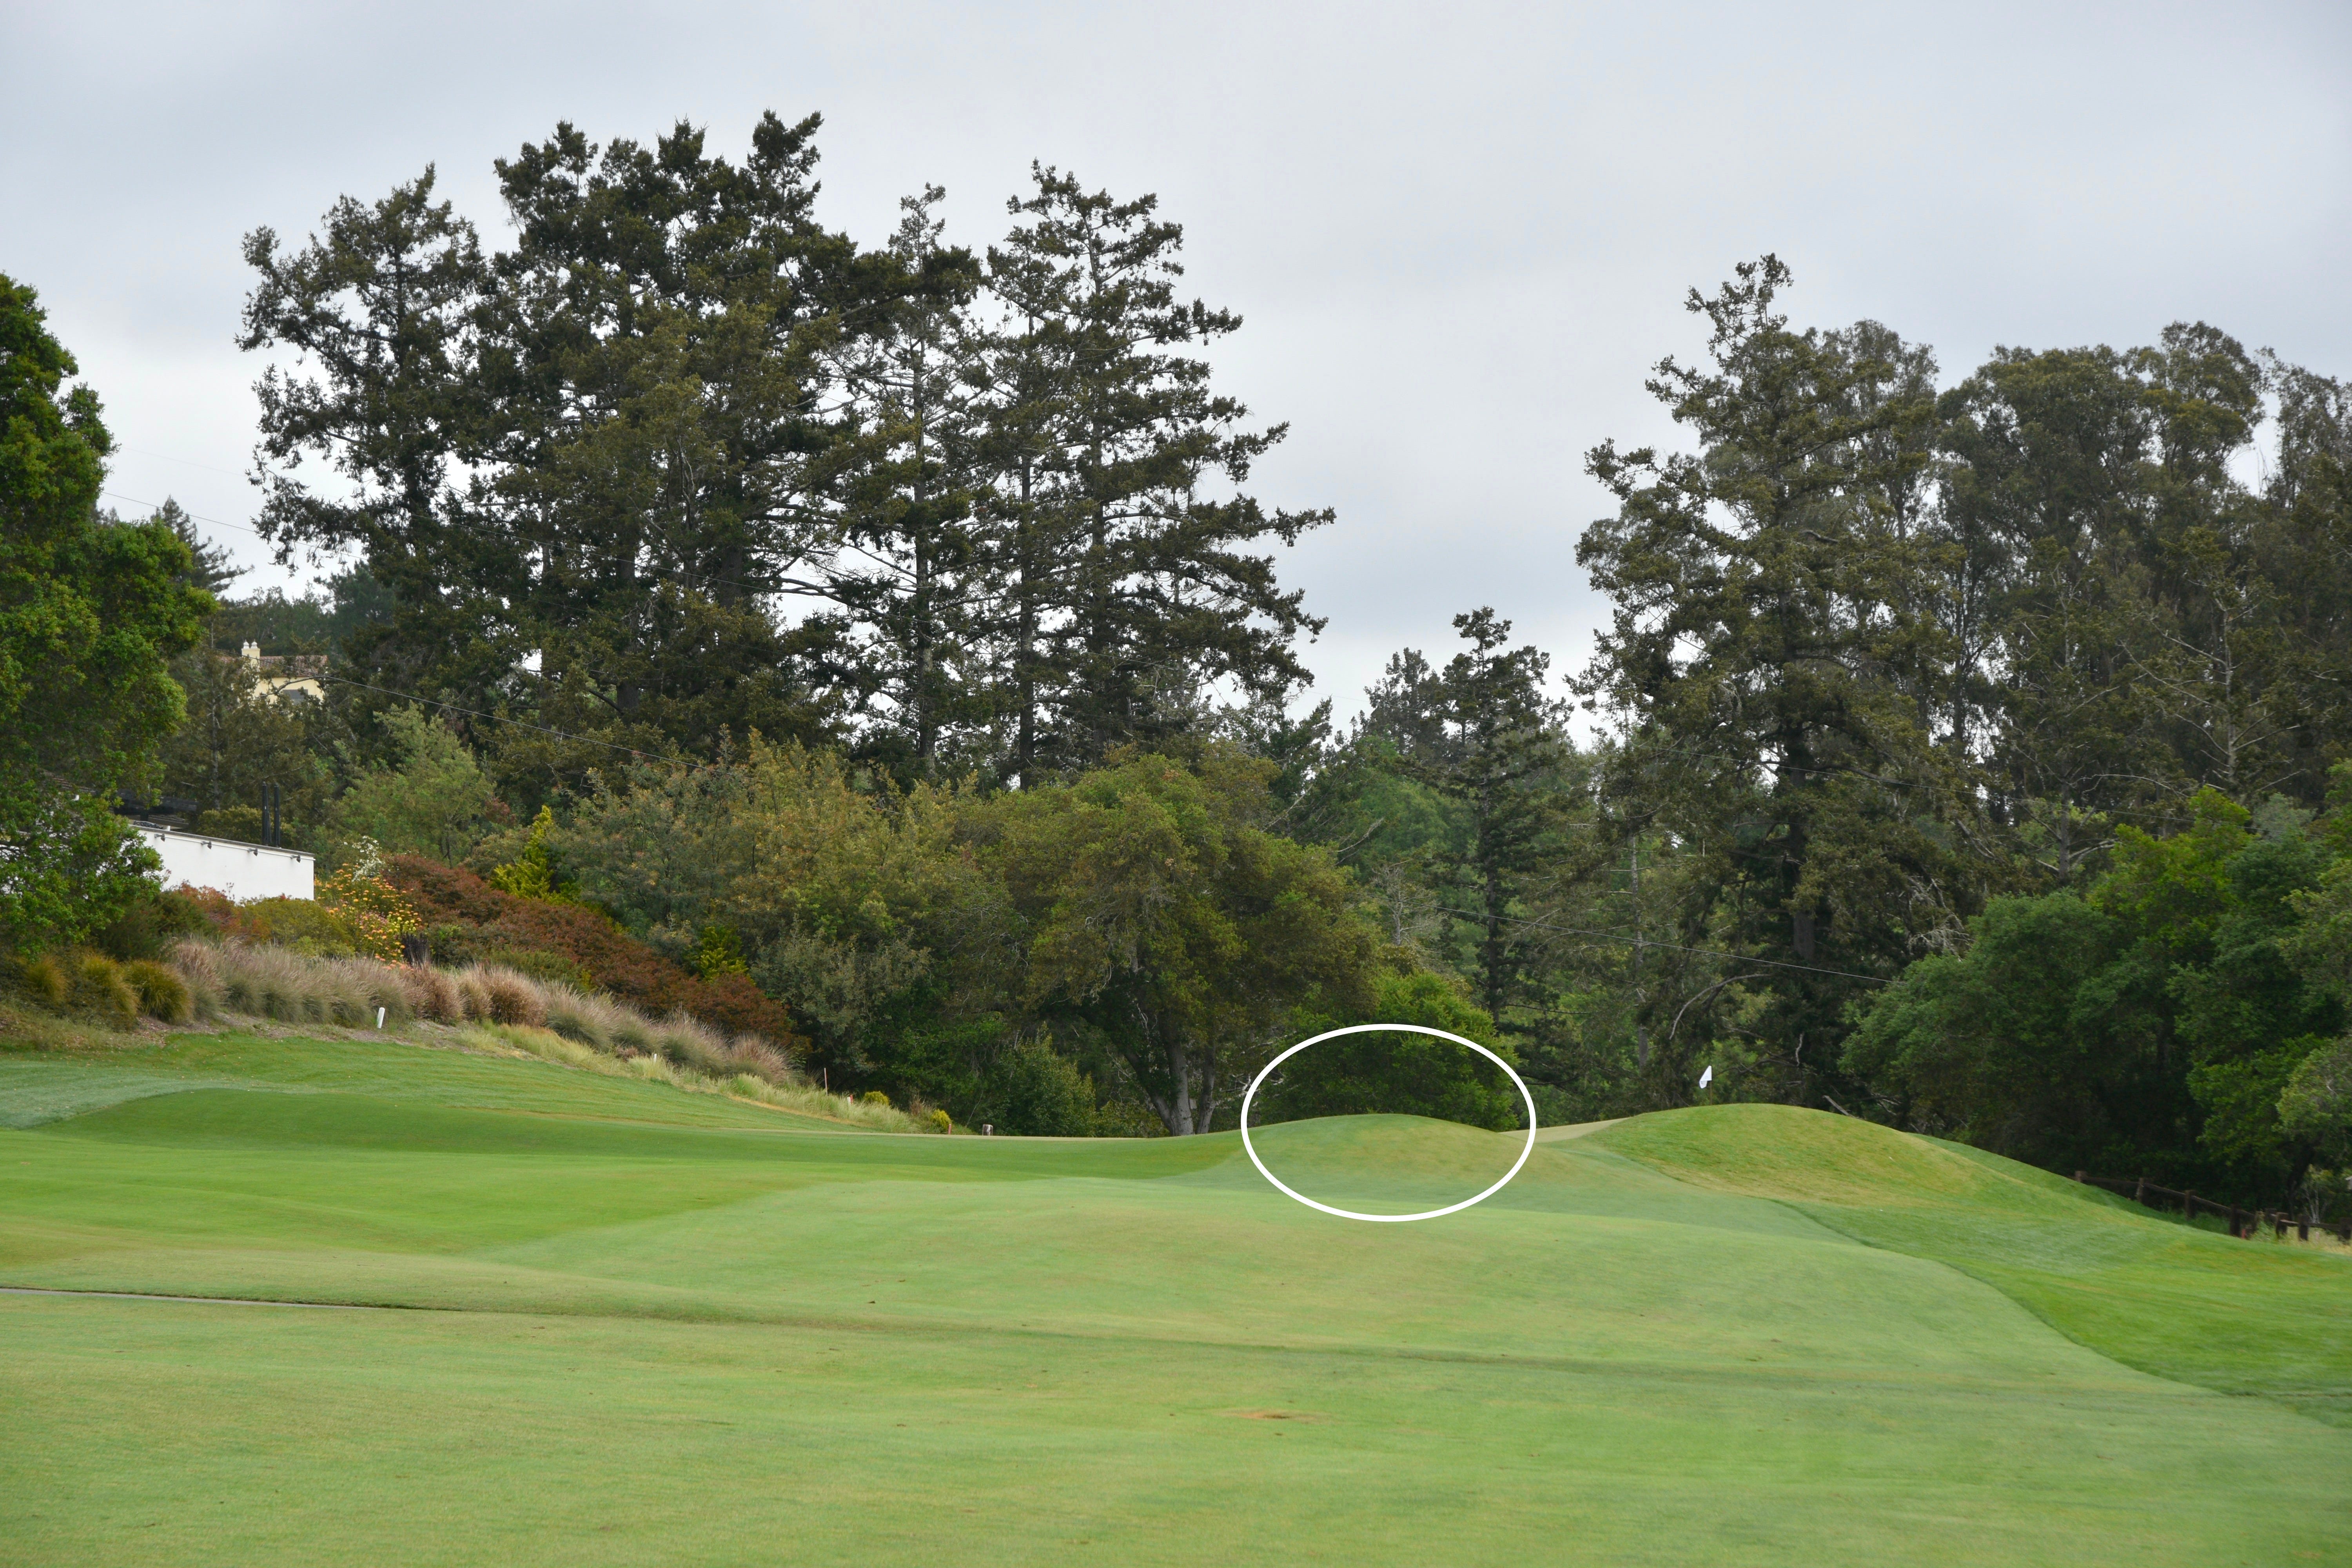
Hitting the right side of the fairway or missing the fairway to the right is actually a disadvantage as the green no longer is visible for the approach
I liked what Urbina did here by re-shaping a subtle knob (shown in the circle above) that guards the front right side of the green. This knob further obscures the green when approached from the right. Also, you can’t run up a shot coming from the right as this knob can kick the ball anywhere
The closer you get to the green and come from the right, the worse the angle becomes for the approach and you can see the knob become more imposing. Very clever and brilliant work from Urbina that pays homage to a very subtle MacKenzie design trait
When coming from the left side of the fairway, the 17th hole approach is significantly more easier
However, trying to fit a tee shot to left side of the 17th hole fairway is not without danger. Out of bounds looms tightly on the left. More risk, more reward — a classic MacKenzie design trait
Another look at how close out of bounds looms on the left side of the 17th hole — This hole is now much more interesting than you initially thought
The 17th hole green approach from 40 yards away
The 17th hole green viewed from the front — Urbina restored the undulations to this green that is narrow but long in length that makes proper distance control on the approach a necessary requirement
A closer look at that re-established knob that cause cause a lot of havoc if approaching this 17th hole green from the wrong angle
The 17th hole green is super long at over 50 yards in length — three putts are very common on this hole and much more so with this restored green
The shaping of the 17th hole green is just fantastic work by Urbina and his crew
A closer look at the undulations of the 17th hole green
A look towards the back of the 17th hole green from the front left
The 17th hole green viewed from the front right — the hole drops off on the right side so pushed approach shots will be punished with balls bouncing away further away from the green
The 17th hole green viewed from the back right
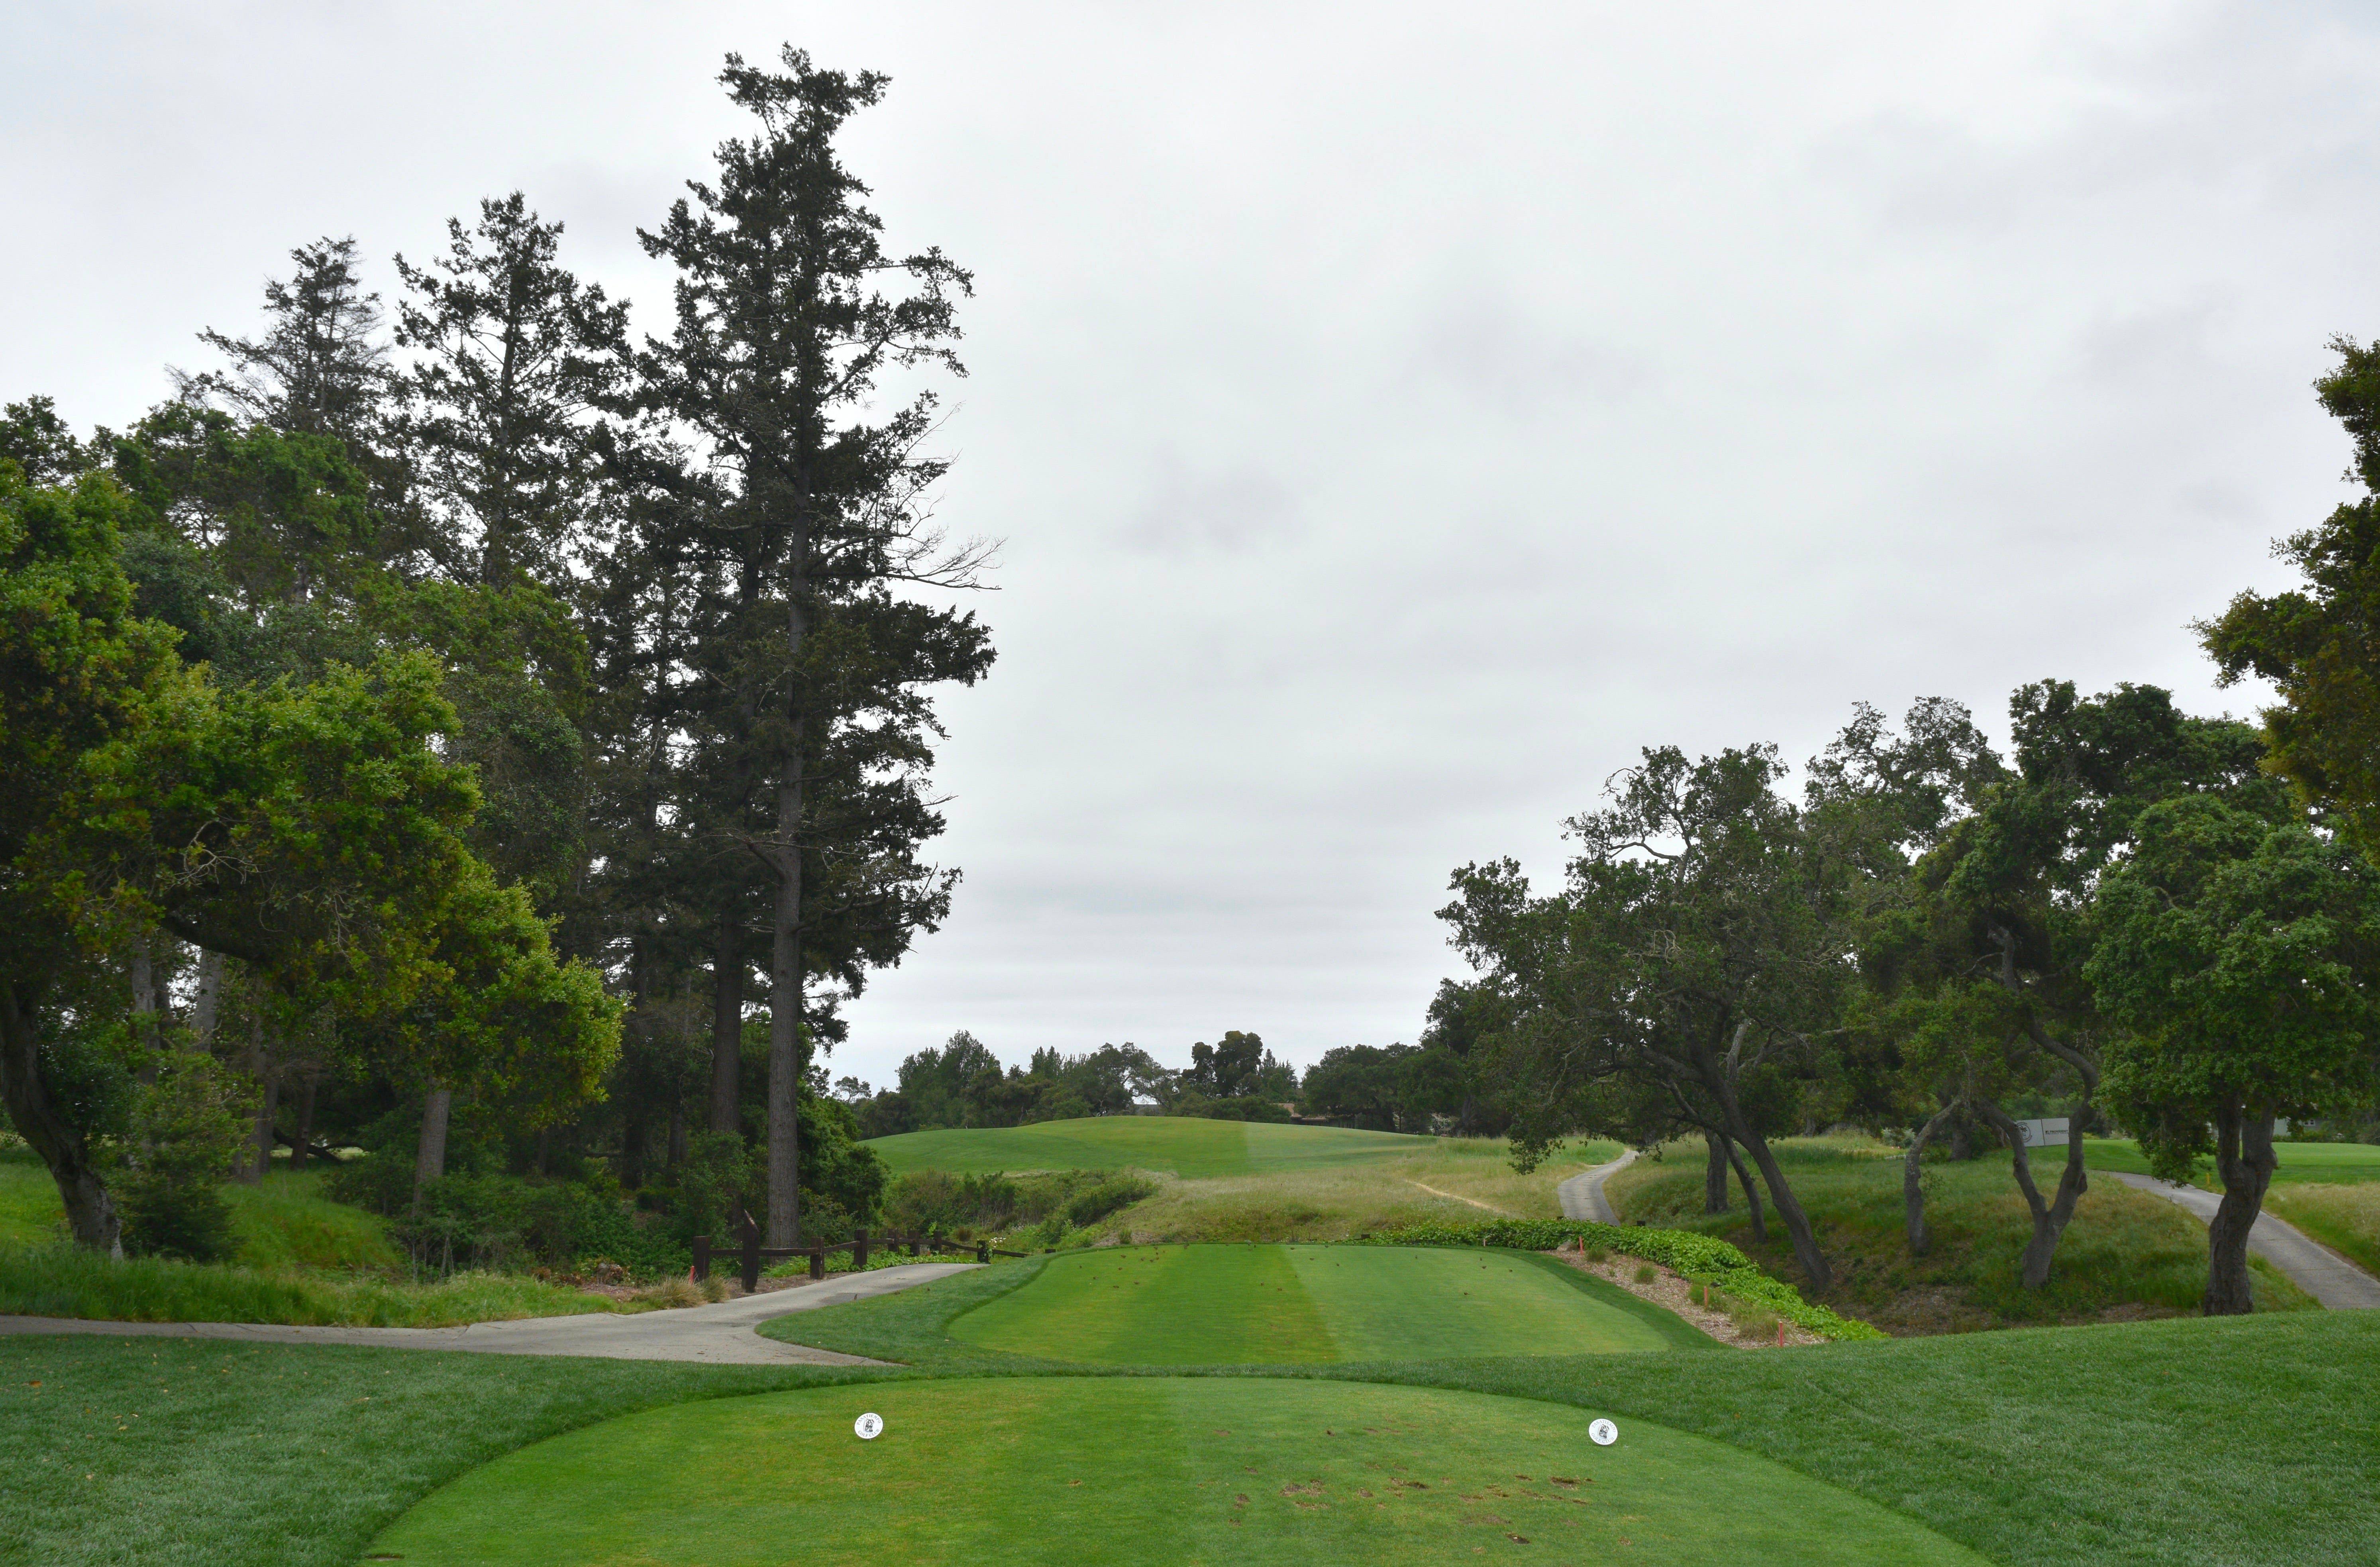
Hole 18: Par 3, 173 Yards
Finishing on a par-3 hole is usually not a good thing, but Pasatiempo’s 18th hole is the exception to the norm. The 18th hole was always a challenging one-shotter, but much more so with this restored green that is a fair but absolute monster
The 18th hole tee shot from the back tee. The tee shot must heroically carry the barranca one final time but the work is not done once reaching the green
The 18th hole tee shot from the middle tees
Another vantage point of the 18th hole green once walking off the tee box
The barranca fronting the 18th hole green is massive and the two front left green side bunkers are incredible deep and sloped. There was actually three front bunkers but Urbina elected not the re-create the furthest right front bunker likely for logistically reasons
A closer look at the two front green side bunkers of the 18th hole. The face of these bunkers are nearly 20-30 feet deep. You don’t want to be in them!
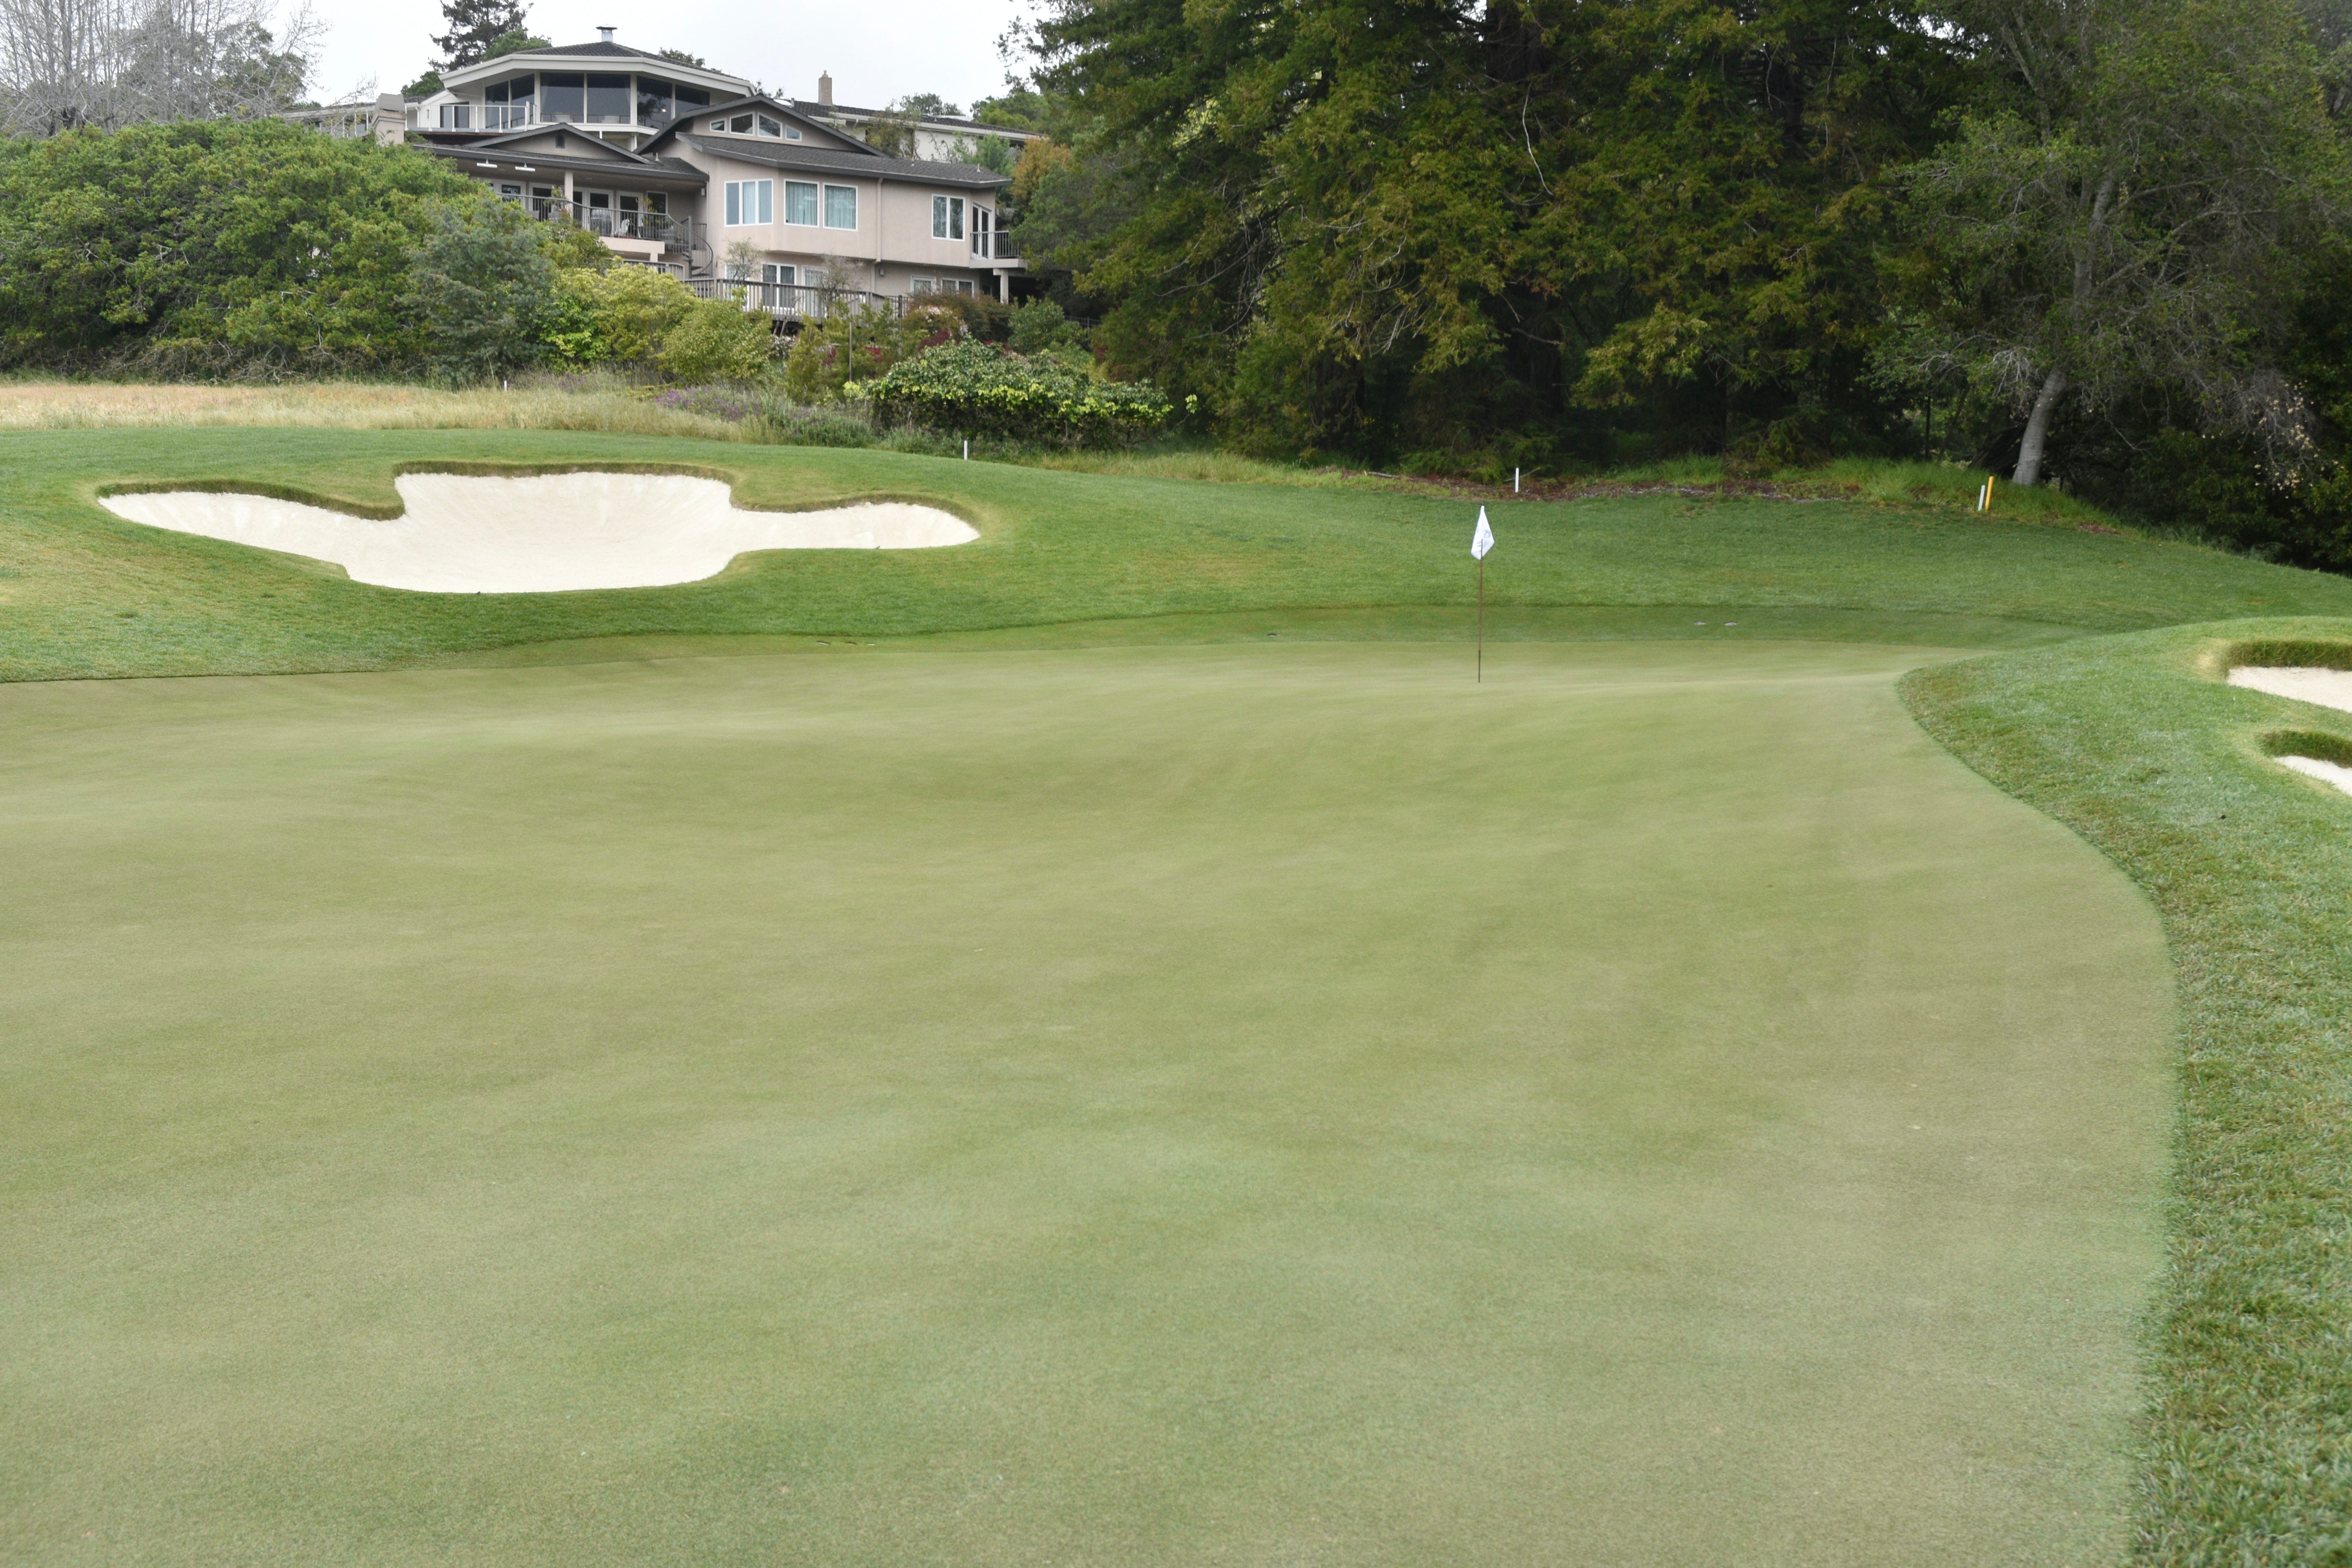
The 18th hole green and the re-established menacing slopes
The 18th hole green viewed from the front right — Urbina created enough space to allow for a front hole location
The 18th hole green viewed from the middle right — the slopes are now more distinct and pronounced than before
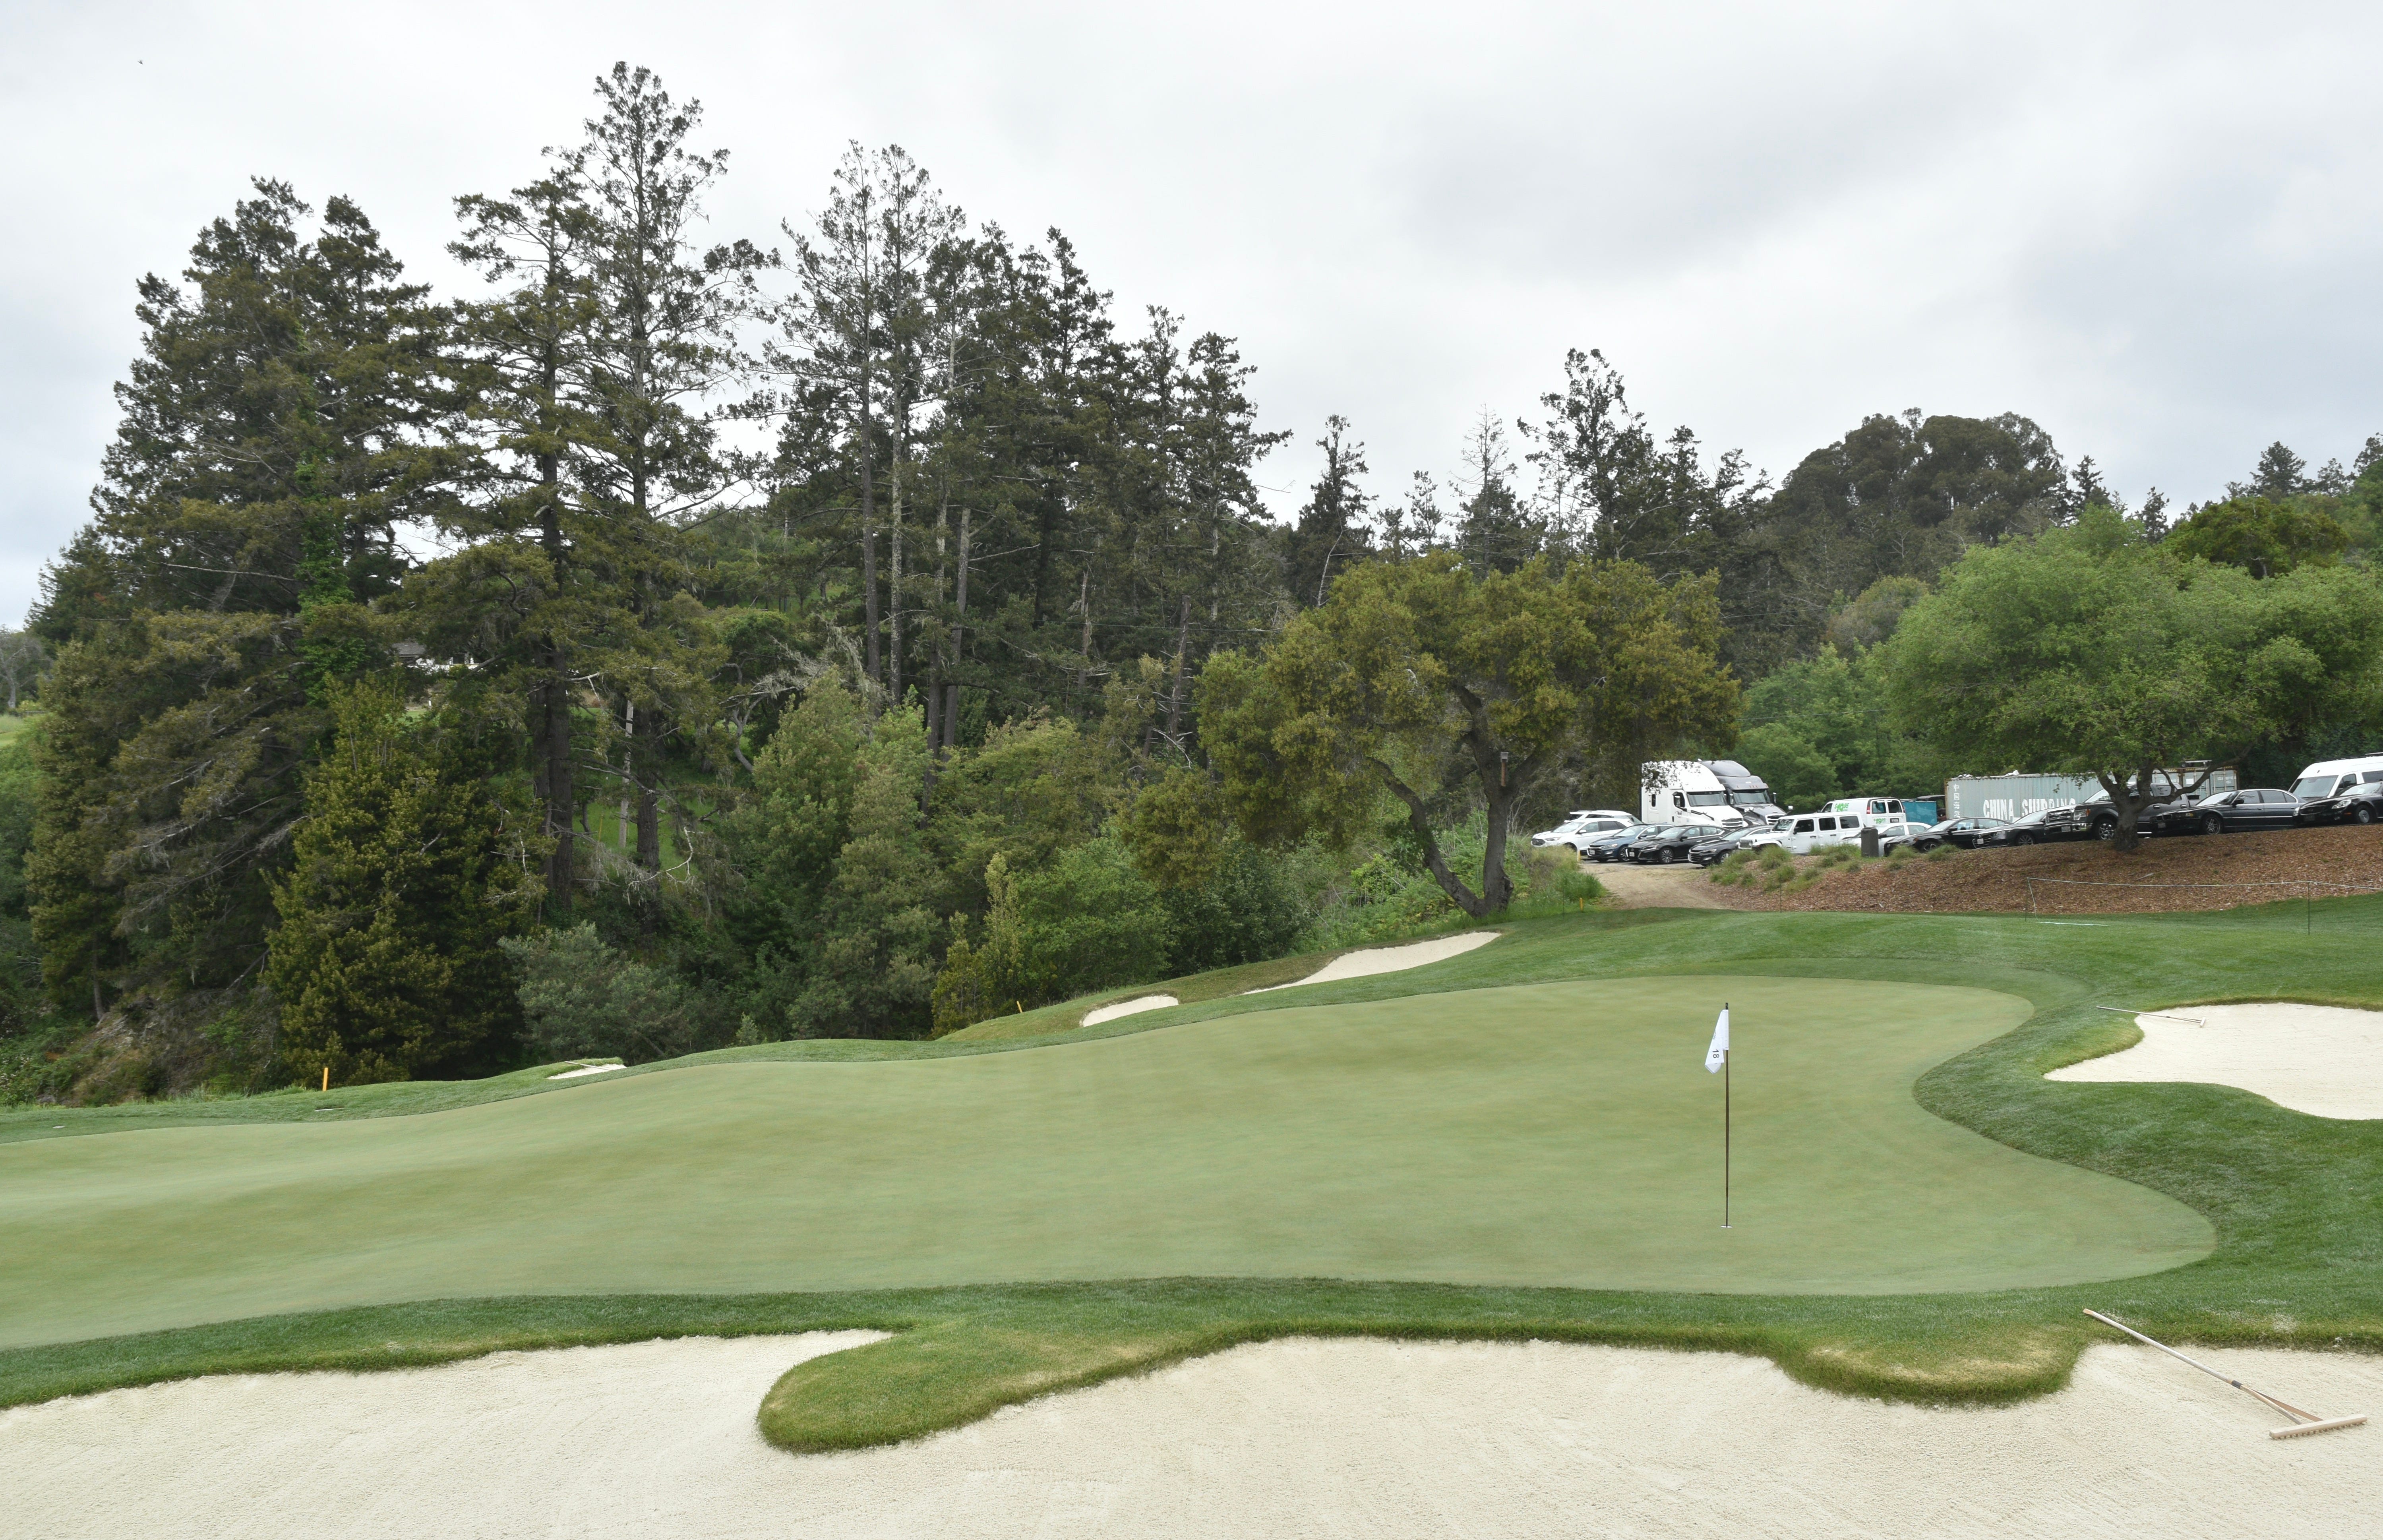
The 18th hole green viewed from the back right
Another vantage point of the 18th hole green from the back right
The 18th hole green viewed from the back left — Getting off this green with two putts is not an easy endeavor
The 18th hole green viewed from the back left — This green used to be problematic for back left hole locations as the ball would rarely stay up on the back left shelf. This green will hold properly struck shots better to reward good shotmaking
The back right green side bunker of the 18th hole
The back left section of the 18th hole viewed from behind
The 18th hole green when Pasatiempo first opened in 1929
The 18th hole green viewed from behind — Incredible work that shows demonstrated attention-to-detail from Jim Urbina and his crew. Pasatiempo is an absolute world-class golf course