Pasatiempo is a golf architectural dream — one of the great golf courses in America showcasing the full design talents of Alister Mackenzie. 16 years after an initial restoration effort, Jim Urbina undertook another restorative effort in 2023 starting with the front nine. The back nine is slated for restorative work in the summer of 2024
Original Architect: Alister Mackenzie (1929) Restorative Architect: Tom Doak (2007), Jim Urbina (2023-2024)
Notable Championships Played: 1982 U.S. Women’s Amateur 2004 U.S. Senior Women’s Amateur Western Intercollegiate (since 1947)
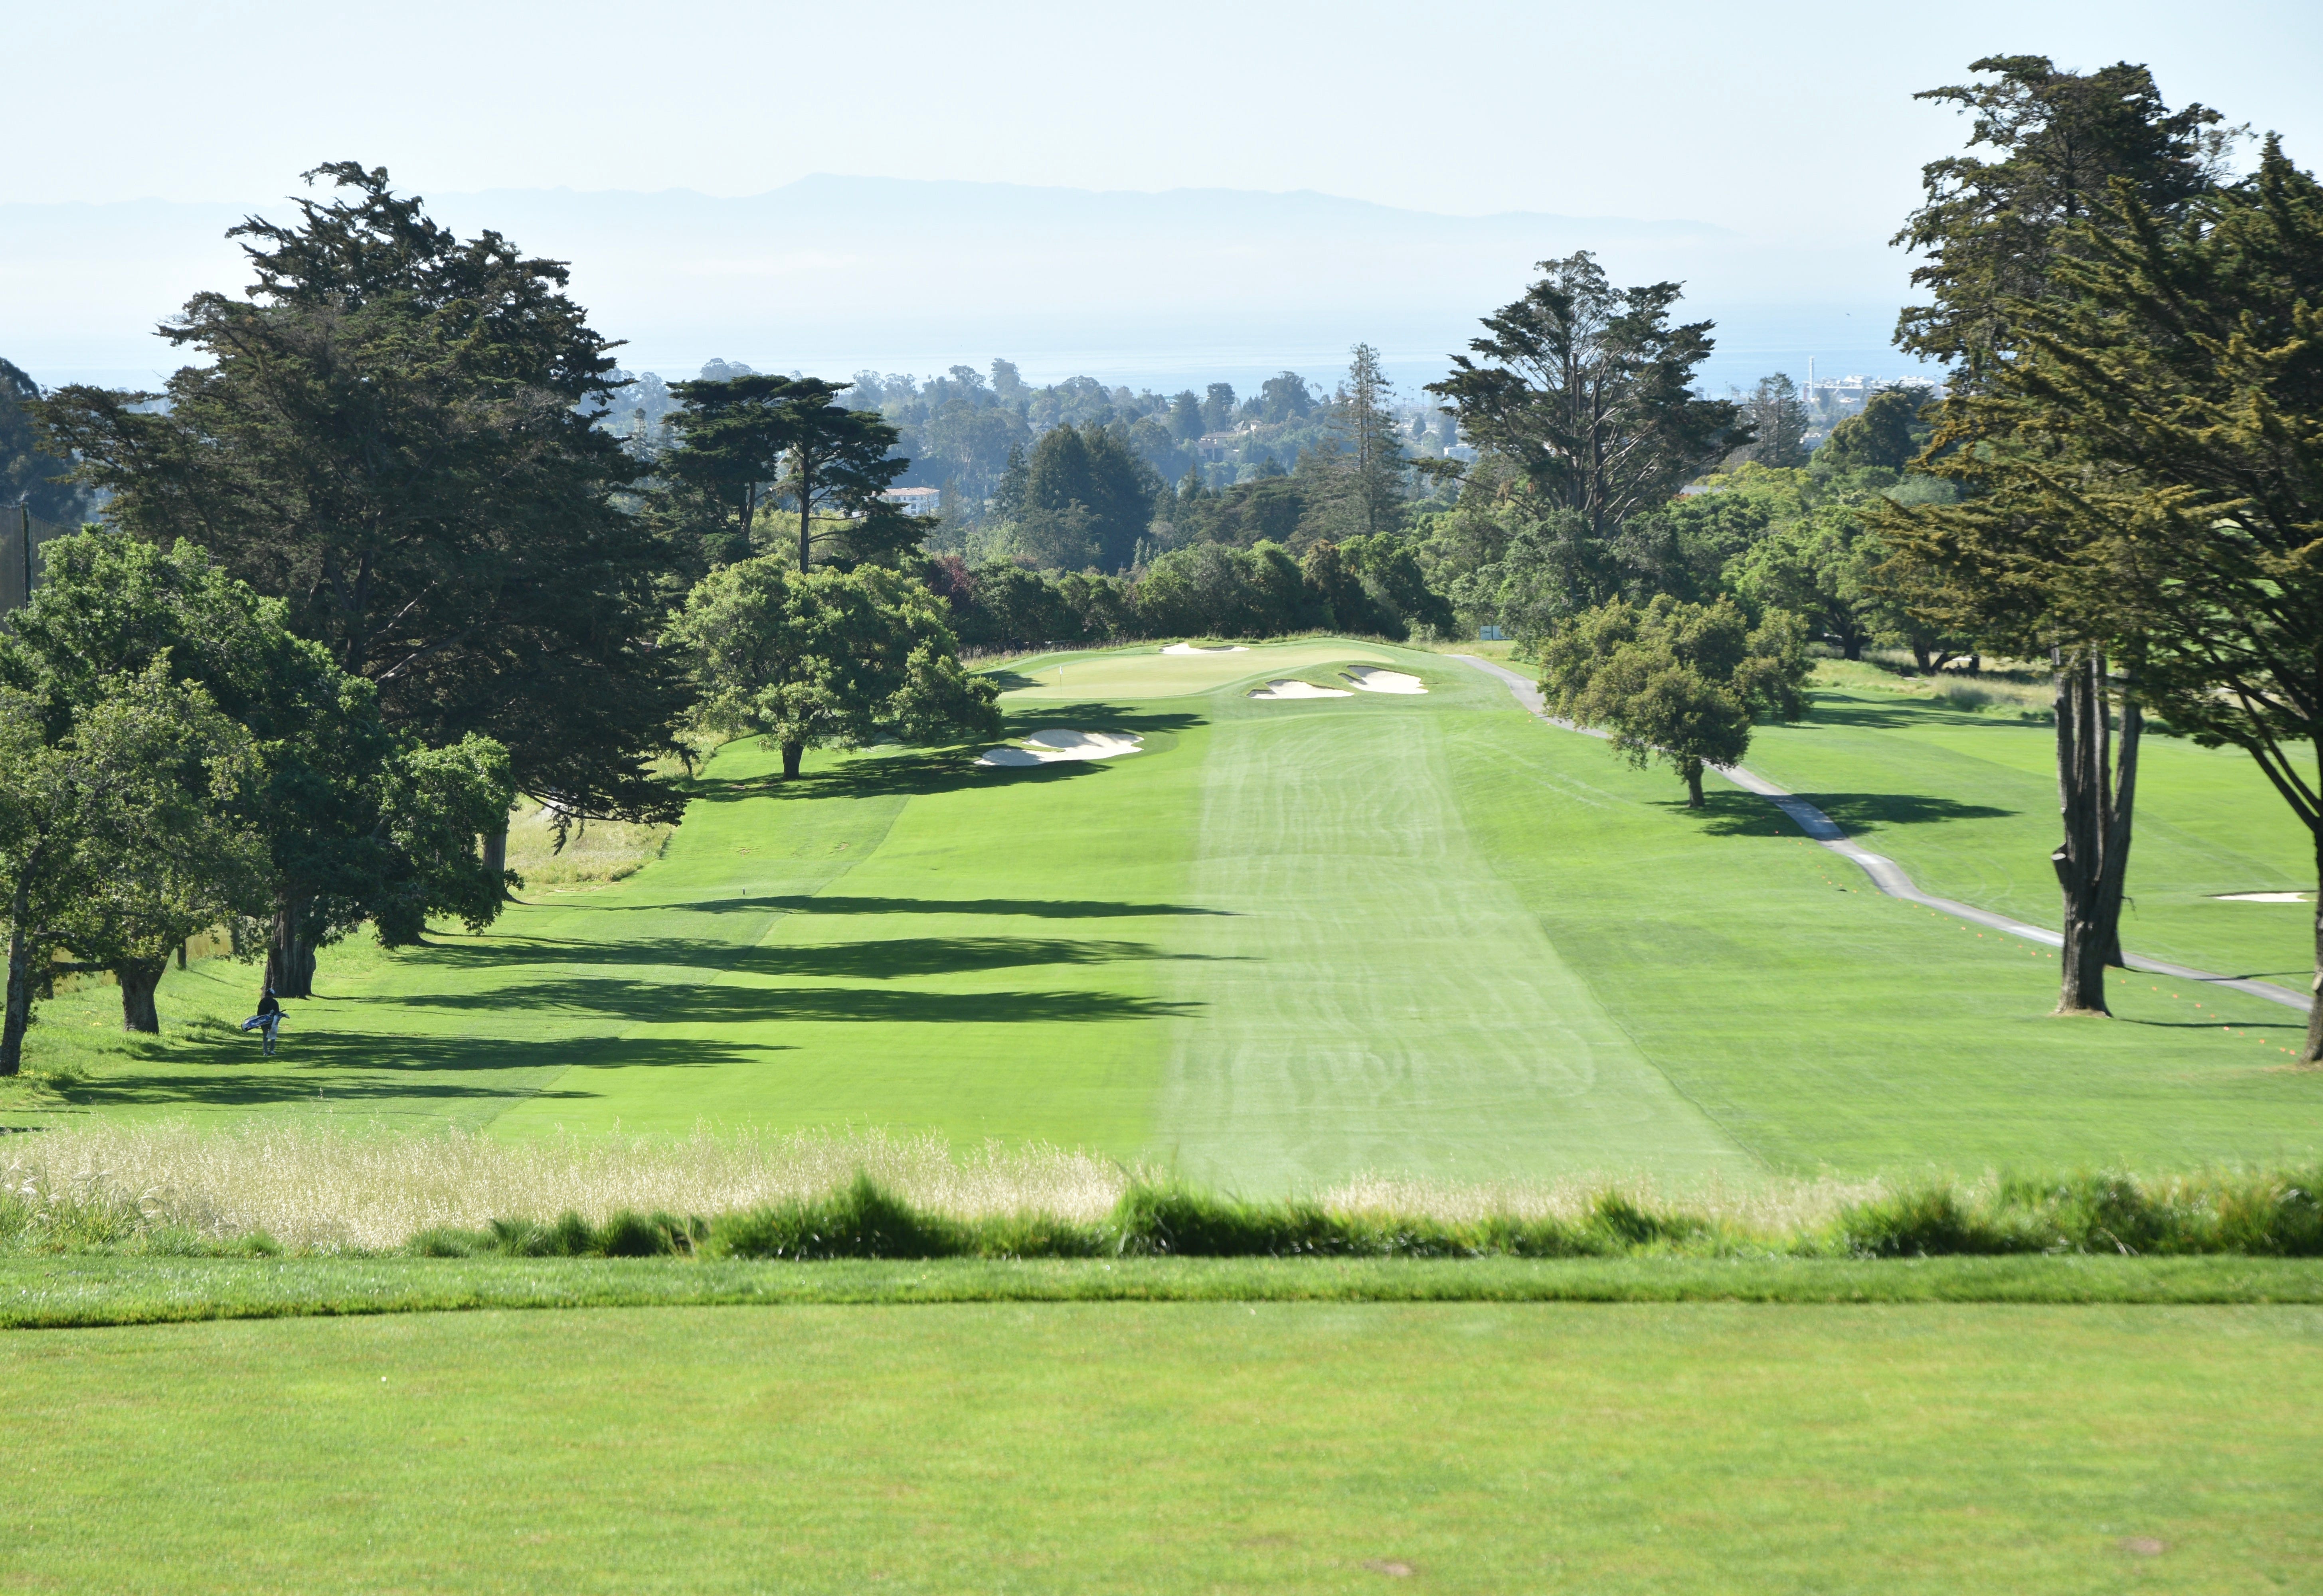
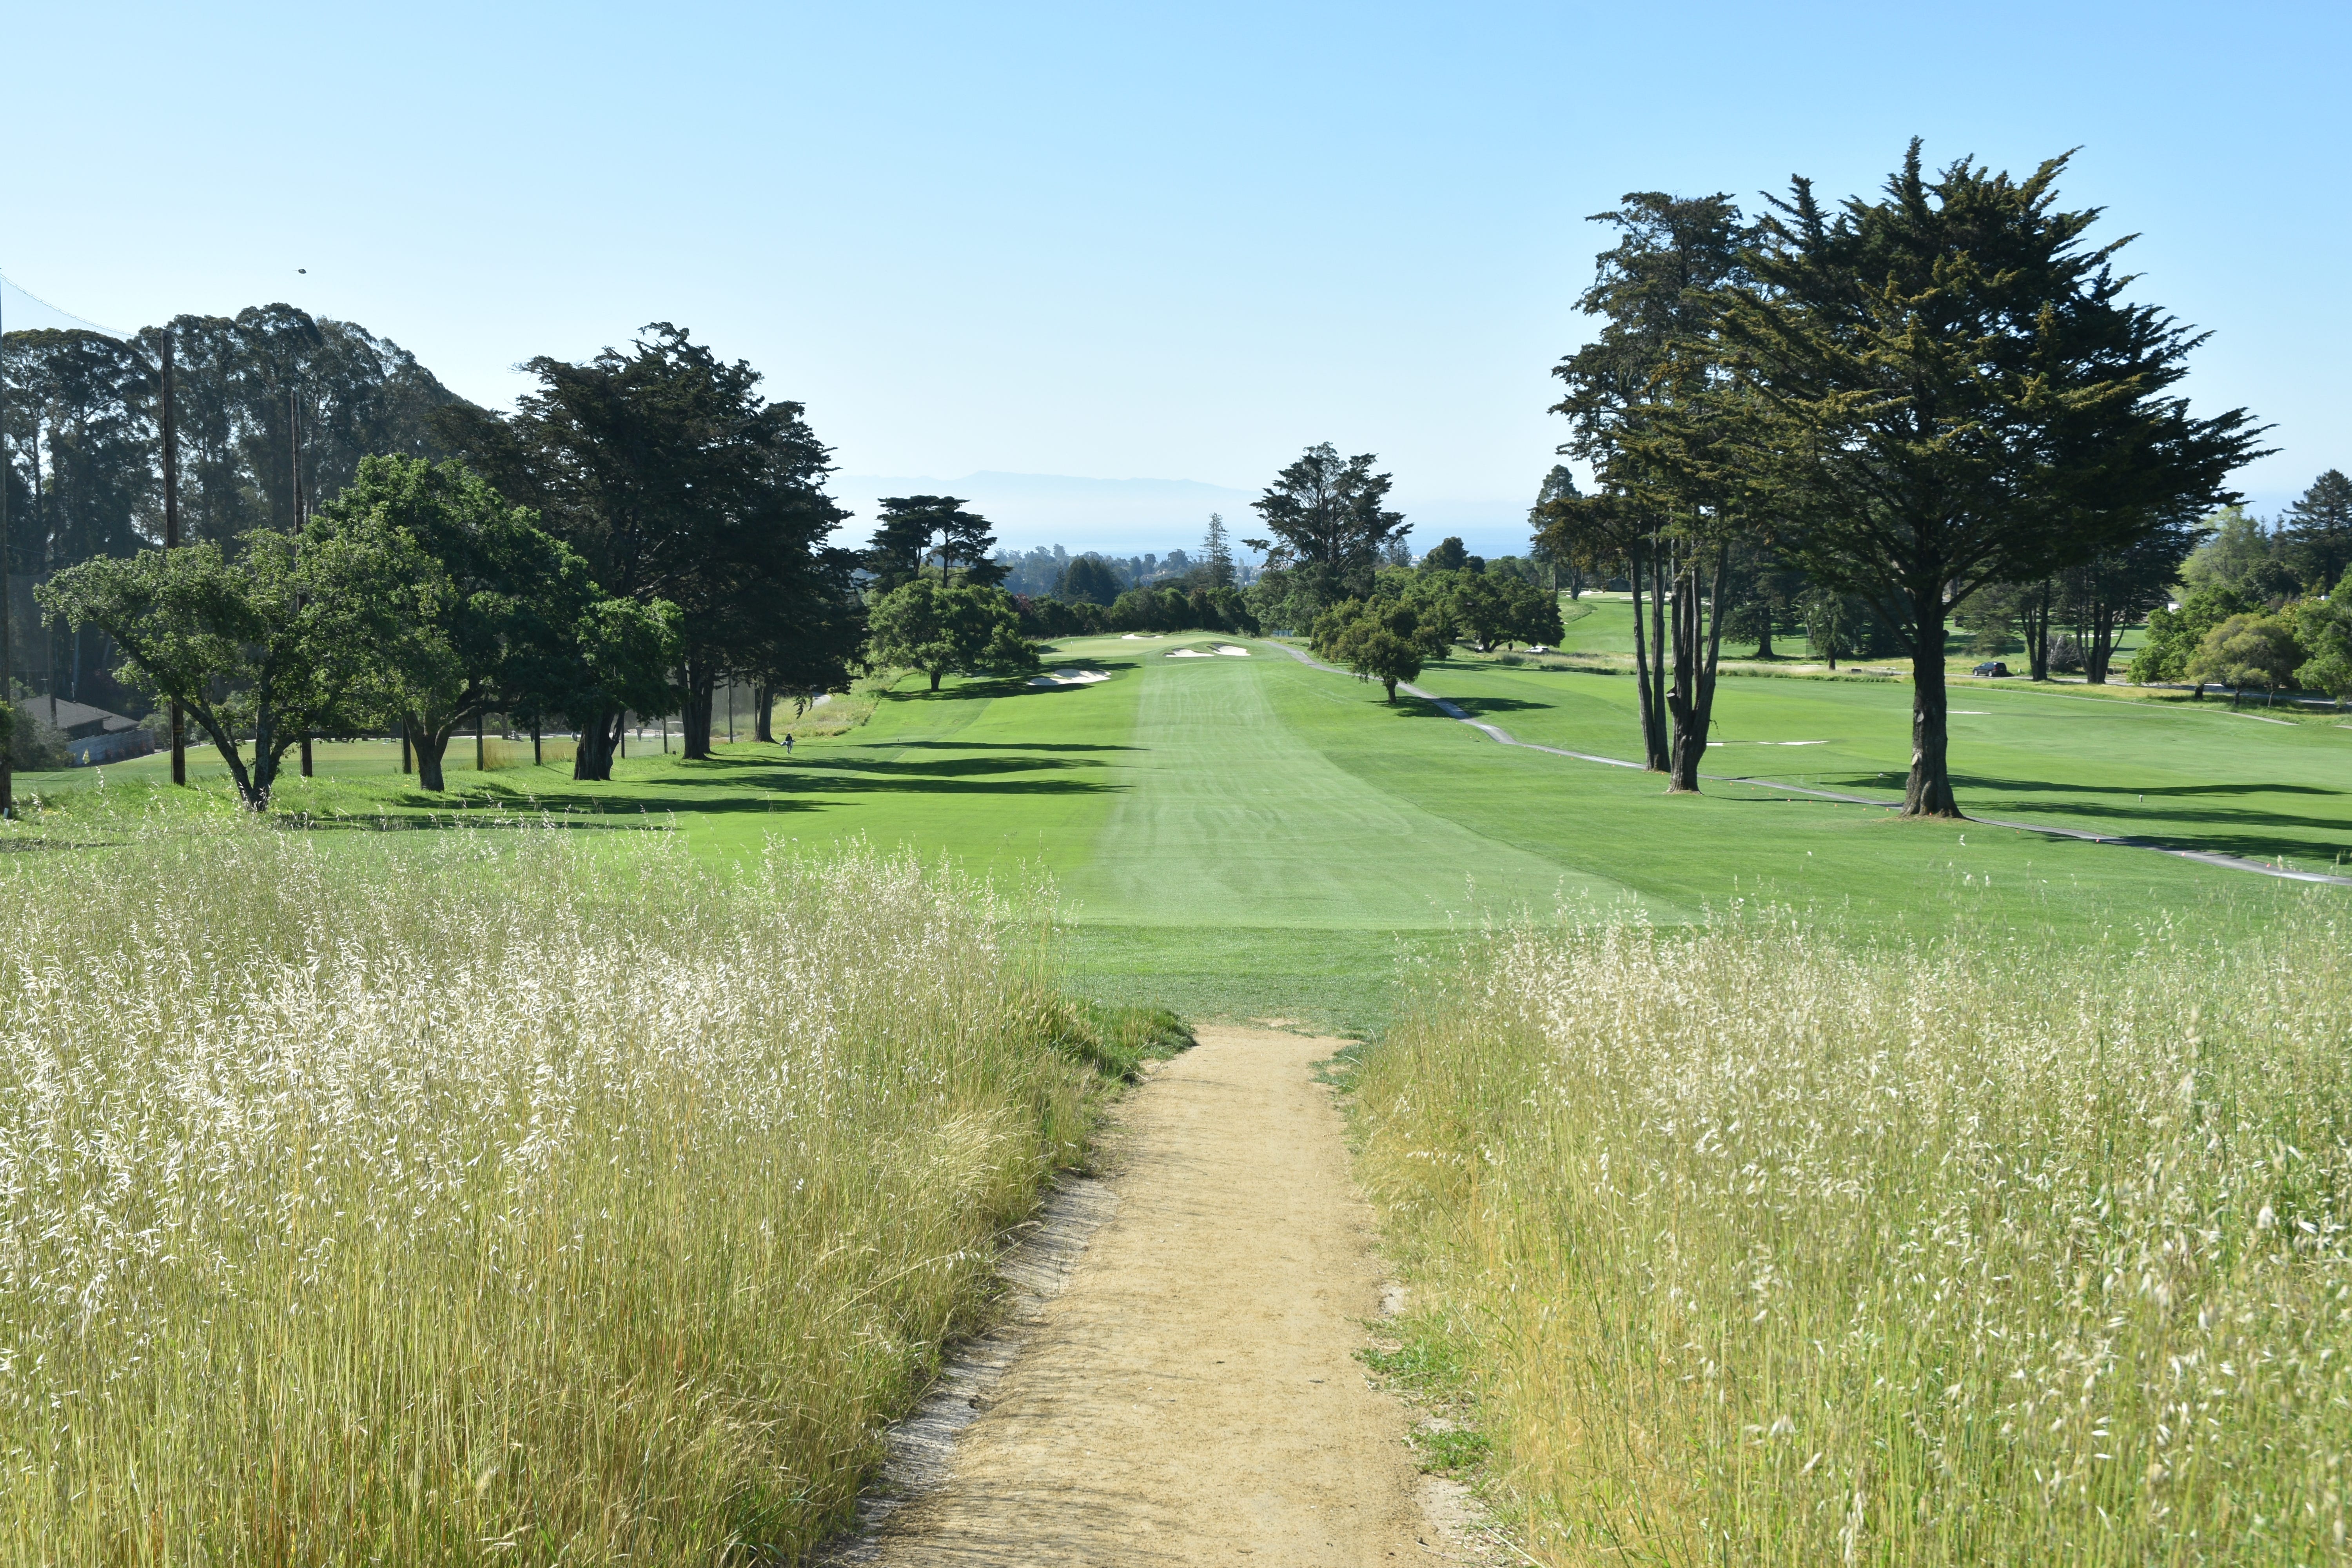
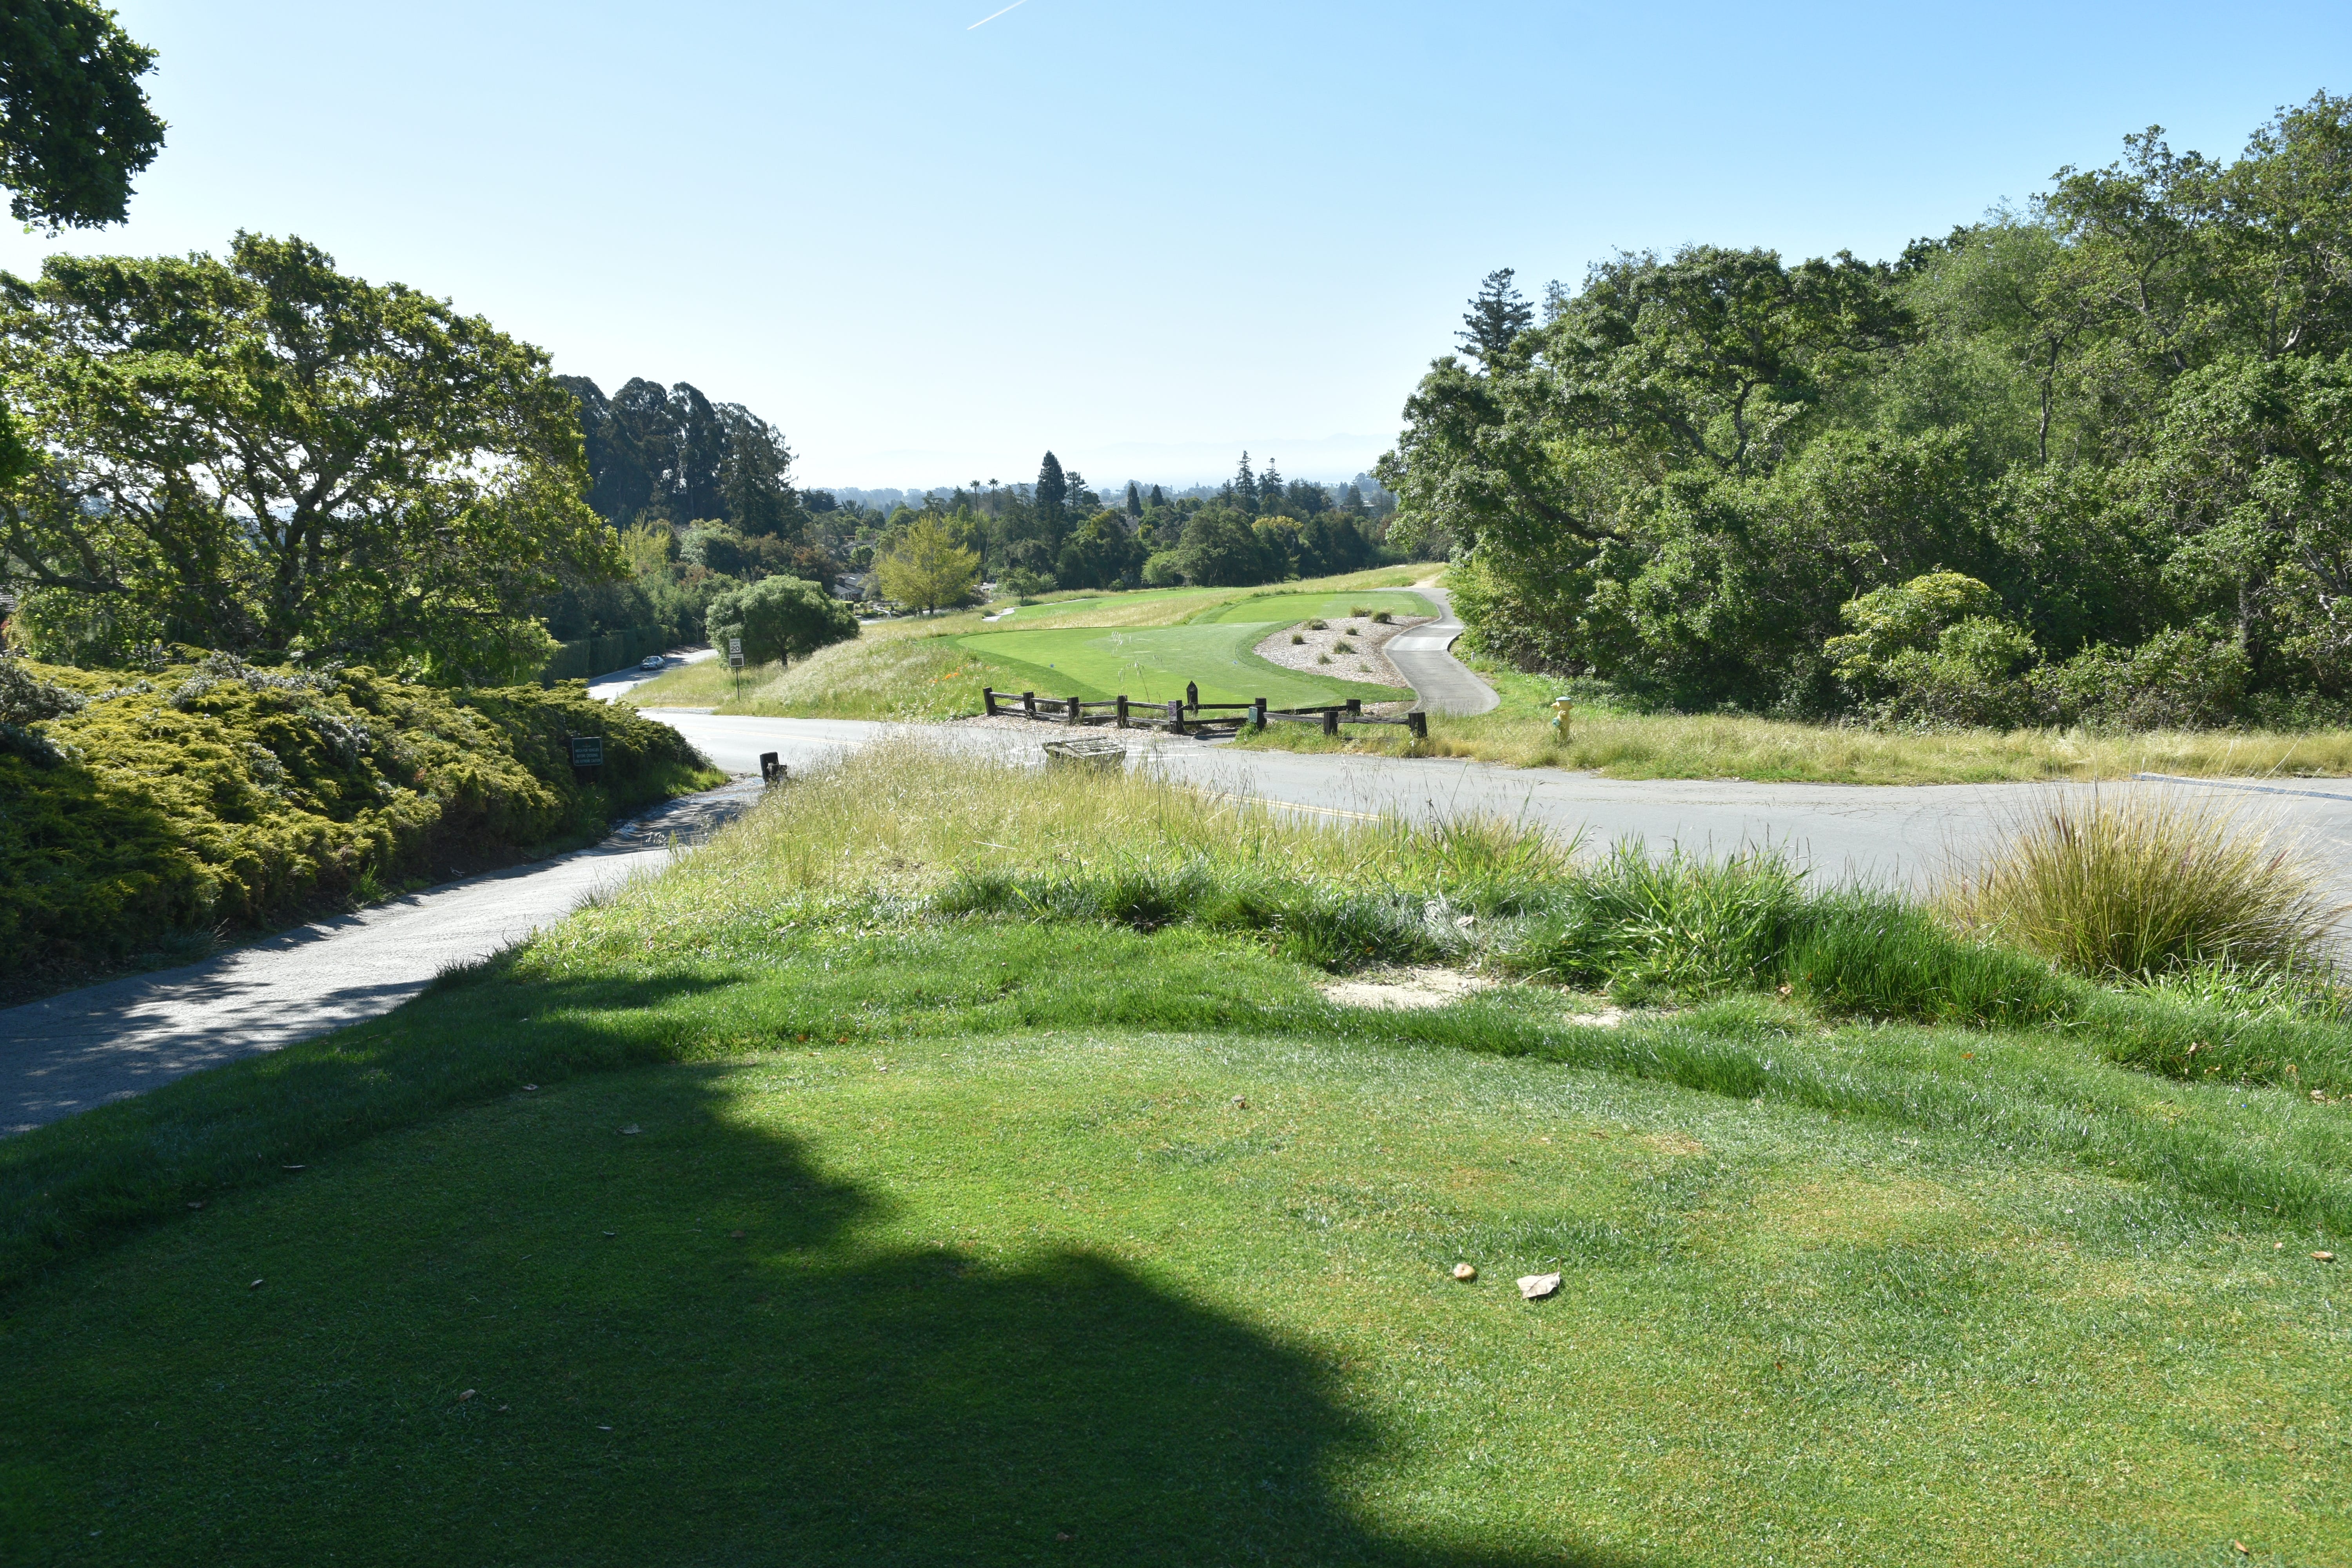
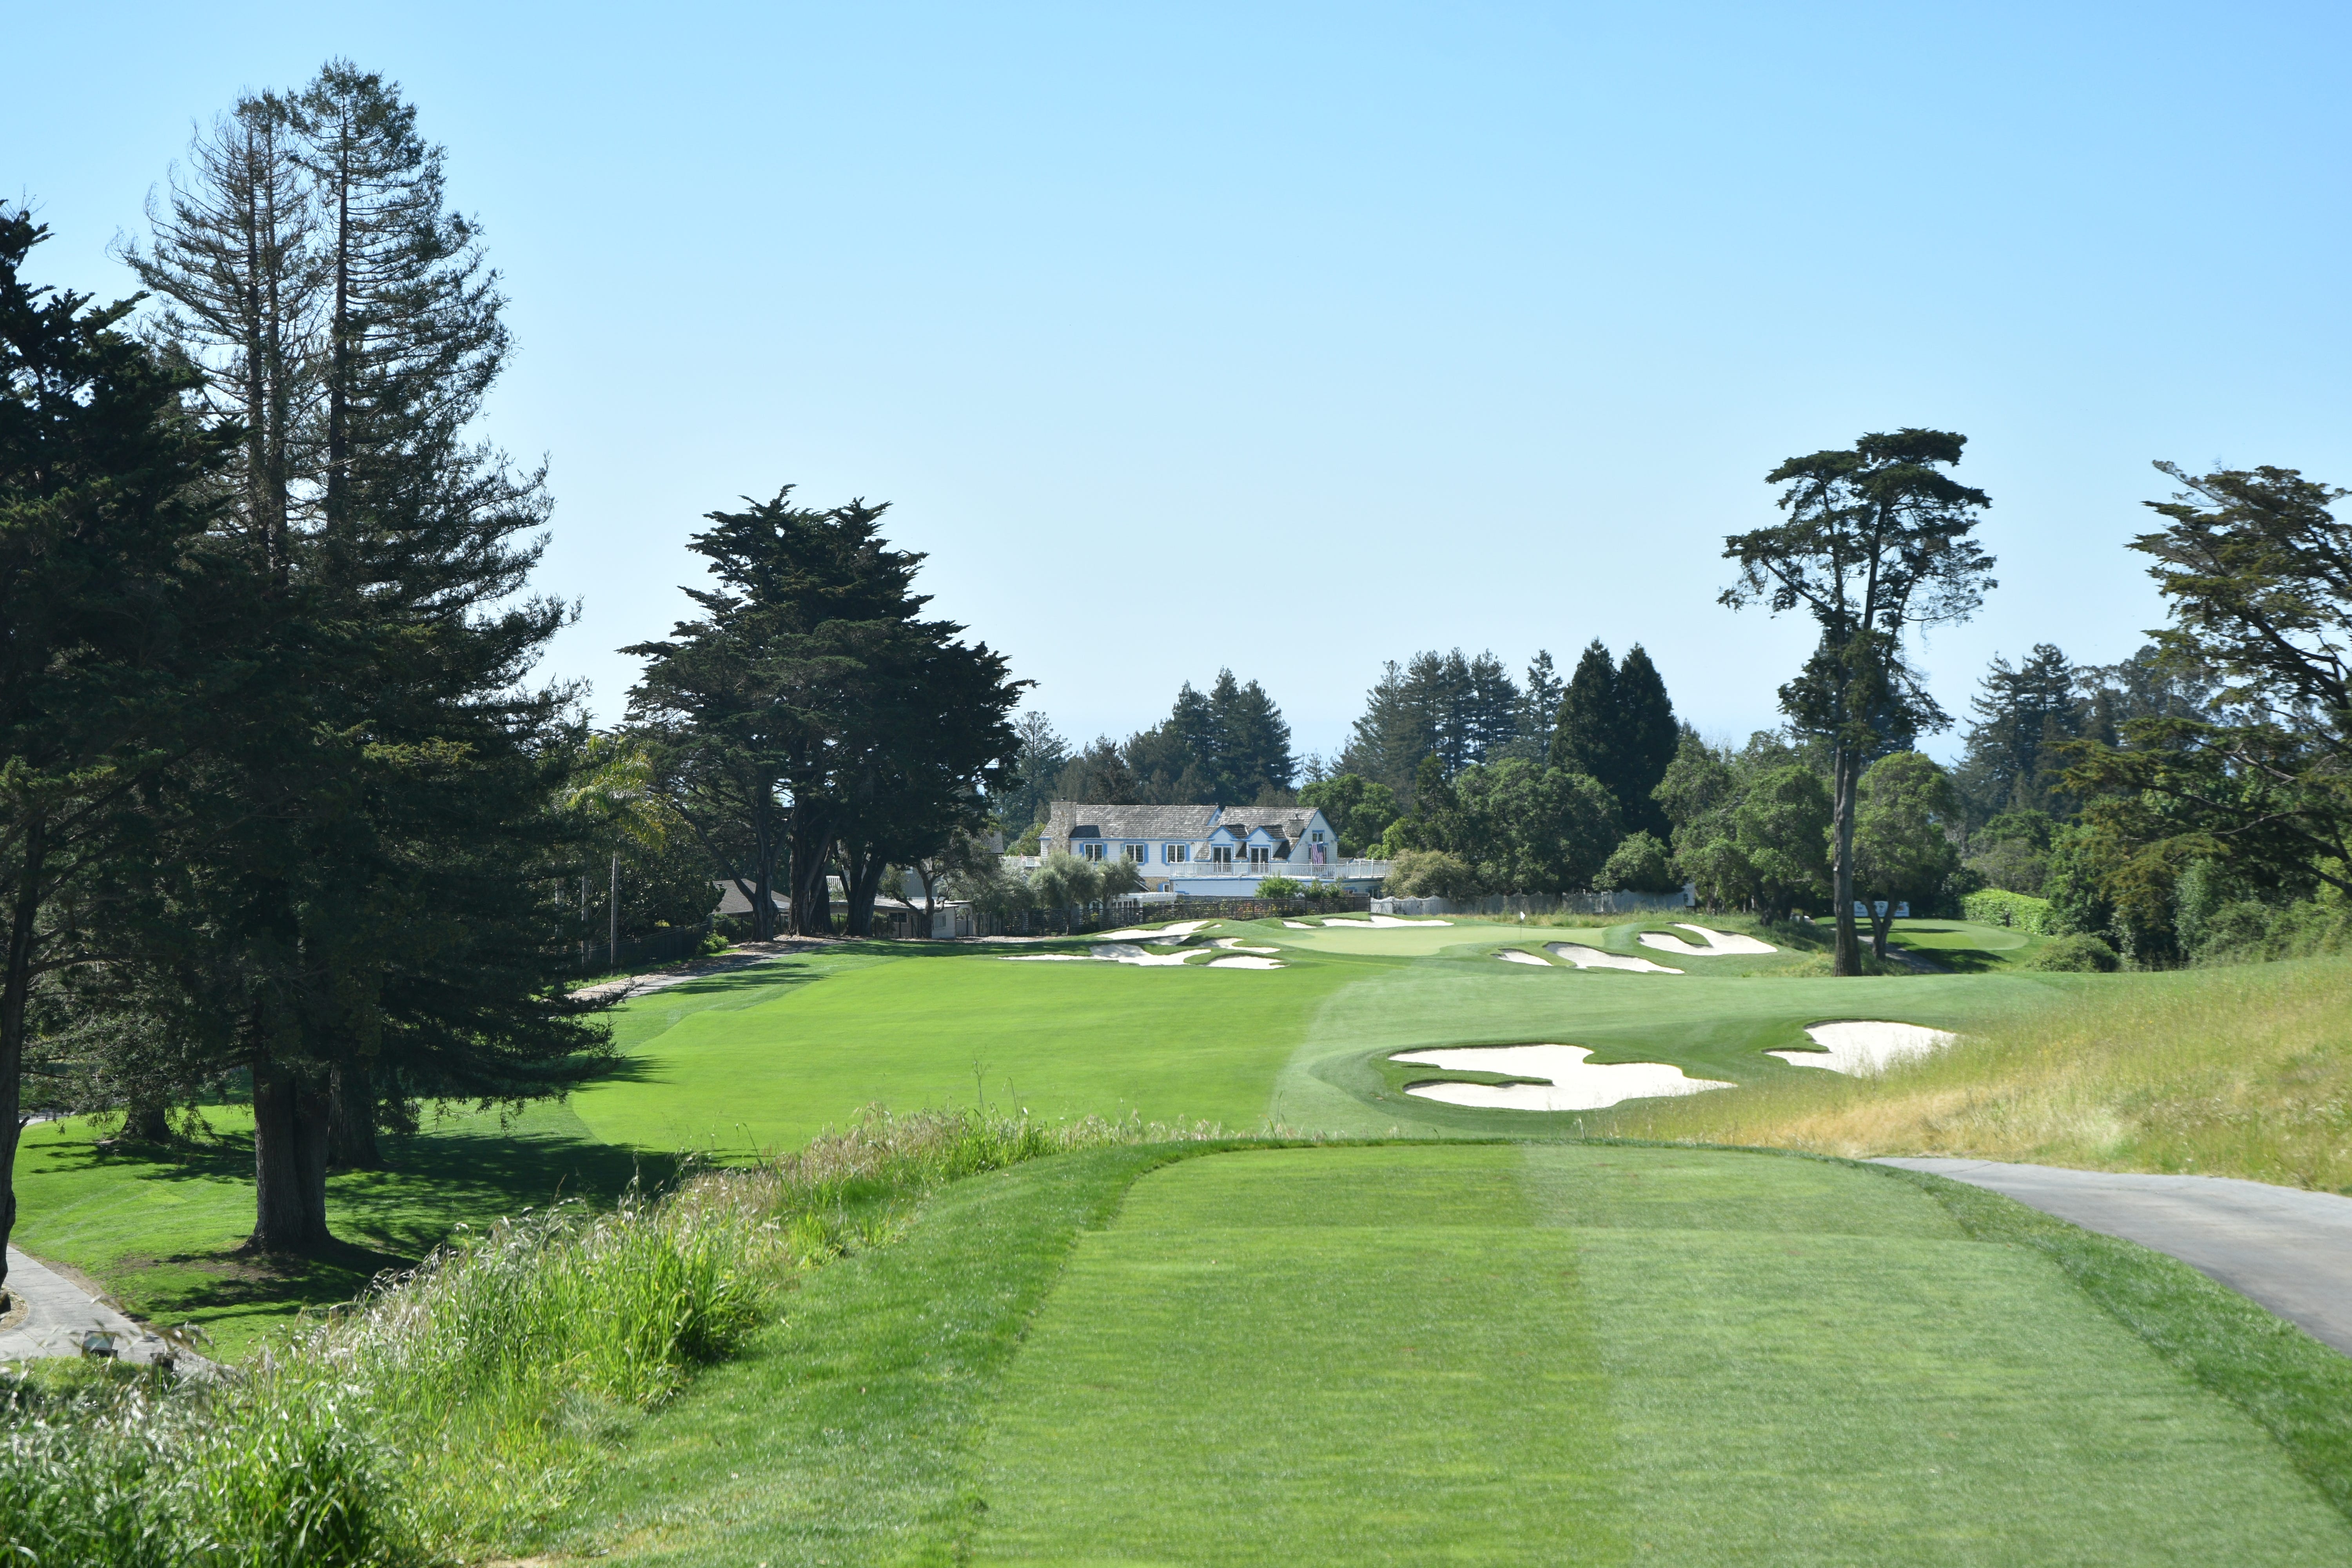
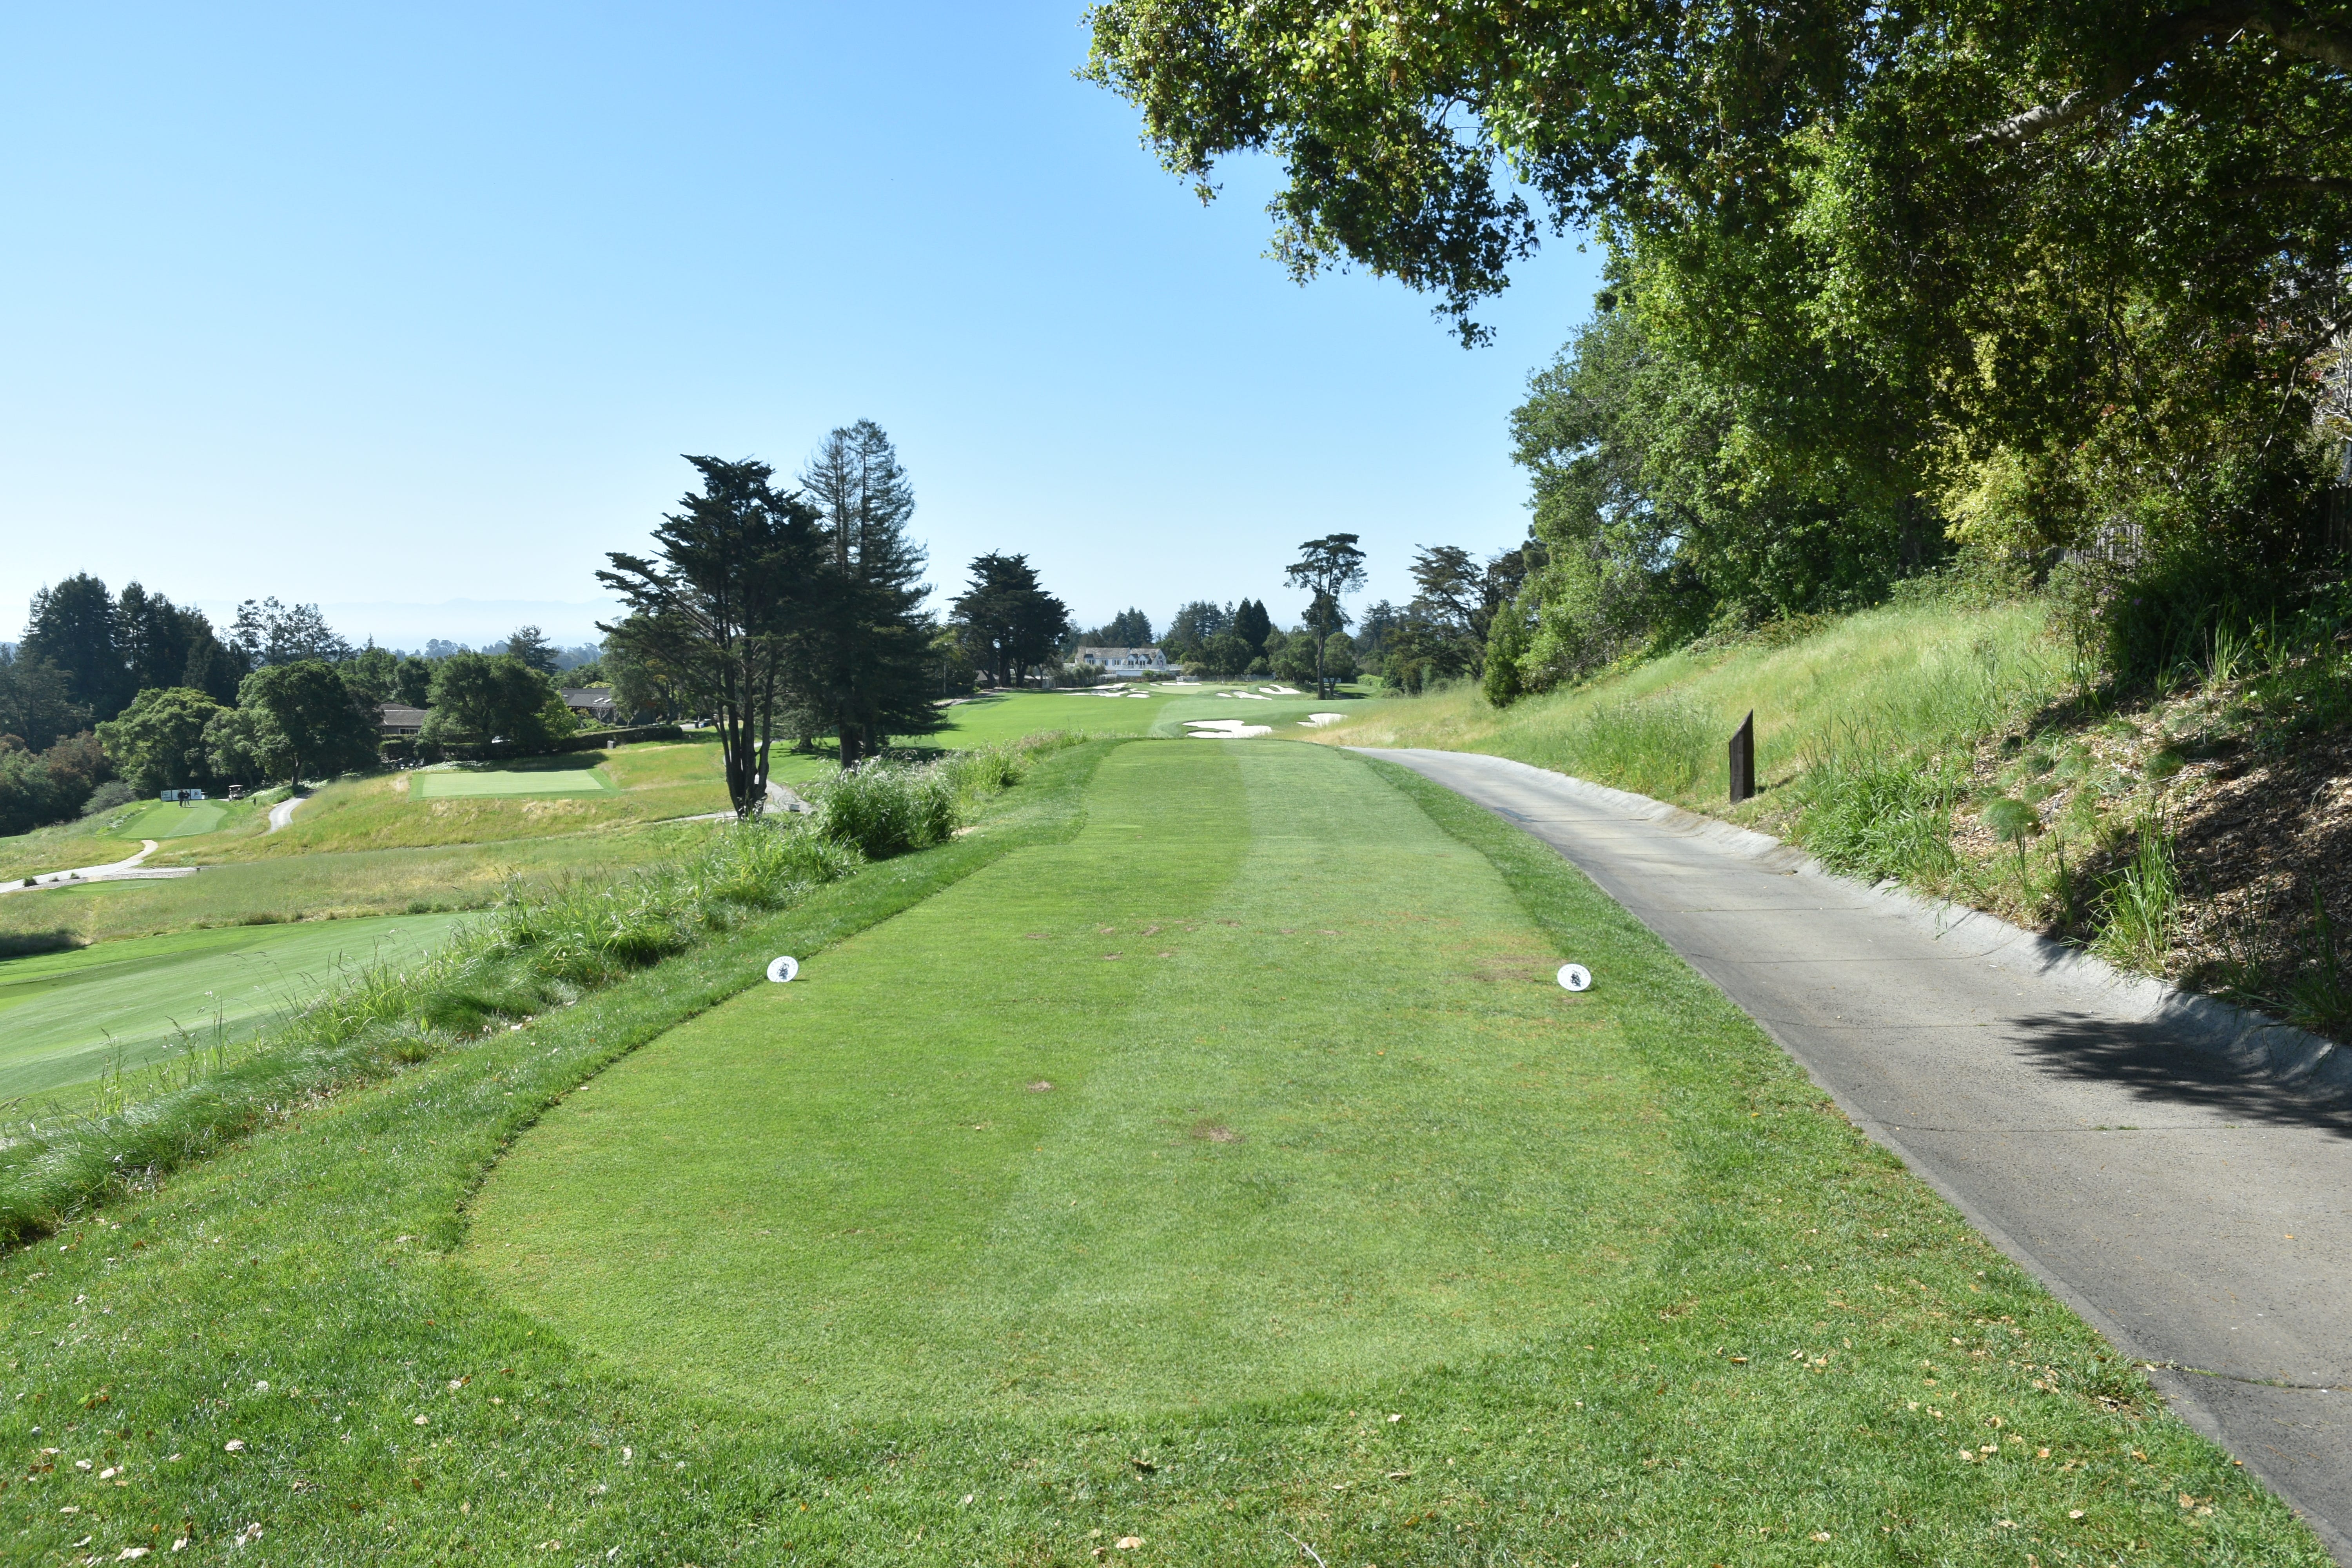
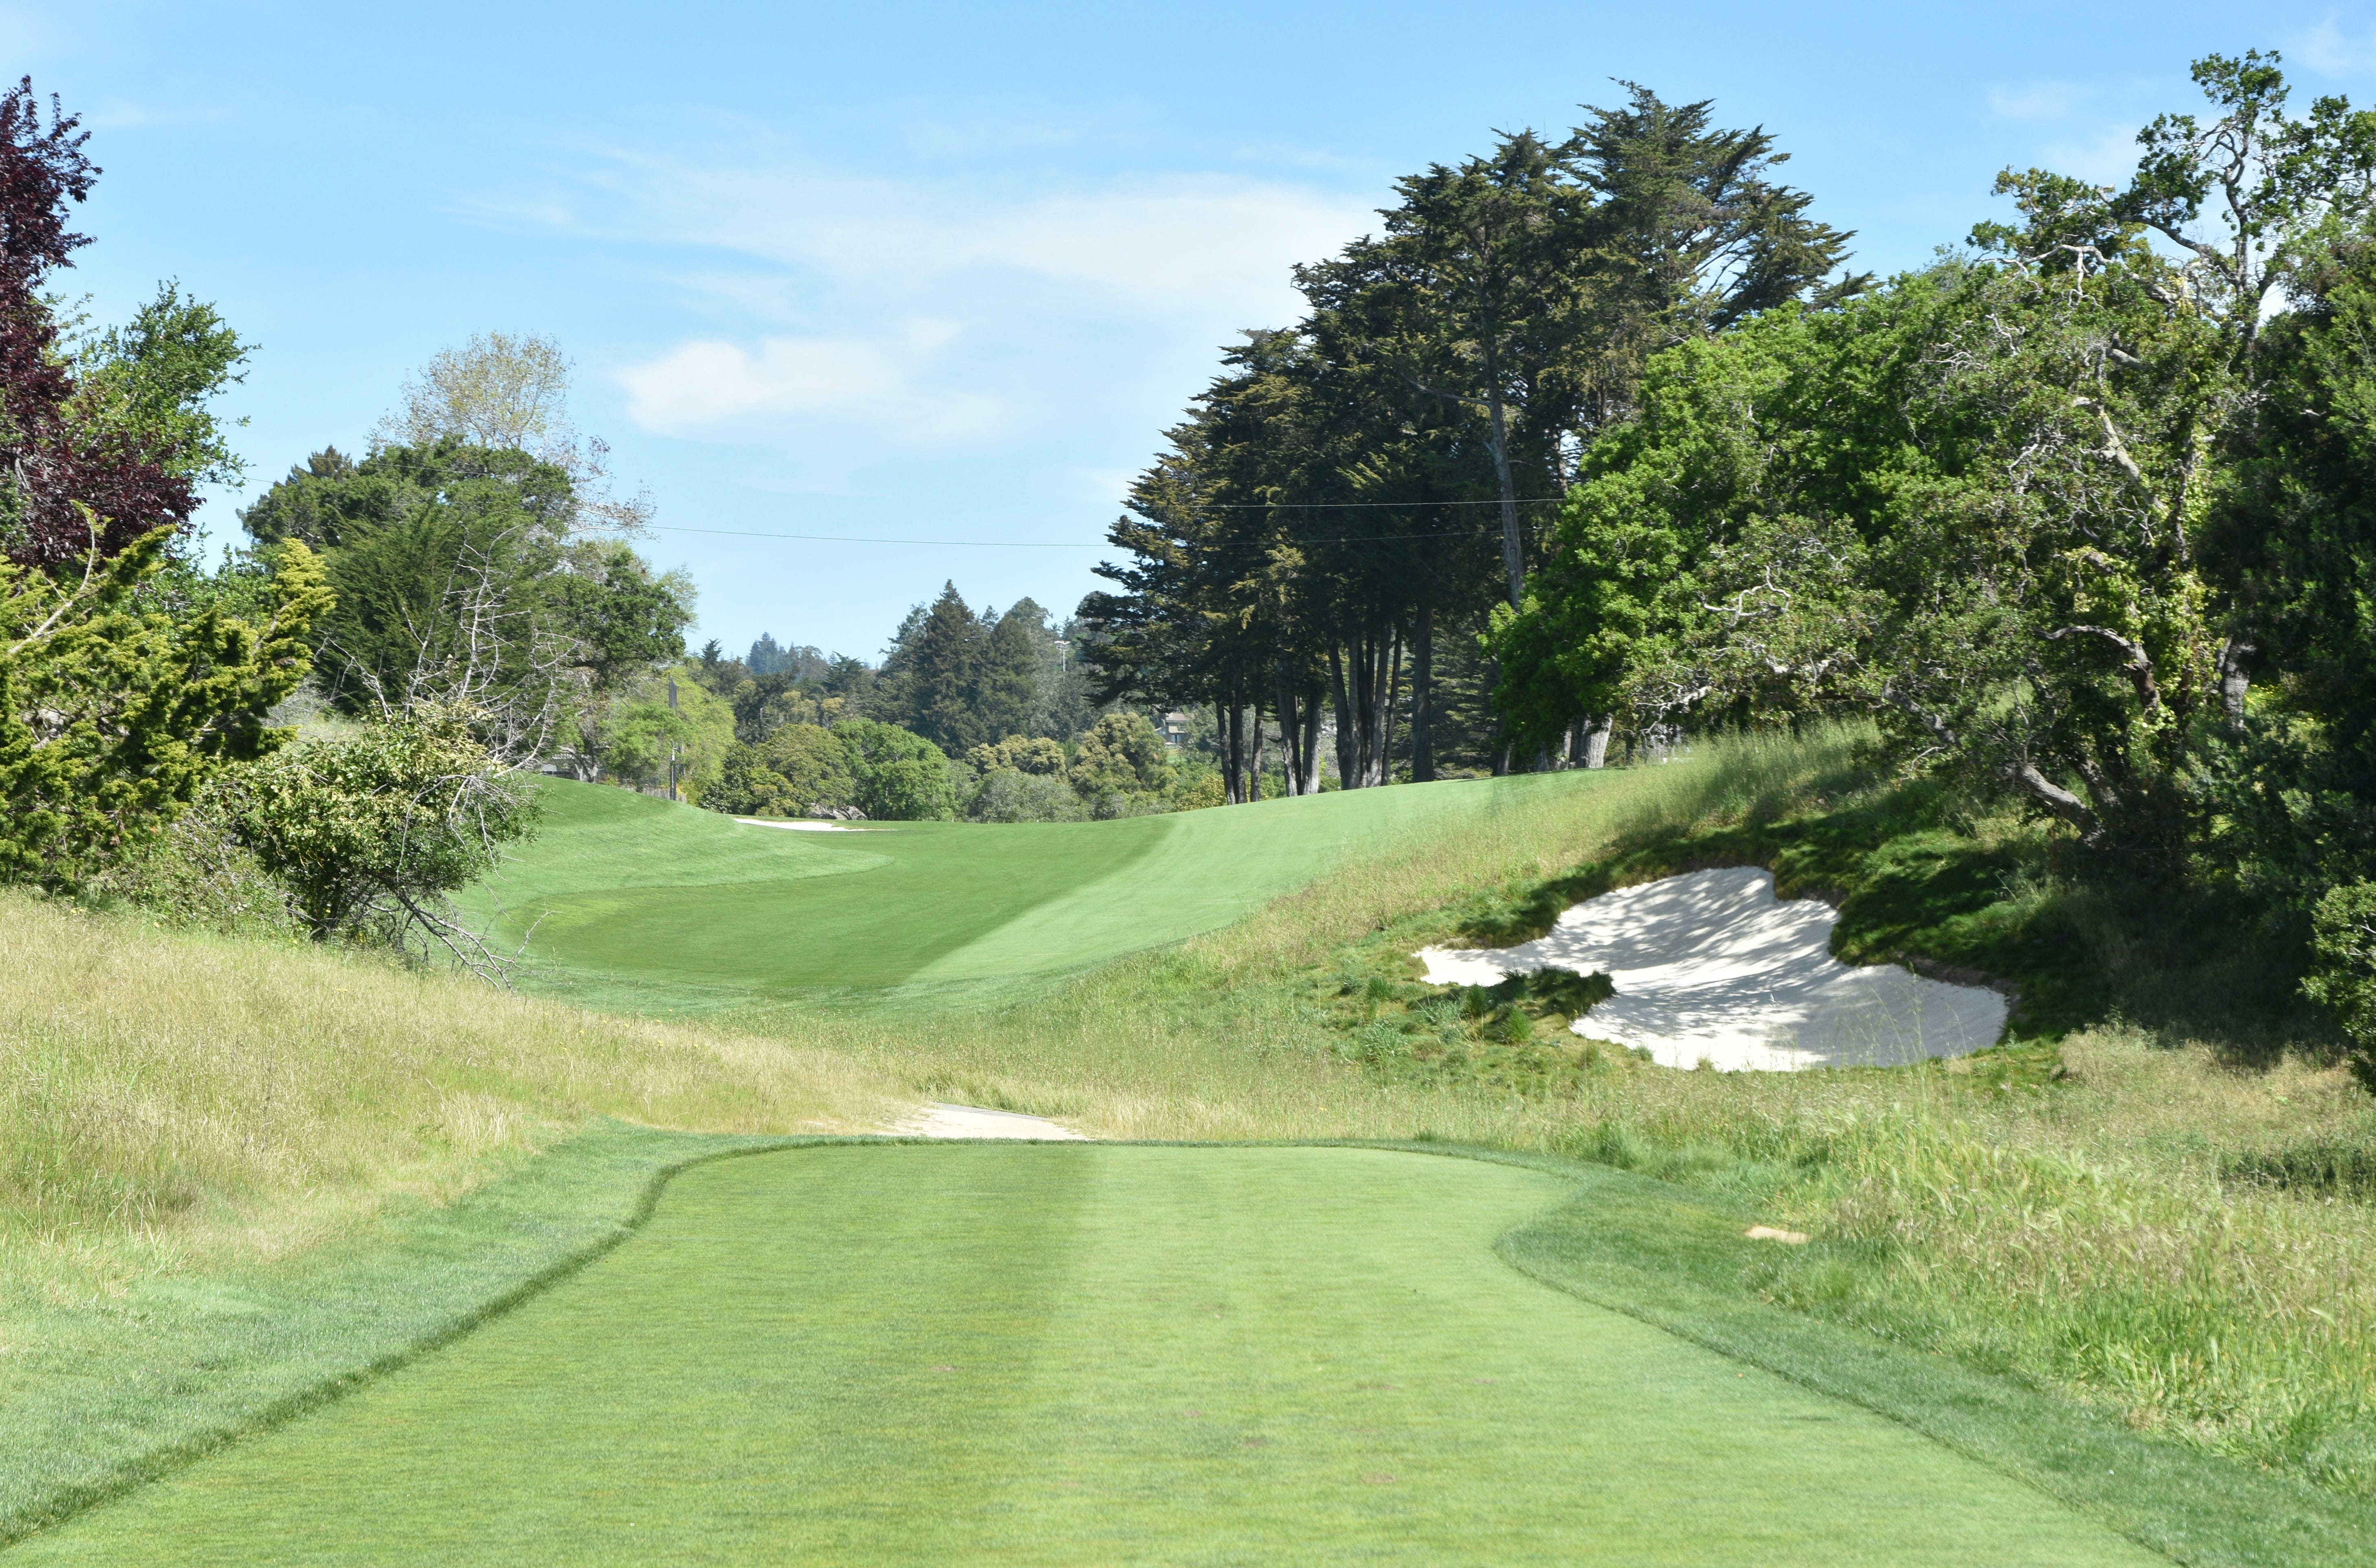
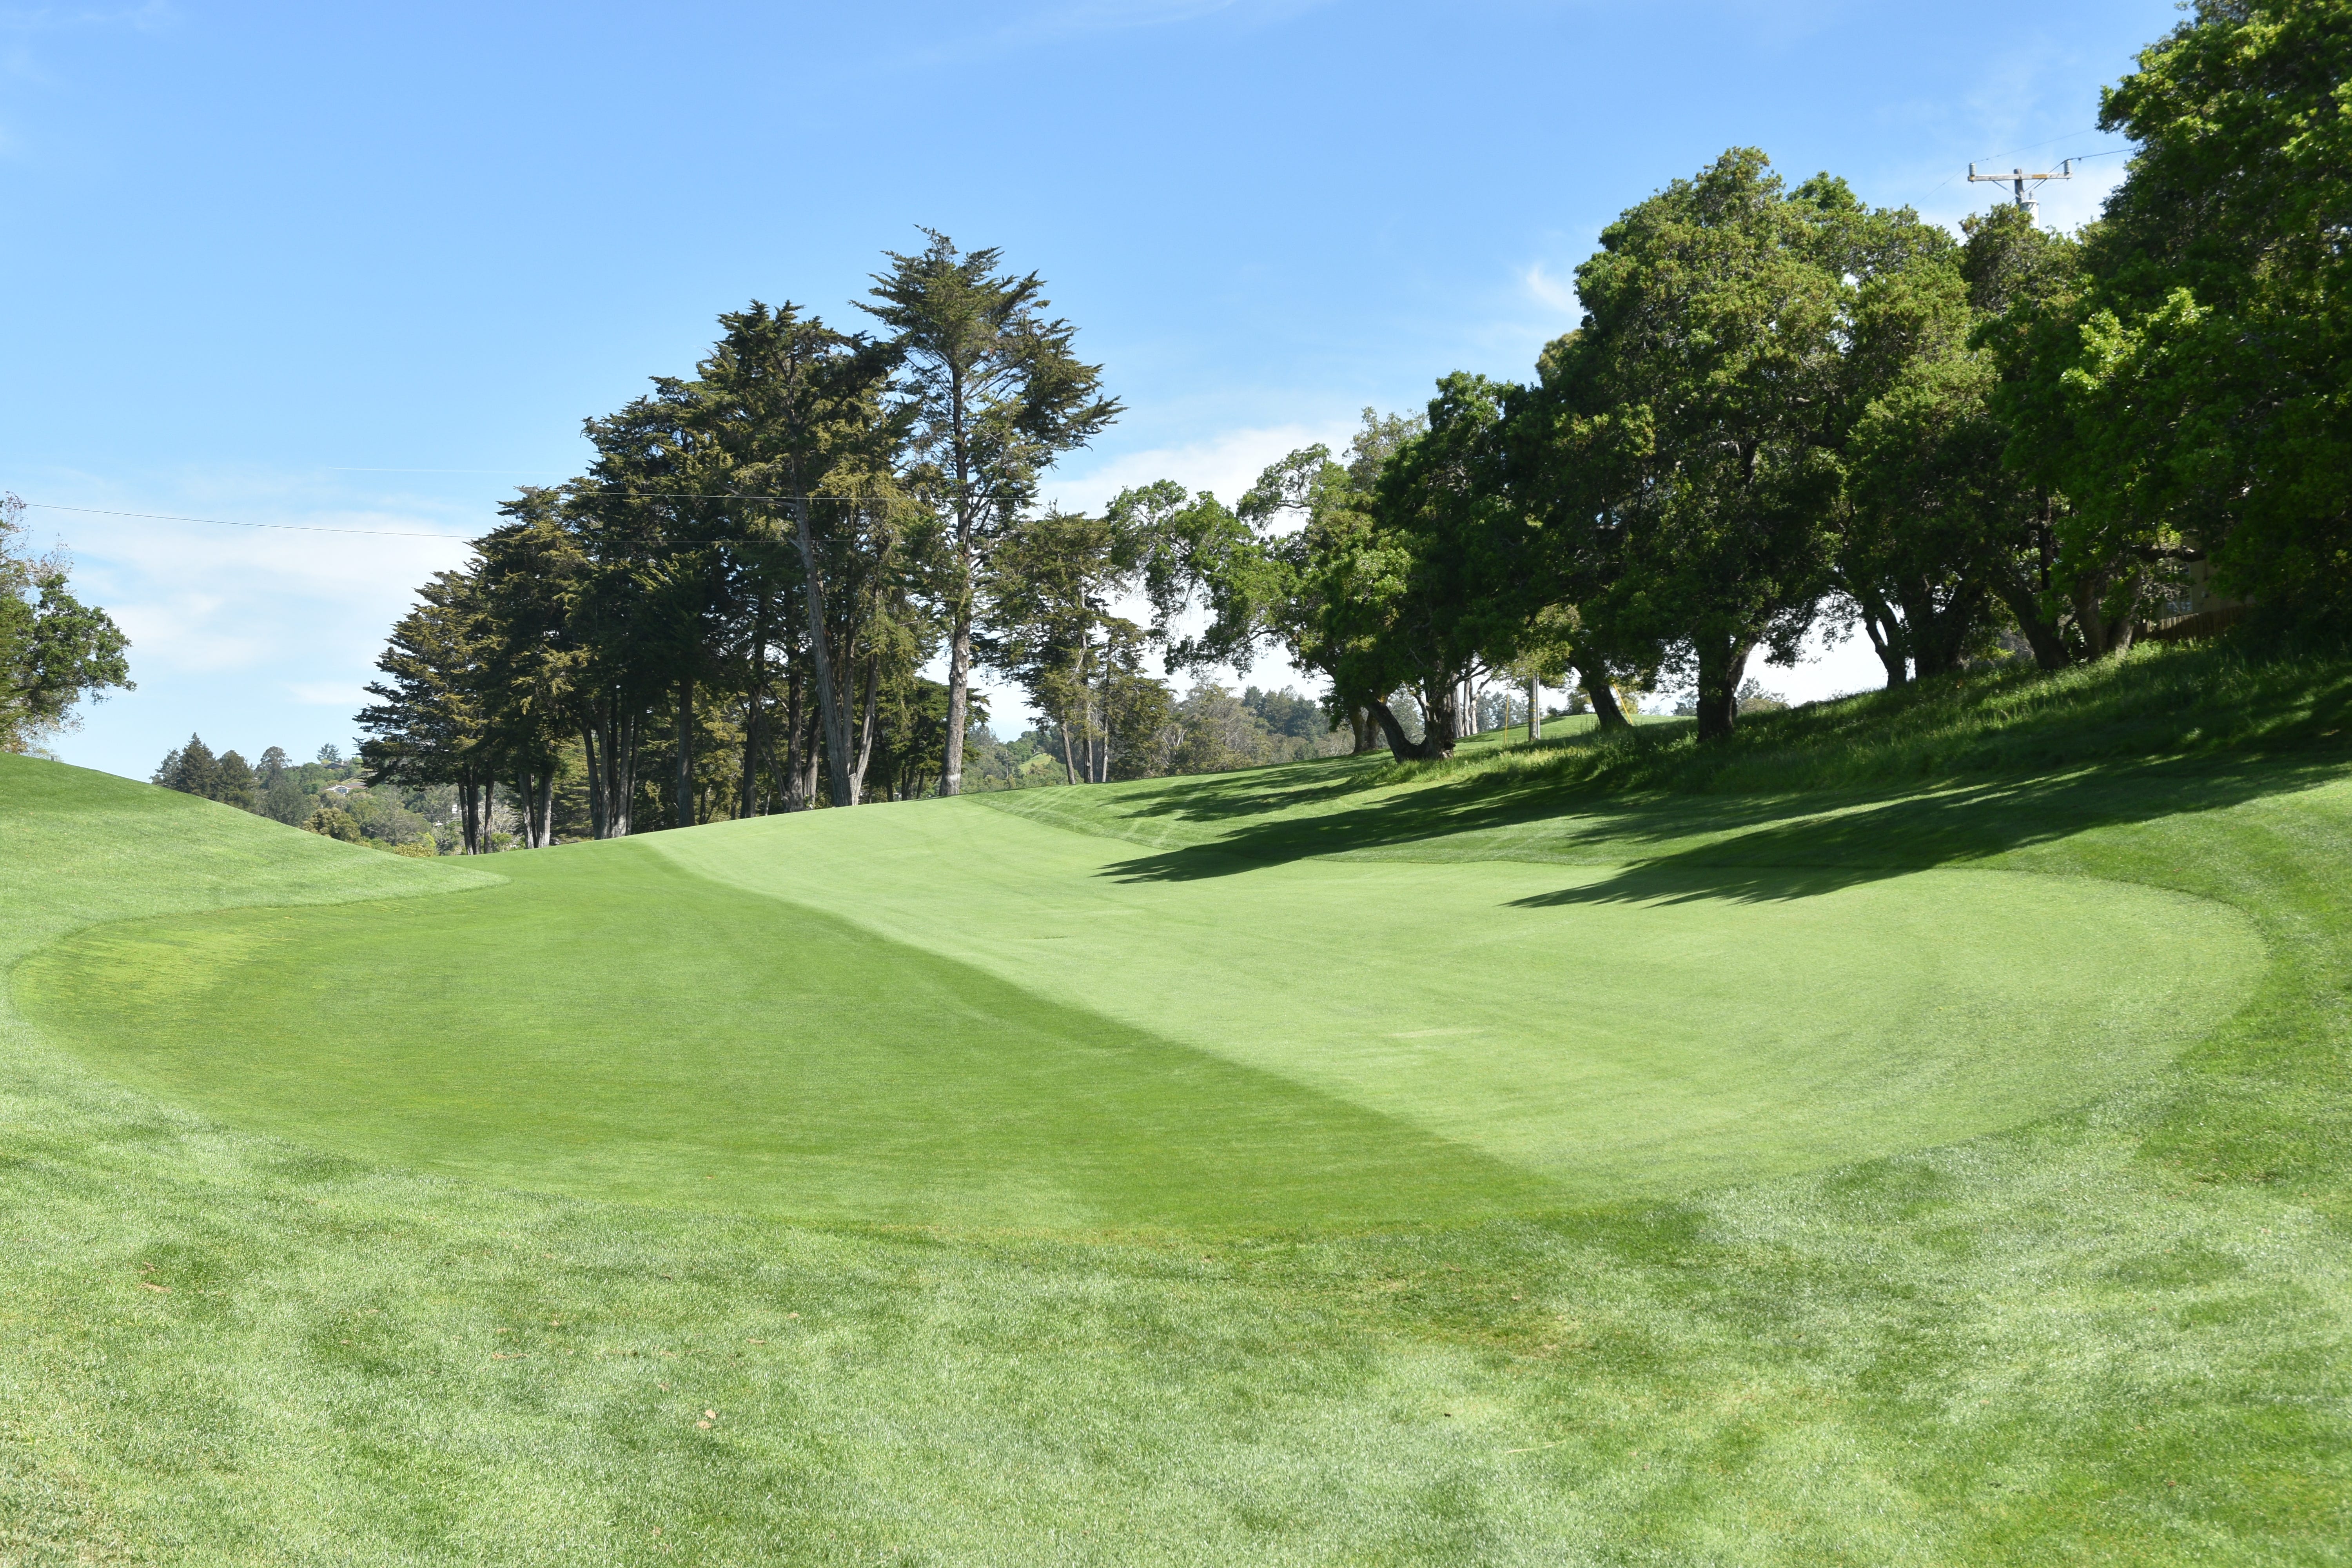
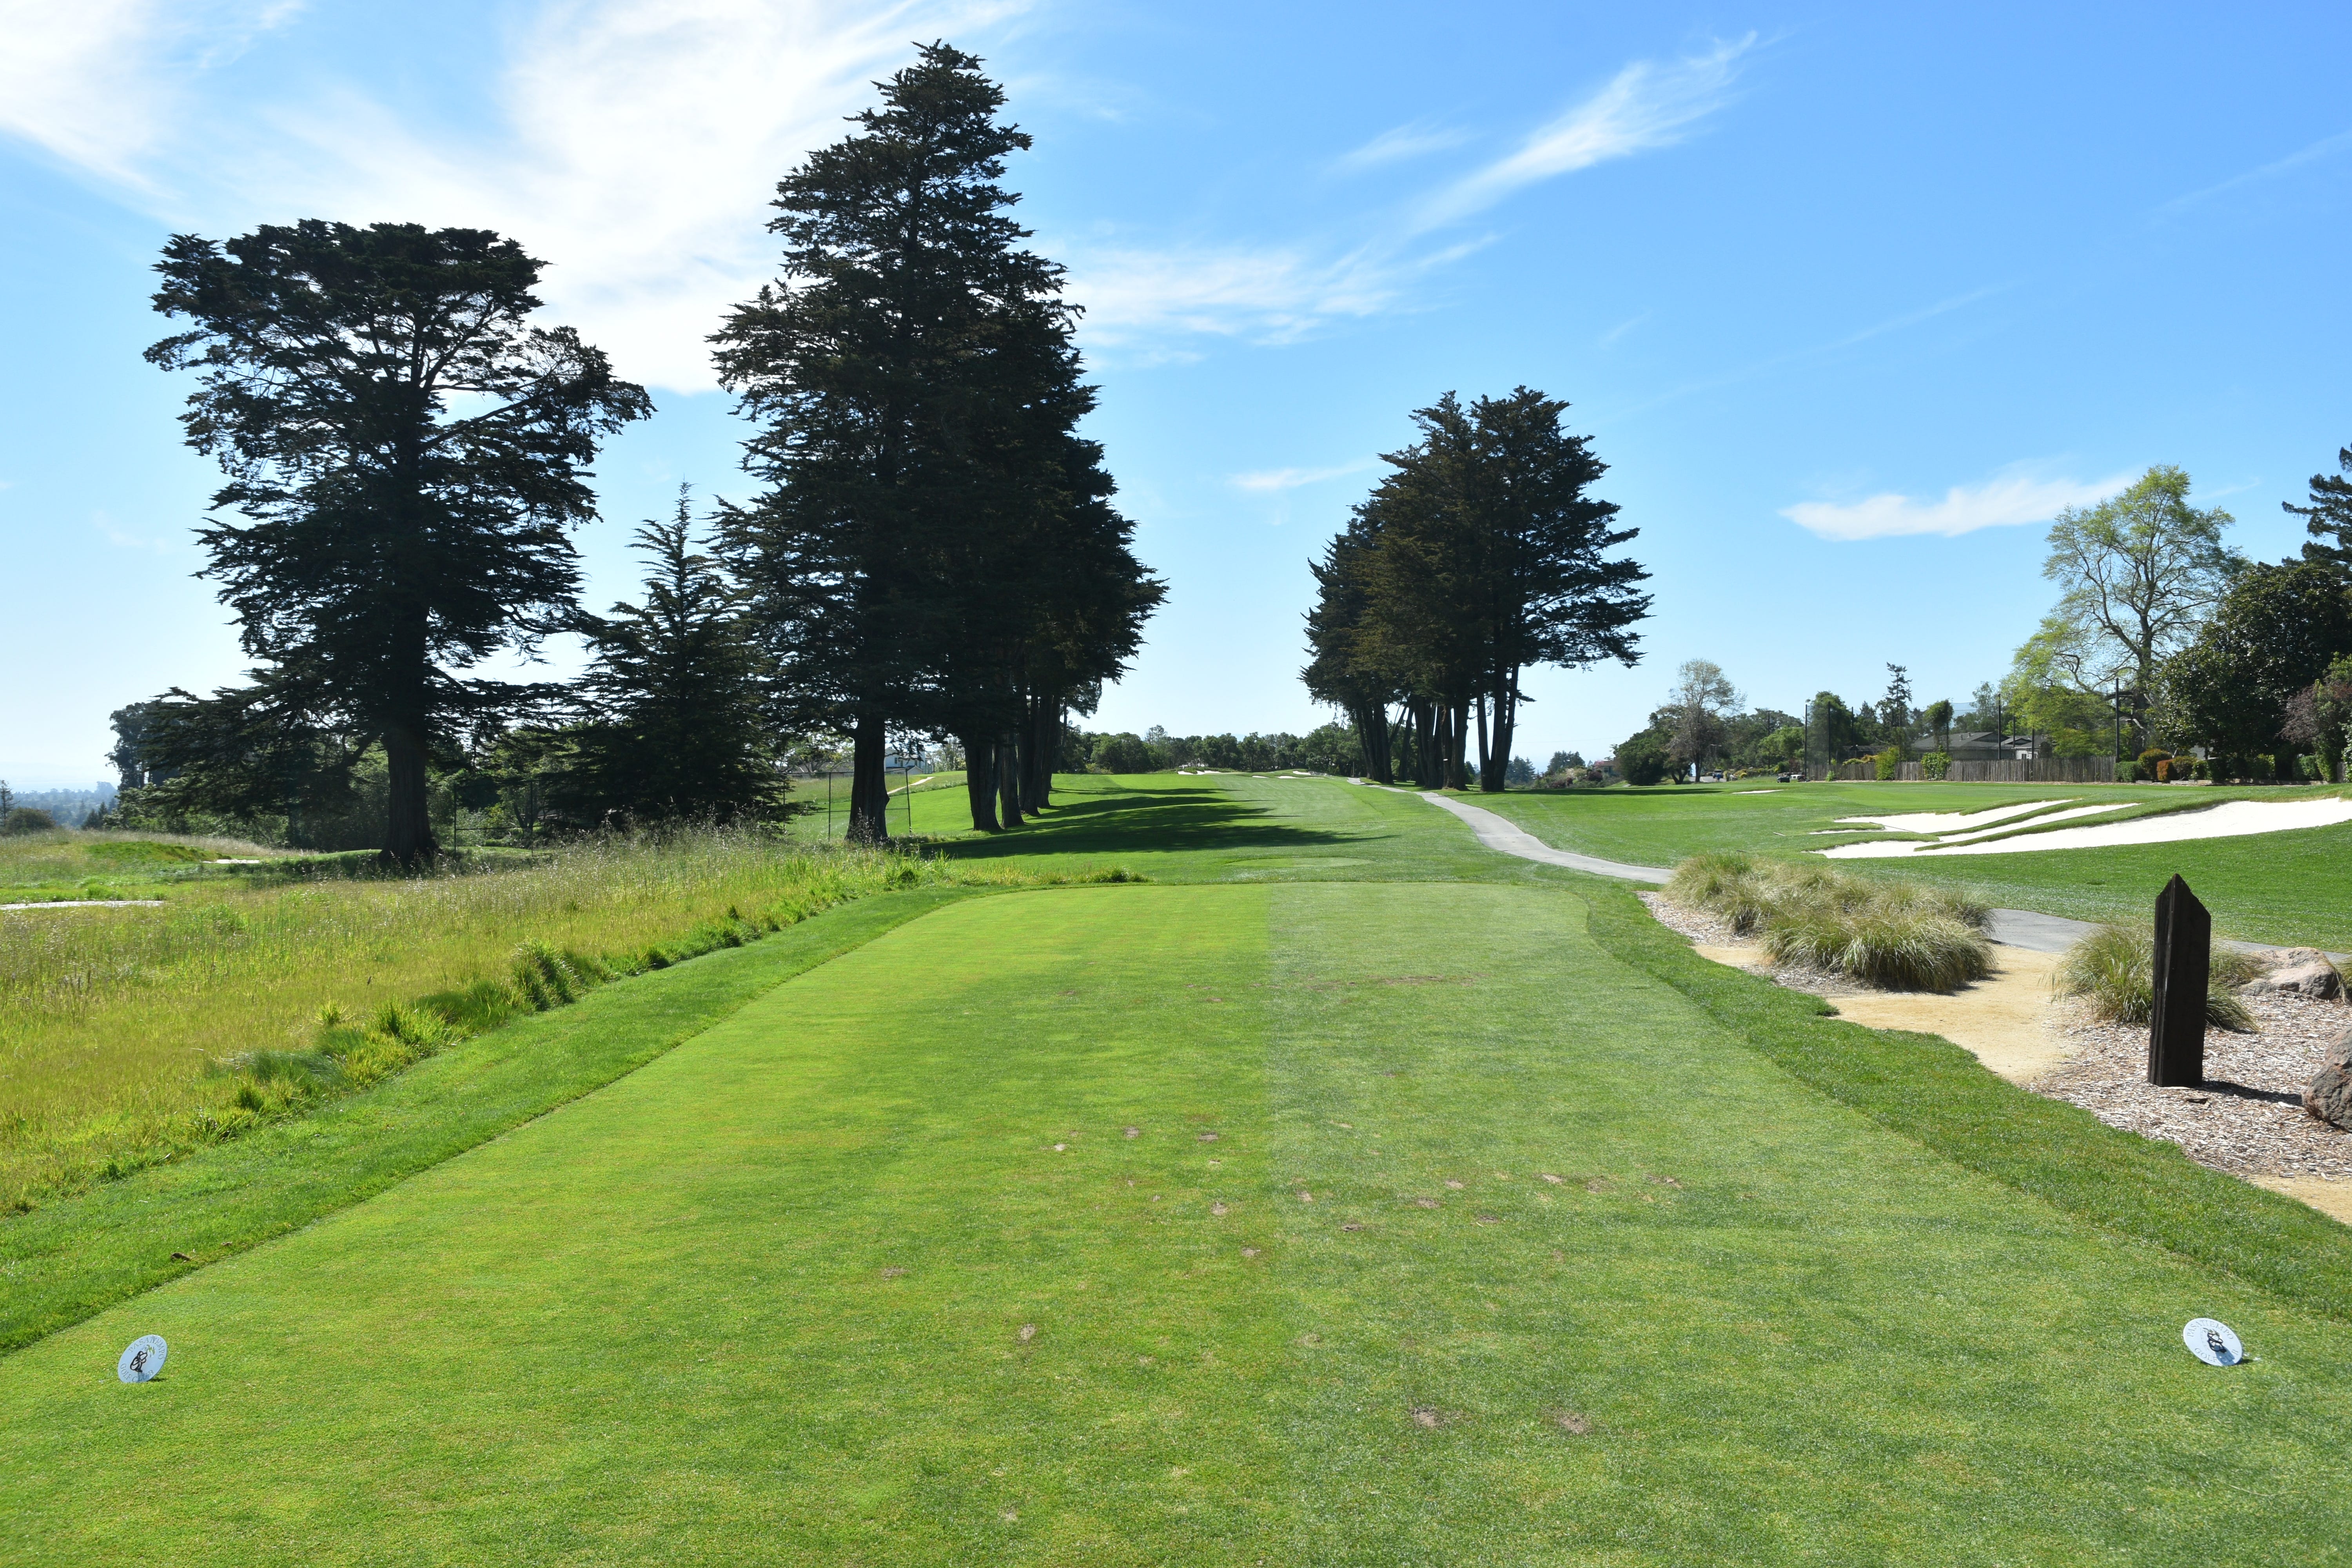
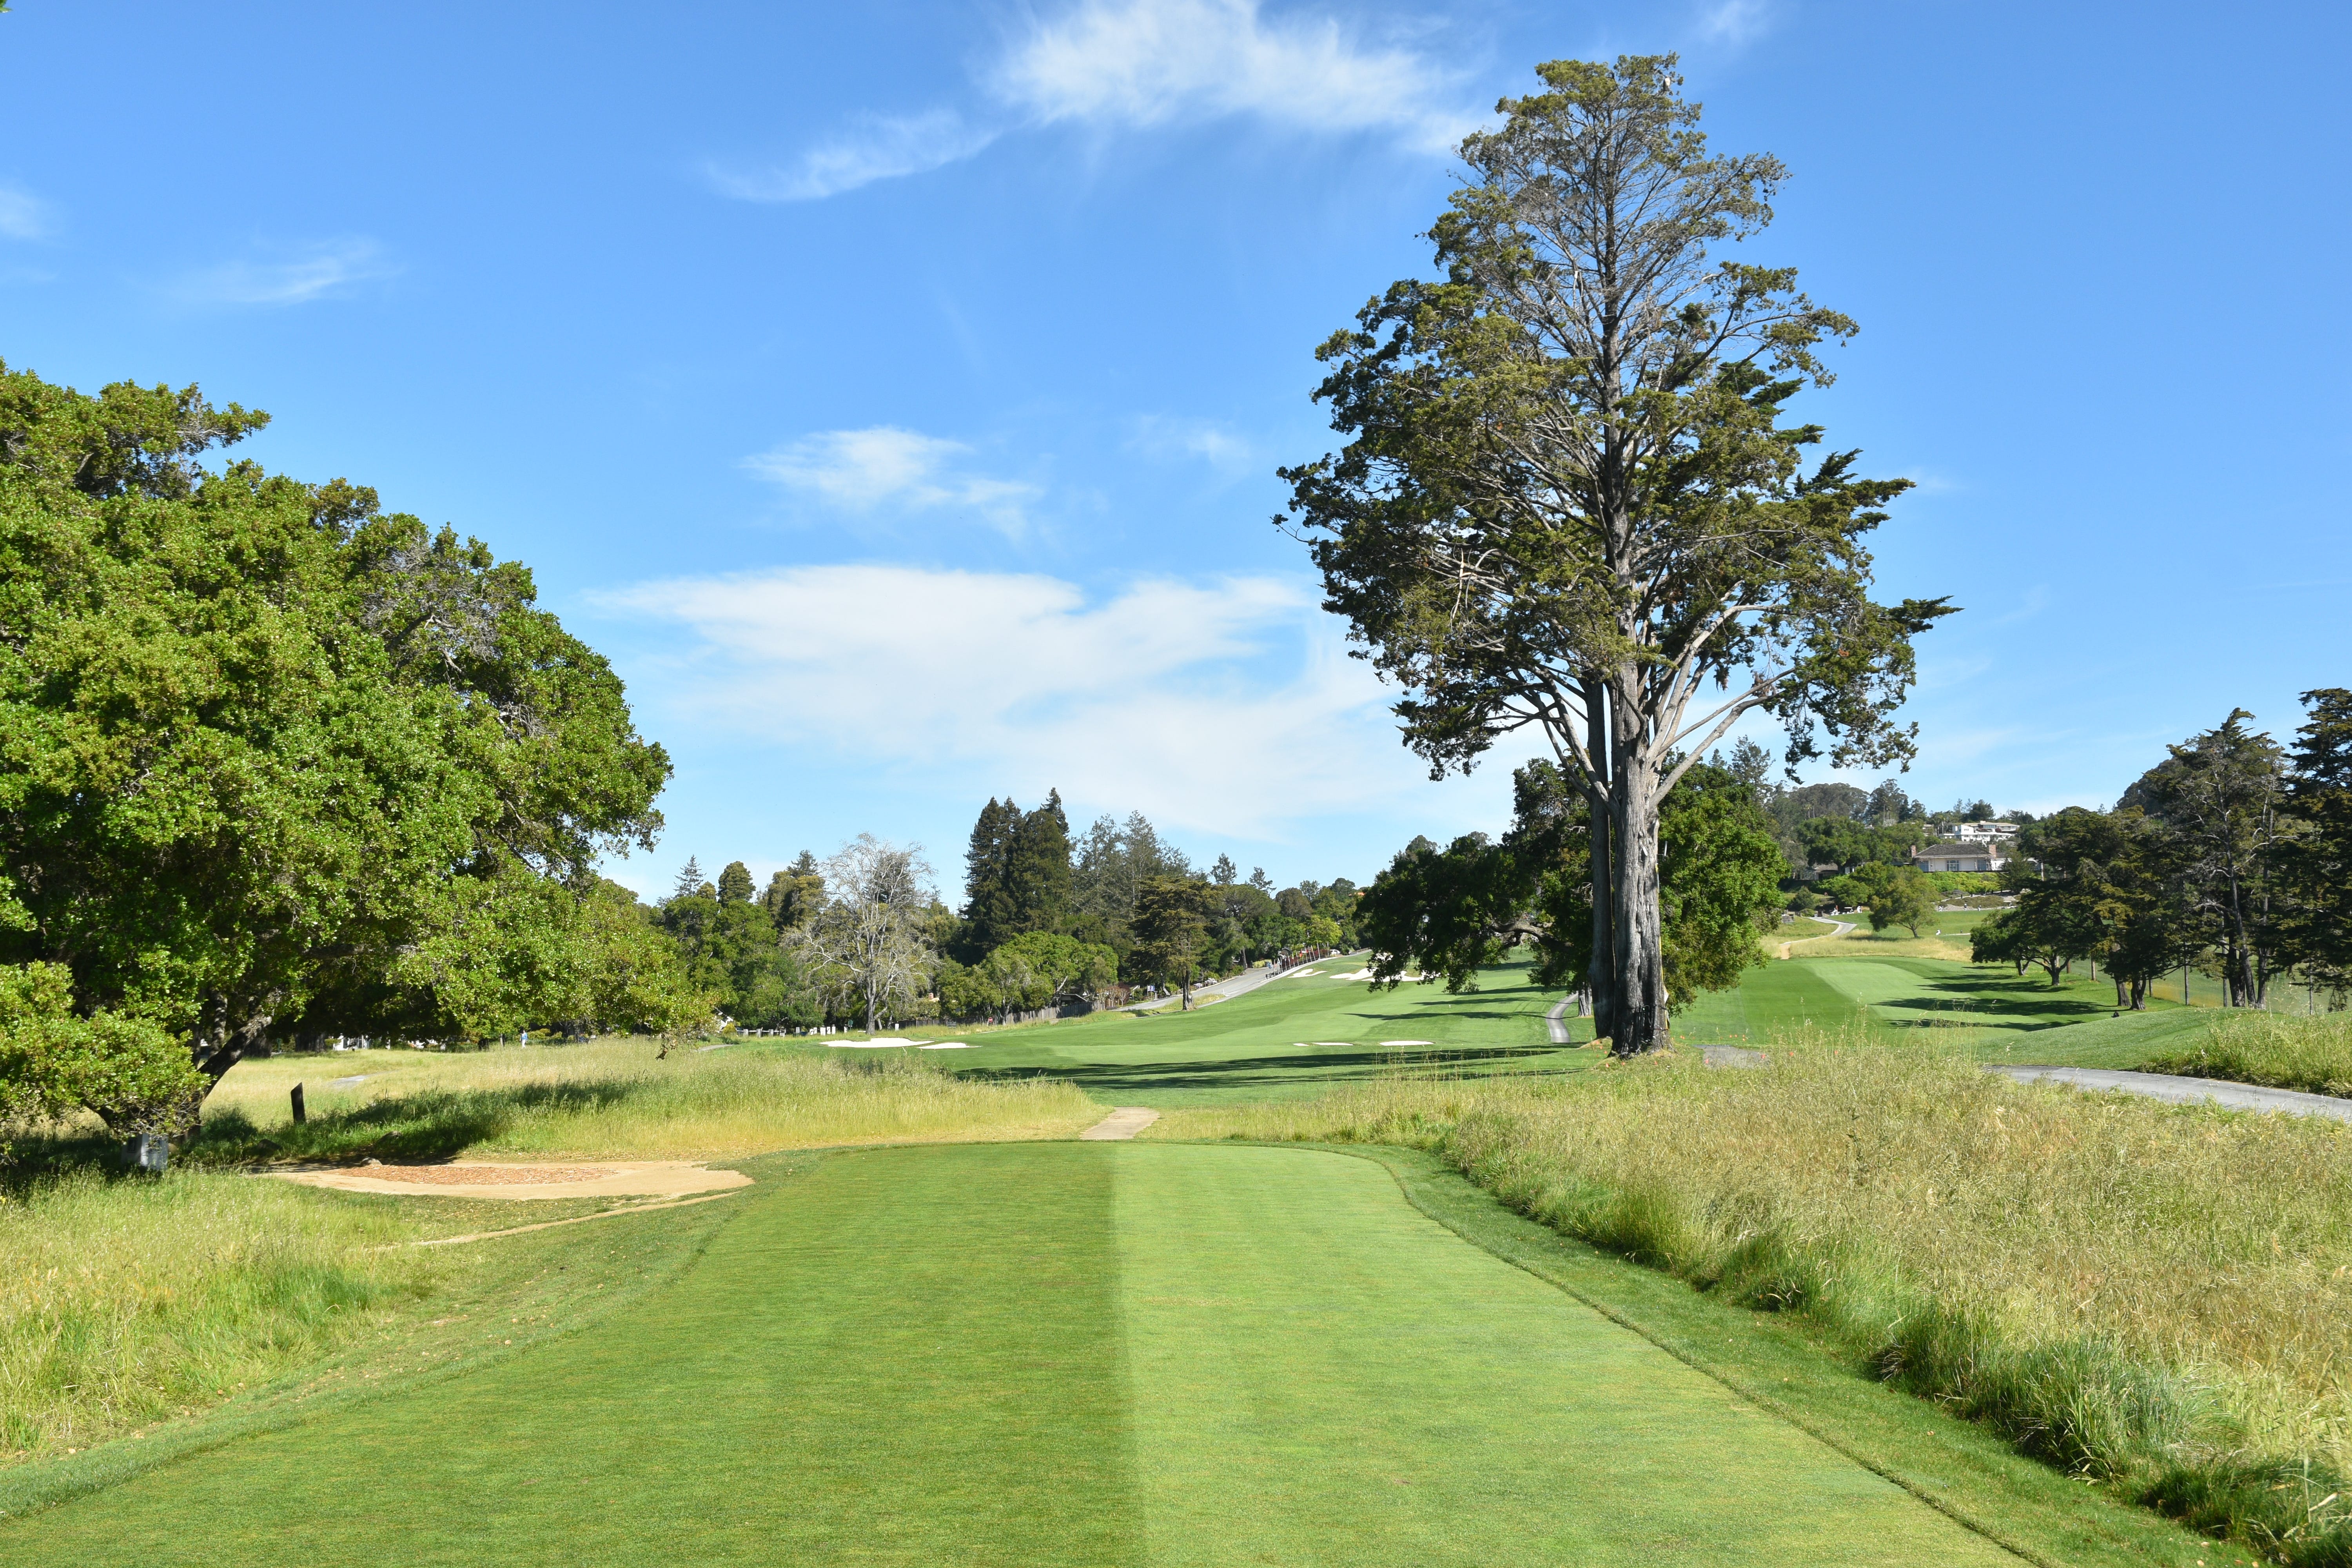
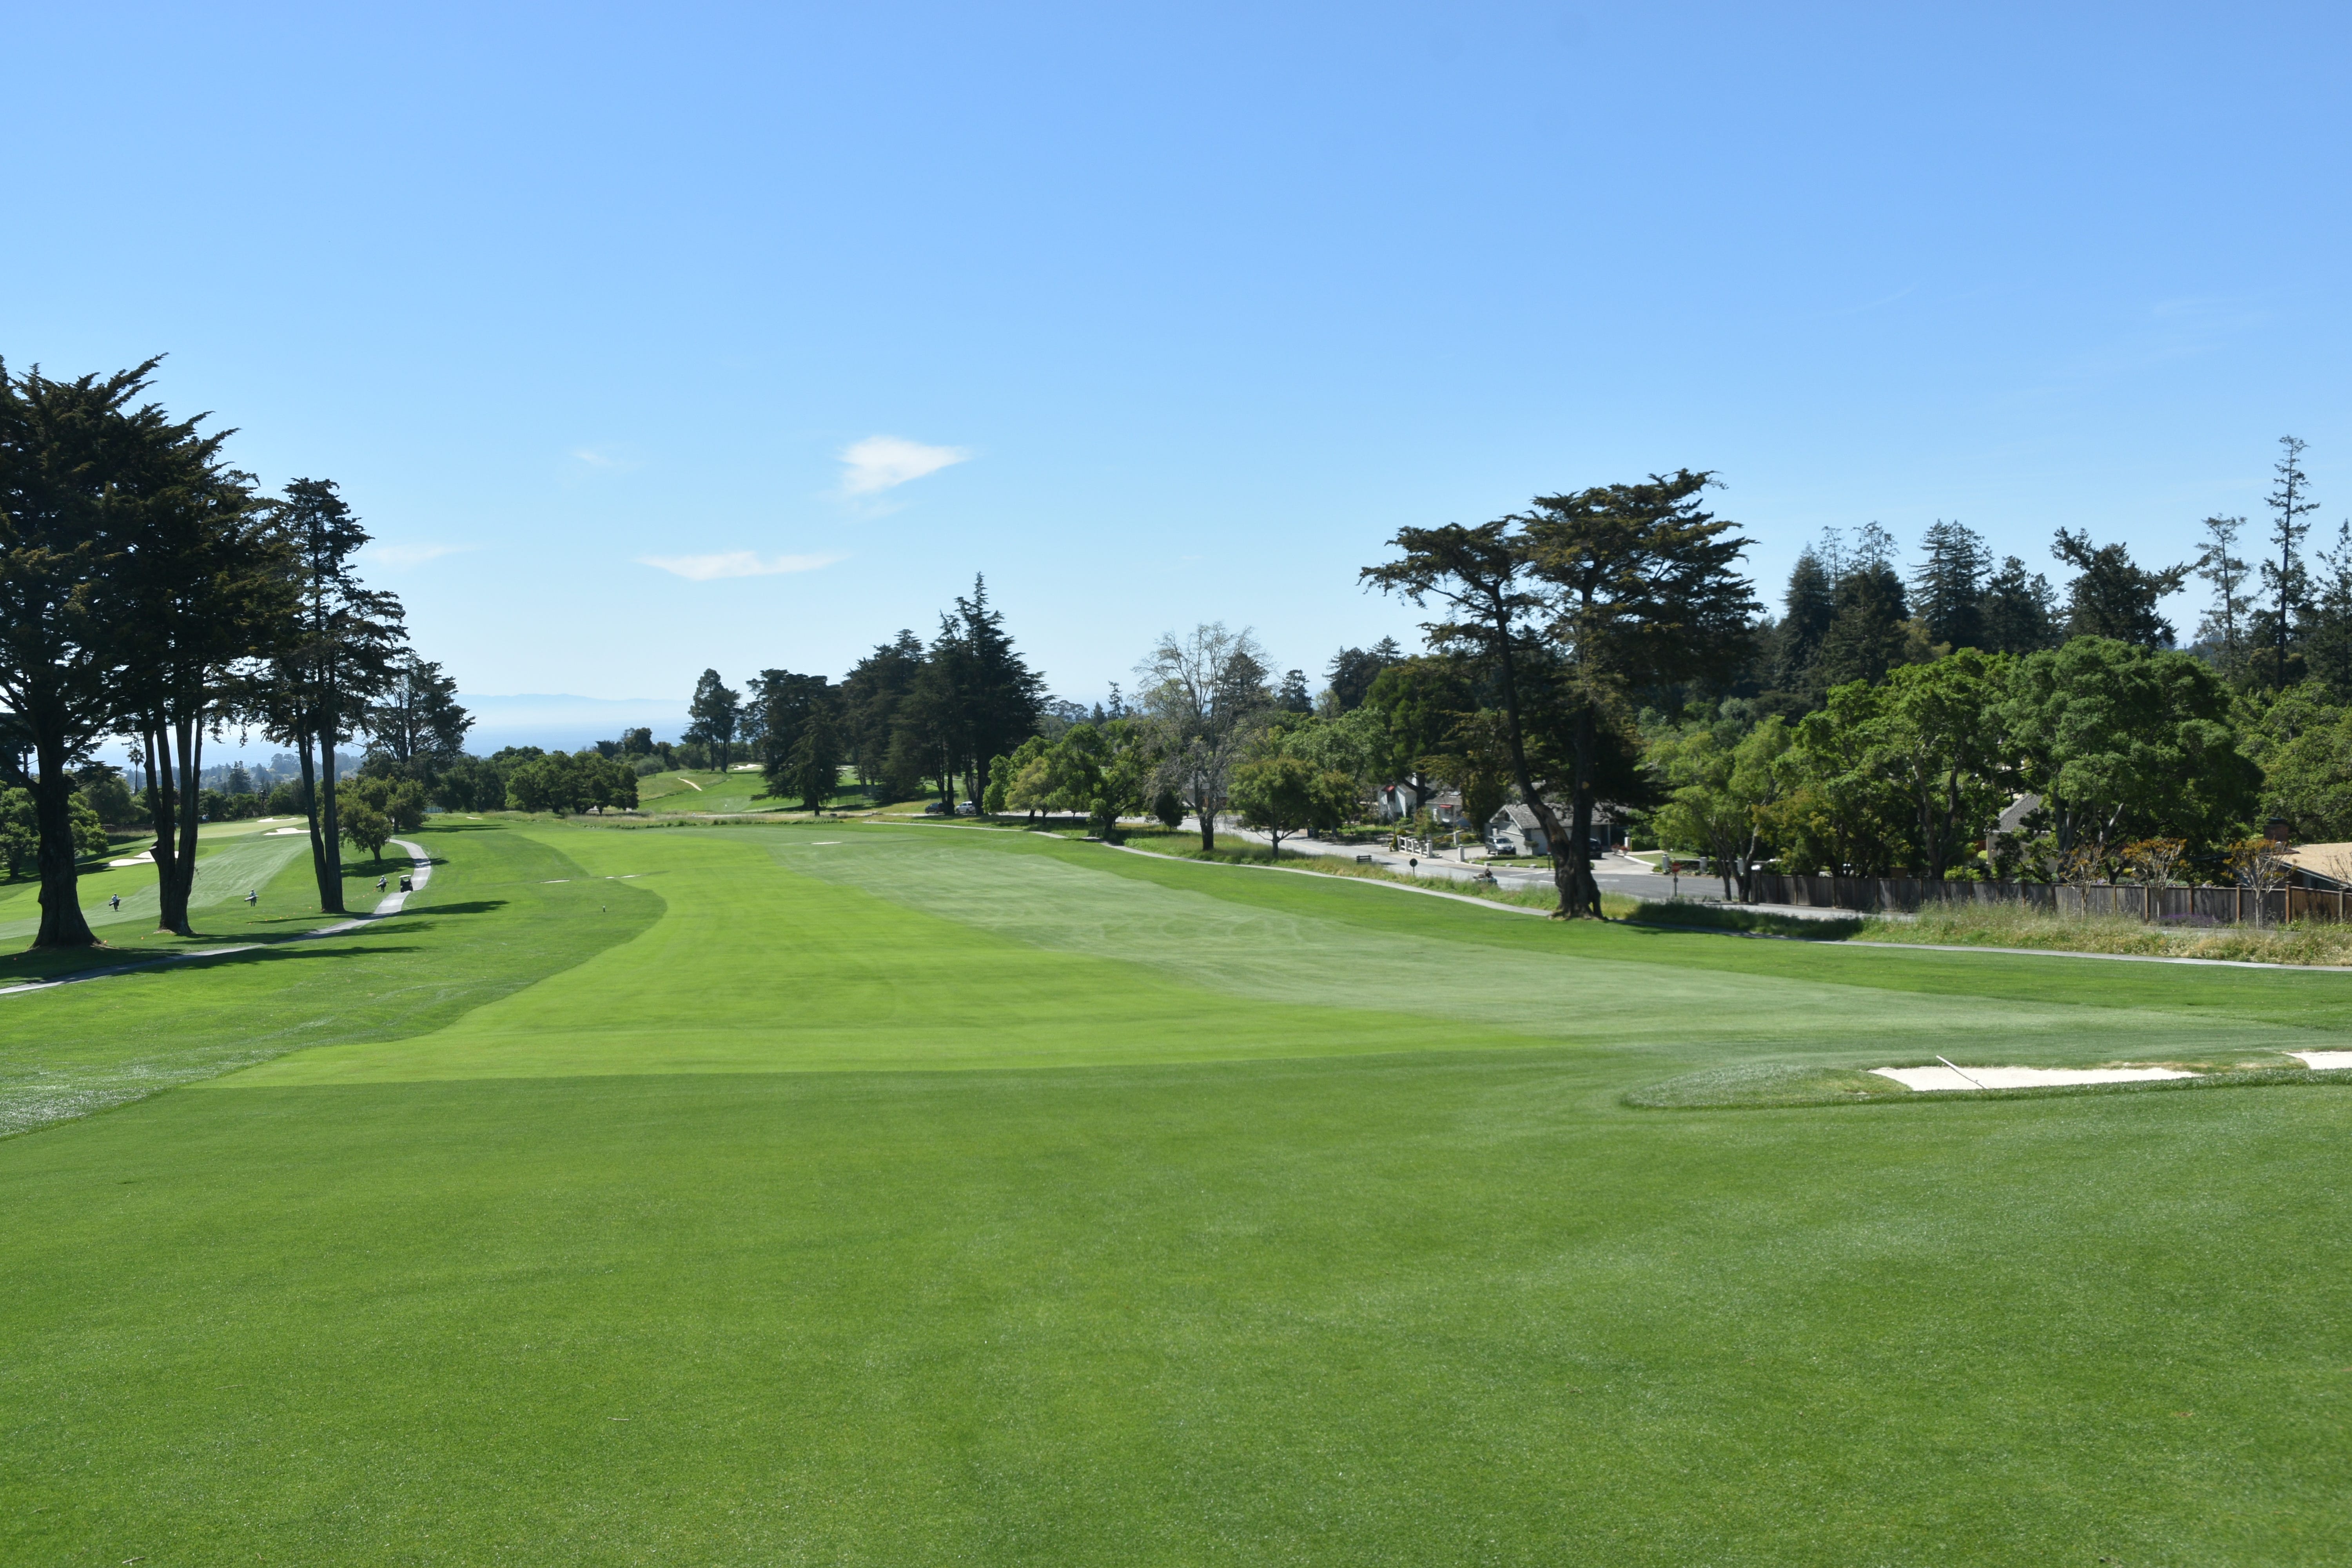
Hole 1: Par 4, 458 Yards
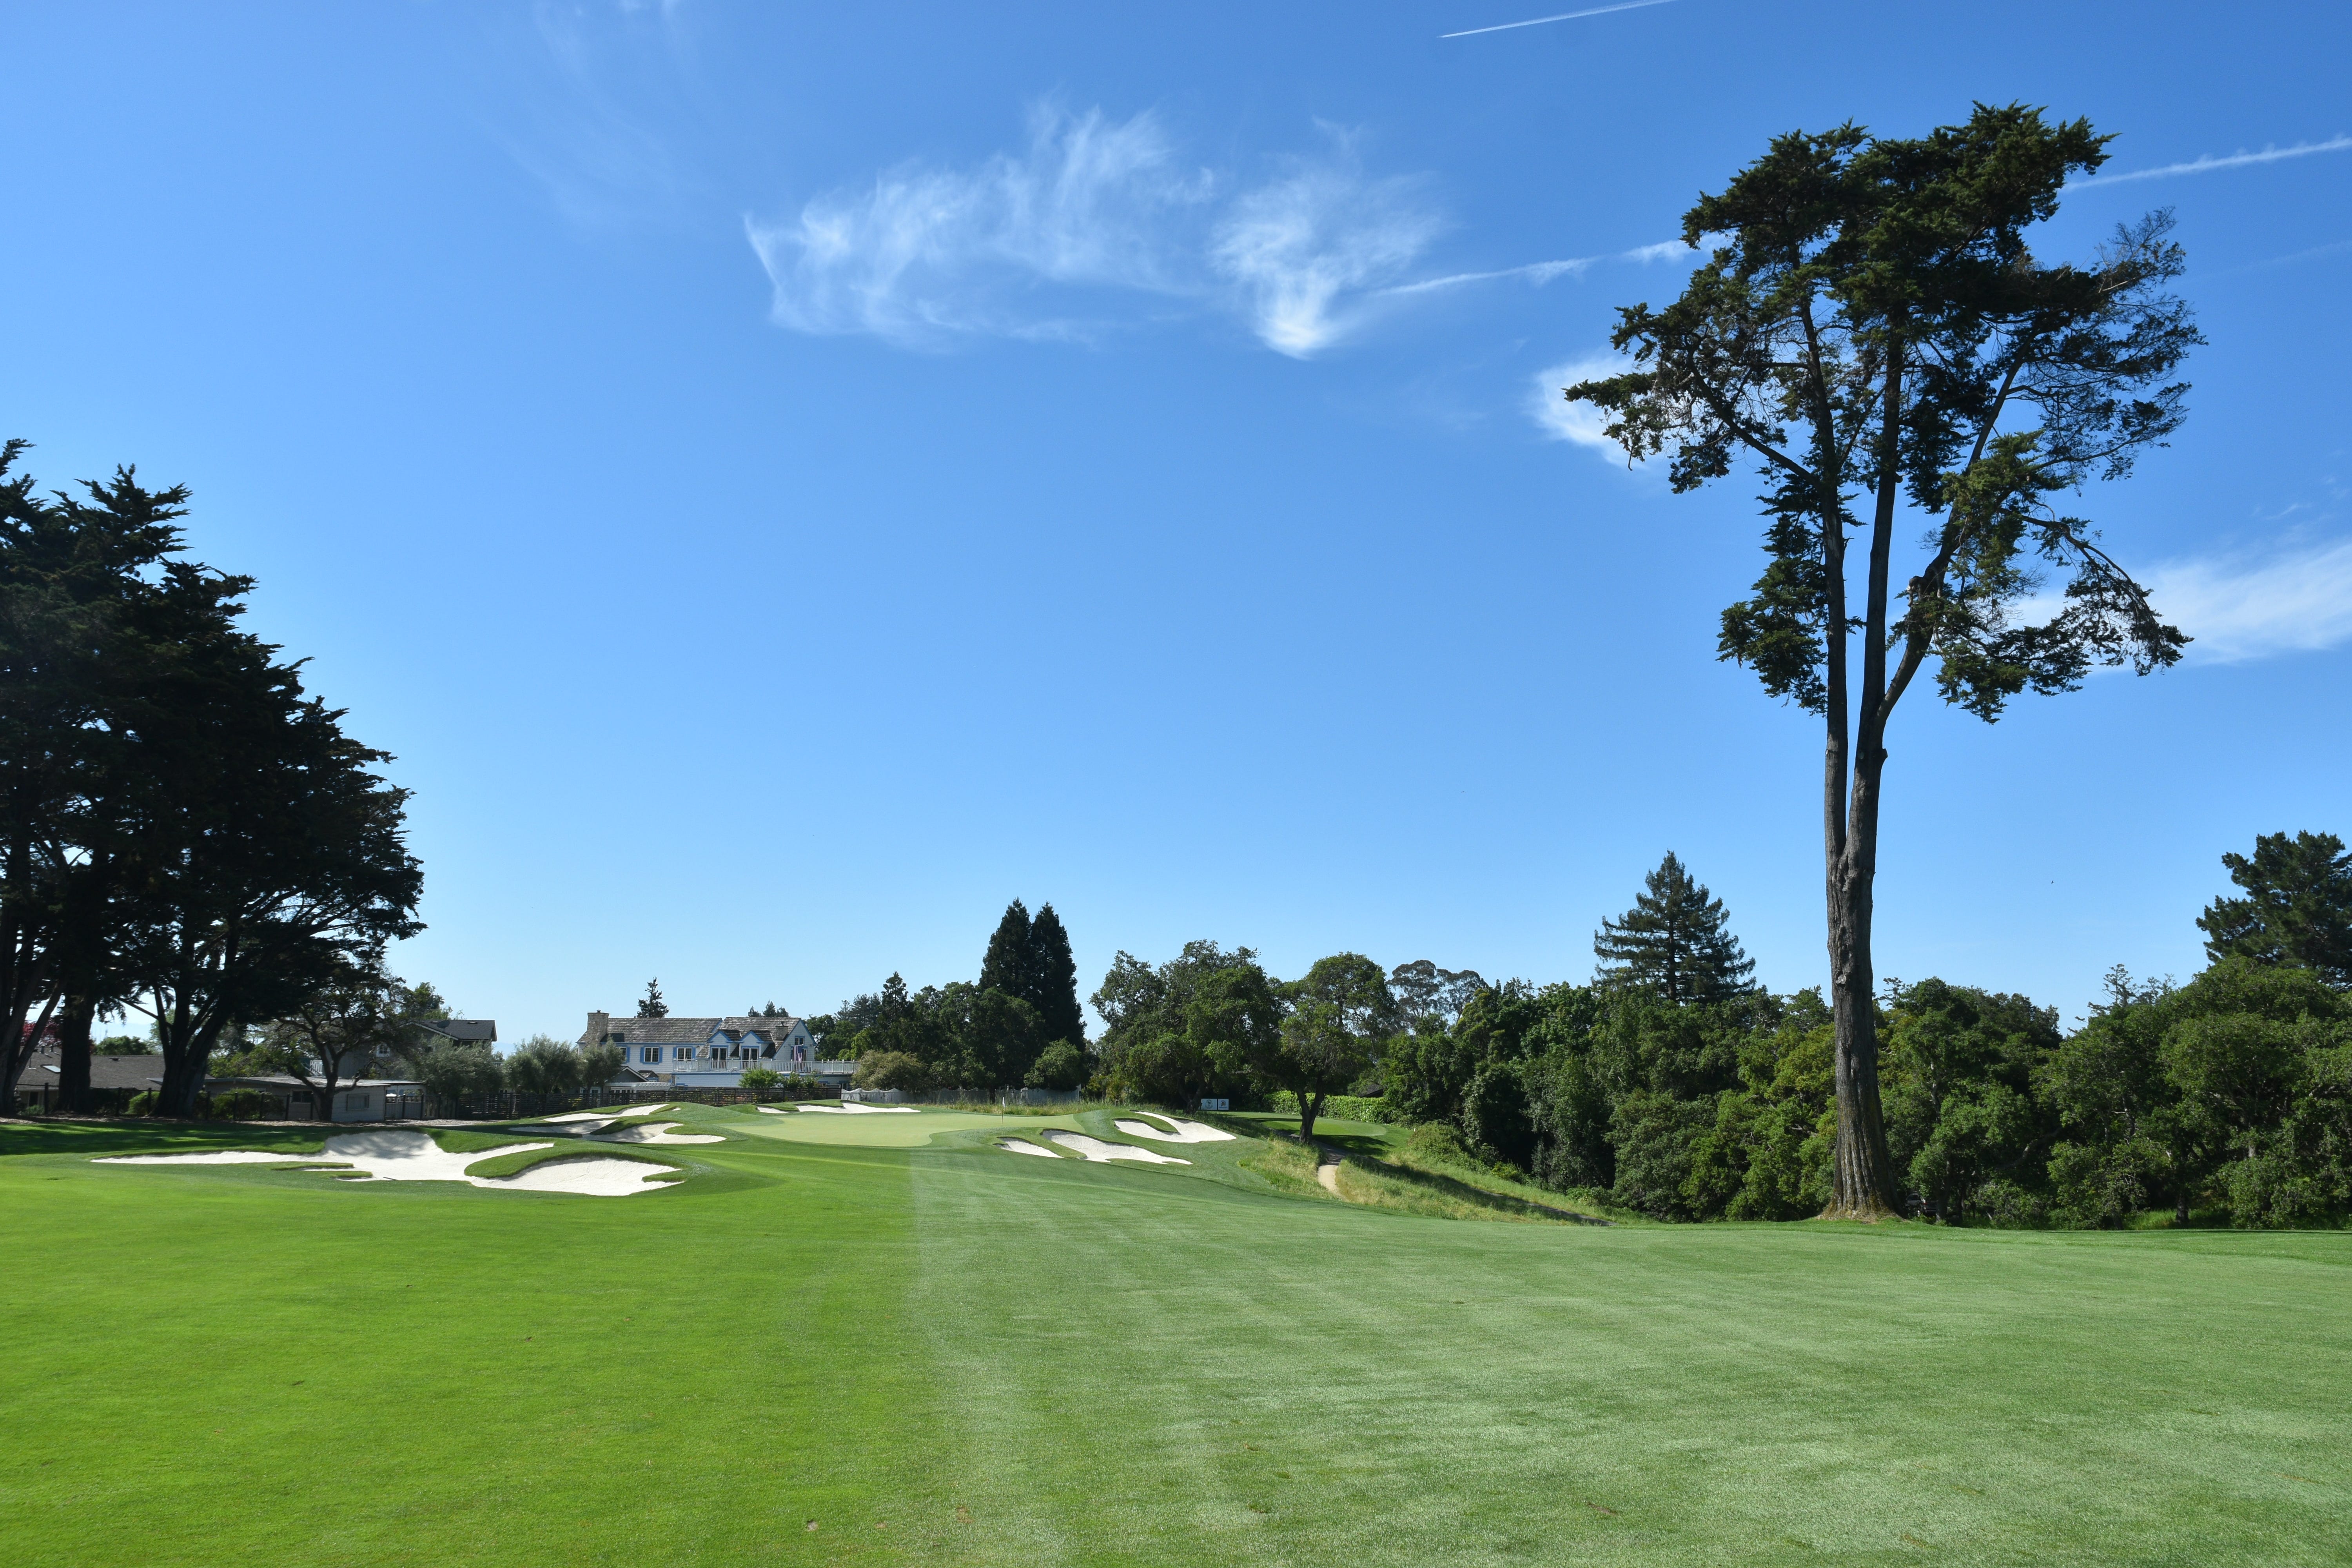
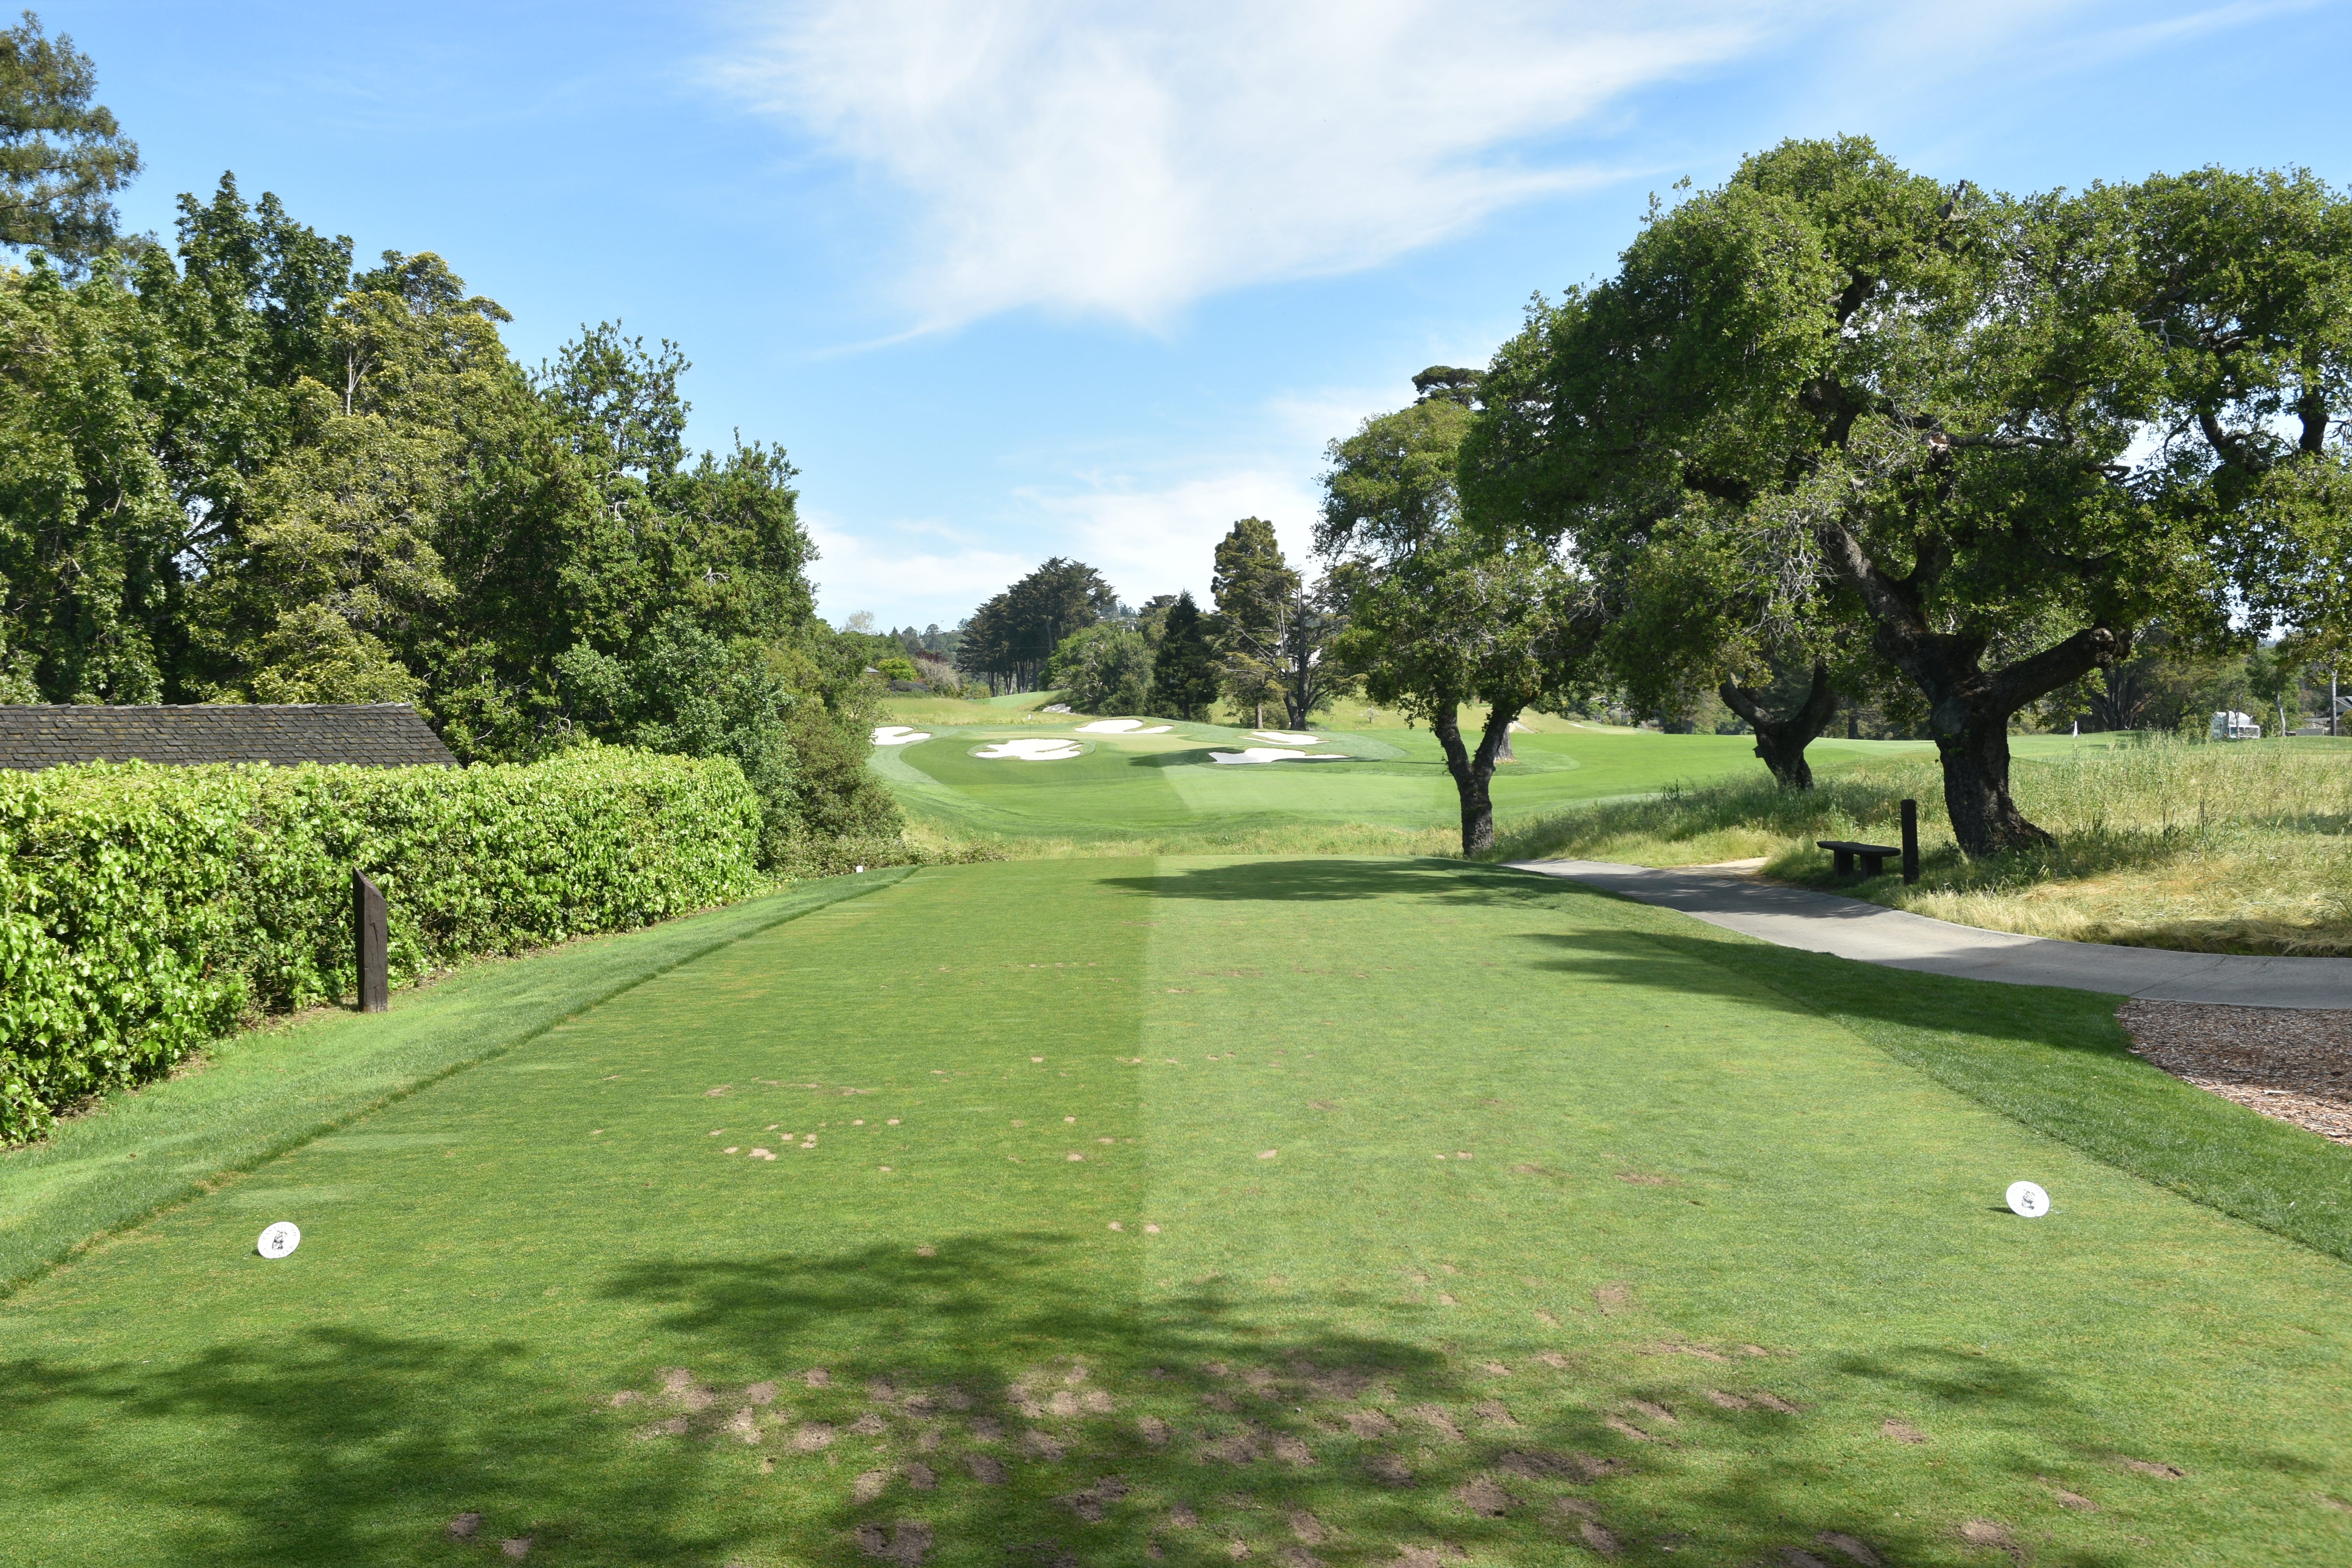
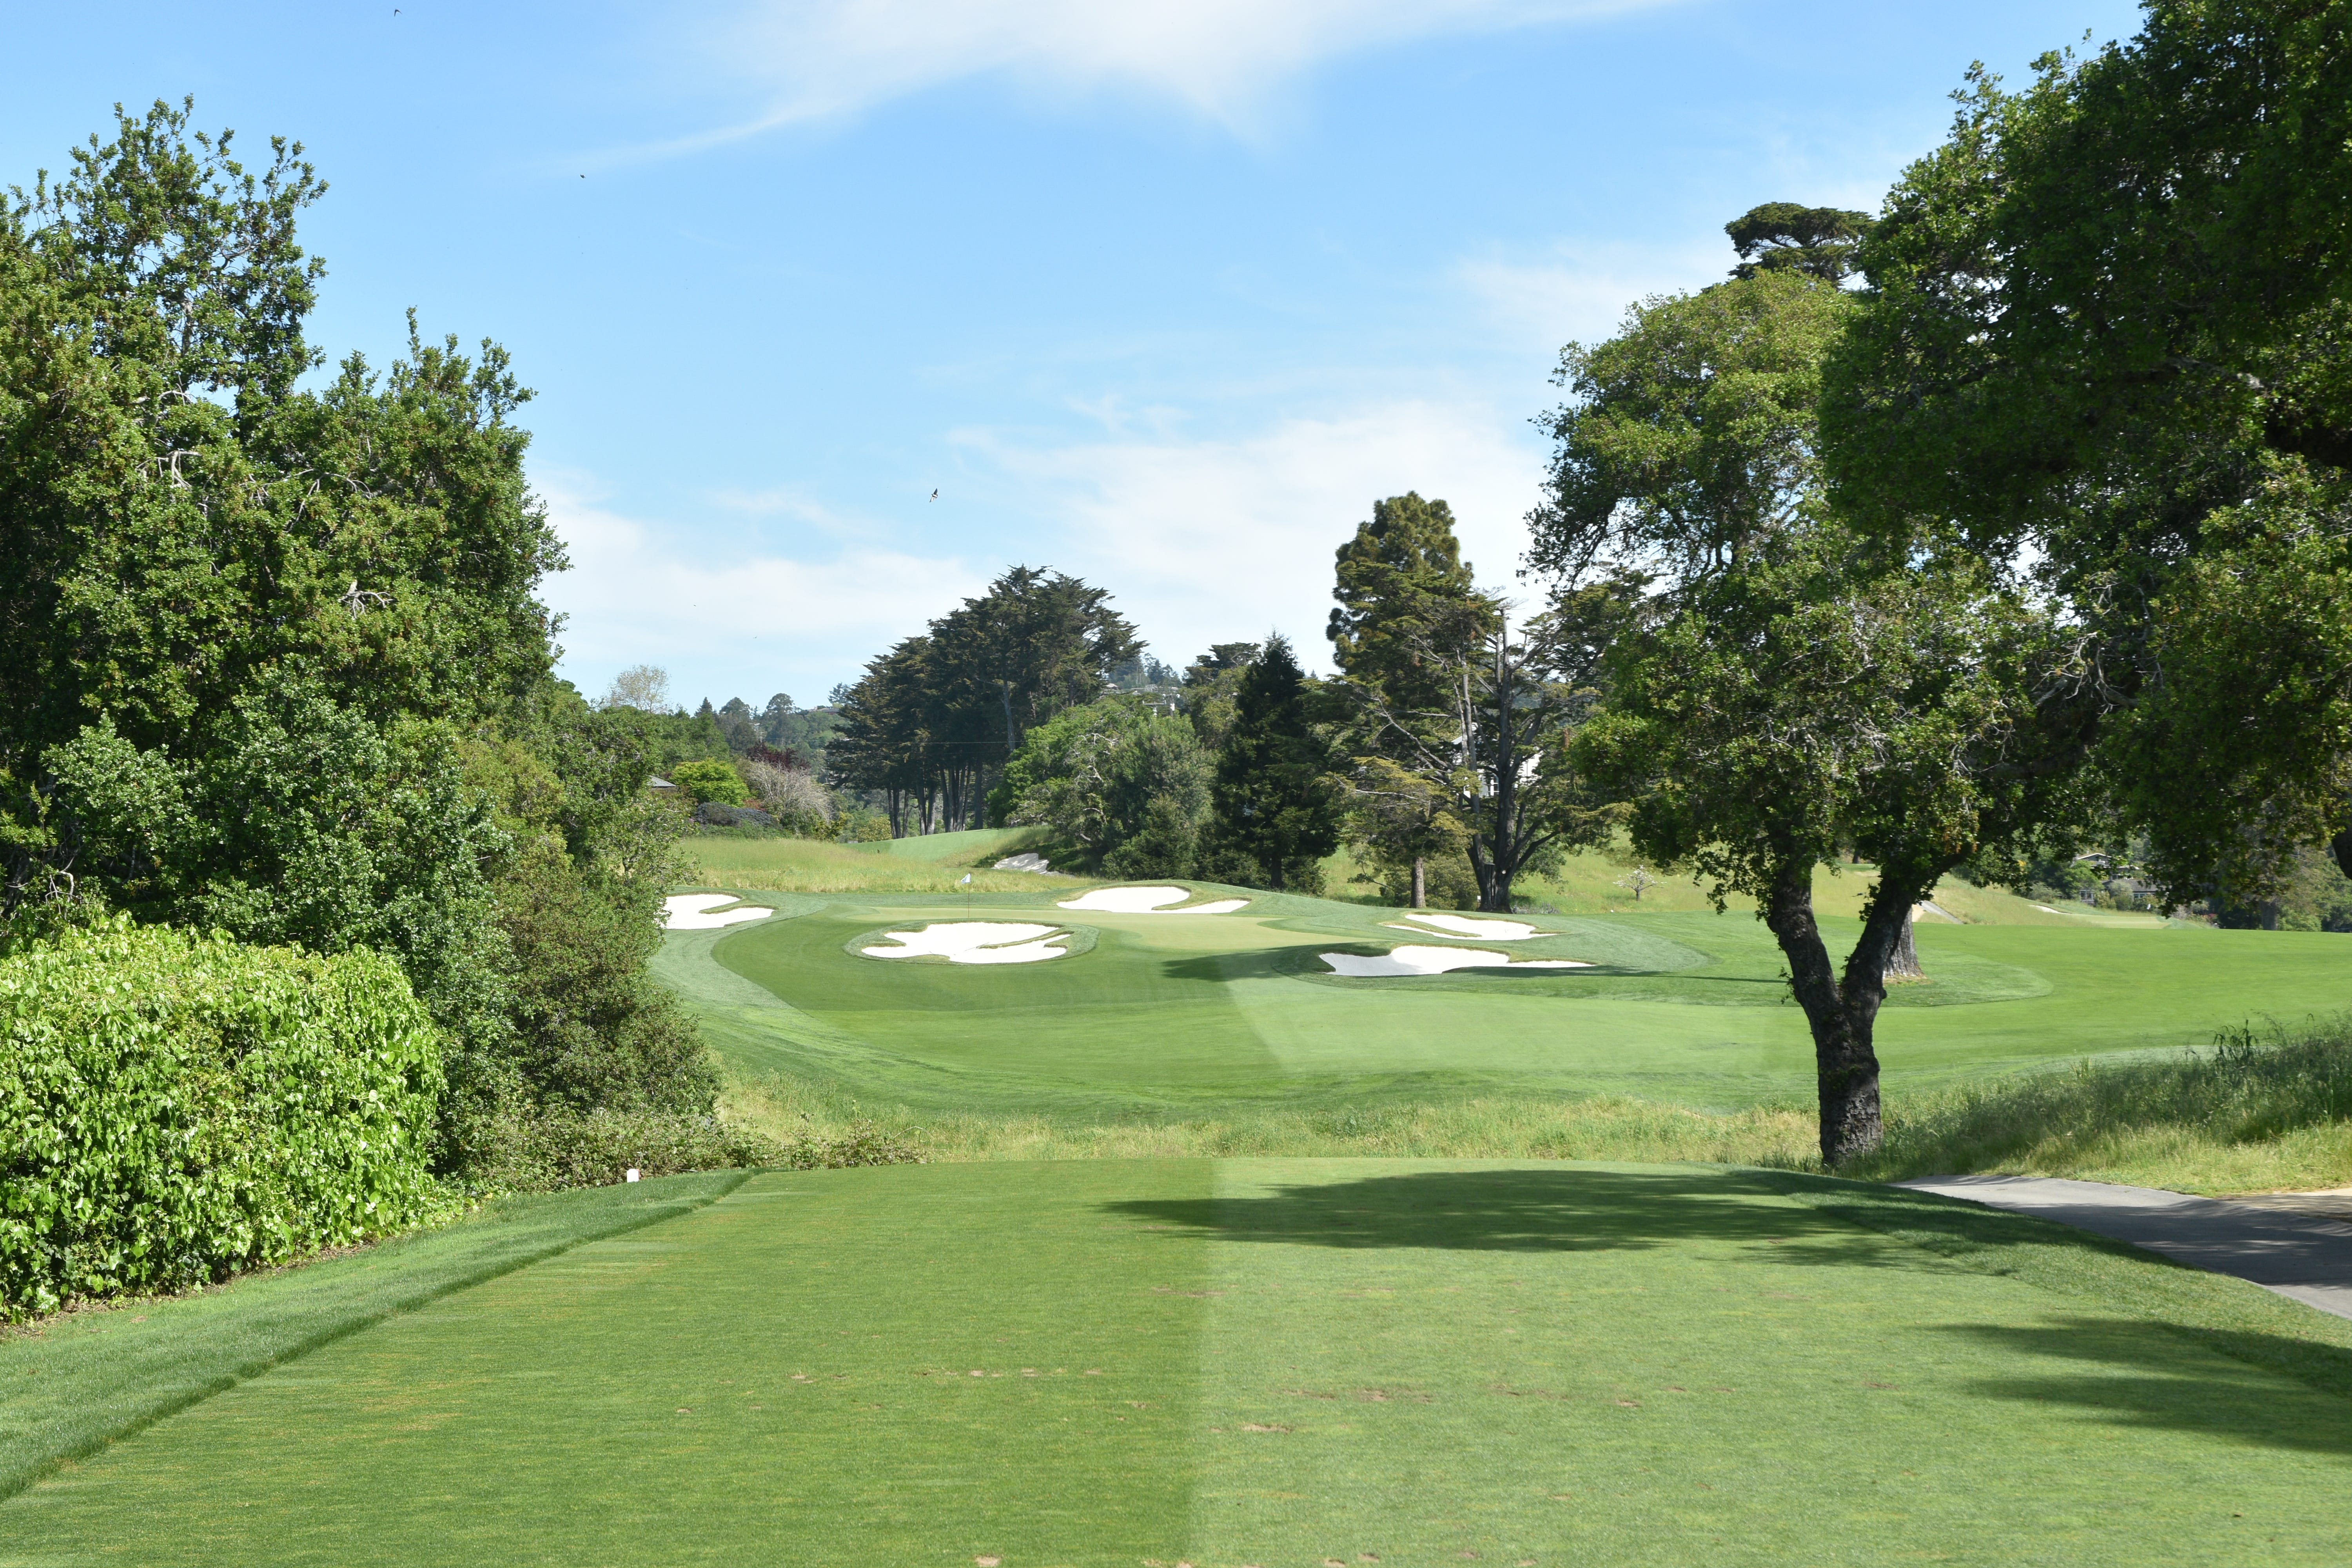
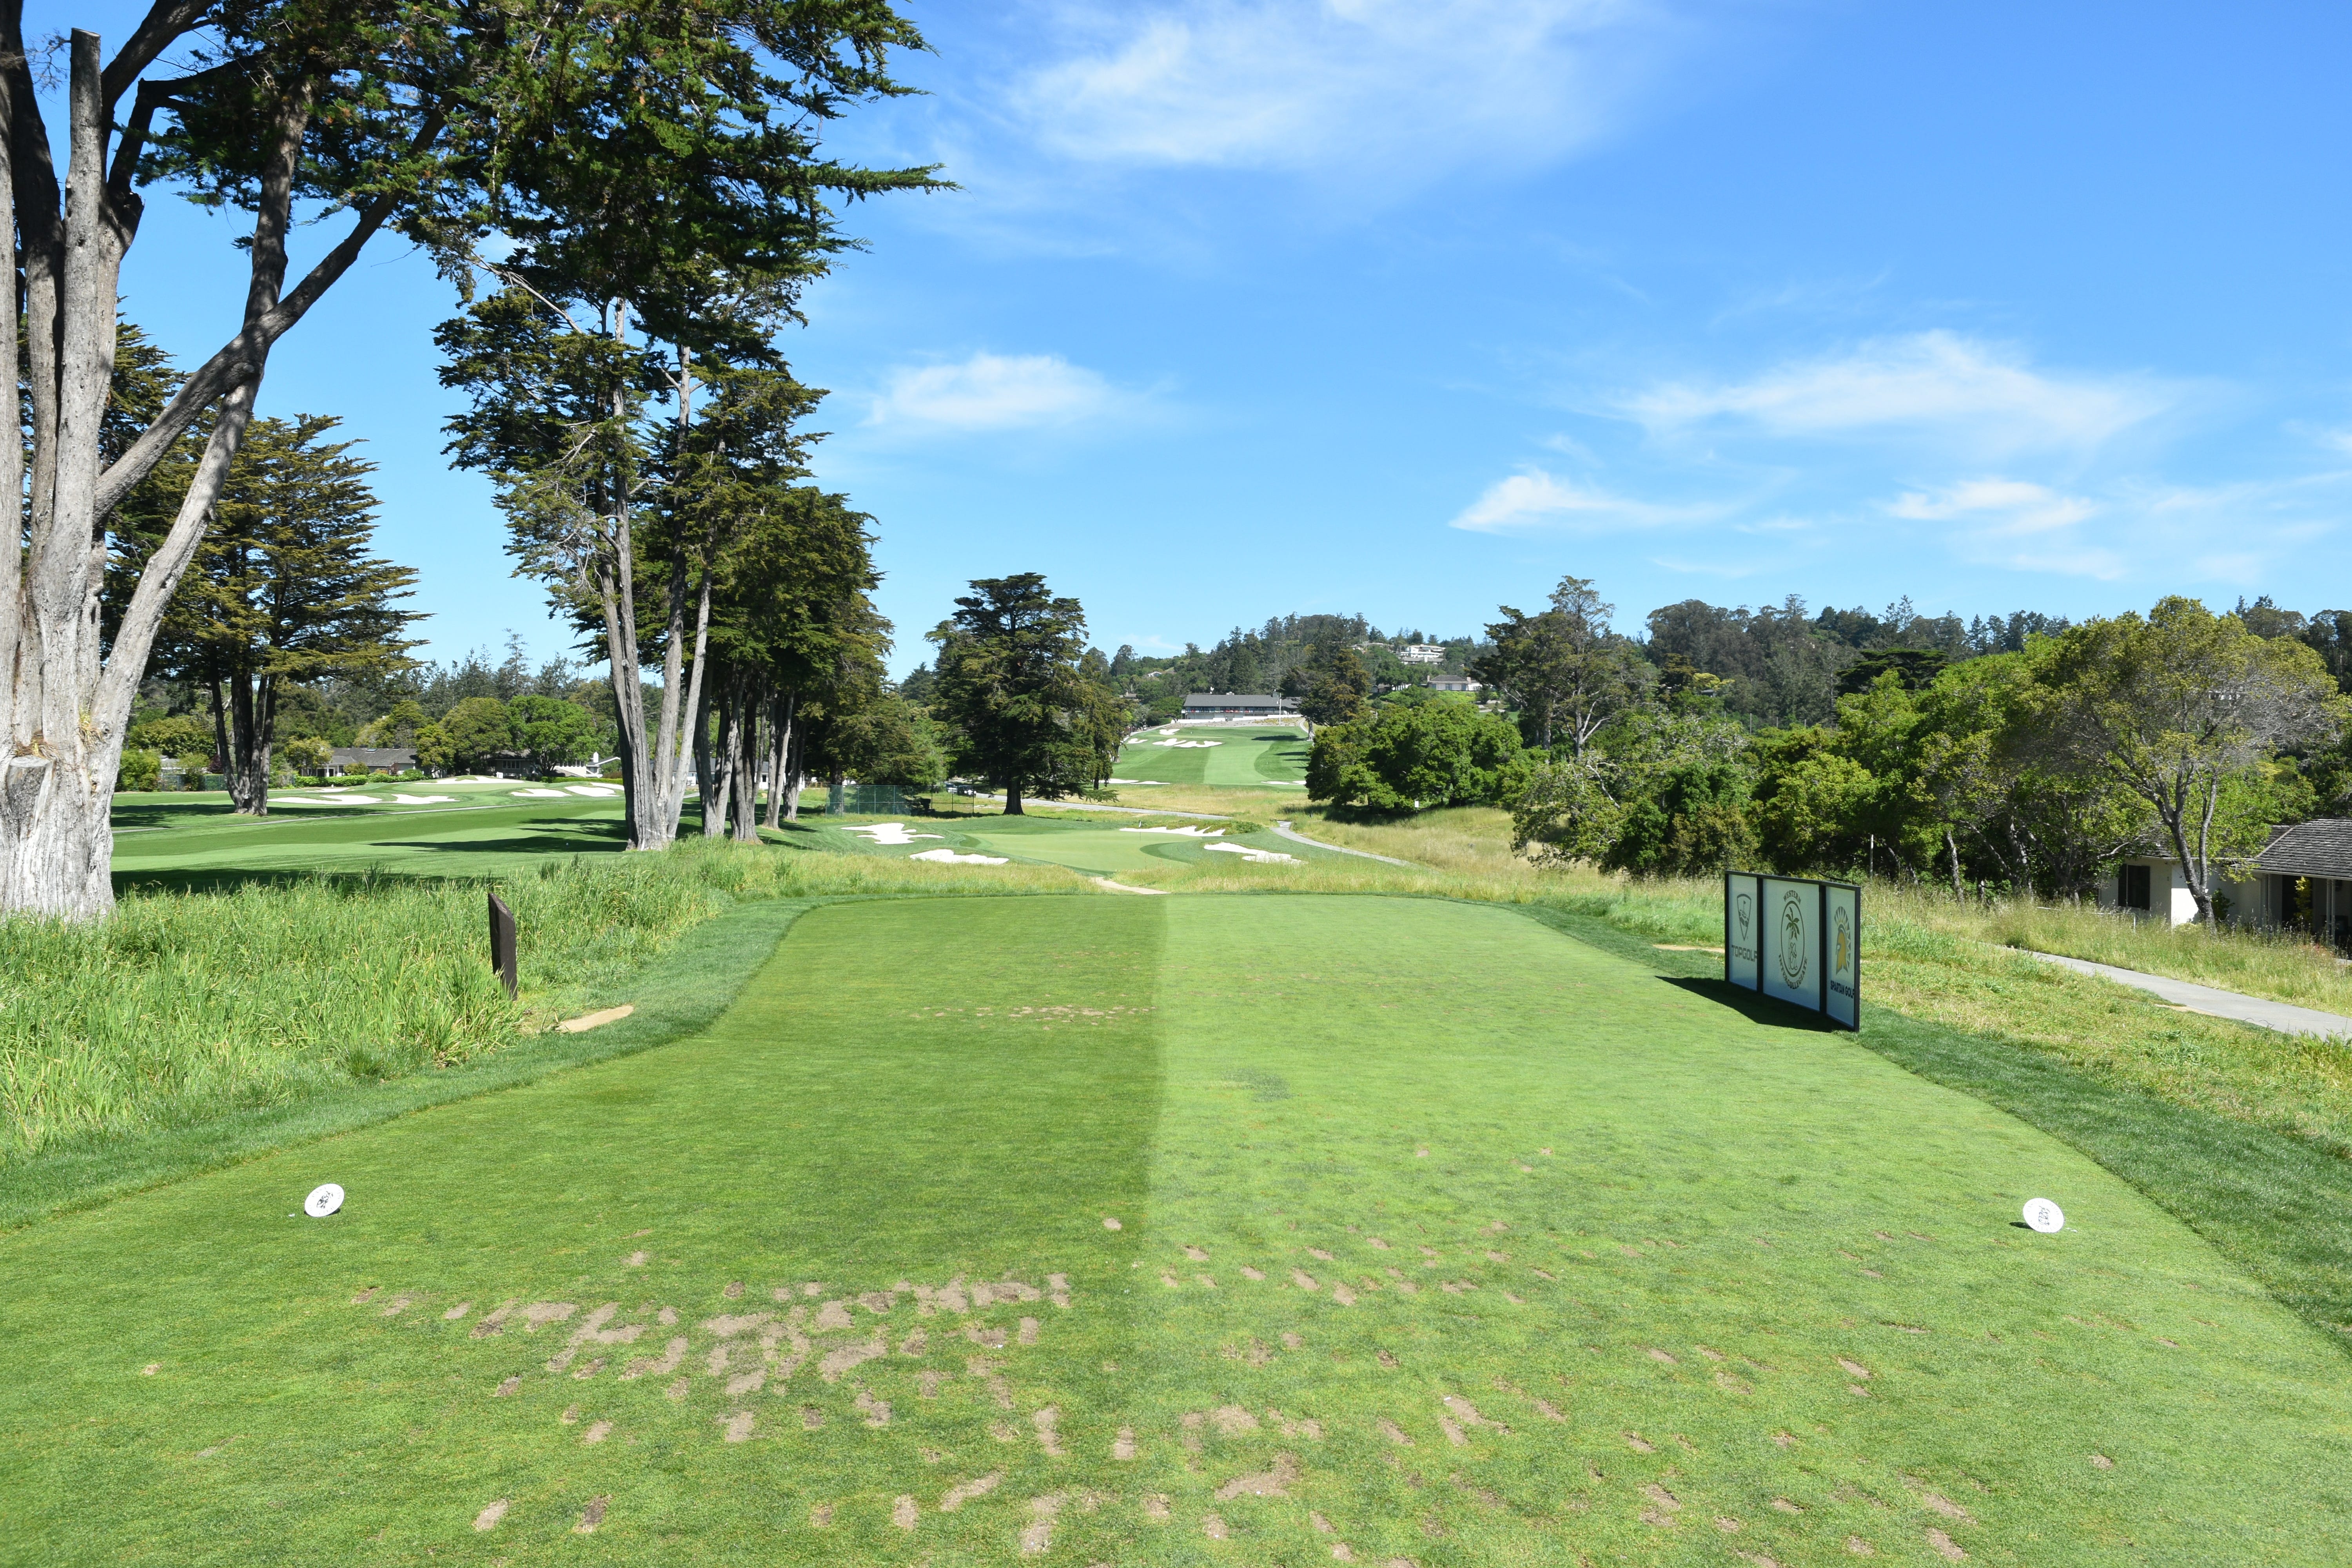
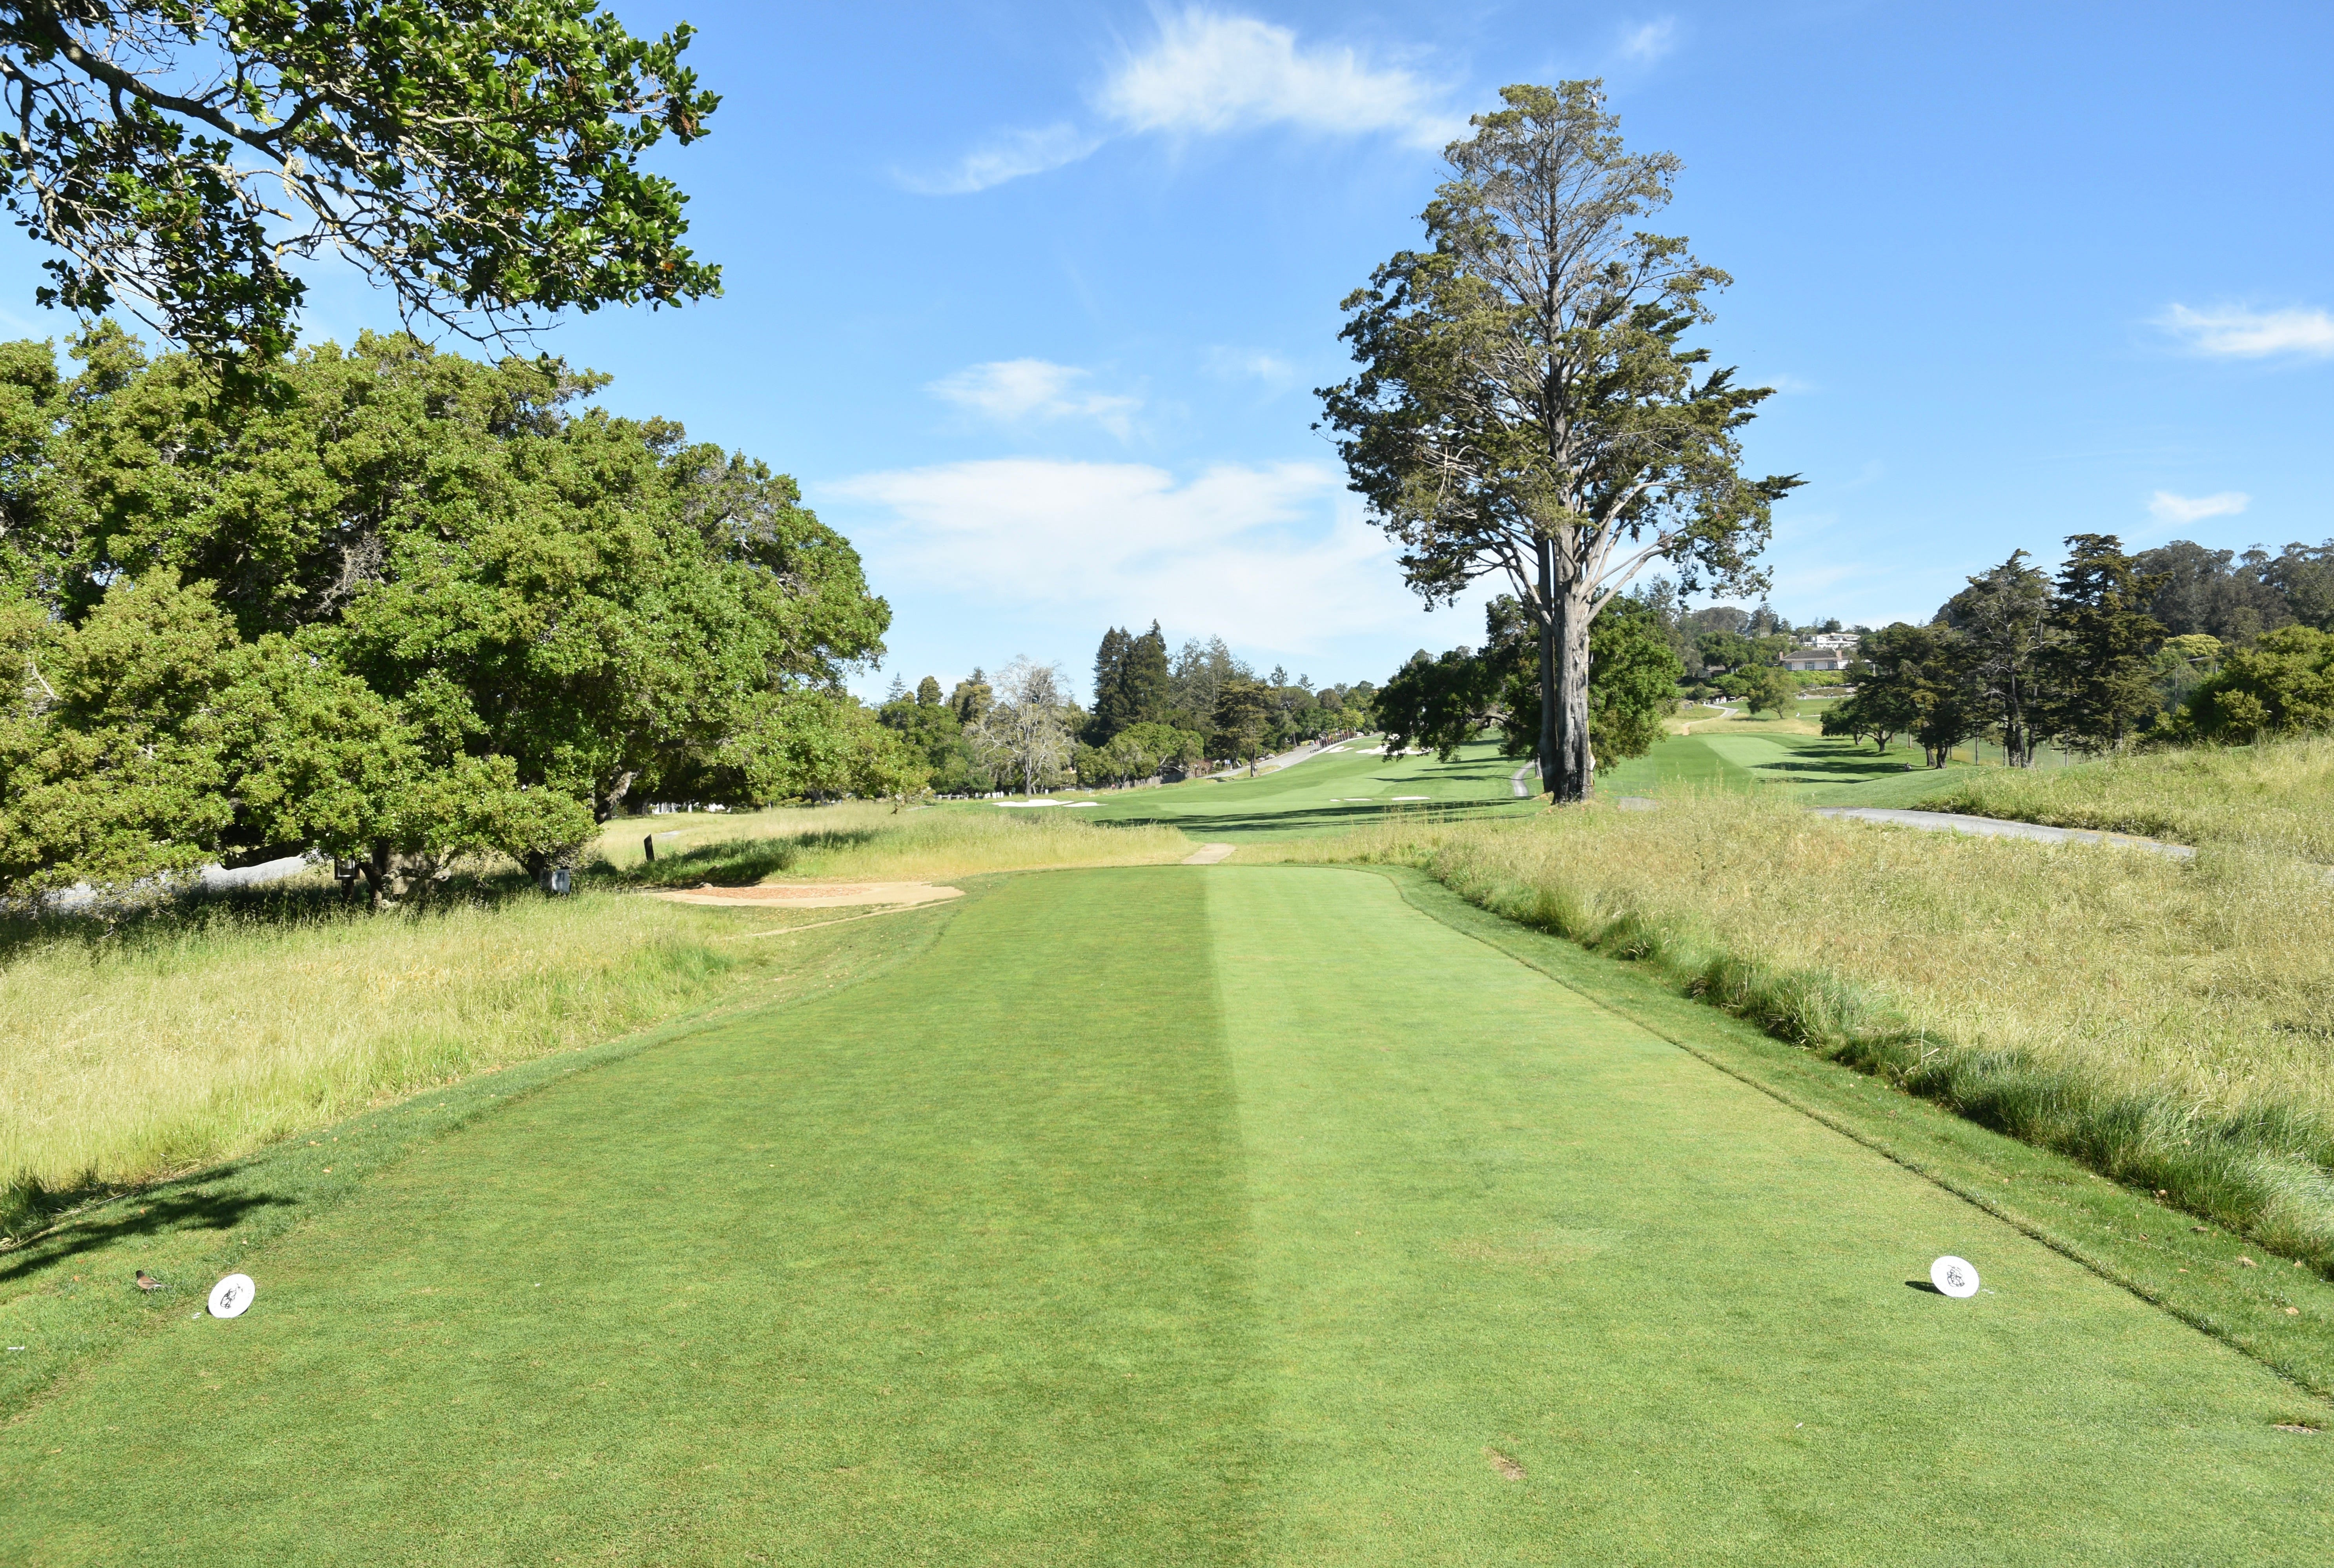
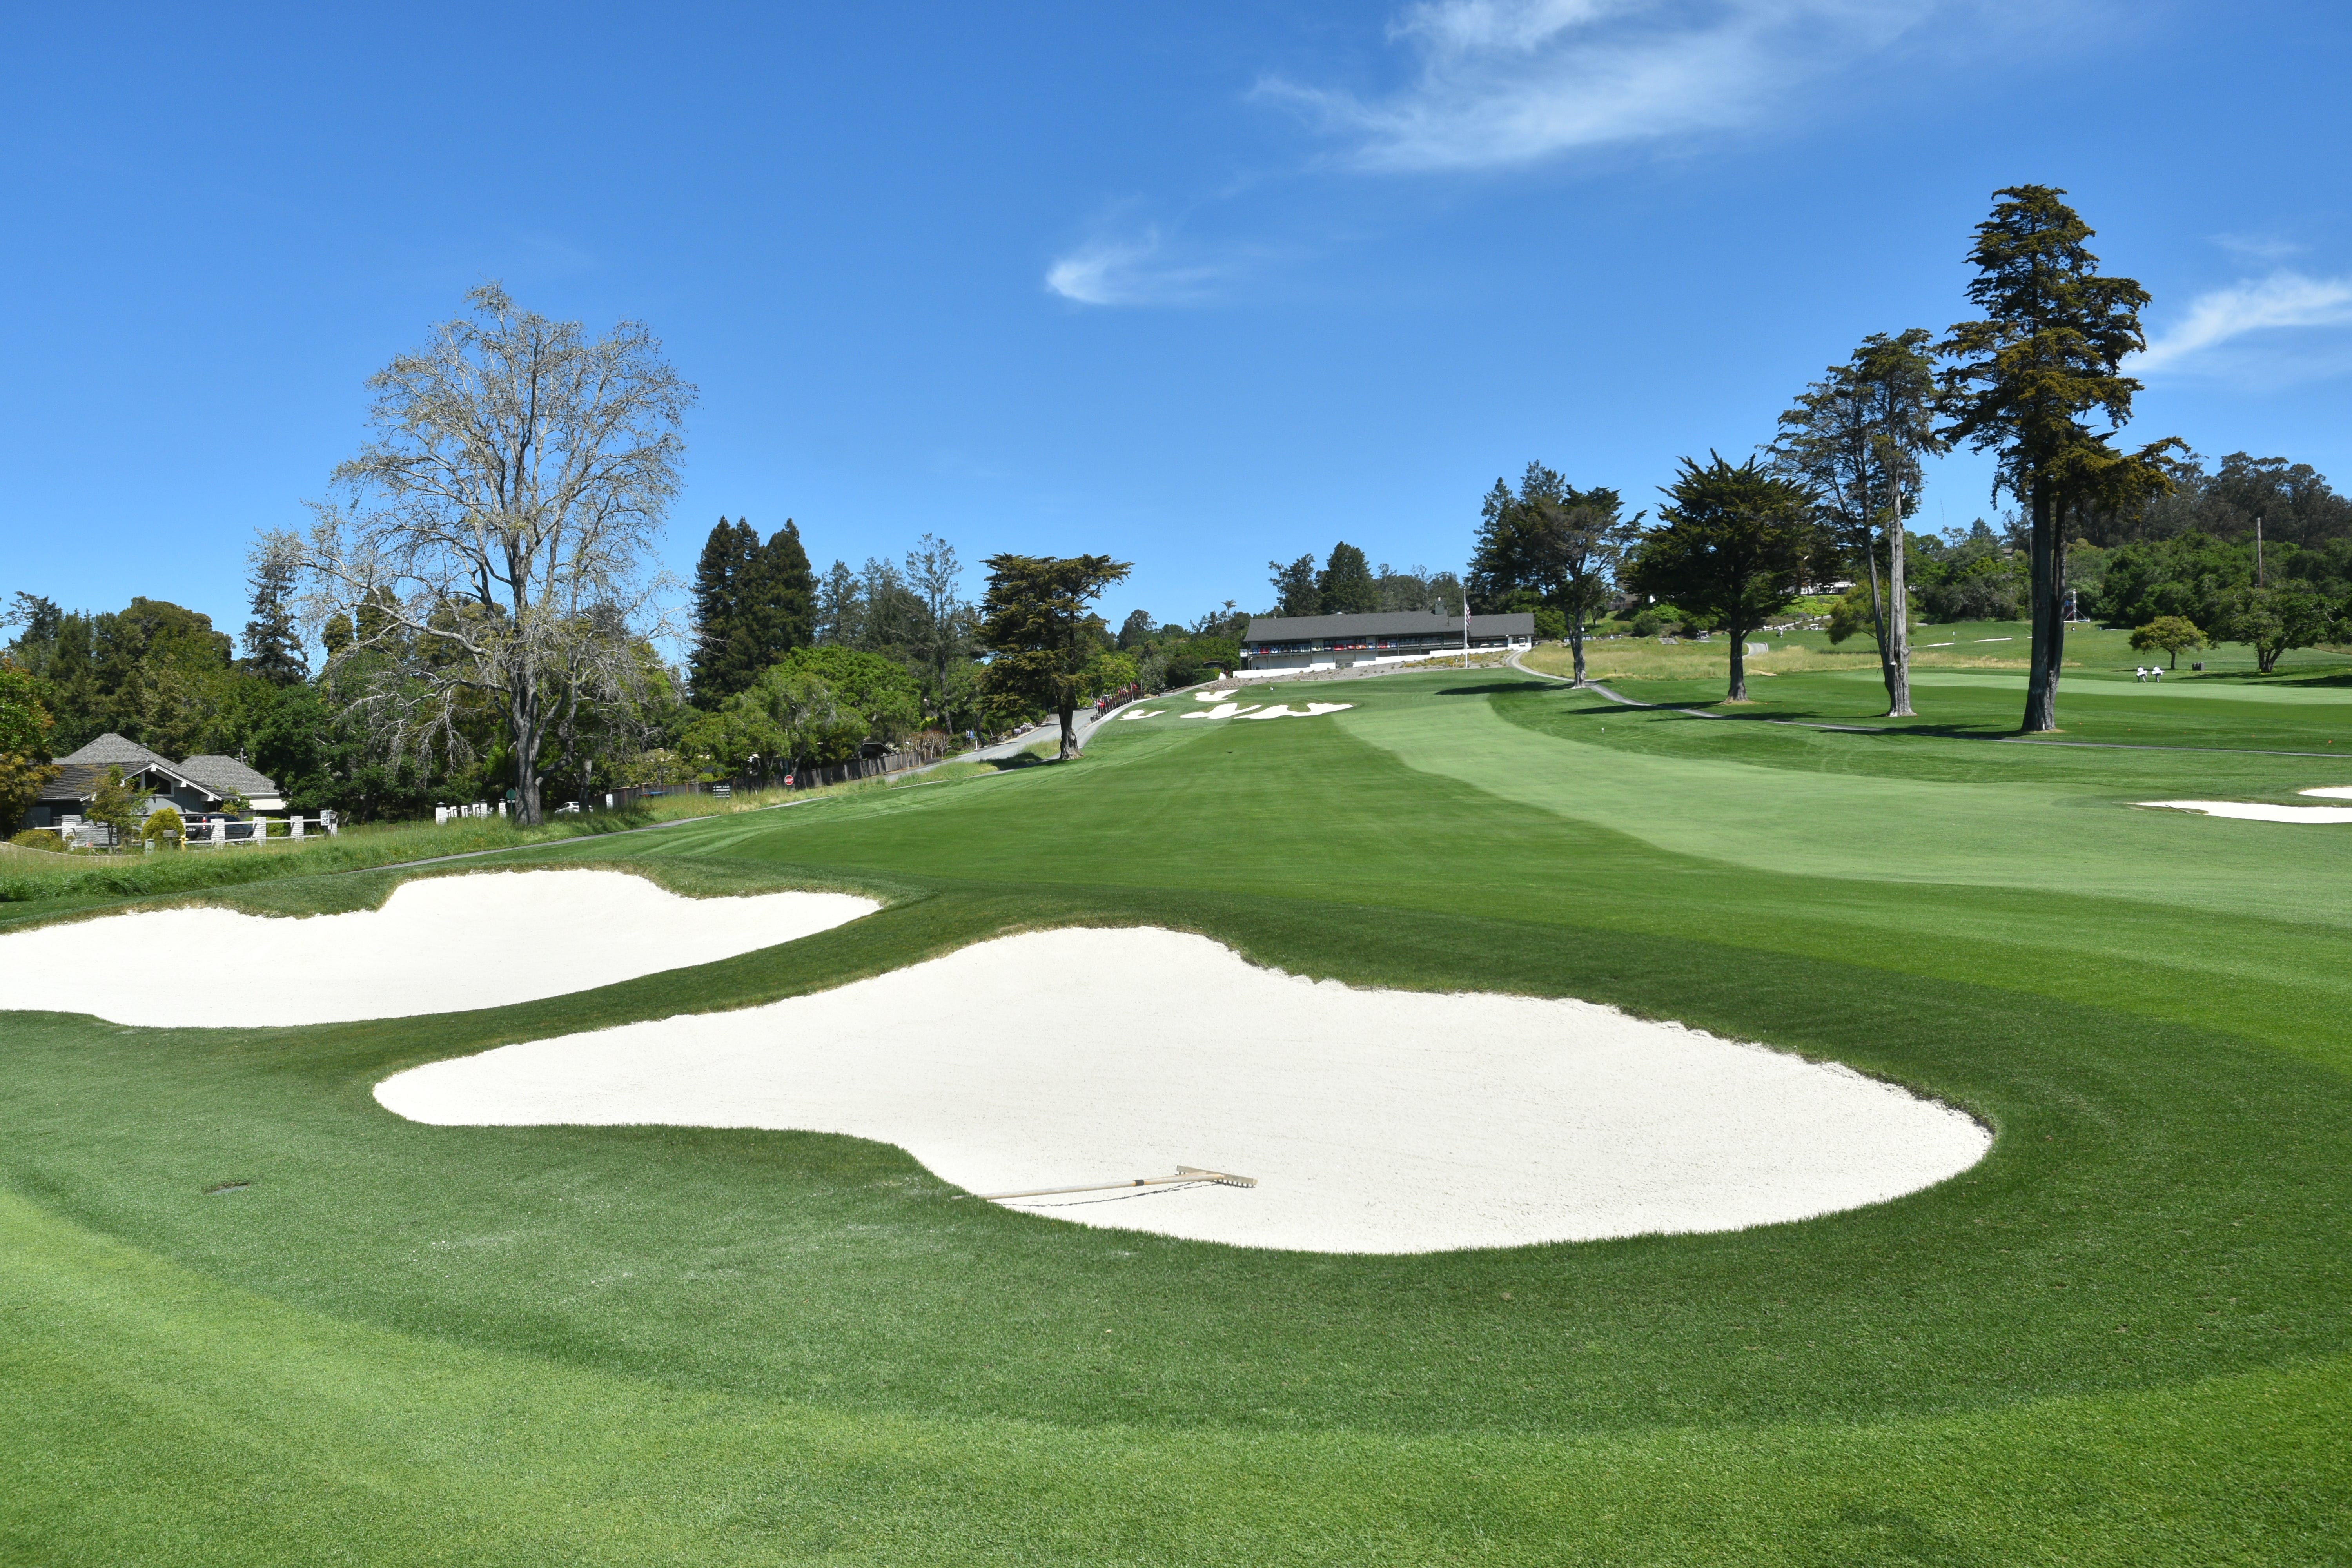
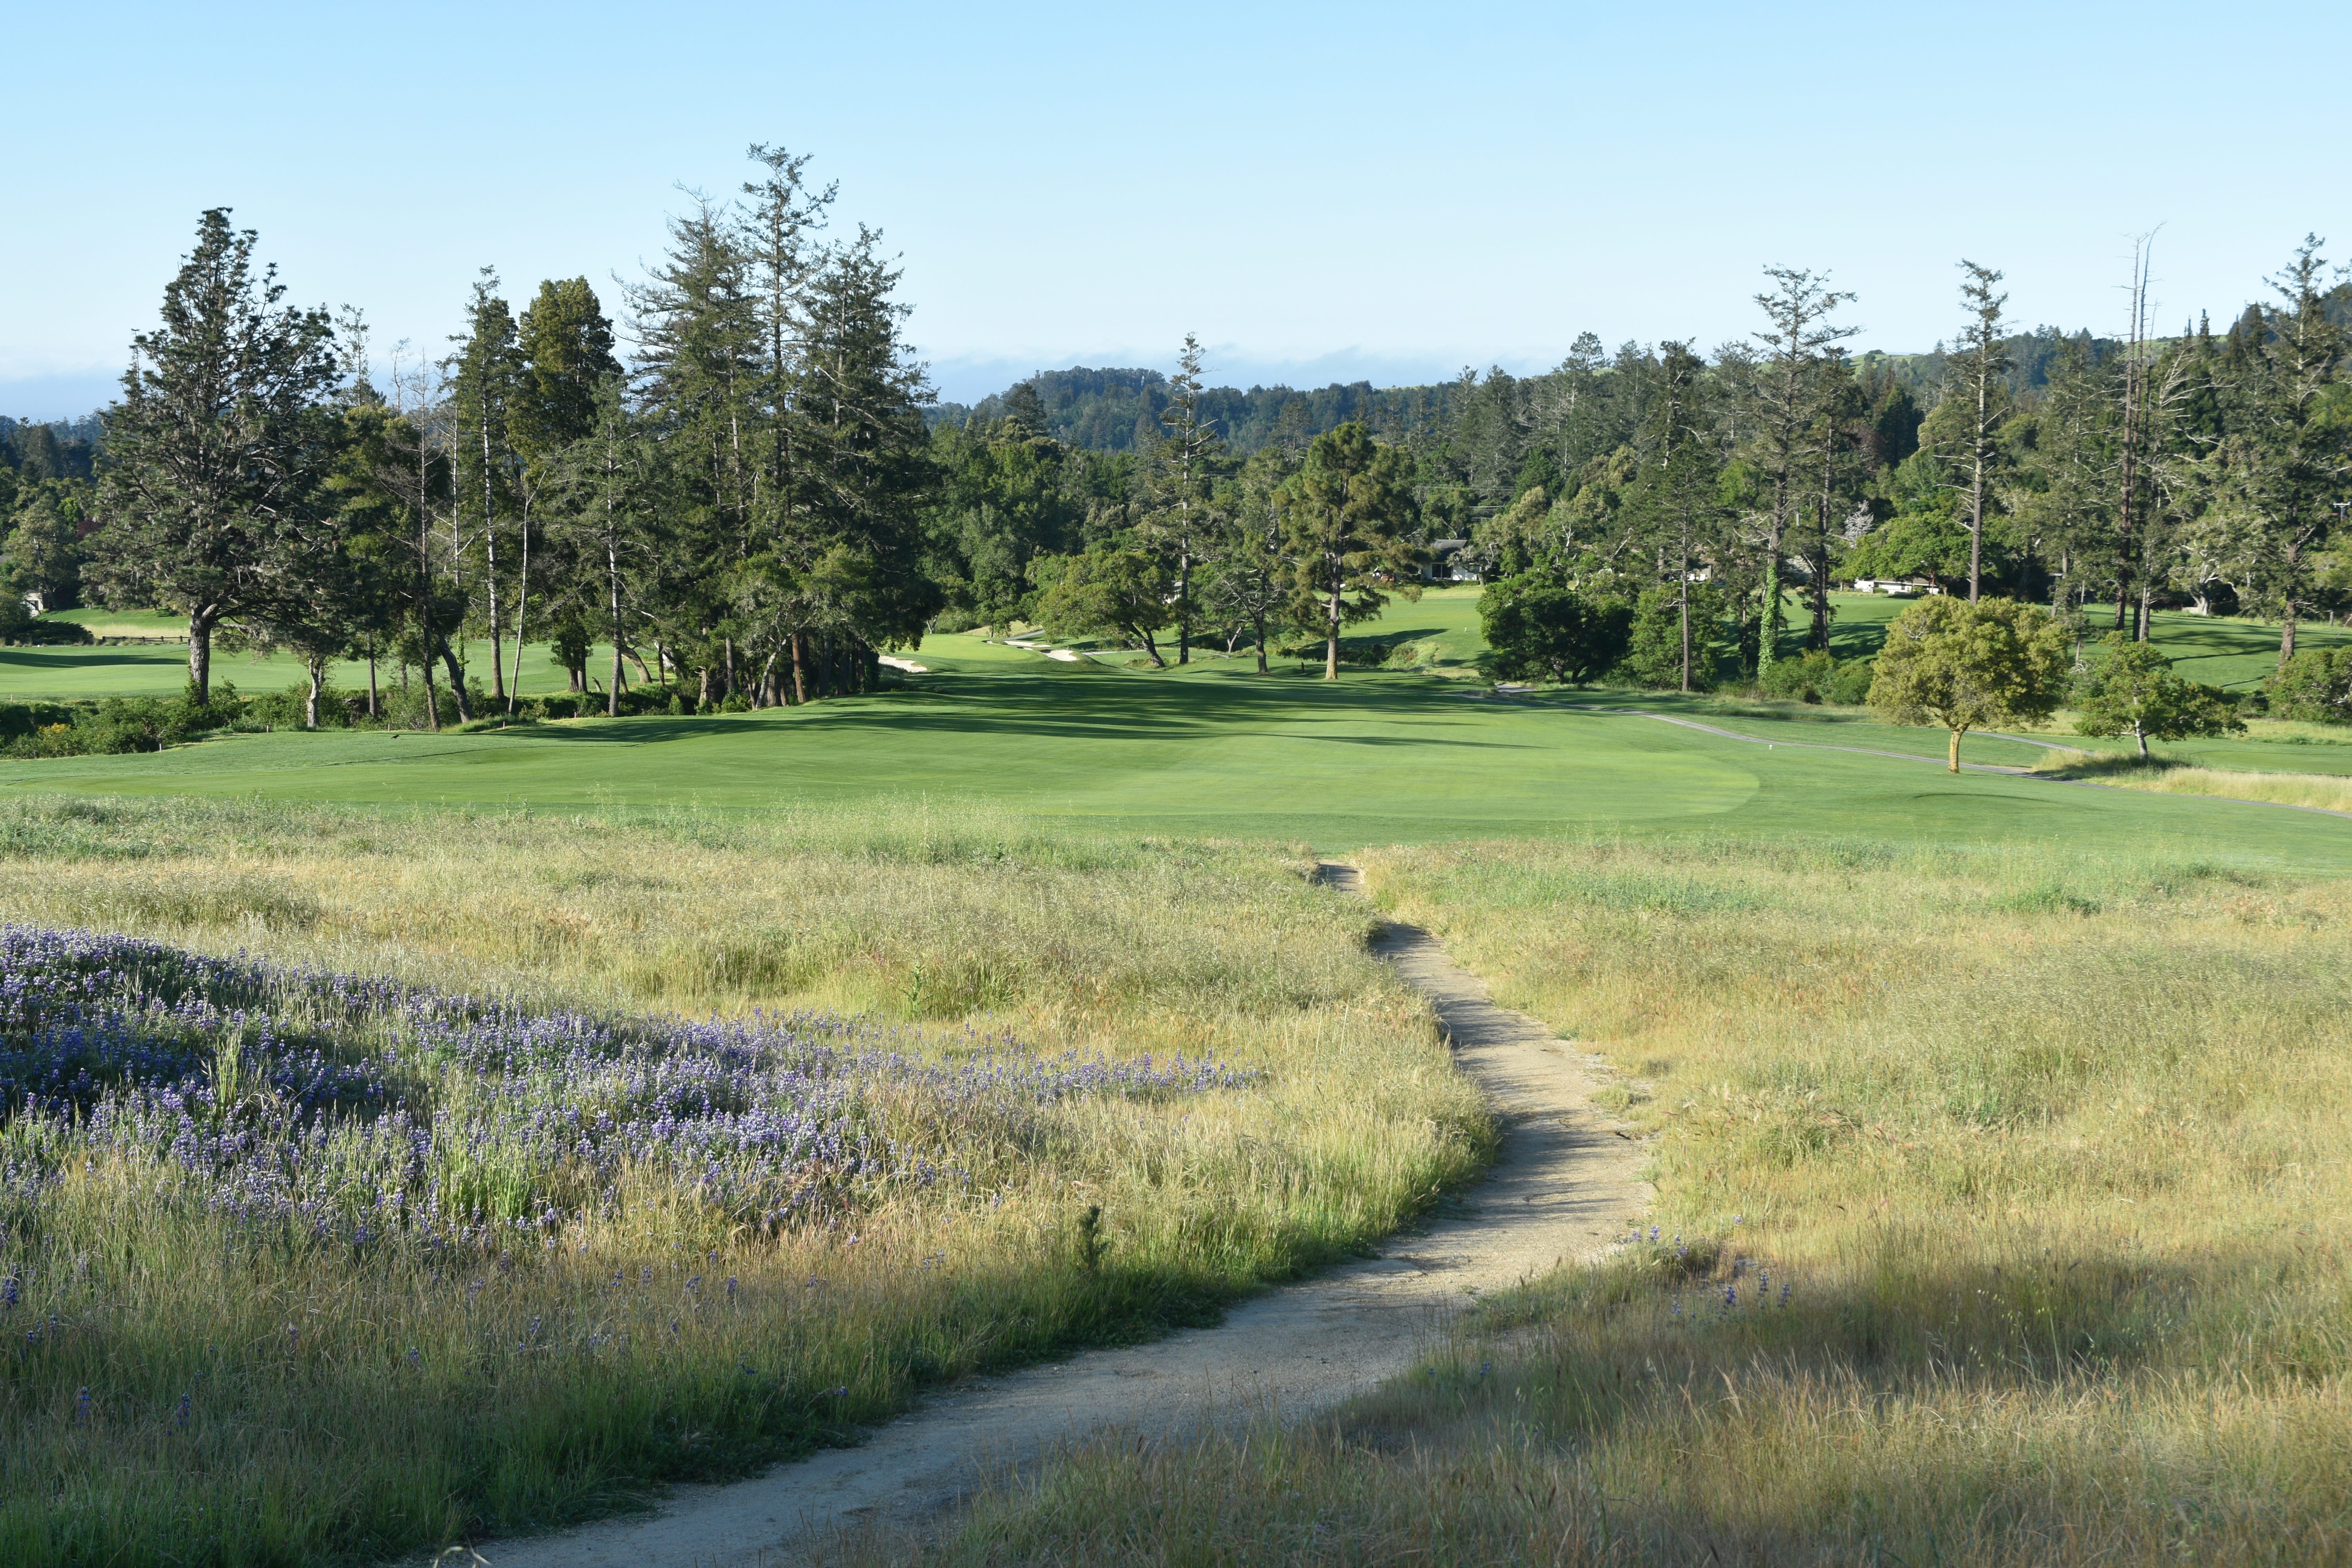
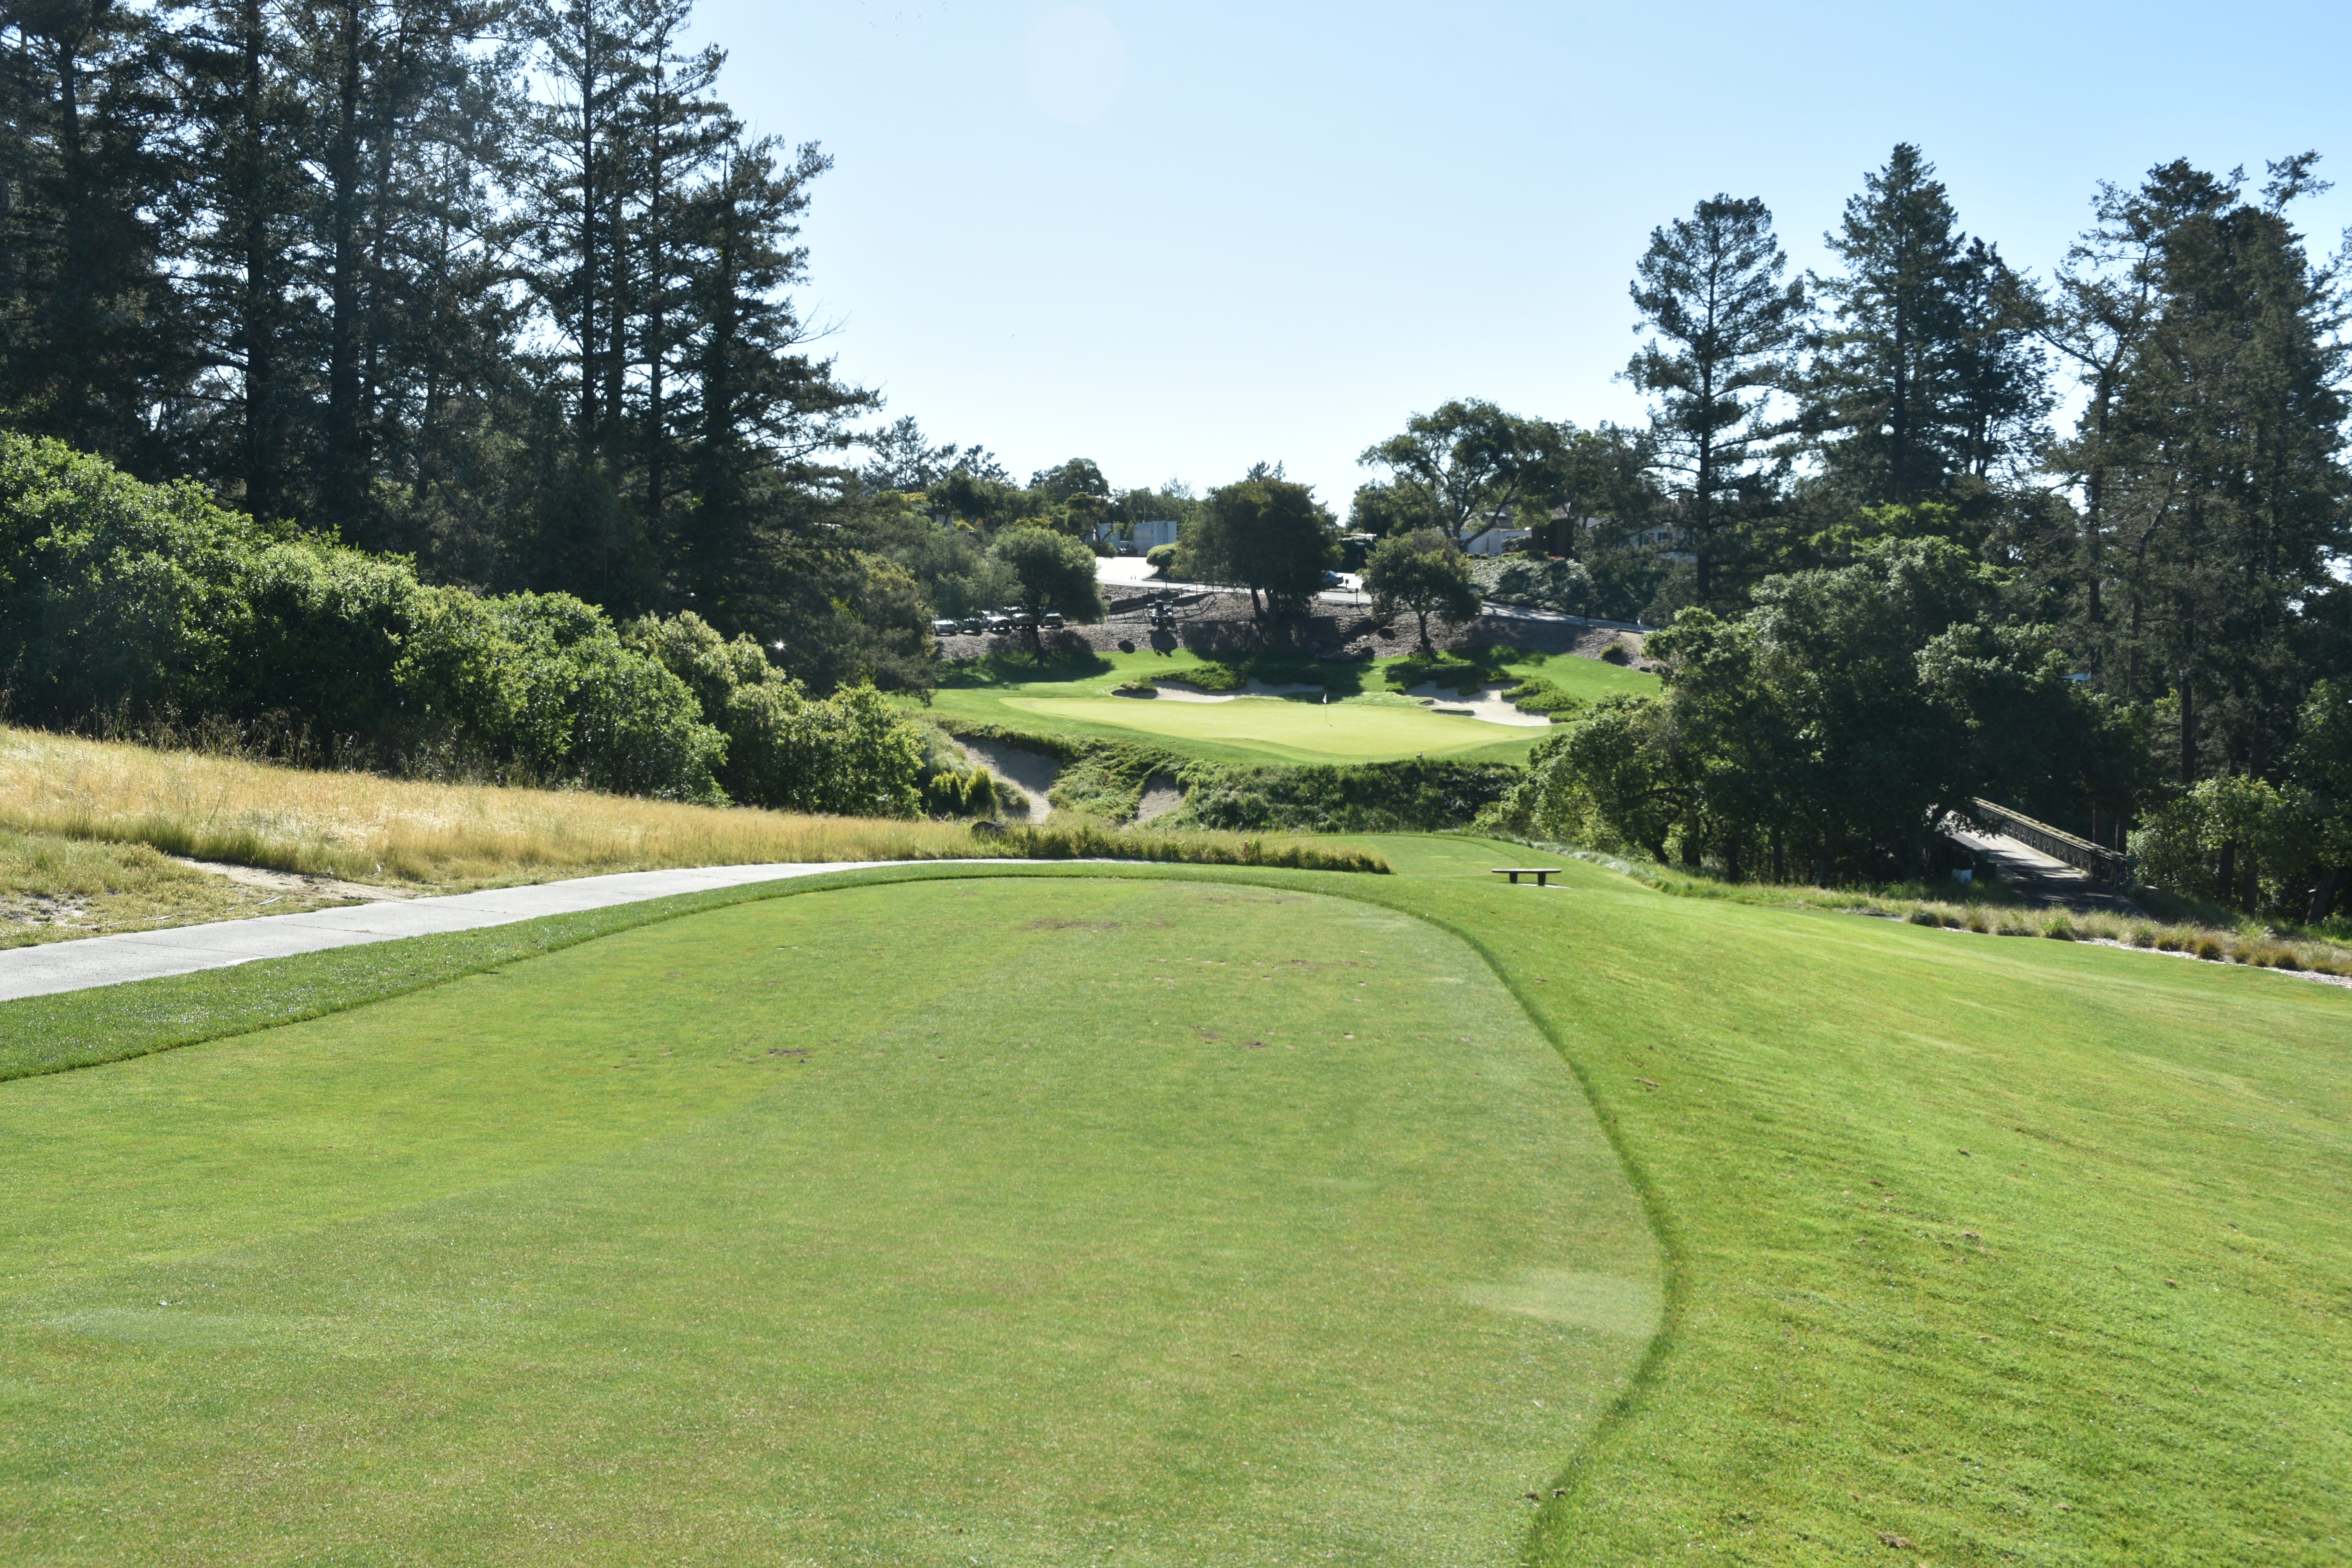
Once a par-5 hole, the opener at Pasatiempo requires a demanding downhill tee shot to a narrow fairway. Many players block it out to the right with the driving range (and out of bounds) looming on the left side. On a clear day, the Pacific Ocean can be seen in the background from the tee
Kudos to the Pasatiempo grounds crew led by superintendent Justin Mandon for continually upgrading the presentation of Pasatiempo
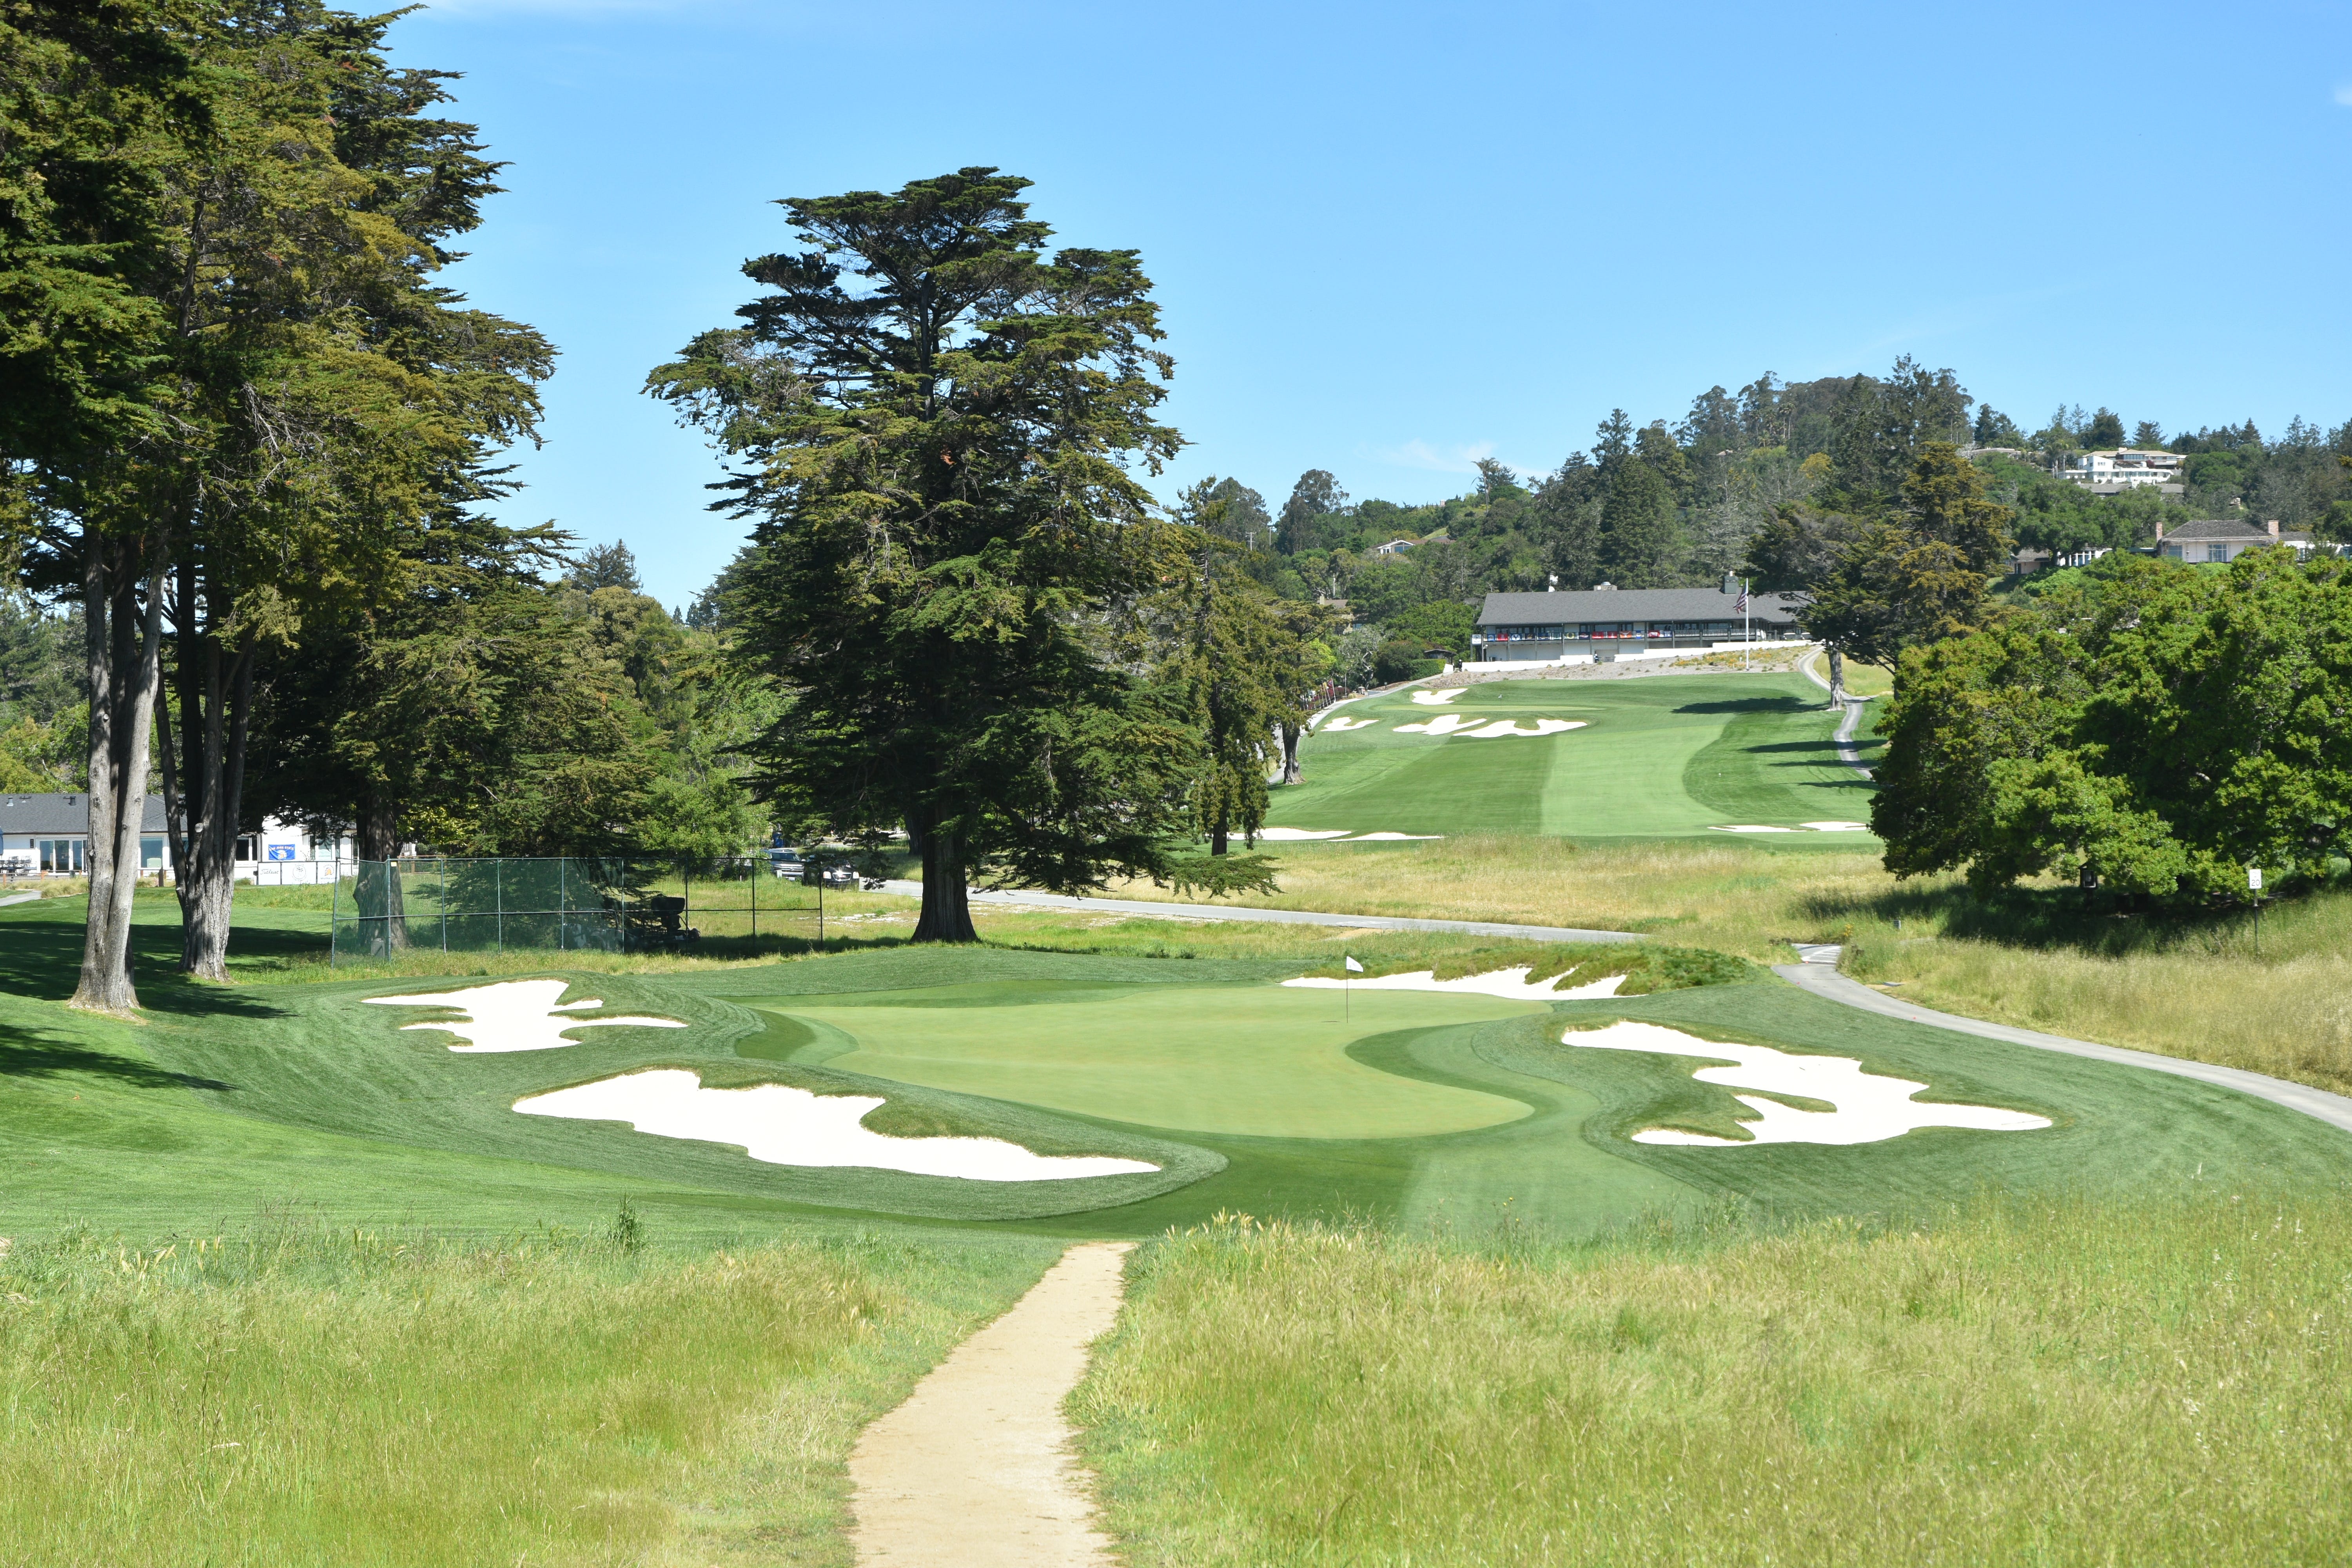
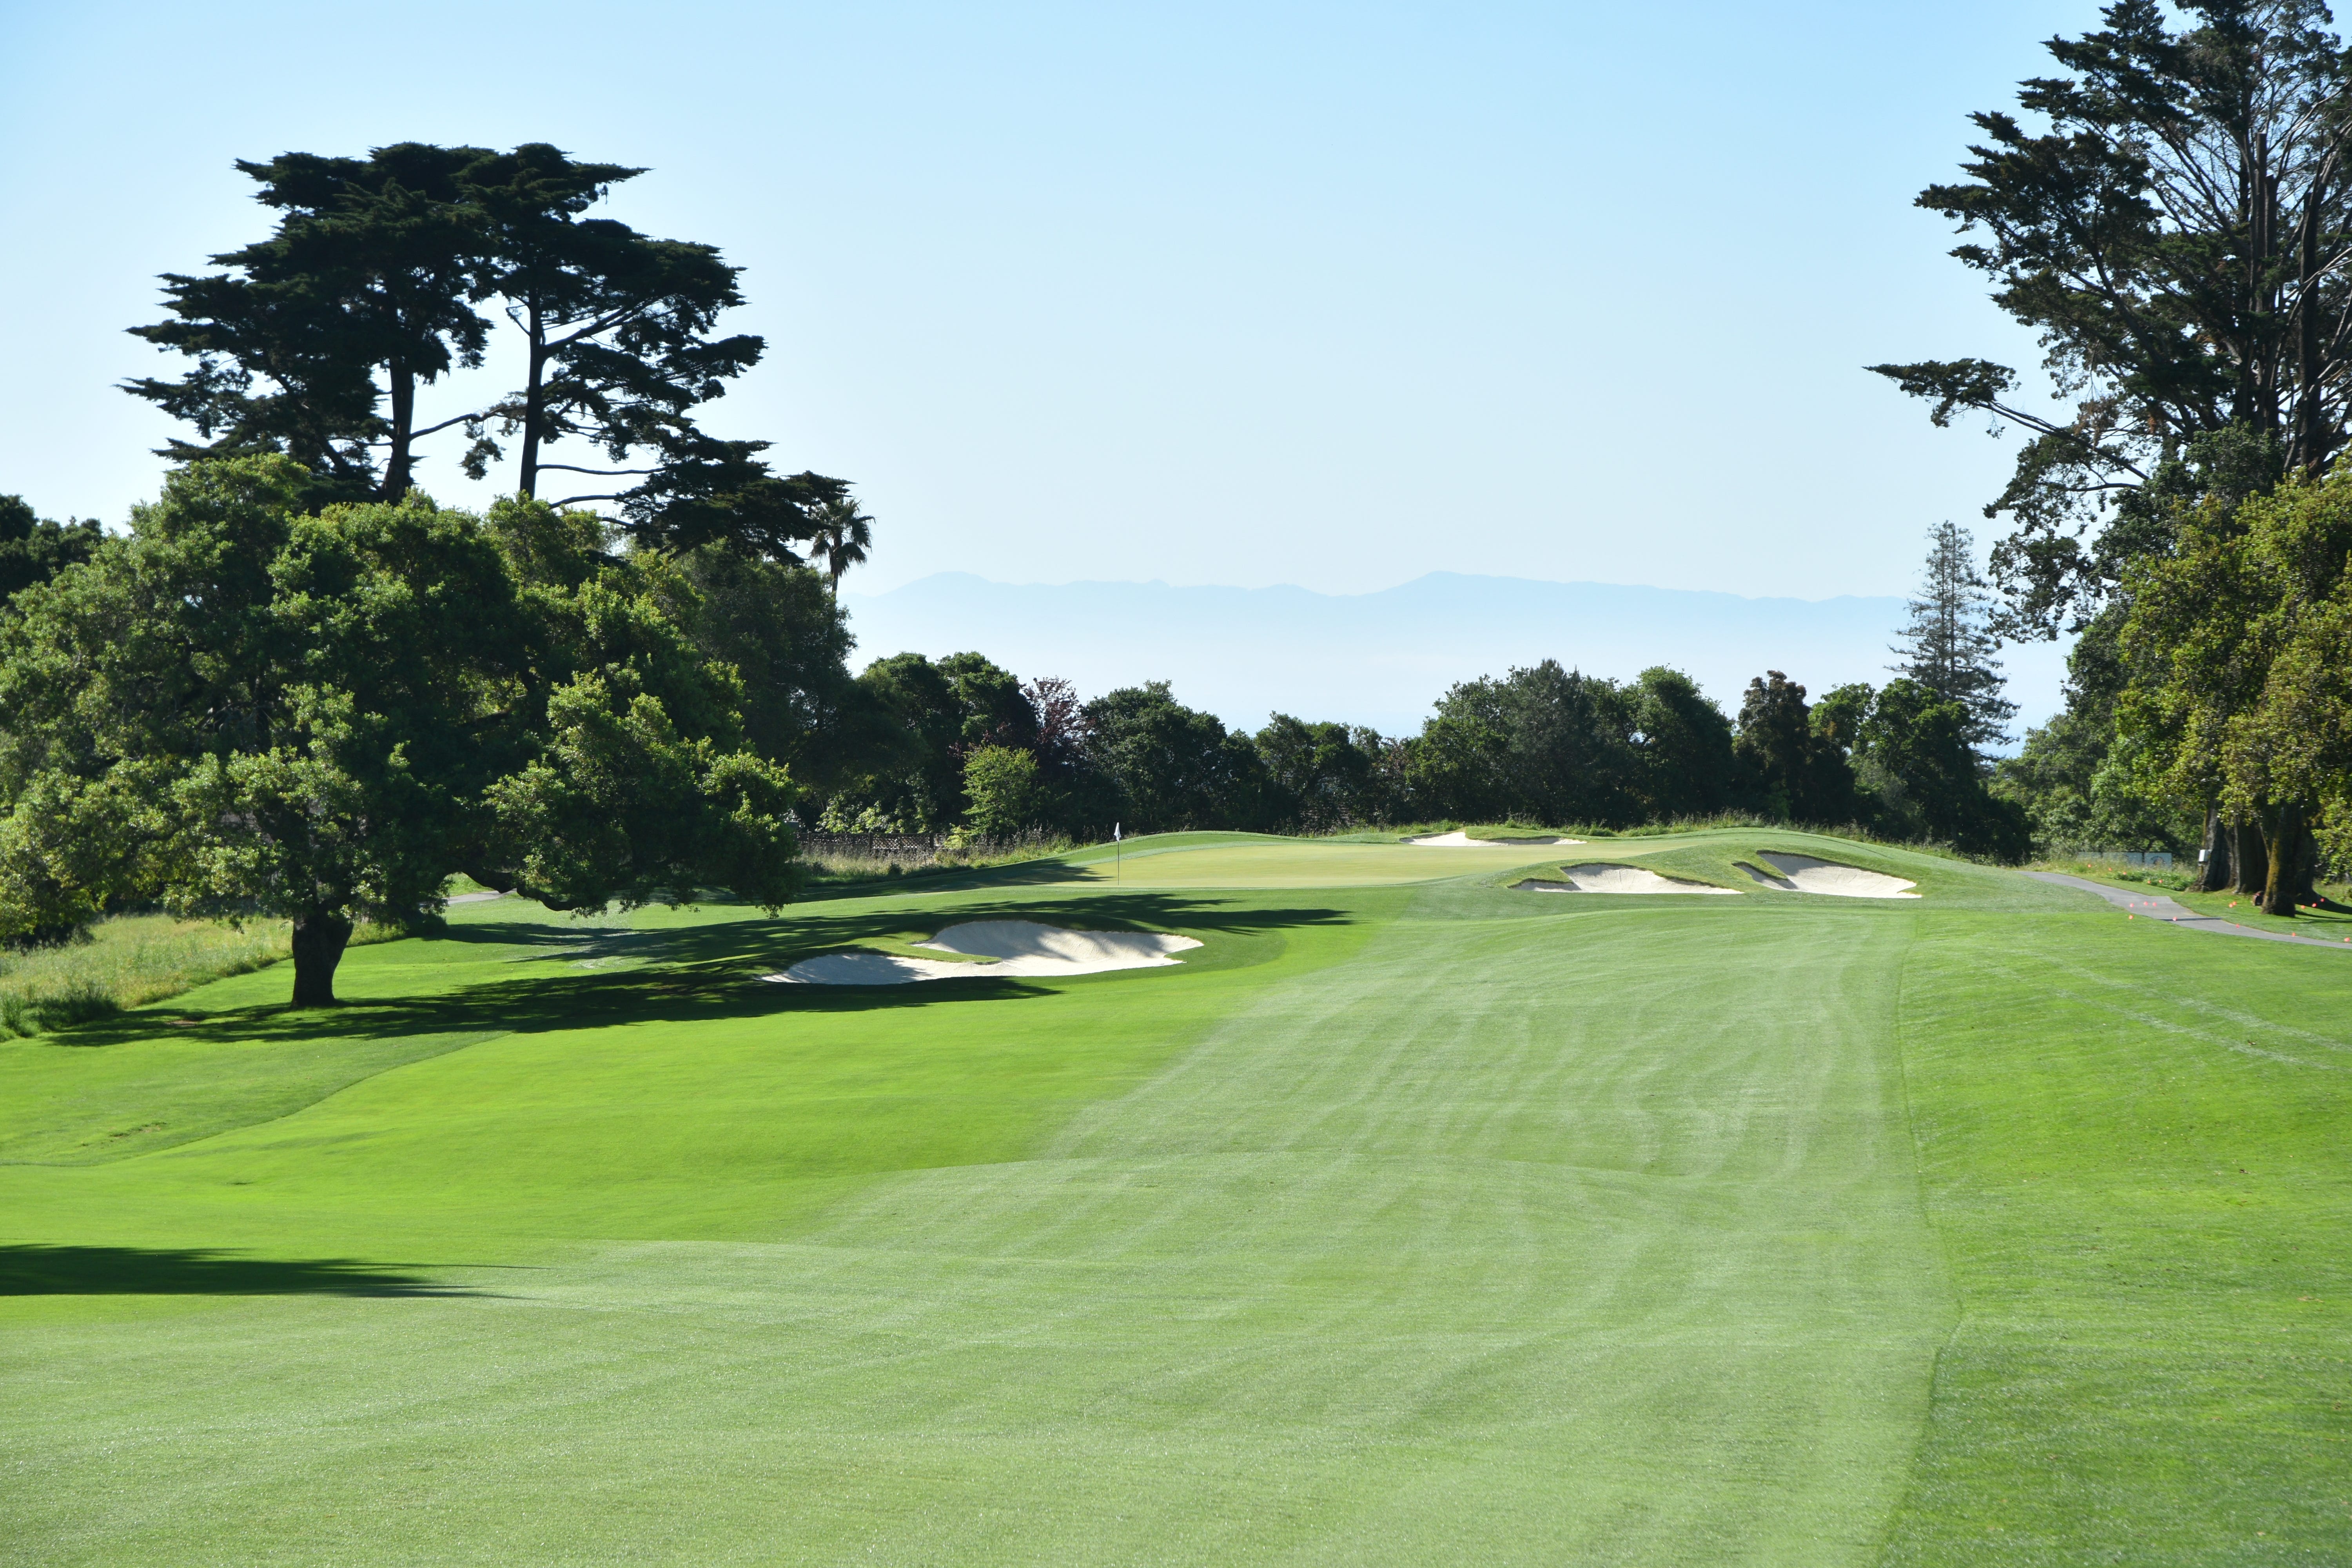
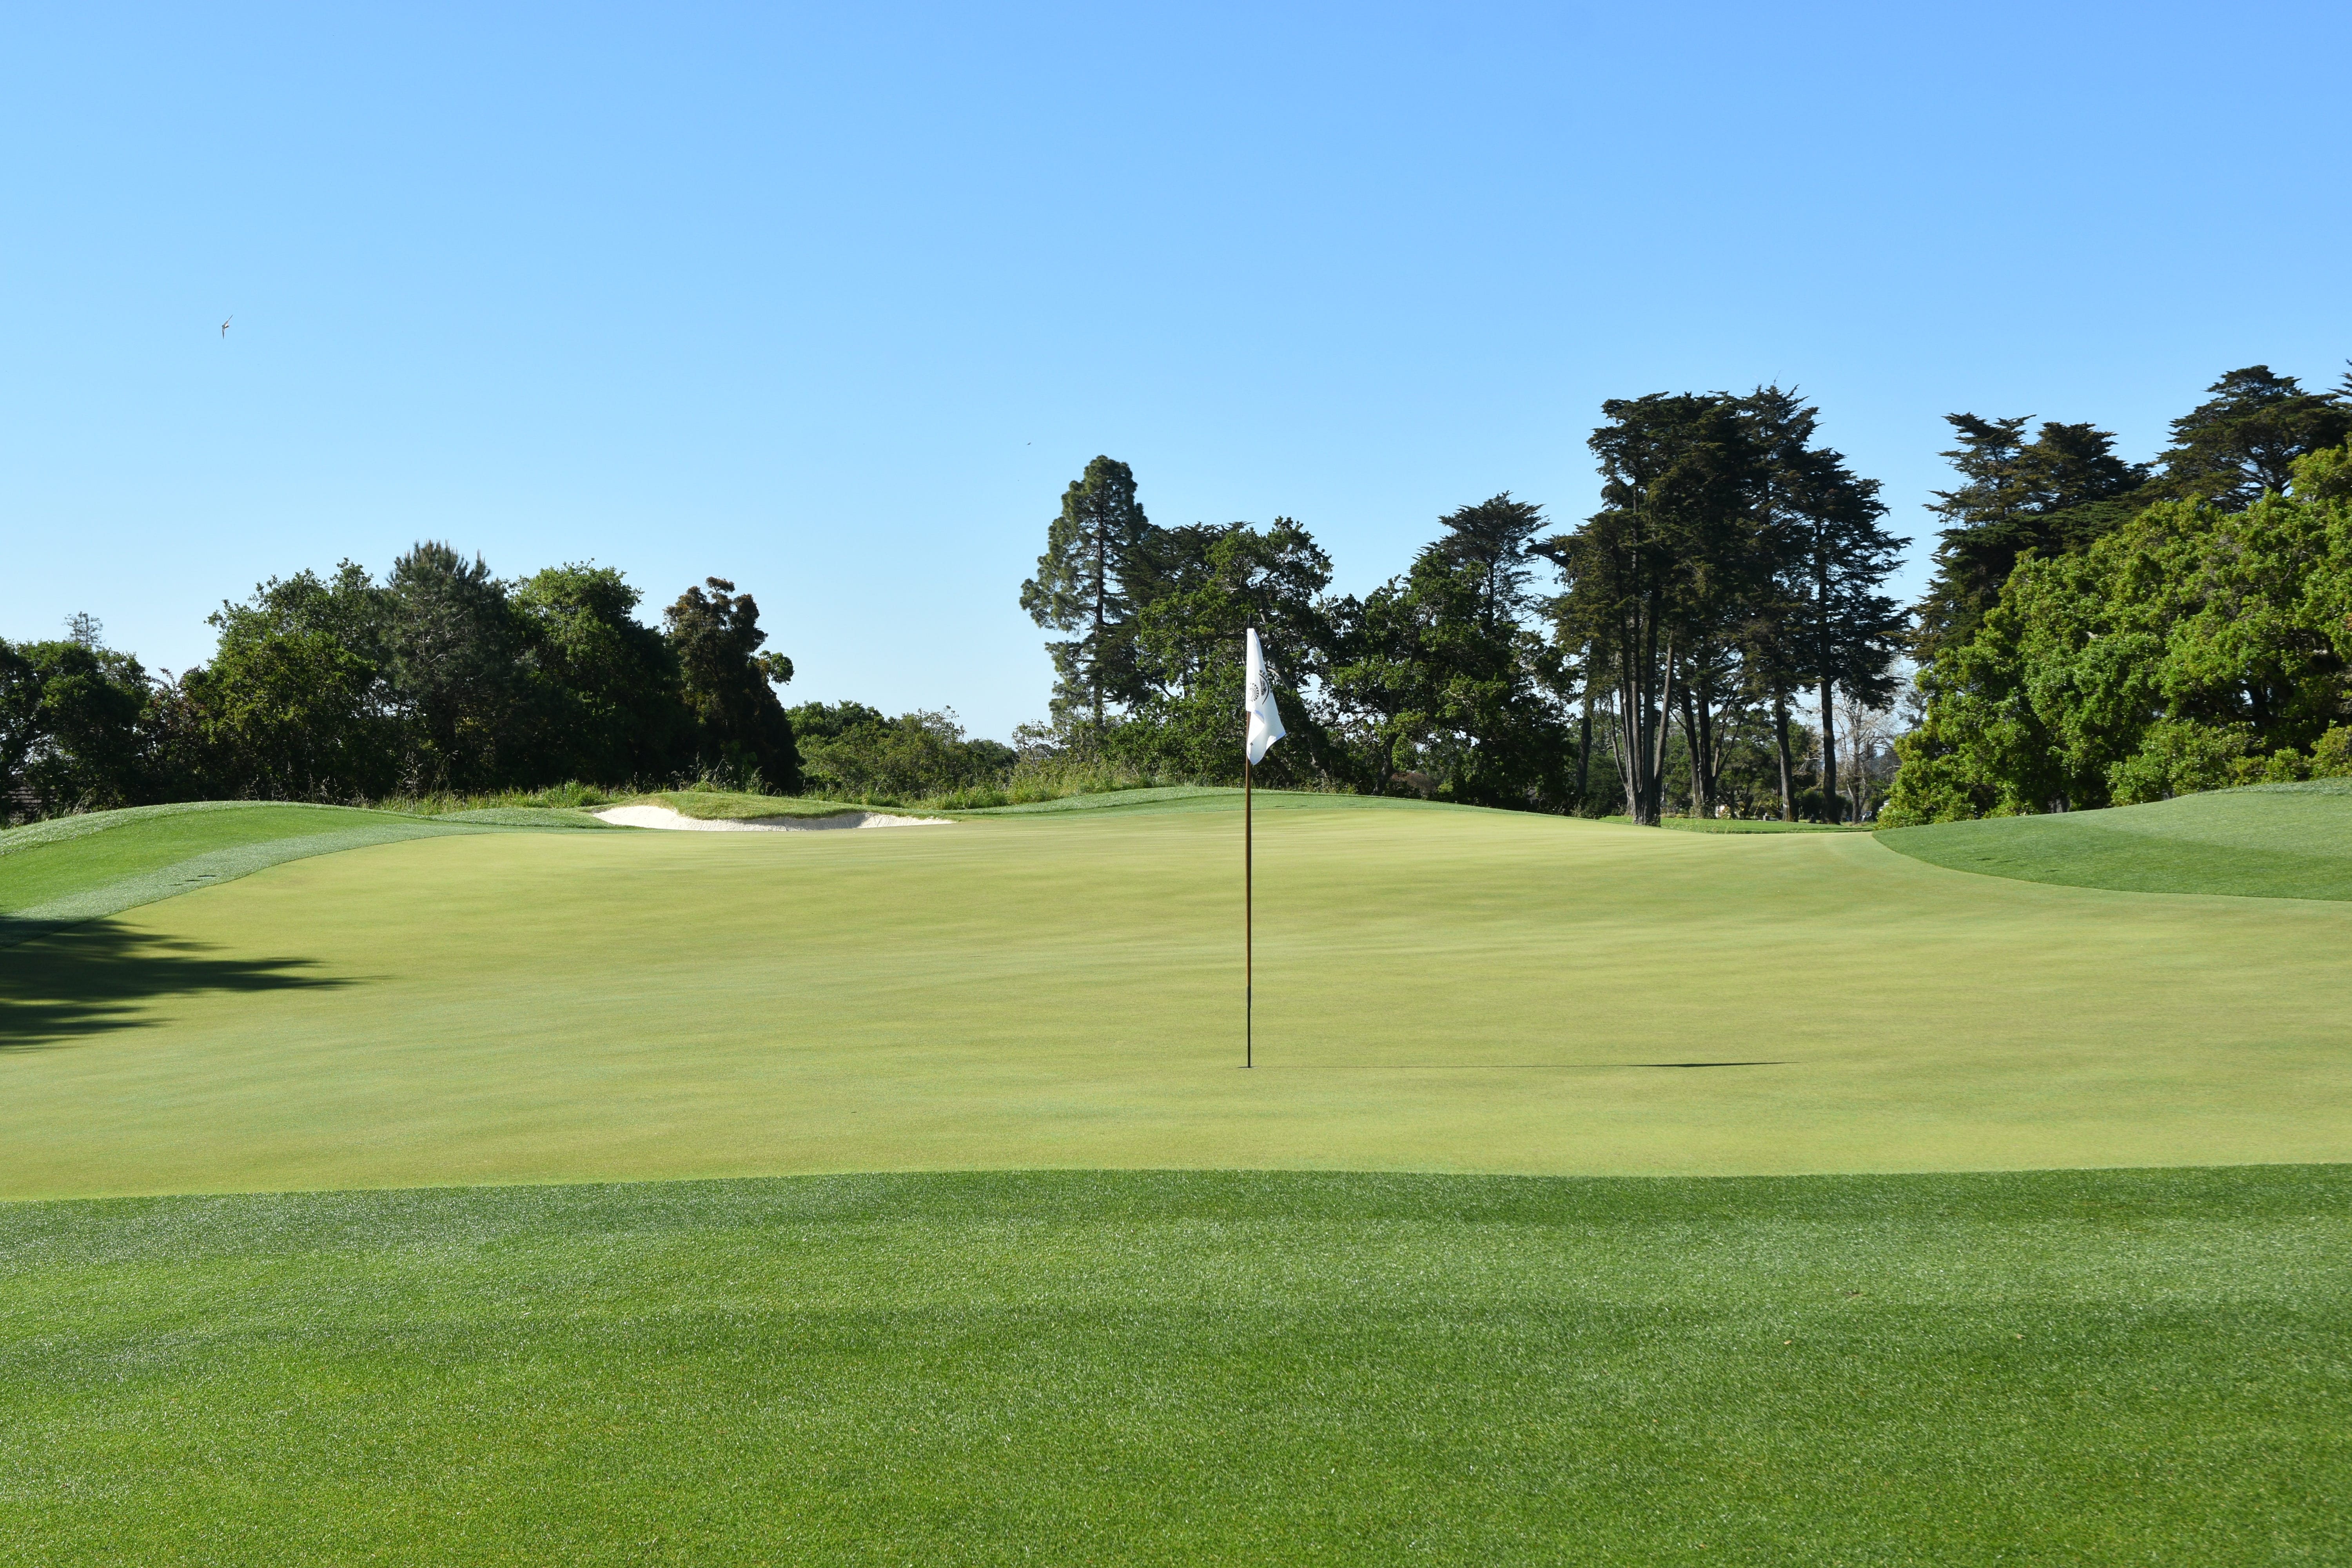
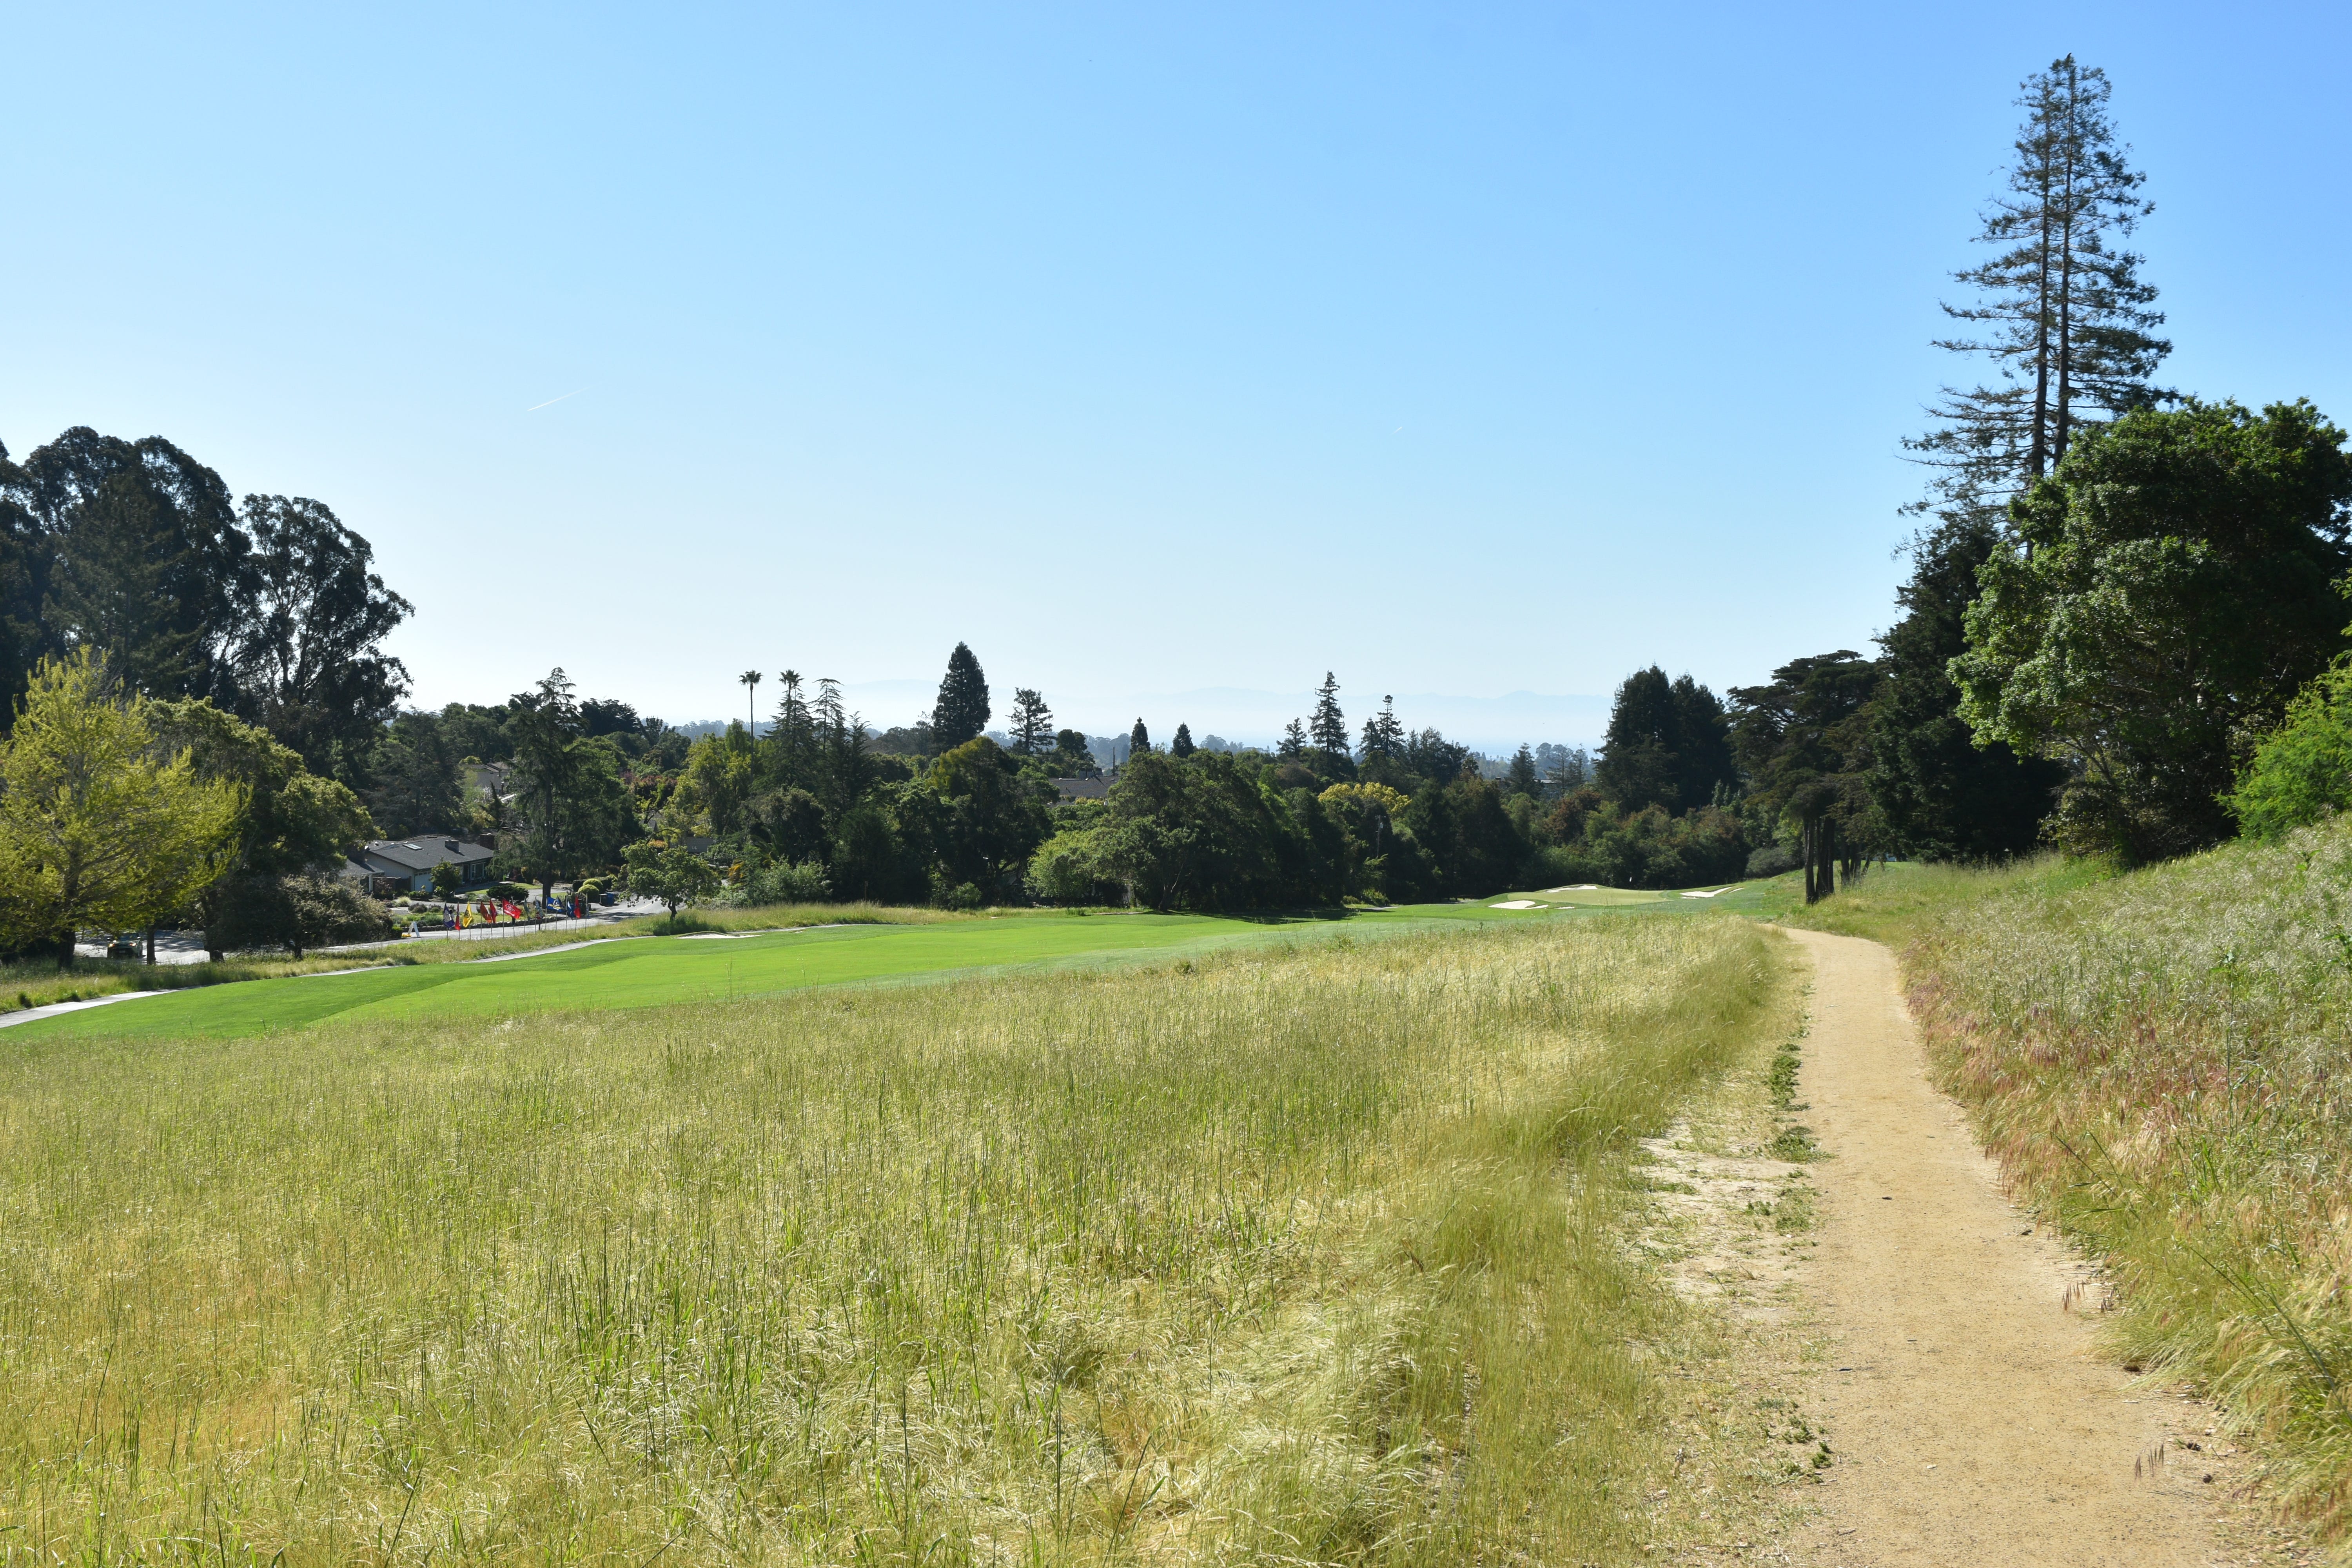
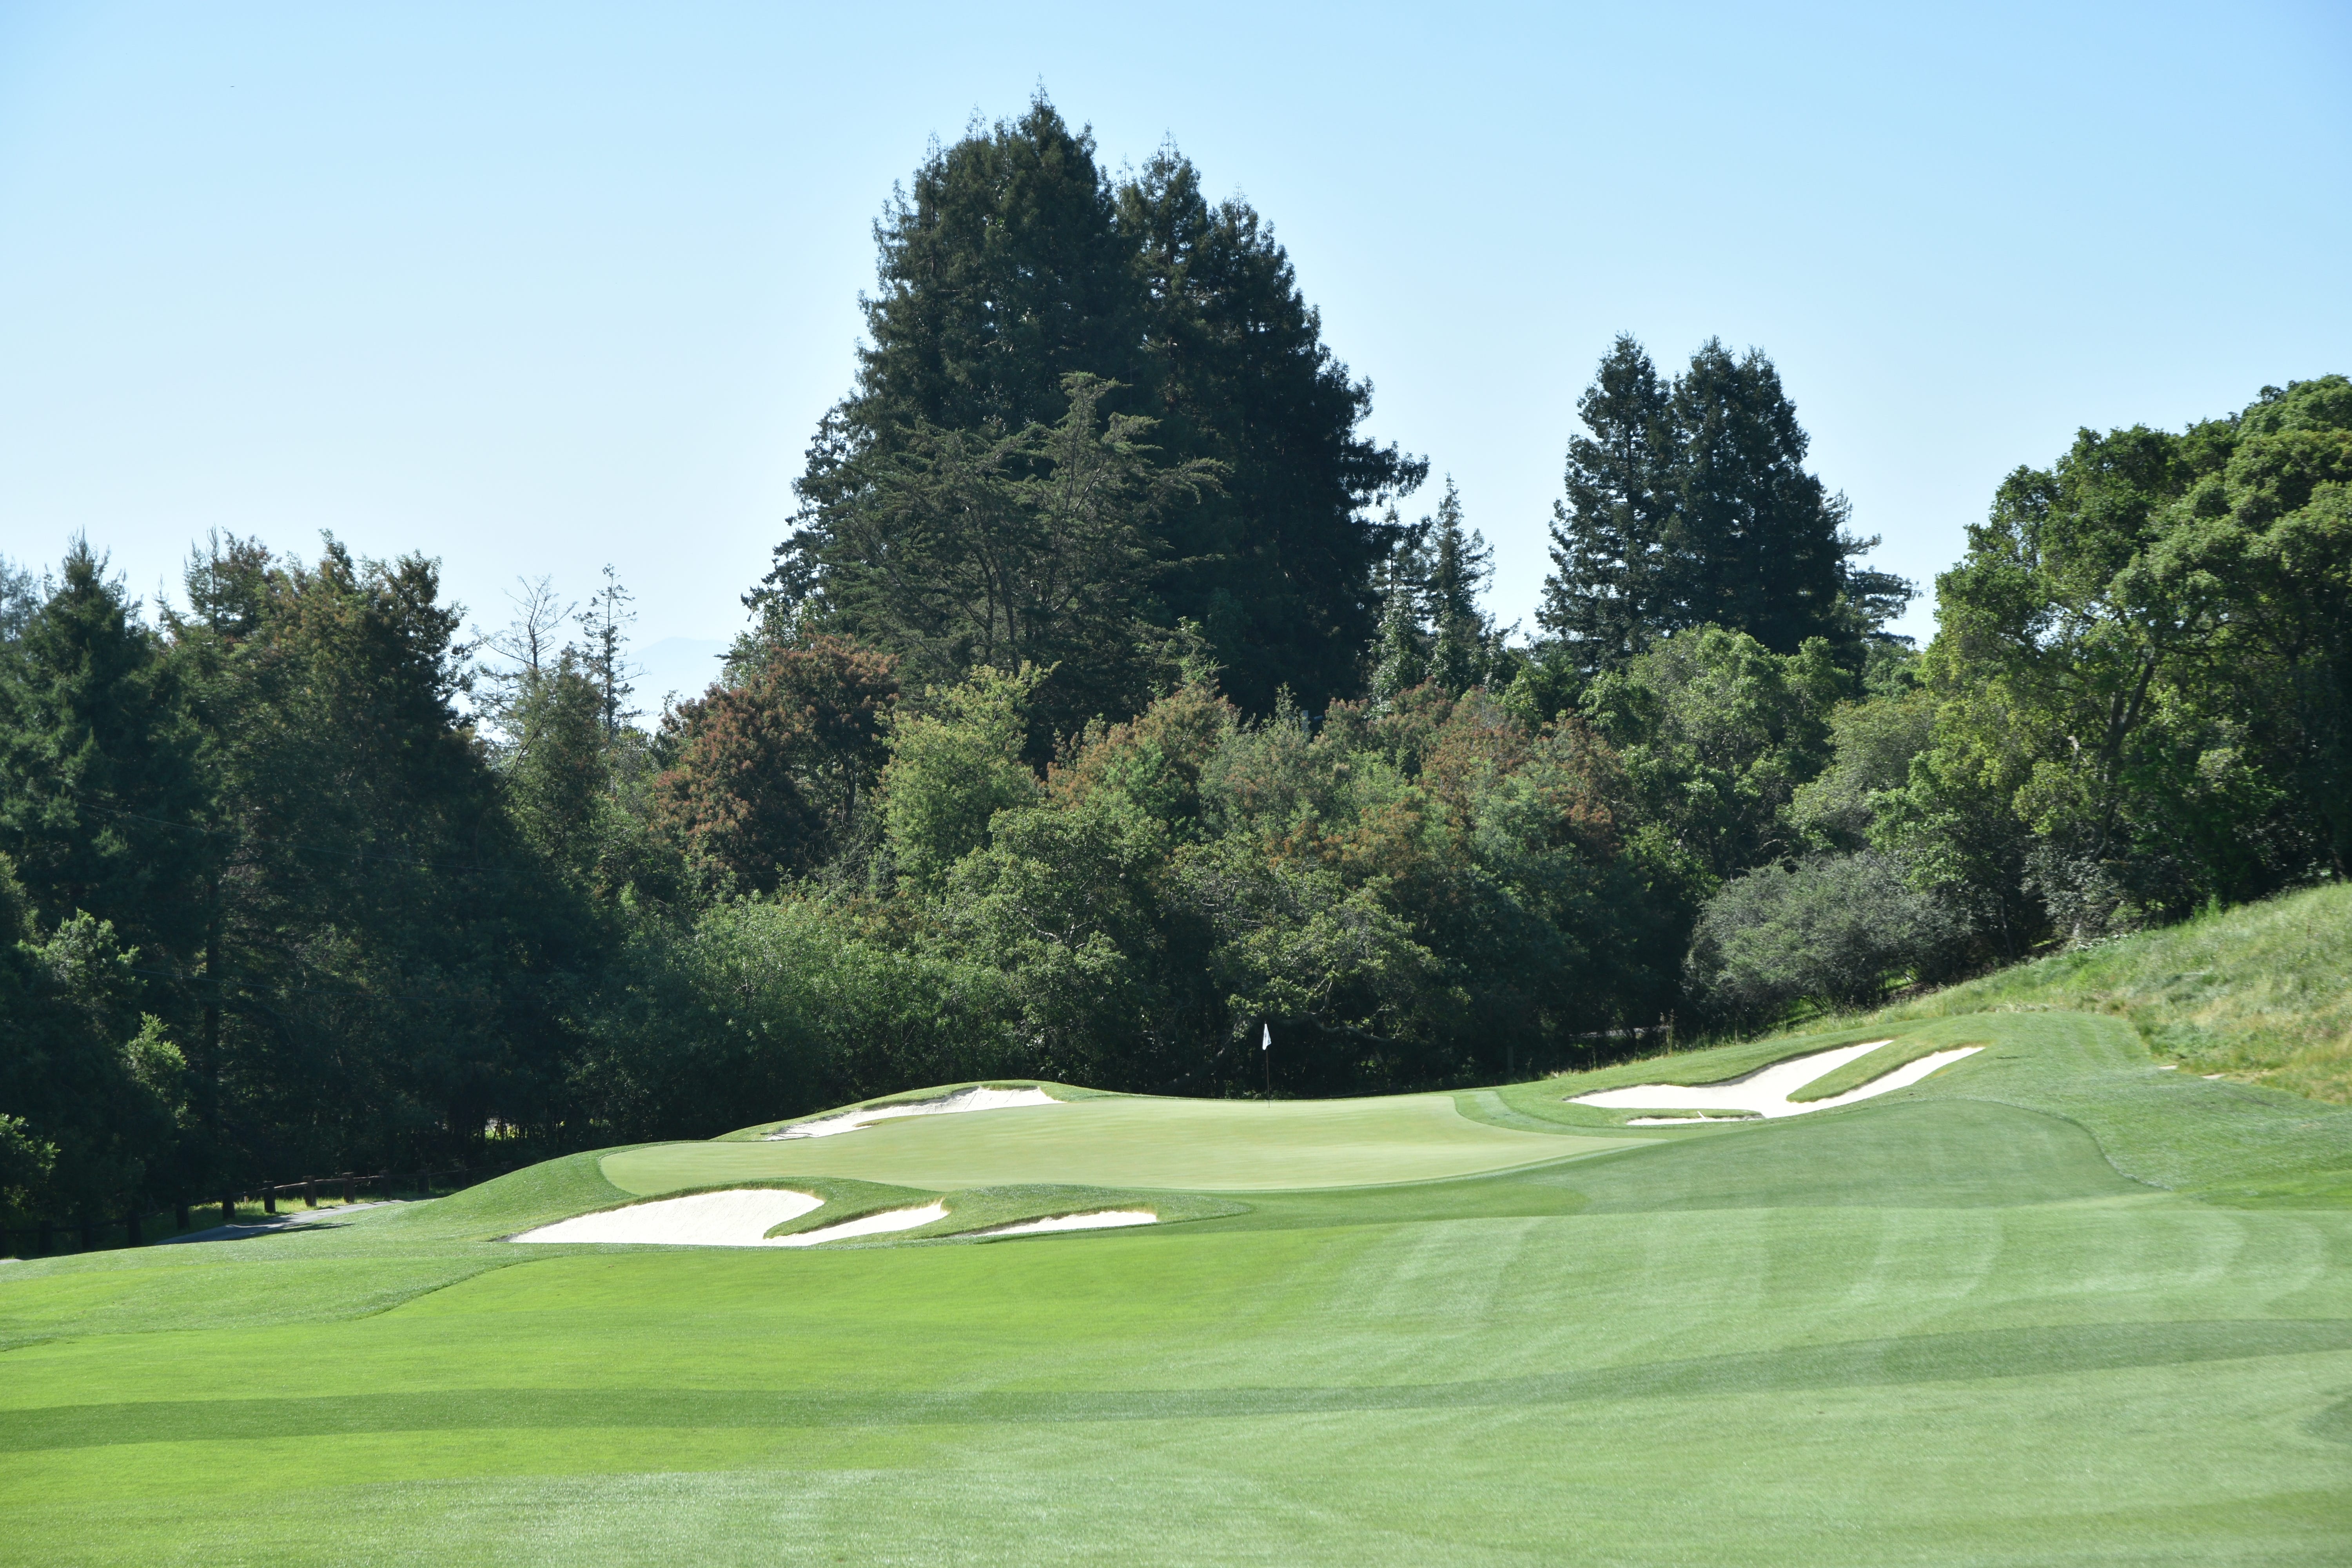
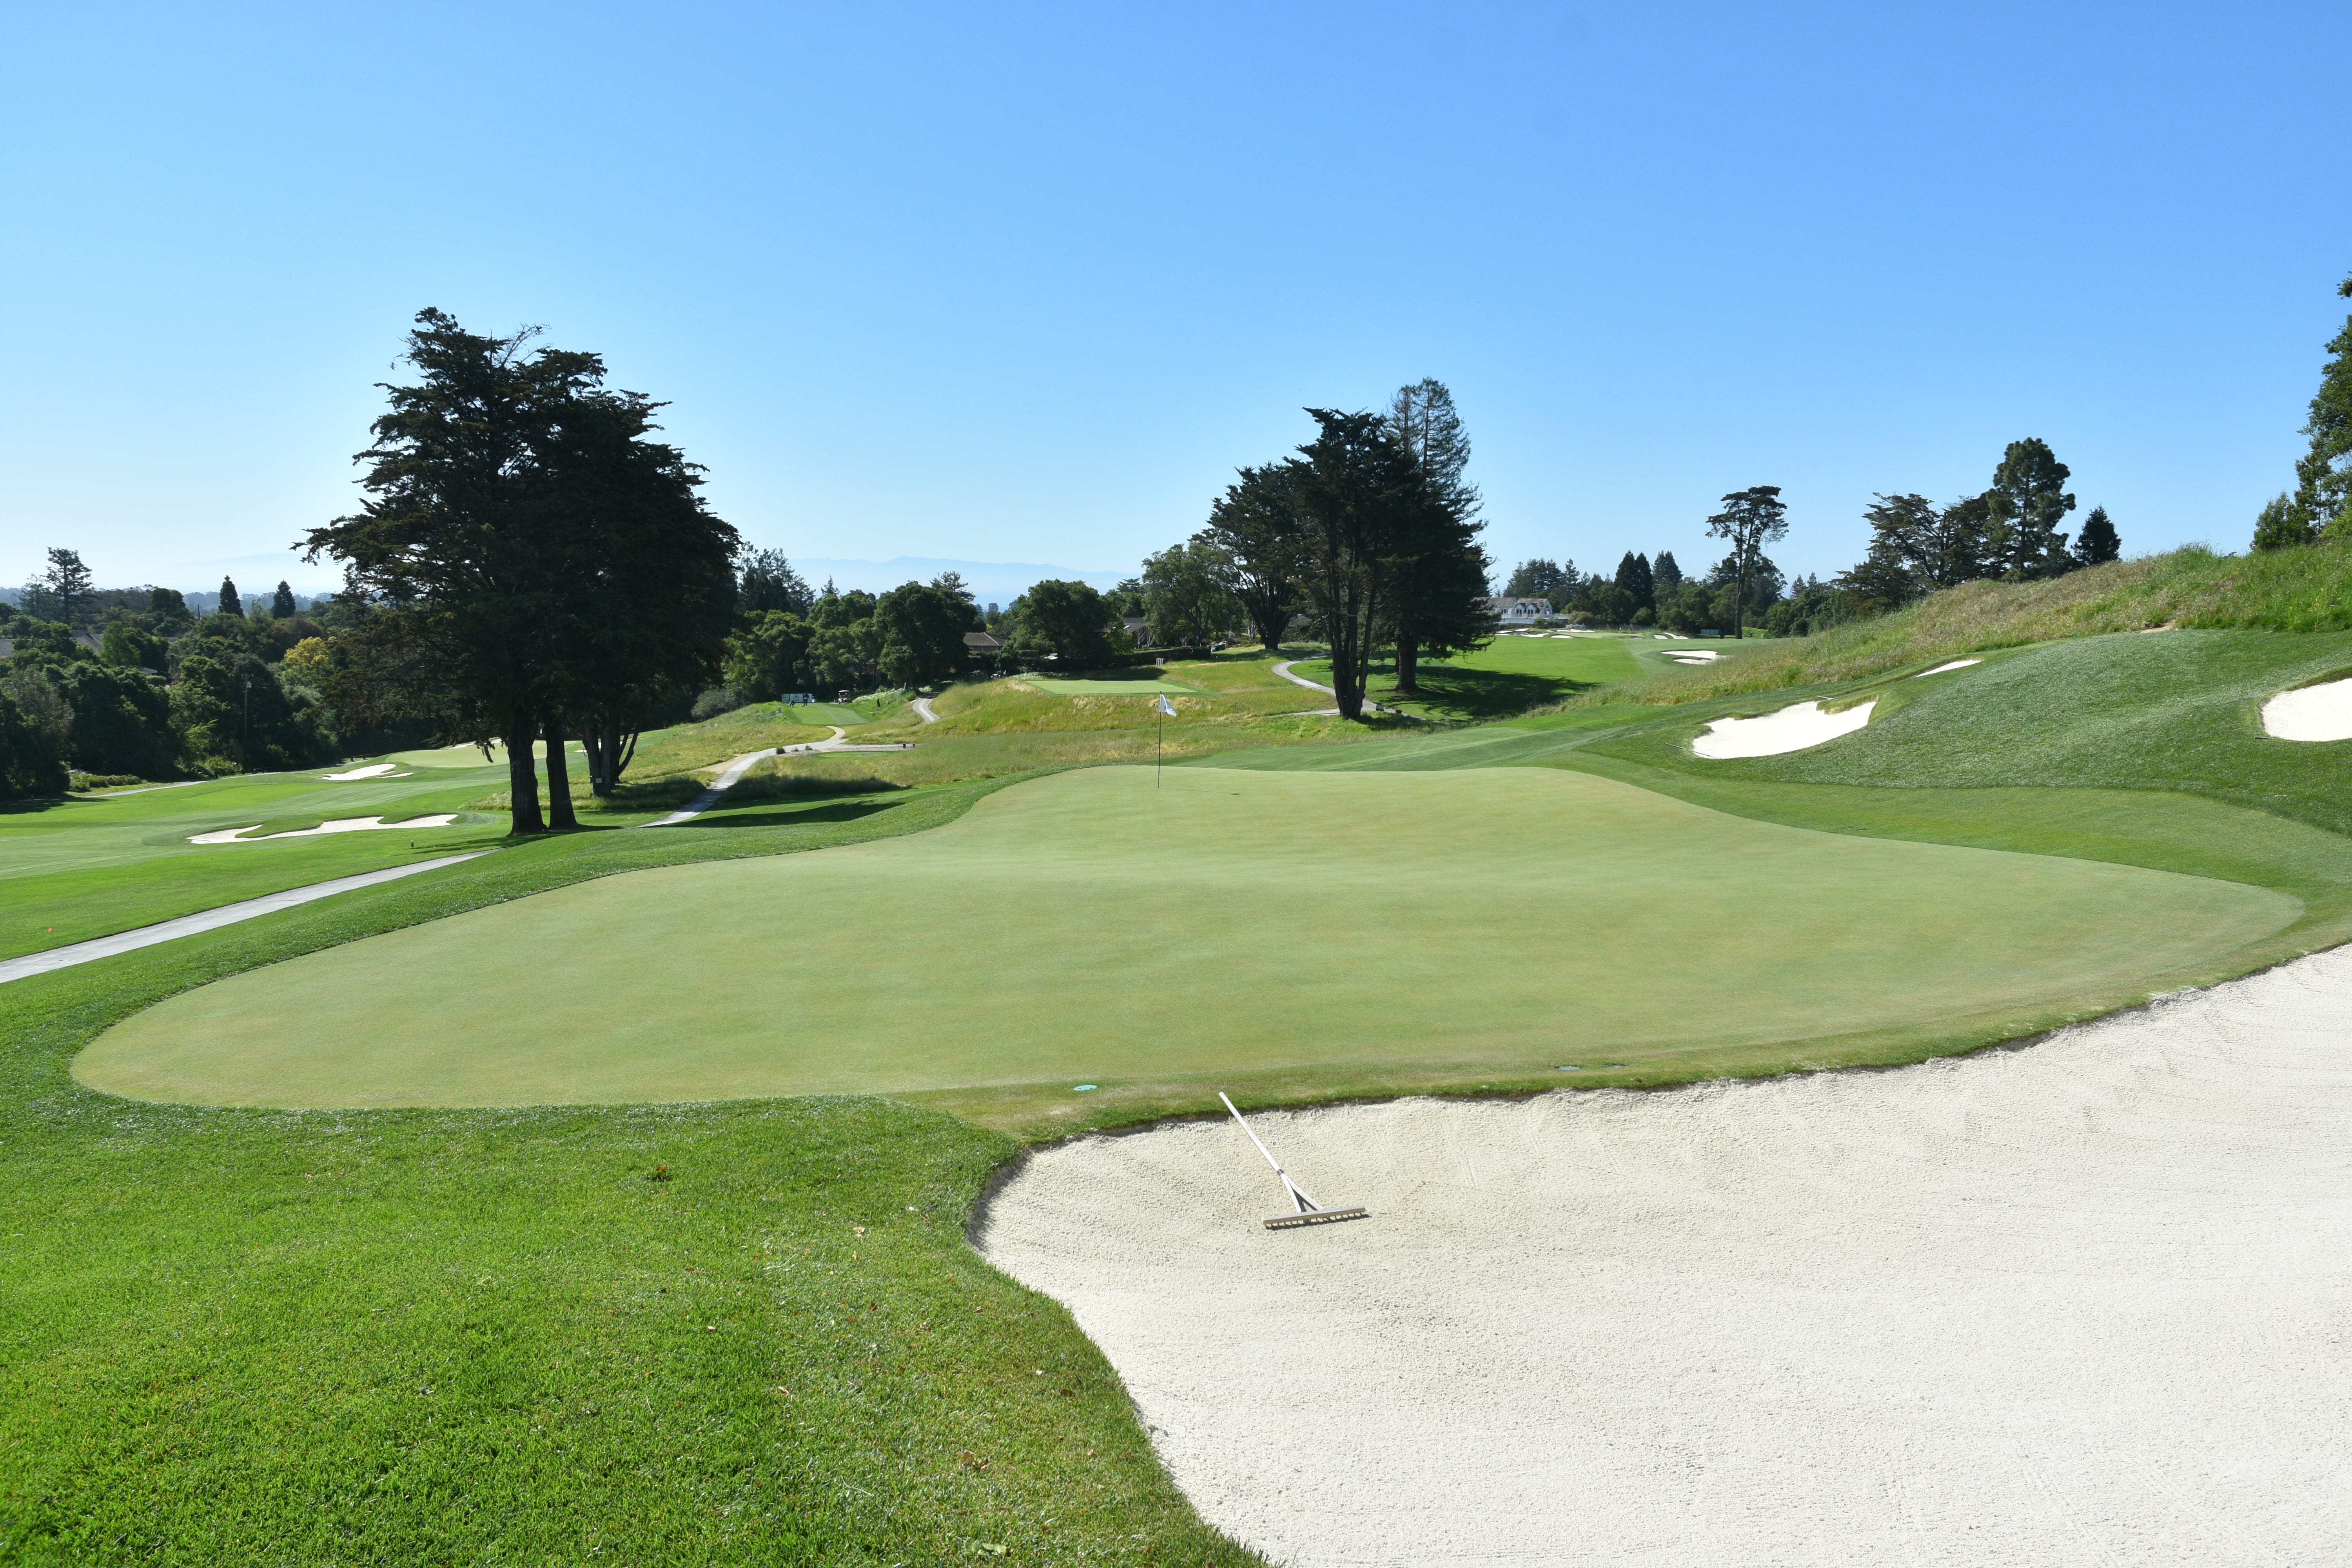
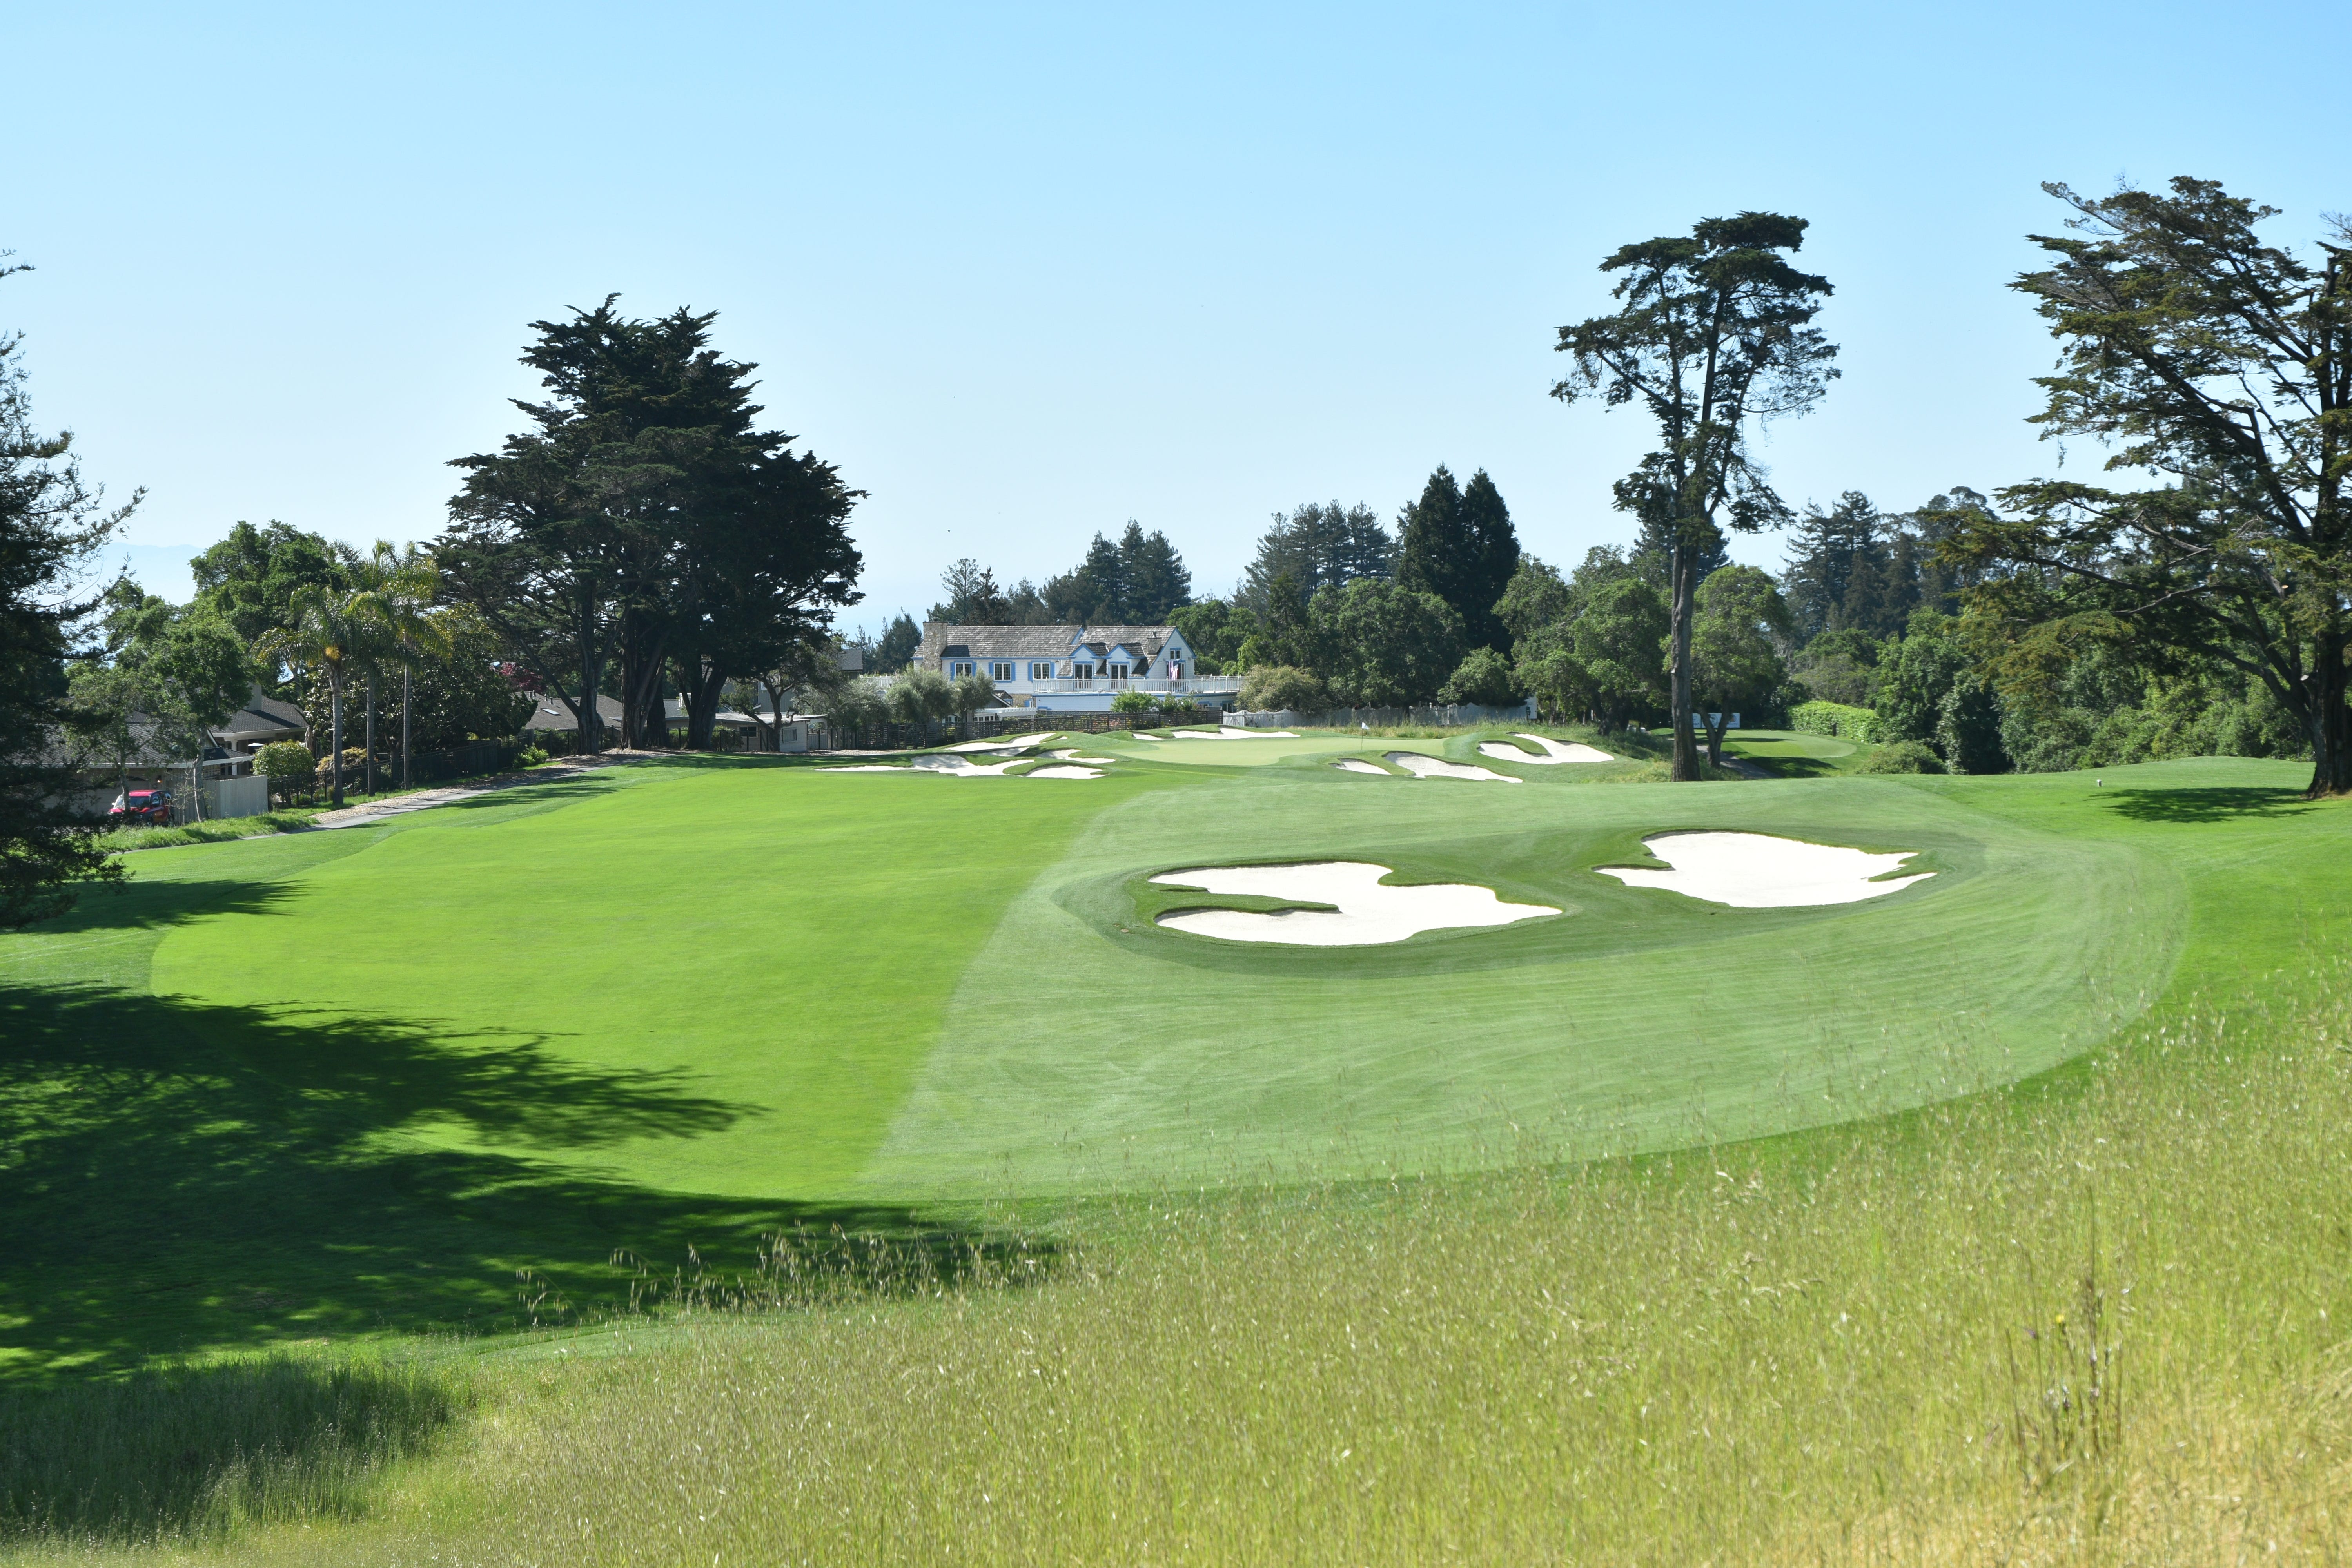
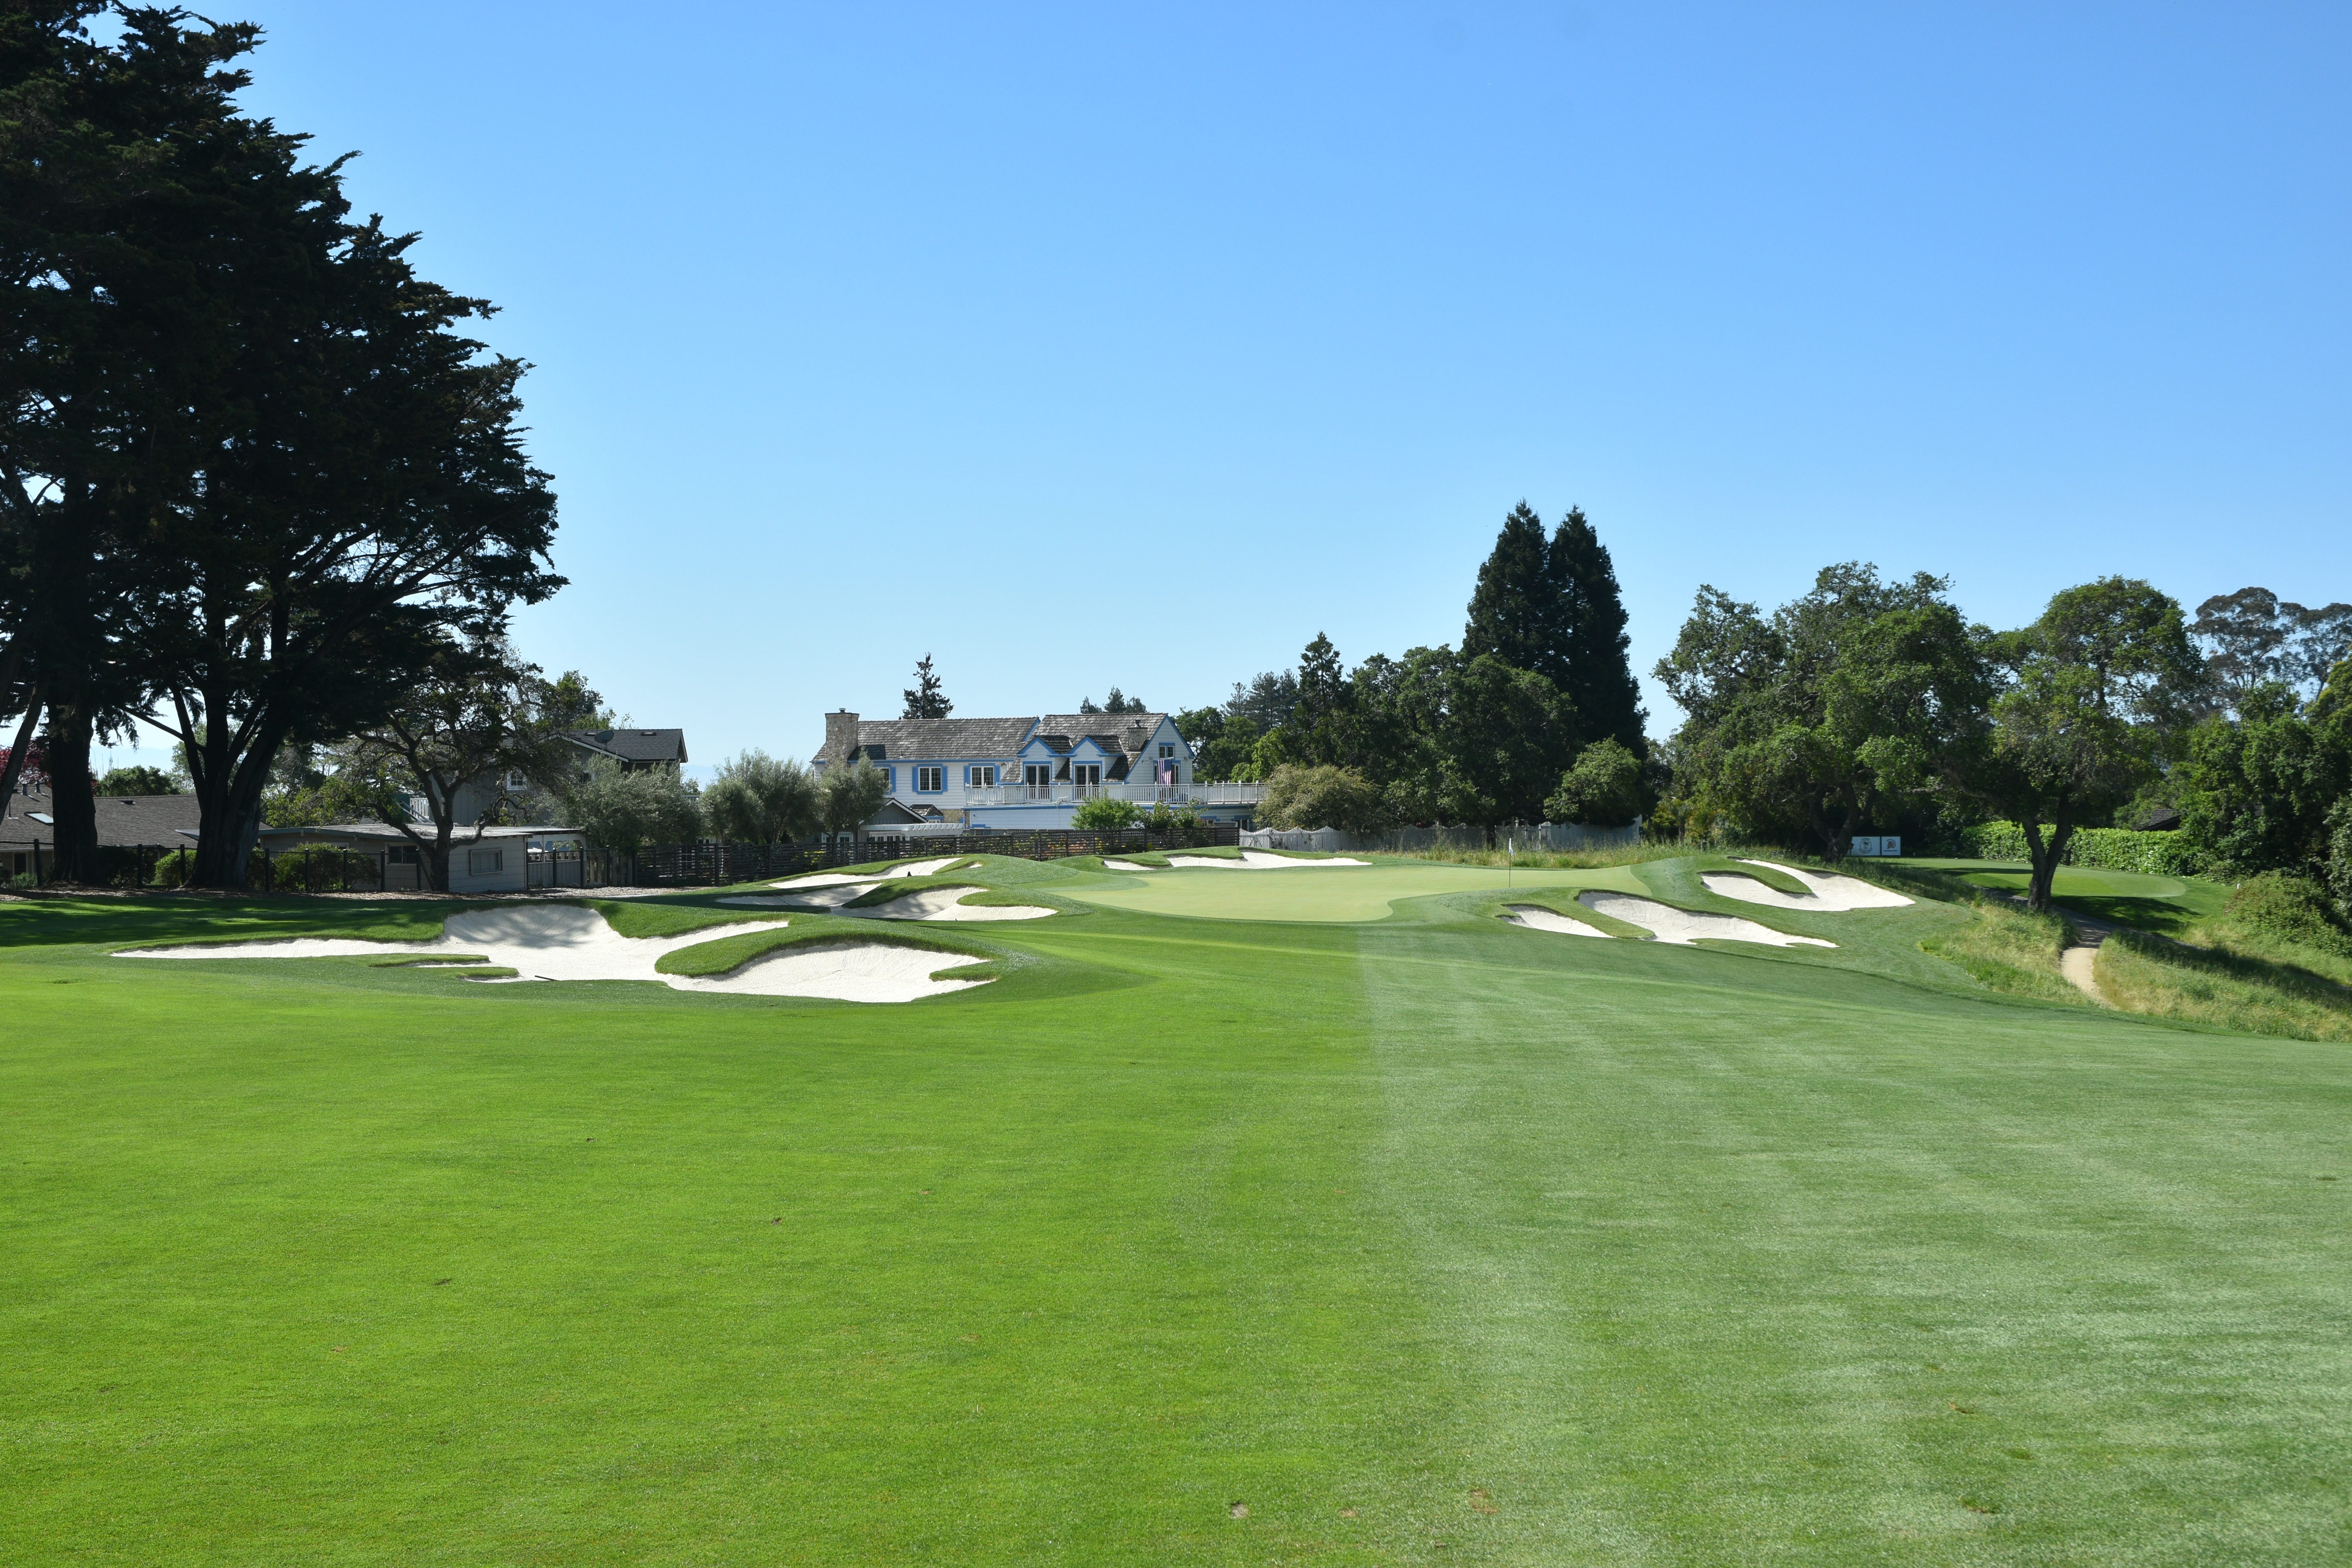
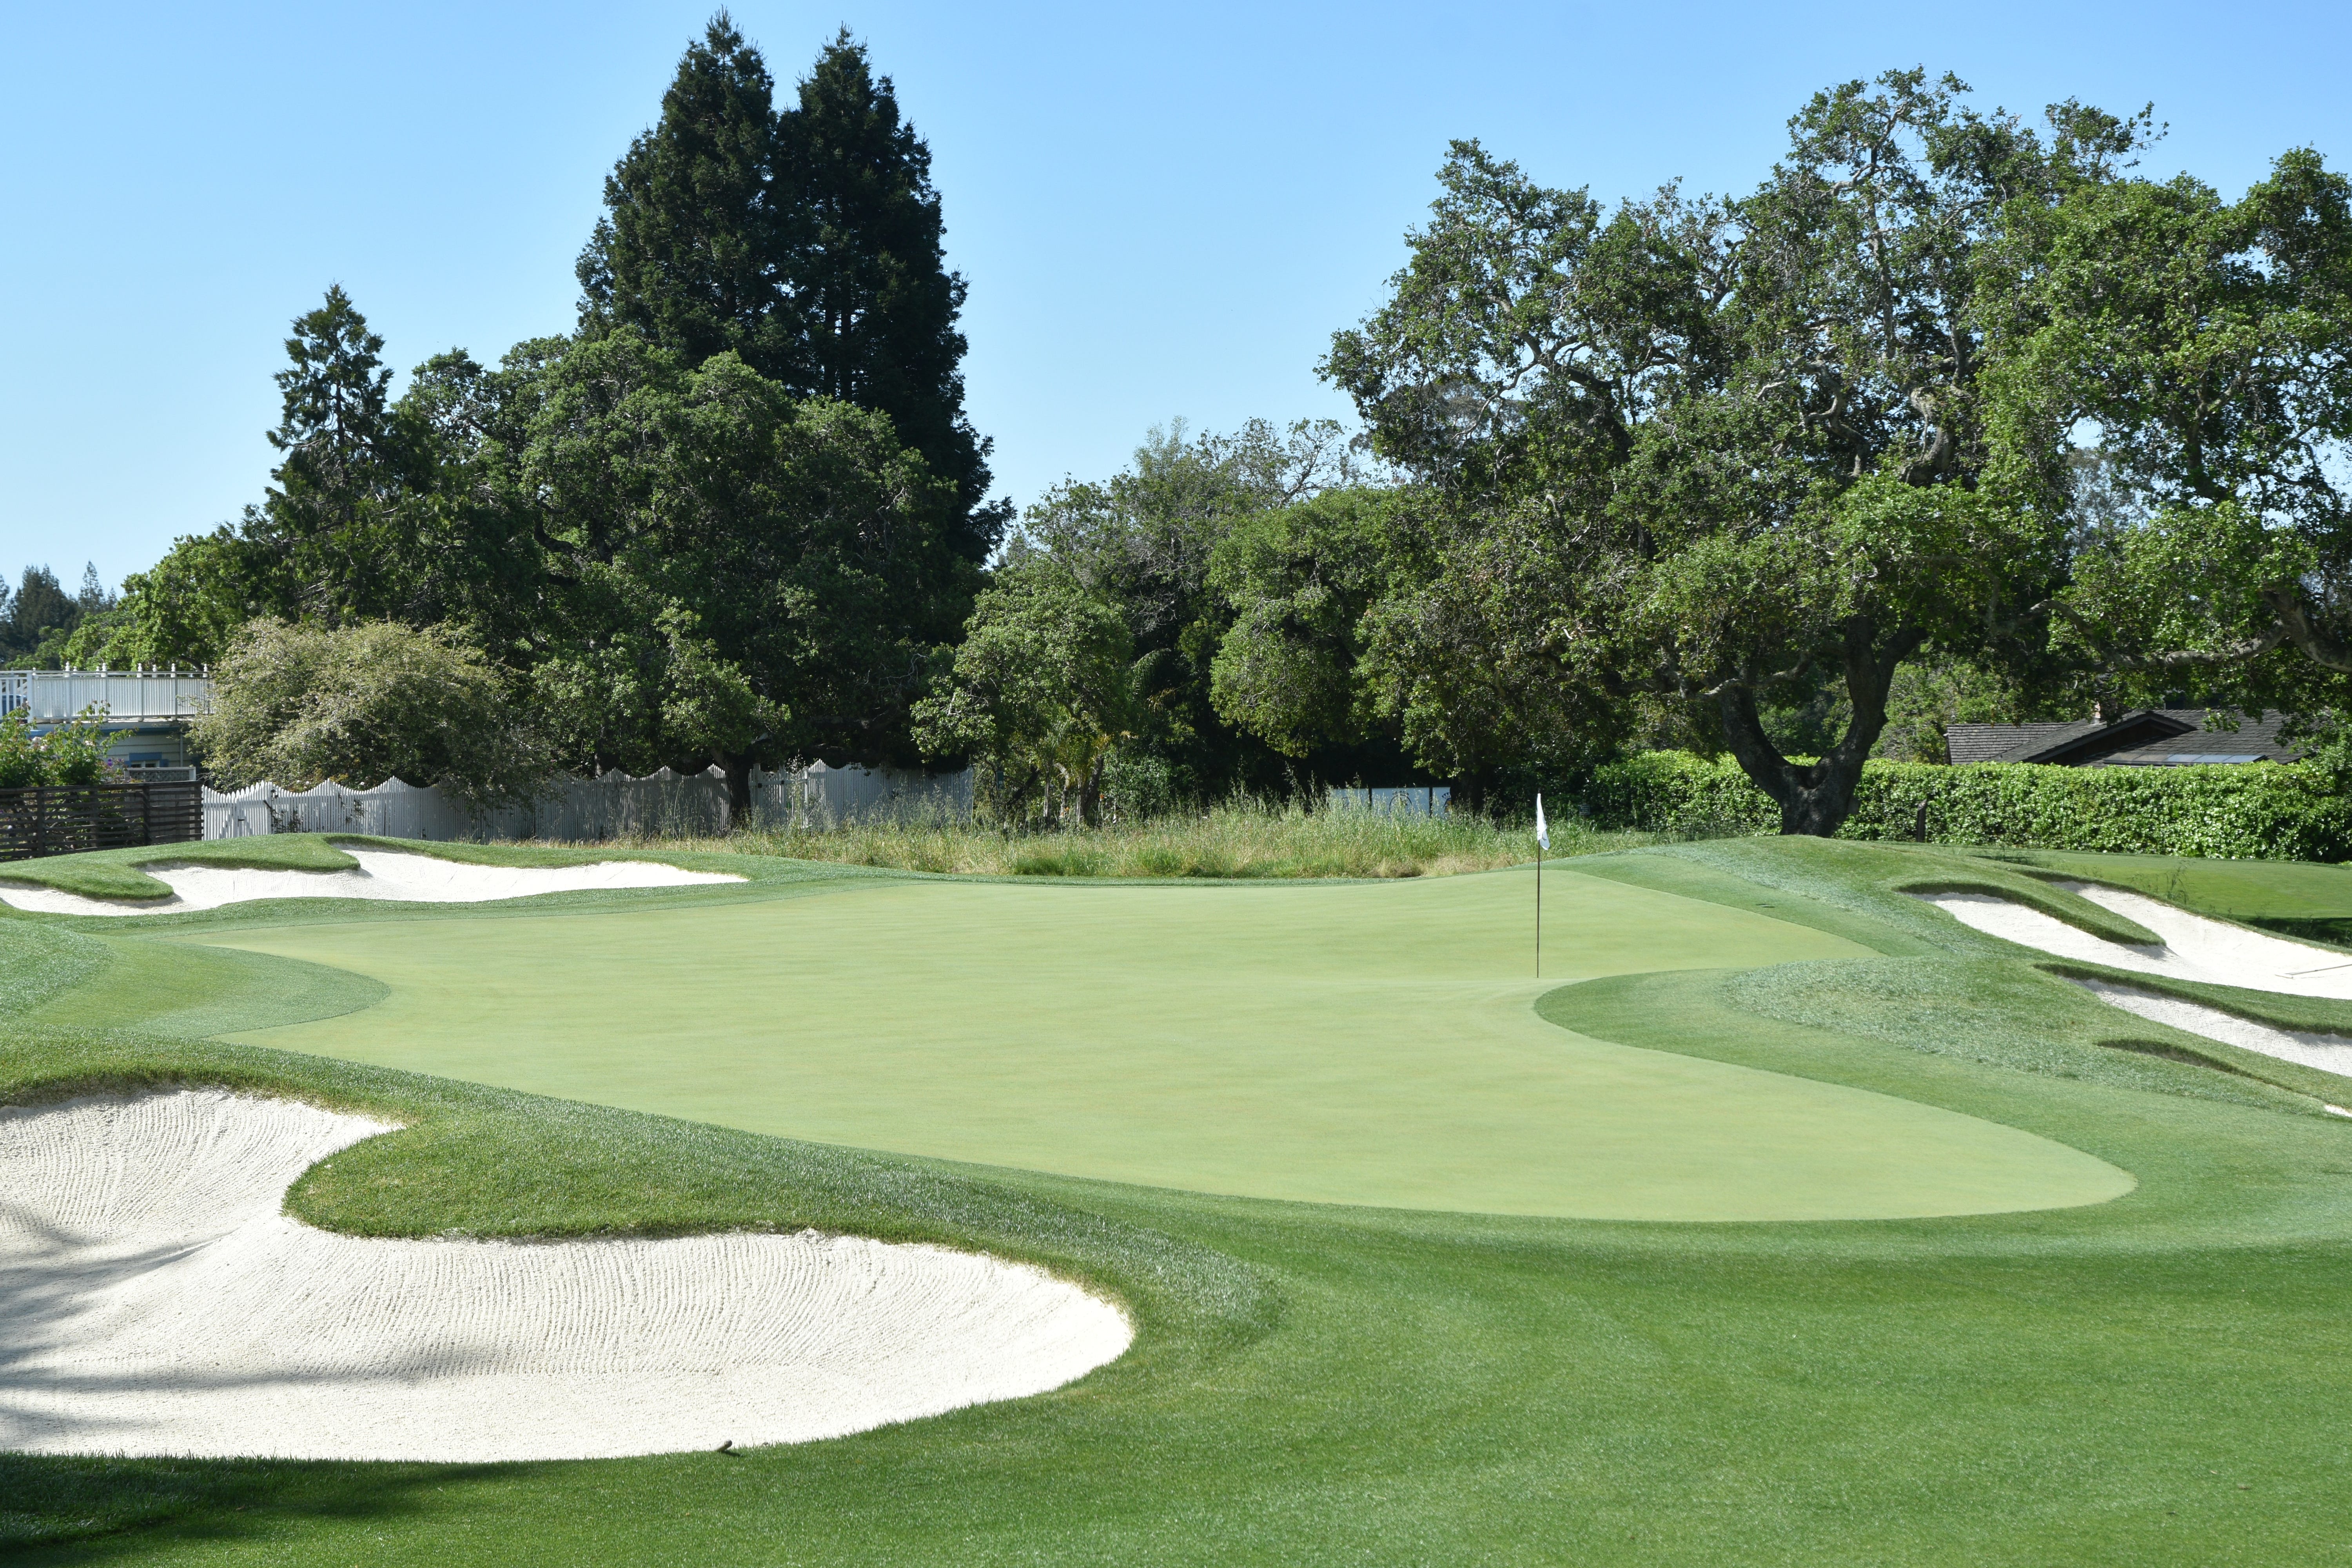
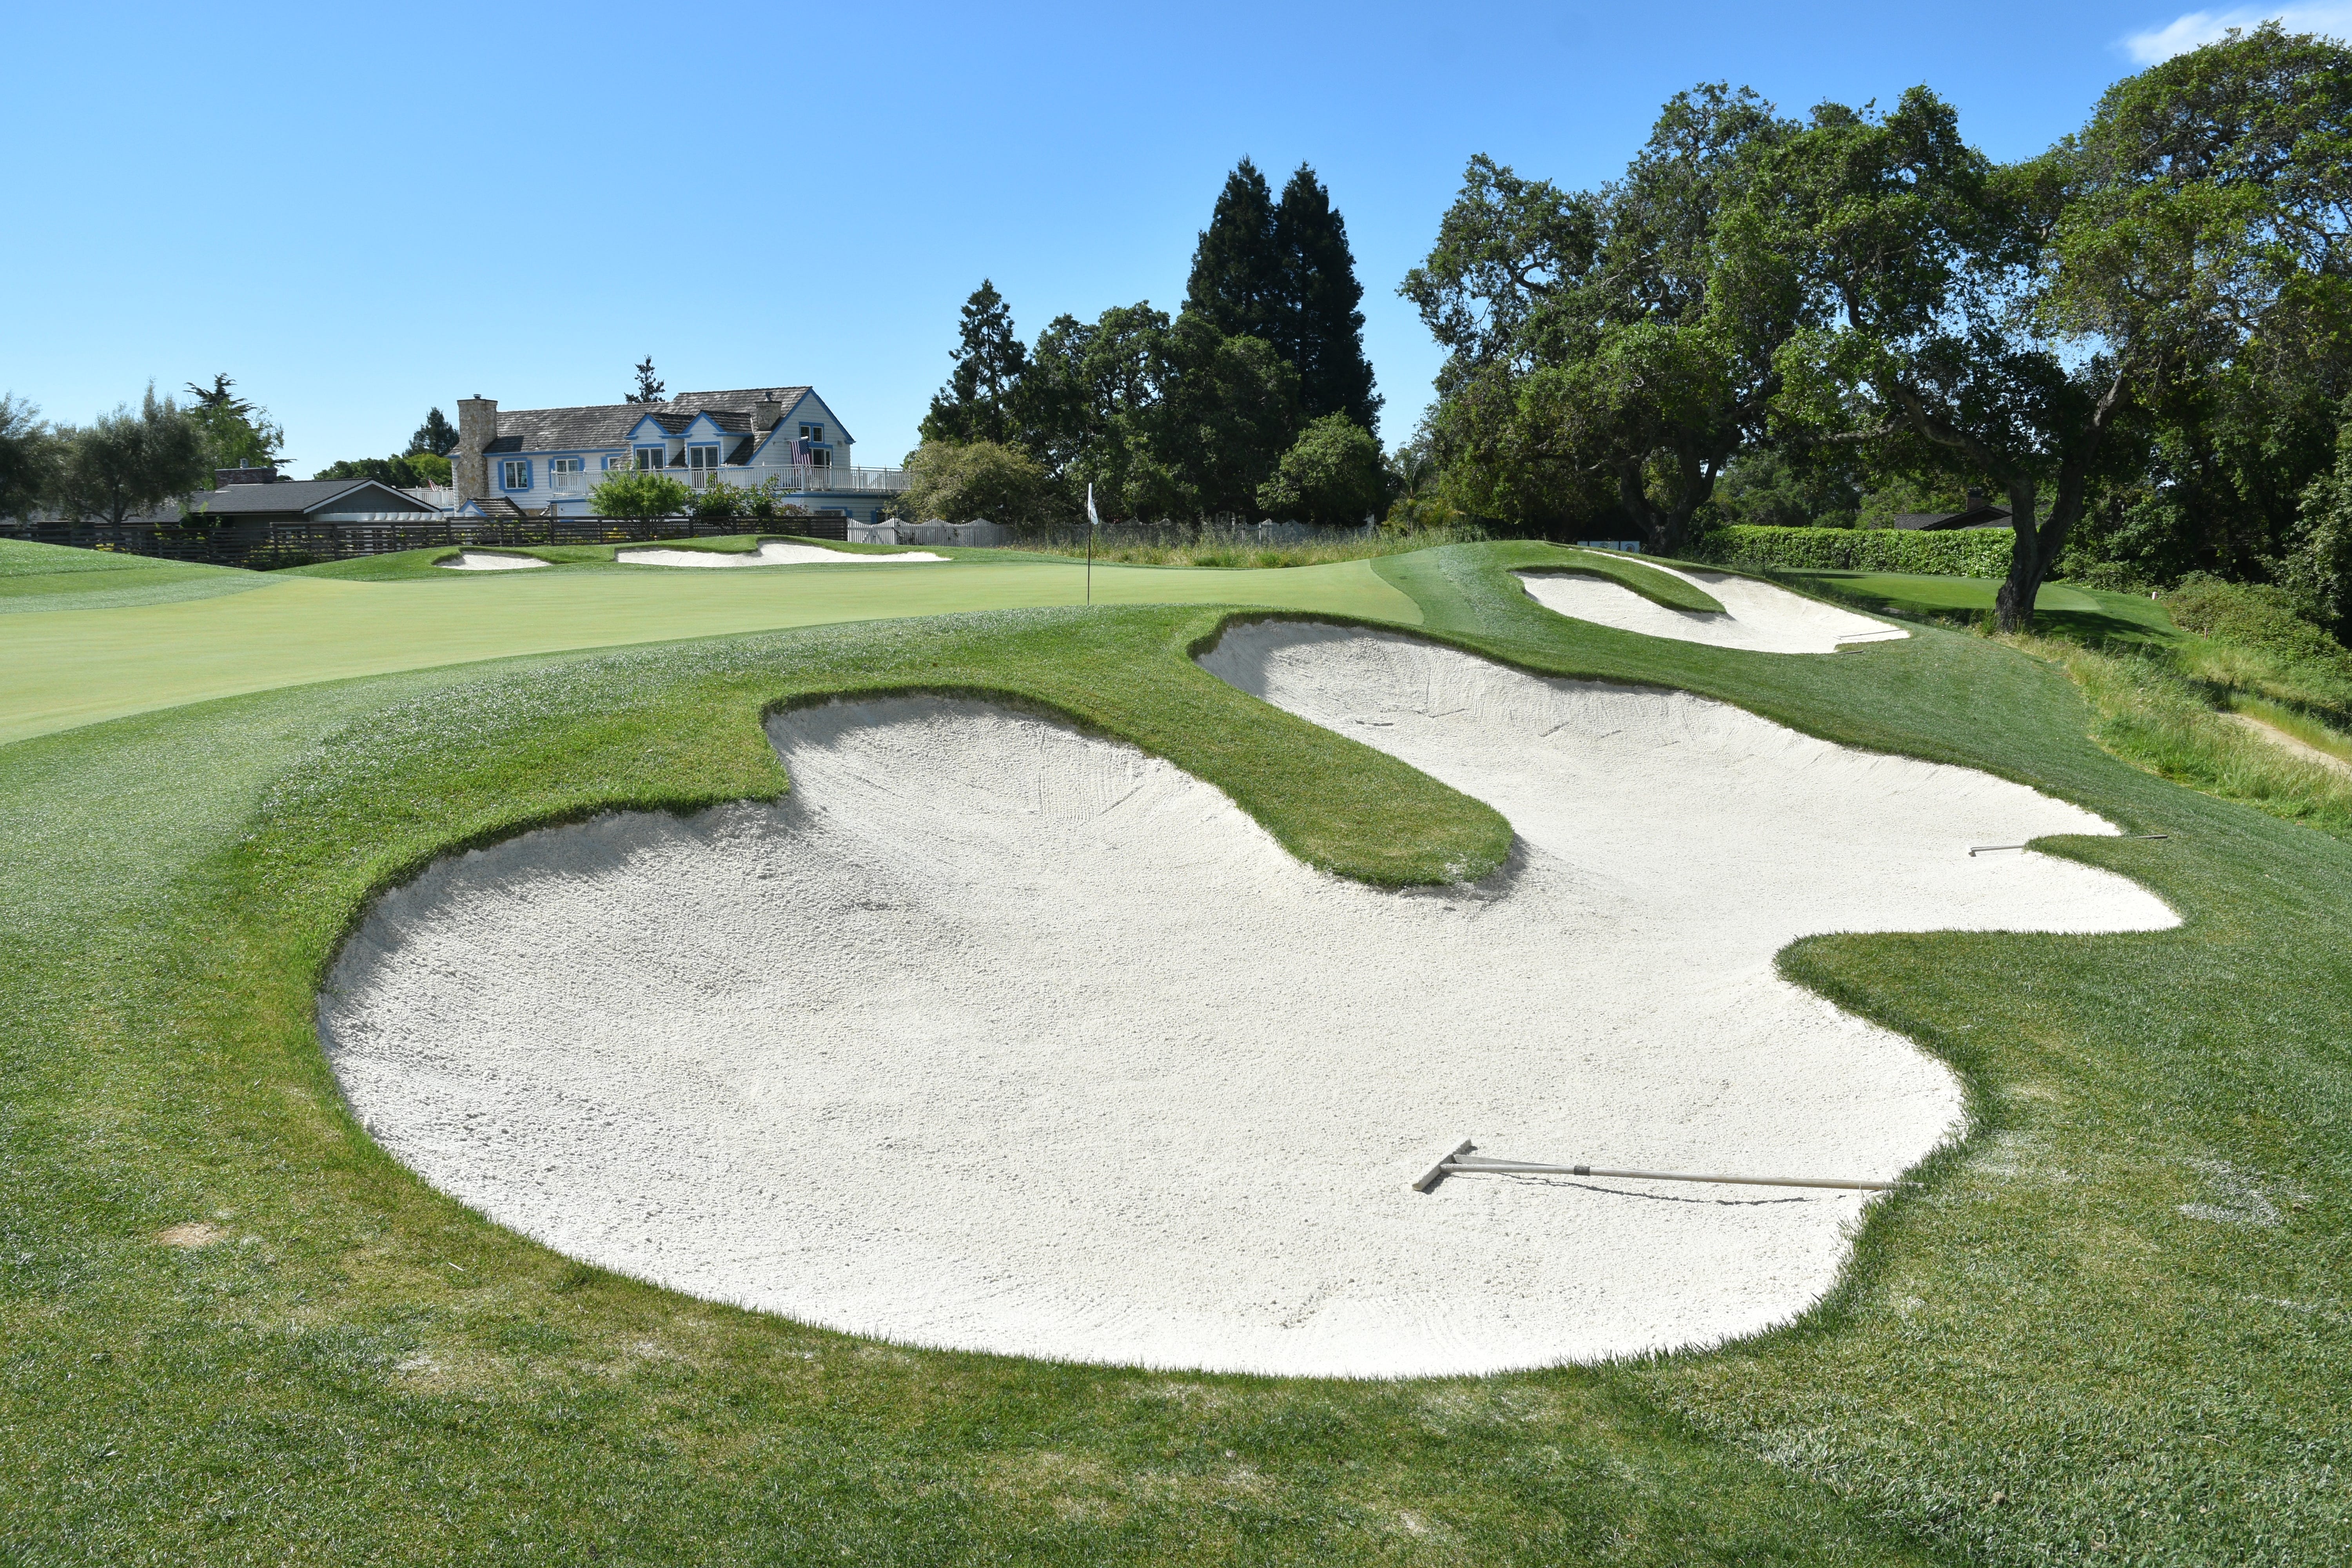
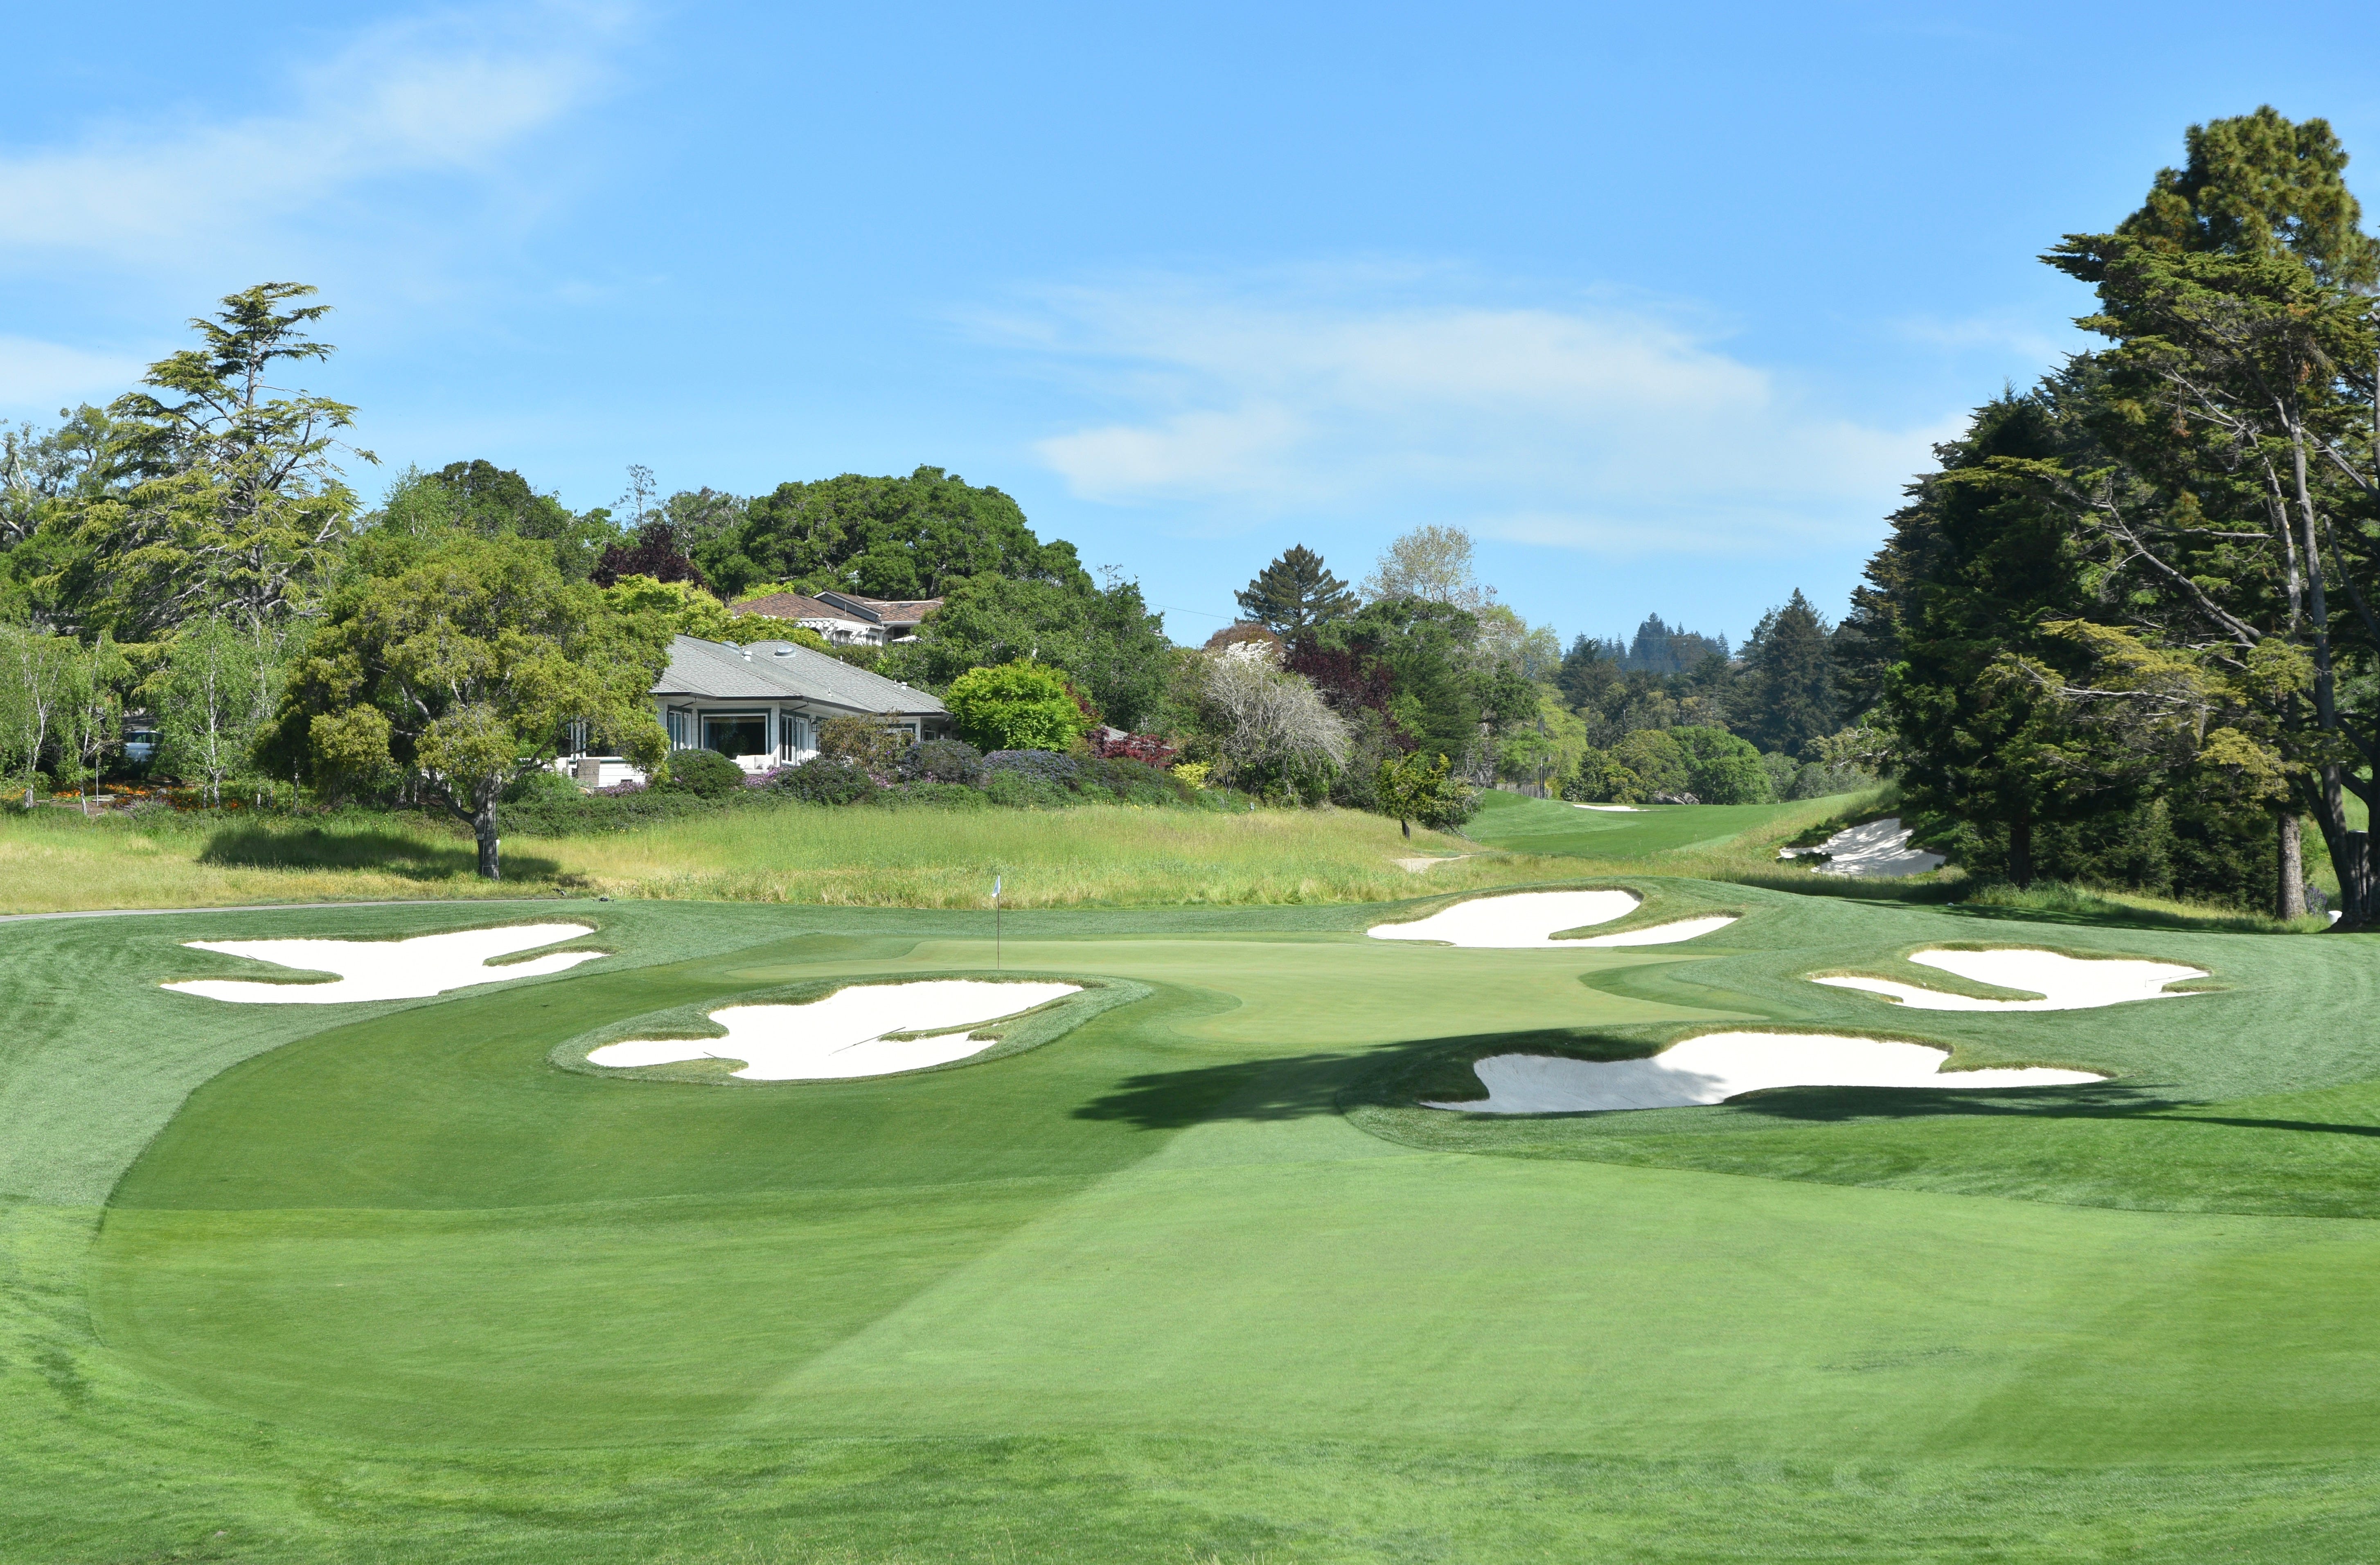
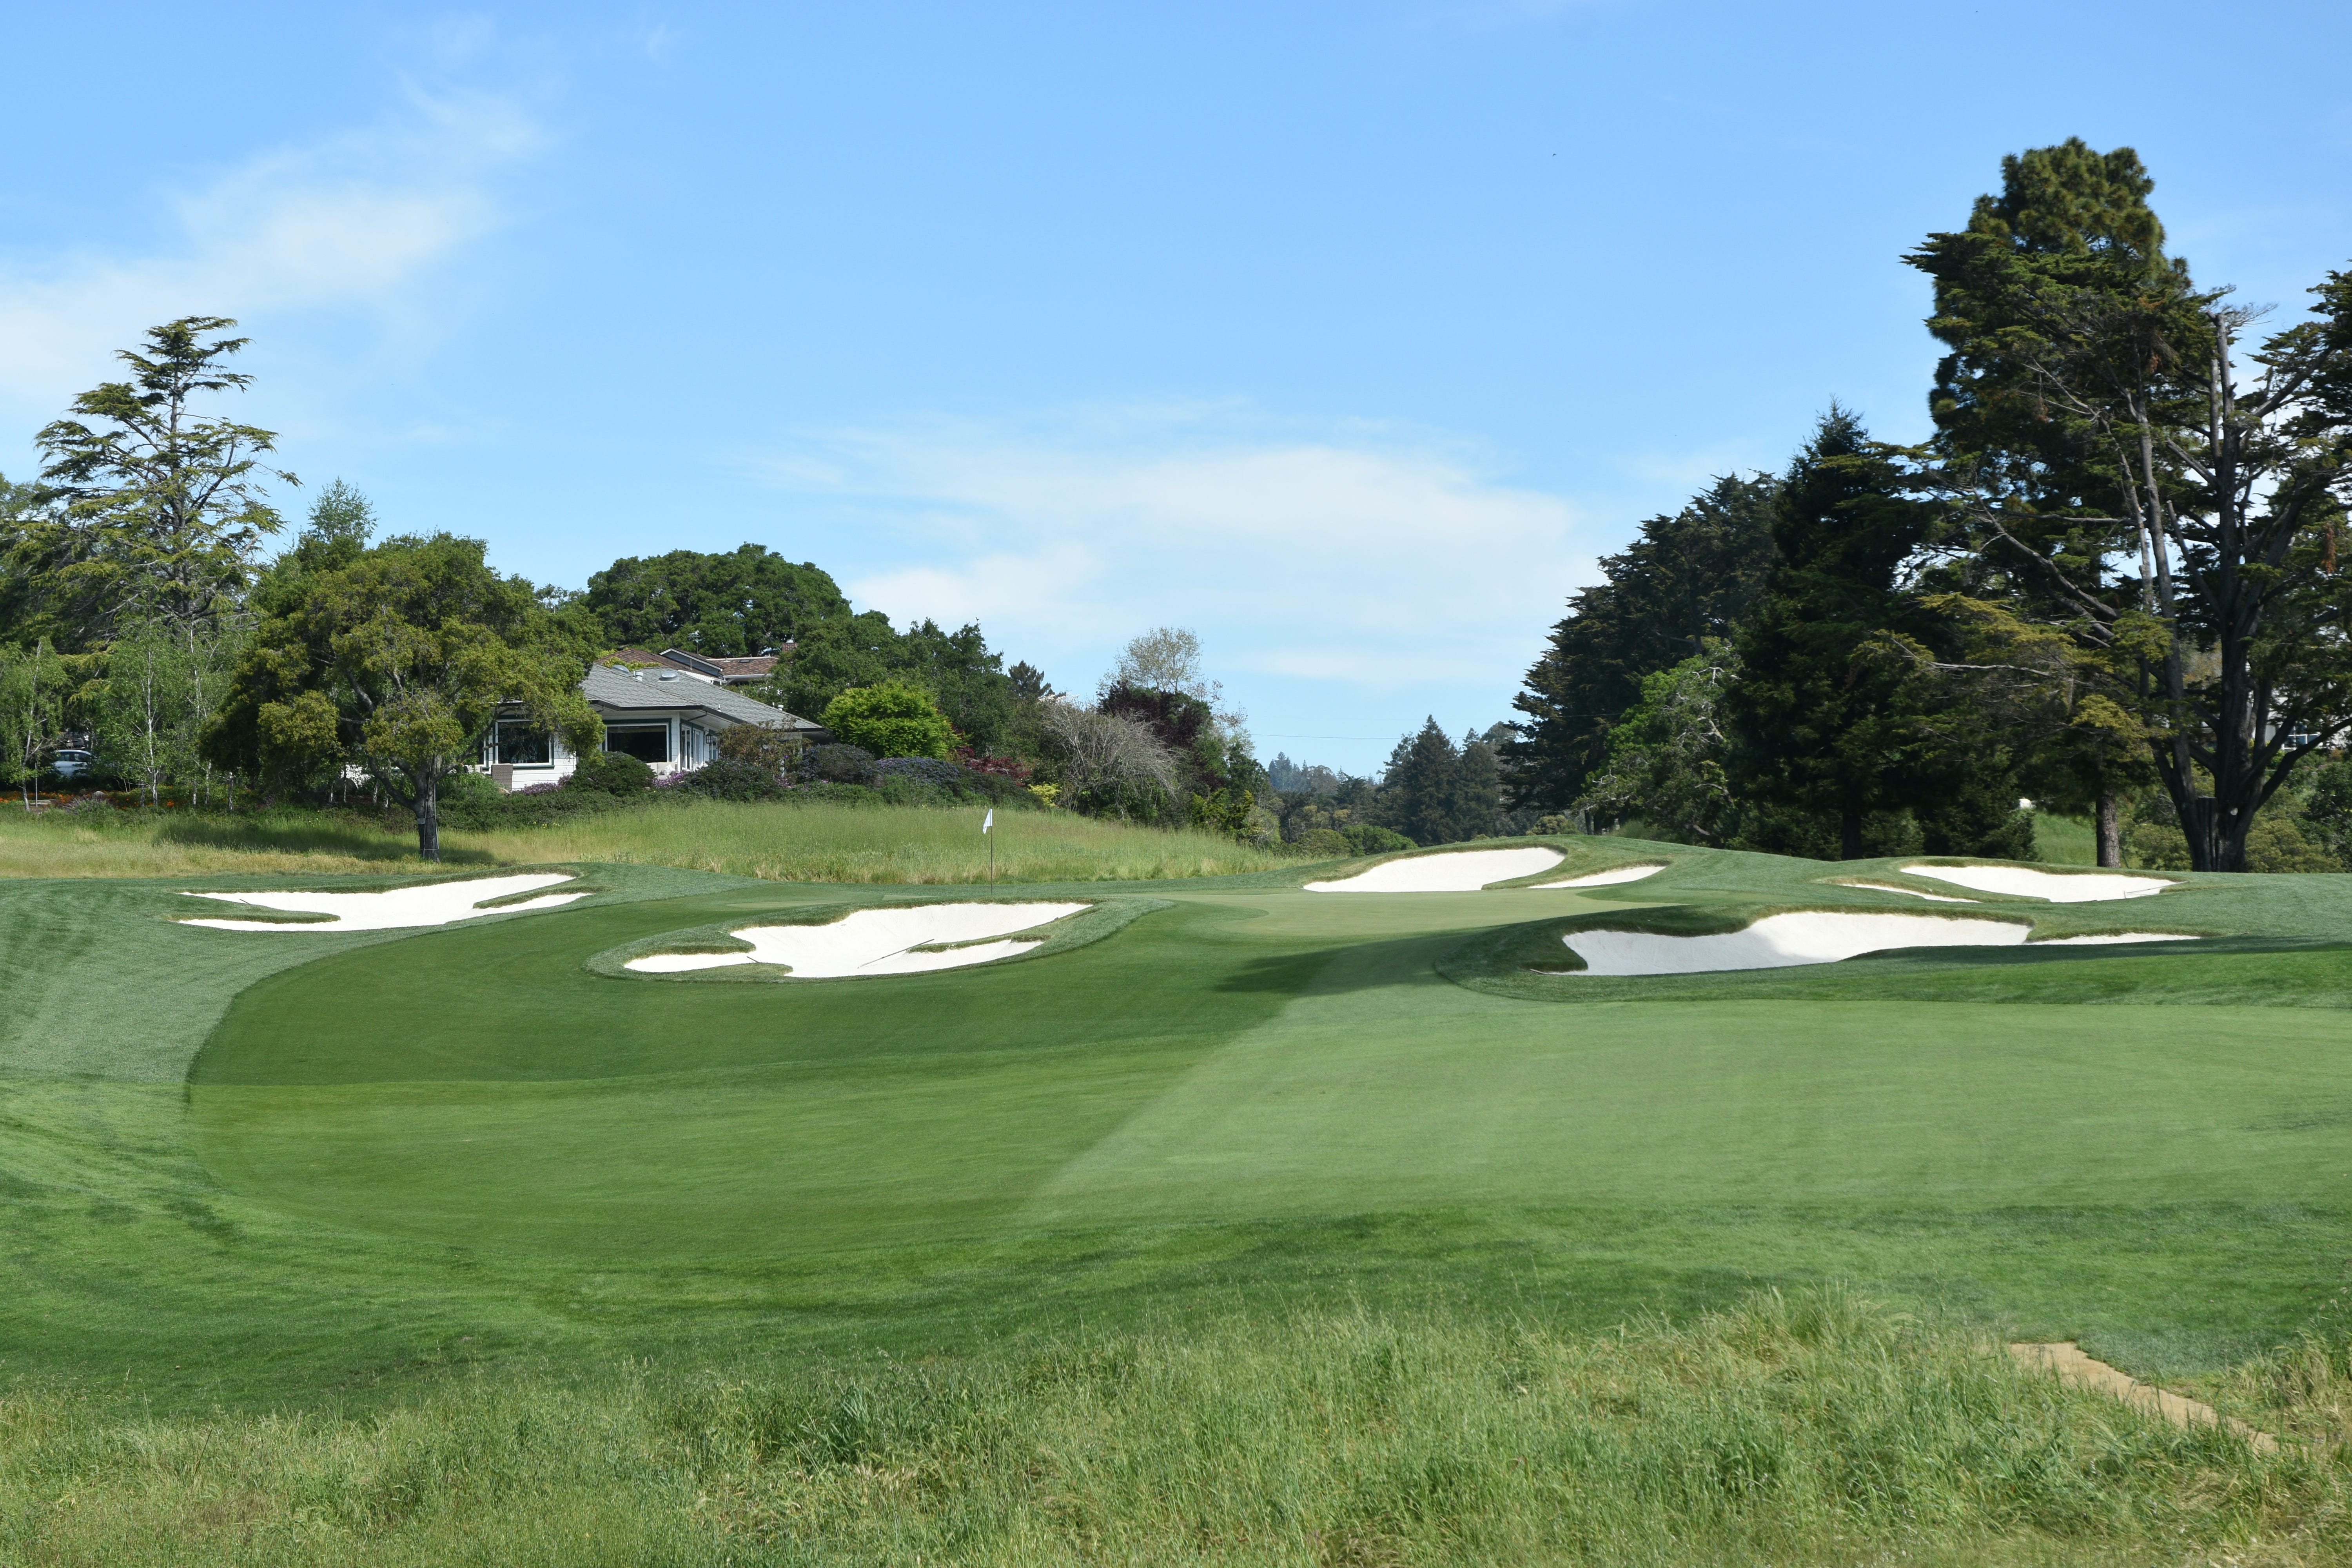
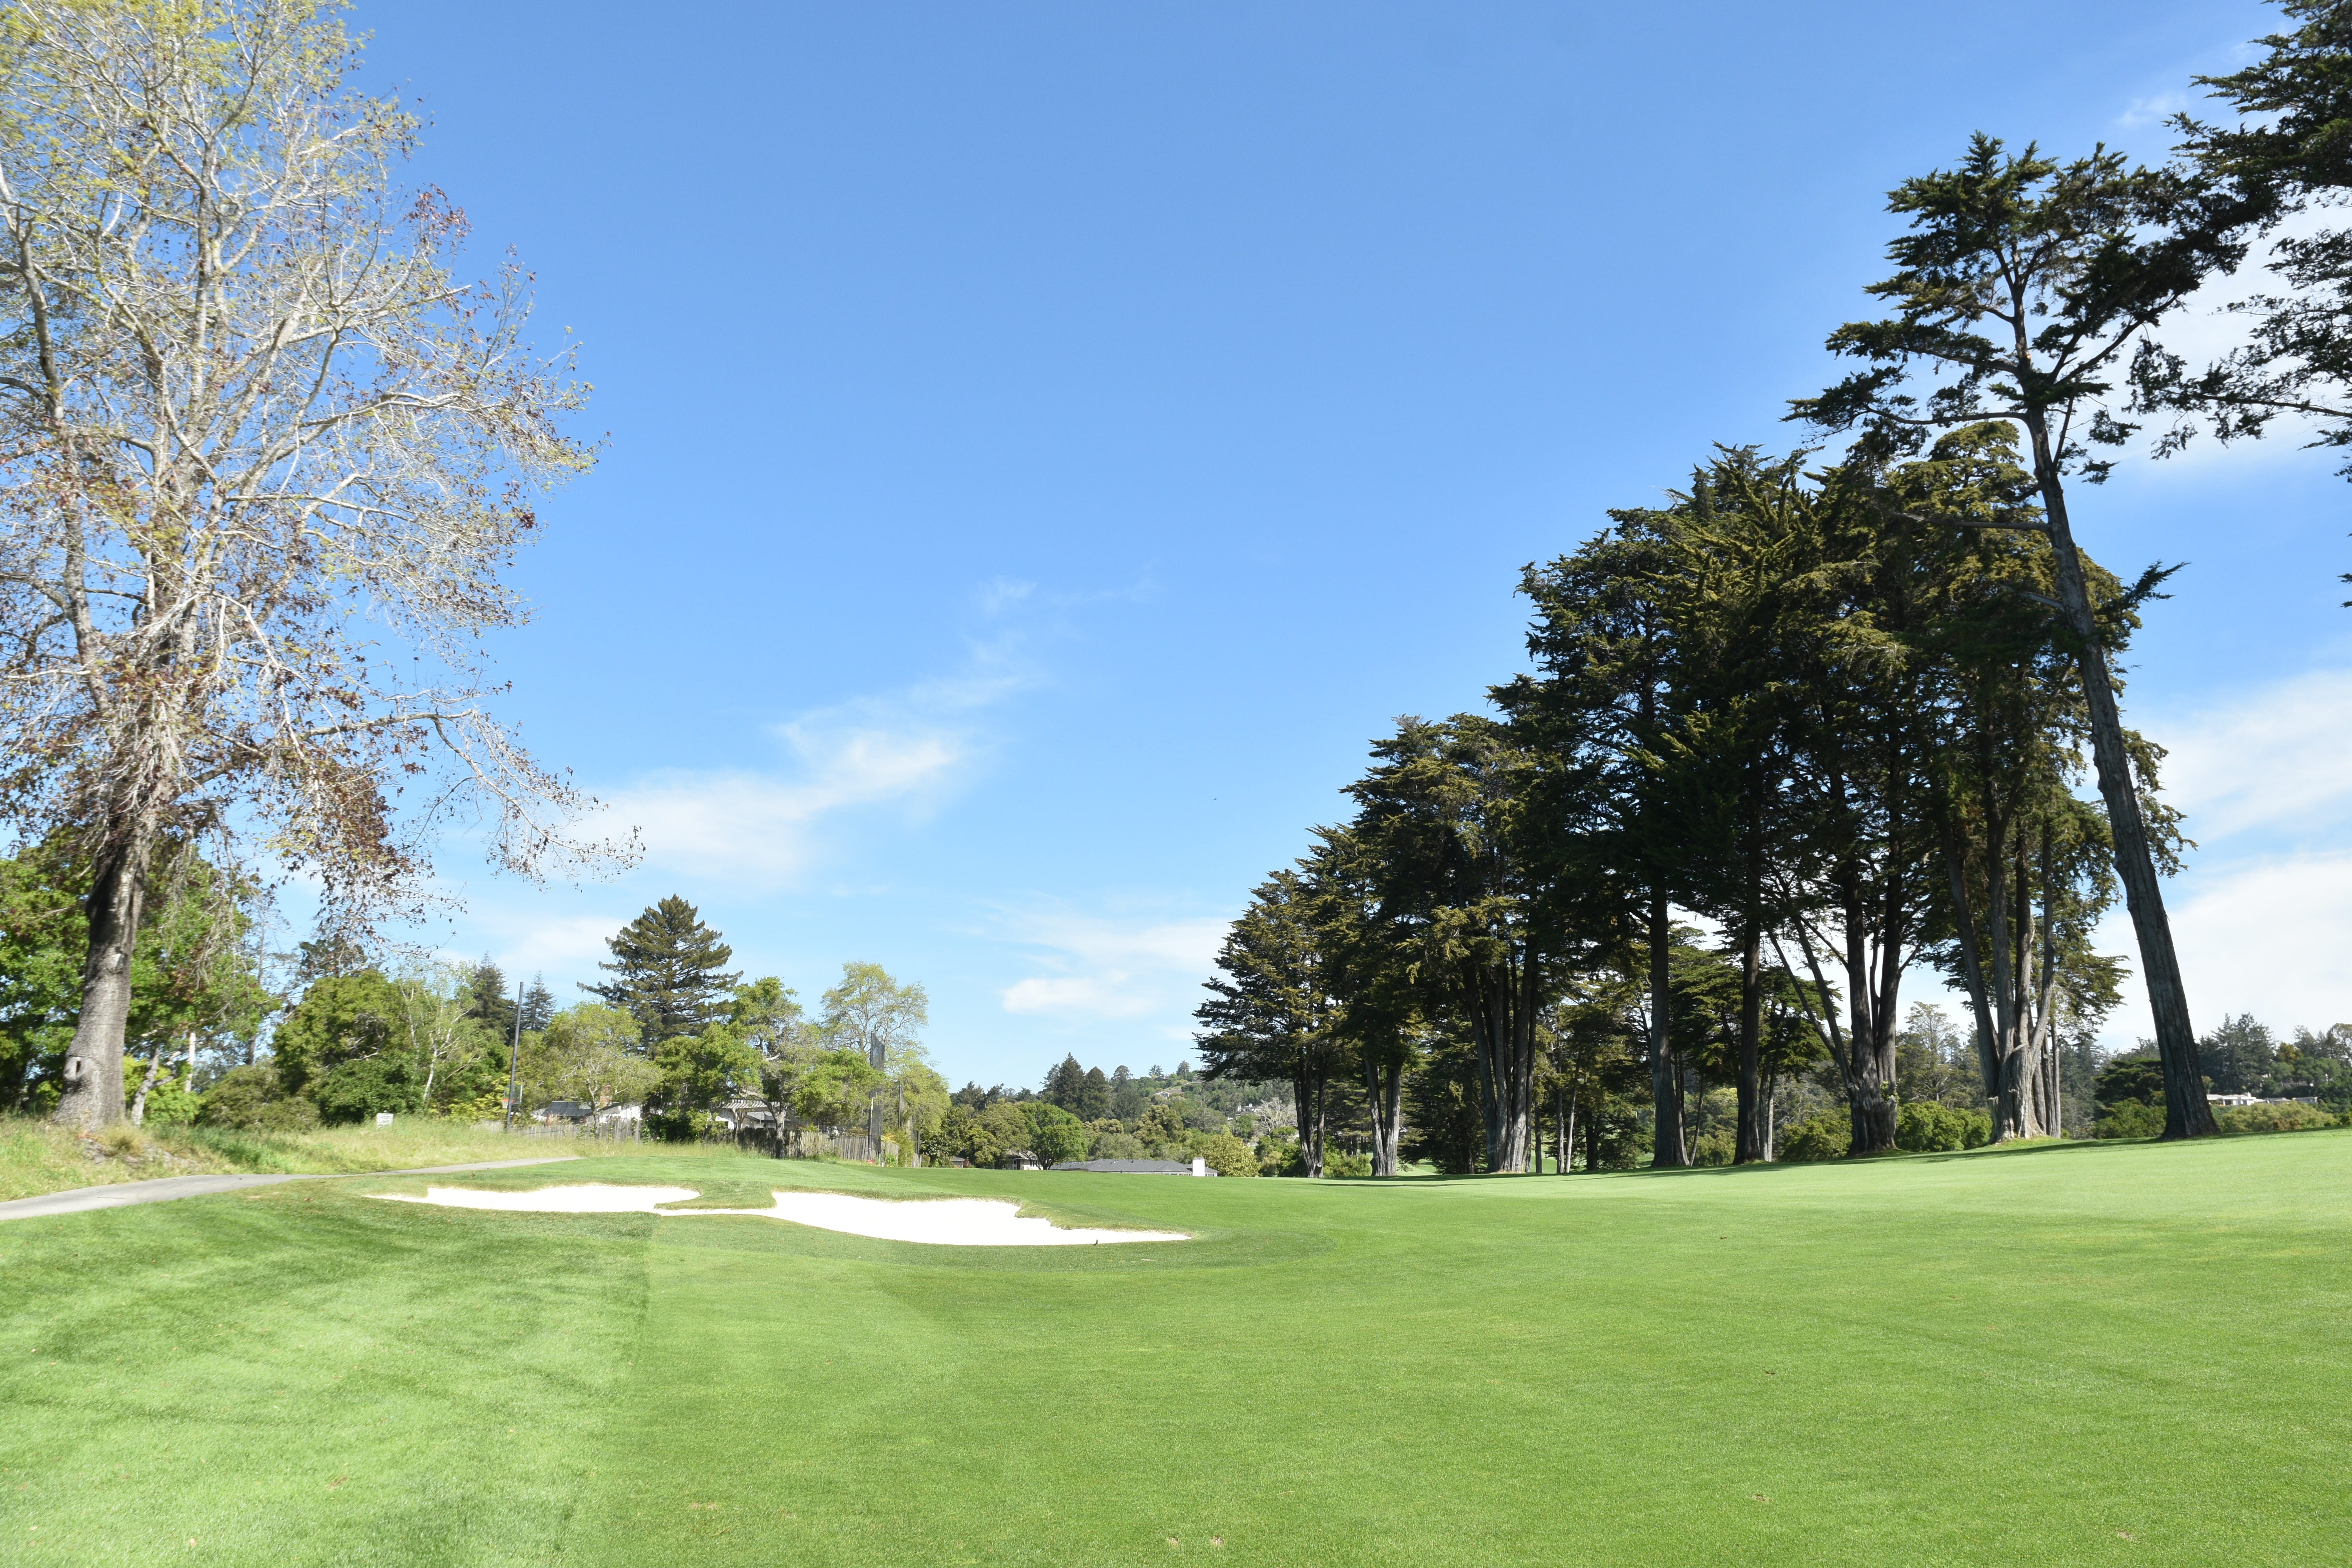
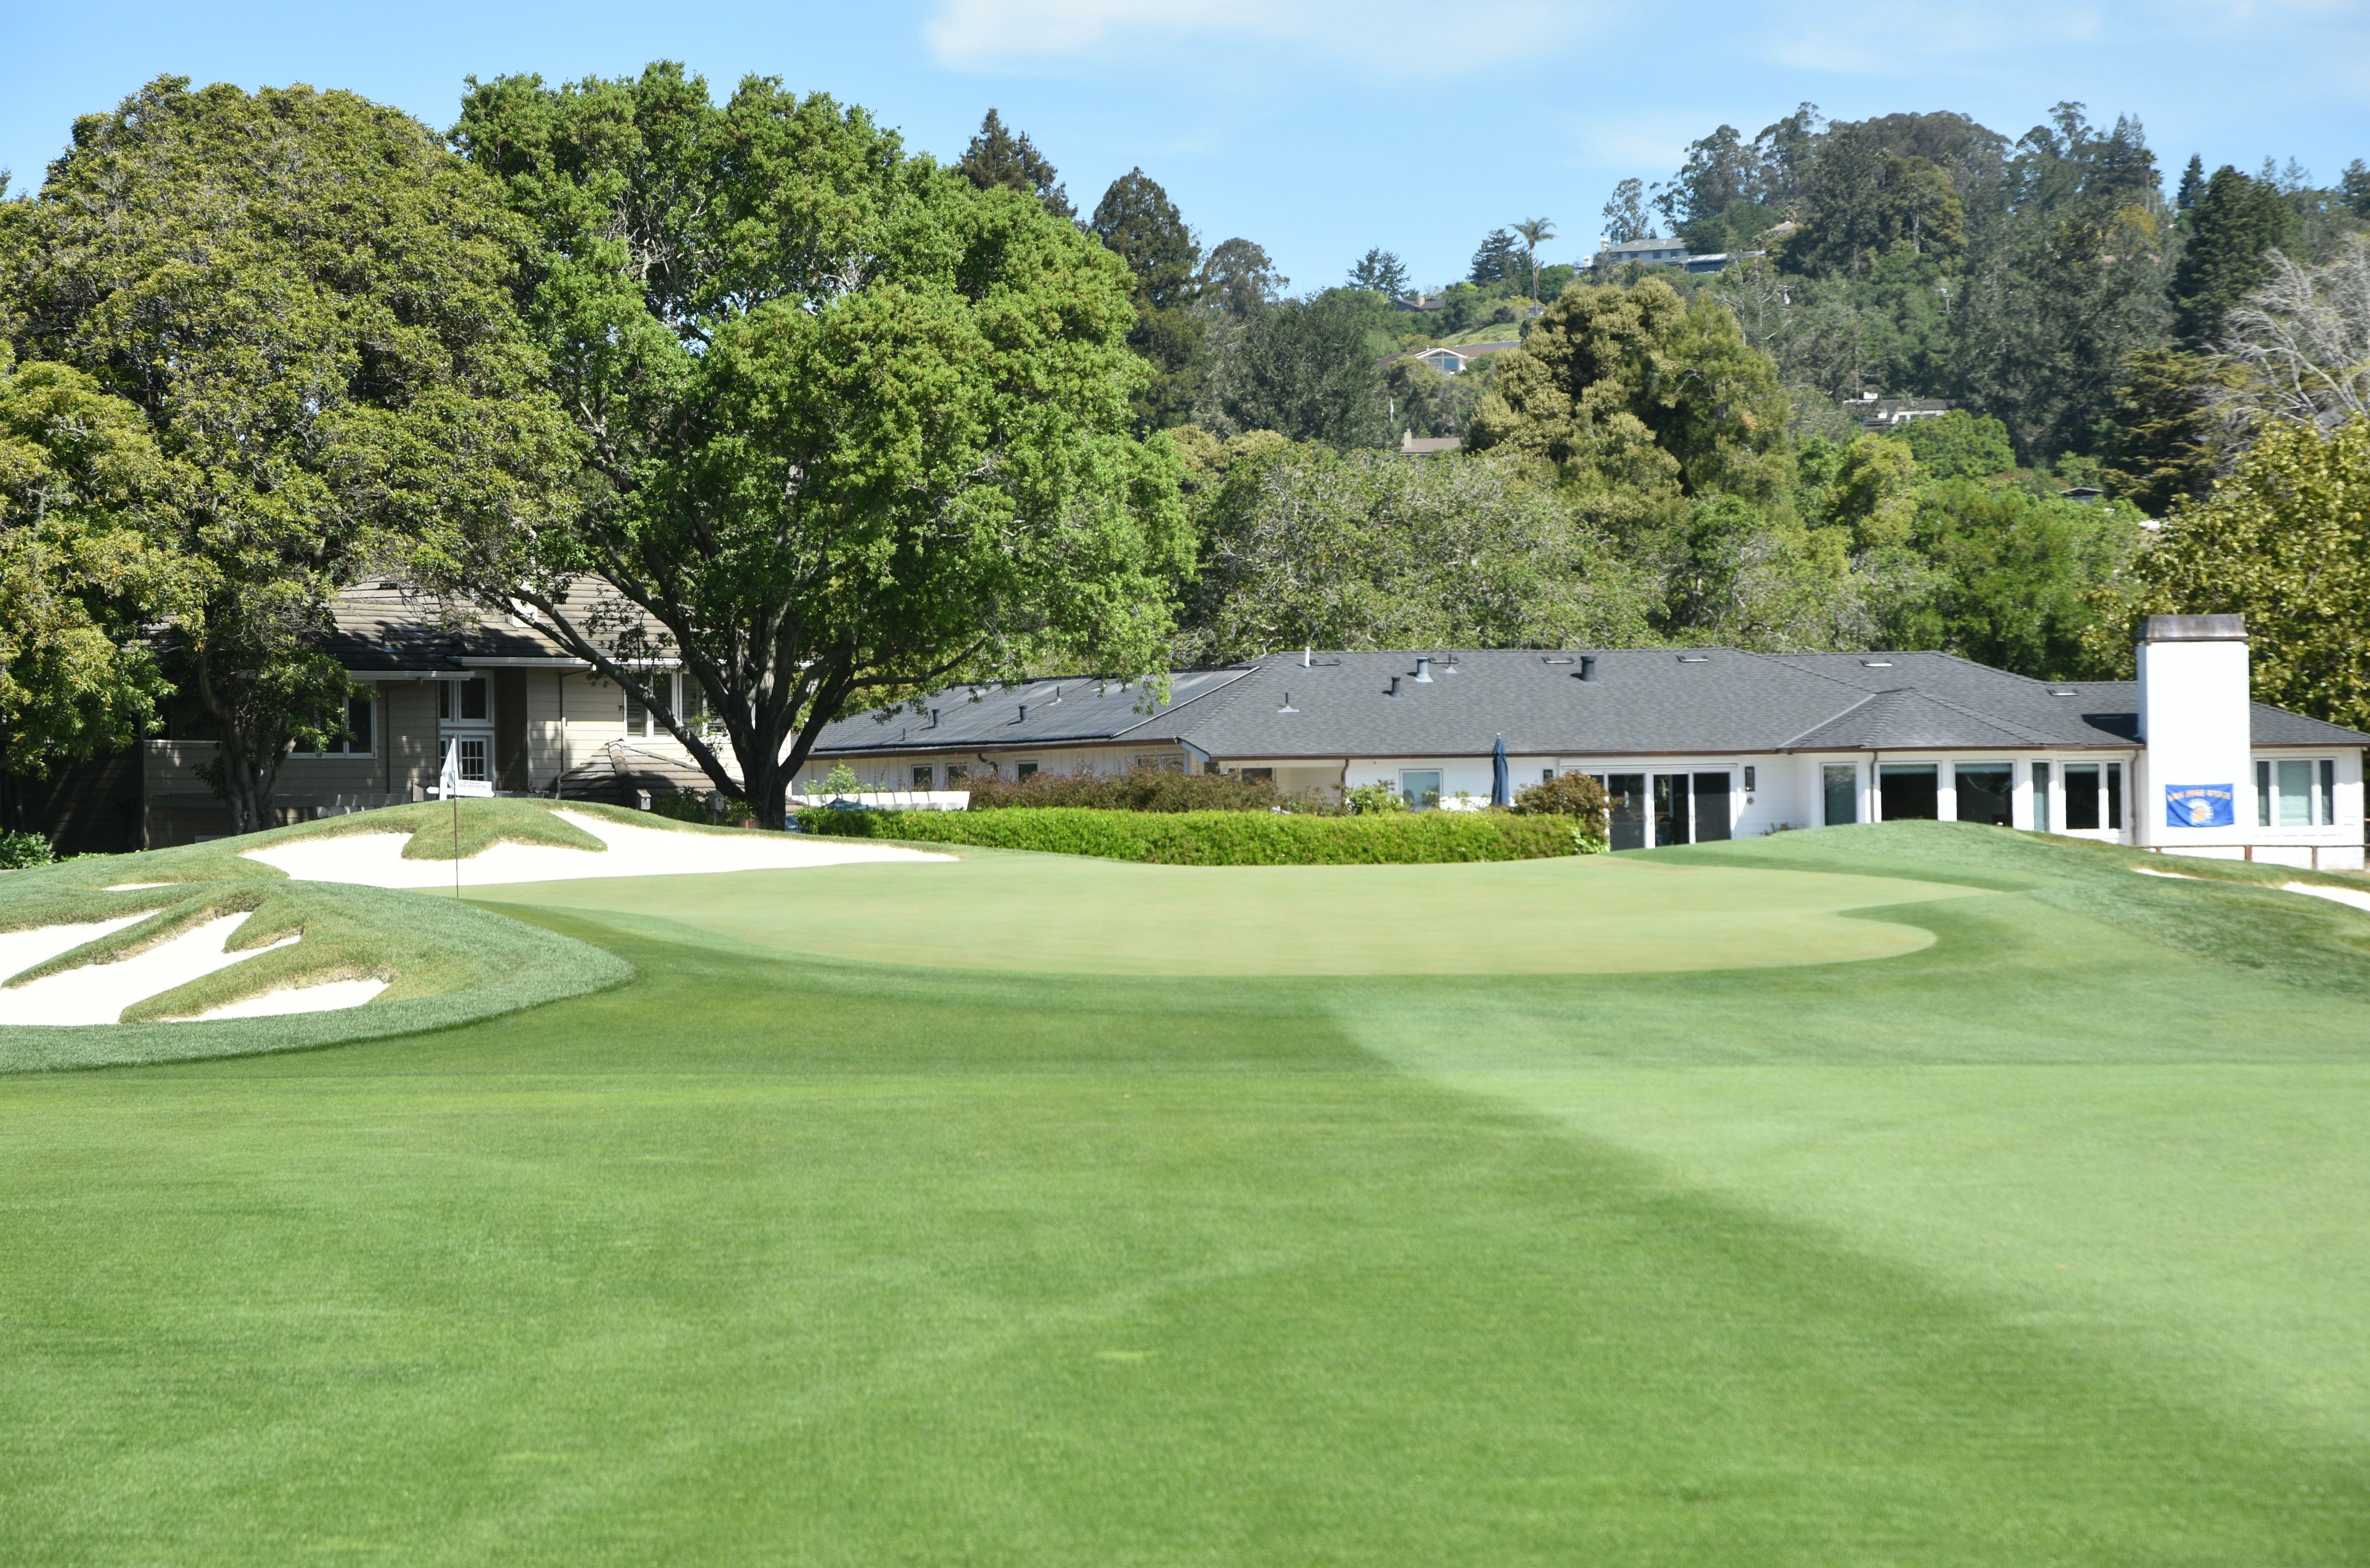
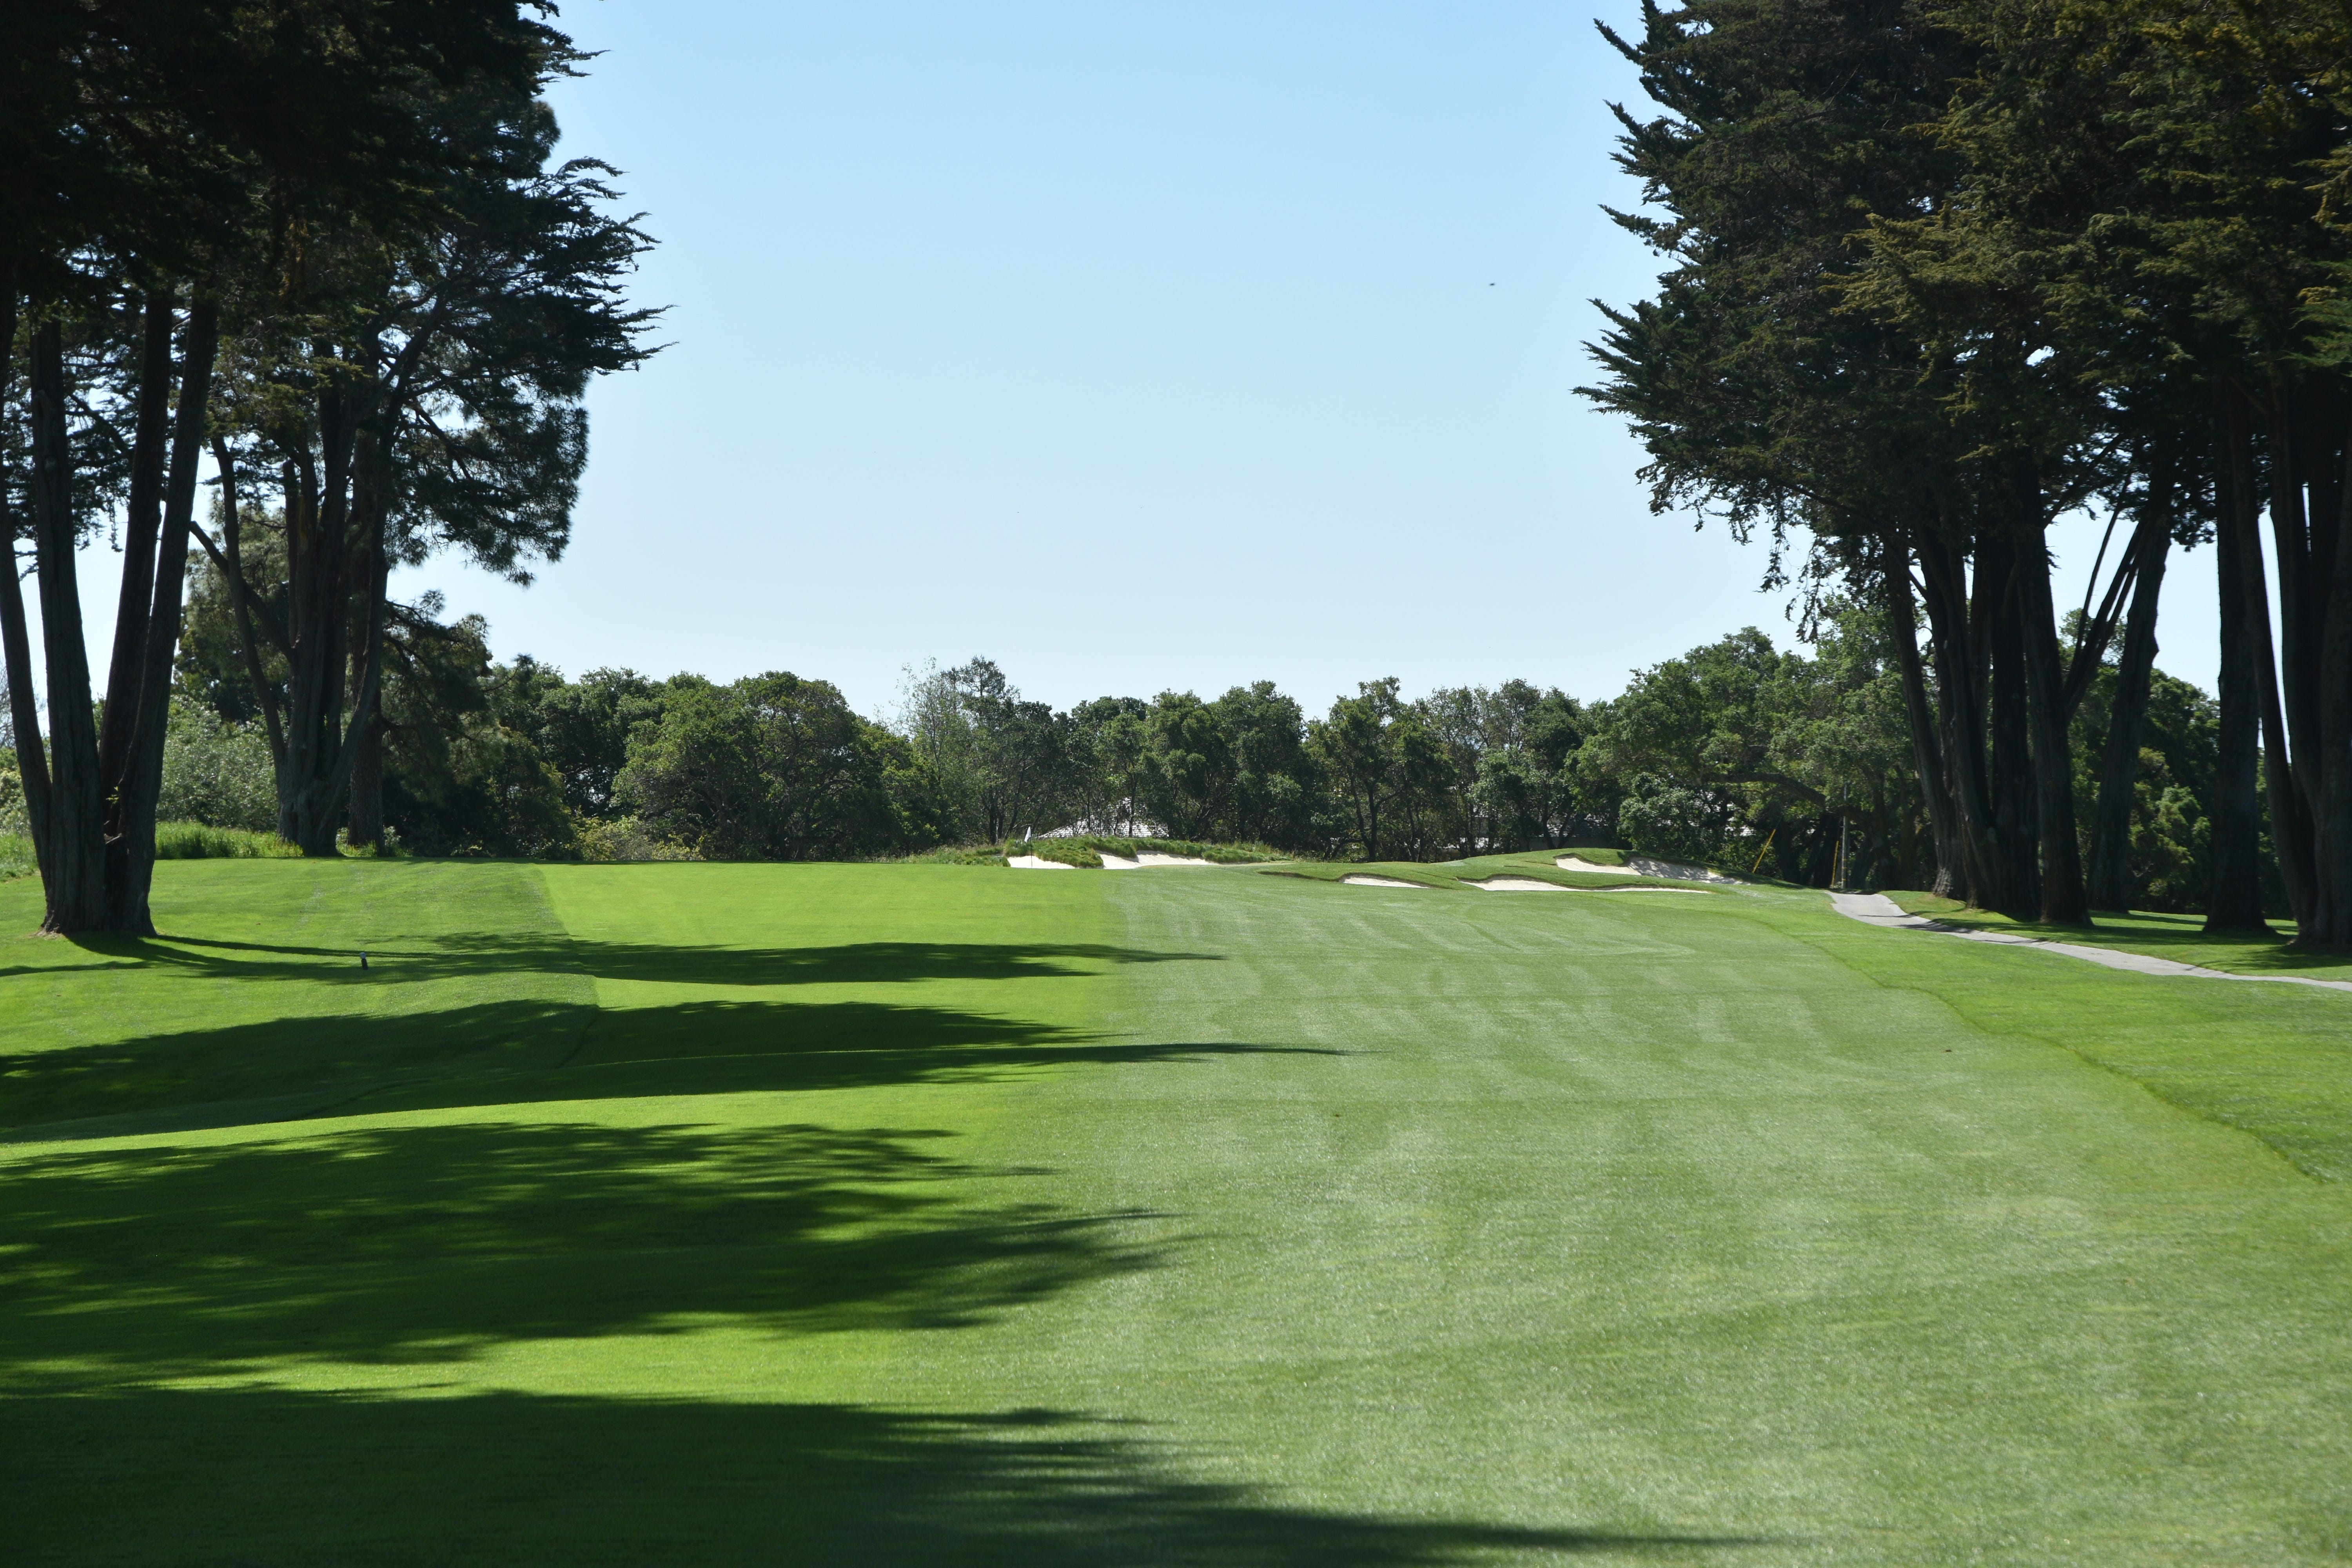
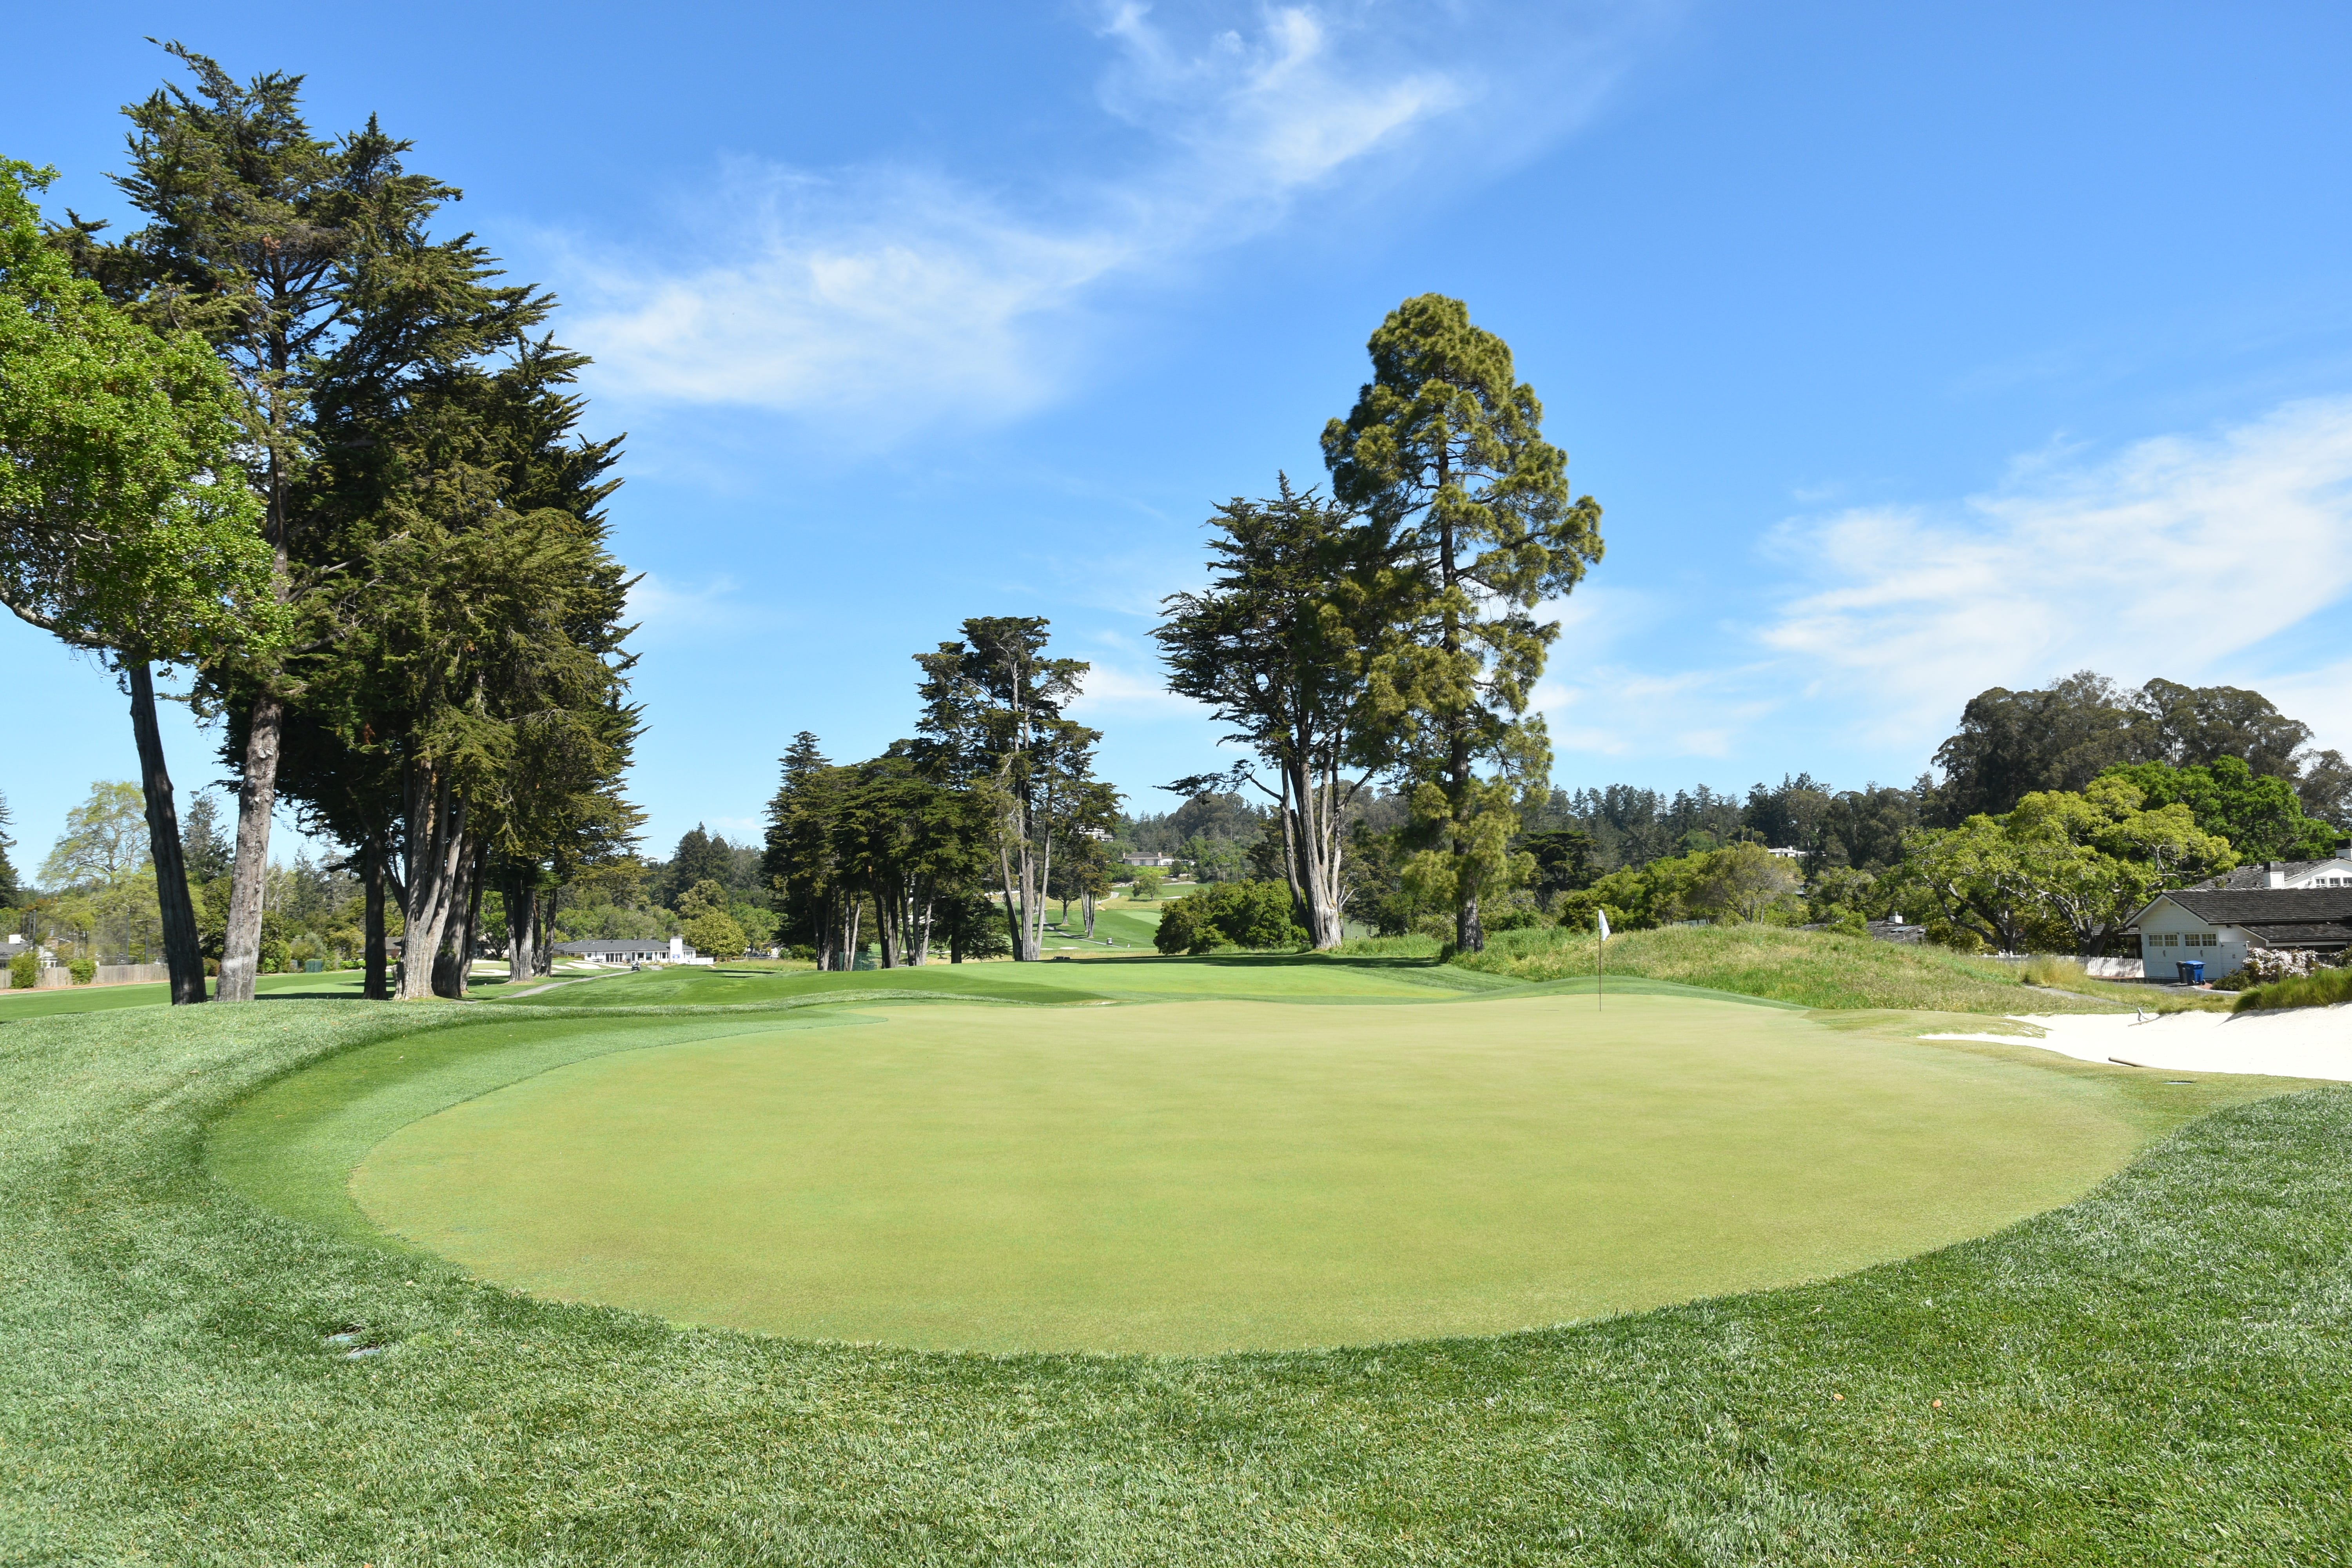
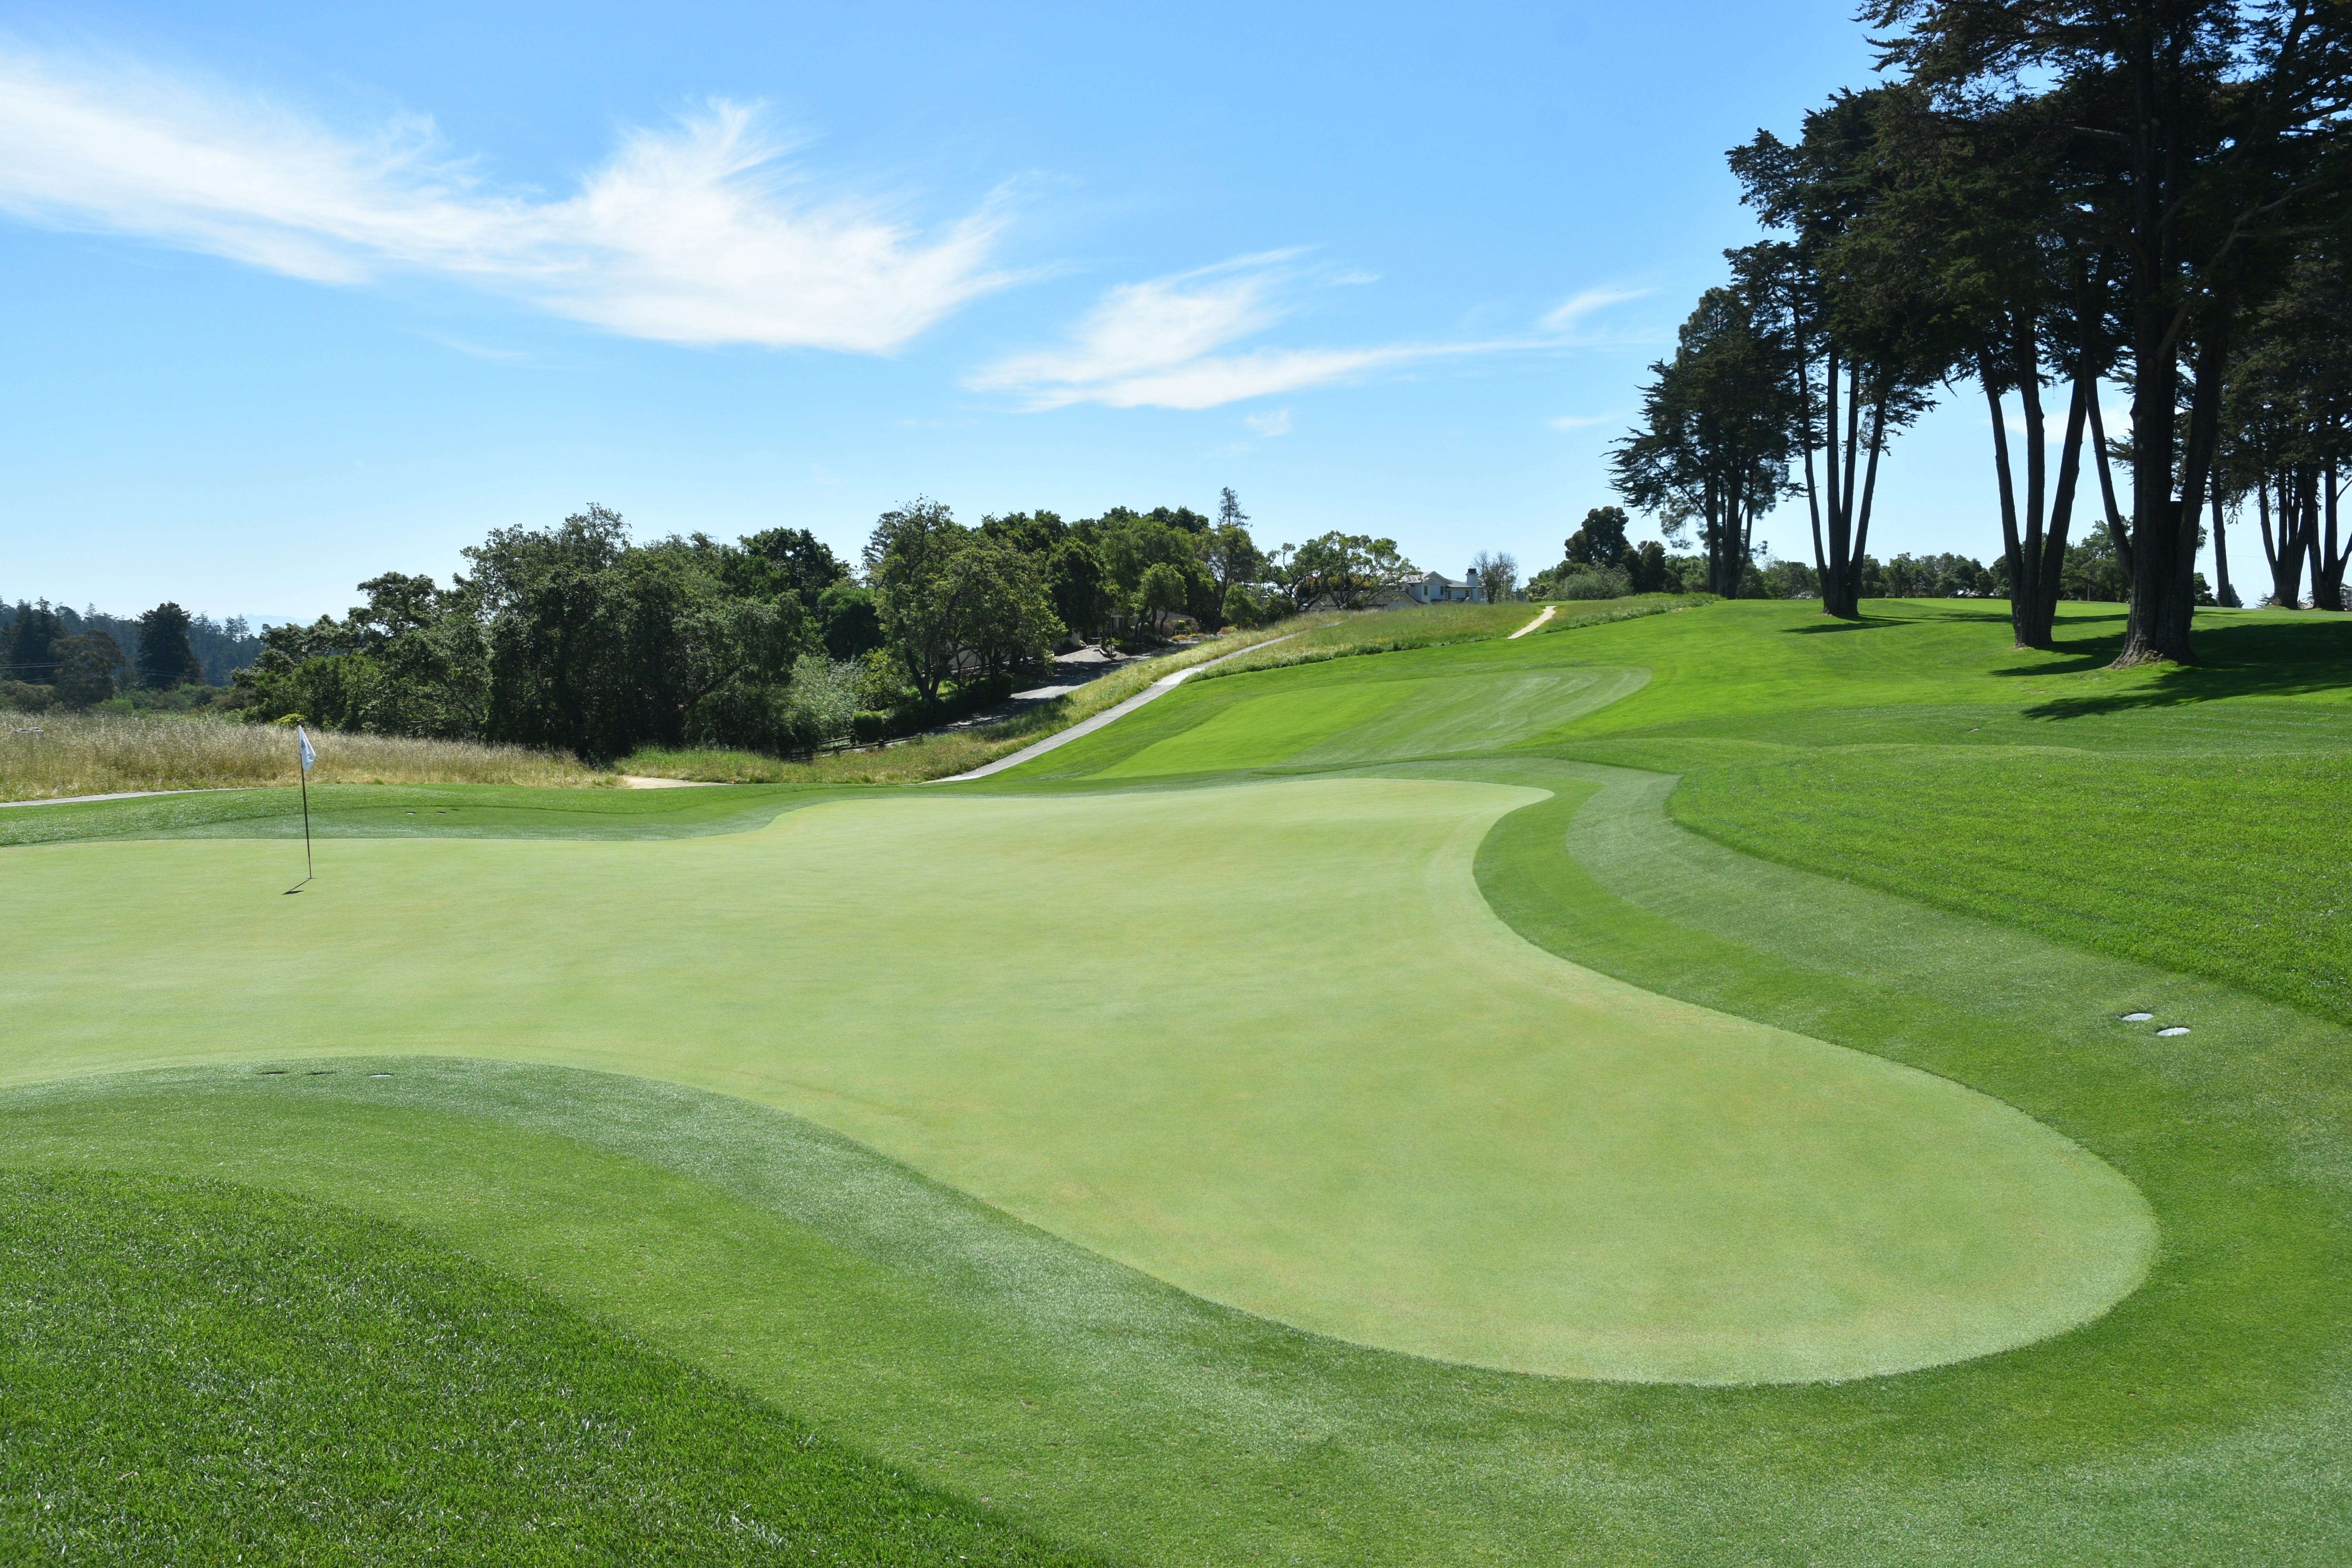
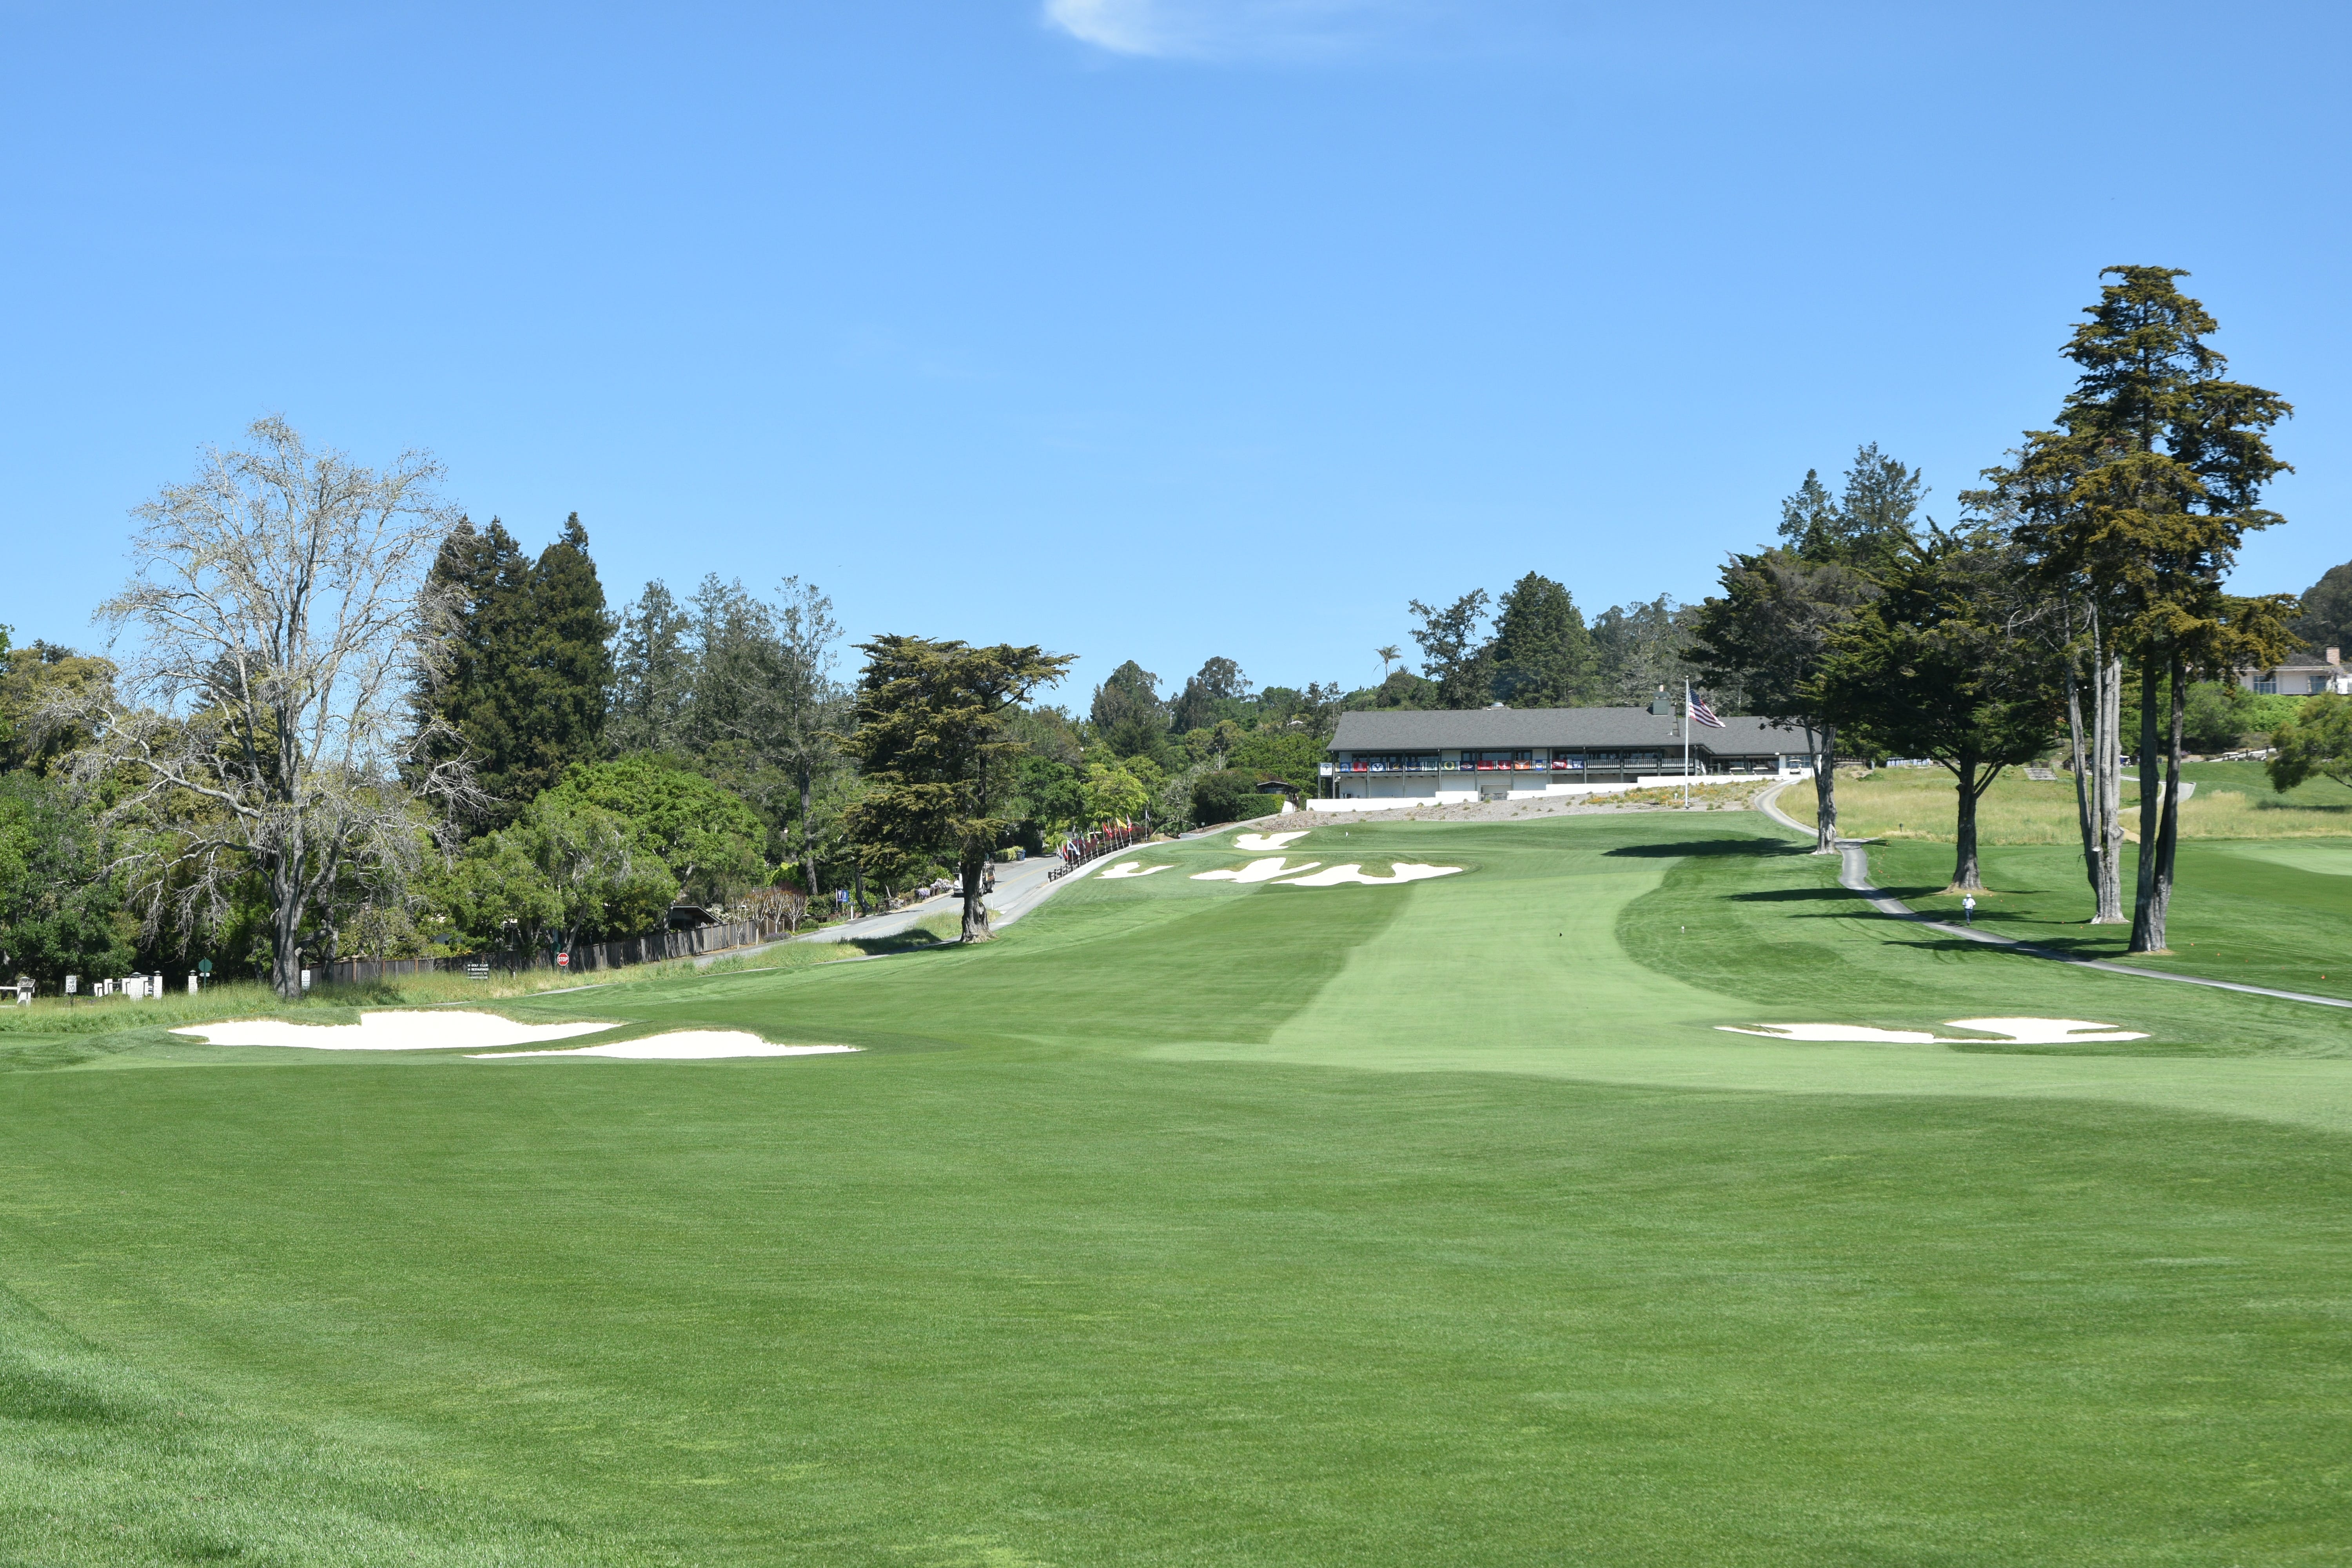
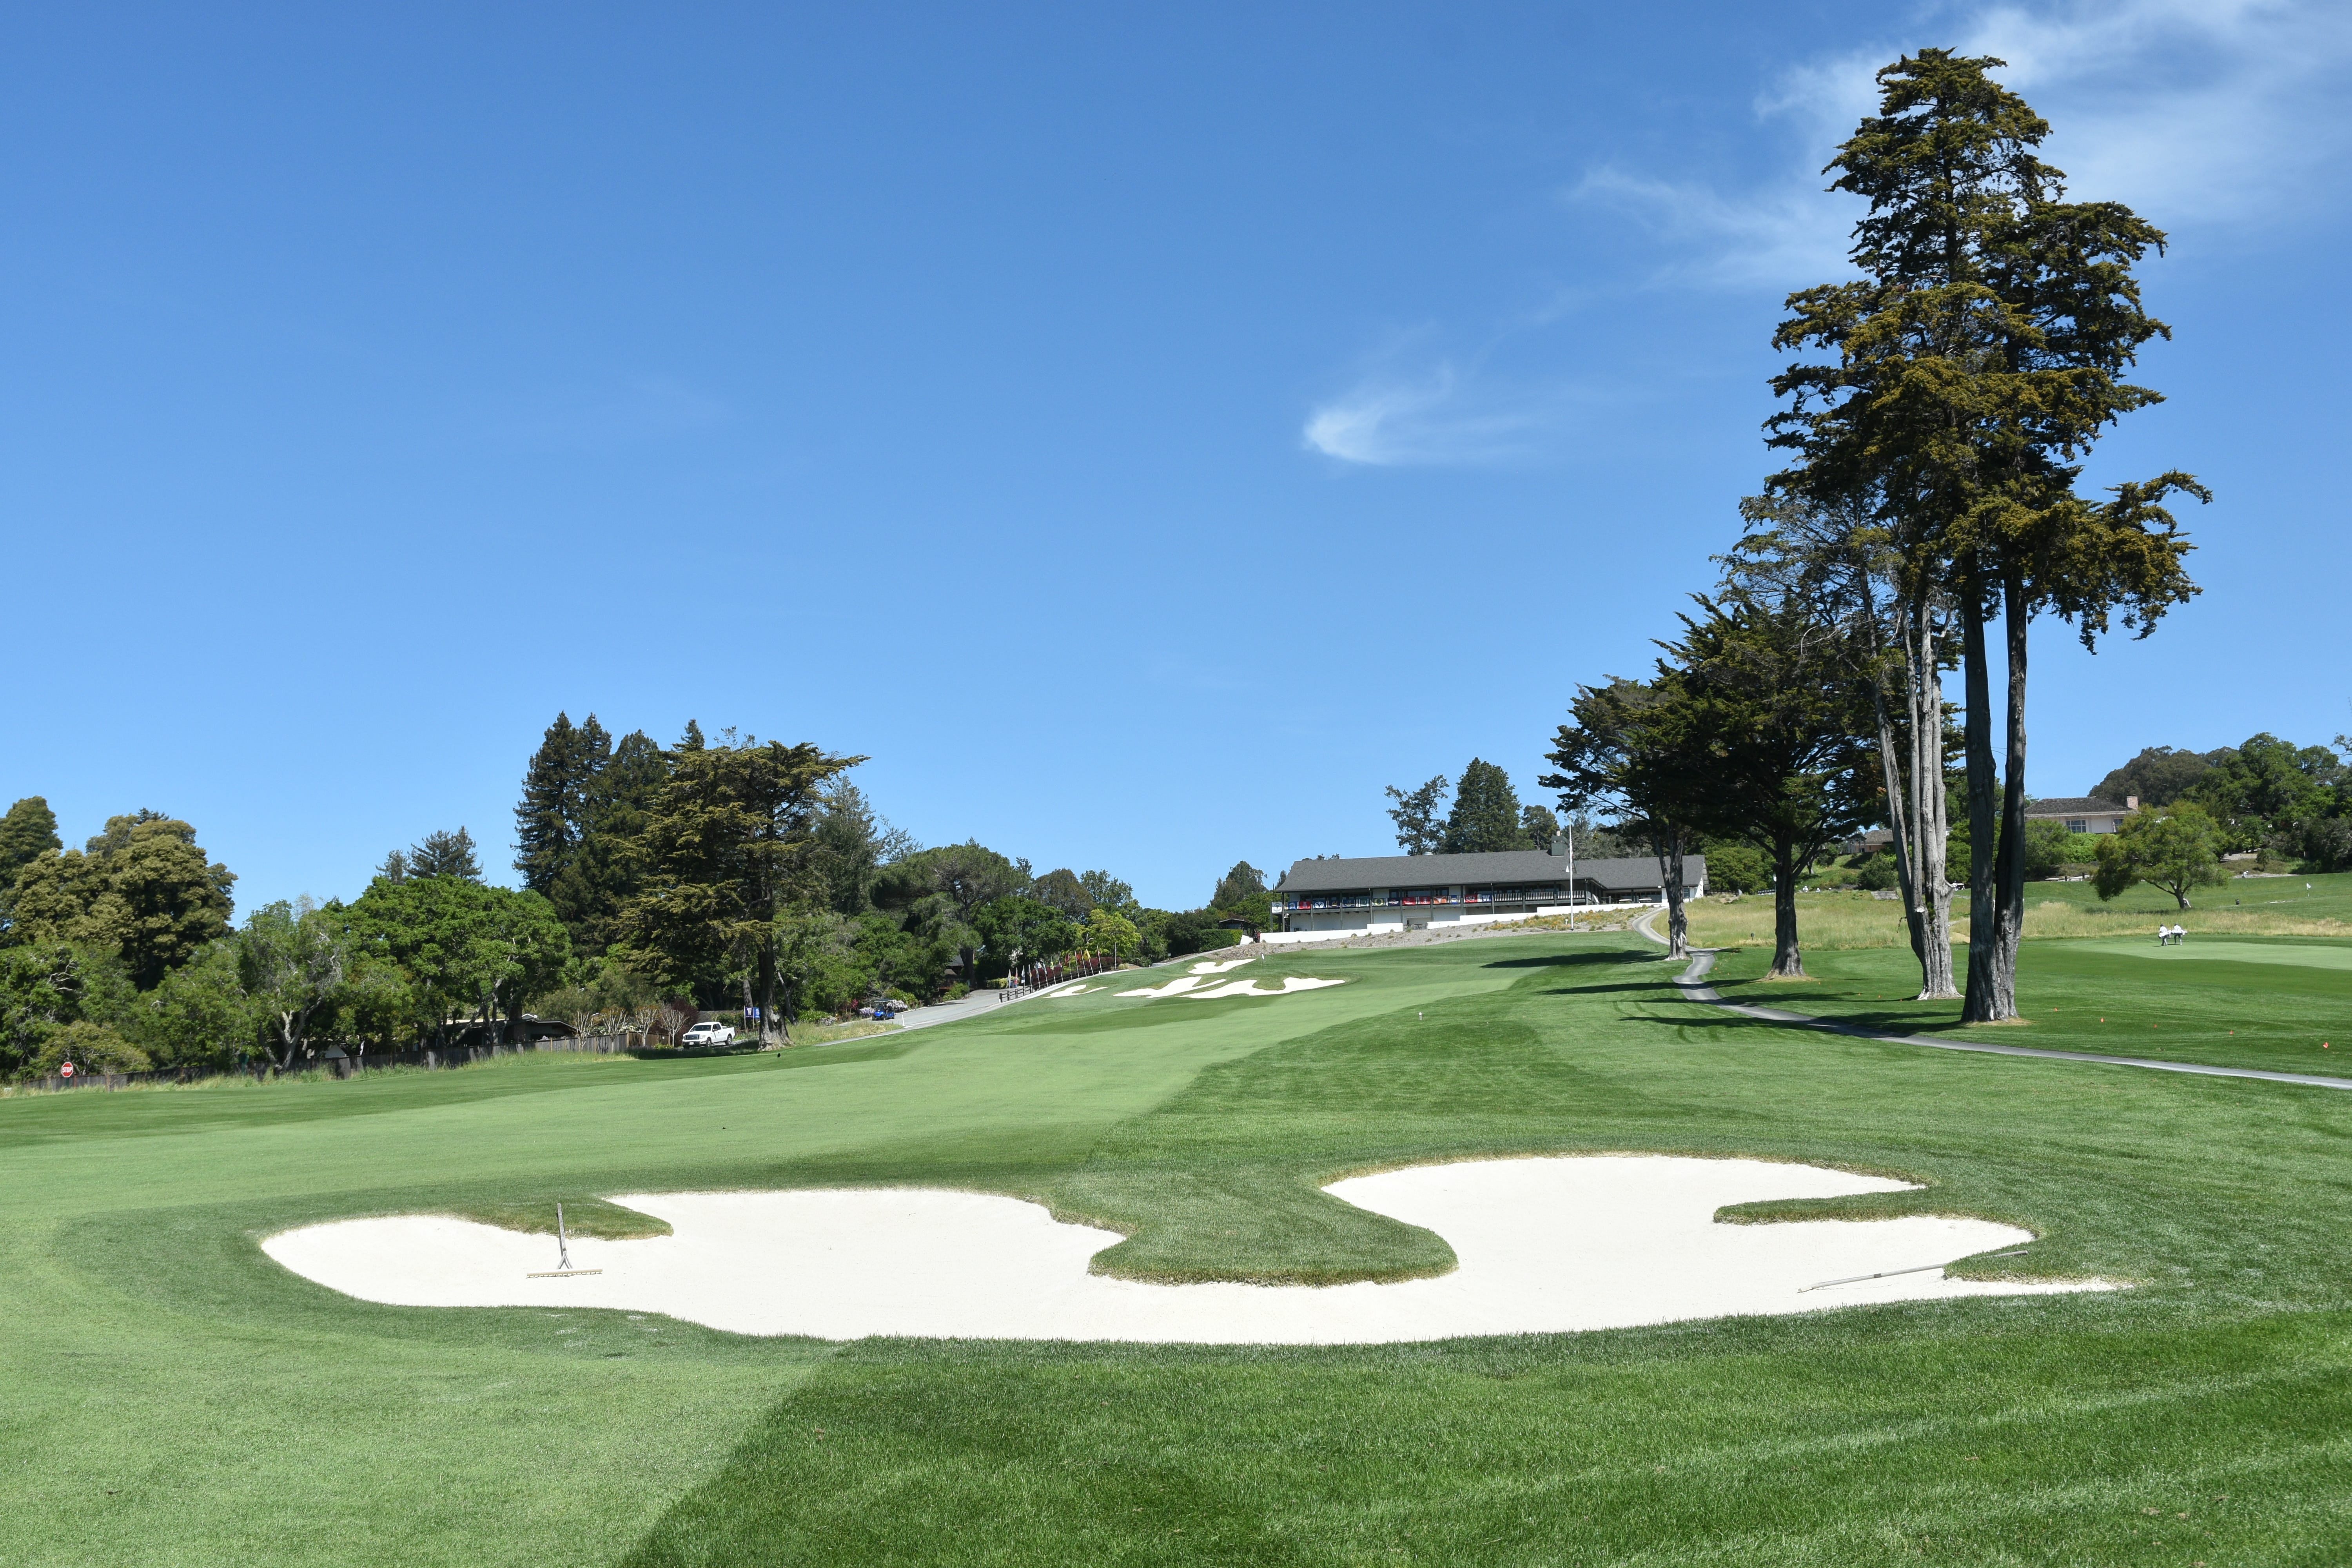
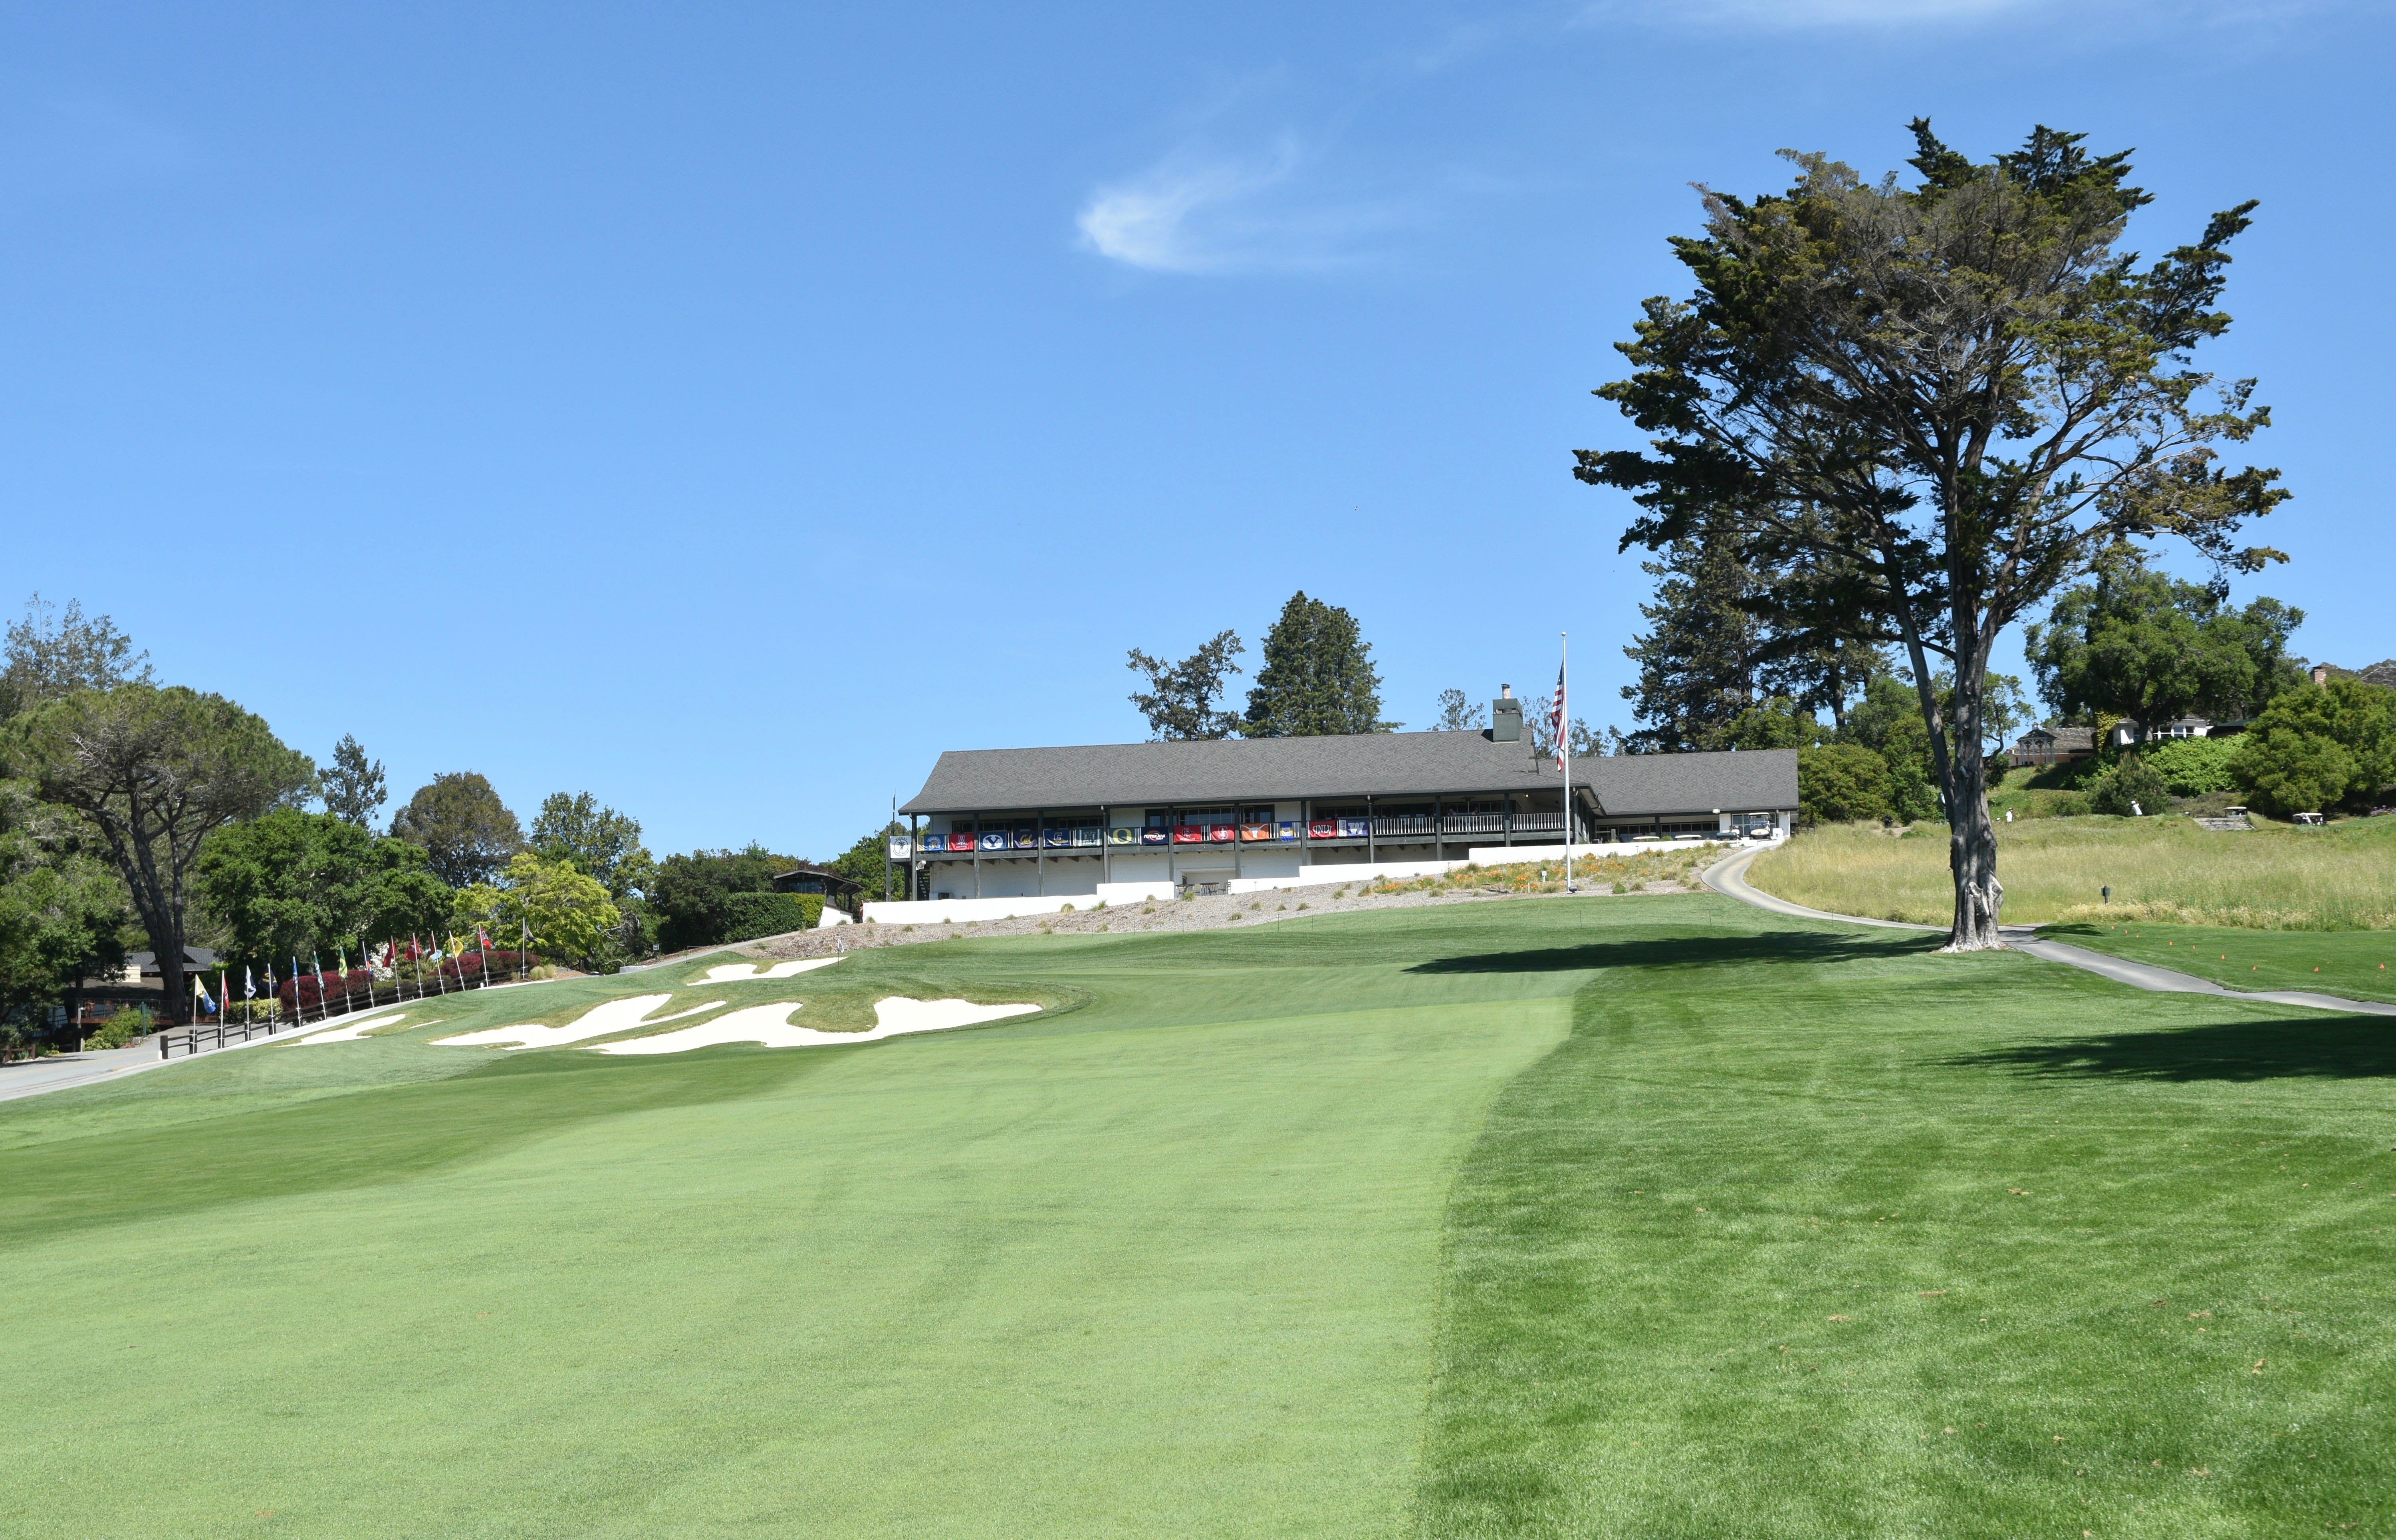
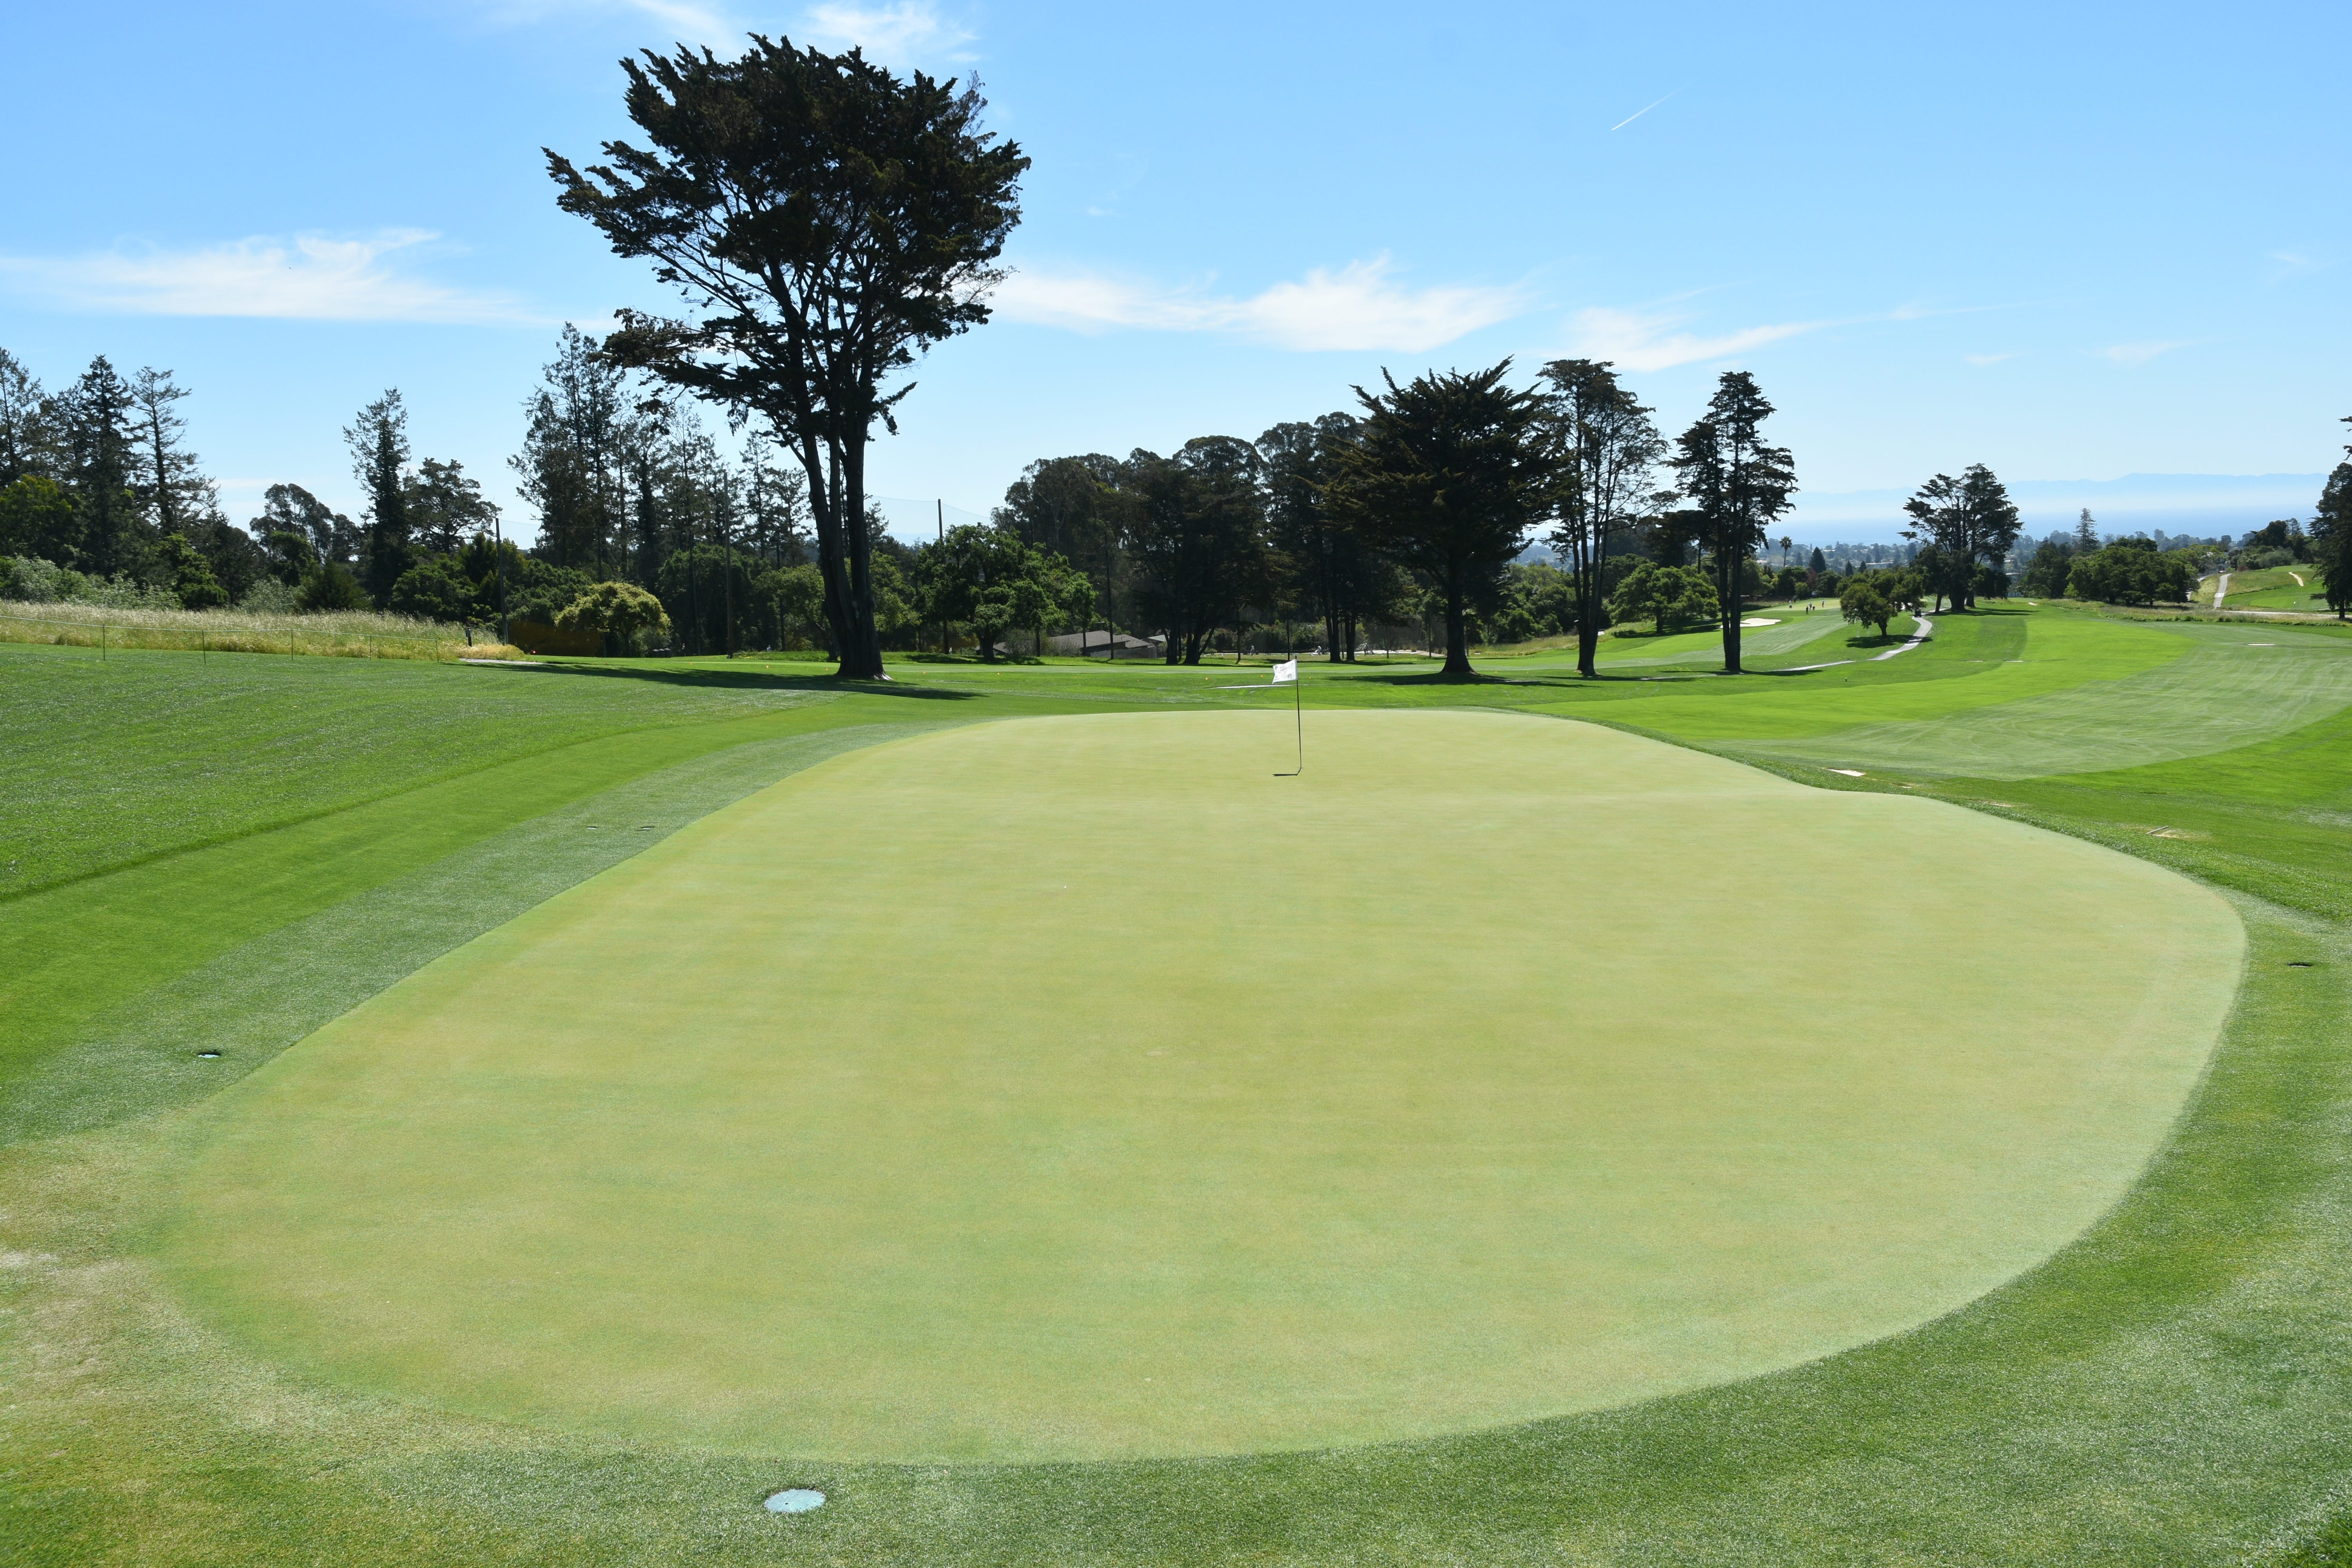
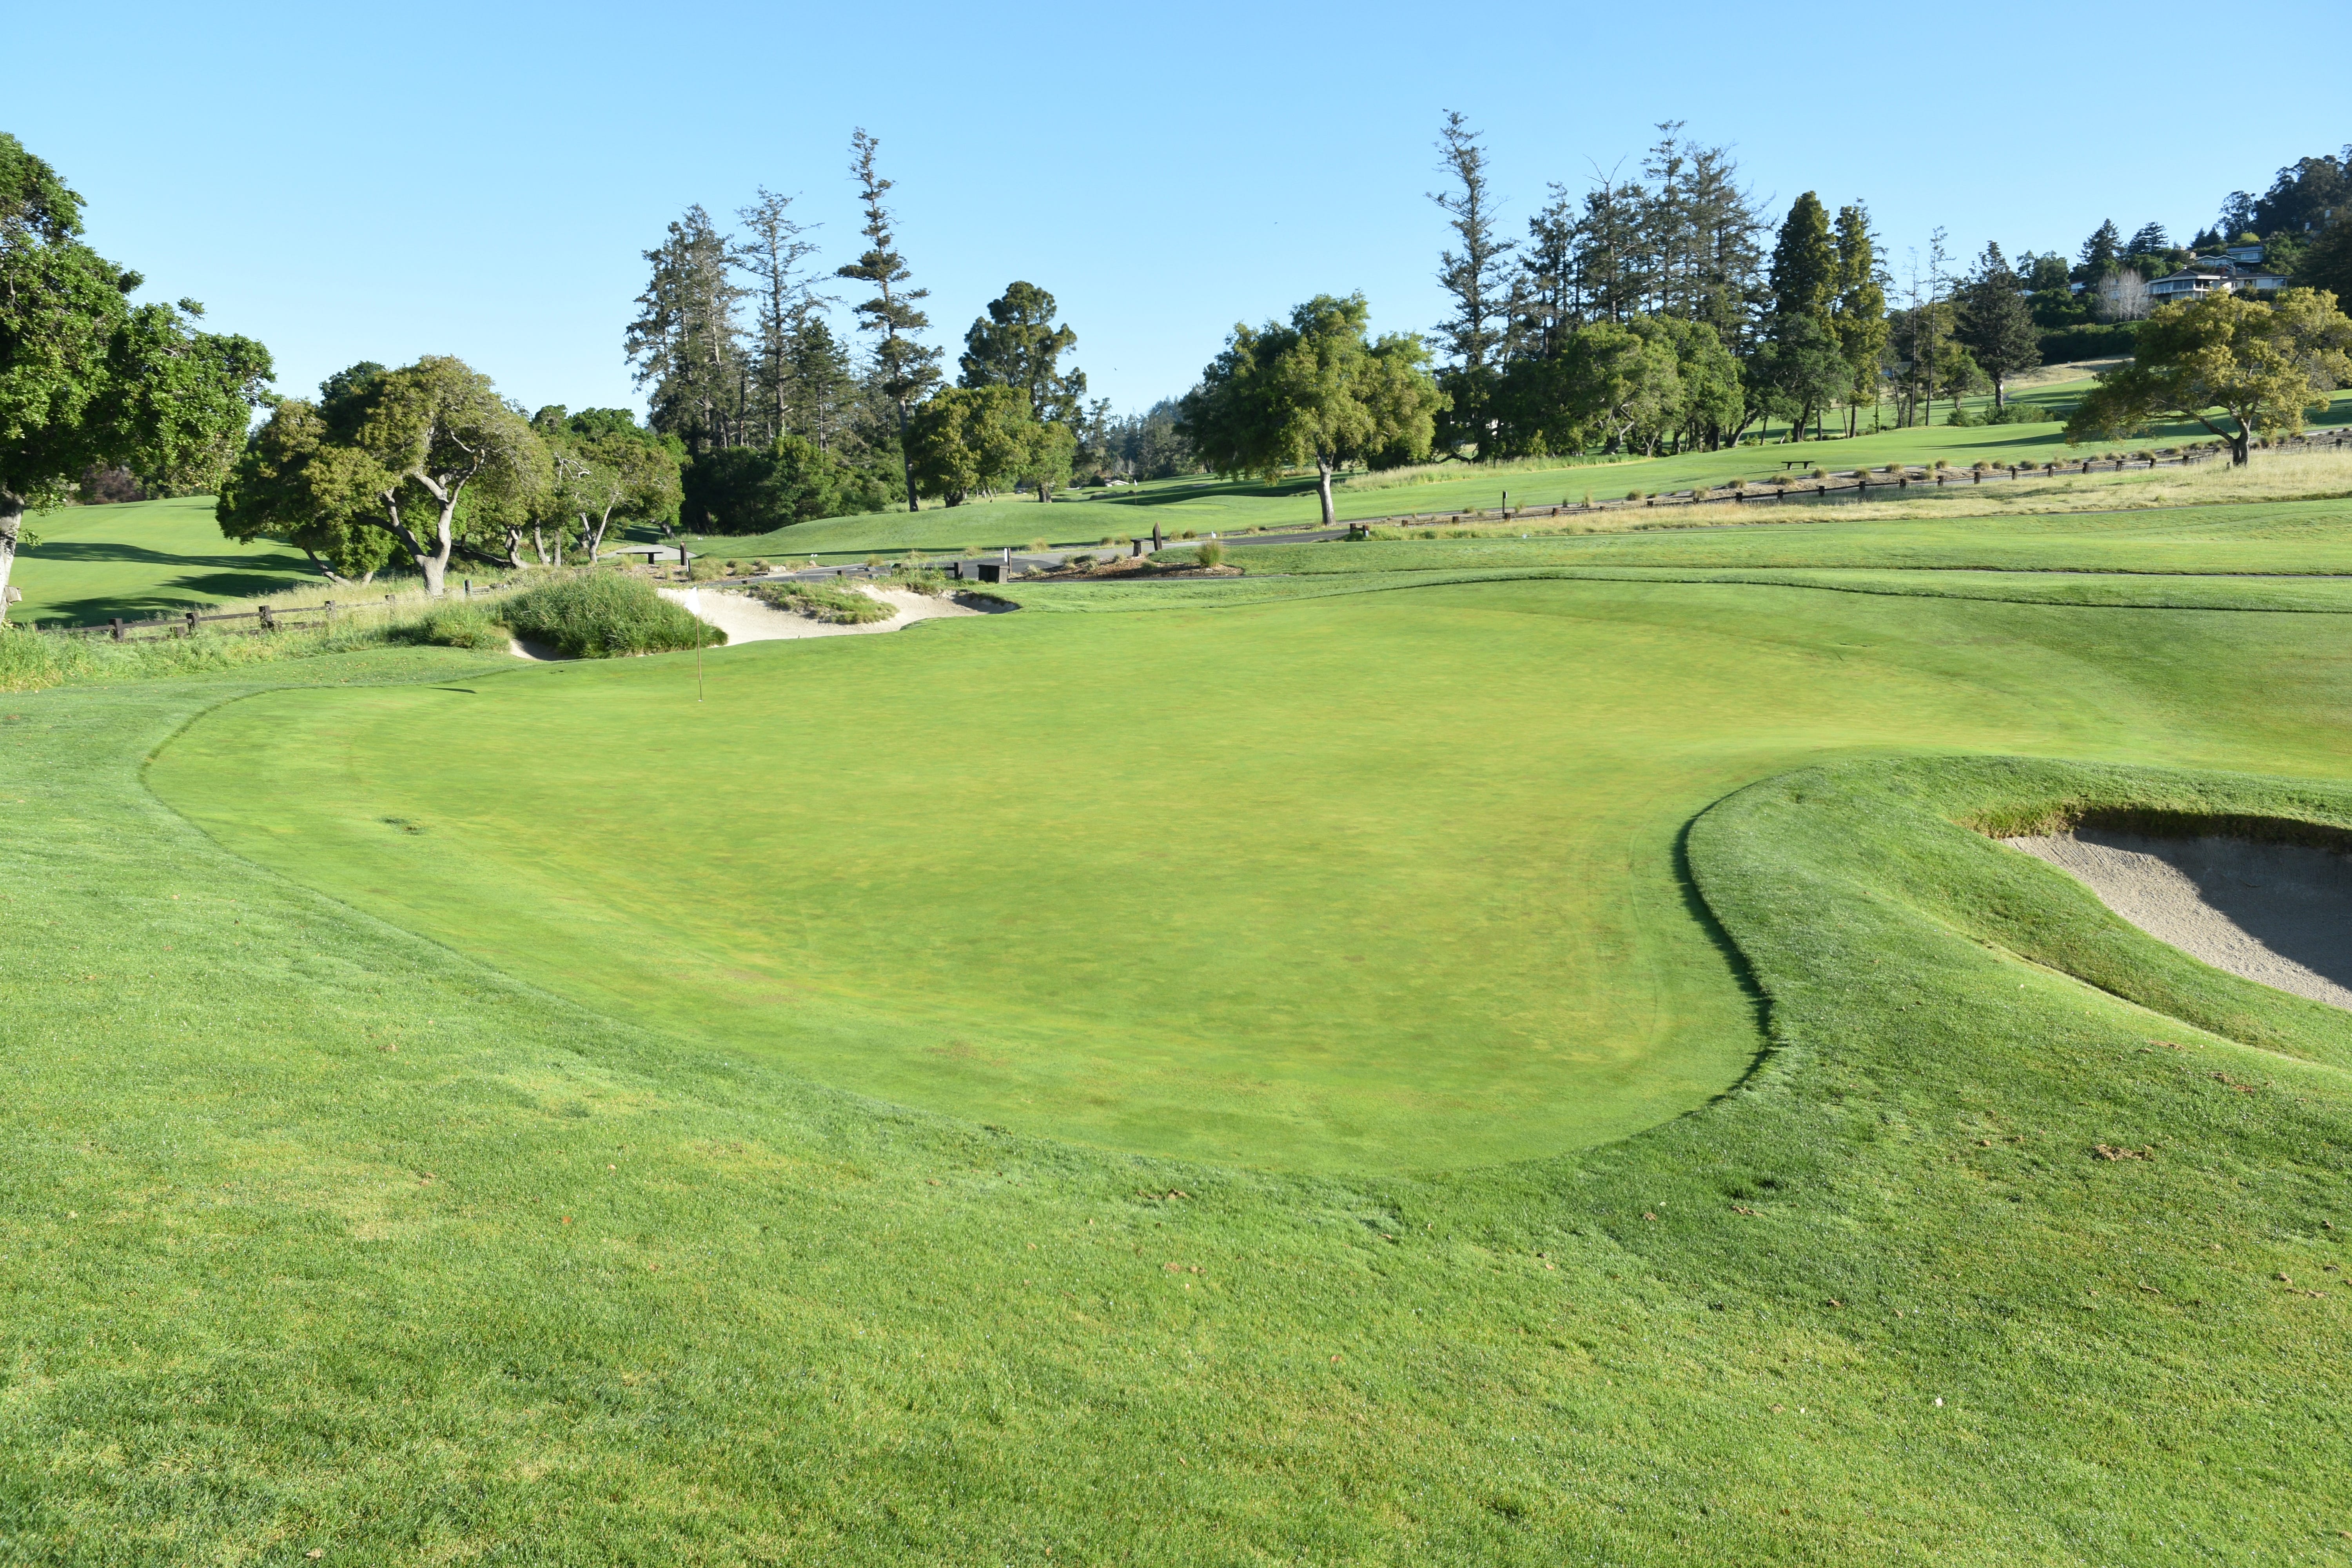
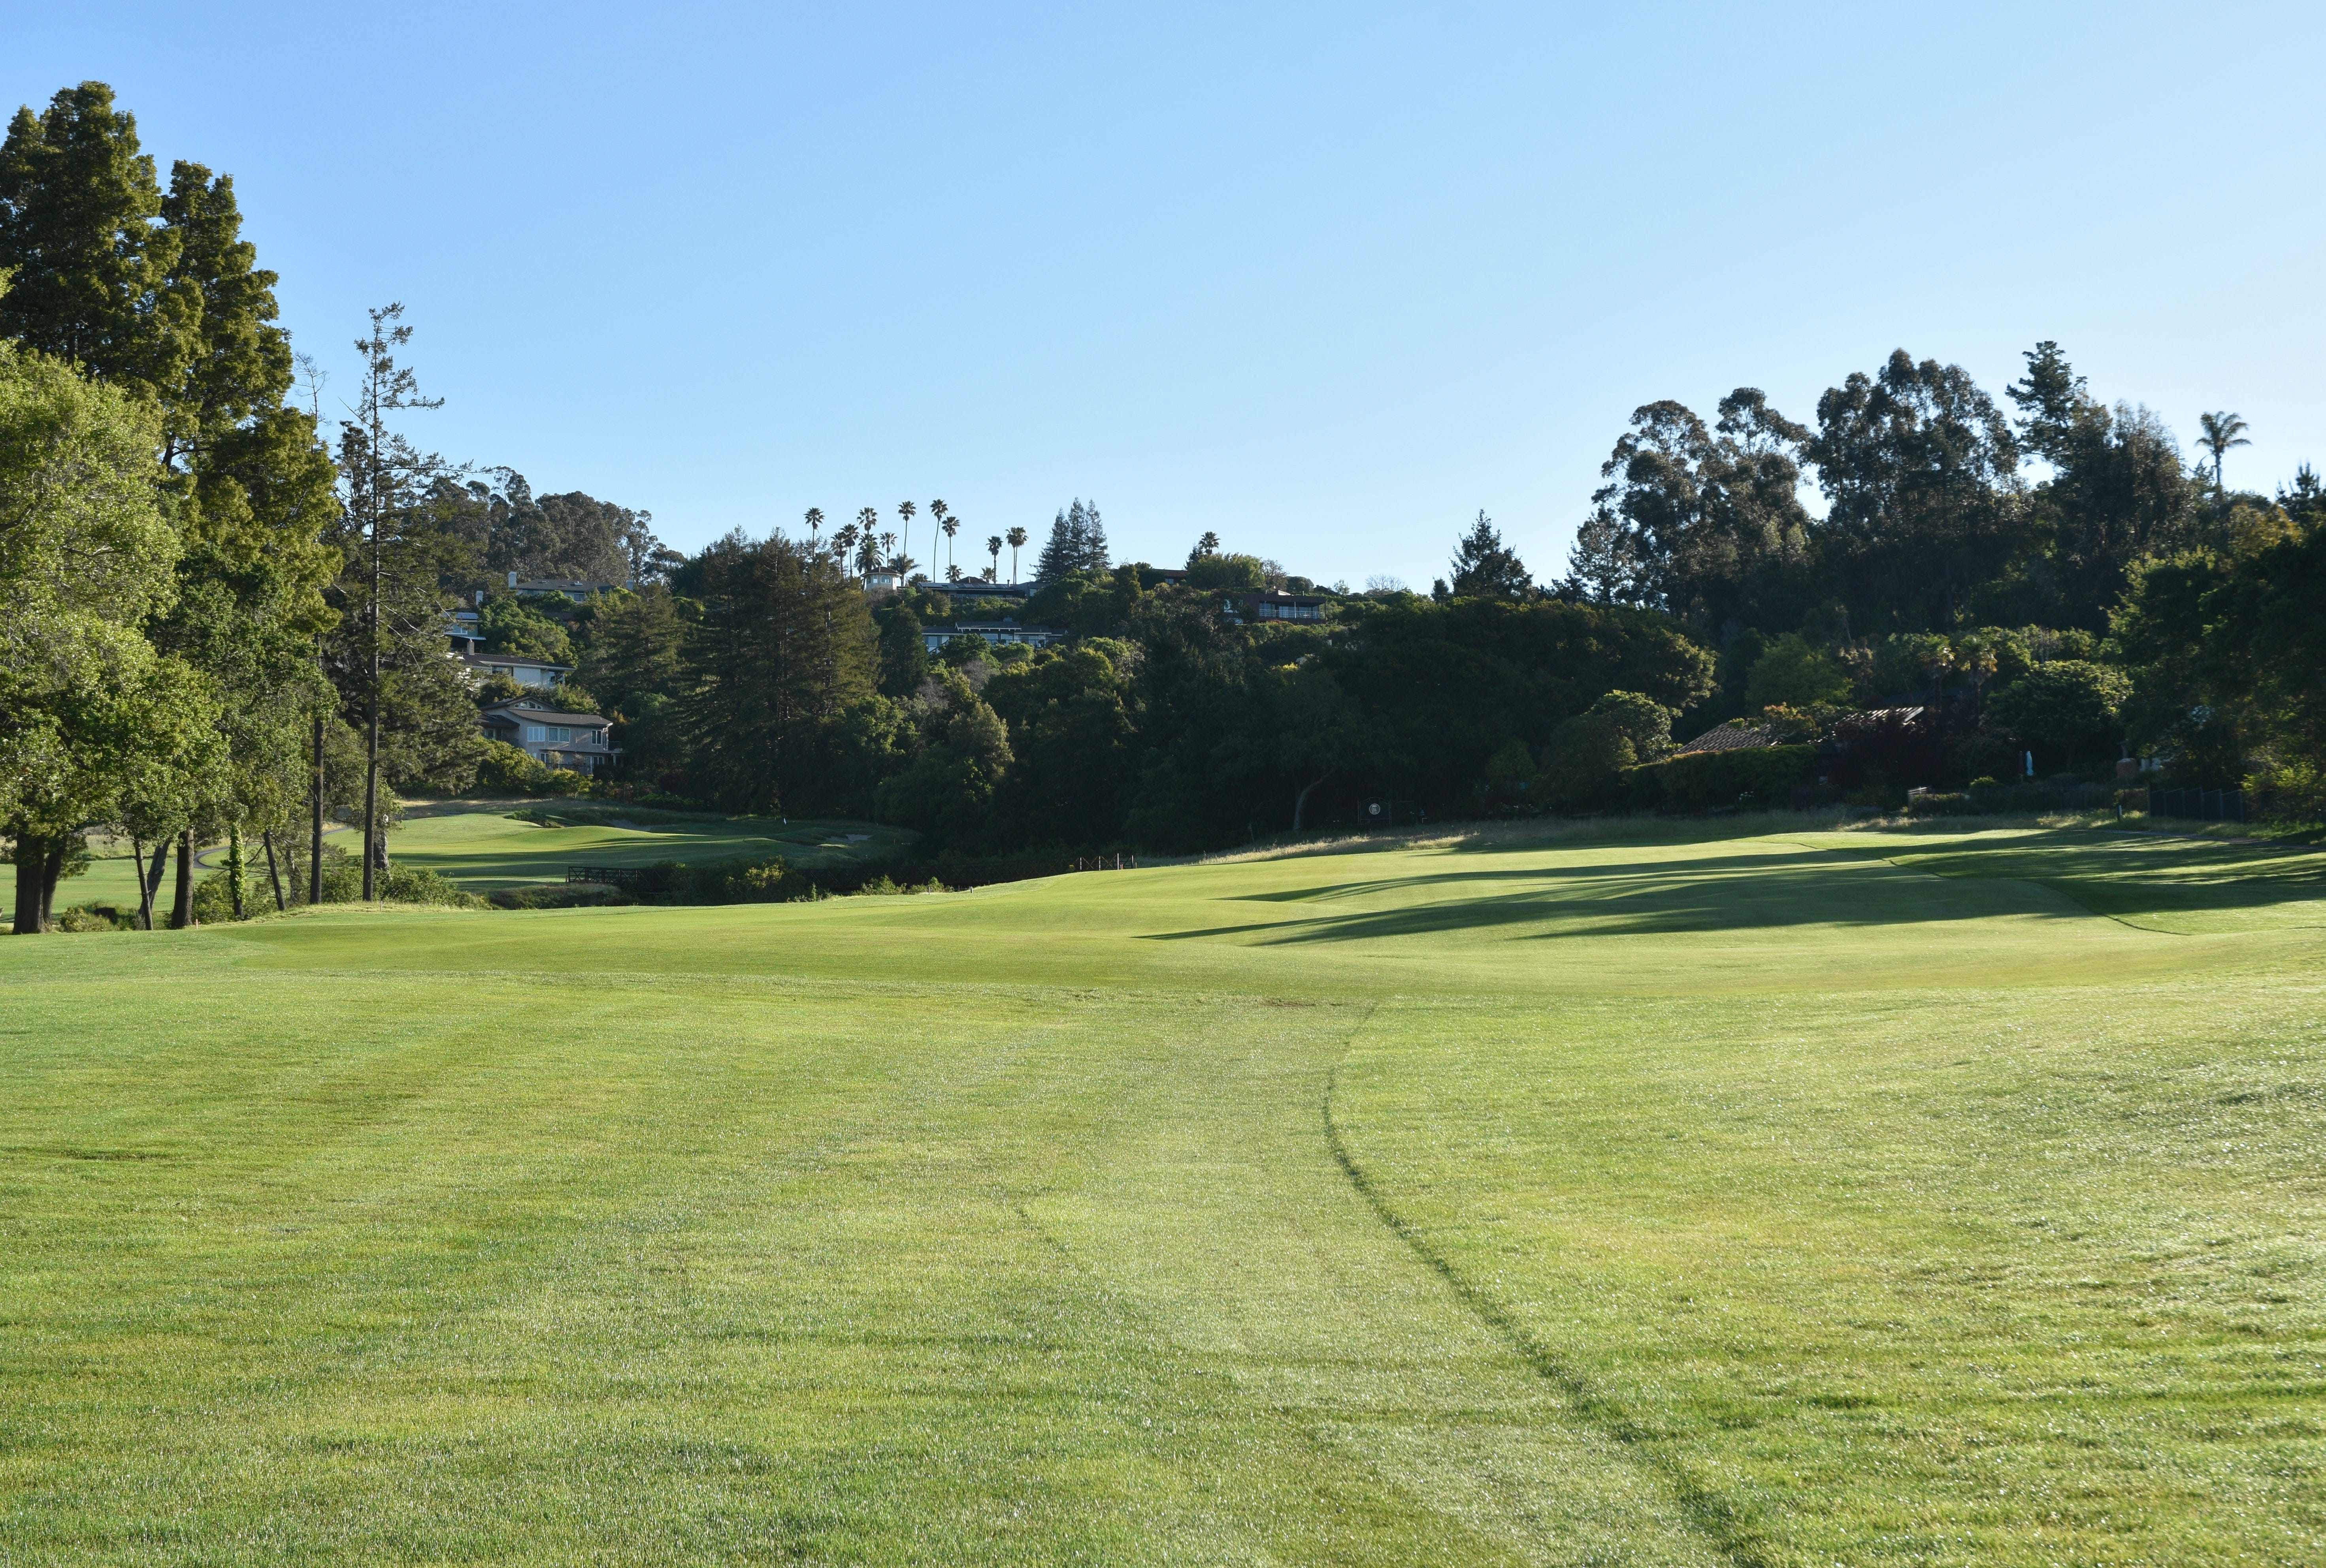
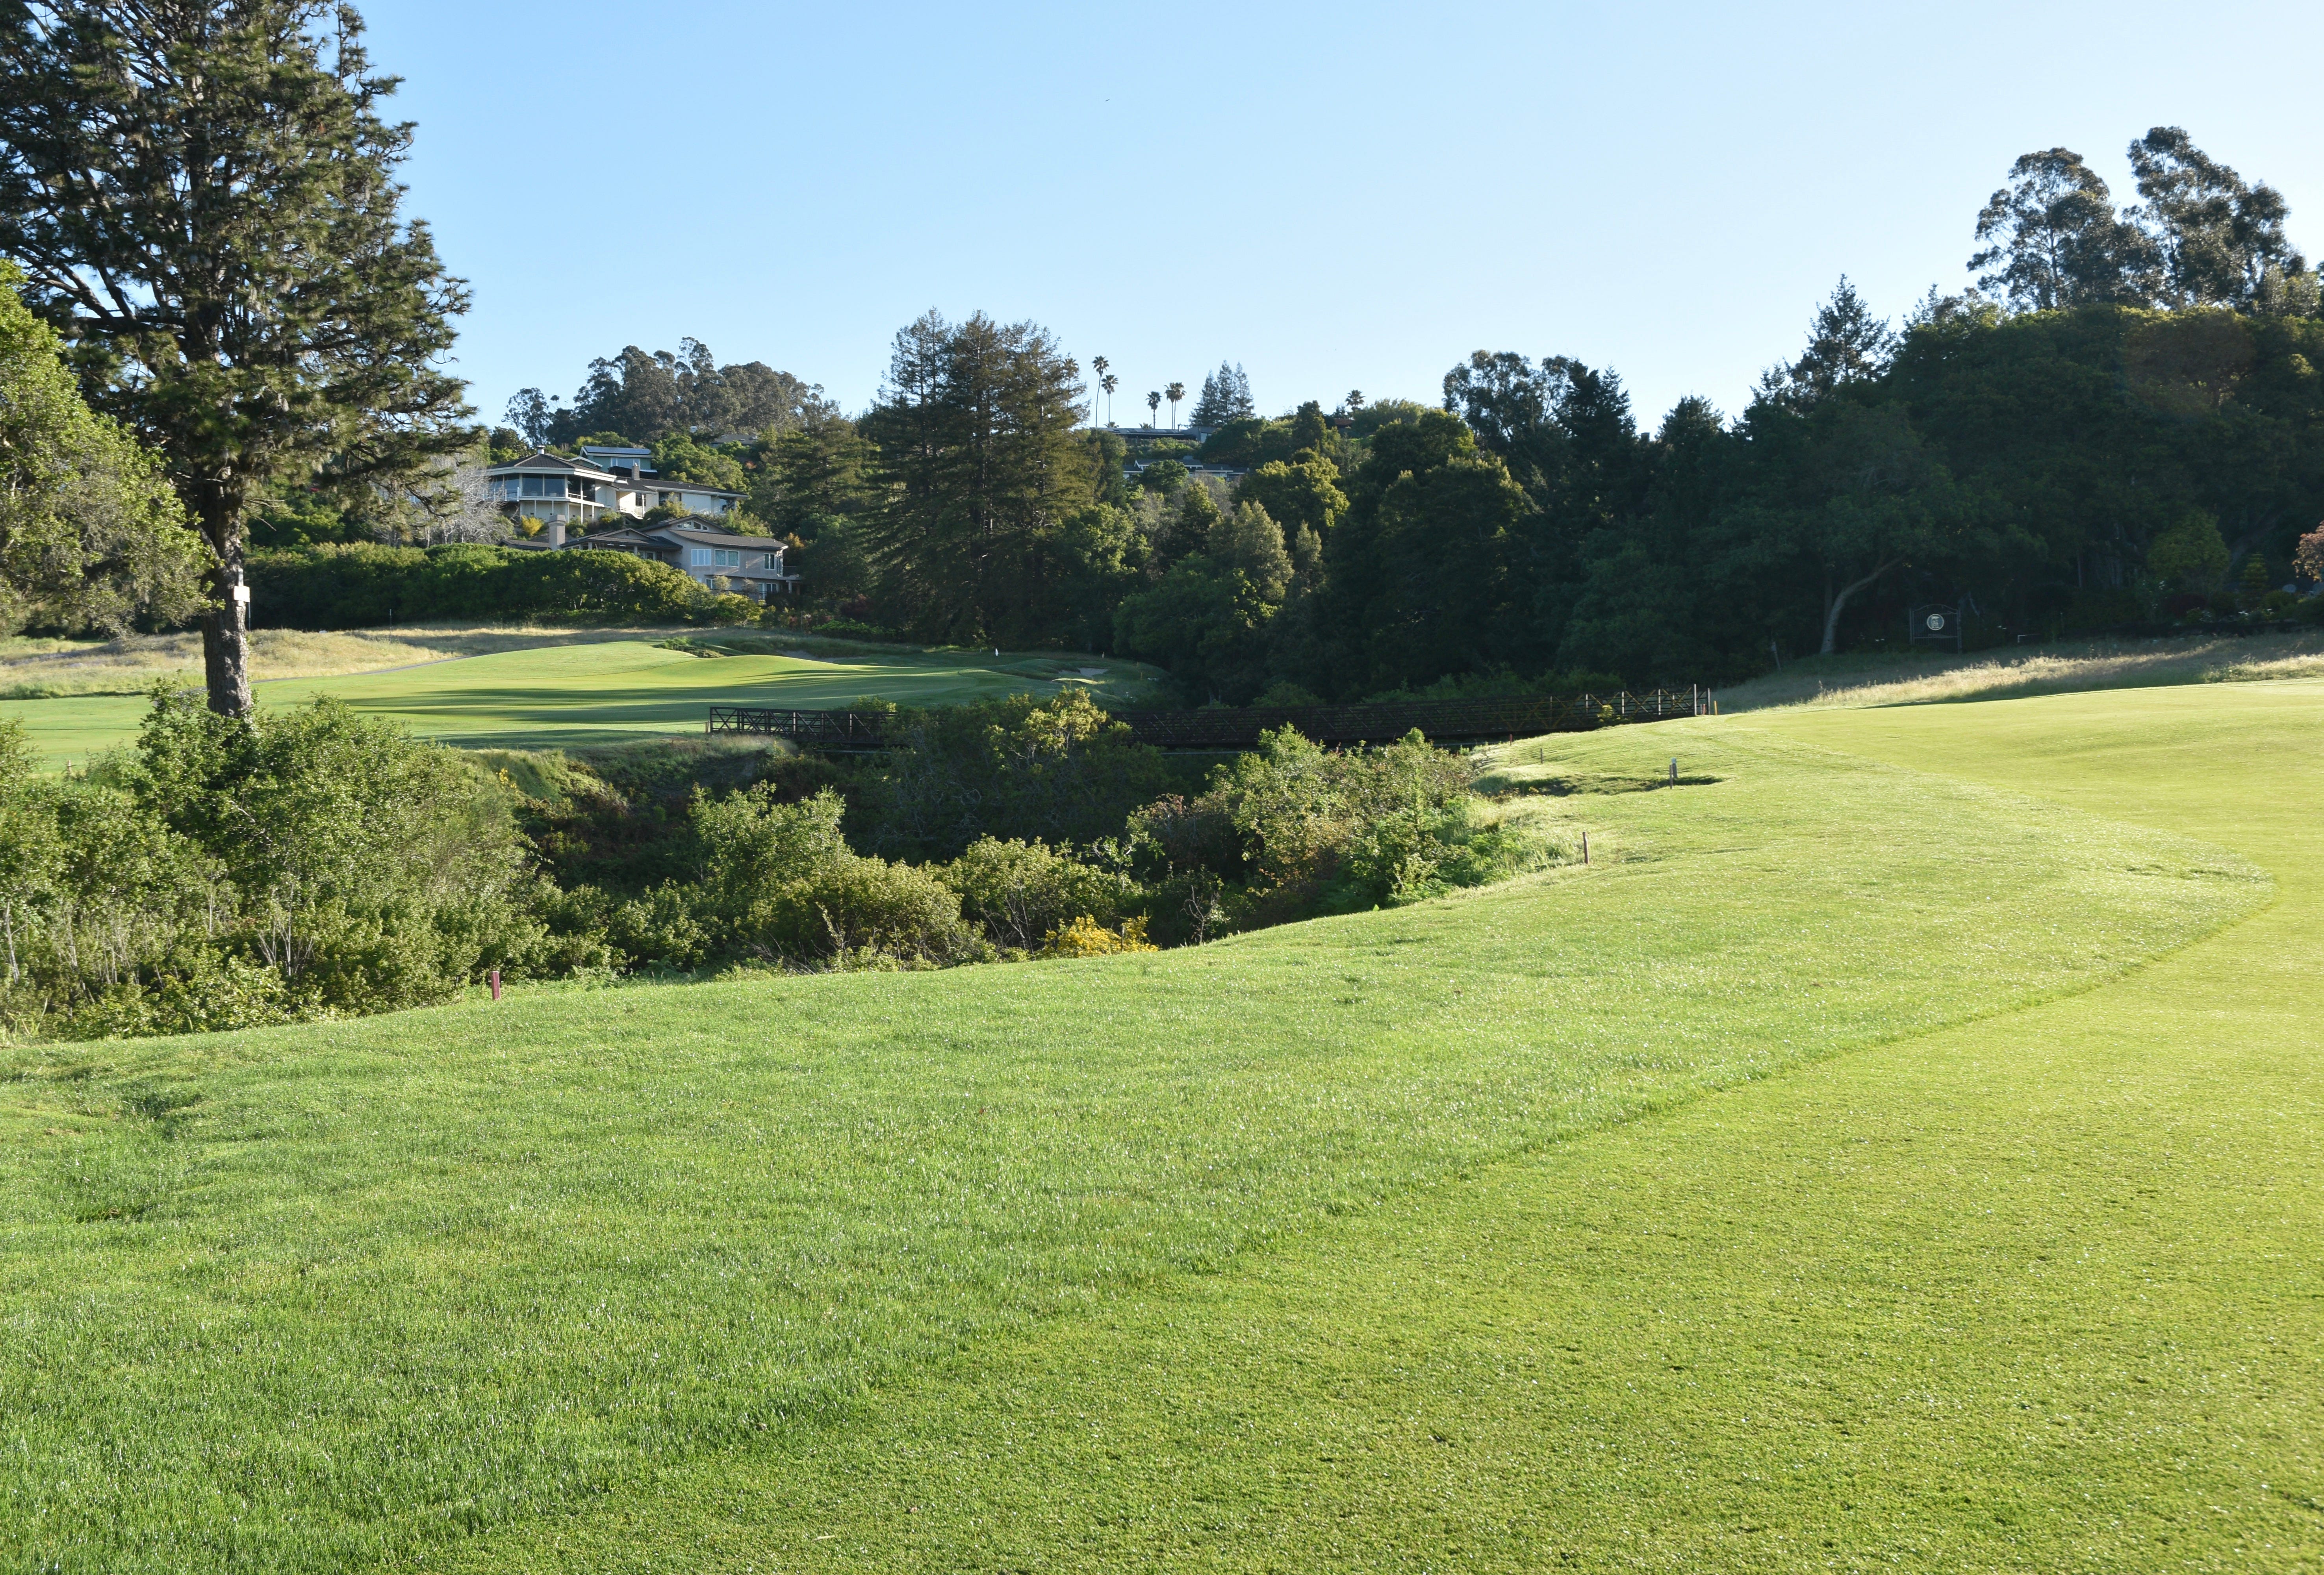
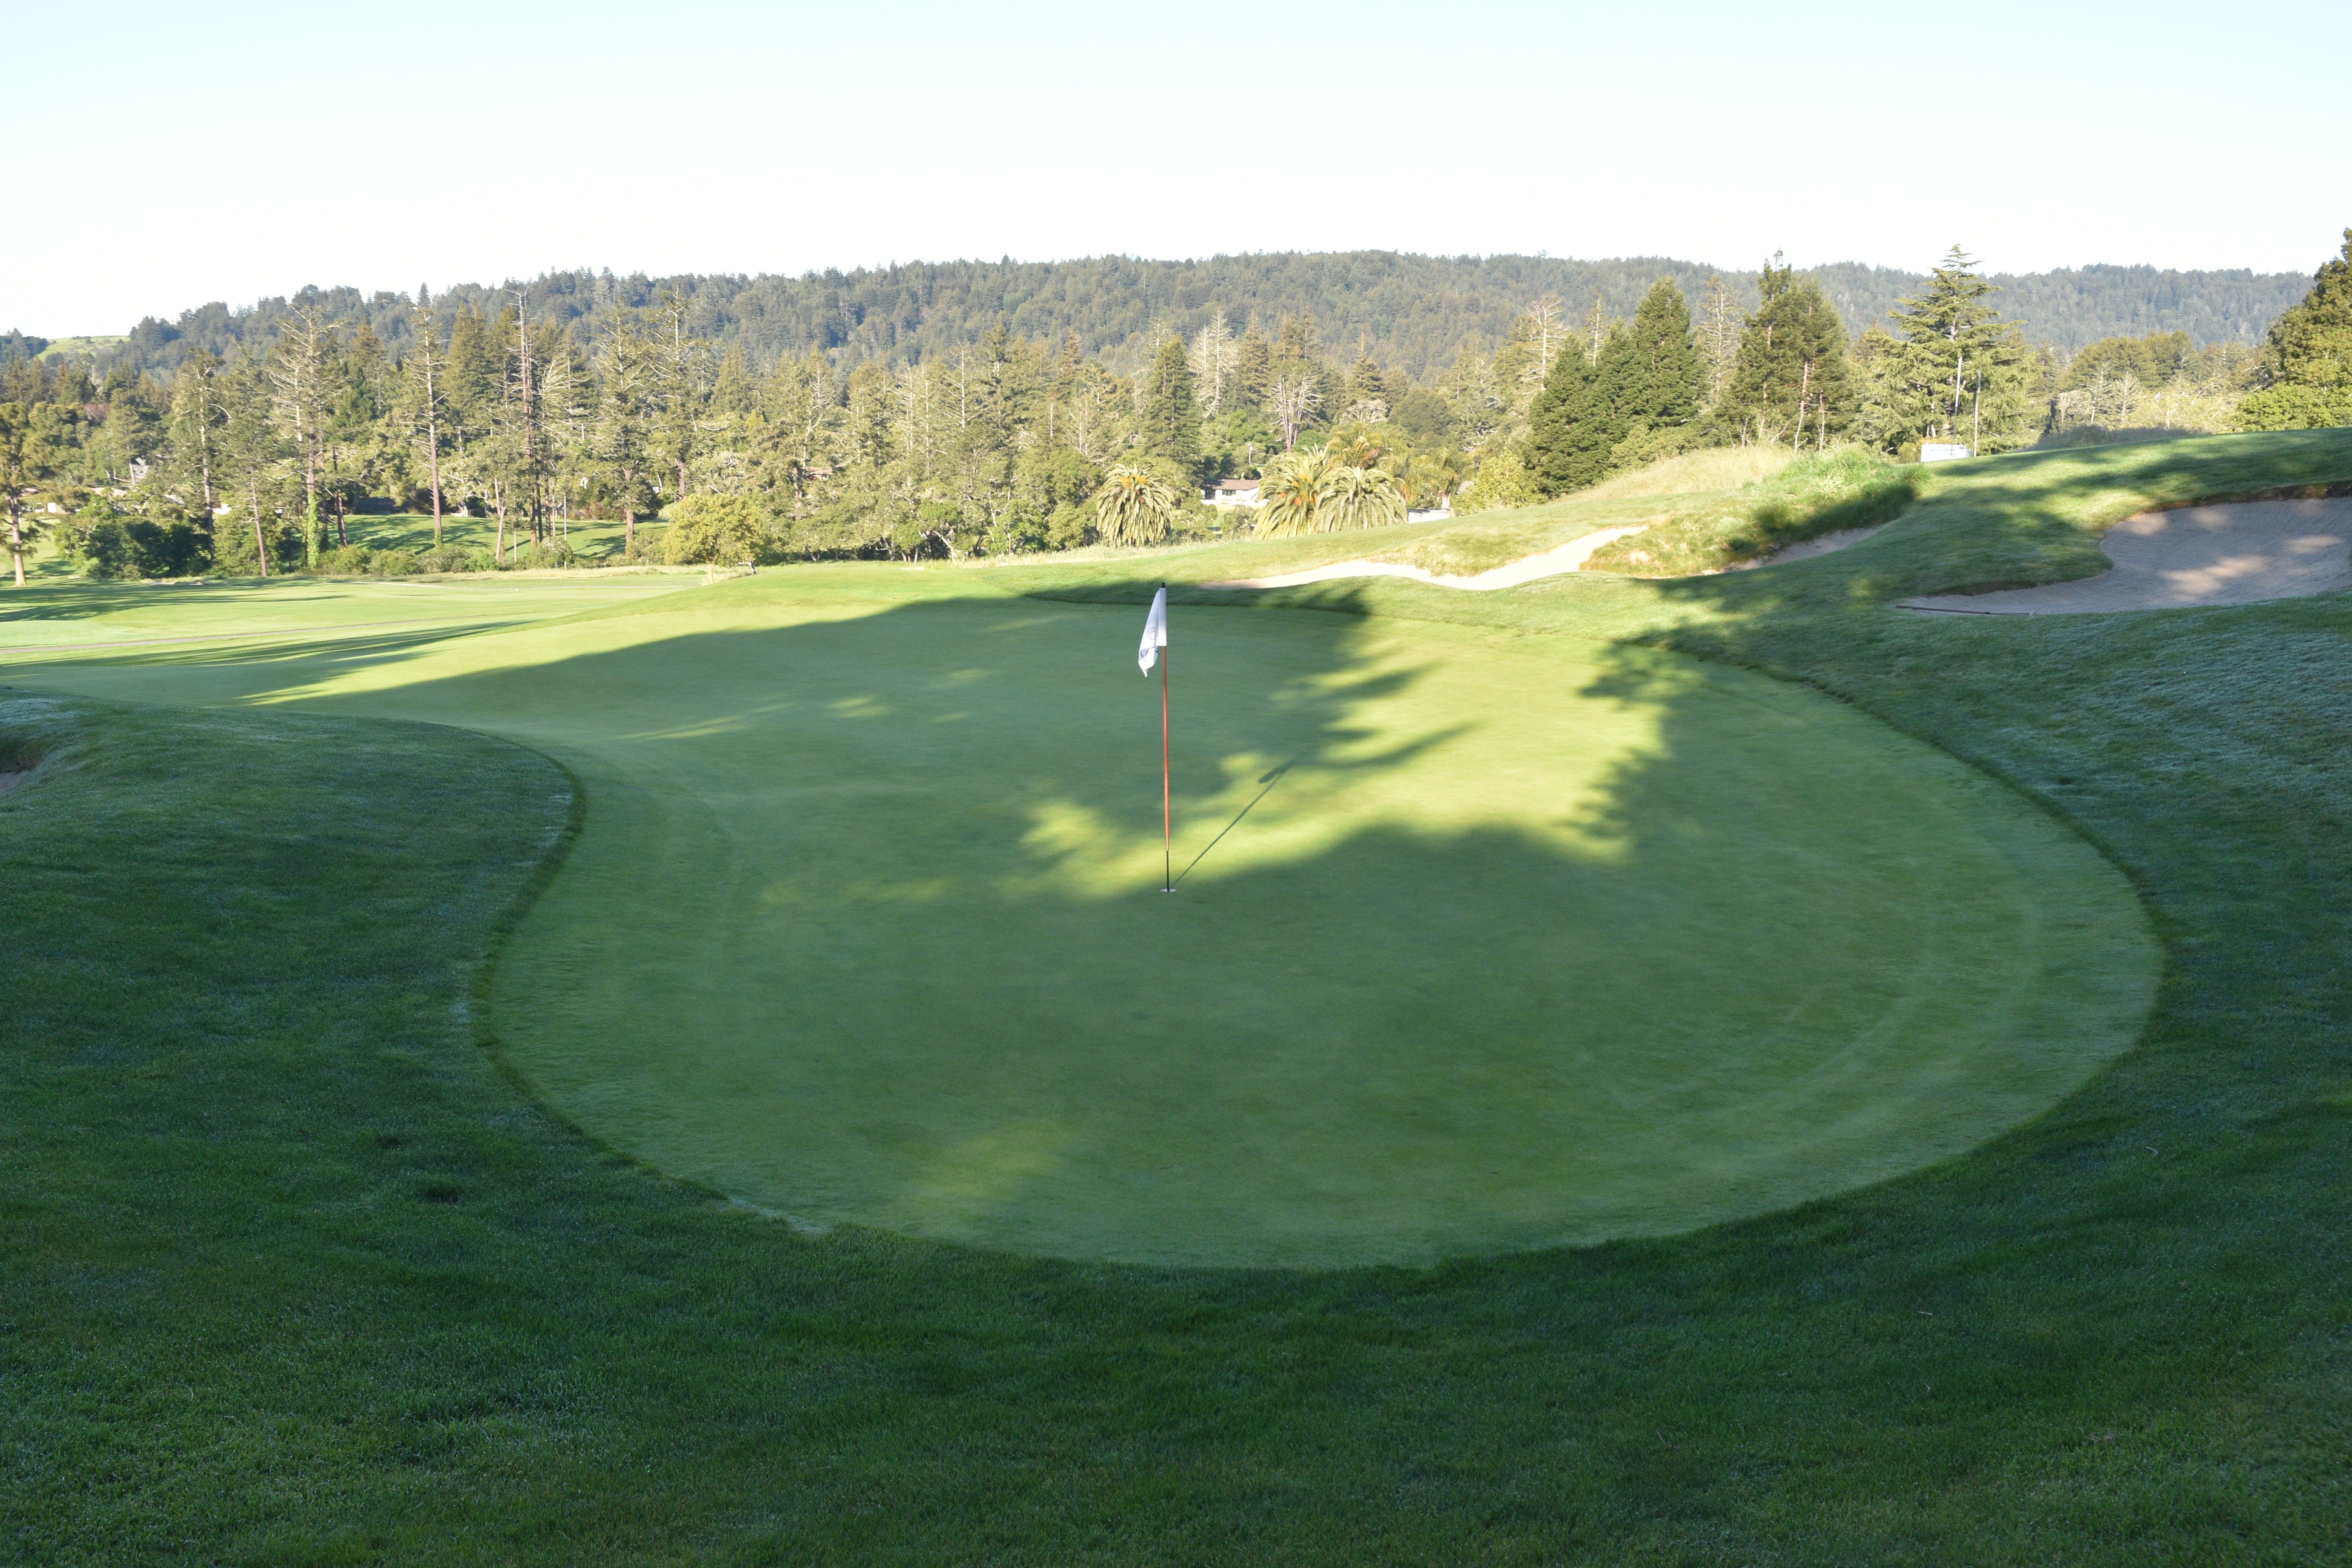
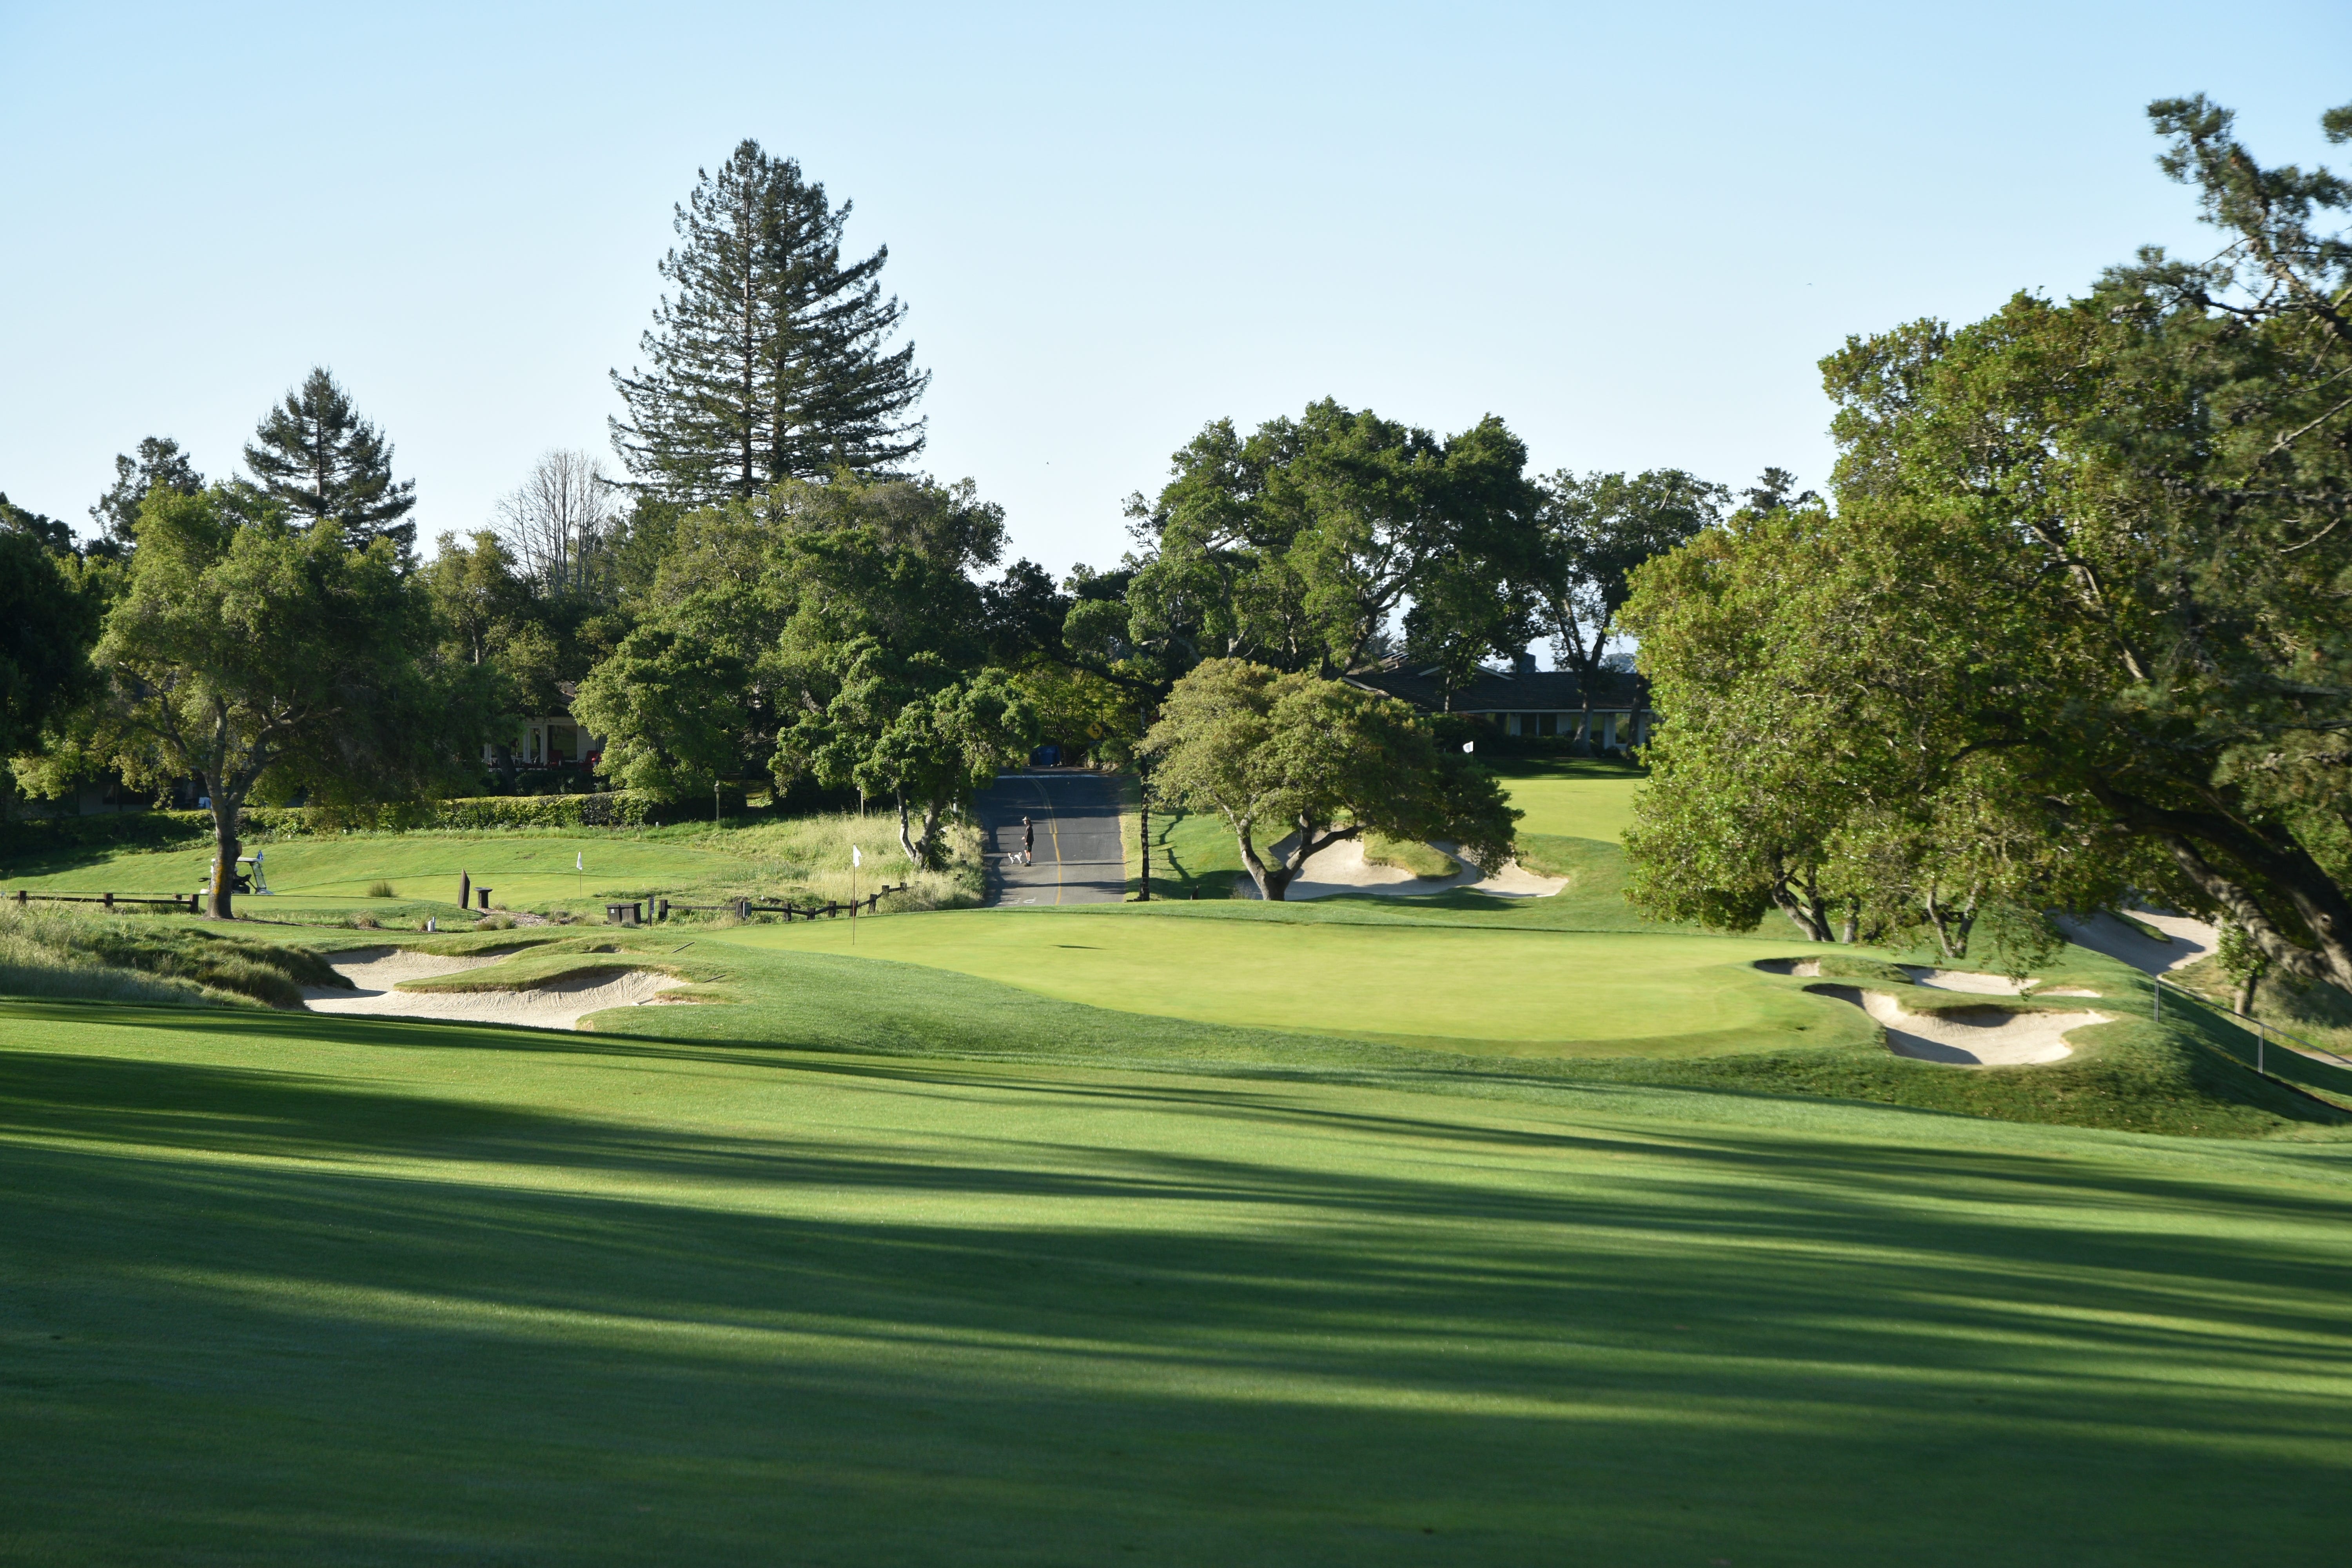
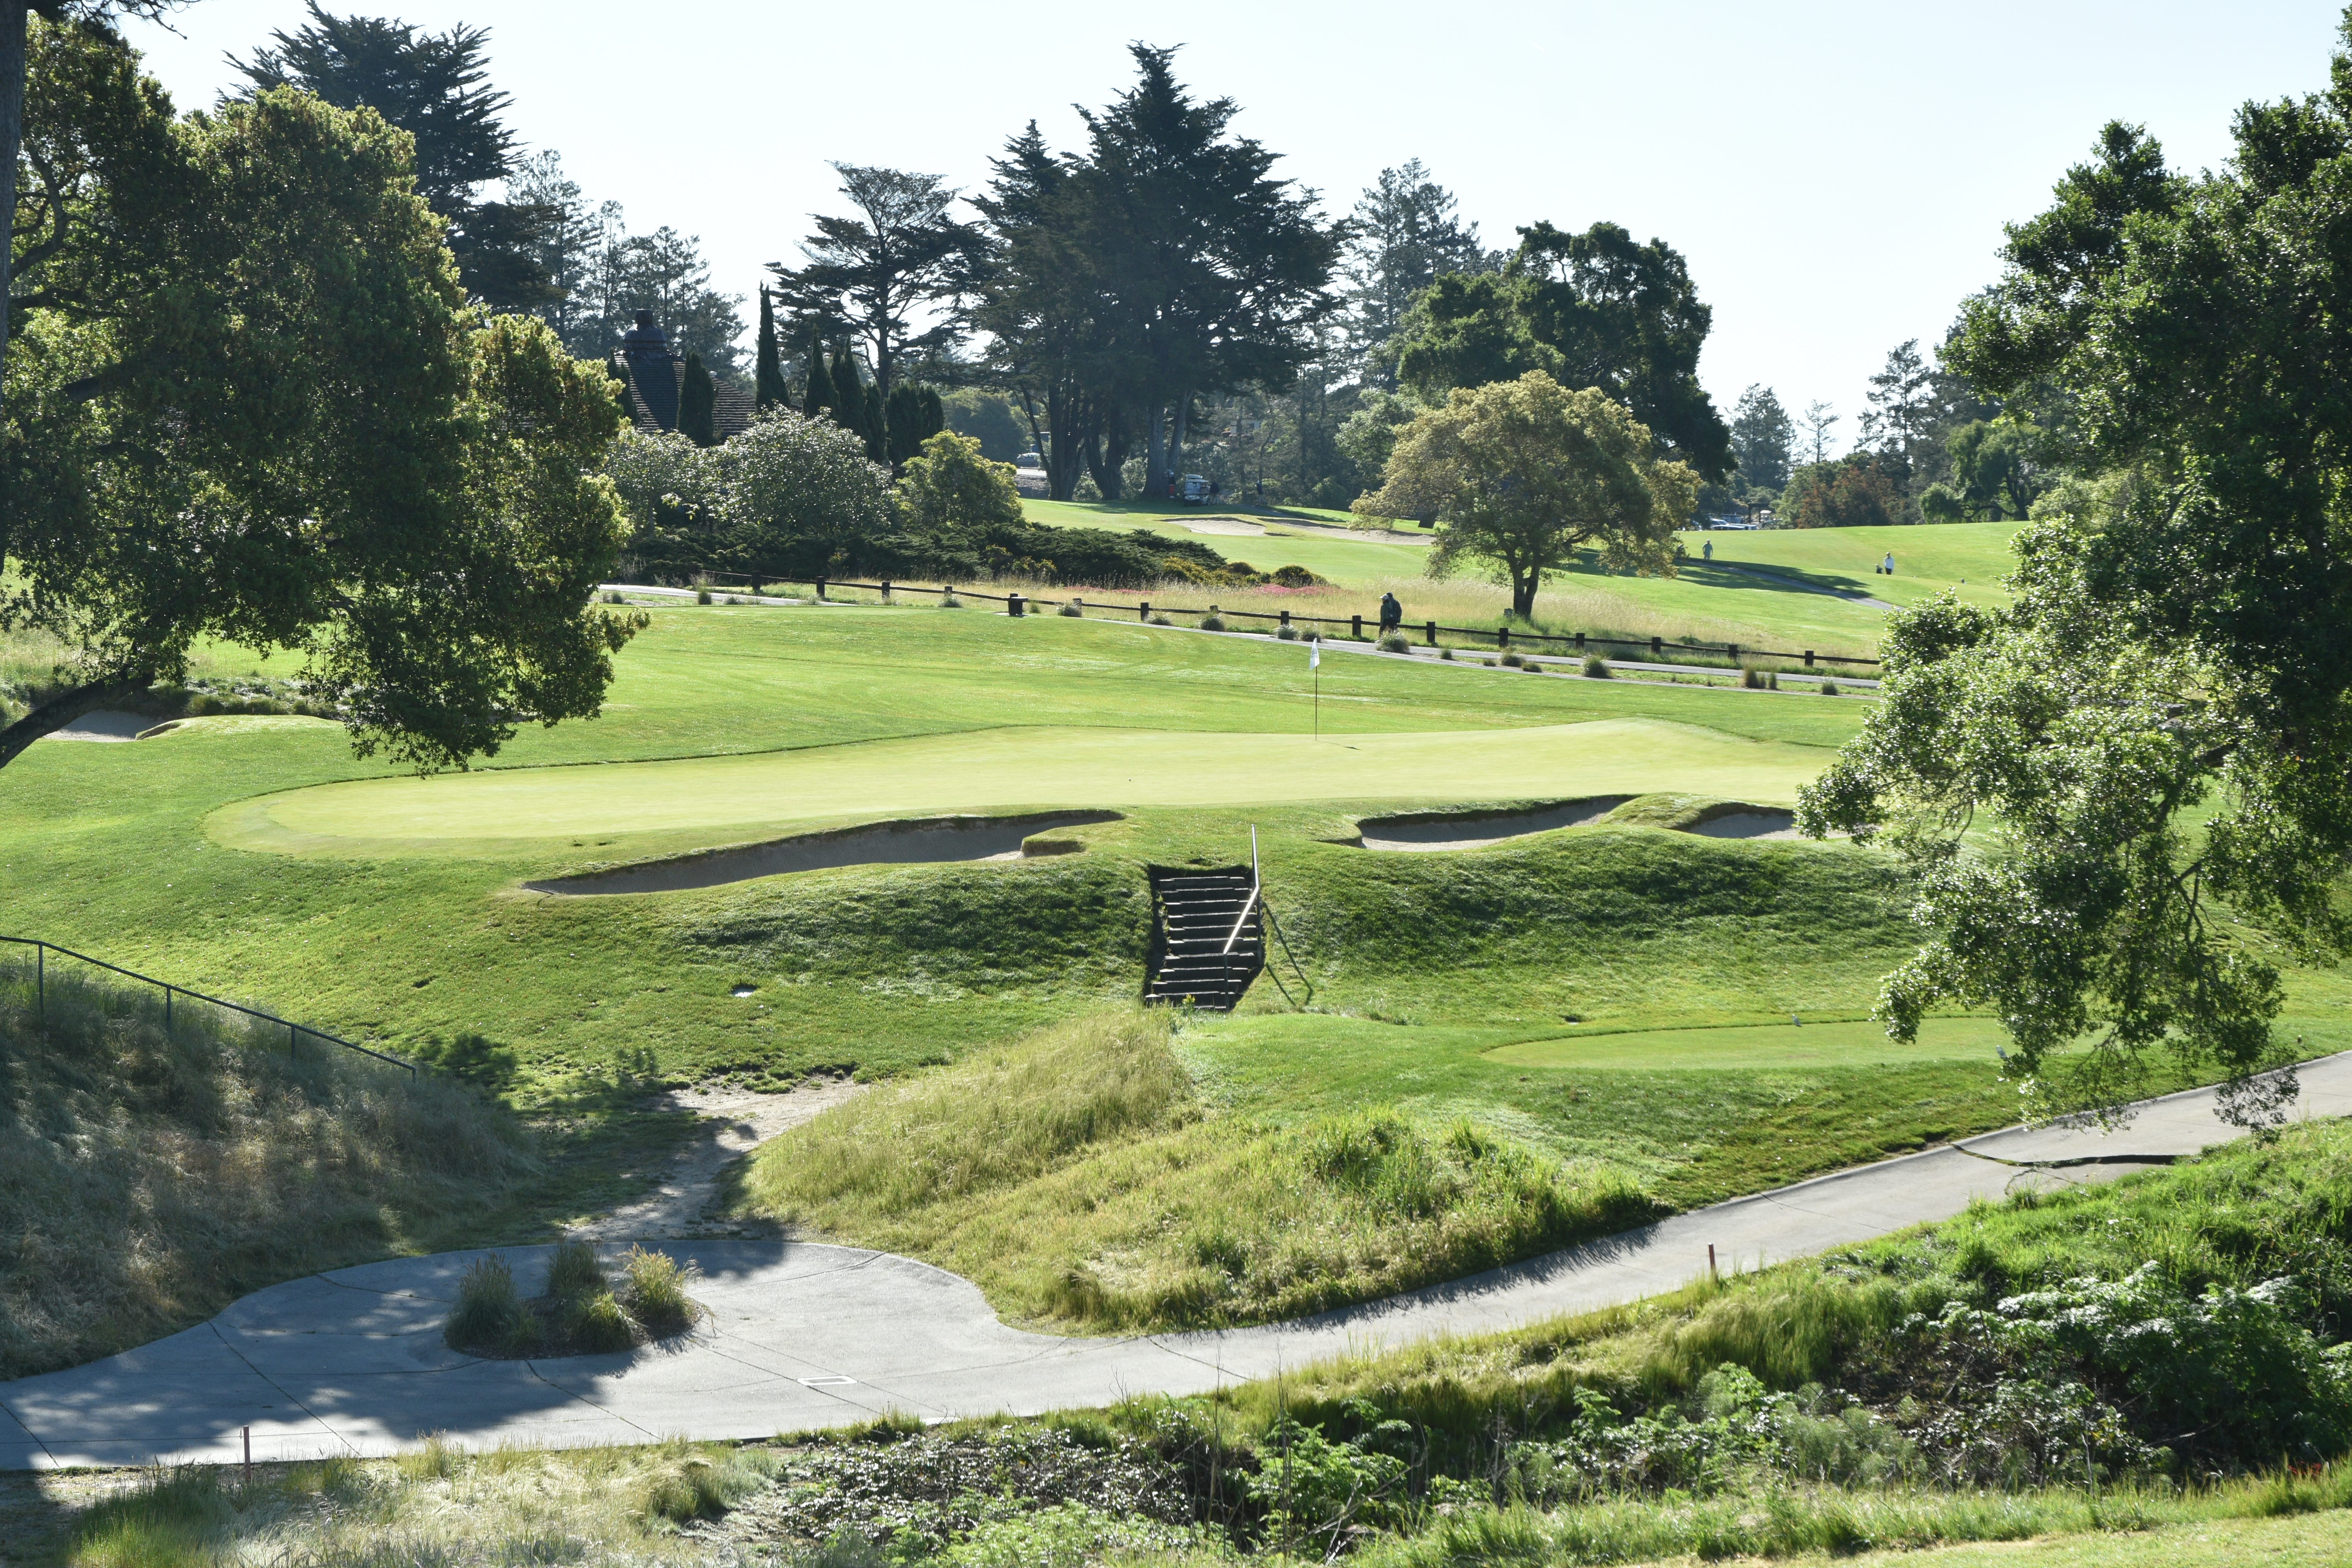
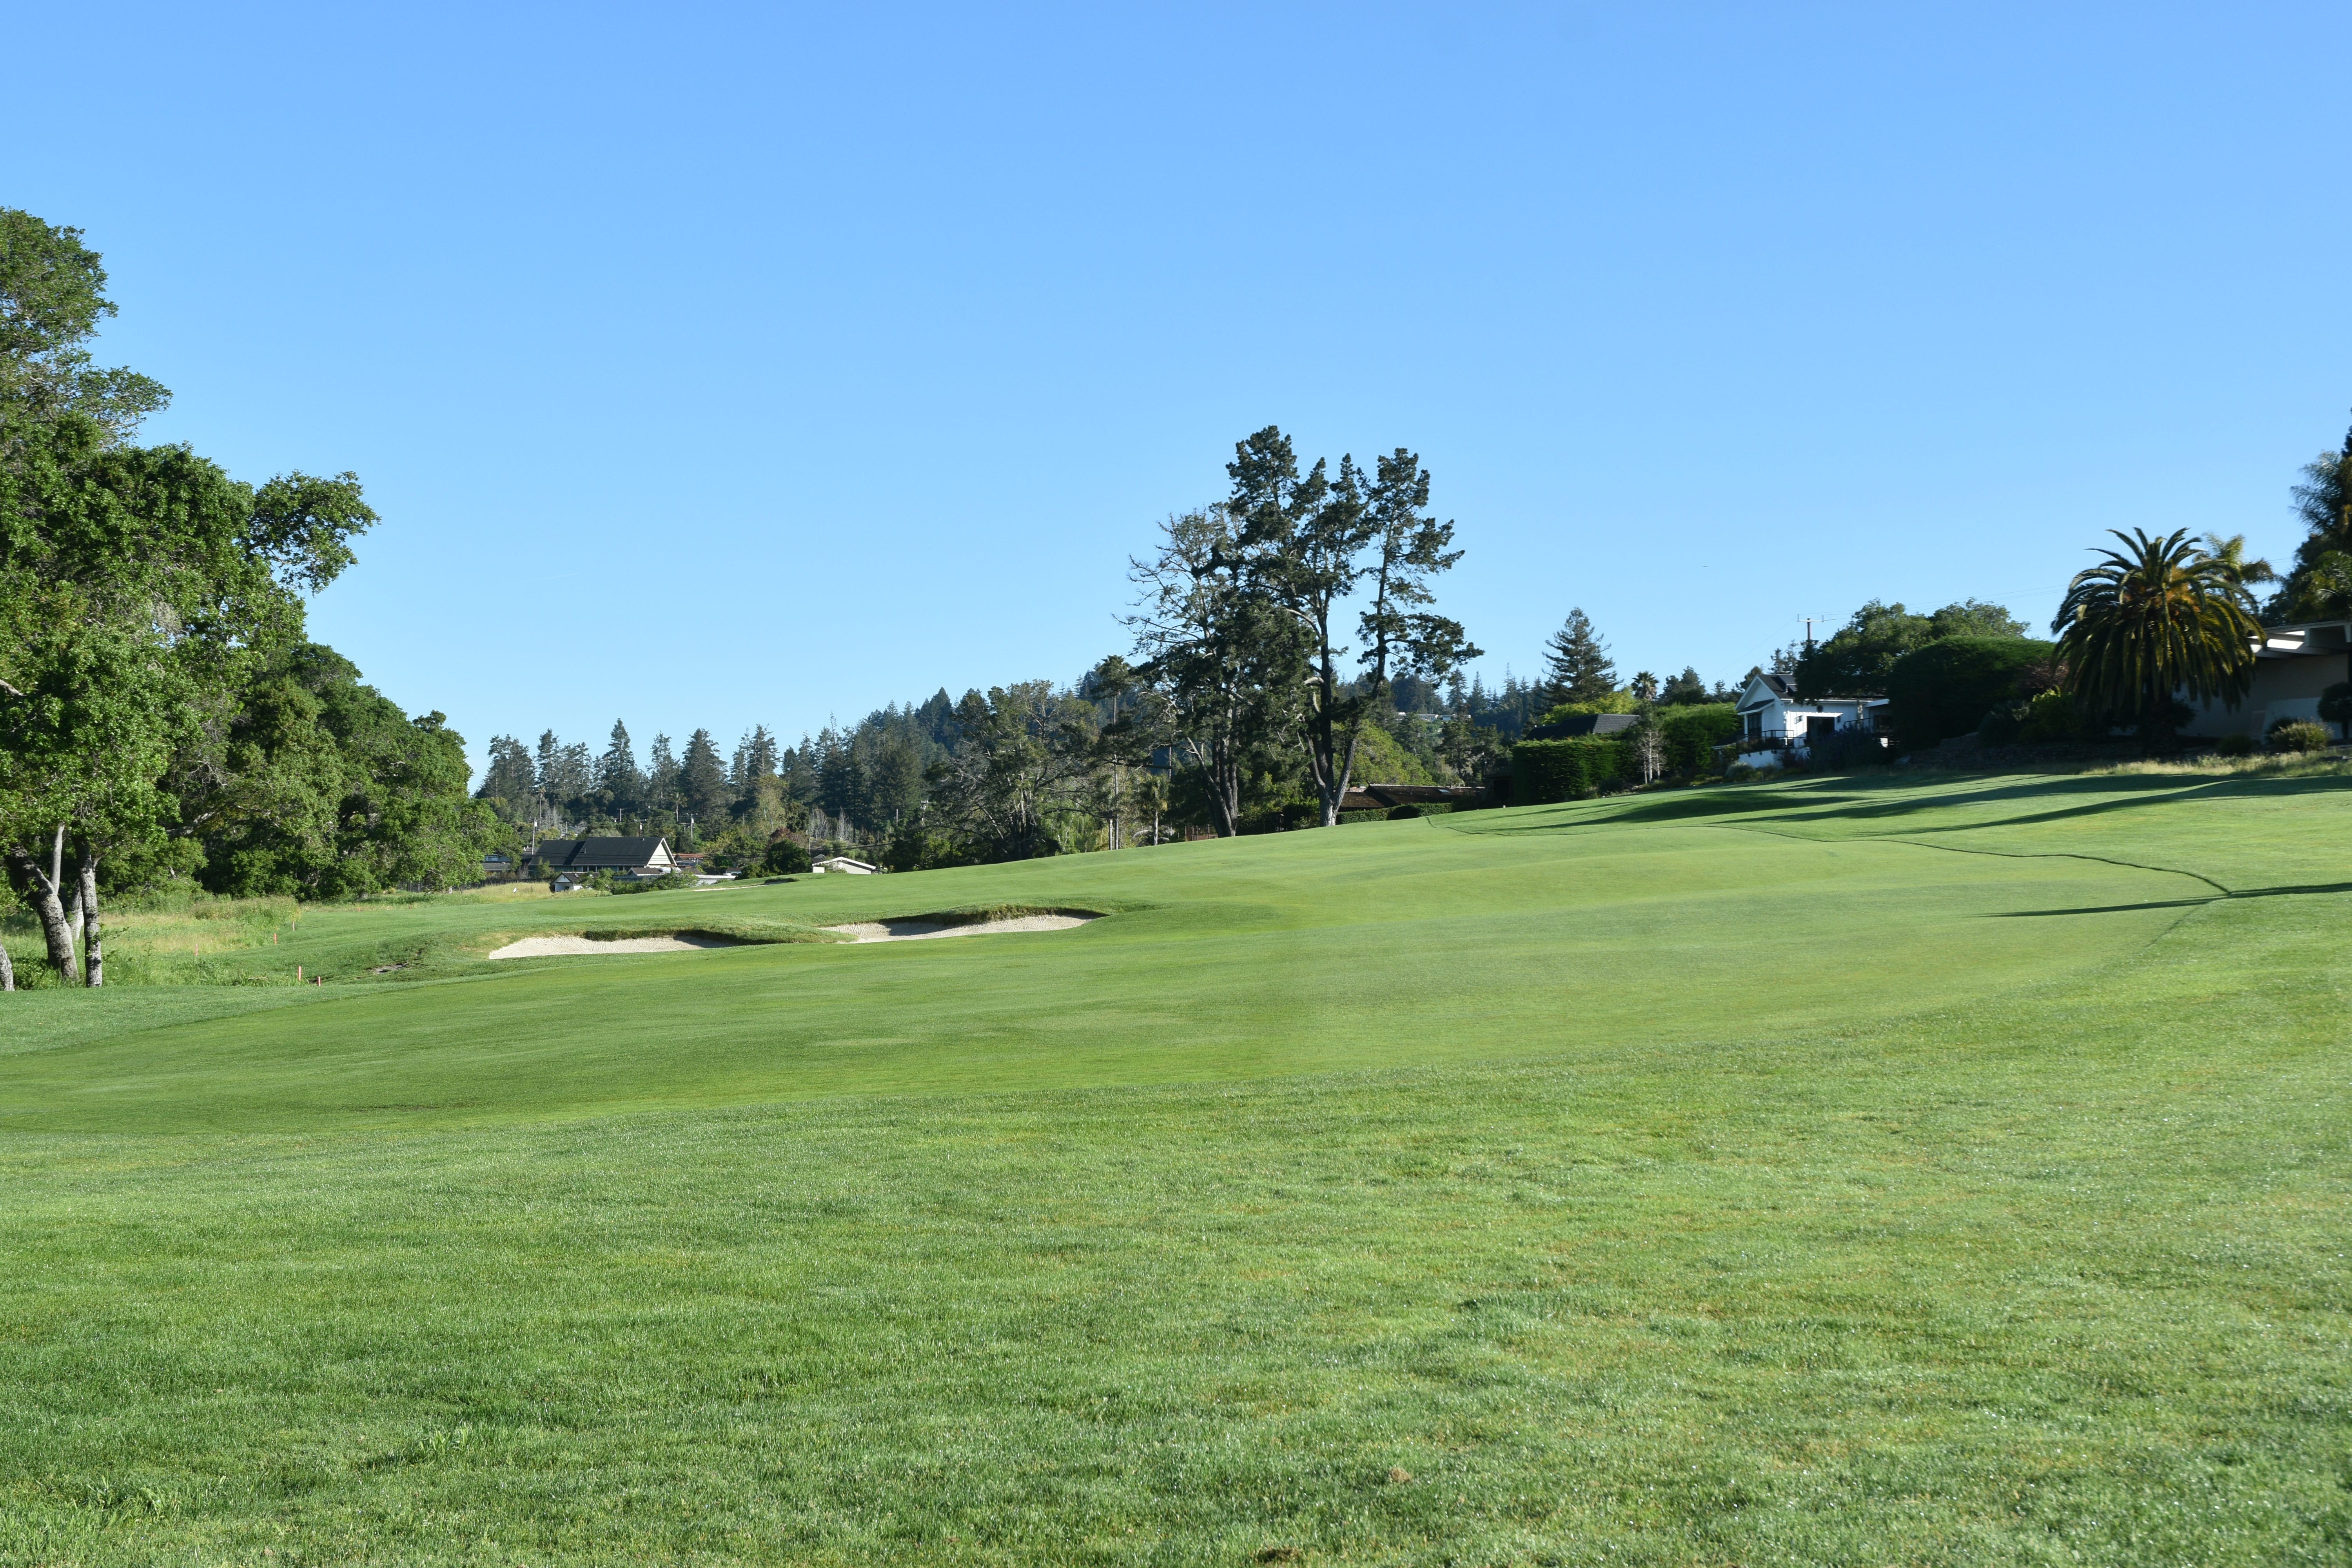
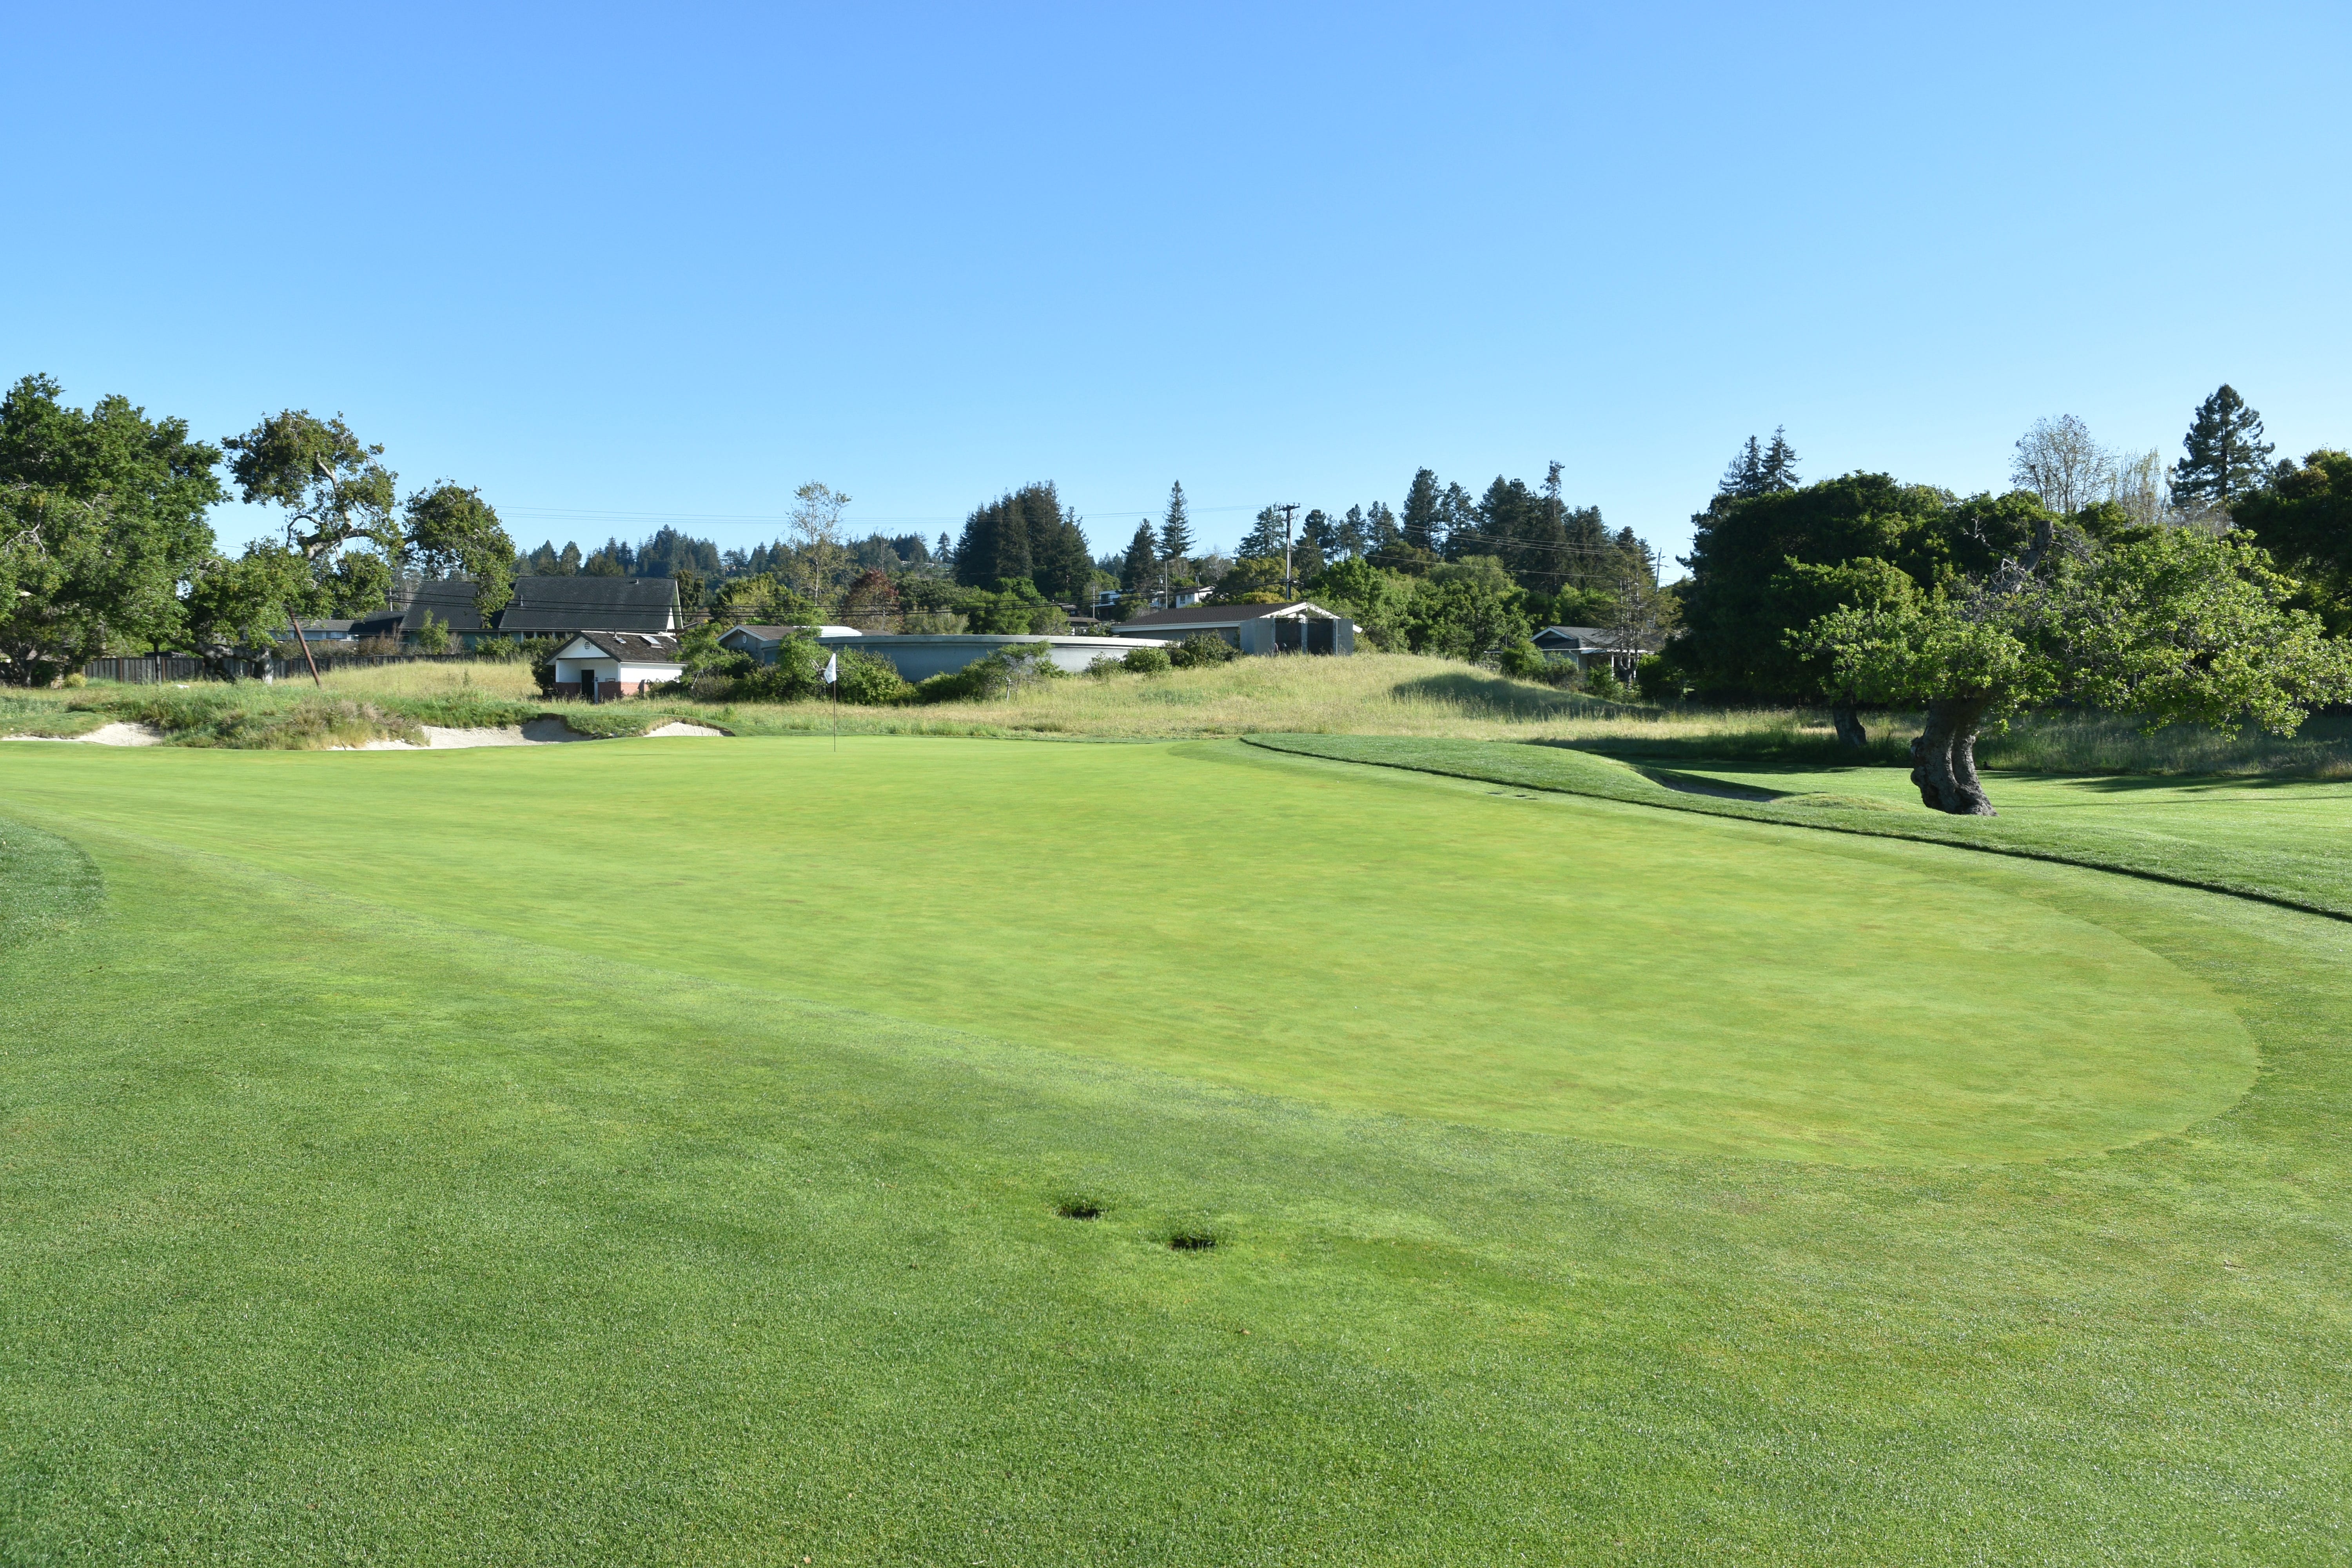
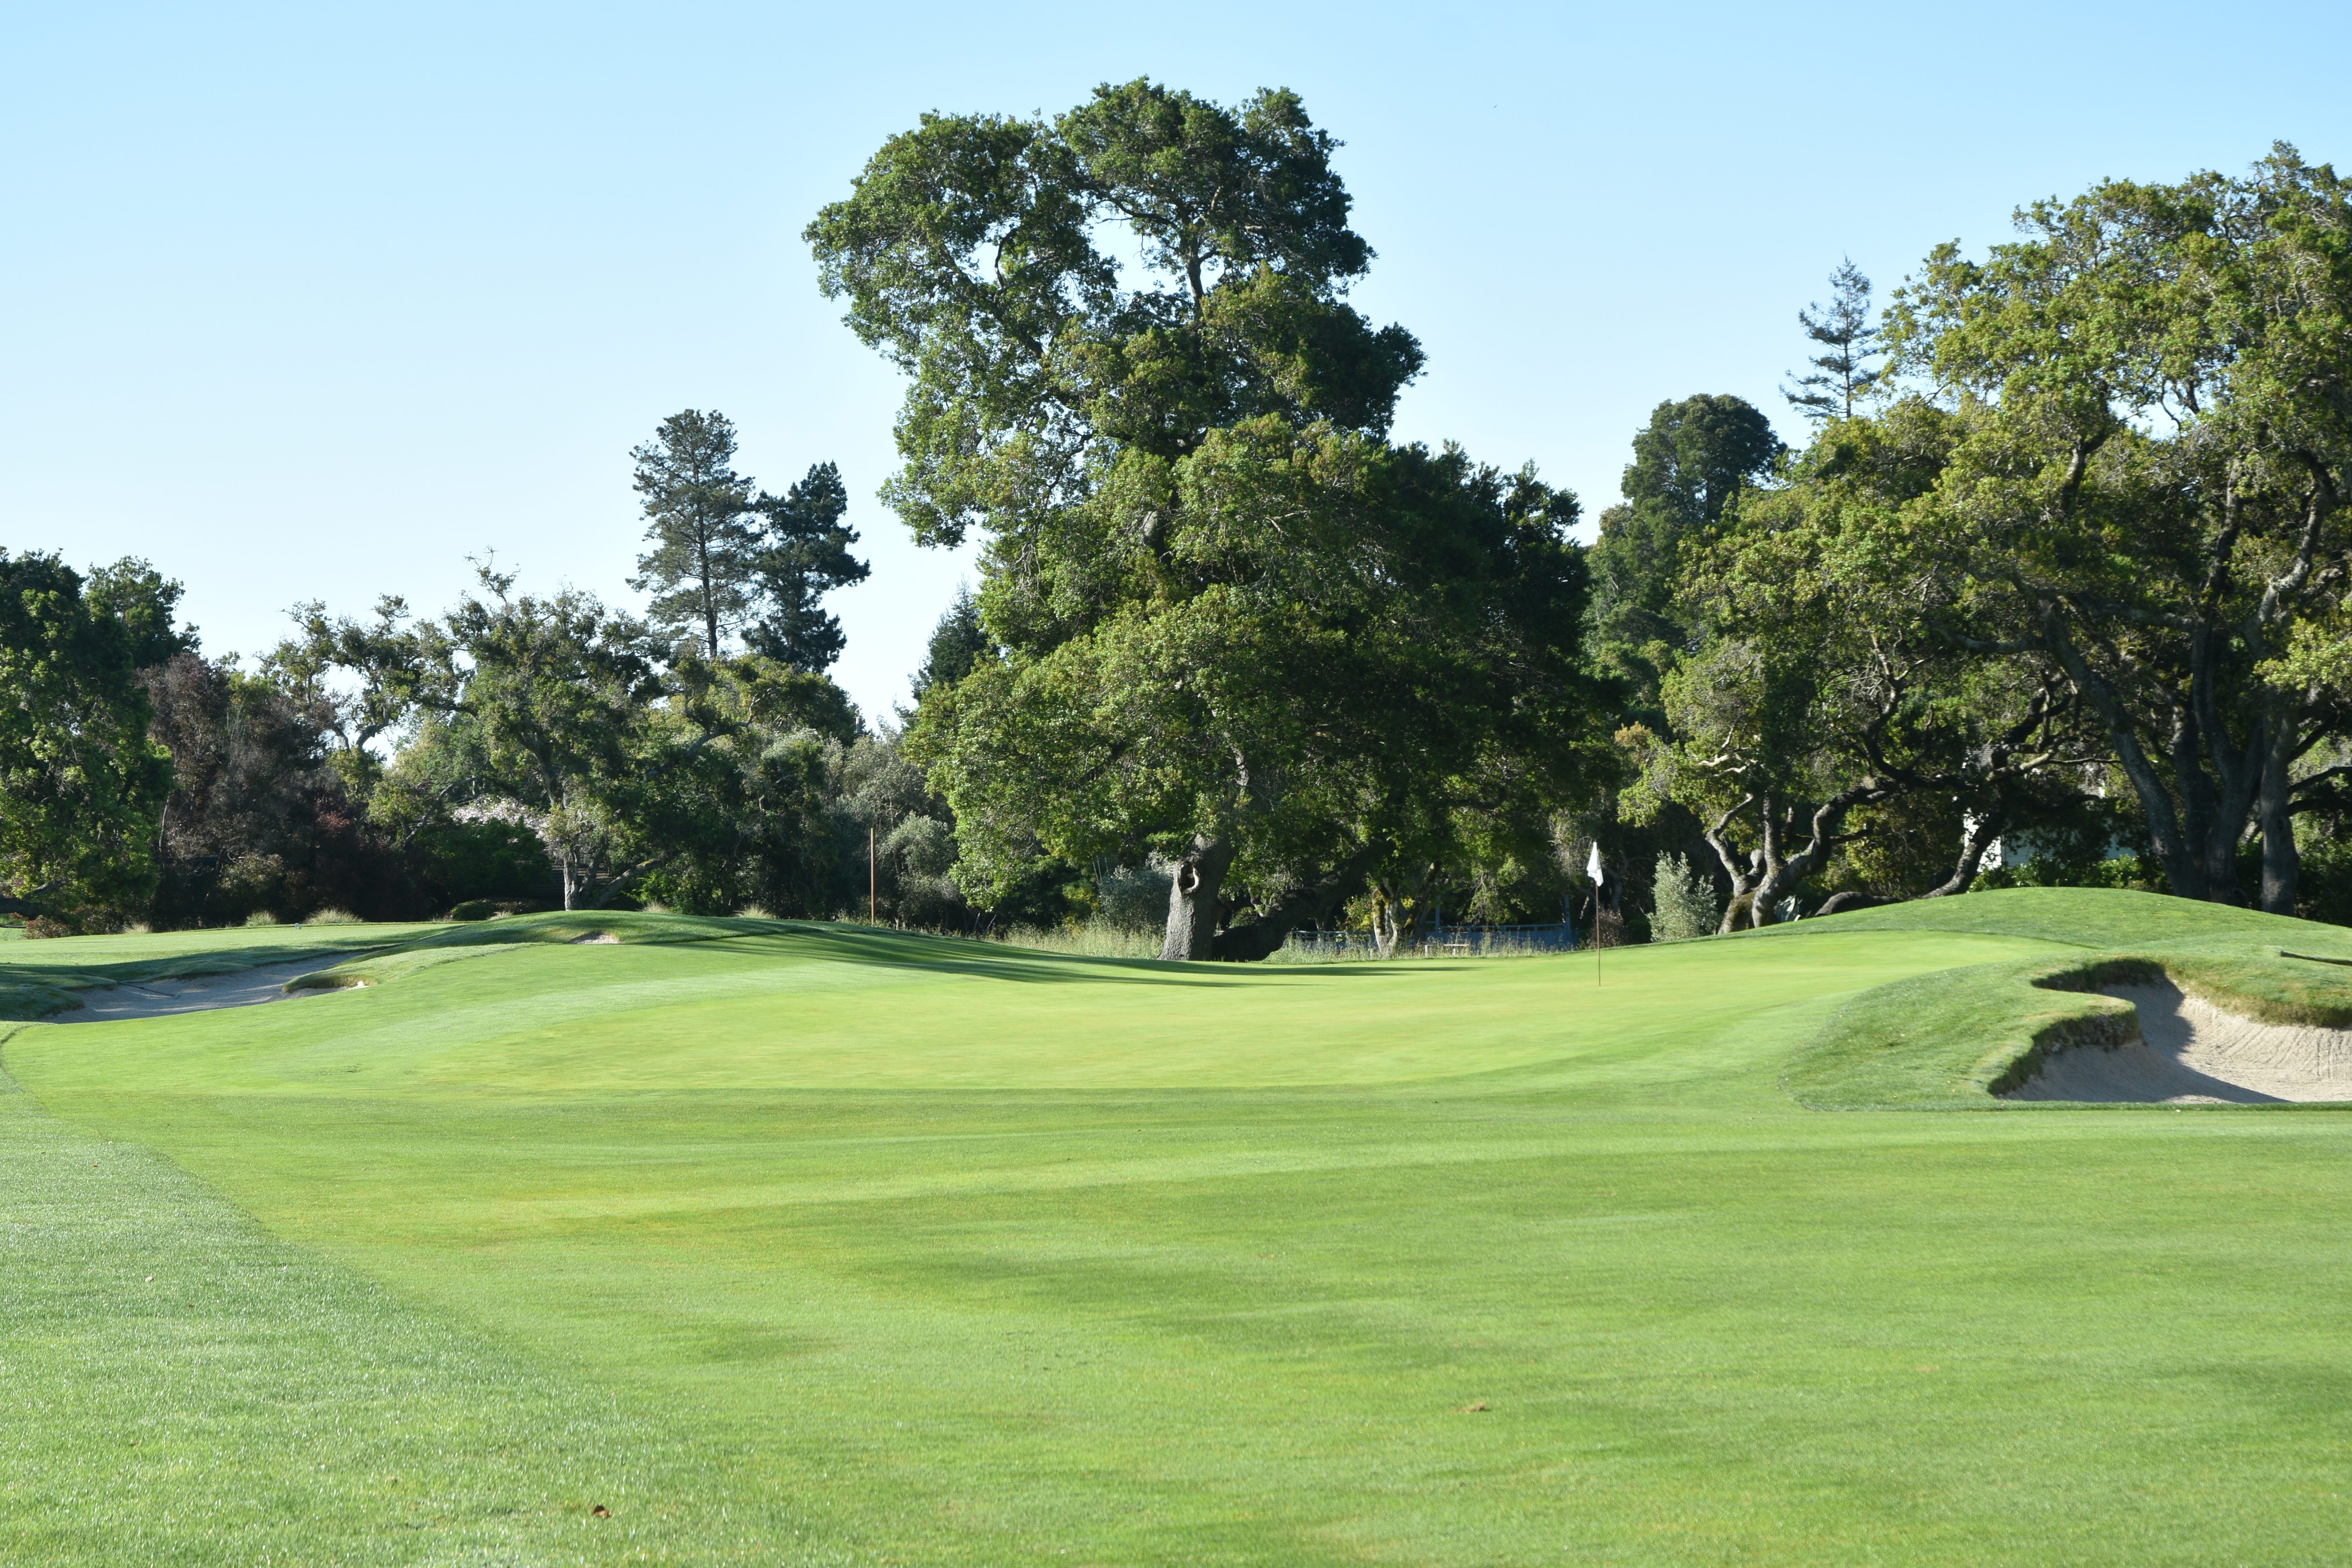
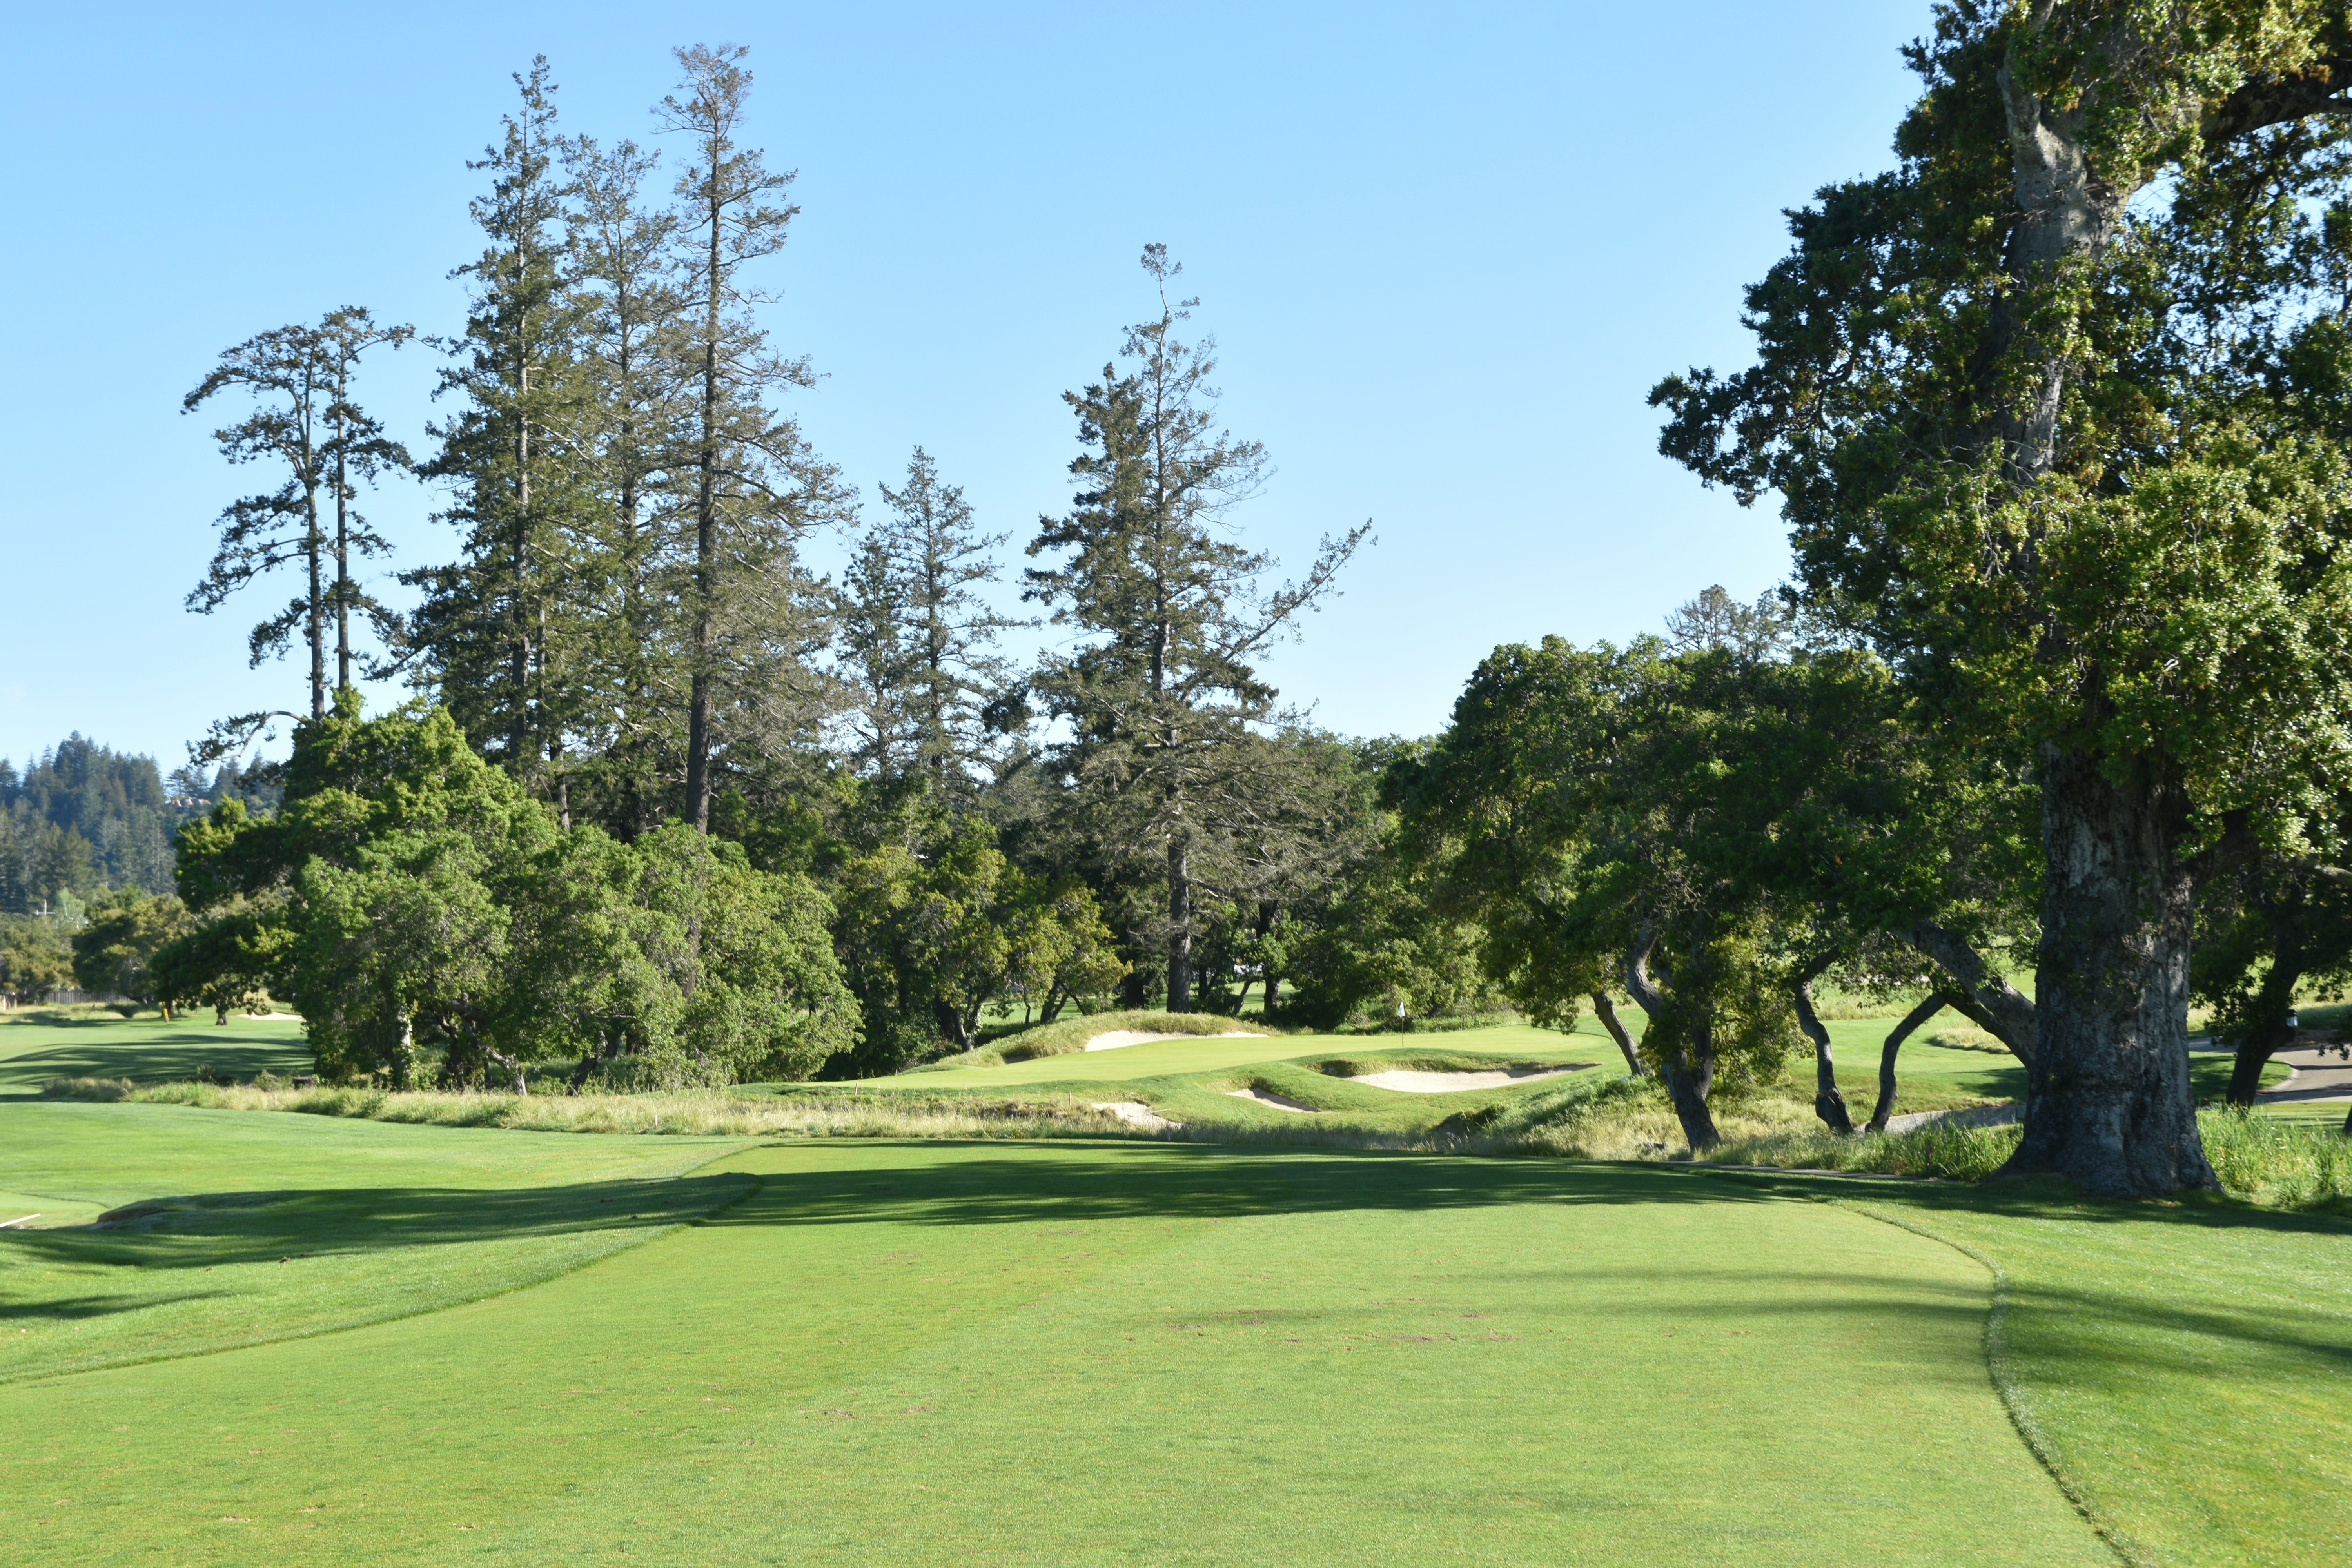
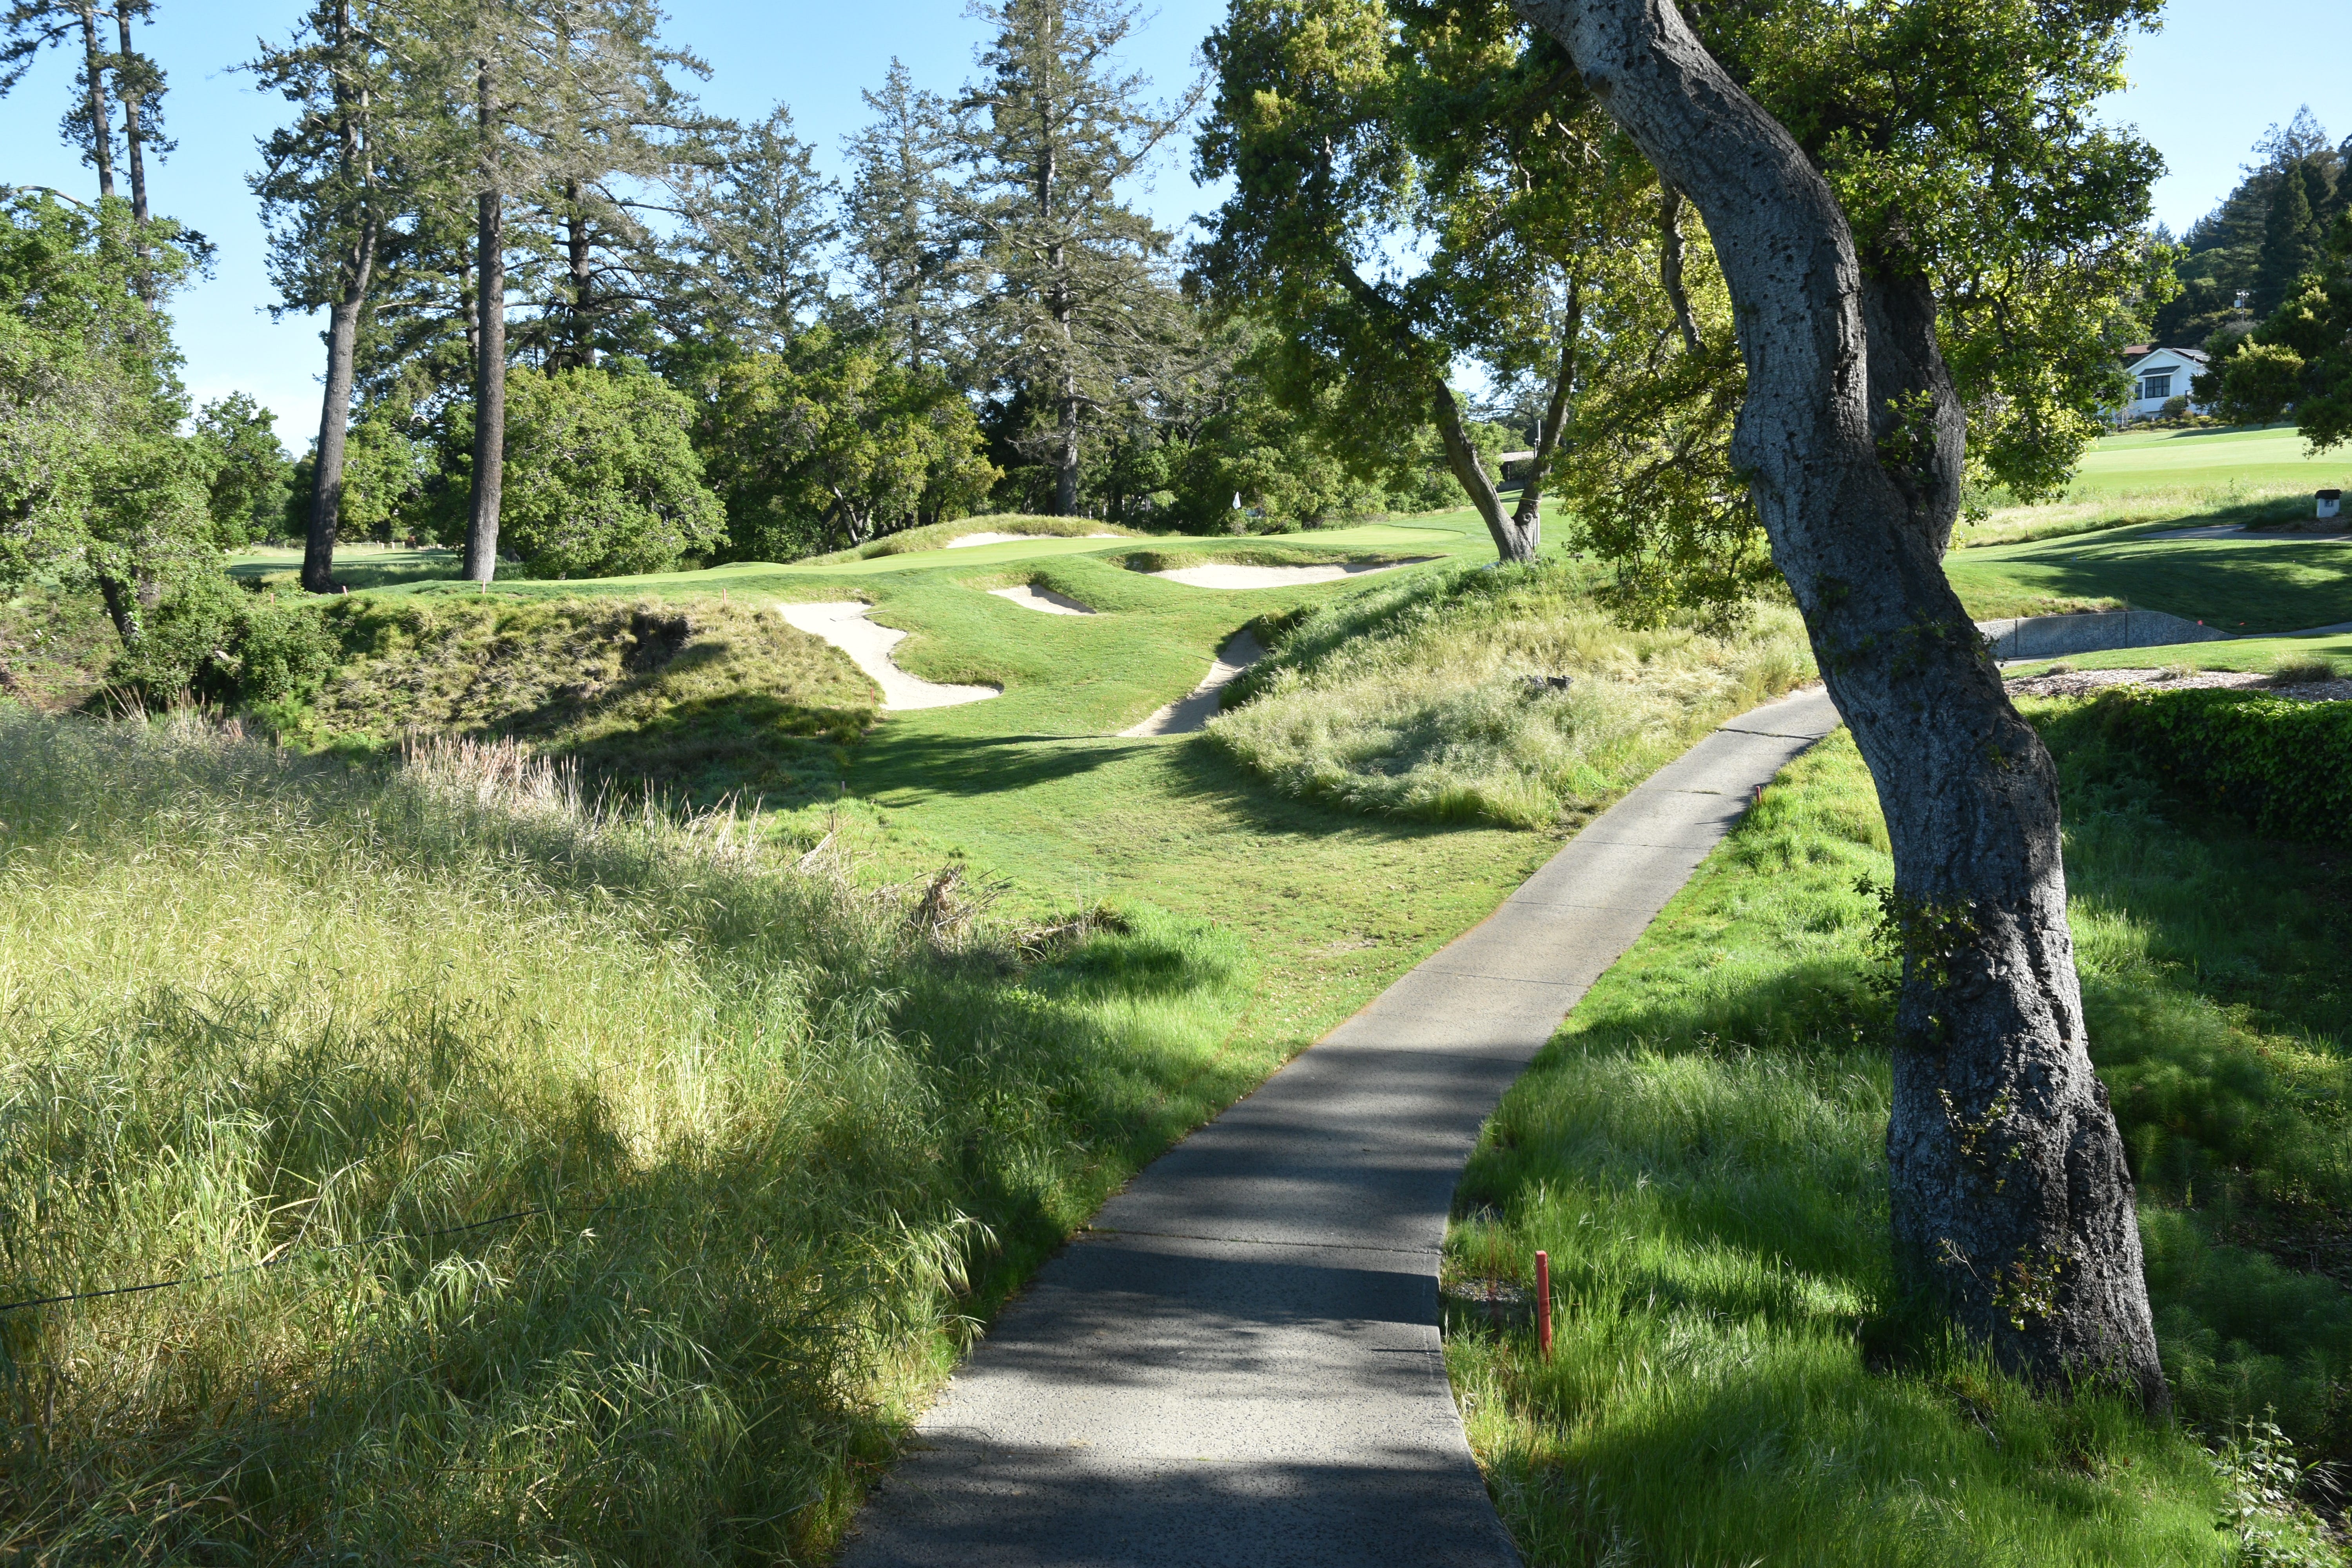
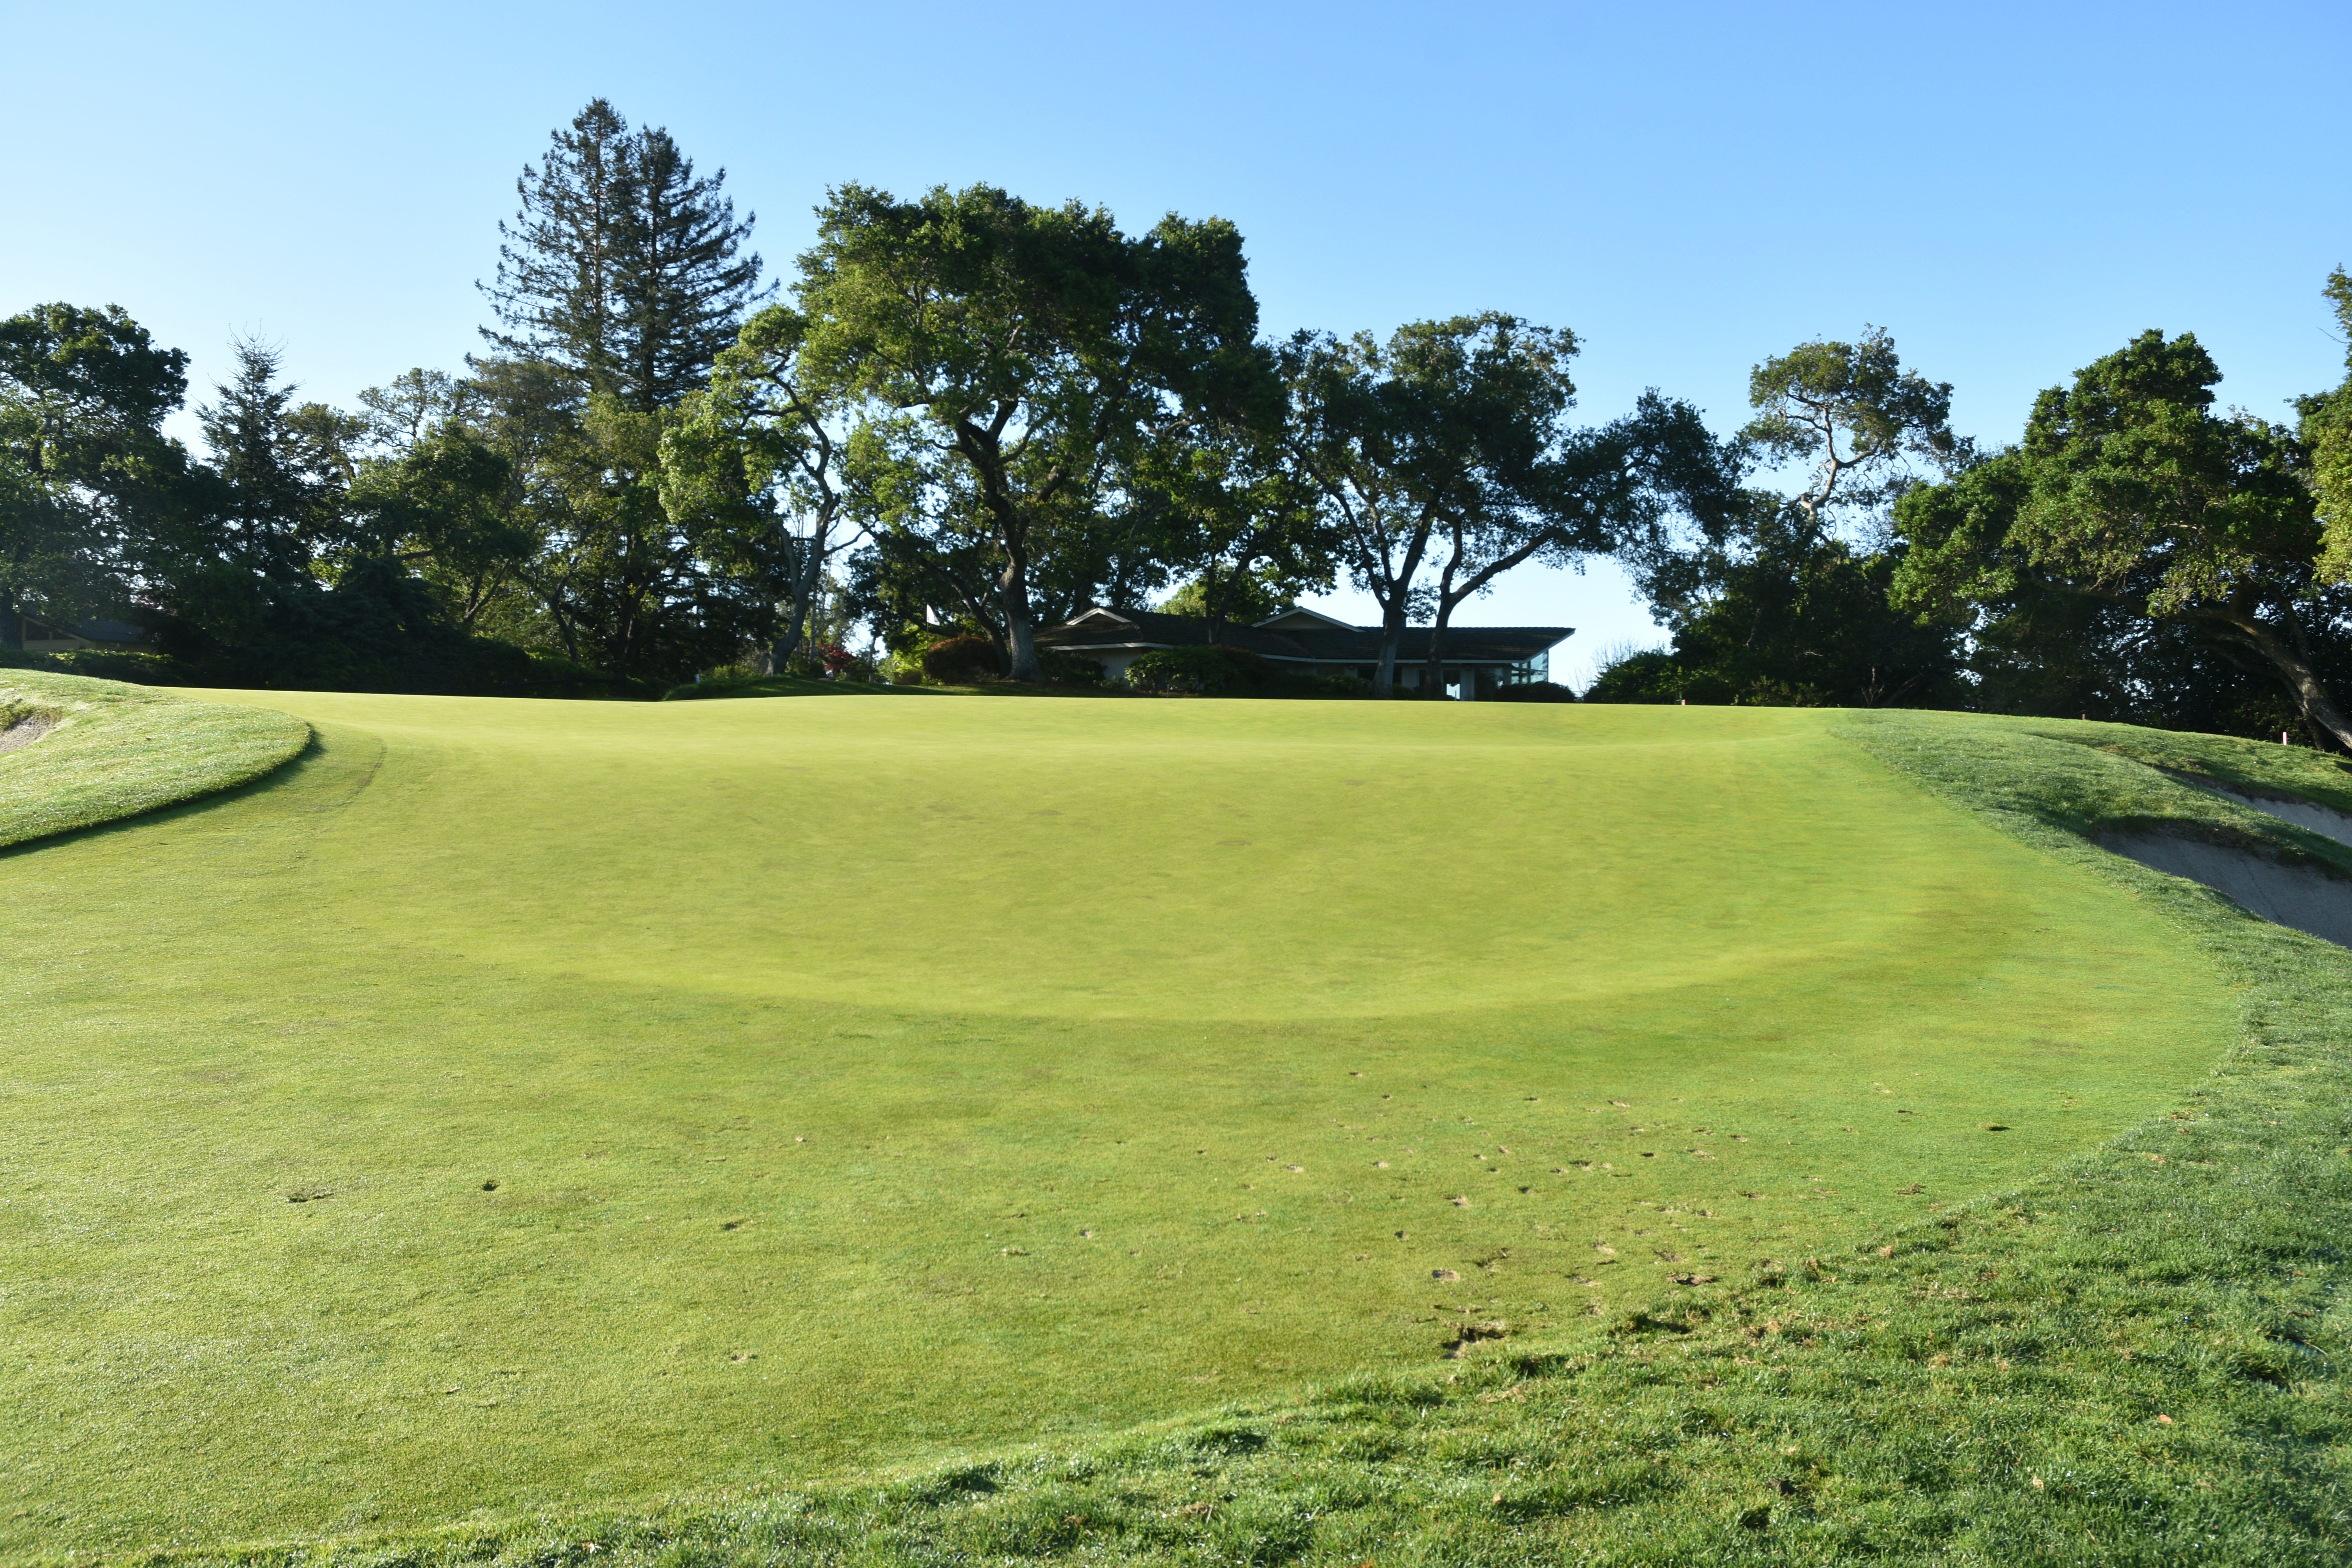
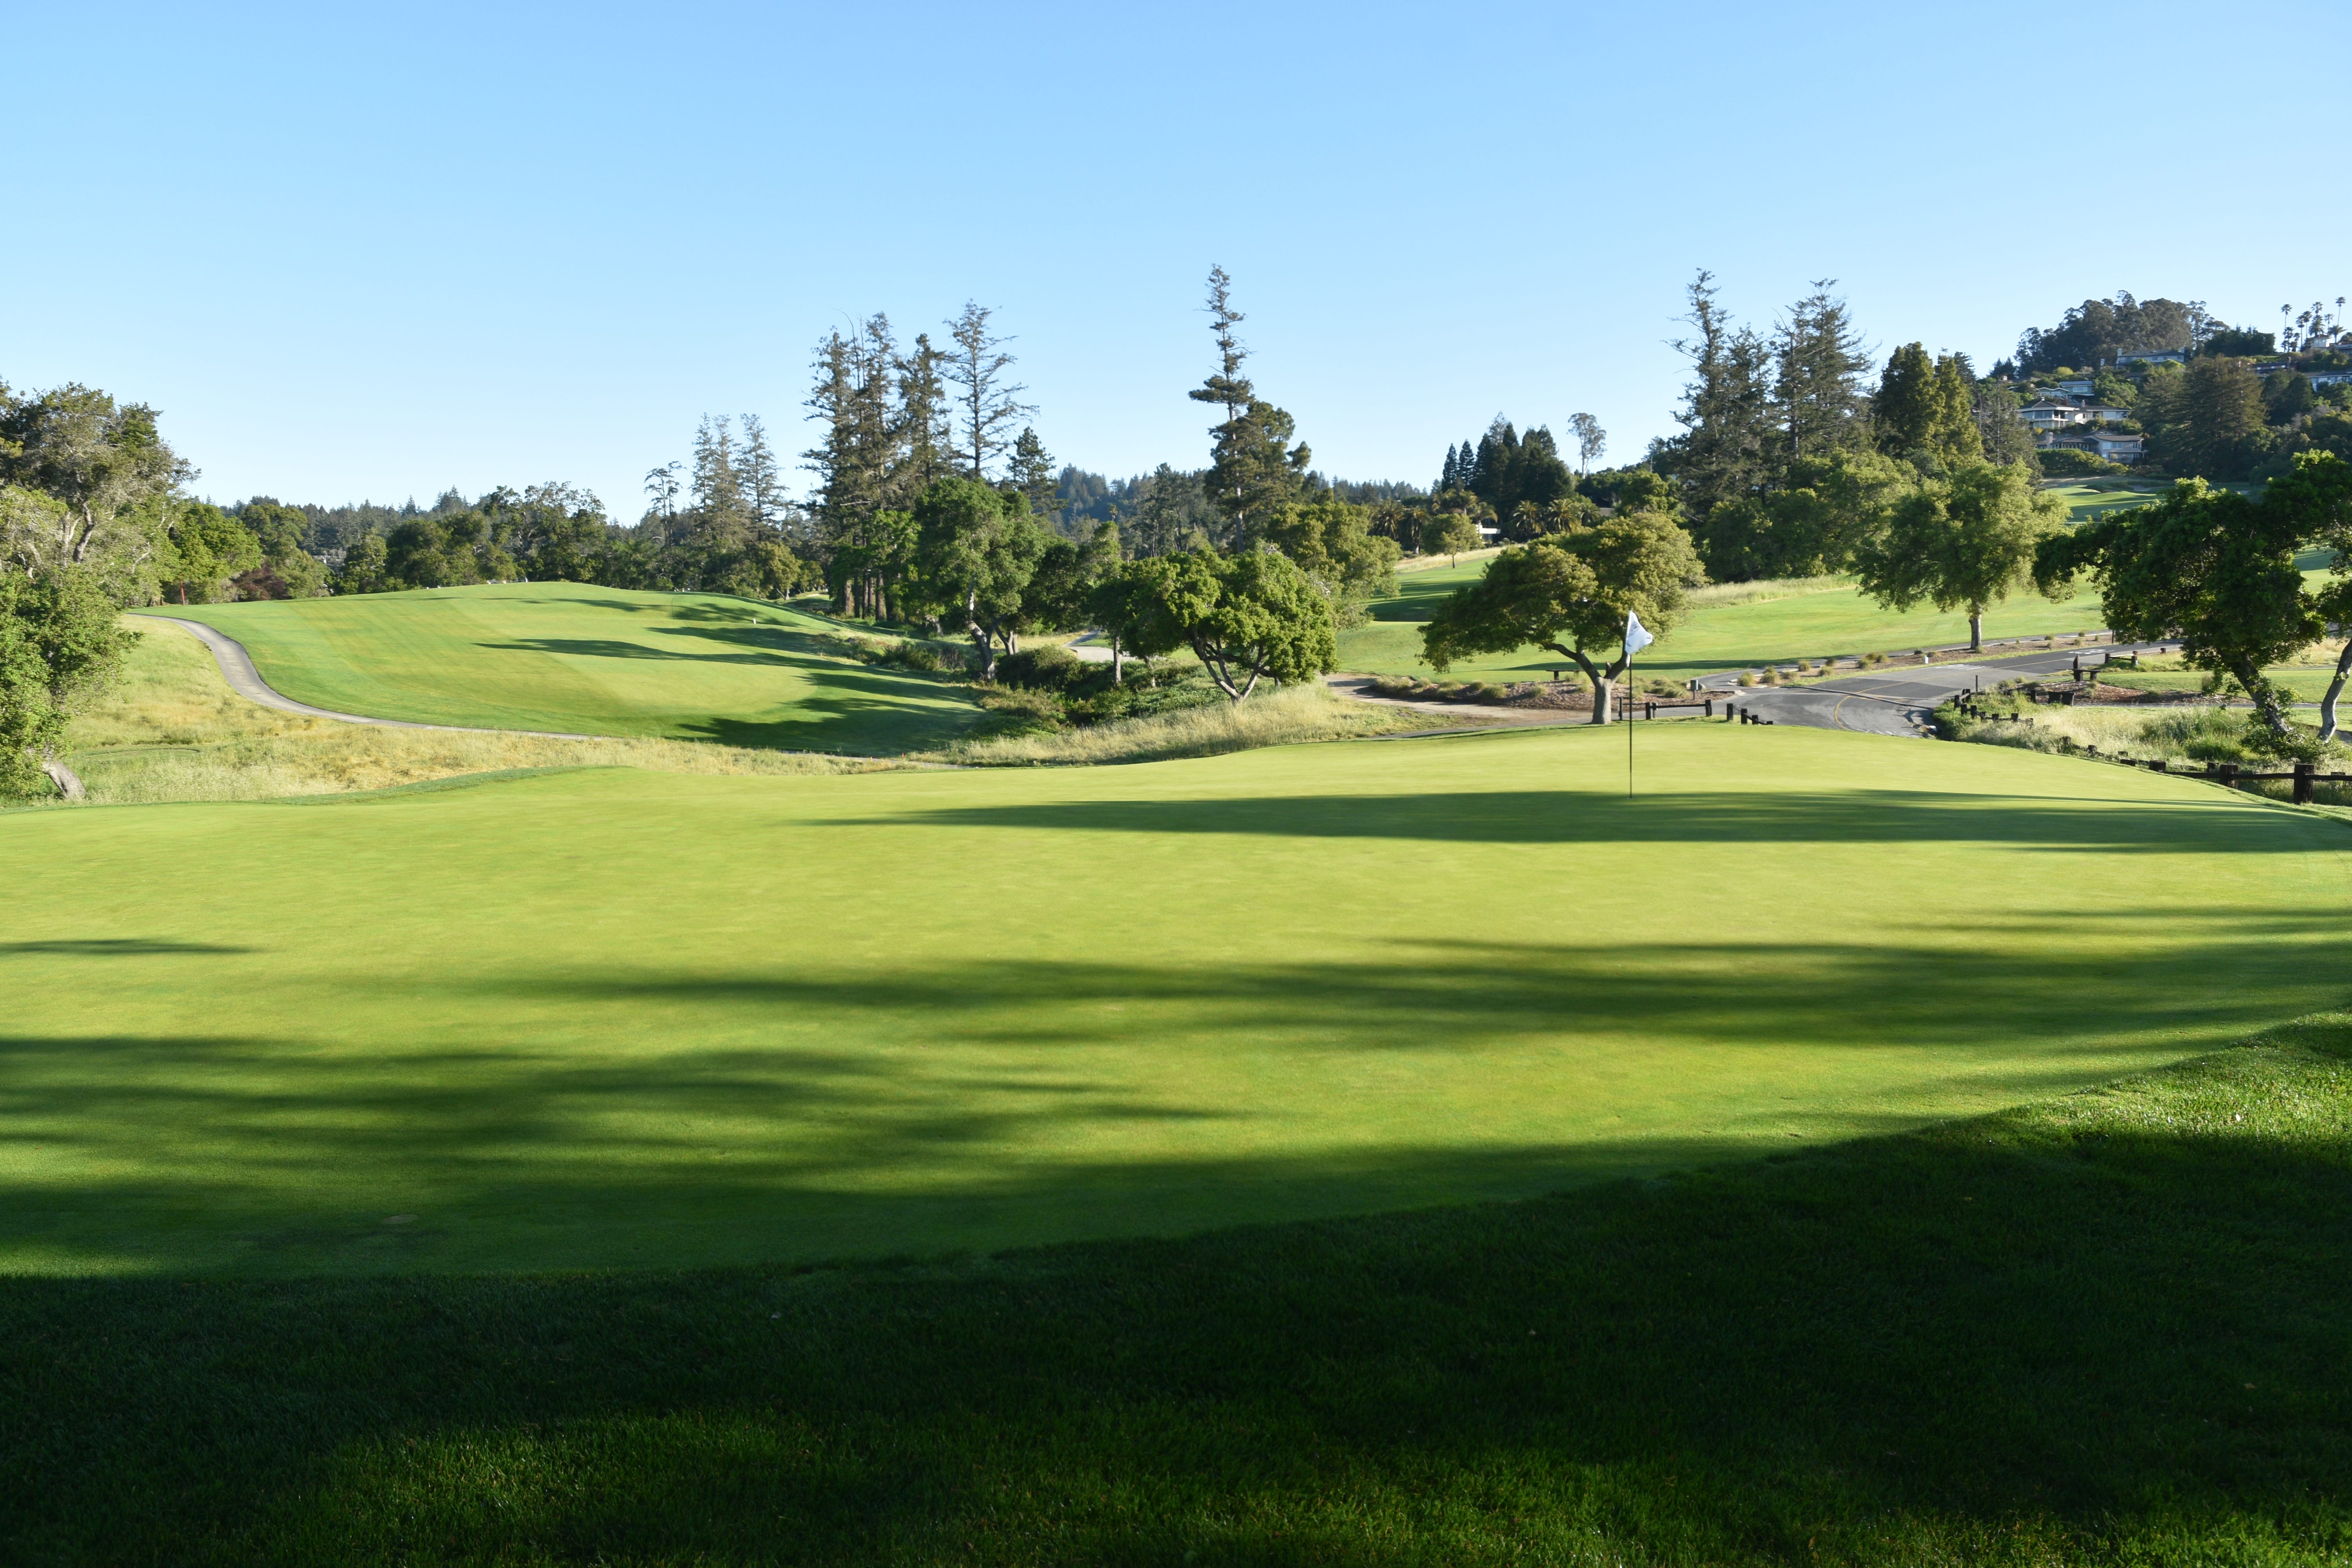
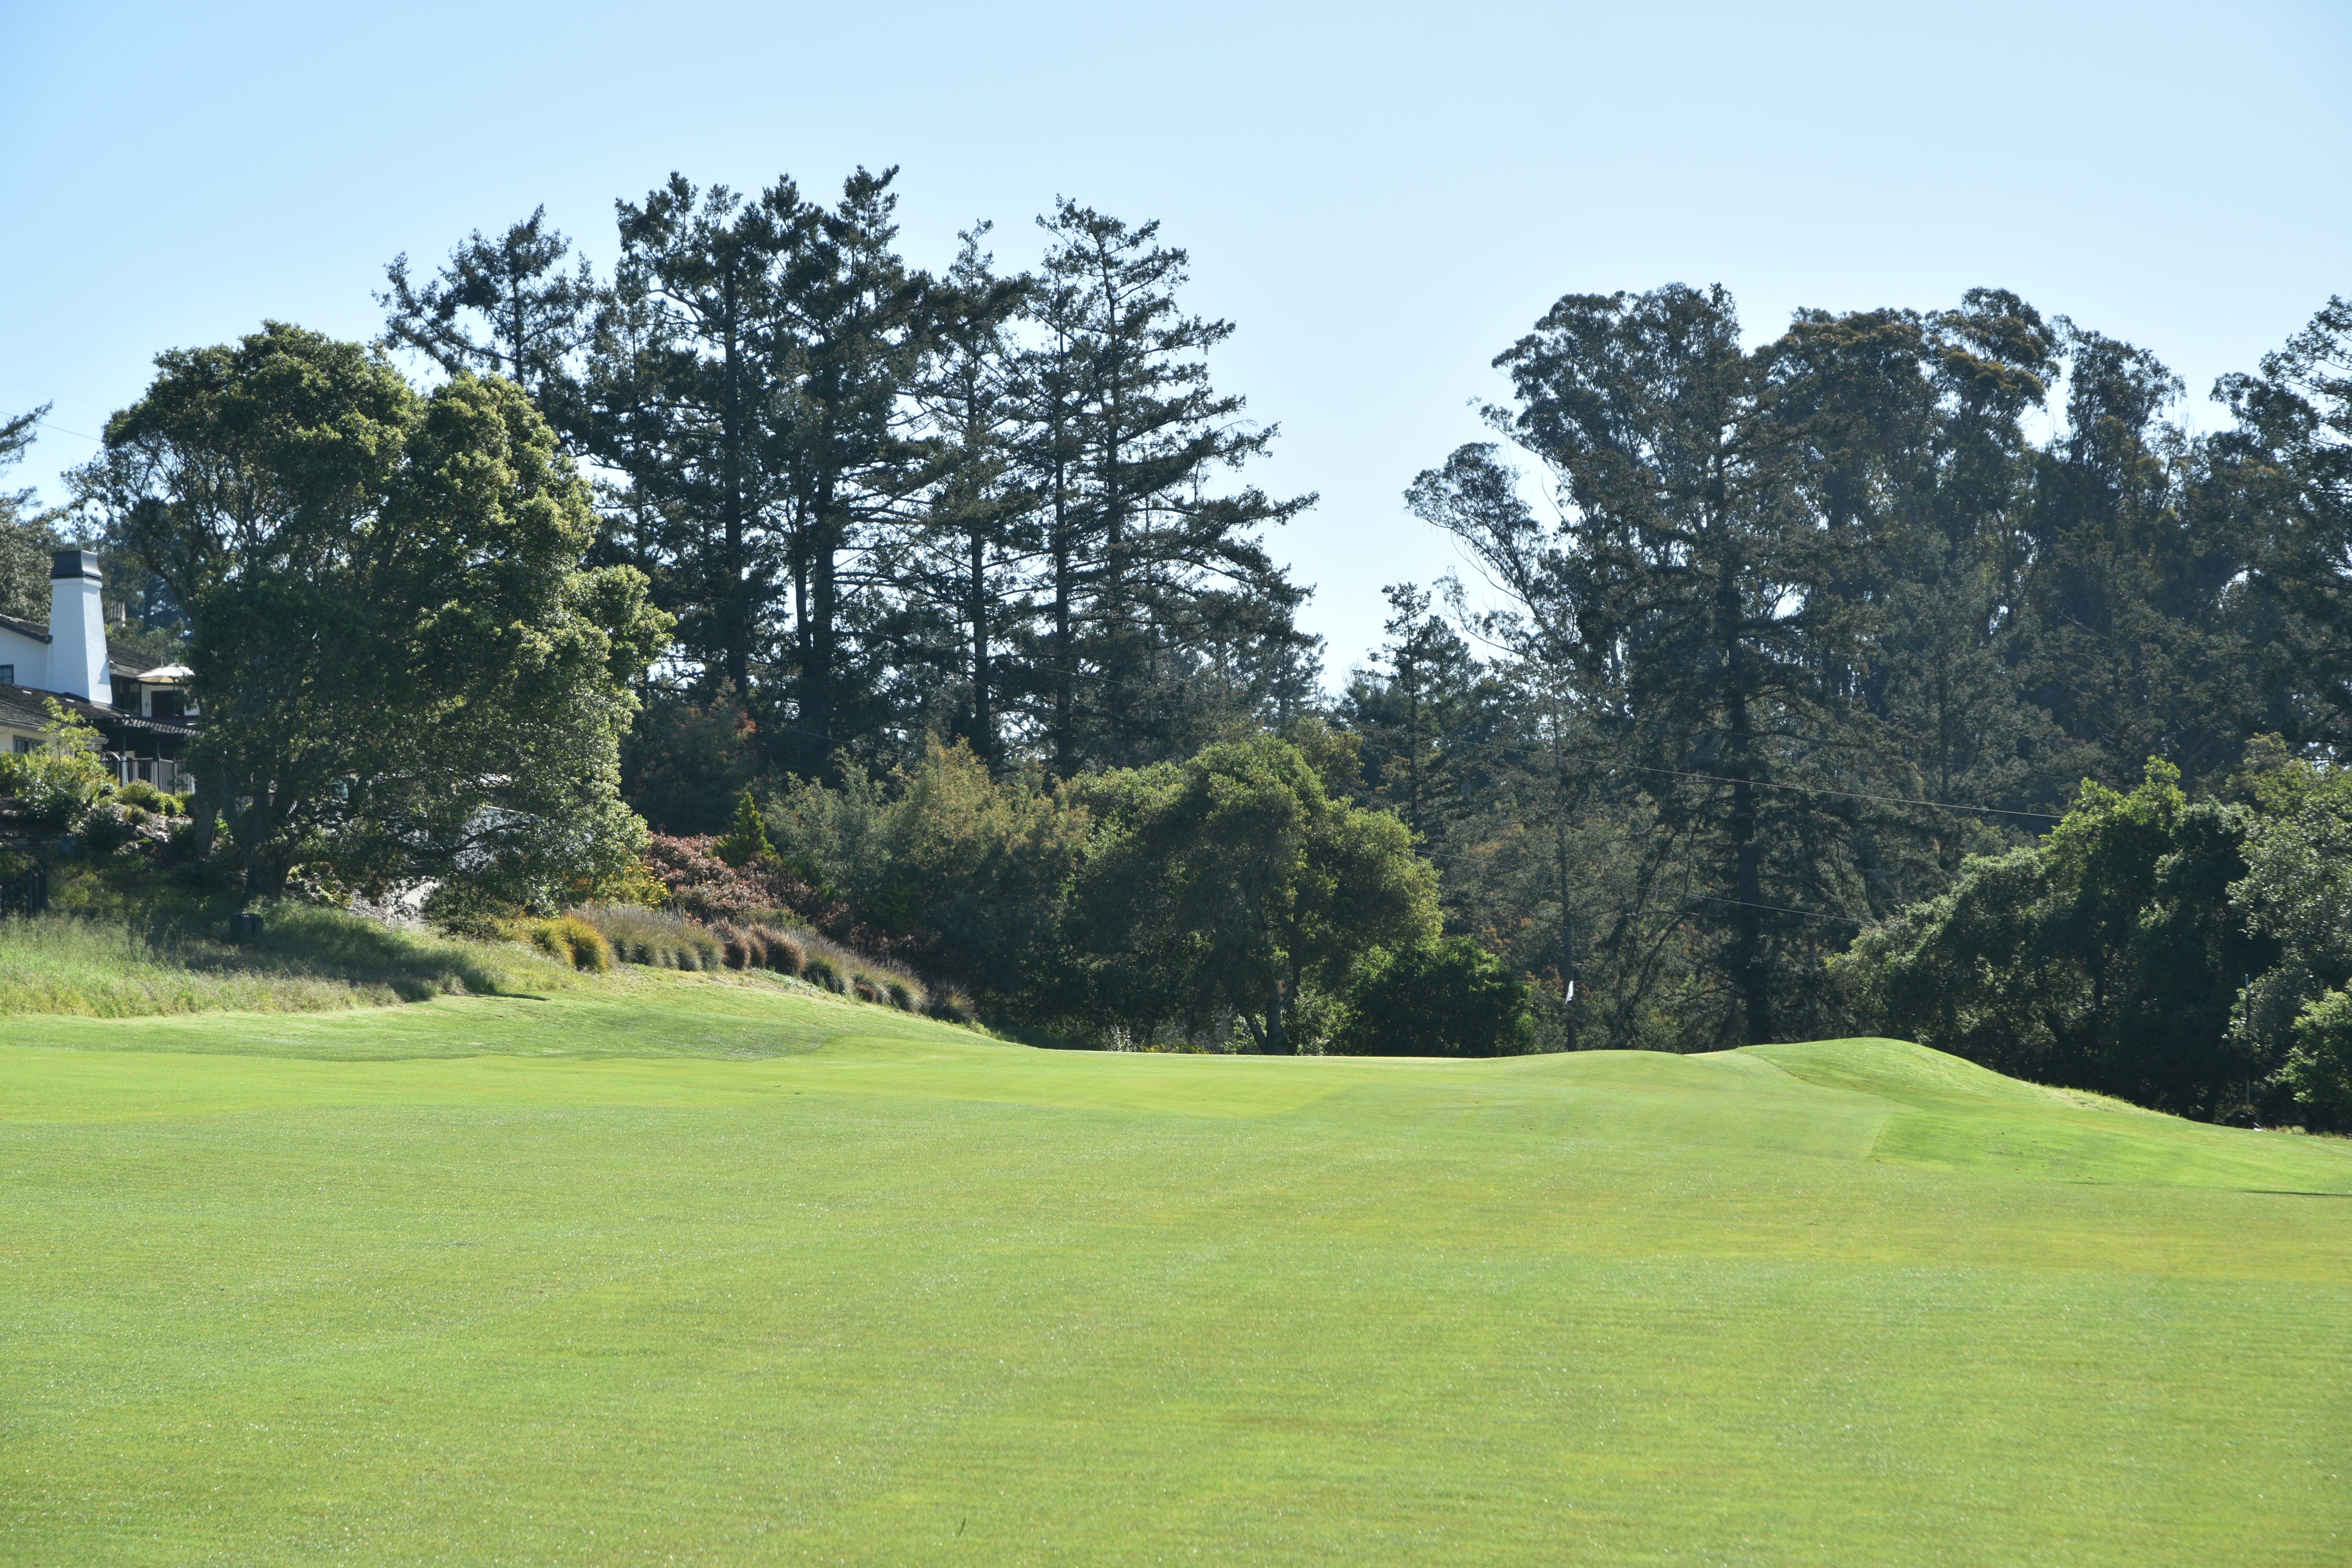
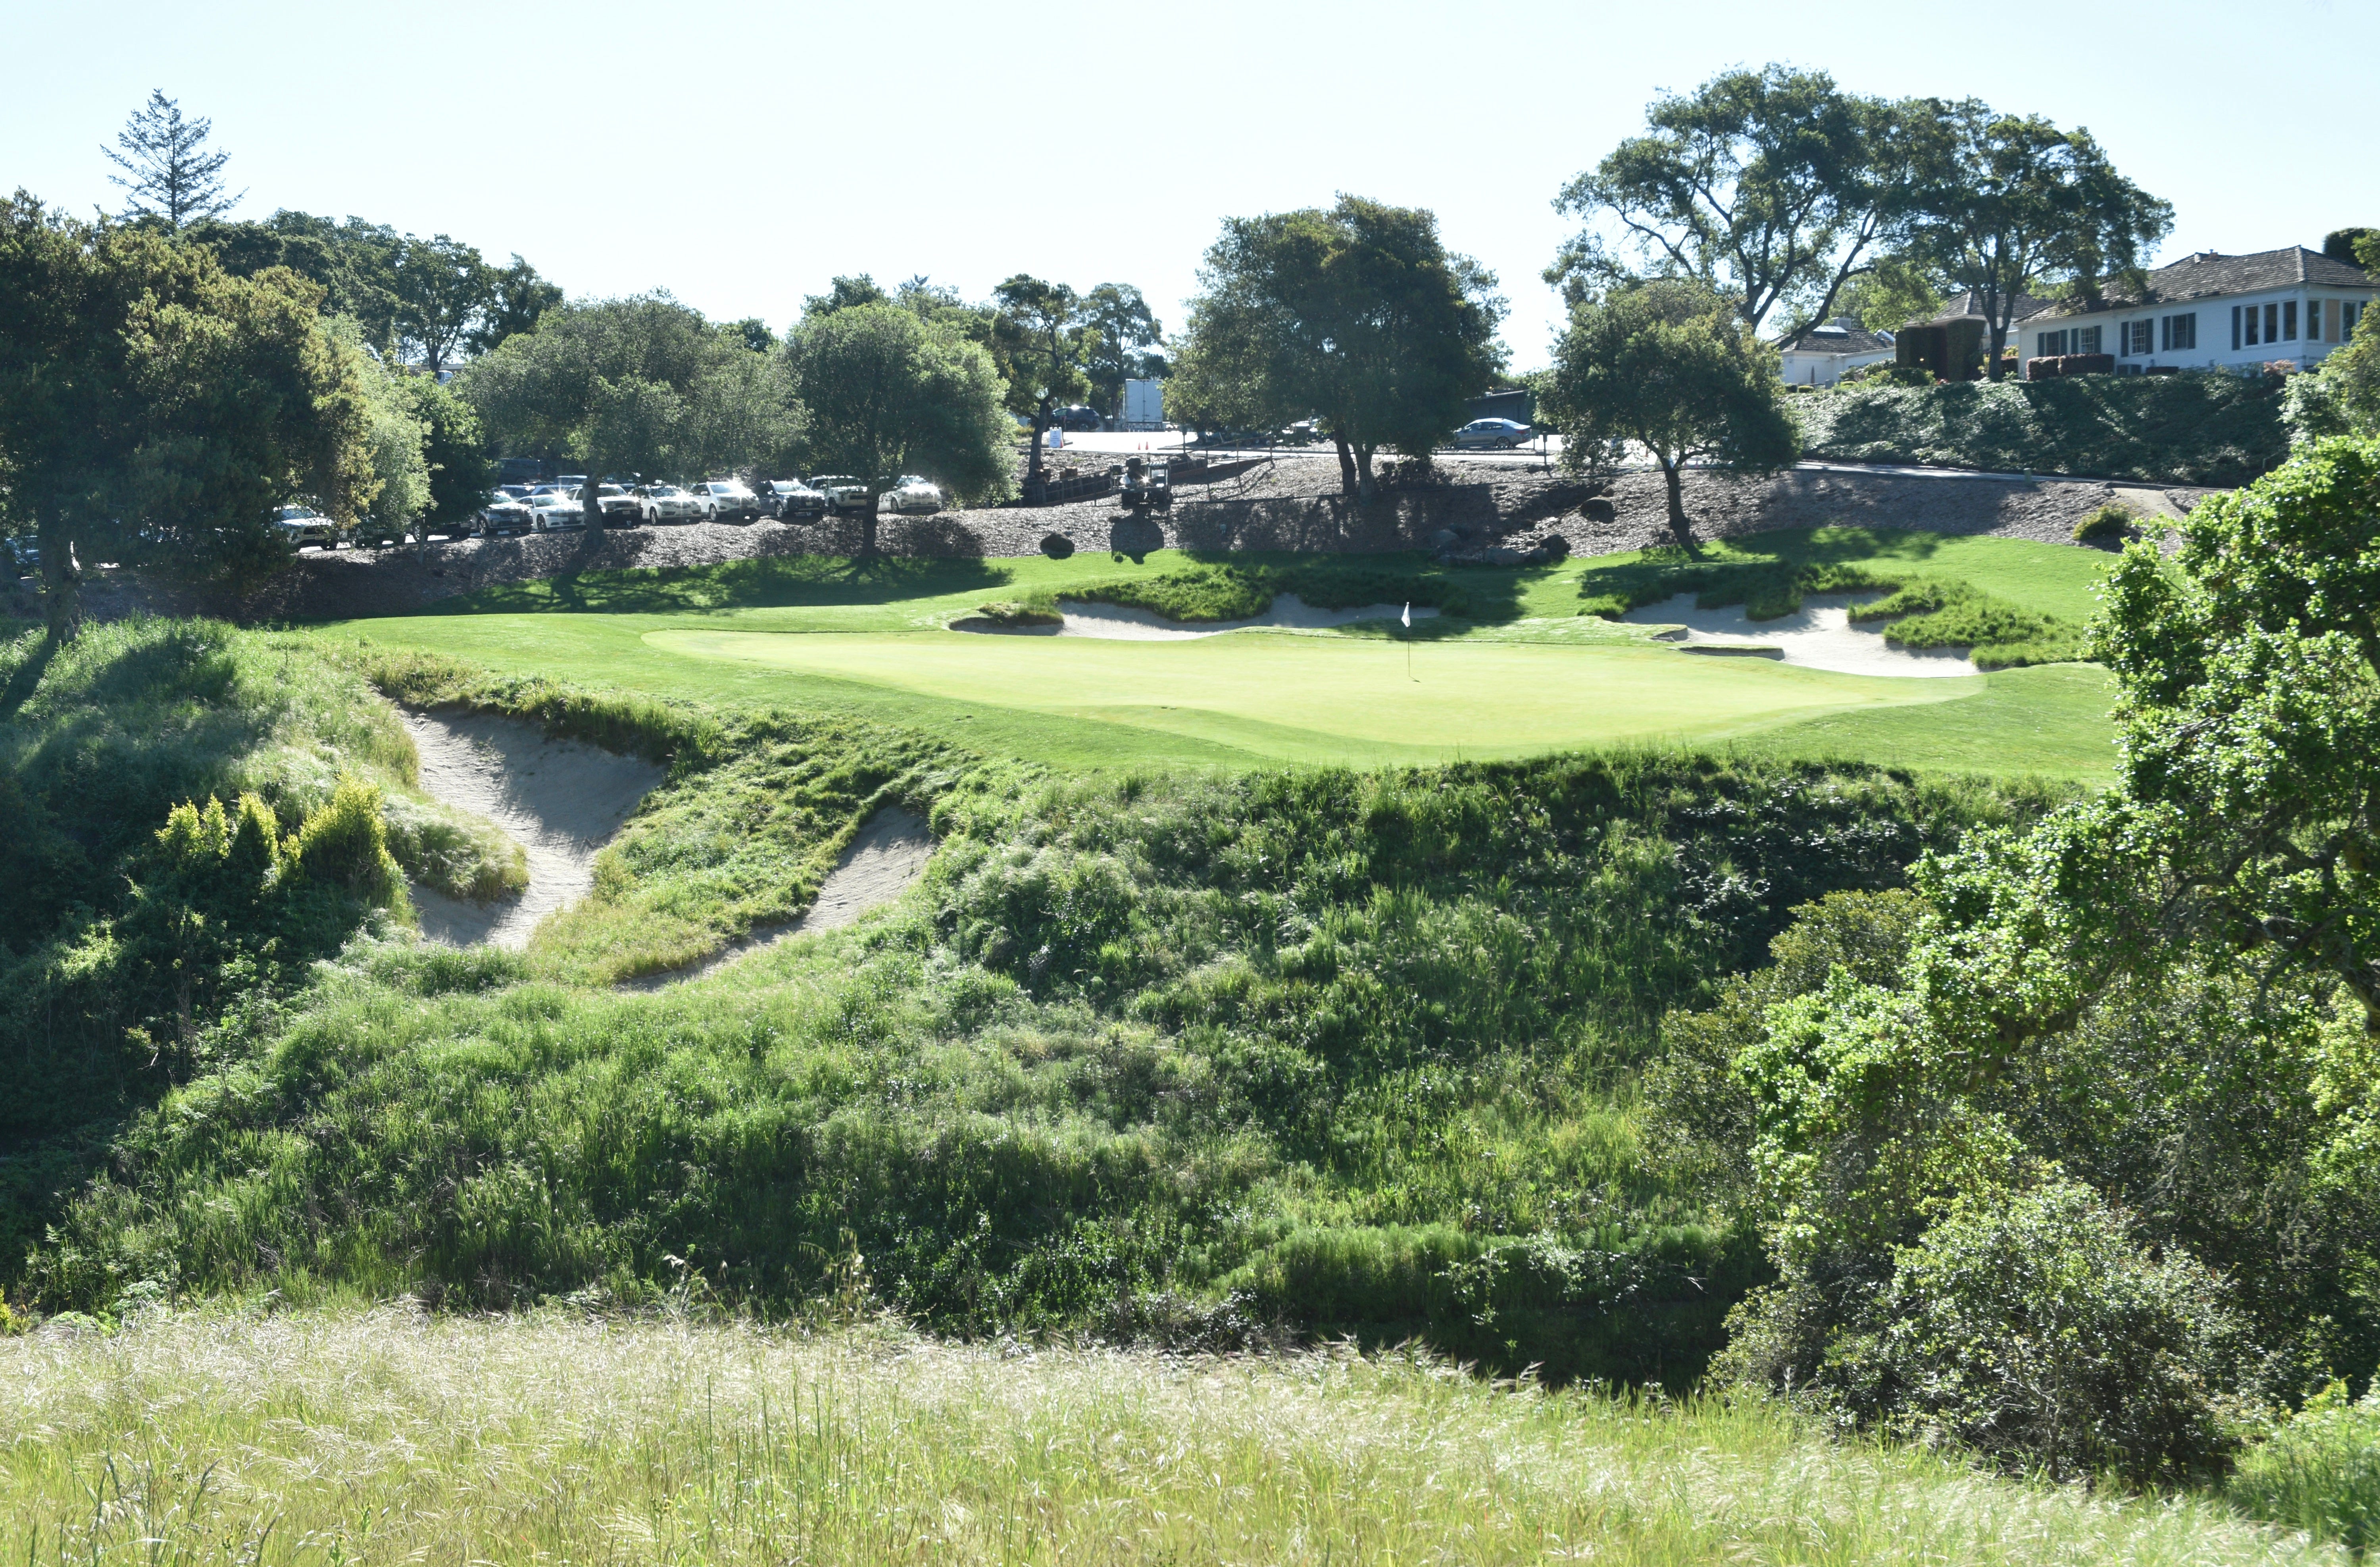
The approach to the 1st hole green. Jim Urbina simplified the green shape while adding some subtle contouring to this narrow and deep green. The Fire Pit Collective did a neat short video featurette on the restorative work on the front nine
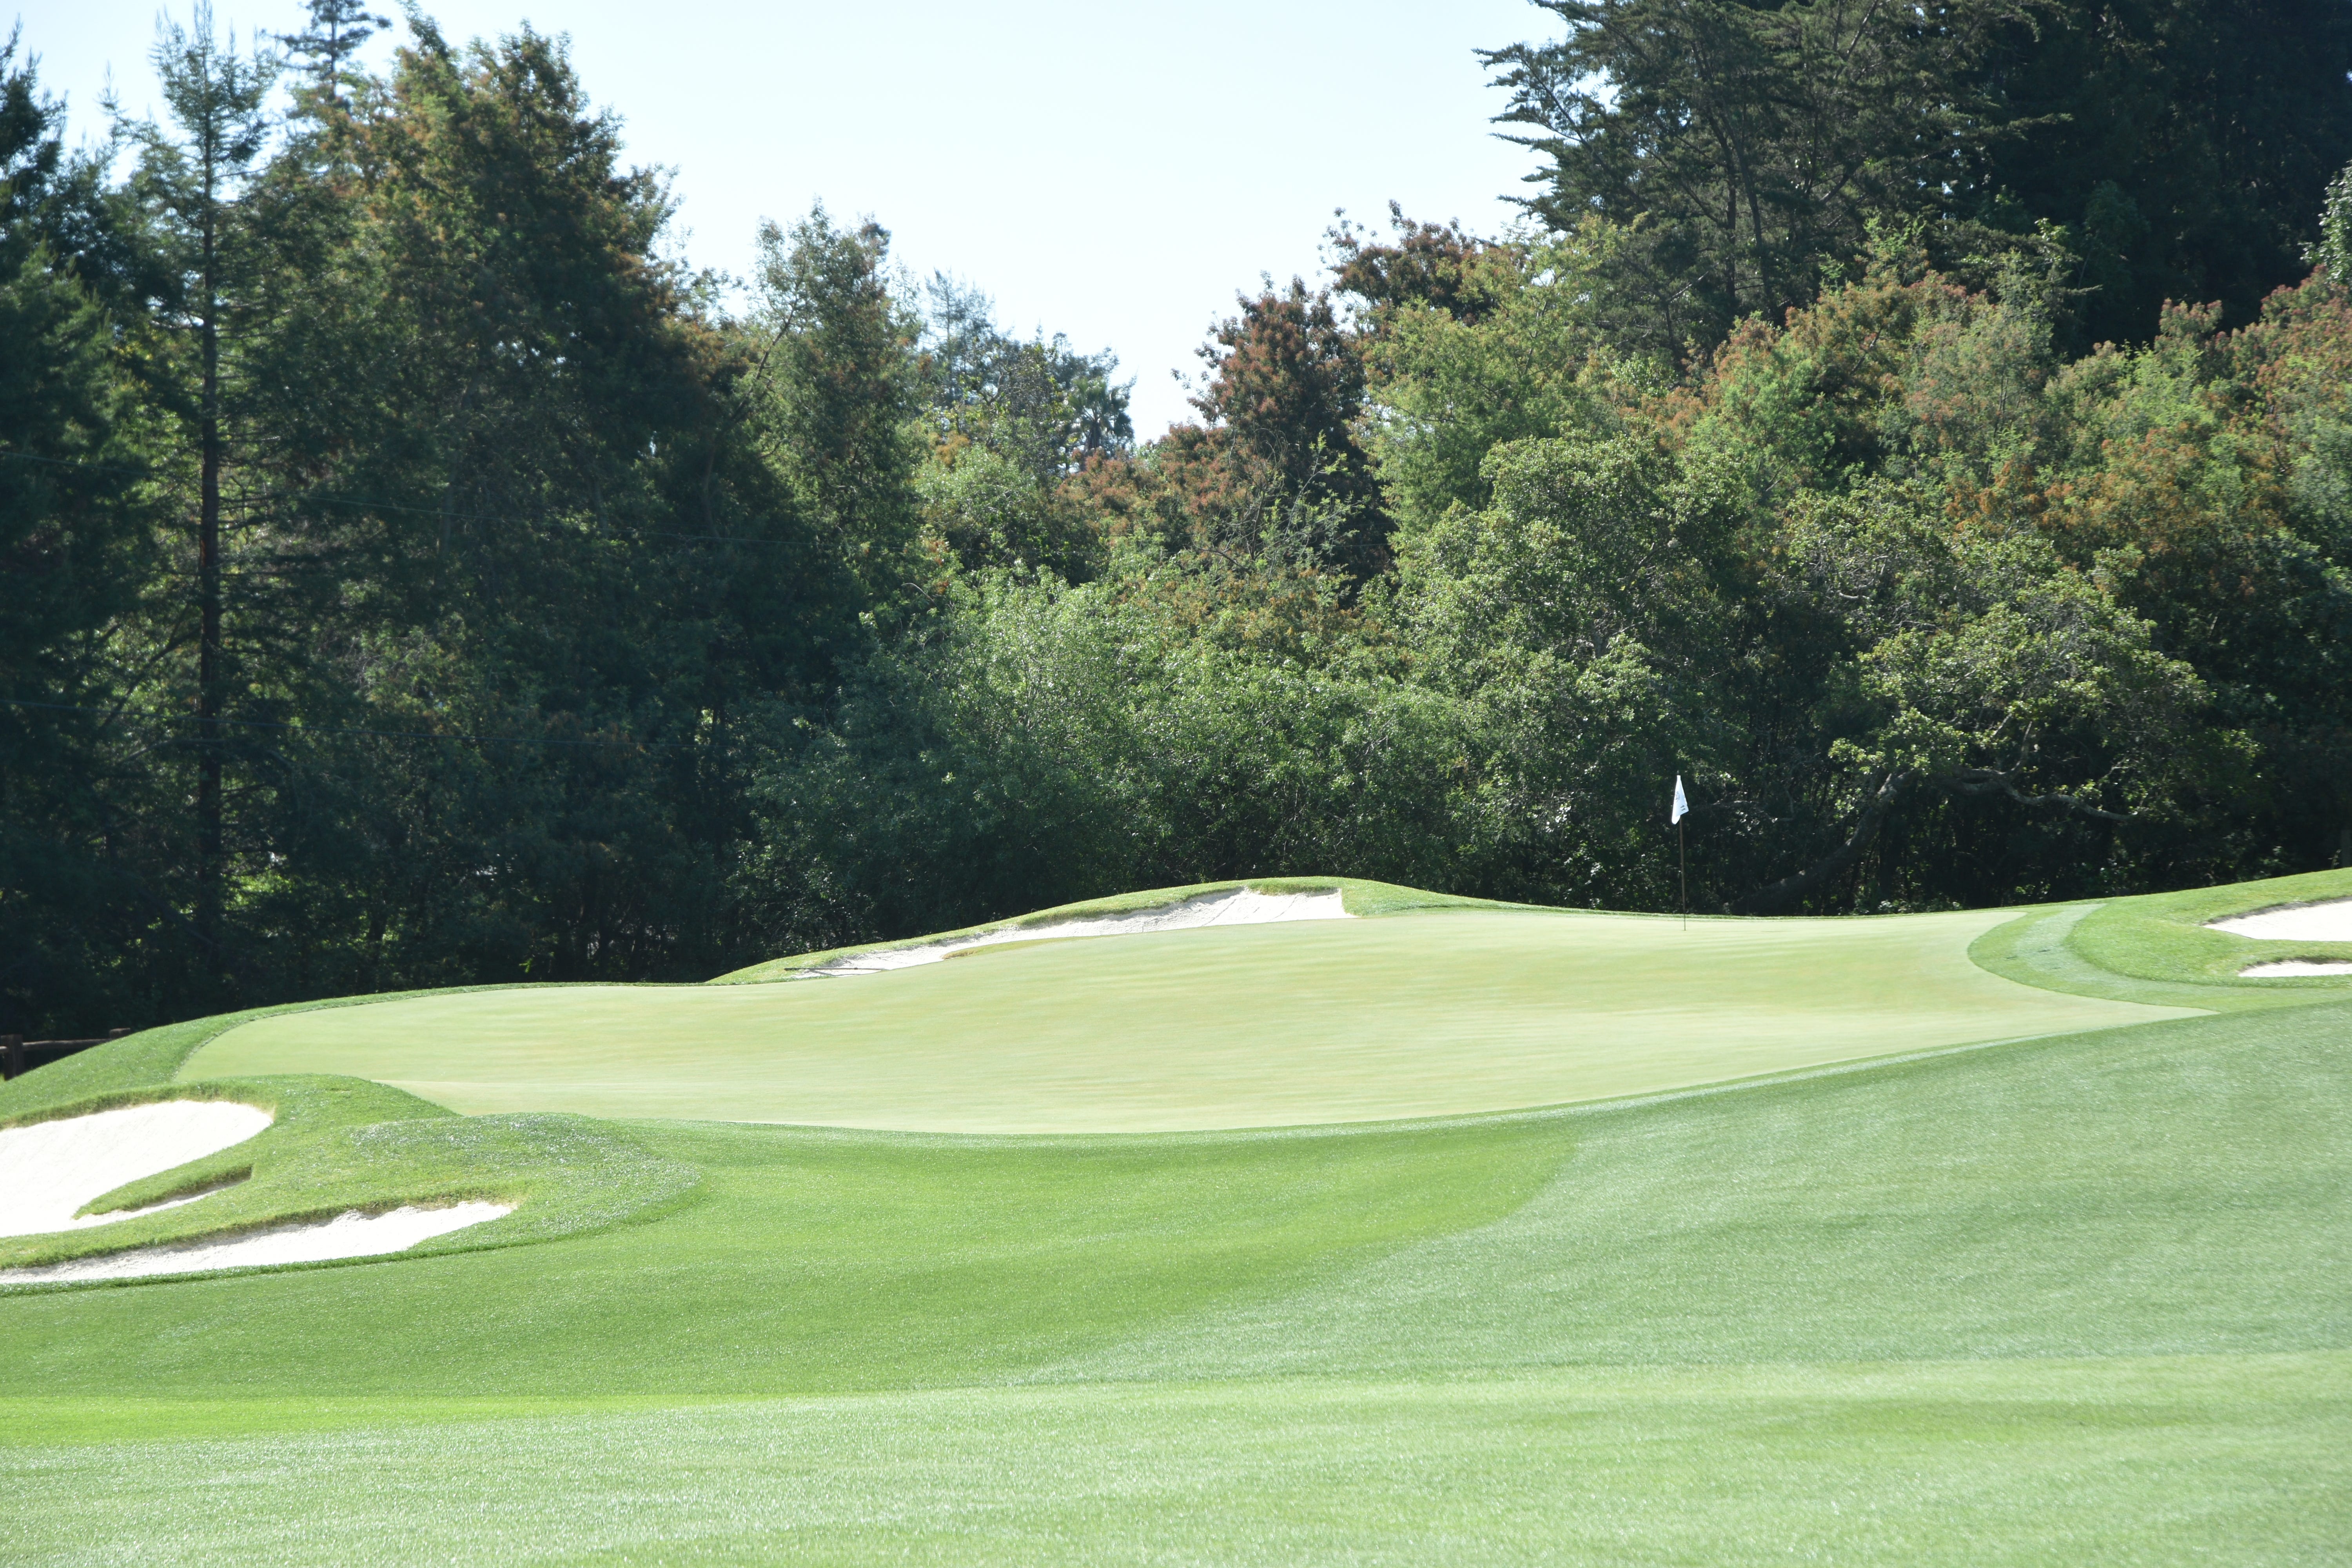
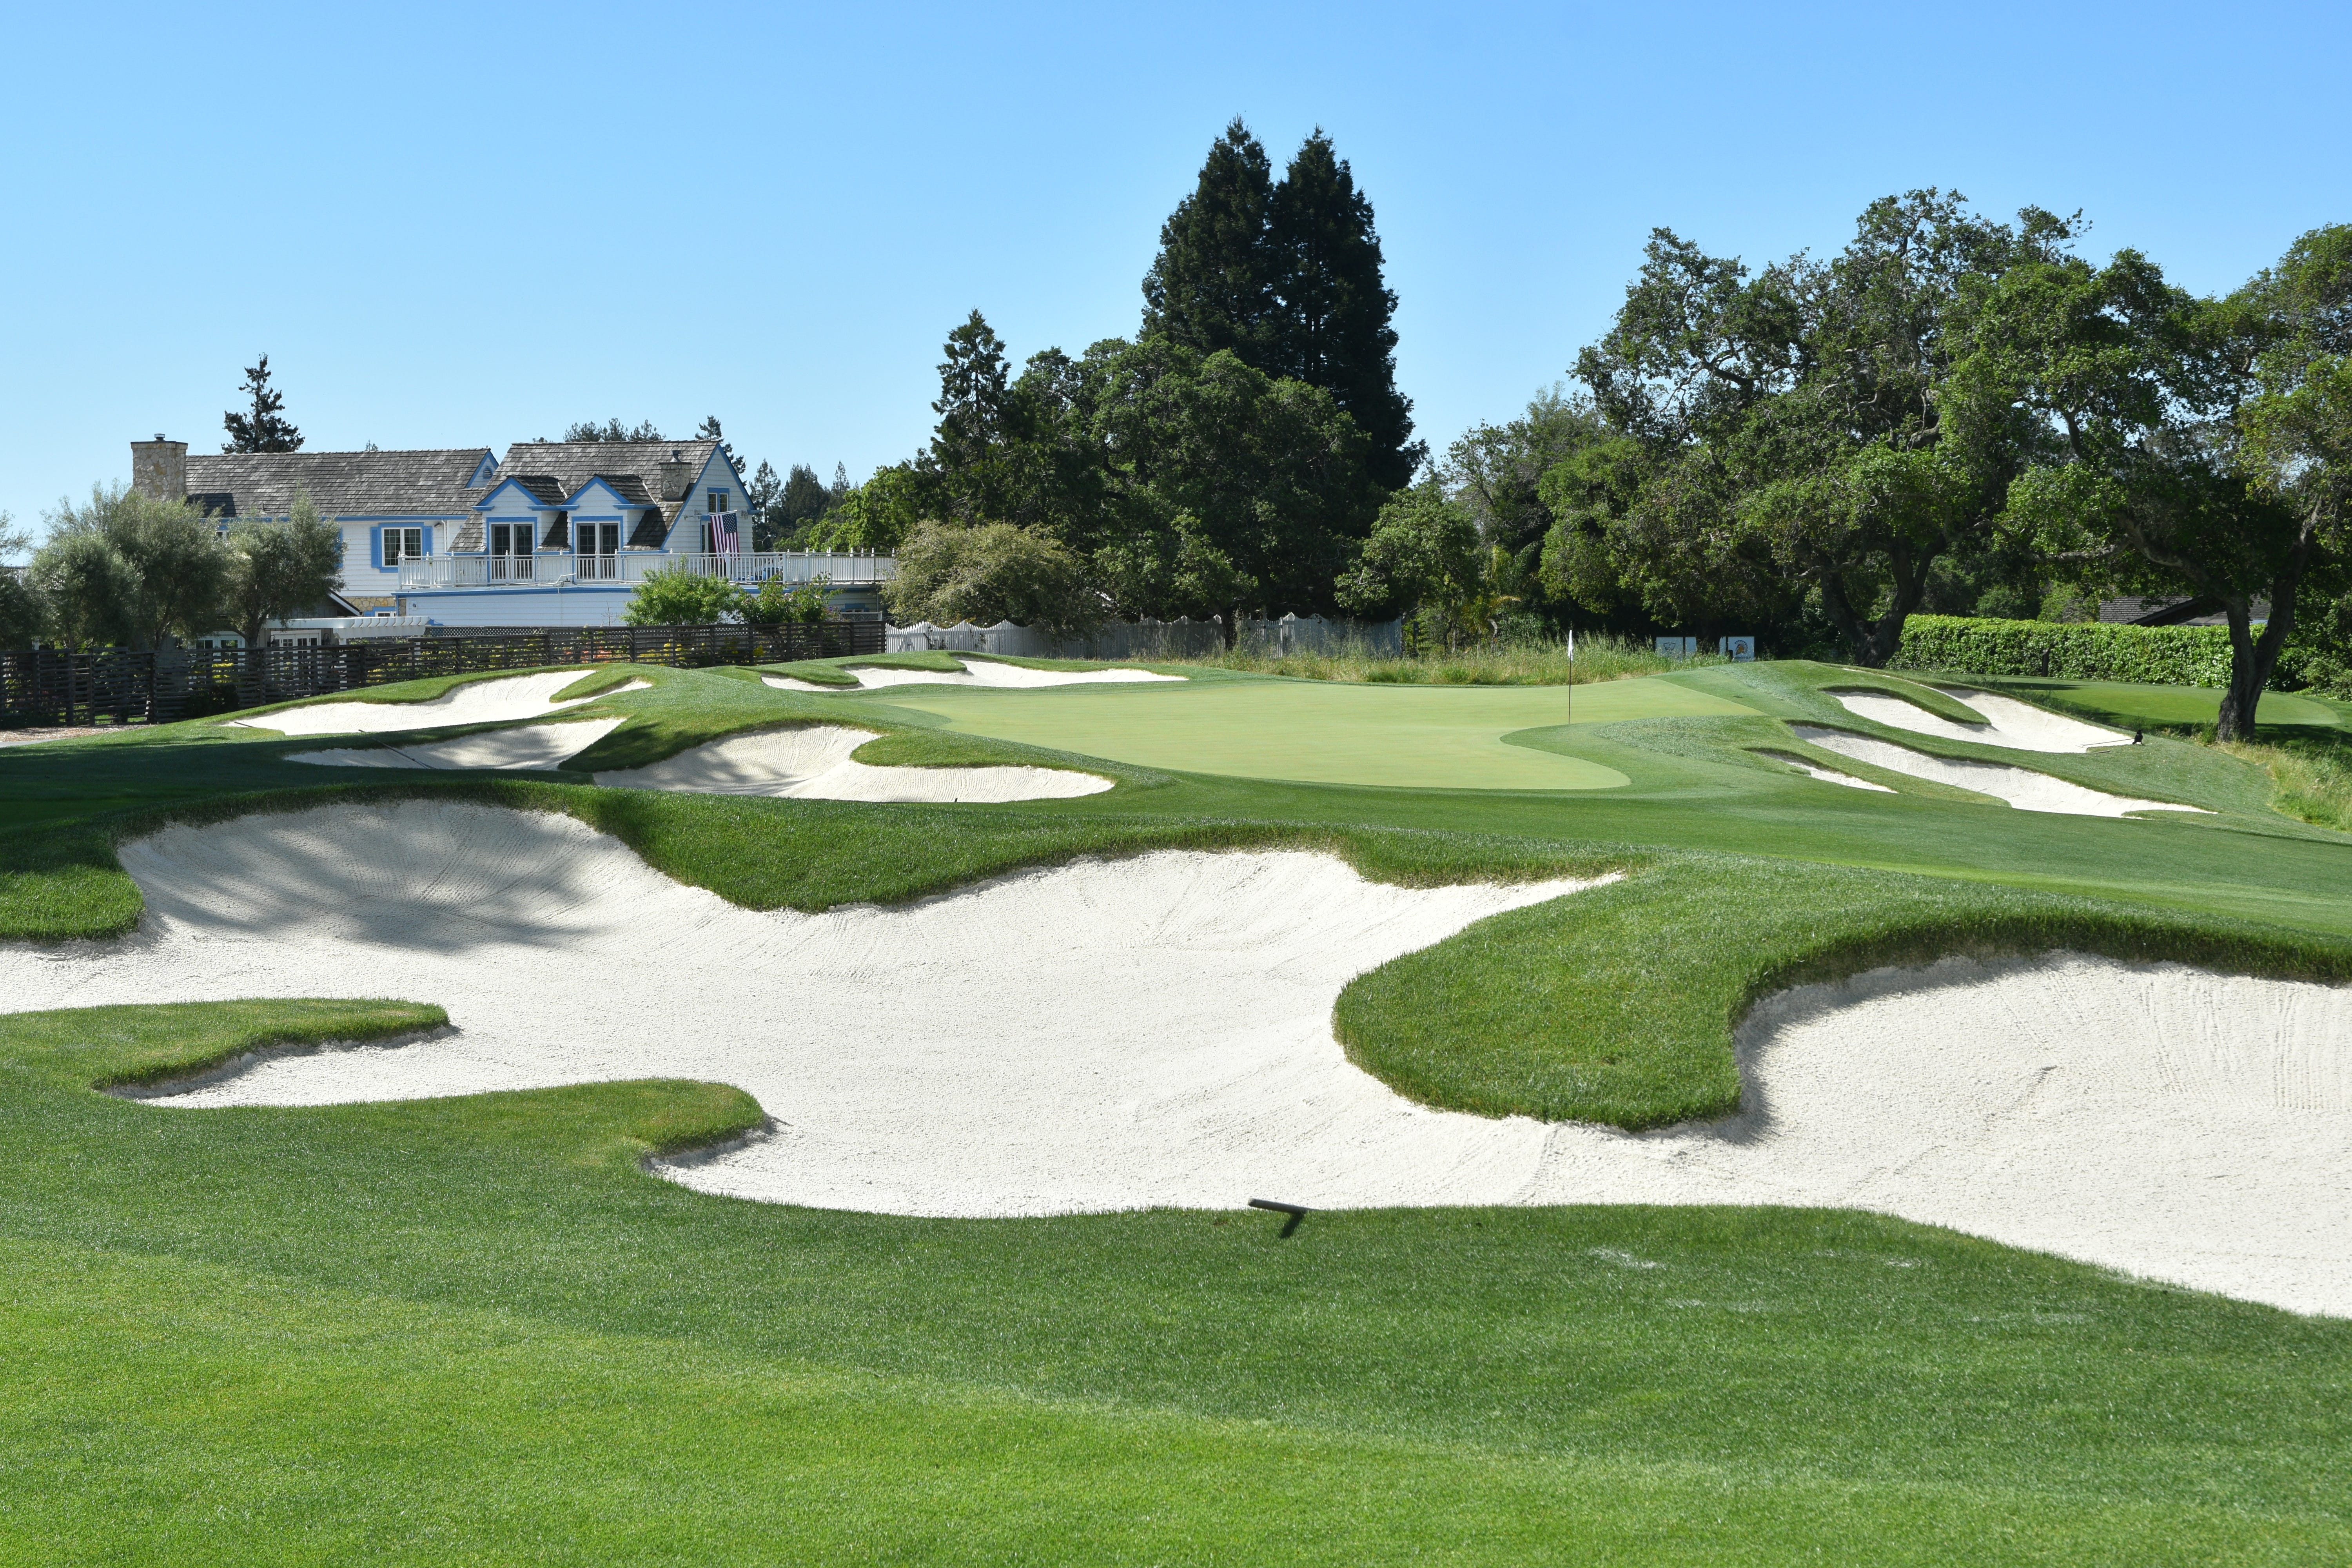
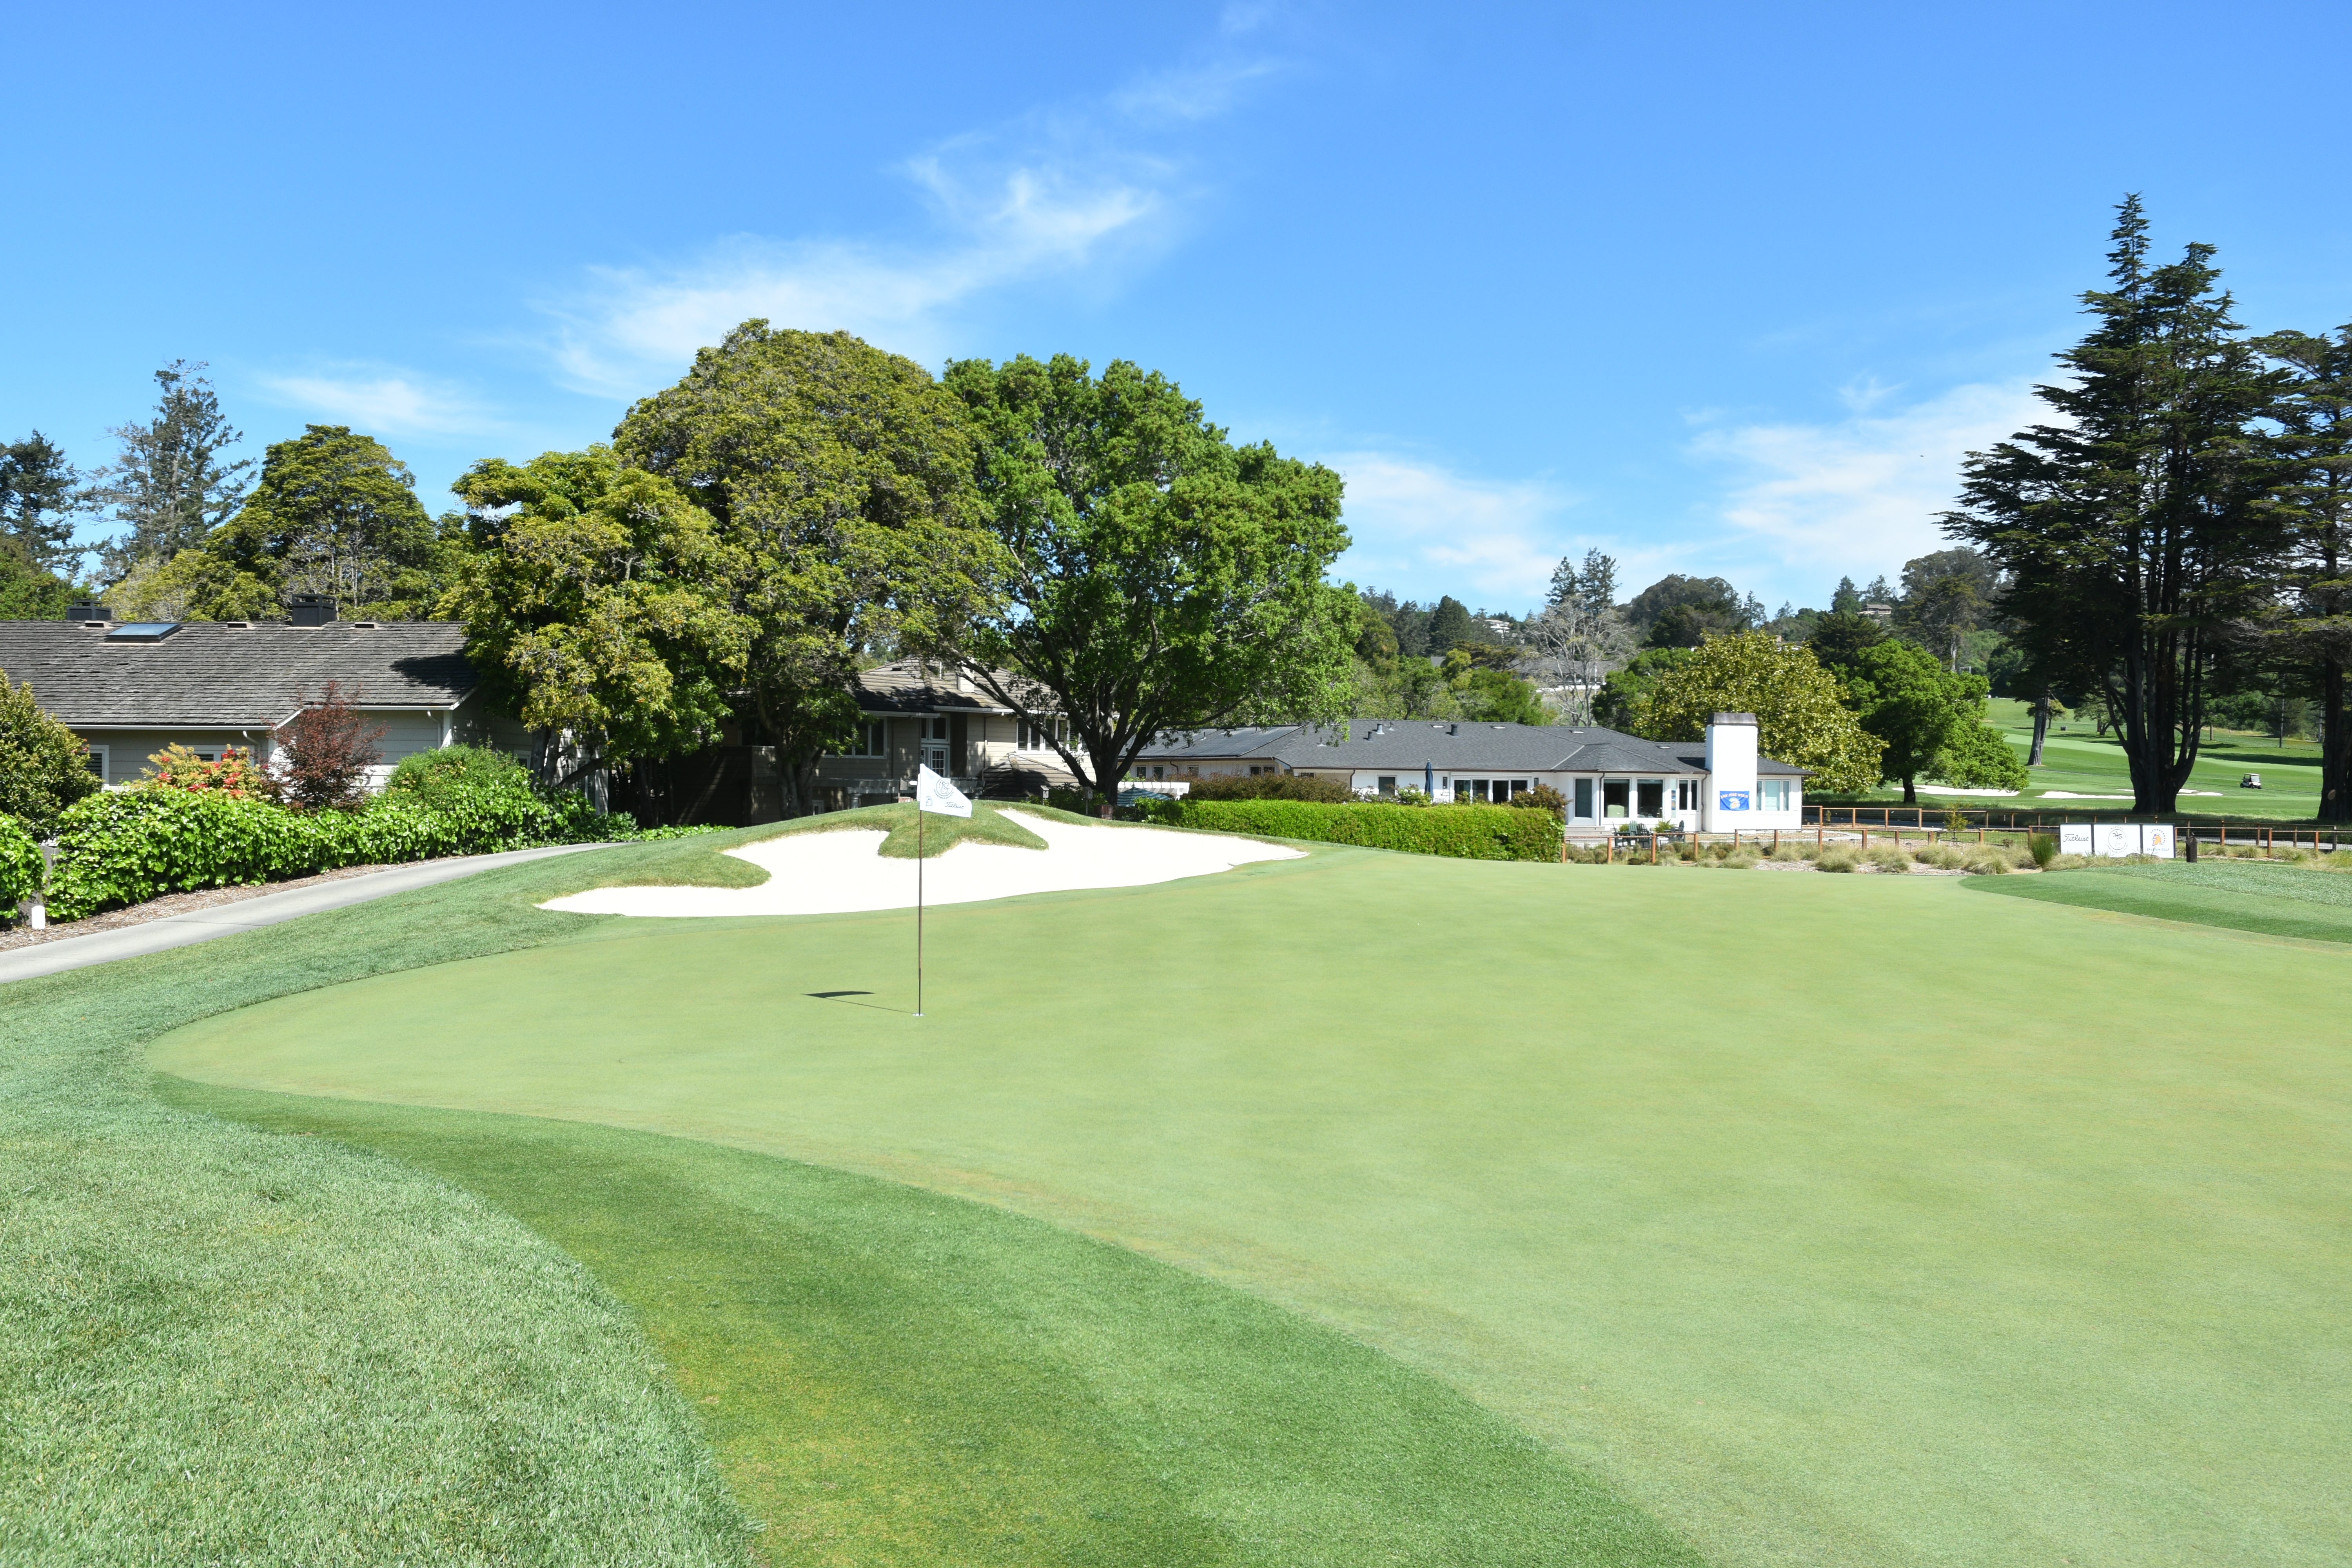
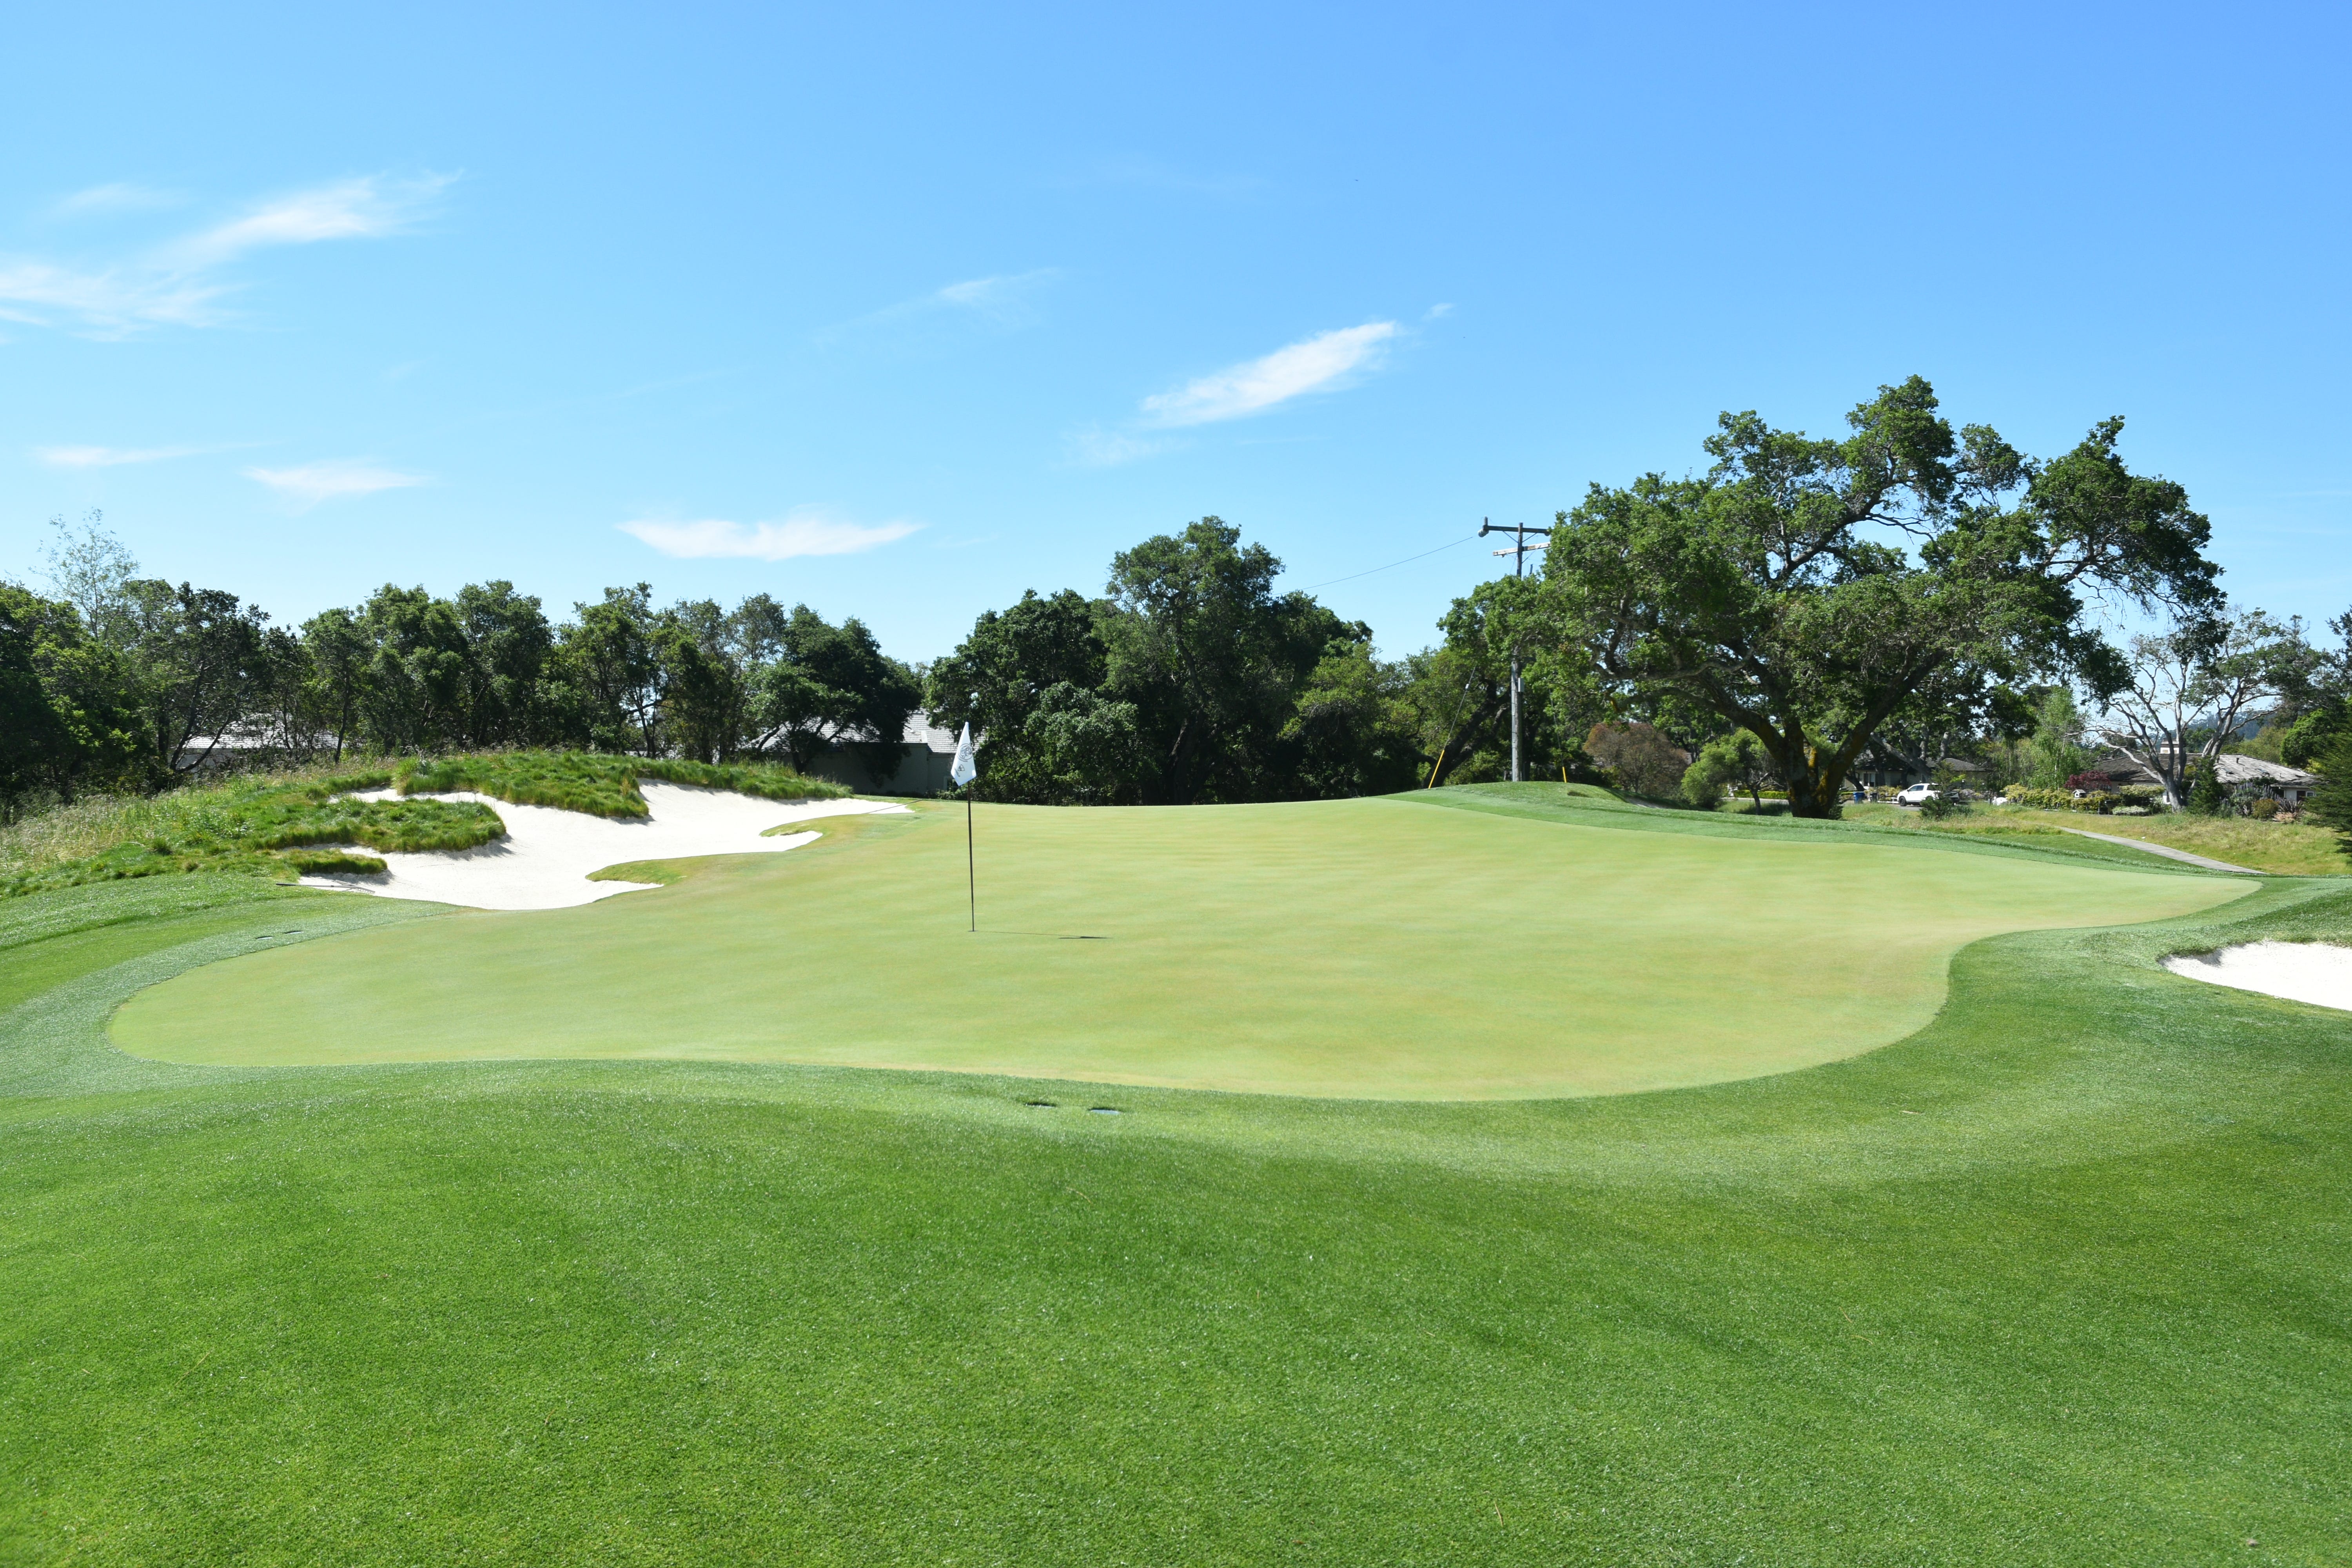
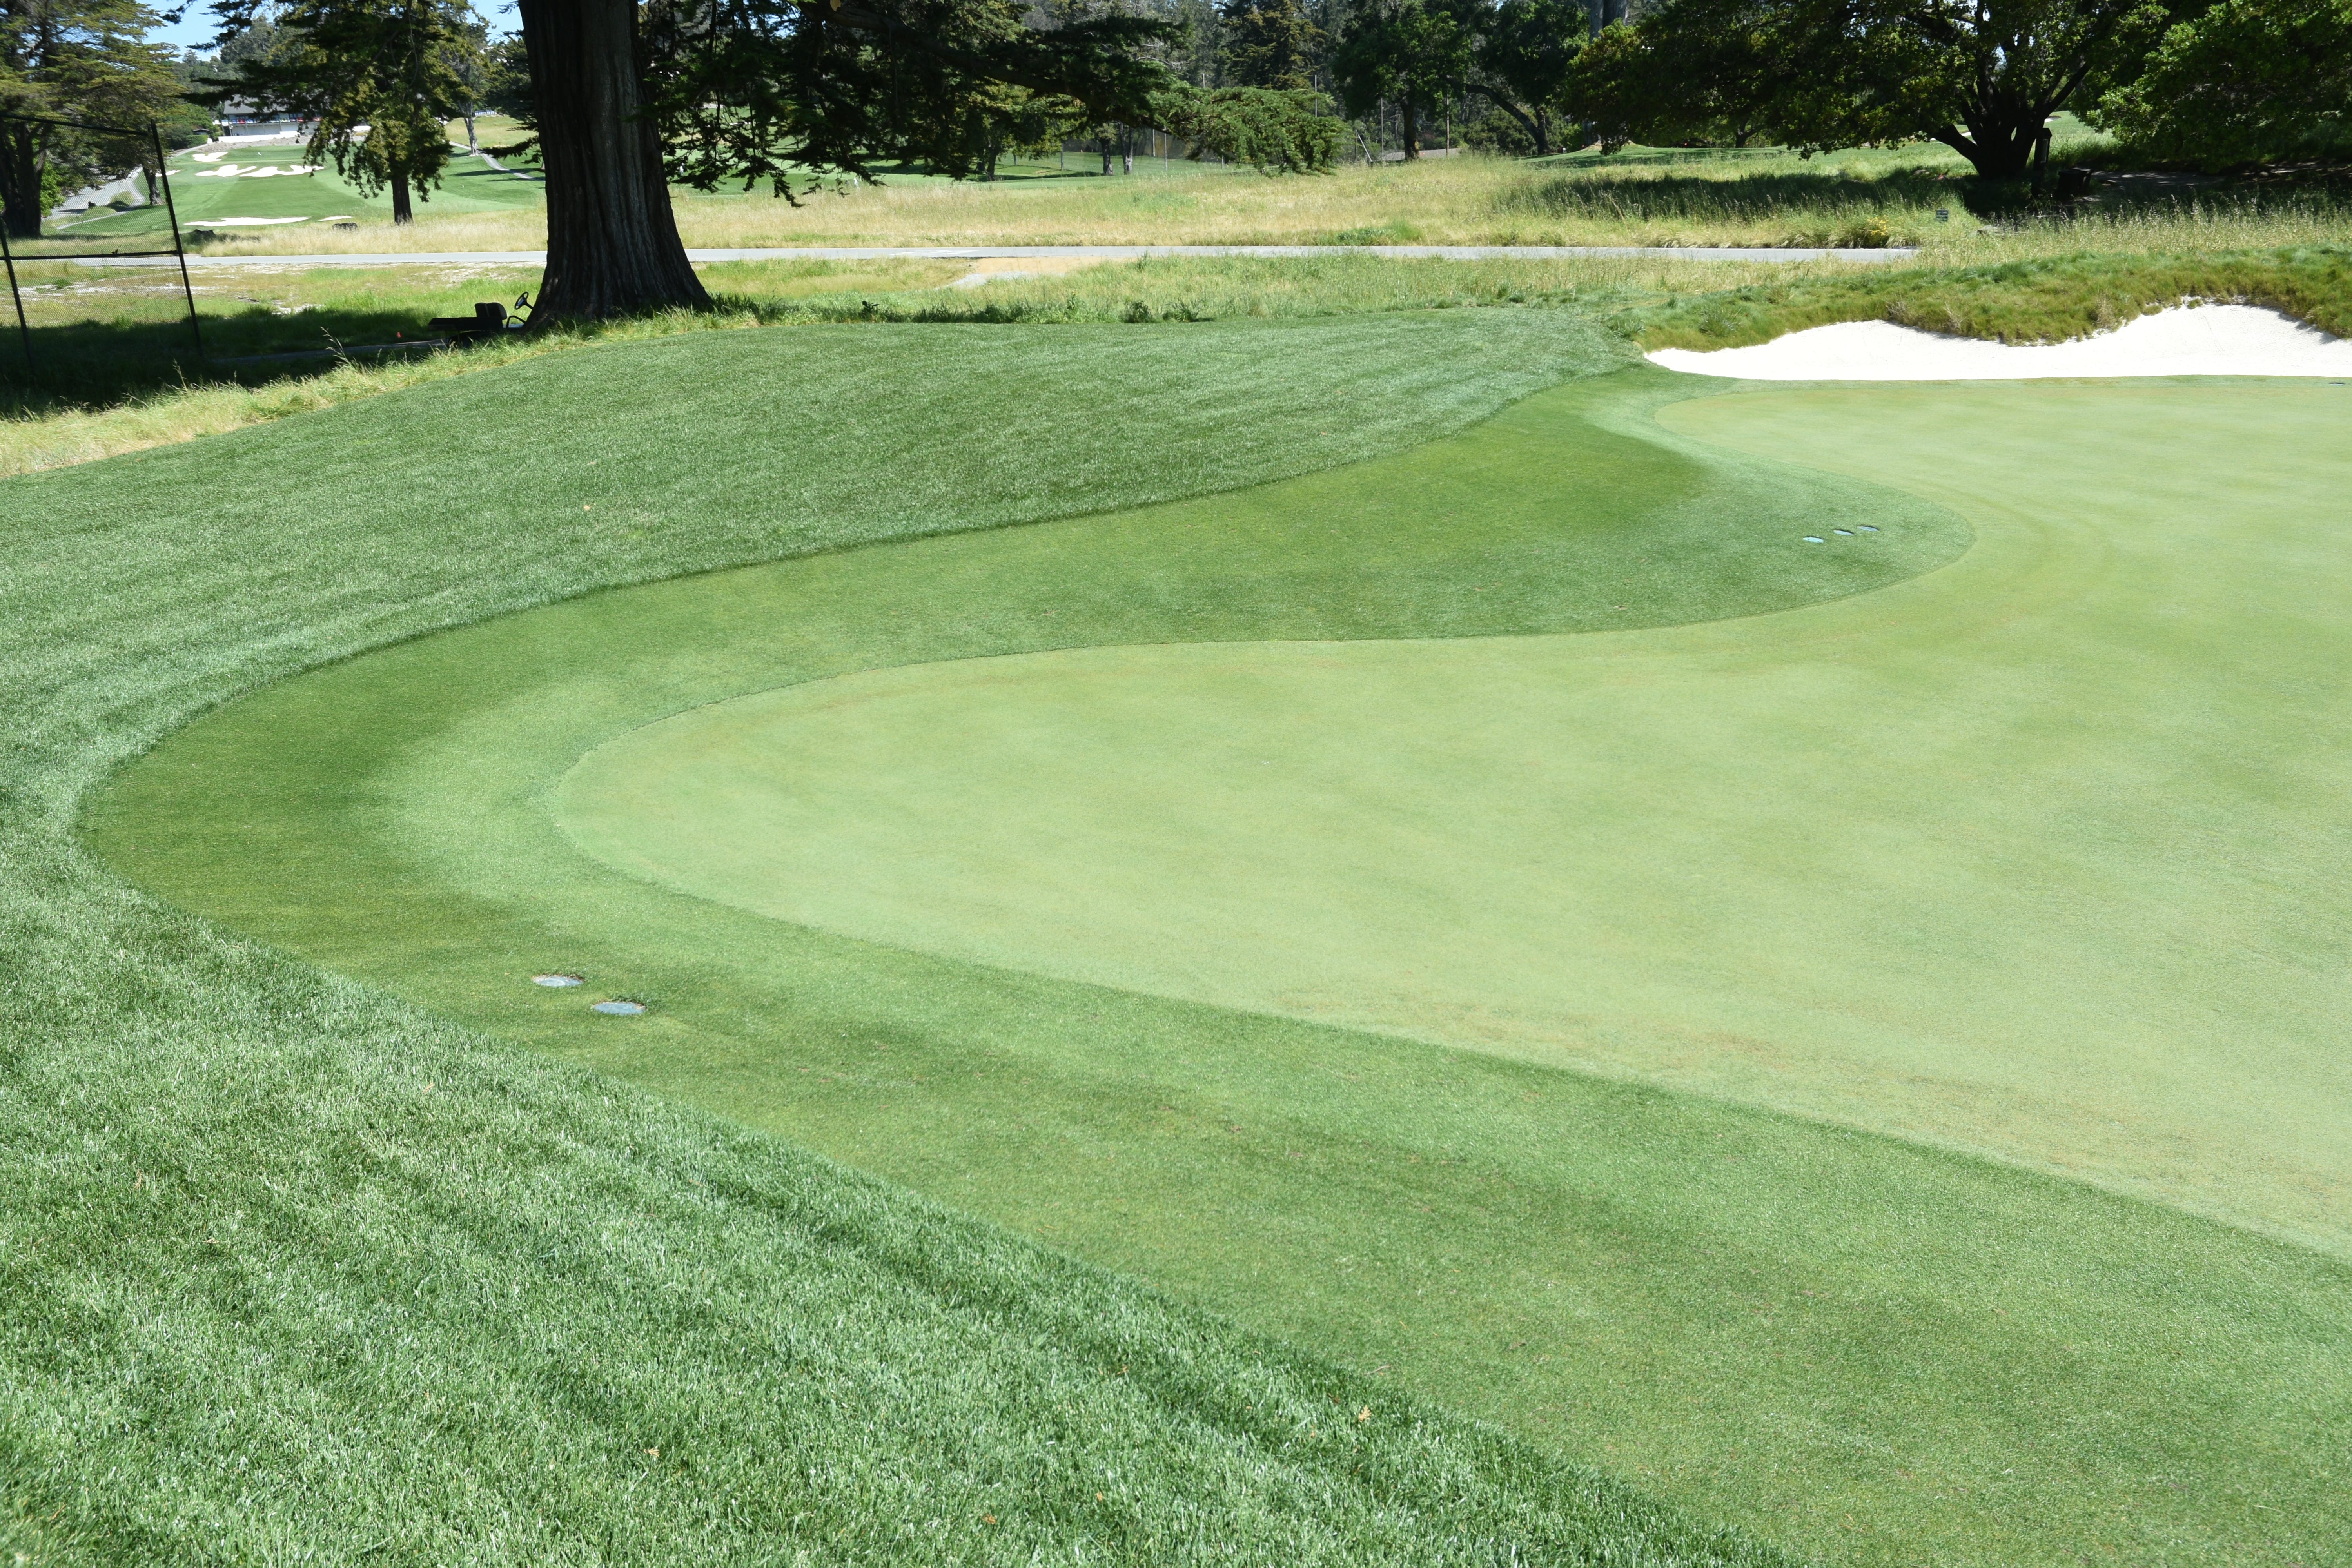
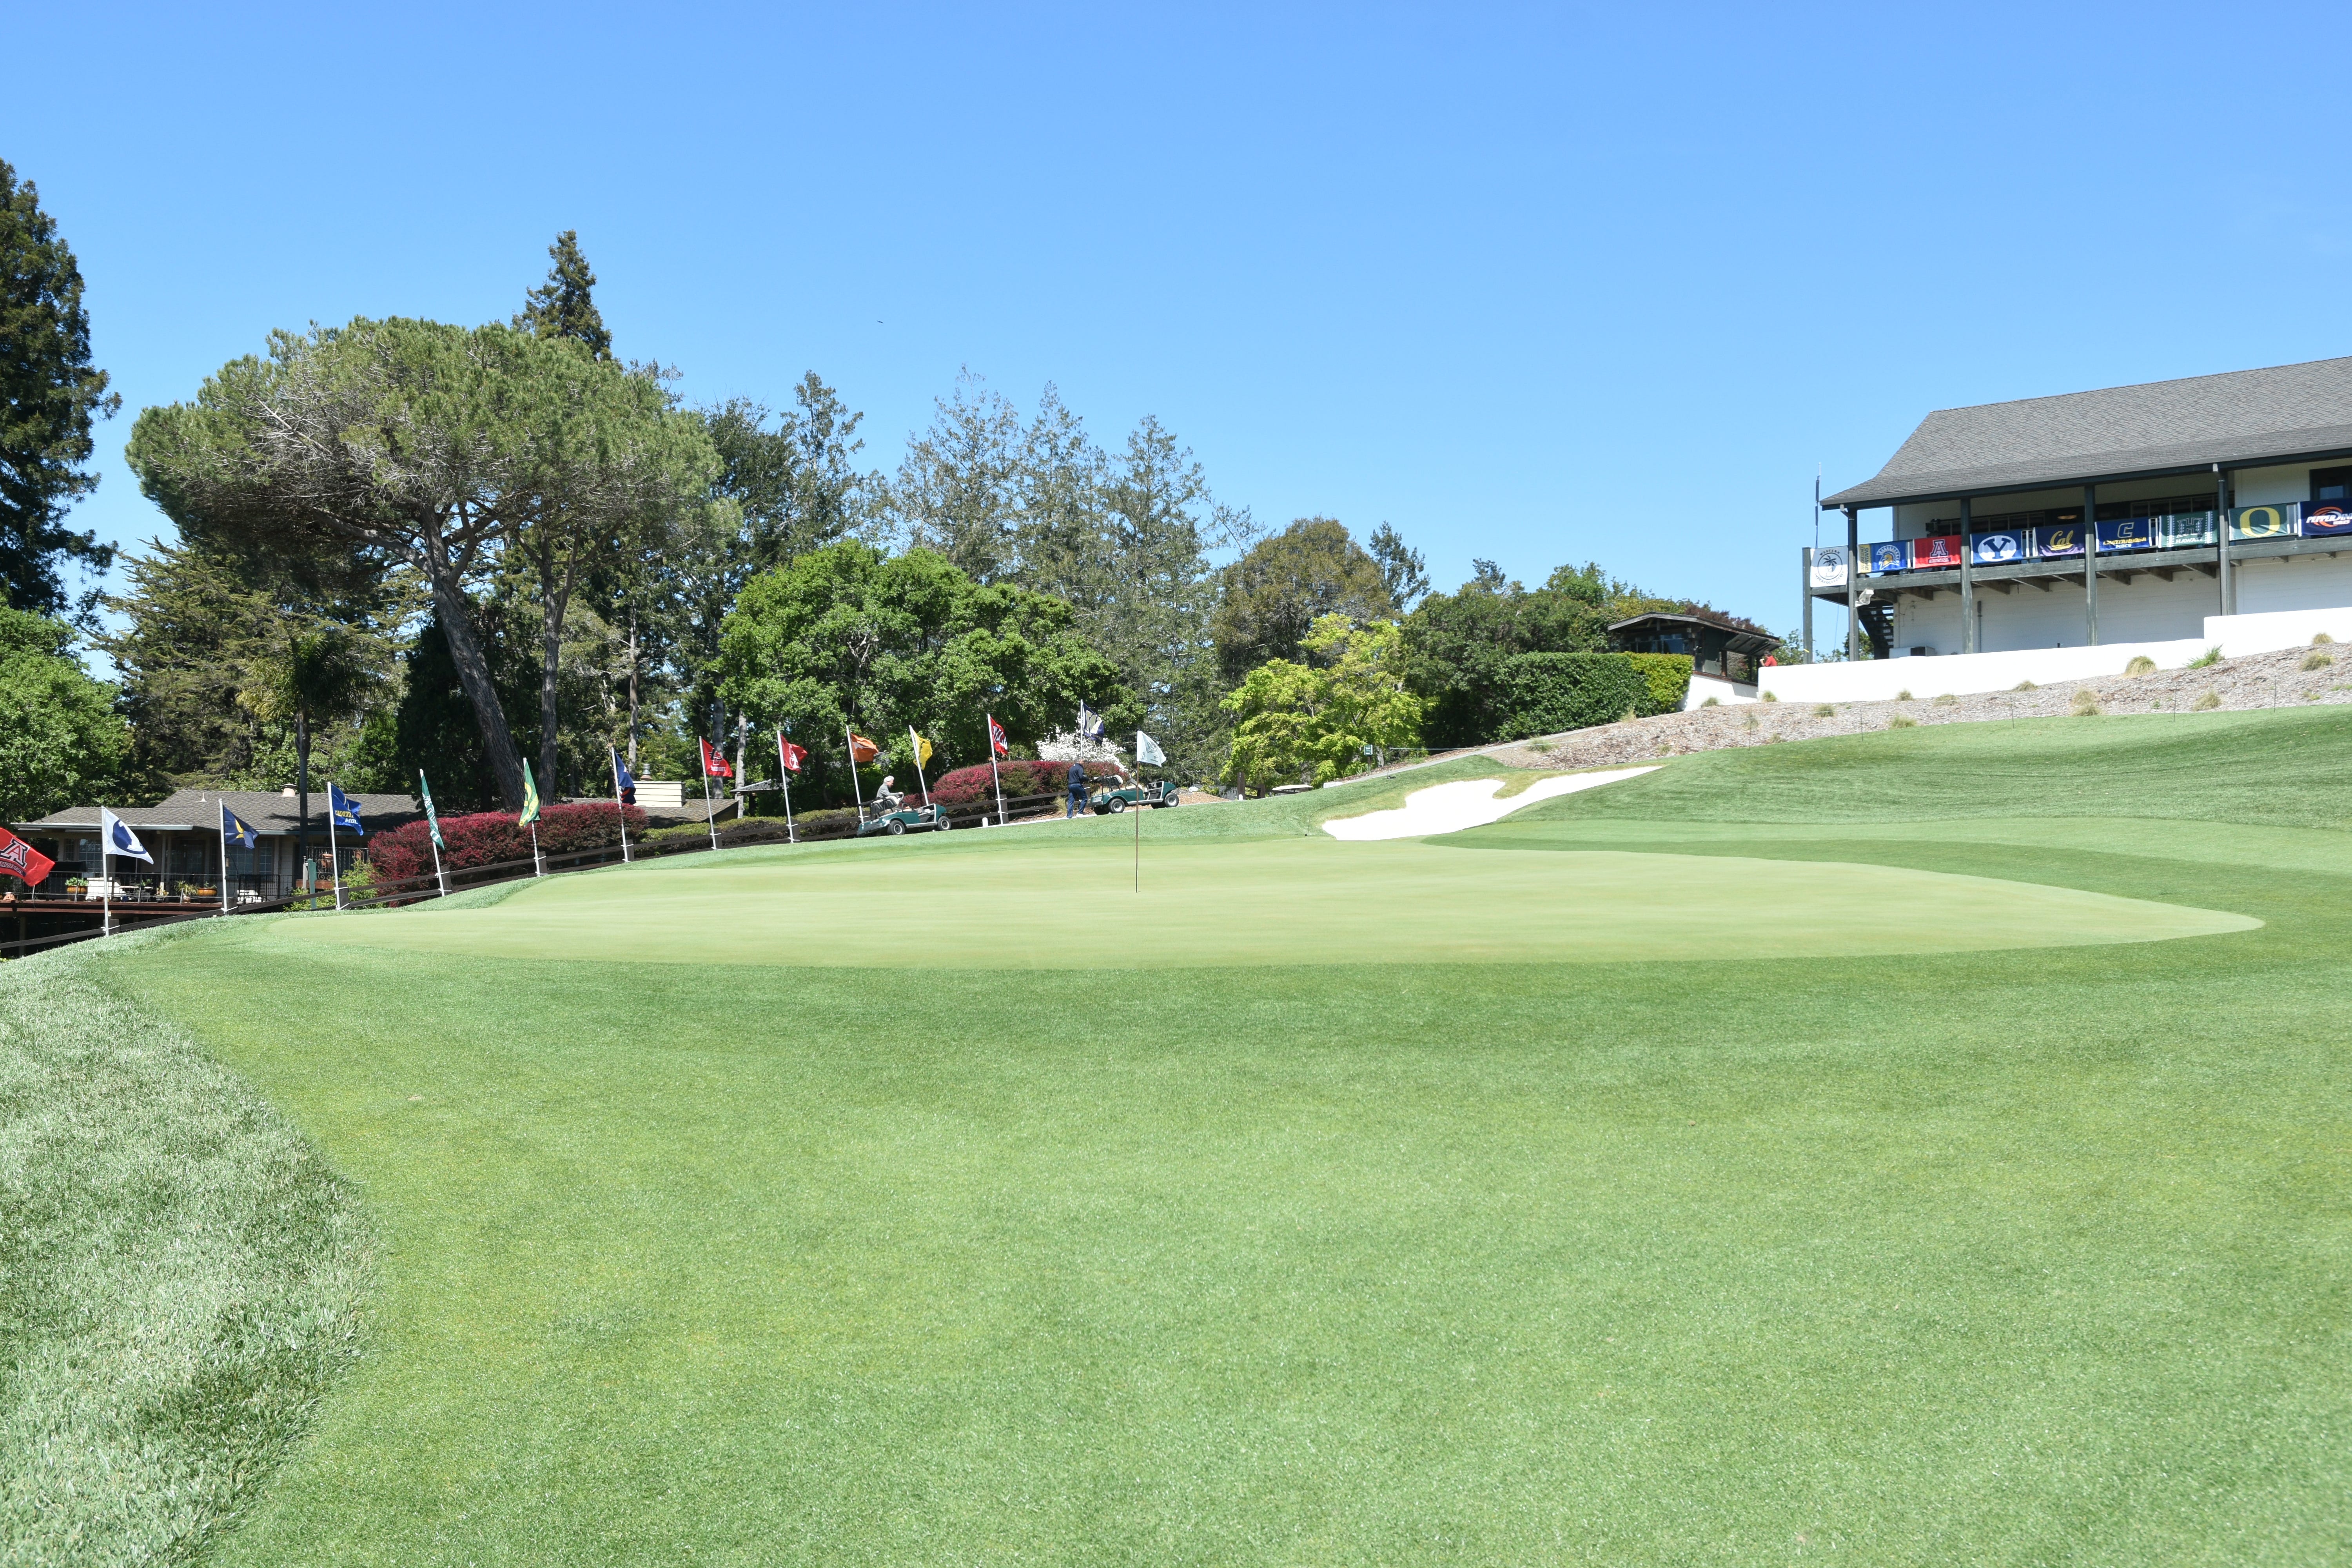
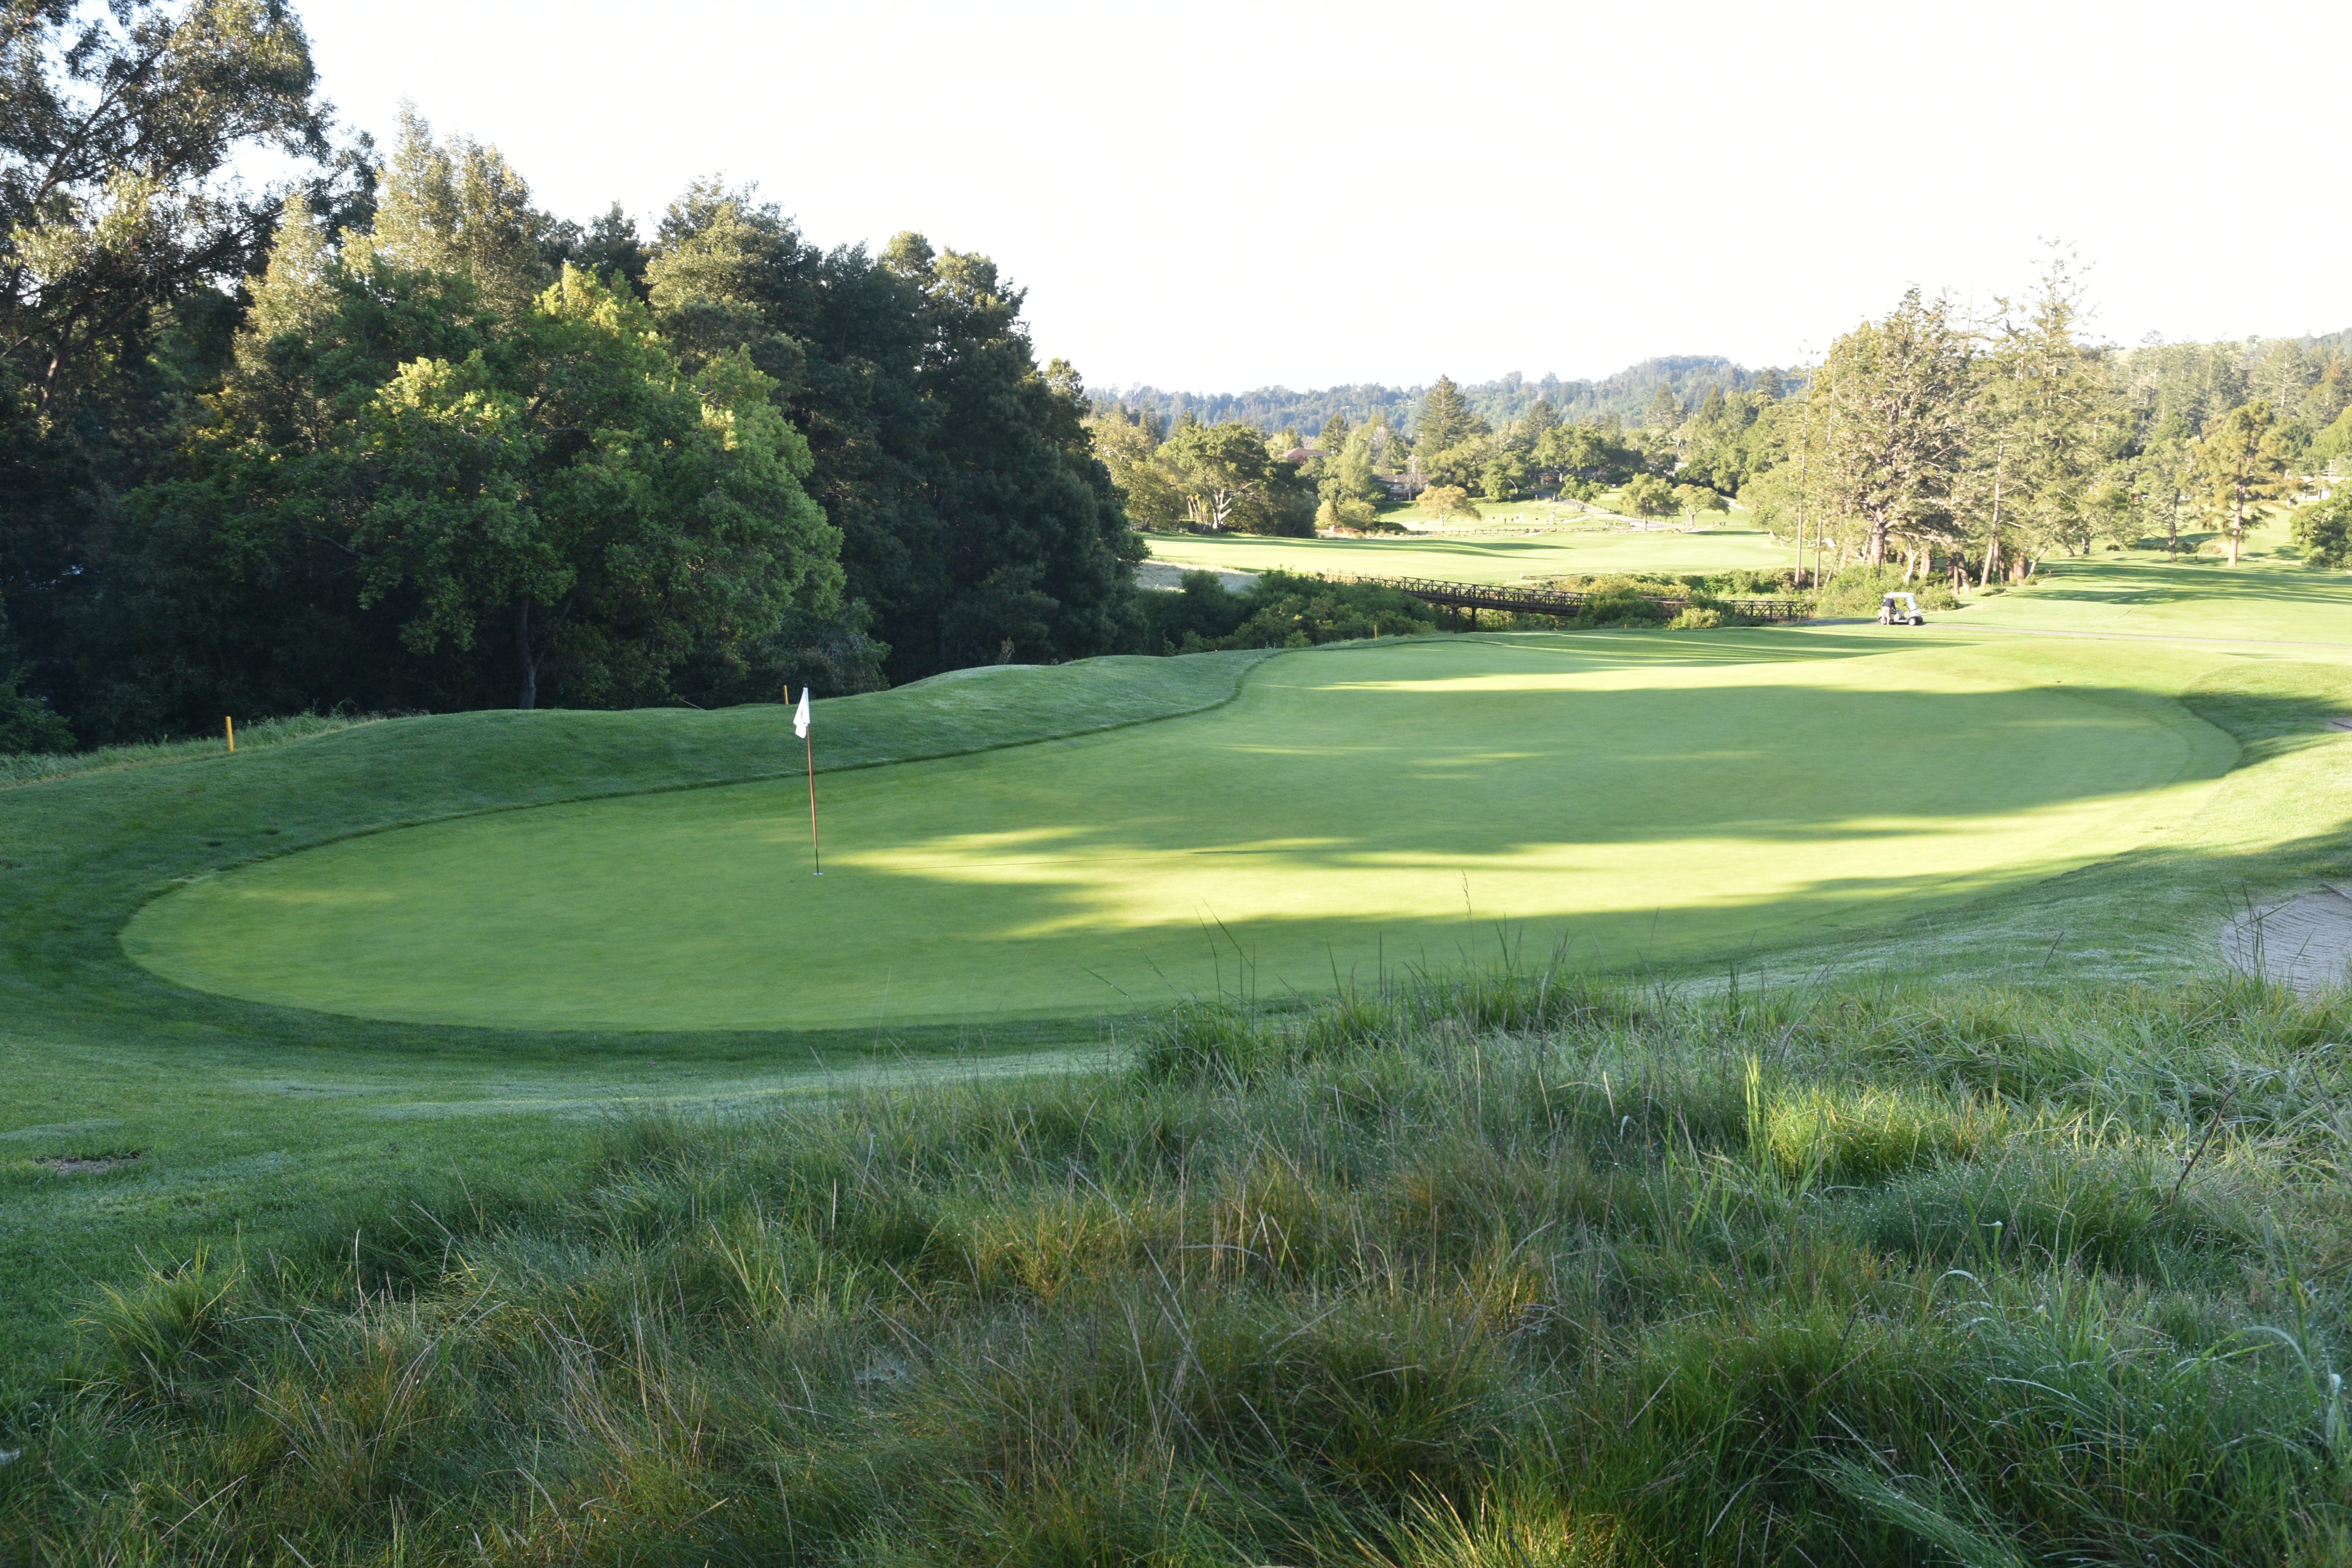
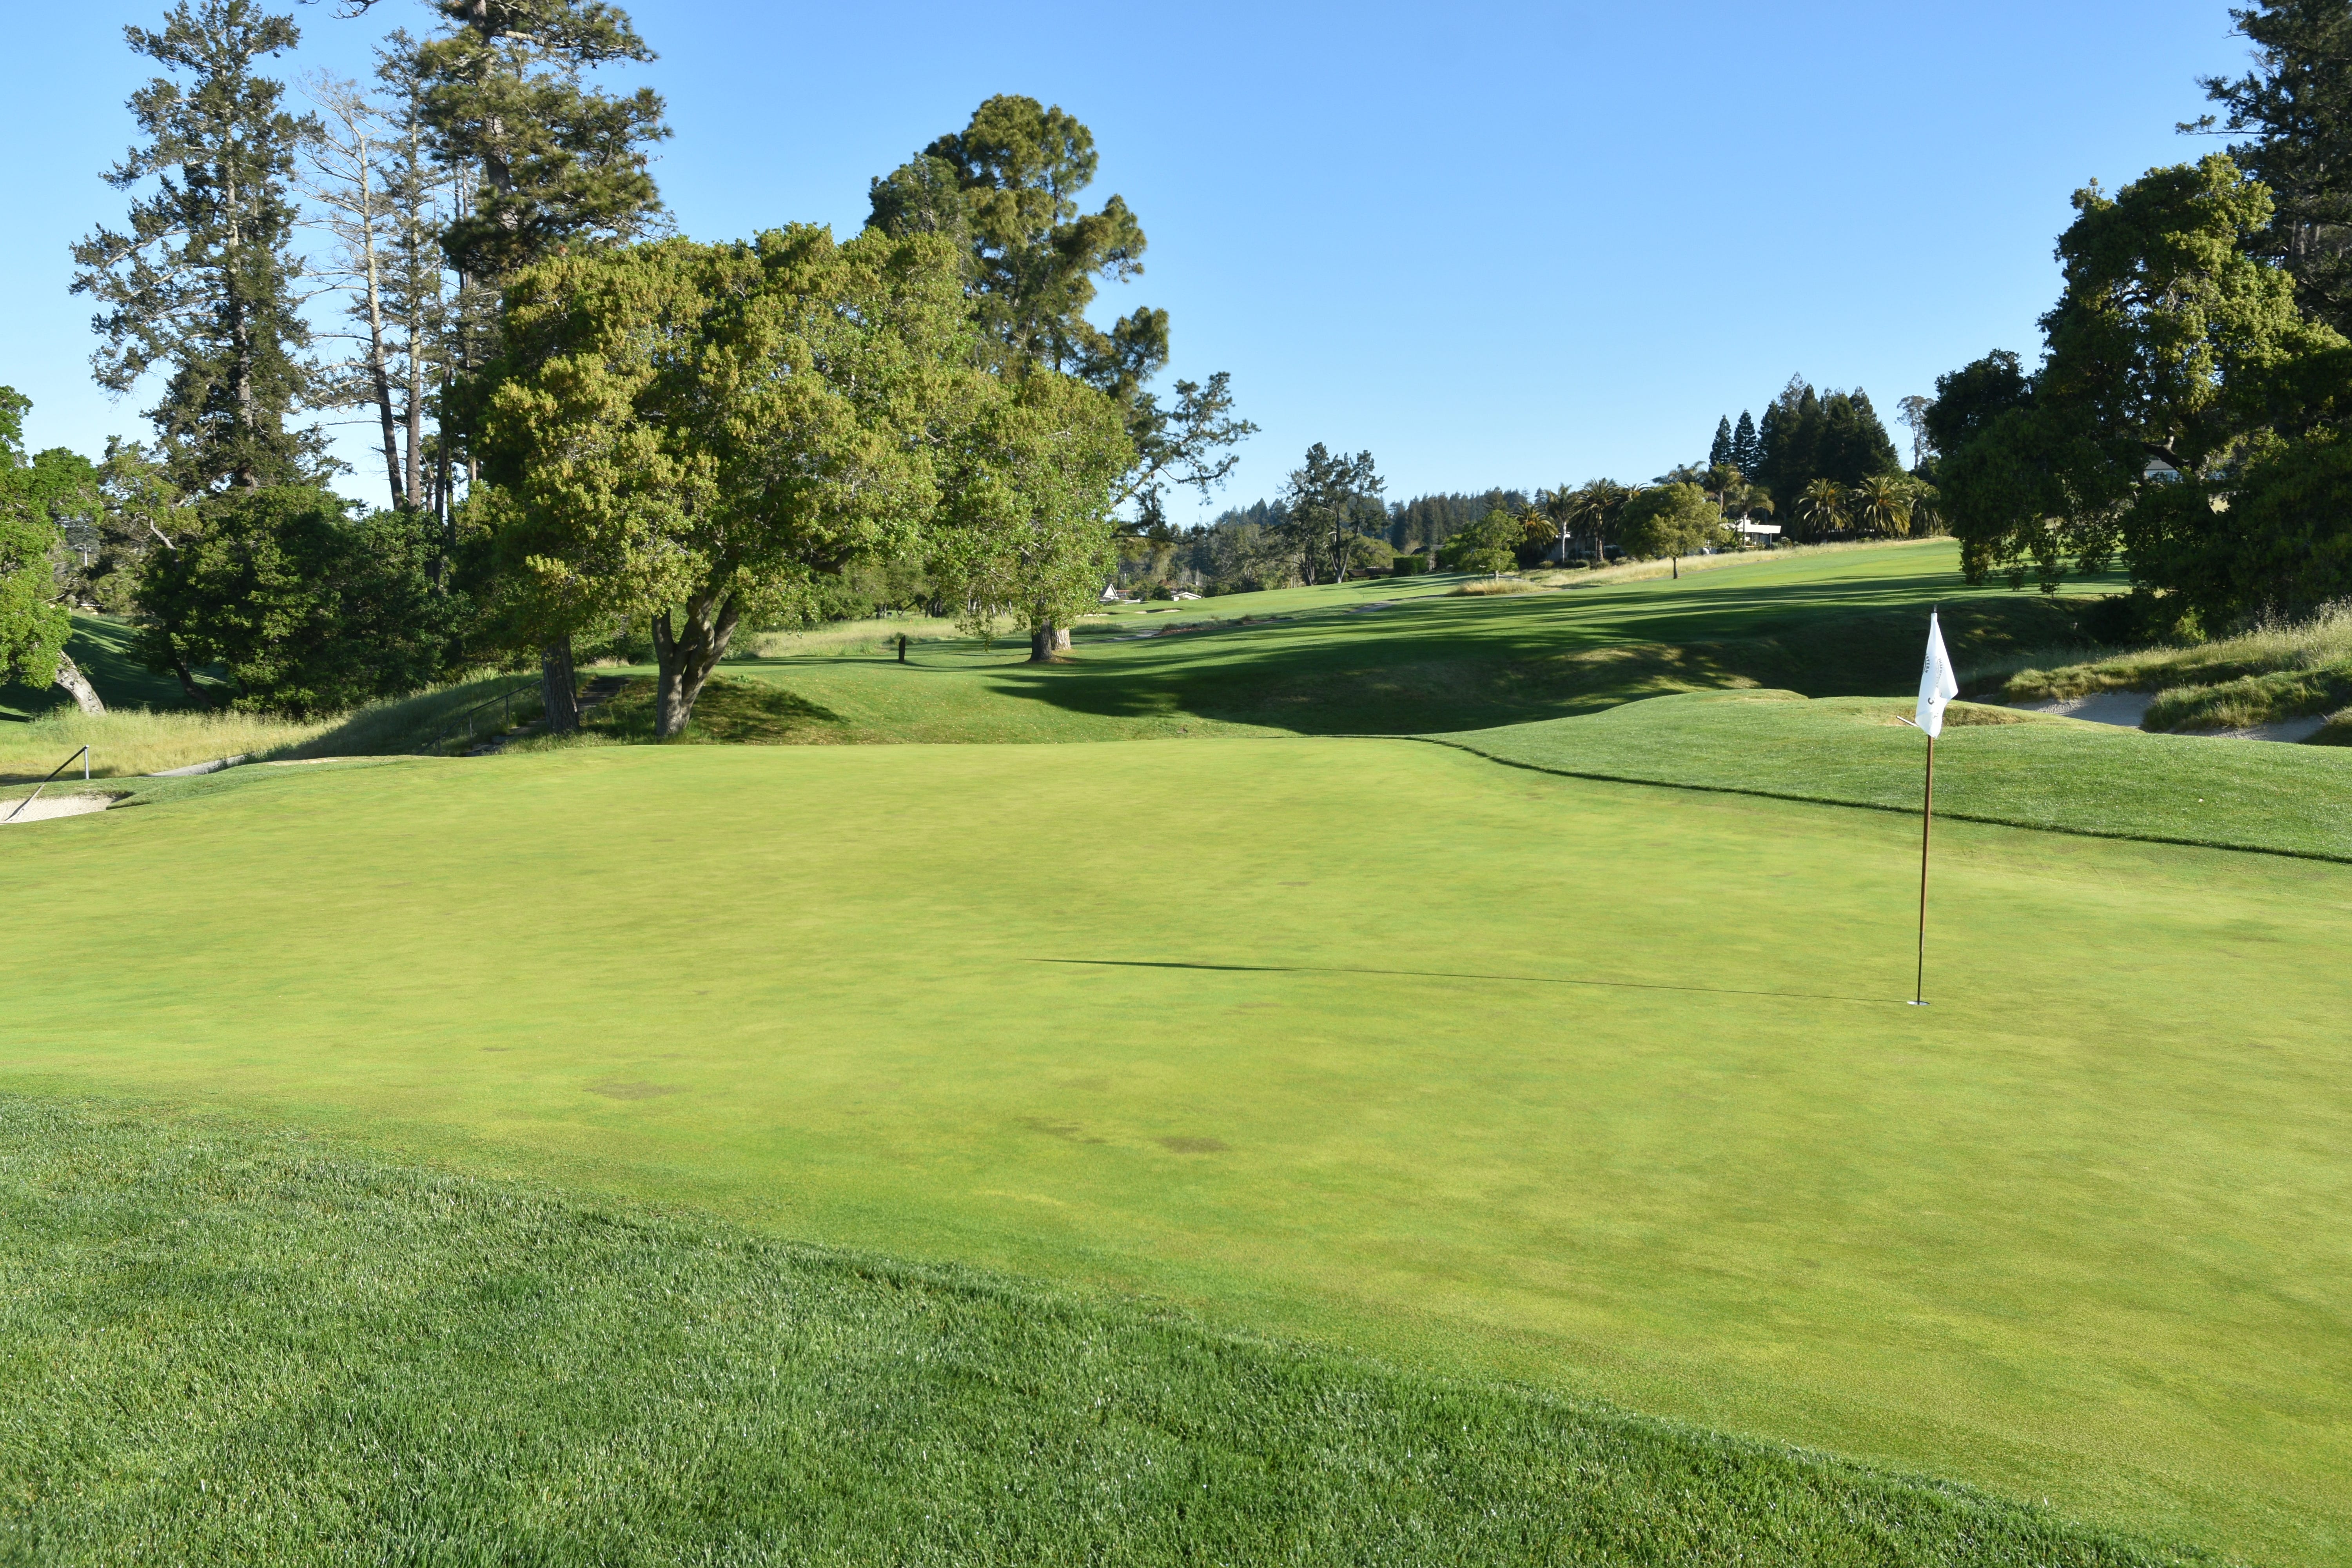
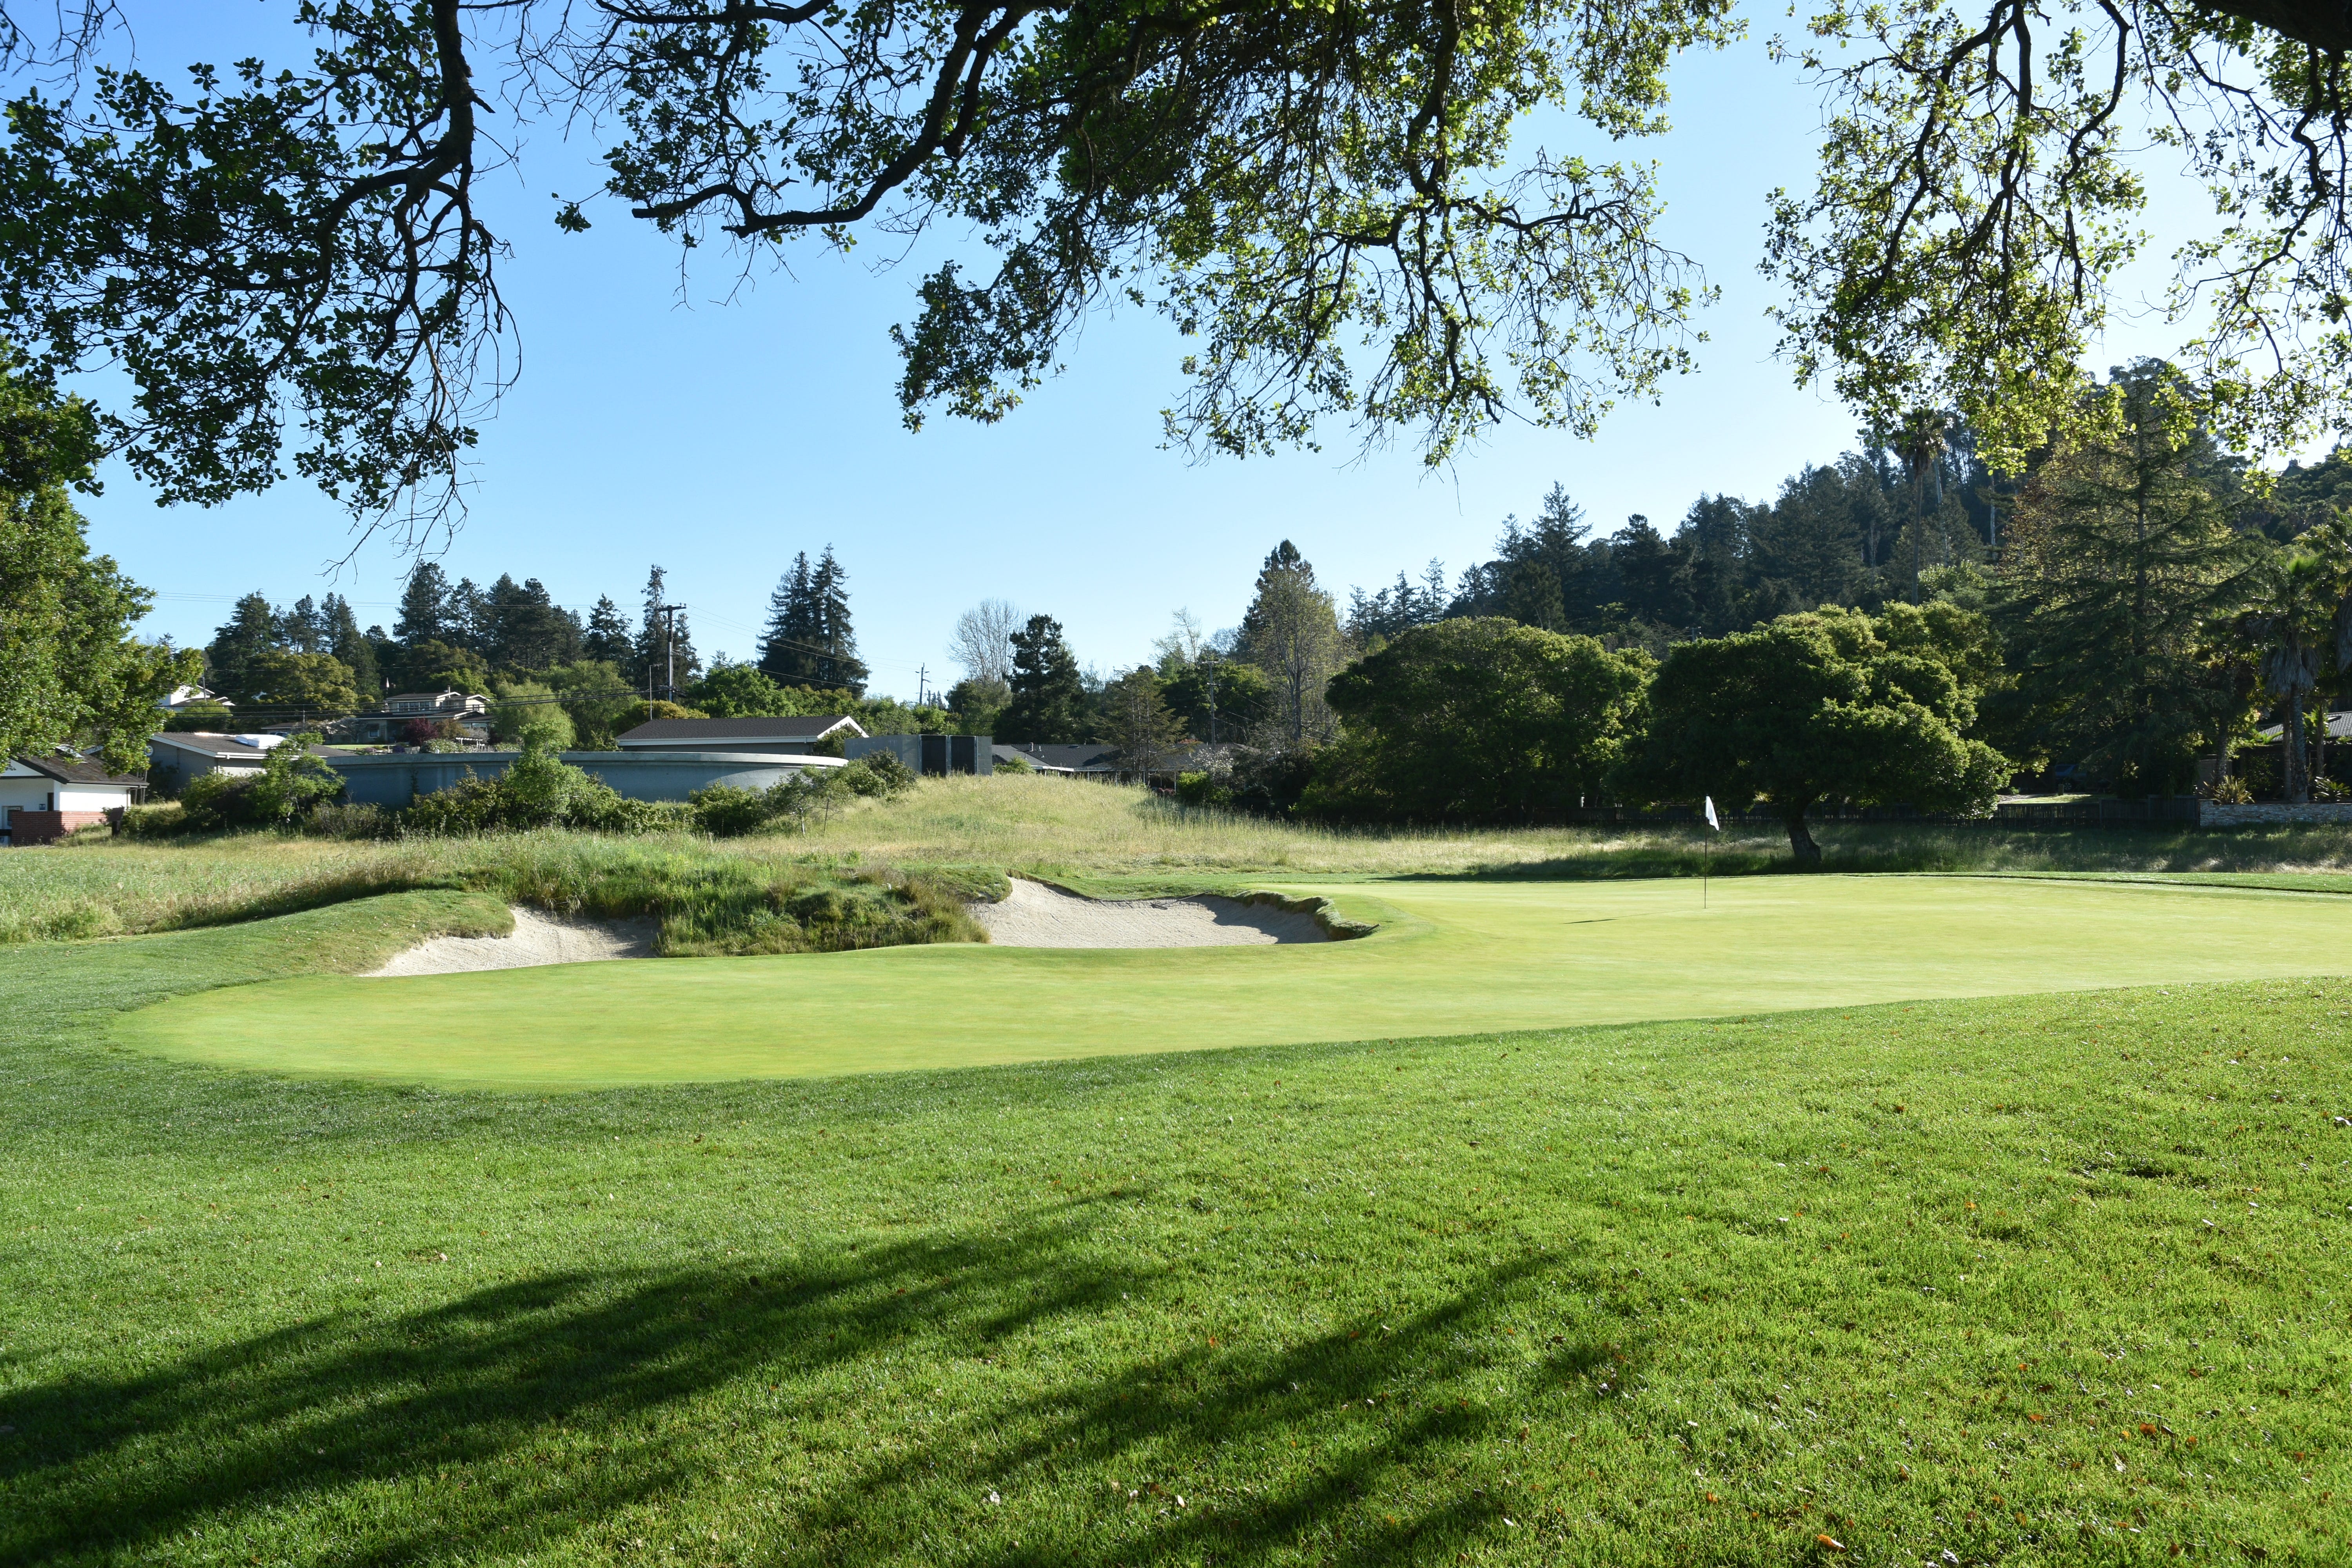
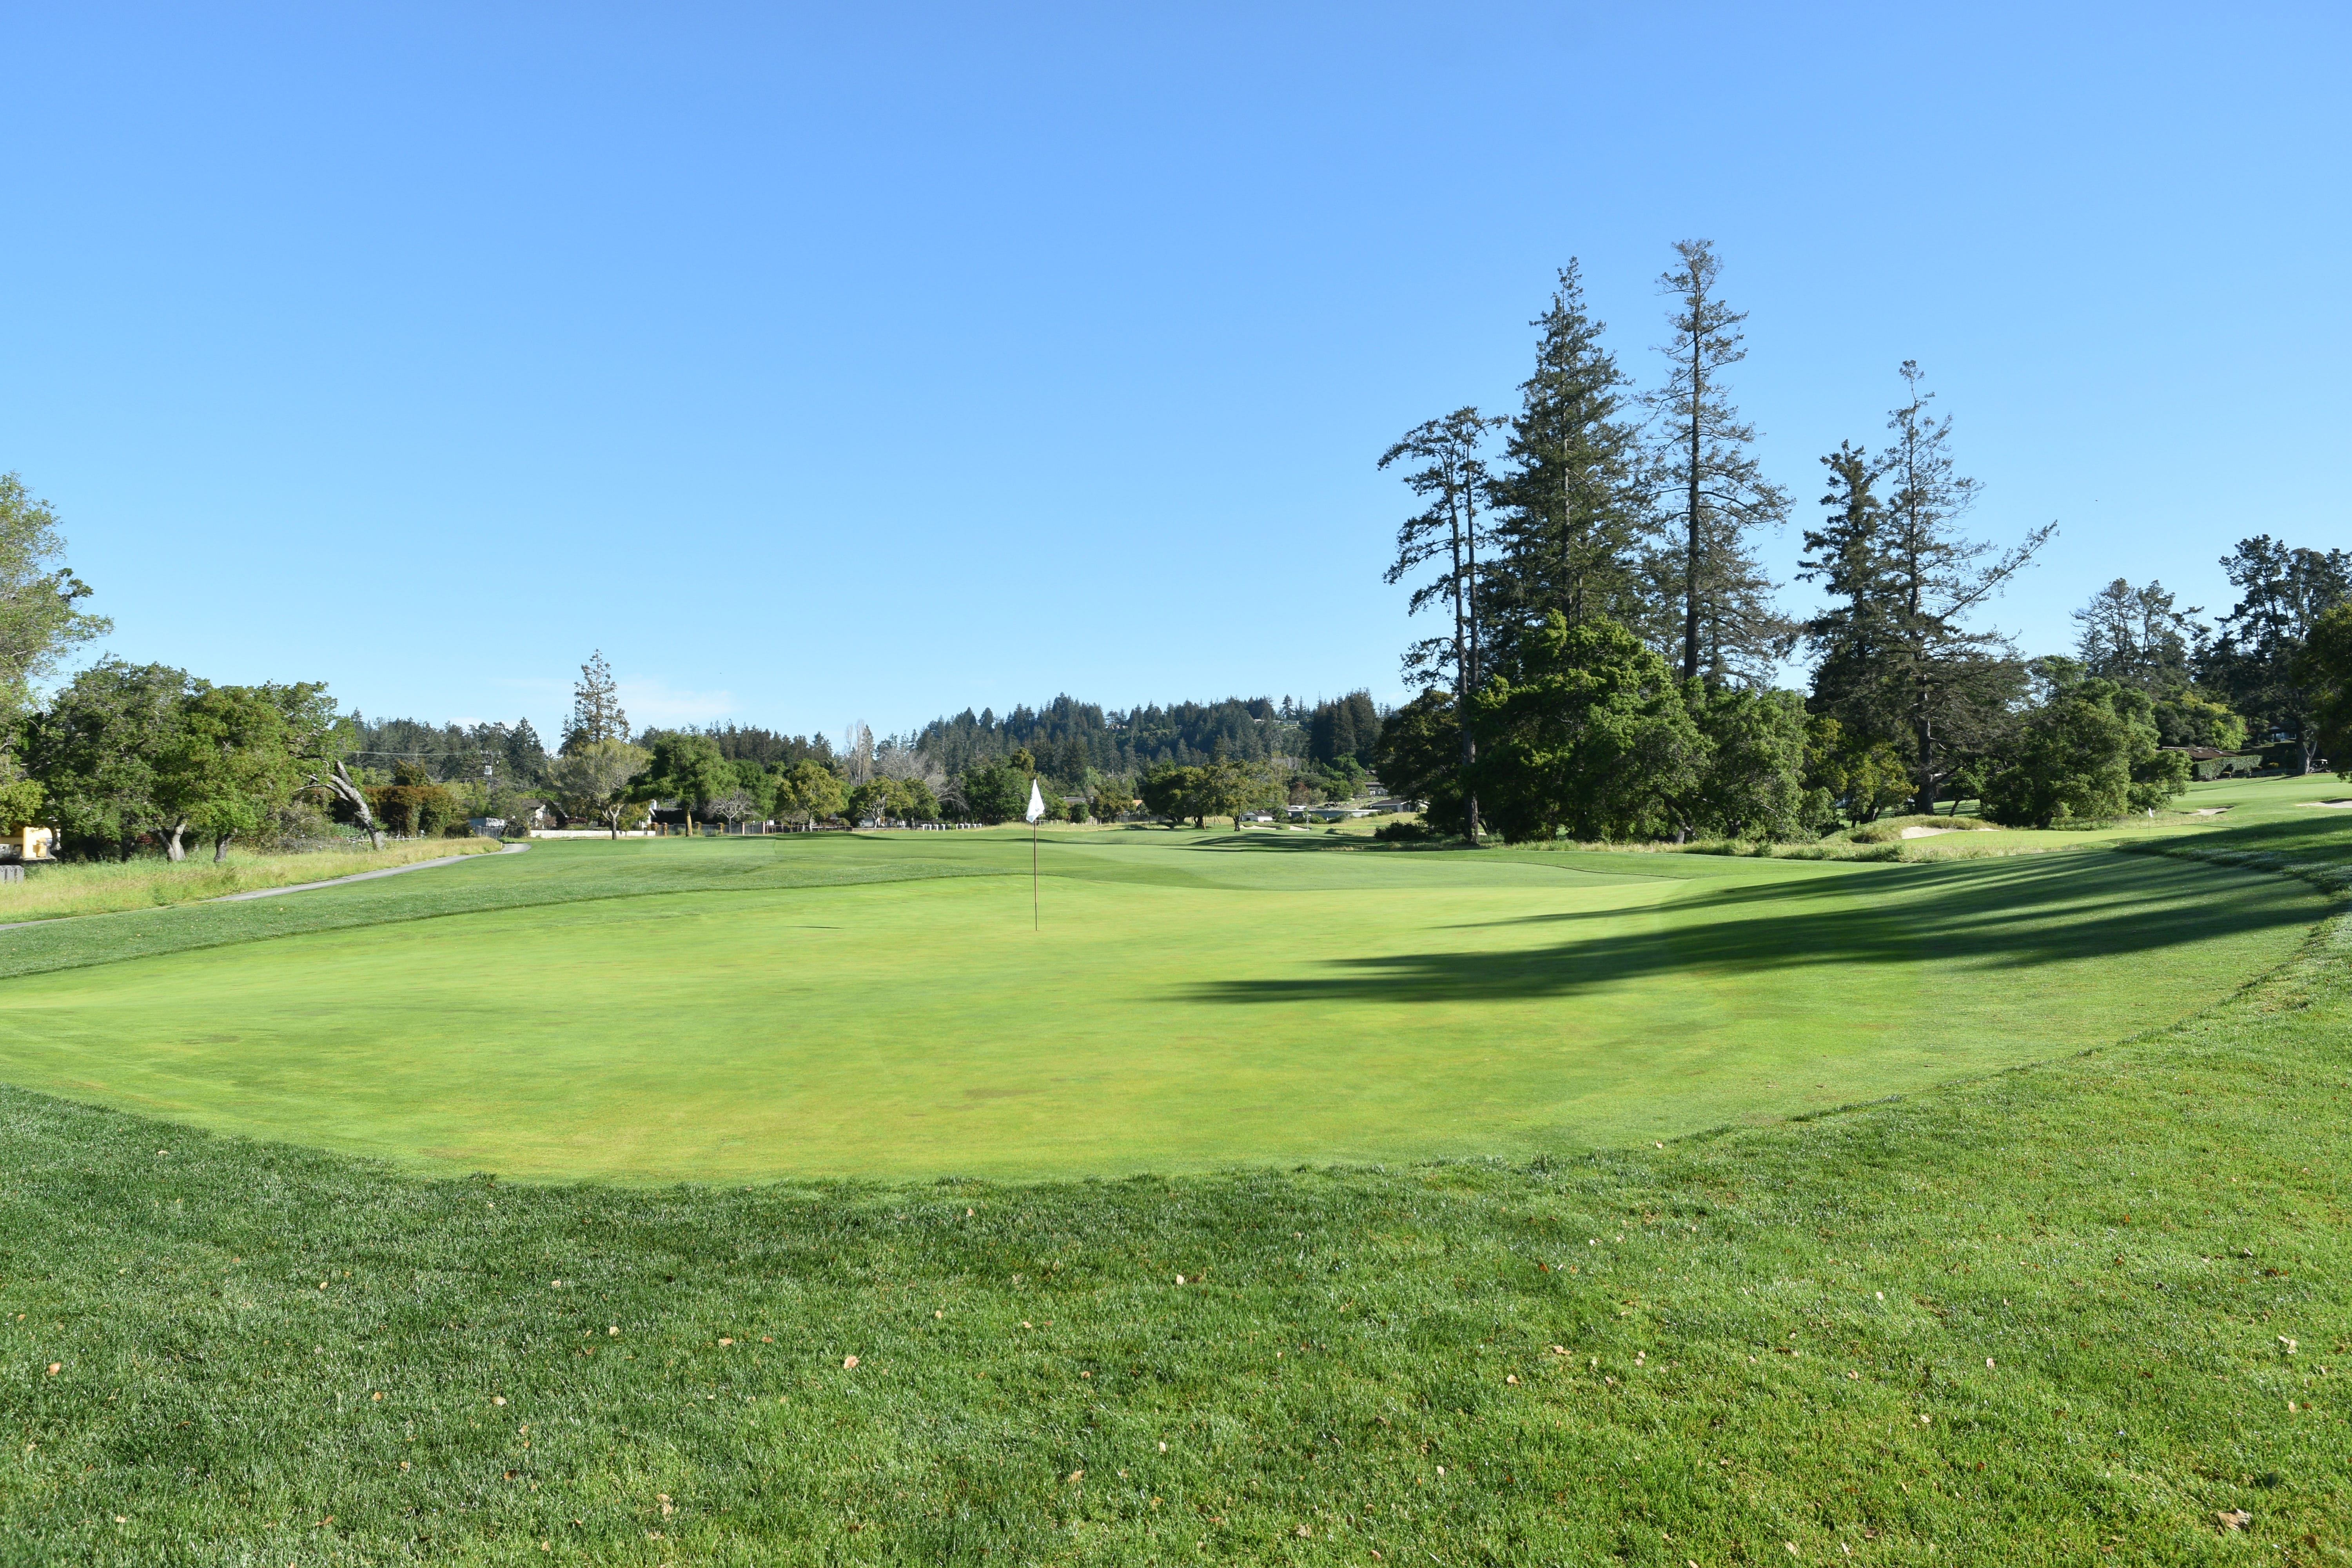
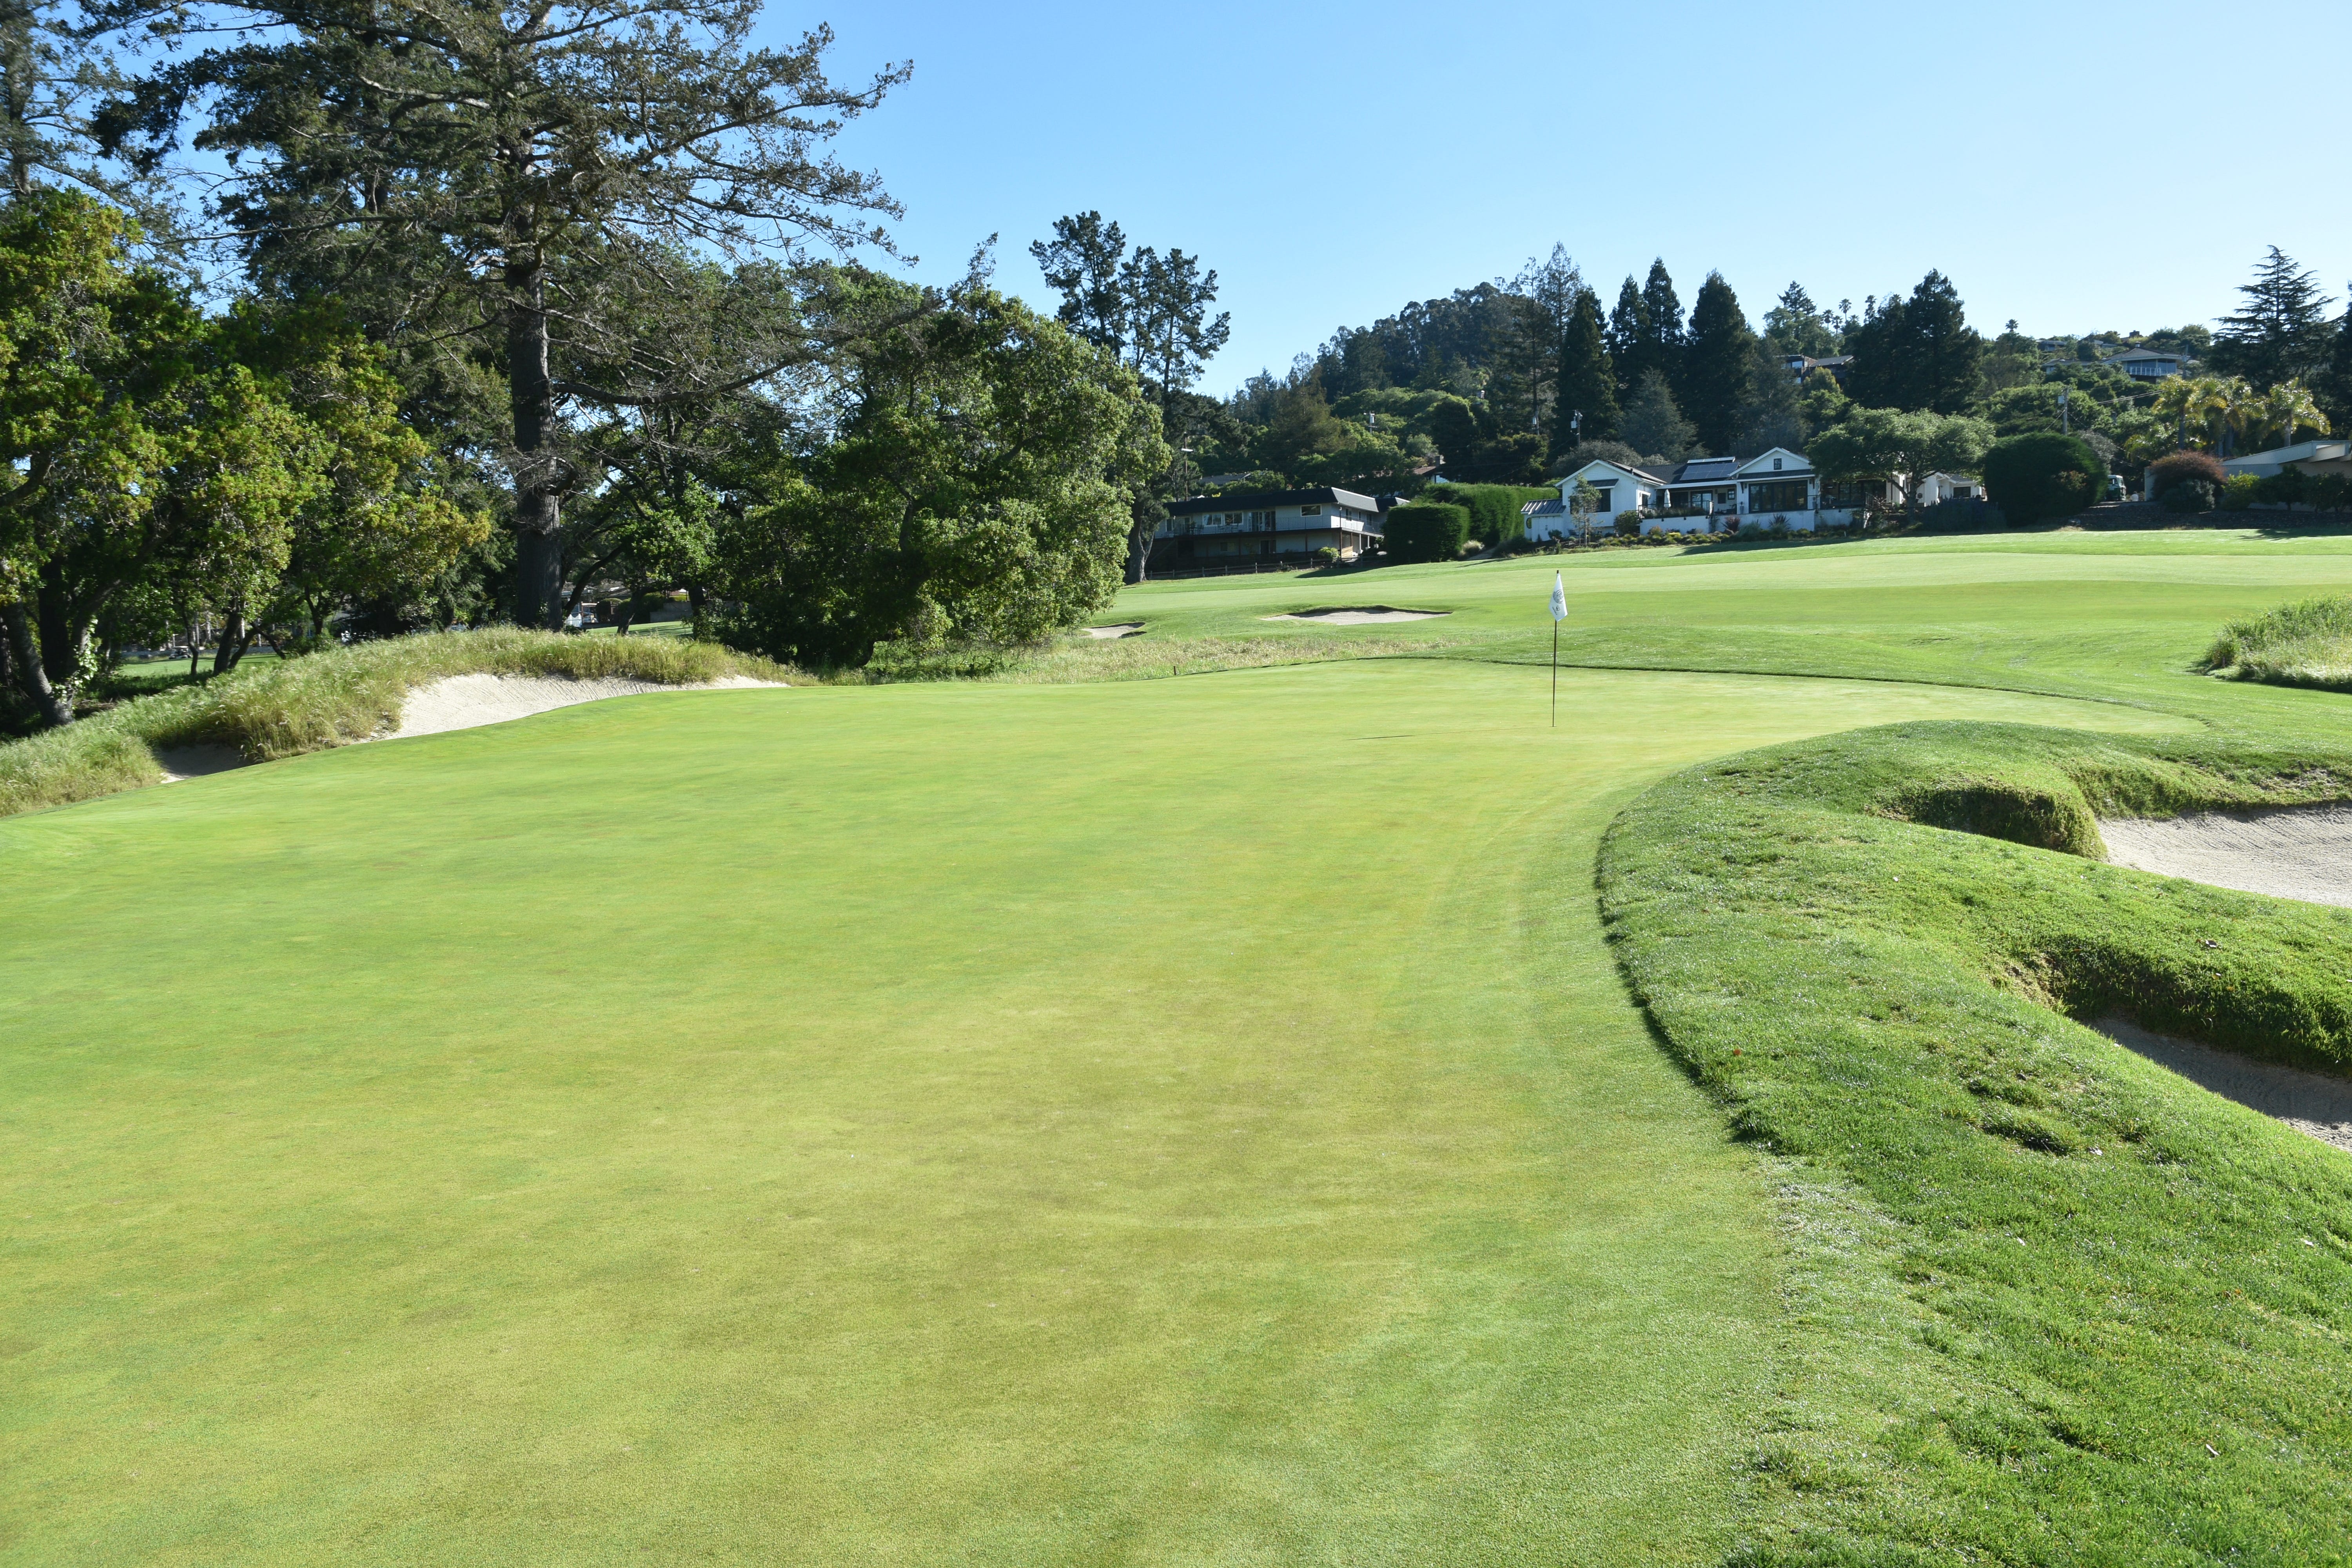
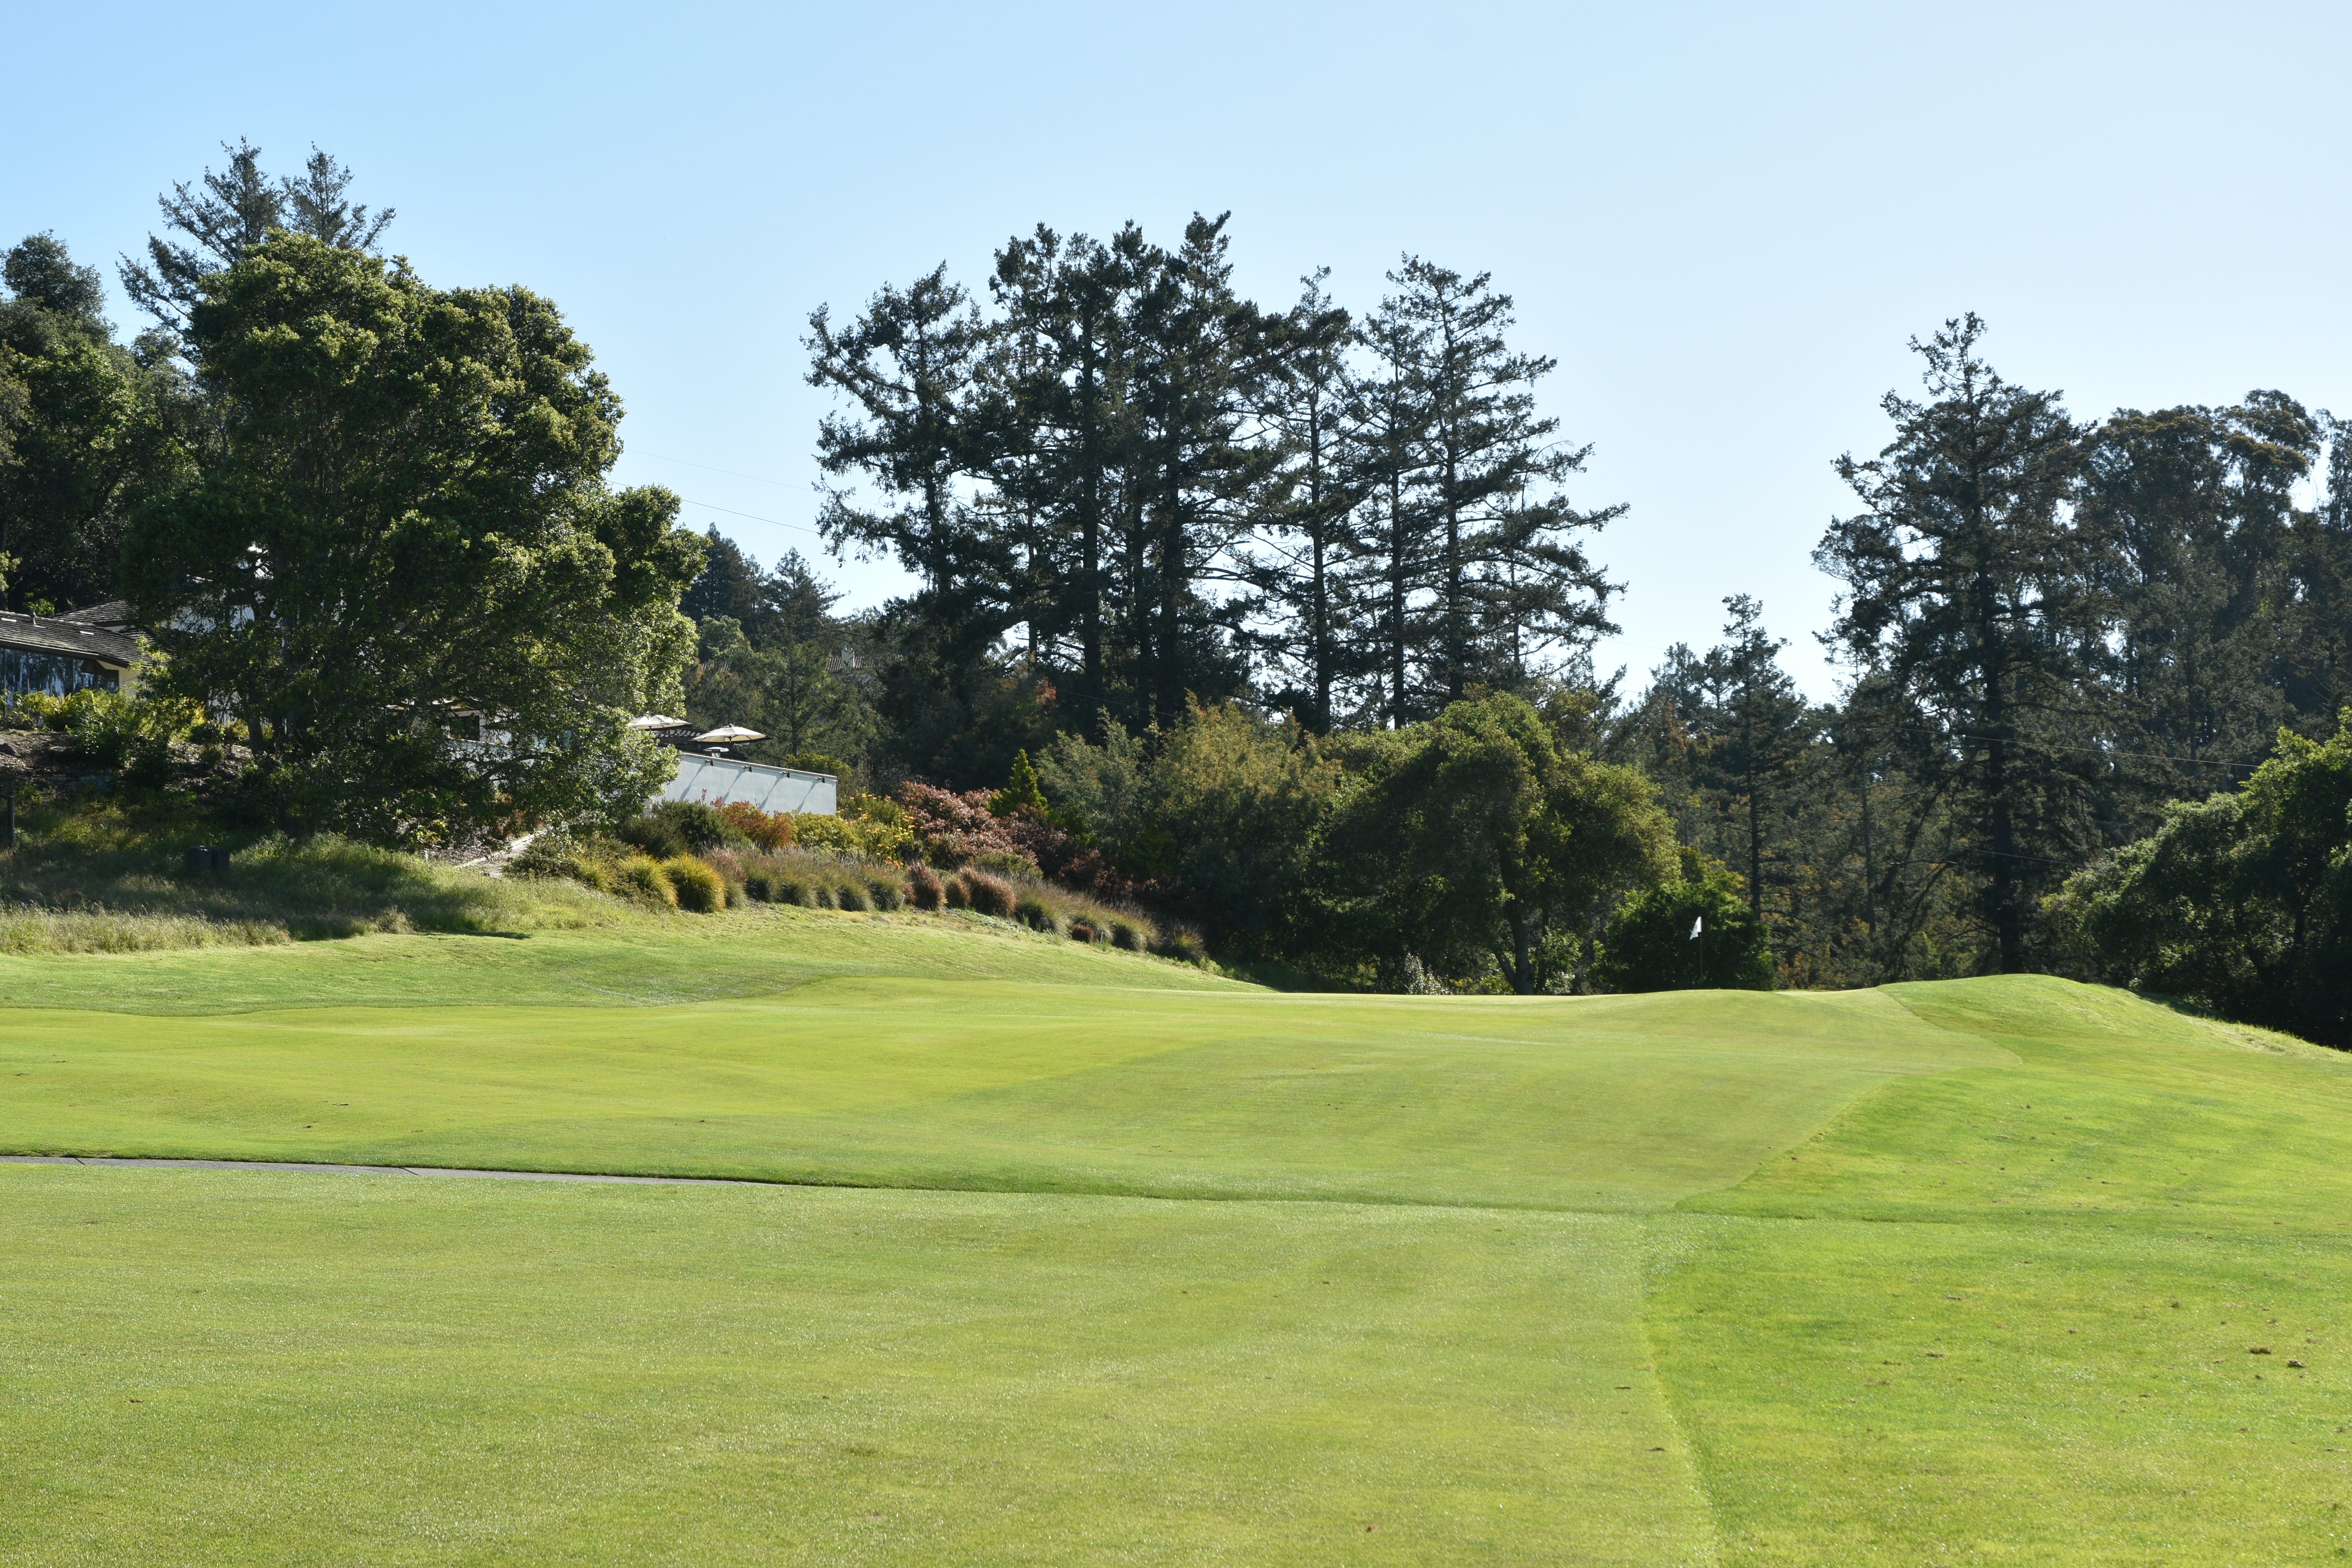
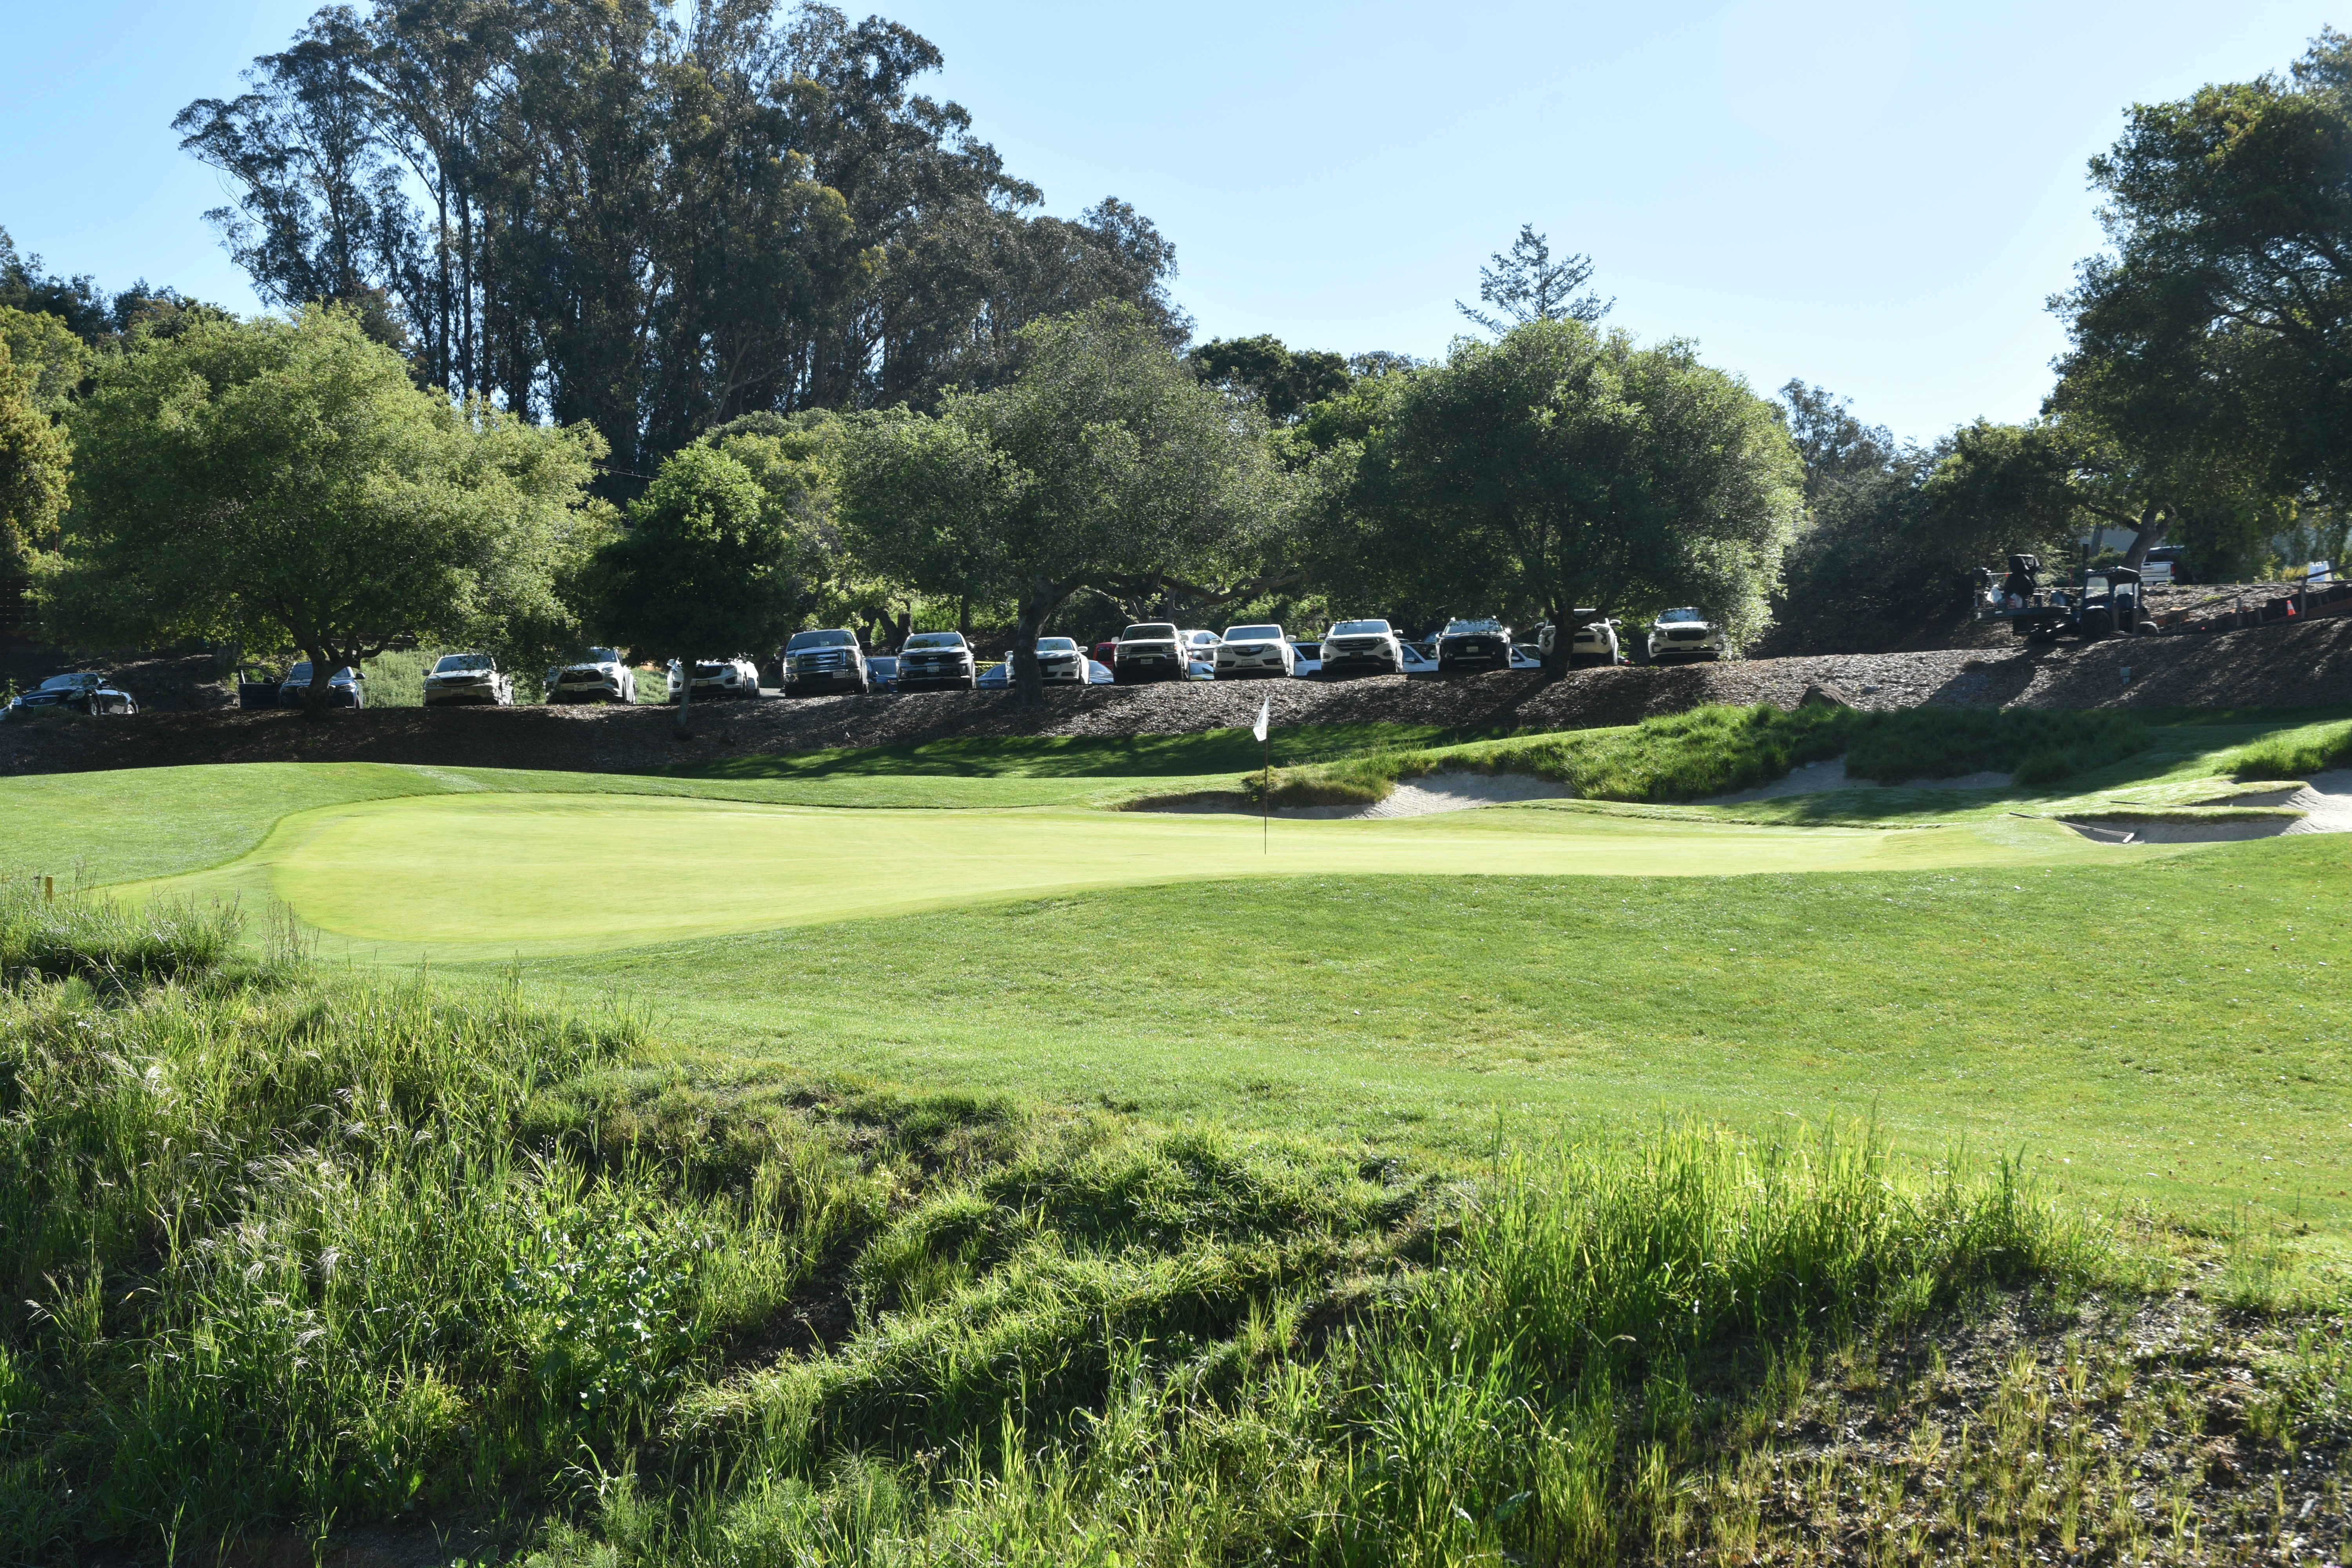
The 1st hole green from the front — all the front nine greens are now bentgrass
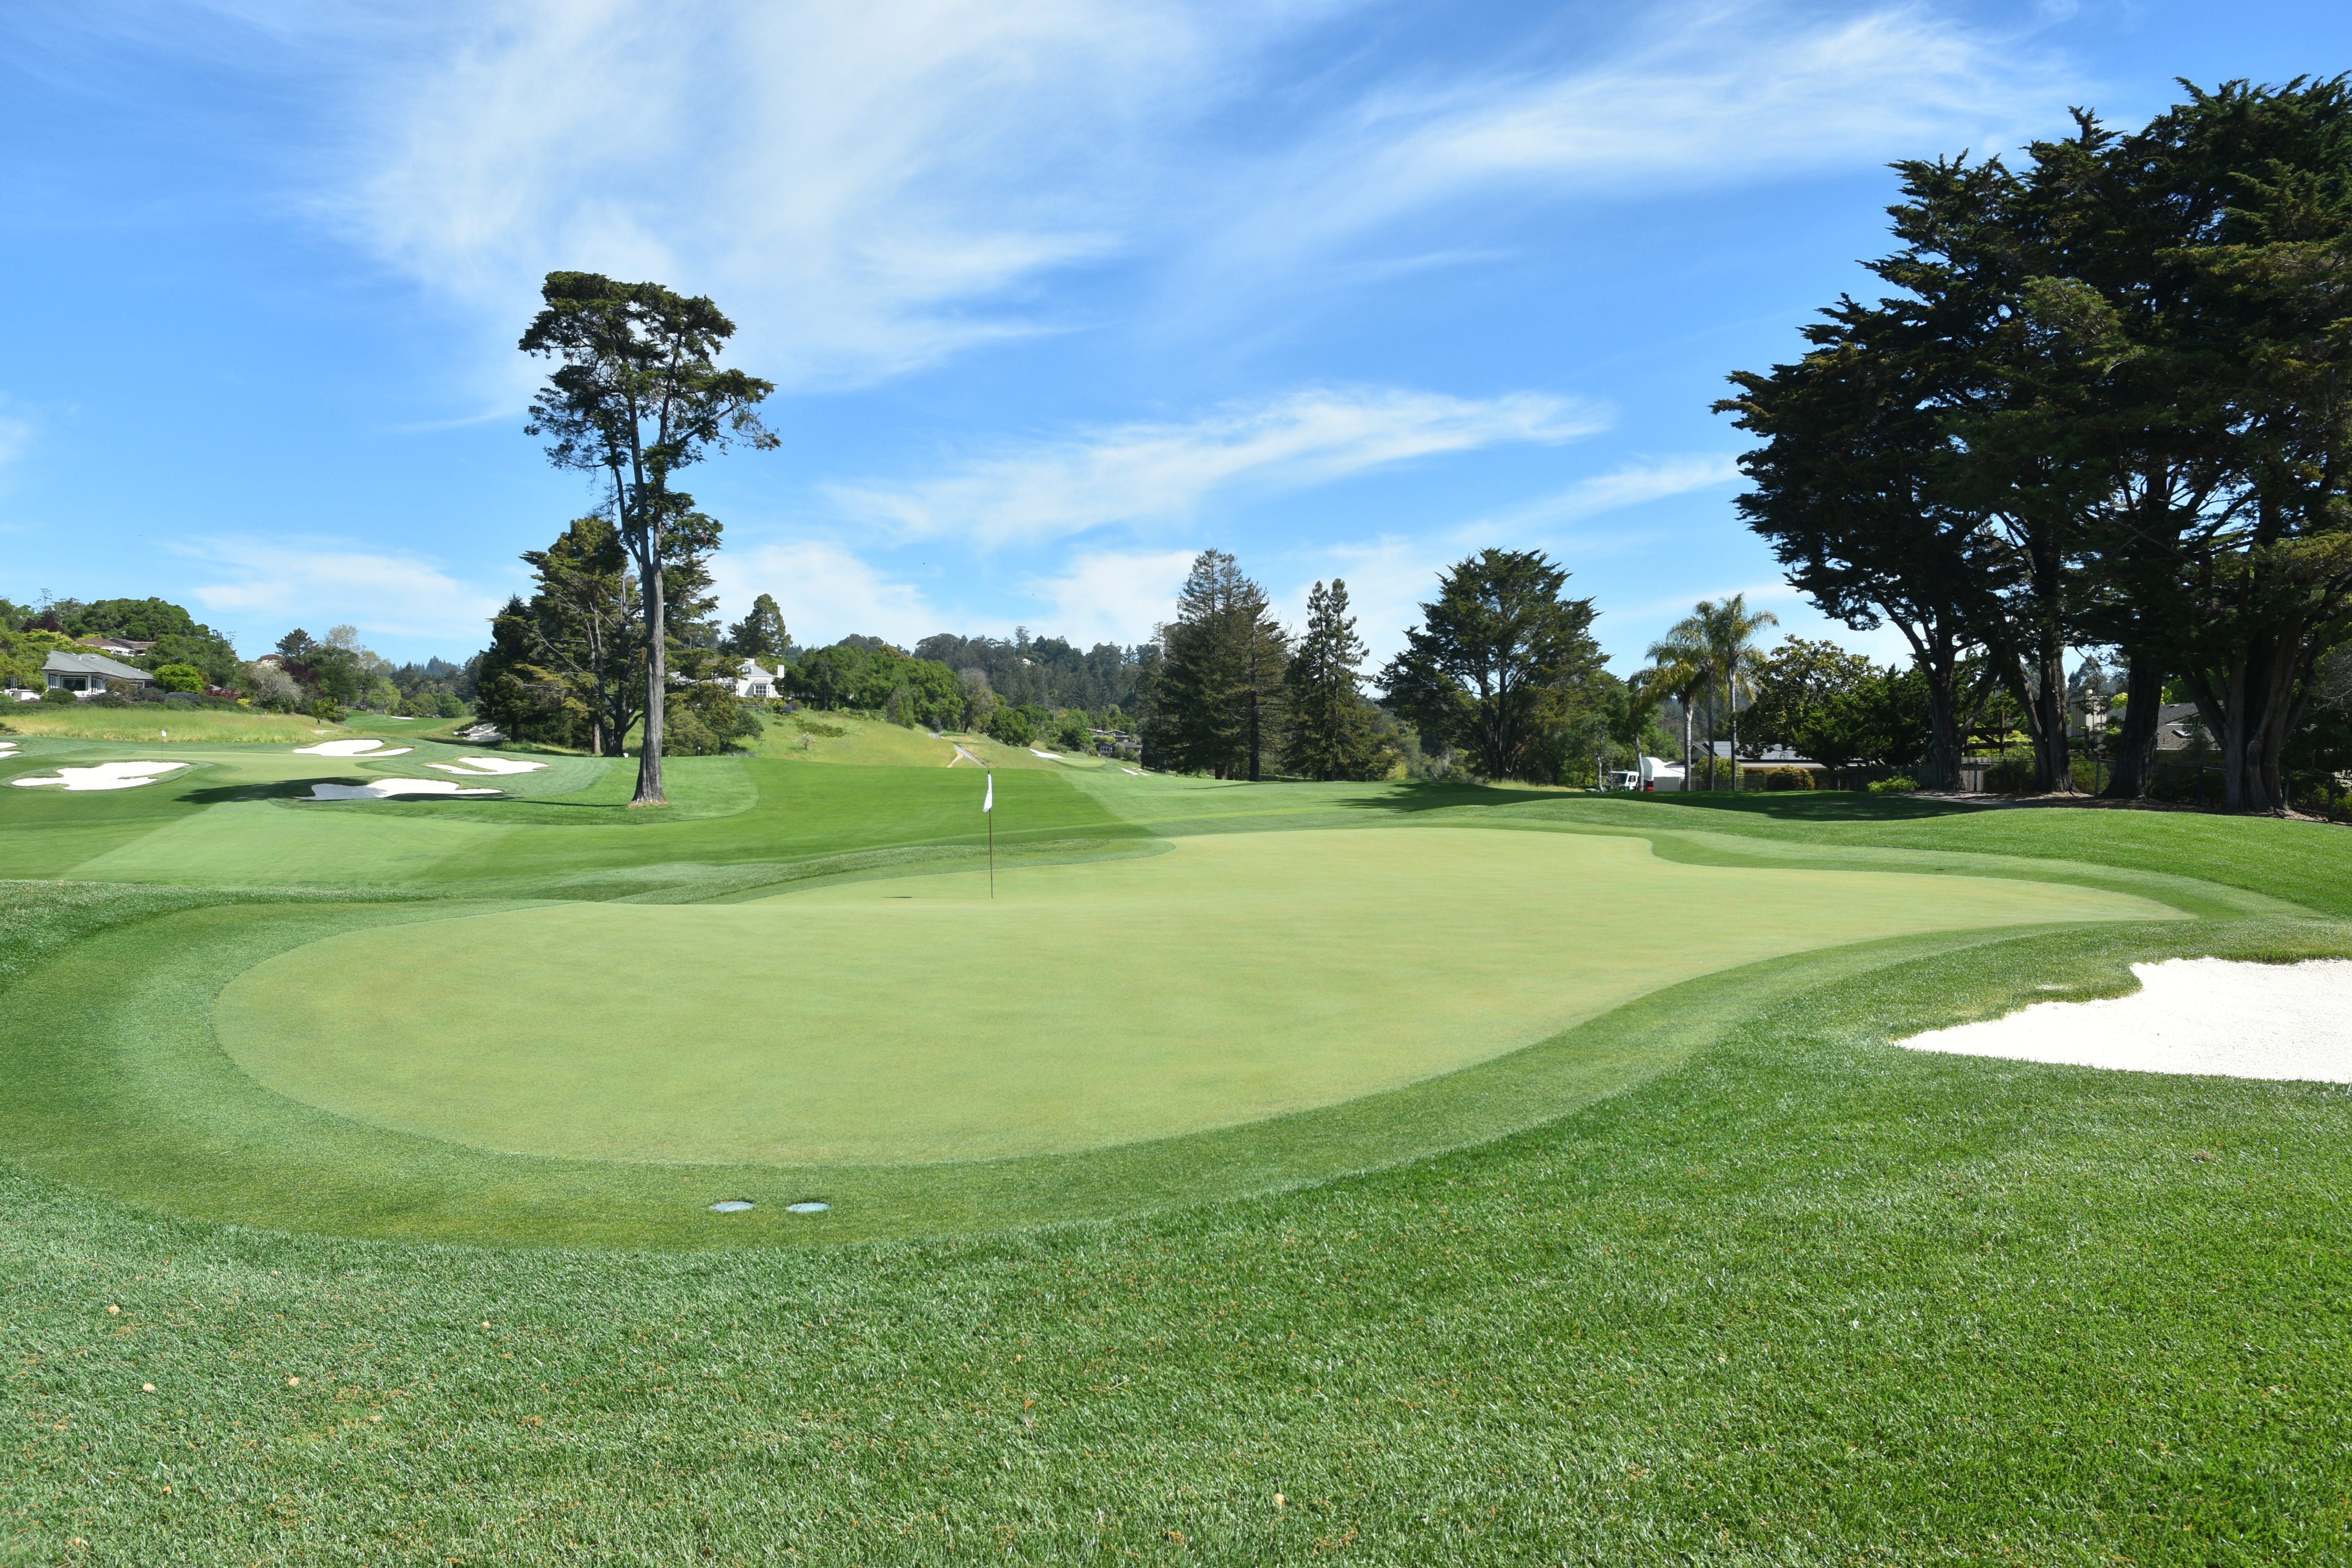
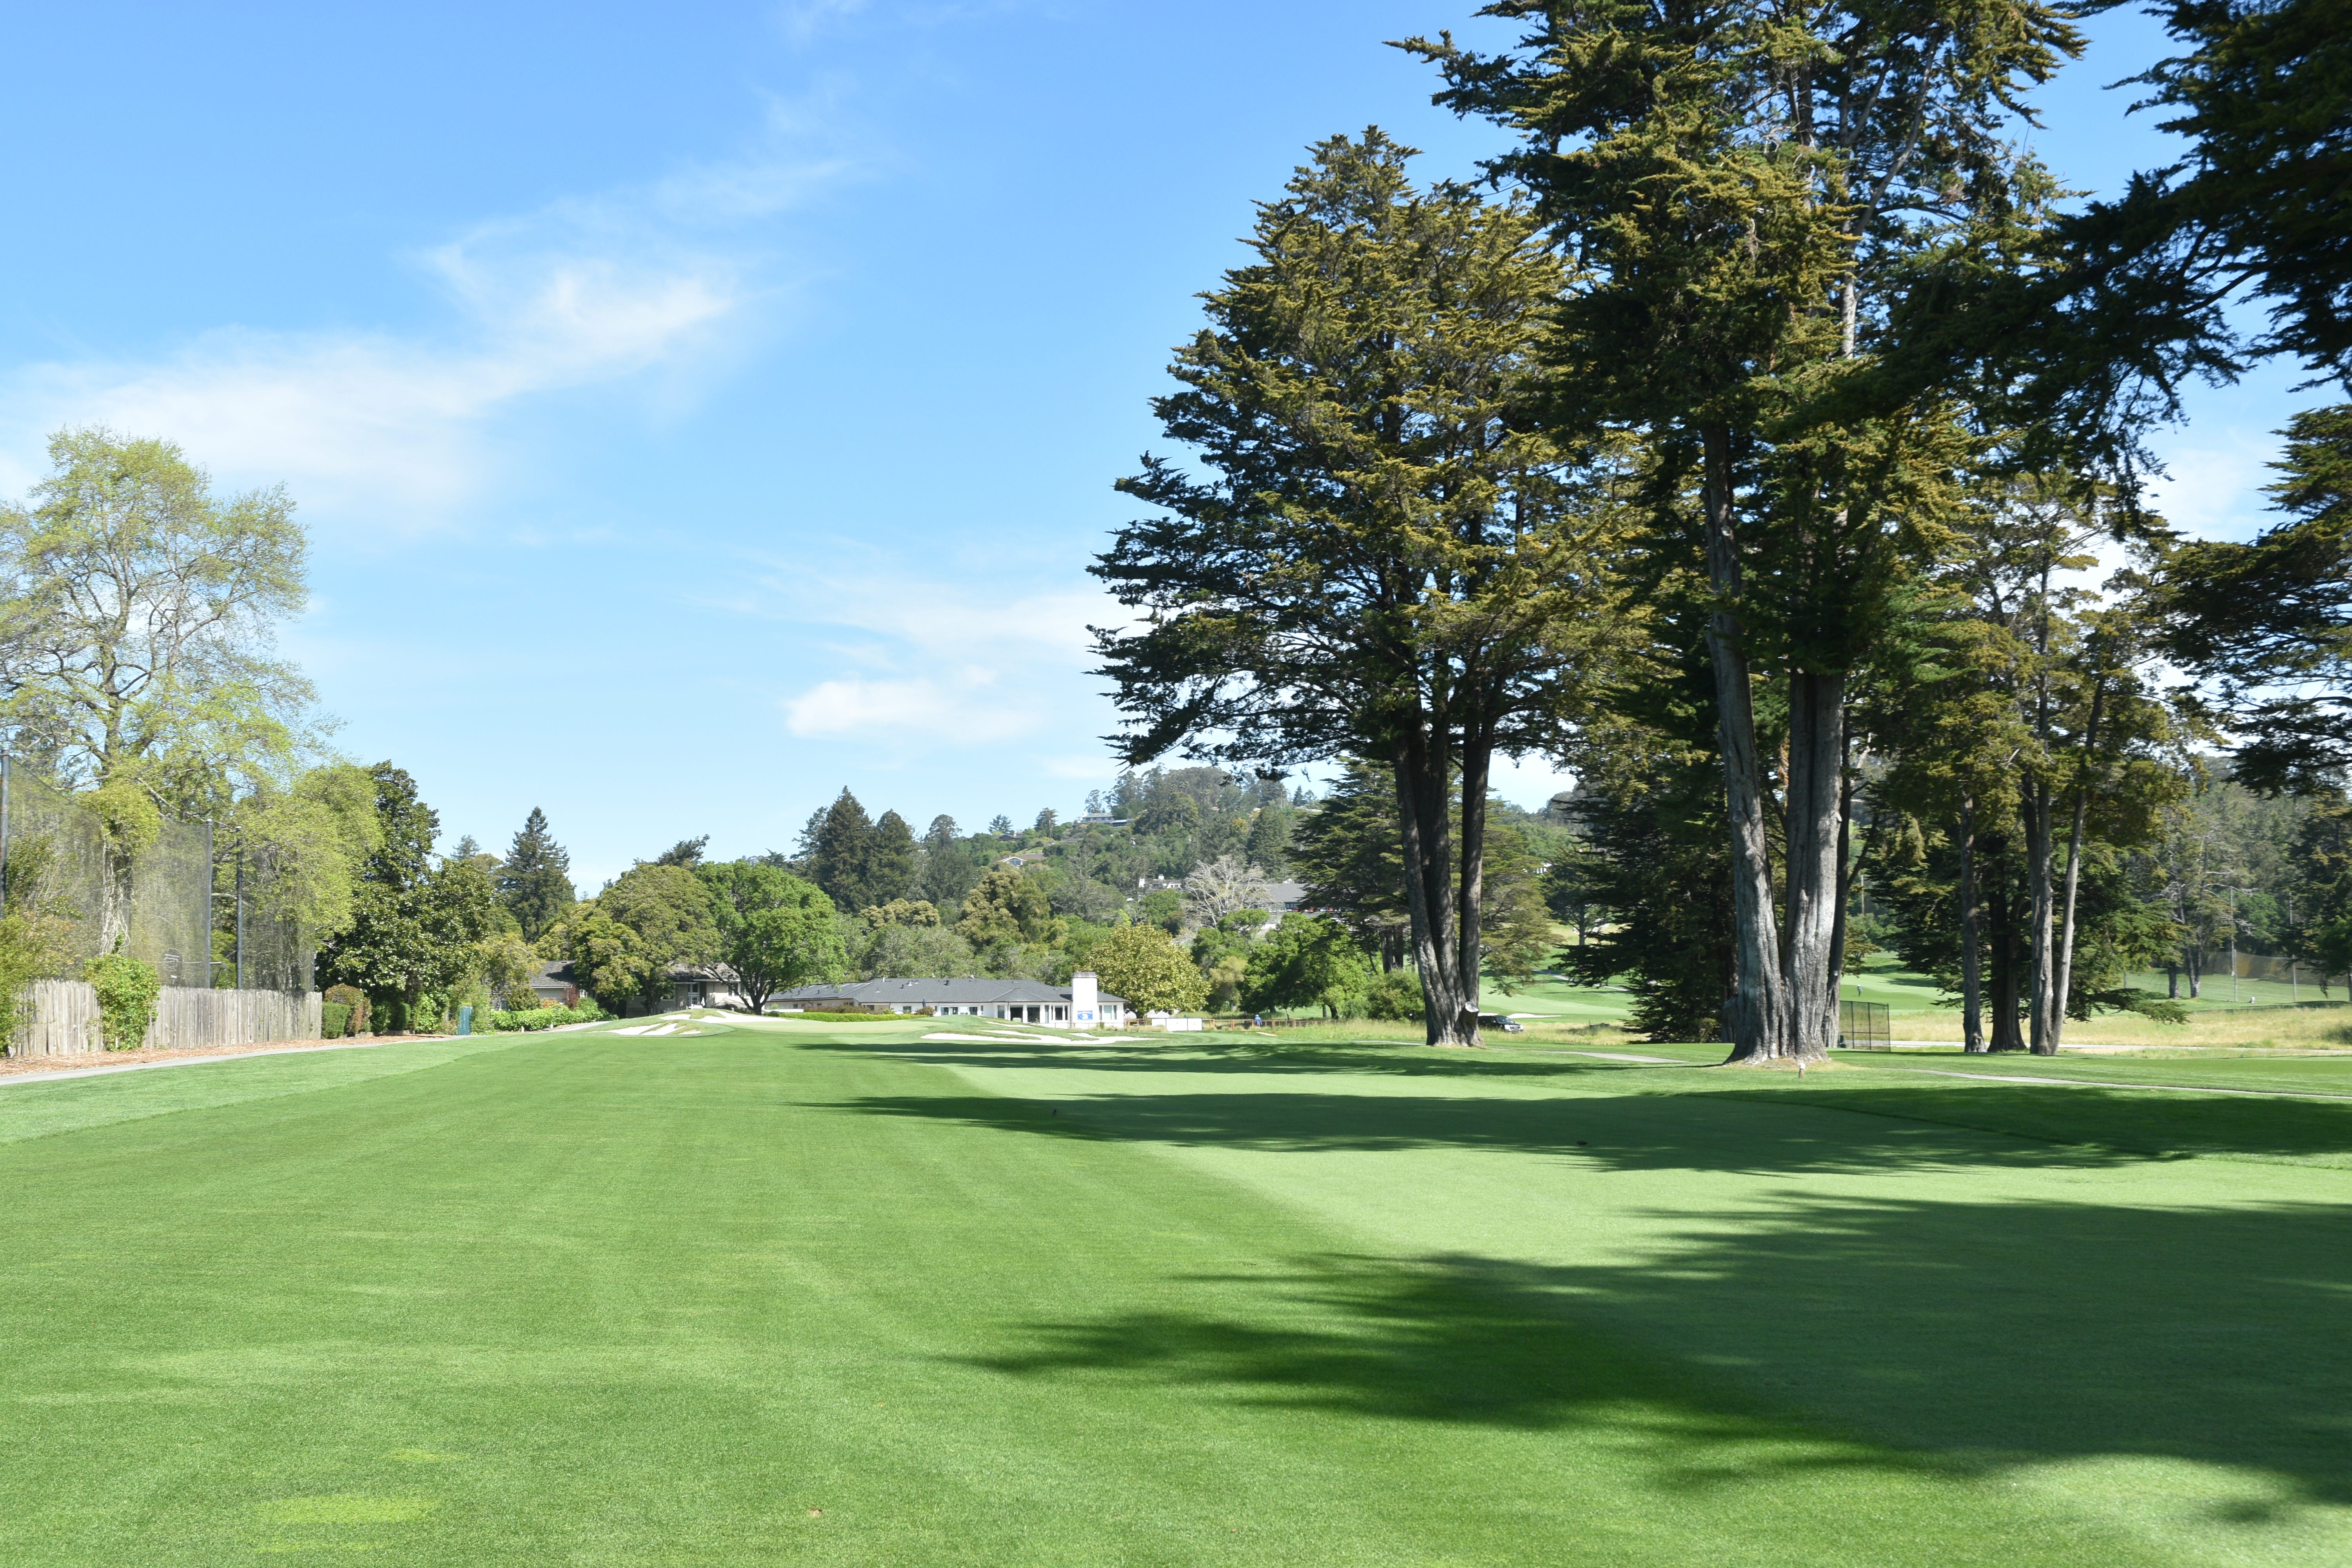
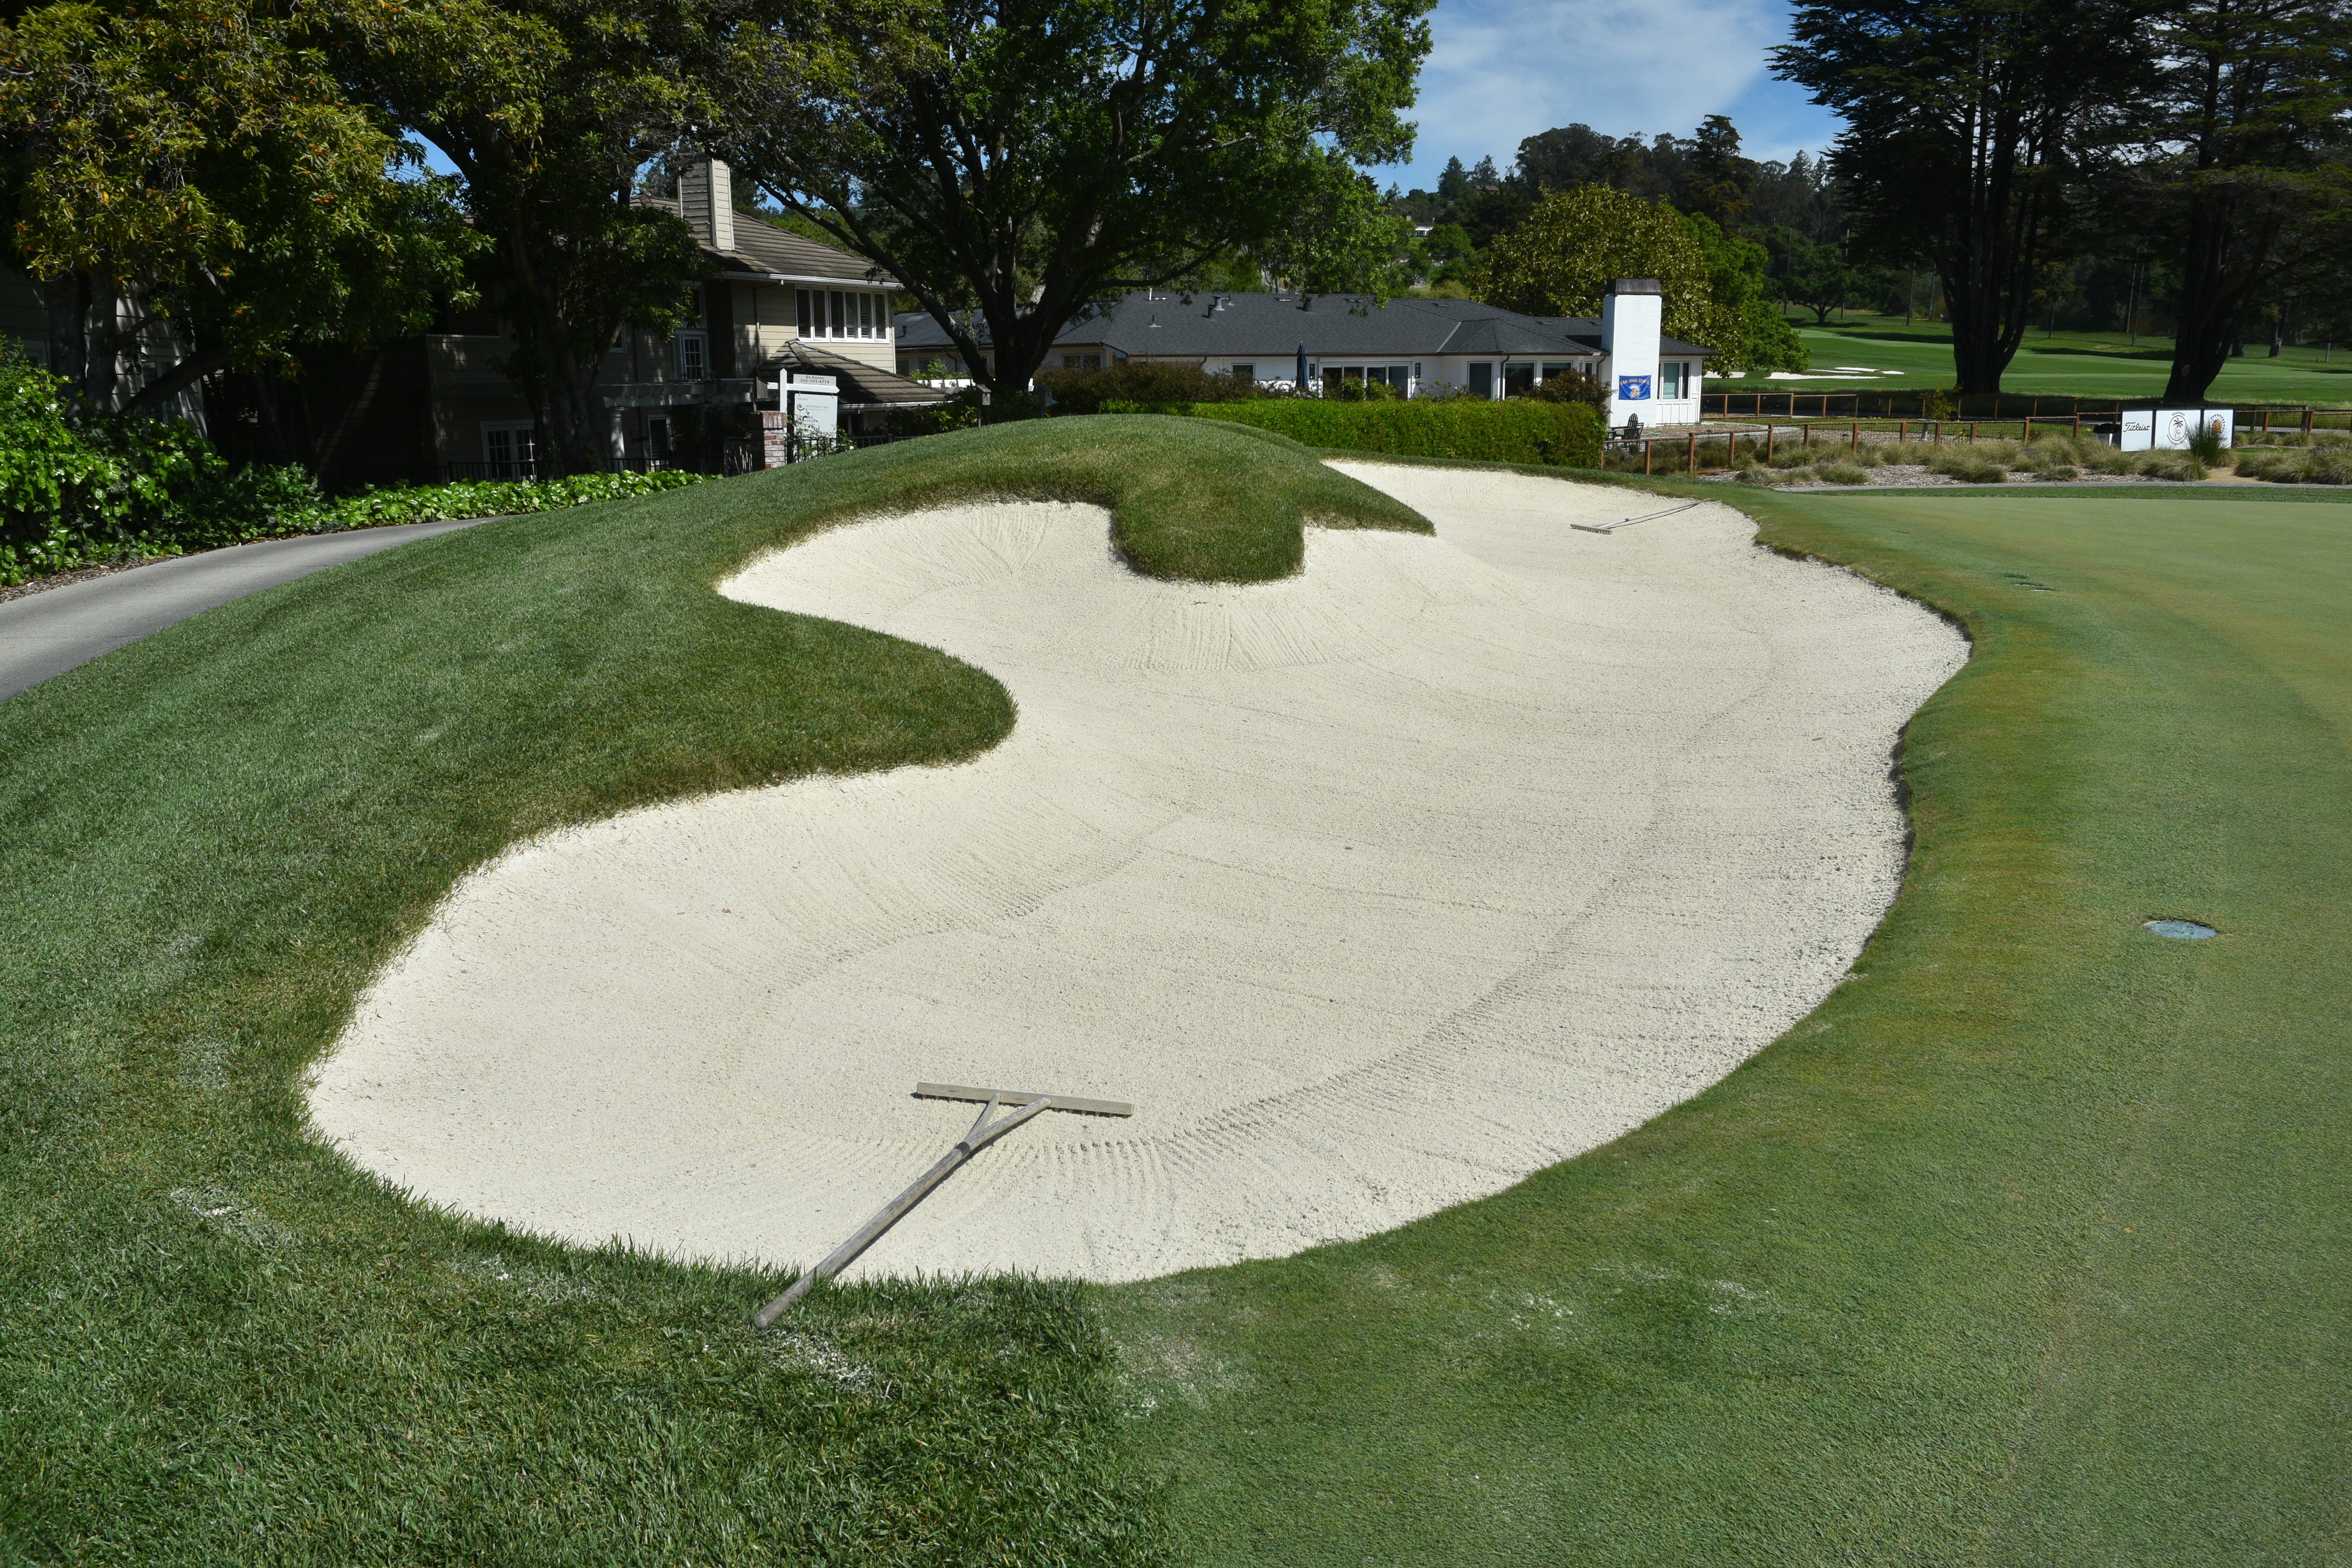
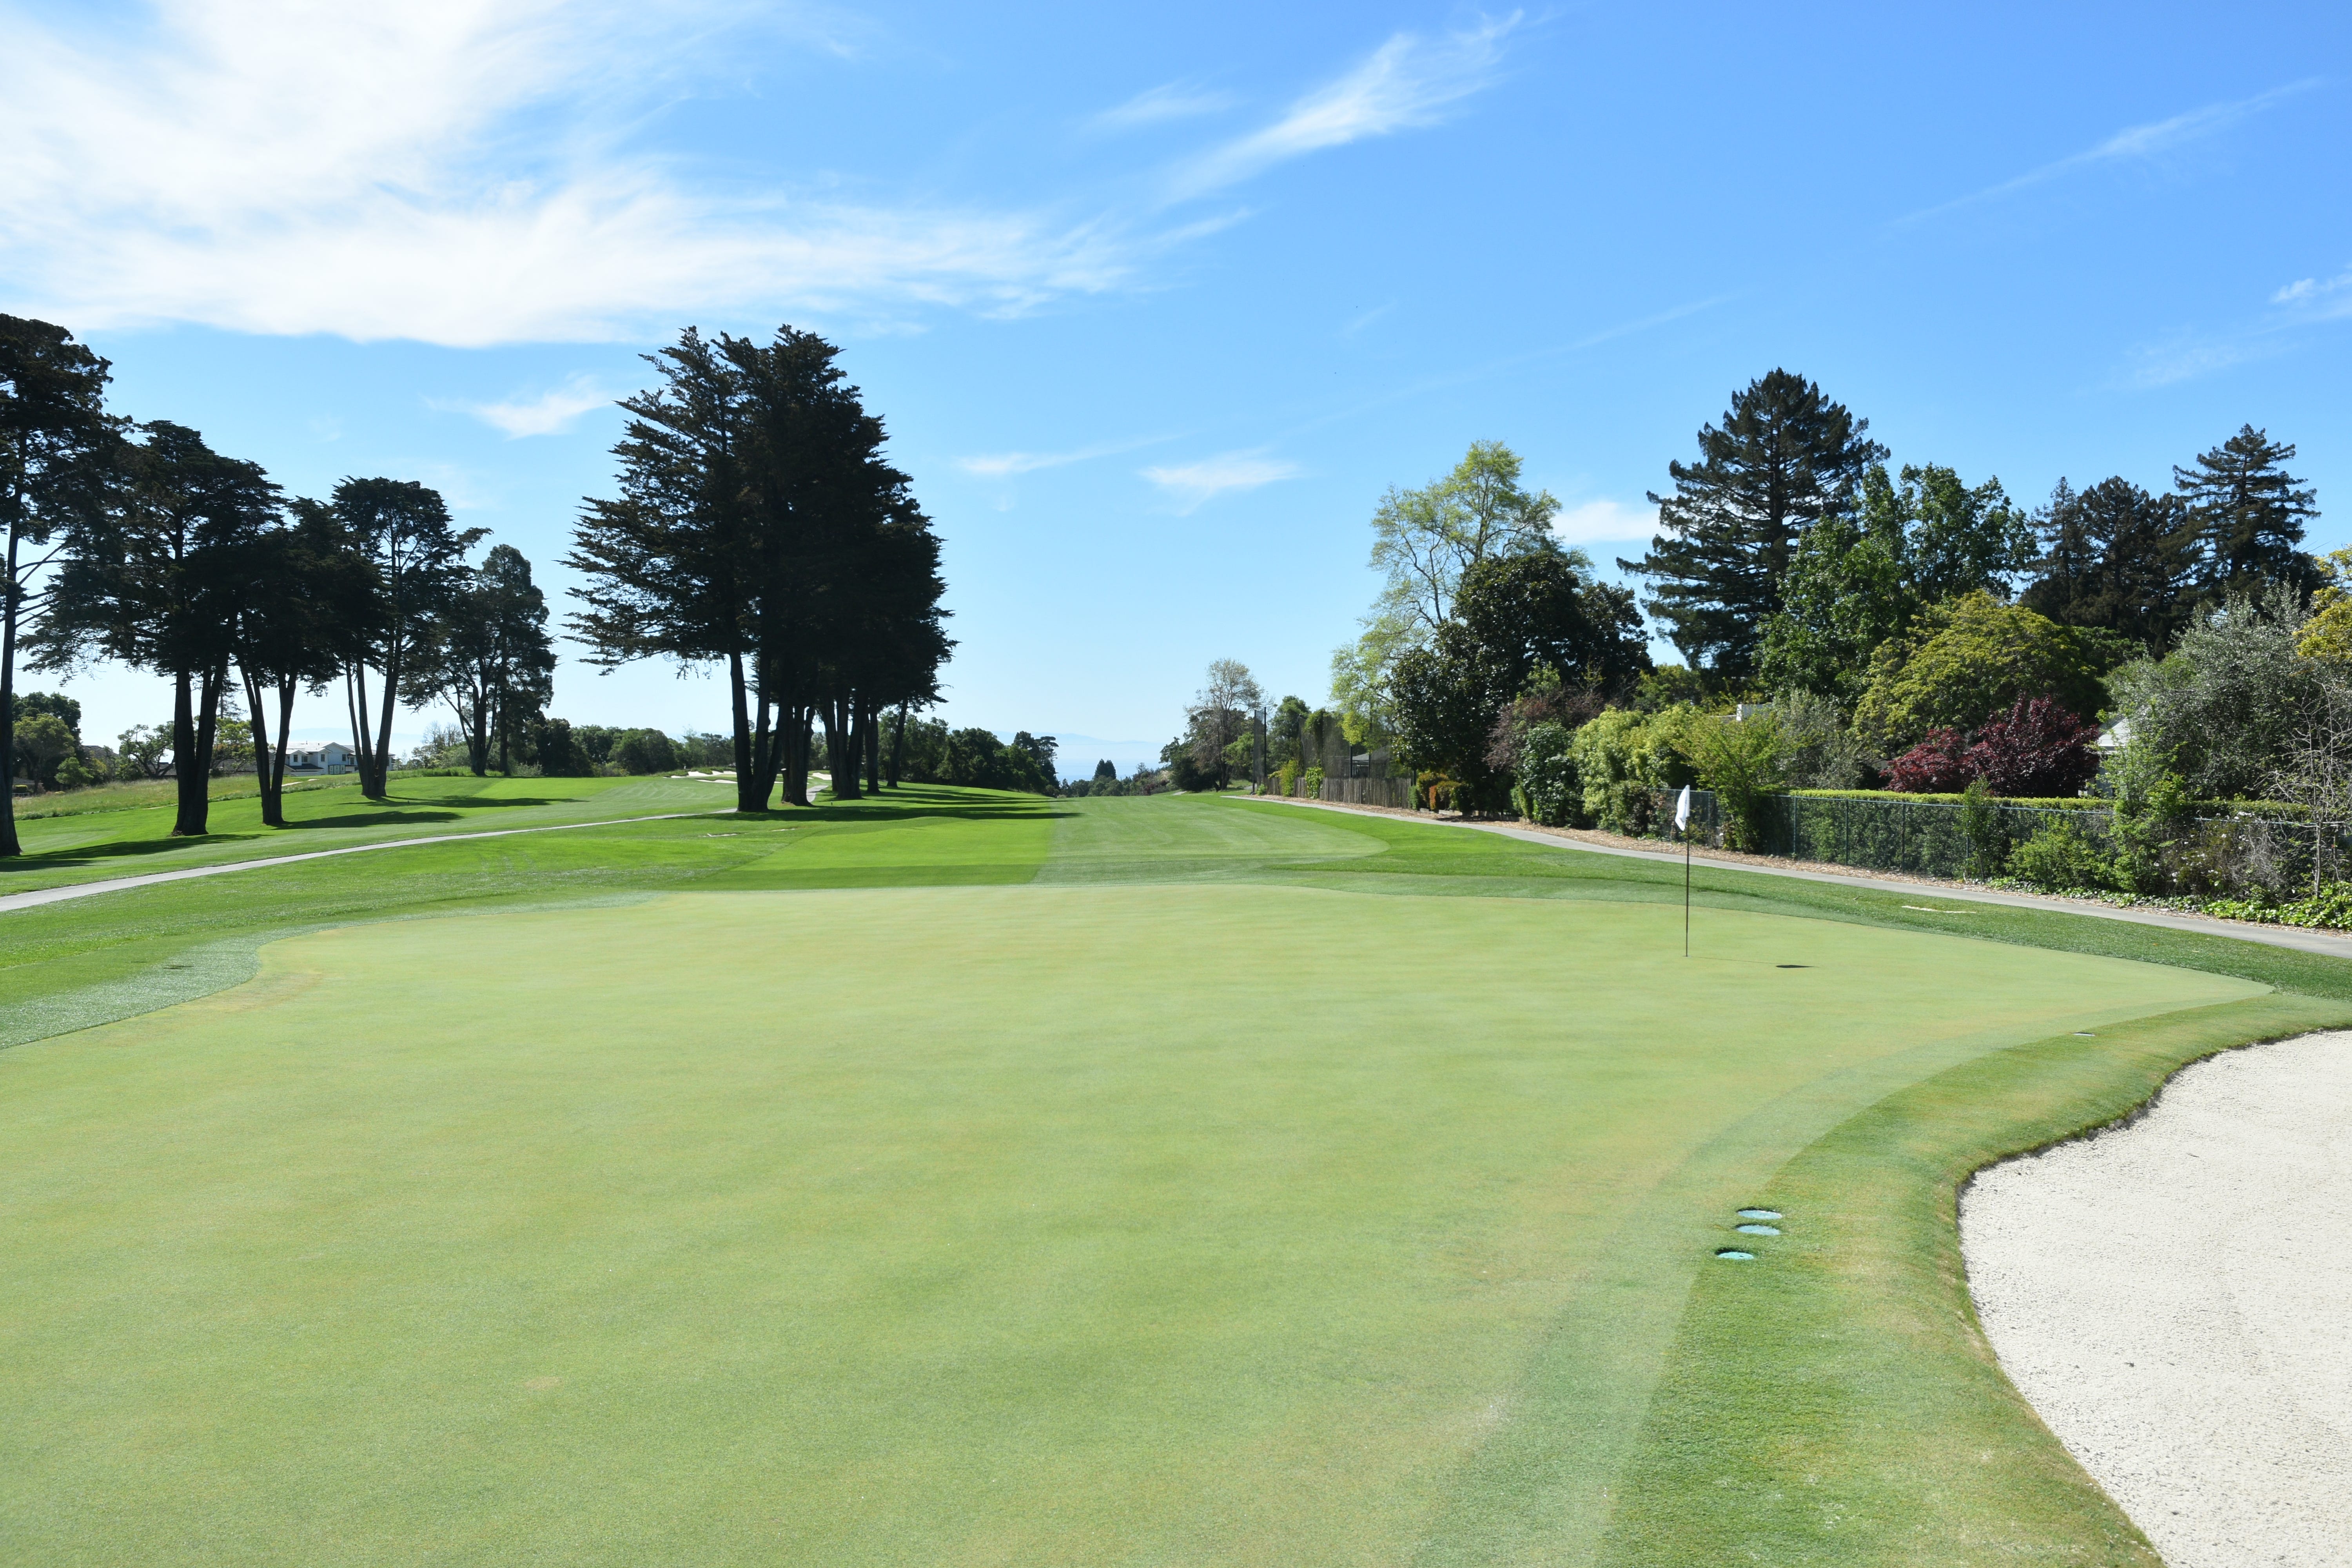
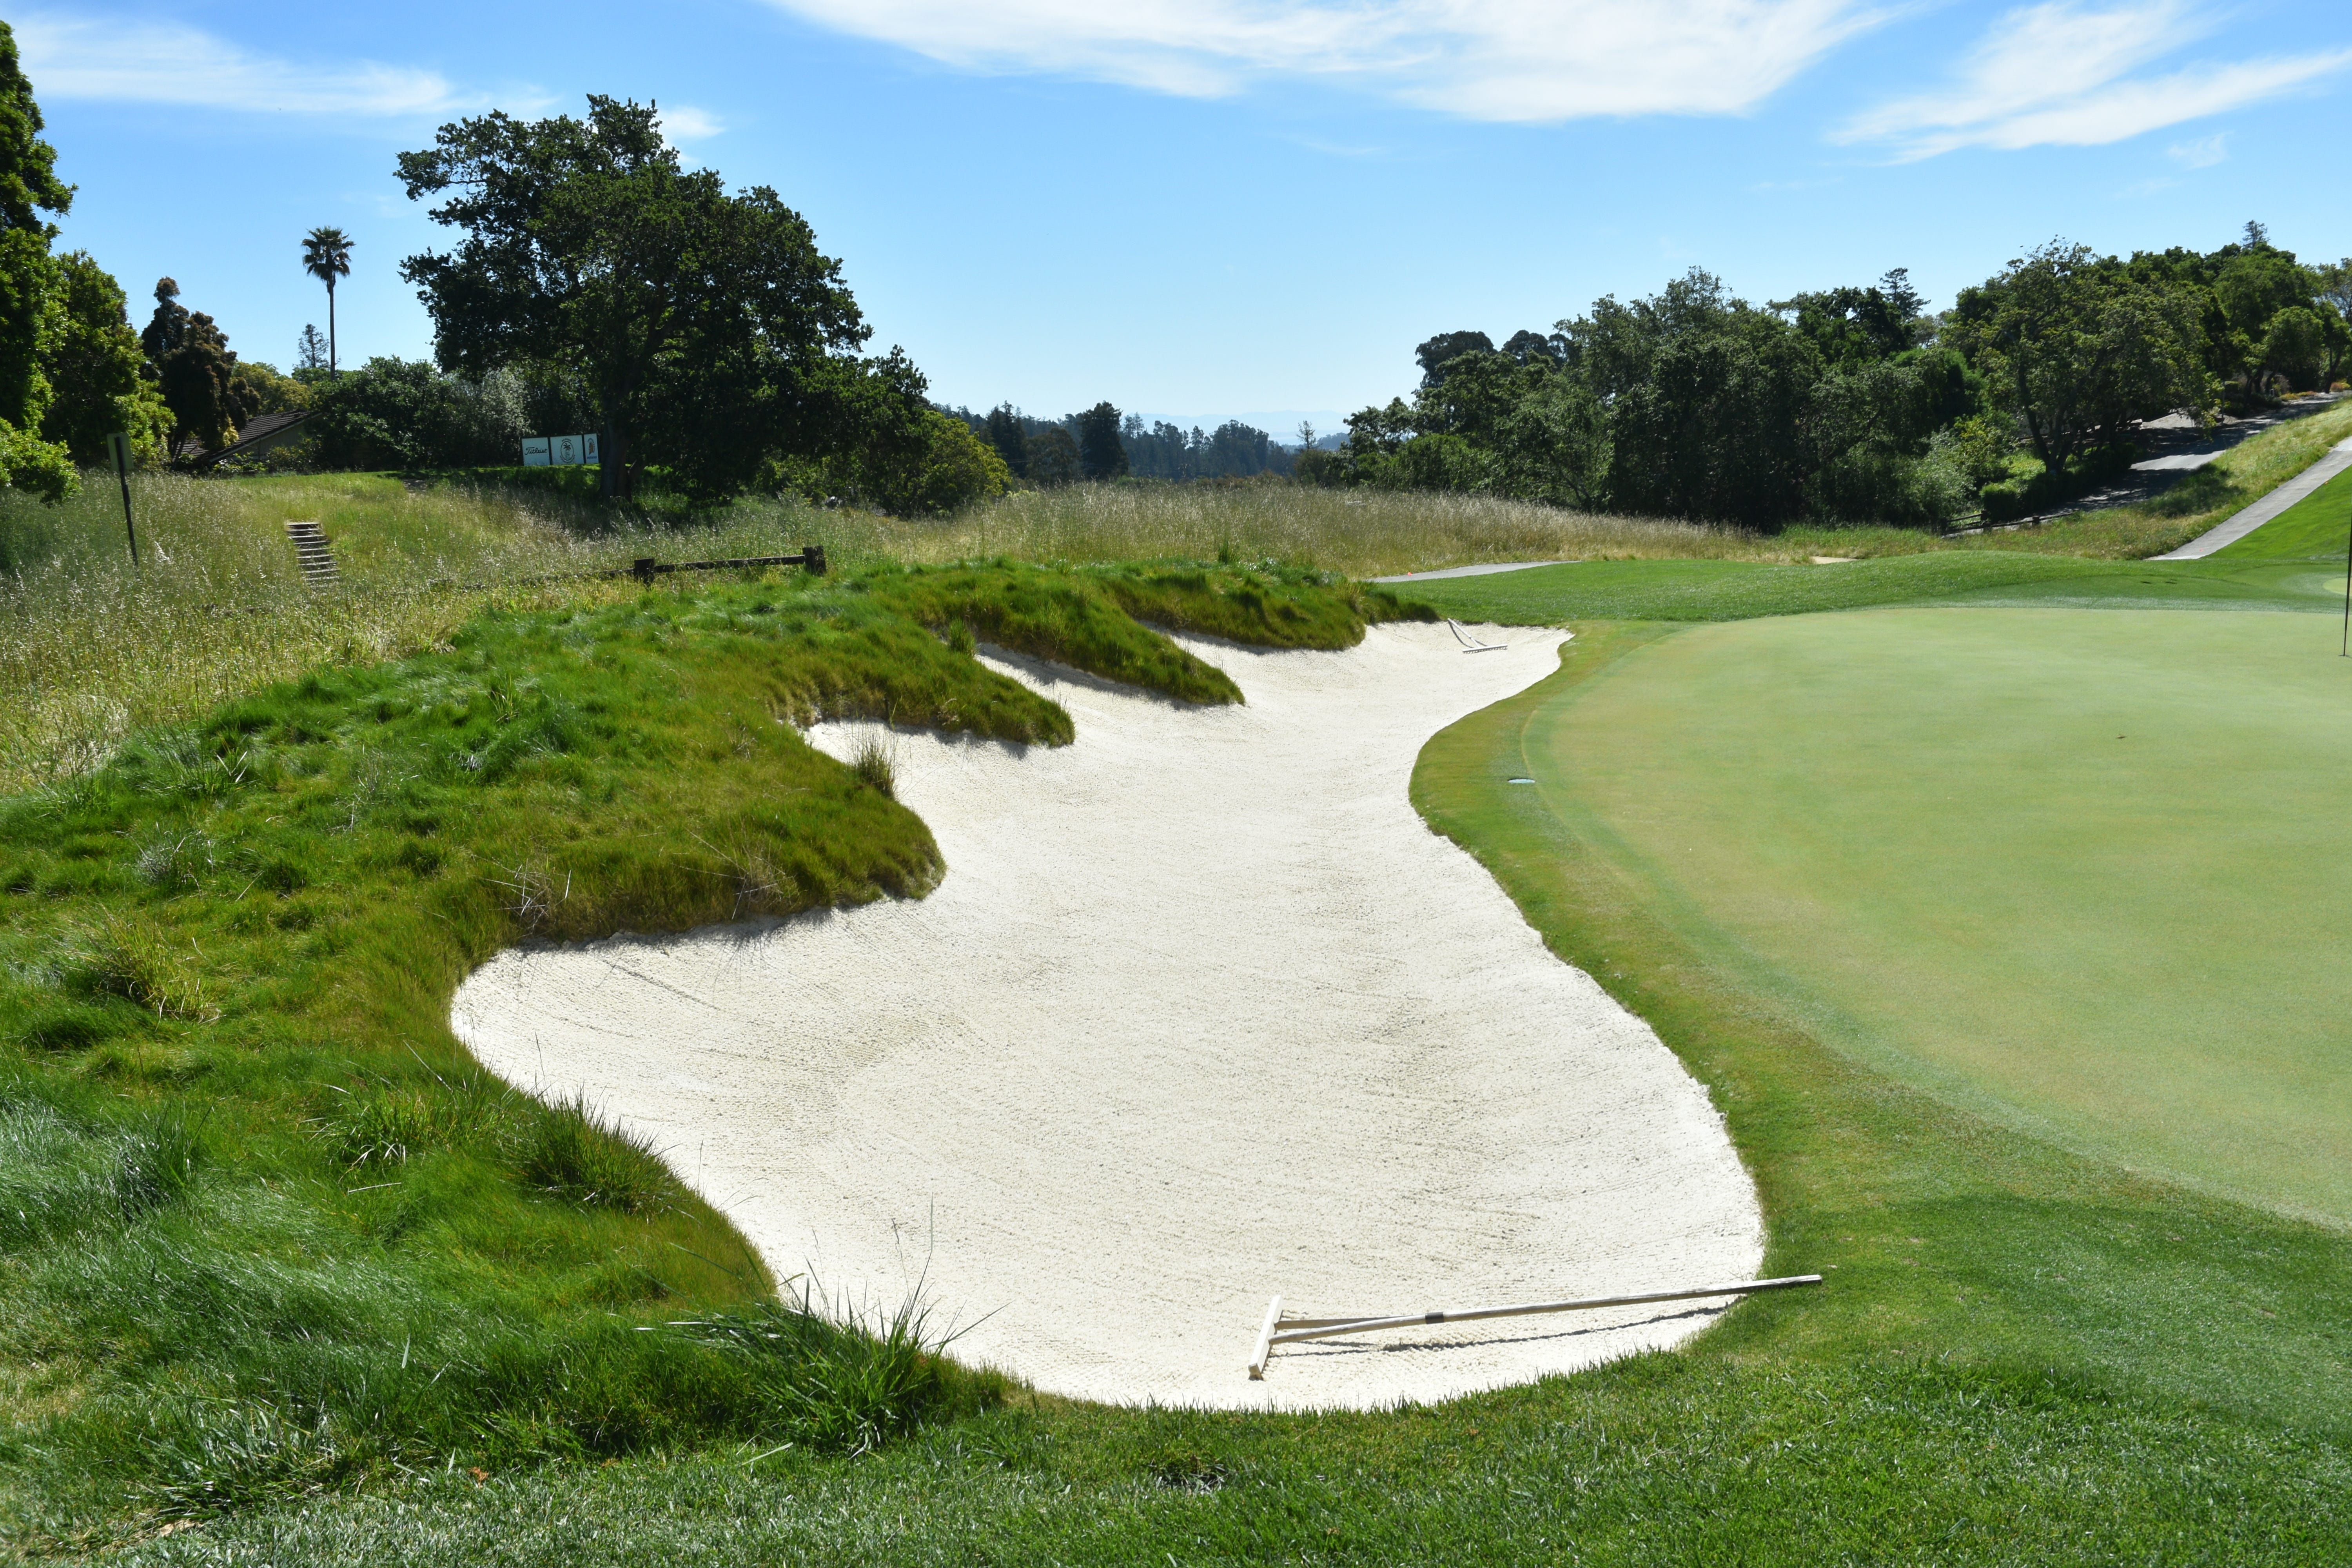
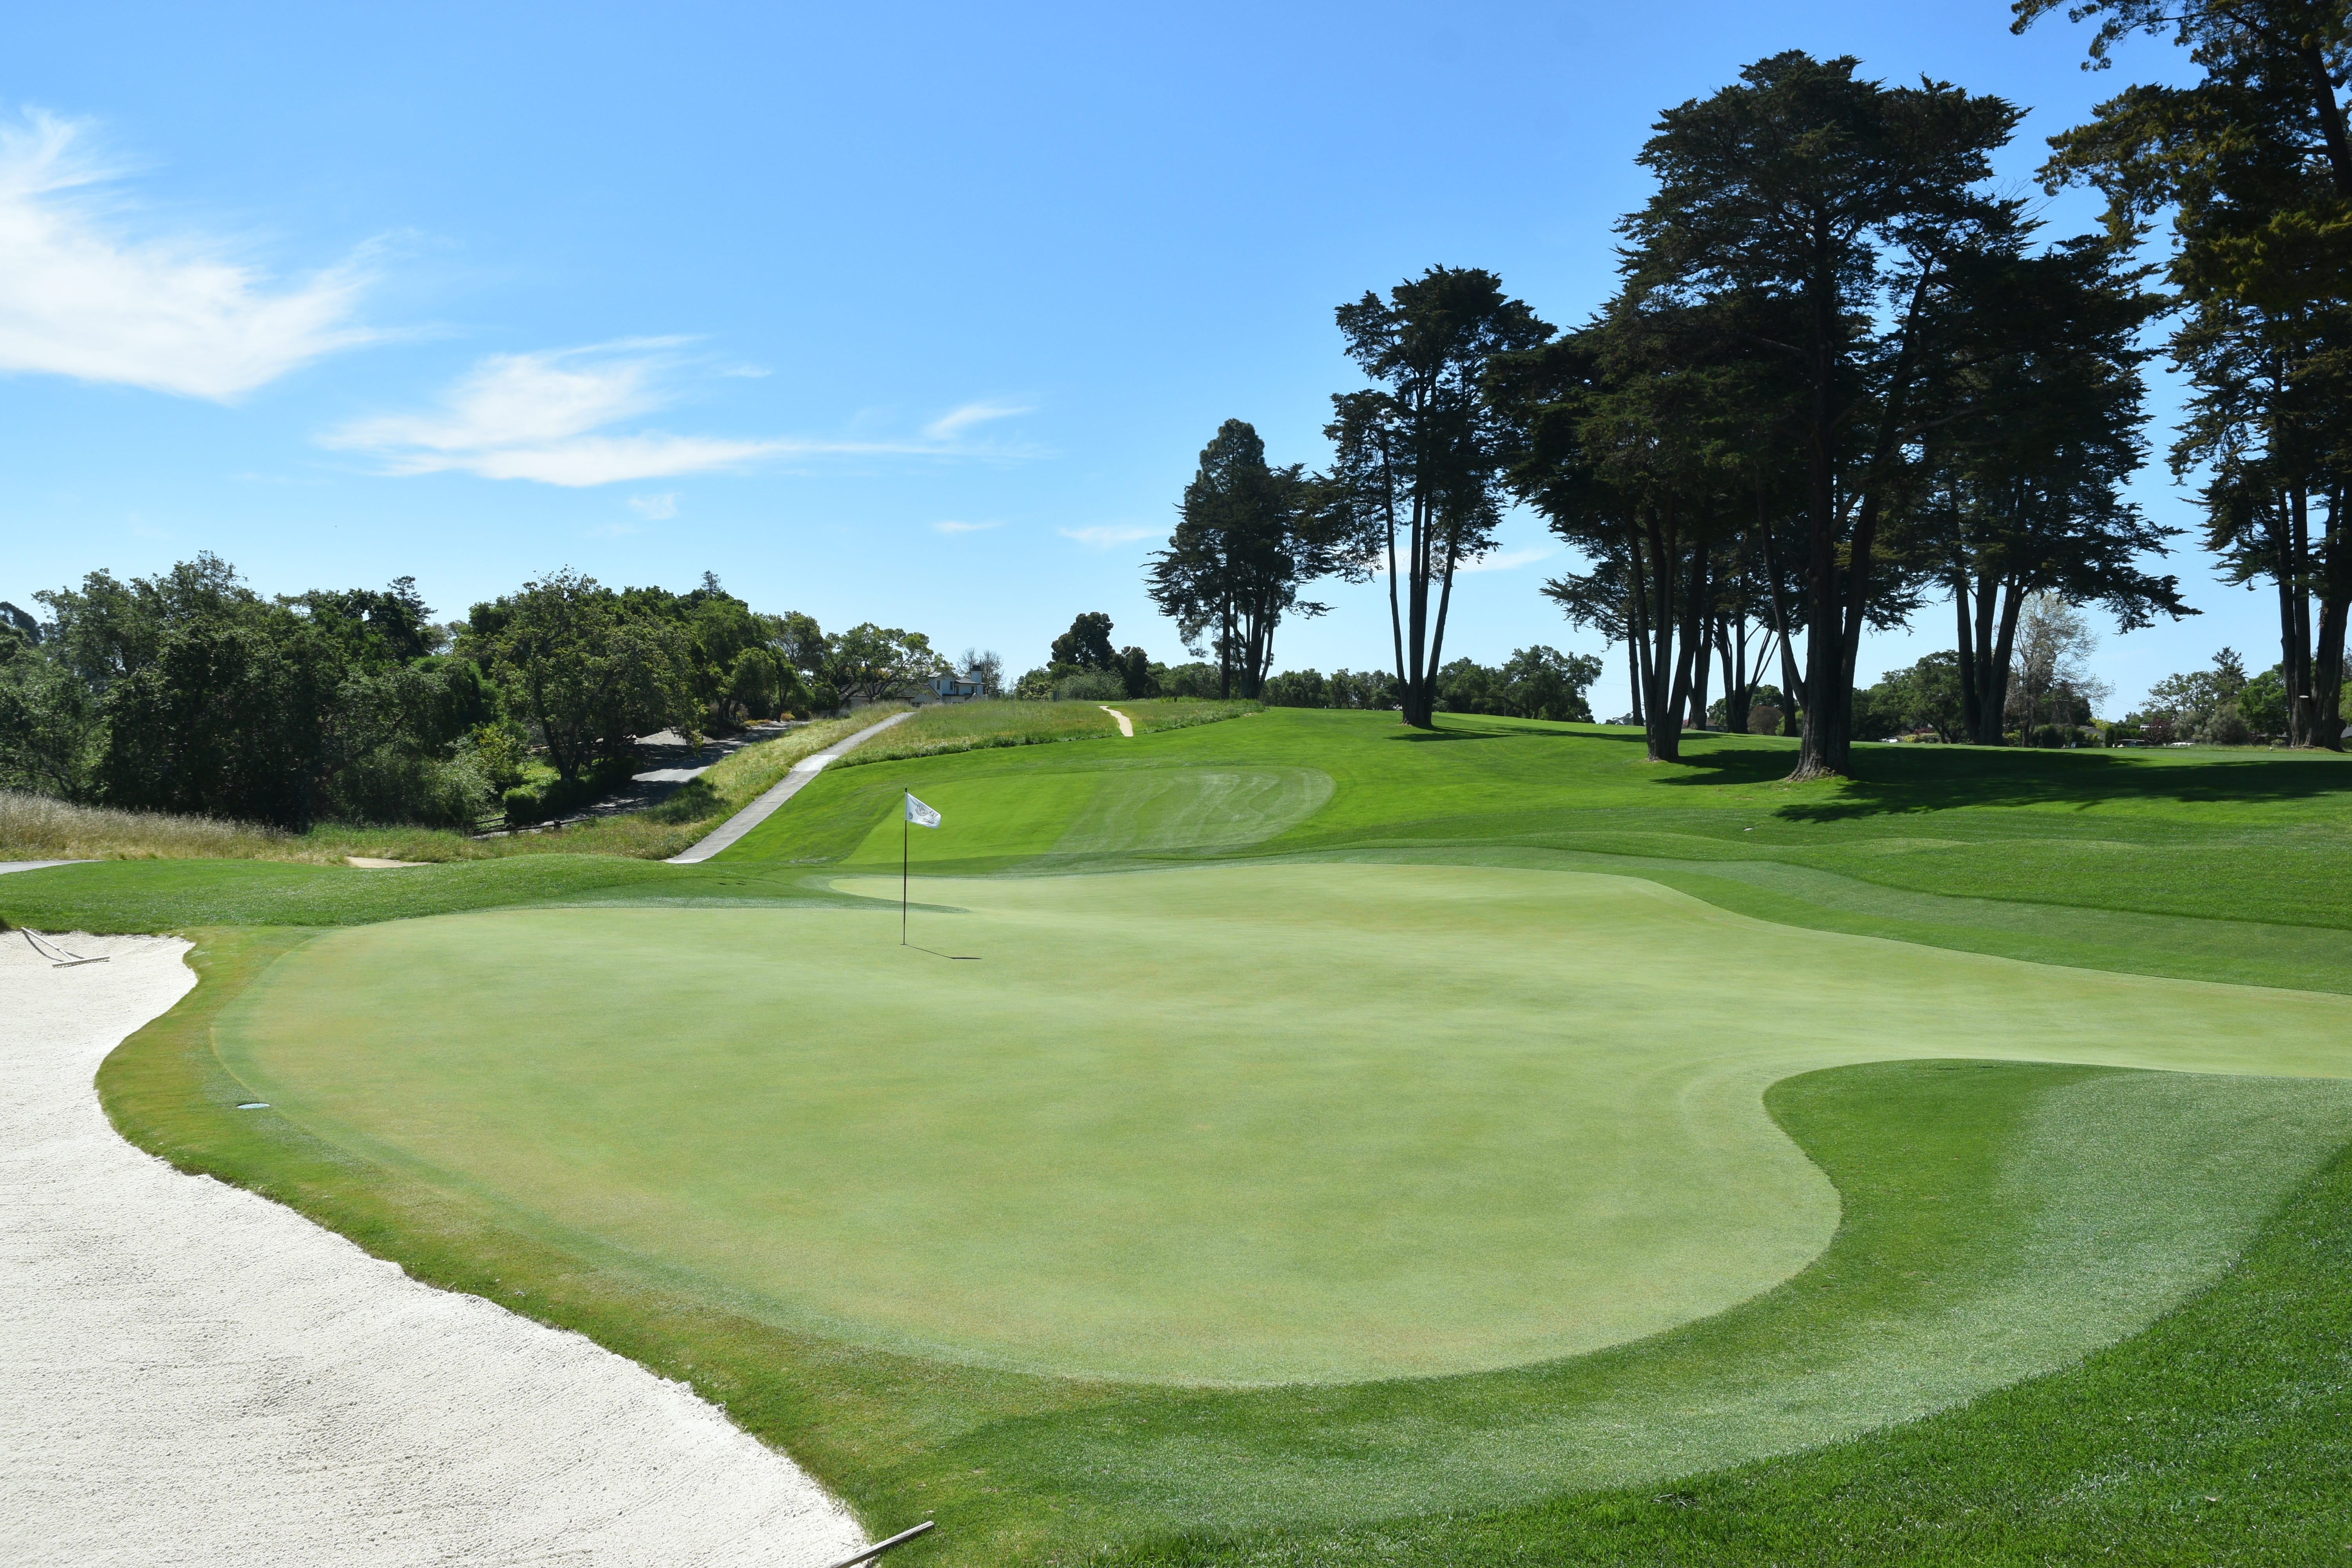
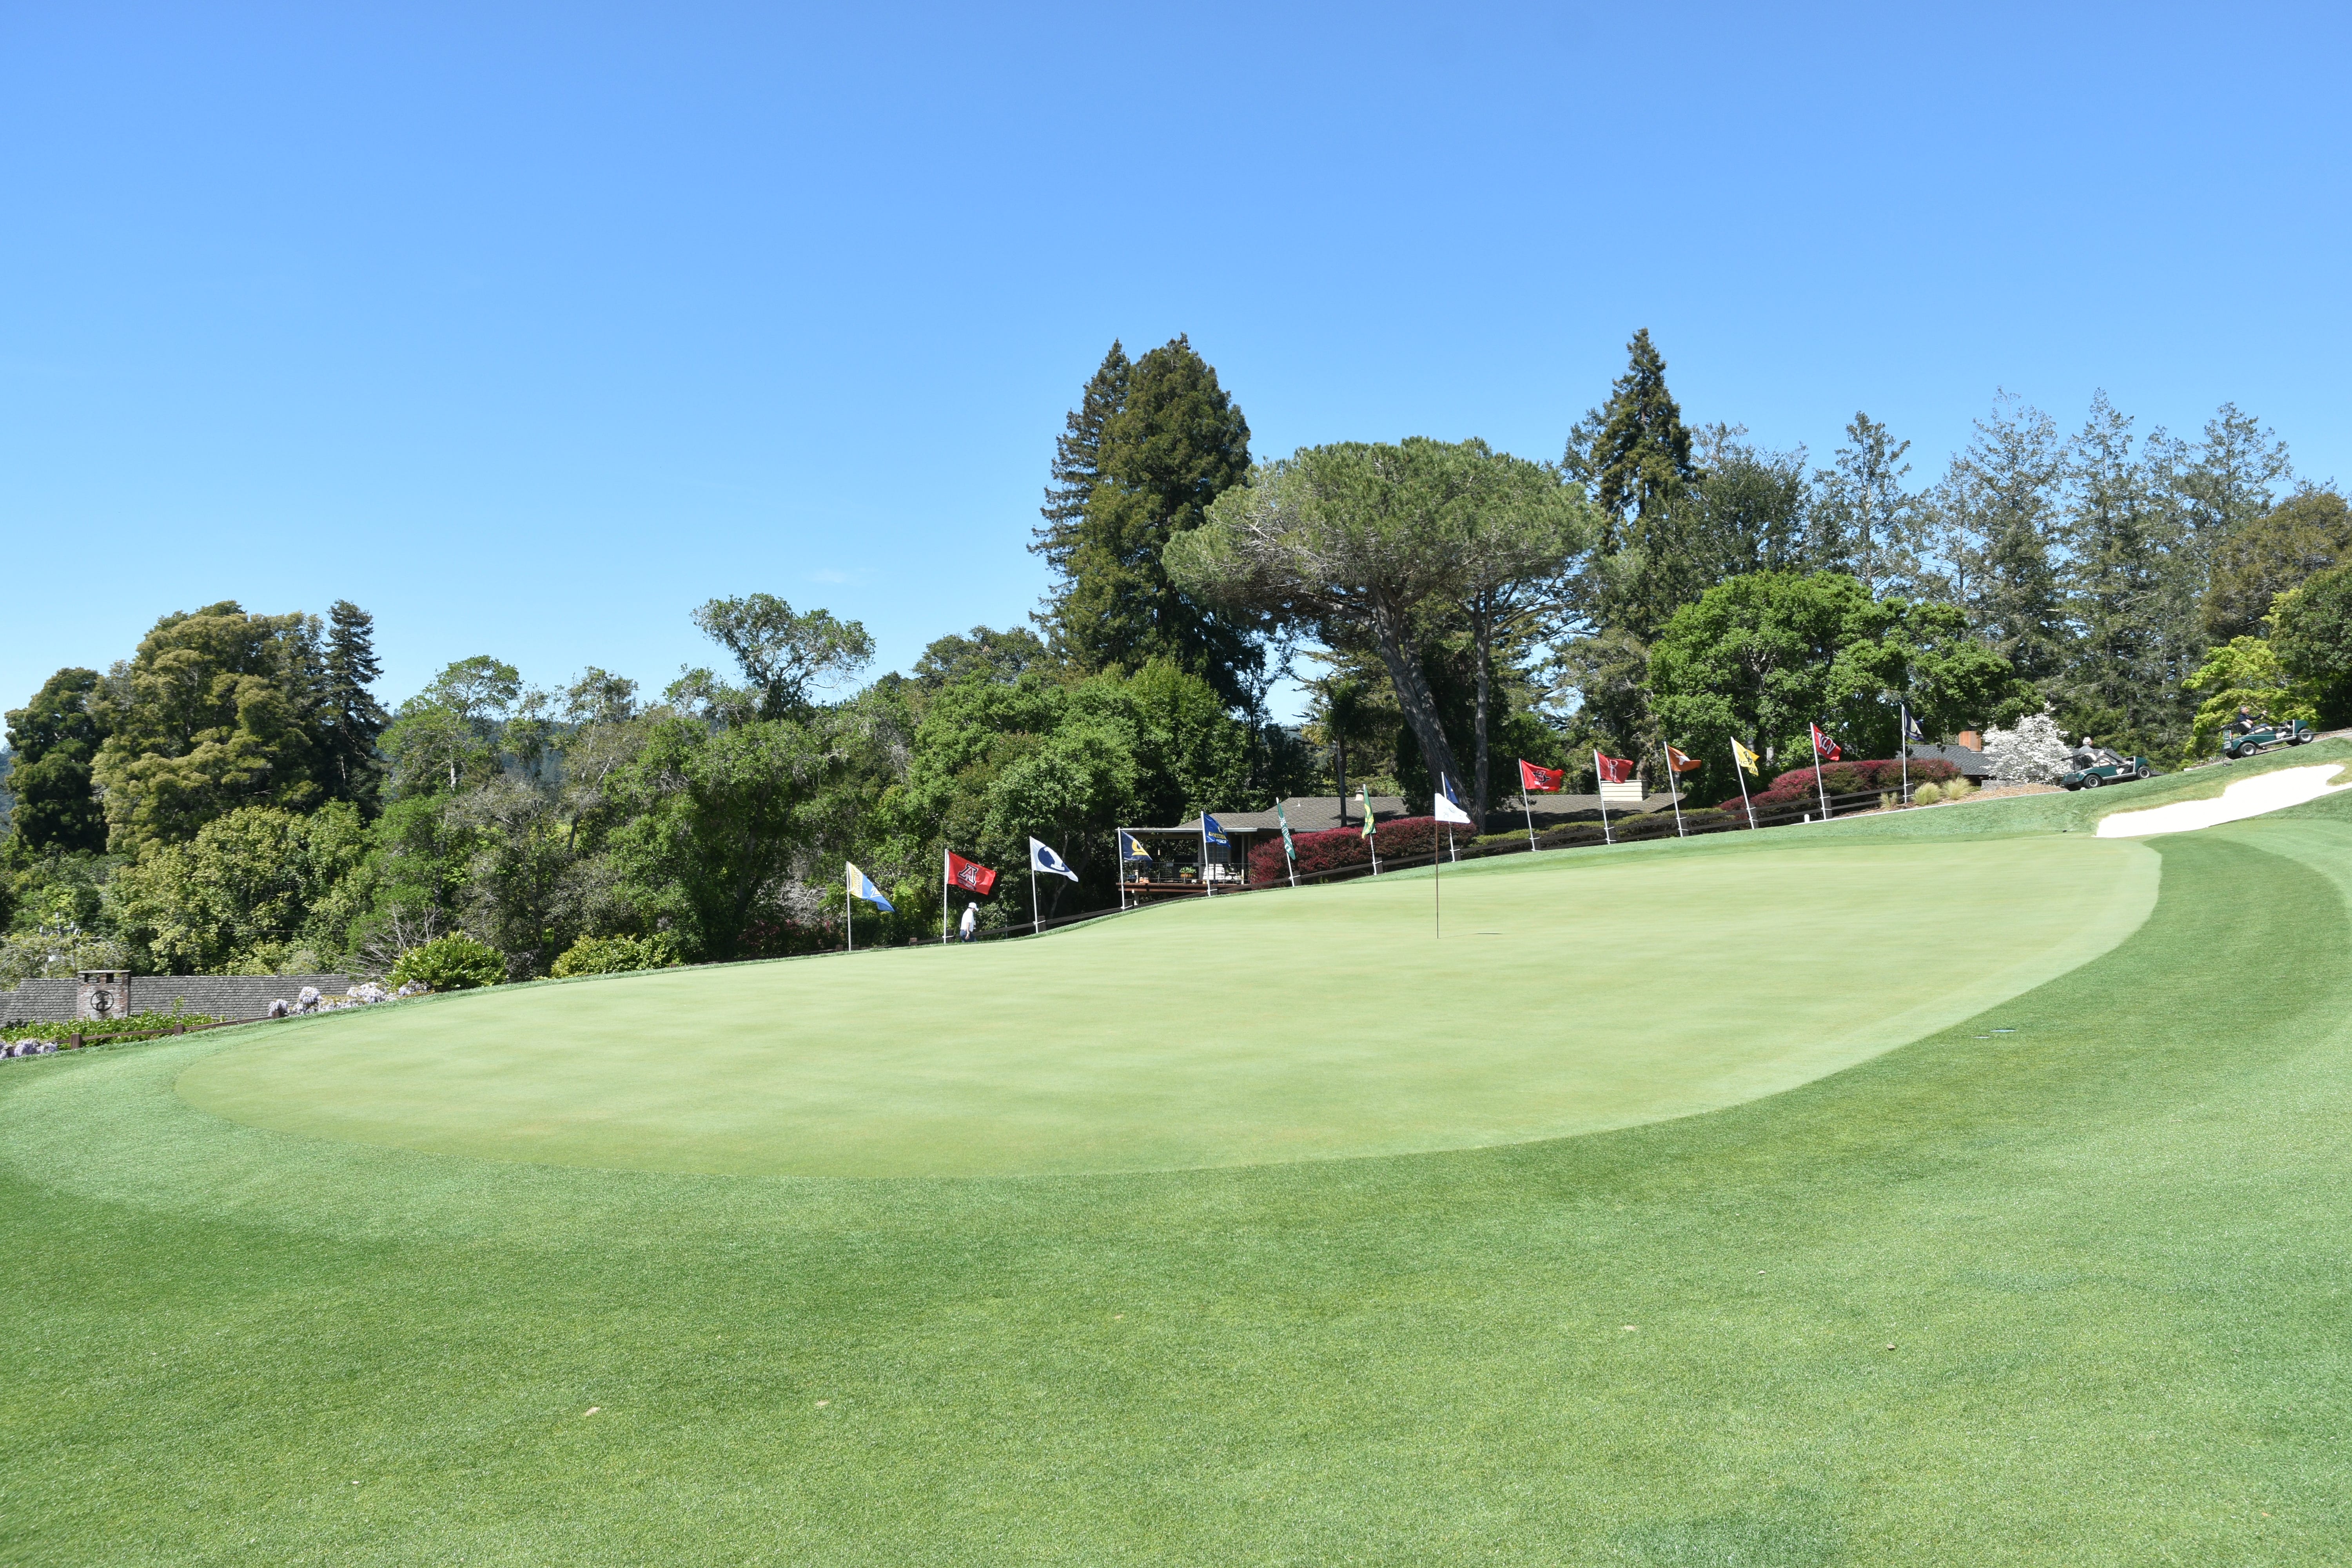
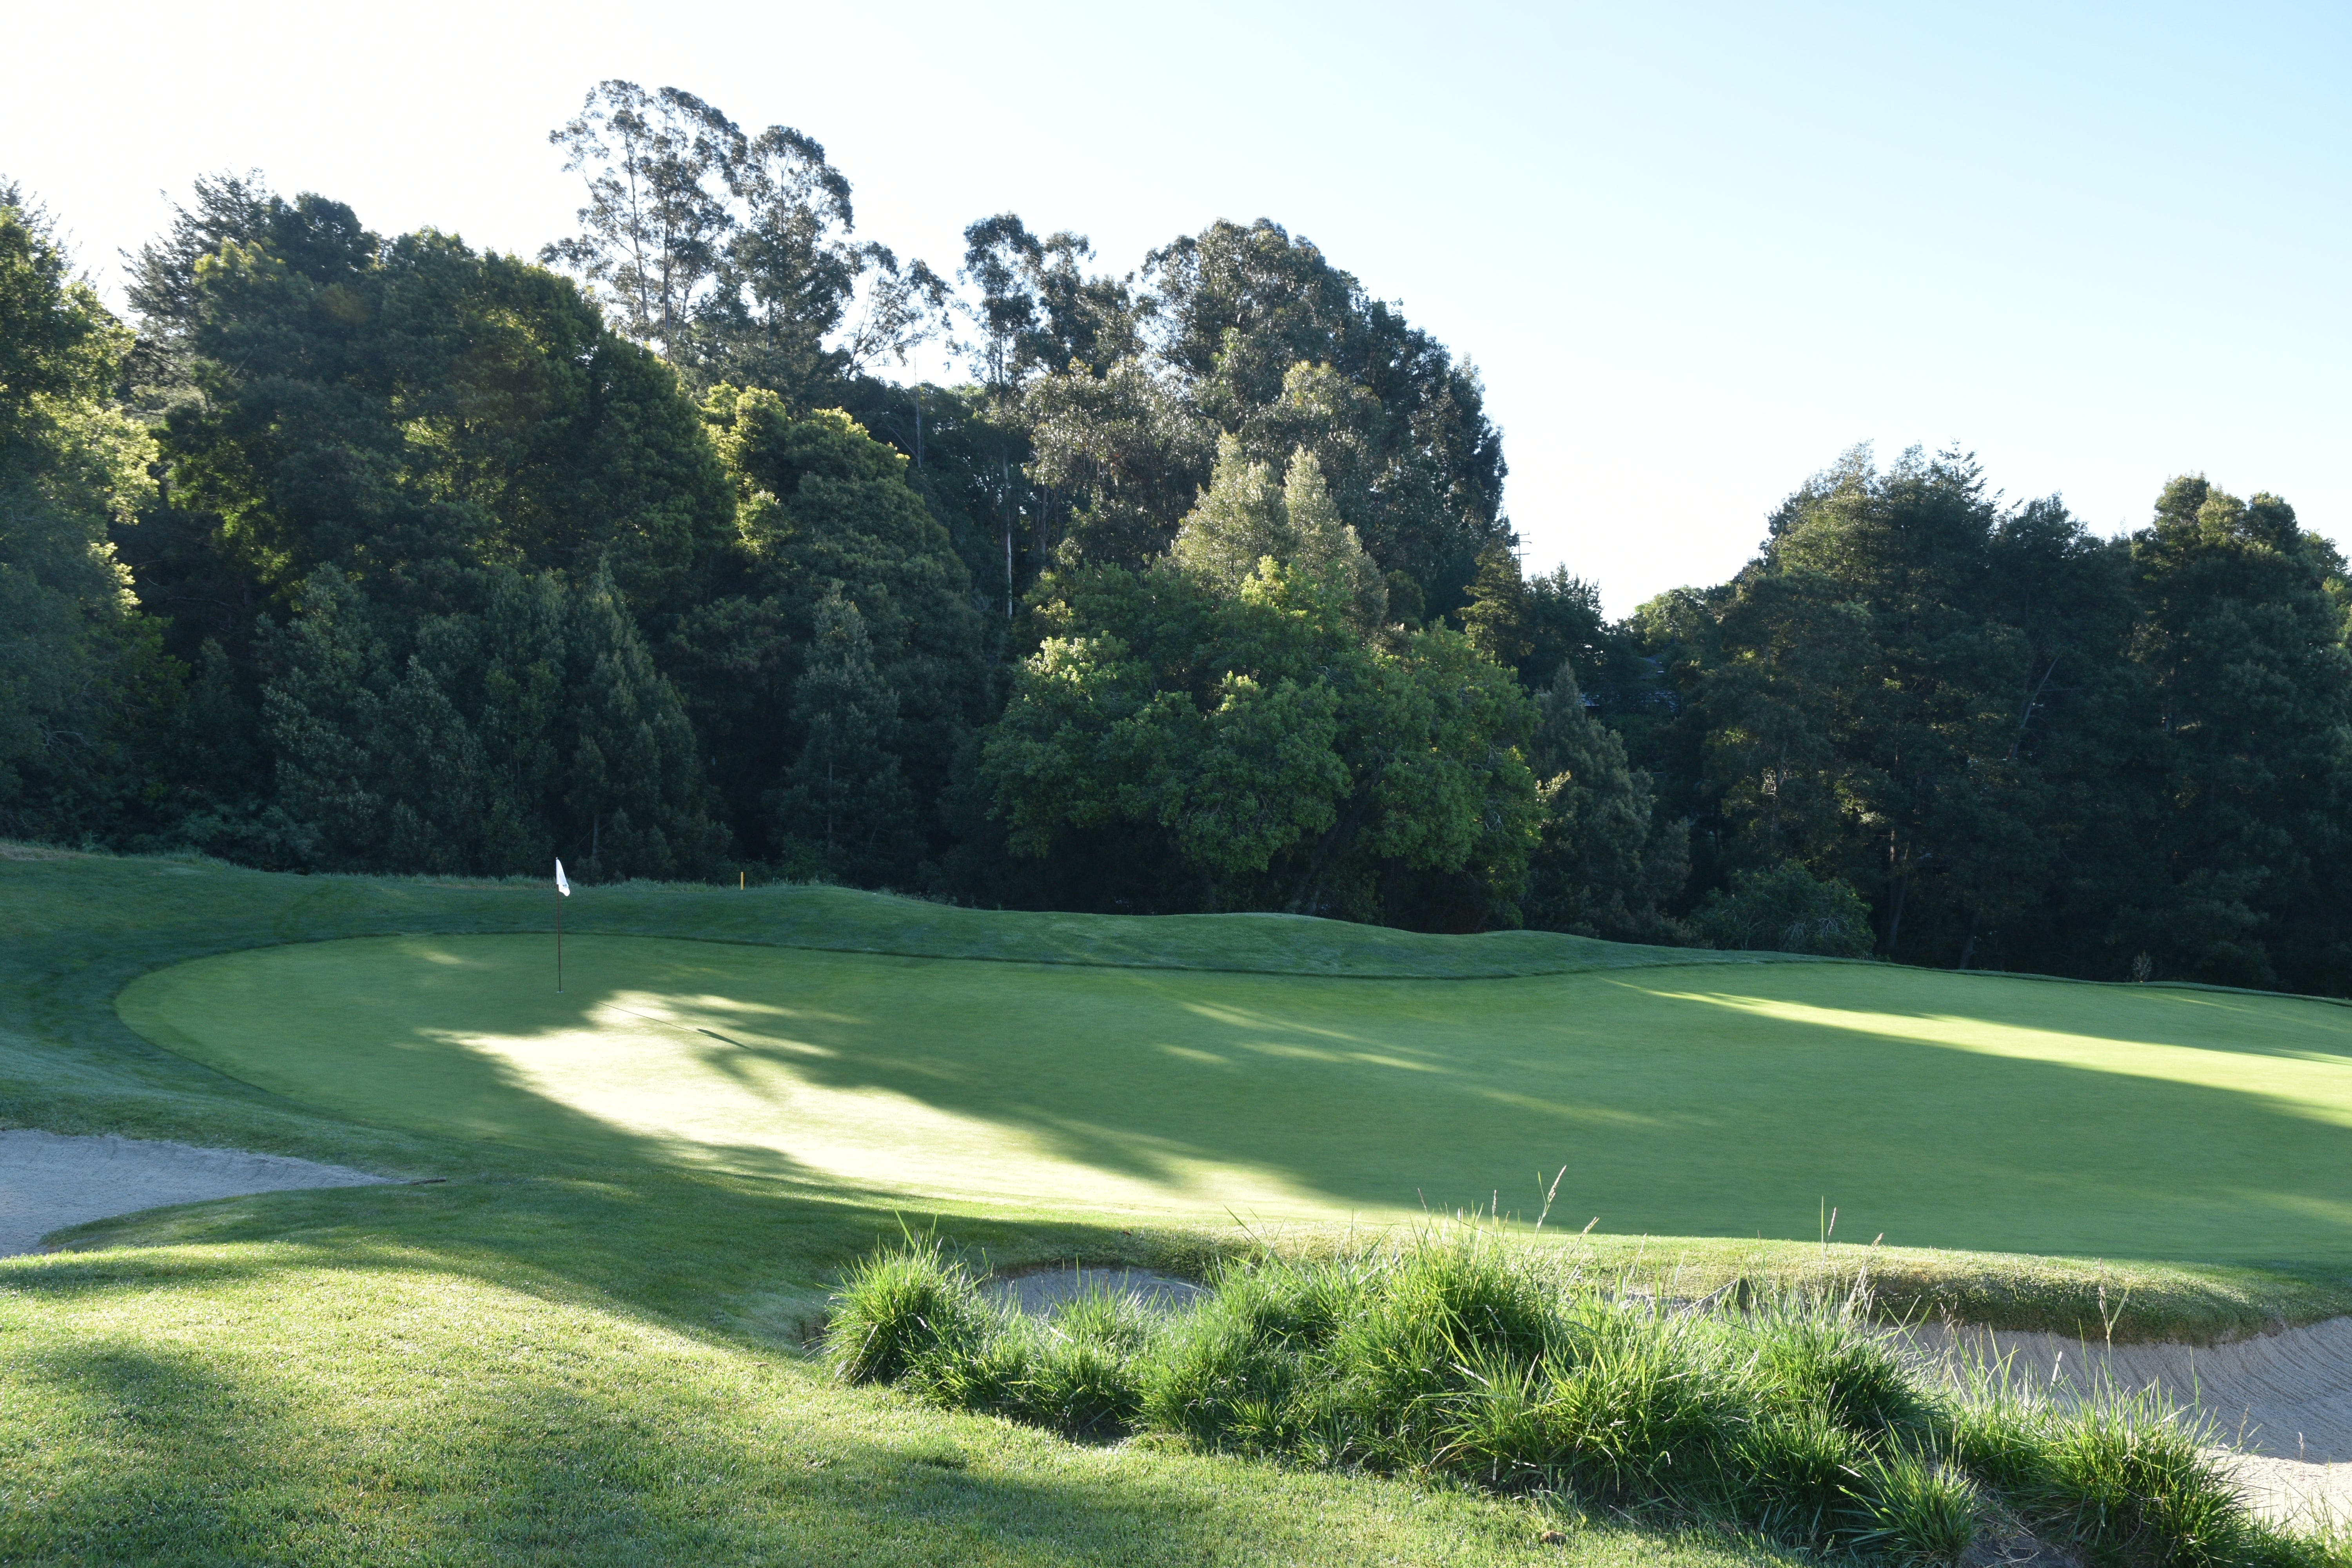
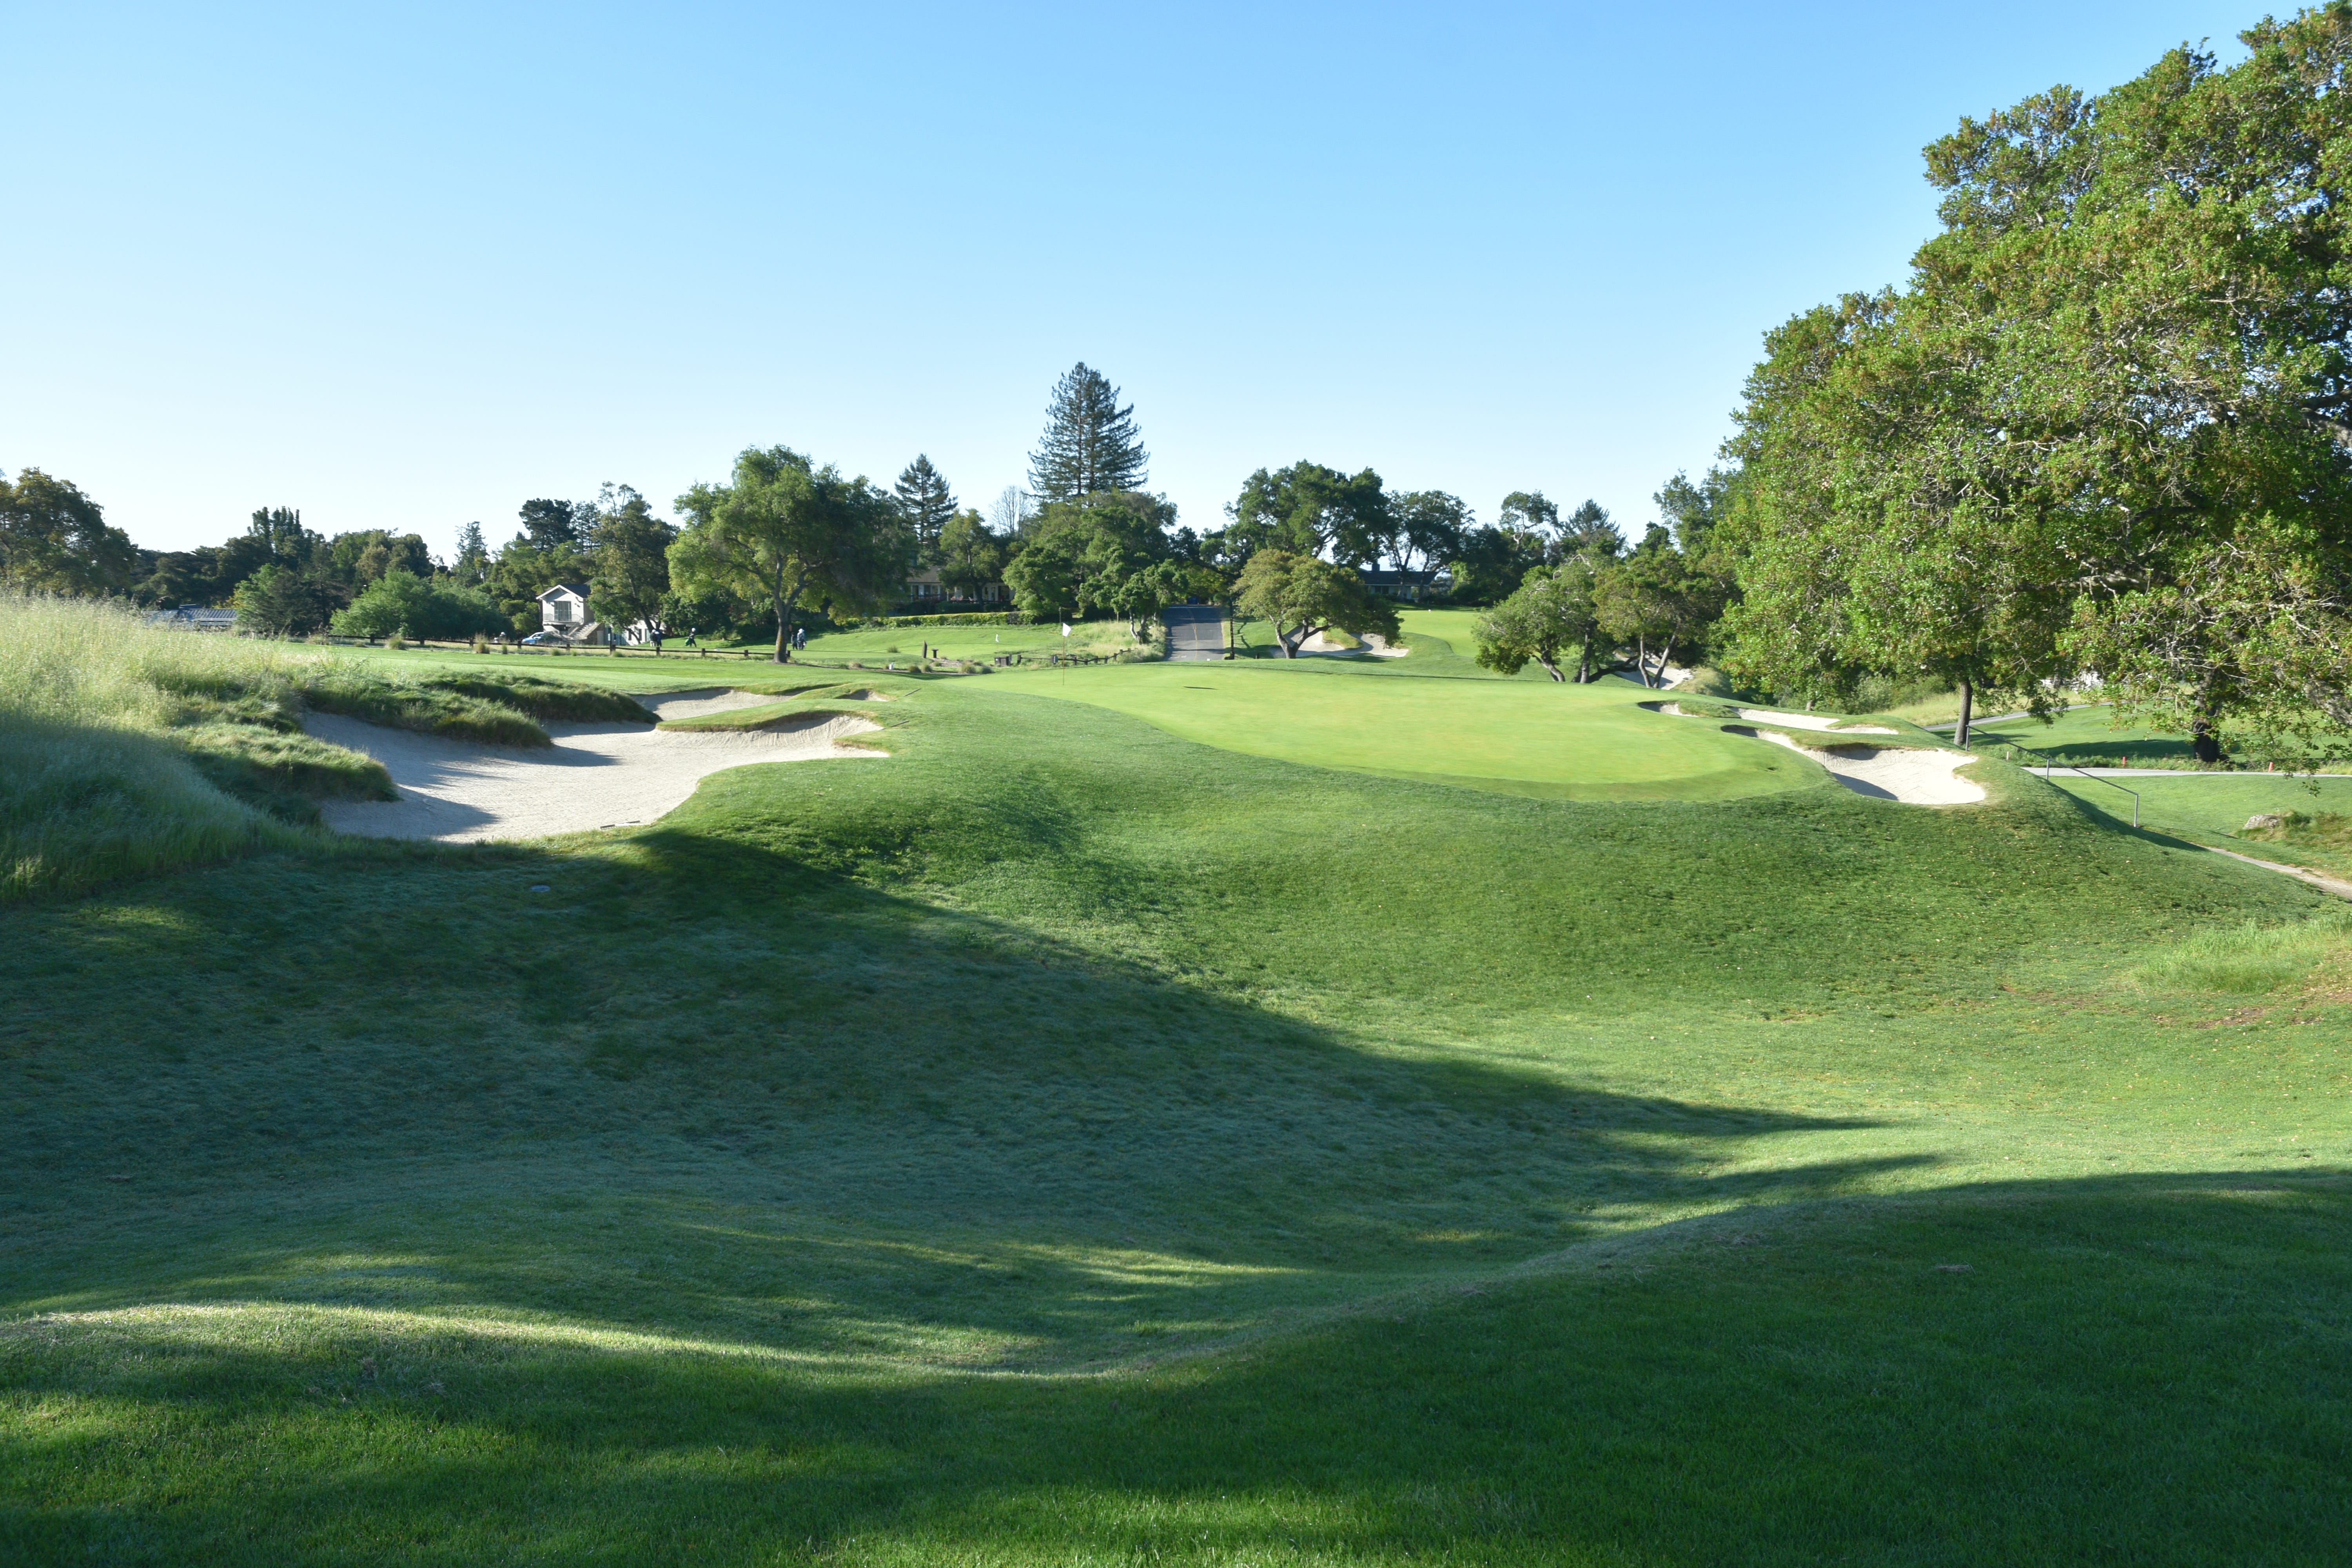
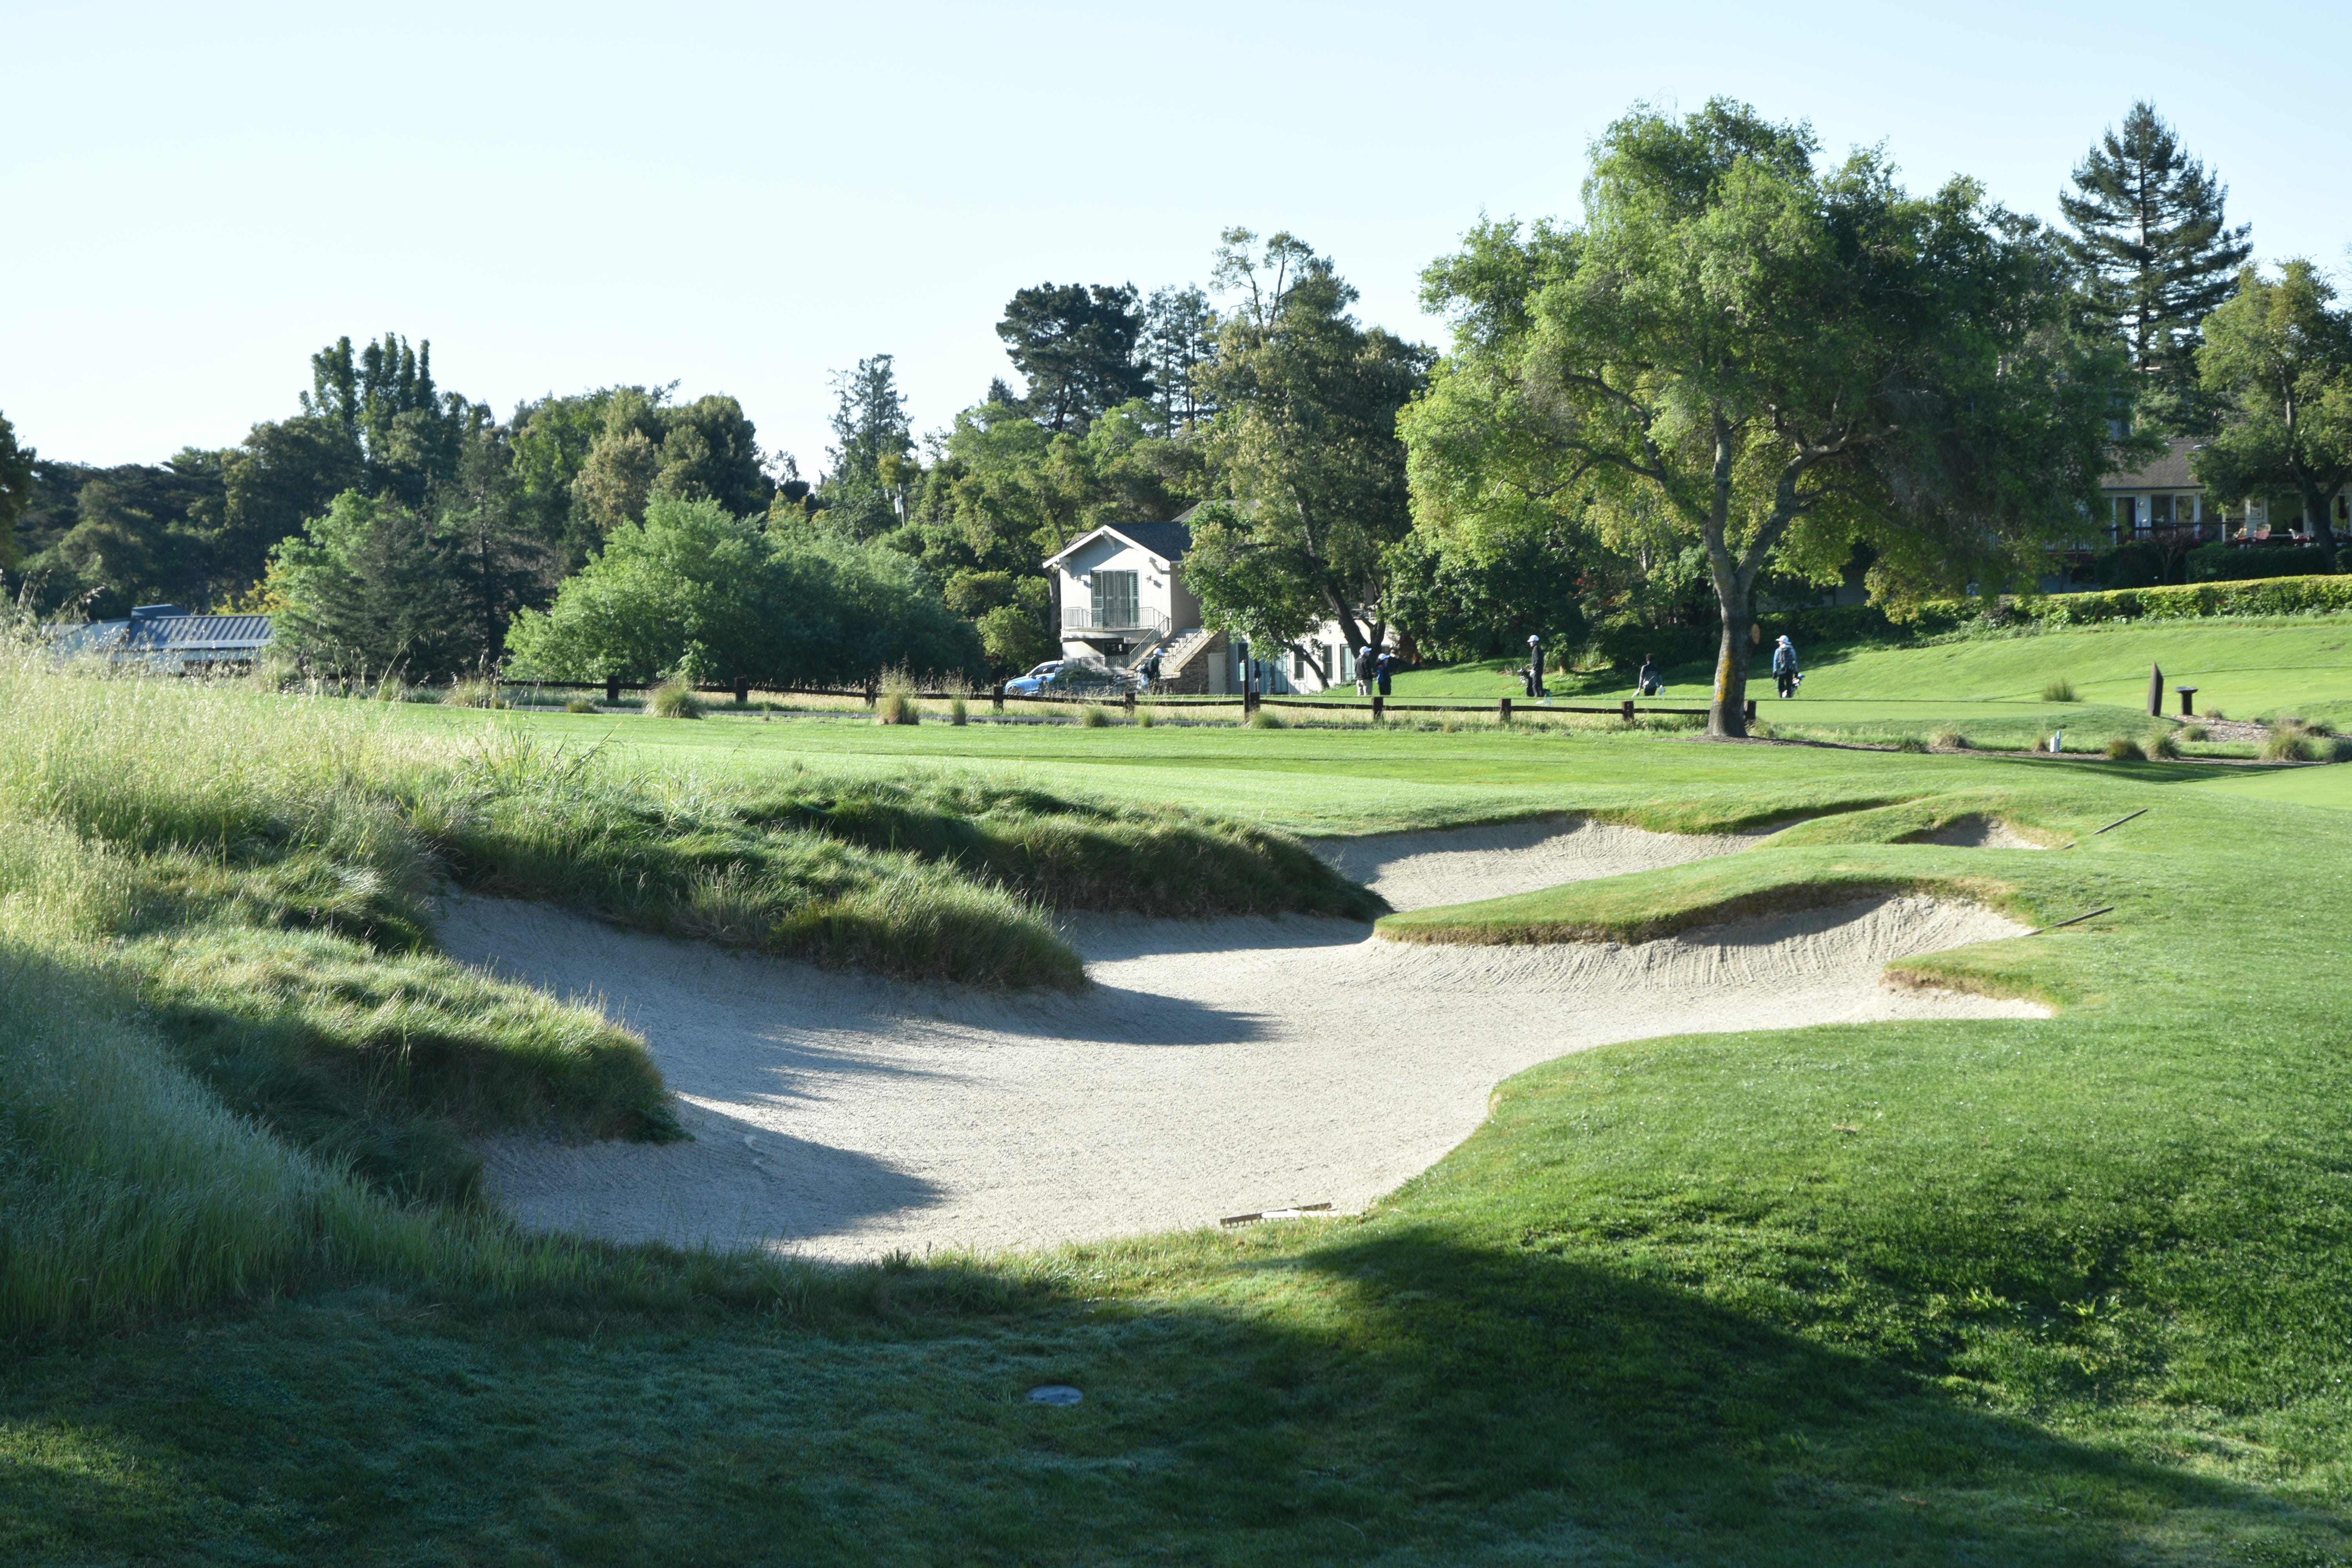
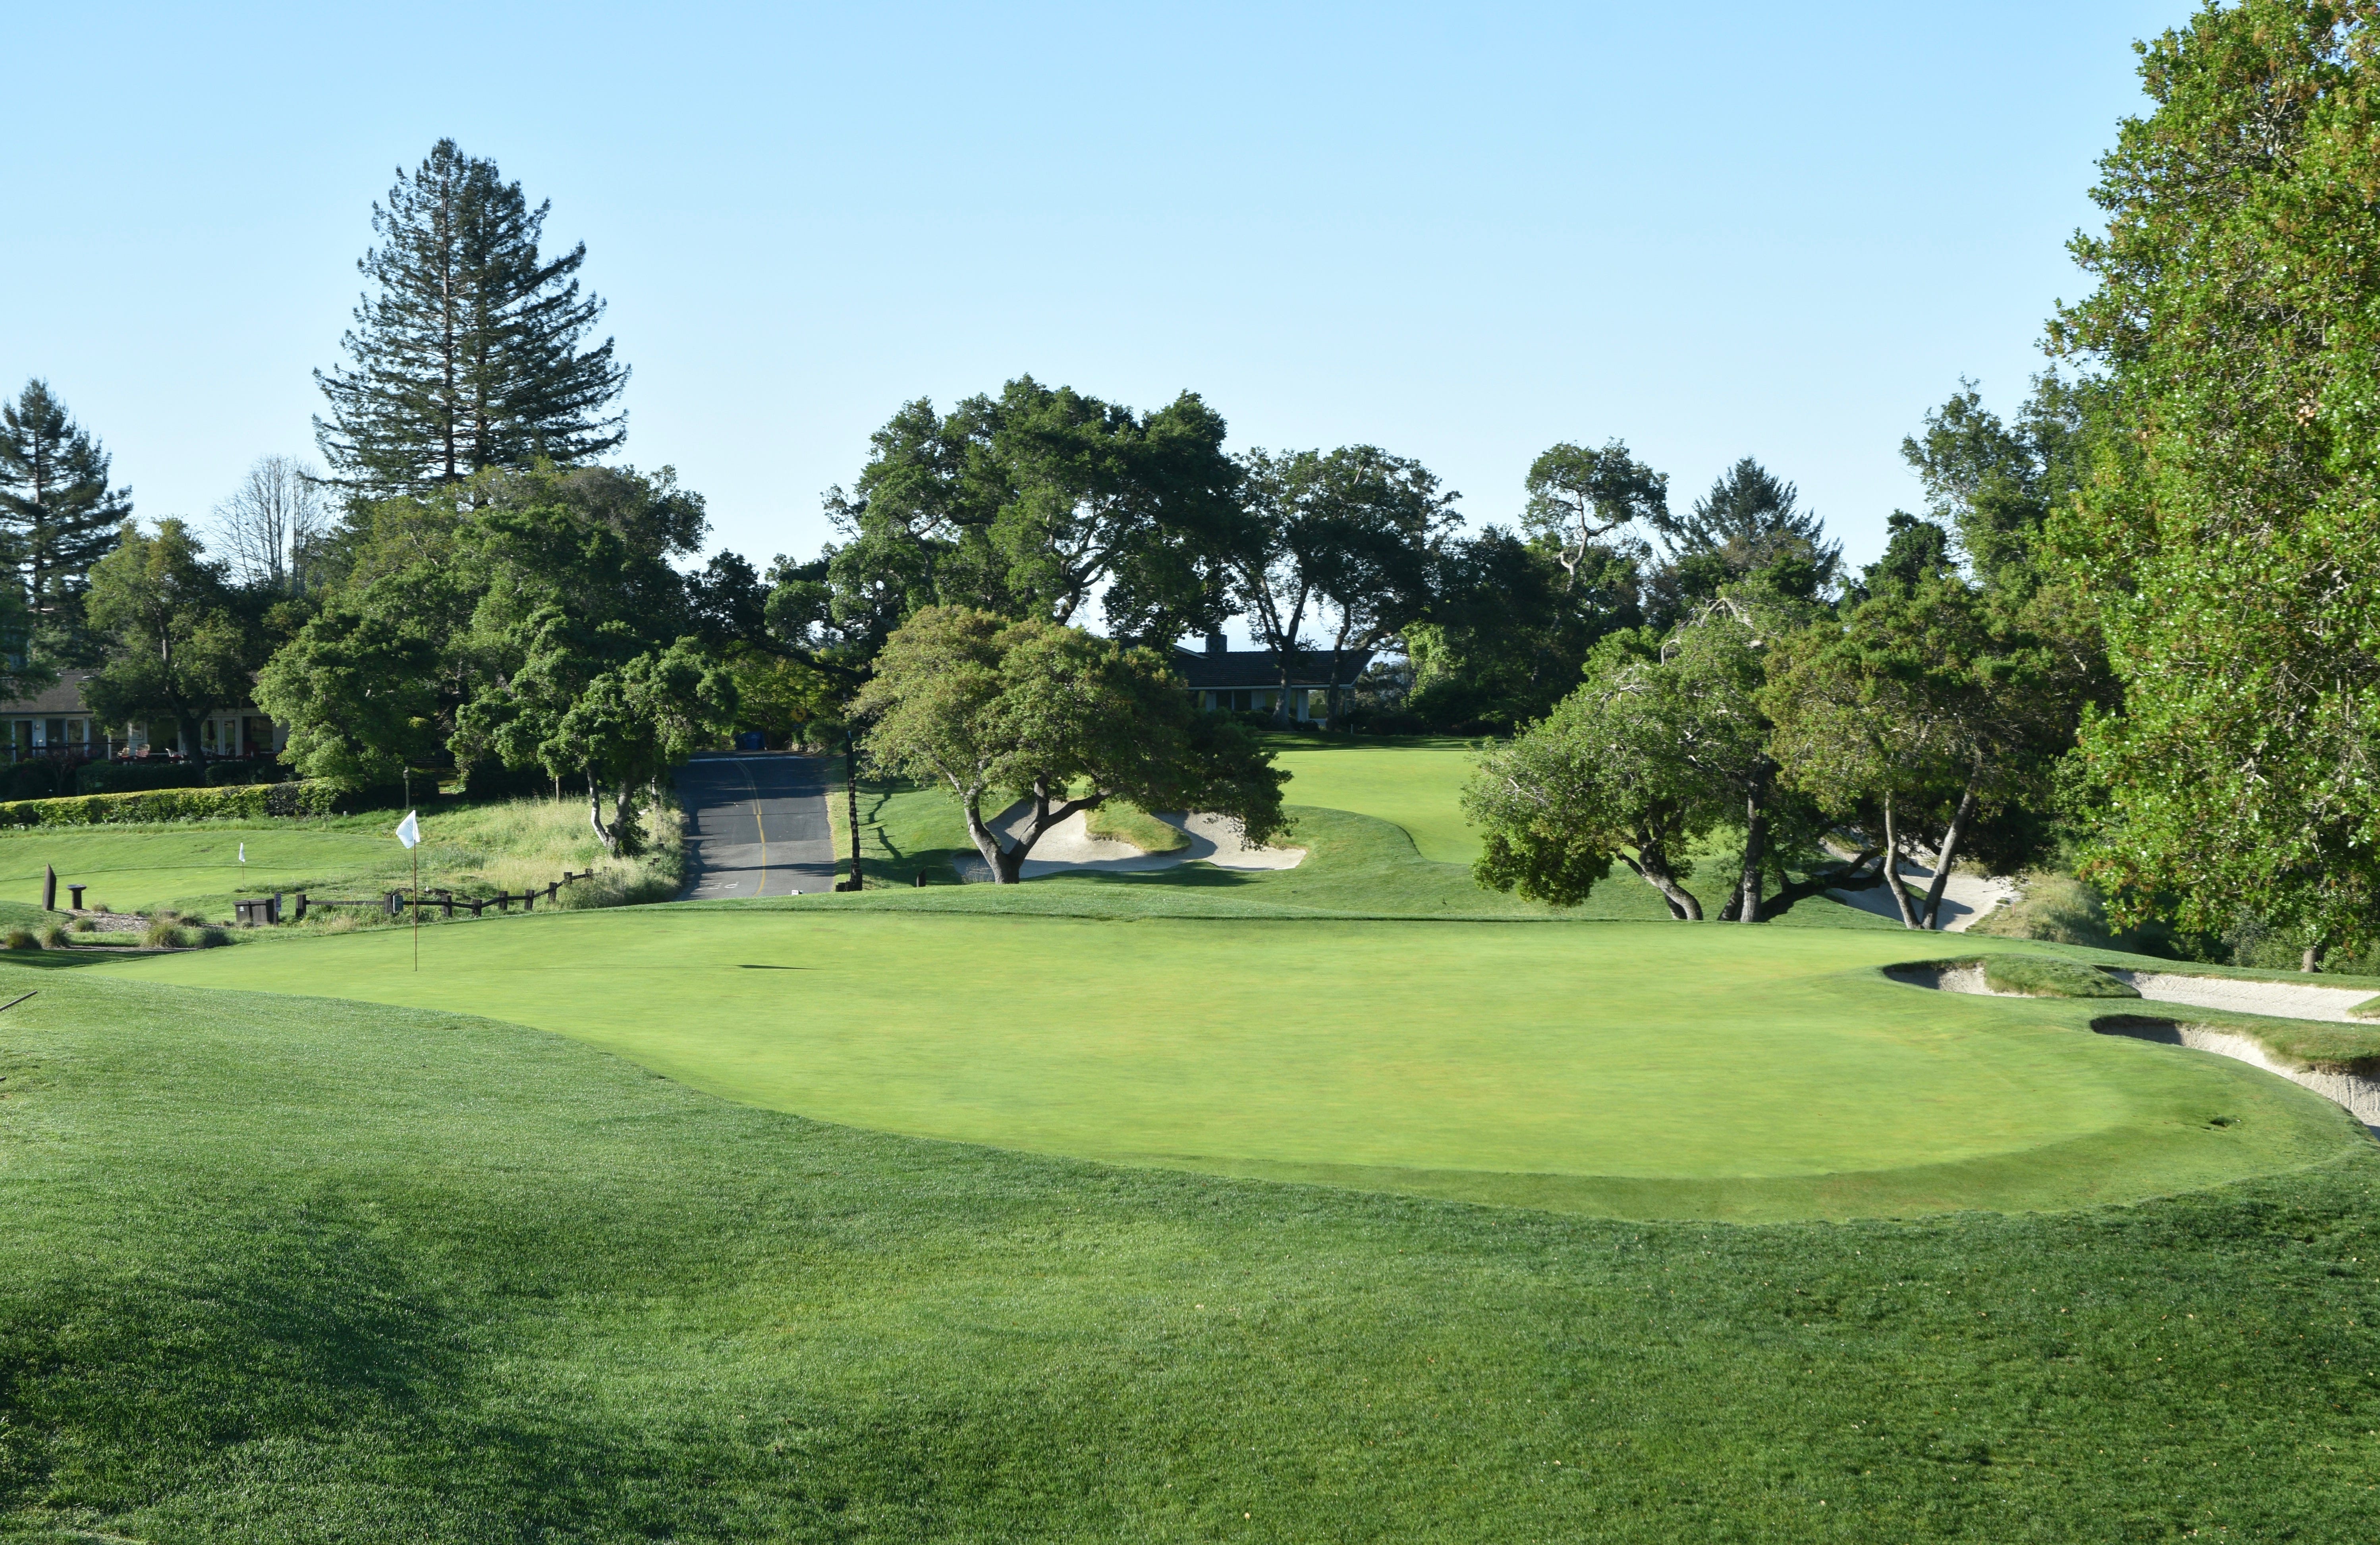
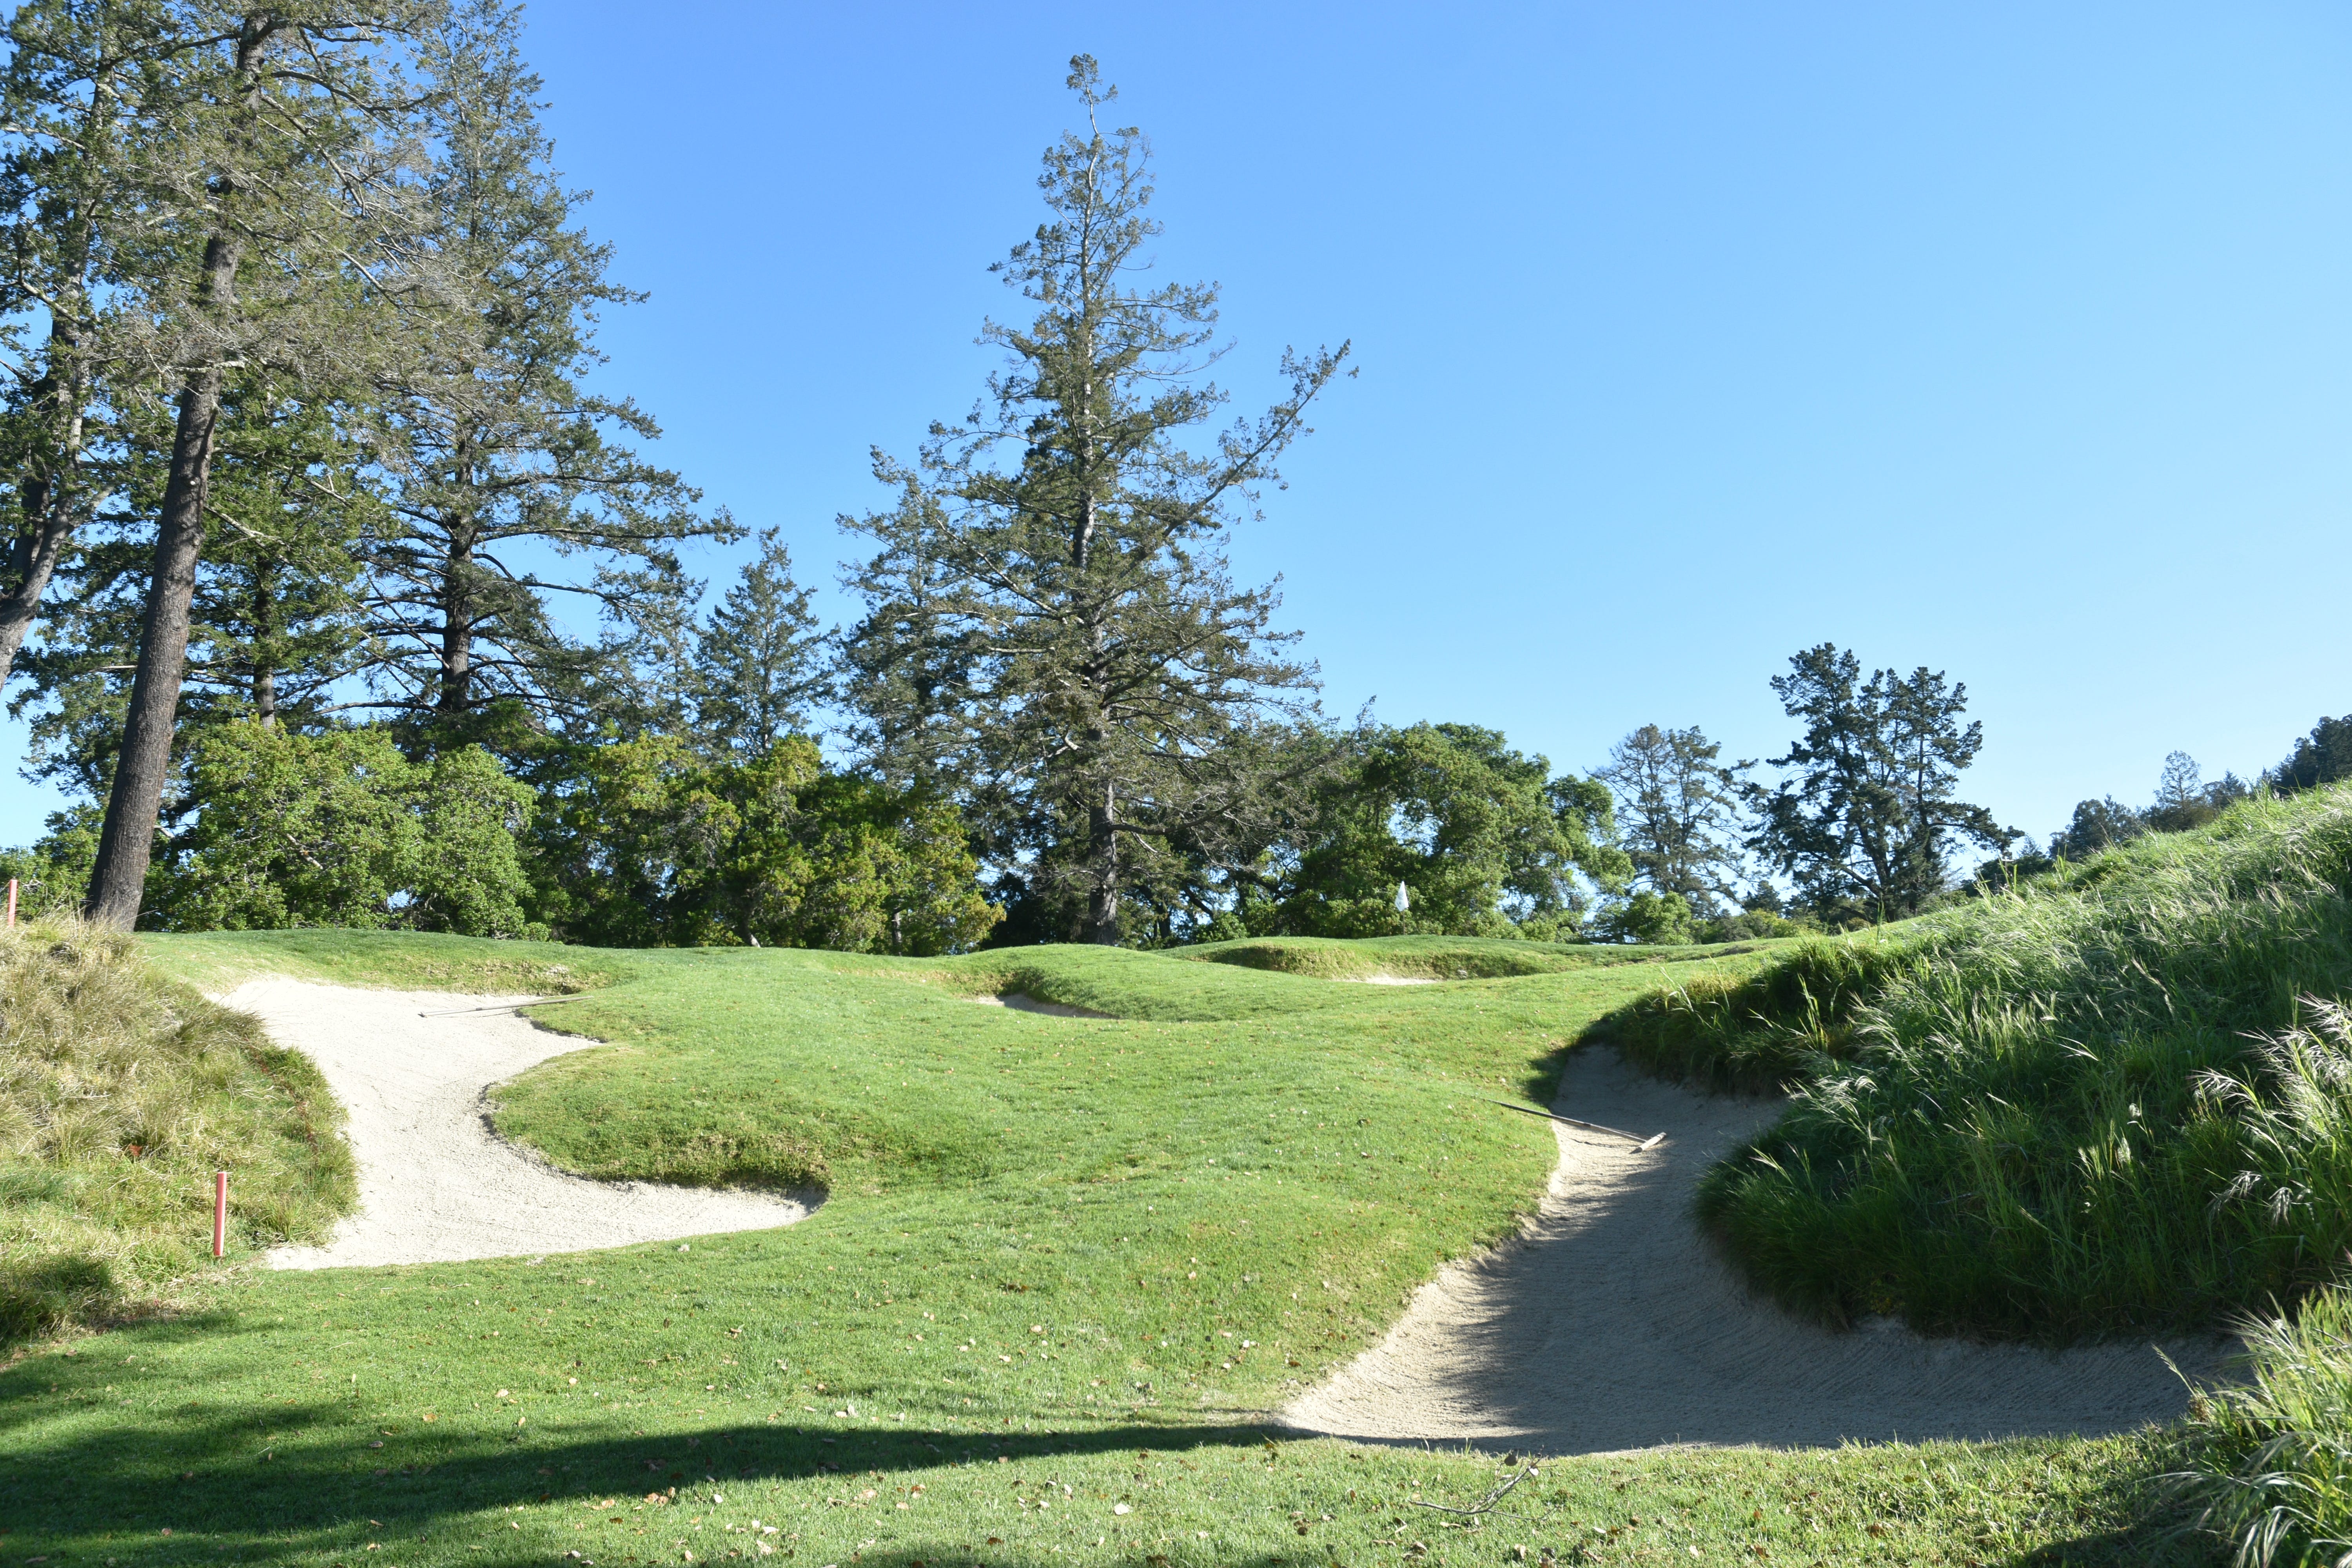
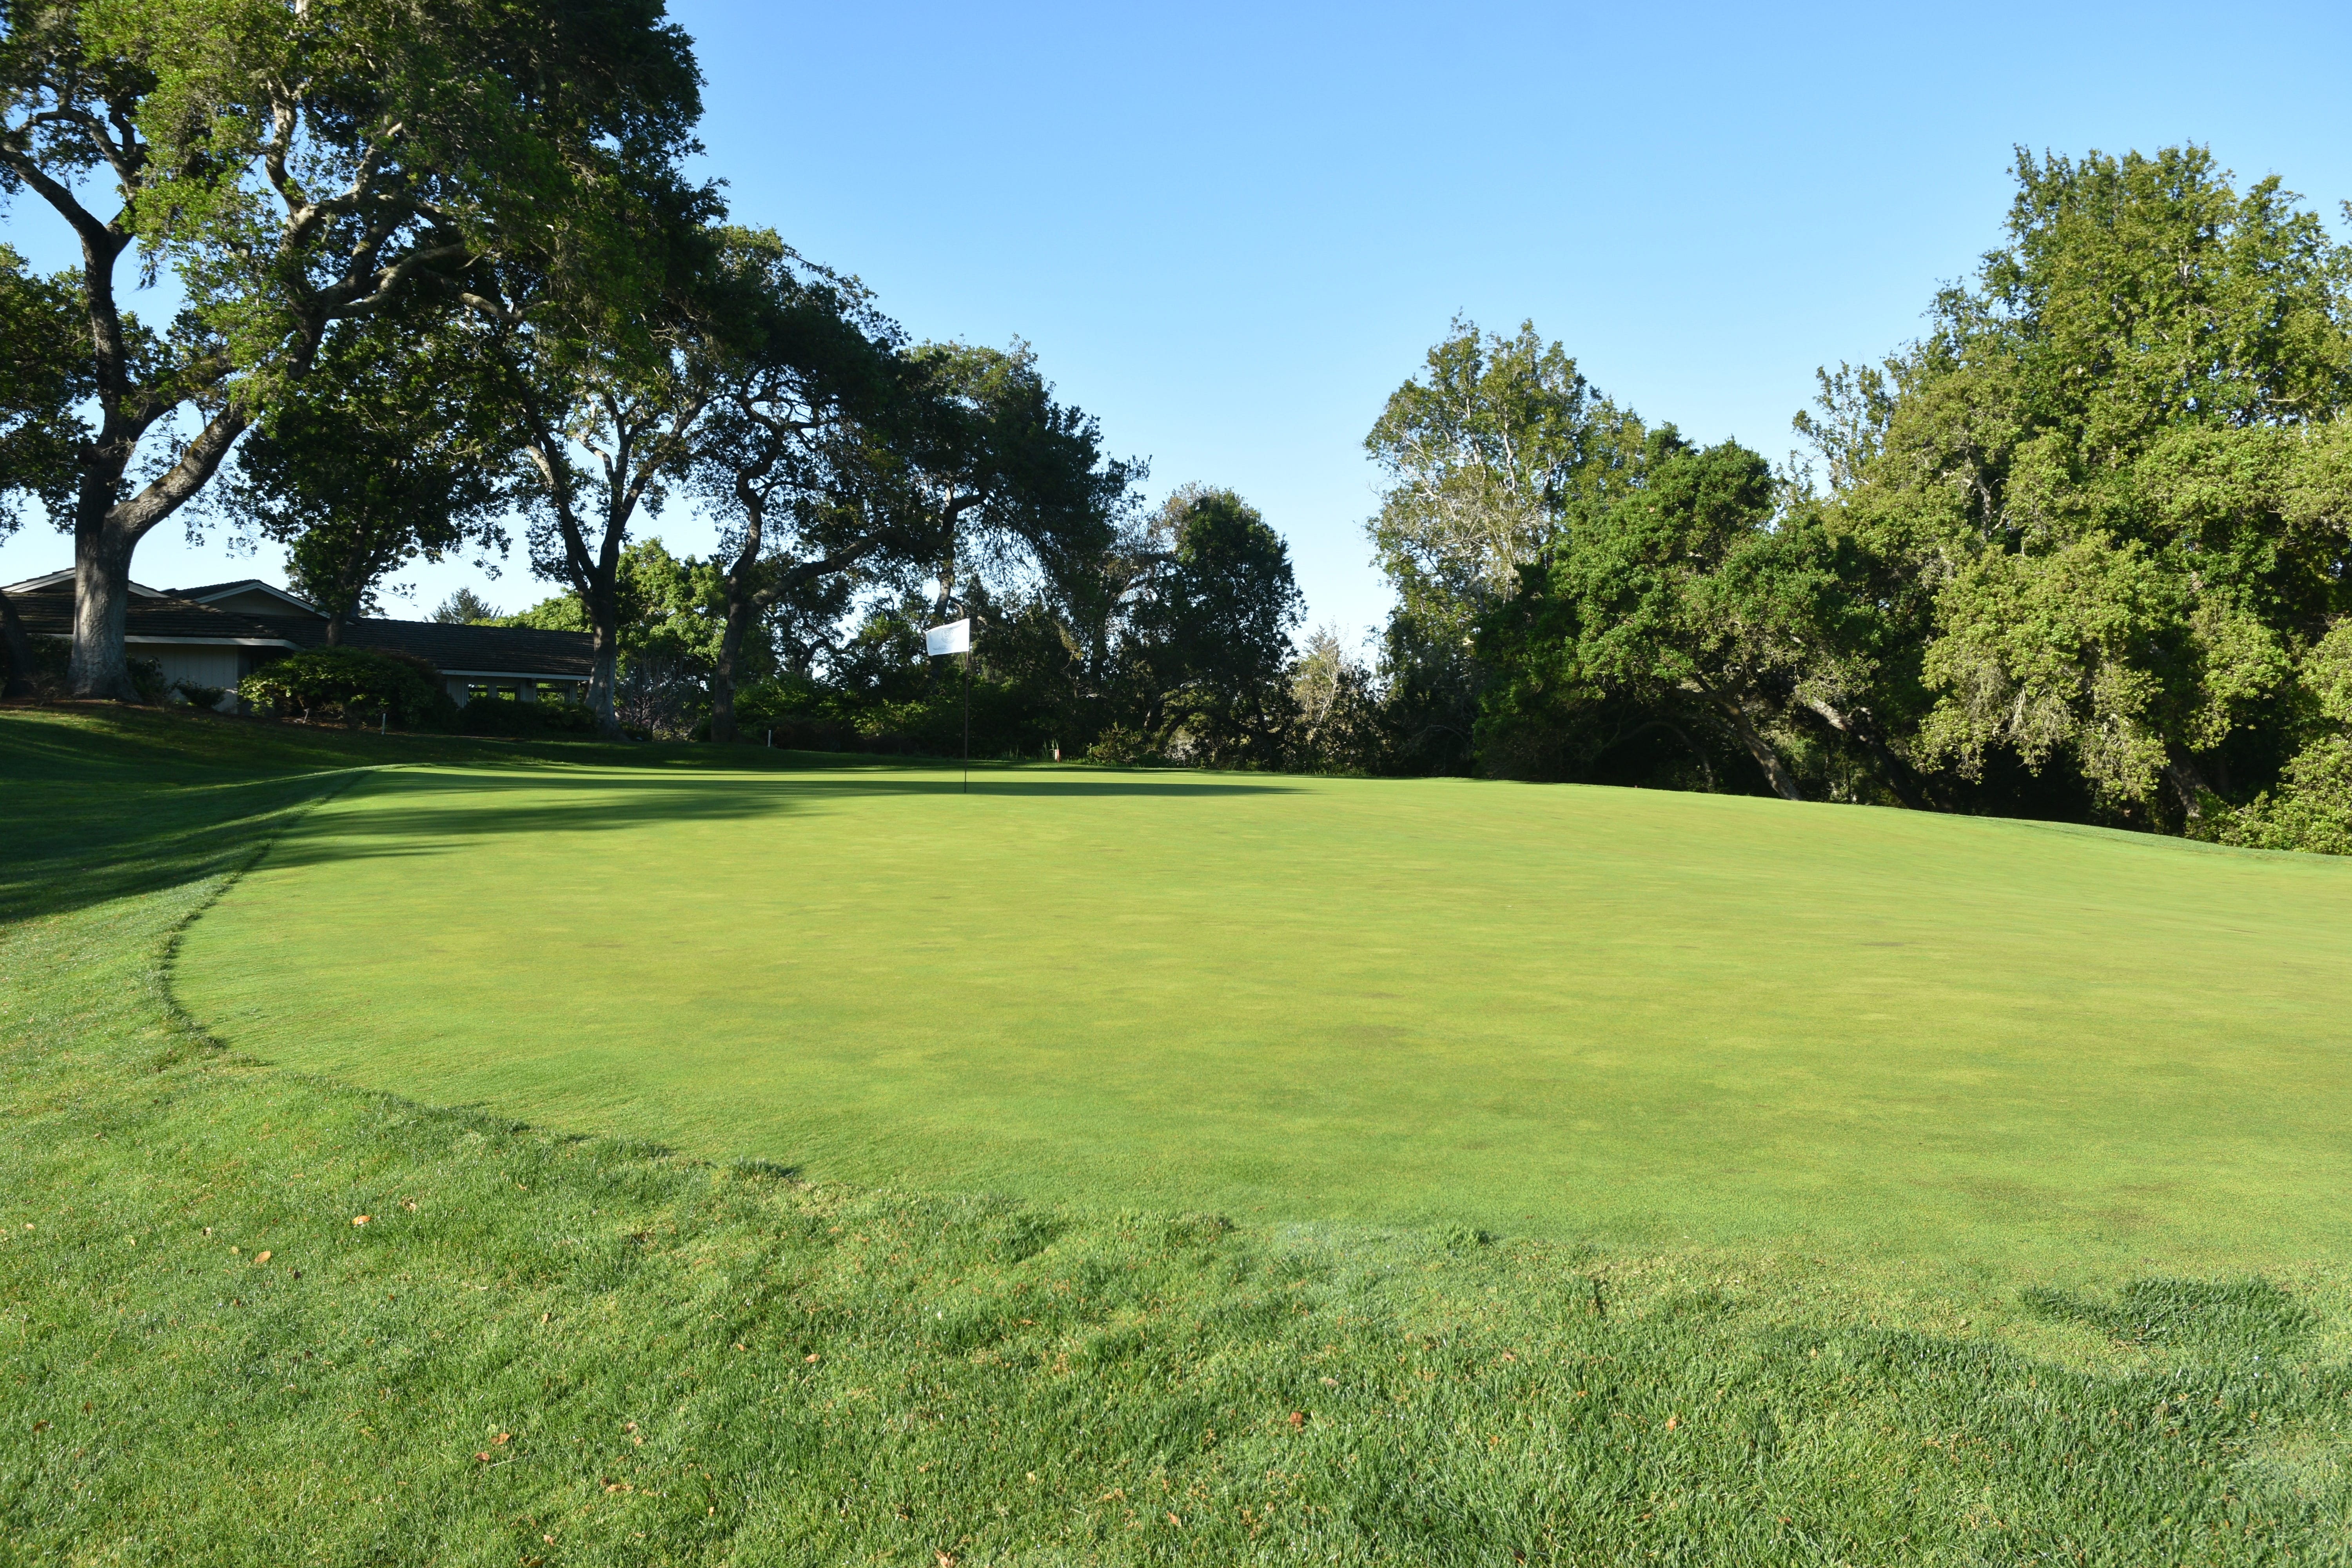
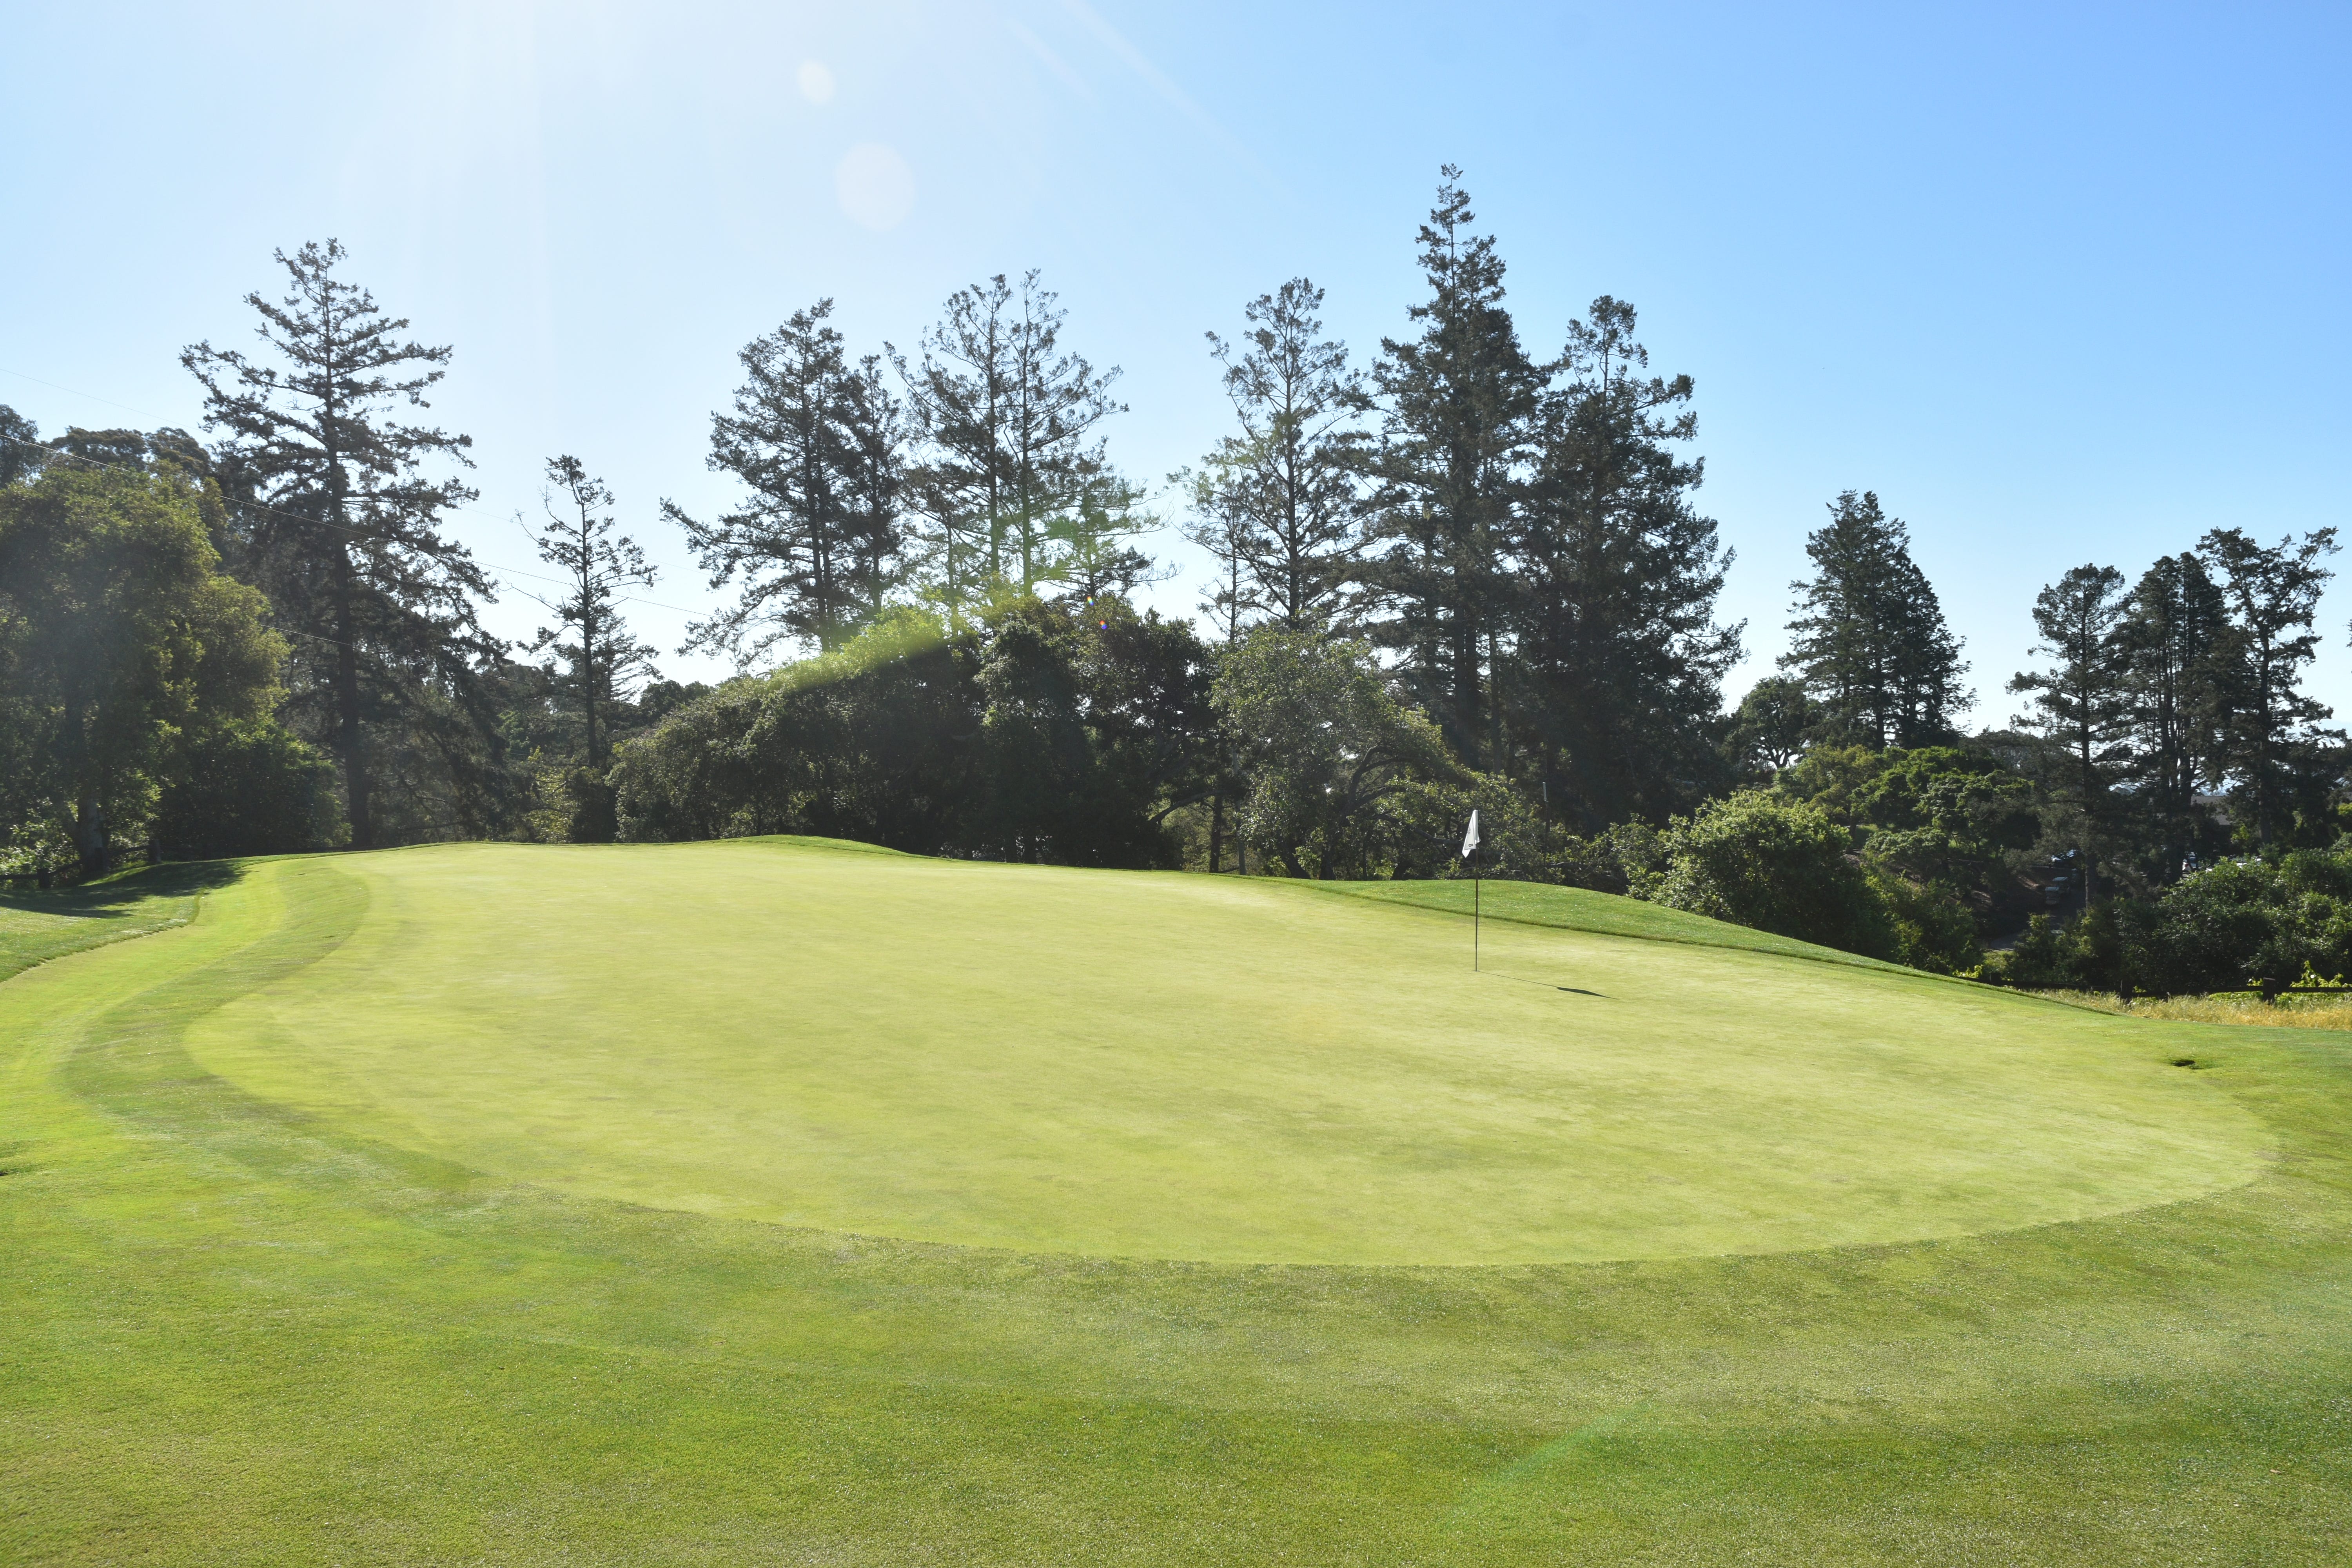
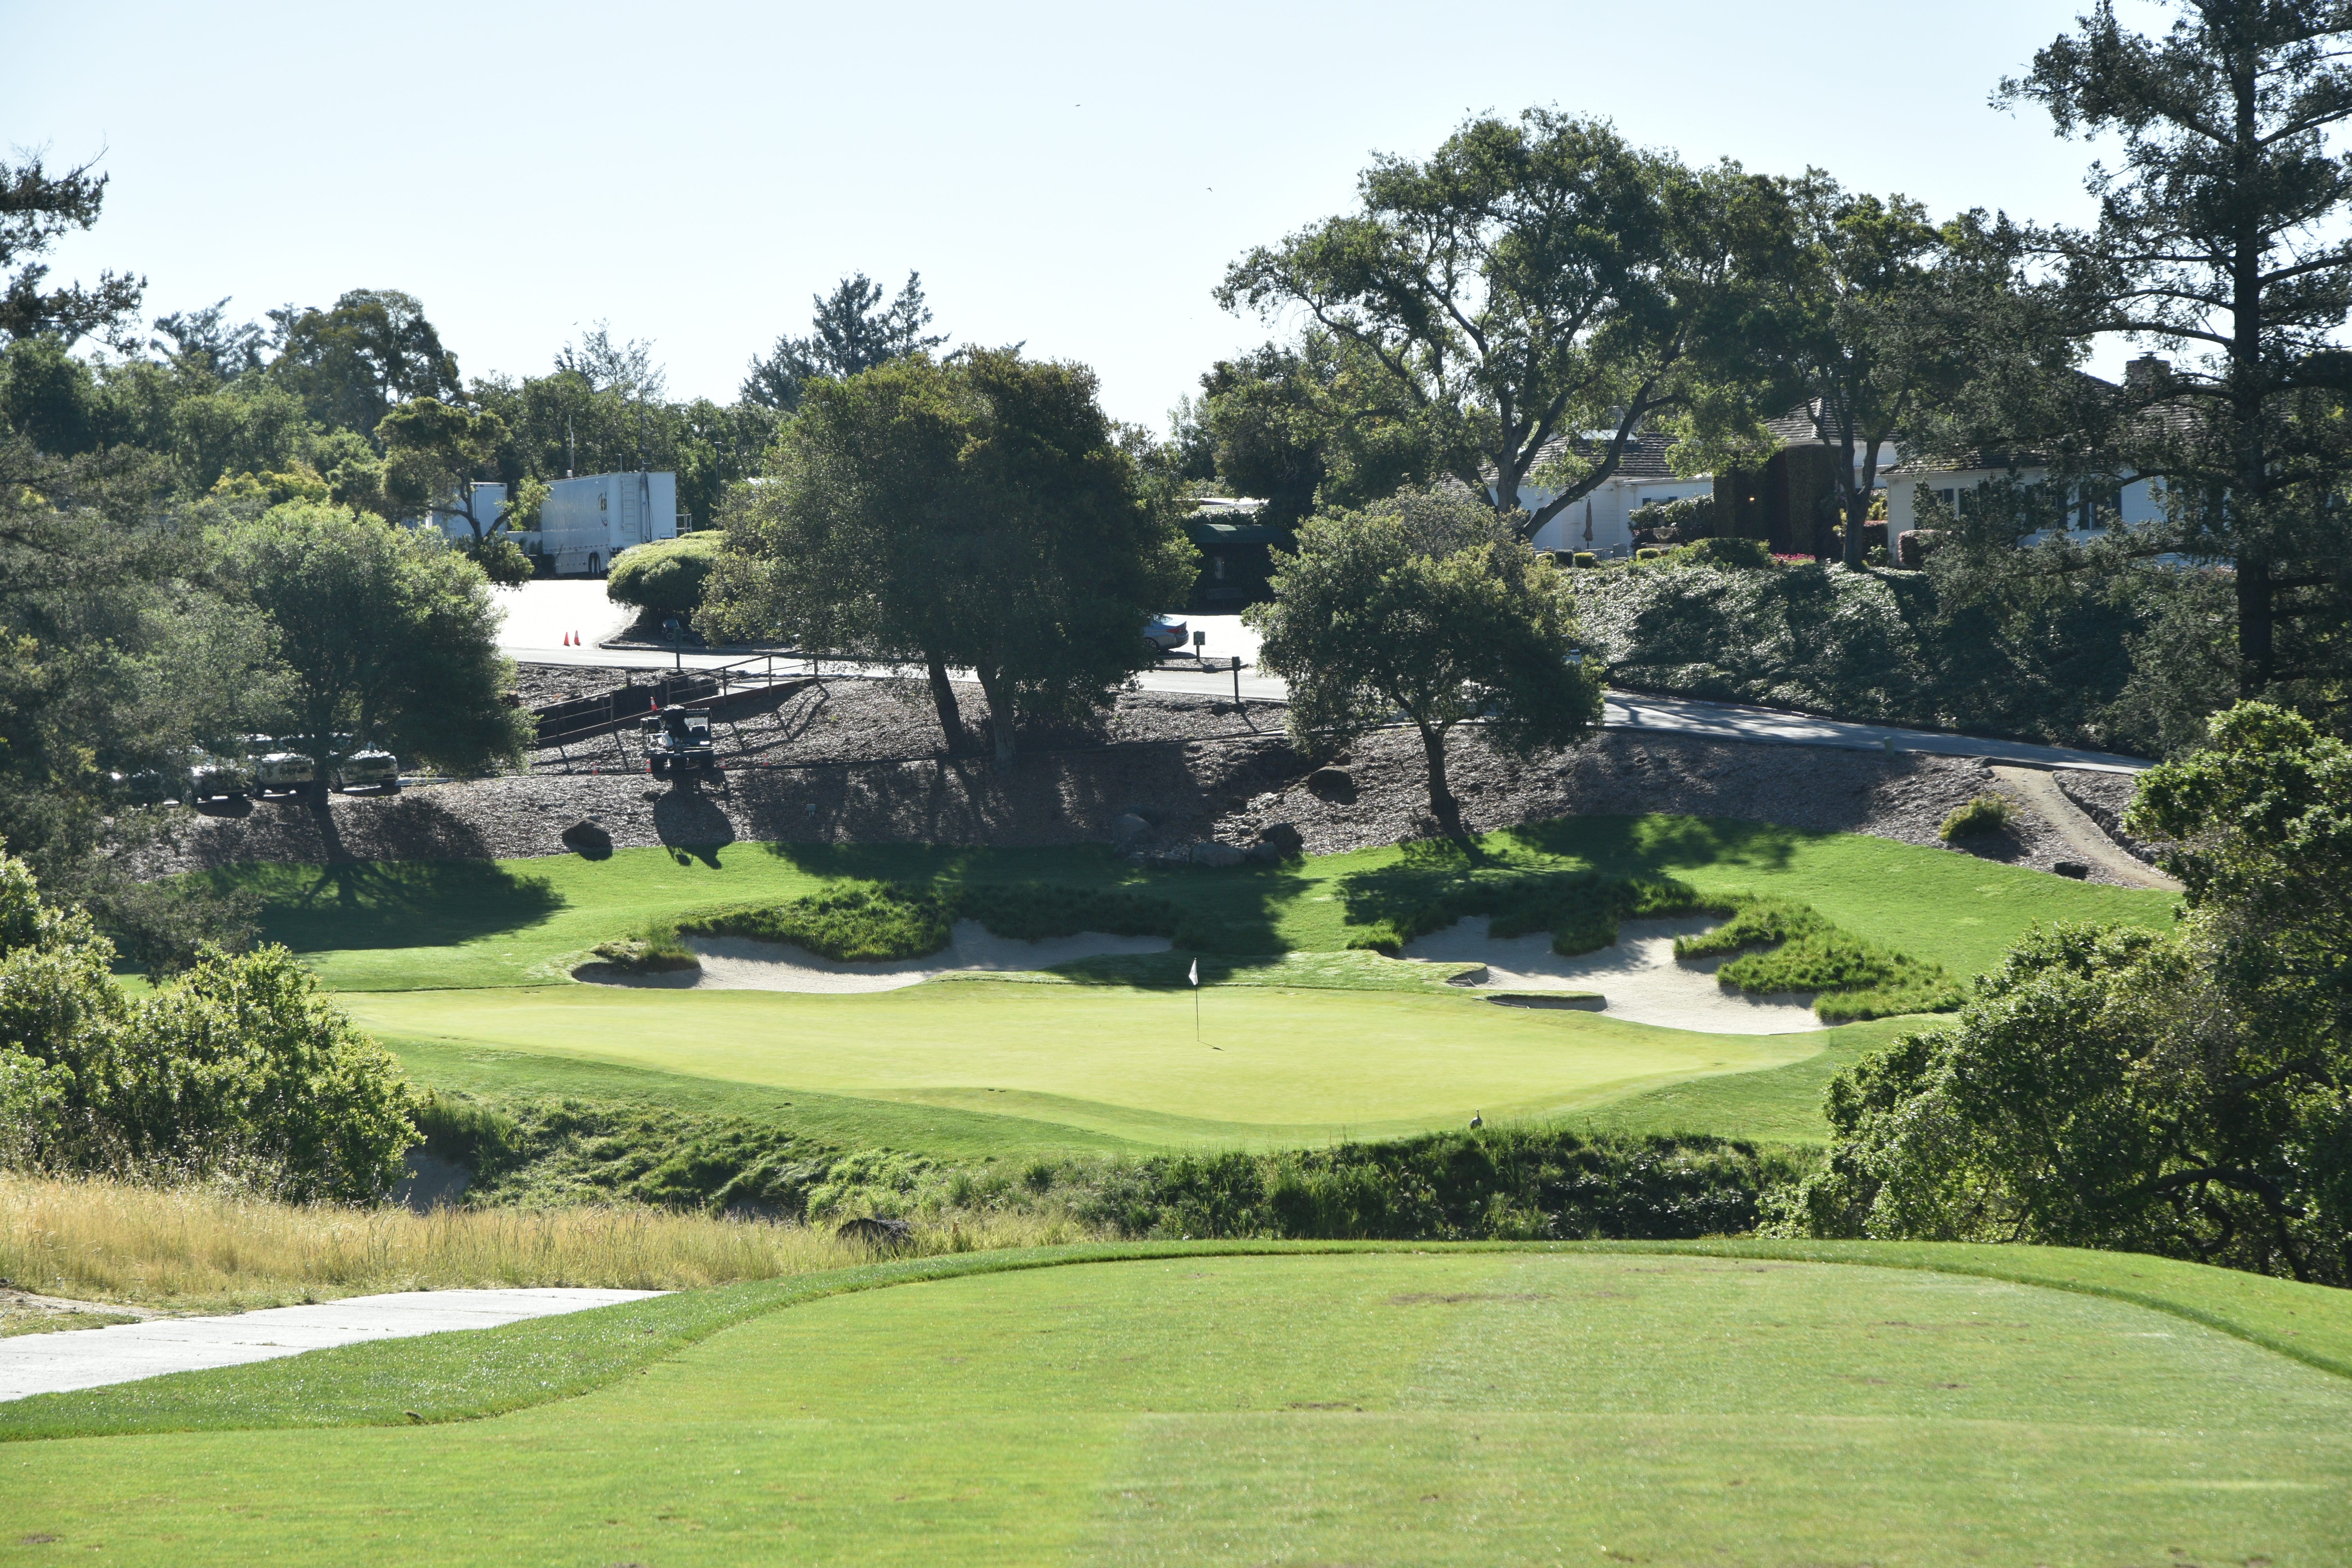
Various vantage points of the 1st hole green
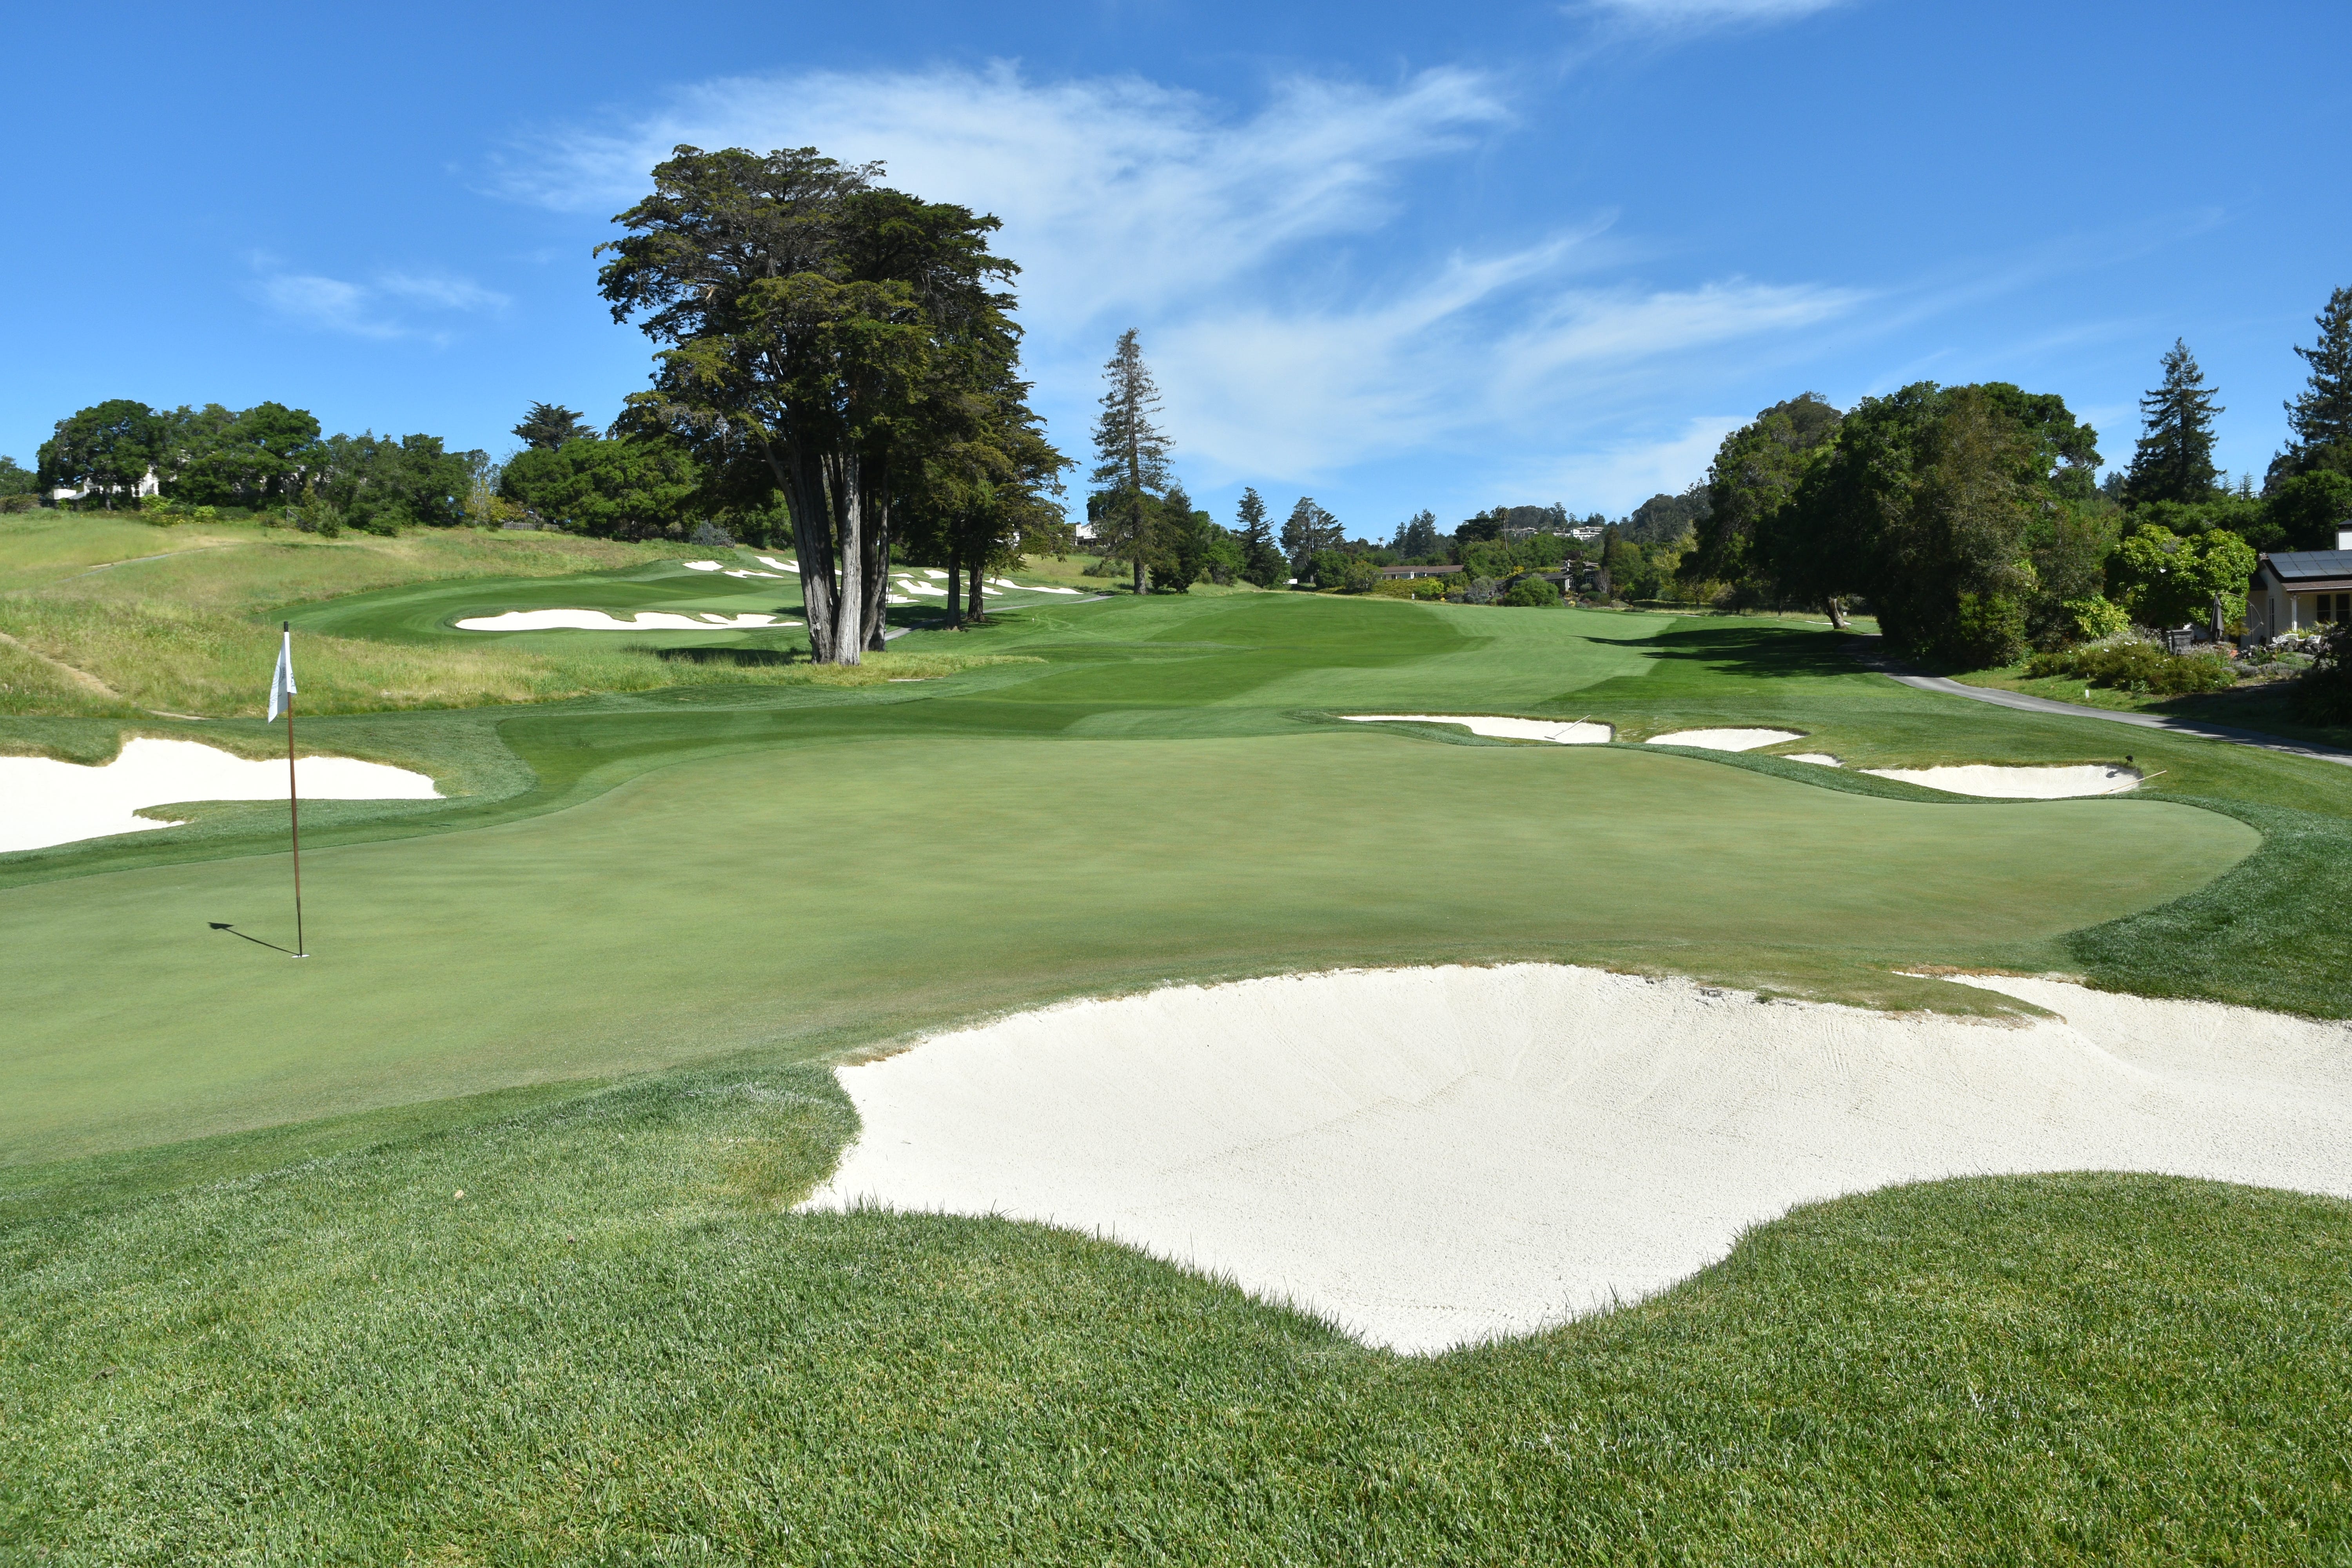
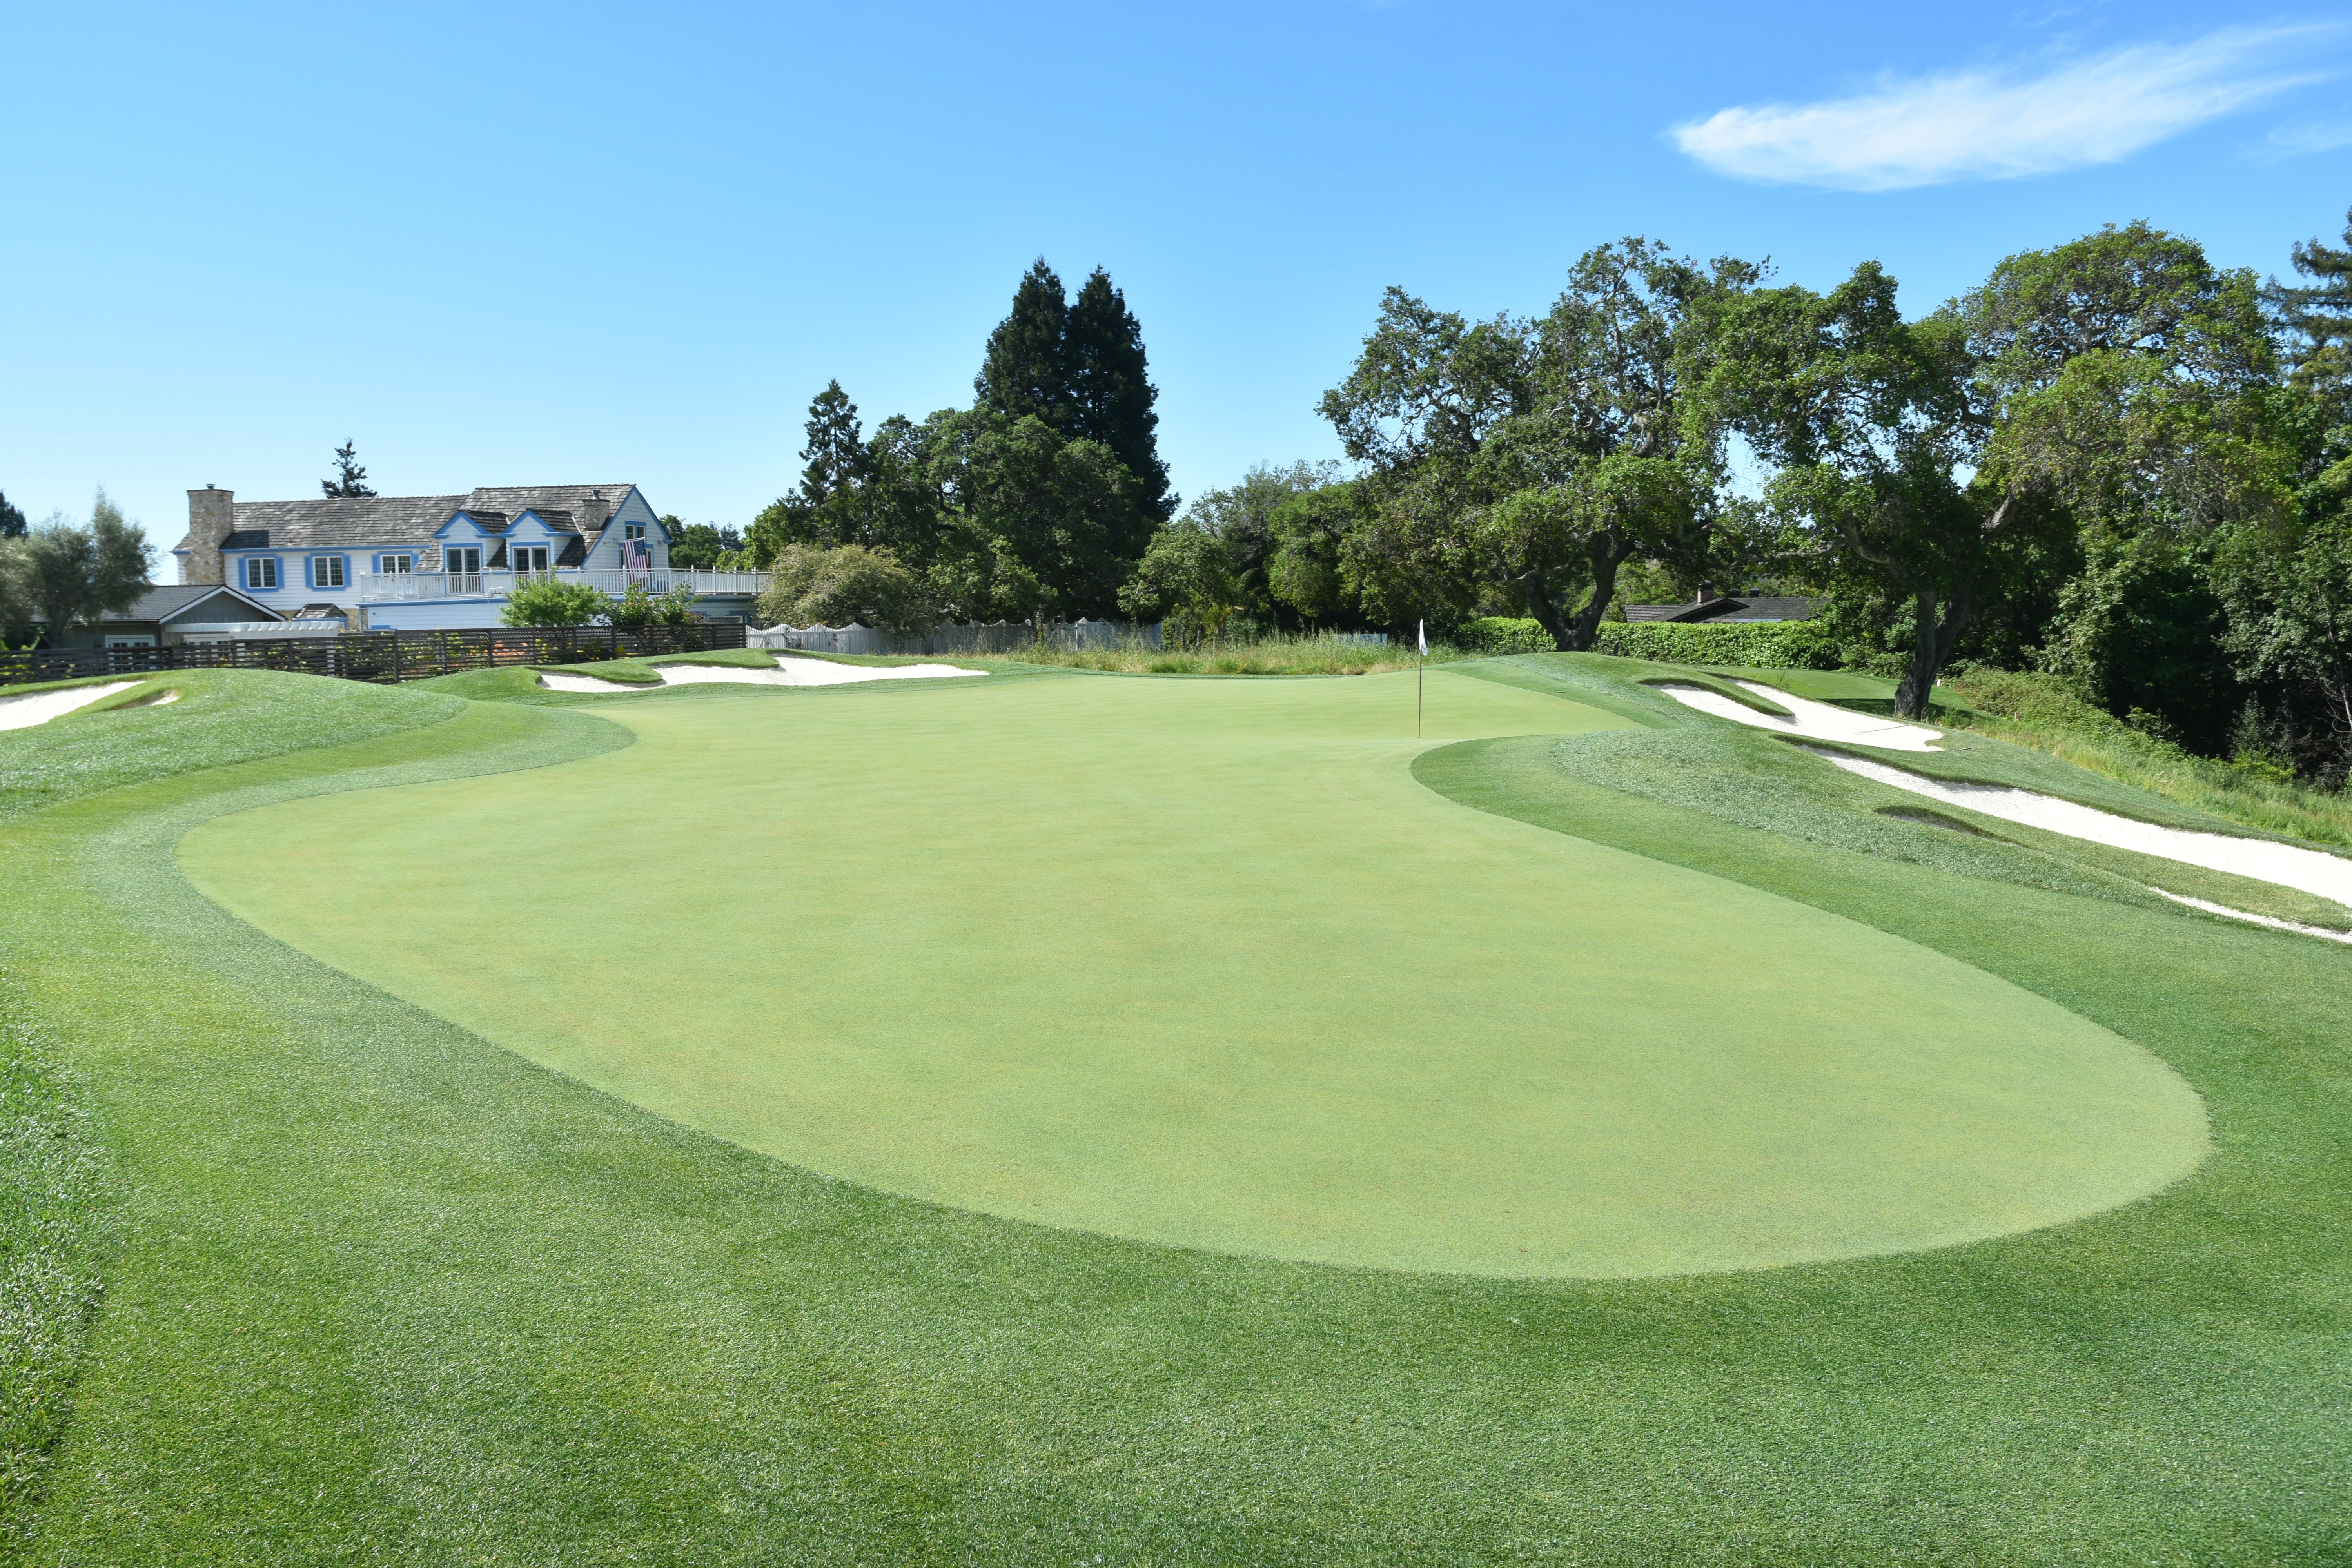
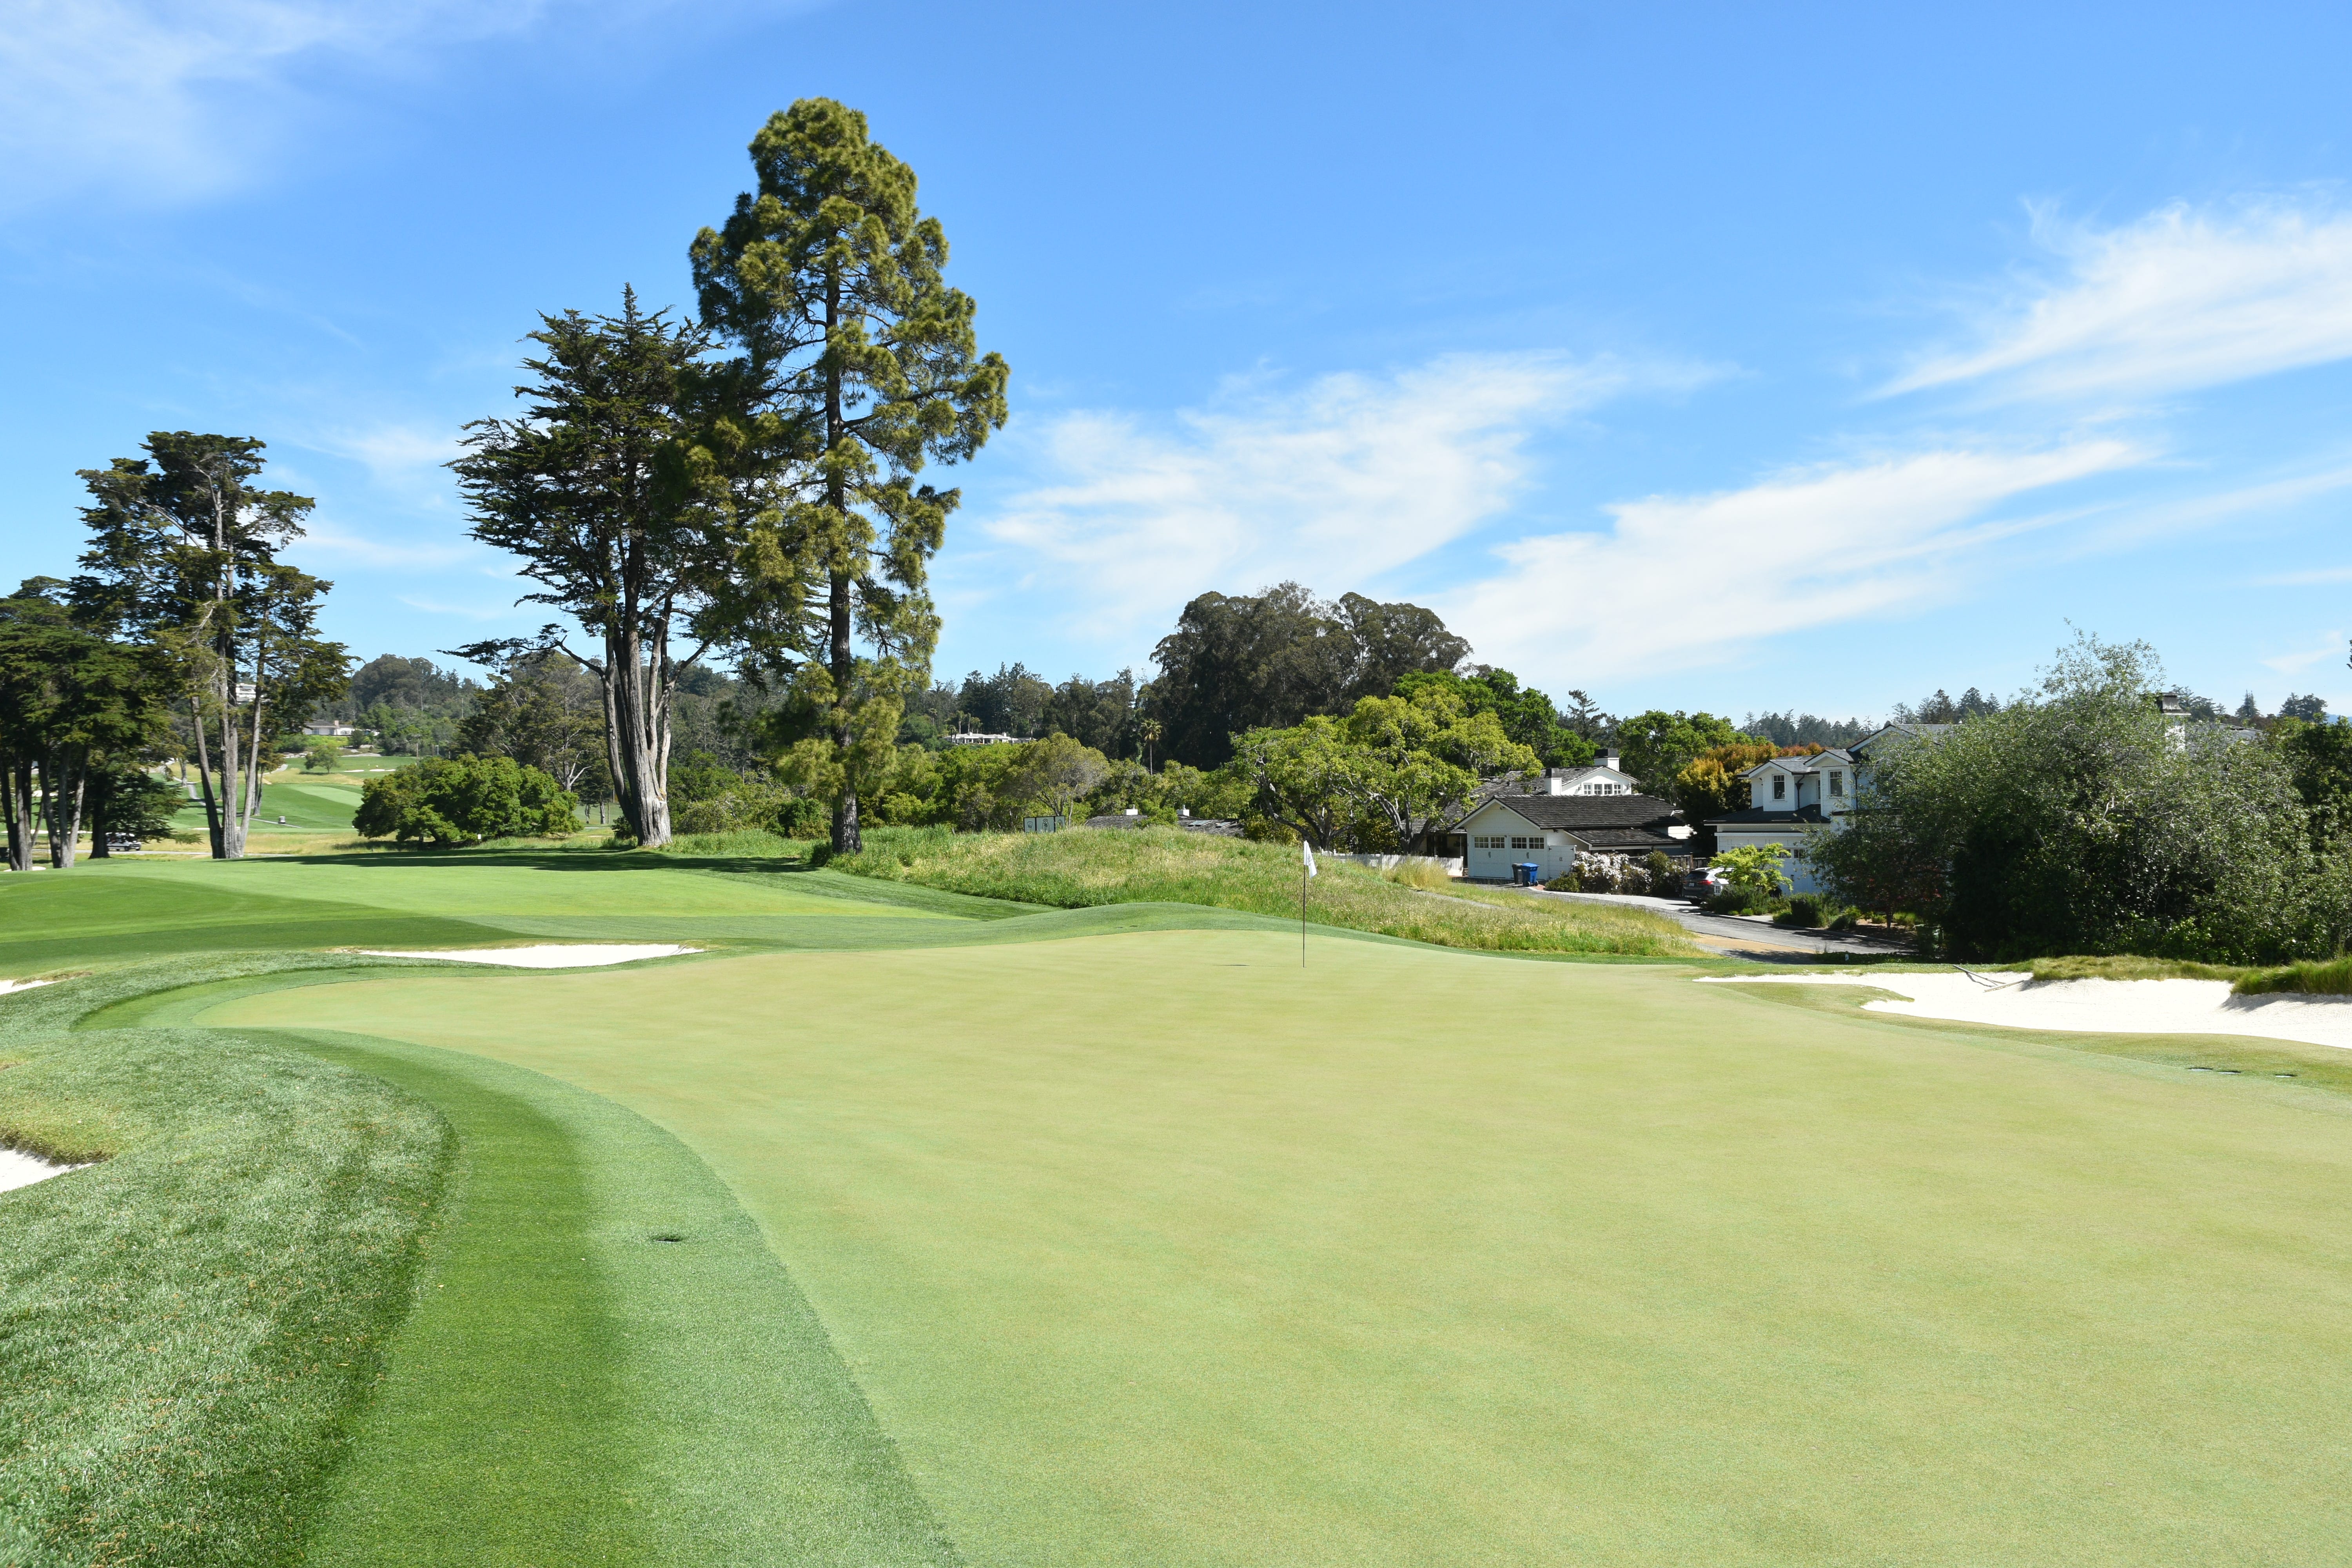
The 1st hole green viewed from the back left
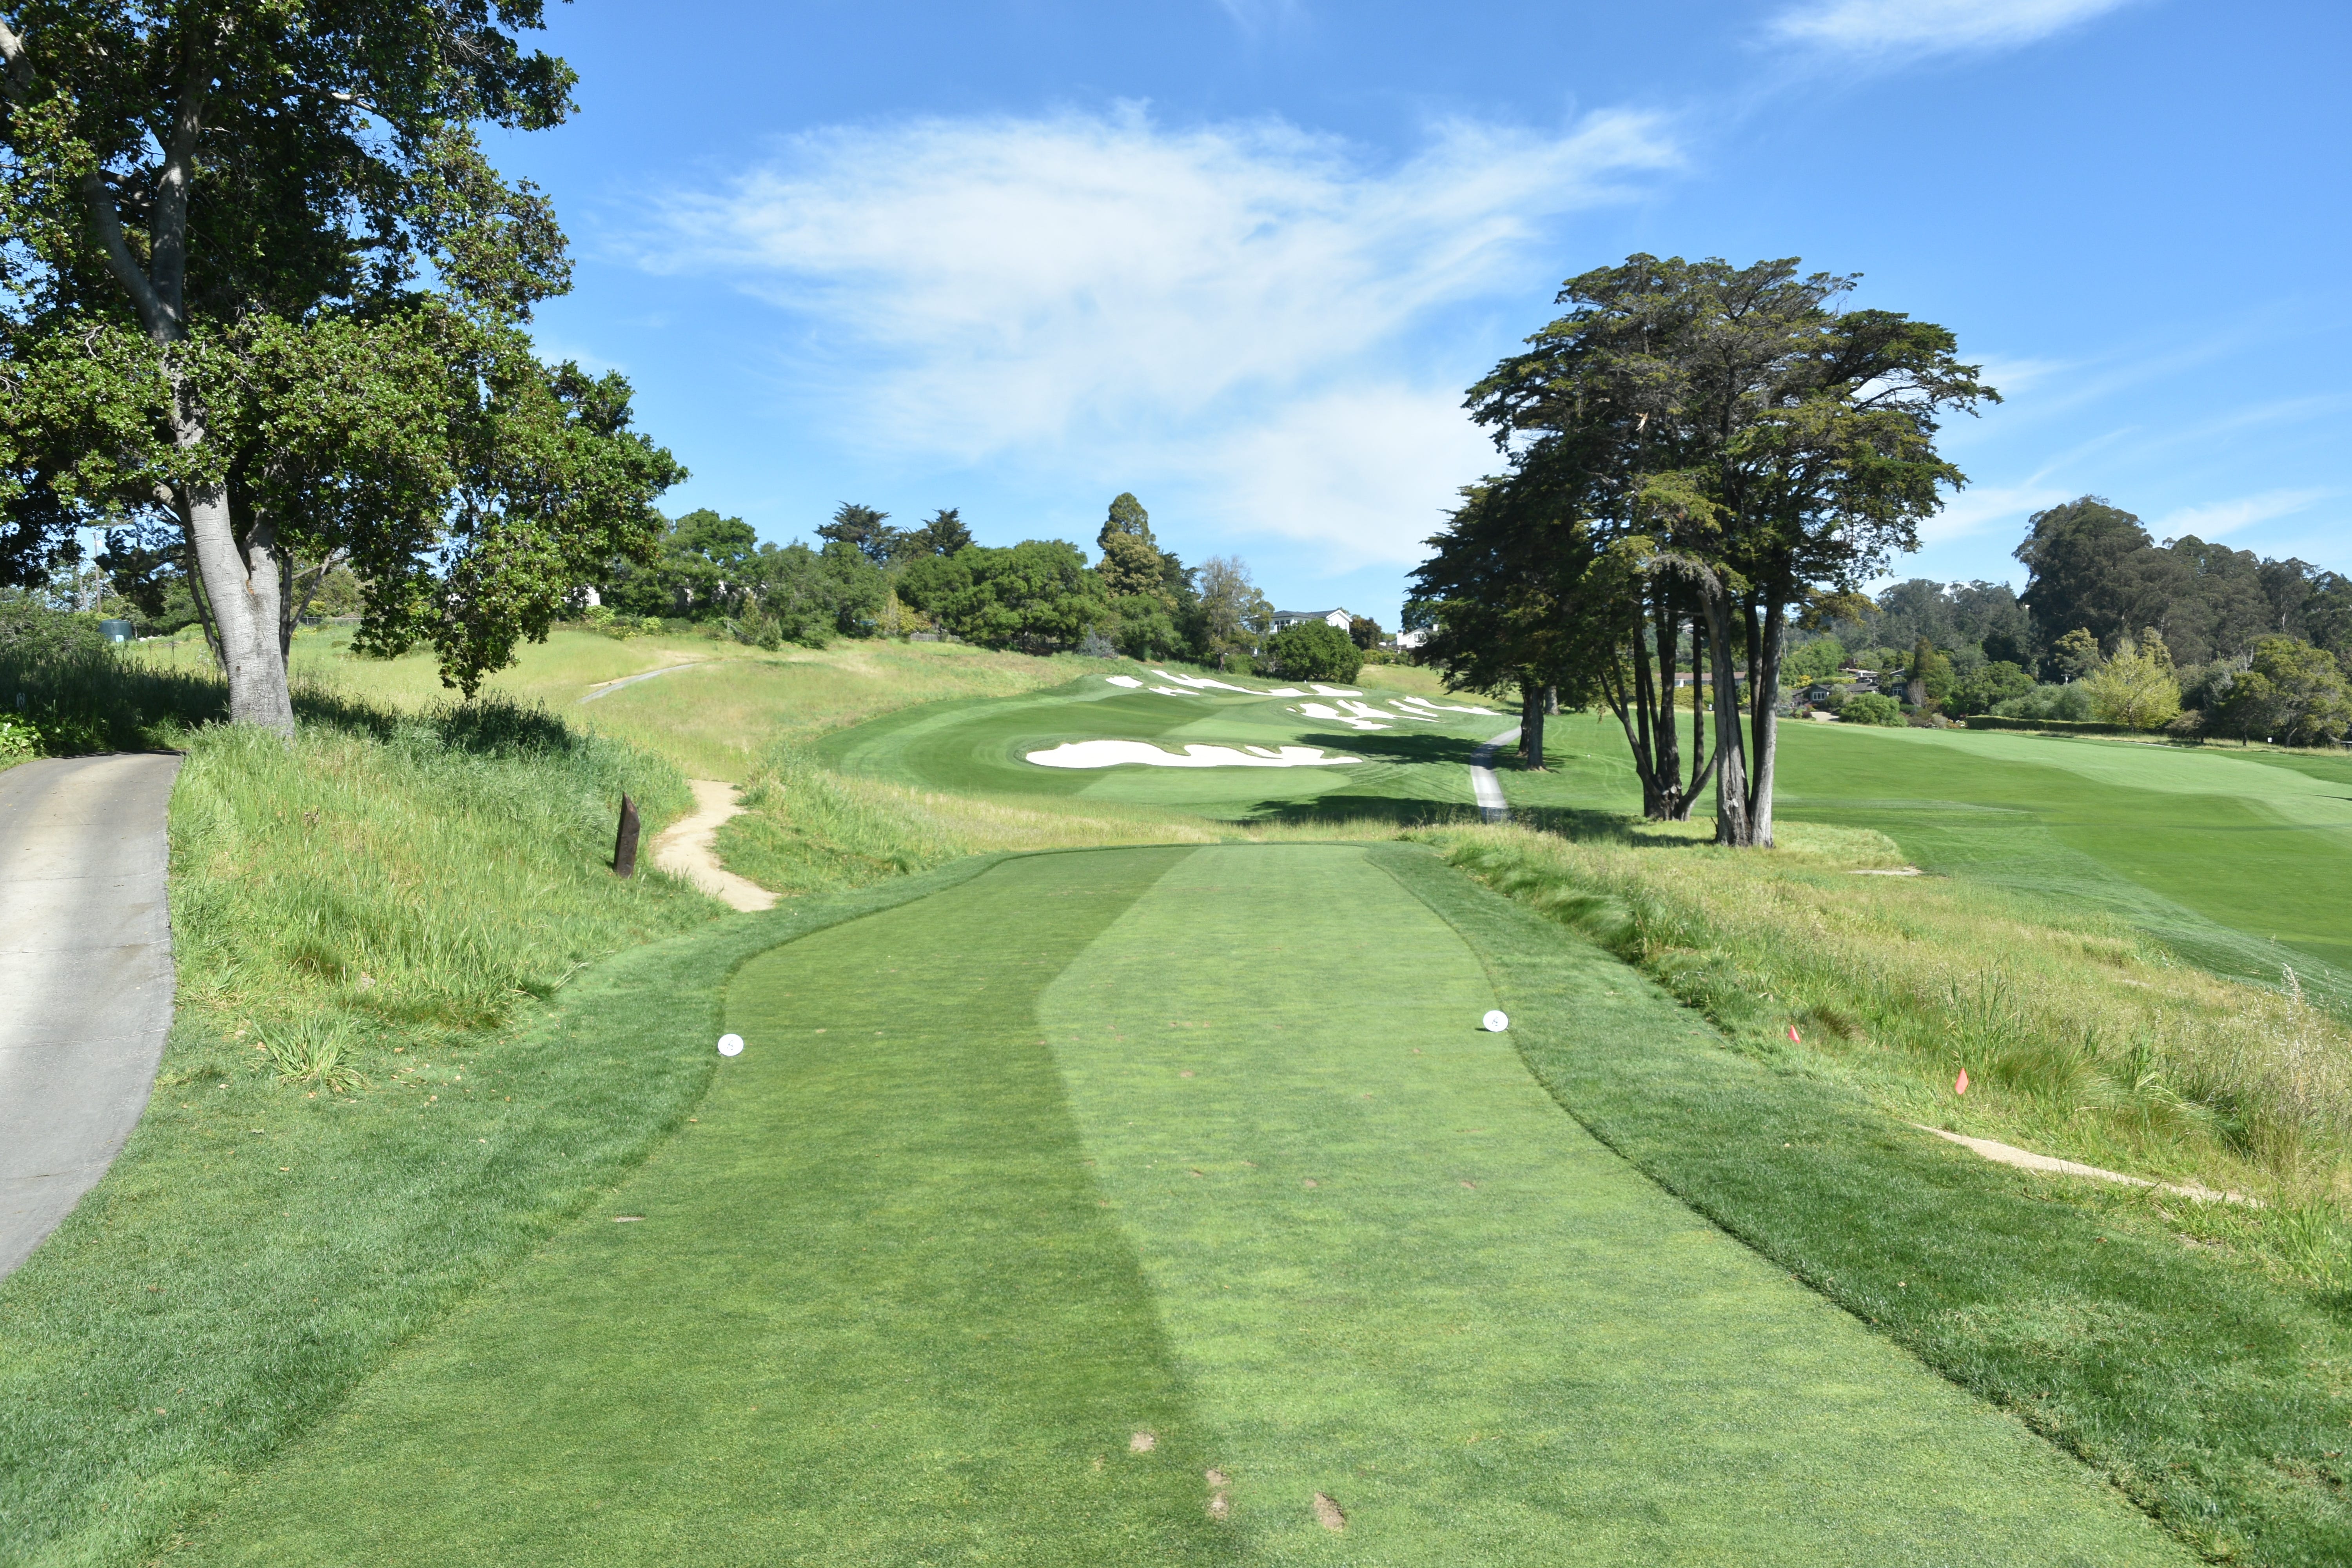
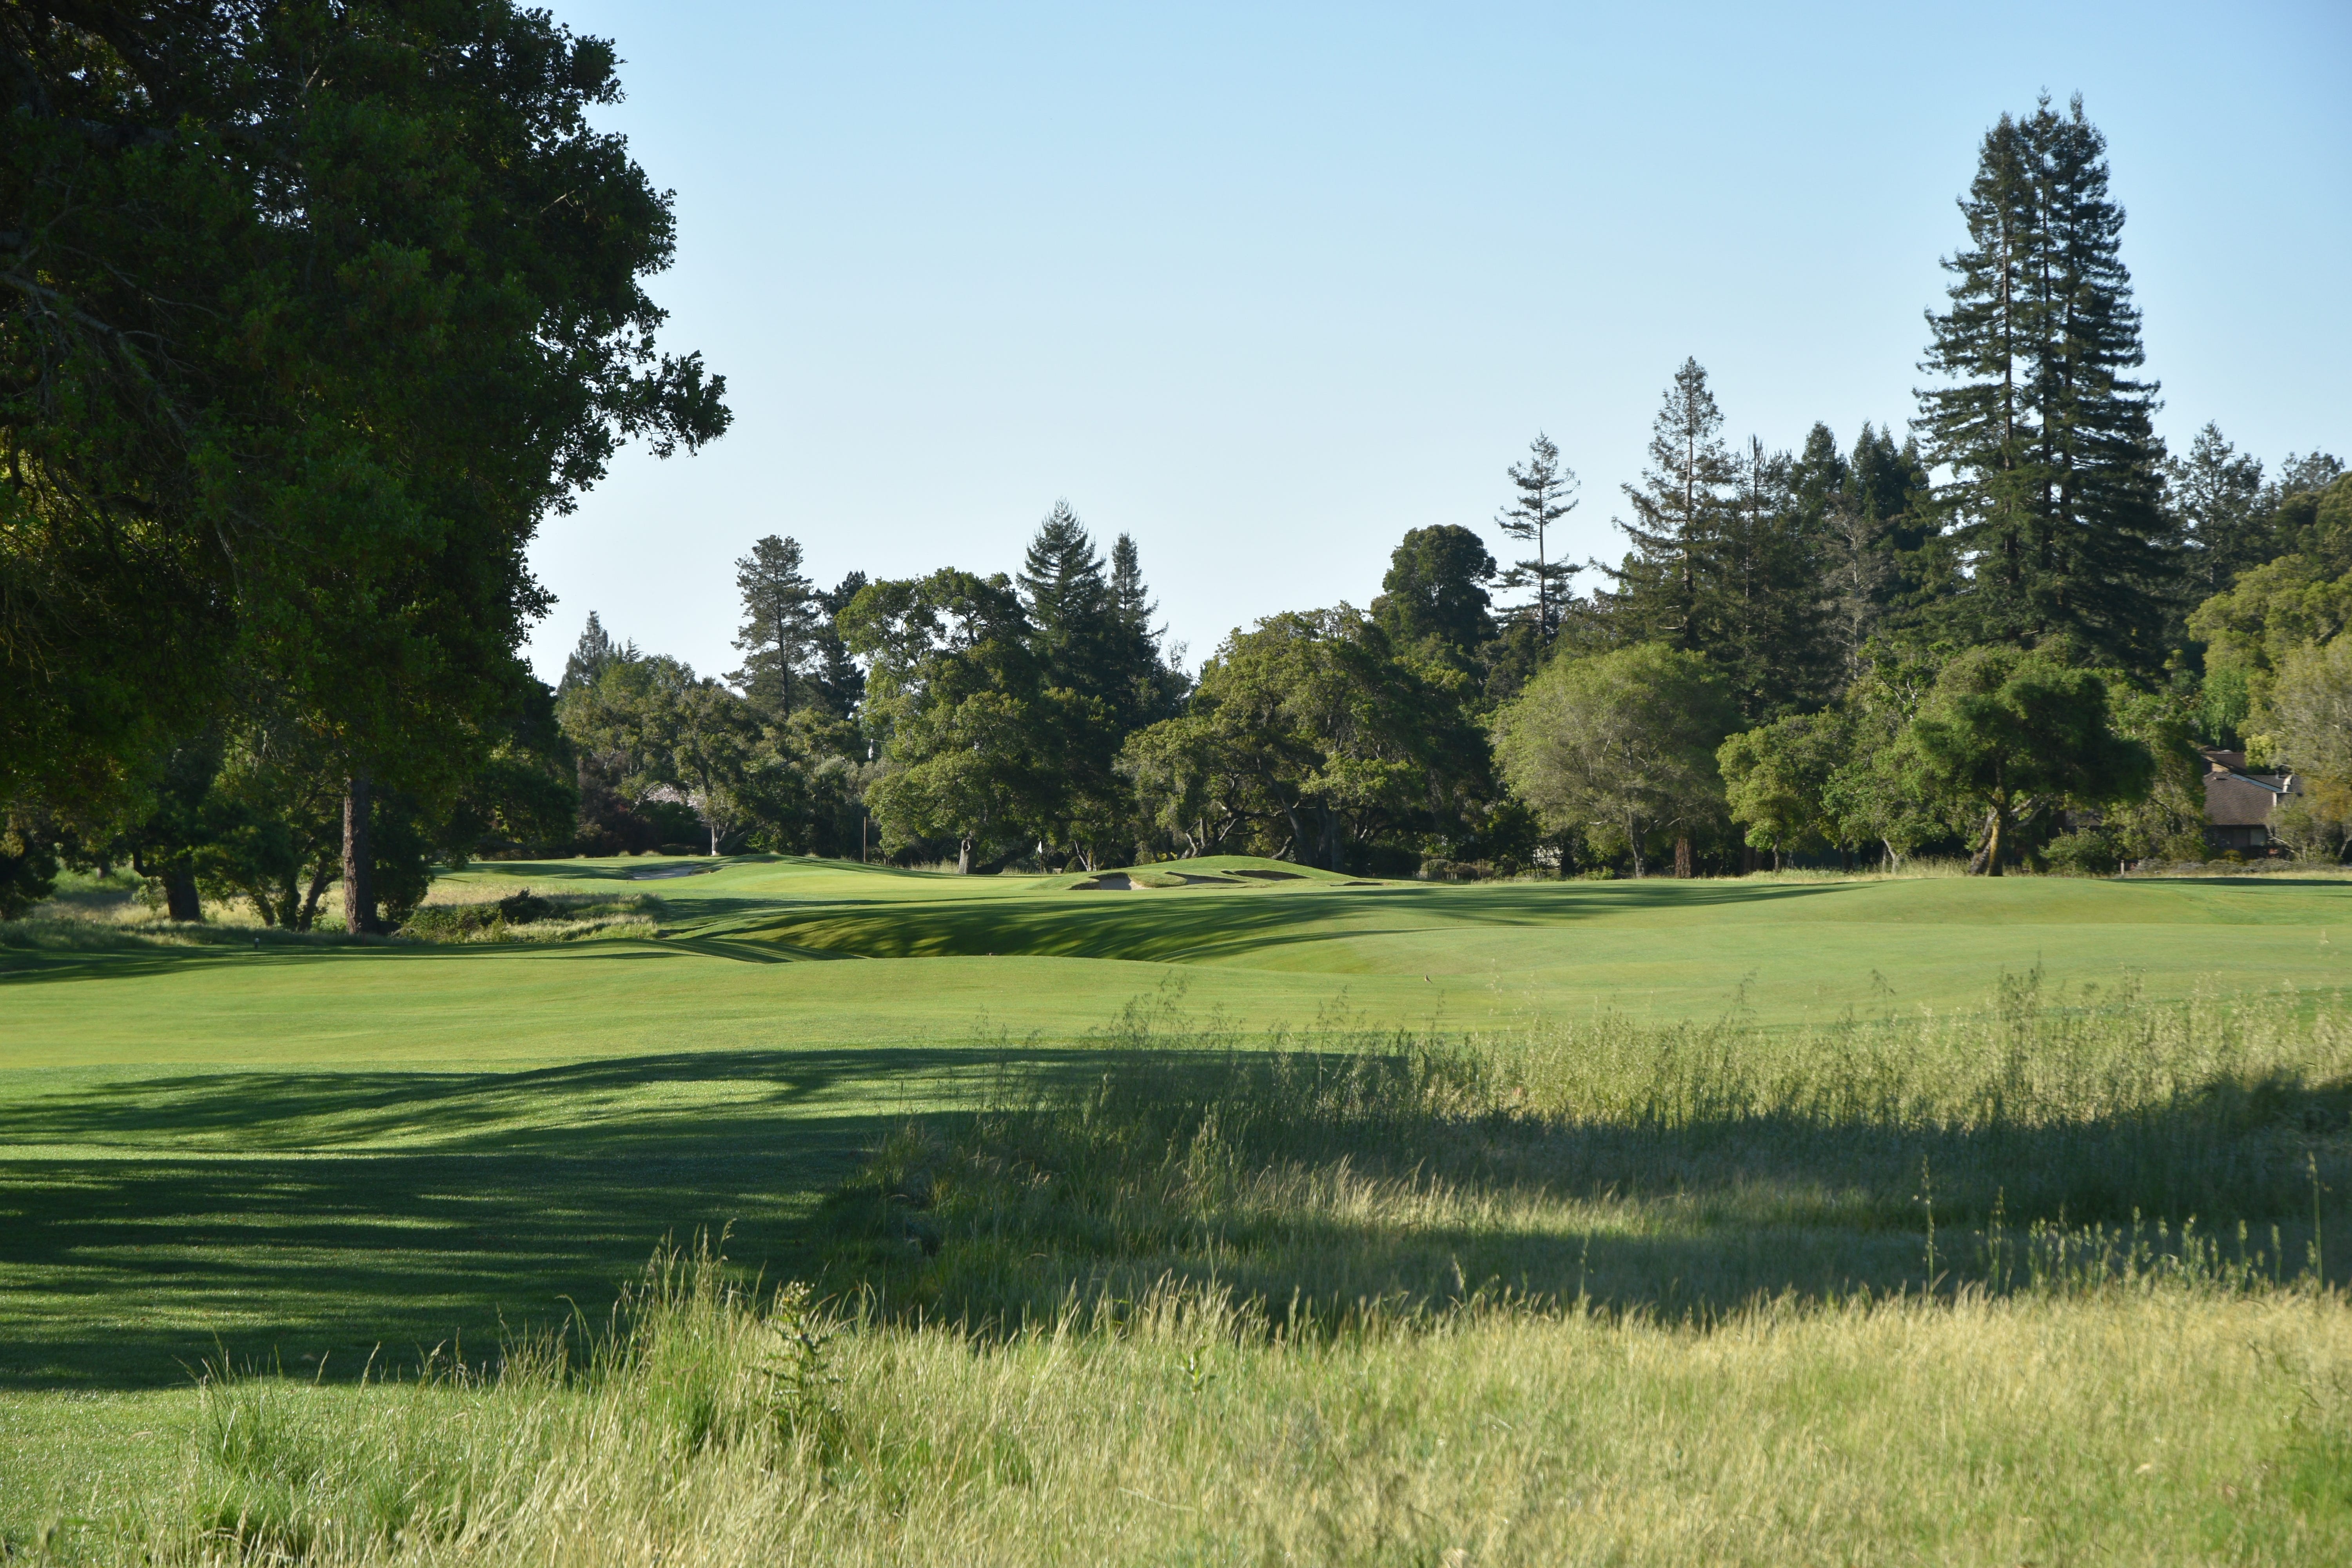
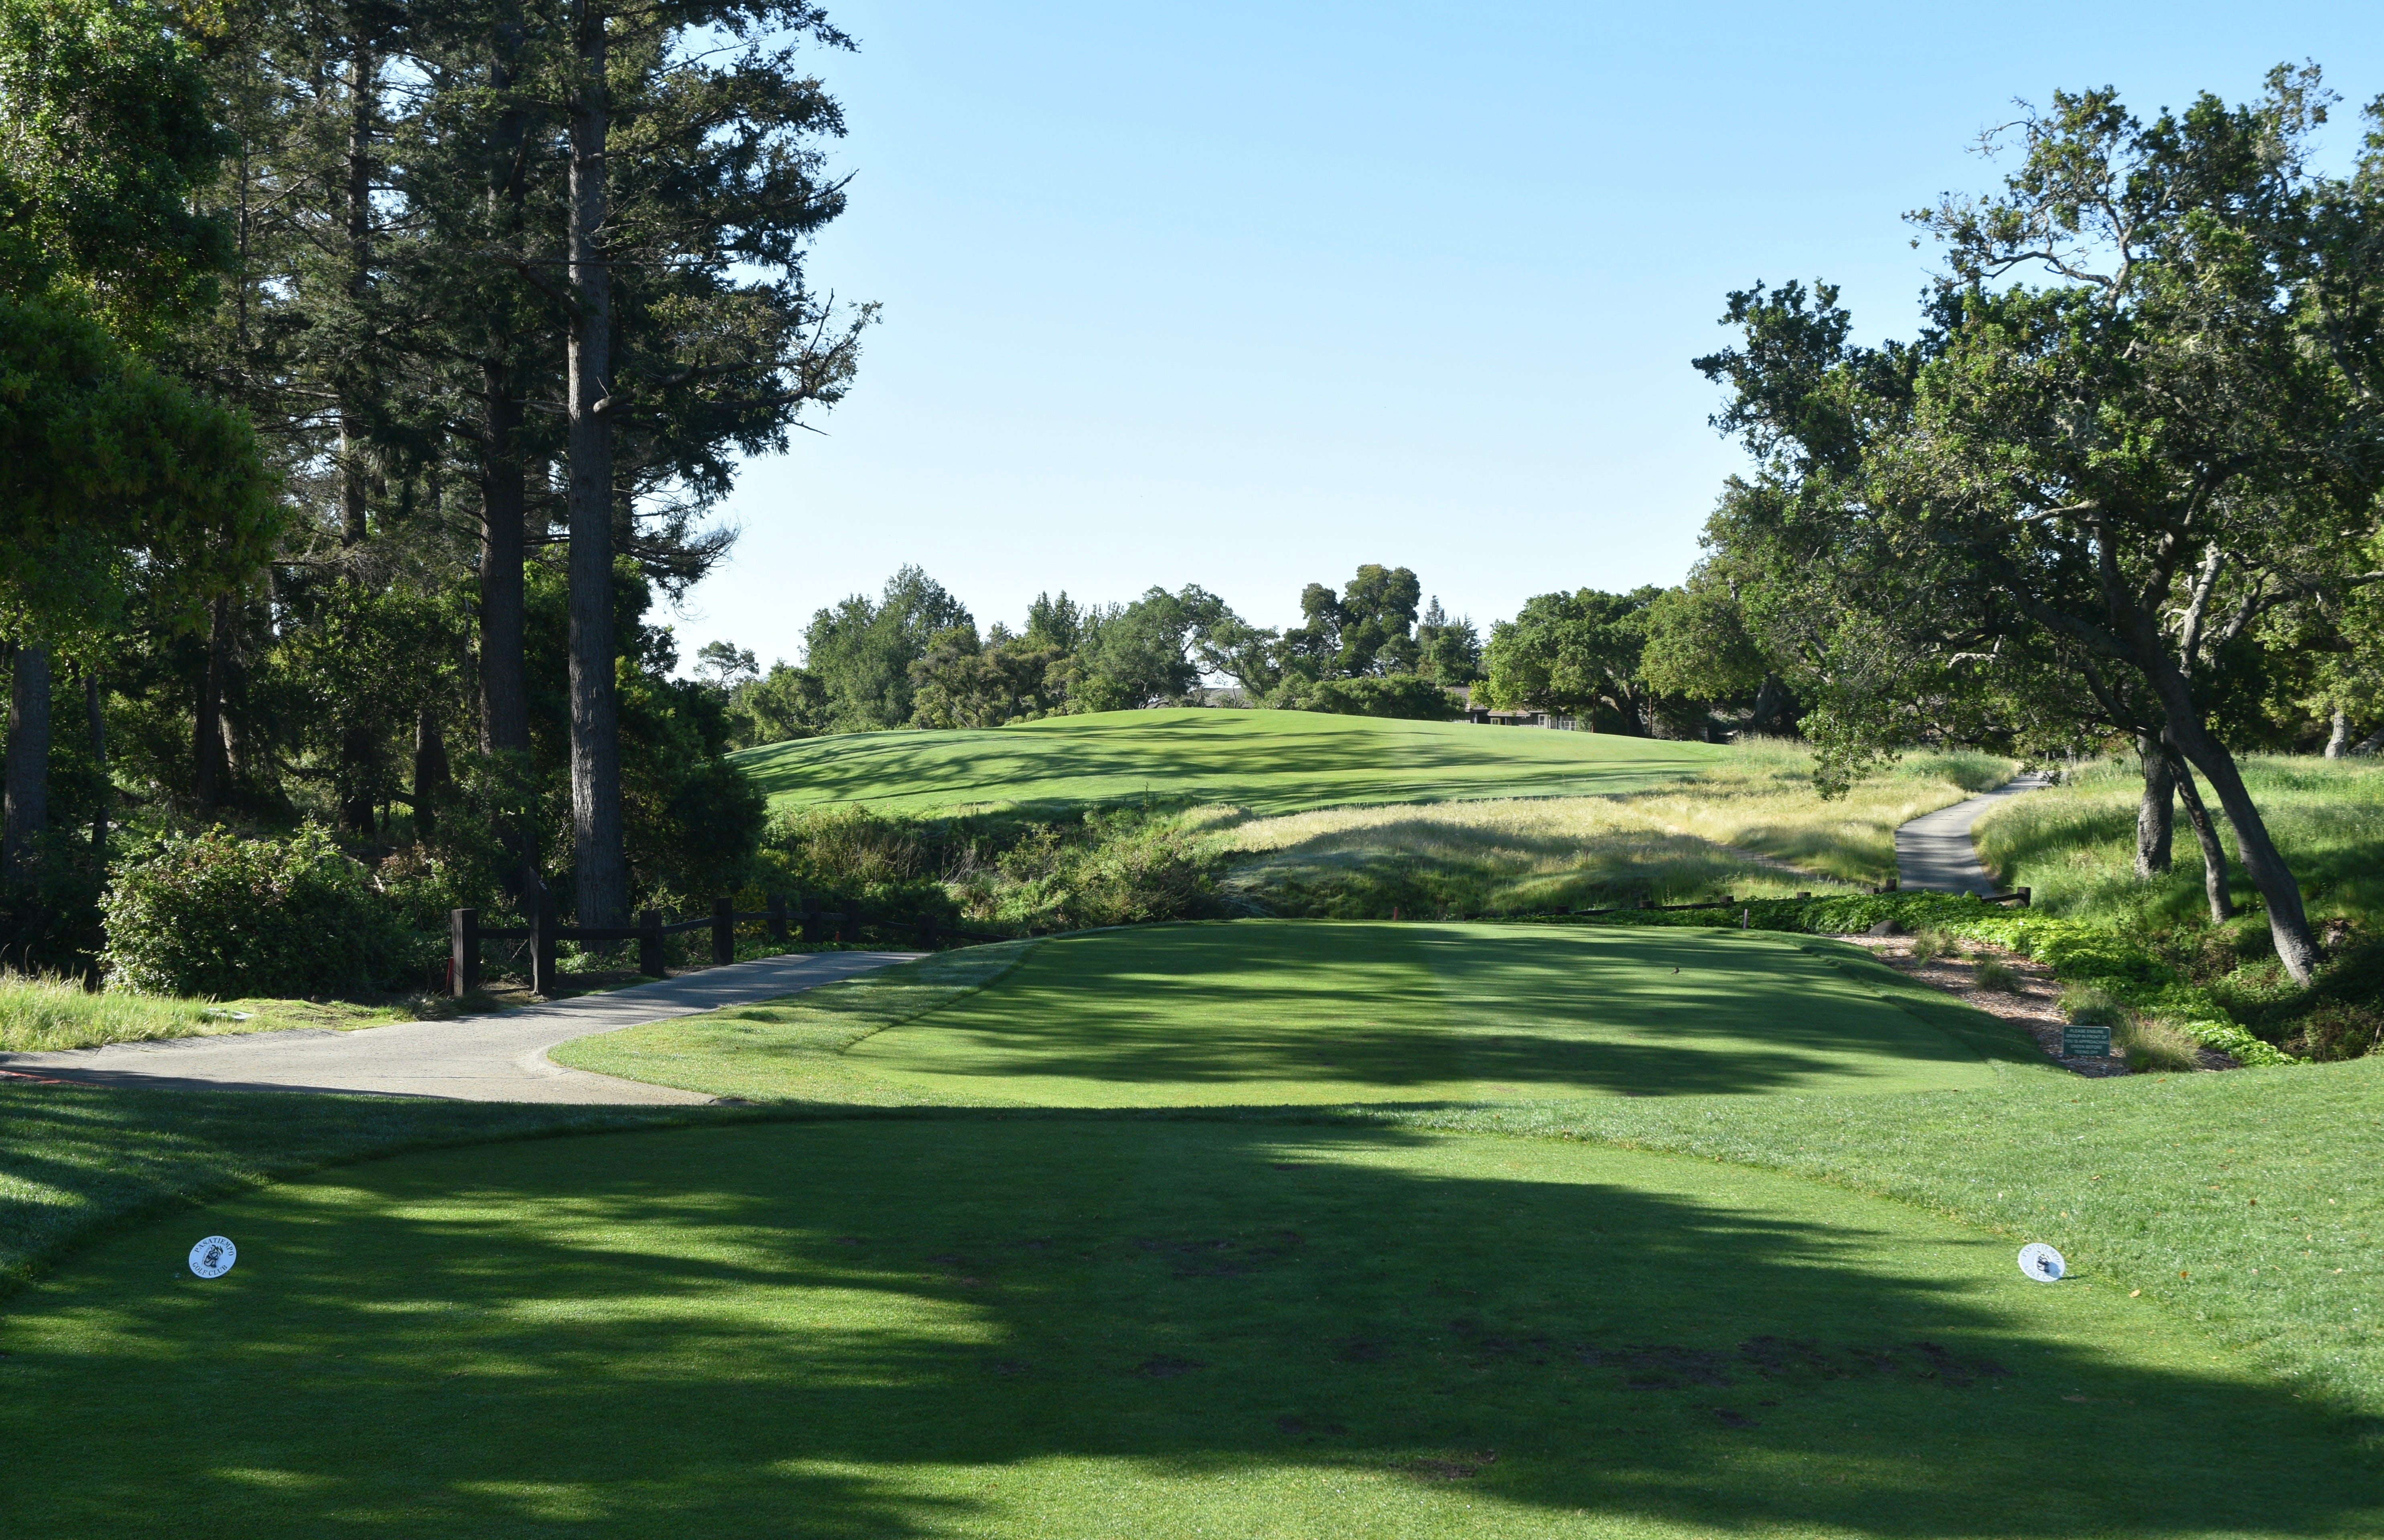
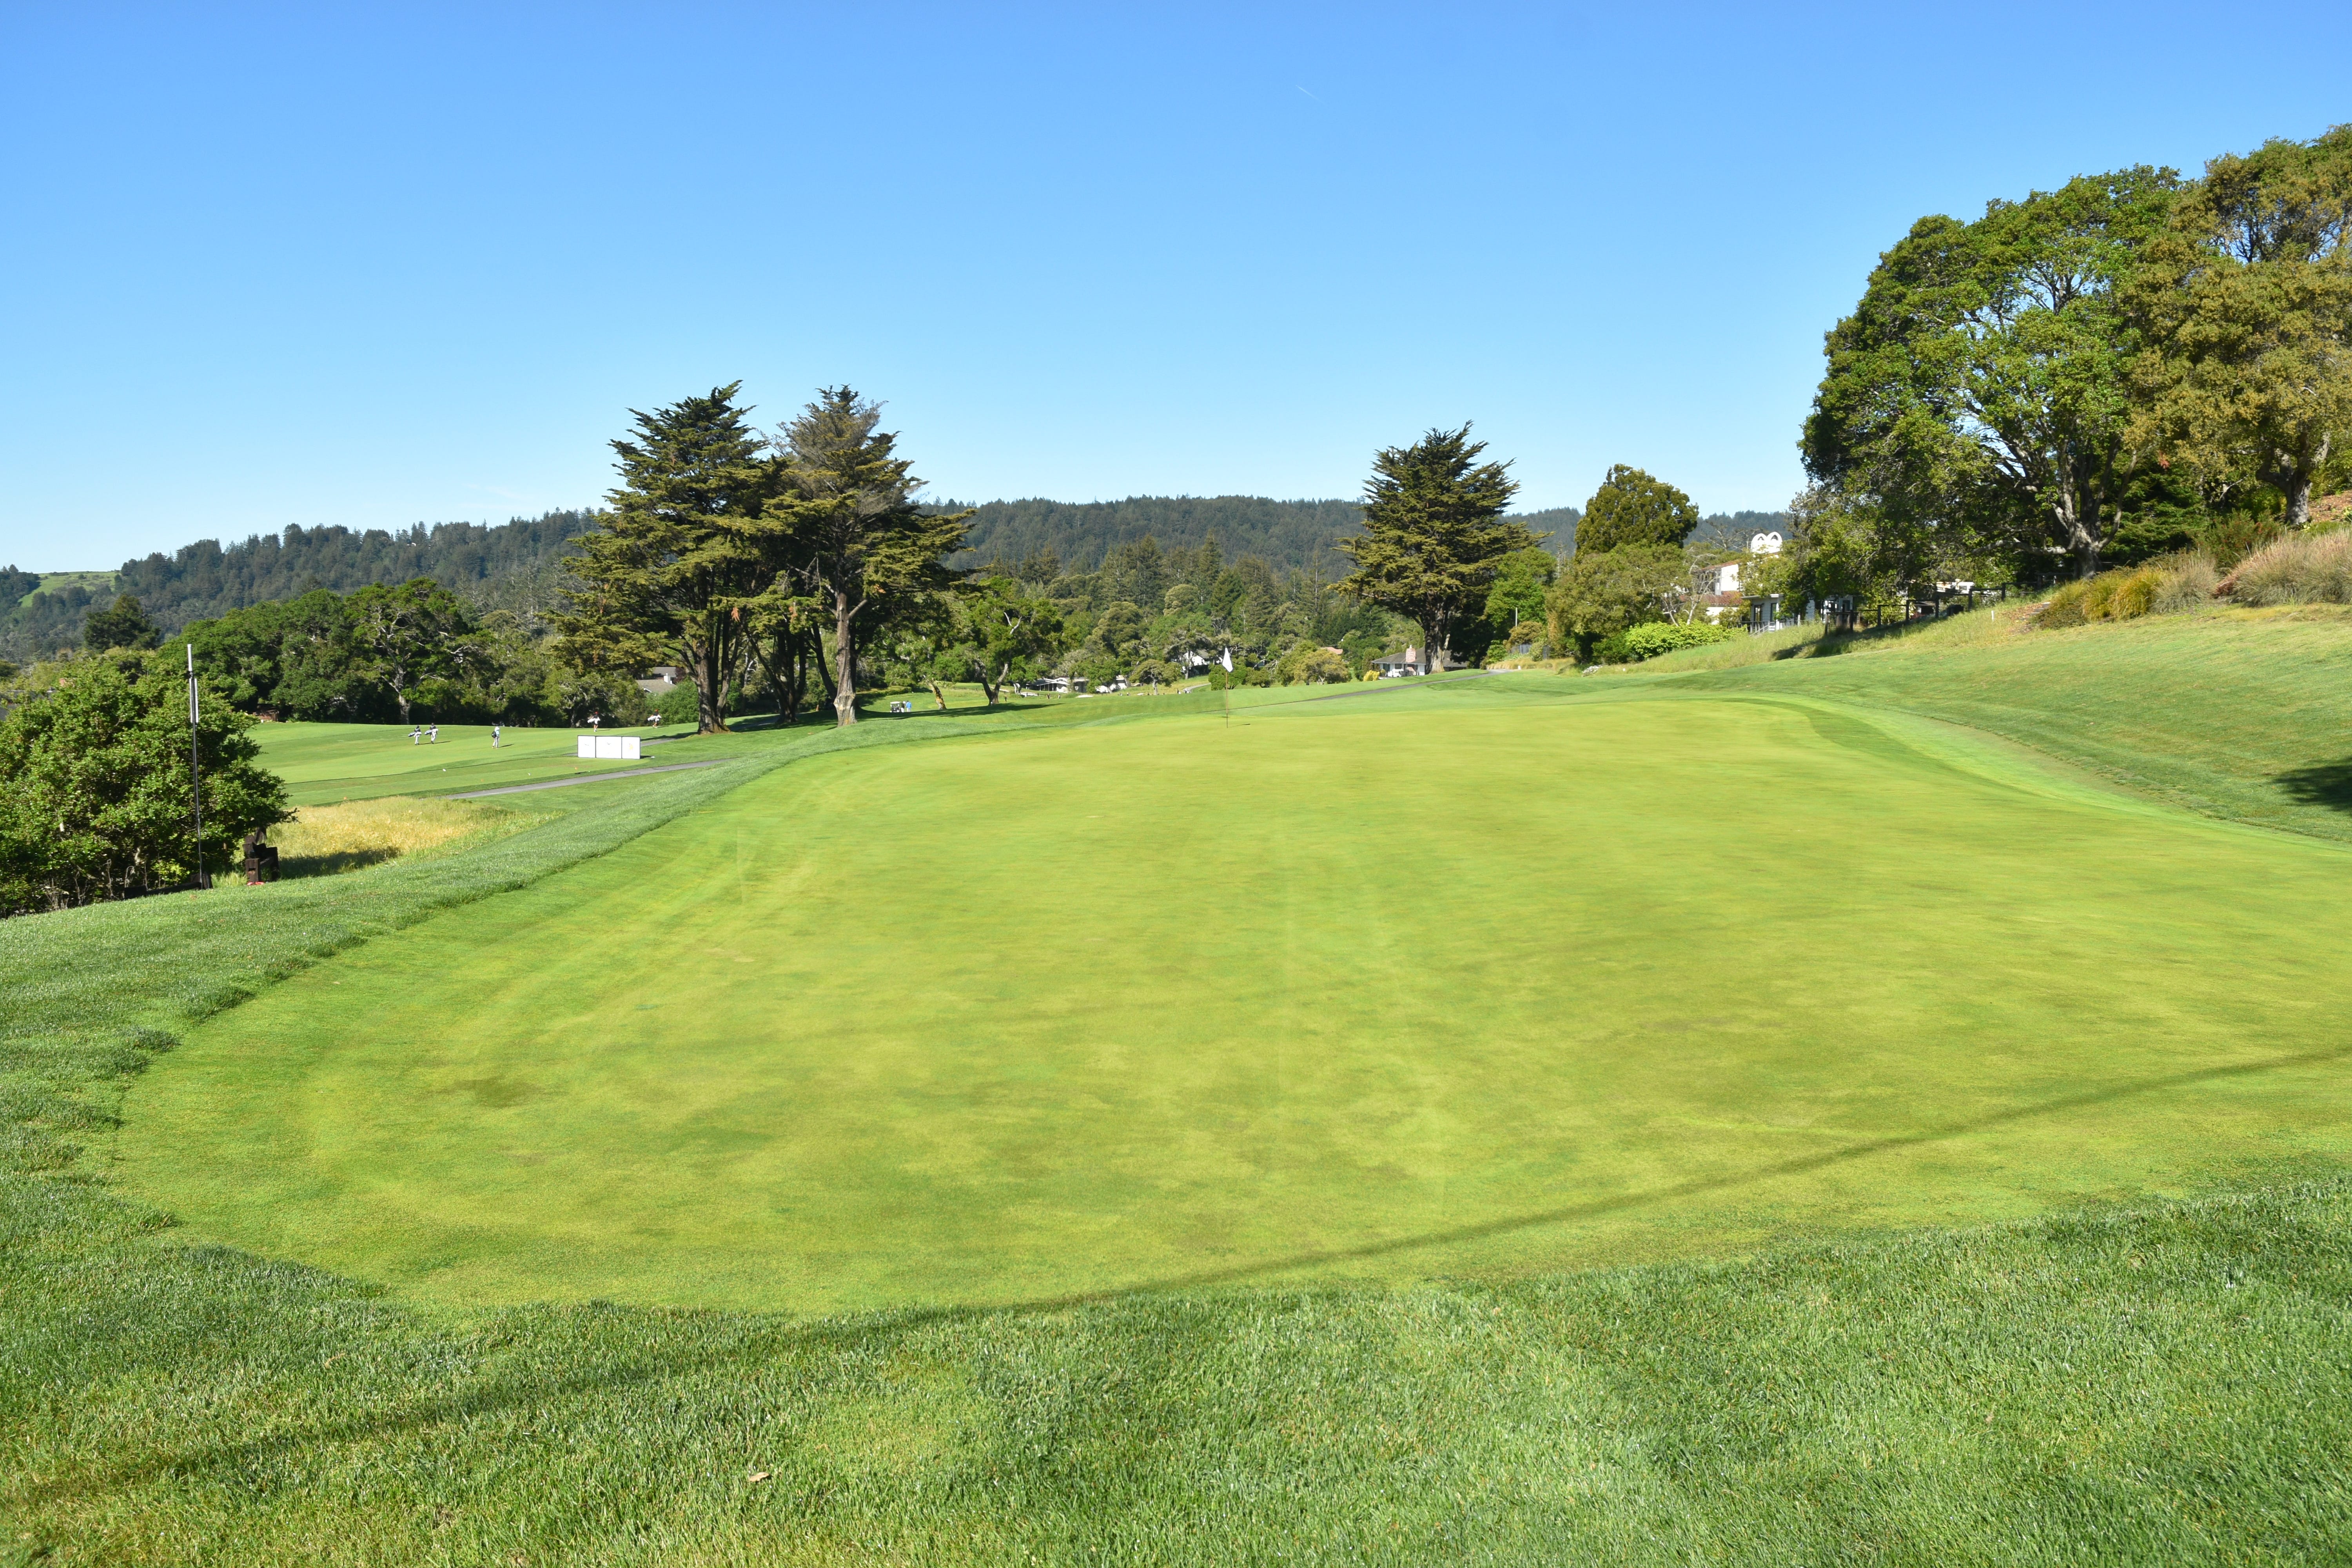
Hole 2: Par 4, 430 Yards
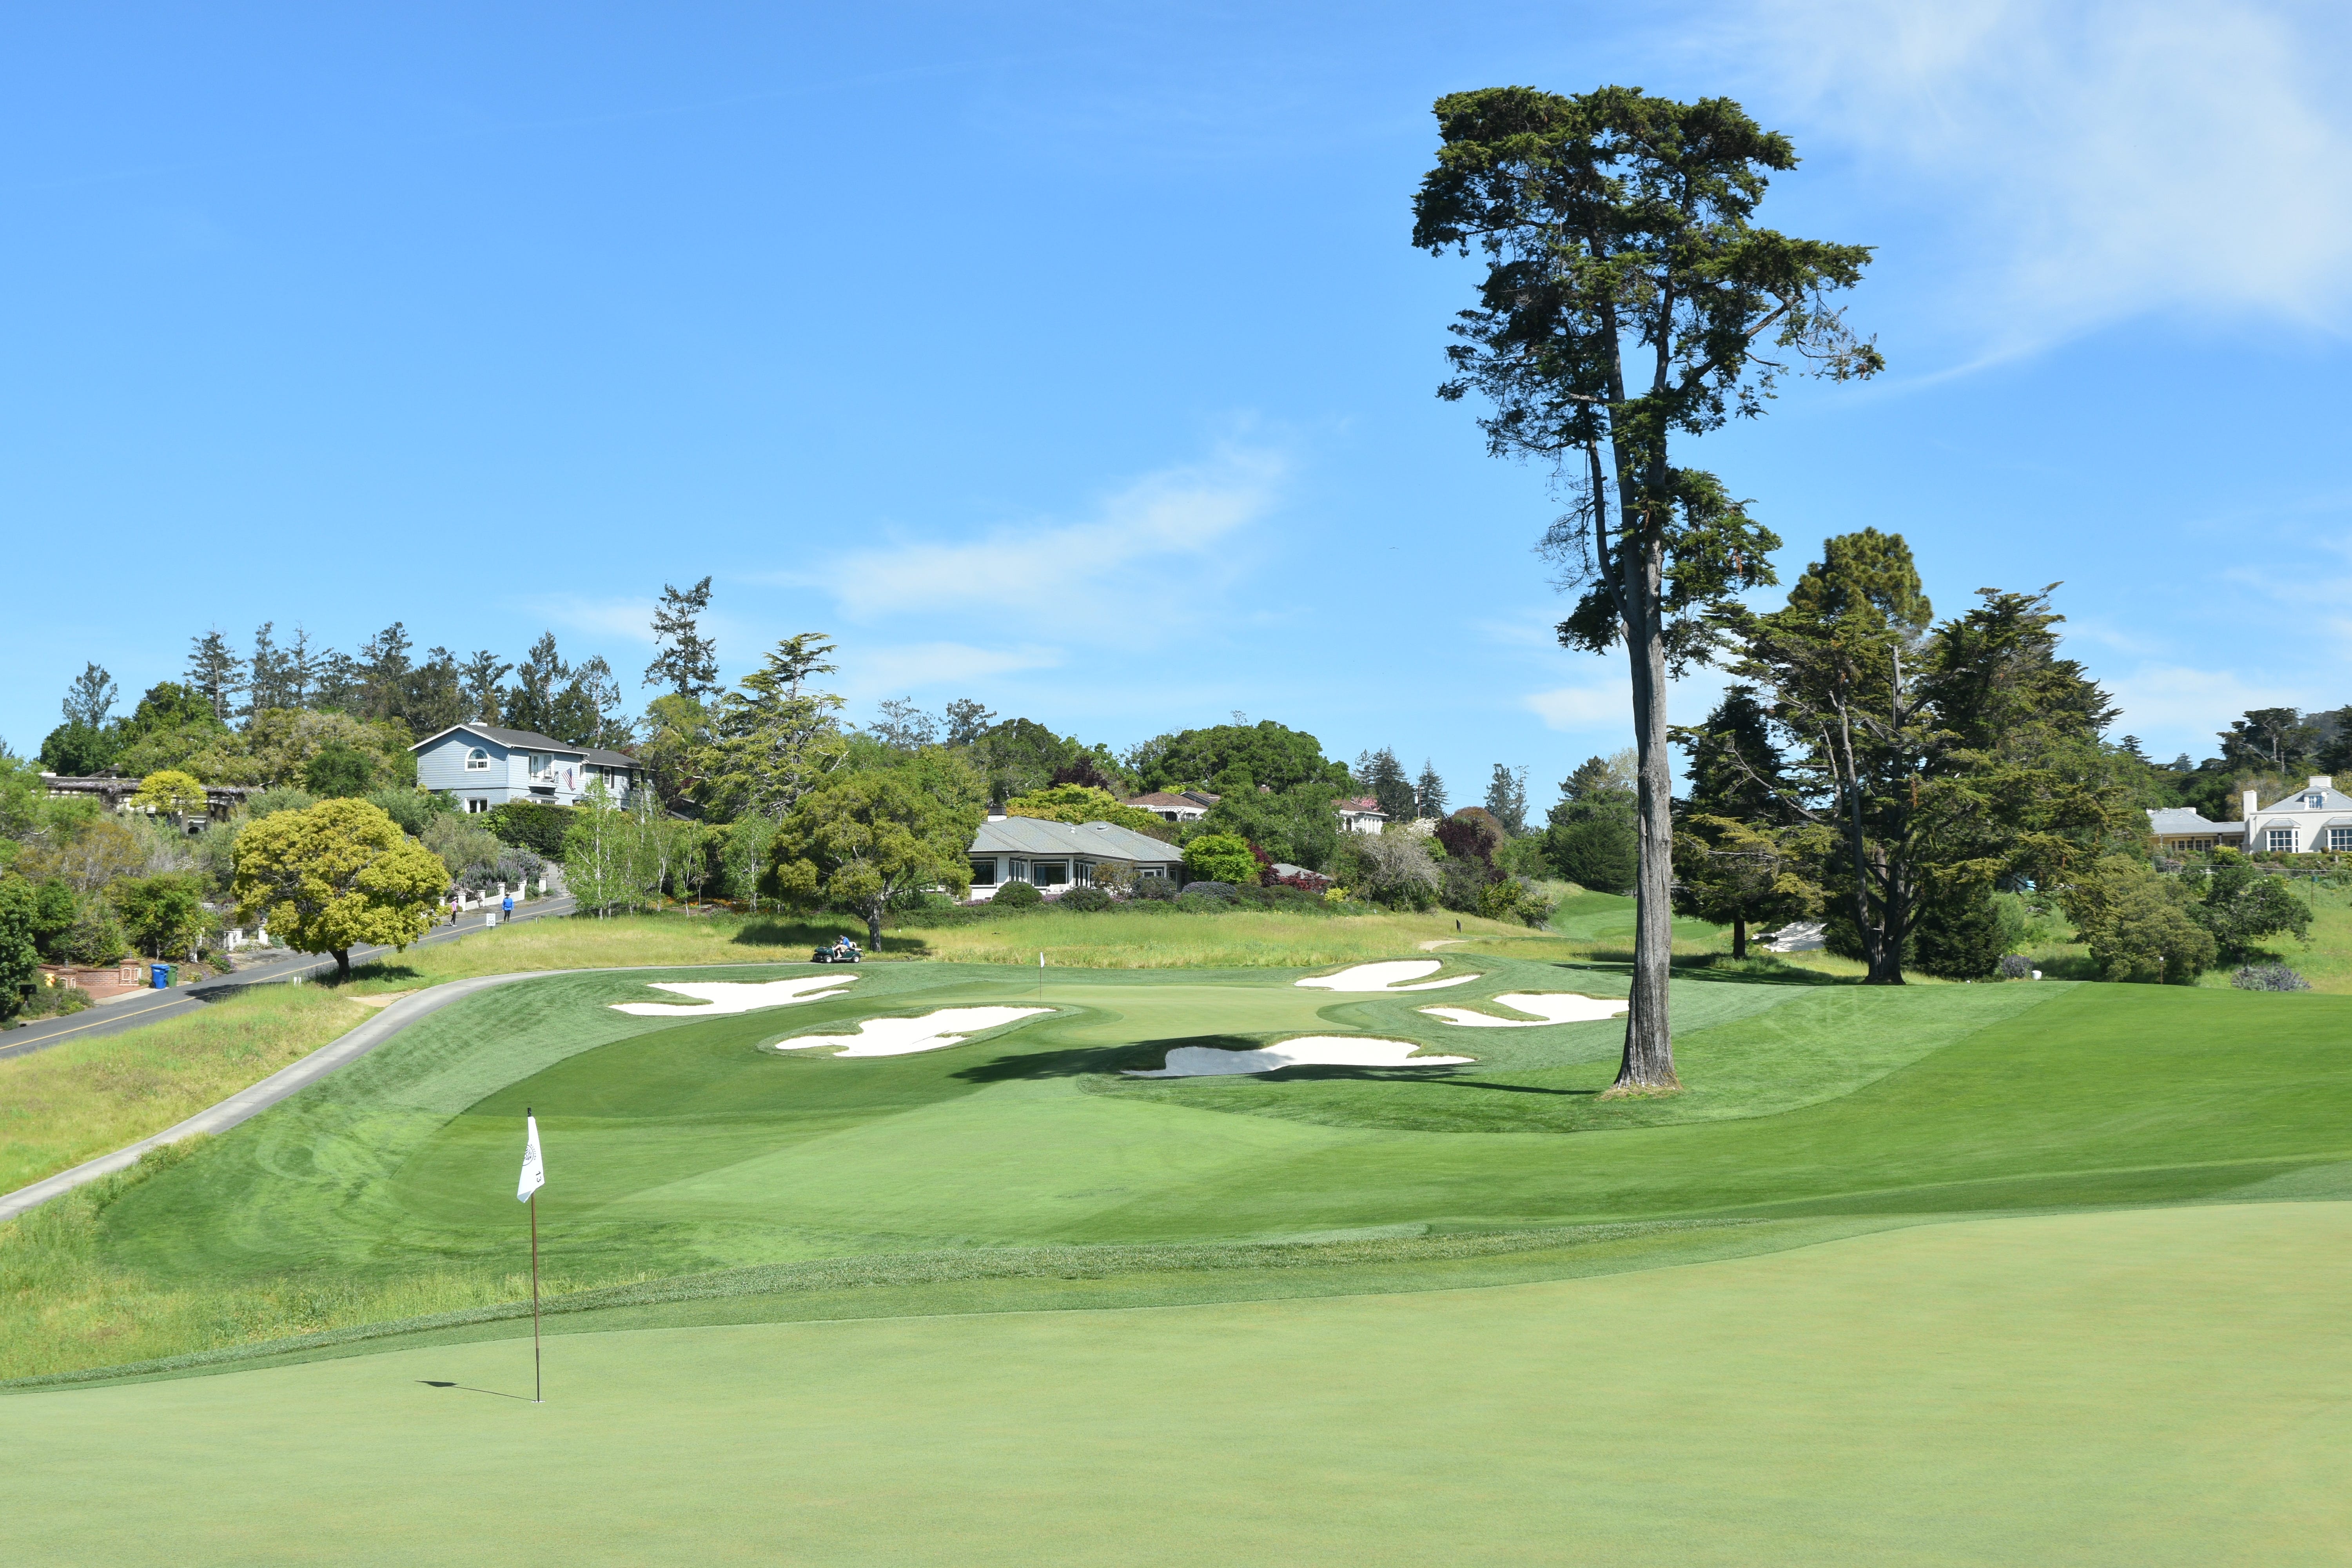
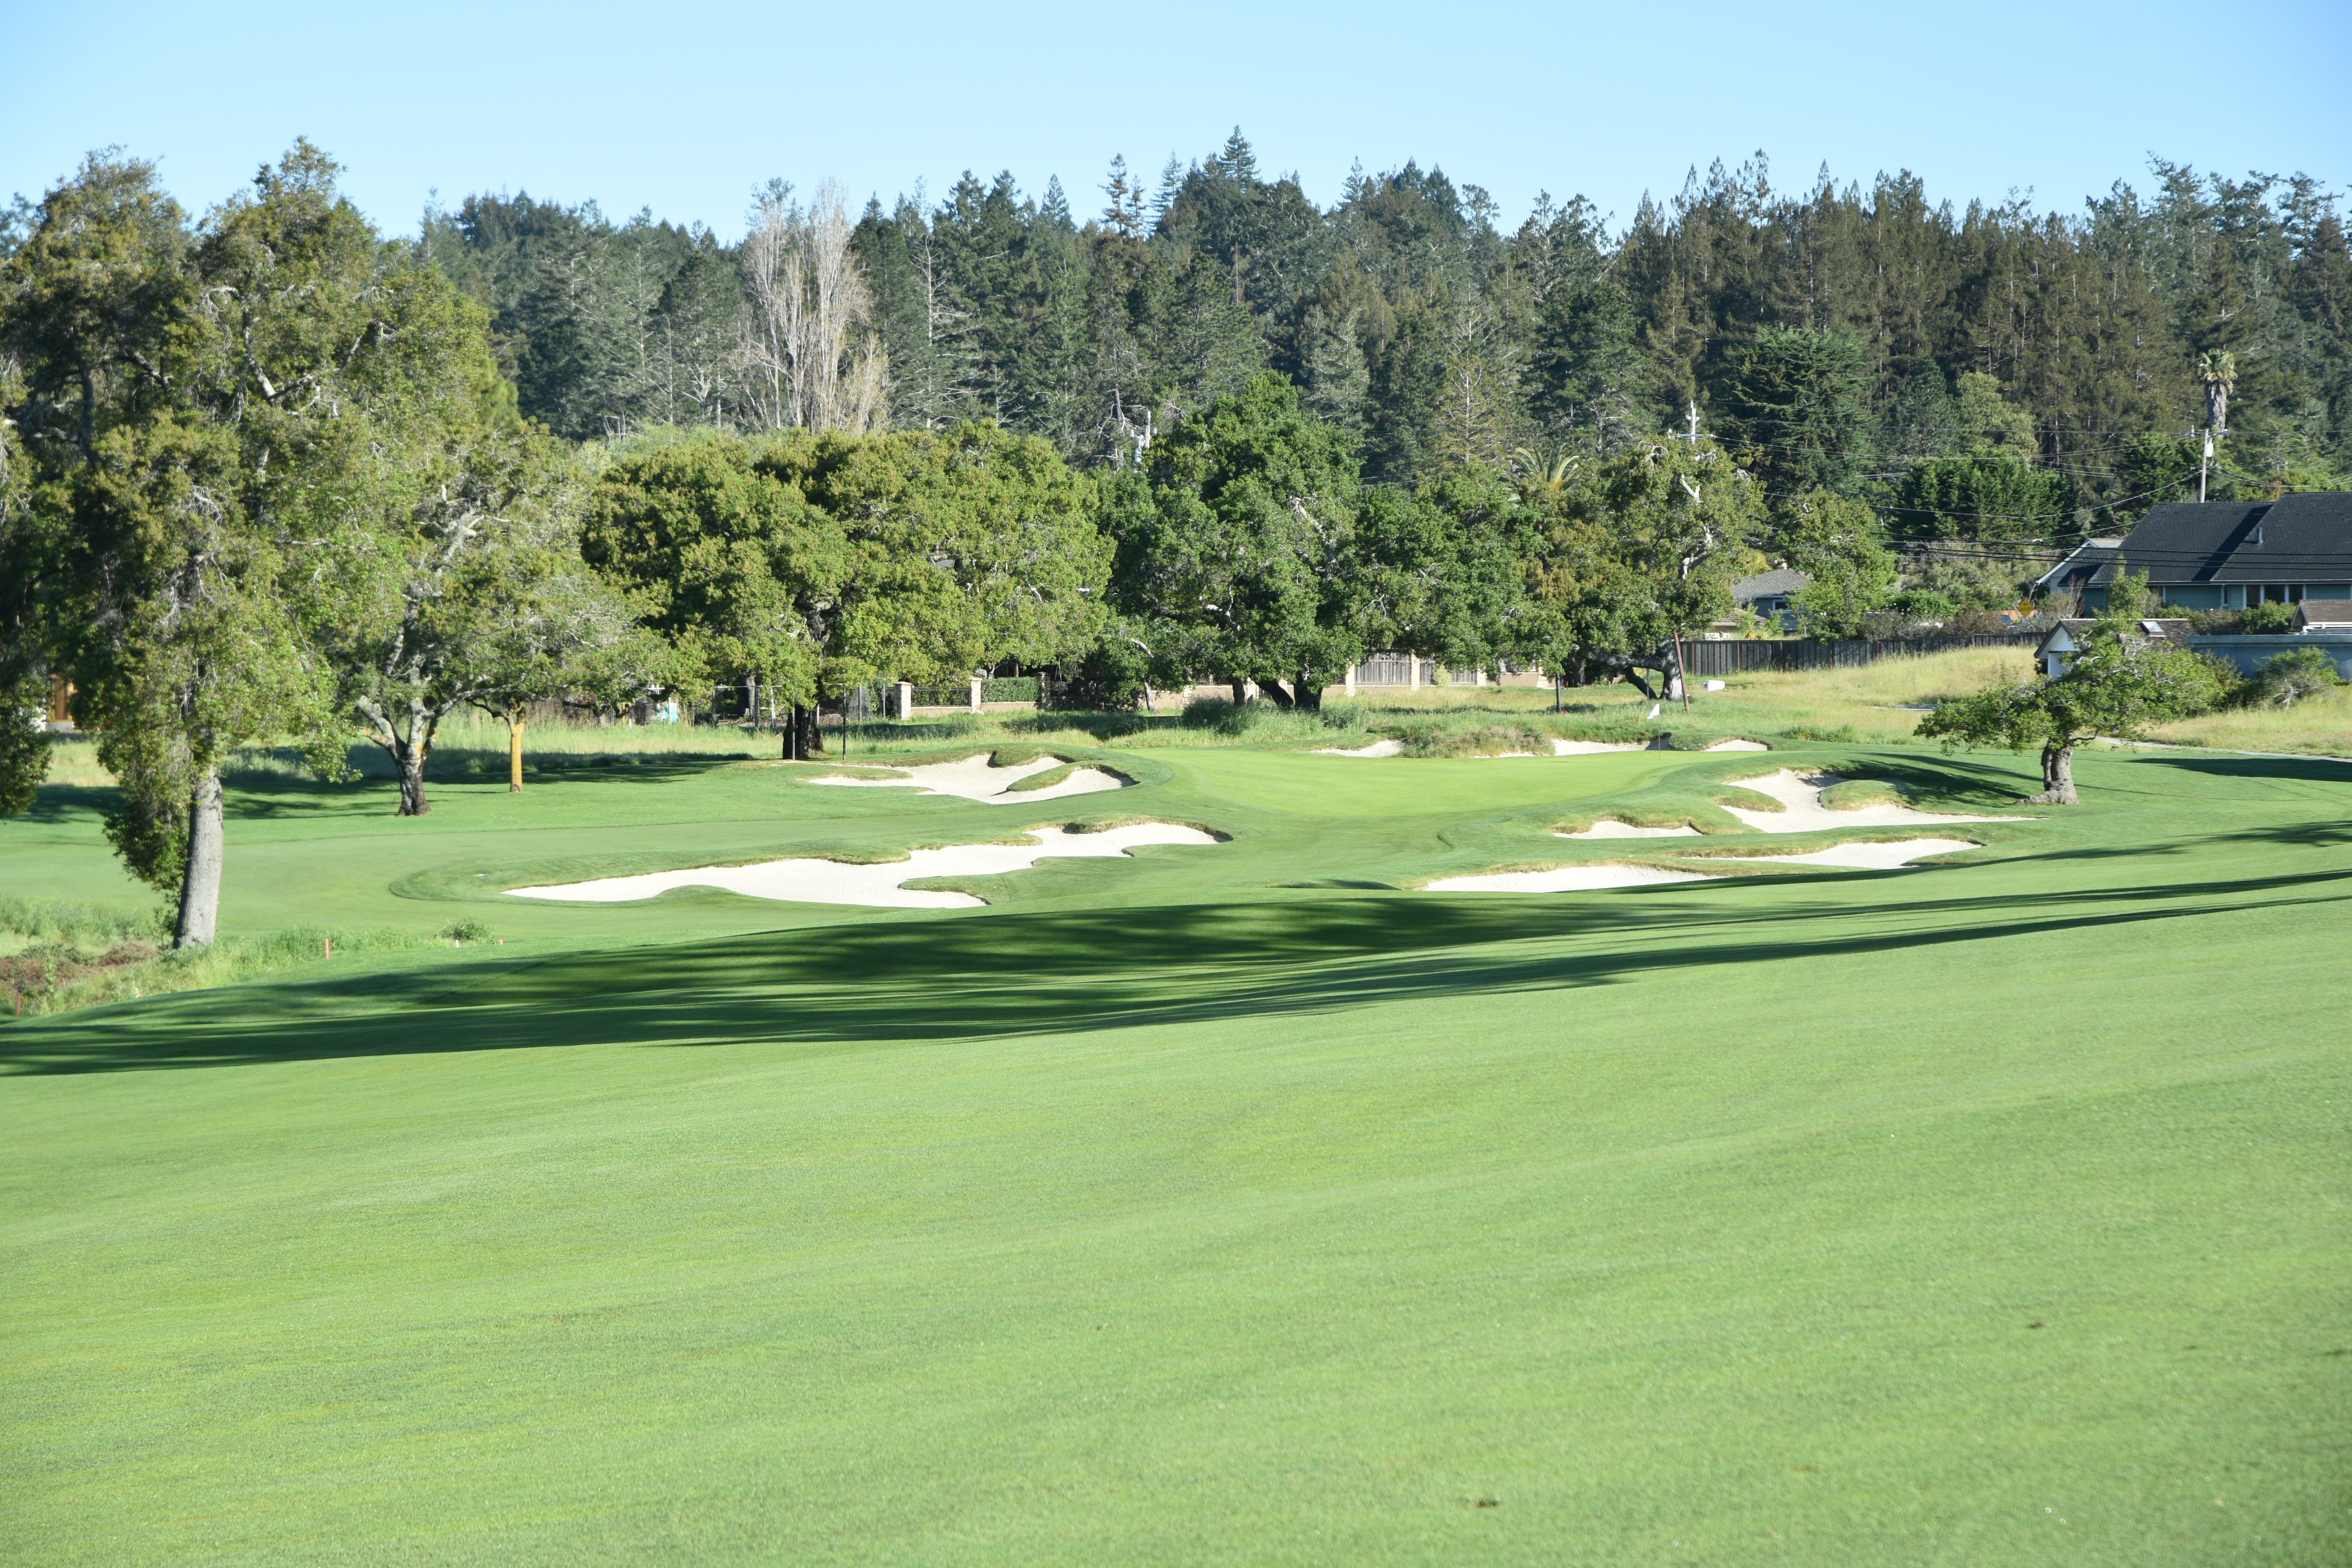
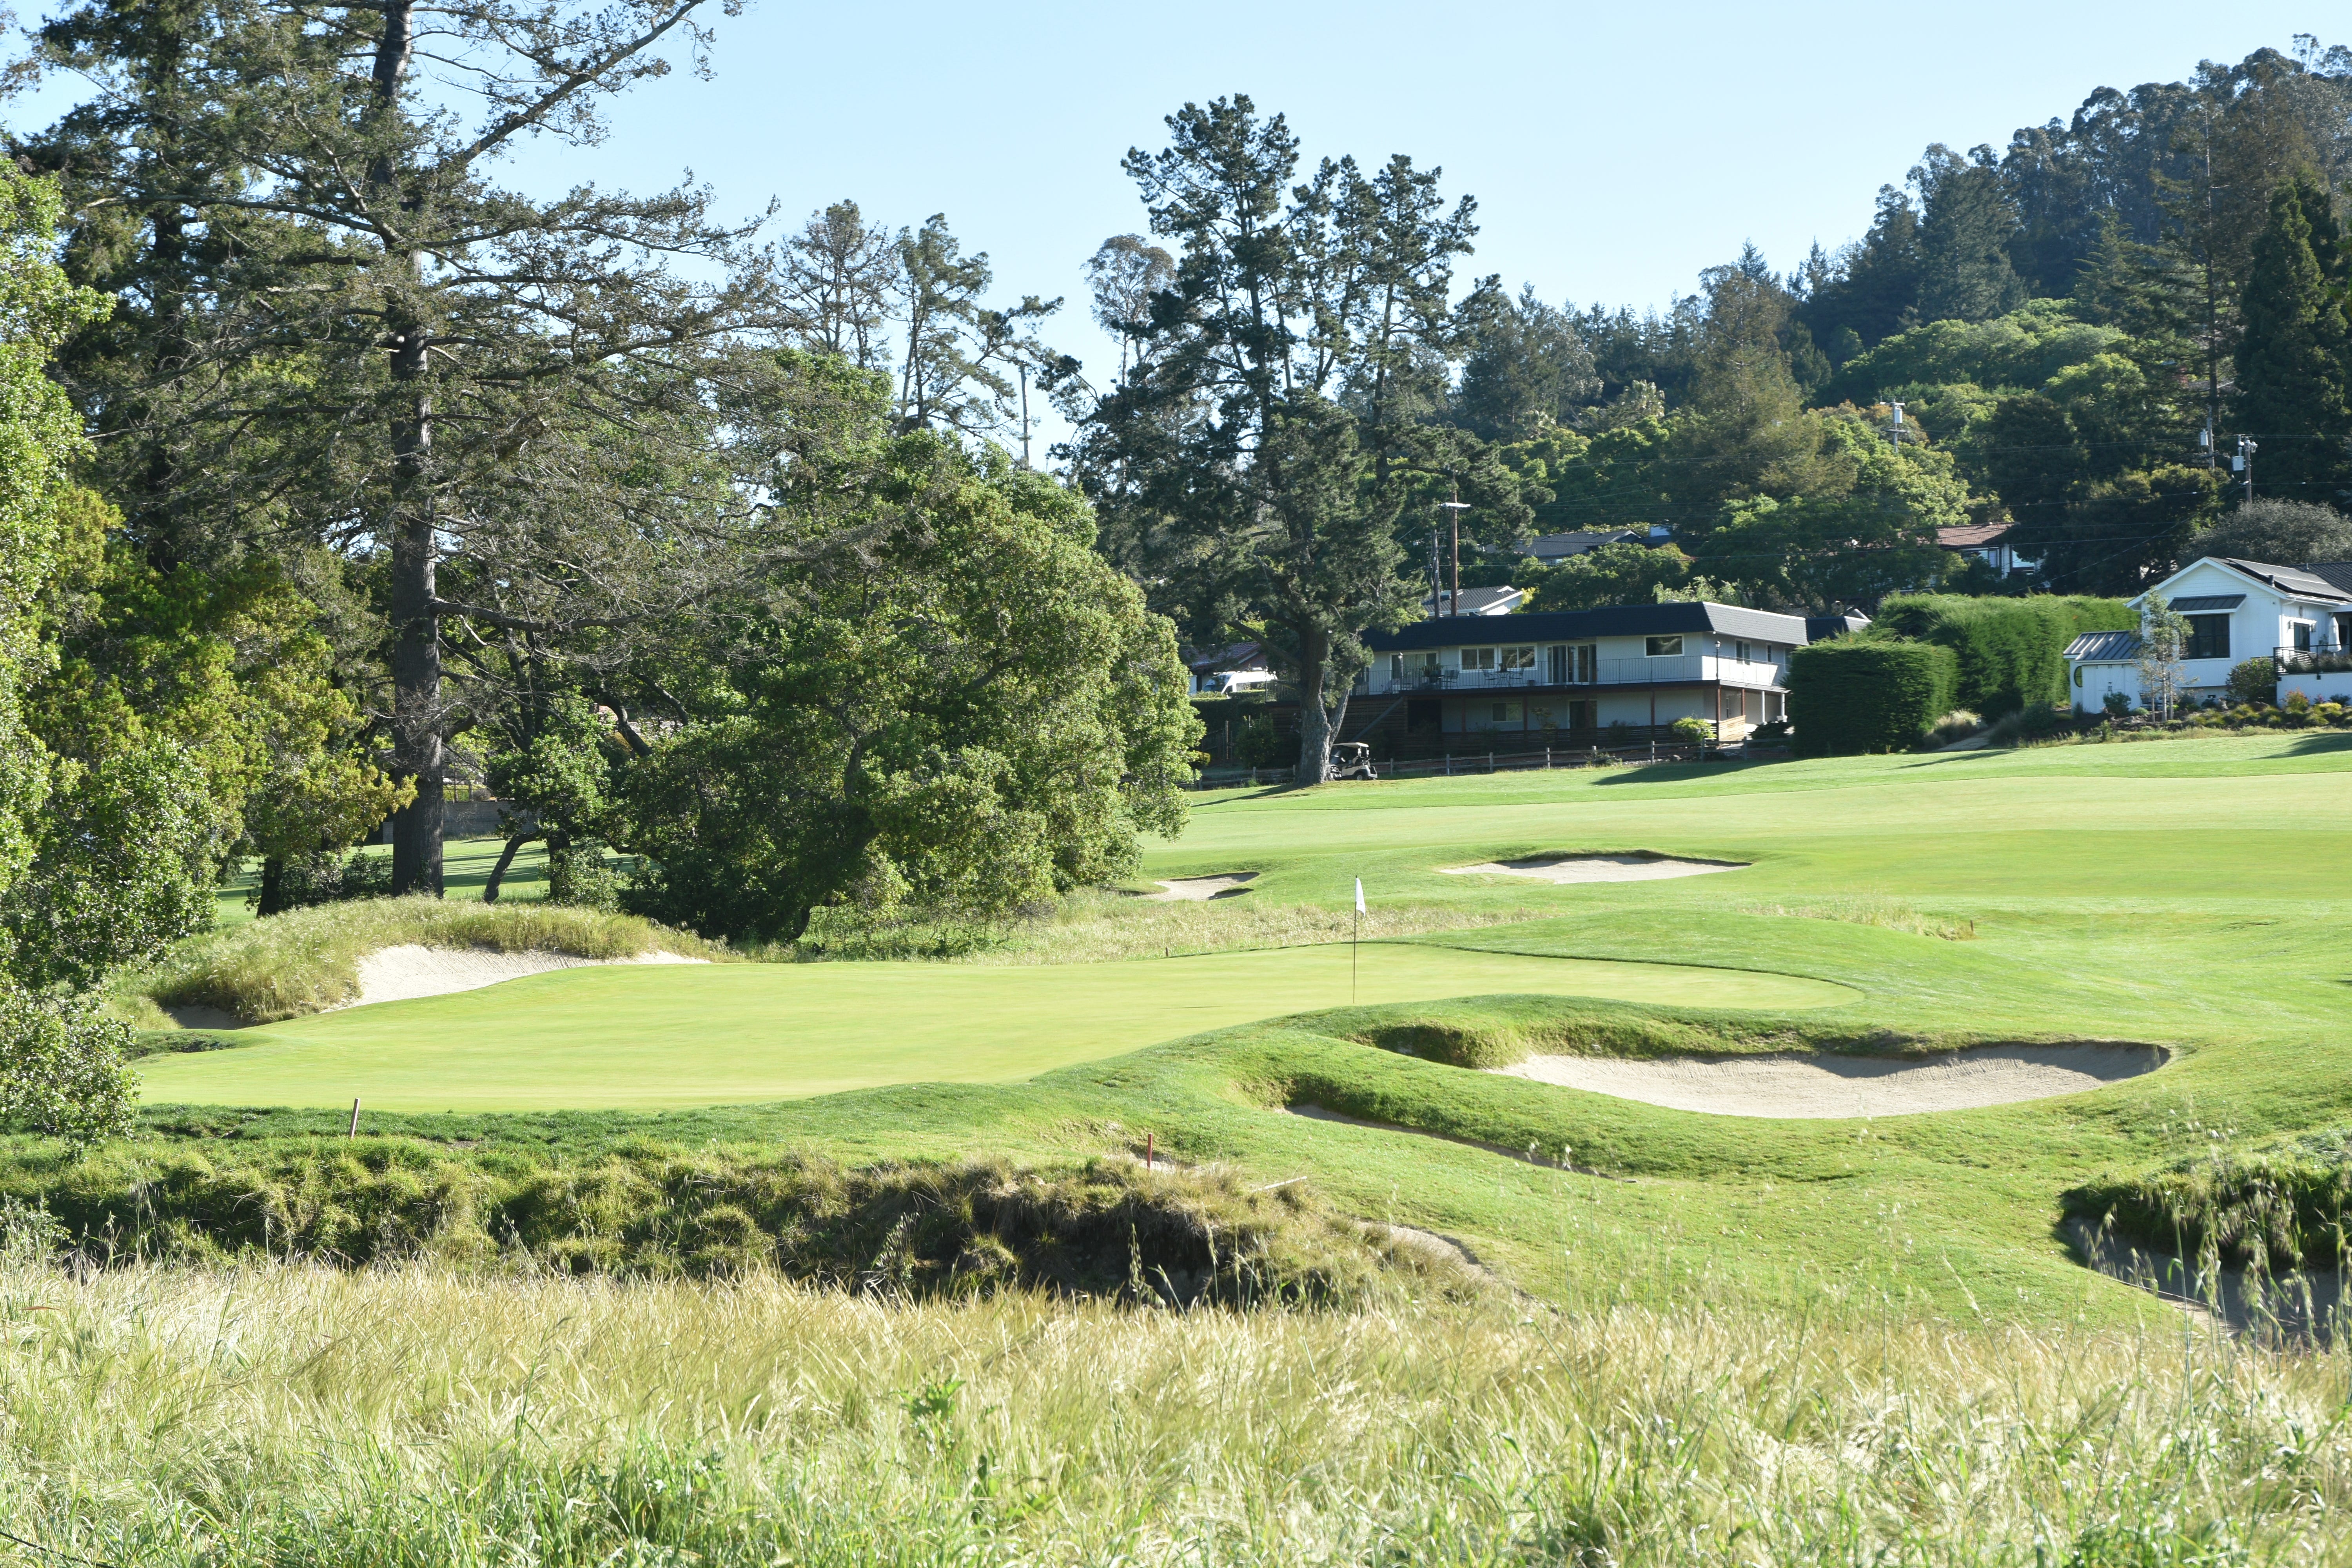
The 2nd hole at Pasatiempo is sneaky tough and requires a carefully considered tee shot to preserve a proper attack angle into this green. The 2nd hole green demands a certain shot shape and precision to get close to the pin
Pasatiempo once had clean square tee boxes installed during the 2007 restoration led by Tom Doak. Before the 2023 Urbina restoration, the club reverted back to natural and continuous tee boxes that have become increasingly in vogue in modern golf architecture
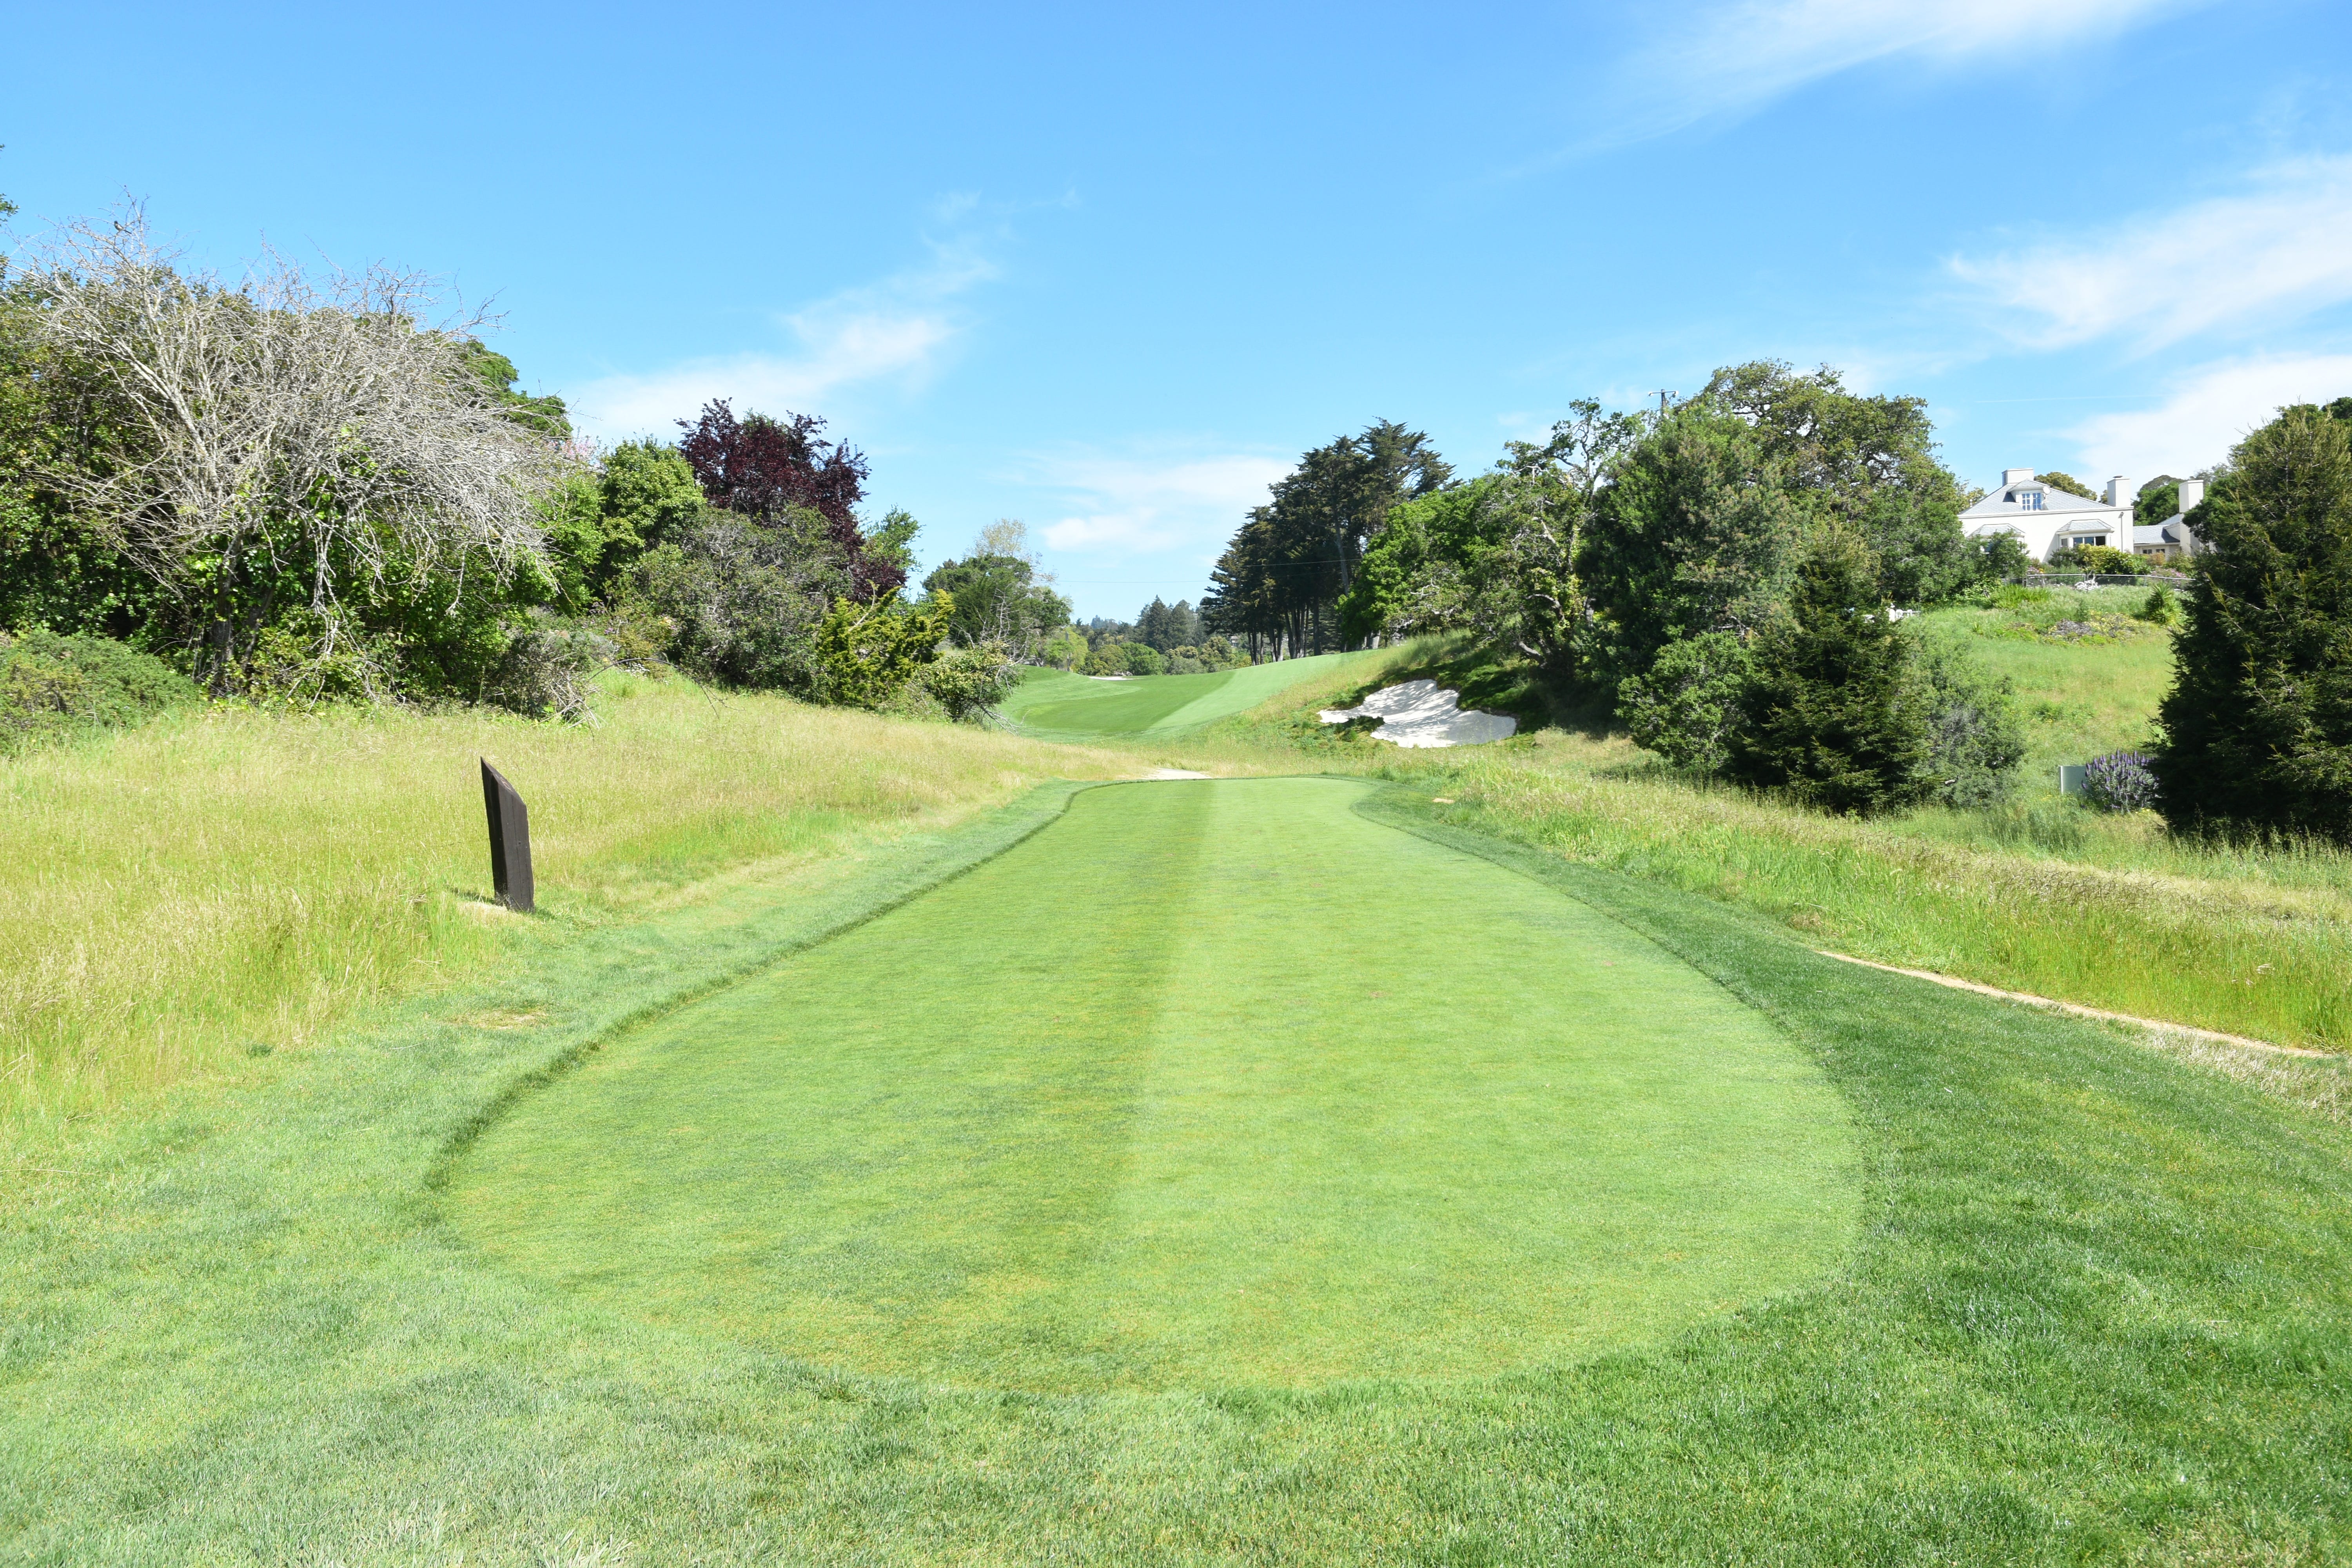
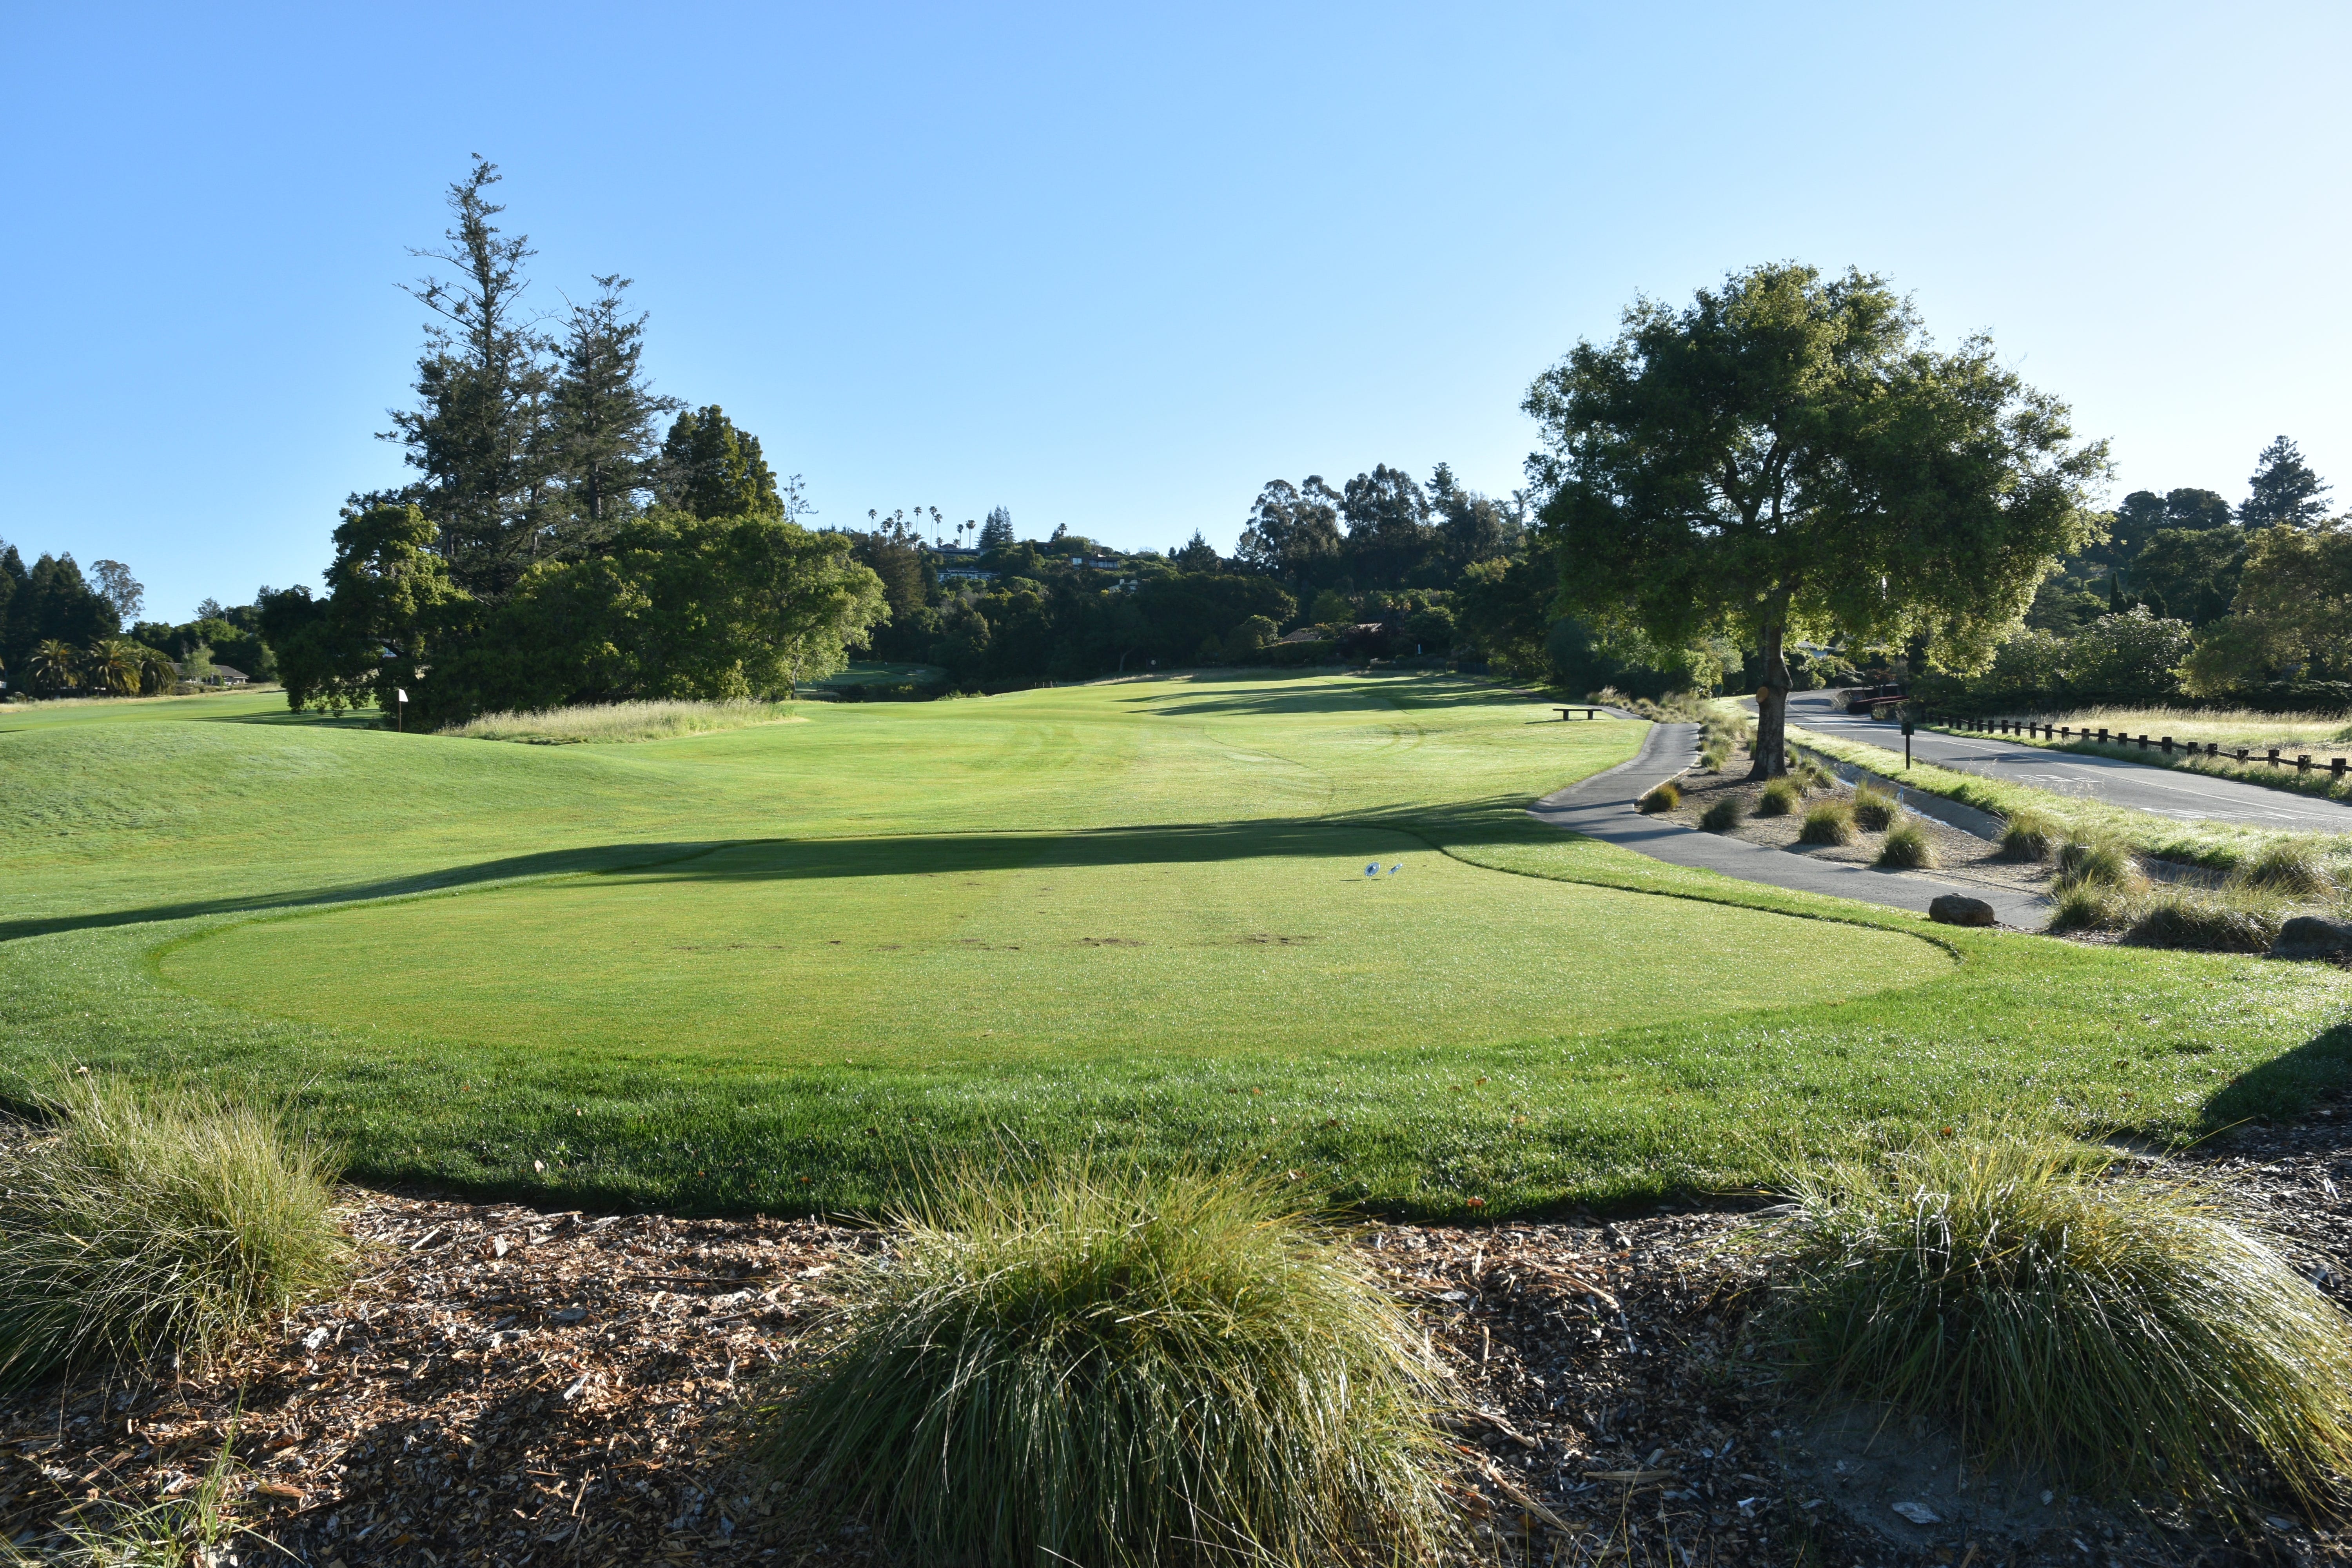
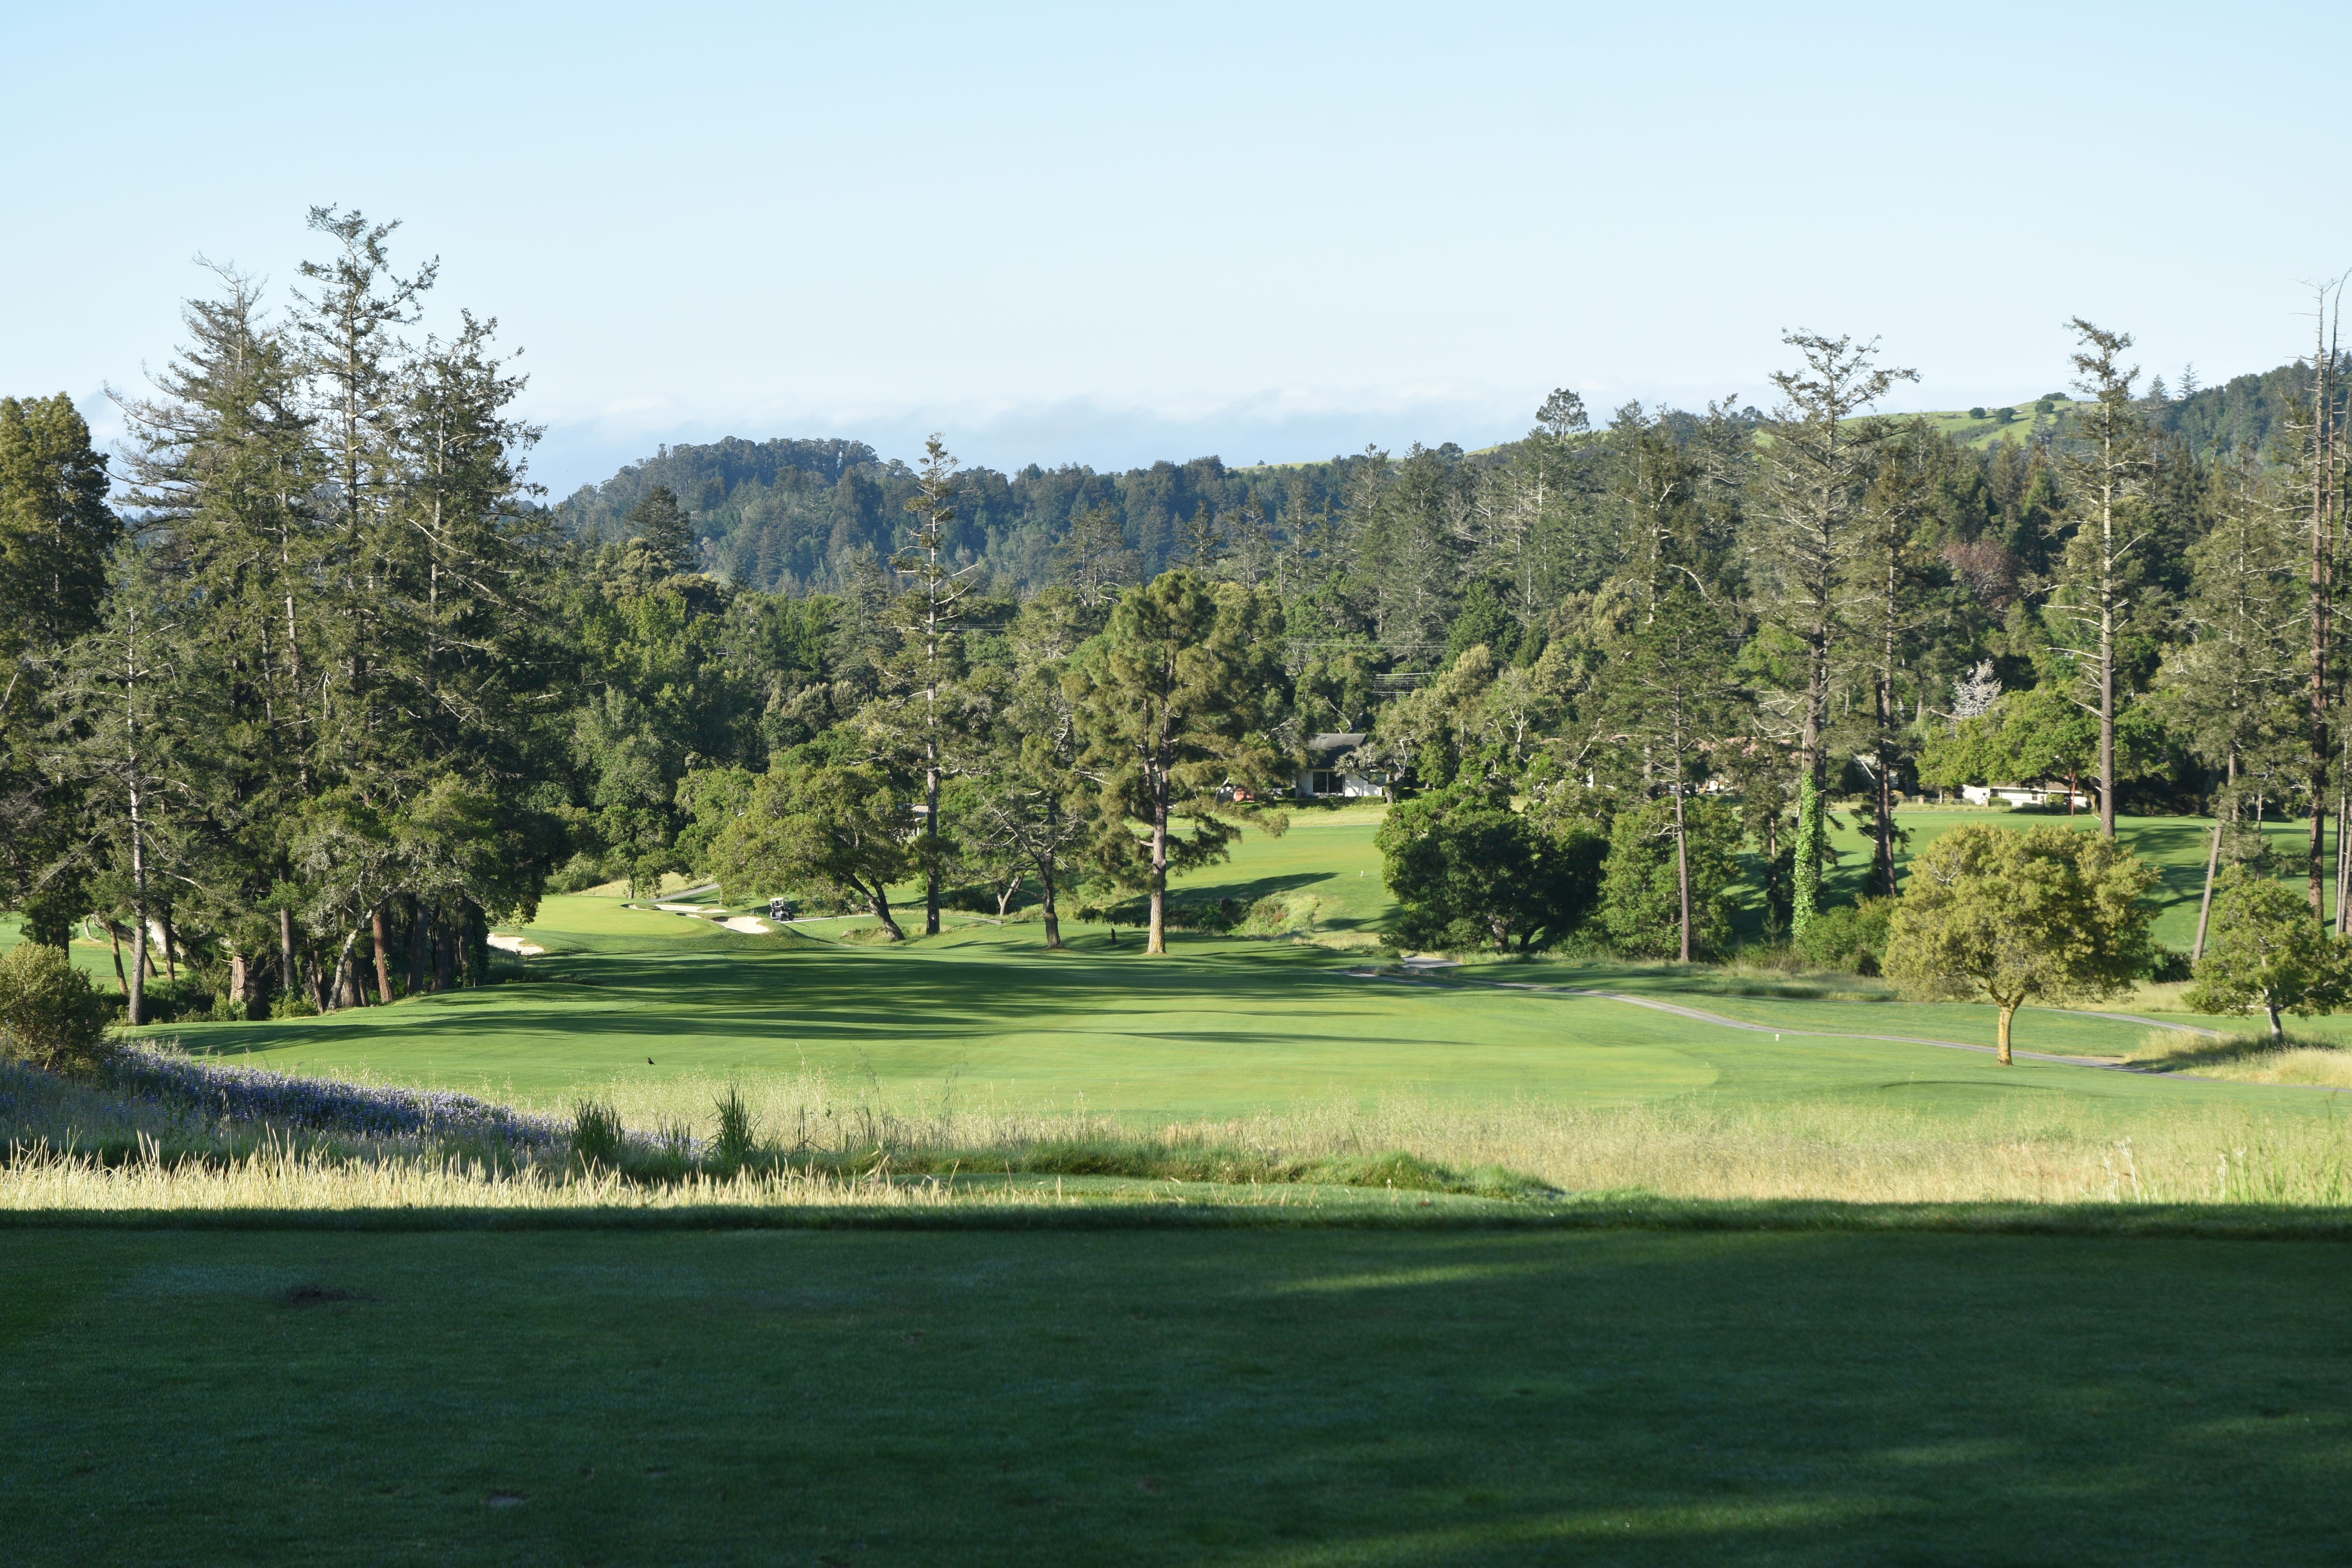
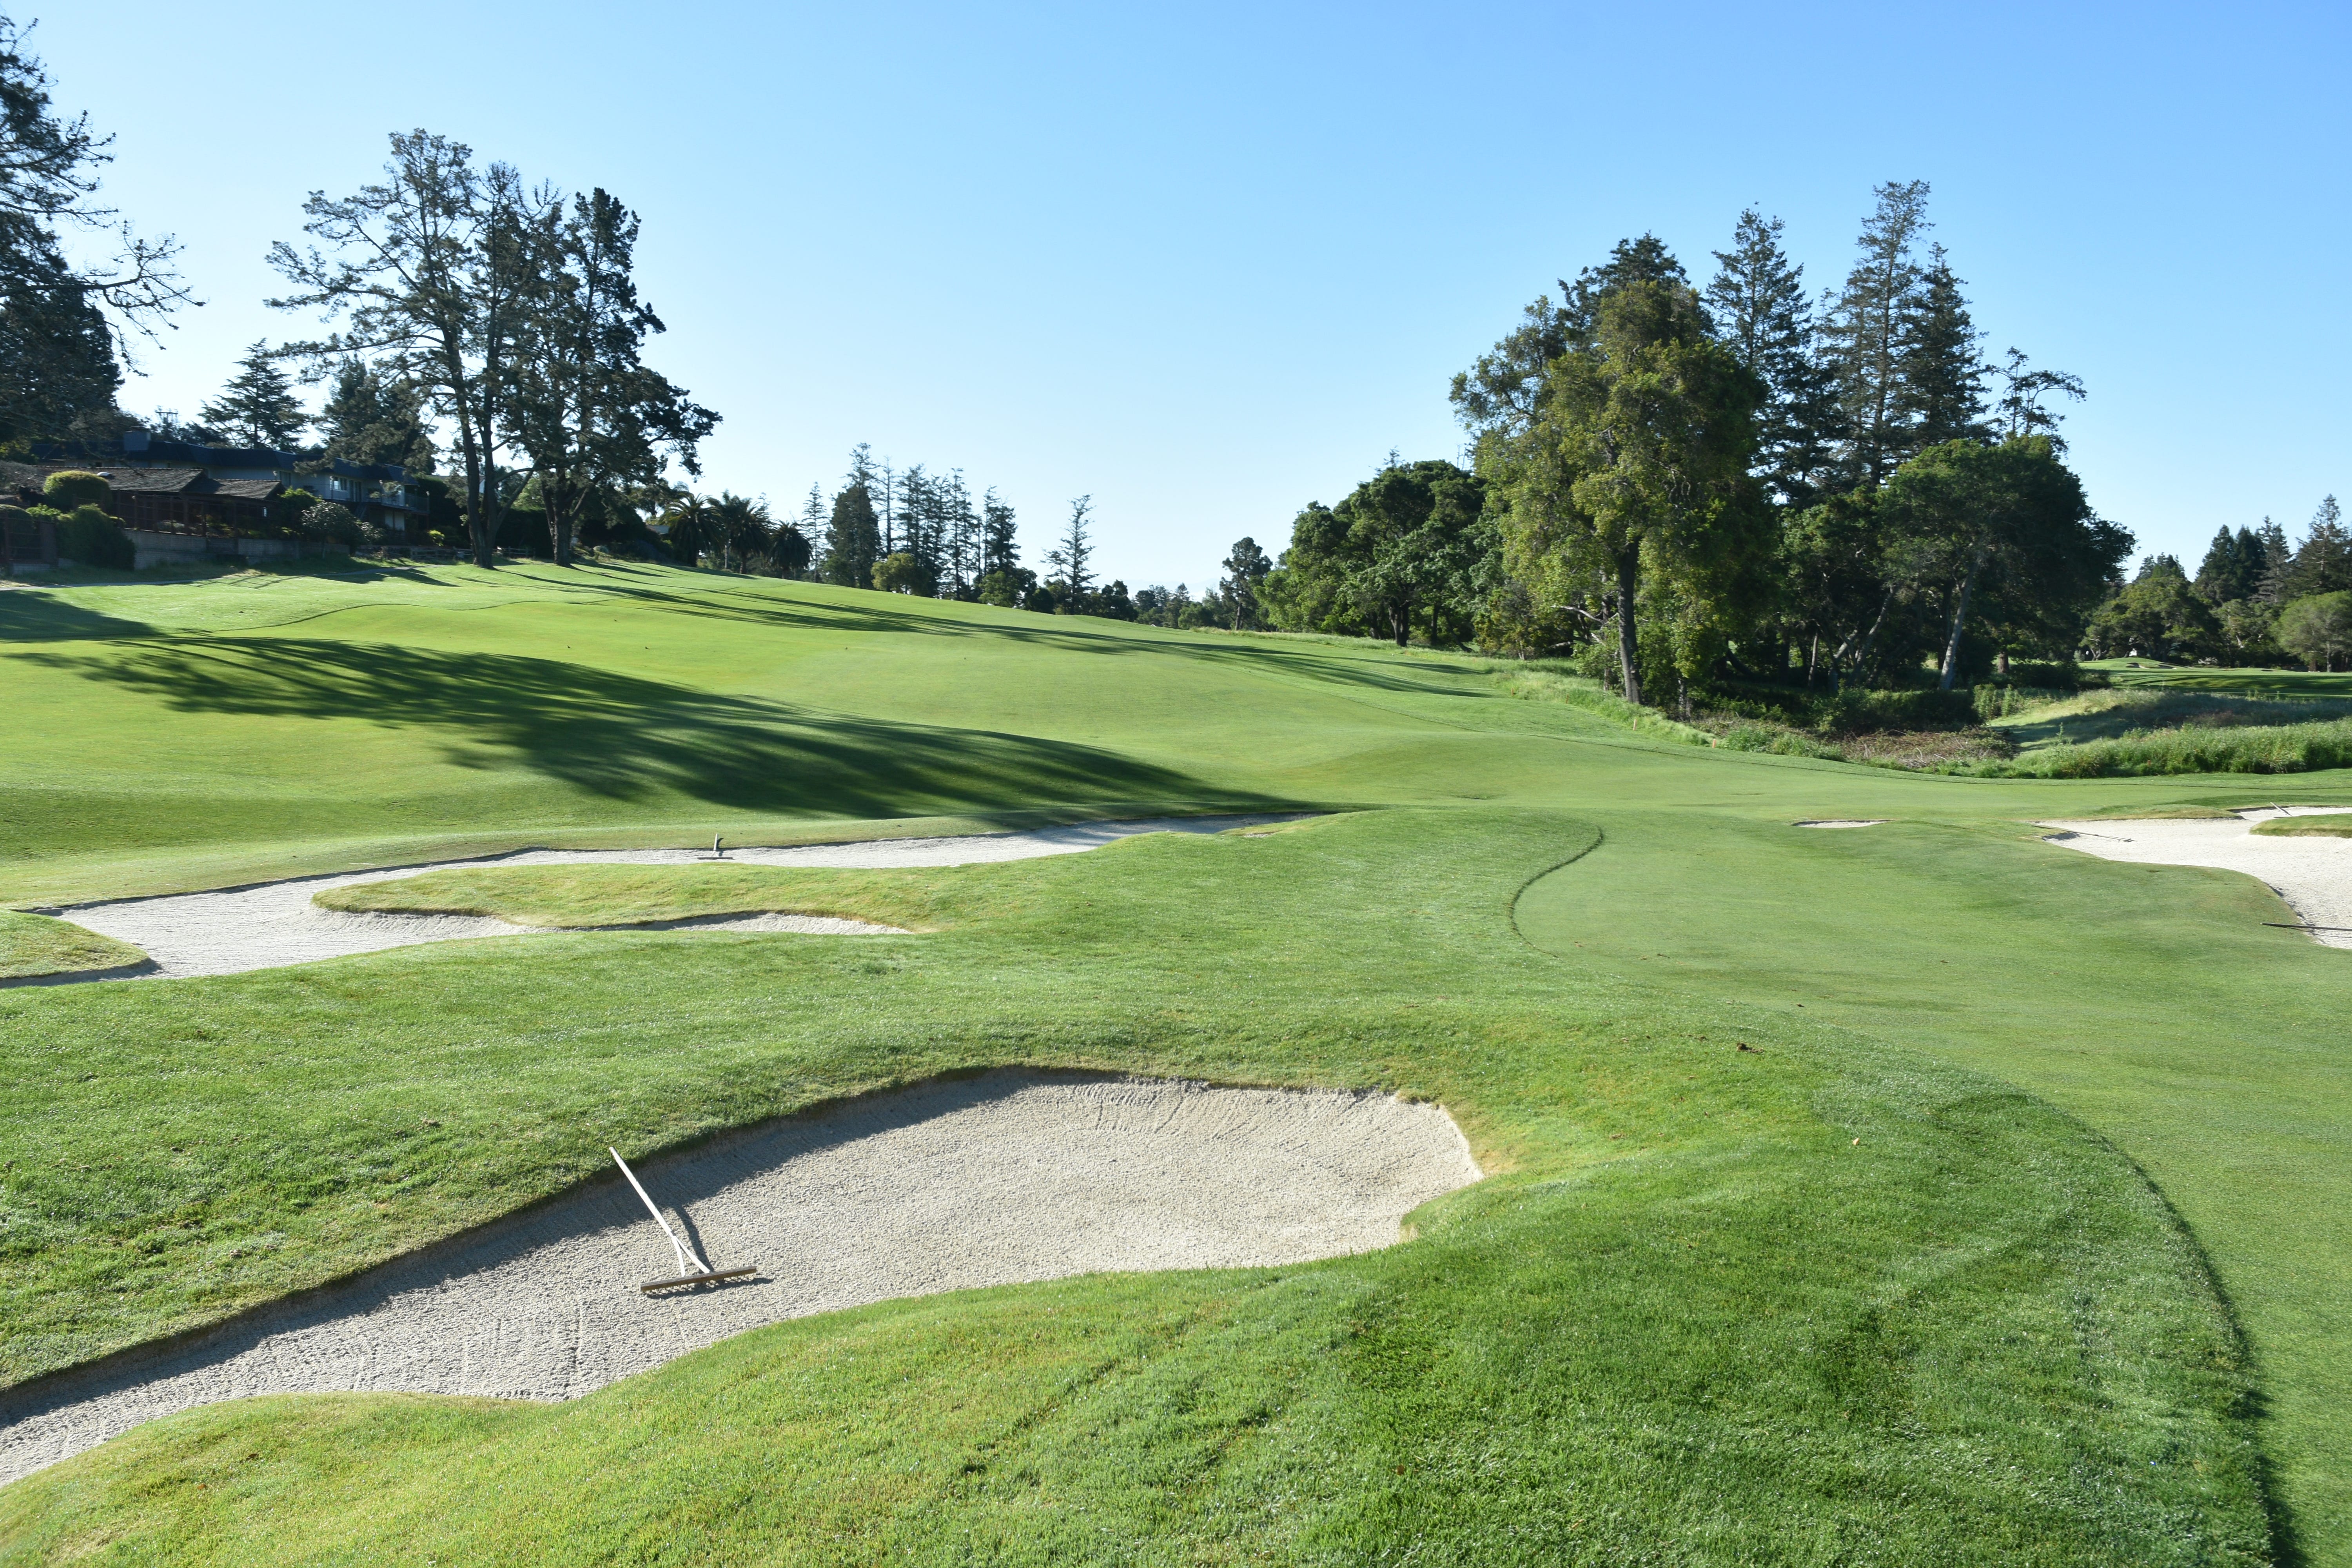
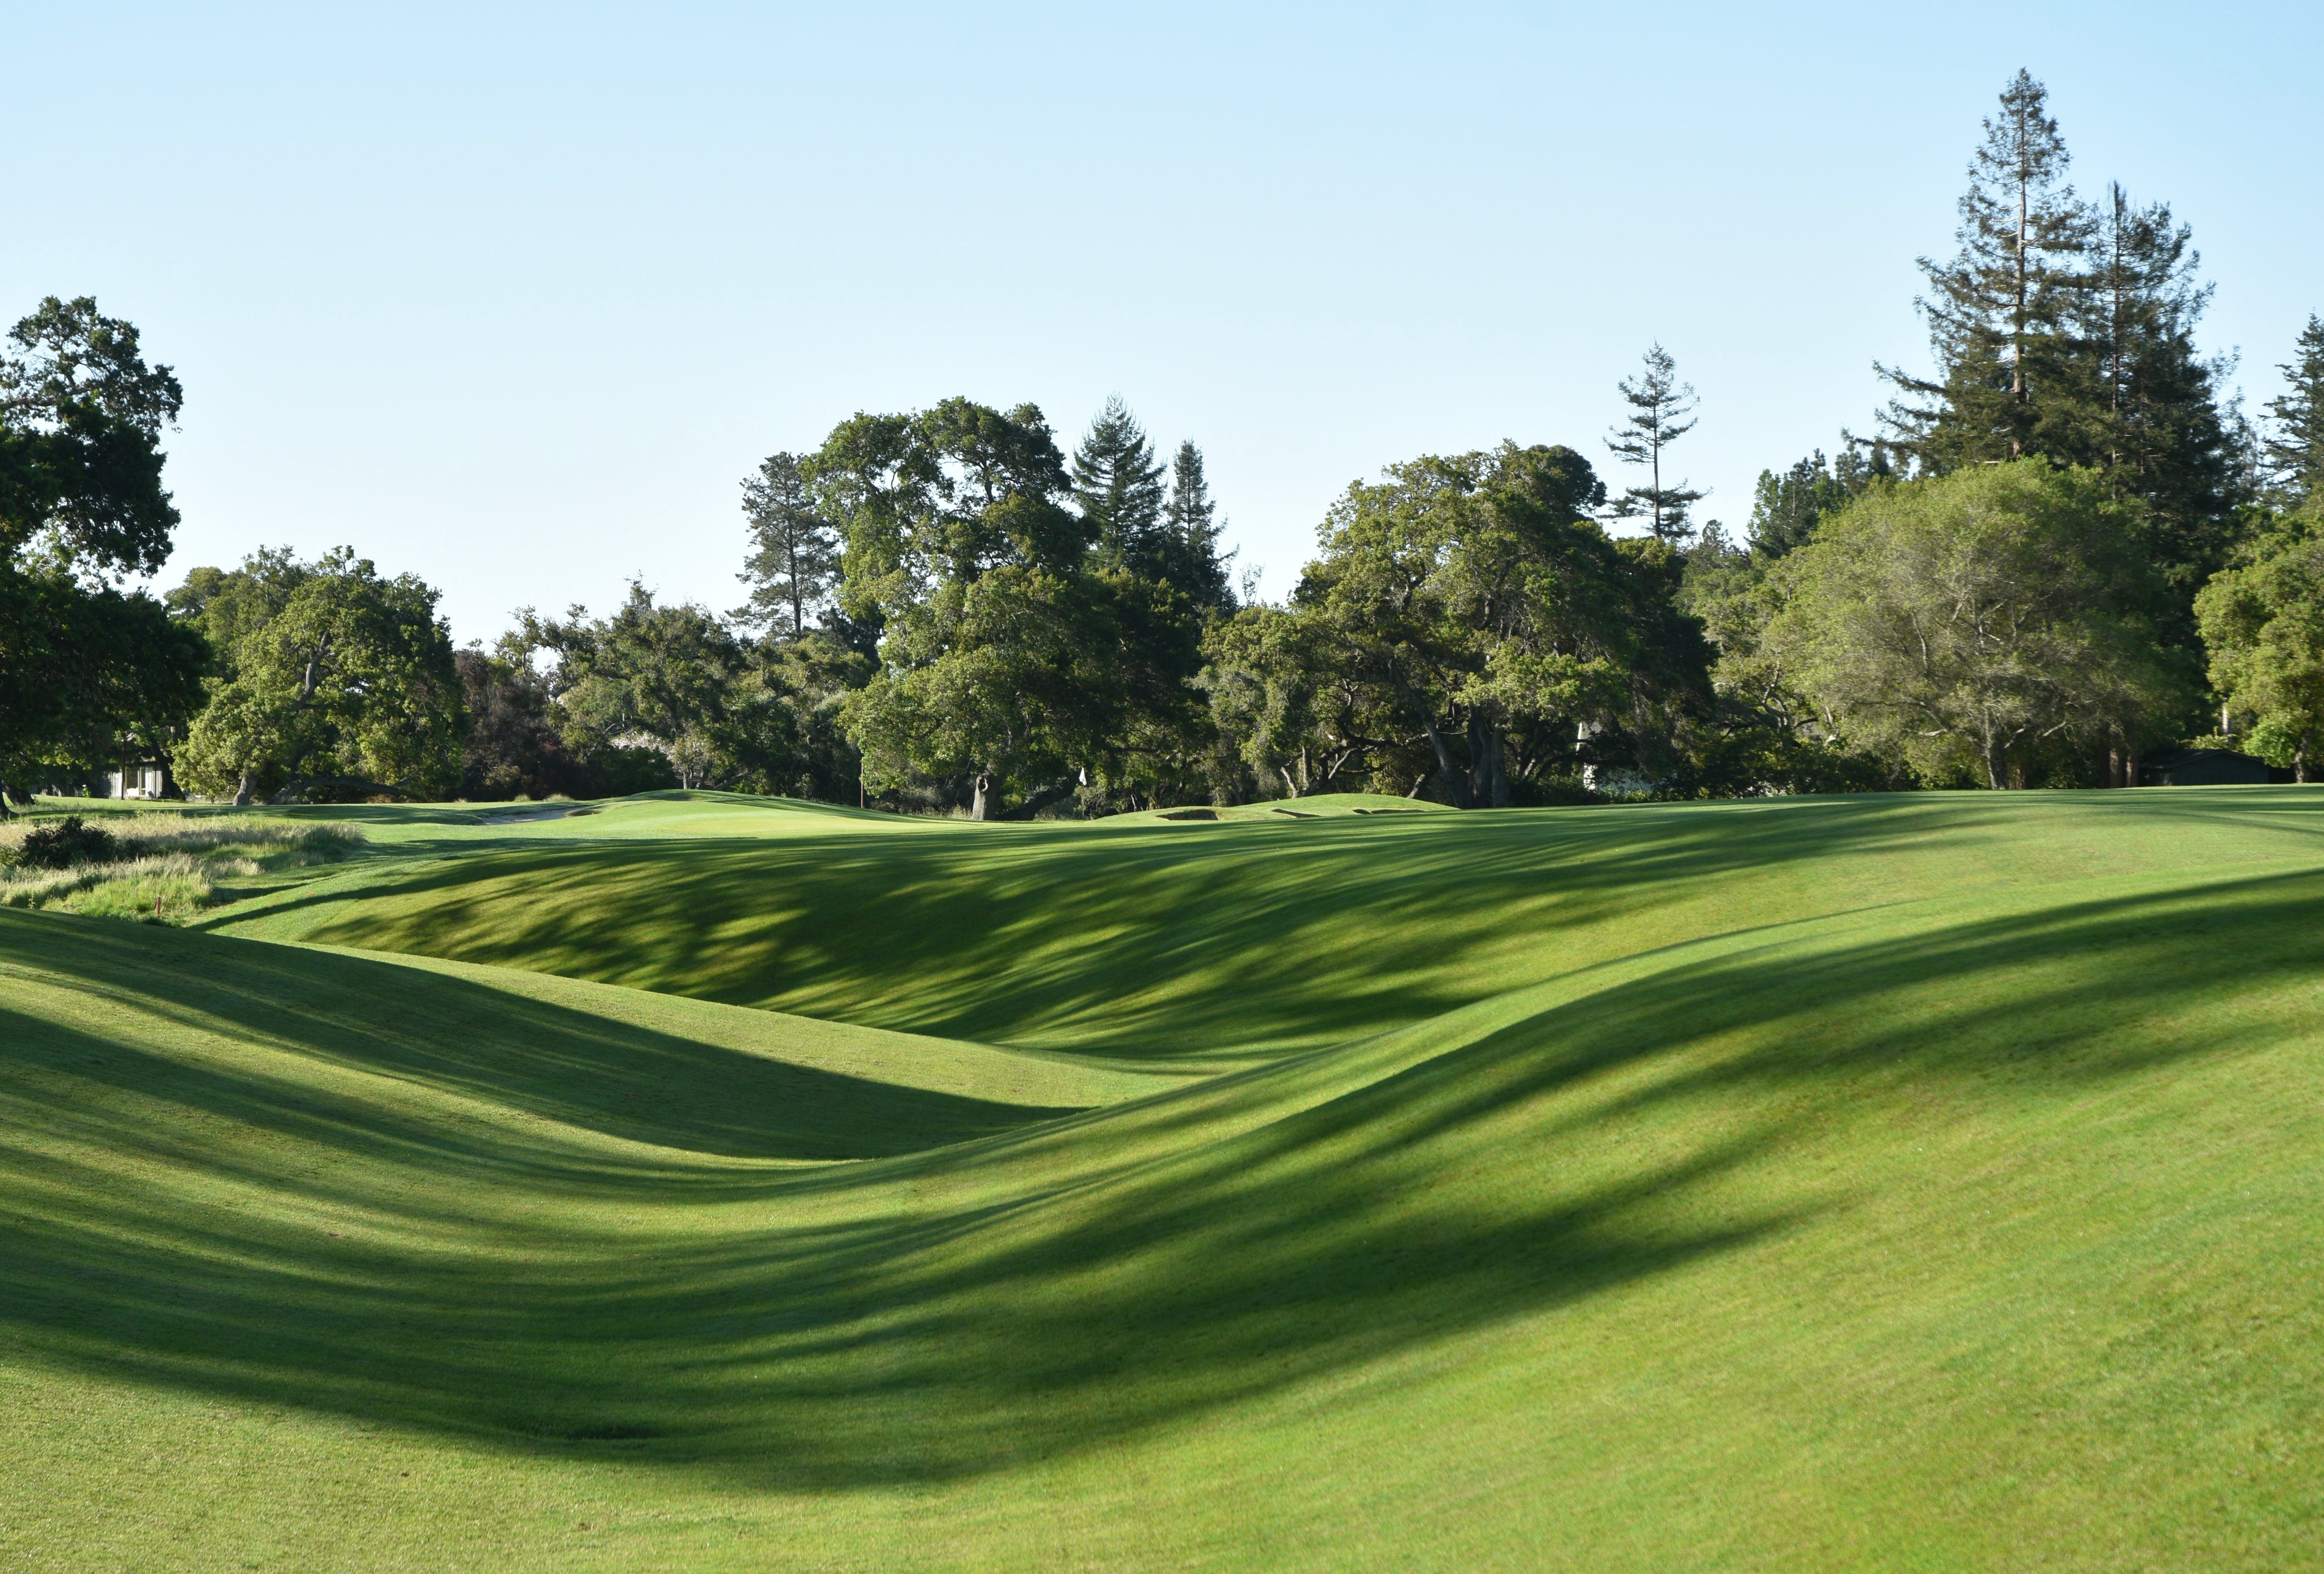
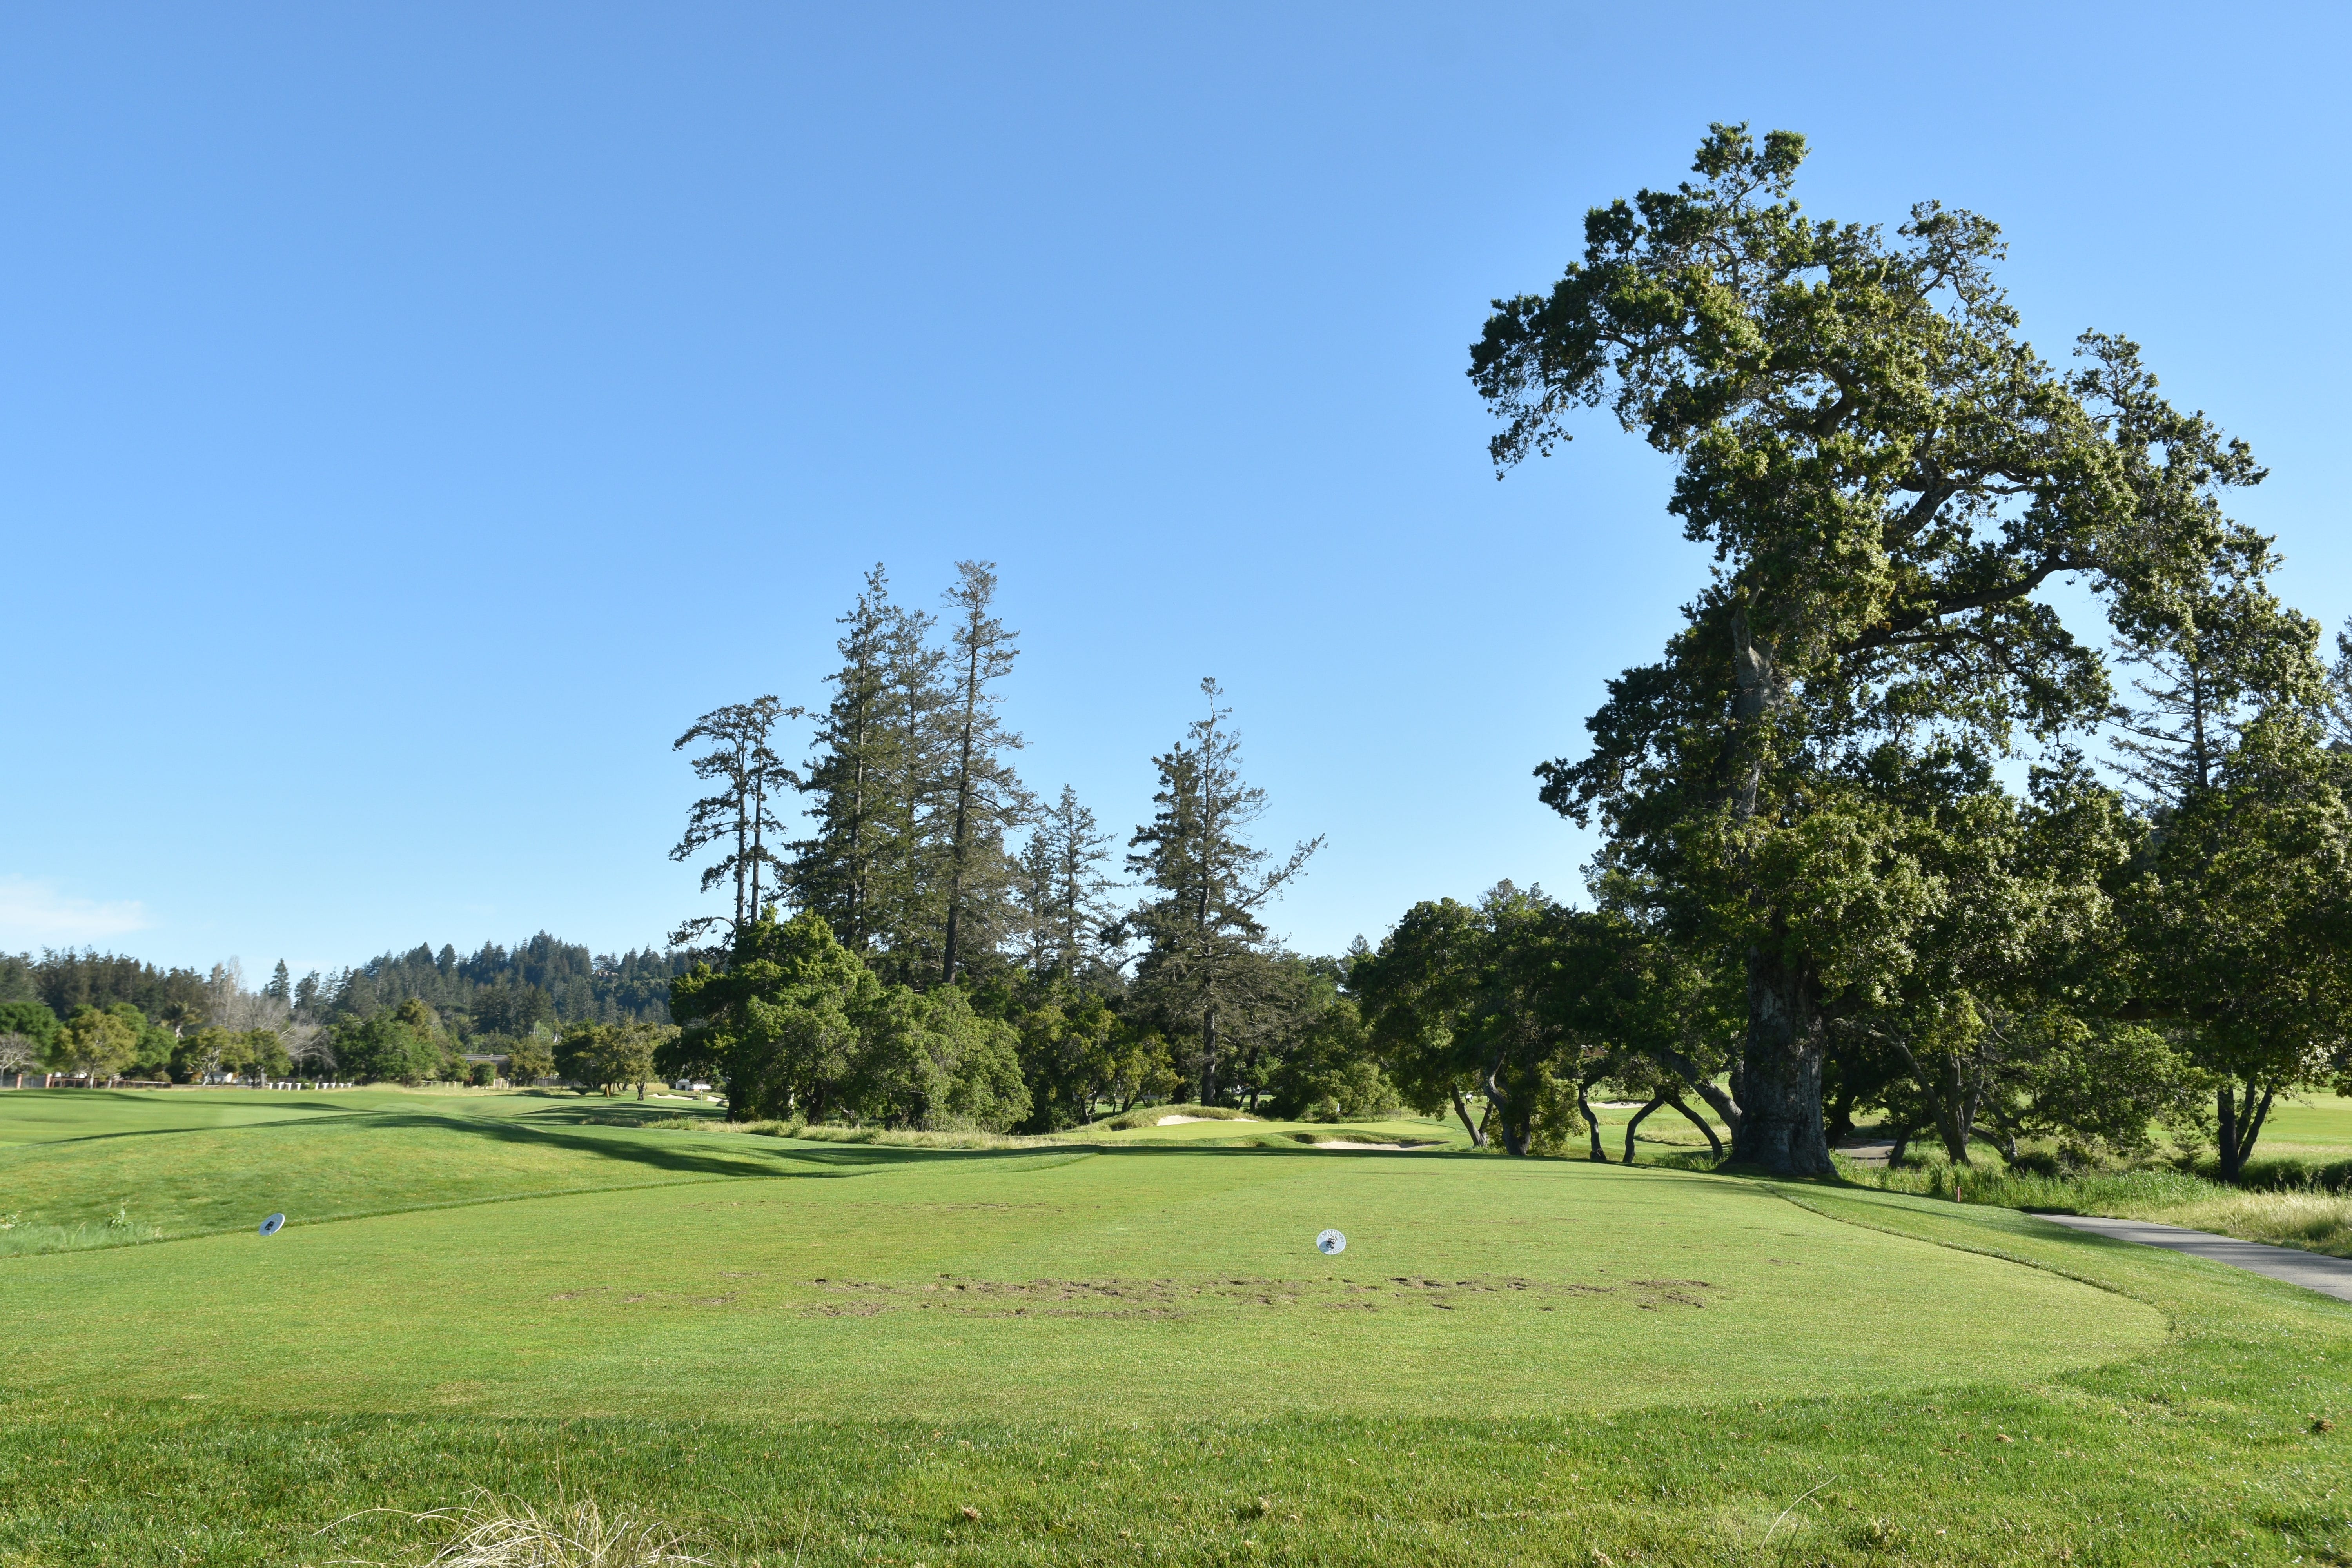
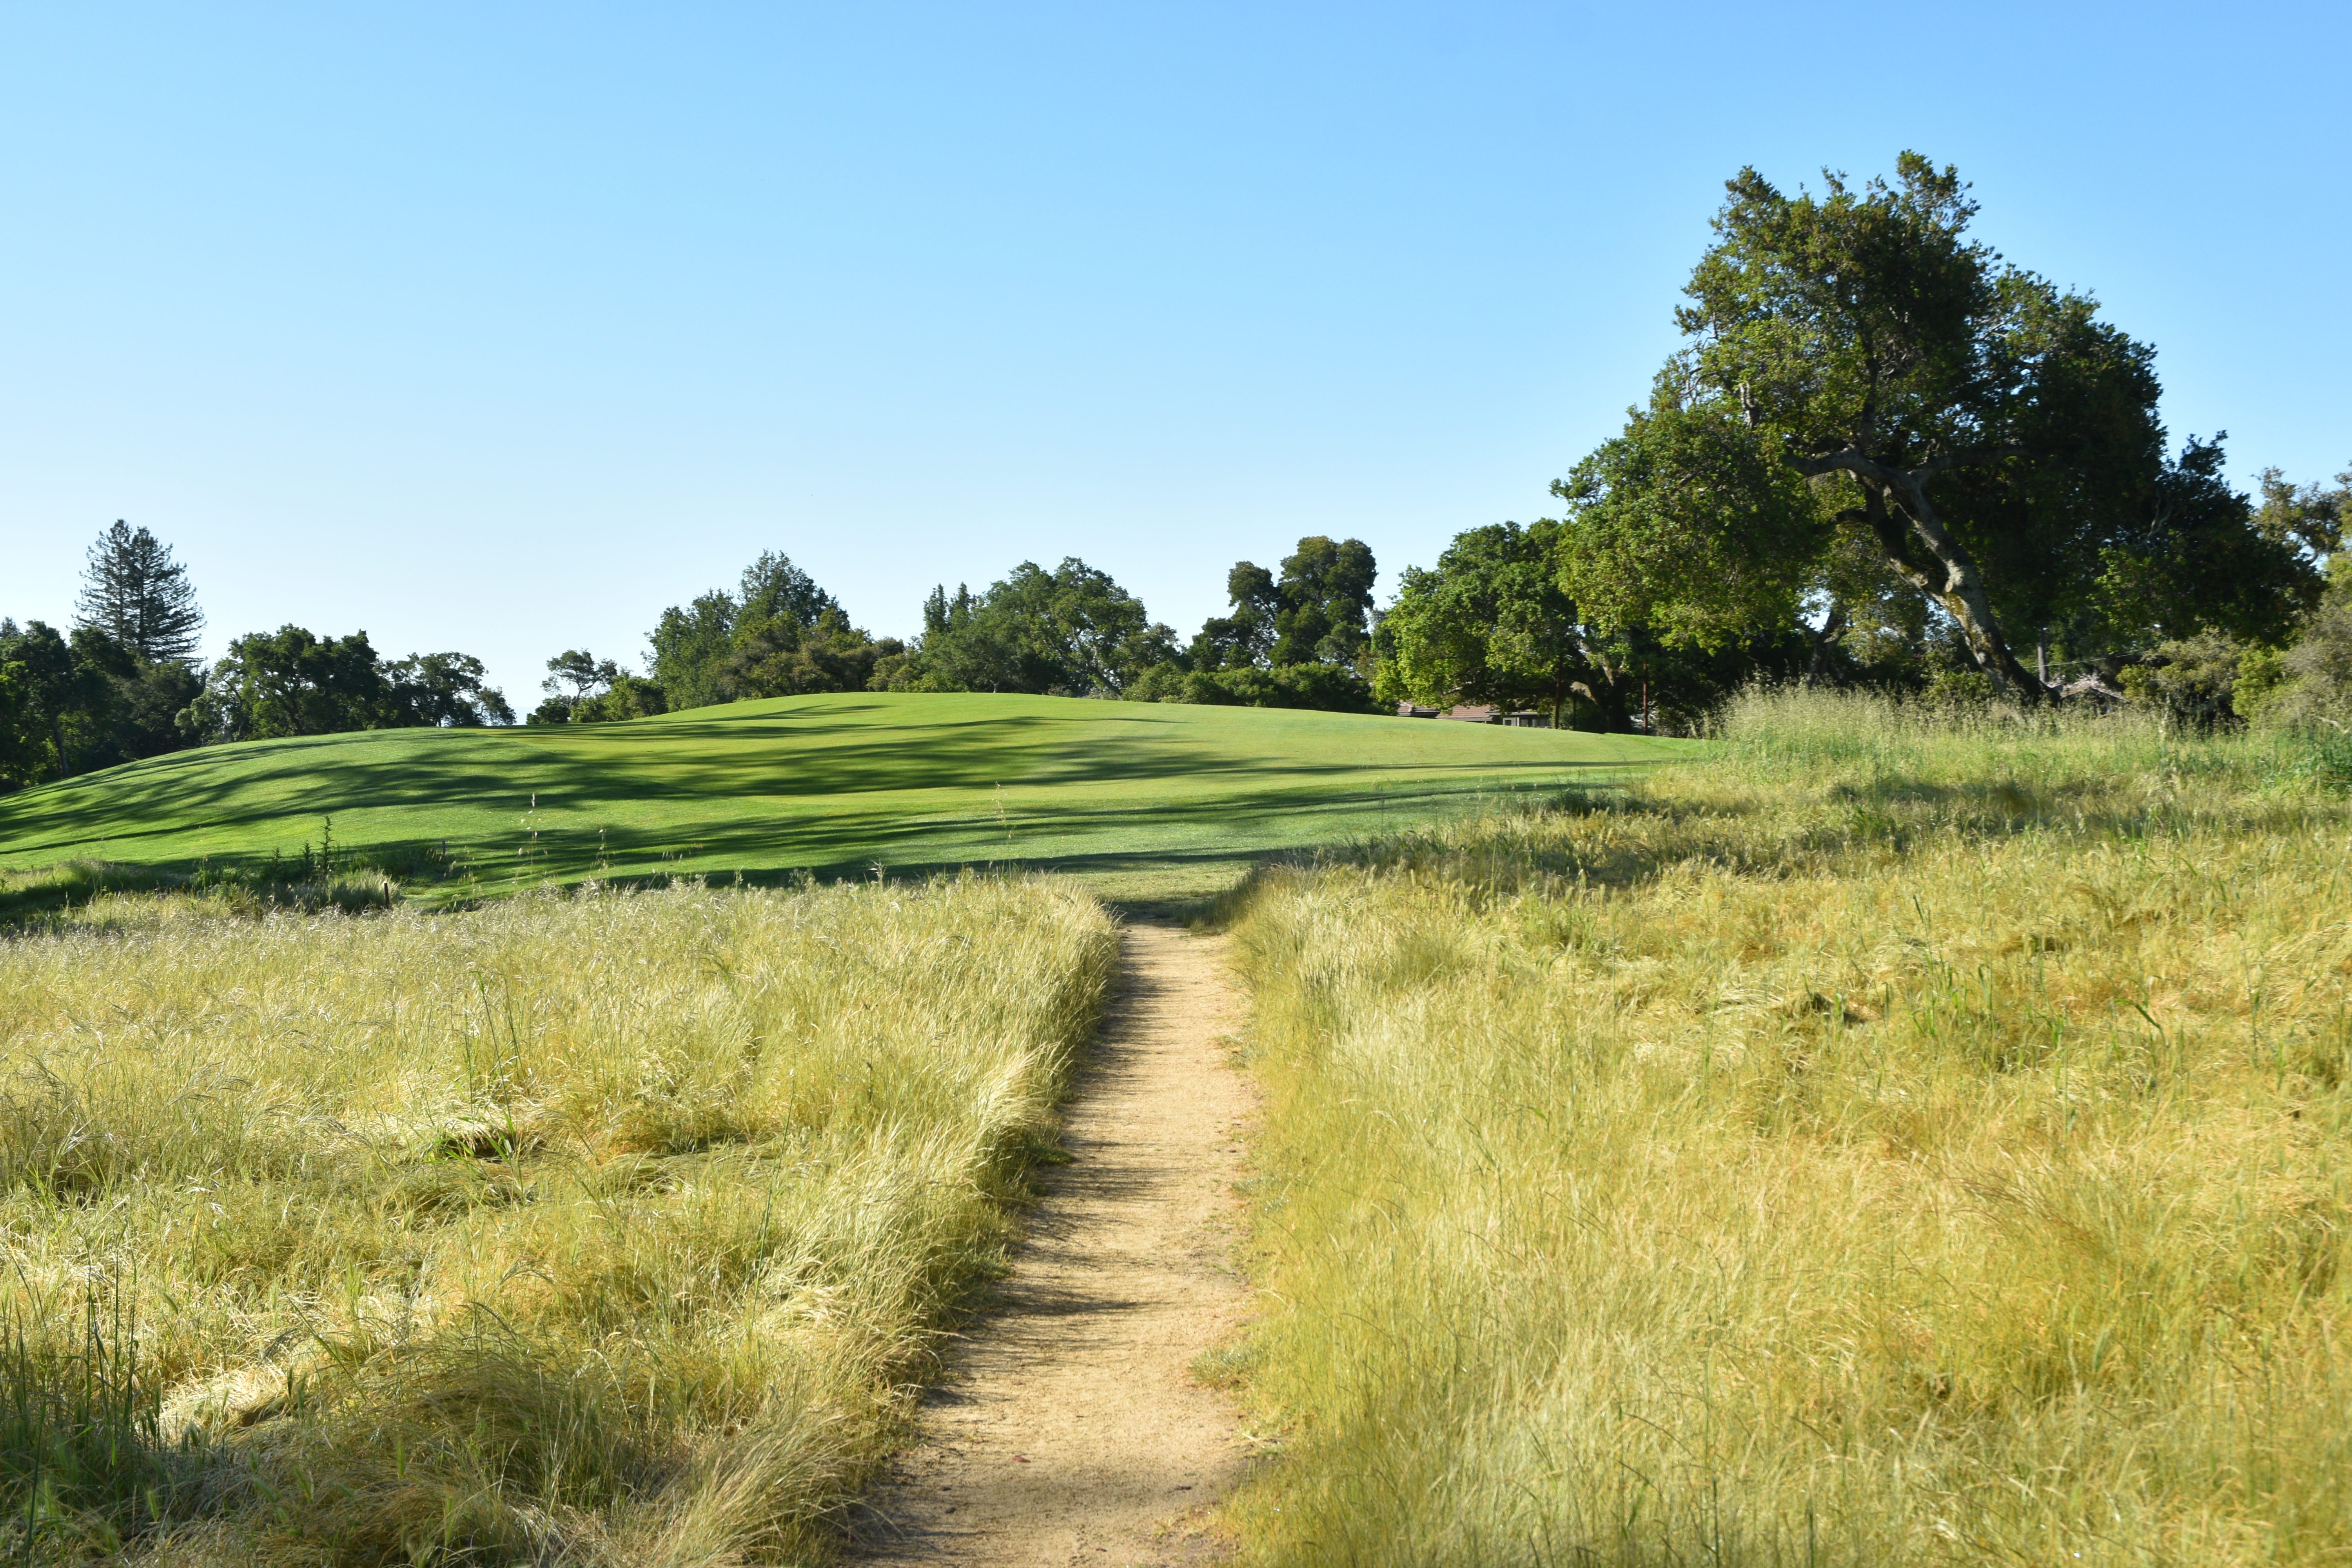
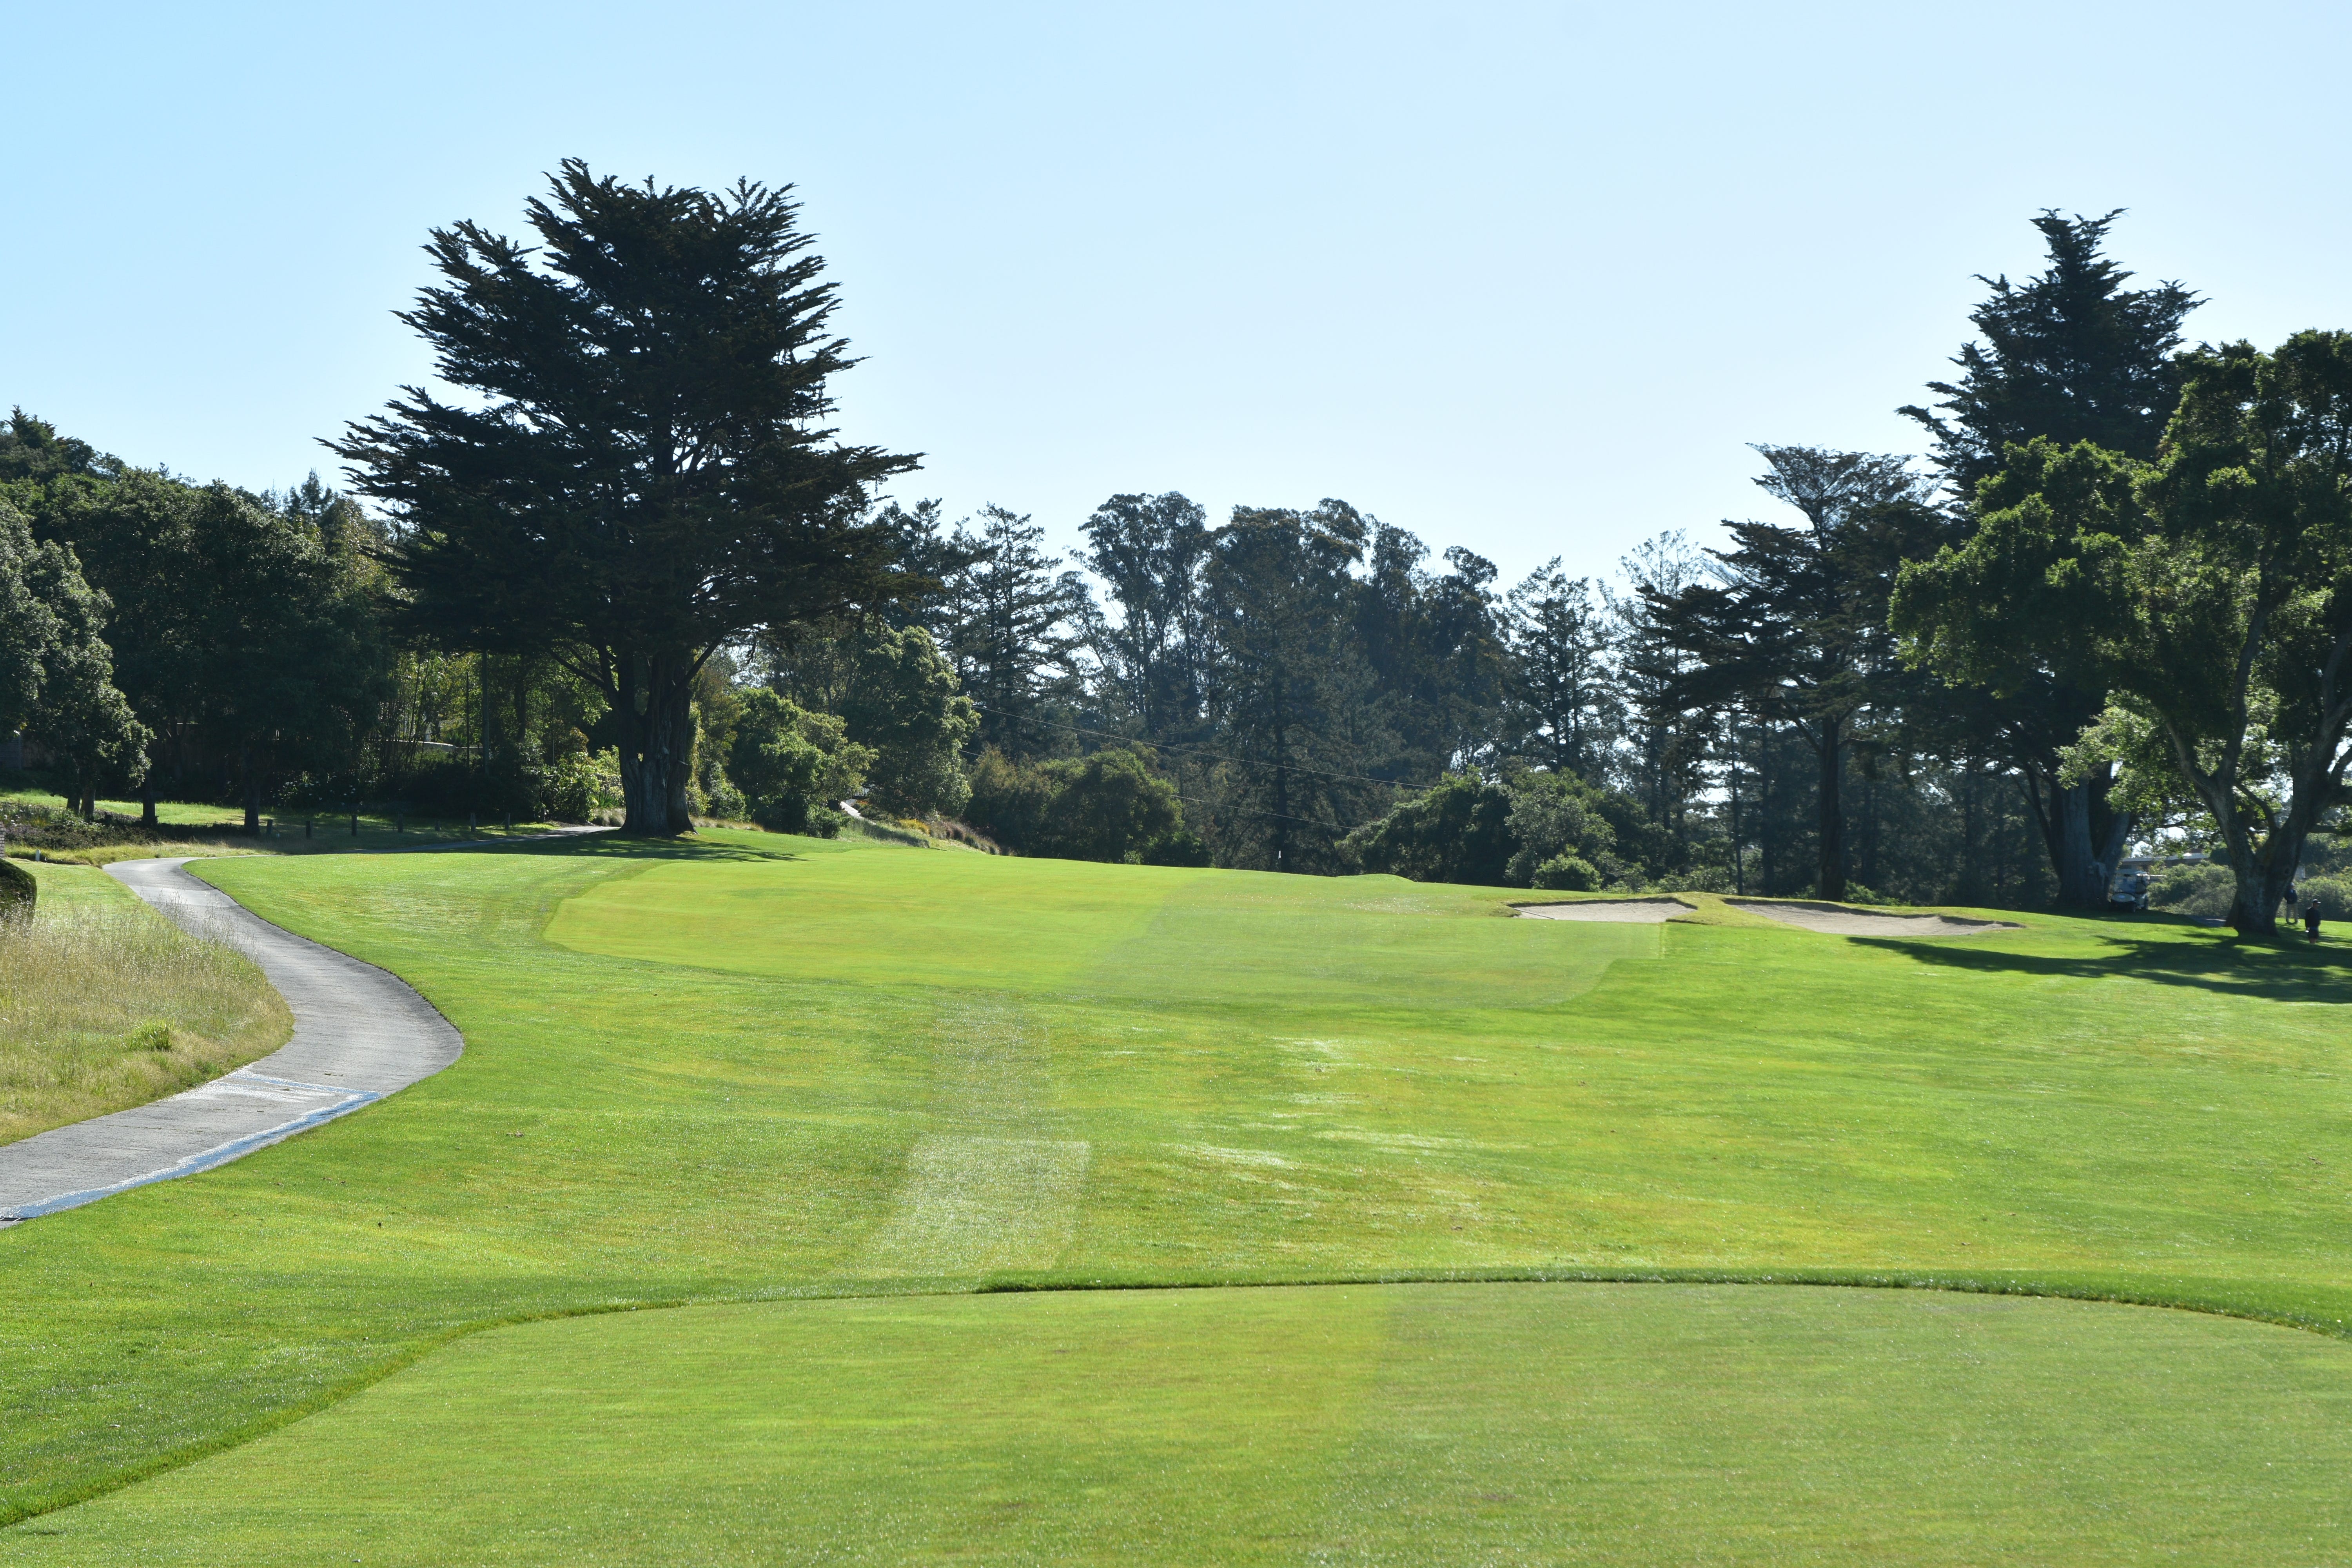
The 2nd hole tee shot is blind to a relatively wide fairway. However, it is super important to hit this fairway as coming from the left side rough is extremely problematic to hold the green with the approach
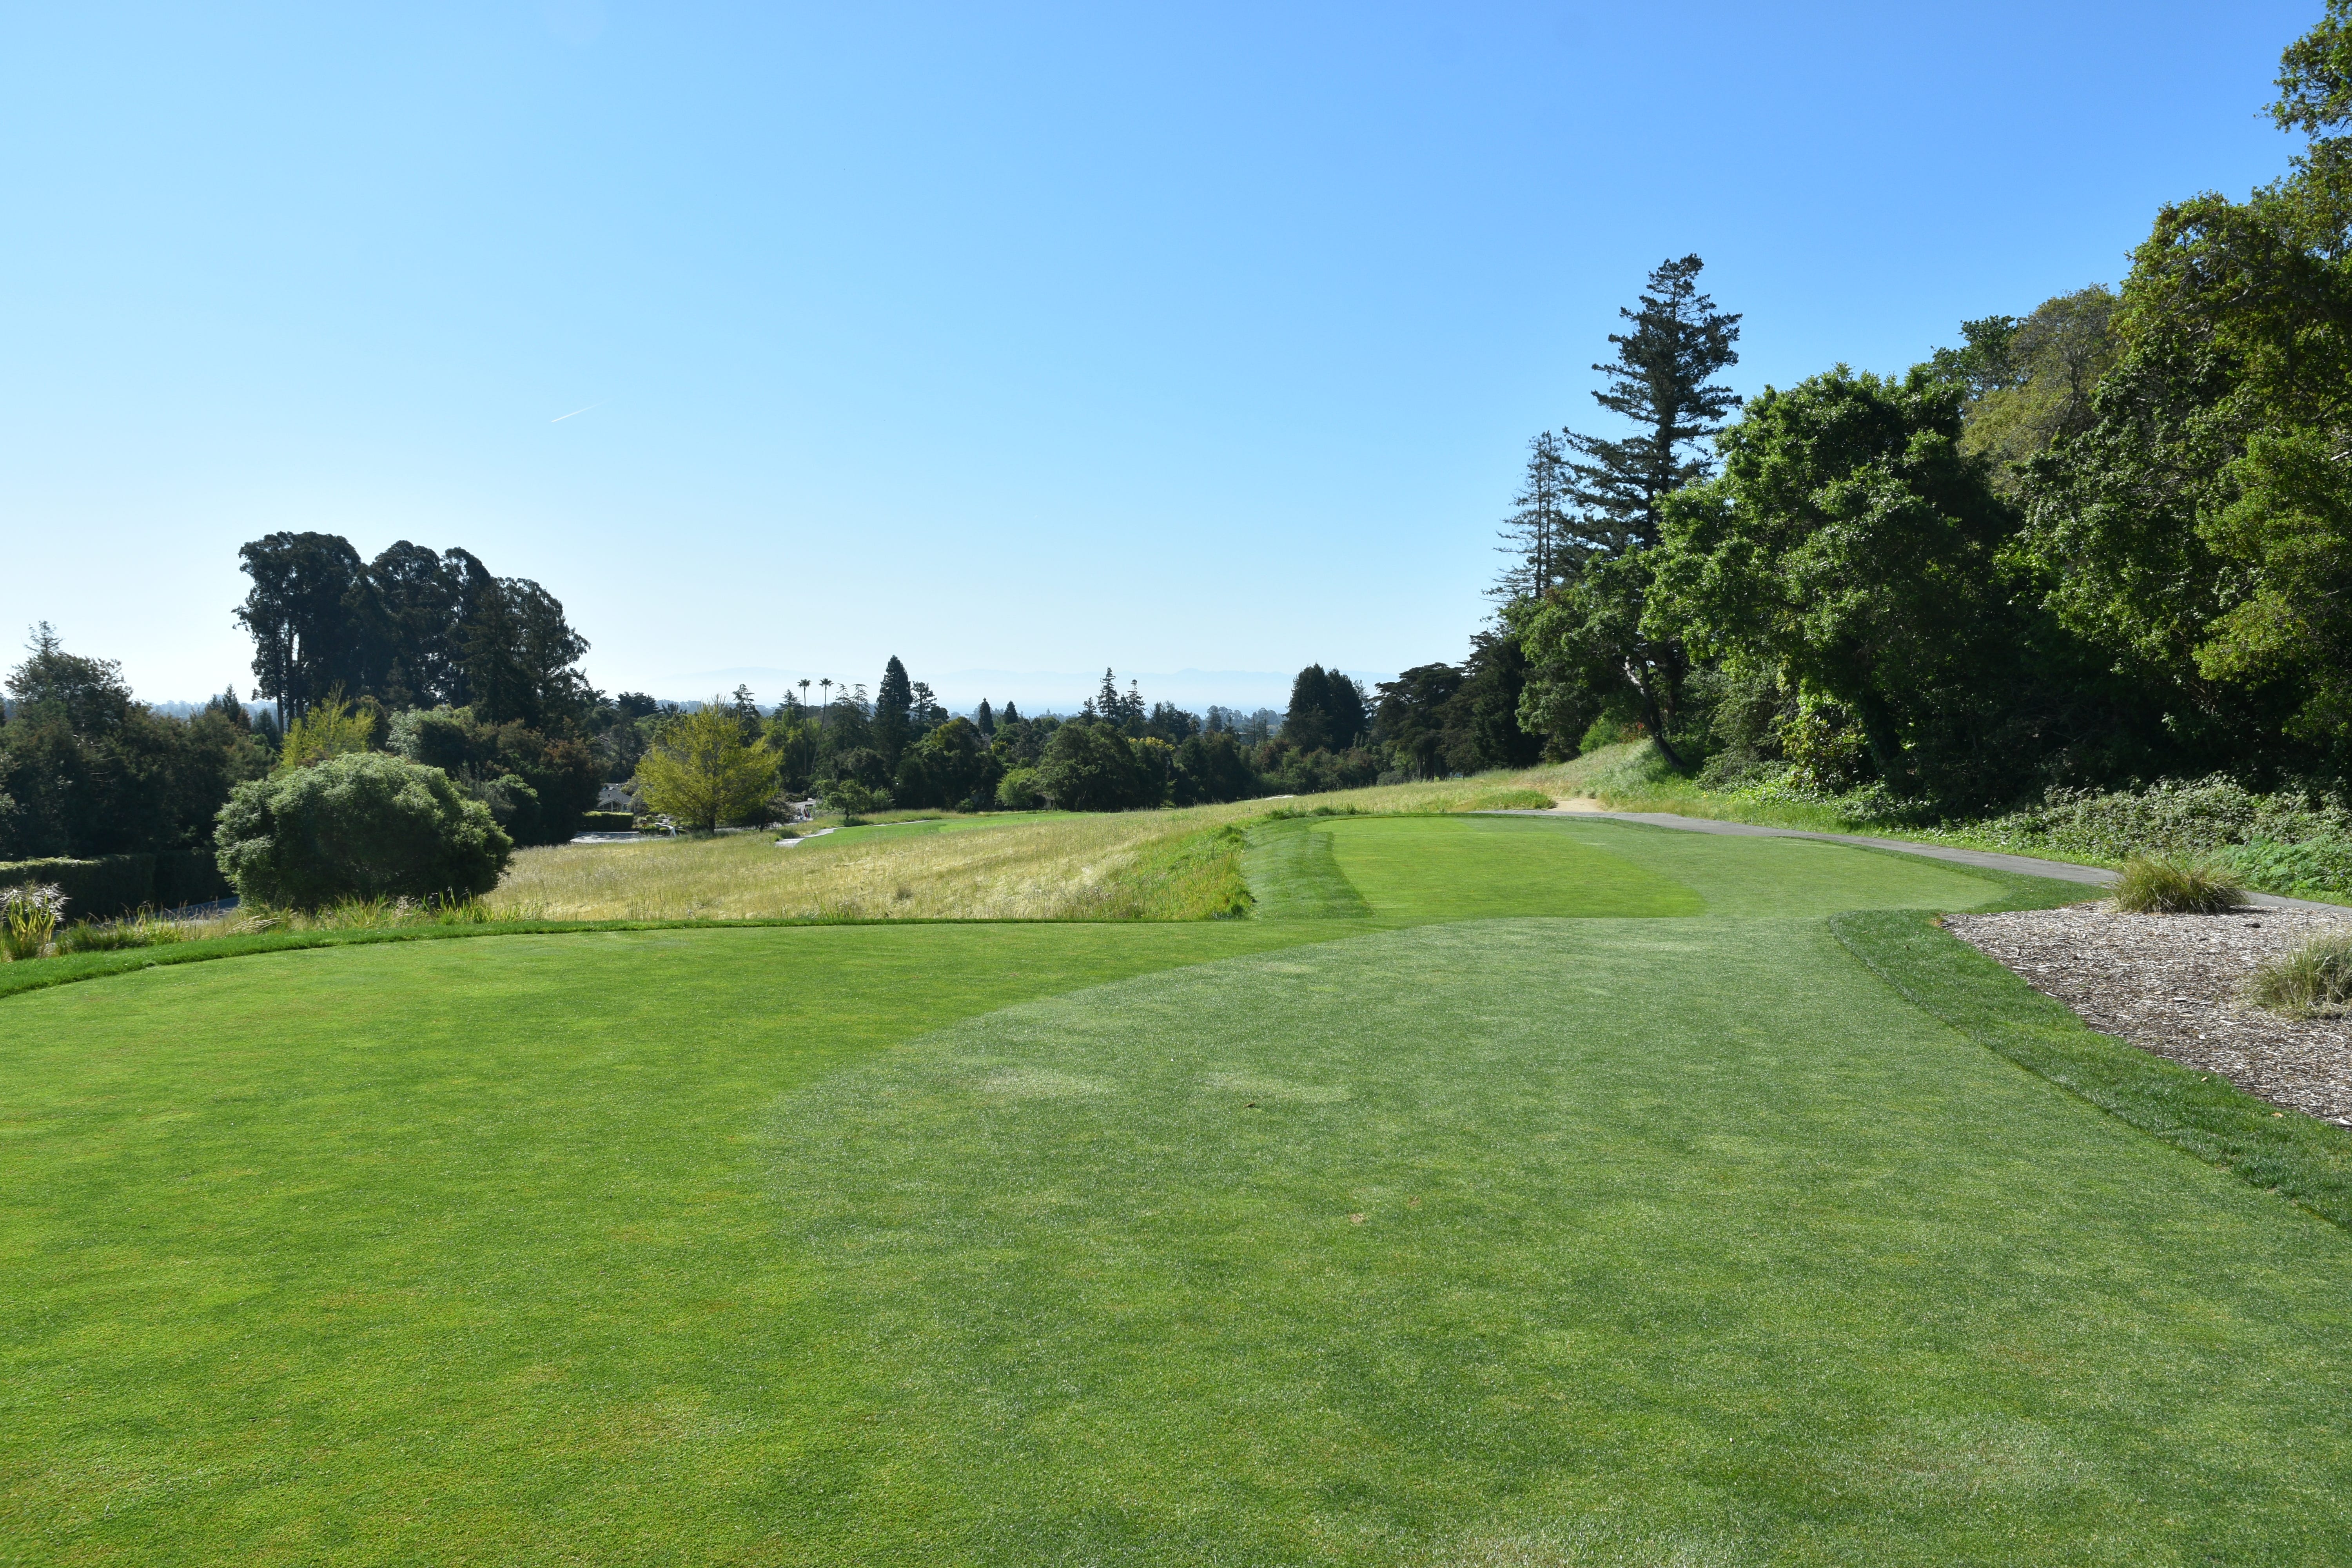
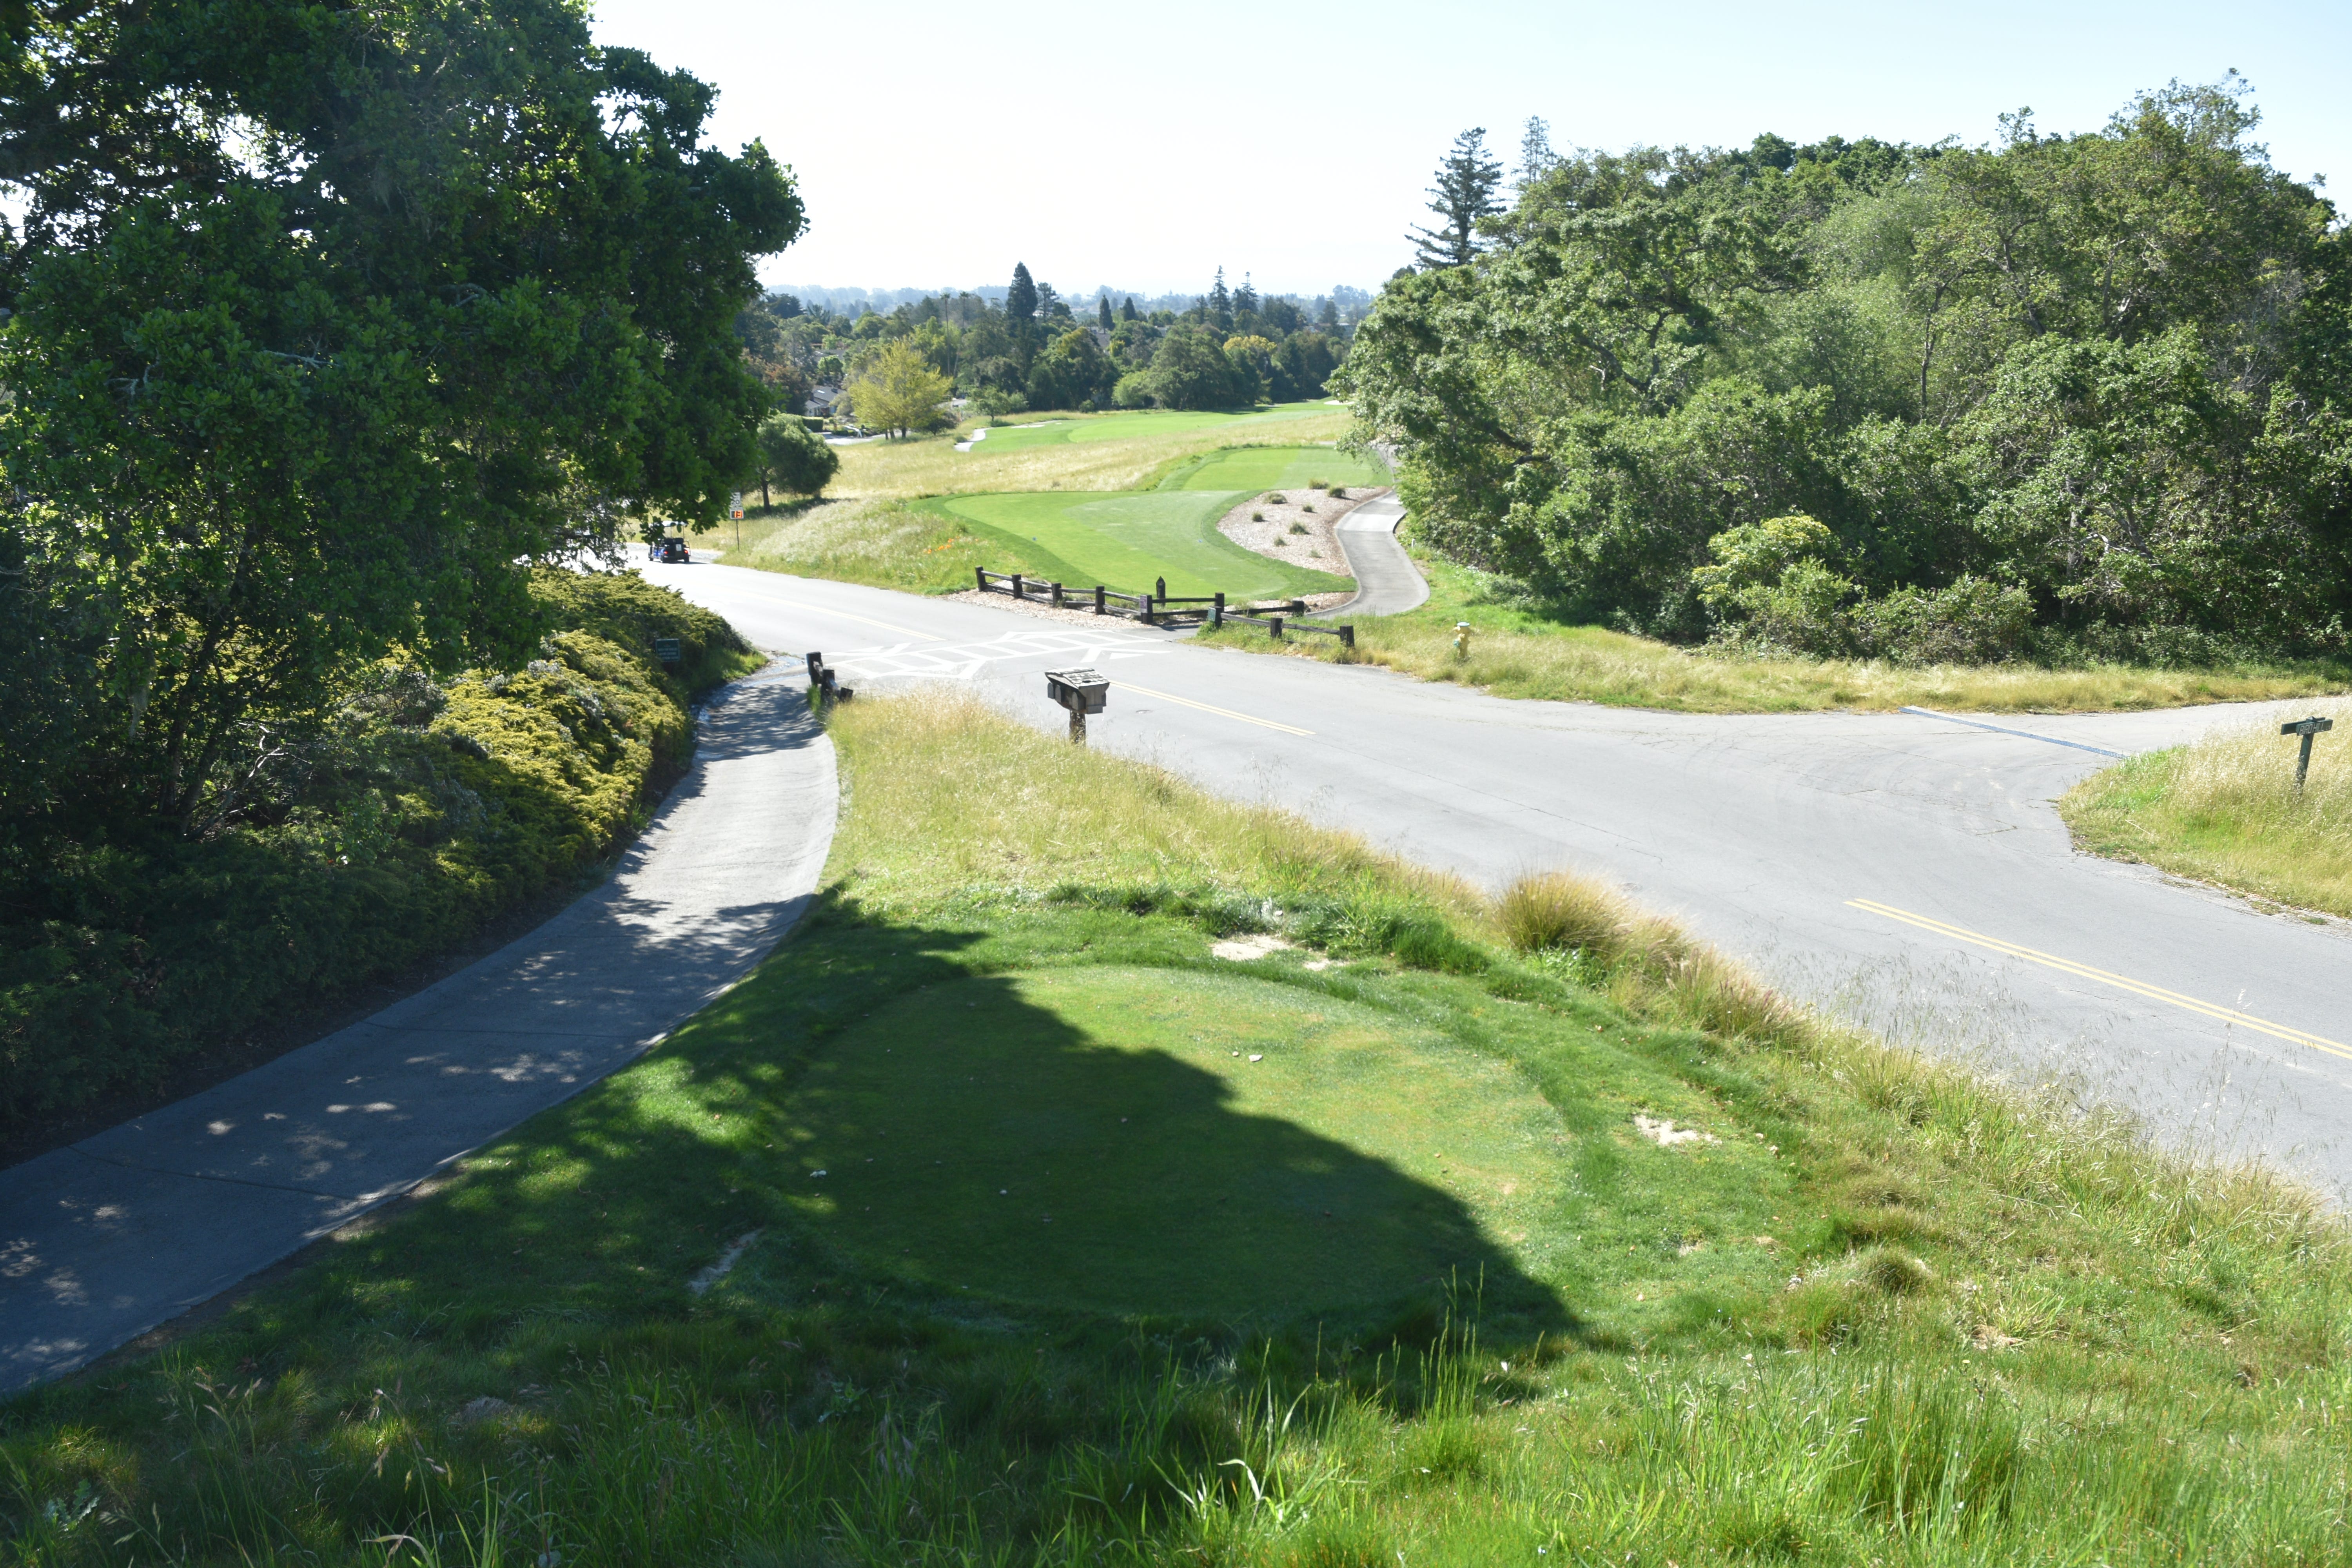
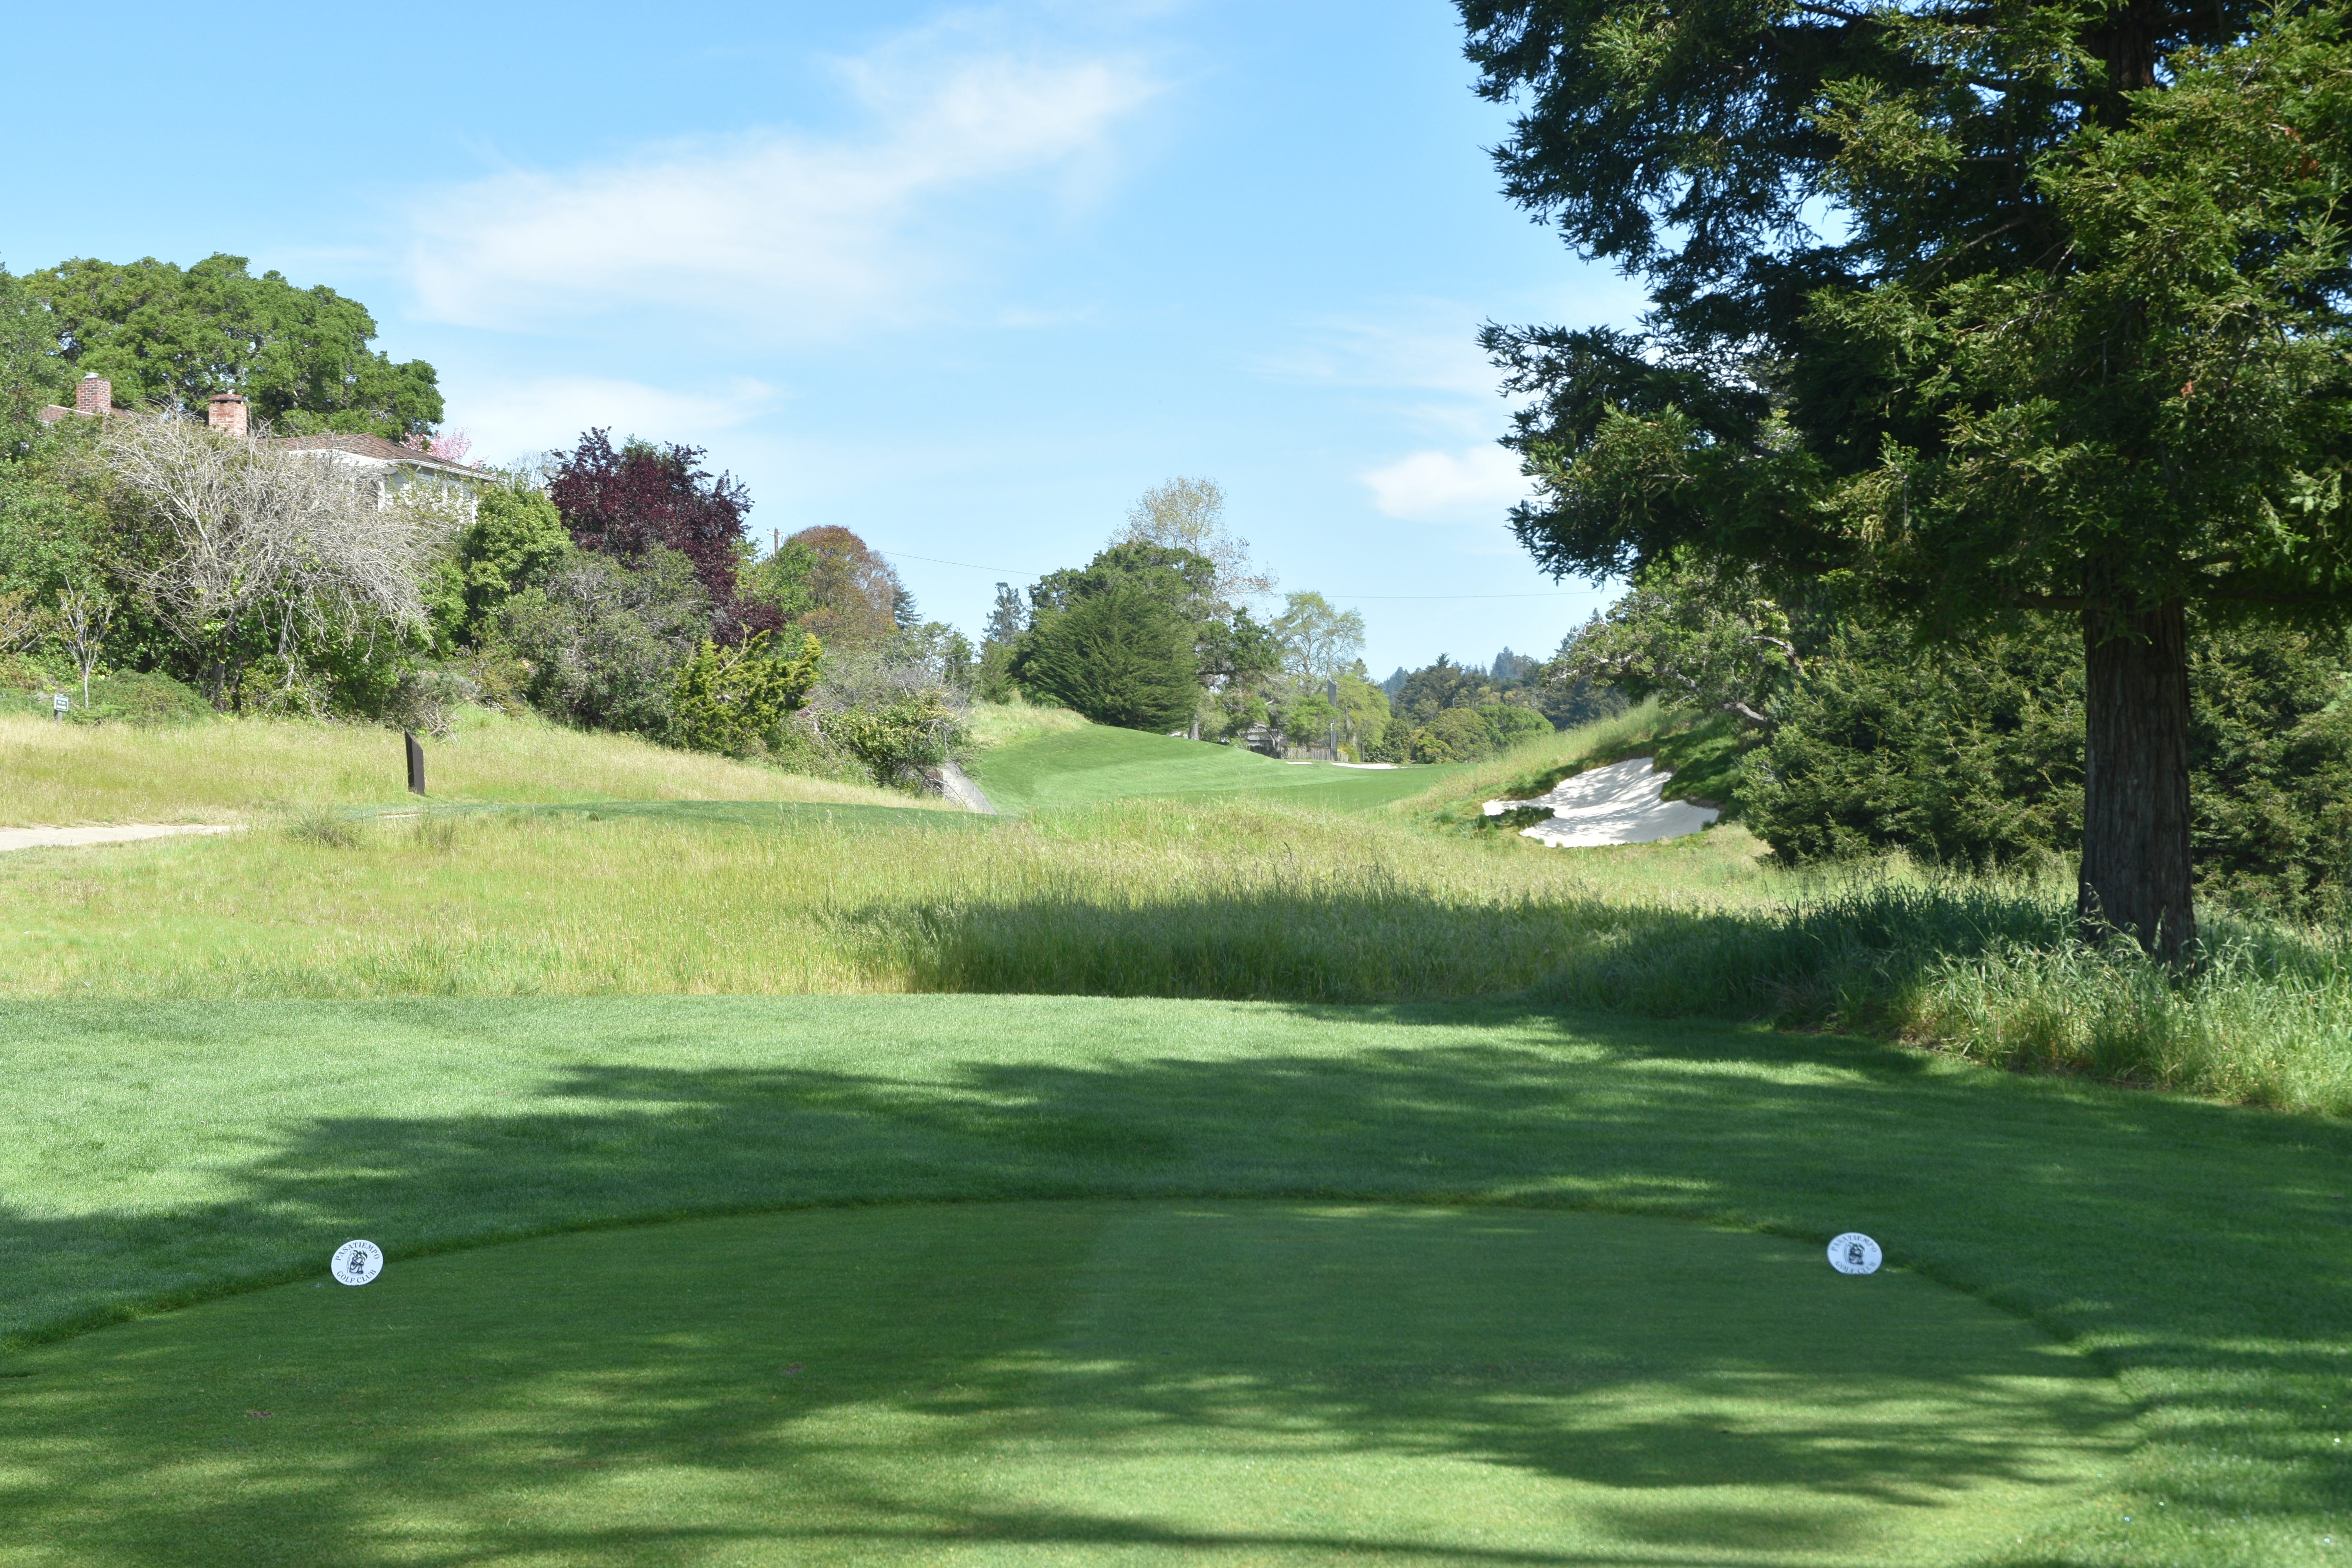
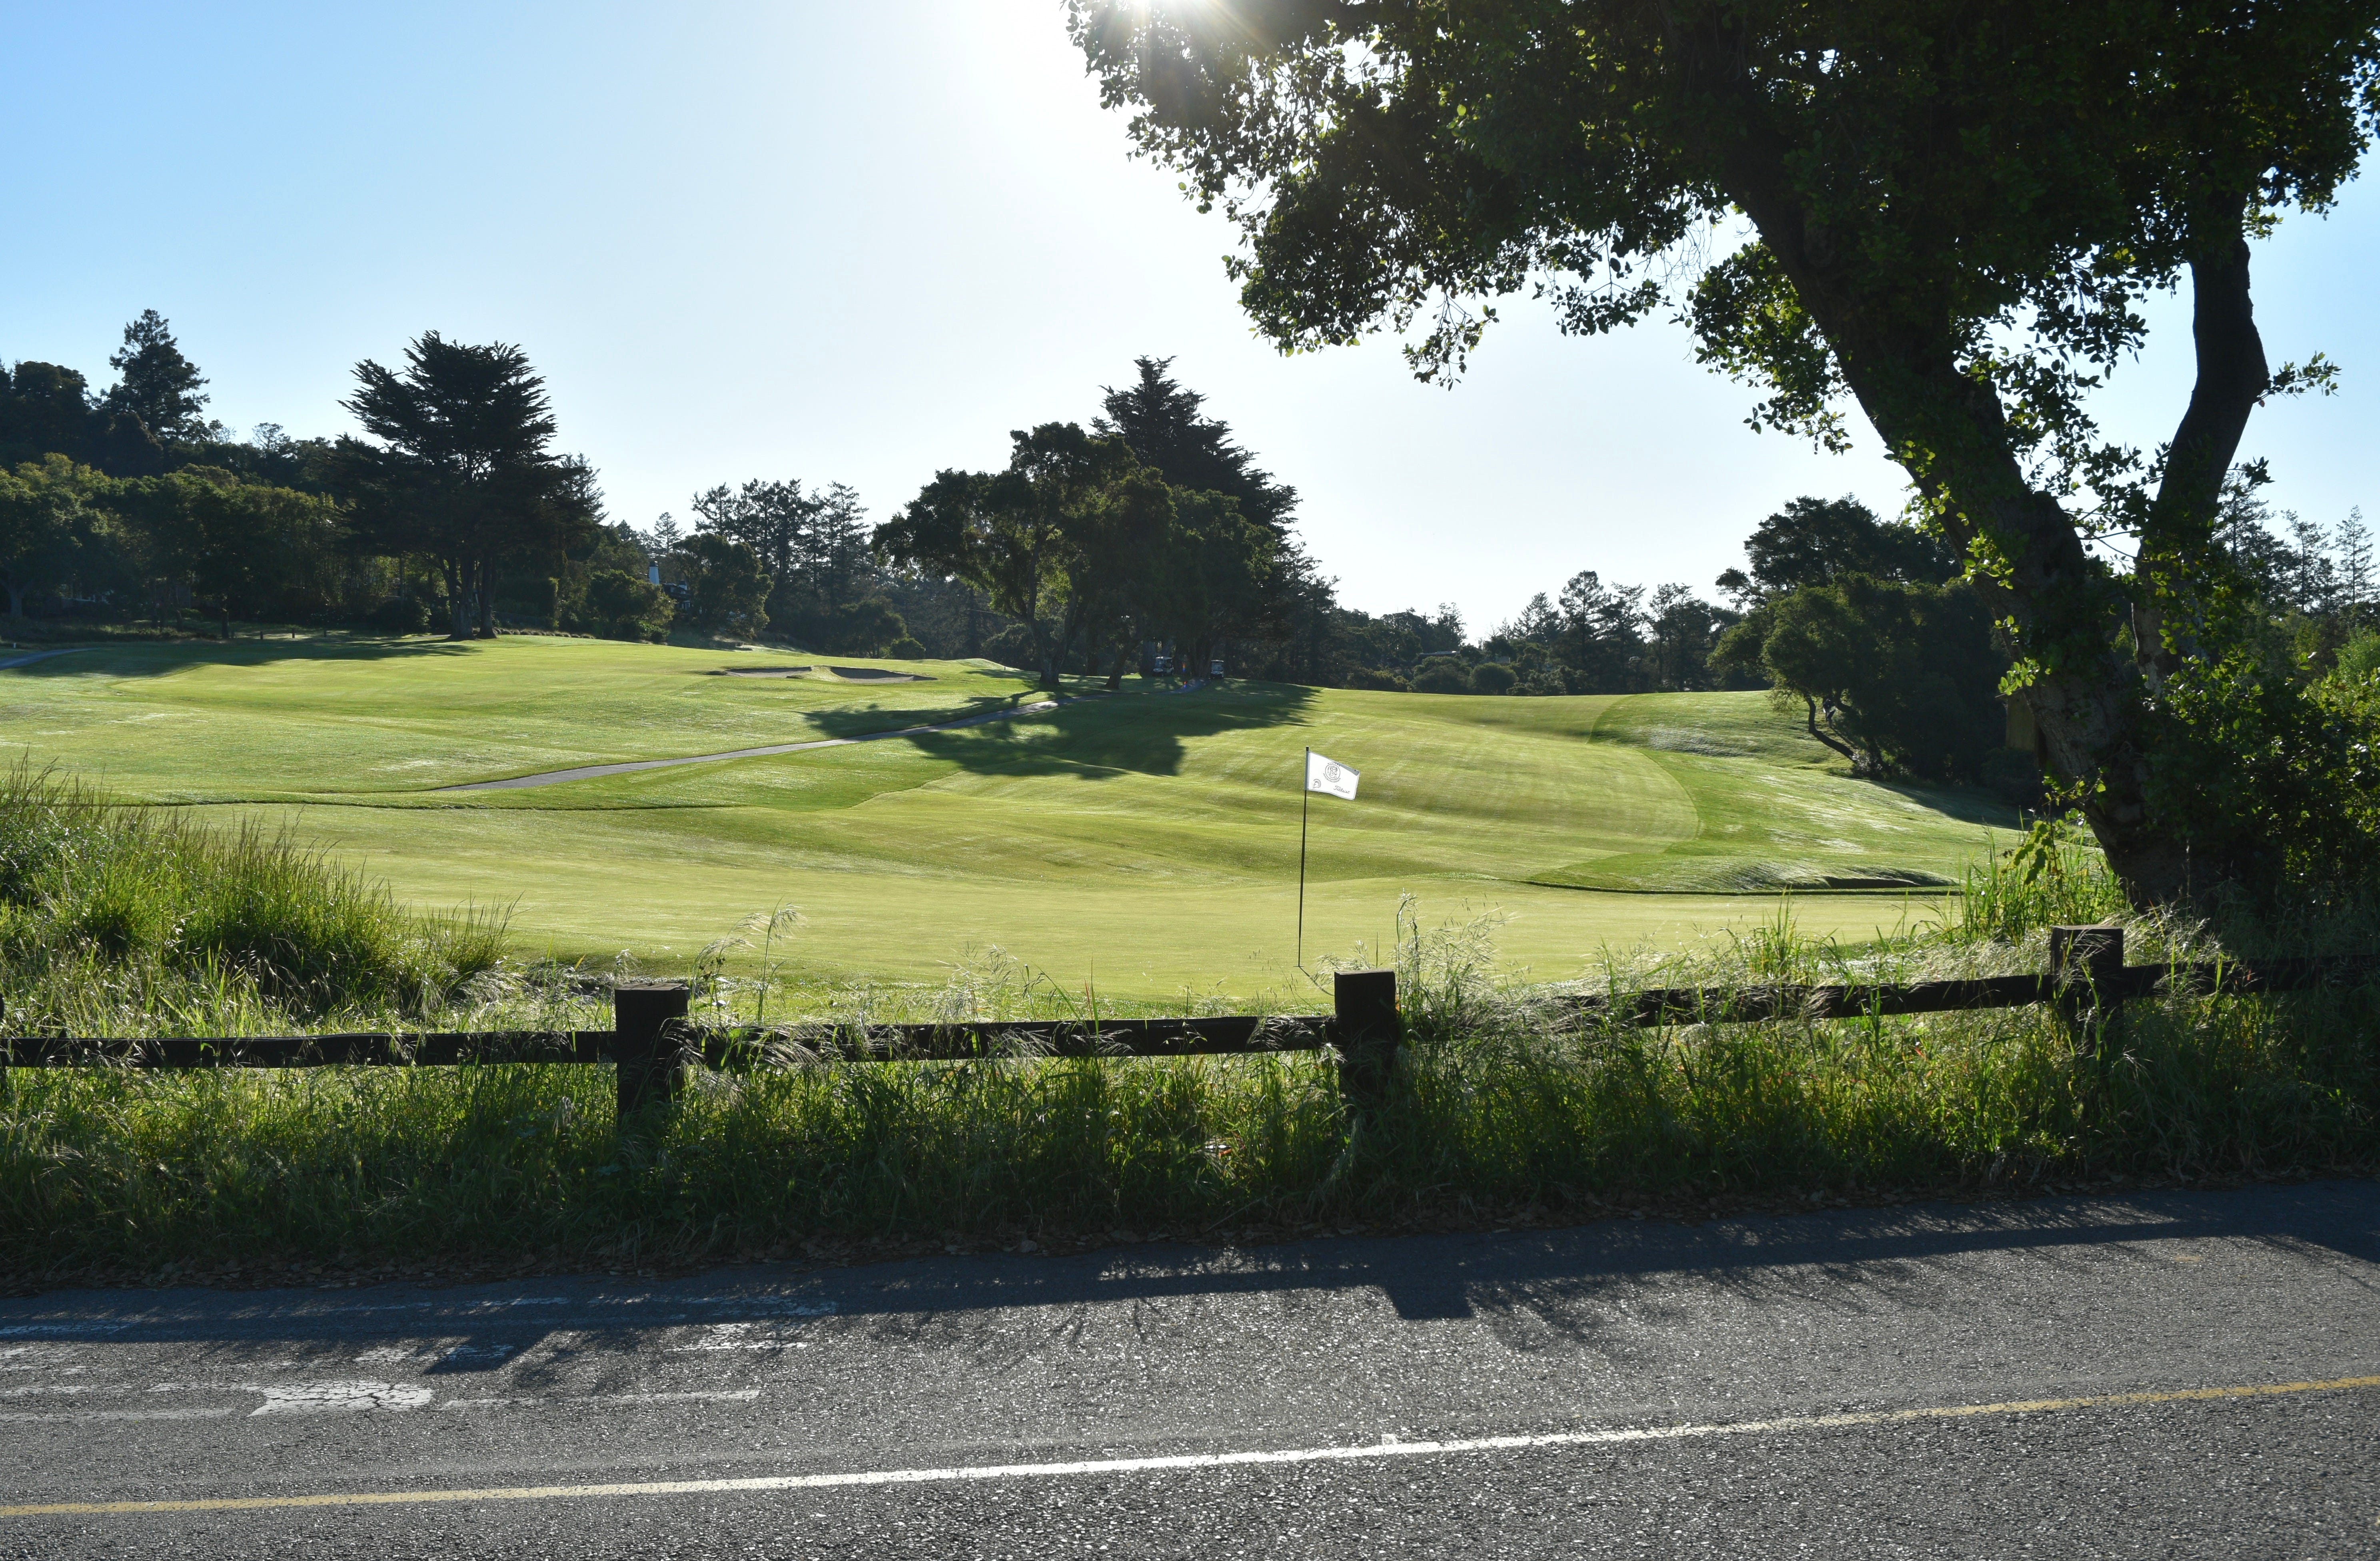
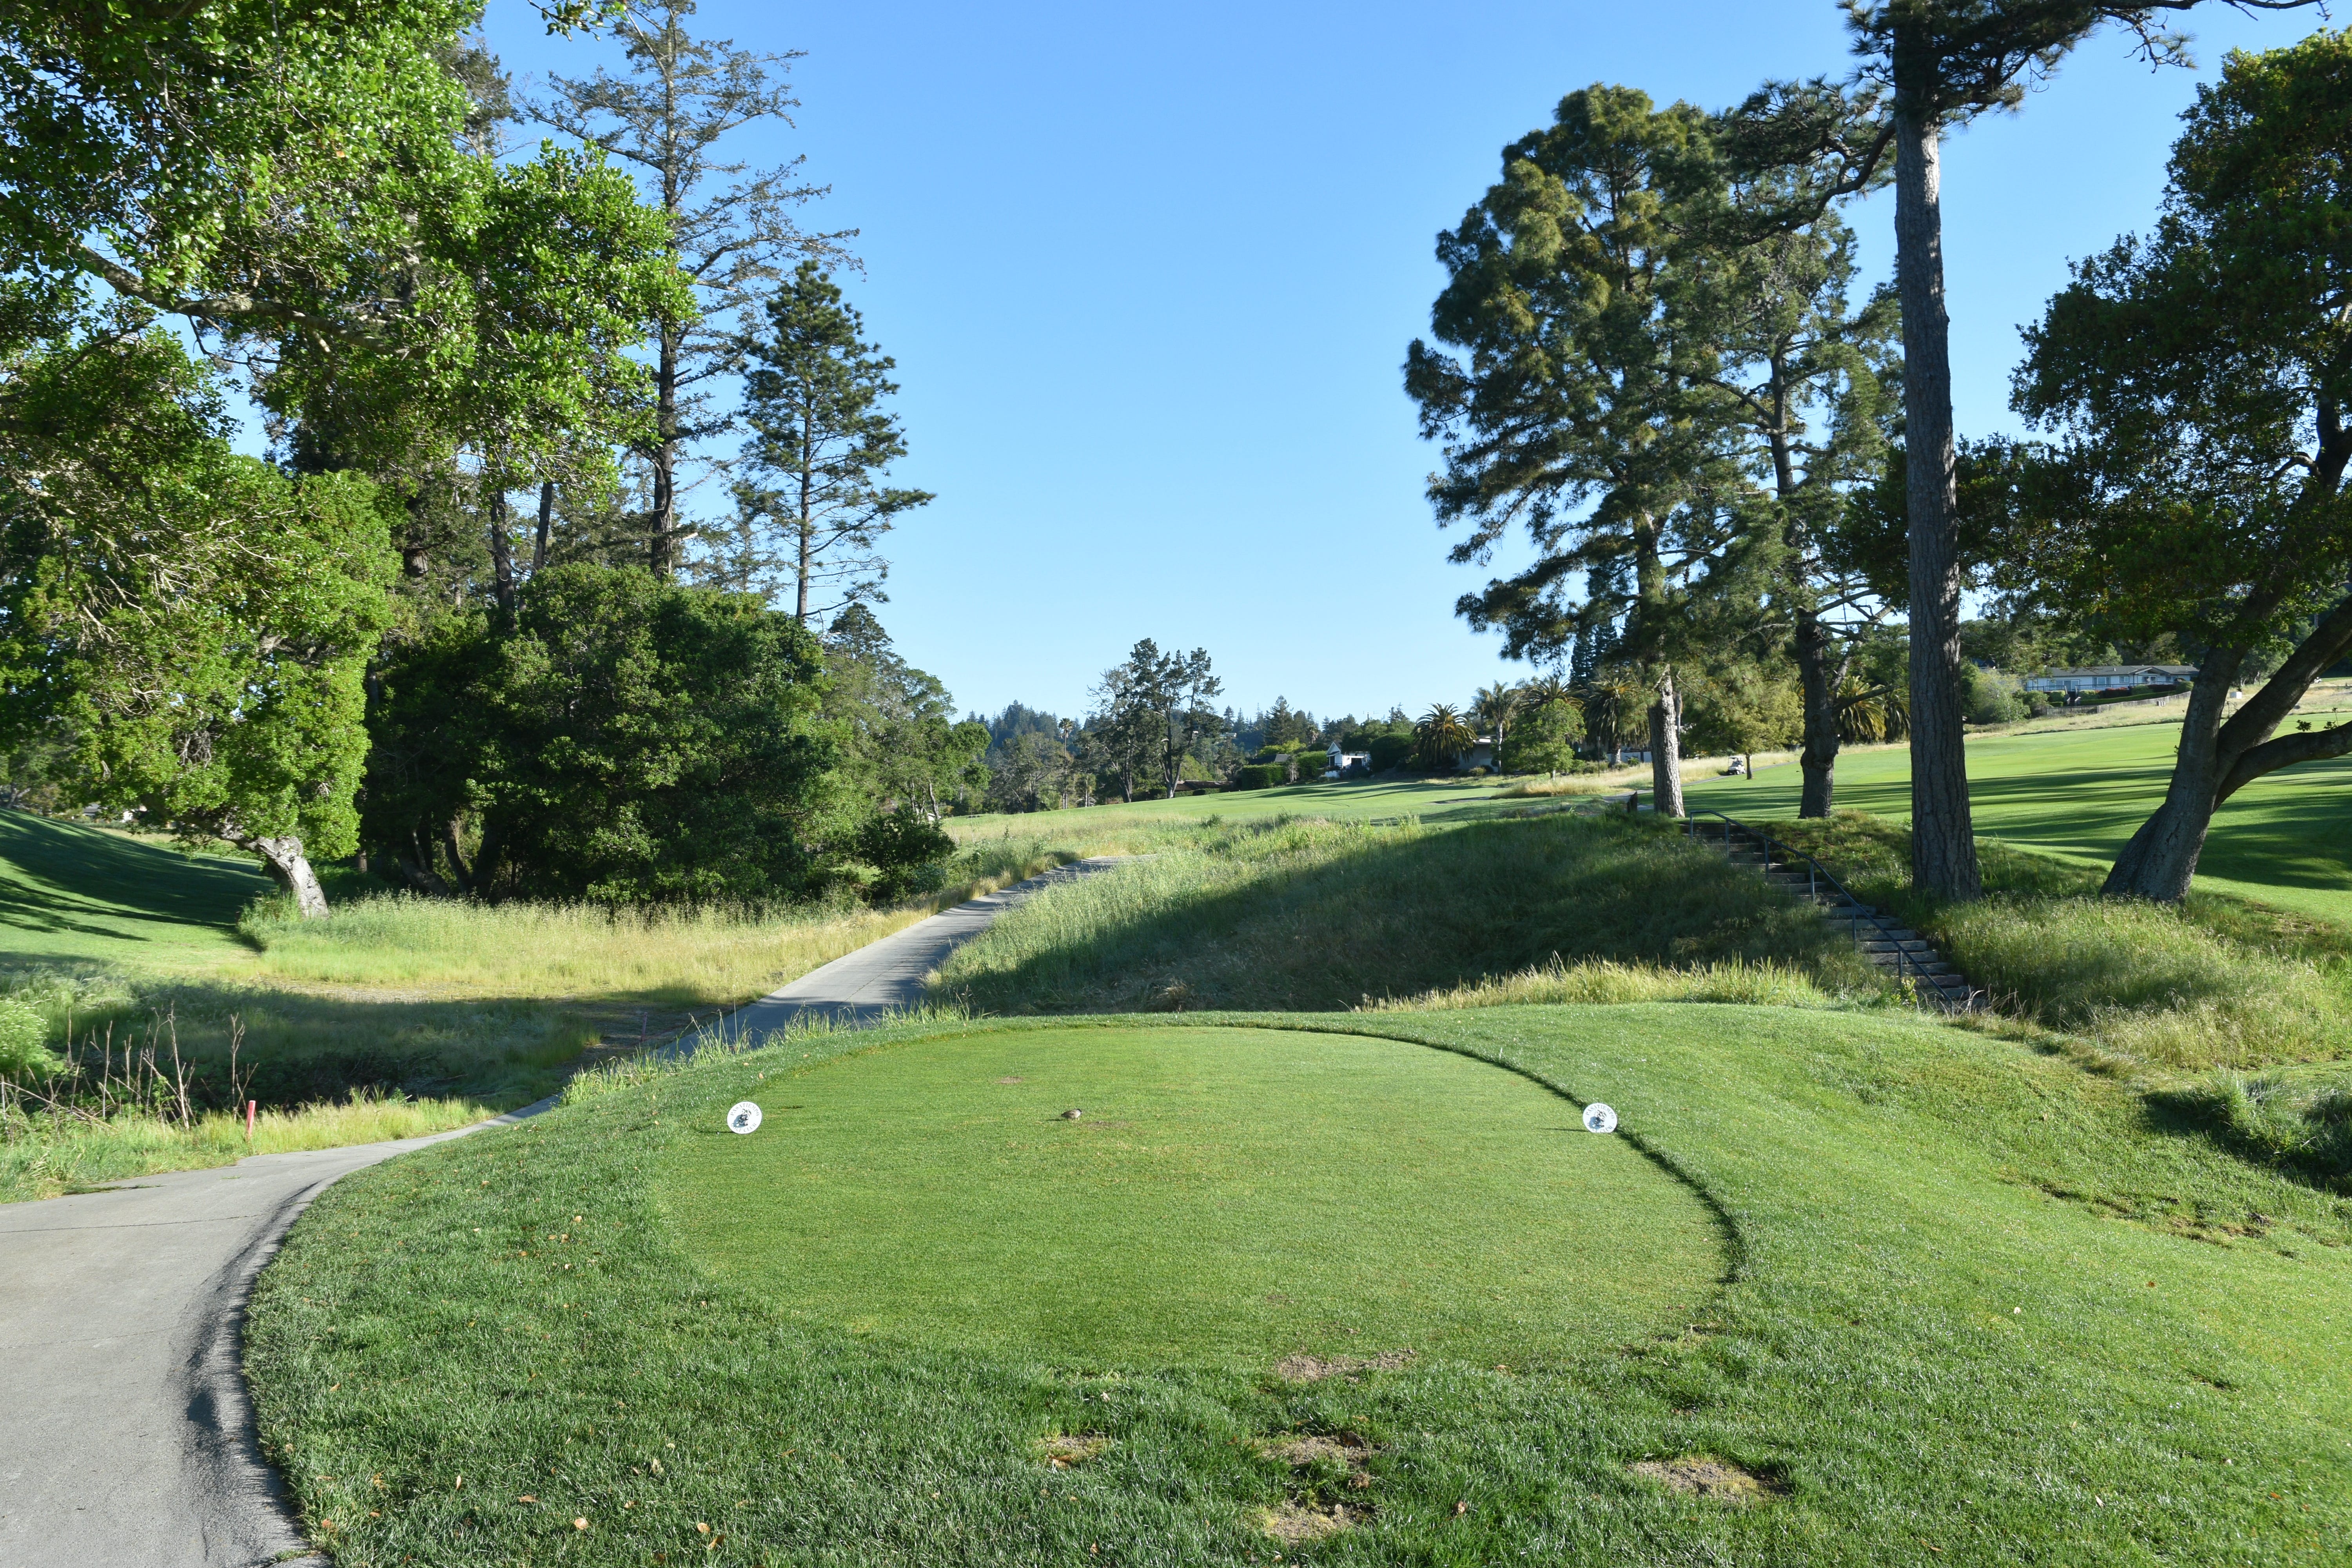
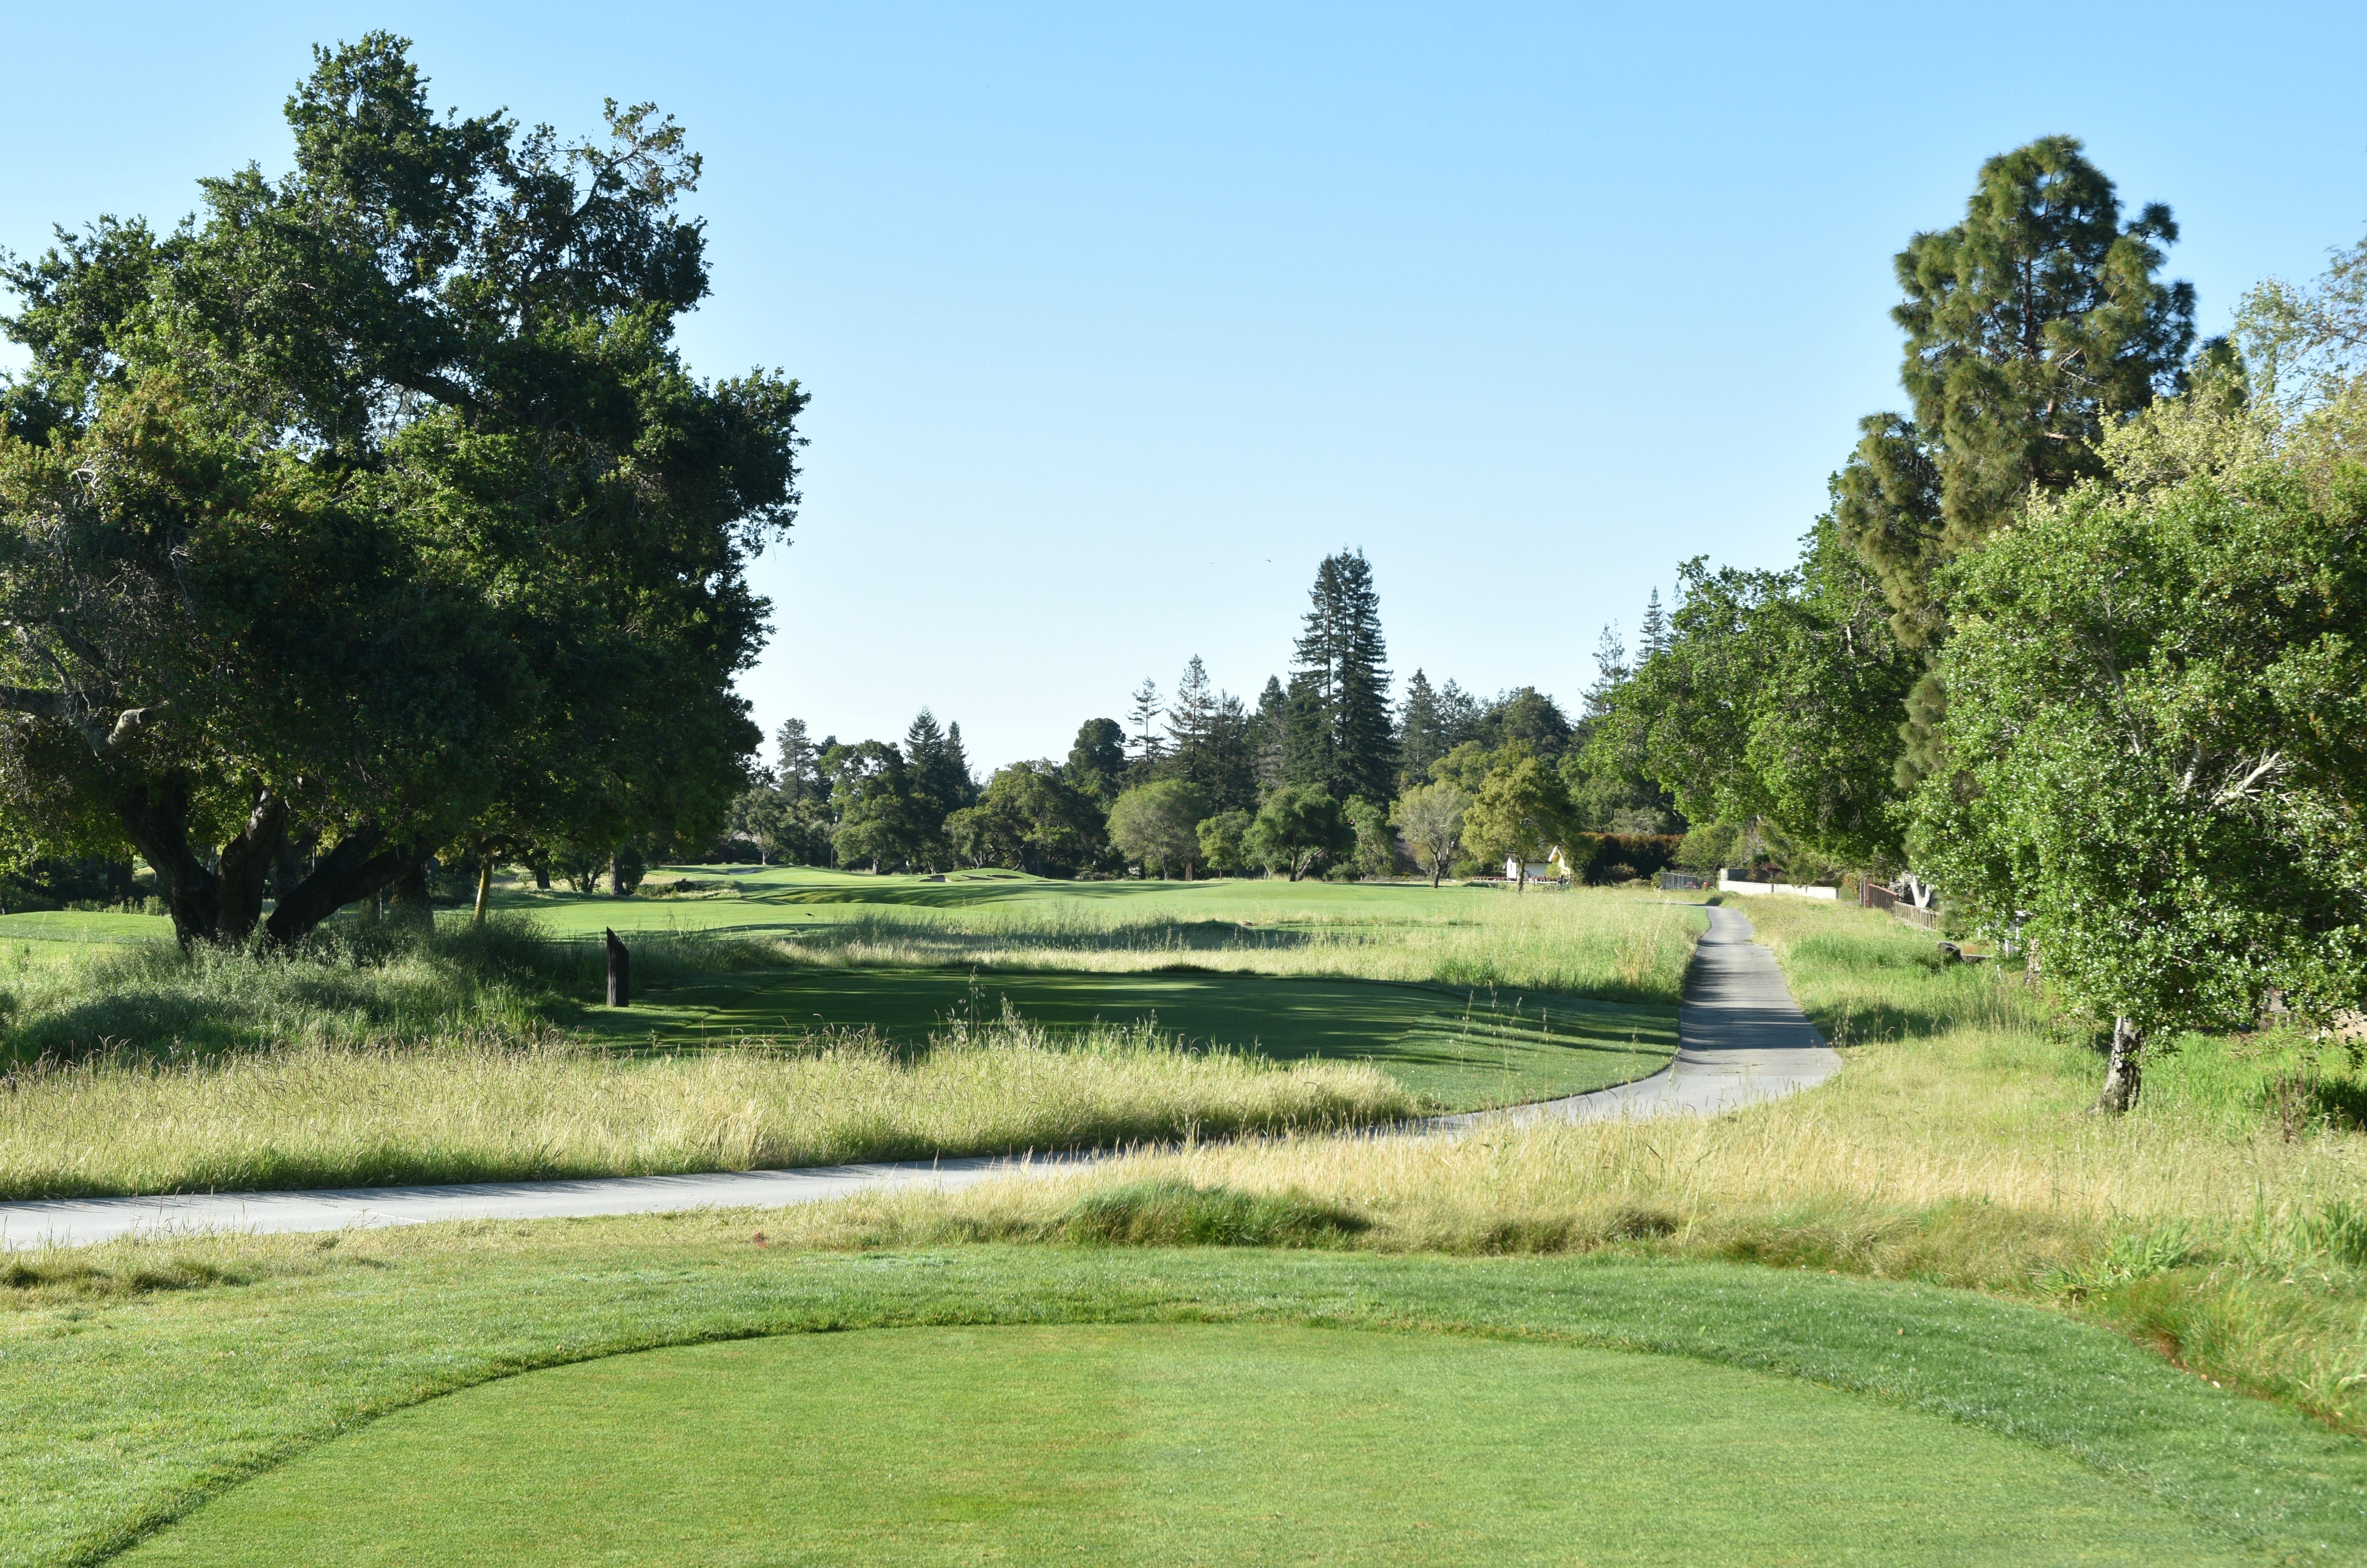
There is a special tee box for the 2nd hole behind the 1st hole green and above Clubhouse Road — stretches the hole by another 50 yards (making the hole play as a 480-yard par 4 hole)
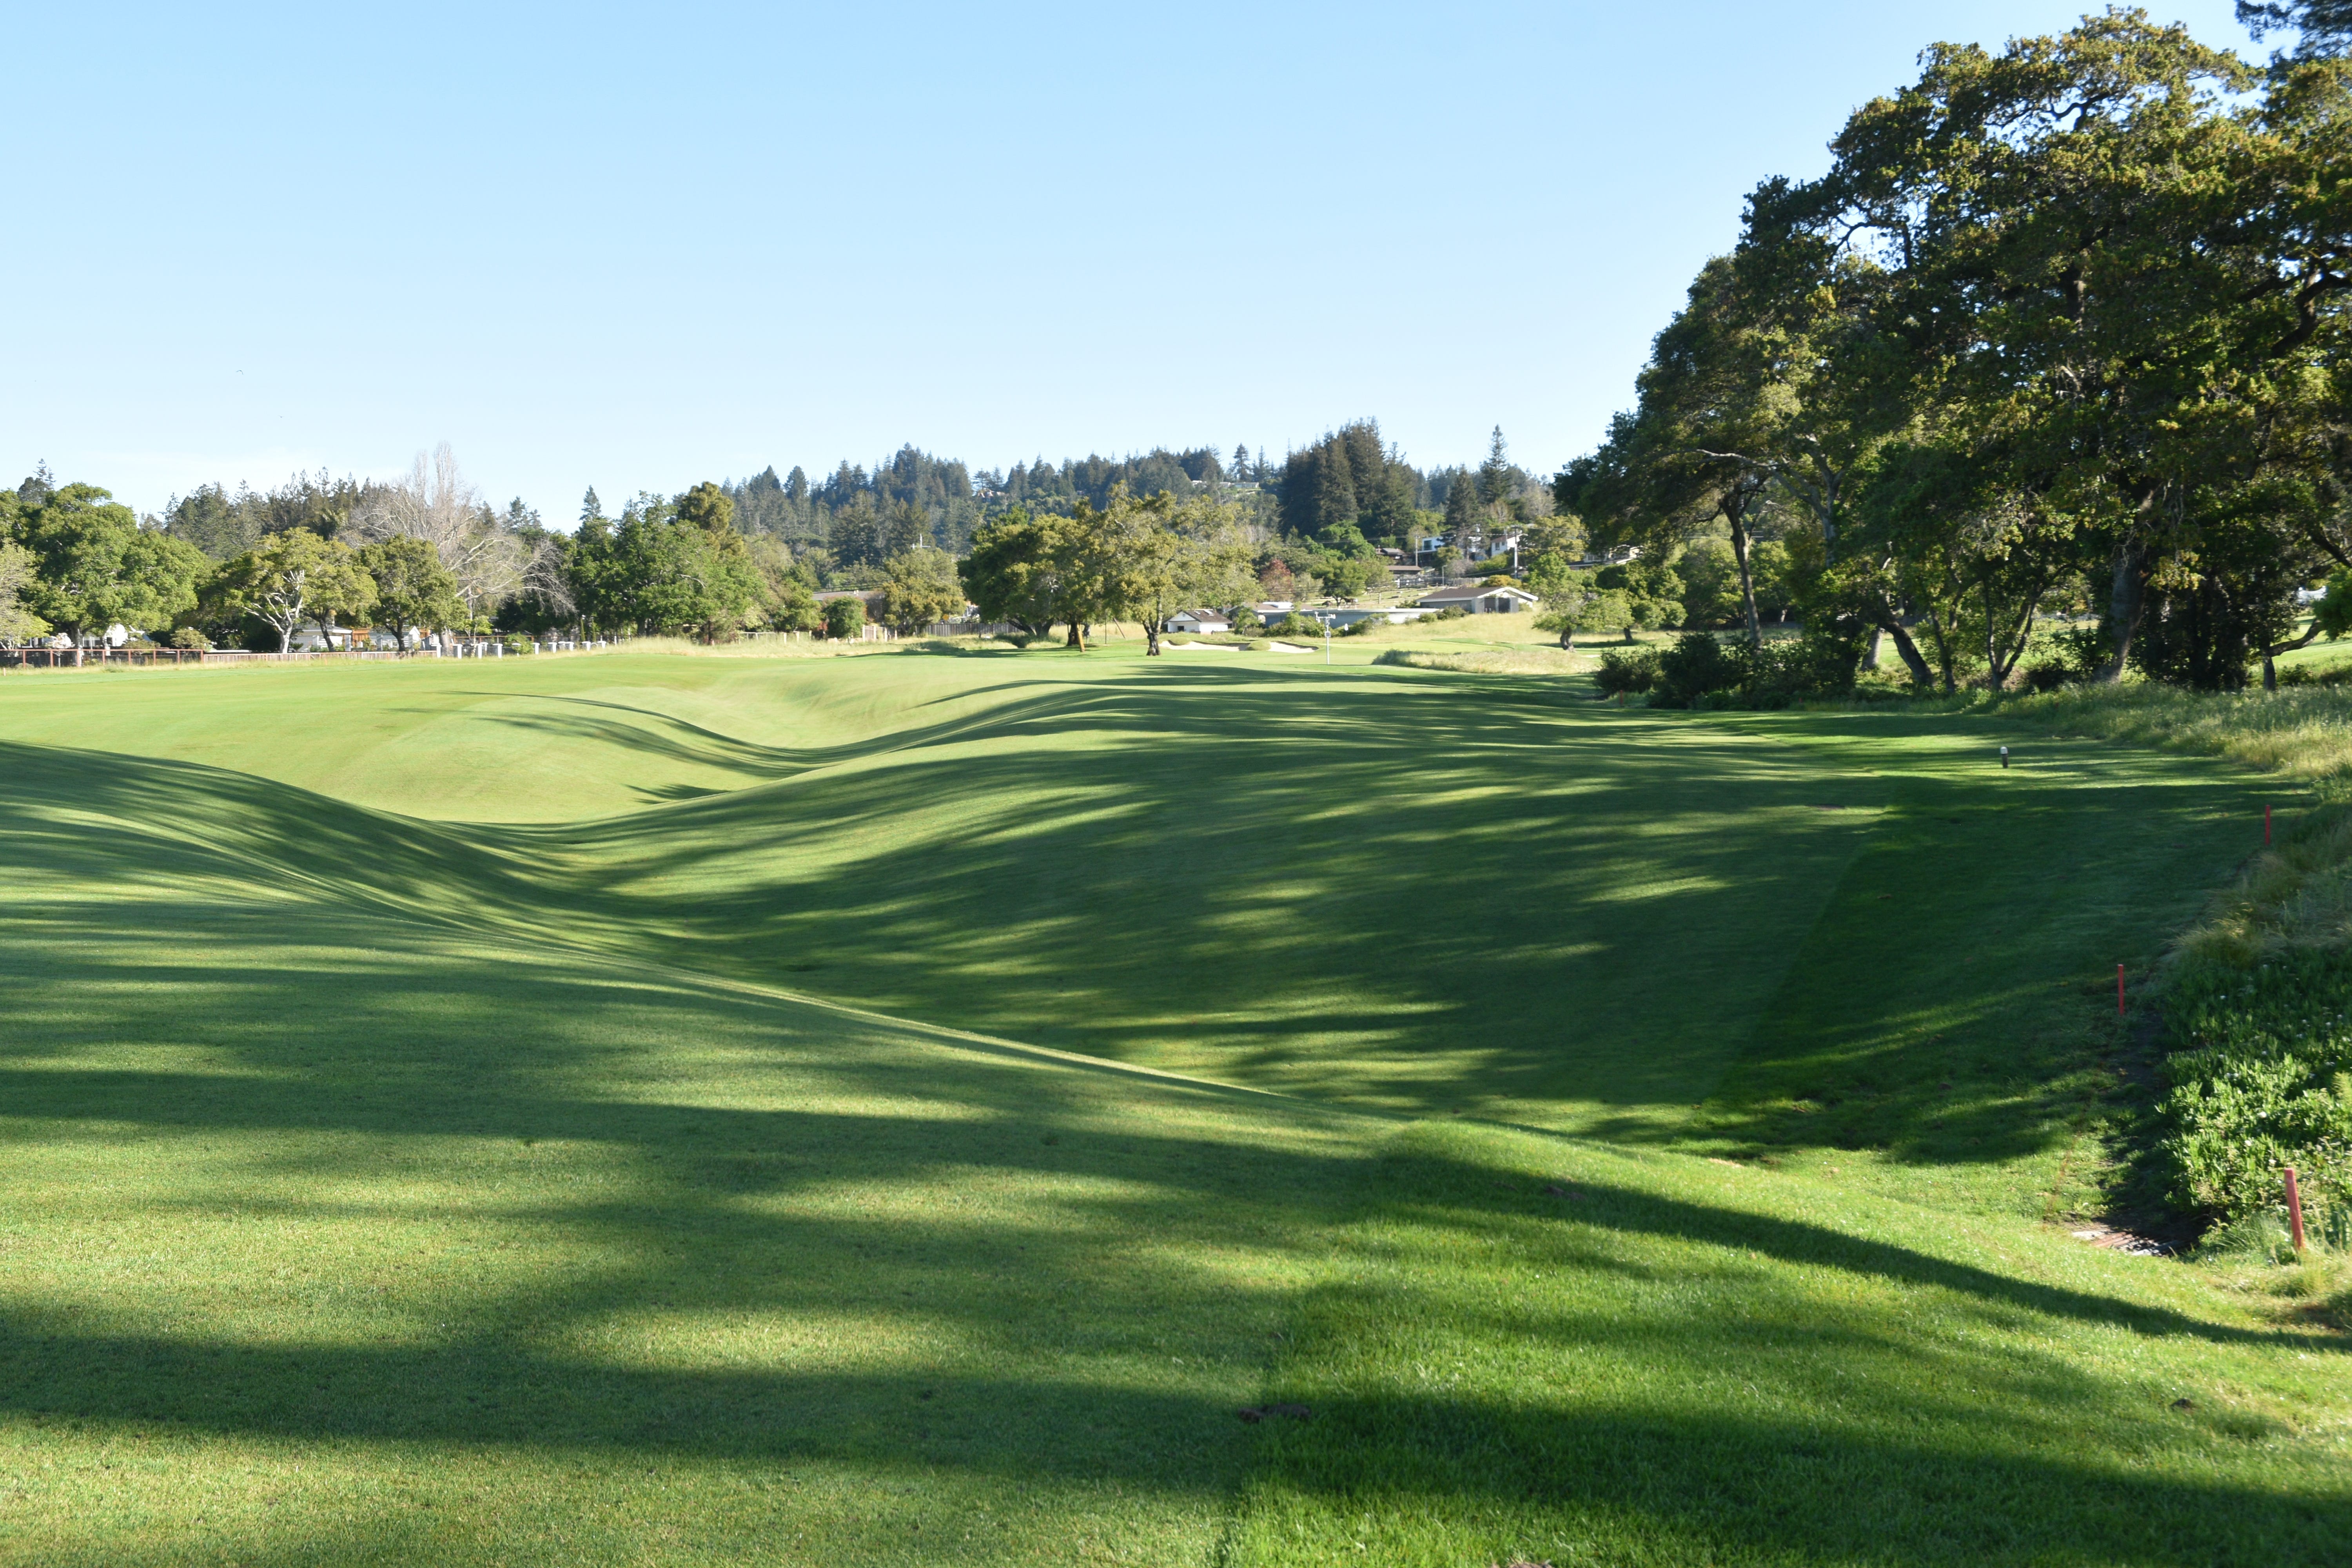
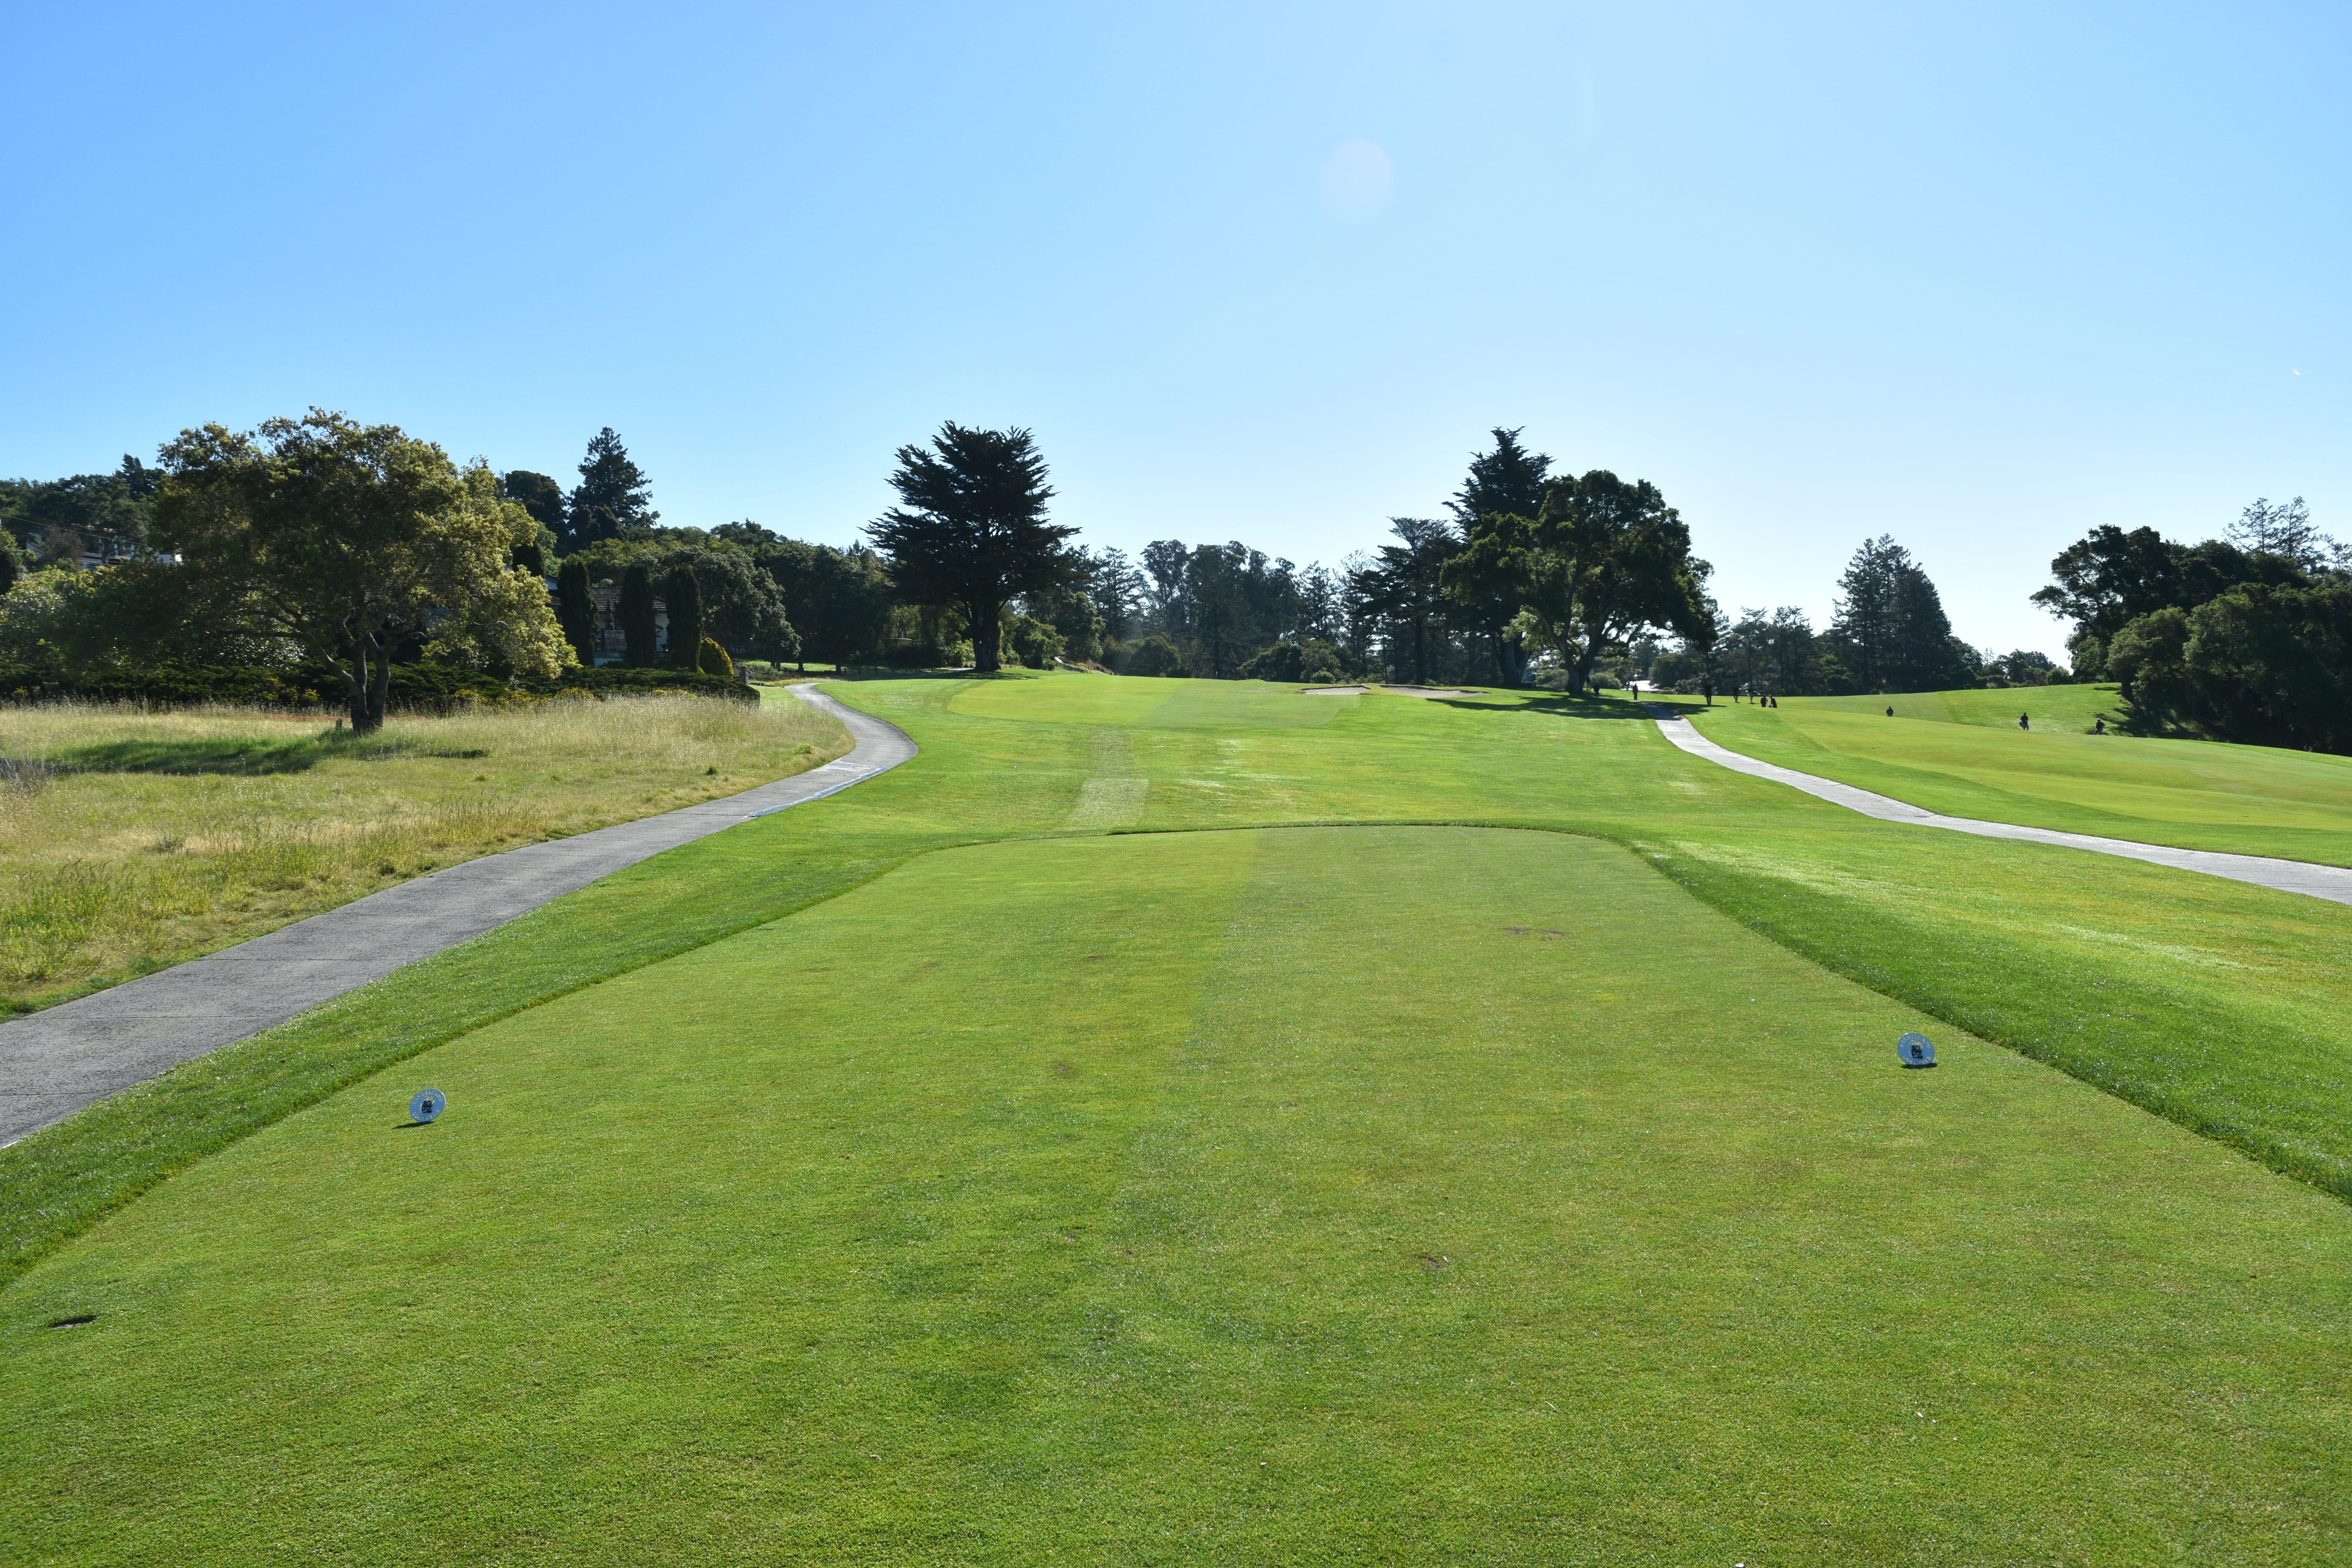
The view of the 2nd hole tee shot from the special tee box — the only way to challenge the young stallions during the Western Intercollegiate tournament
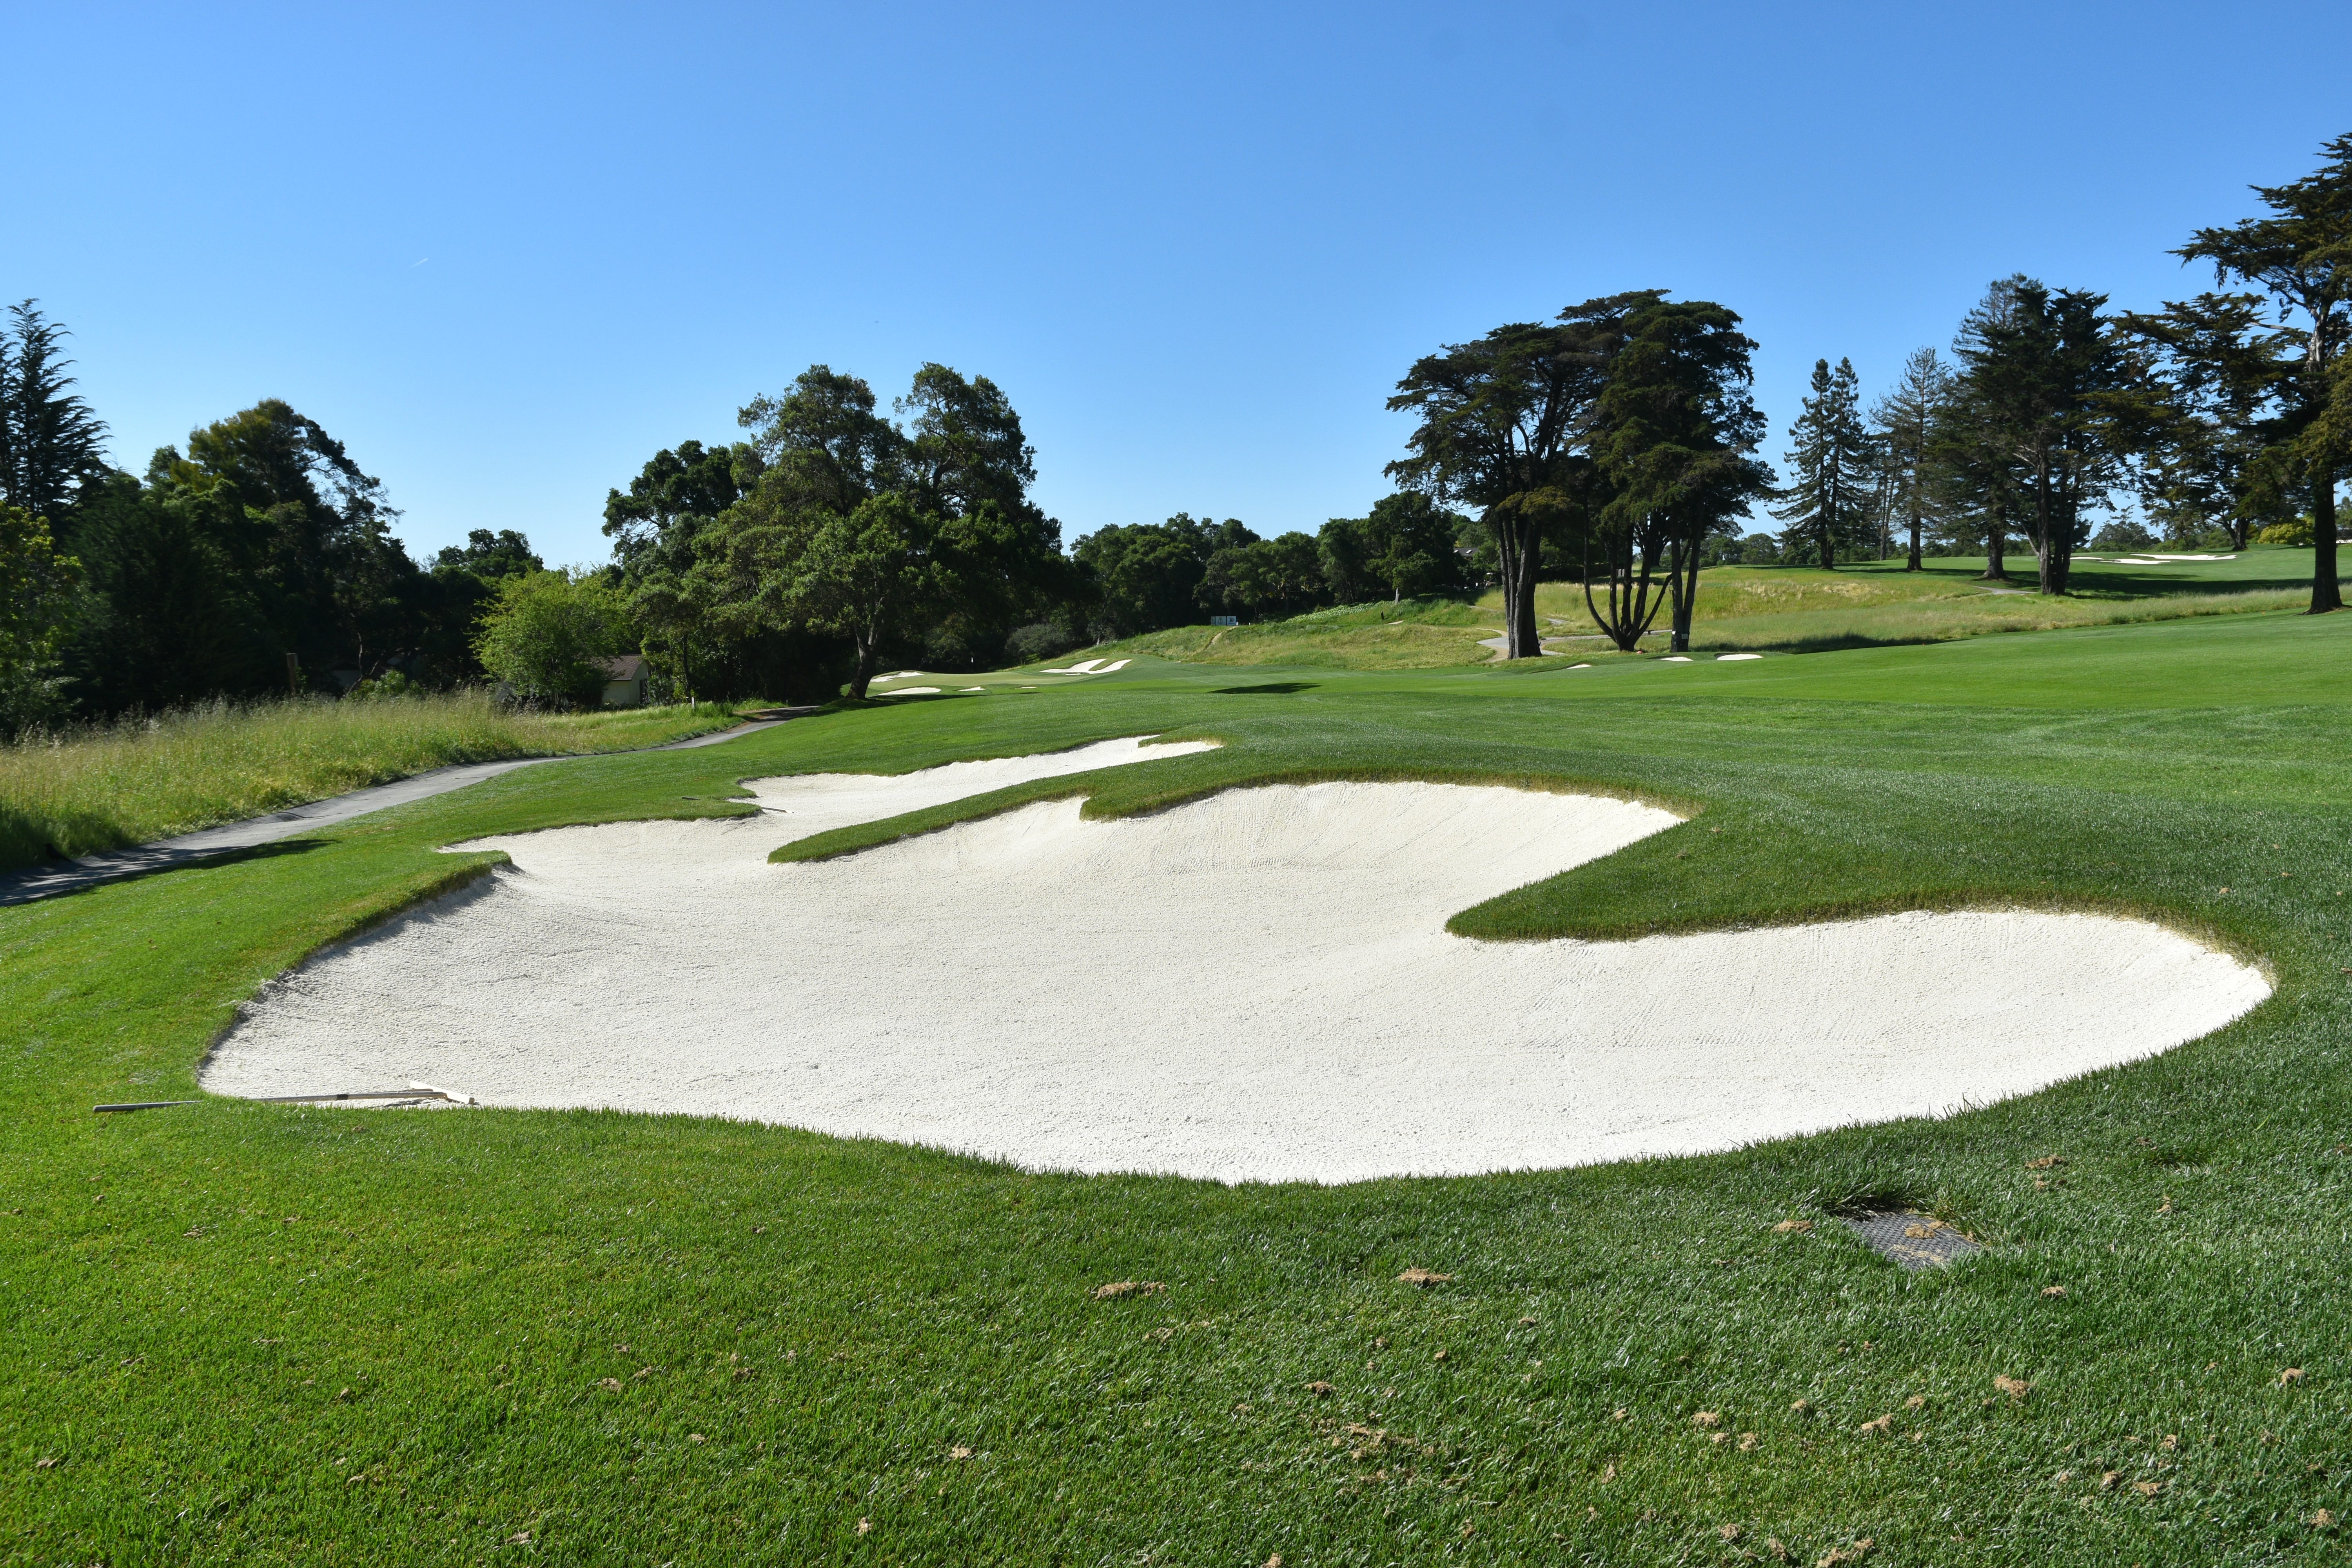
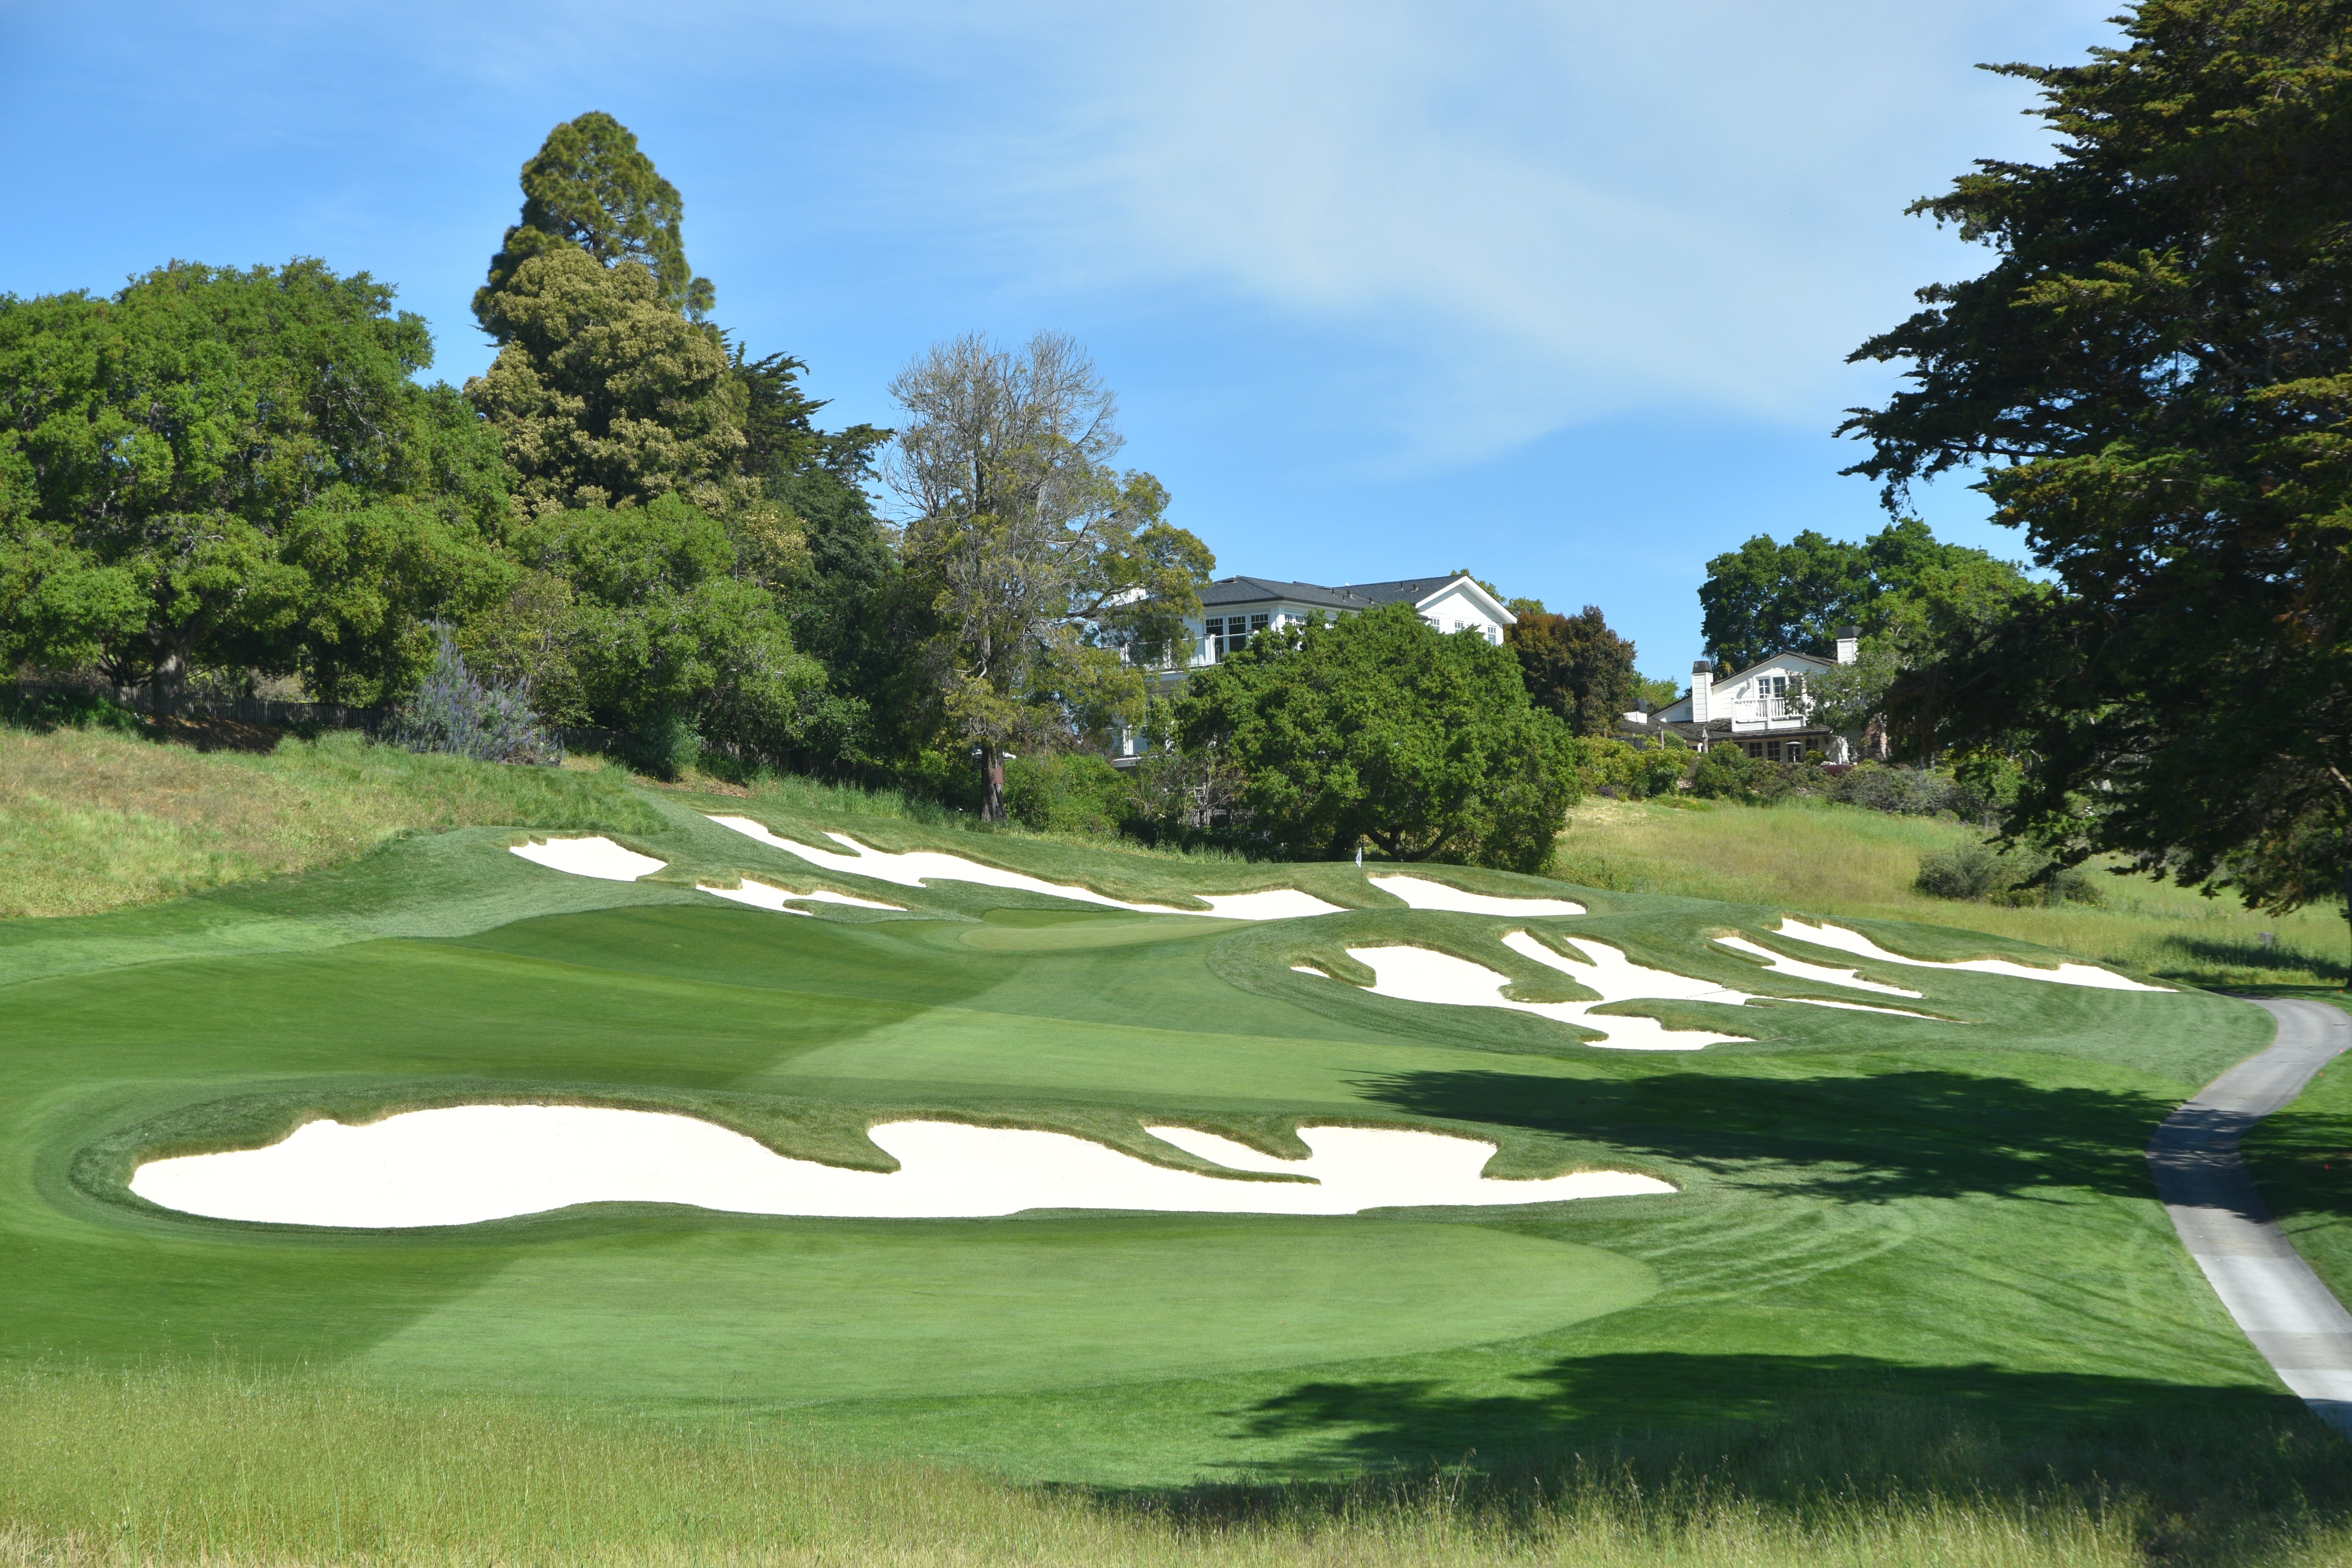
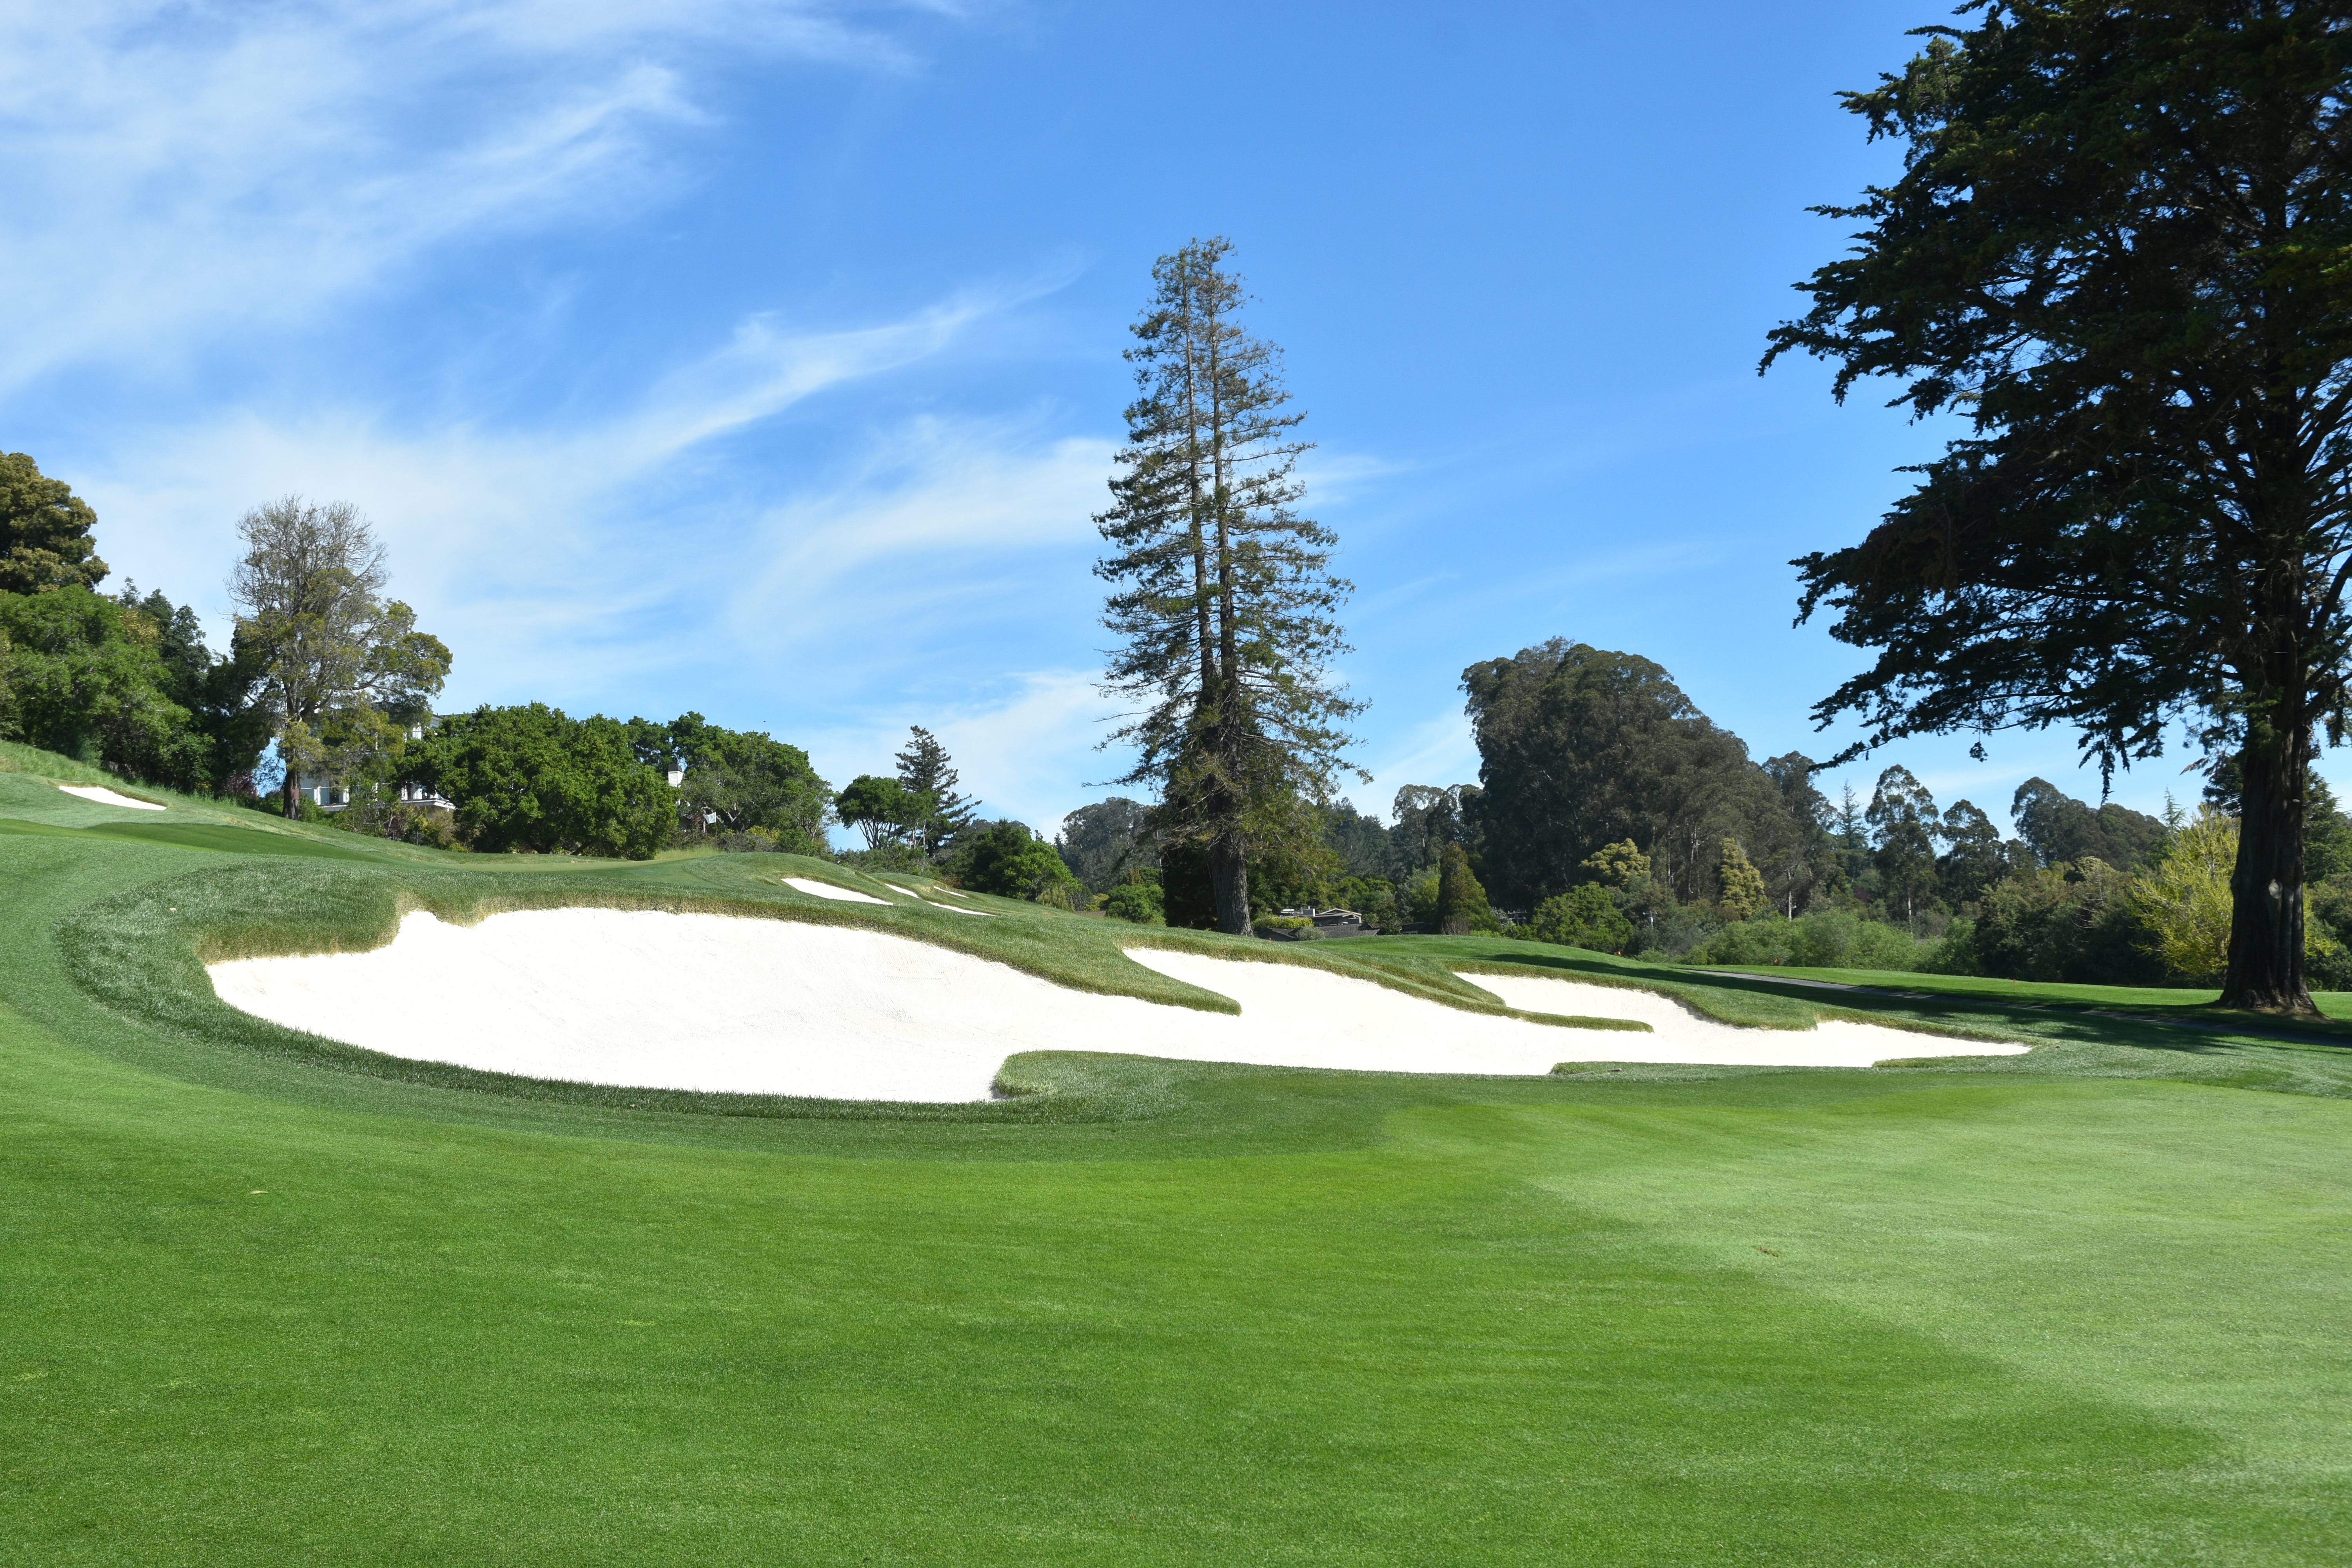
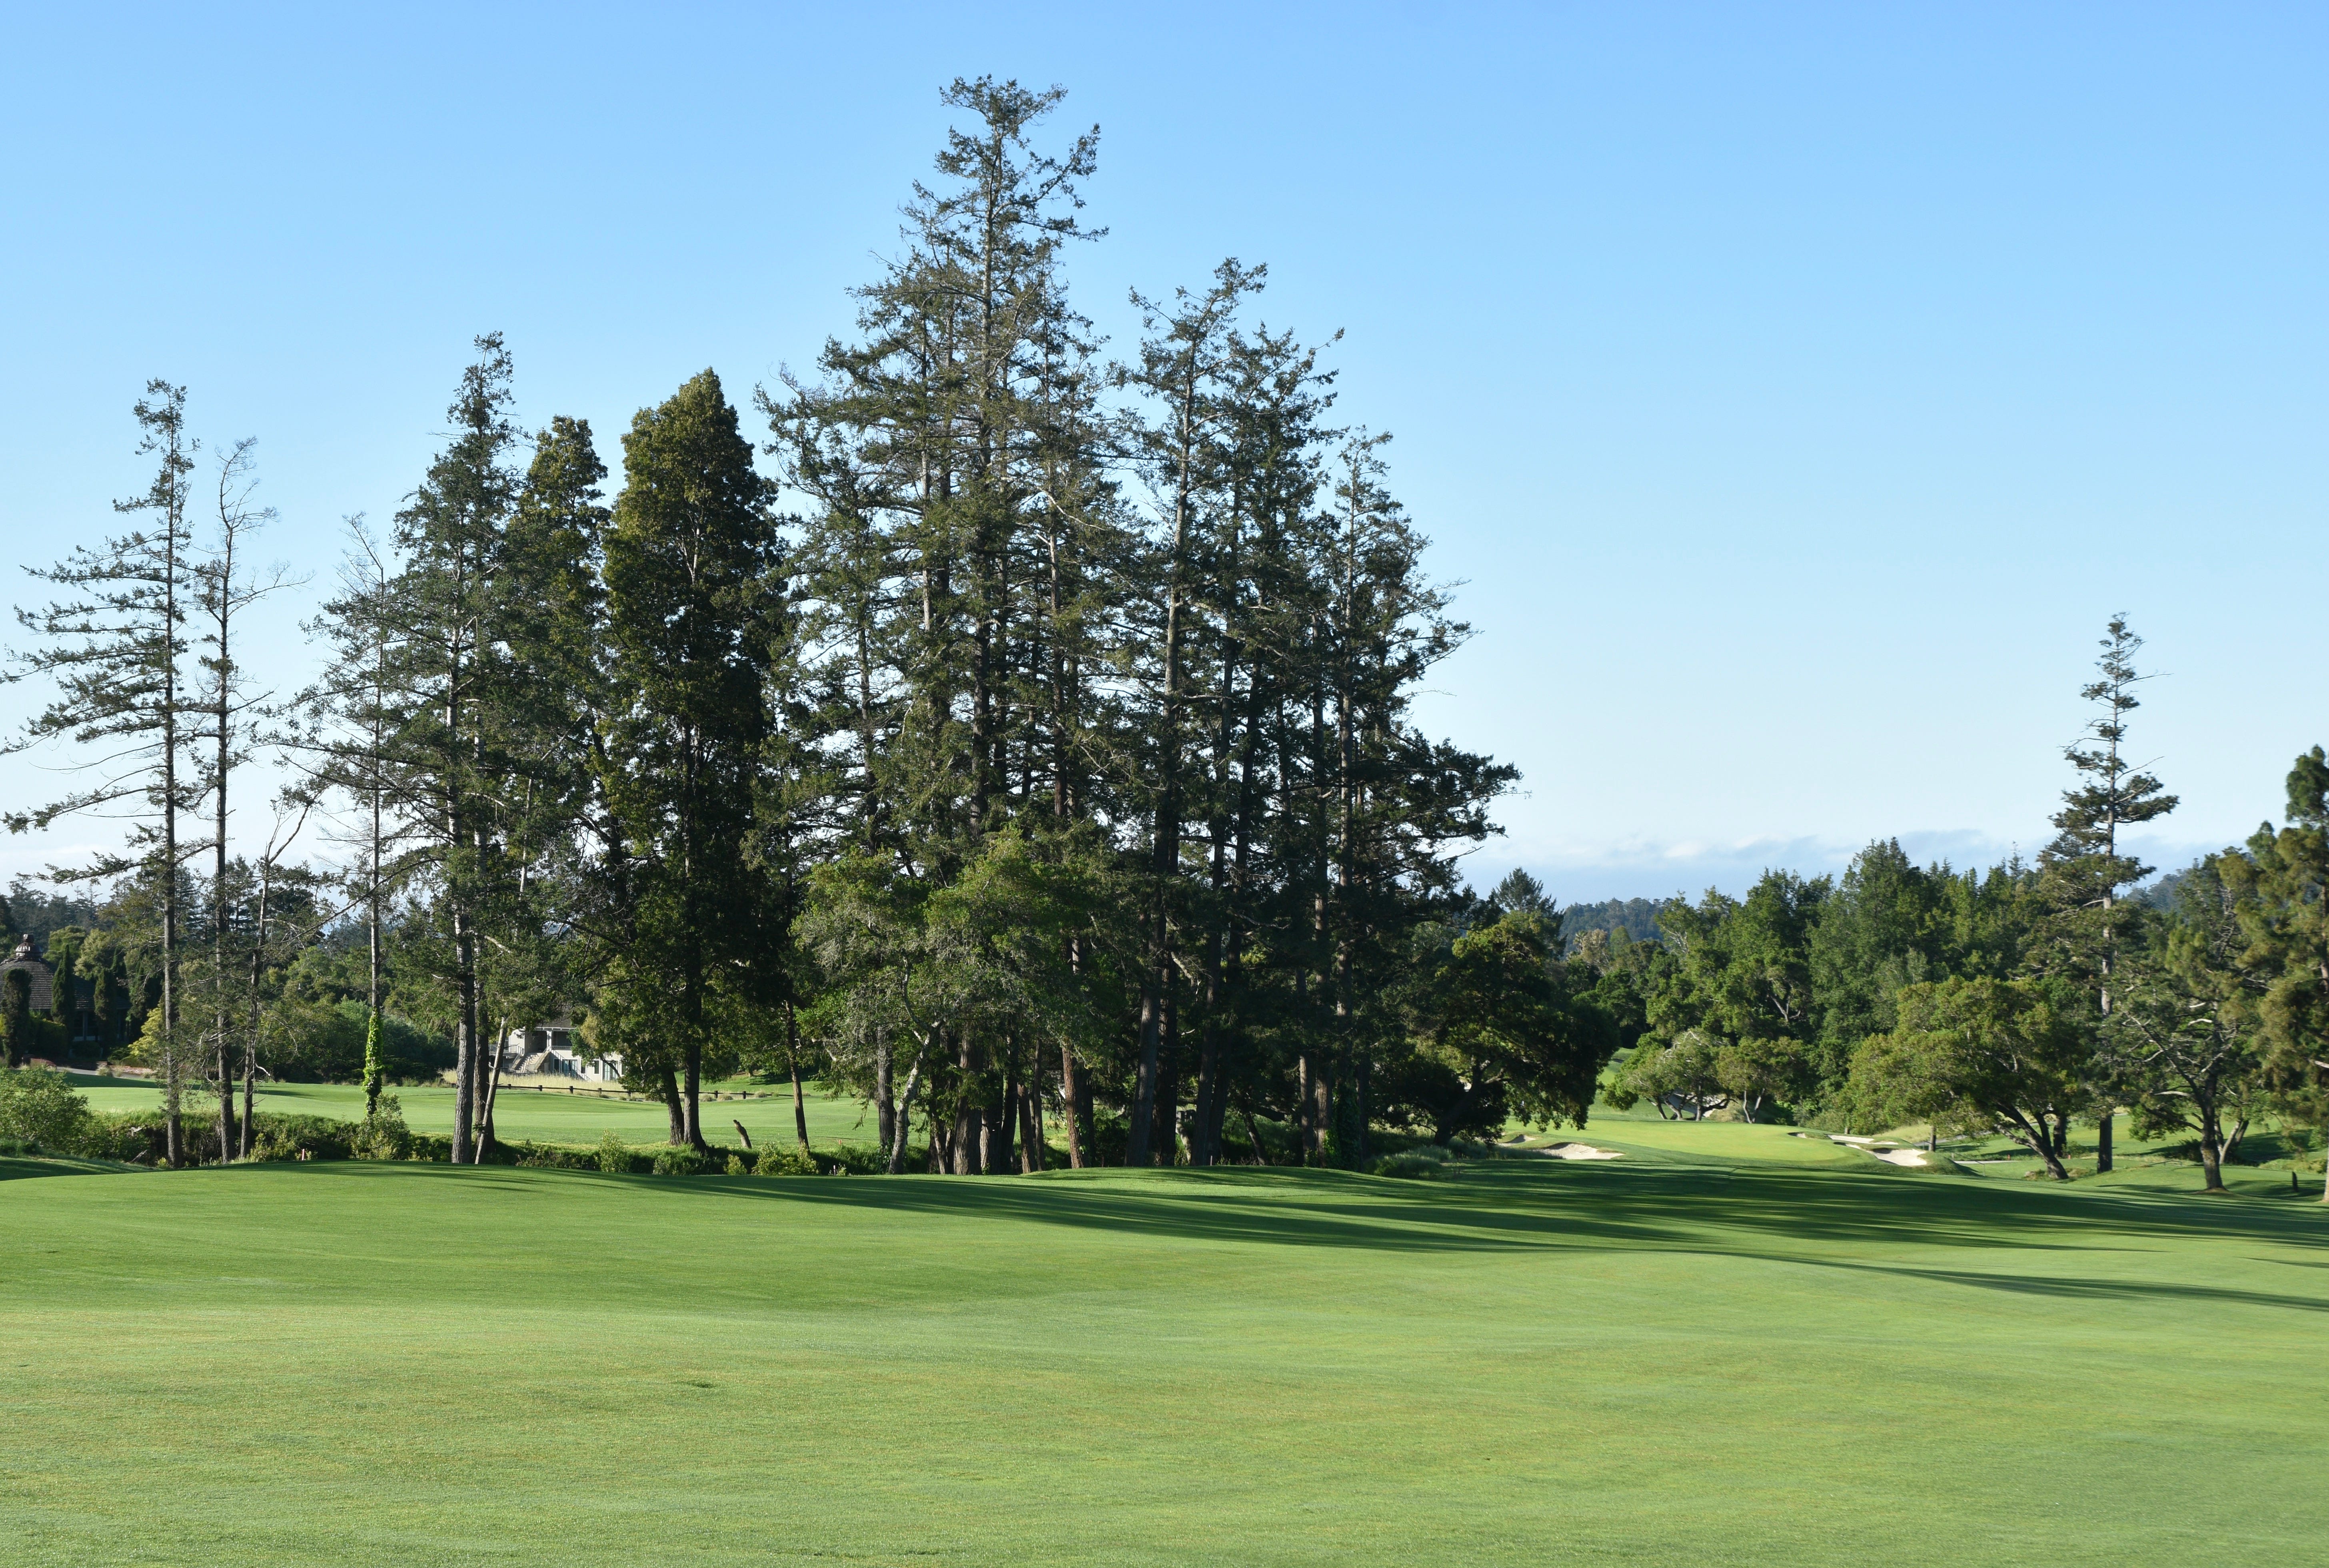
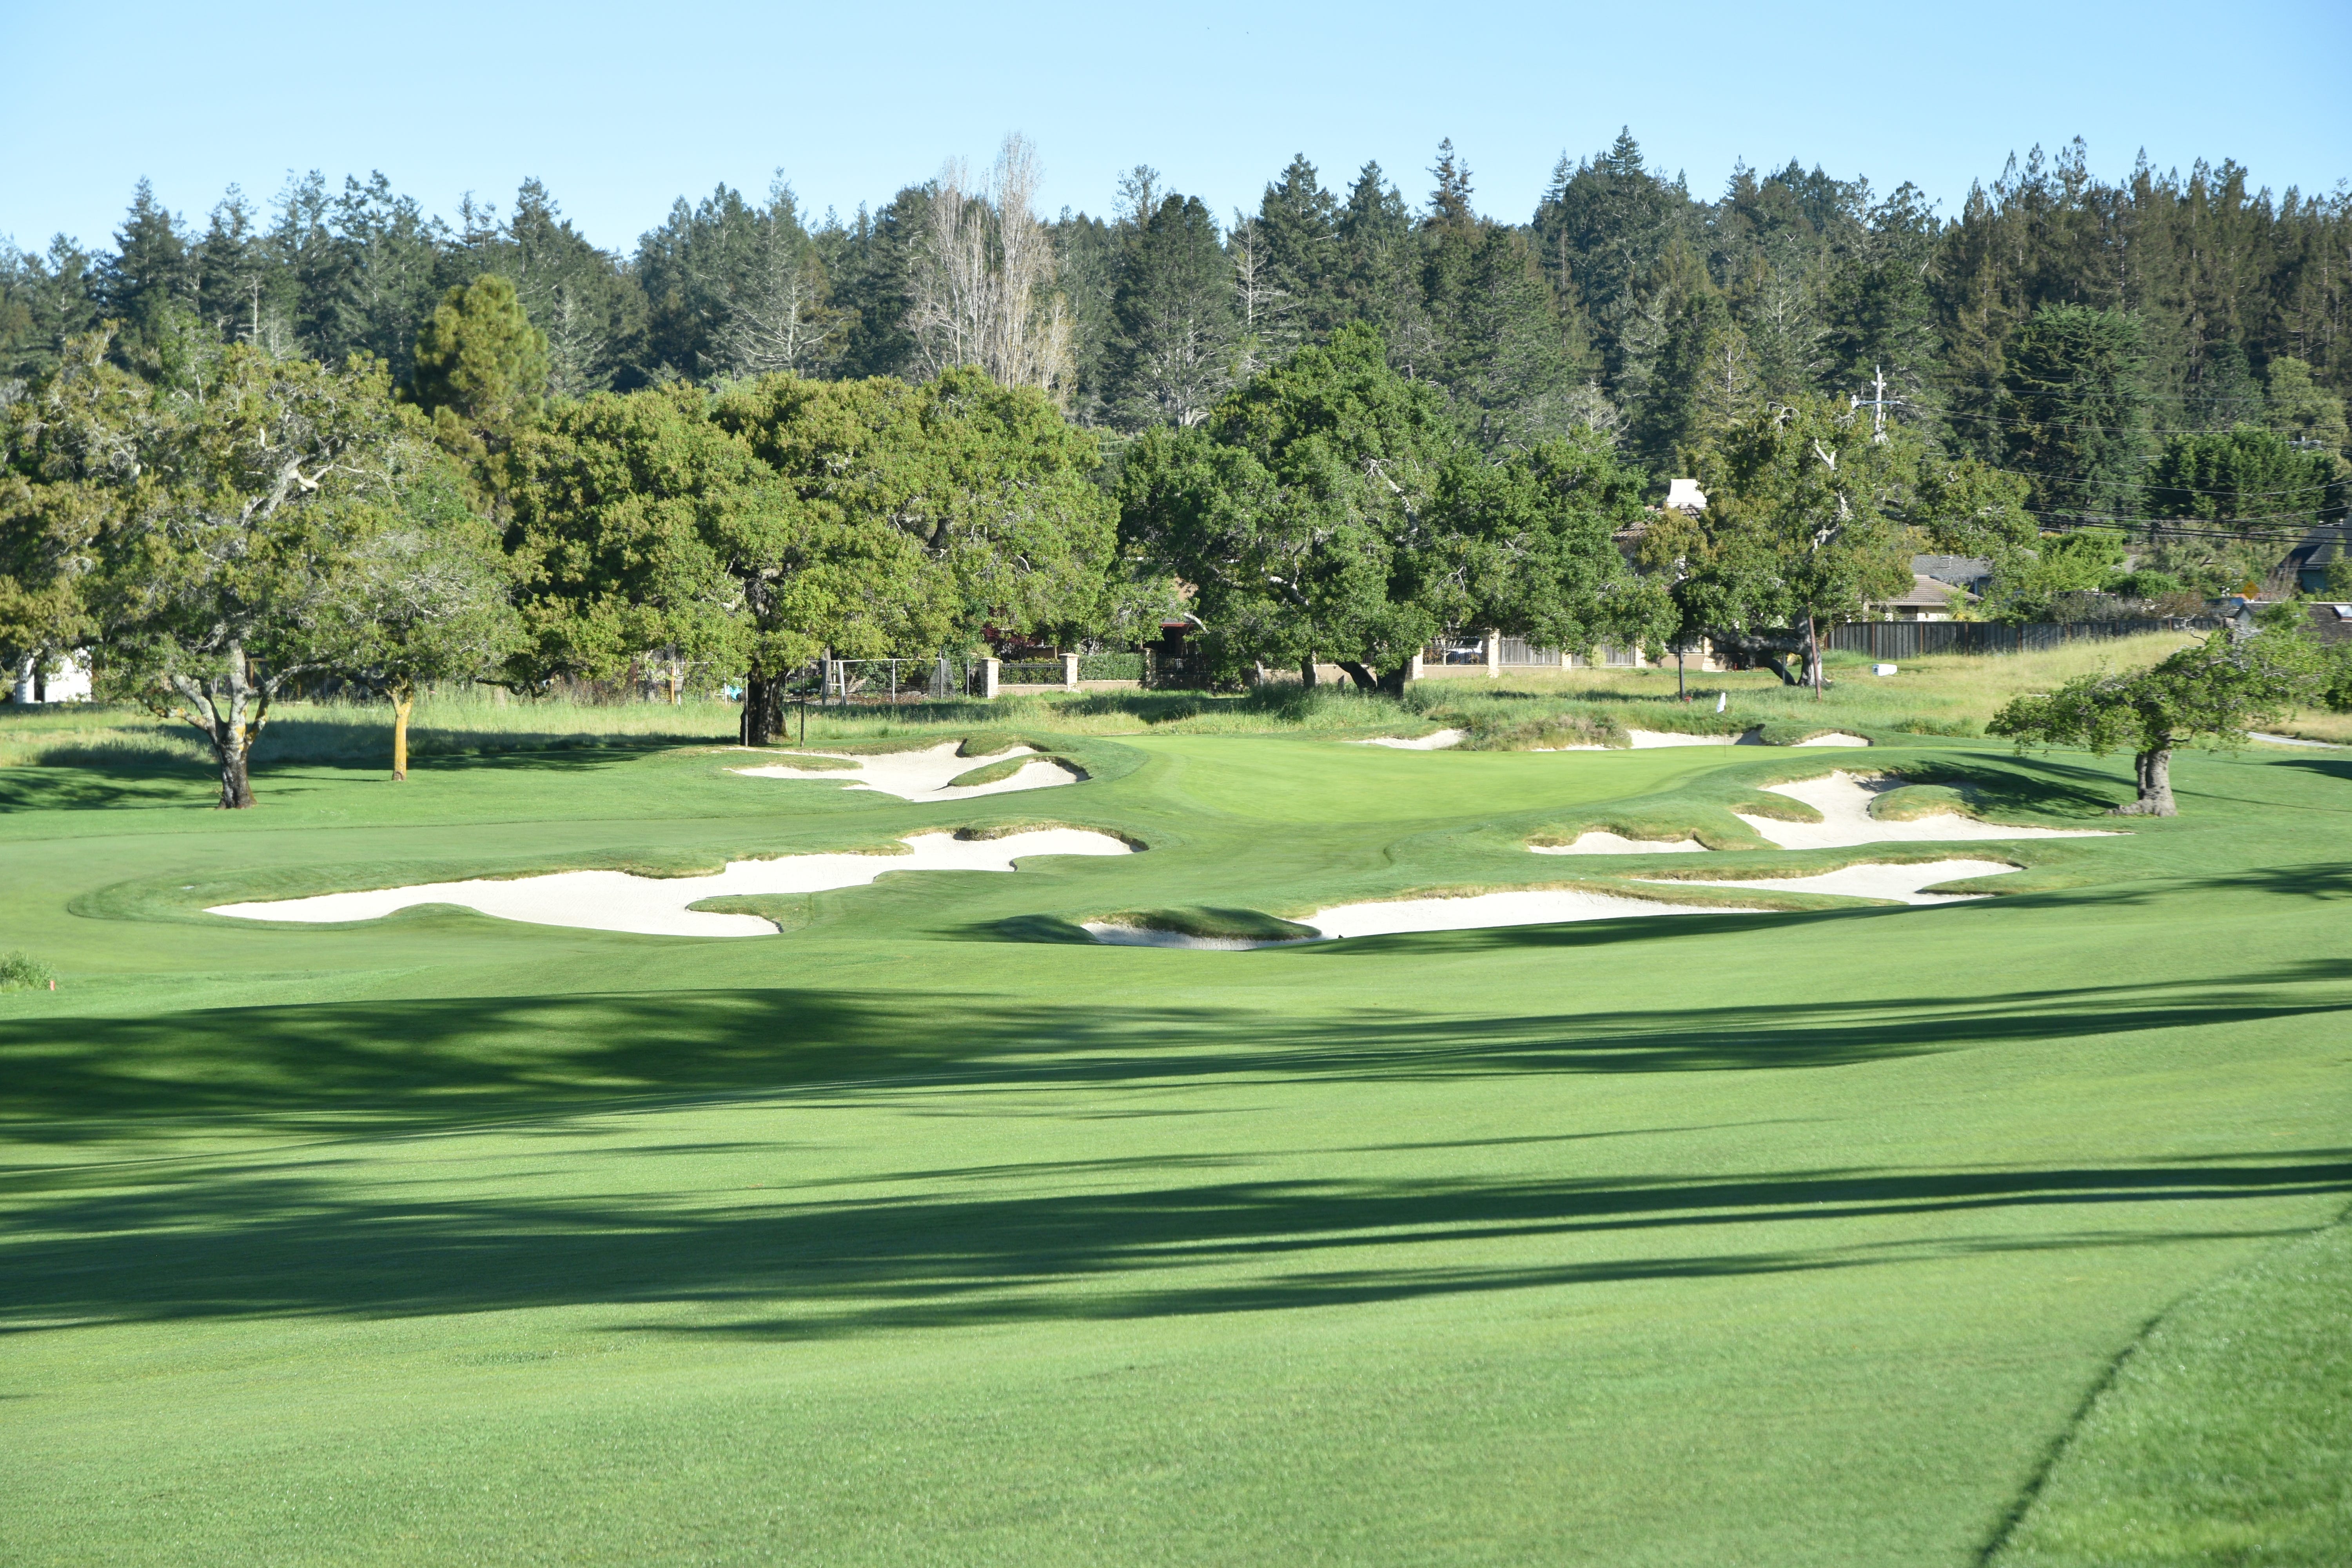
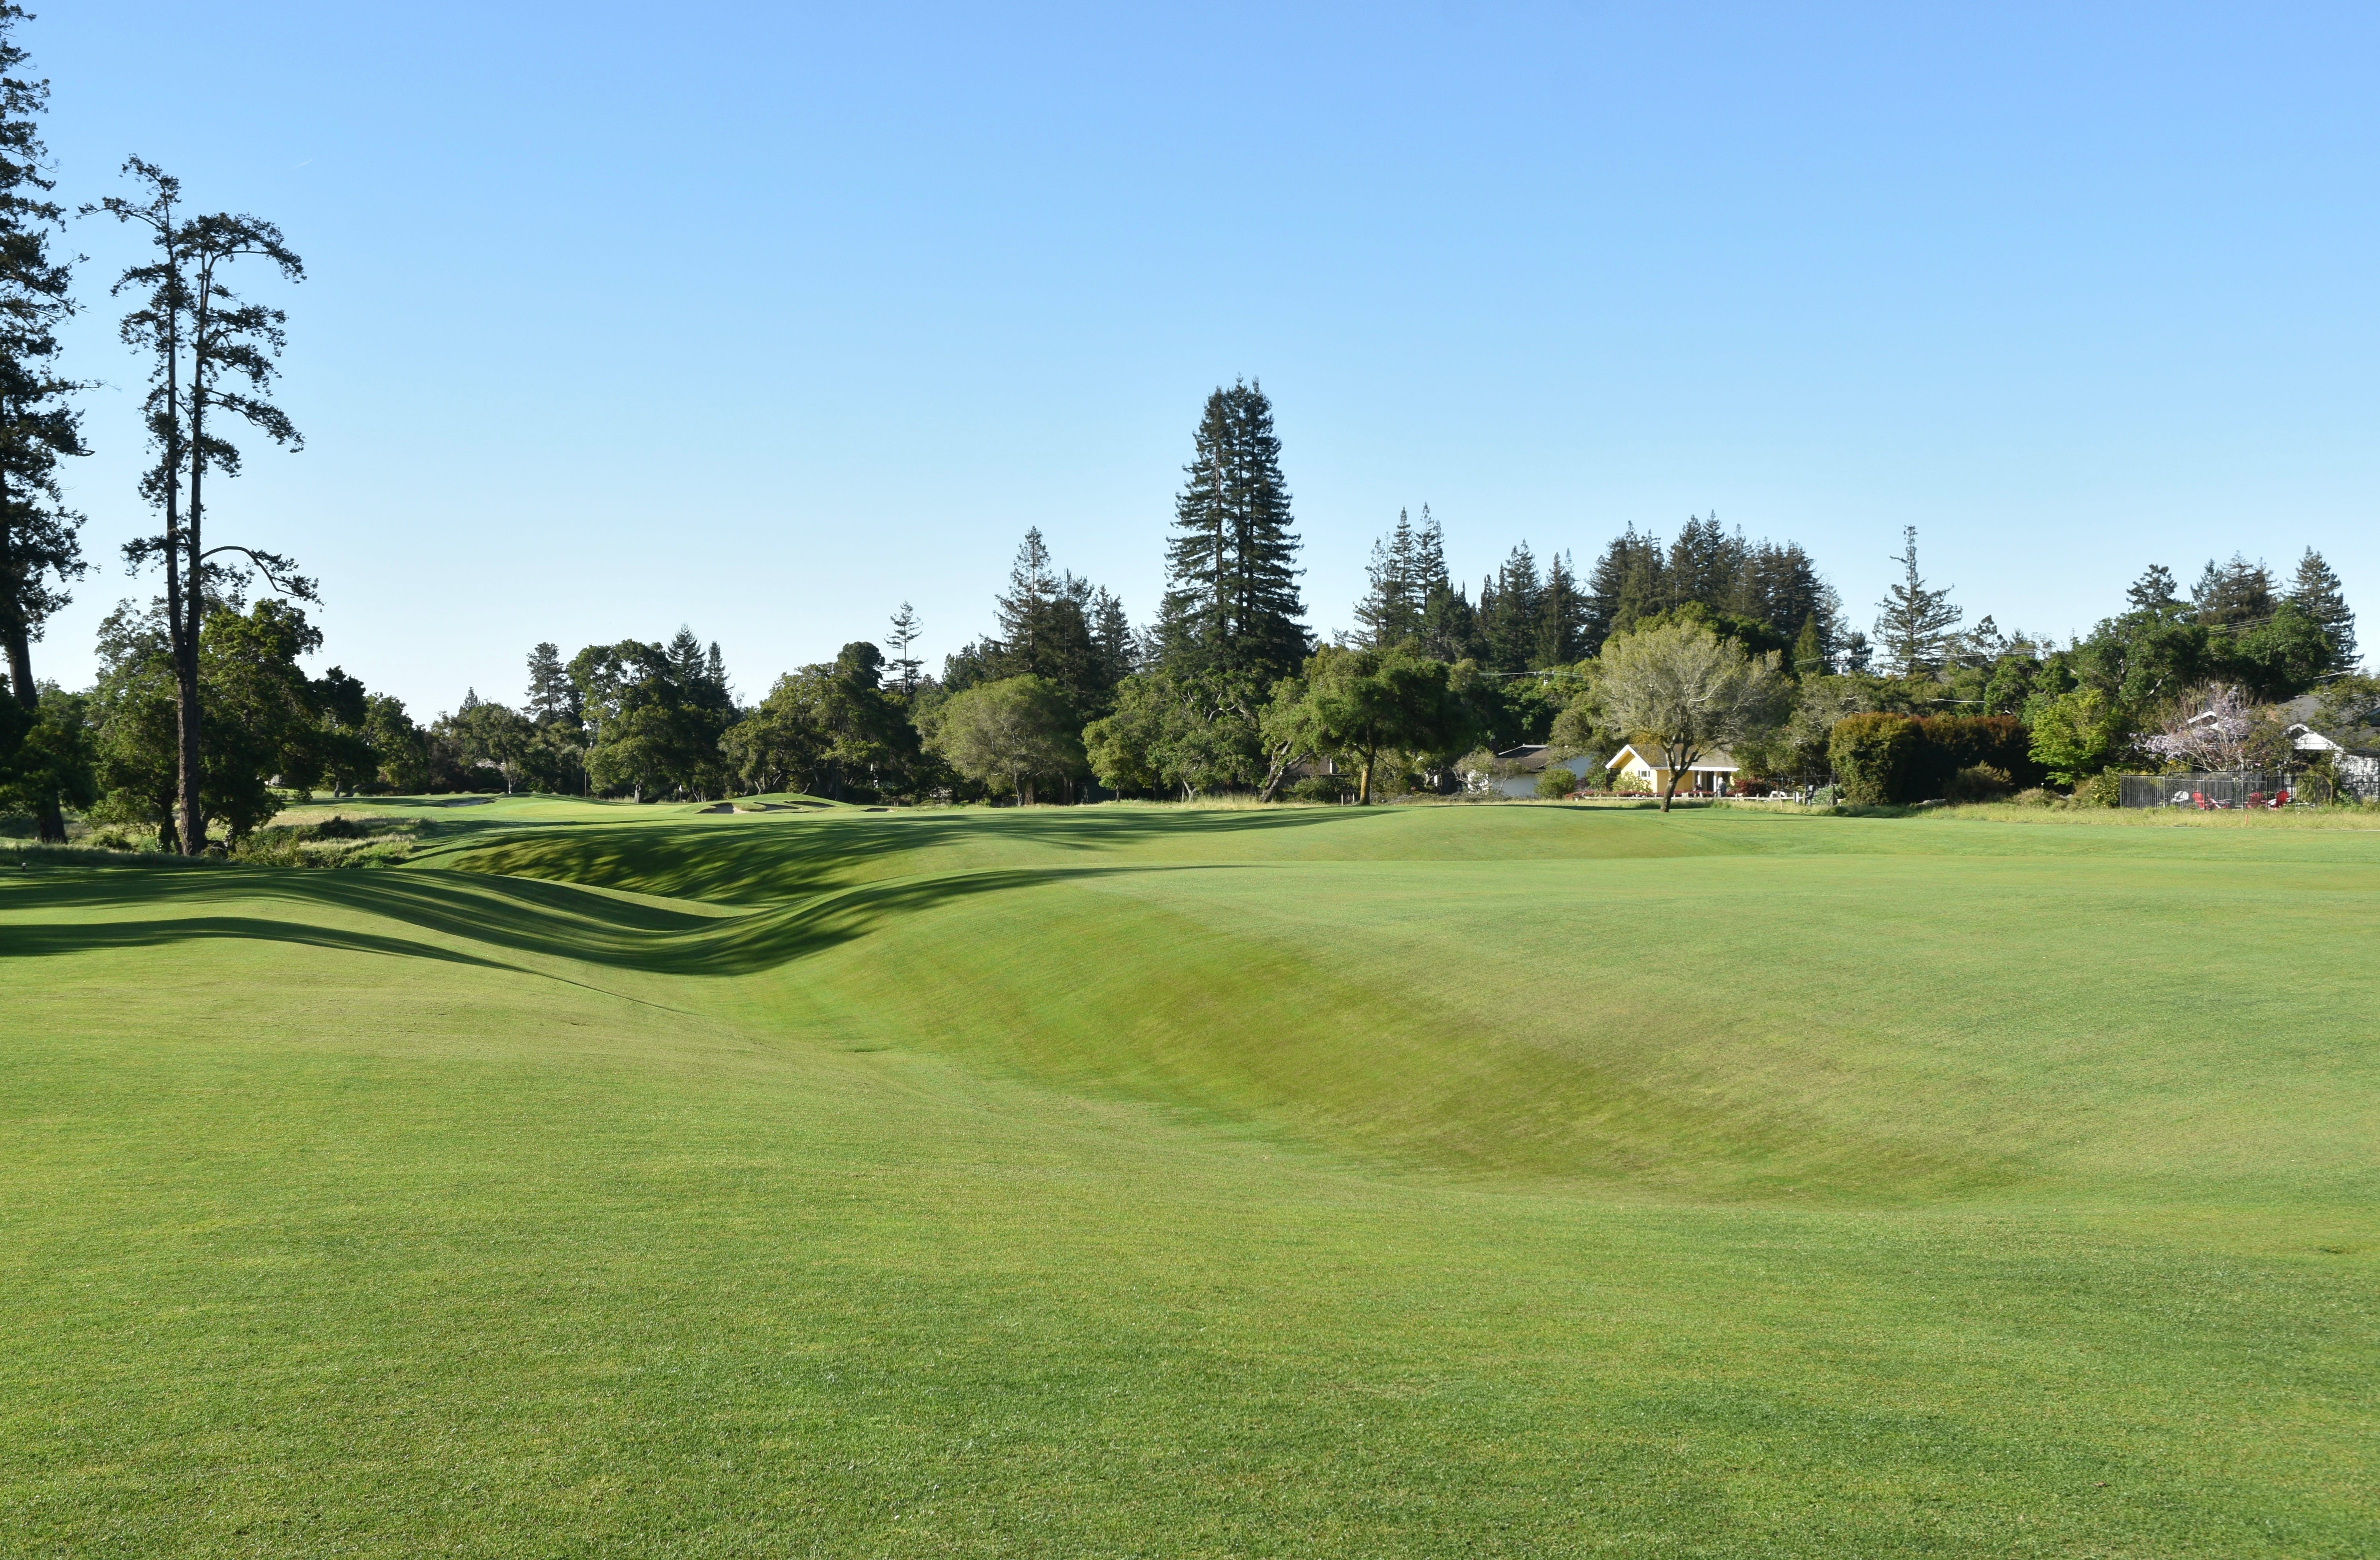
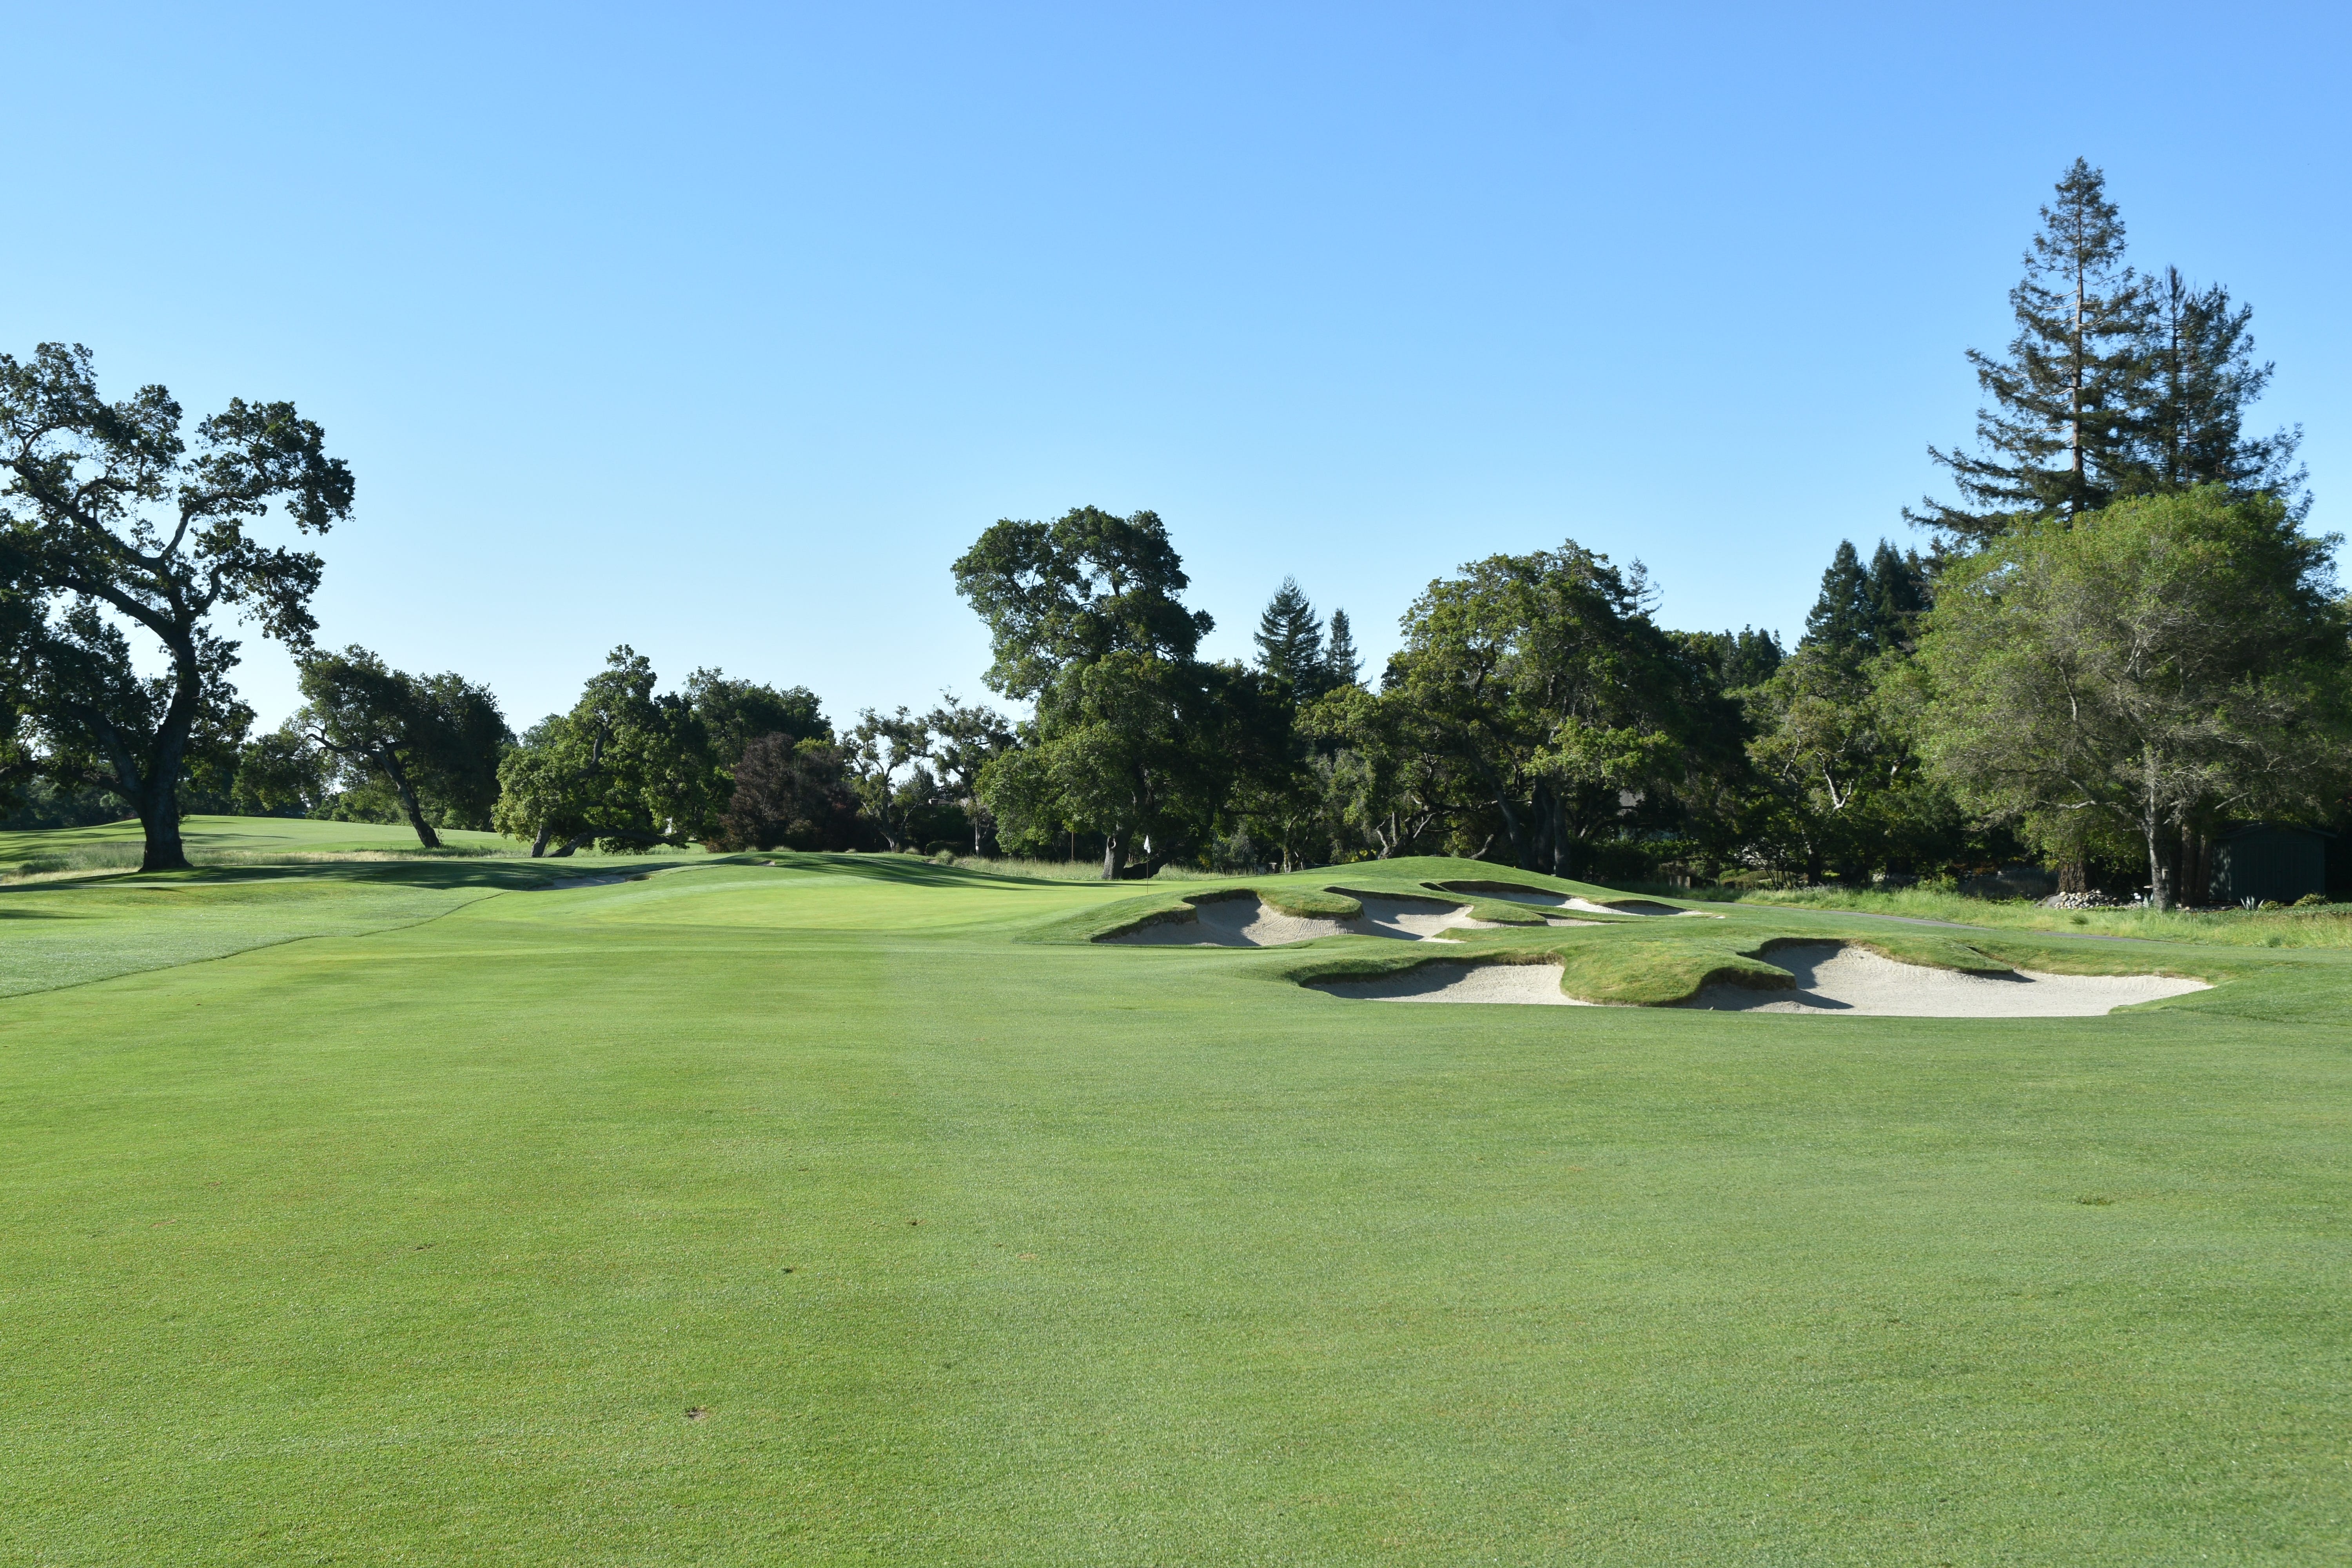
The 2nd hole fairway seems generous, but the best approach is from the right hand side. It’s all about angles on a Alister Mackenzie golf course
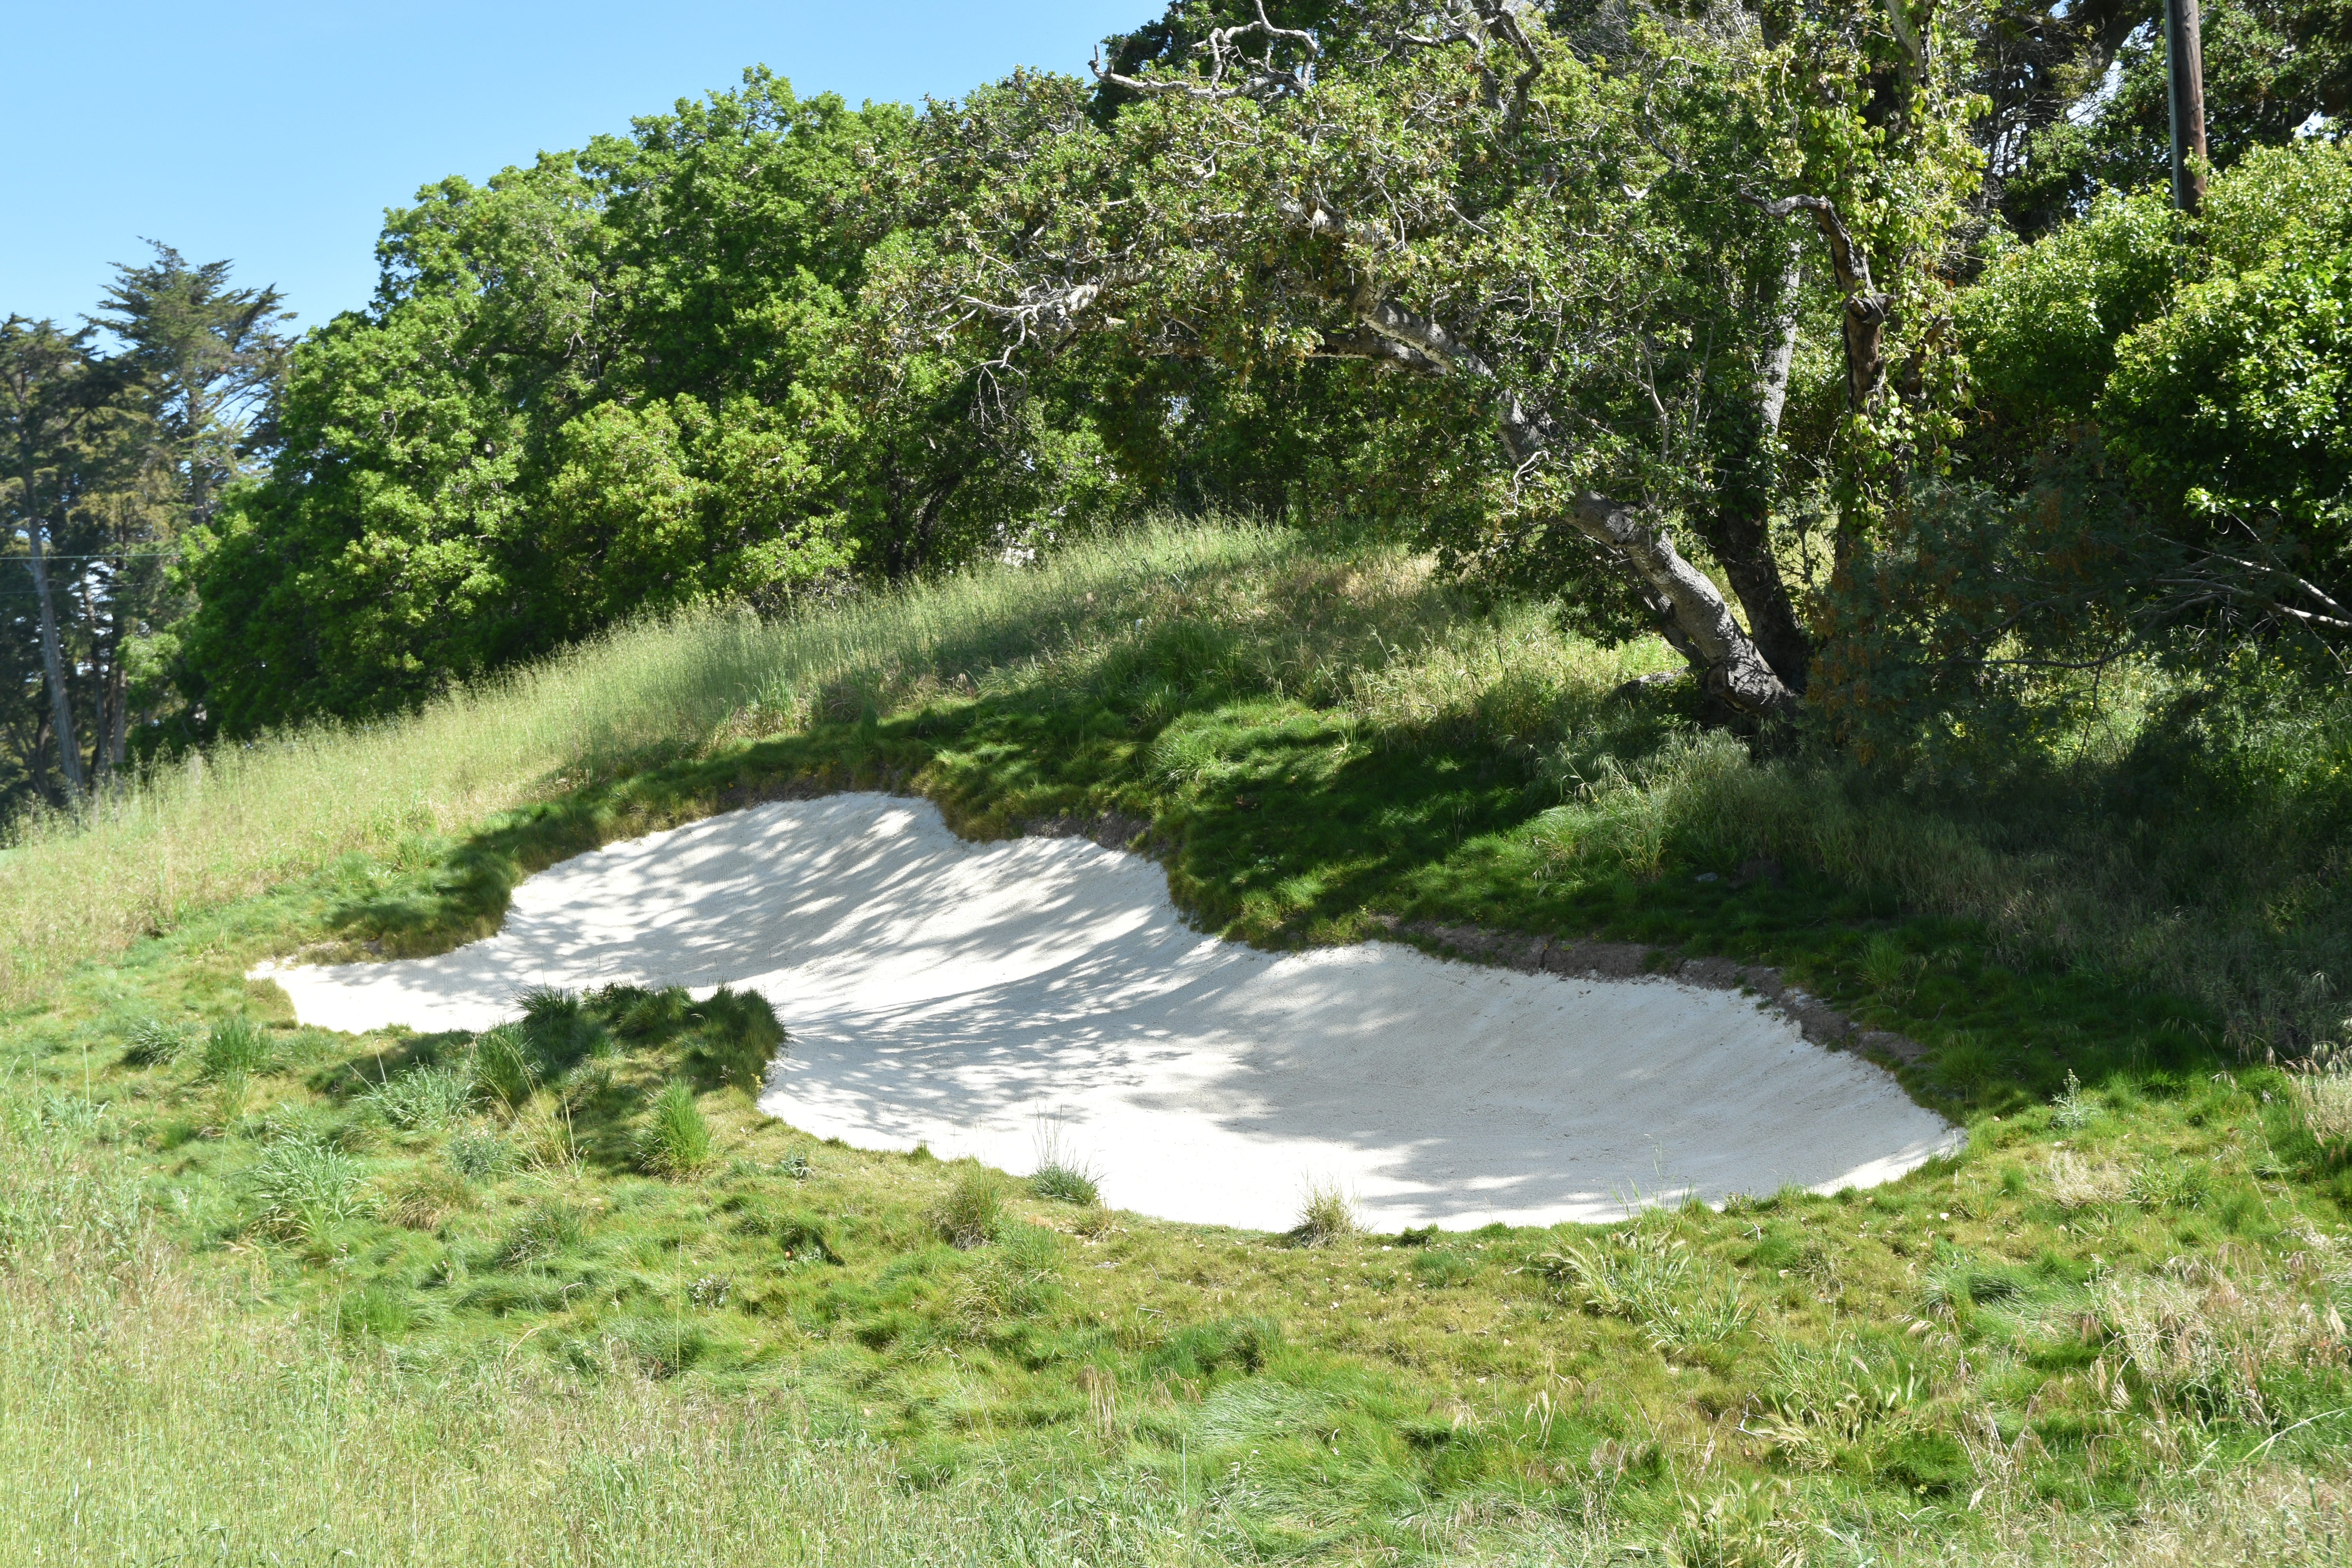
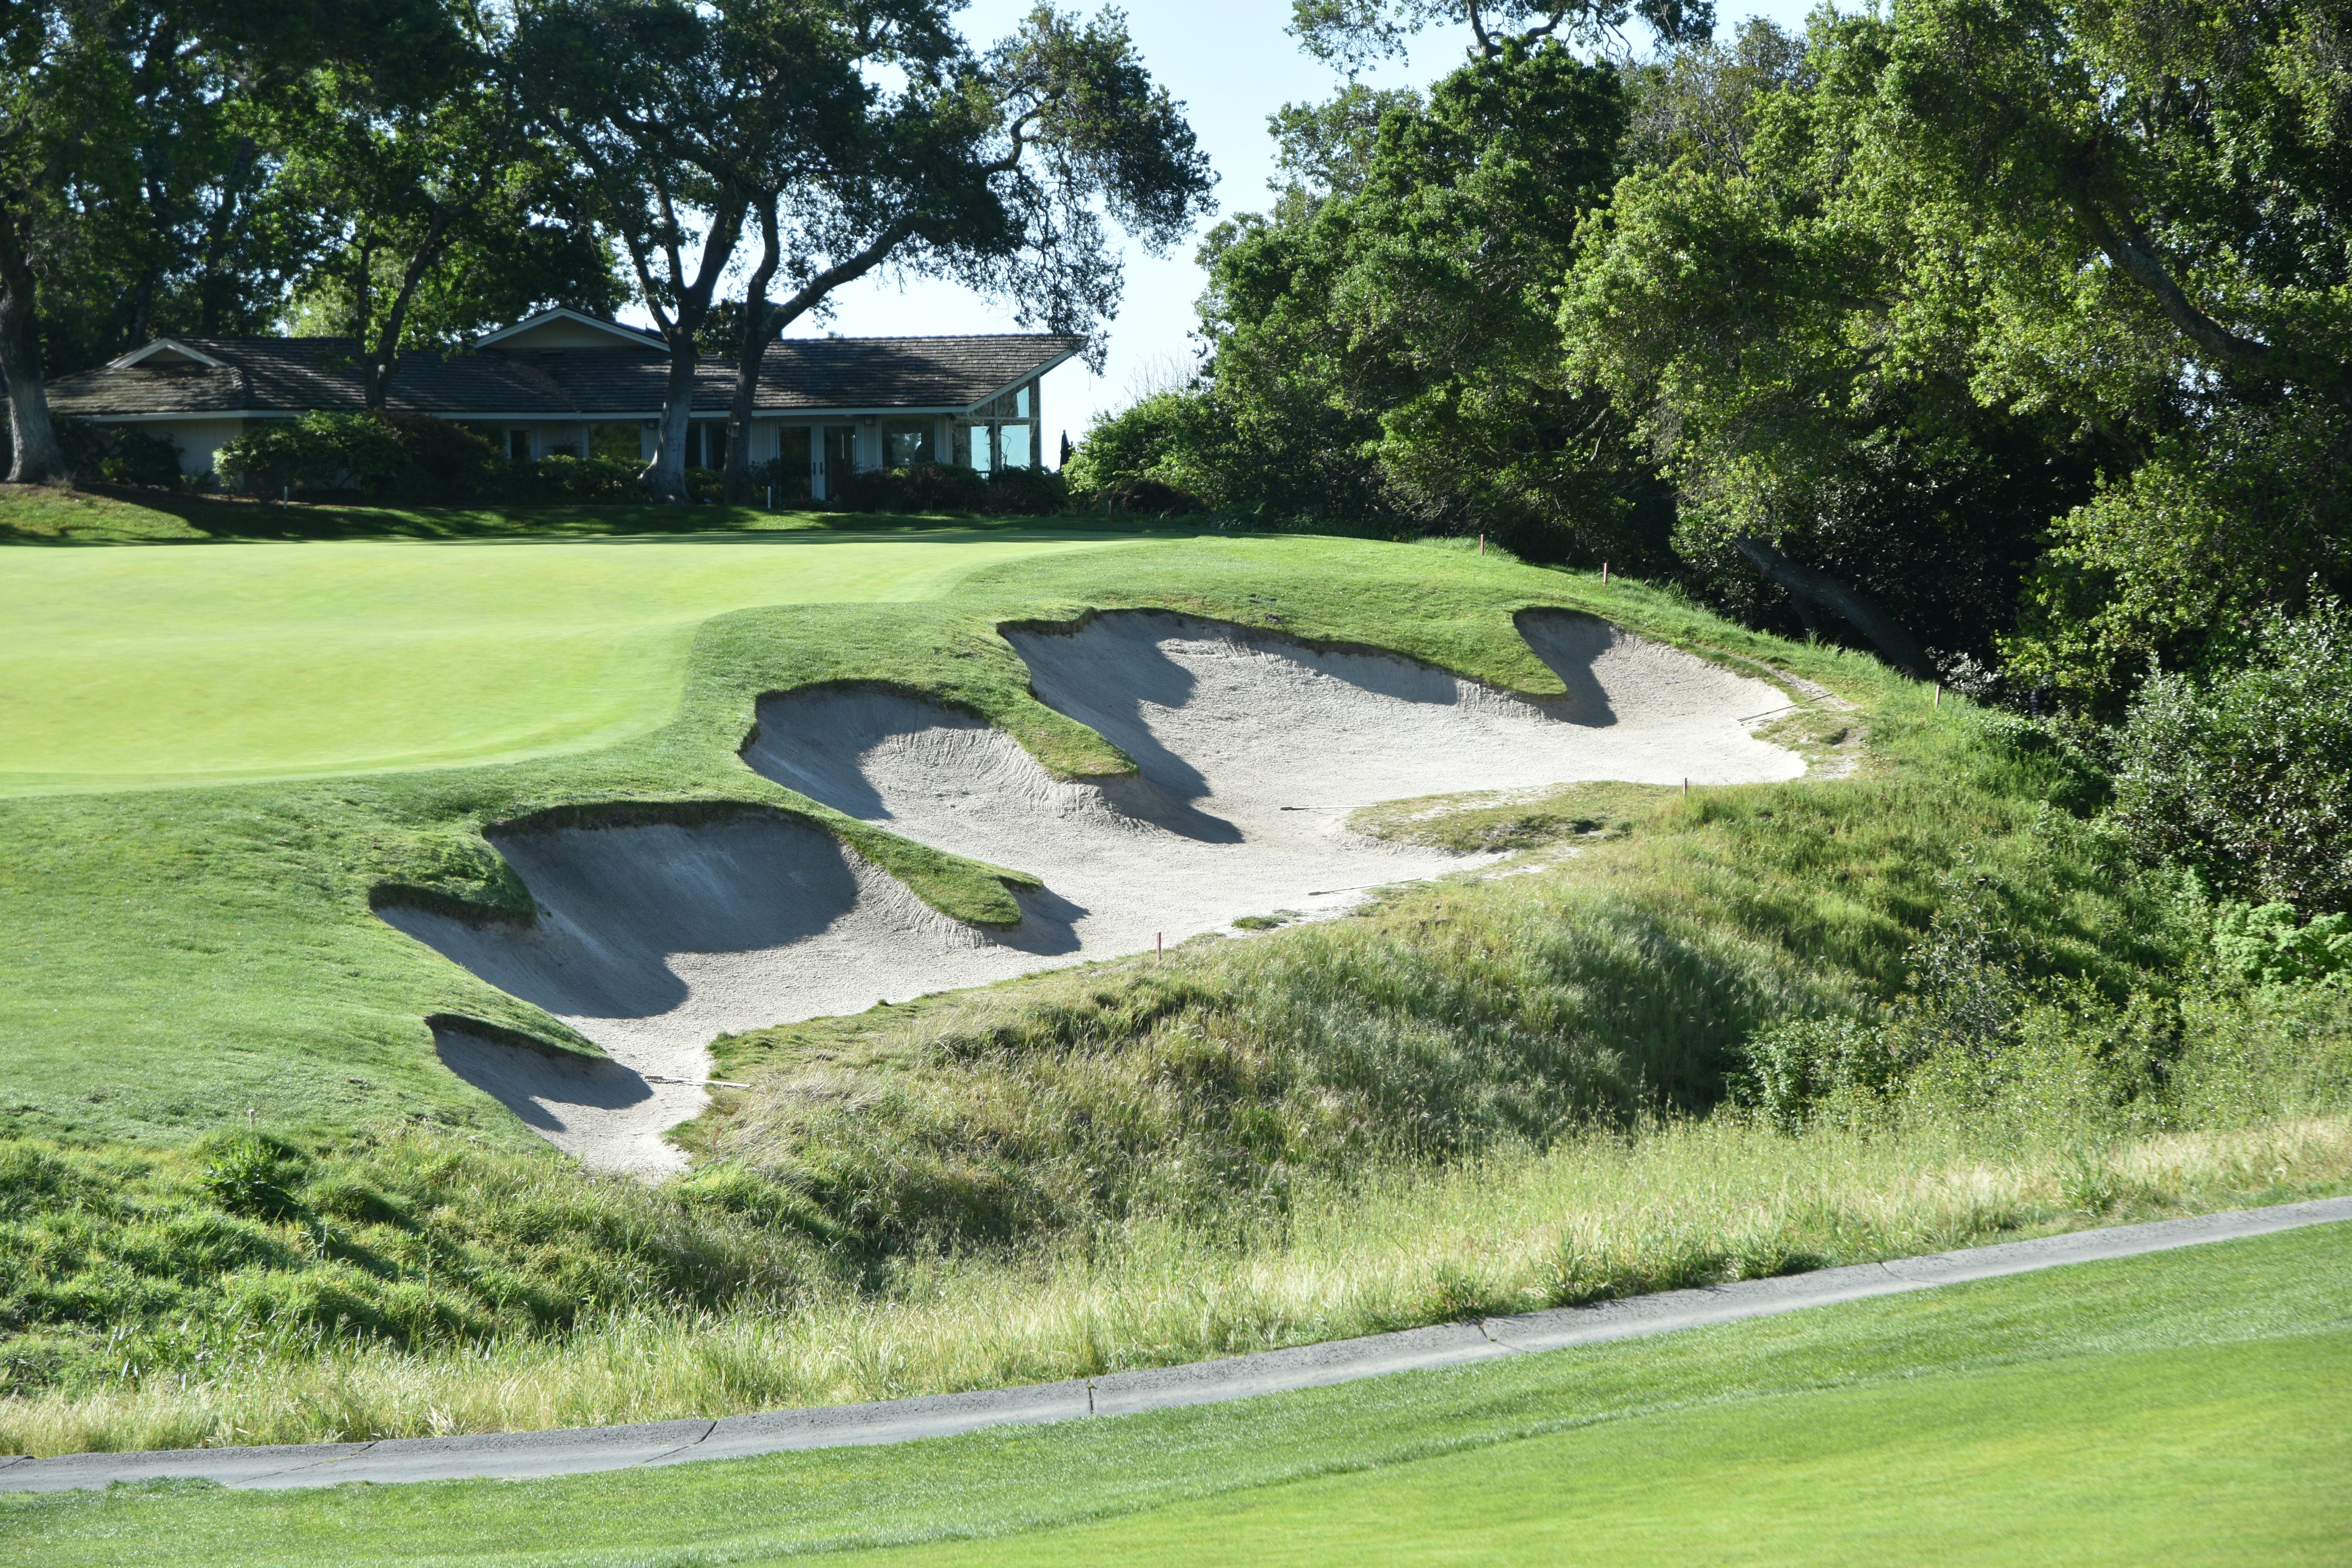
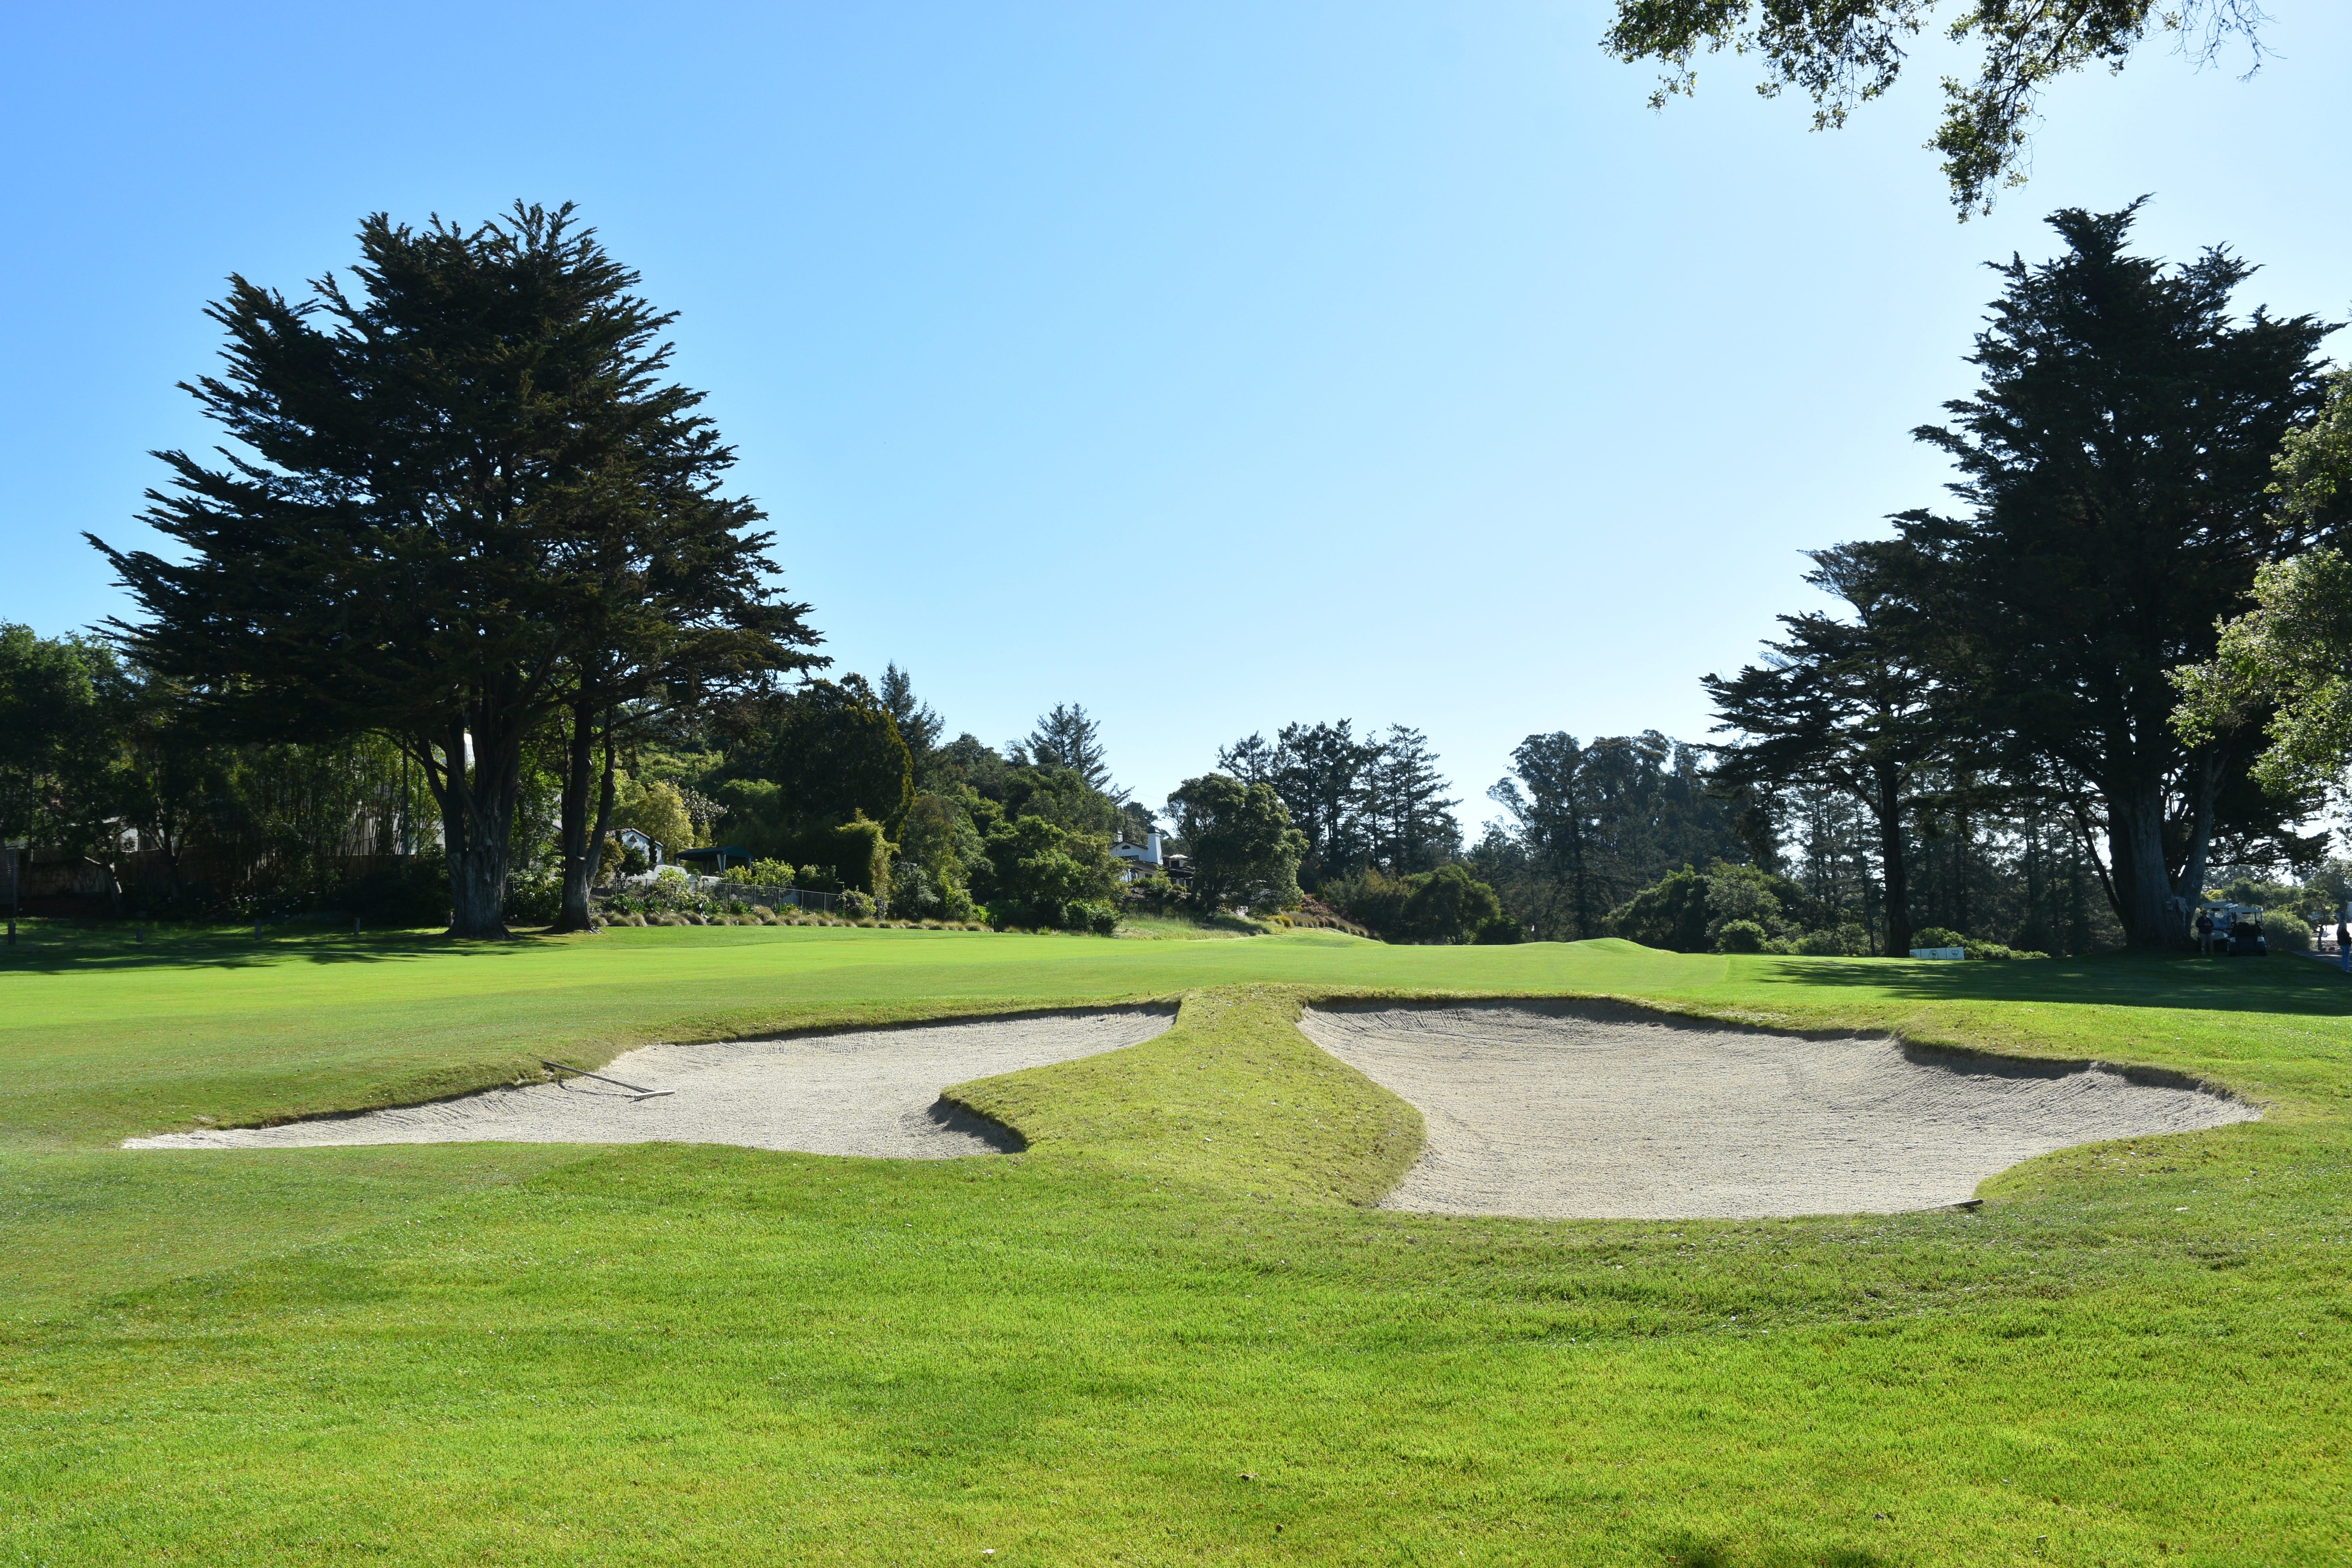
The left fairway bunker on the 2nd hole — coming from the left makes this hole much more difficult and making it a challenge to hold this green with the approach
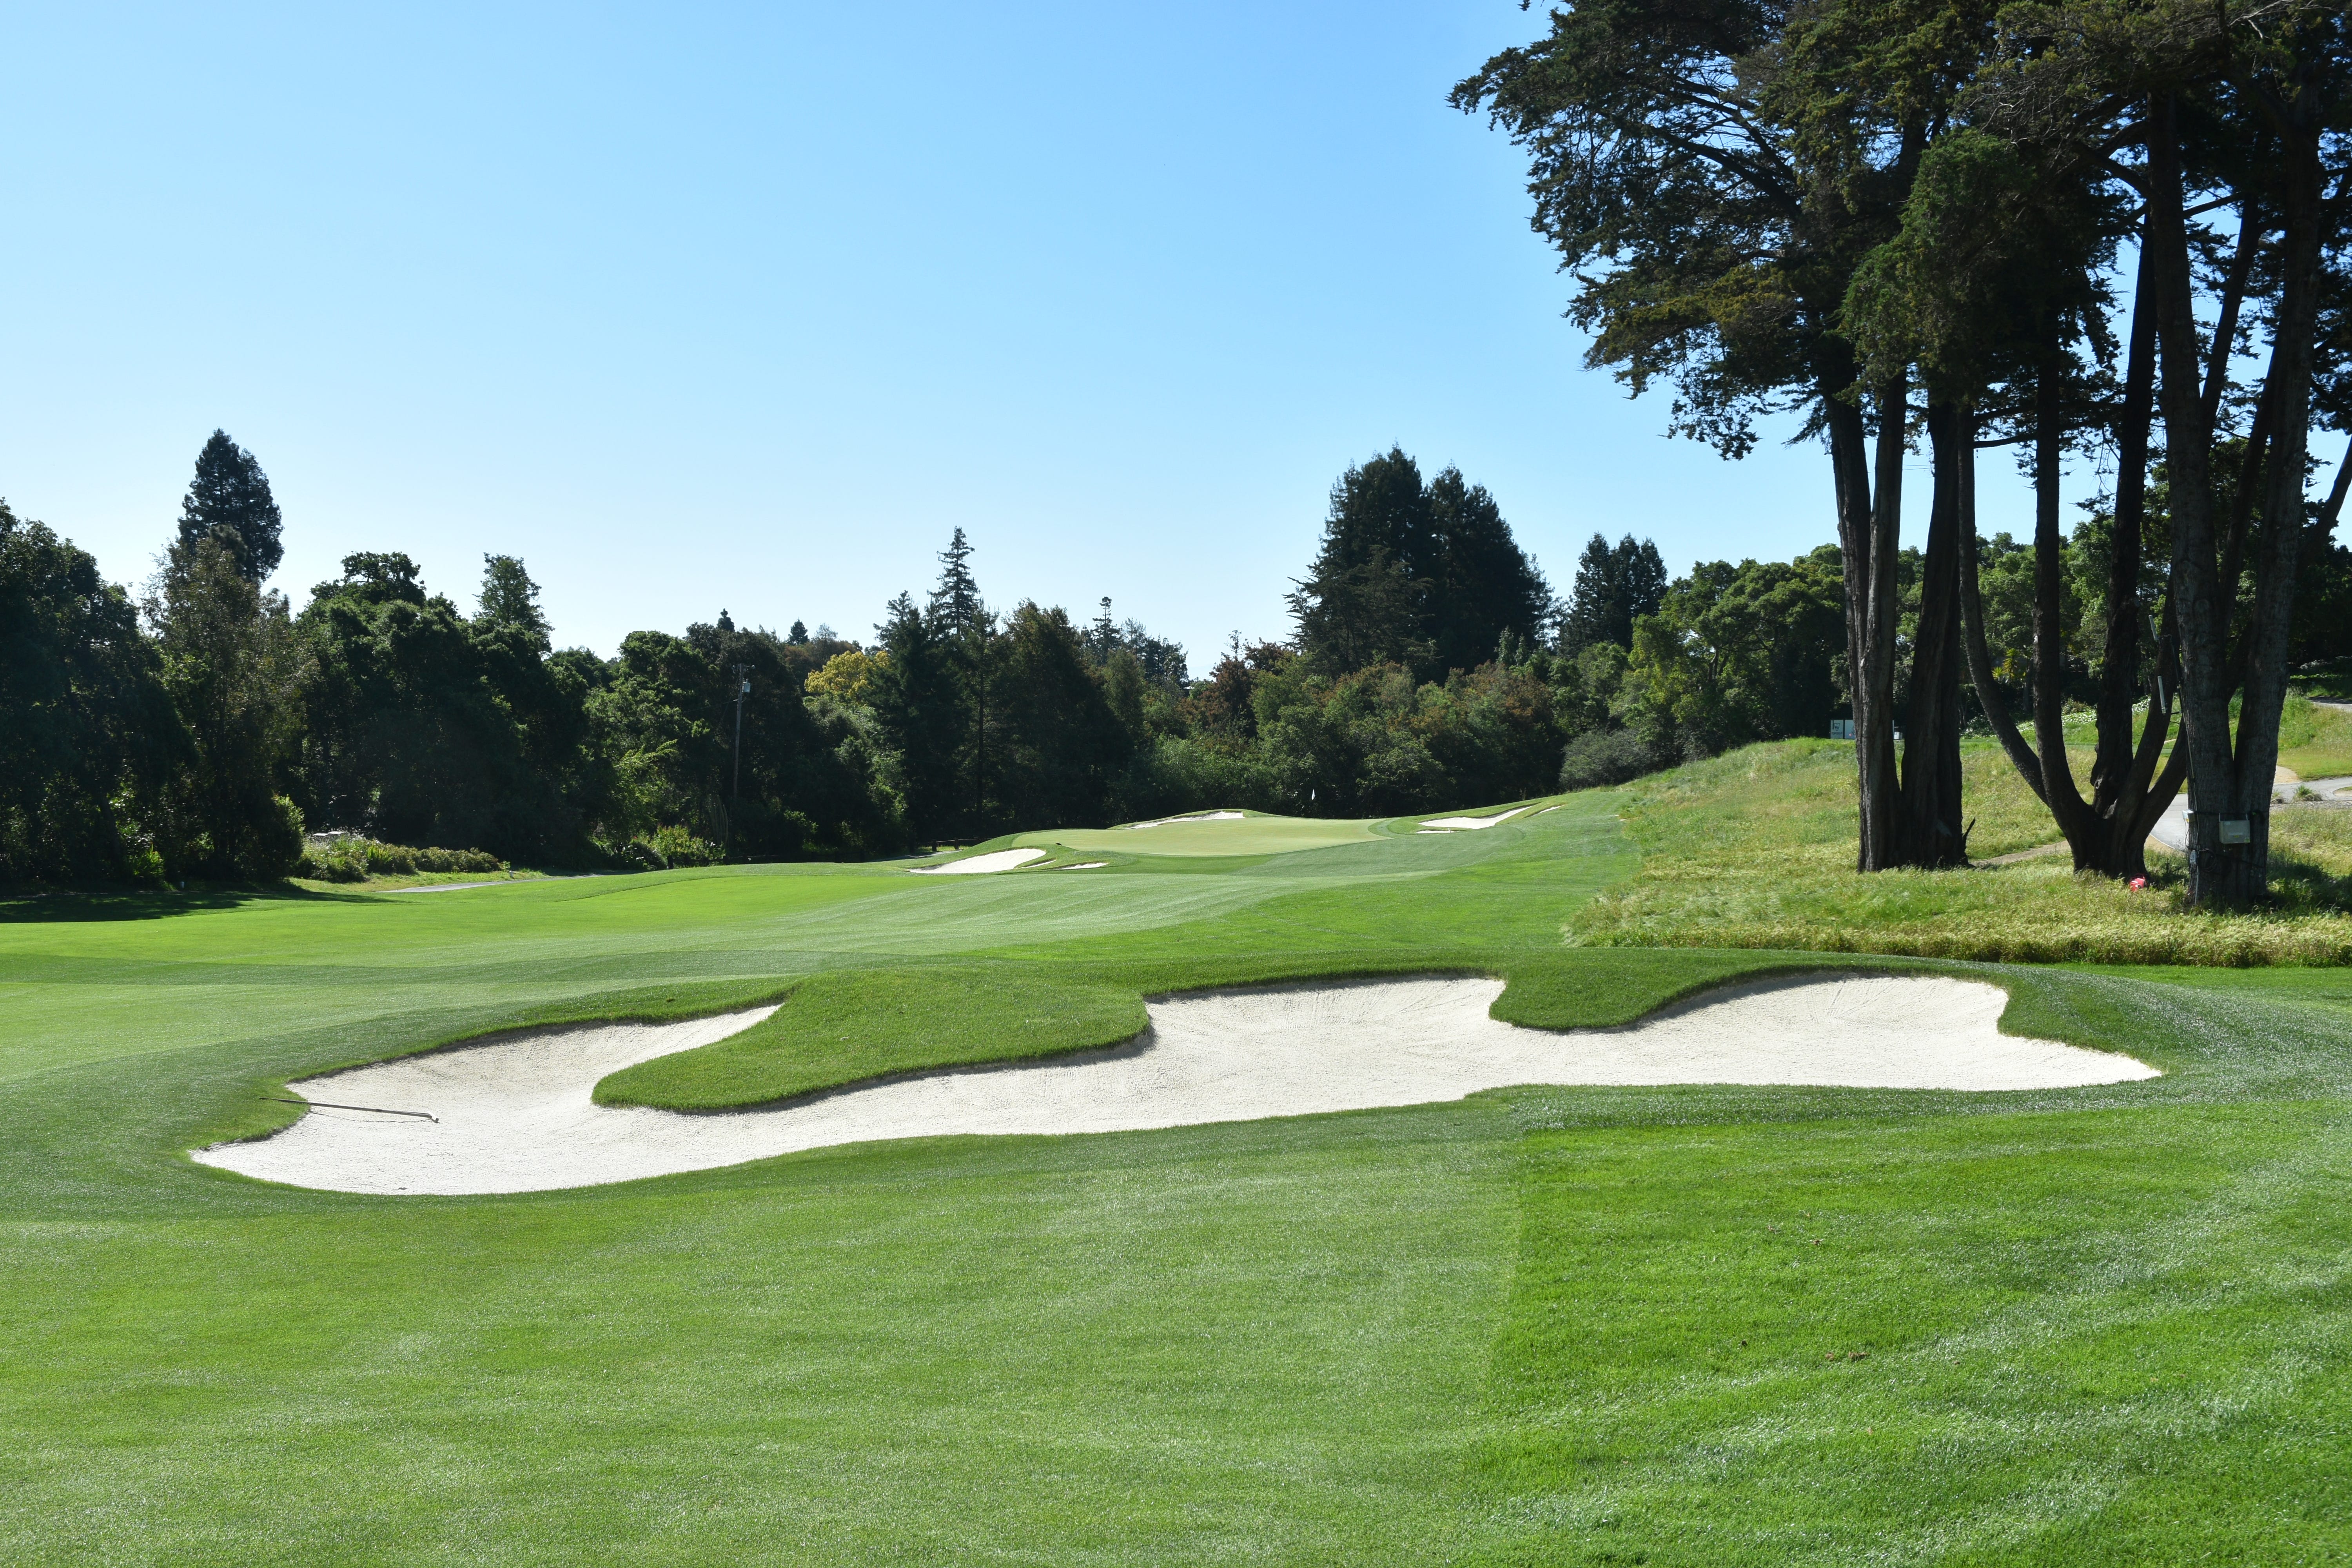
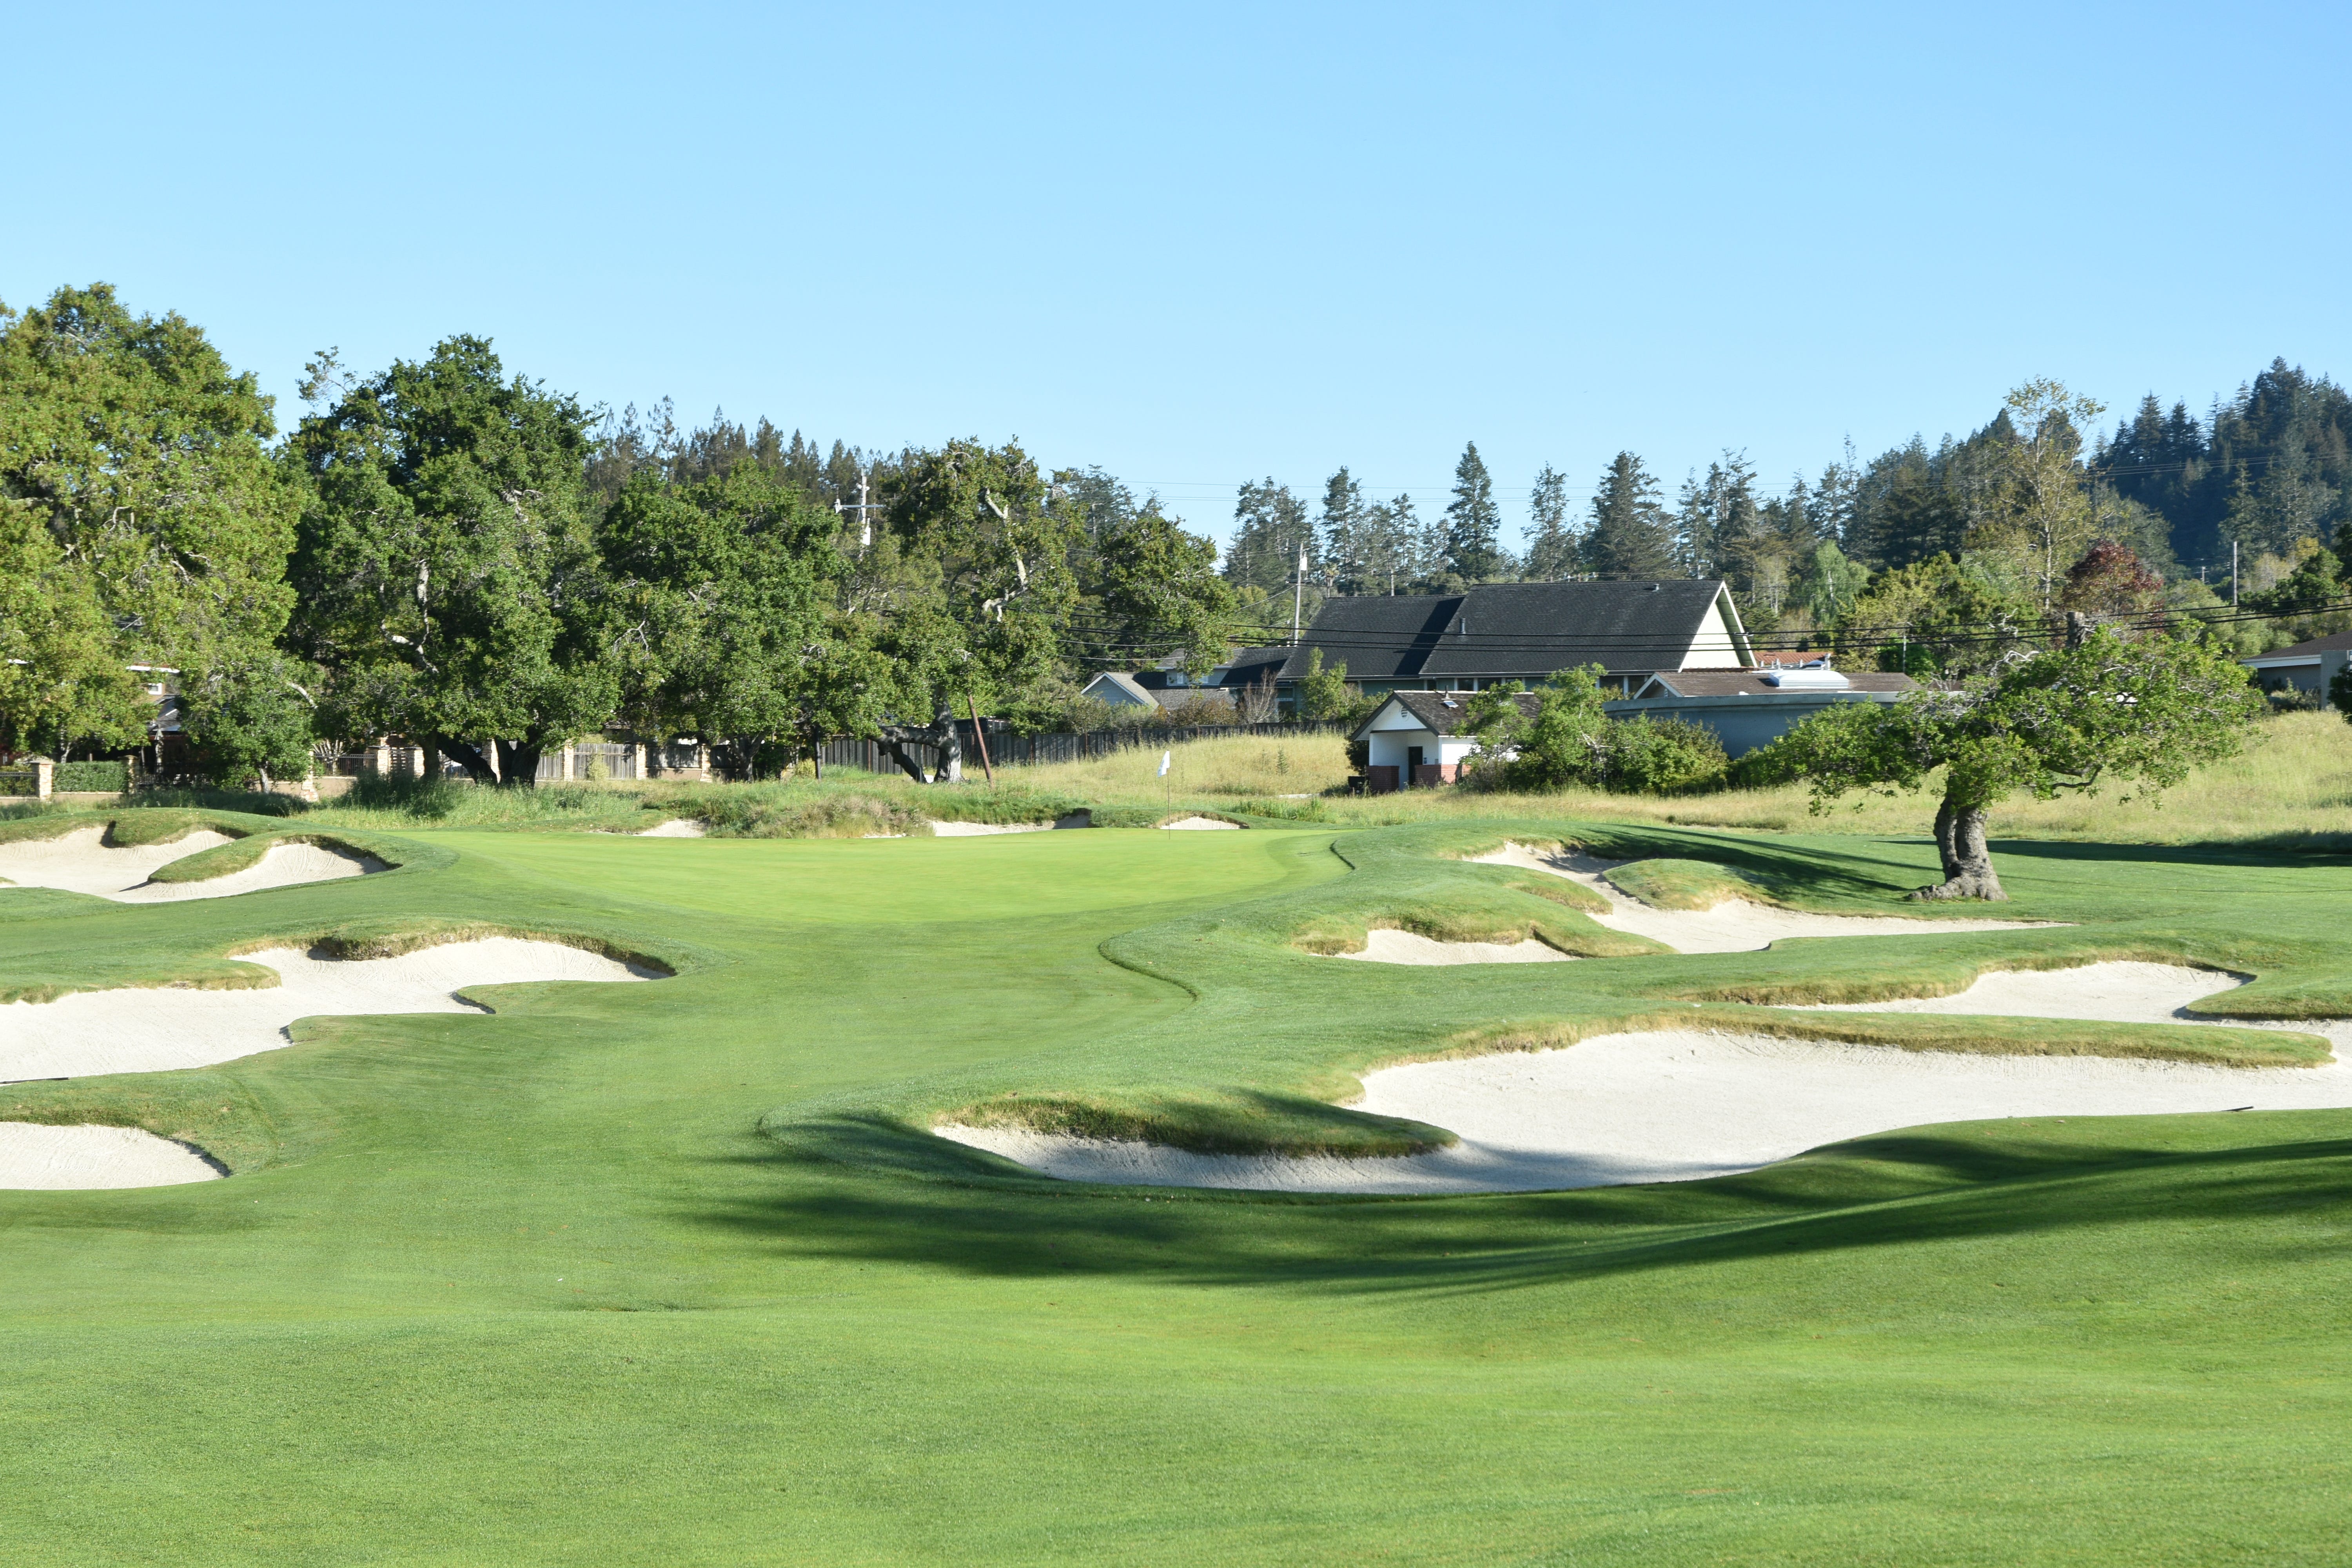
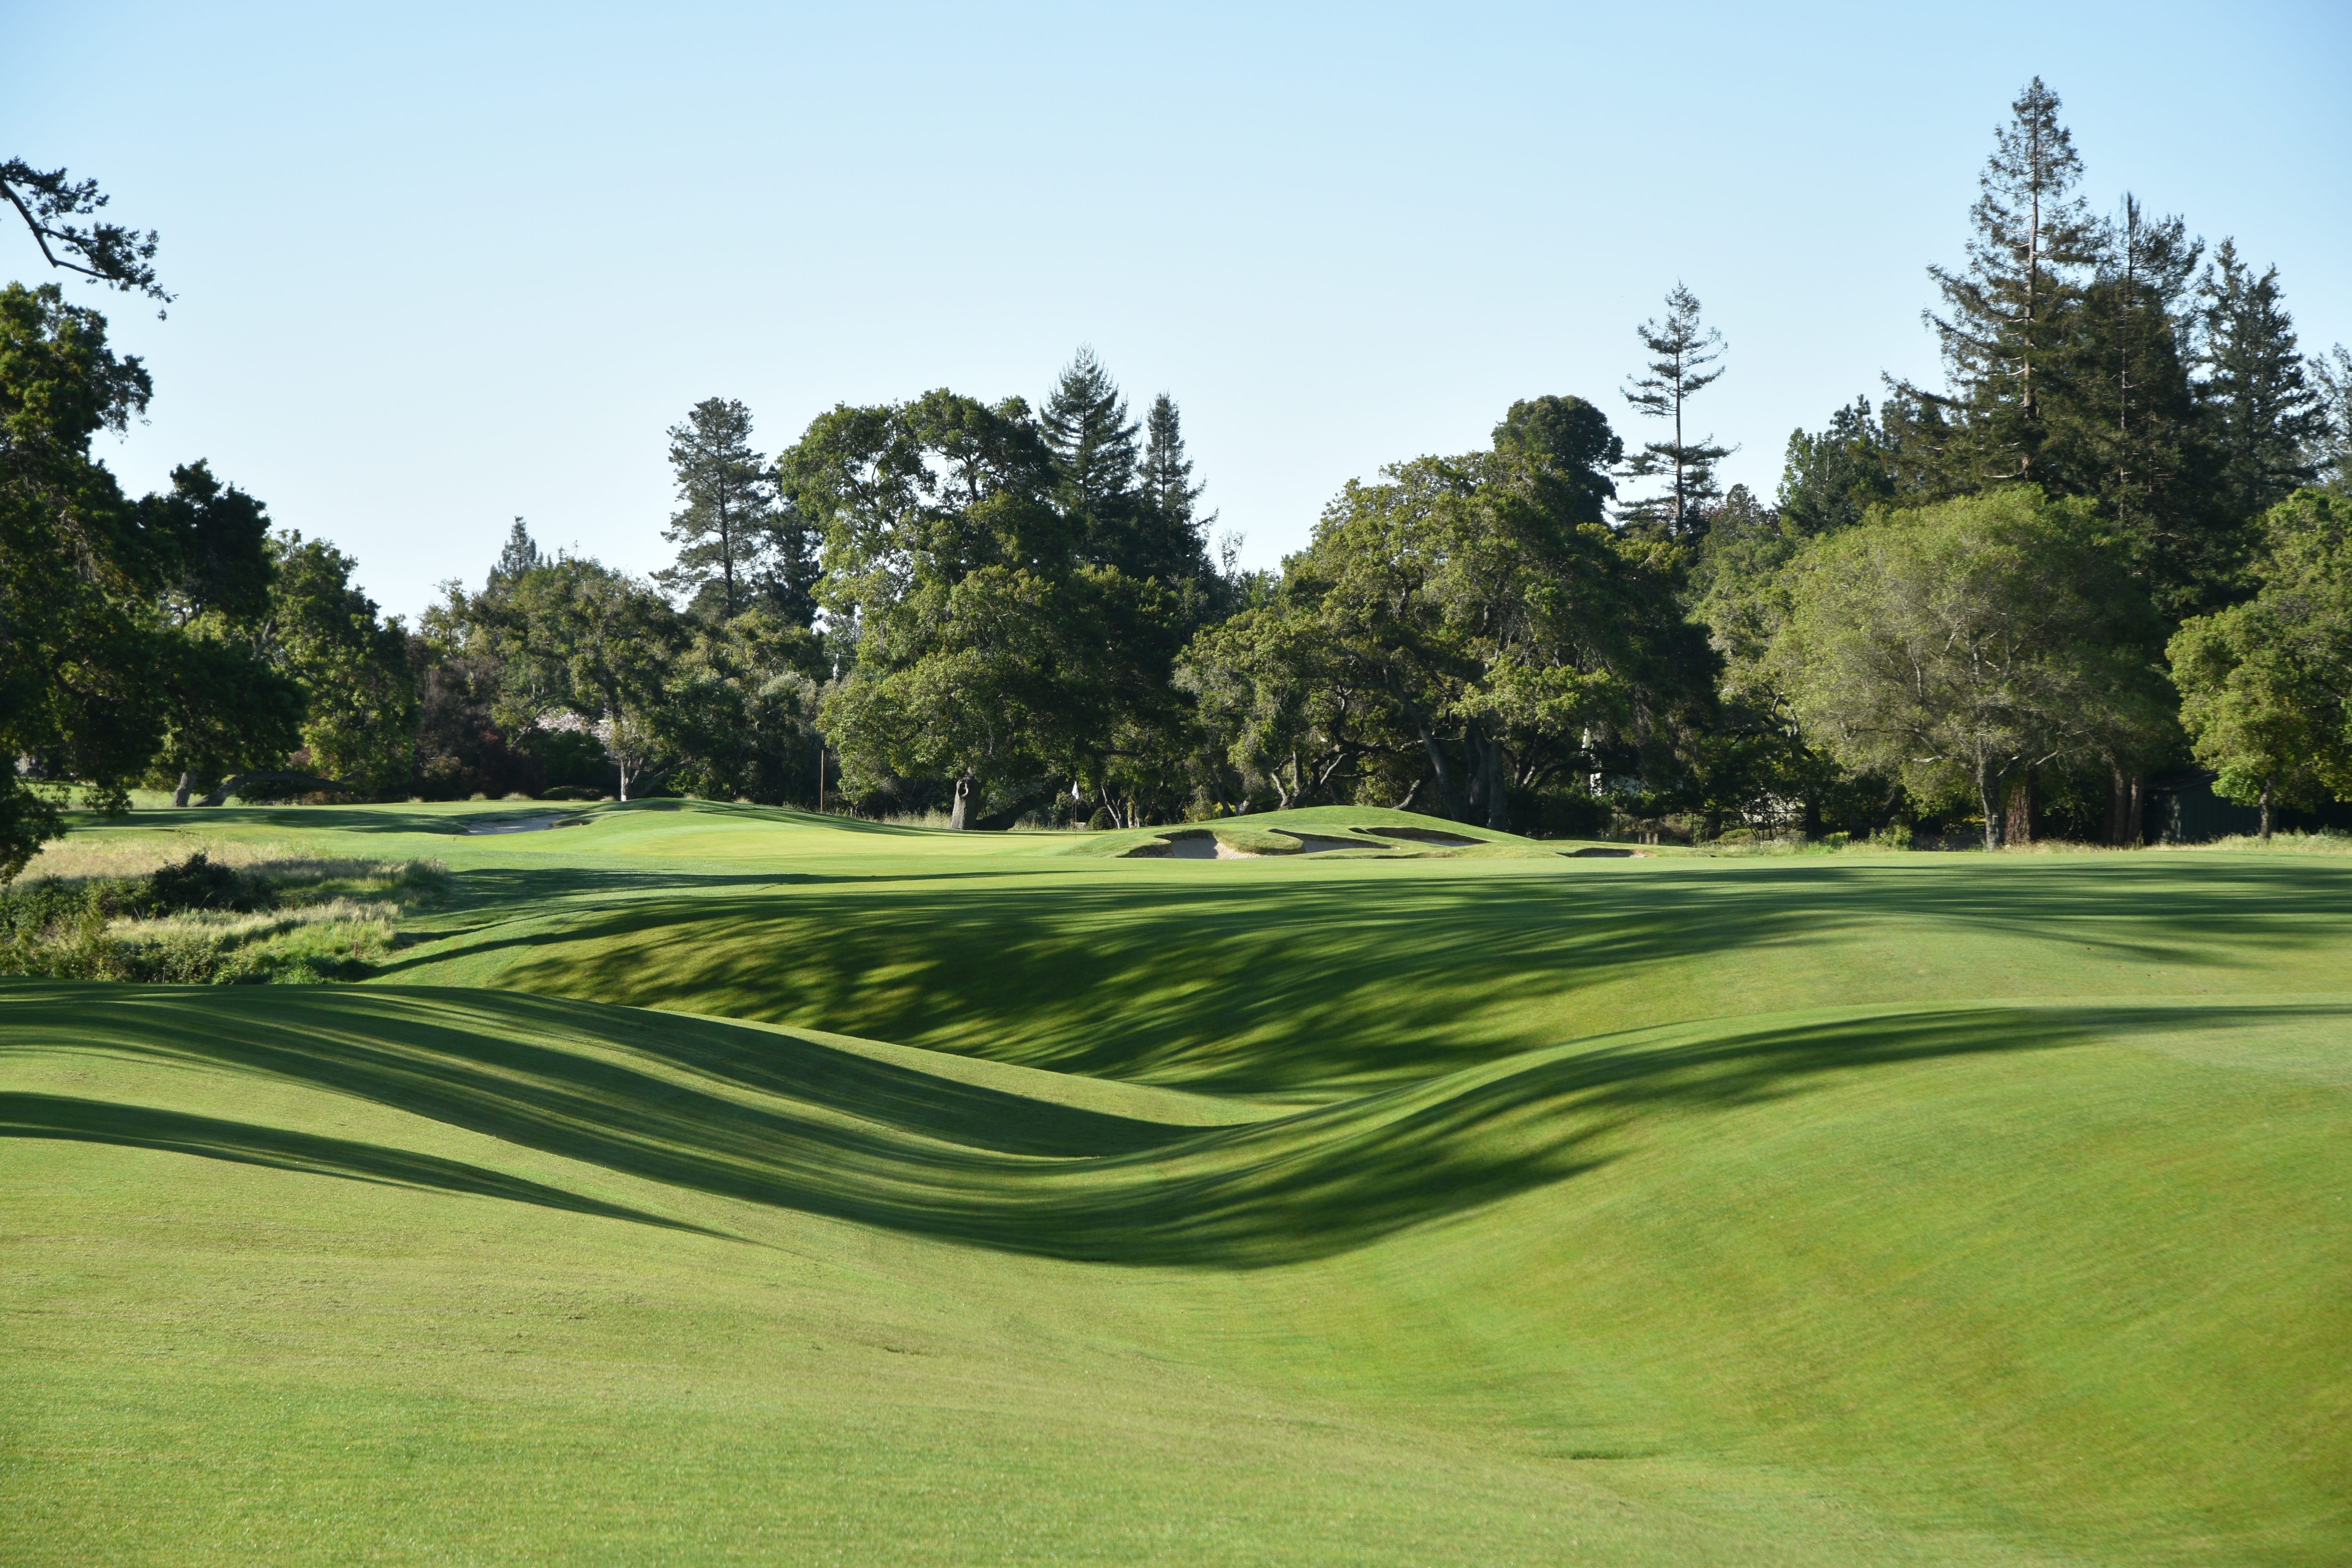
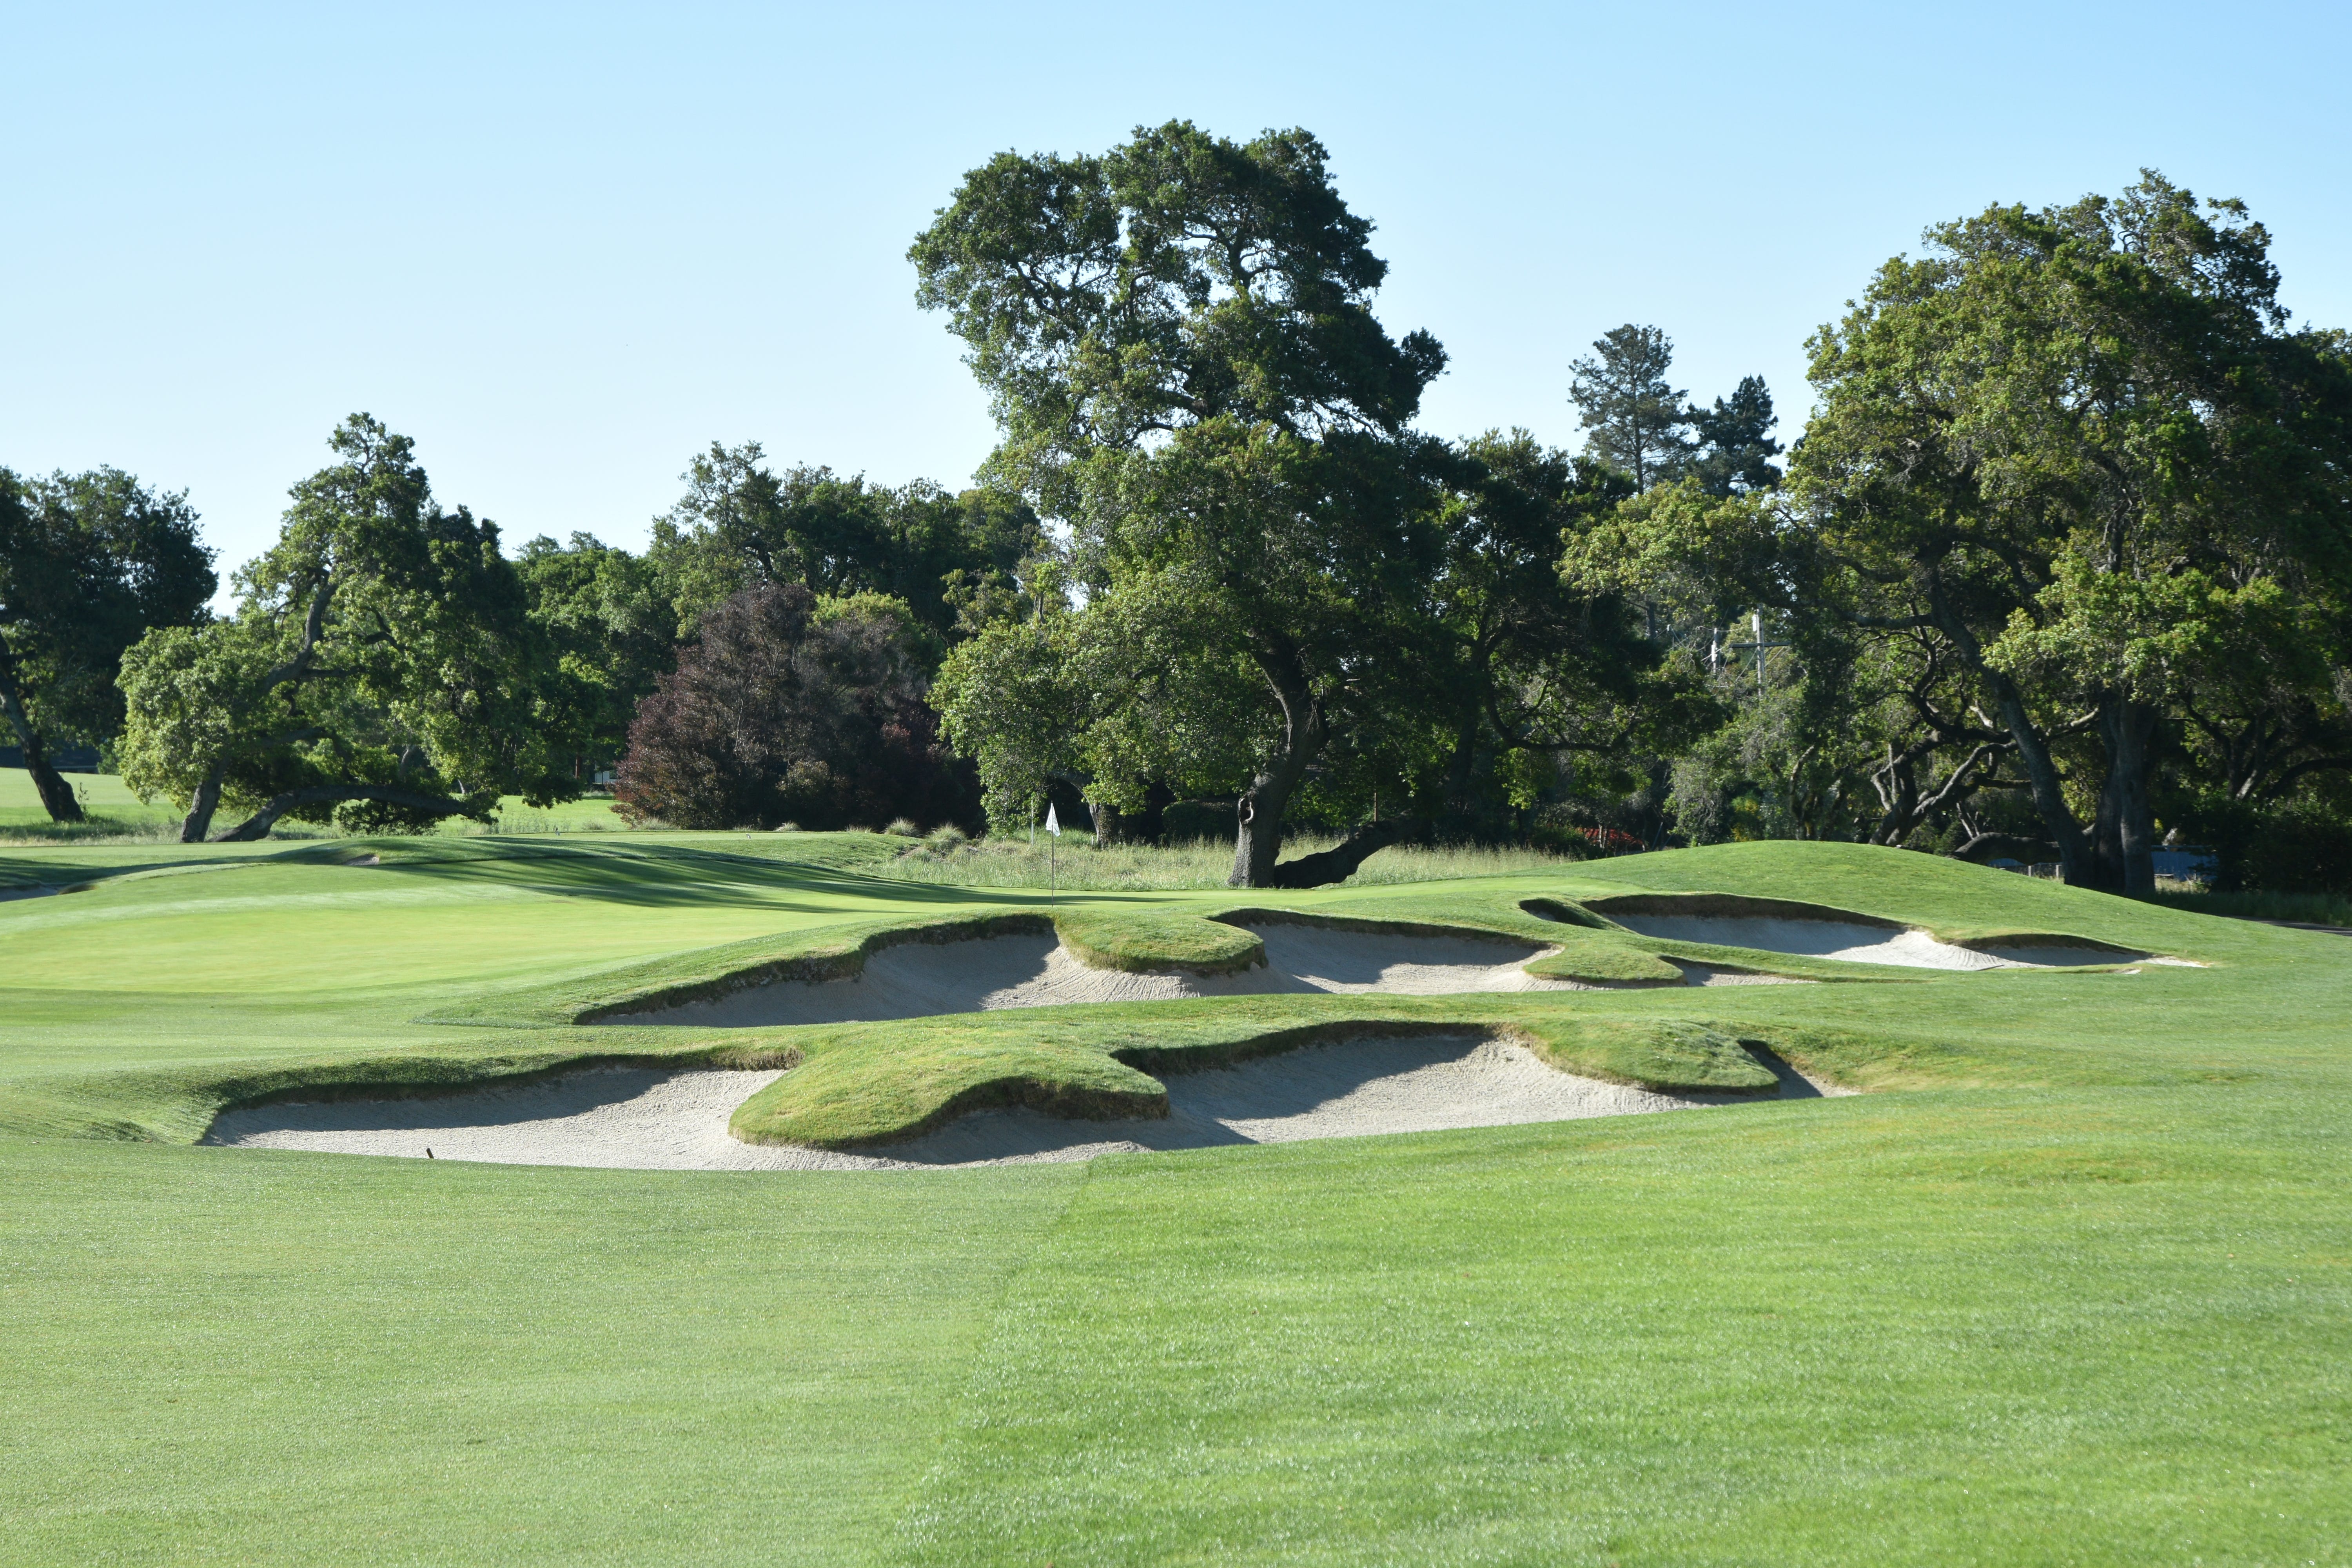
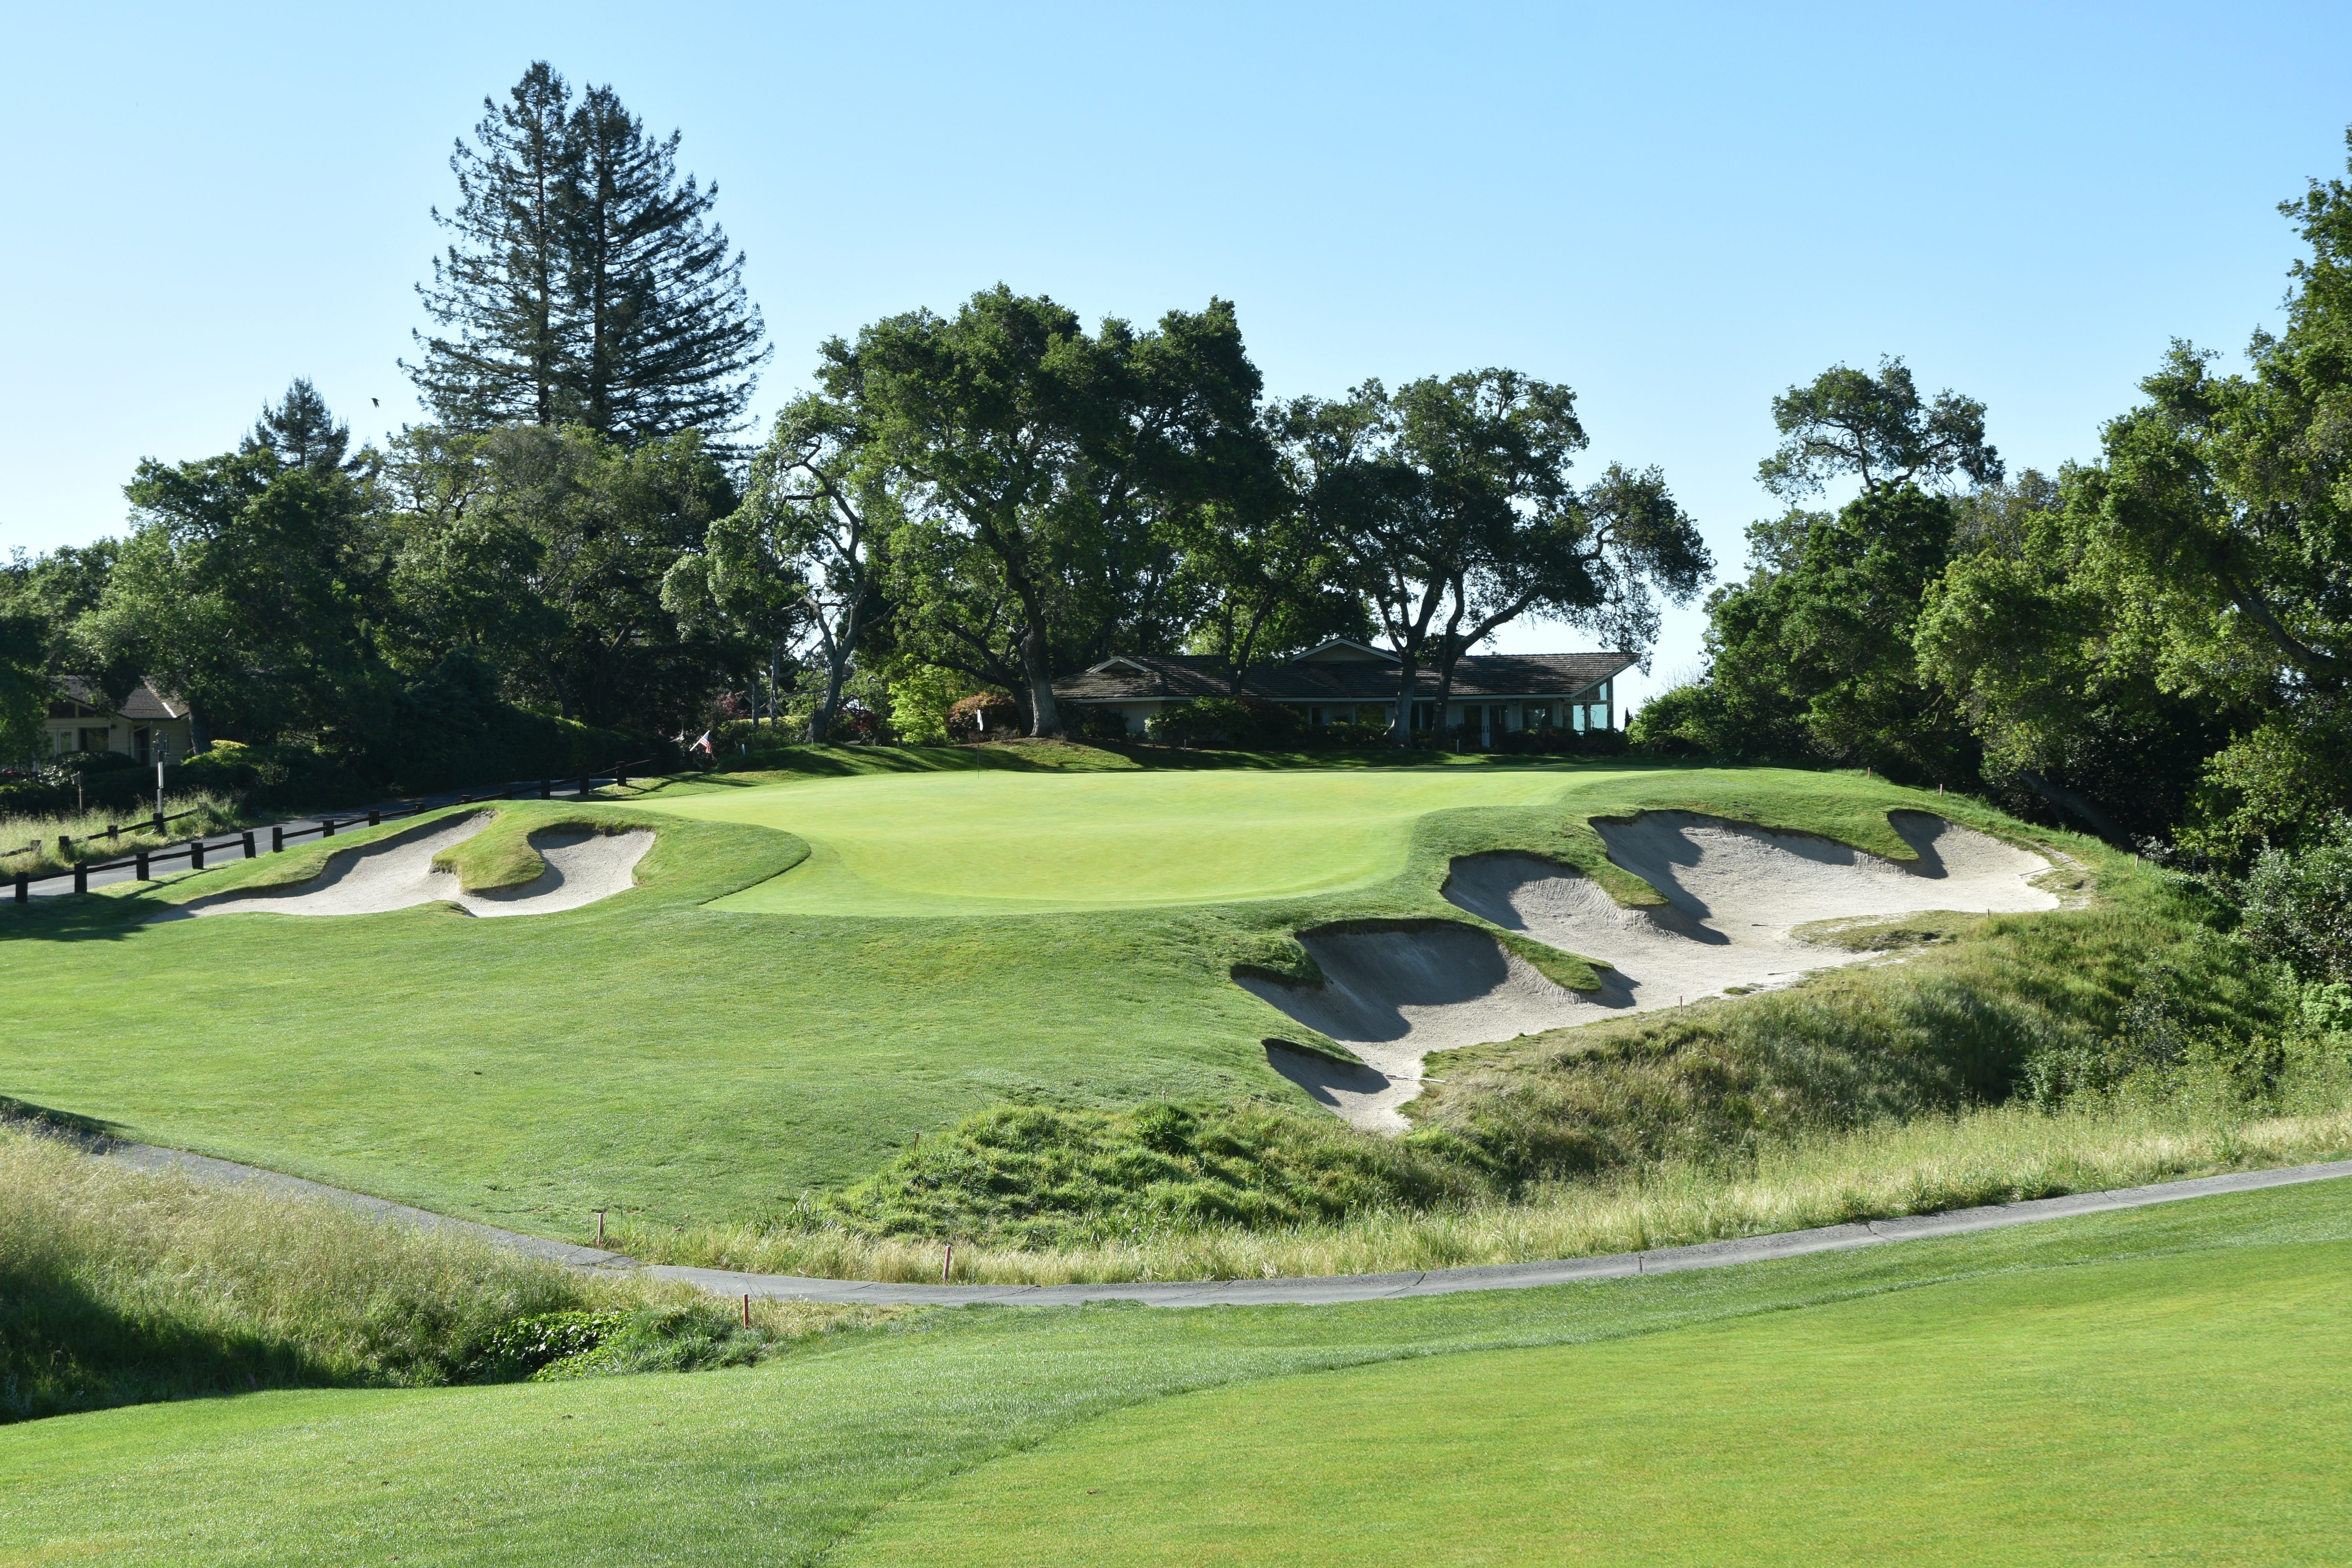
Coming from the right hand side of the fairway provides the ideal approach to attack the 2nd hole green
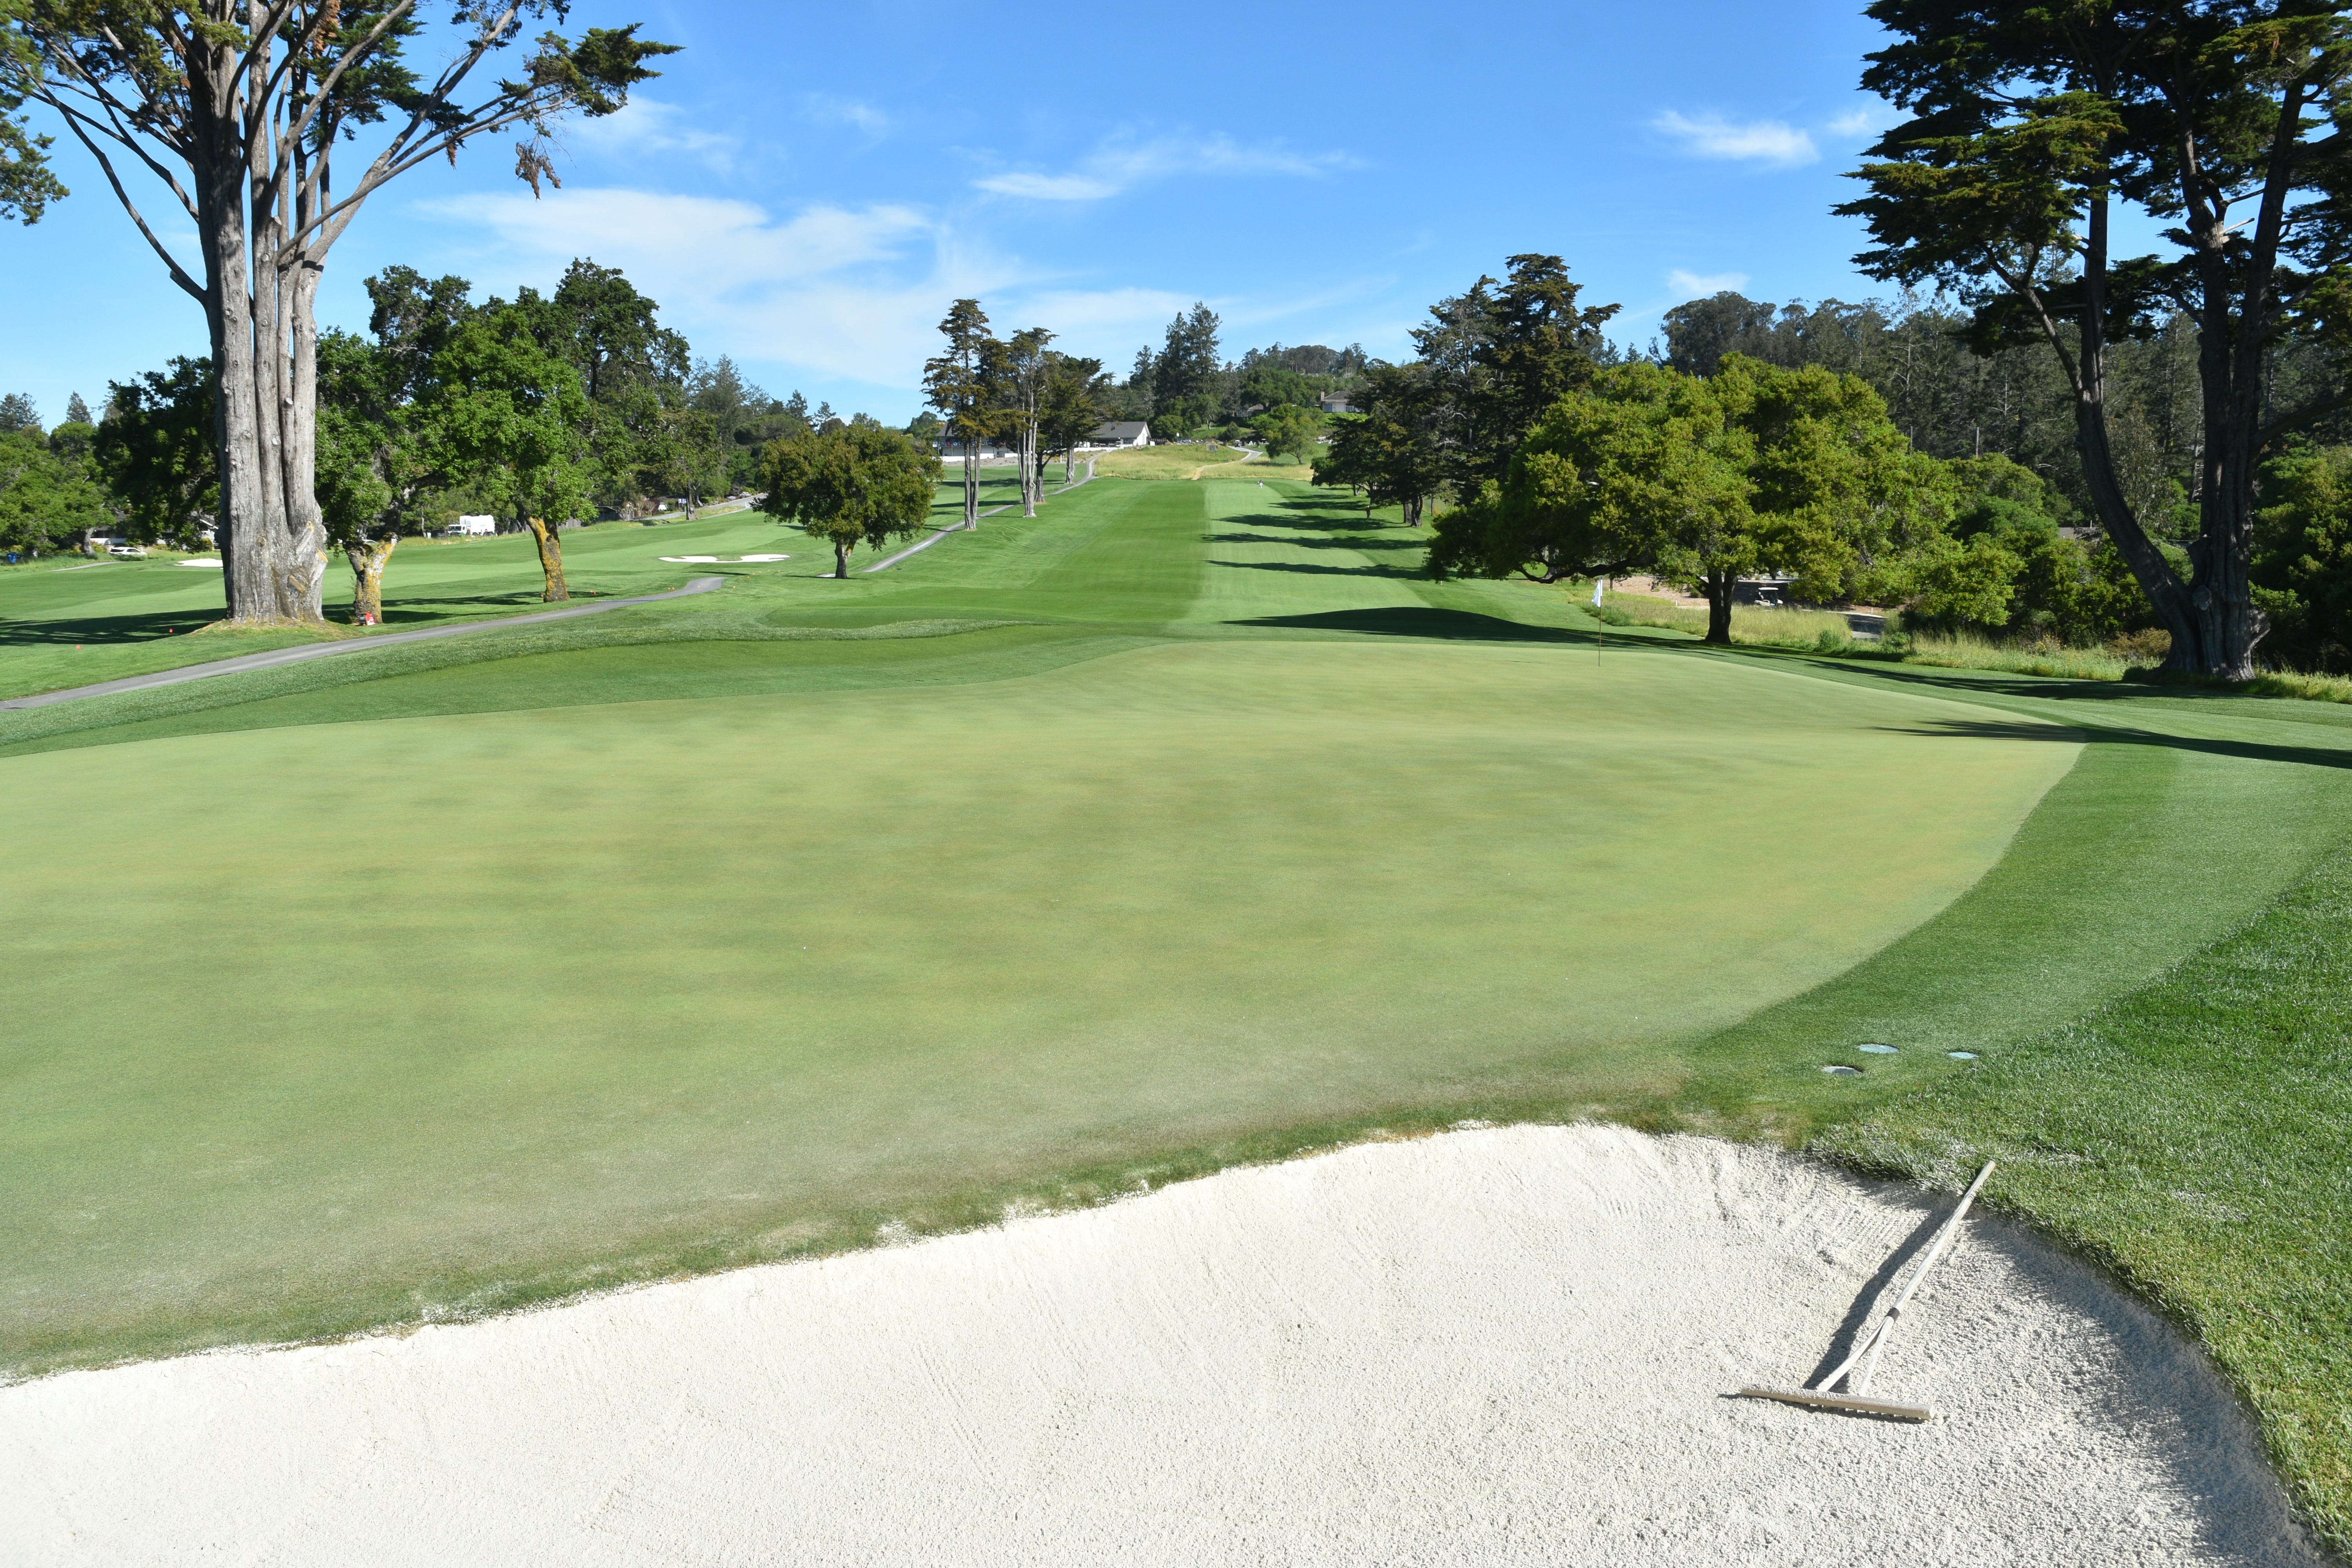
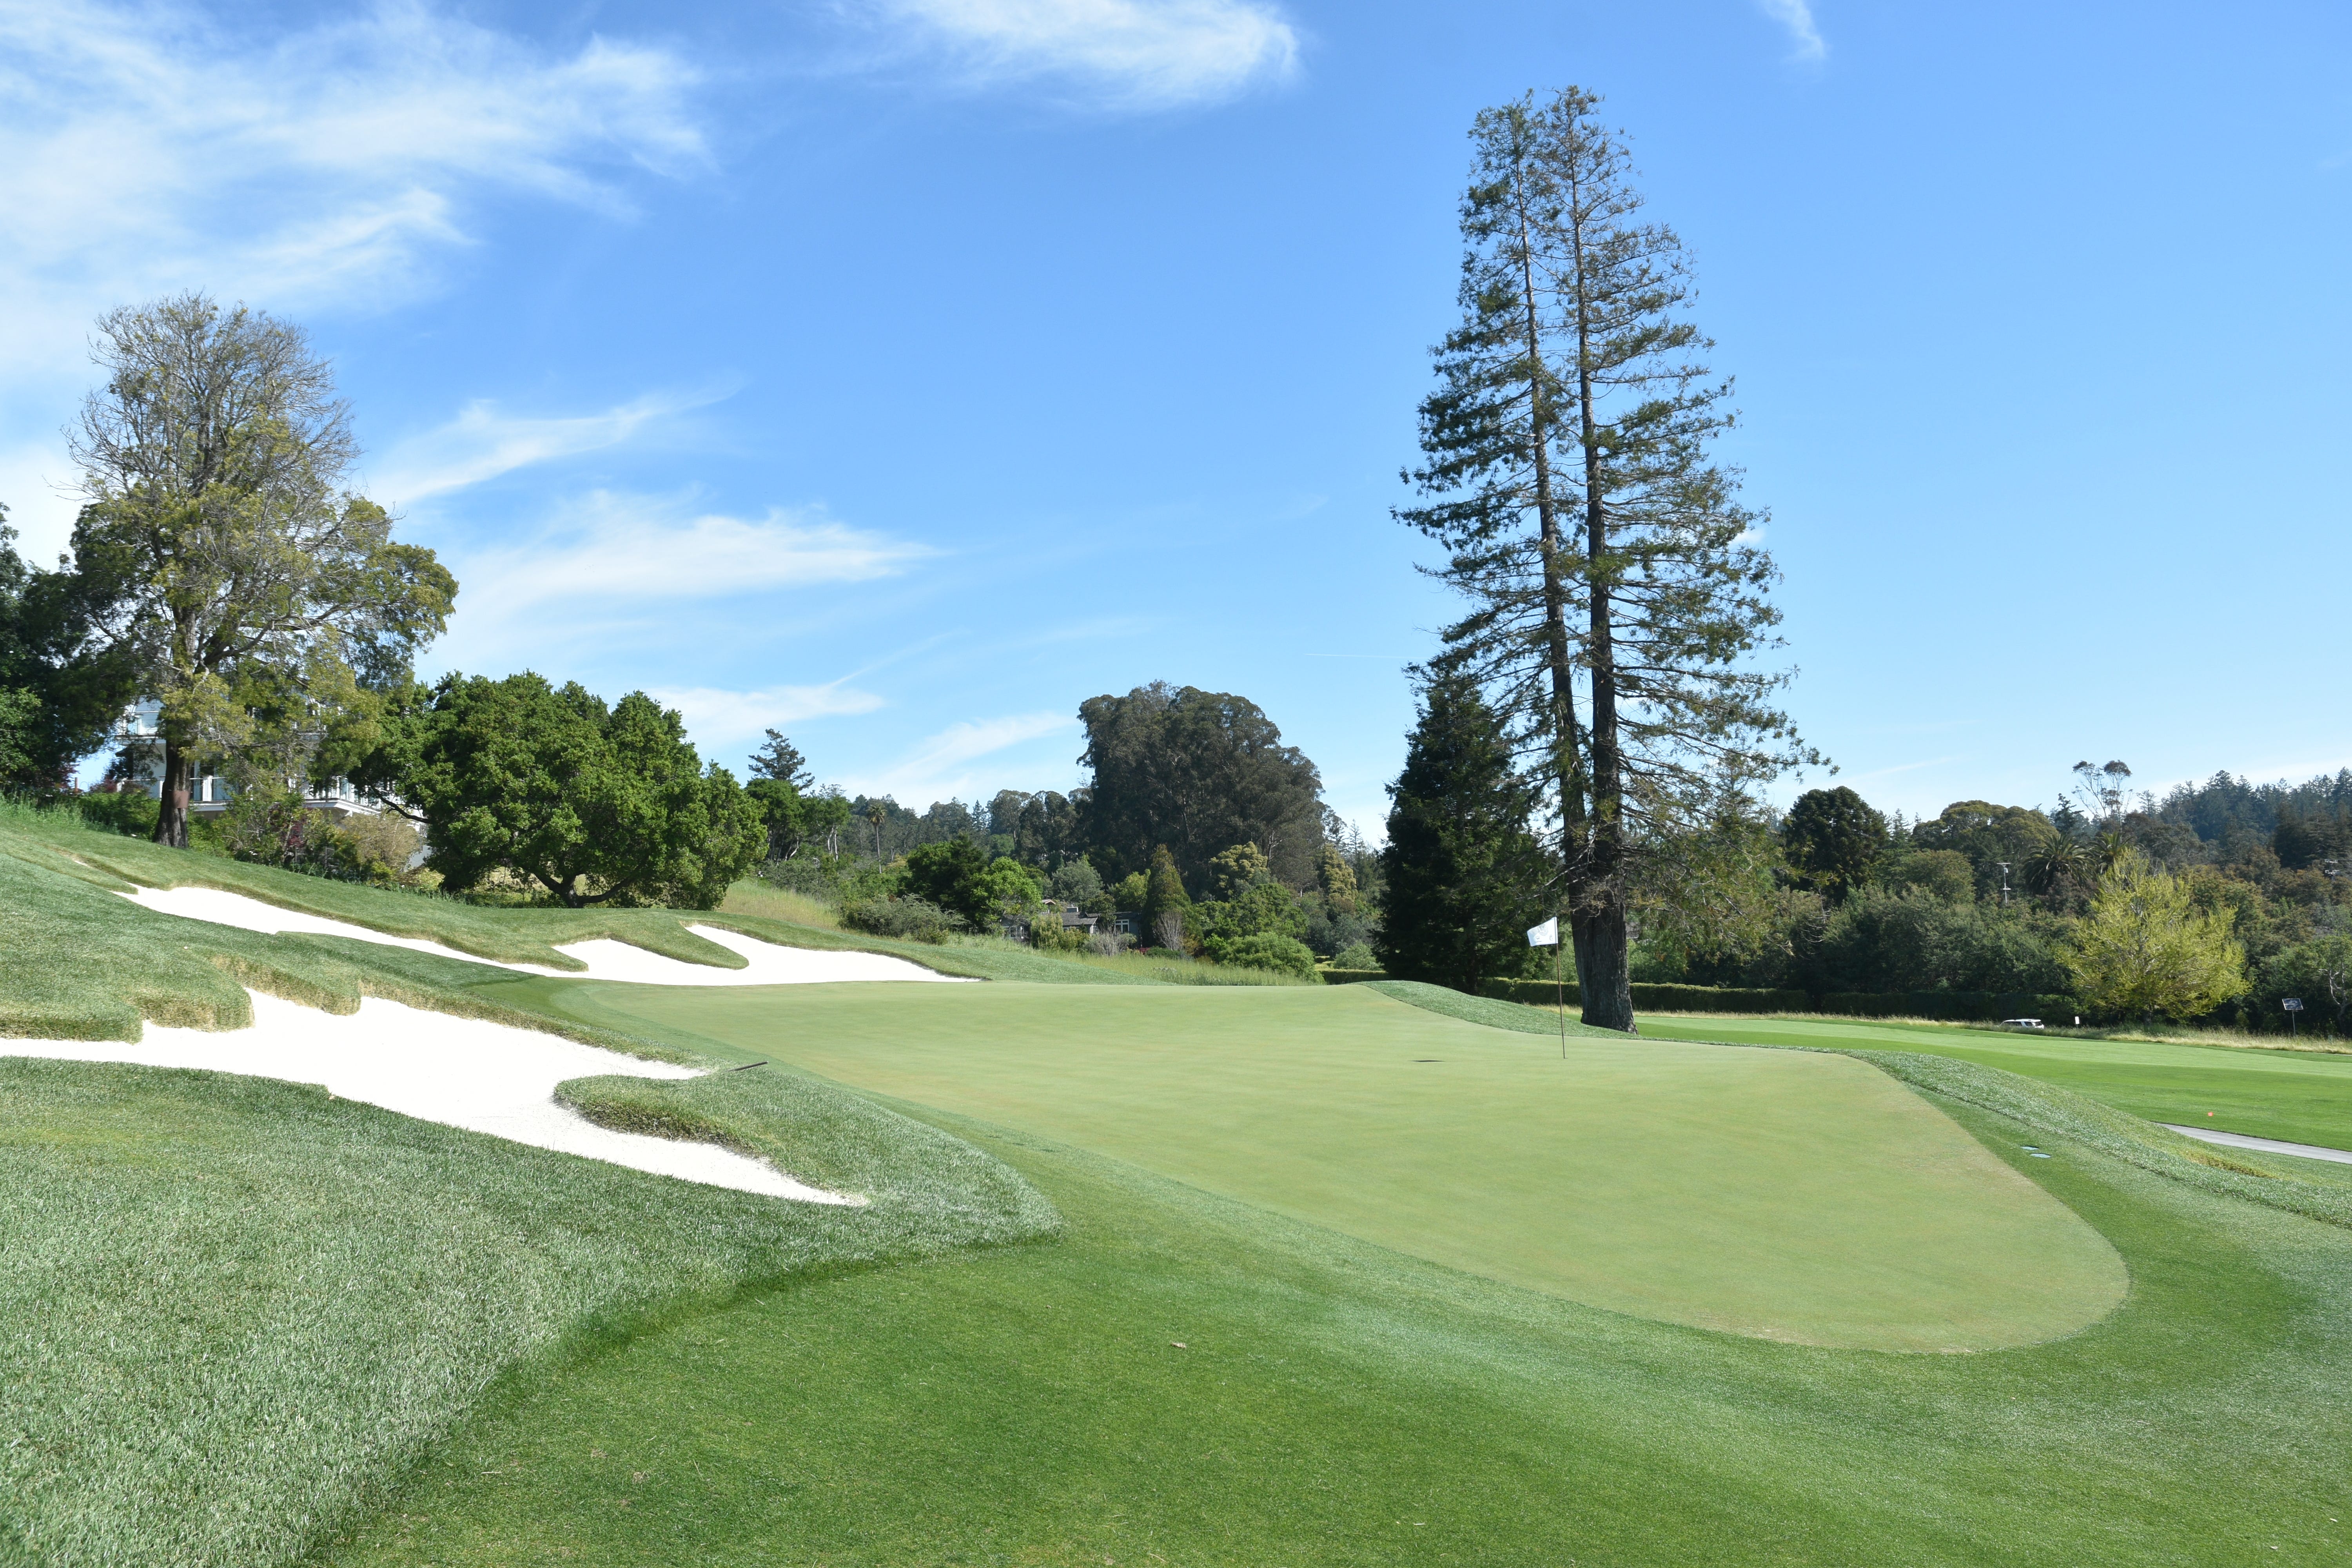
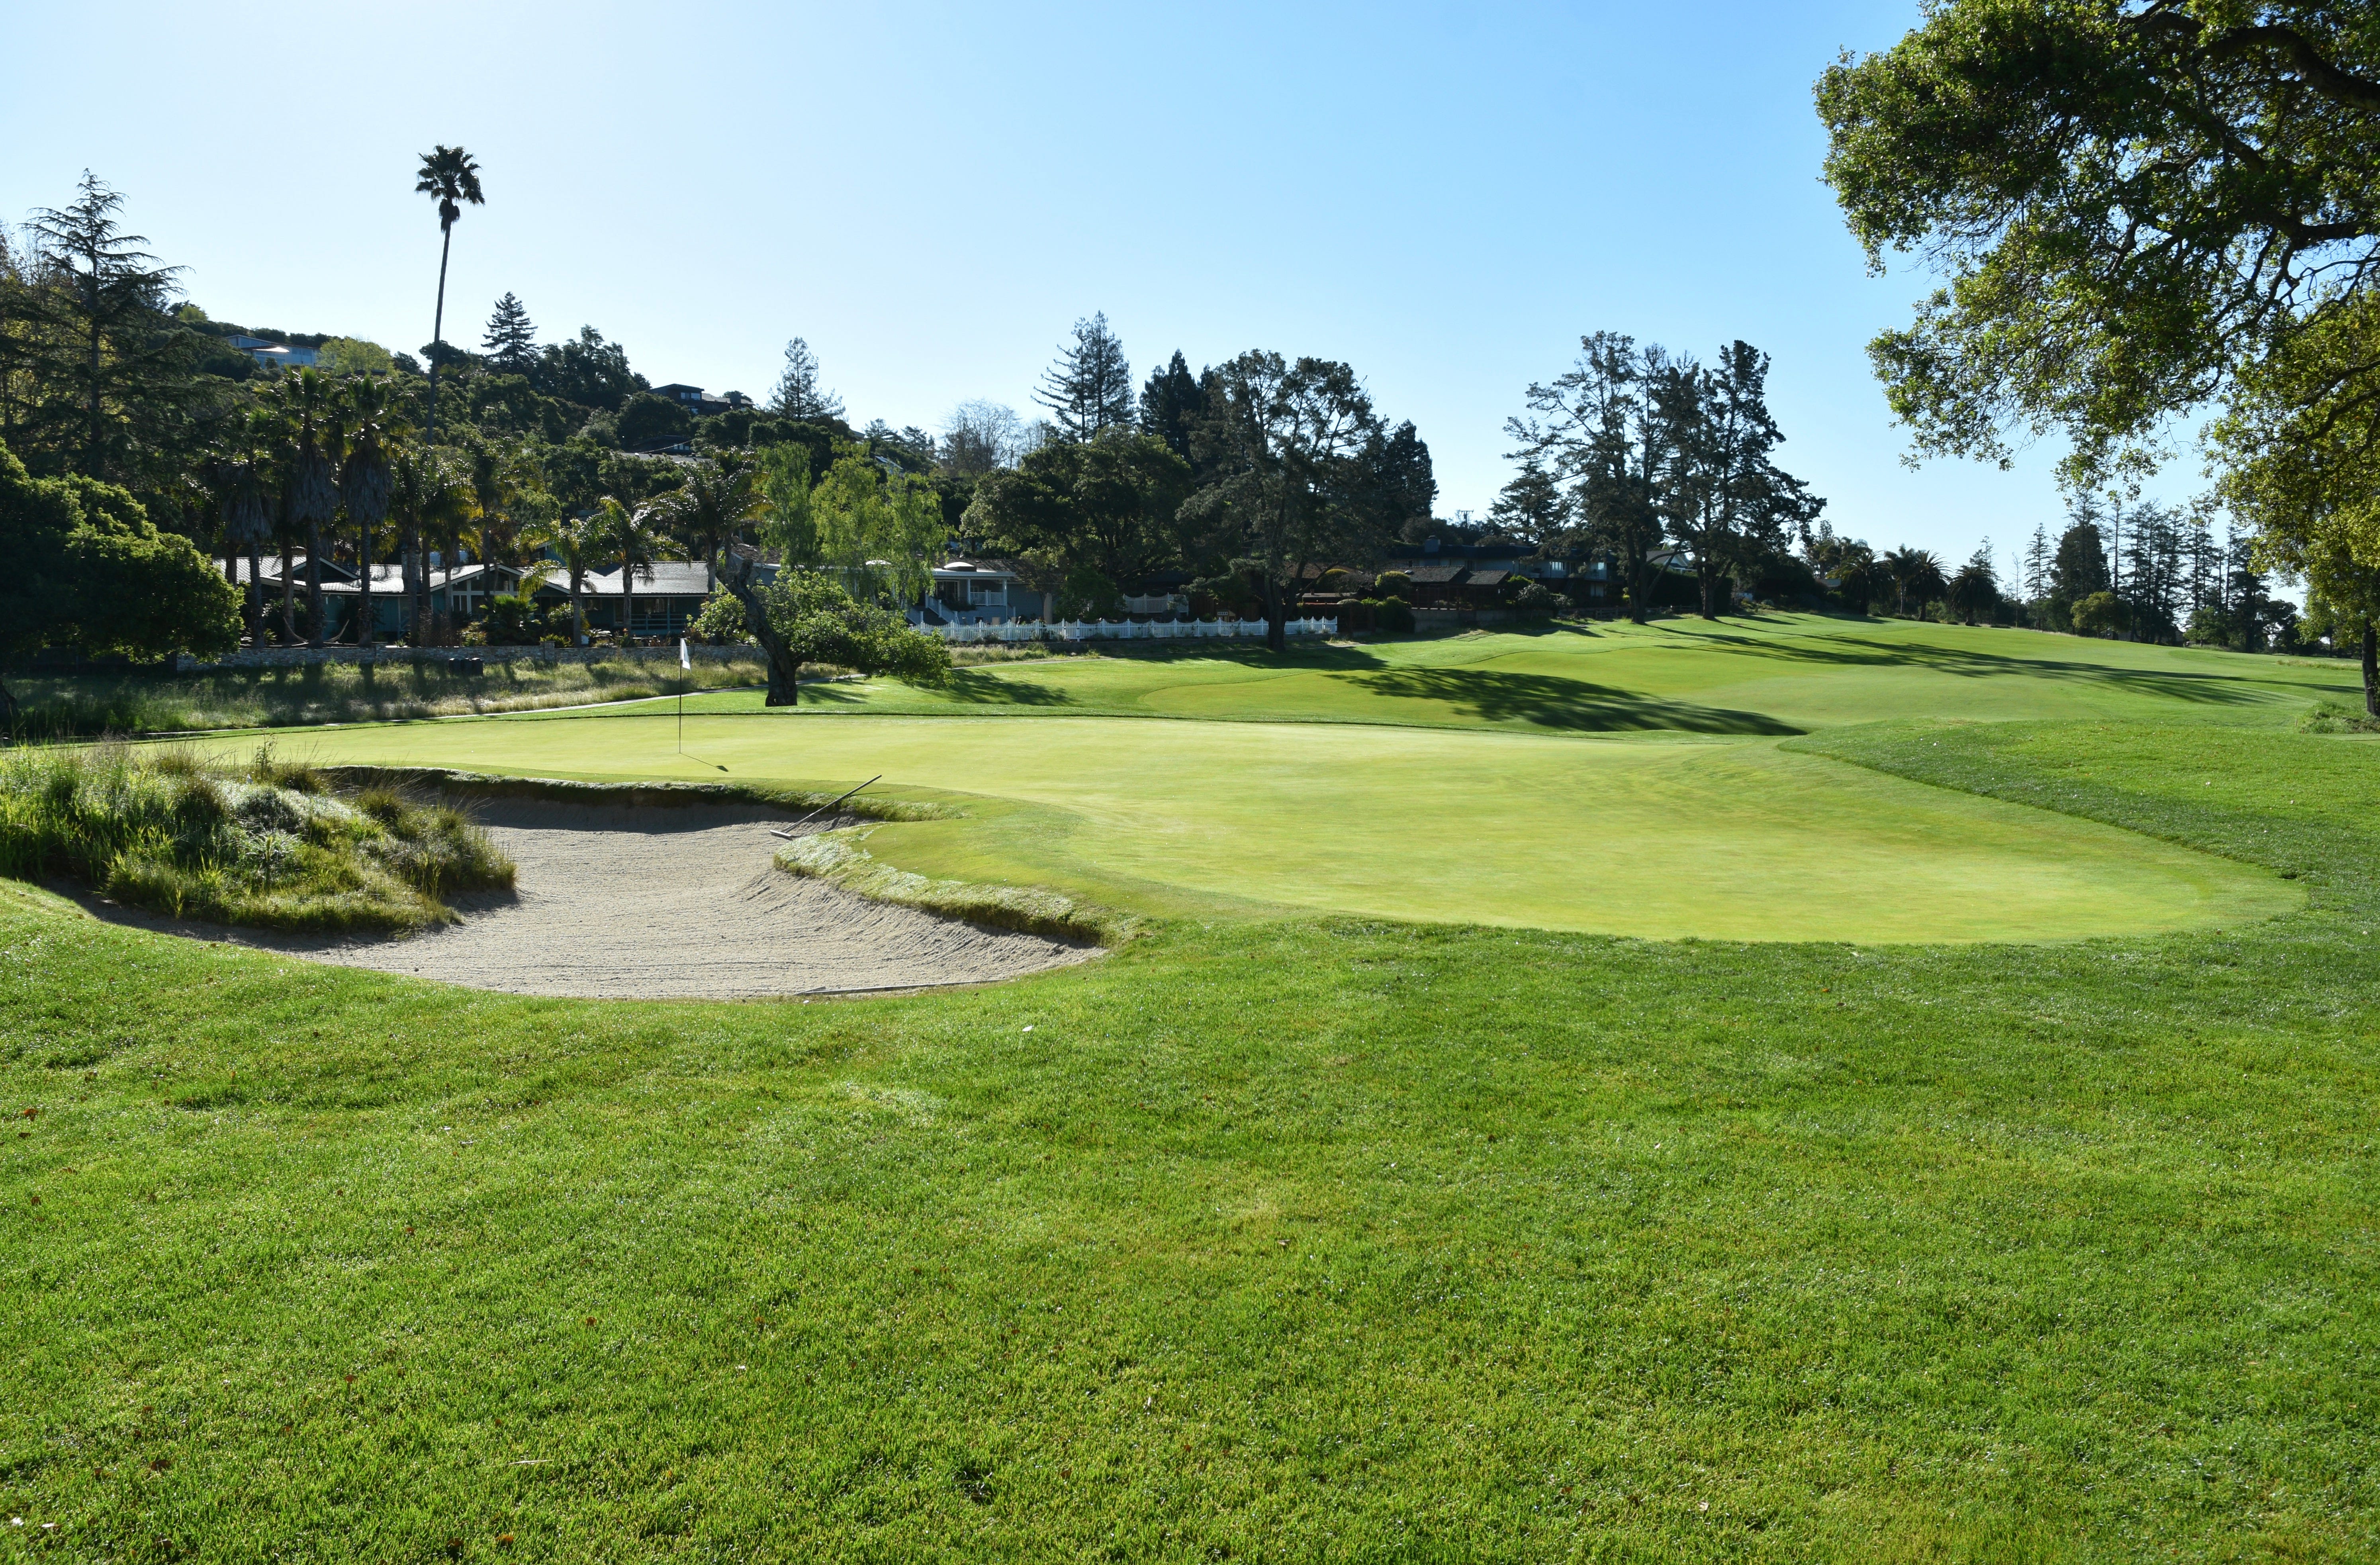
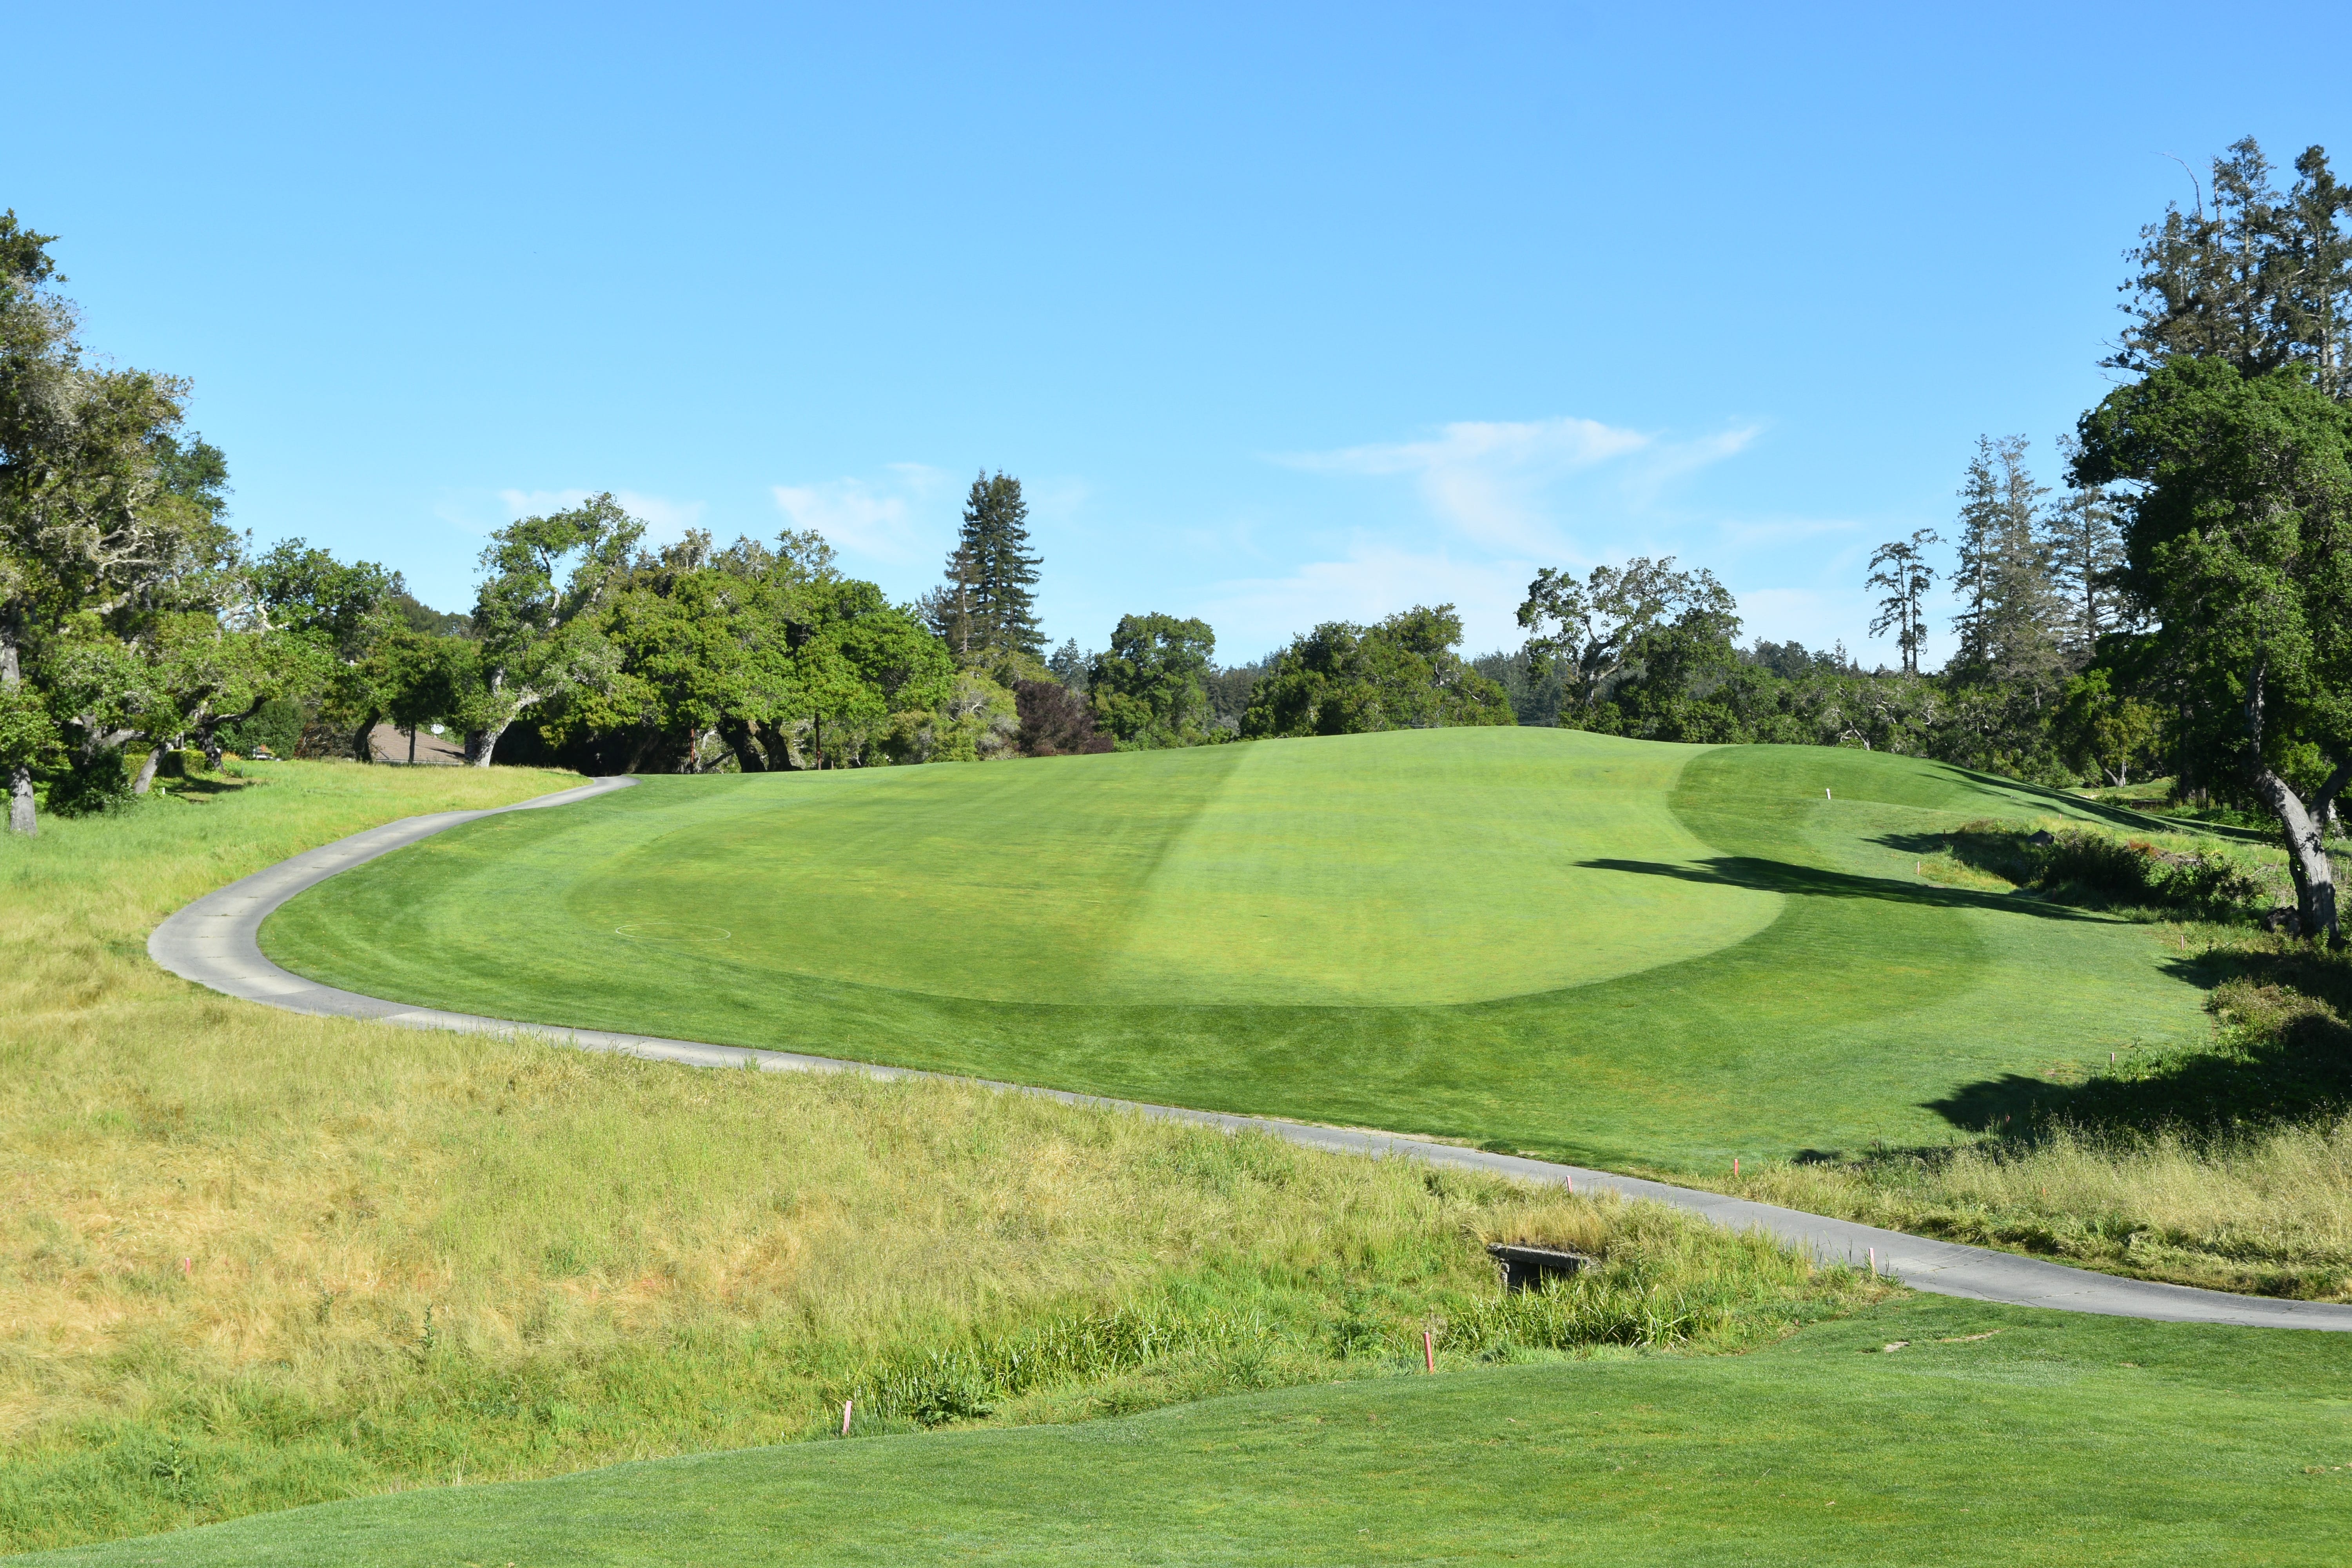
The 2nd hole approach — balls struck properly will feed down from the right side to the left side of this green
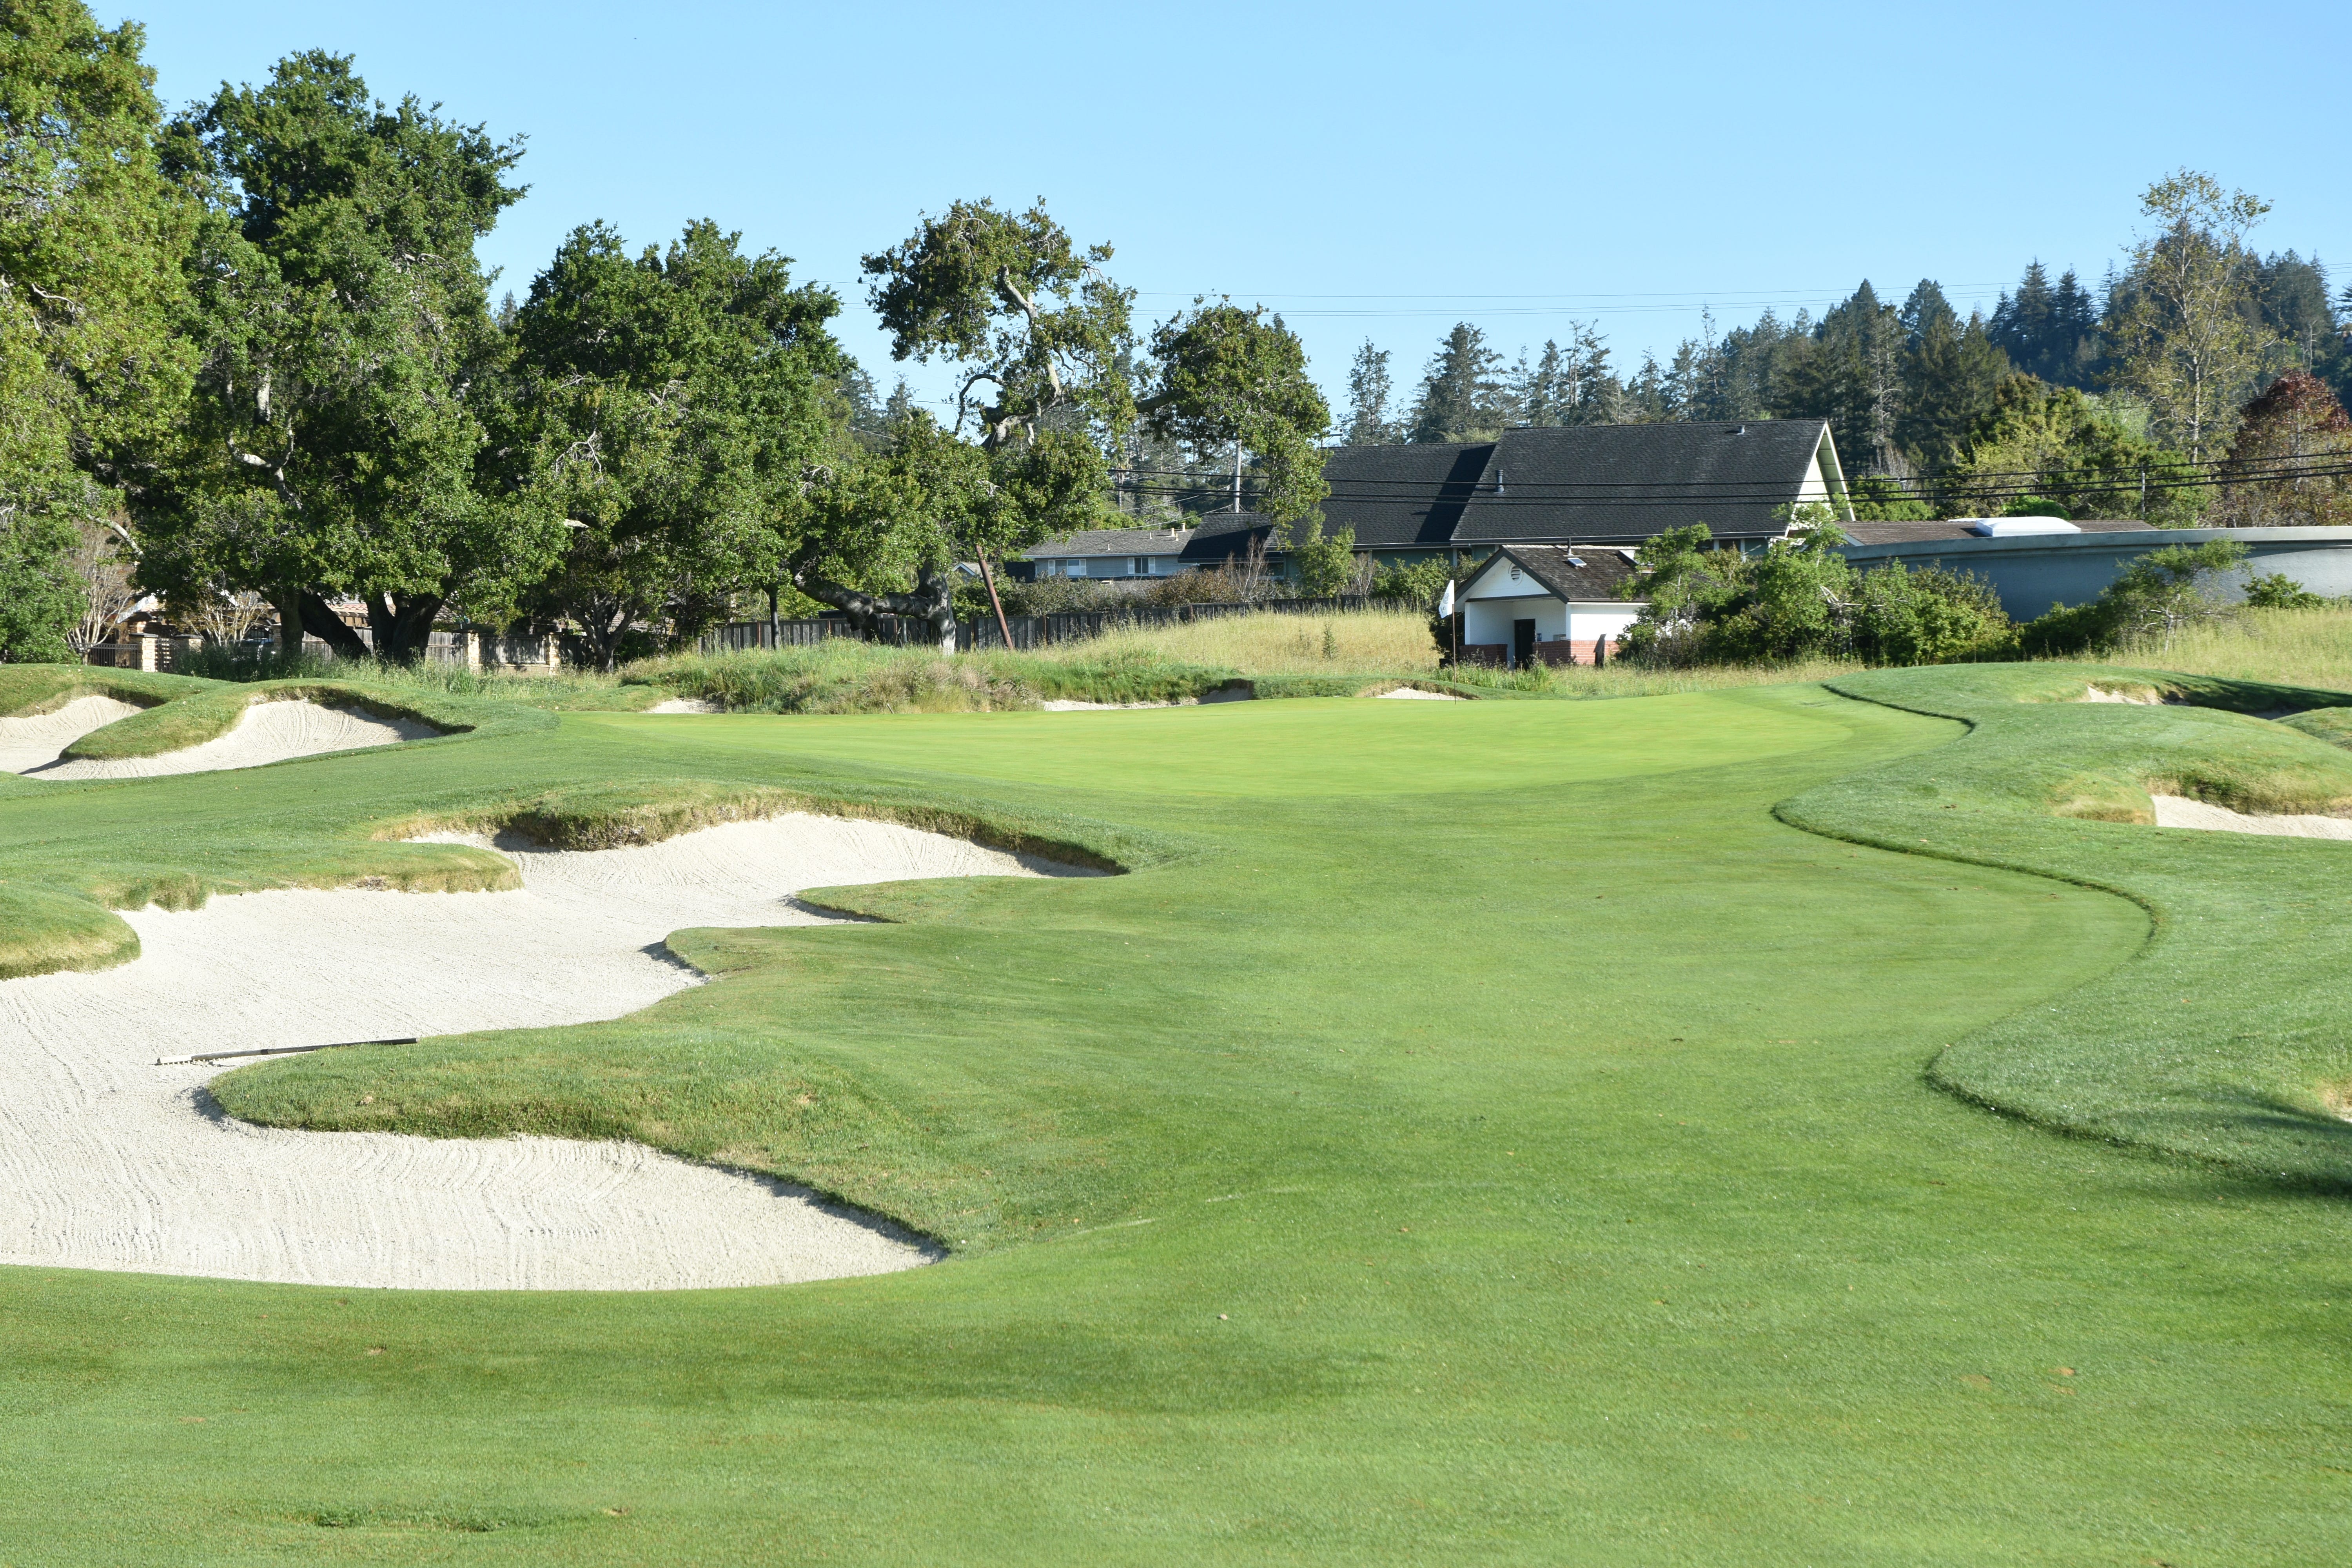
The 2nd hole green from the front — one of the neat greens at Pasatiempo with its movement and contouring
Various vantage points of the 2nd hole green
The 2nd hole green viewed from the back left
Hole 3: Par 3, 220 Yards
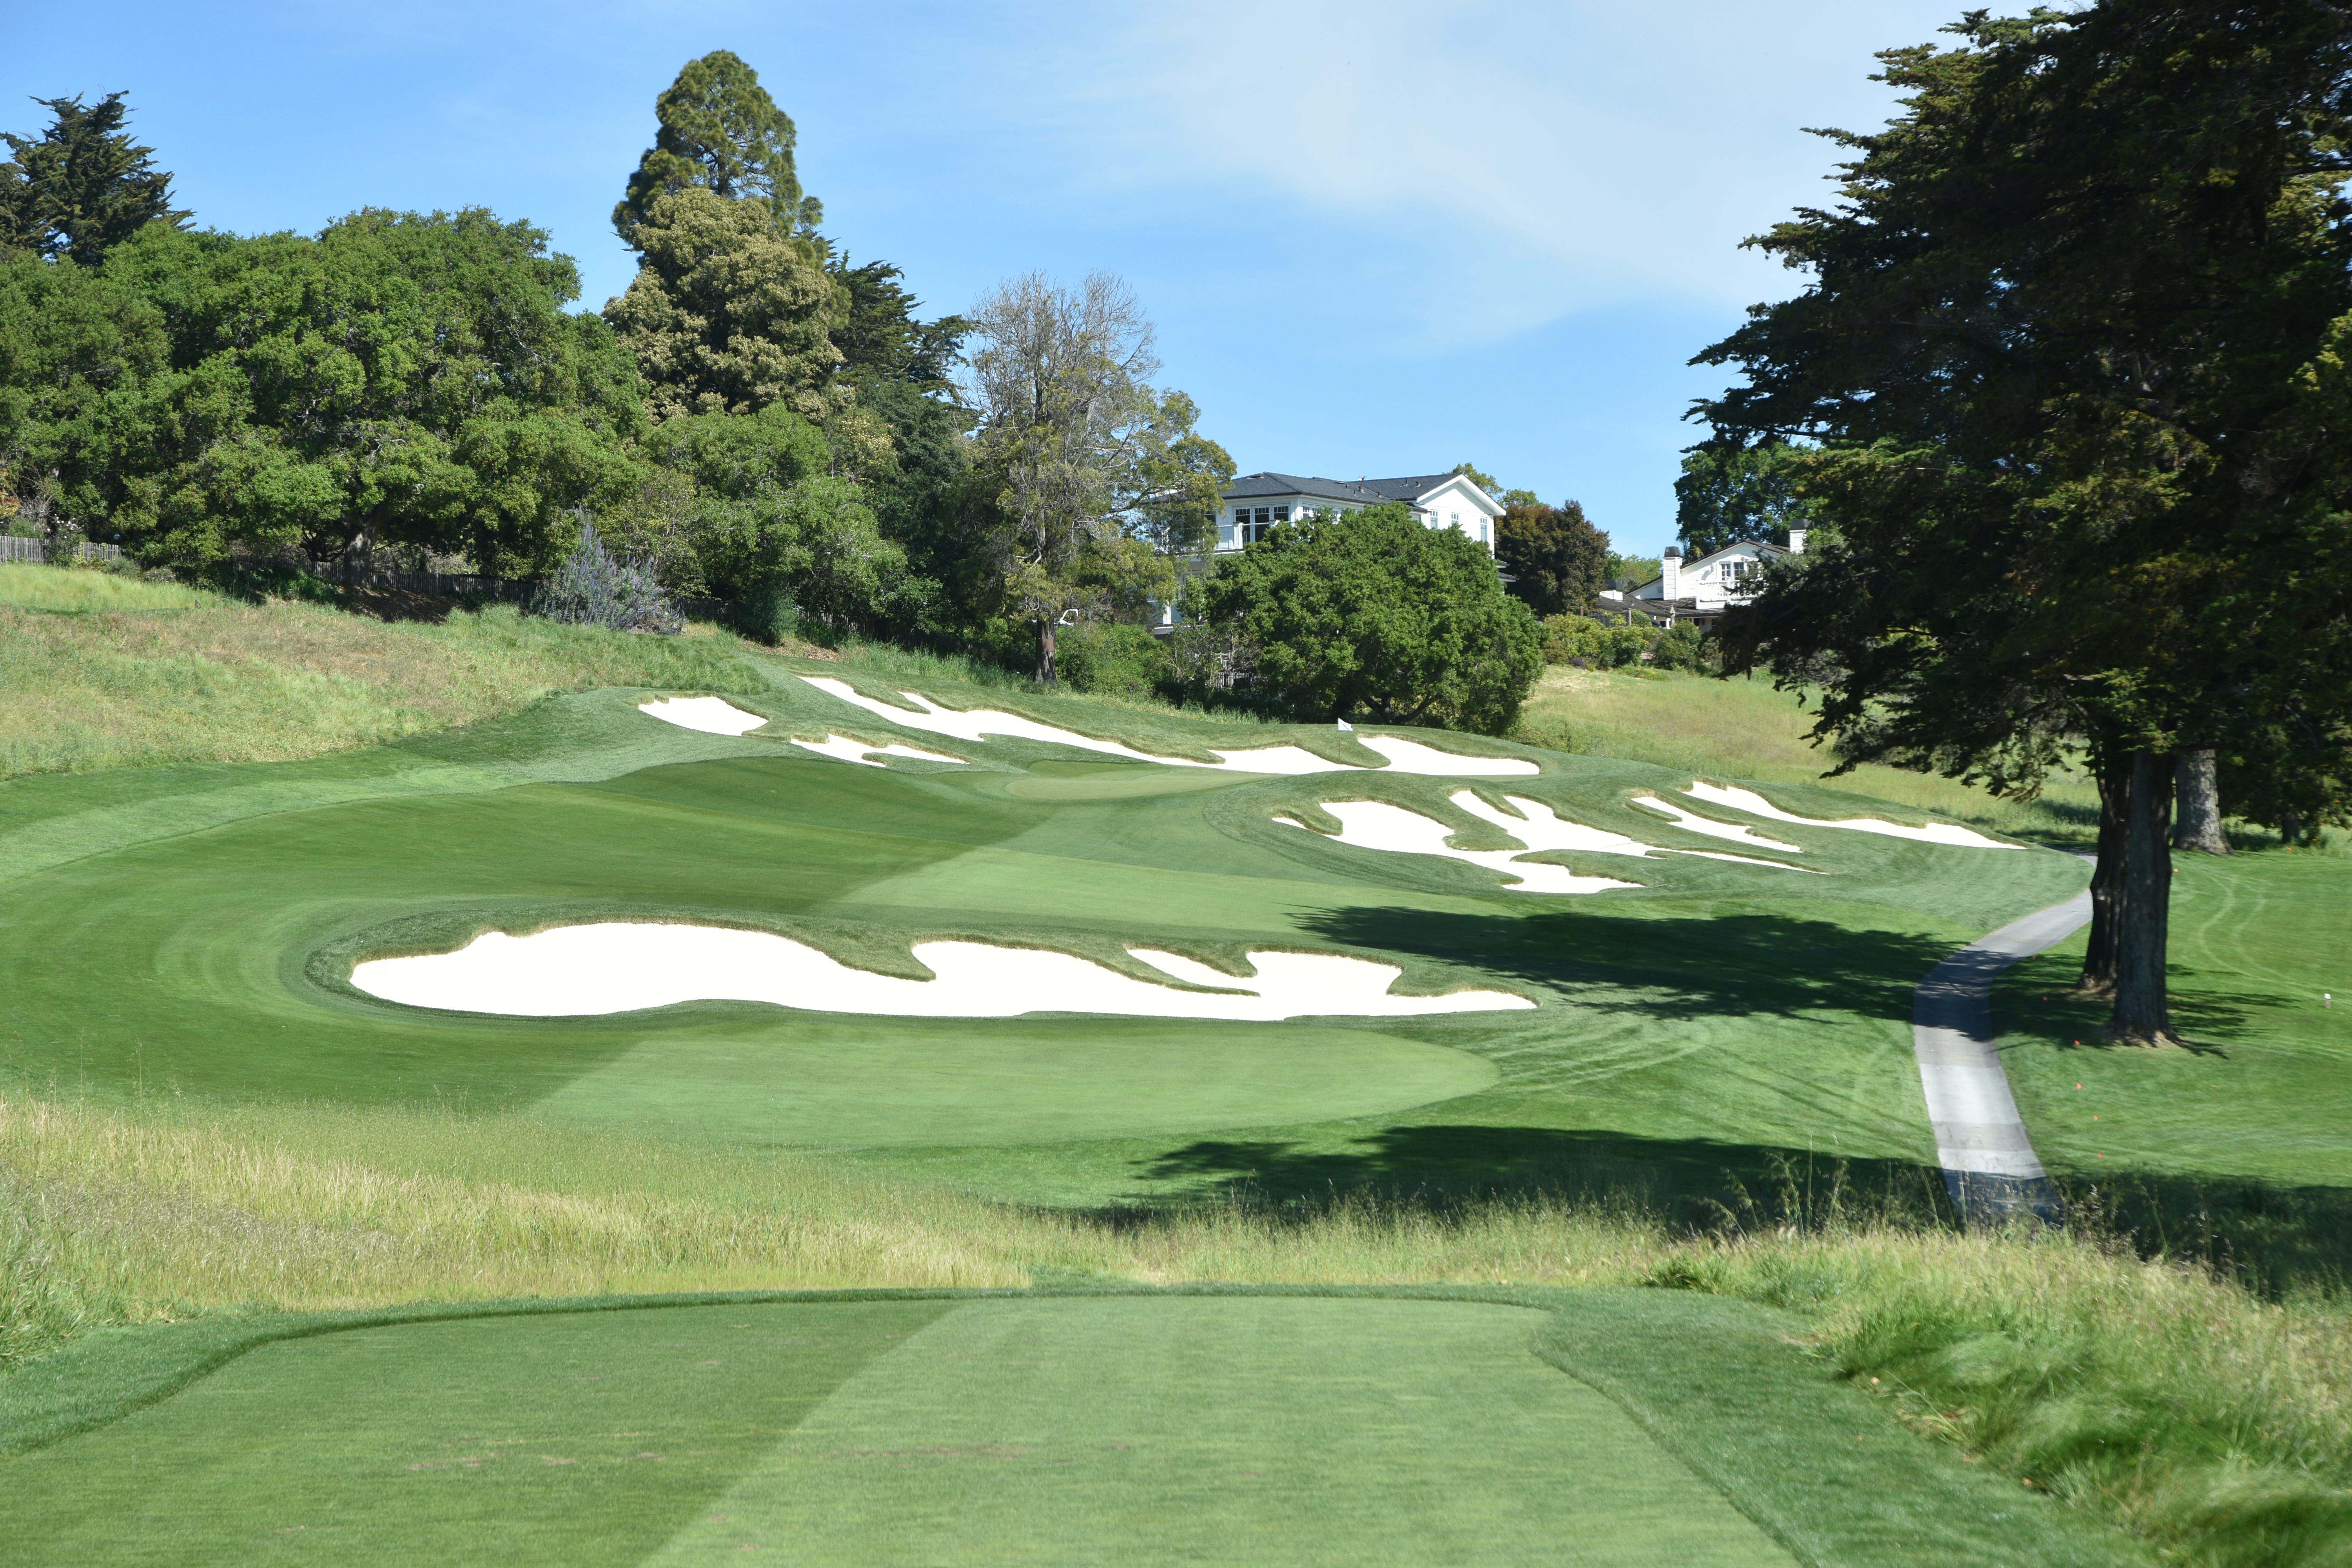
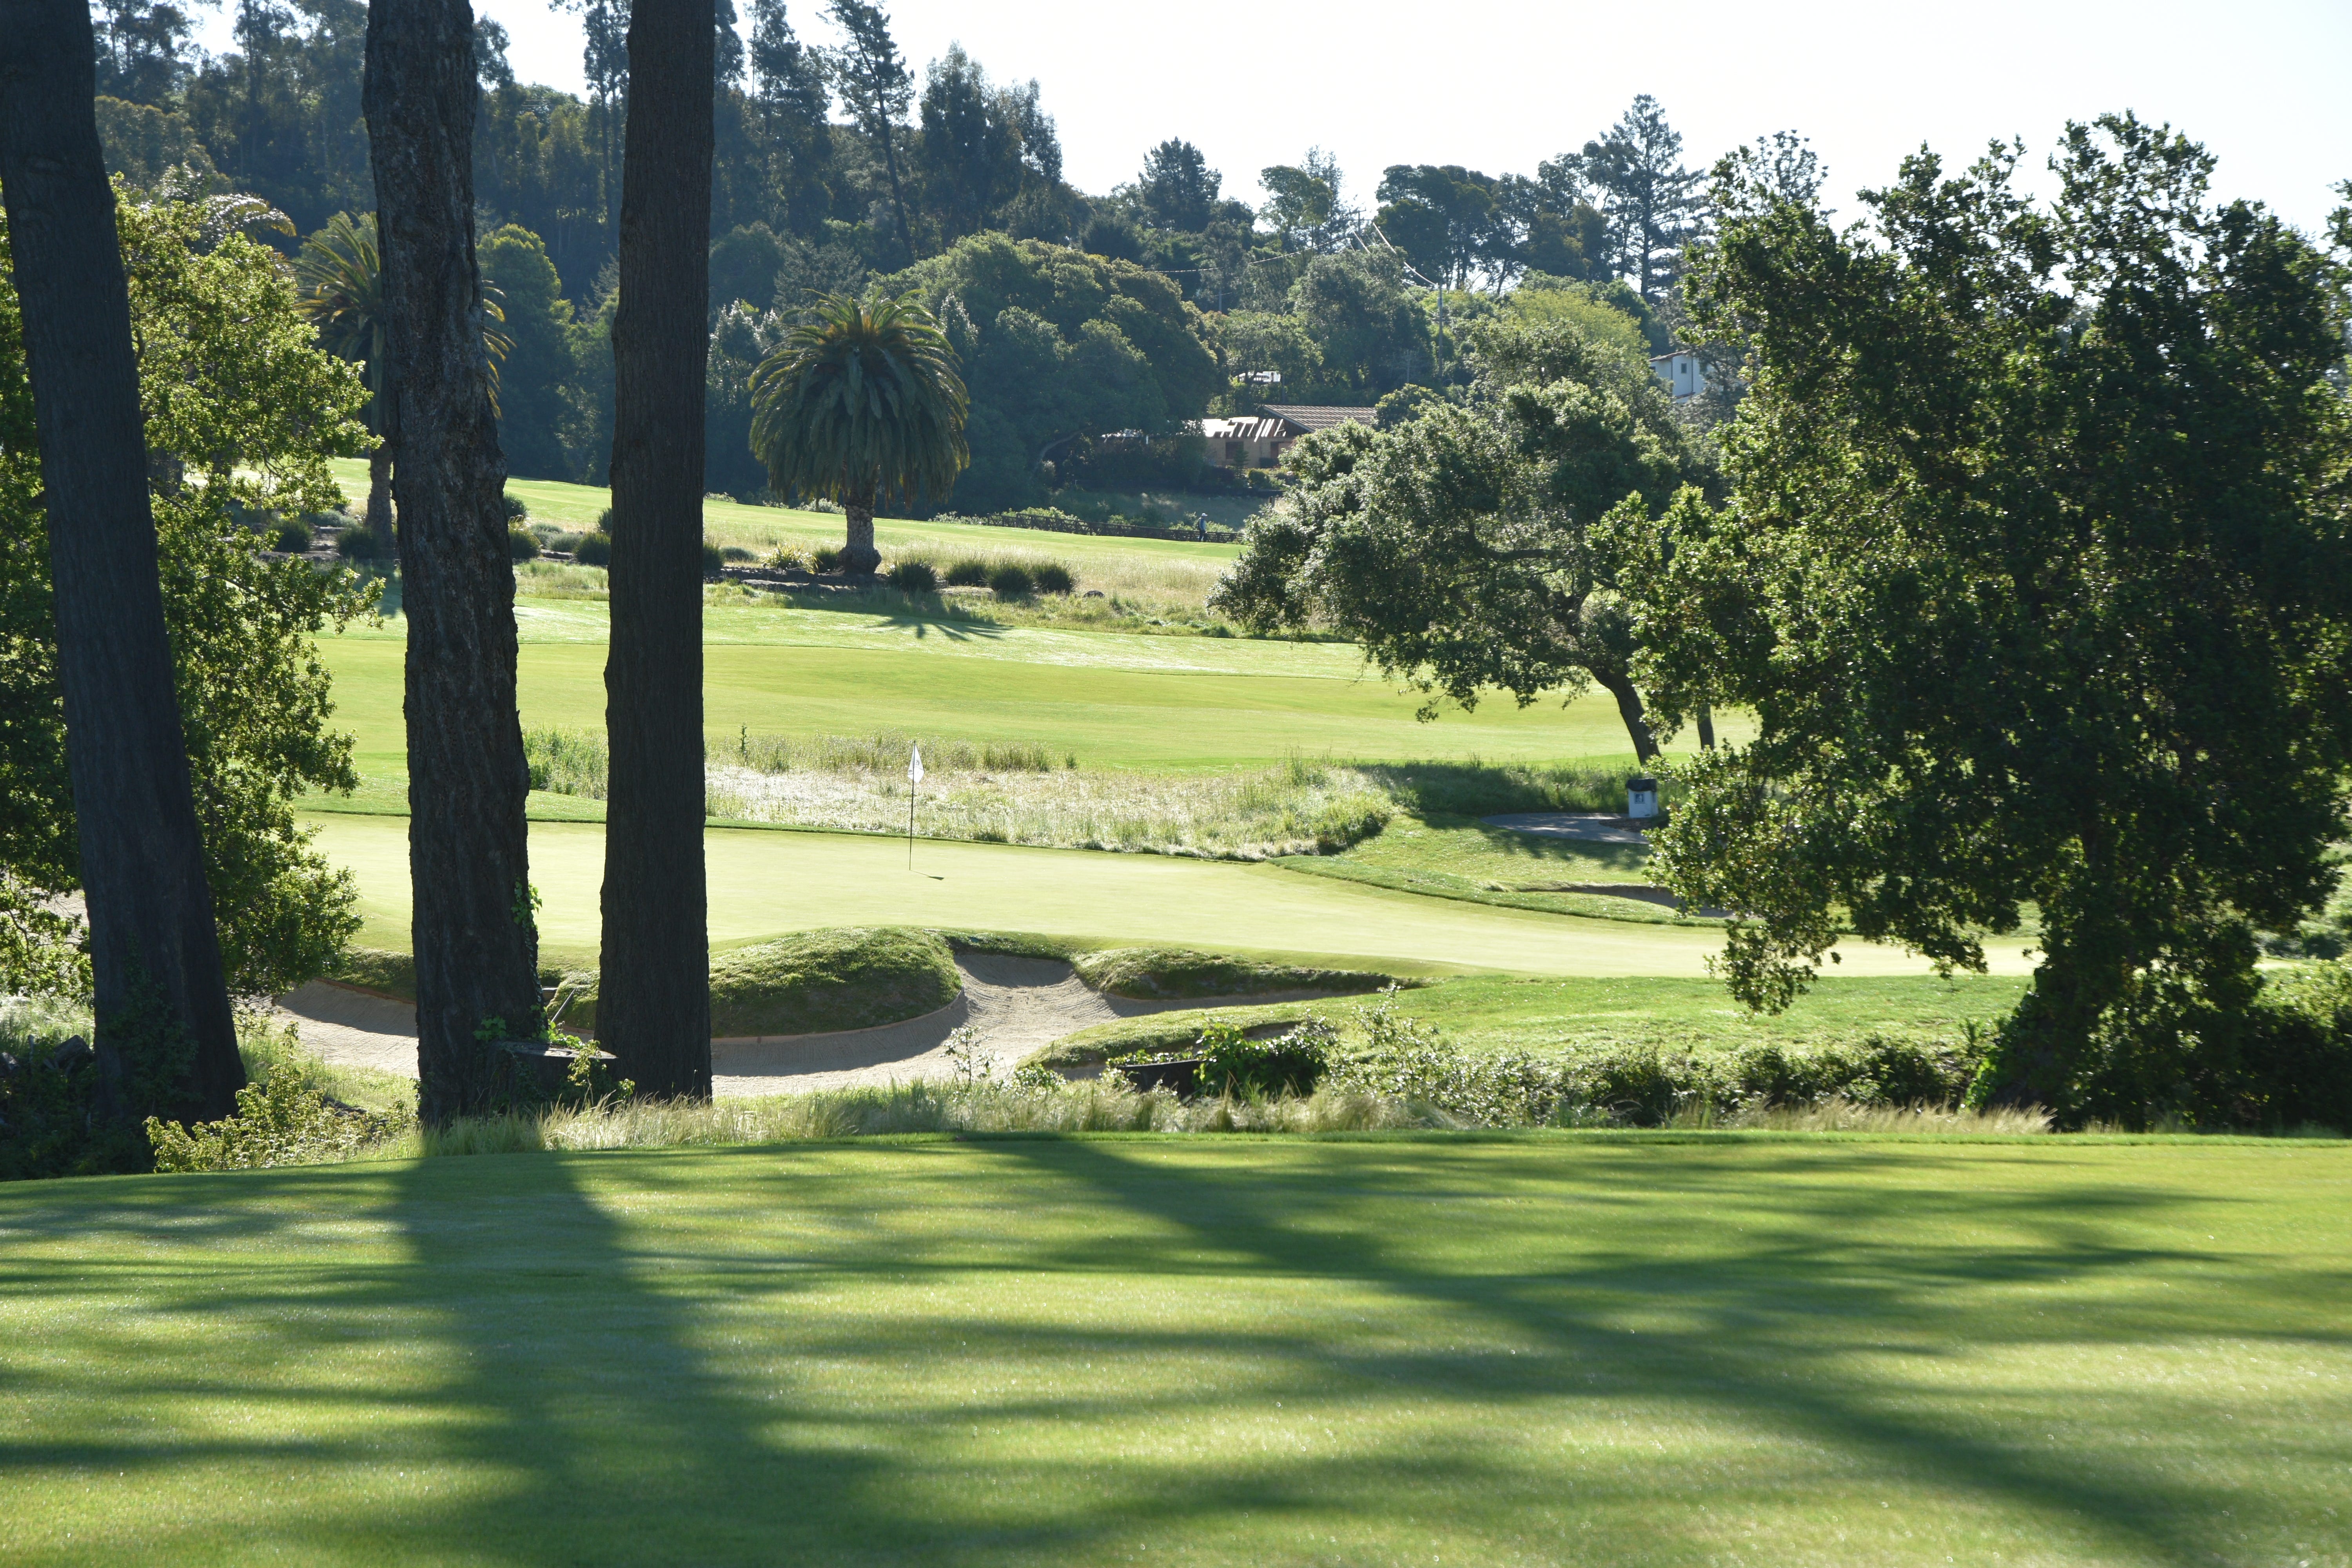
The 3rd hole at Pasatiempo is an absolute beast — 220 yards straight uphill to an extremely well-protected green. With a long iron or wood in hand, most players bail and push their tee shots into the right bunkers or watch their balls bounce off the hill into no man’s land
The 3rd hole as viewed from the back tee
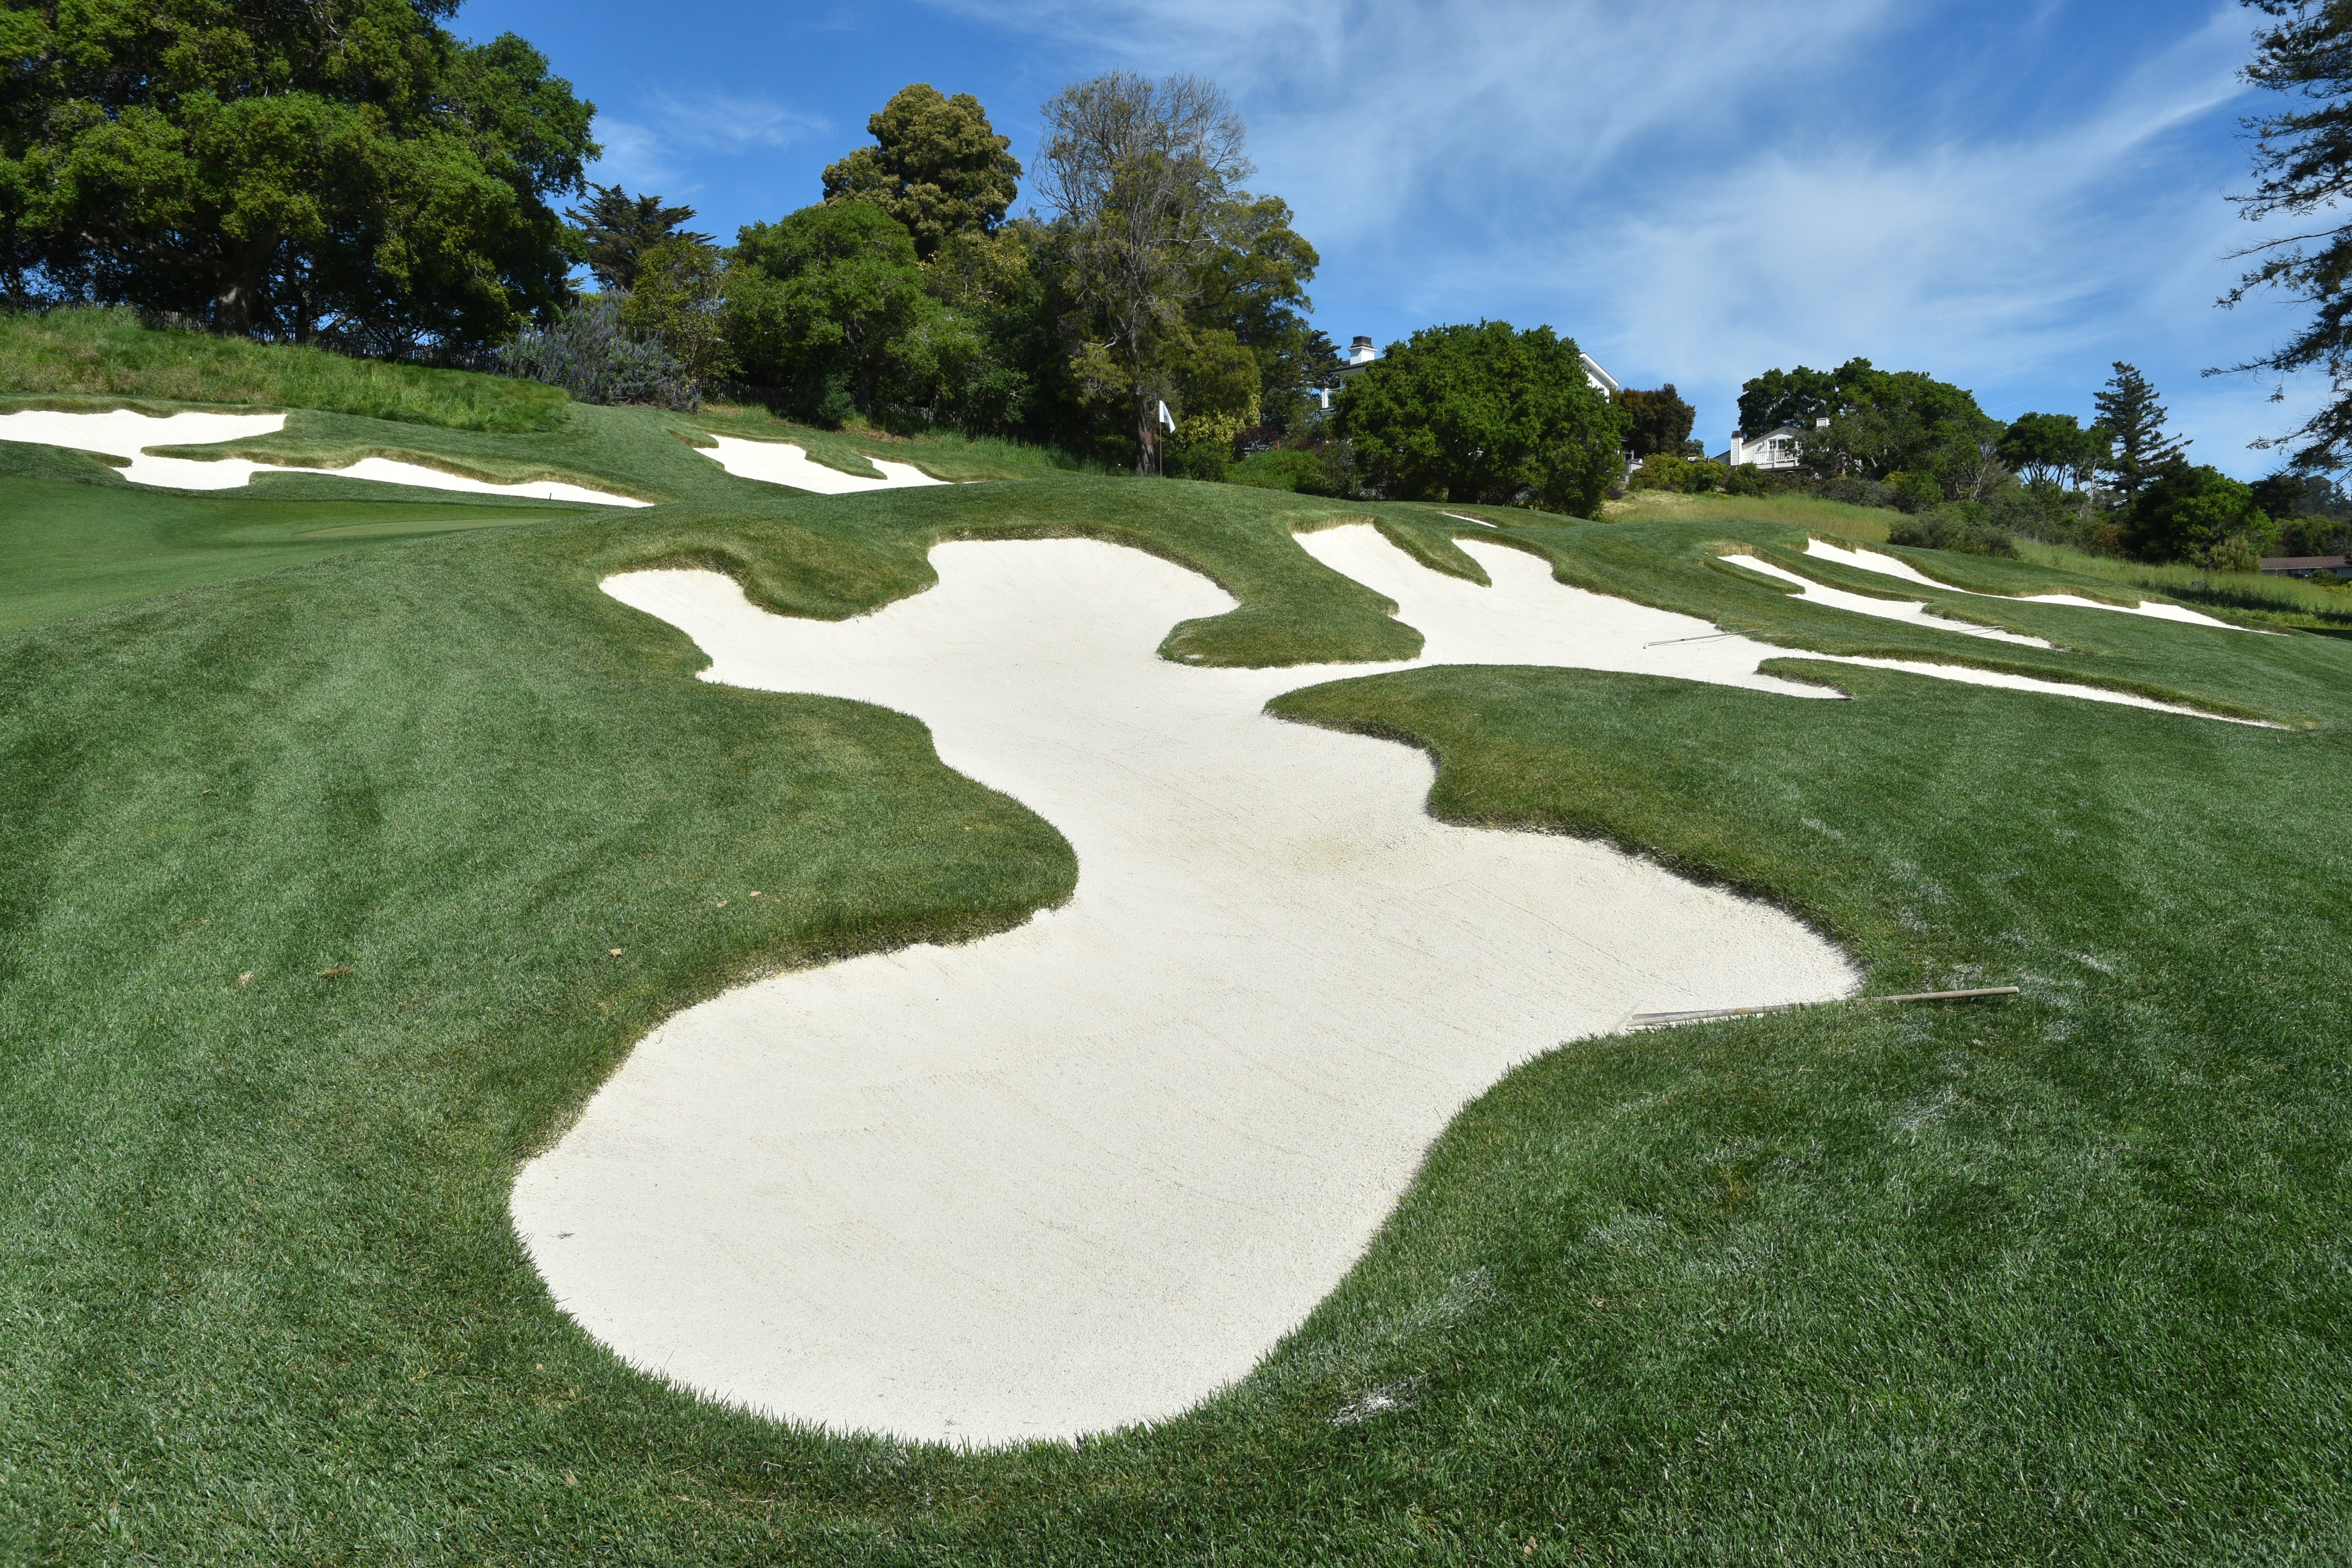
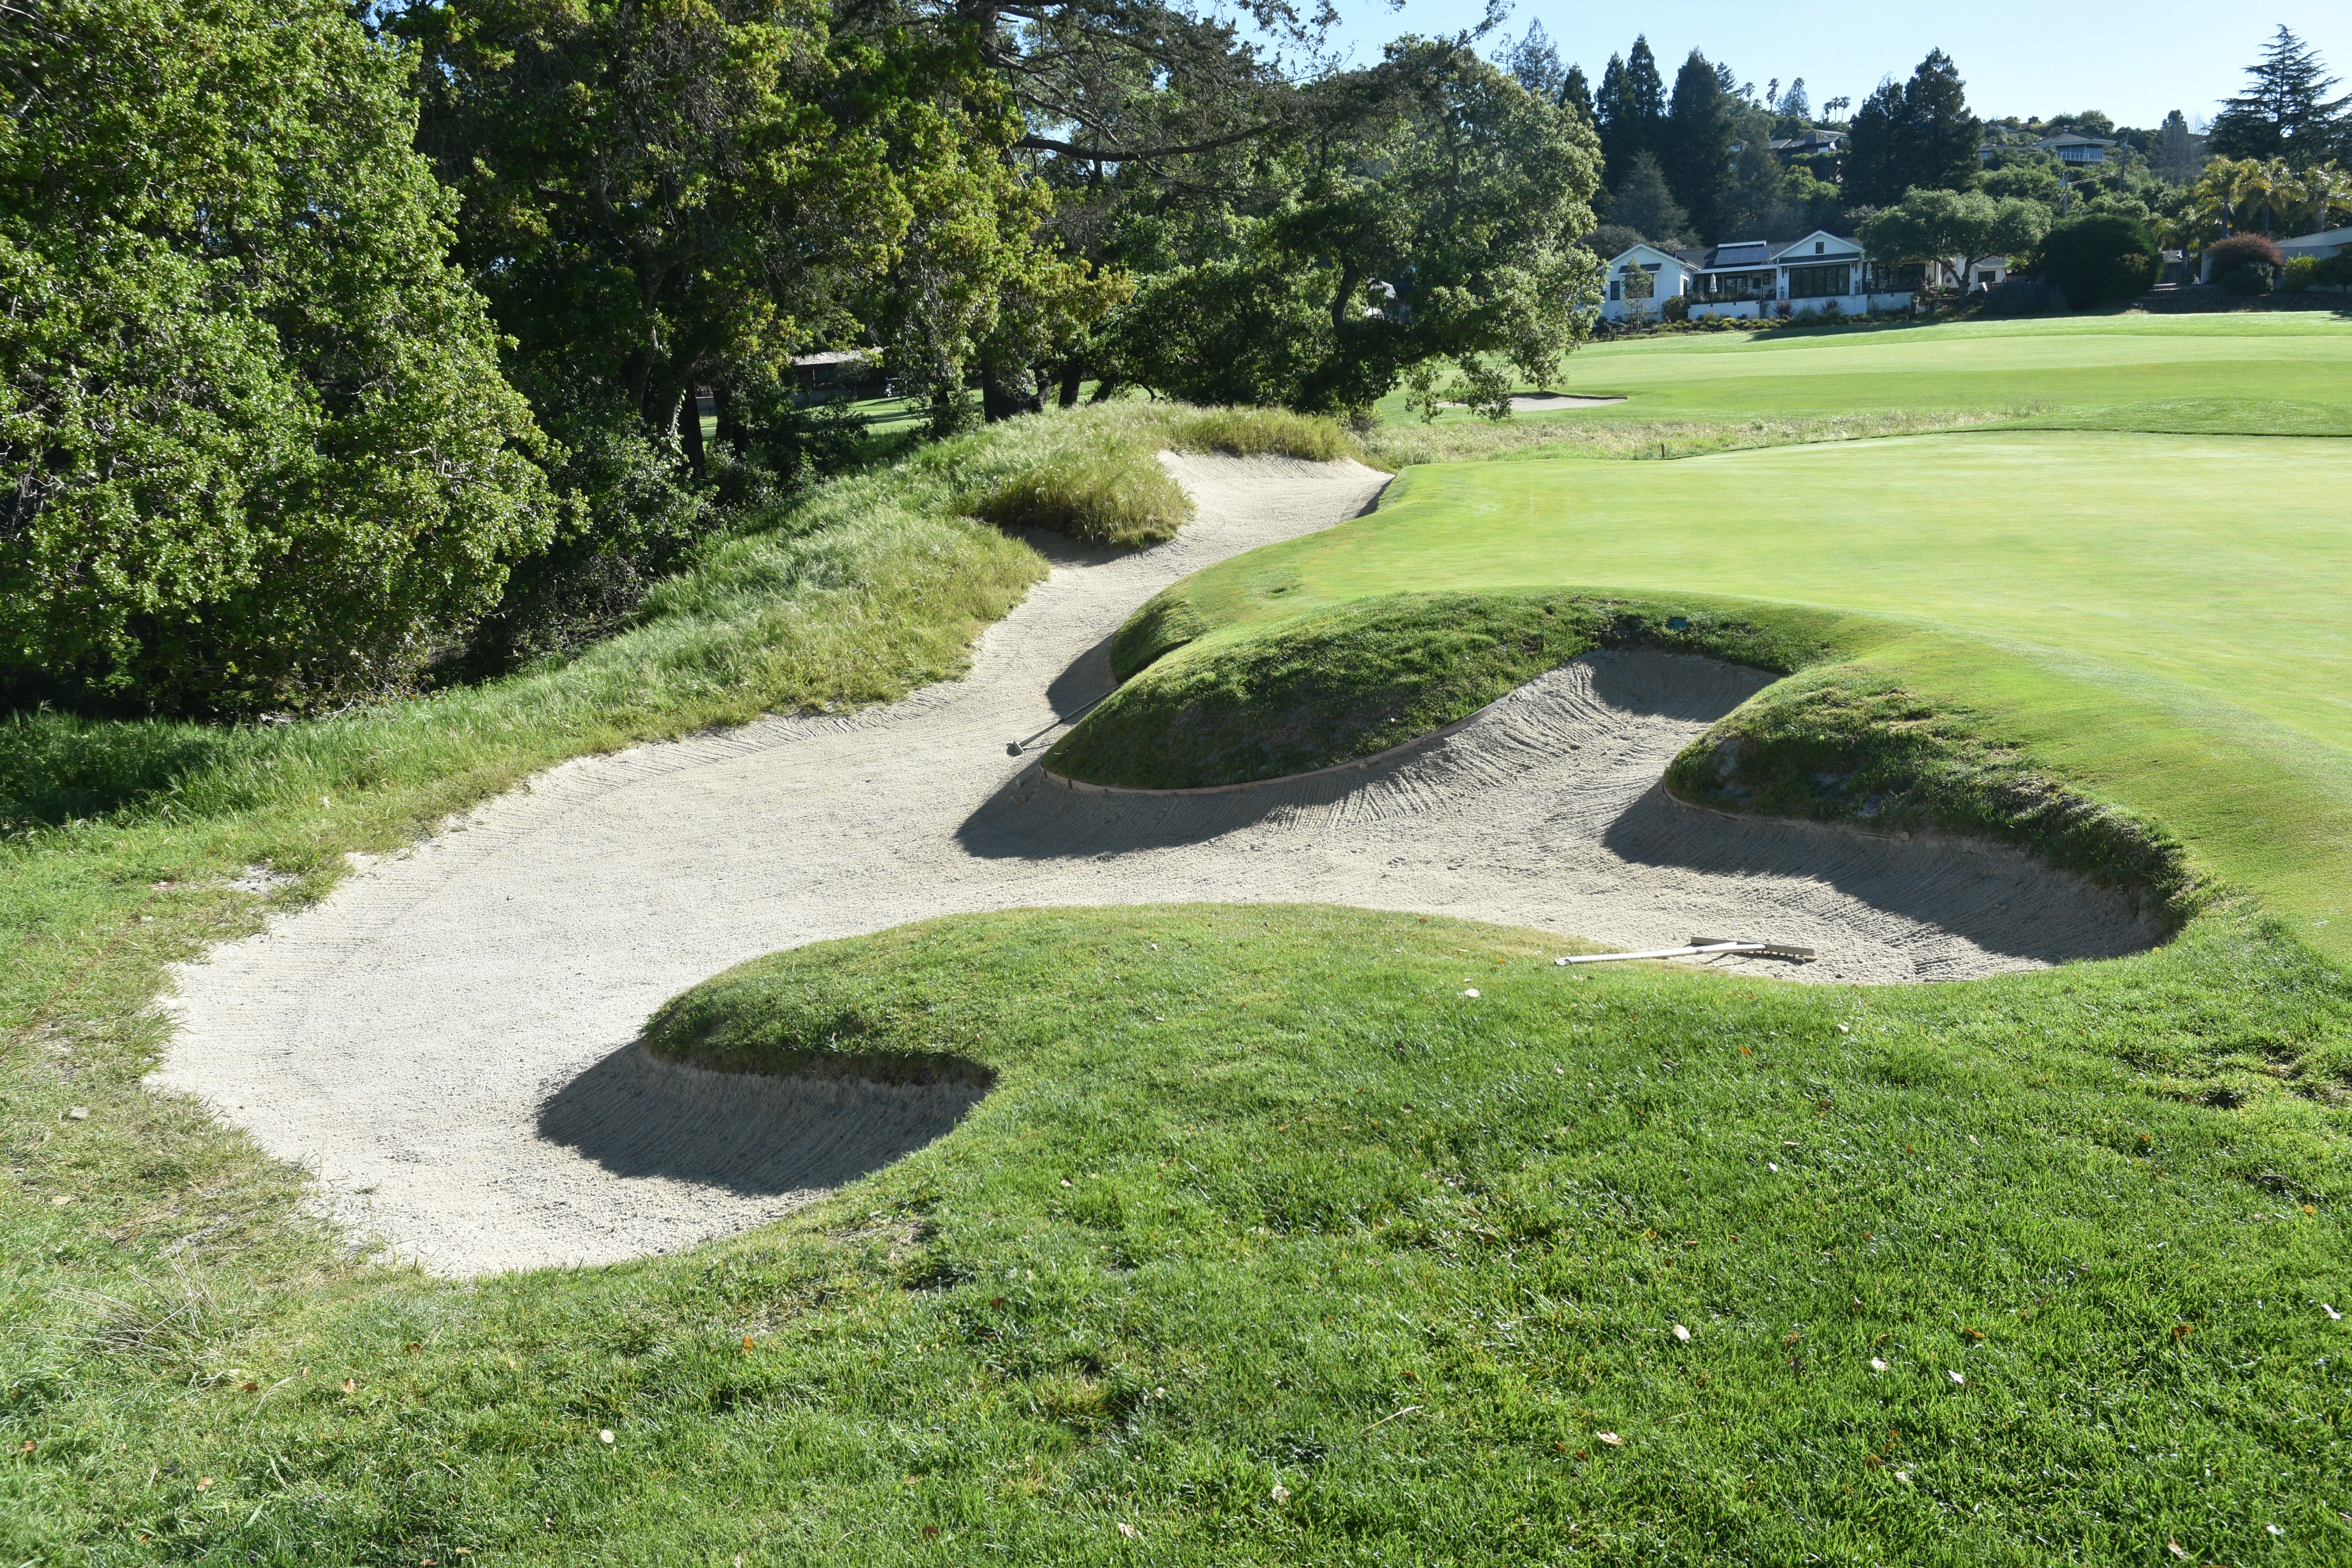
The 3rd hole at Pasatiempo features some of Alister Mackenzie’s most artistic bunkering. For more details on Mackenzie style bunkers, watch this fantastic video featurette produced by The Fried Egg explaining Mackenzie’s bunker construction
The first front bunker of the 3rd hole up close — Mackenzie was known to design these “camoflauge” bunkers to mess with a player’s depth perception
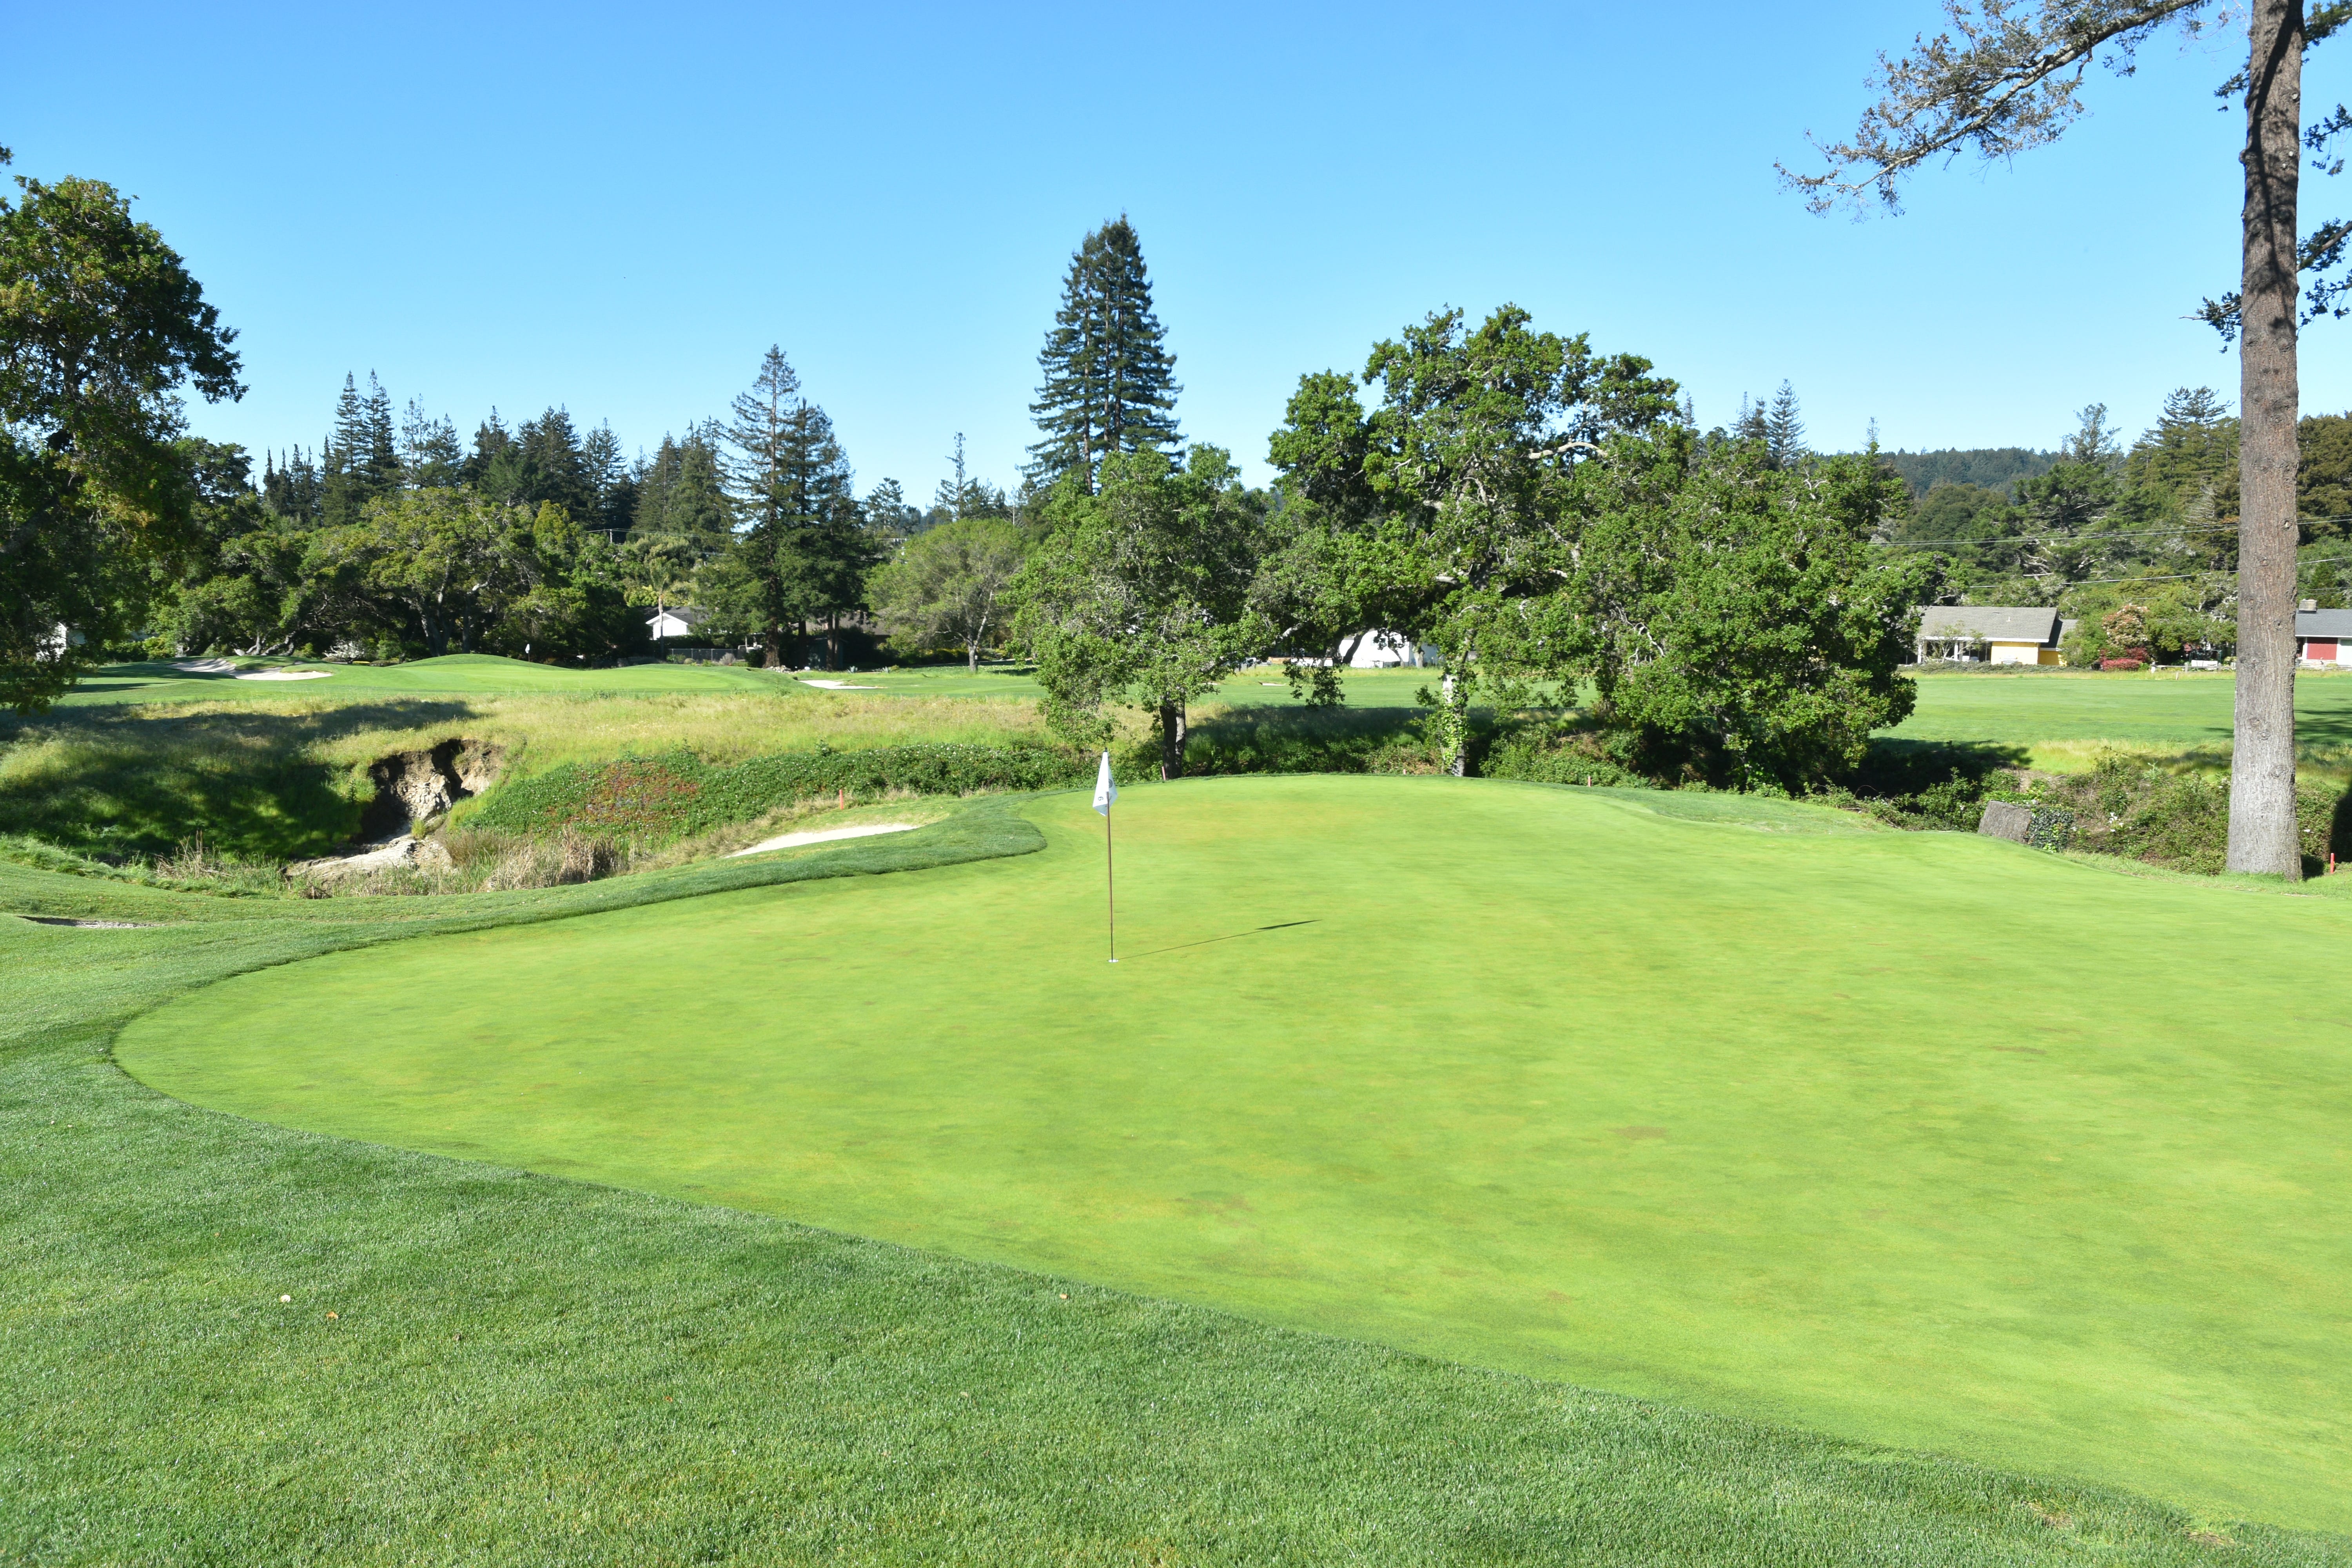
The 3rd hole green is perched up on the side of a hillside — you hit the green or else you’ll have no fun at all on this hole
The 3rd hole green used to be more circular in shape. Jim Urbina restored the green to have more of a diamond shape
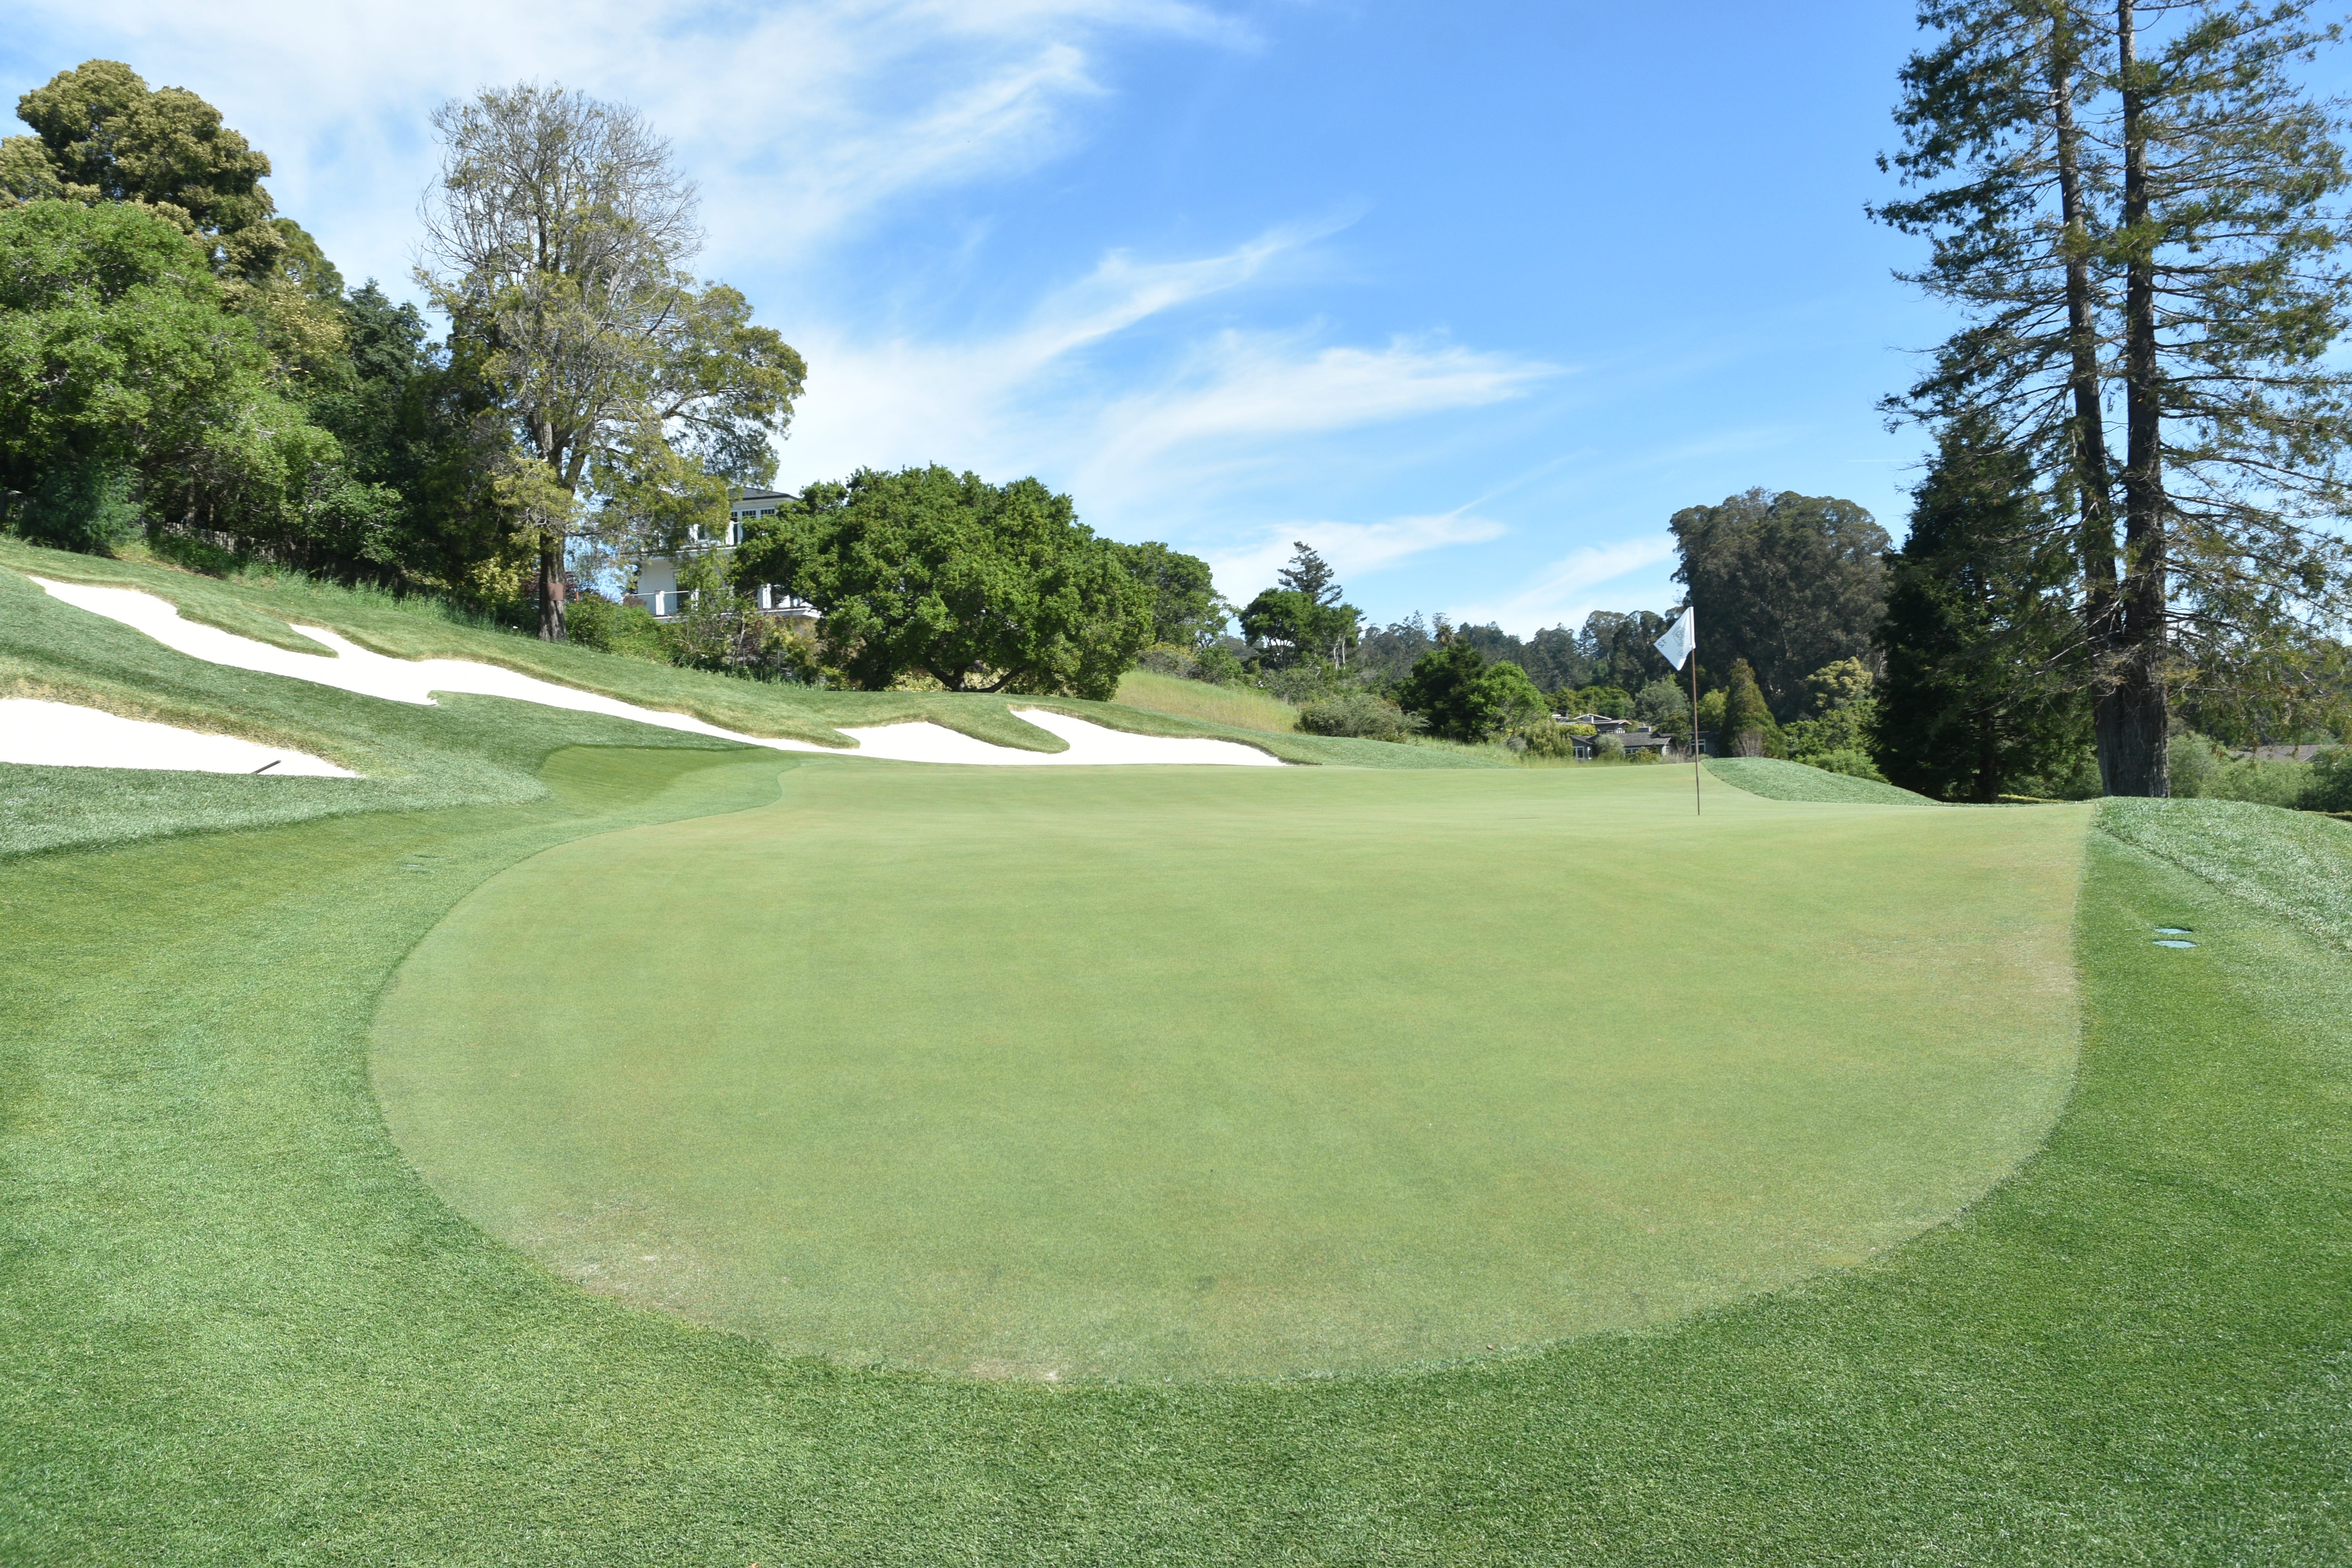
The 3rd hole green from the front — the best approach angle is from the left side as balls will kick off and feed down to this right pin. Watch Stanford’s Sean-Karl Dobson execute the shot on this hole to perfection
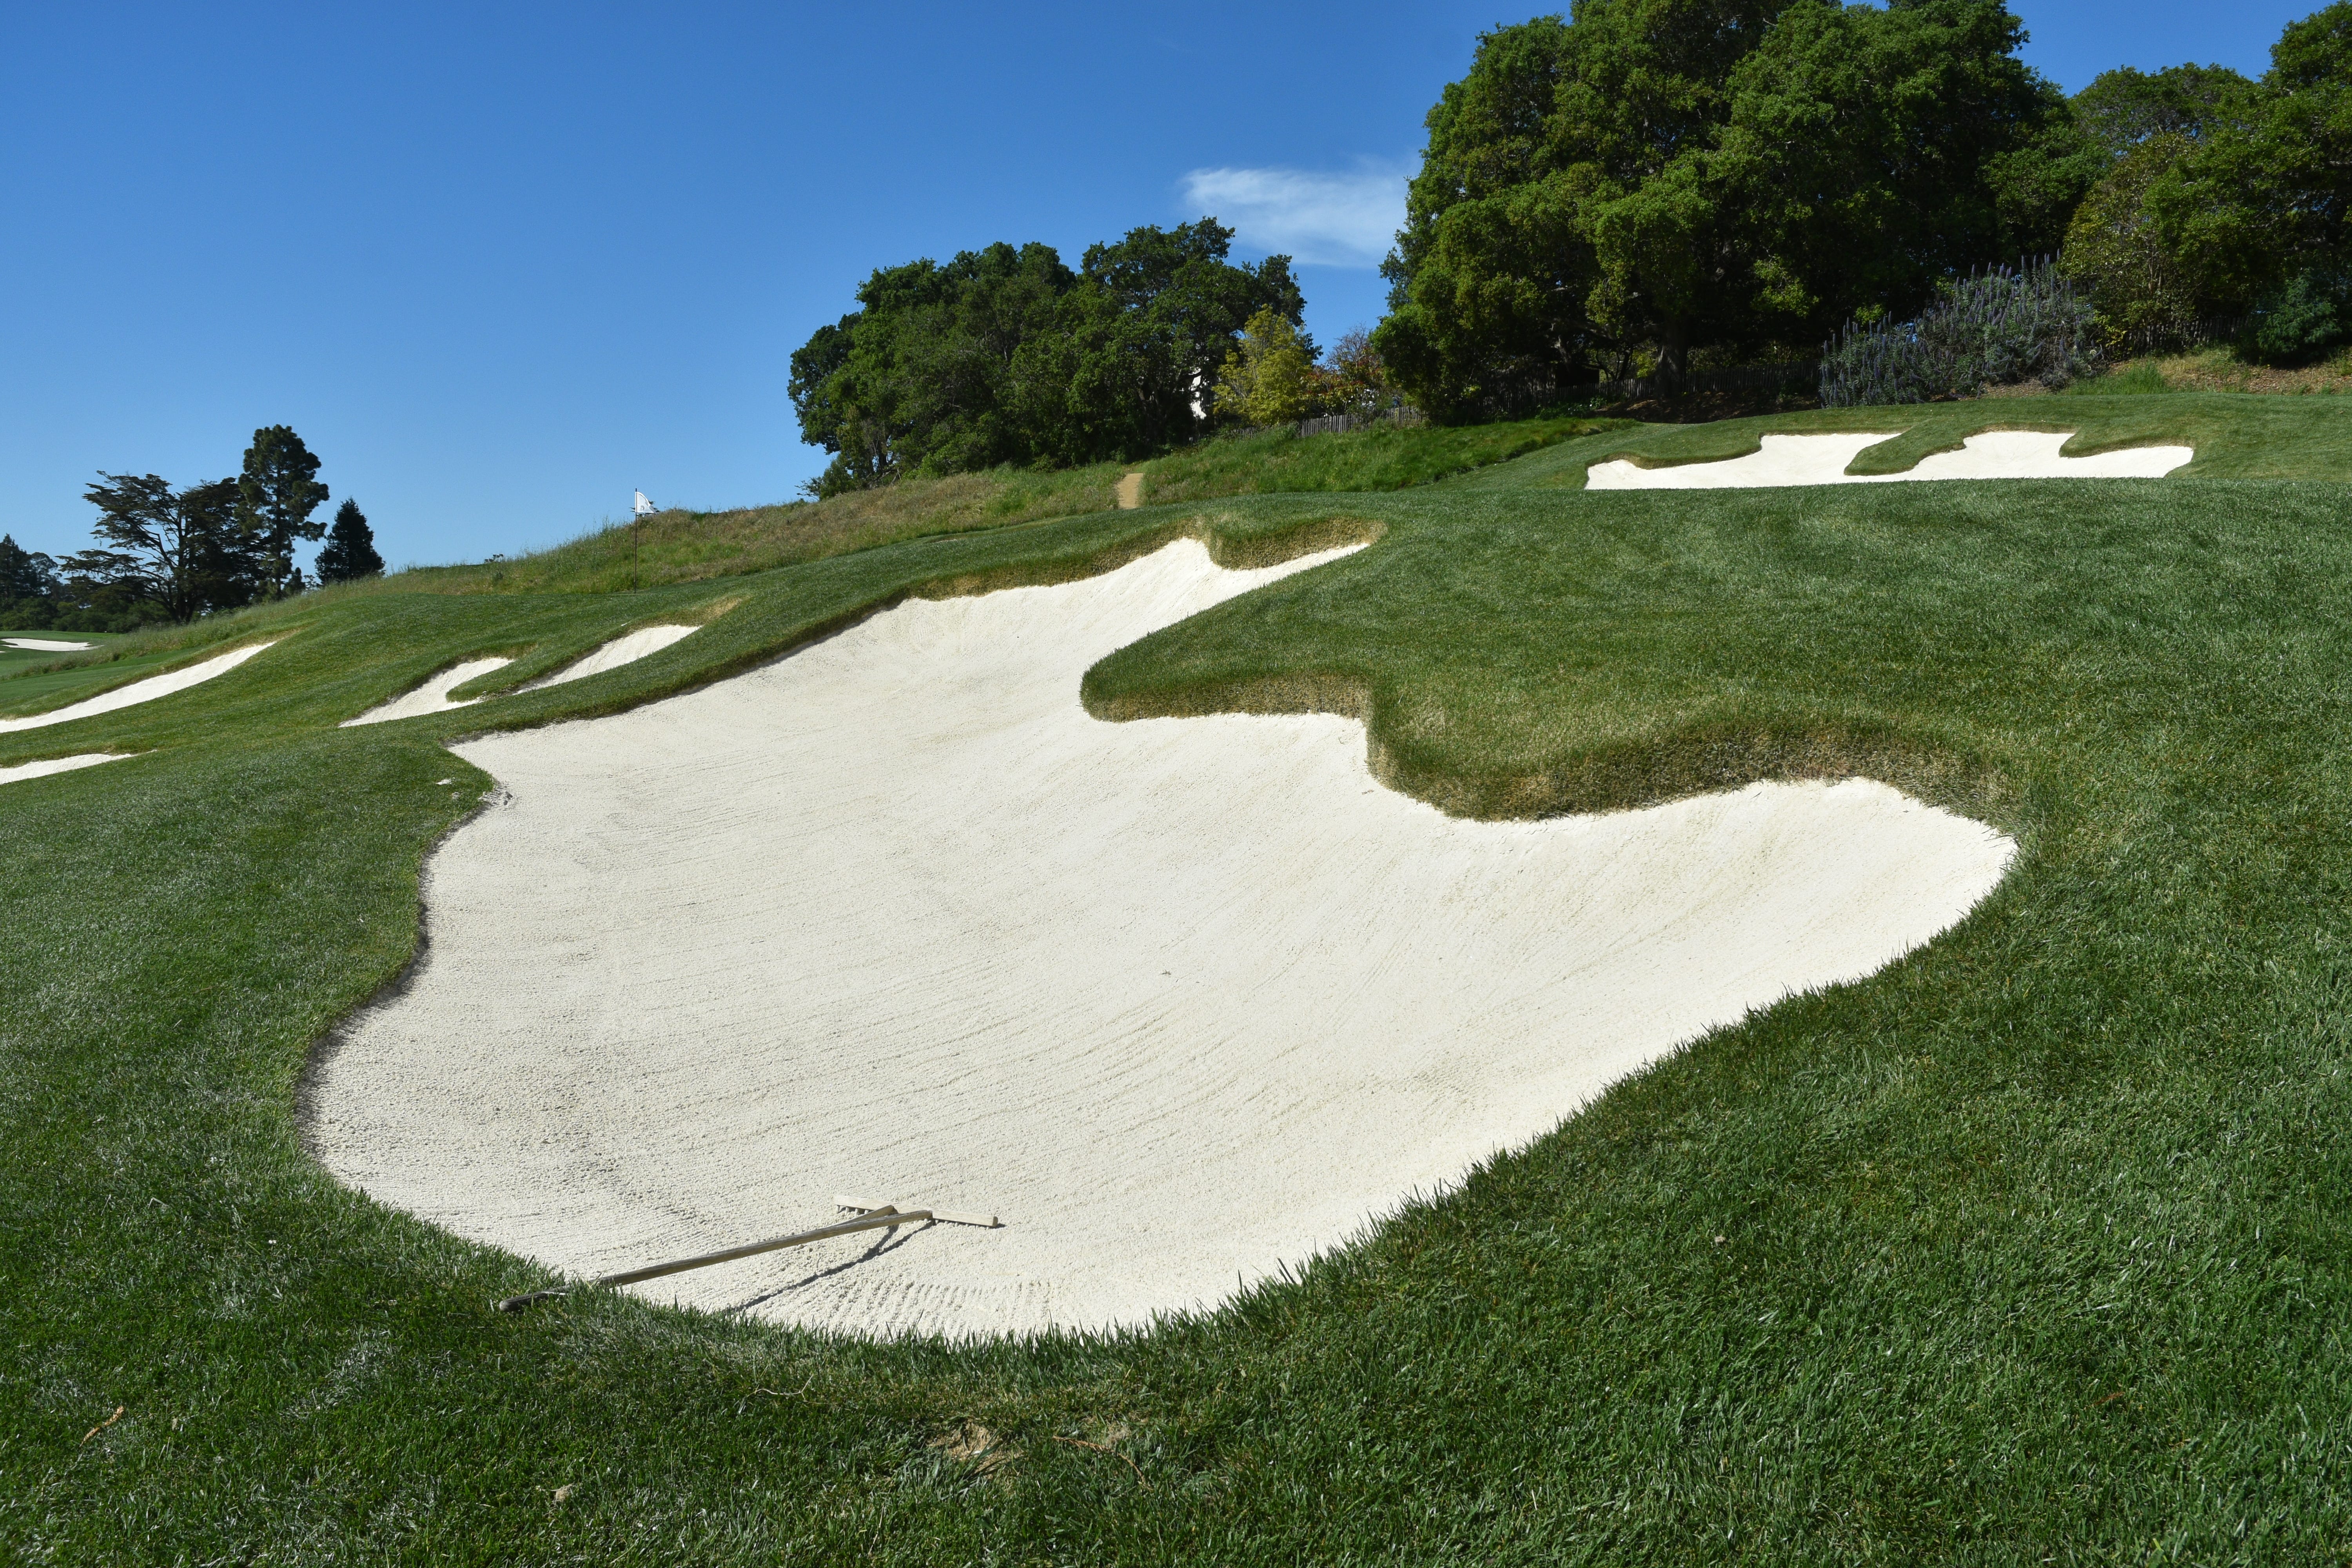
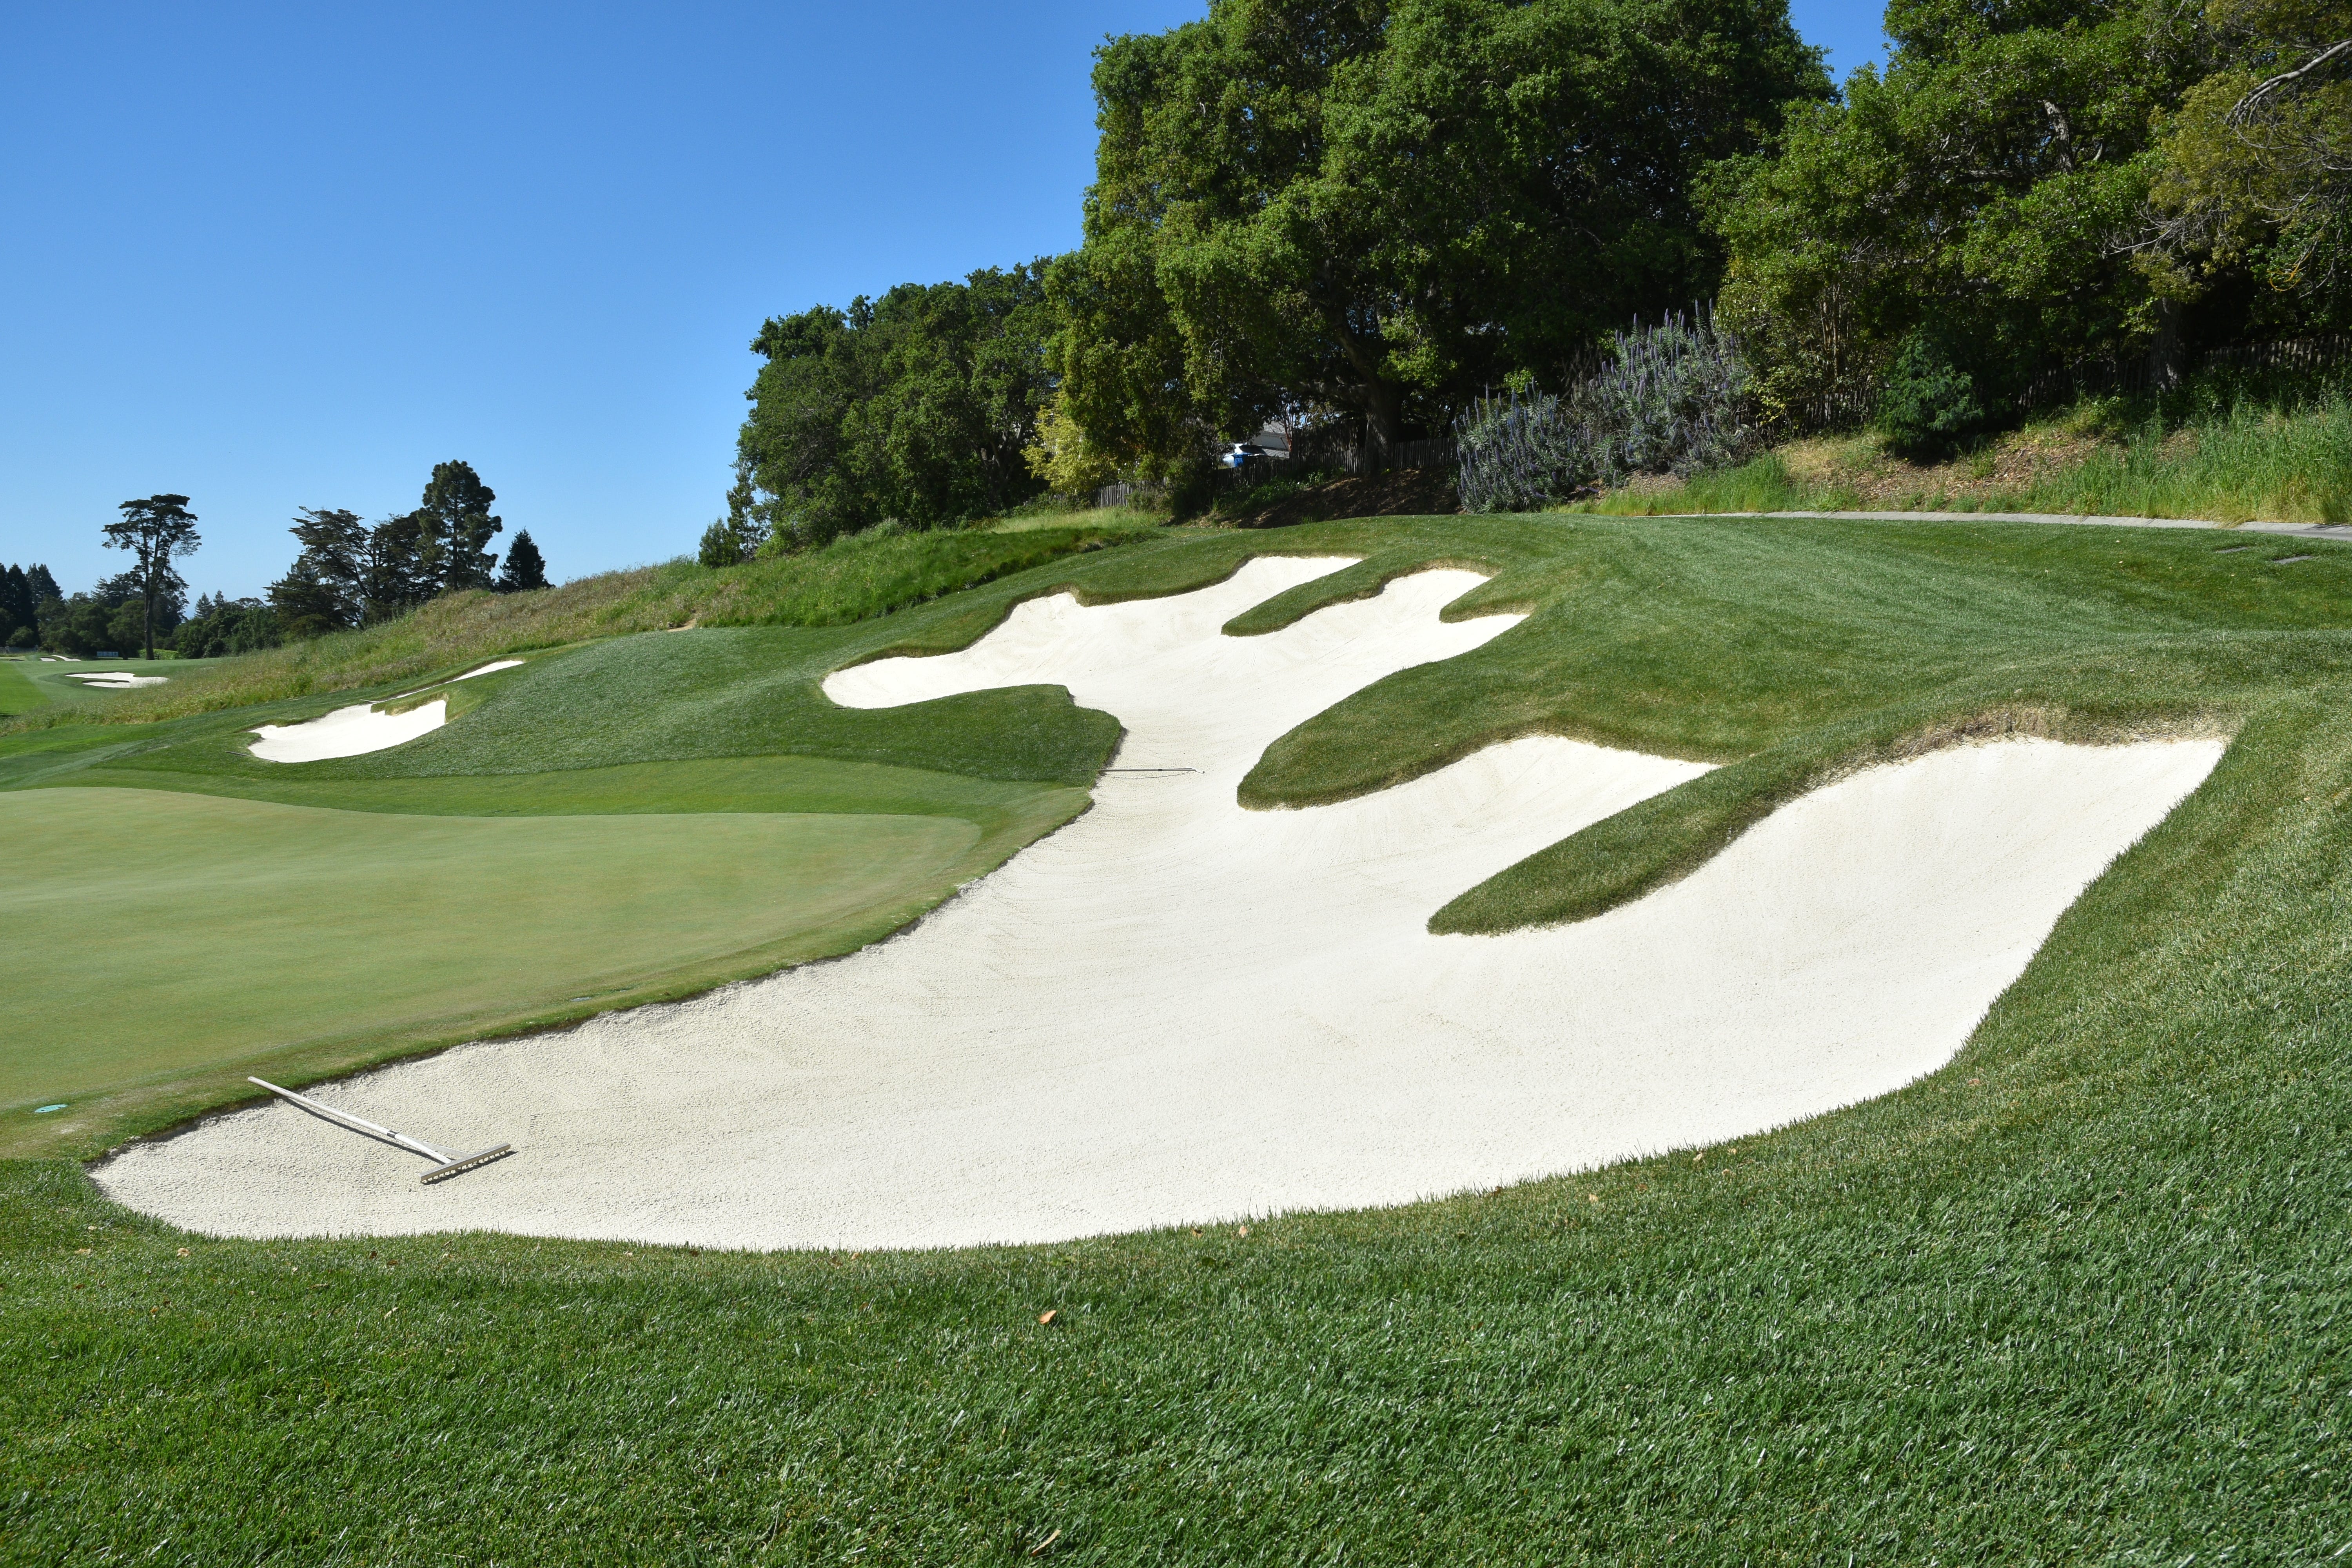
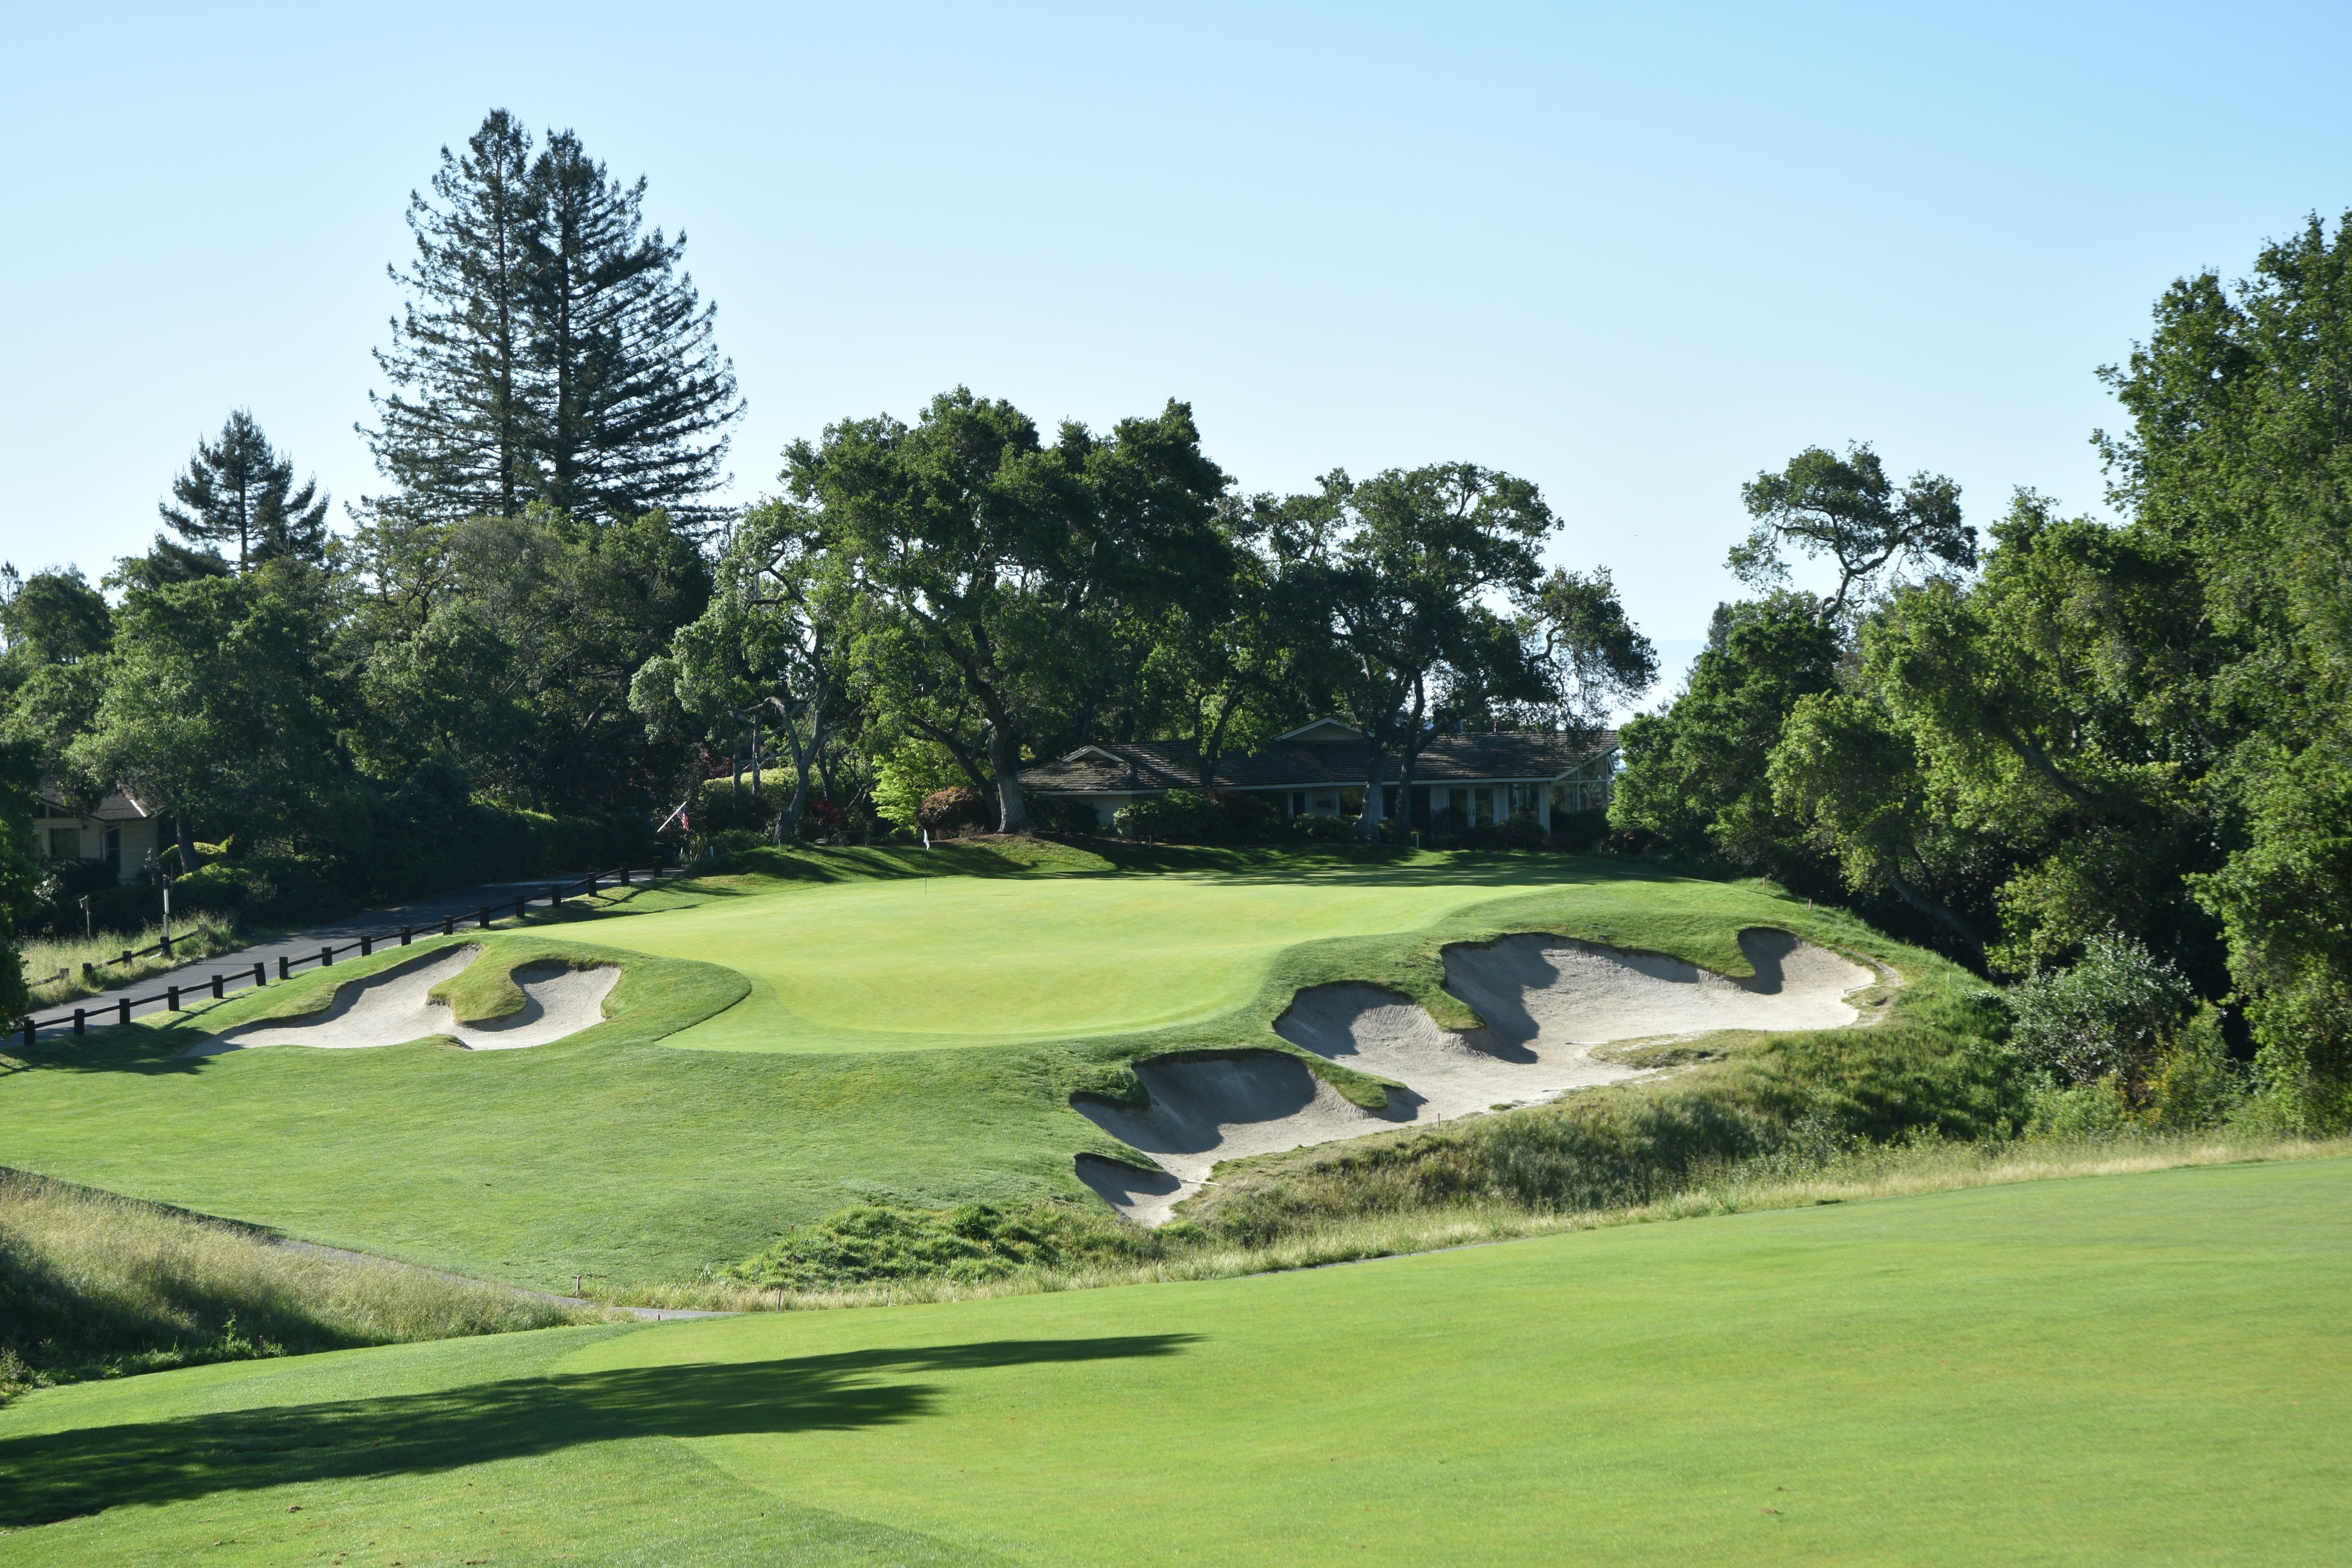
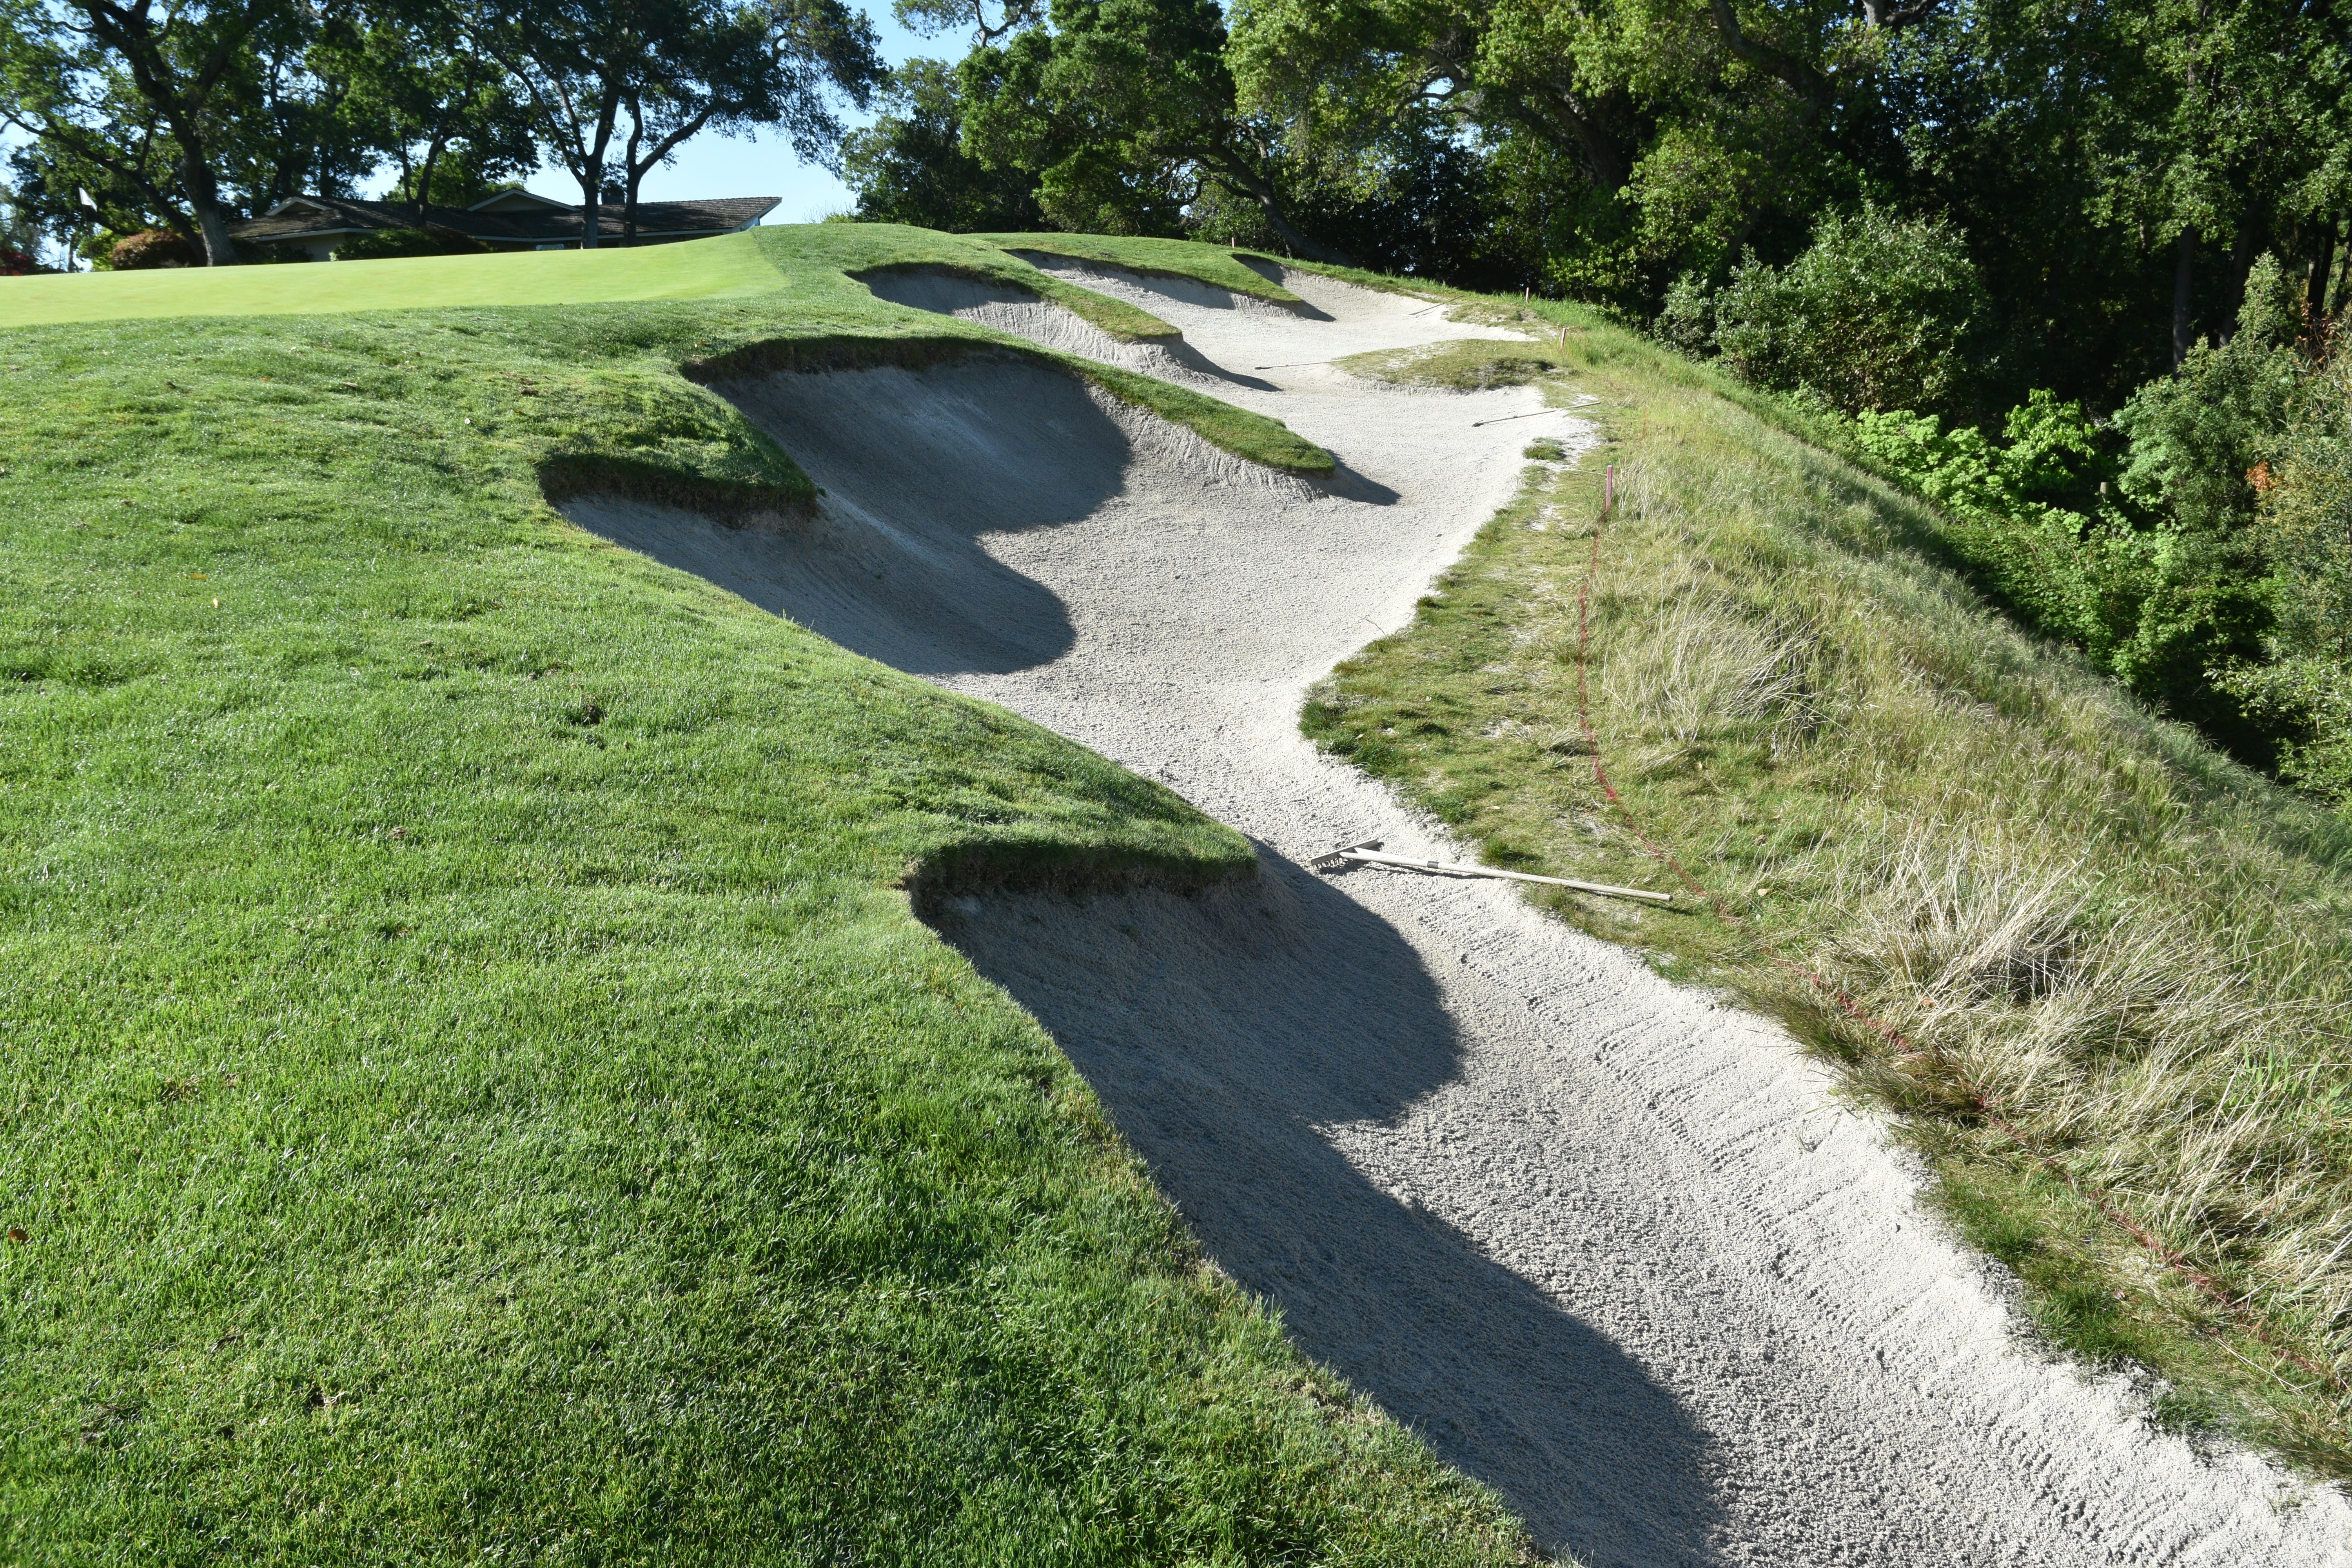
The massive and artistic right green side bunkers of the 3rd hole
The far right green side bunker — probably not making par from here
The massive bunker guarding the left side and back of the 3rd hole green — balls coming into this green too hot will release into this bunker
The 3rd hole green viewed from the back — one of the most challenging par 3 holes anywhere!
Hole 4: Par 4, 376 Yards
While the 4th hole looks relatively straightforward, there is plenty of subtle danger on this hole especially as you get closer to the green
The 4th hole tee shot as viewed from the back tee. Usually a player is hitting into the prevailing Pacific Ocean wind, making this tee shot more complicated
Carrying the two right fairway bunkers is the first challenge on the 4th hole
The 4th hole approach — the green is 42 yards in length and hitting into a prevailing wind makes judging distance control on the approach shot of utmost importance
Another view of the 4th hole approach
The 4th hole approach viewed from the left side of the fairway
The 4th hole green viewed from the front
The 4th hole green has an interesting right nook — a hole location within it hides the pin well and creates some interesting and precarious putting situations
The first right green side bunker of the 4th hole
The 4th hole green viewed from the back — Jim Urbina restored the green pad with its distinct sections to create some interesting hole locations and provide much needed variety for daily play
The neighboring 5th hole creates a cool vantage point from the 4th hole green
Hole 5: Par 3, 188 Yards
The 5th hole green presents some interesting and different challenges depending on the hole location. Jim Urbina restored the green to make the tongue sections of this green more distinct
The 5th hole tee shot from the back tee
Missing the 5th green in the wrong areas creates serious problems — a player might not be able to access the pin with the next pitch or chip shot
The 5th hole green on the walk up from the teeing area
The 5th hole green from the front right
The front tongue of the 5th hole green
The 5th hole green from the right side — the shape and levels of the green create some precarious chipping and pitching situations if you miss the green from the wrong angle — angles are everything at Pasatiempo!
The 5th hole green from the left side — the left front tongue creates a great place to tuck and hide a pin and make the hole accessible with only a thoughtful tee shot respecting the proper angle
The 5th hole green viewed from the back
Hole 6: Par 5, 565 Yards
The first par 5 hole at Pasatiempo requires a relatively precise tee shot guarded by a large grove of cypress trees on the right side and out of bounds on the left
The 6th hole tee shot from the back tee
Another special tee box is available on the 6th hole that is 50 yards back and shifted to the right (stretching the hole to over 600 yards). This tee box angle forces a power fade to reach the fairway
The directional bunker of the 6th hole. It is an ornamental bunker and never comes in play
The 6th hole fairway and its appealing contouring hugs the ground nicely
The 6th hole tee shot may look claustrophobic from the tee due to the grove of cypress trees on the right hand side, but there is more room than you think
The ideal spot in the 6th hole fairway to go for the green in two
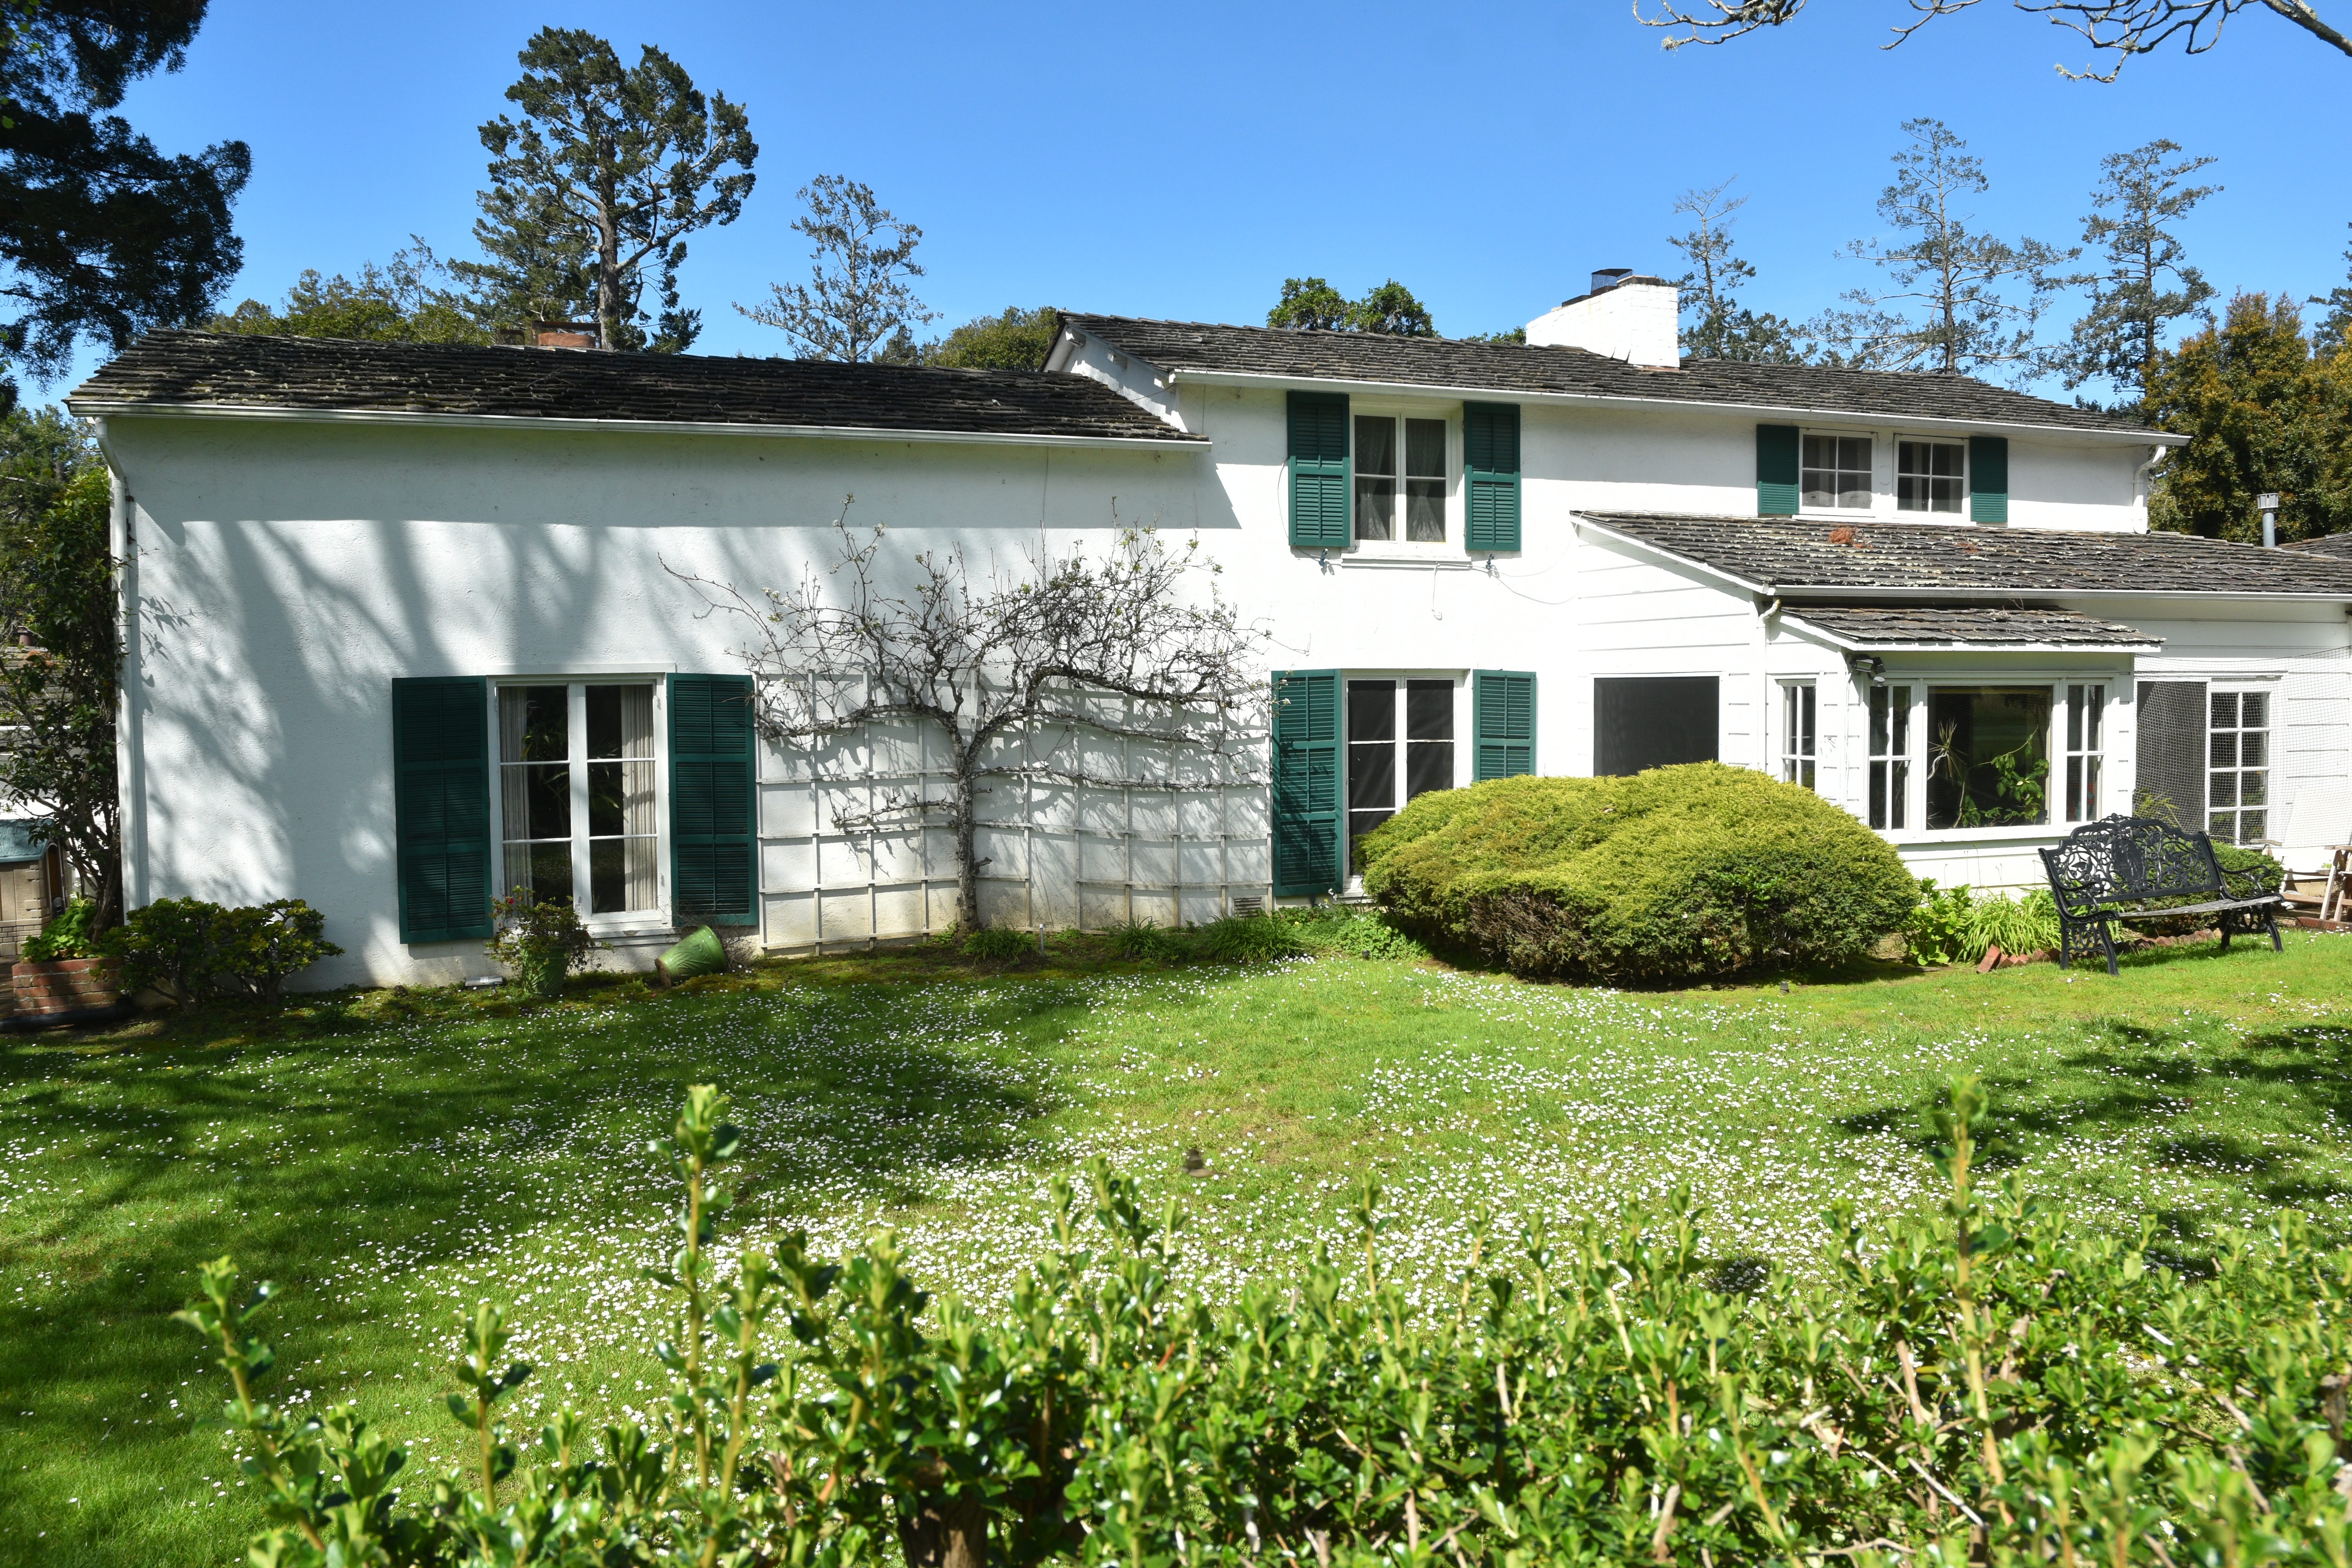
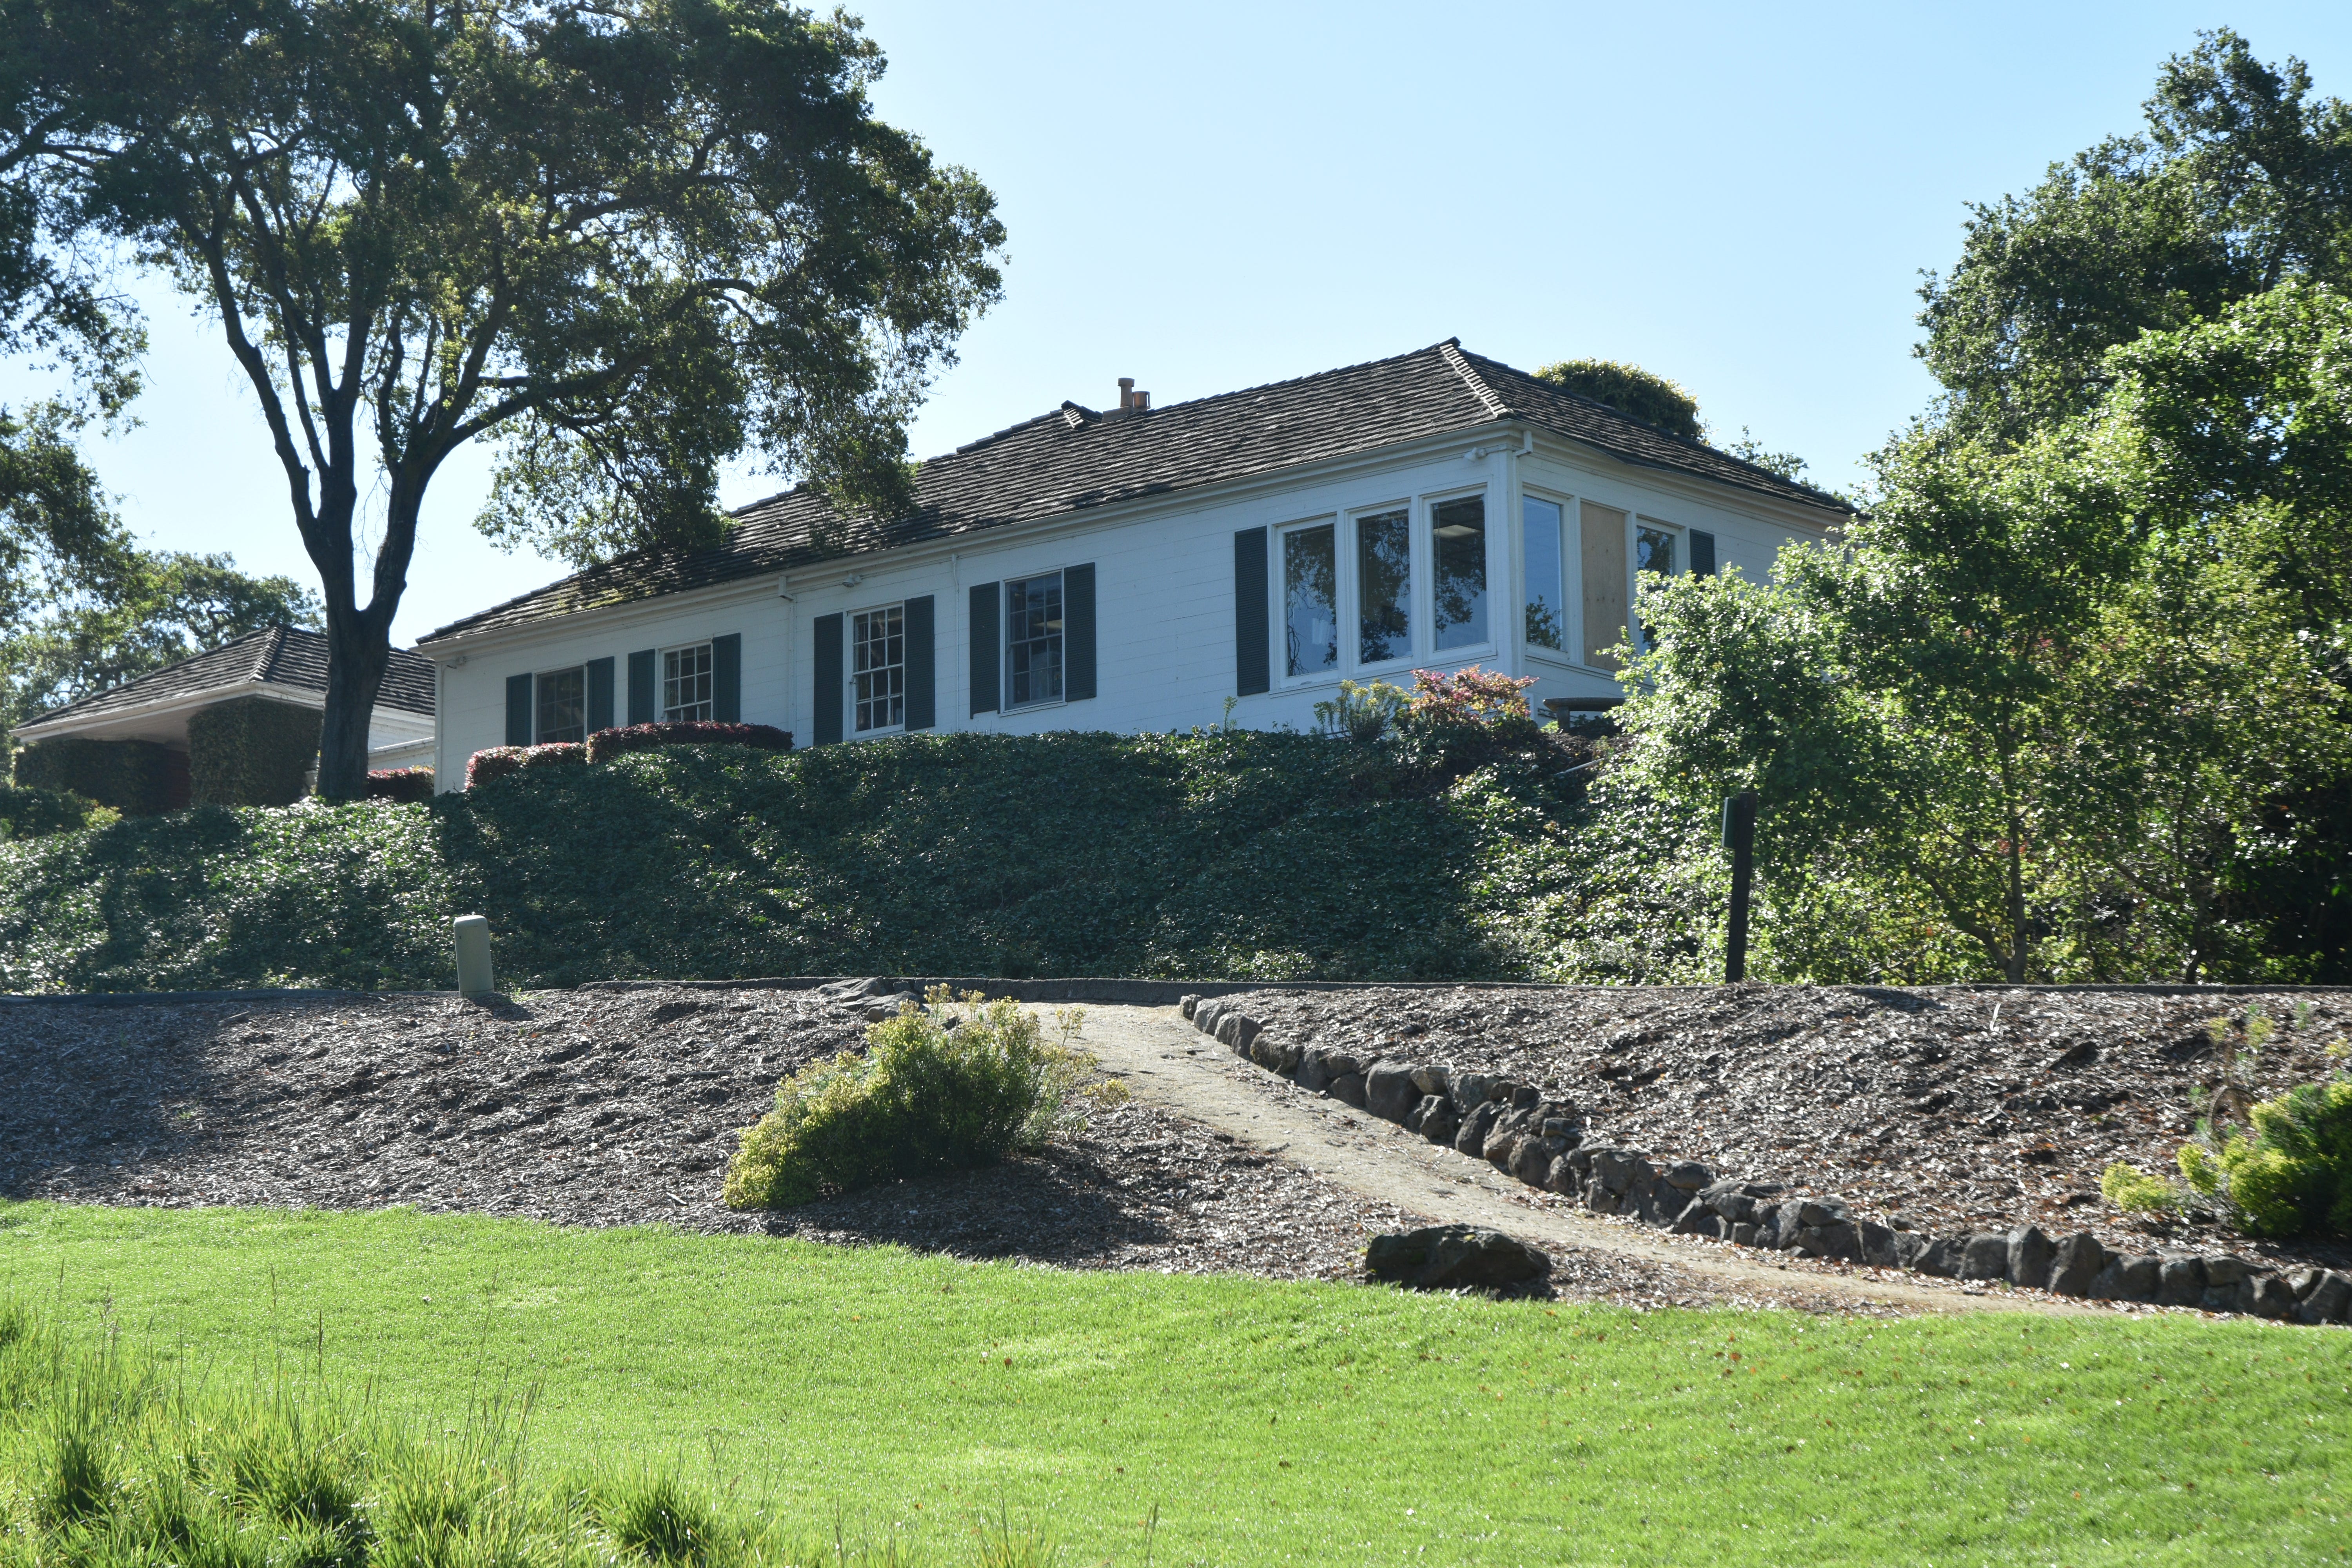
Alister Mackenzie’s home before his death in 1934 sits right along the left side of the 6th hole fairway — worthwhile to pay homage to the famed golf course architect
The 6th hole green is long and narrow where depth perception is challenging and distance control is everything
The 6th hole has an interesting back left section and back right section to tuck pins
The back left green side bunker of the 6th hole
The 6th hole green viewed from the back left
Hole 7: Par 4, 346 Yards
The 7th hole at Pasatiempo might be overlooked on the scorecard at only 346 yards, but it plays as a sneaky tough hole. Carelessness is duly punished on this hole
The 7th hole tee shot from the back tee. The narrow corridor created by the large cypress trees was not part of the original design. The trees were planted for safety when someone on this tee hit a wayward drive and killed someone on the 8th green to the left. A fence was also installed alongside the 8th green as an additional safety measure
The initial intuition on the 7th hole is to hit a layup into the fairway, but doing so doesn’t give you a clear view to this dangerous green. Taking a risk to hit it further down the narrow fairway is required if a player wants a better look at this green
The 7th hole approach from the right fairway
The 7th hole green benefitted greatly from Jim Urbina’s restoration — the green requires a precise shot with some difficult hole locations — getting out of position on this green creates a lot of stress
The 7th hole green viewed from the front left
The back left bunker on the 7th hole green is no good to be in
The 7th hole green viewed from the back right
The 7th hole green viewed from the back
Hole 8: Par 3, 177 Yards
The 8th hole at Pasatiempo is one of the iconic holes on the golf course — the view from the tee box with the 9th hole in the distance is one of the best vantage points on the course
The 8th hole tee shot from the back tee — the hole is severely downhill to one of the most dramatic and challenging greens at Pasatiempo
The 8th hole tee shot requires some finesse — hitting a standard shot is no good as it will simply spin off the green with its severe pitch from back to front. A player would be wise to hit a “floater” or knockdown shot with limited spin to get the ball to the appropriate section on the green
Perhaps Jim Urbina’s best creative work during the renovation was accomplished on the 8th green by re-establishing the distinct levels and tongue shapes that create some fascinating hole locations
The 8th hole green viewed from the front
Various vantage points of the 8th hole green at Pasatiempo
Jim Urbina re-established the back left tongue to the 8th hole green. Re-capturing this lost hole location was a great move
Another vantage point of the new back left tongue section
The back right green side bunker of the 8th hole at Pasatiempo
The 8th hole green viewed from the back — putting on this green is pretty stressful and being out of position will likely lead to a three putt experience or more!
Hole 9: Par 5, 491 Yards
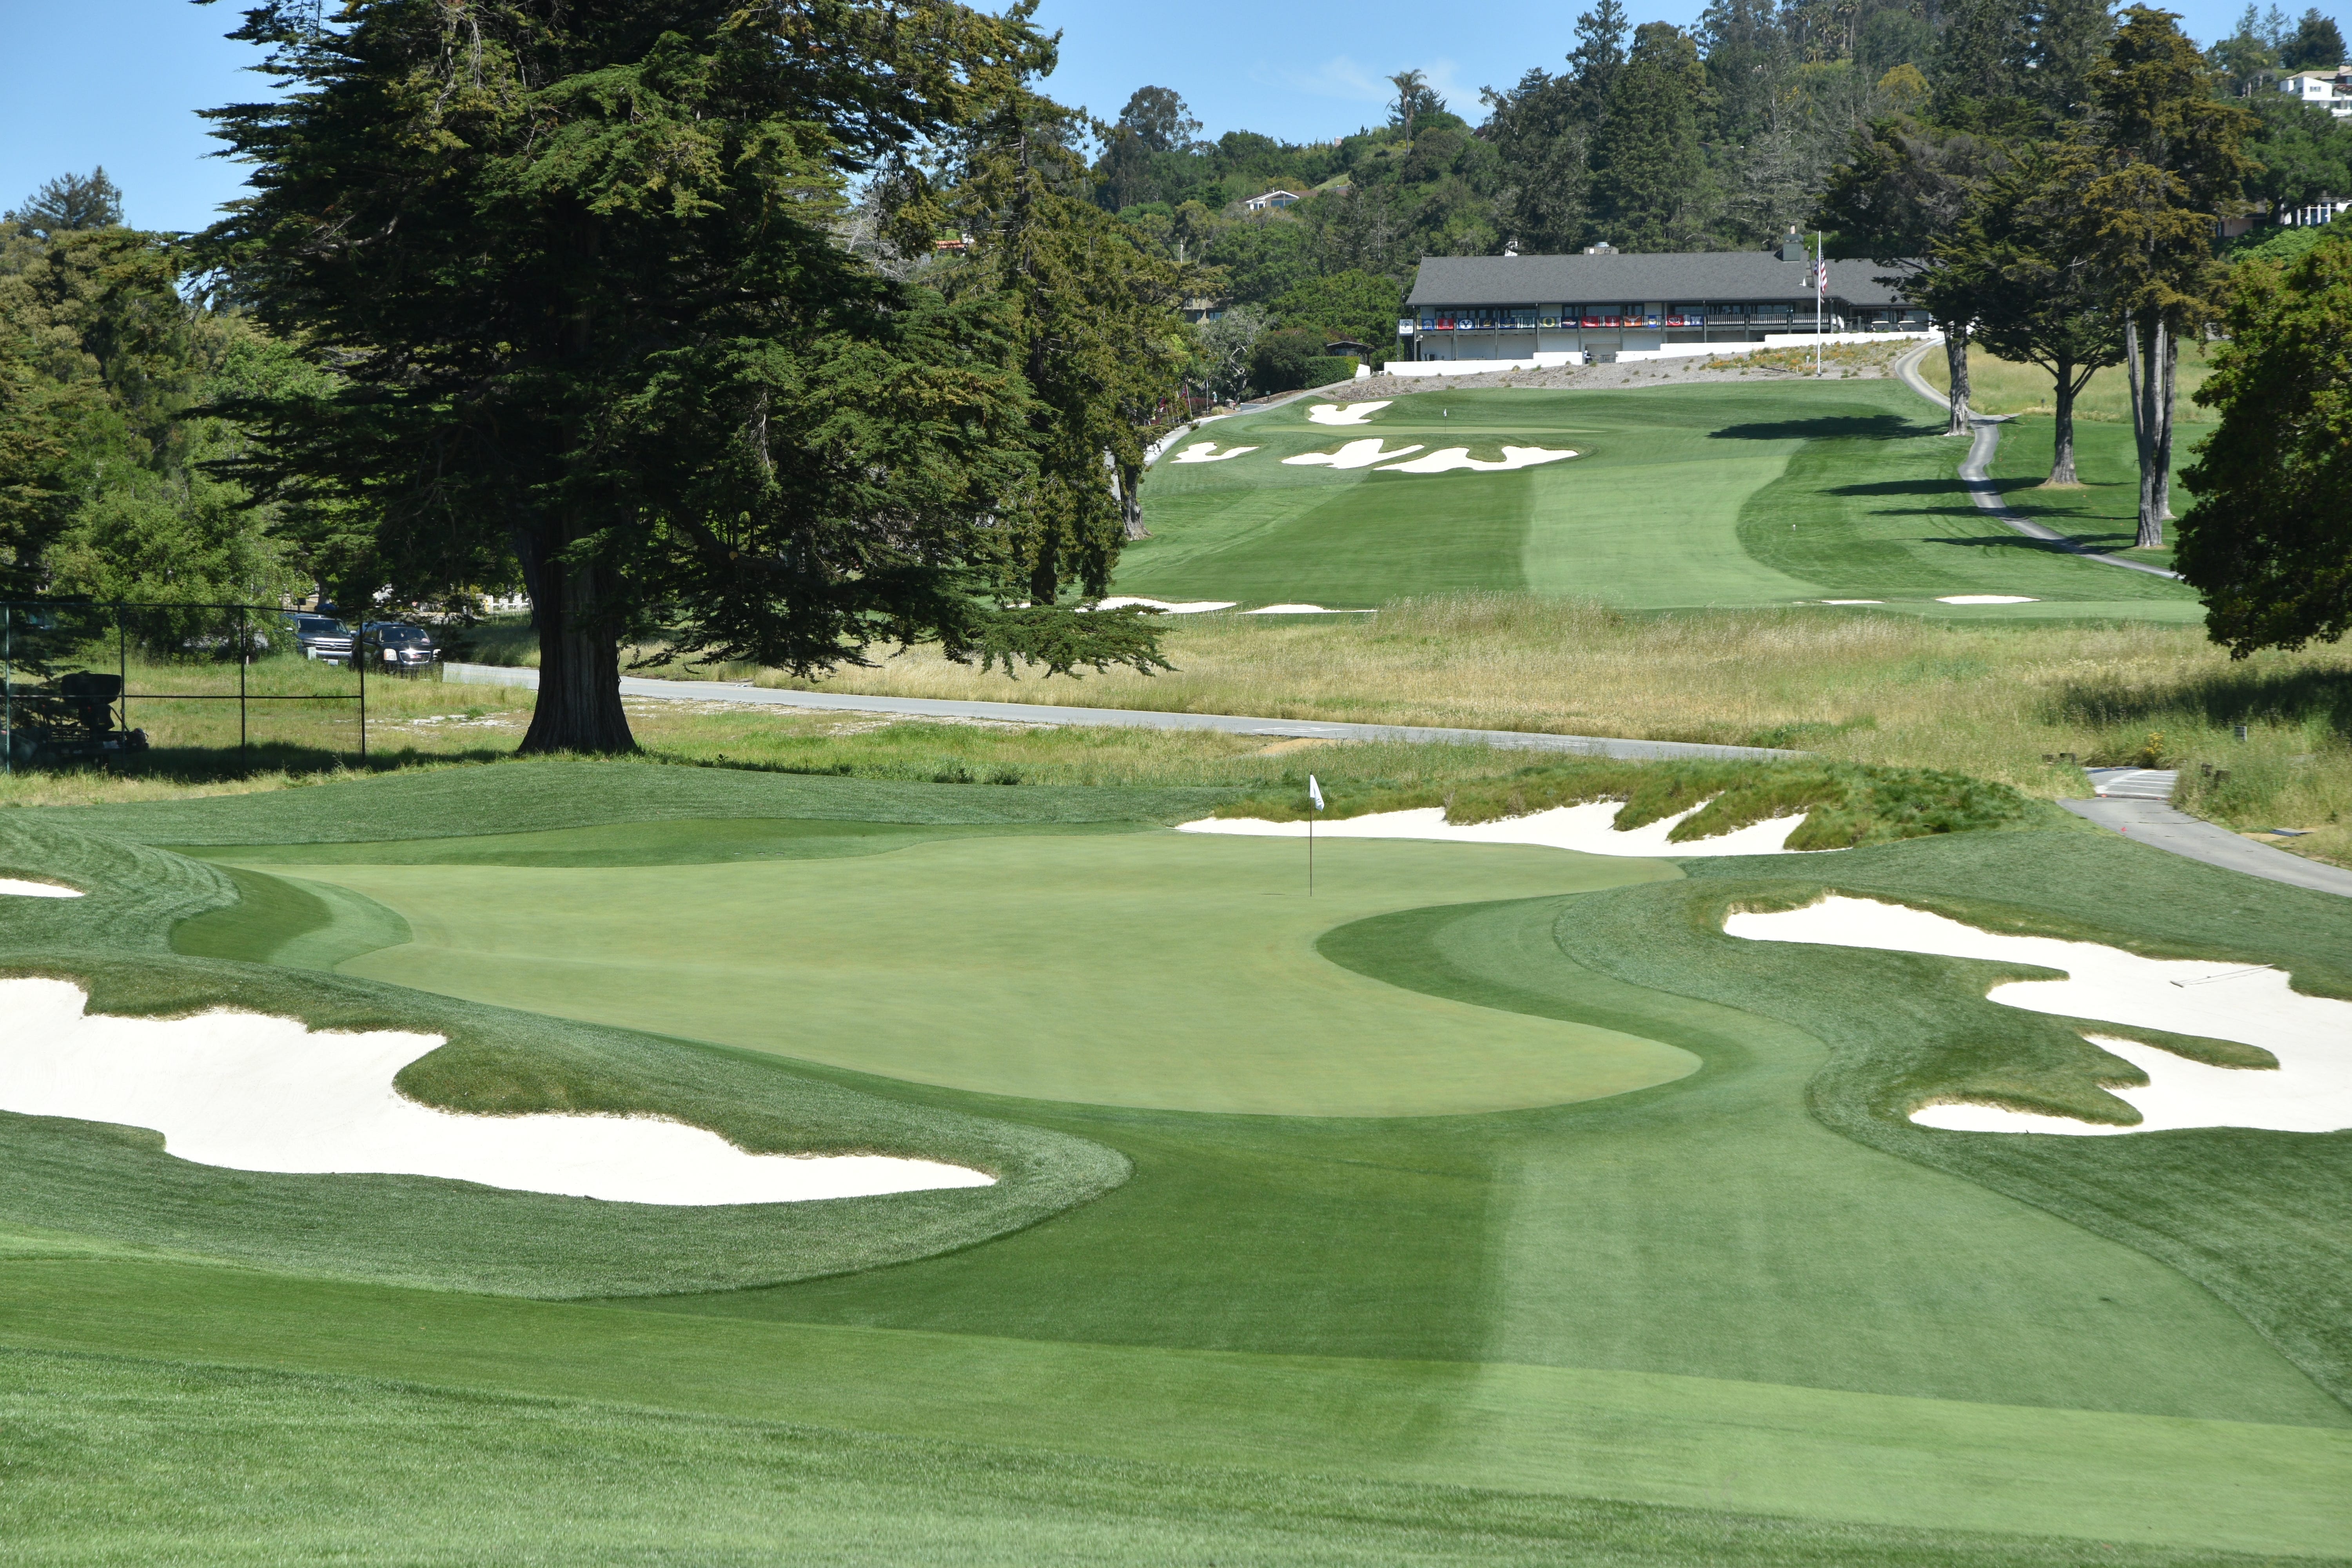
The 9th hole at Pasatiempo is a gently sweeping dogleg right hole that plays longer than its listed yardage with the climb up the hill to the clubhouse
The 9th hole tee shot from the back tee
The 9th hole has three fairway bunkers to negotiate with — most modern players will blow right past them
The right fairway bunker on the 9th hole
The two left bunkers cut into the fairway and dogleg of the 8th hole
The approach to the 9th hole — requires a big hit to reach and hold the green. The best leave is short right, but long right is very problematic
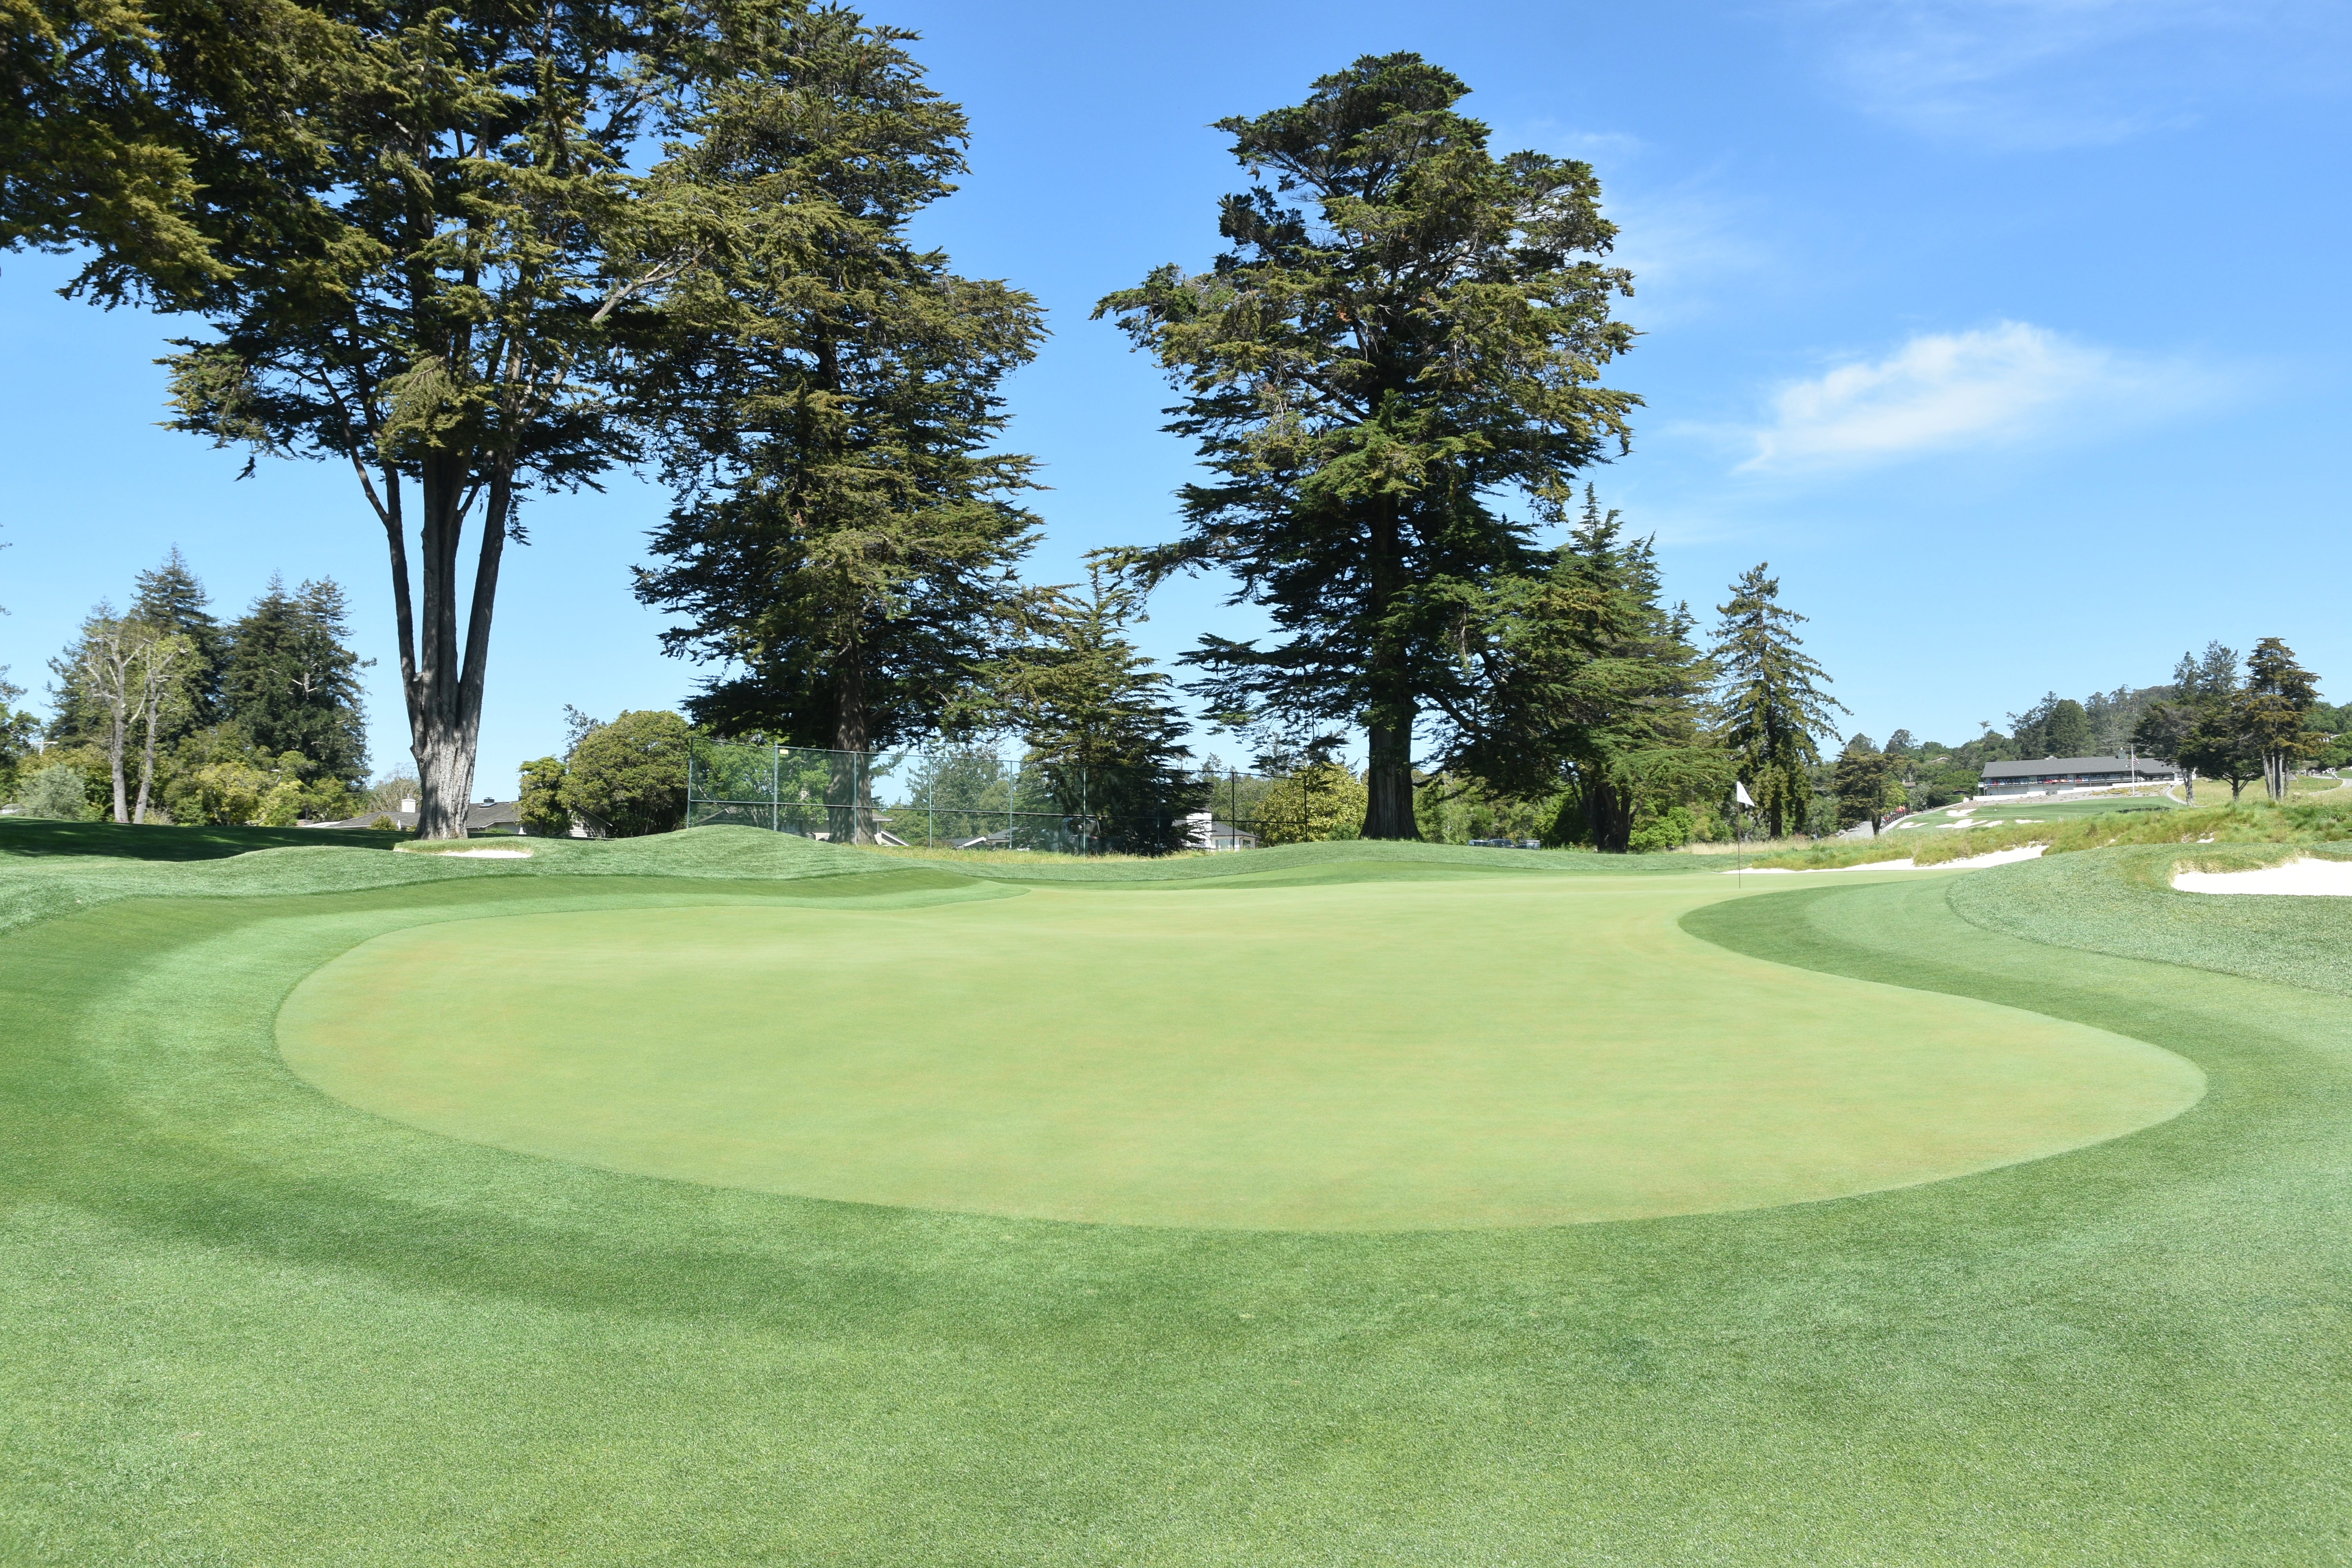
The 9th hole green may appear simple, but it has a lot of movement to it. Many players walk off the green shaking their heads on how they three-putted the hole after not giving the green more respect
Balls that are properly struck to the right side of the 9th green will release towards the middle of the green. Being above the hole is extremely dangerous and balls will roll out much more than expected. The dumbfounded look on bewildered players never gets old on the severely pitched and tricky green
A look back towards the 9th hole fairway from the front of the green
The 9th hole green from the back left — looks plain but tons of movement on it
The 9th hole green viewed from the back right
Hole 10: Par 4, 437 Yards
The 10th hole at Pasatiempo is world class — Alister Mackenzie makes brilliant use of the natural canyons and barrancas with the routing on the back nine
For photos of the newly restored back nine holes, please refer to the Golf Course Nerd post on Pasatiempo from April 2025 (Link)
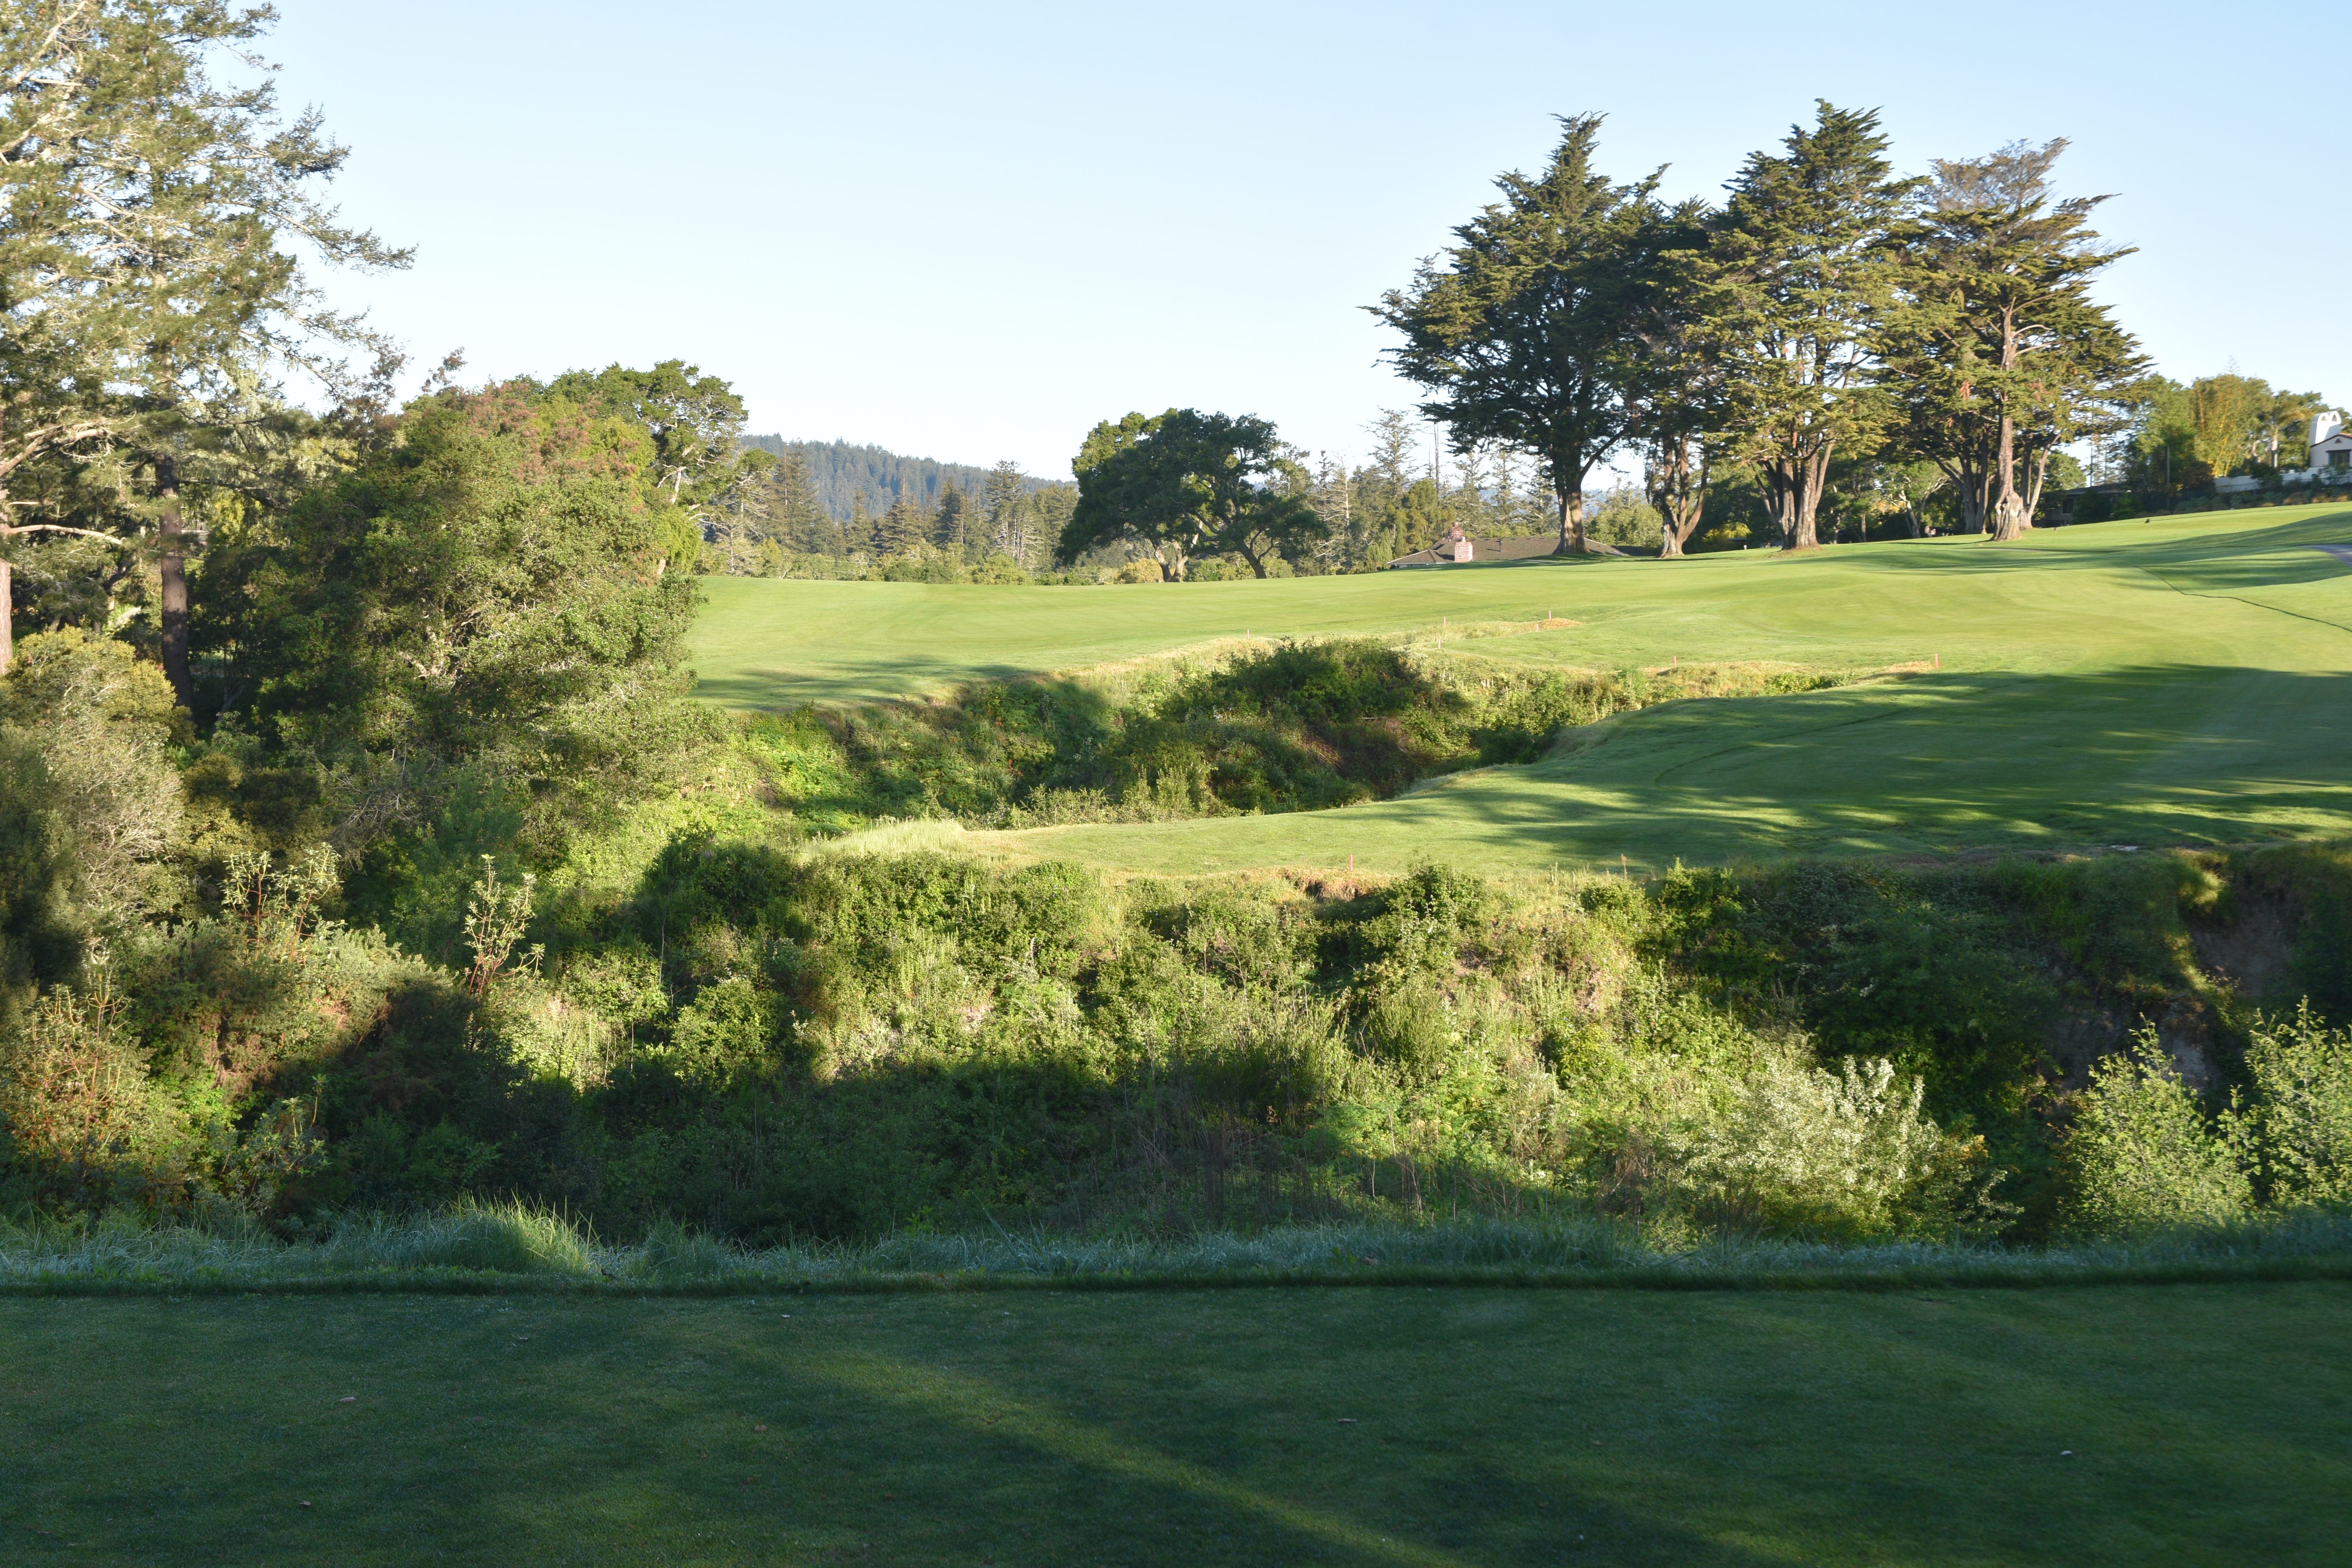
The 10th hole tee shot from the back tee — a player faces a blind shot over a canyon. The tee shot feels awkward and it is difficult to commit to a line. Players tend to pull it left into trouble or block it out way right
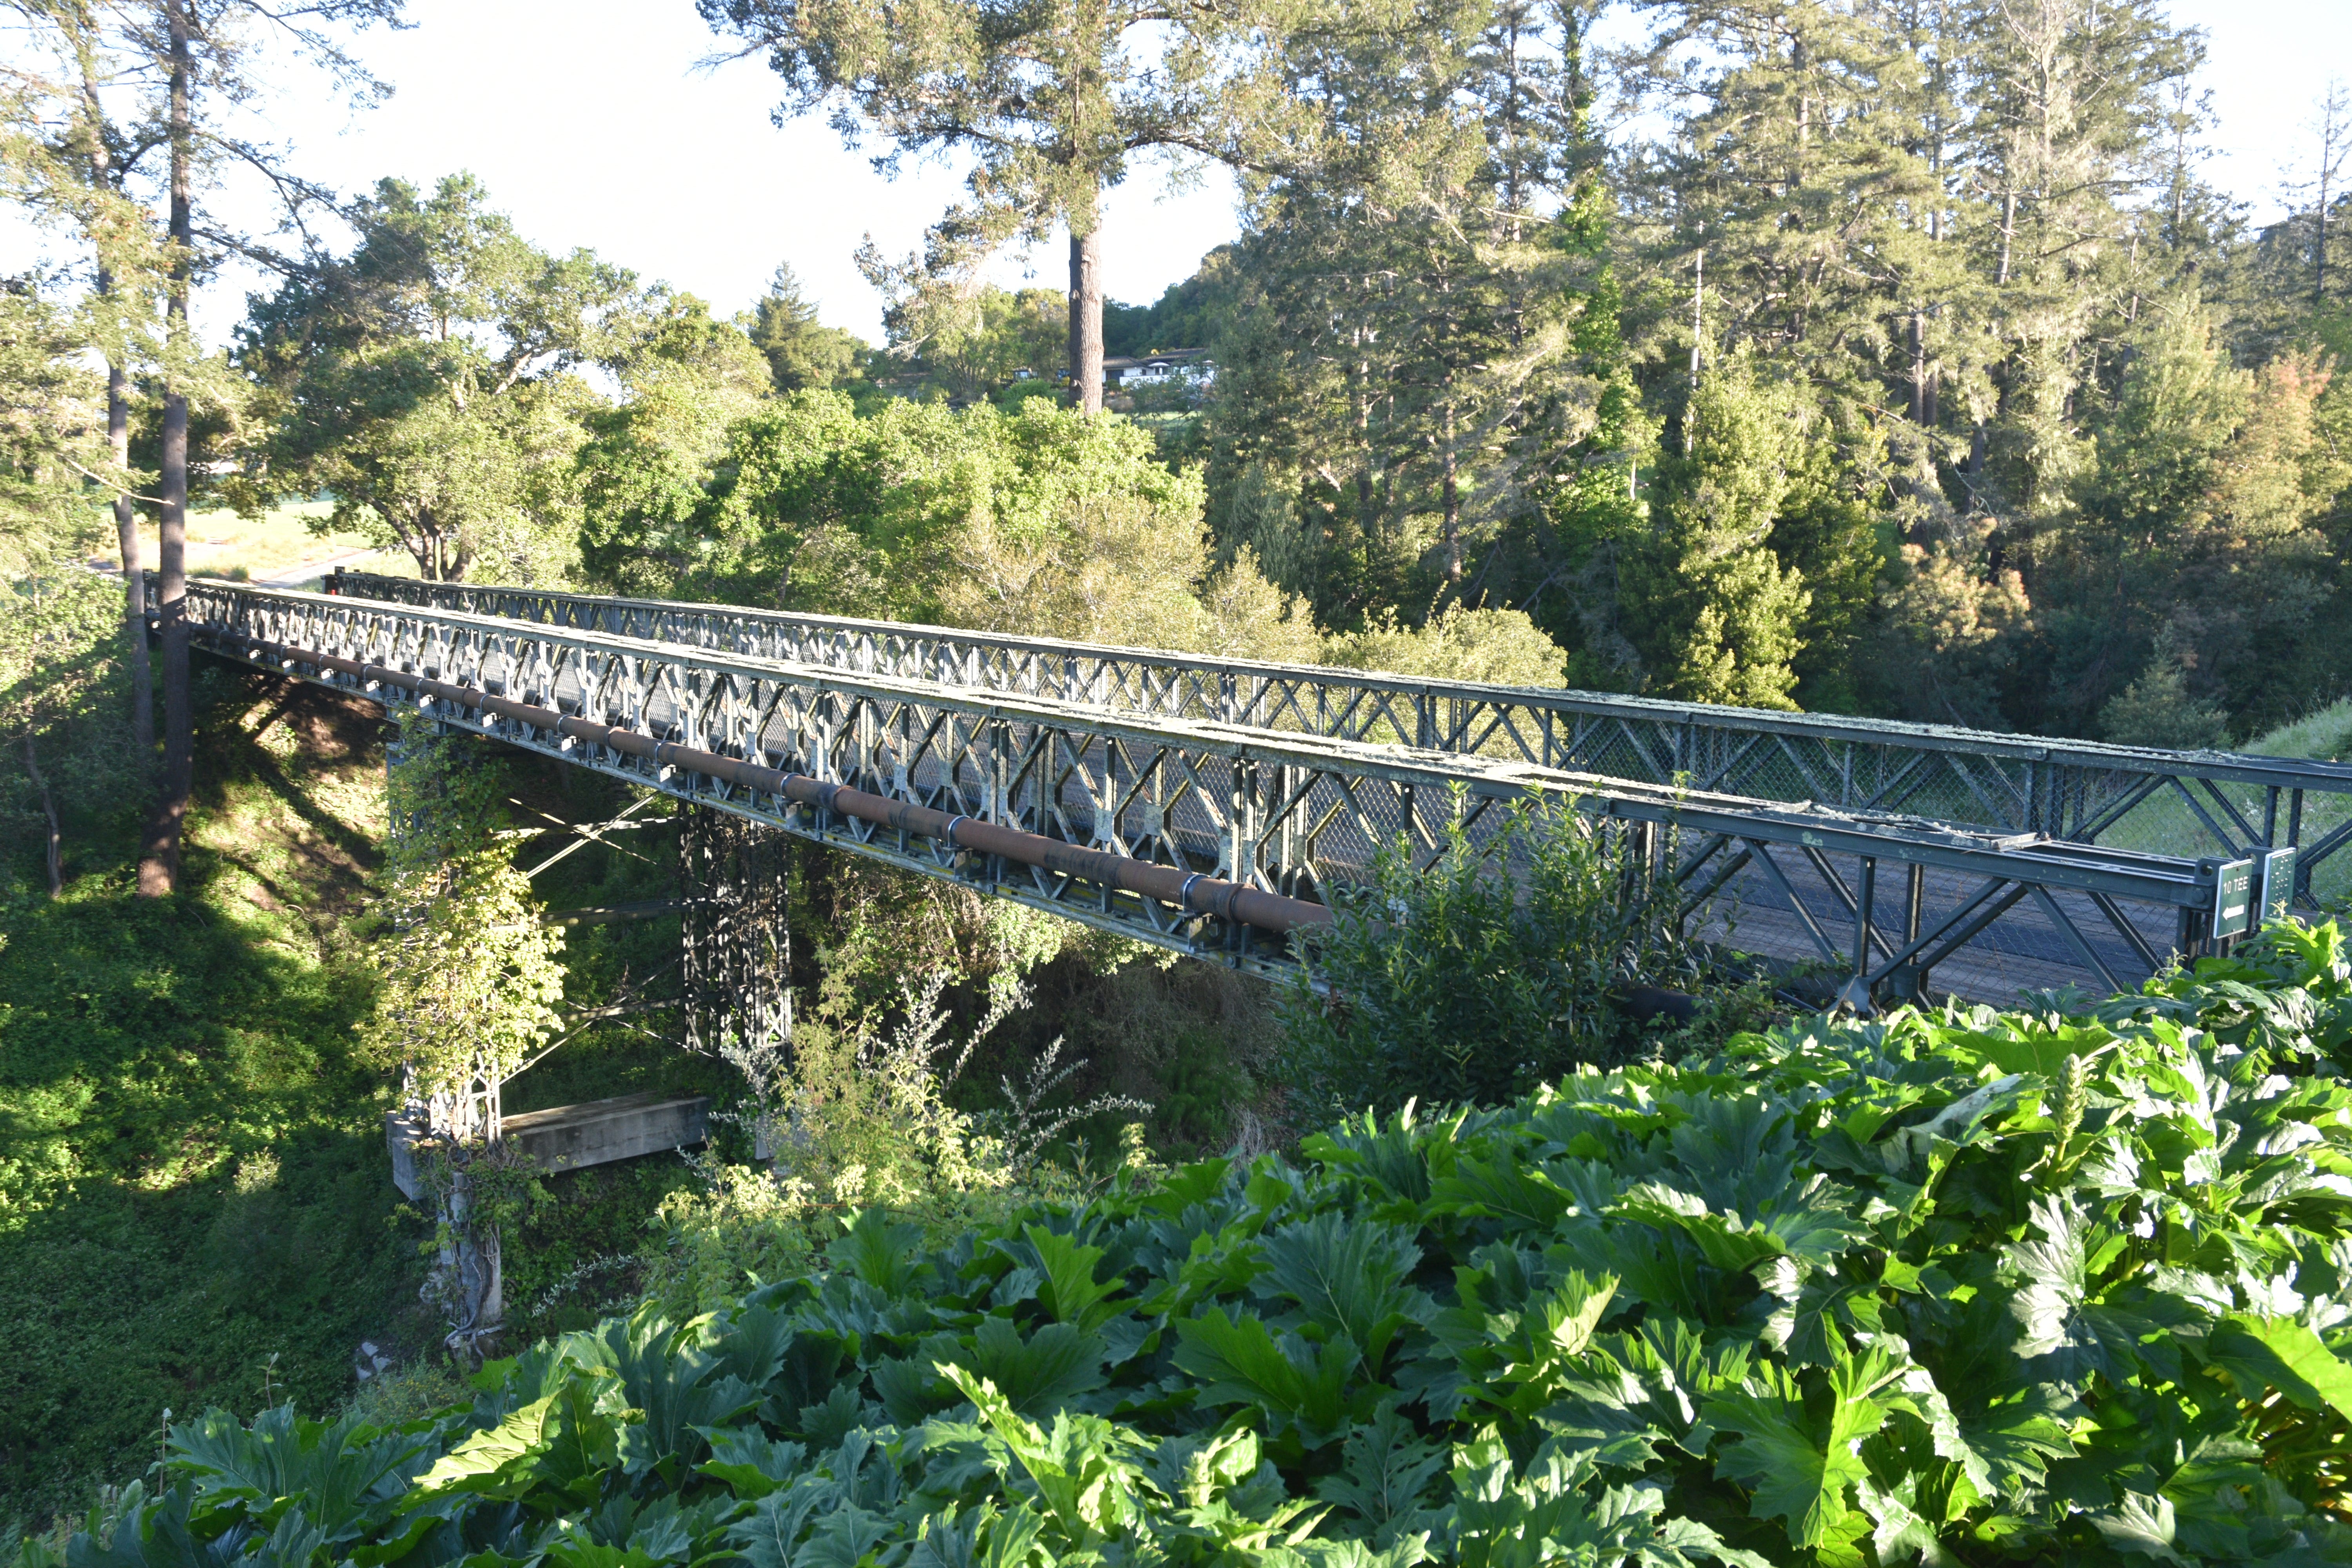
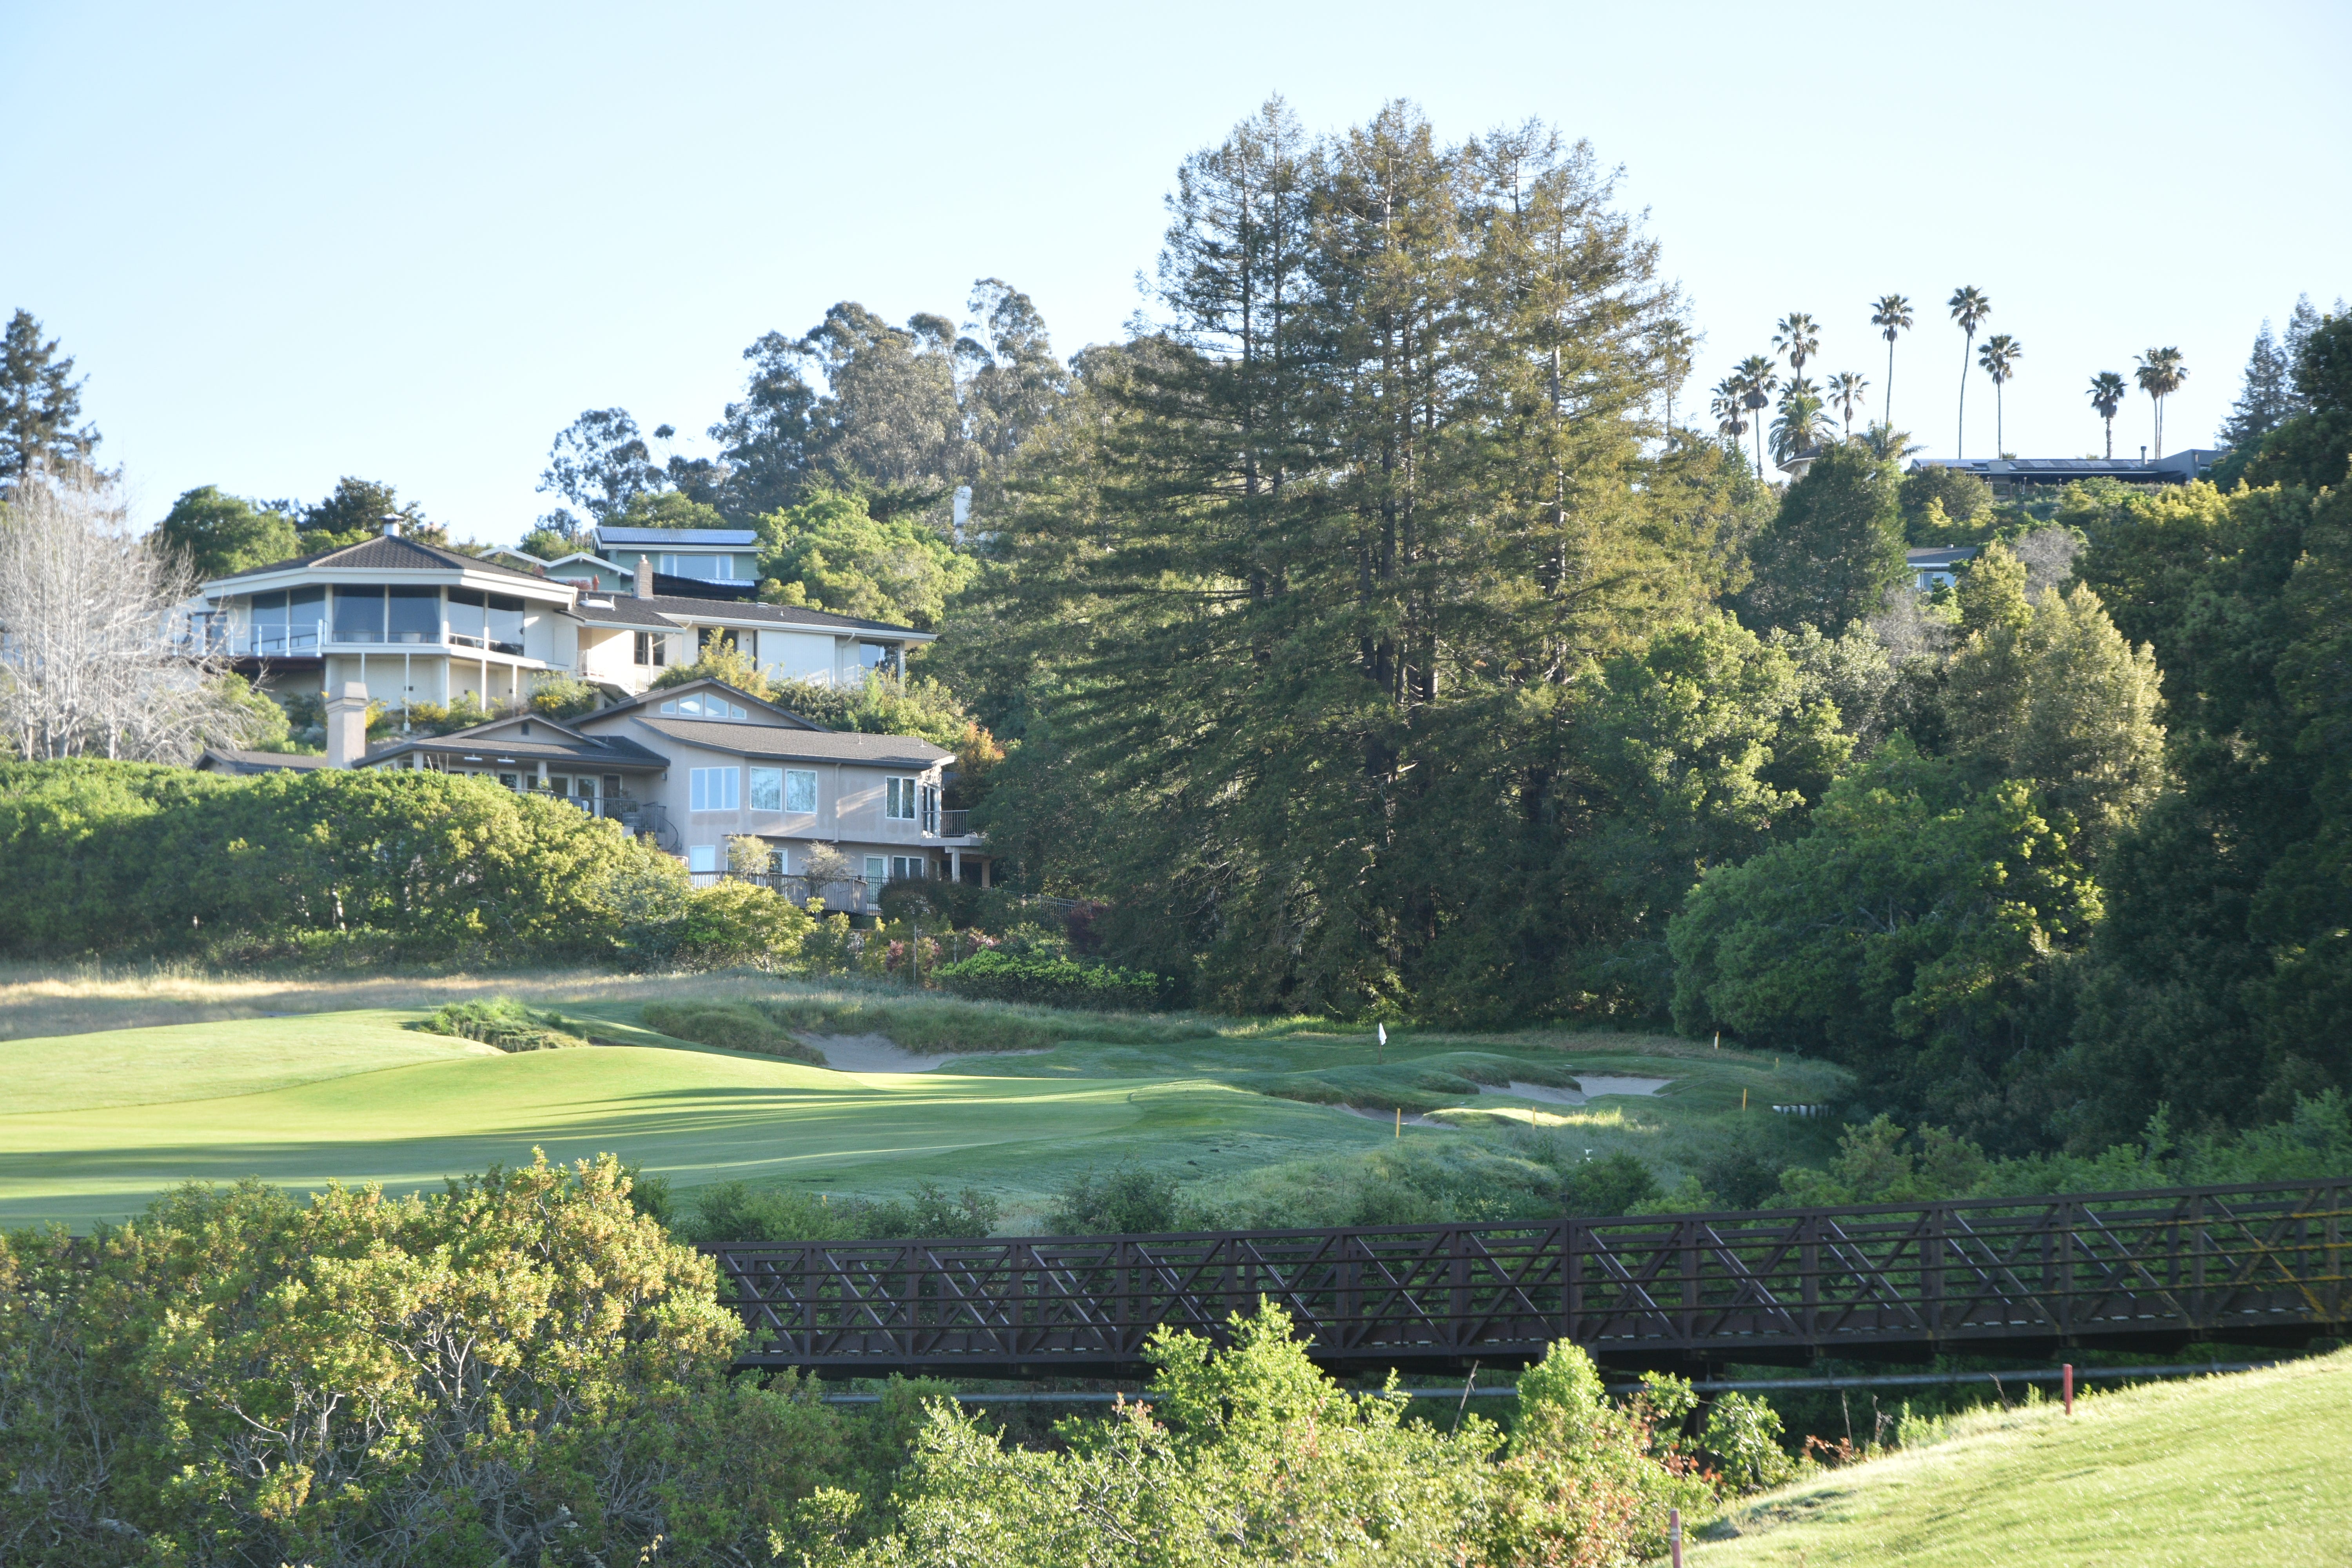
The bridge to transport players over the canyon after the 10th hole tee shot. The same bridge is used to walk across the canyon after hitting the 18th hole tee shot
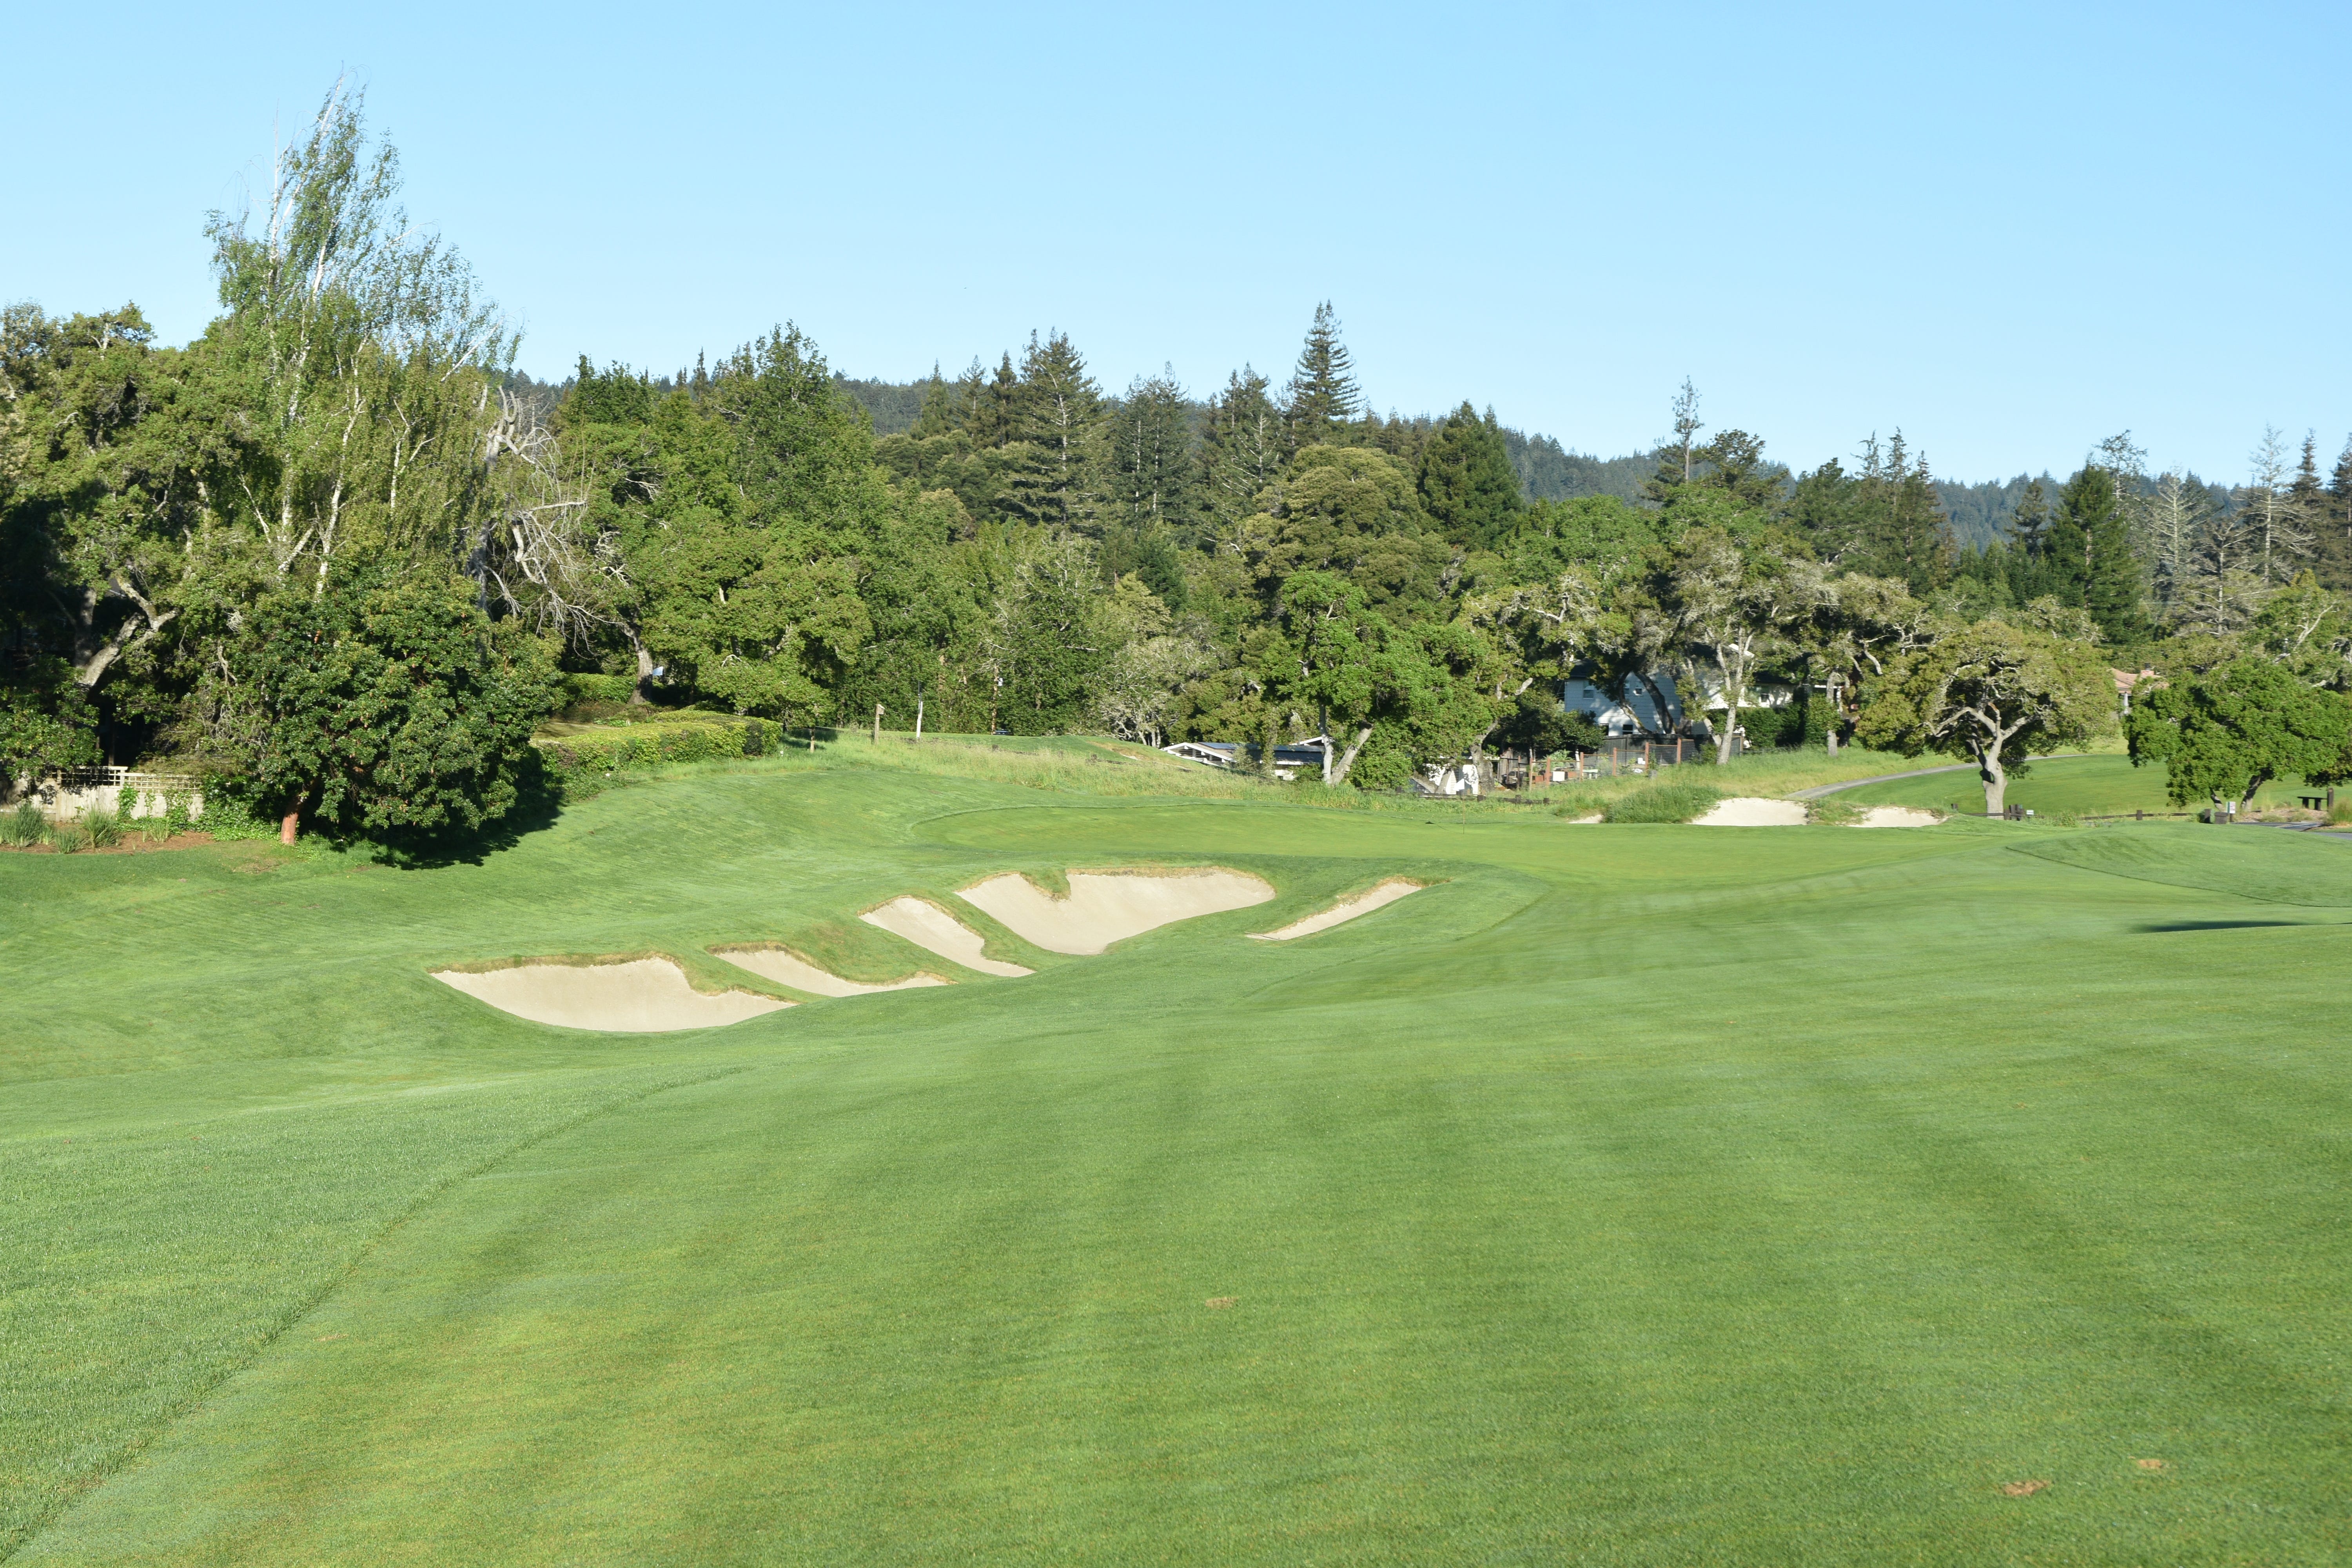
The 10th hole approach from the fairway. The green sits downhill and wraps itself around a cluster of bunkers. When the pin is in the back left, a running draw shot can utilize the slope of the green to feed the ball to the back left section
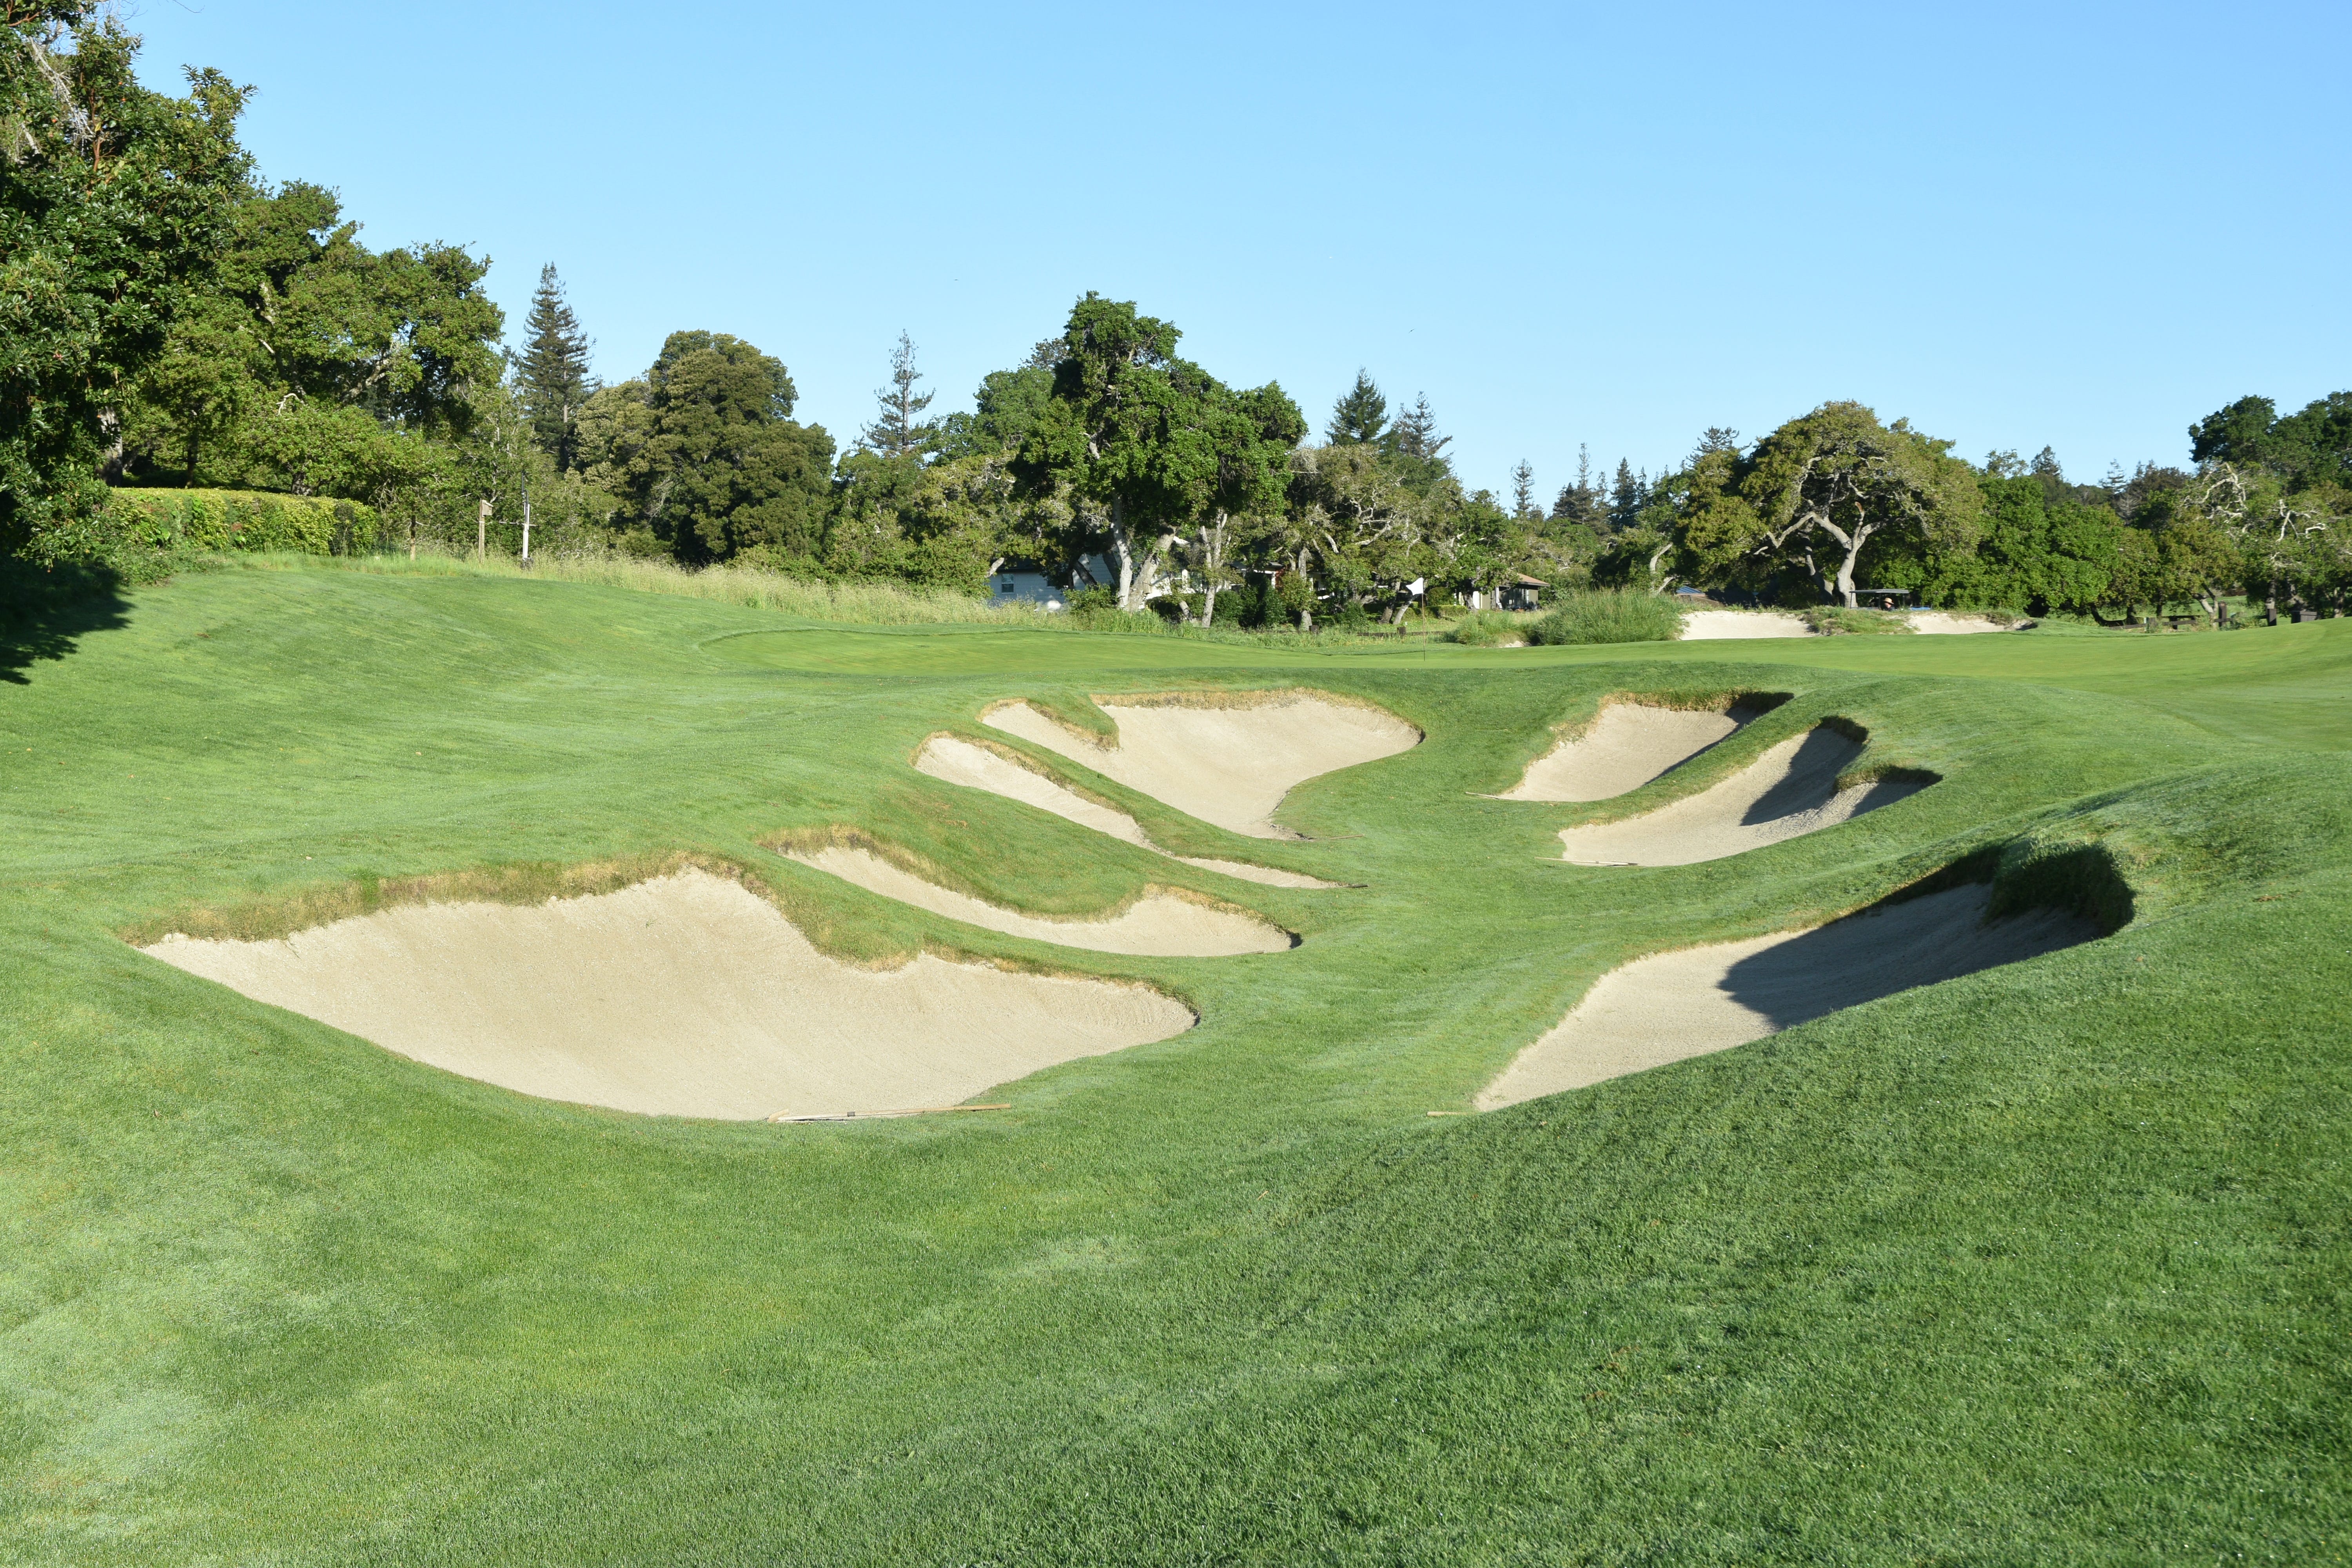
The first series of this bunker cluster are merely ornamental in nature and rarely come into play — the two bunkers nearest the green do come in play and are rather deep. An interesting thing Jim Urbina did with the new bunkers on the front nine is shallow them out. The new bunkers are not as deep as they once were
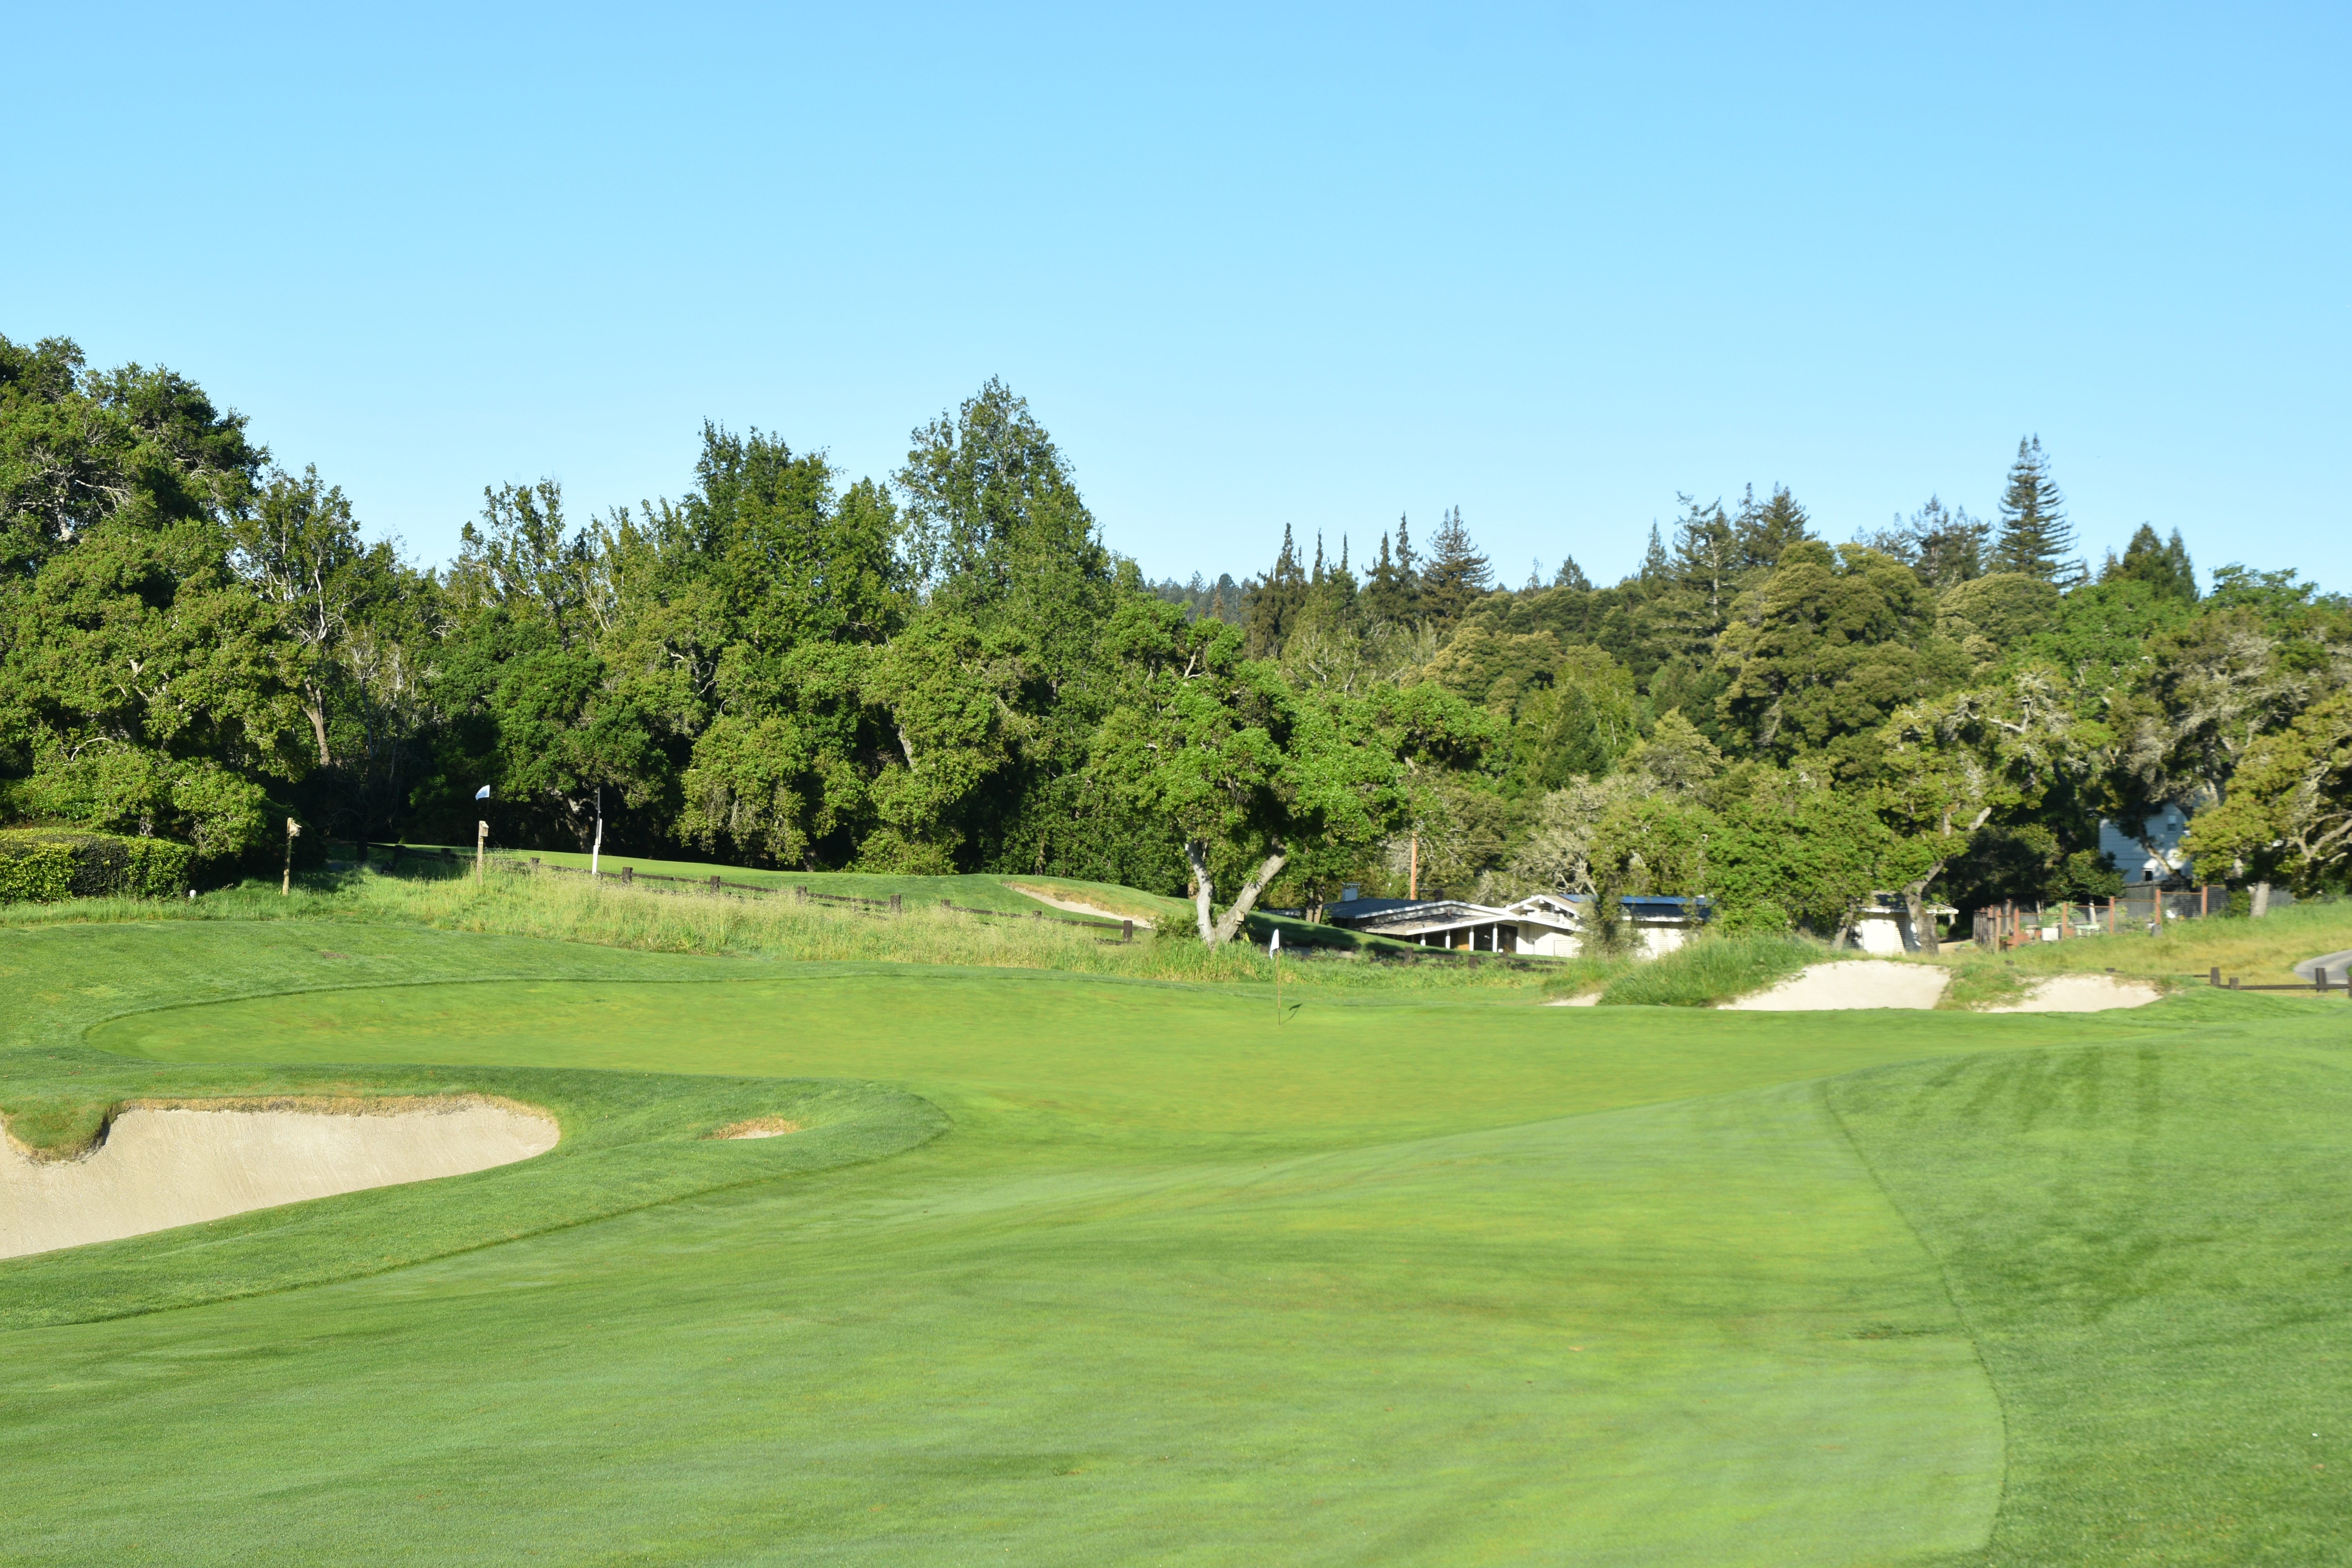
The 10th green viewed from the front
Various vantage points of the 10th hole green and bunkers
The 10th hole green viewed from the left — the green is heavily pitched from back to front in its left section. Balls can be feed down to the hole location with the approach shot or with a clever pitch shot
The 10th hole green viewed from the back
Hole 11: Par 4, 390 Yards
The 11th hole at Pasatiempo may be one of the hardest sub-400 par 4 holes in the world — the ultra-demanding approach shot requires precision and discipline
The 11th hole tee shot from the back tee — while the hole may look benign, the dramatic elevation change of this hole is well disguised. It is over a 100 foot climb from tee to green!
The 11th hole fairway is generous, but it is best to favor the left hand side. The bisecting barranca abruptly interrupts the fairway and a player needs to be careful not to drive into the canyon with the tee shot
This is the ideal spot with the tee shot to attack the 11th hole approach
A closer look at the barranca bisecting the 11th hole at Pasatiempo
Approaching one of the more diabolical greens at Pasatiempo
The 11th hole green is severely pitched from back right to front left and has two distinct tiers along with a false front. Approach shots that hit the green tends to have a lot of movement once the ball is on the green. Getting up and down is quite a challenge on this hole if you miss the green
This photo shows just how severely pitched the 11th green at Pasatiempo truly is — a player would be grateful to take a par 4 score any day!
The 11th hole viewed from the back right
Hole 12: Par 4, 371 Yards
The 12th hole is one of the more underrated holes at Pasatiempo
The 12th hole tee shot from the back tee — the downhill tee shot is trickier than it first appears. It is rather easy to pull a tee shot into the barranca. To guard against doing so, most players block their tee shots out to the right which makes the approach shot longer and with a trickier angle
The generous 12th hole fairway at Pasatiempo
The 12th hole approach — the green has three distinct tongues to create various hole locations. It is a relatively easy green to hit and one of the tamer greens at Pasatiempo
The 12th hole green’s defense is the grassed in barranca just in front of it. The green does fall off on all of its sides so misjudged approach shots will bounce further away into tougher spots
The left green side bunker of the 12th hole — beautifully presented with the native grasses blended into the back edge
The 12th hole green viewed from the front
The 12th hole green viewed from the 14th hole fairway
Various vantage points of the 12th hole green at Pasatiempo
The 12th hole green viewed from the back
Hole 13: Par 5, 532 Yards
The 13th hole at Pasatiempo has some dramatic bunkering guarding the green — the bunkers appear as if they are floating hazards to disorient a player
The 13th hole tee shot from the back tee — the fairway is generous and gently slopes from right to left
The first fairway bunker on the 13th hole is rarely a challenge for modern players — if a player elects not to go for the green in two, the layup must be strategic due to the design of the green
Once over the fairway knoll, the 13th hole approach presents itself — the layup is very dependent on the hole location. If the pin is tucked left, a player needs to layup to the right side of the fairway to have an proper angle to the pin. The hole location shown would be best approached from the left side of the fairway
The 13th green has two tongues on each side that jut away from the center of the green creating interesting areas to tuck pins away
A closer look at the 13th hole green
The 13th hole green viewed from the front
Various vantage points of the 13th hole green at Pasatiempo
The back left tongue of the 13th green usually has the most difficult hole location
Looking back towards the 13th hole fairway from the front right of the green
The 13th hole green is a fun challenge — it will be interesting to see how Jim Urbina renovates this well-designed green — please do so carefully!
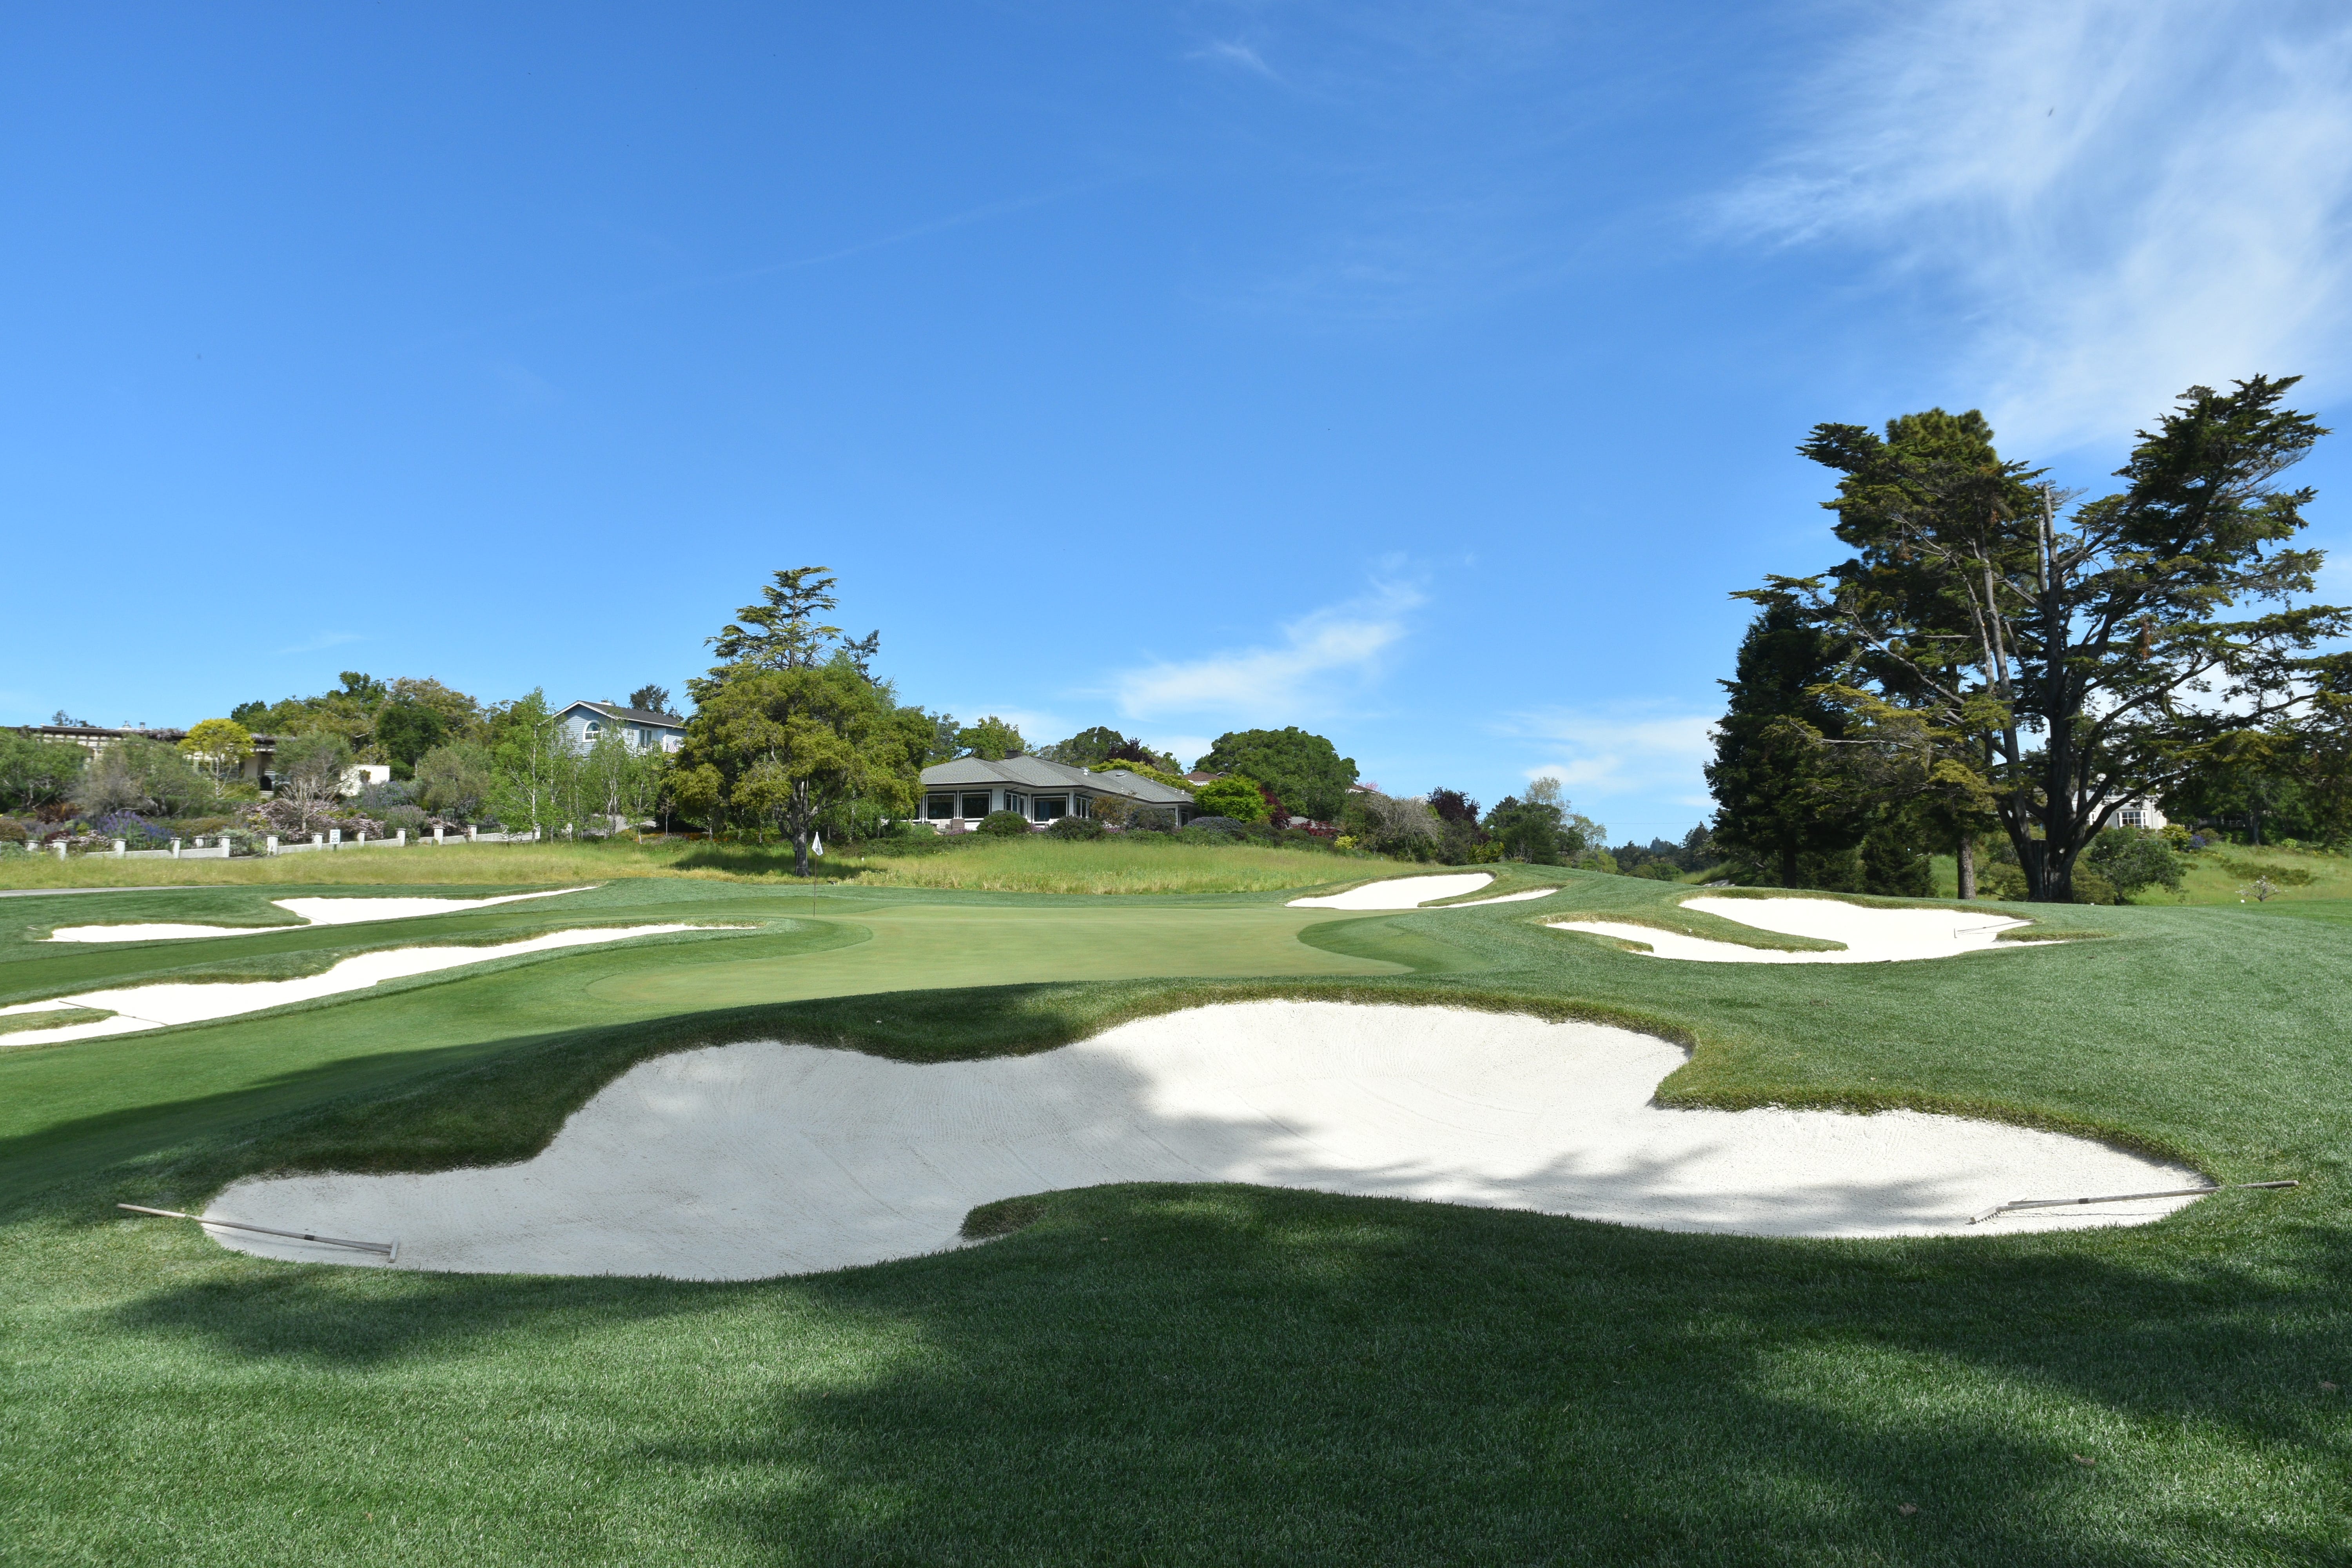
Hole 14: Par 4, 426 Yards
The 14th hole at Pasatiempo is a strong par-4 hole with an interesting design quirk
The 14th hole tee shot from the back tee — while the fairway appears wide, it effectively plays narrower due to a unique swale in the middle of the fairway
The swale is roughly 6 feet deep and cuts into both the center and left side of the fairway in a wishbone shape. It is not a coincidence that the swale is in an area where most tee shots tend to land
Another vantage point of the fairway swale on the 14th hole at Pasatiempo
If a tee shot finds the swale, a player will still have a clean lie in the fairway but the view of the 14th green is obscured as you can no longer see the green surface
Distance is required on the tee shot to avoid the swale and have a view of the green surface with the approach shot — most modern players can blow past the swale, but it requires a straight and long tee shot
Looking back towards the 14th hole fairway showcases how much the swale takes away ideal fairway space
The first bunker in the picture is actually 50 yards short of the 14th green — another great example of Alister Mackenzie using disguise with his bunker design to mess with a player’s depth perception
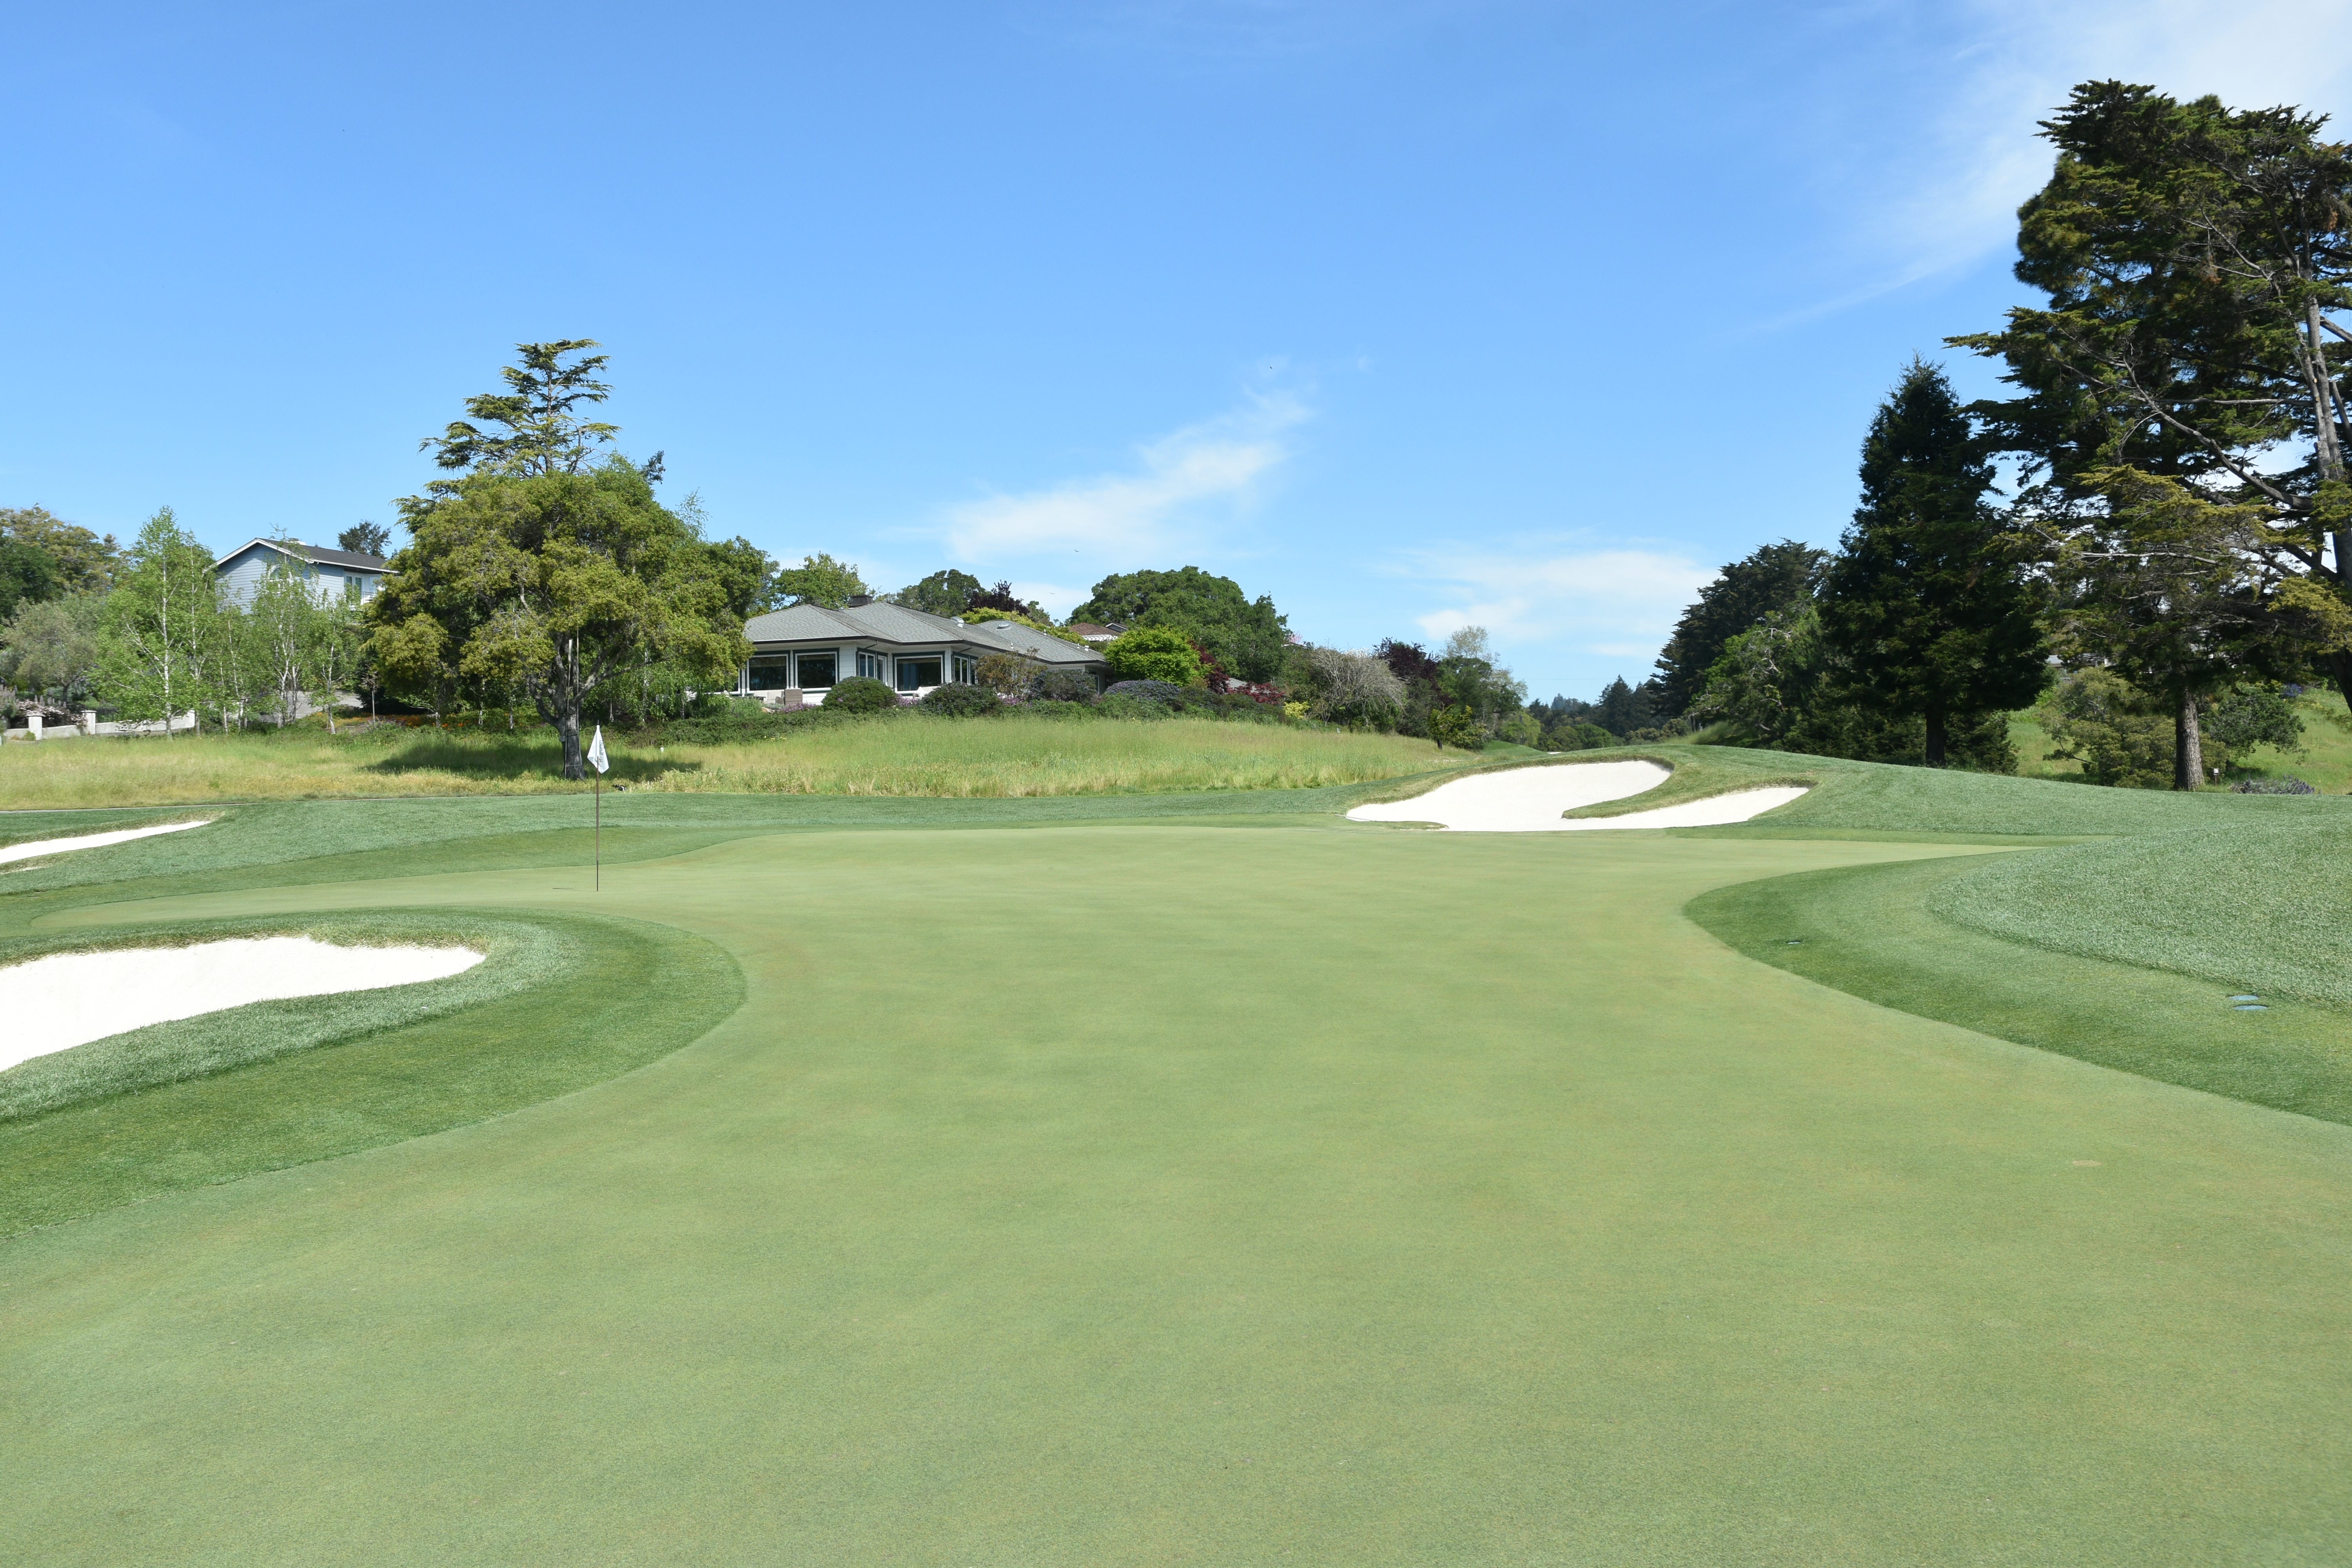
The 14th hole green viewed from the front
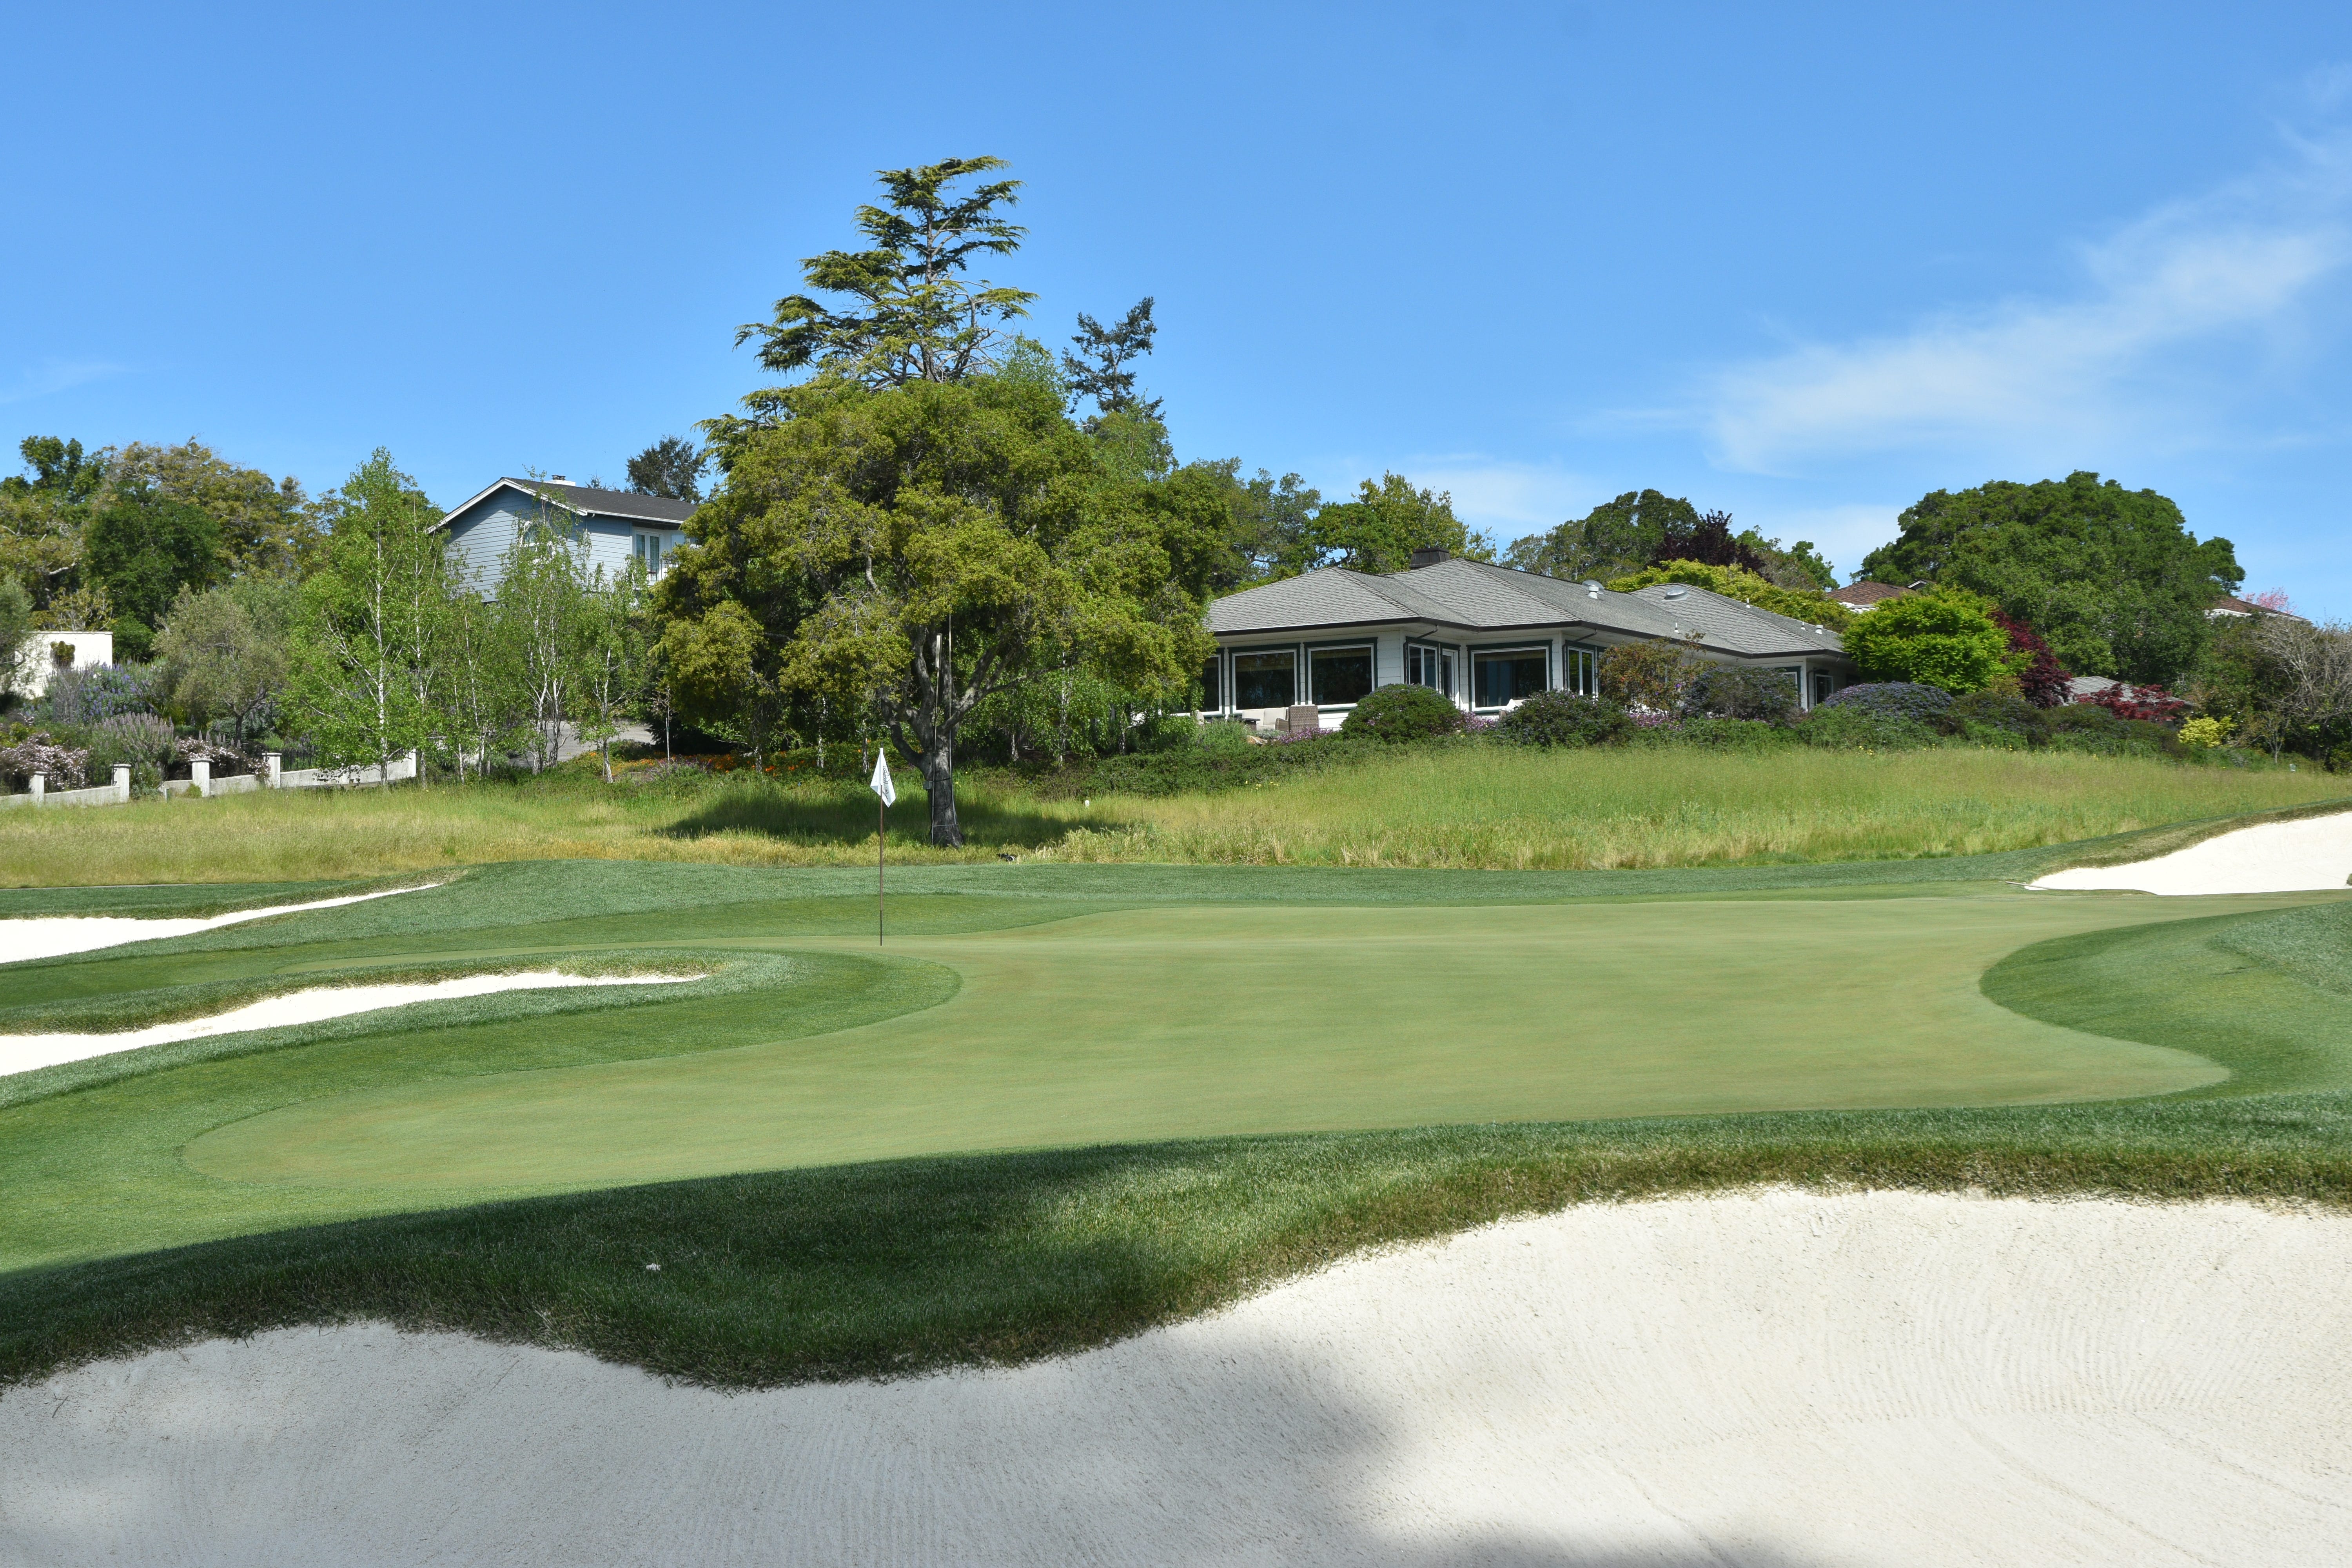
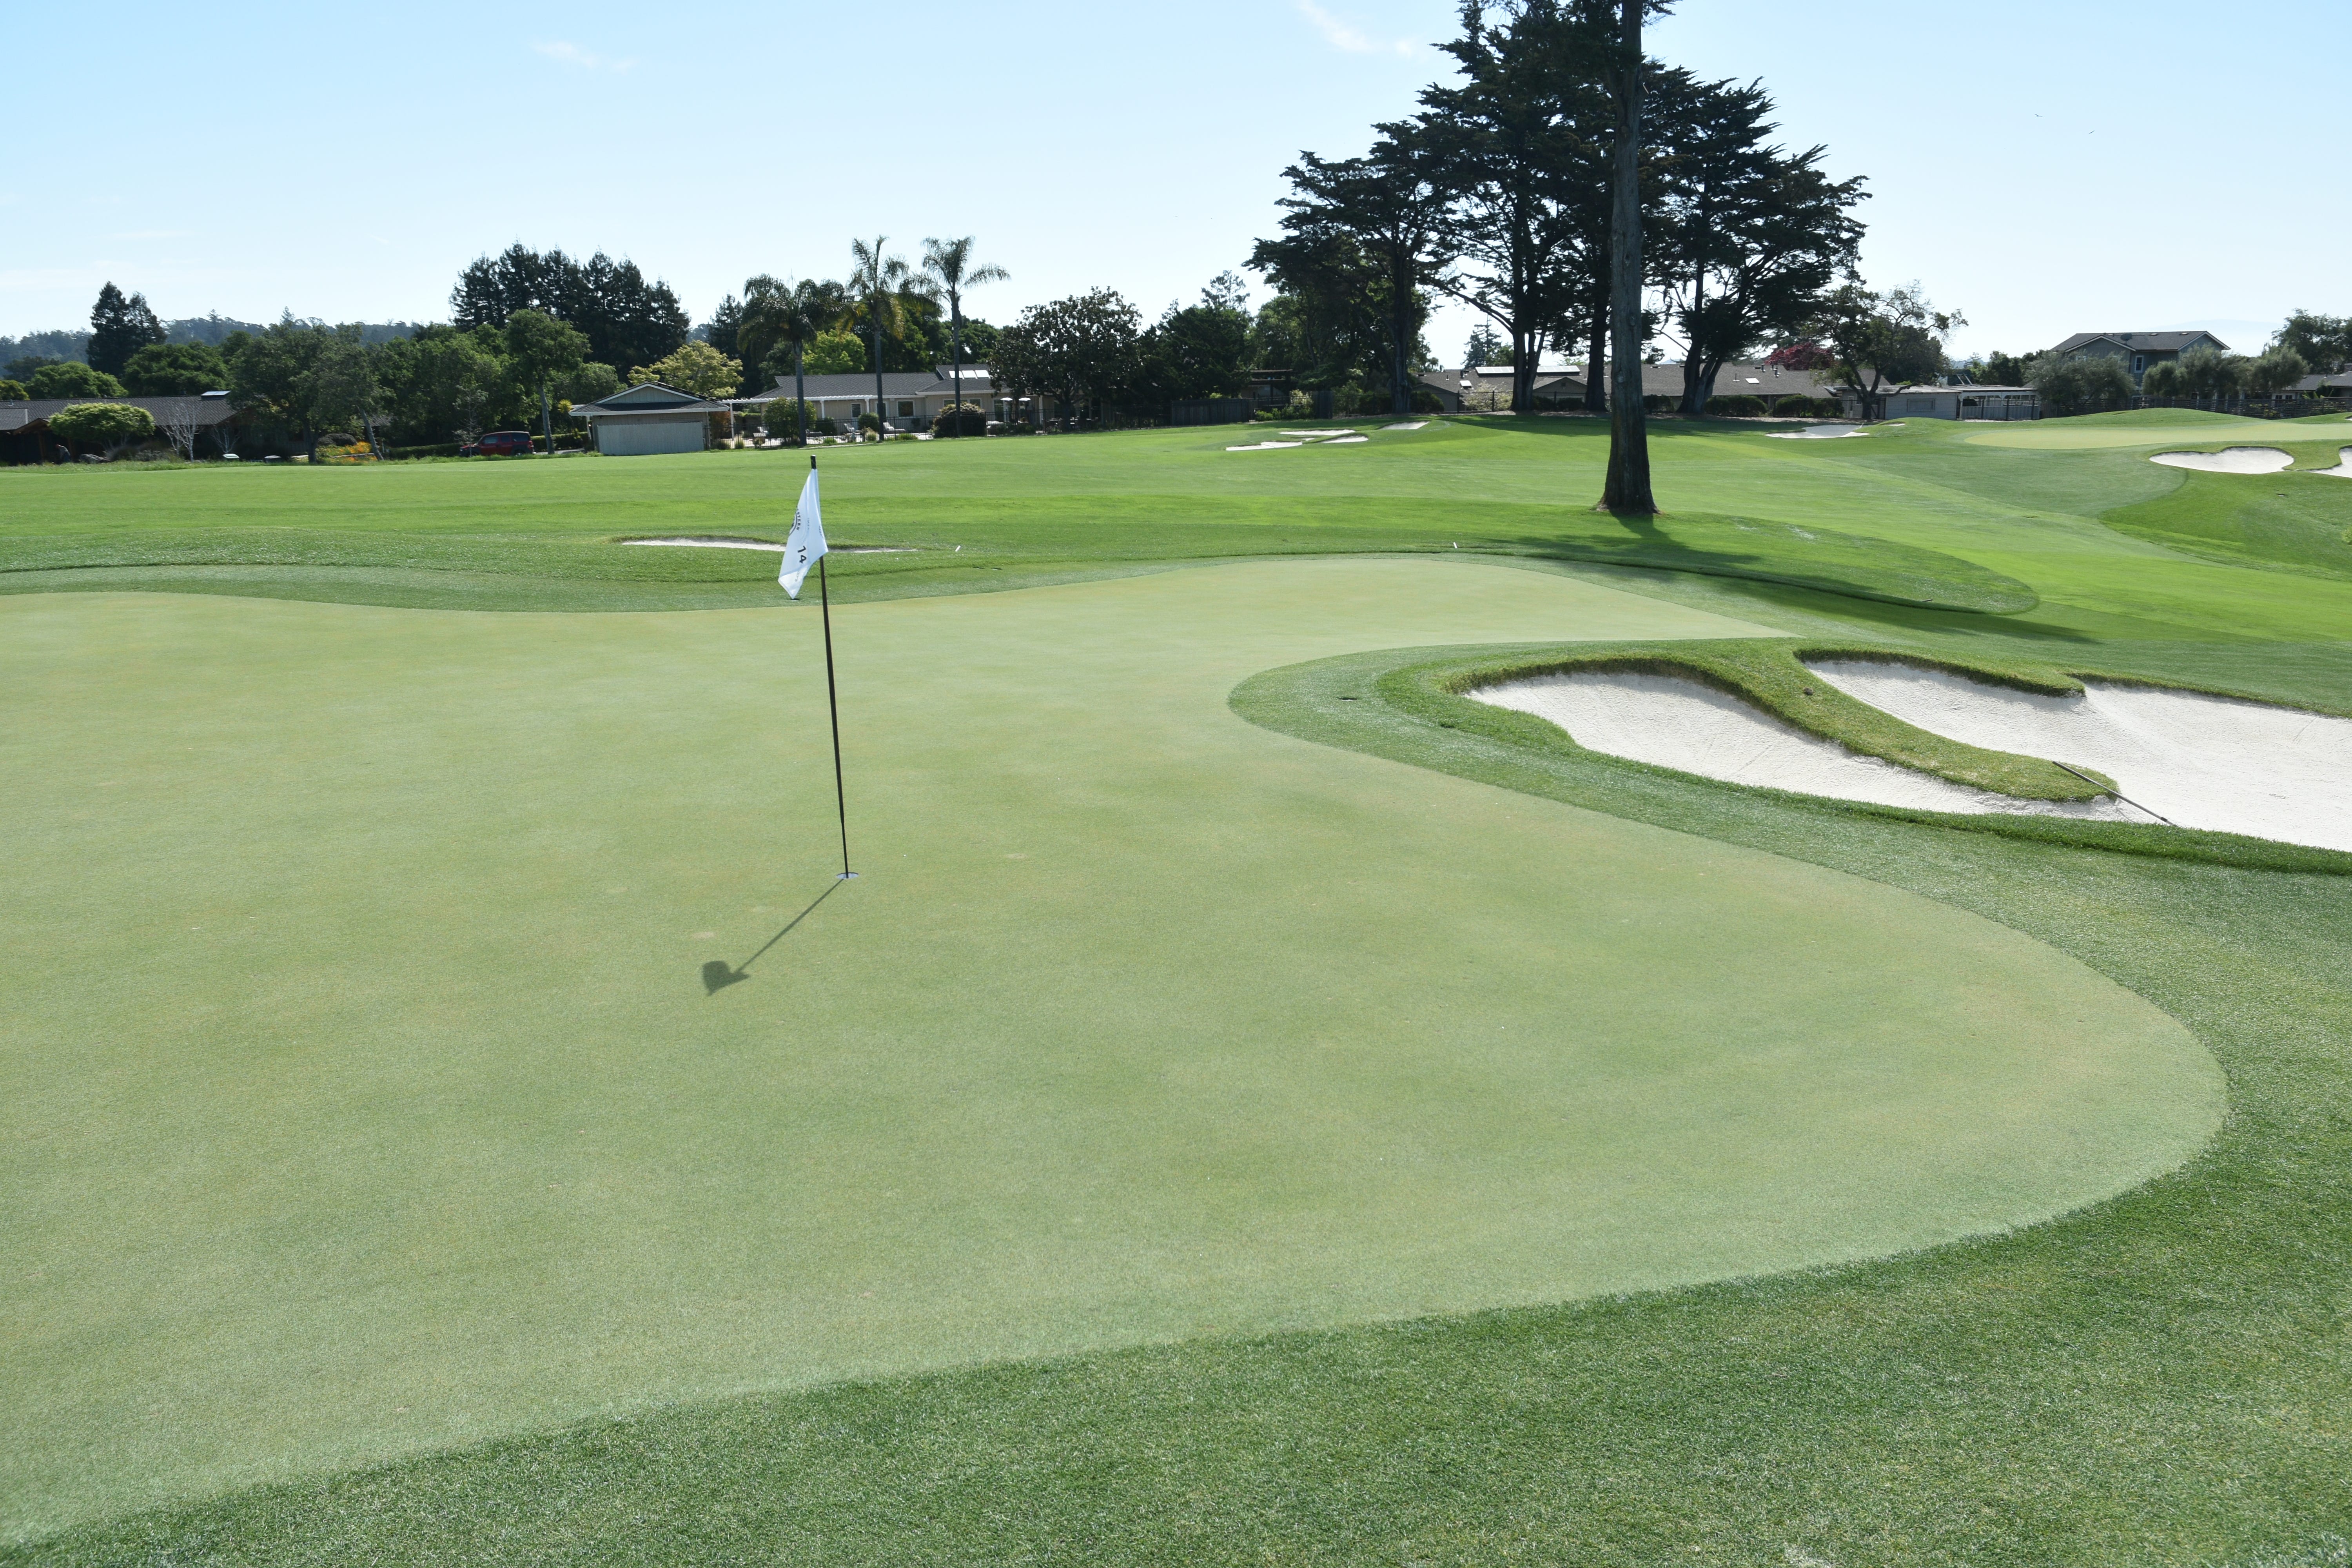
Various vantage points of the 14th hole green at Pasatiempo
The 14th hole green viewed from the back
Hole 15: Par 3, 142 Yards
The 15th hole at Pasatiempo is one of the sexiest (and deadliest) par-3 holes you’ll ever play anywhere
The 15th hole tee shot from the back tee
While only 142 yards in length, the 15th hole has trouble everywhere surrounding the green which cants diagonally to make it a more shallow target. The prudent play is to play the hole rather defensively — just try to hit the green, two putt, and walk away happy
The 15th hole at Pasatiempo has a really quaint and intimate setting nestled within the barranca and the trees
The walk up to the 15th hole green at Pasatiempo
The 15th hole green viewed from the front left
The back green side bunker of the 15th hole
Various vantage points of the 15th hole green at Pasatiempo
The 15th hole green viewed from the right
The 15th hole at Pasatiempo is one of the Chief Golf Nerd’s favorite holes
Hole 16: Par 4, 392 Yards
The 16th hole at Pasatiempo is arguably the signature hole on the course — Alister Mackenzie considered the monstrous 16th green as his most favorite green design
The 16th hole tee shot from the back tee — the tee shot has a very awkward orientation to a player. It is blind and doglegs gently to the left. Although the fairway is plenty wide, the mound in the center of the fairway makes it feel narrower. There used to be an pine tree in the distance that served as the aiming point, but the tree fell down during a storm. A gentle draw tee shot is the ideal play
The walk to the 16th hole fairway at Pasatiempo
Once over the mound, the iconic 16th green presents itself. Hitting the fairway is important to have complete control of the spin on the approach shot
The 16th hole approach shot from the center of the fairway
The 16th hole green has three distinct levels and feels like climbing a grand staircase. The hardest hole location is the center back left. Participating college coaches during the Western Intercollegiate have repeatedly asked the Pasatiempo staff to not use that hole location!
The right green side bunker of the 16th hole is iconic in its own right. There is also a small water stream to the right of it. Hopefully Jim Urbina takes precious care of preserving the presentation of this wonderful Mackenzie-style bunker during the upcoming restoration phase
A closer look at the 16th hole right green side bunker
The 16th hole green viewed from the front
The 16th hole green viewed from the left
Looking back towards the 16th hole fairway from the green
The 16th hole green viewed from the back — it is always fun to roll balls from the back of the green and see it roller coaster down to the front of the green!
Hole 17: Par 4, 372 Yards
The 17th hole at Pasatiempo is the weakest hole on the course
The 17th hole tee shot from the back tee is very basic and straightforward without any significant demands on the player
The two fairway bunkers to the right of the 17th hole fairway — not a challenge at all to modern players
The significant challenge of the 17th hole is with the approach shot — the shot is blind to a very narrow and elongated green that is over 50 yards in length
The 17th hole approach from 100 yards away
The 17th hole green viewed from the front — the hole’s difficulty is dependent on the hole location — front pins are the easiest on this green
The 17th hole green is narrow and over 50 yards in length — back hole locations make the hole much tougher
The 17th hole green viewed from the very back
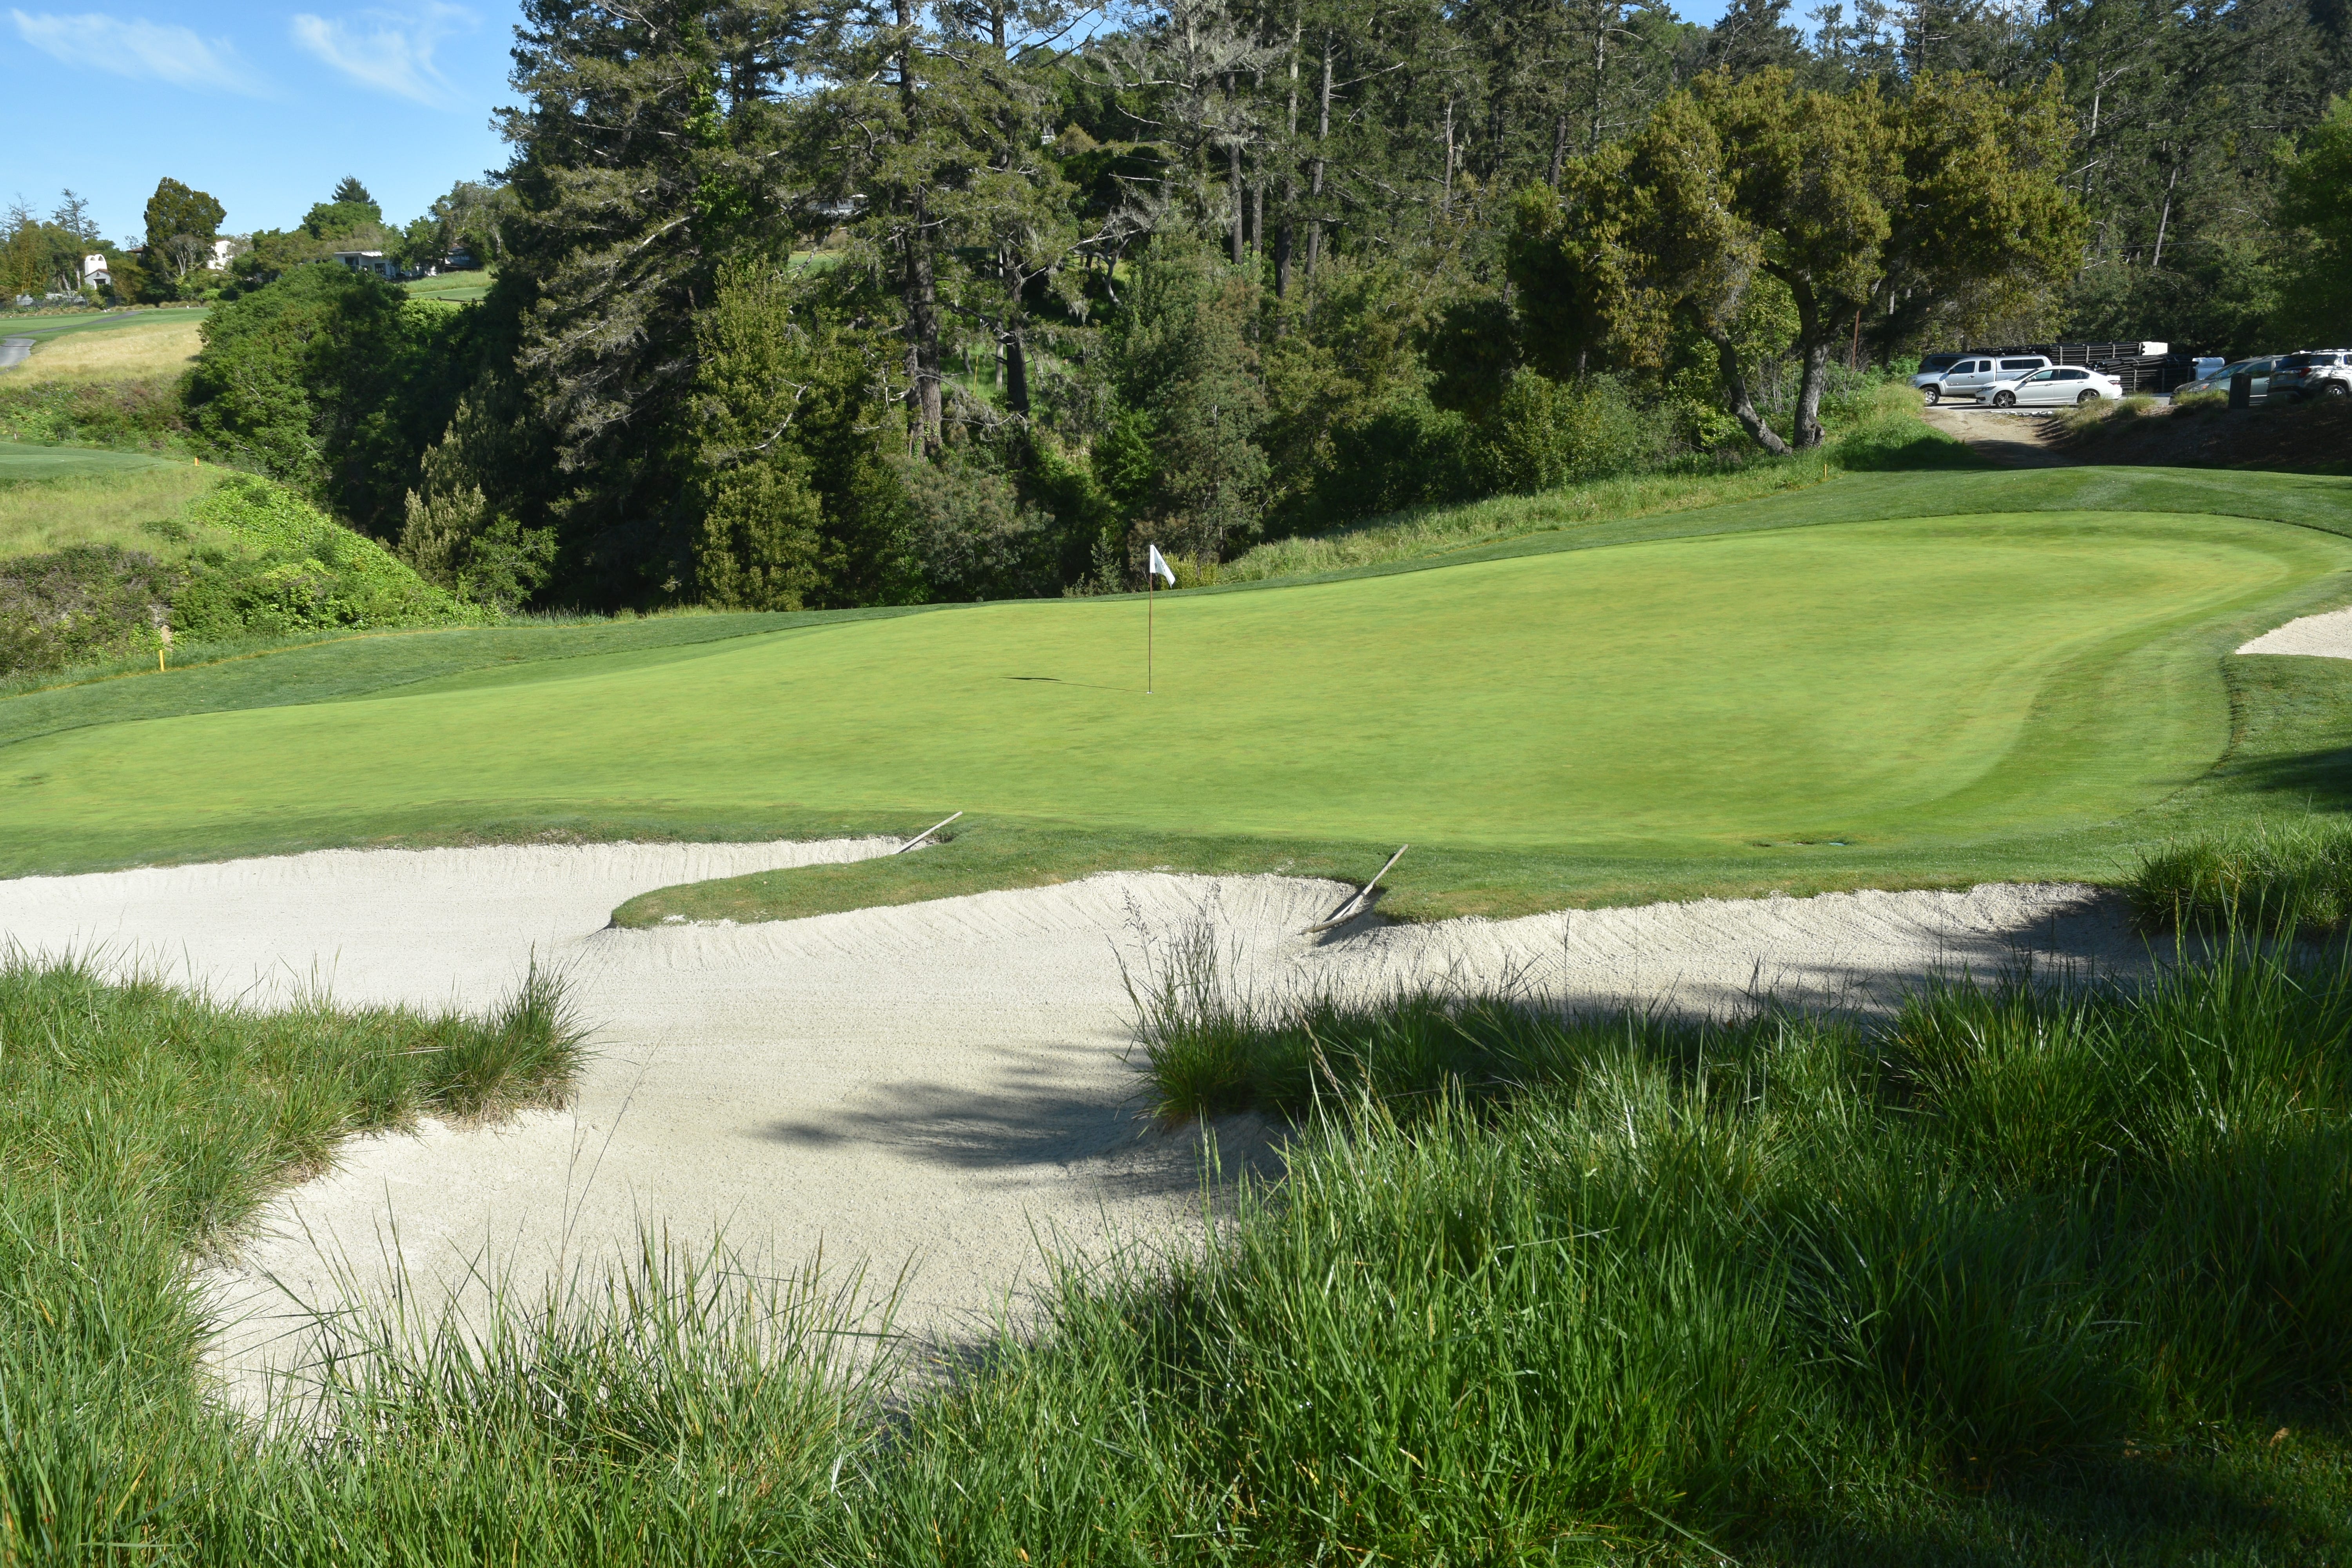
Hole 18: Par 3, 173 Yards
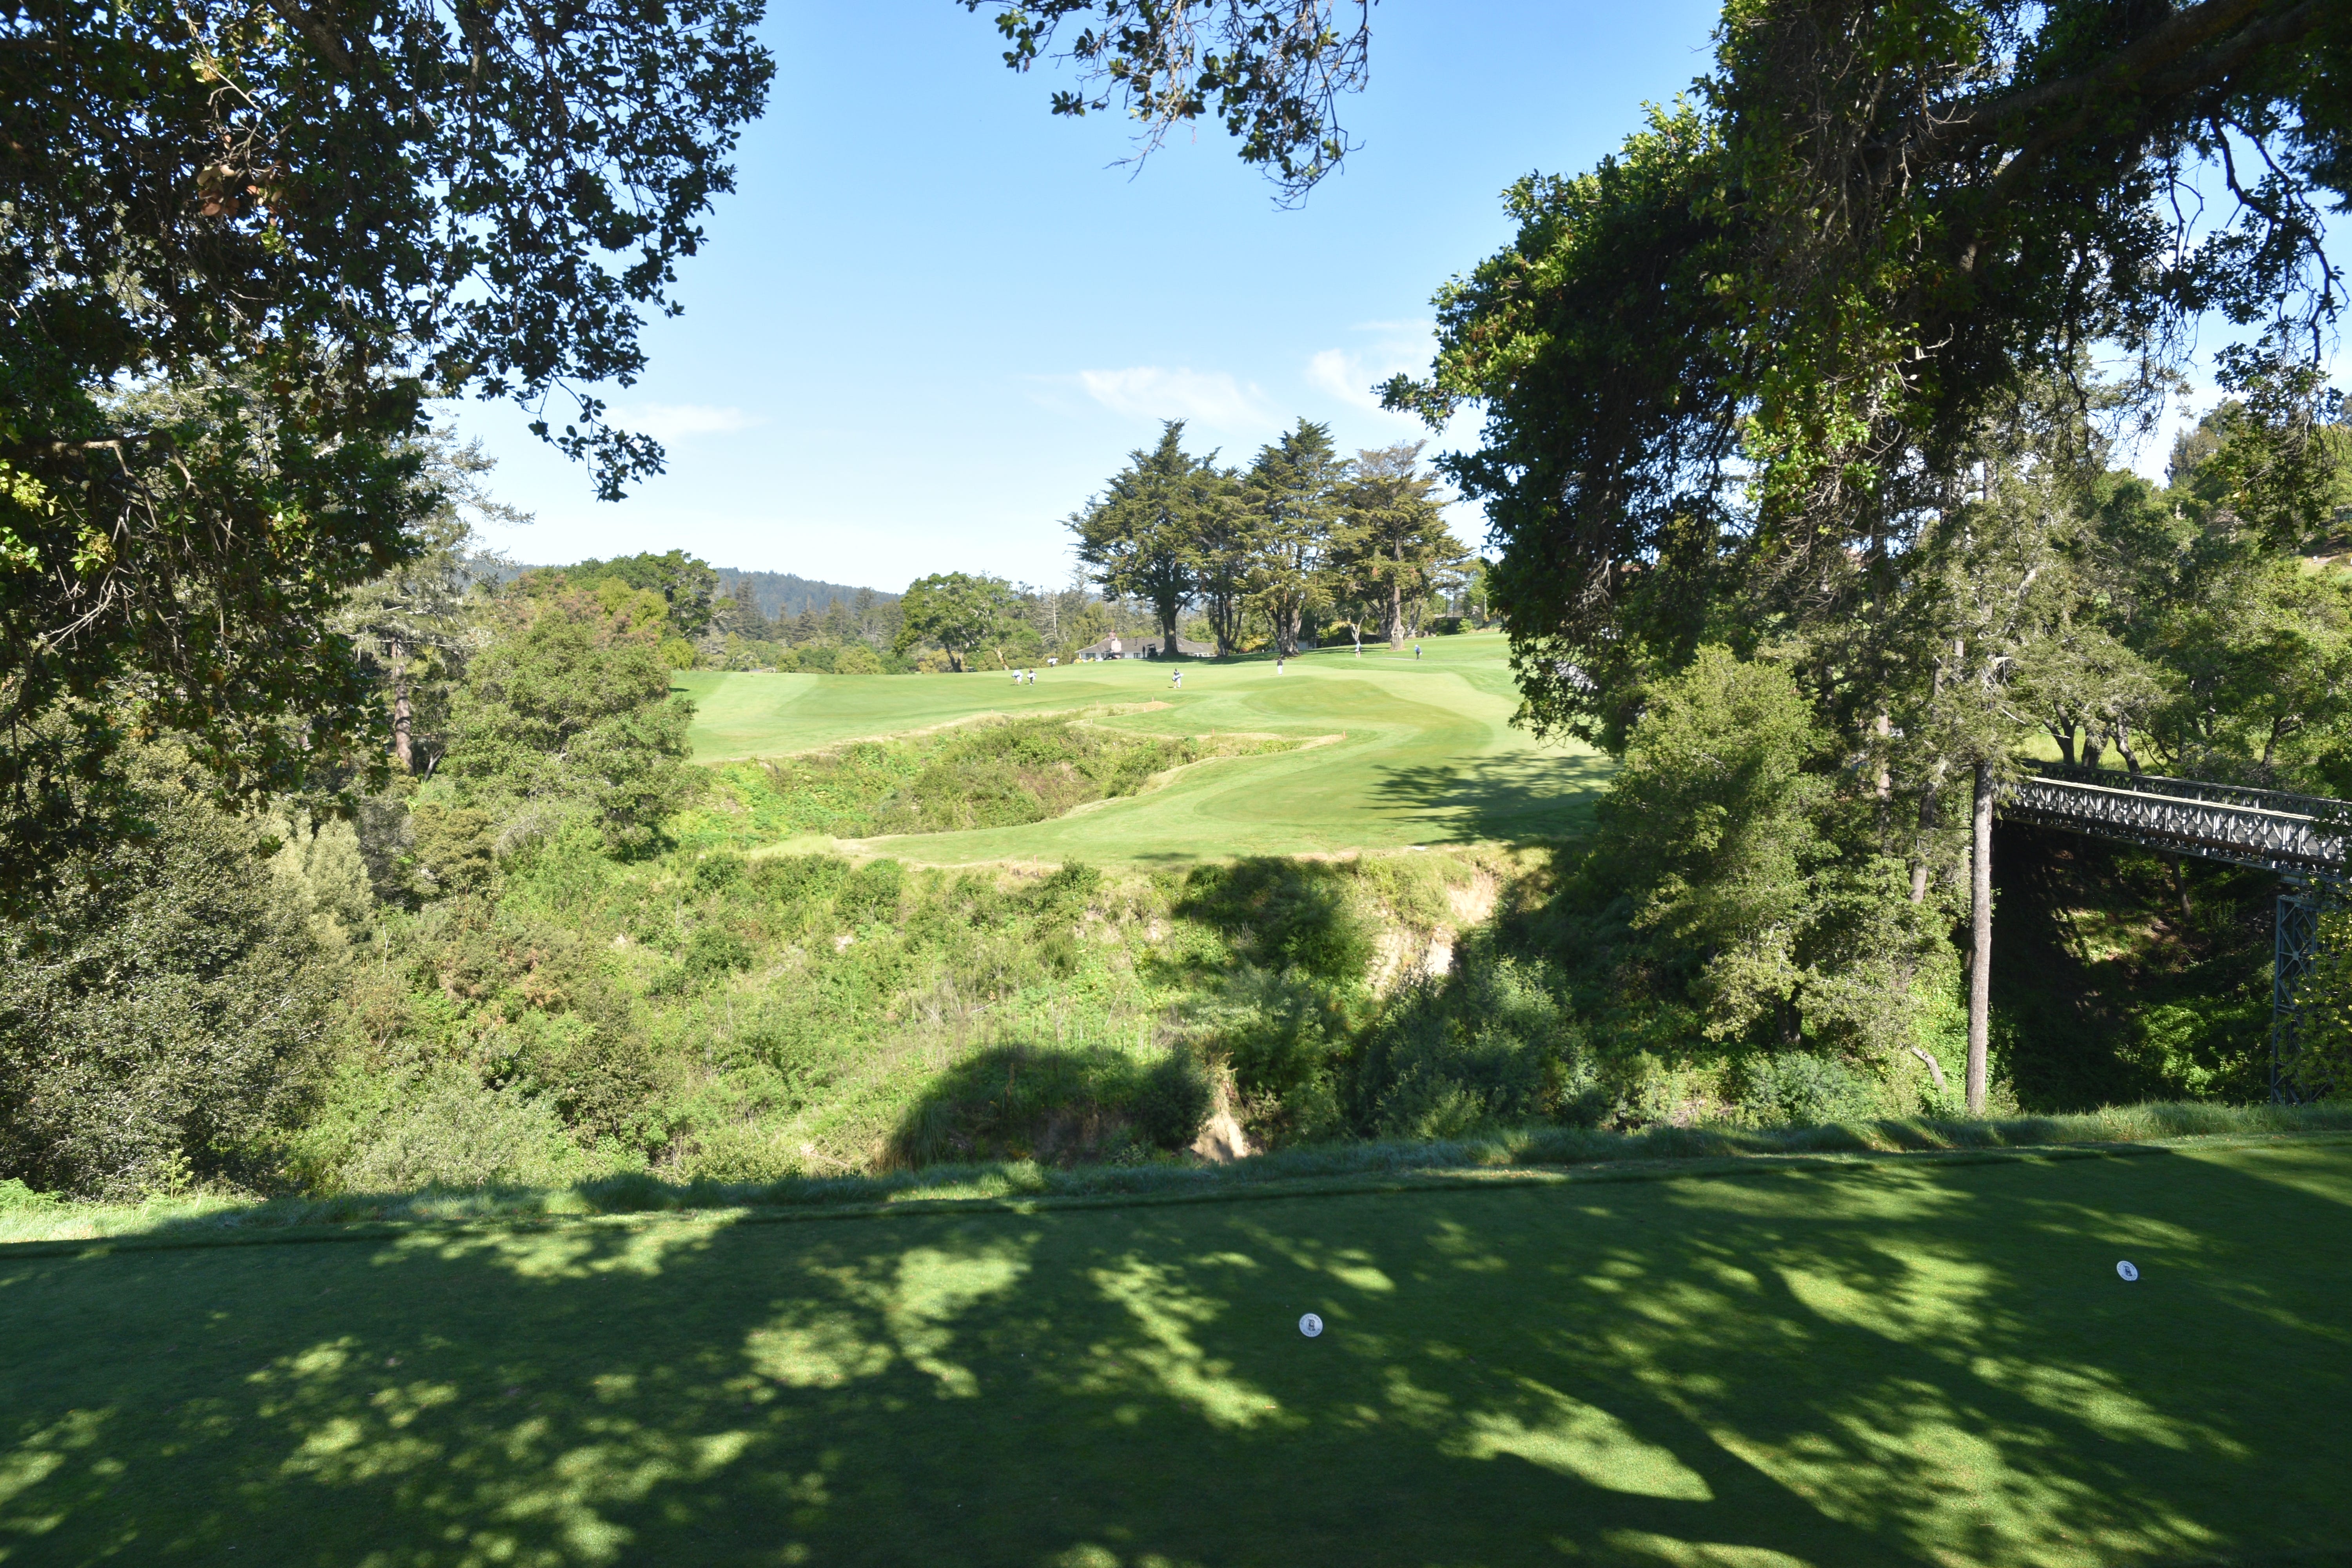
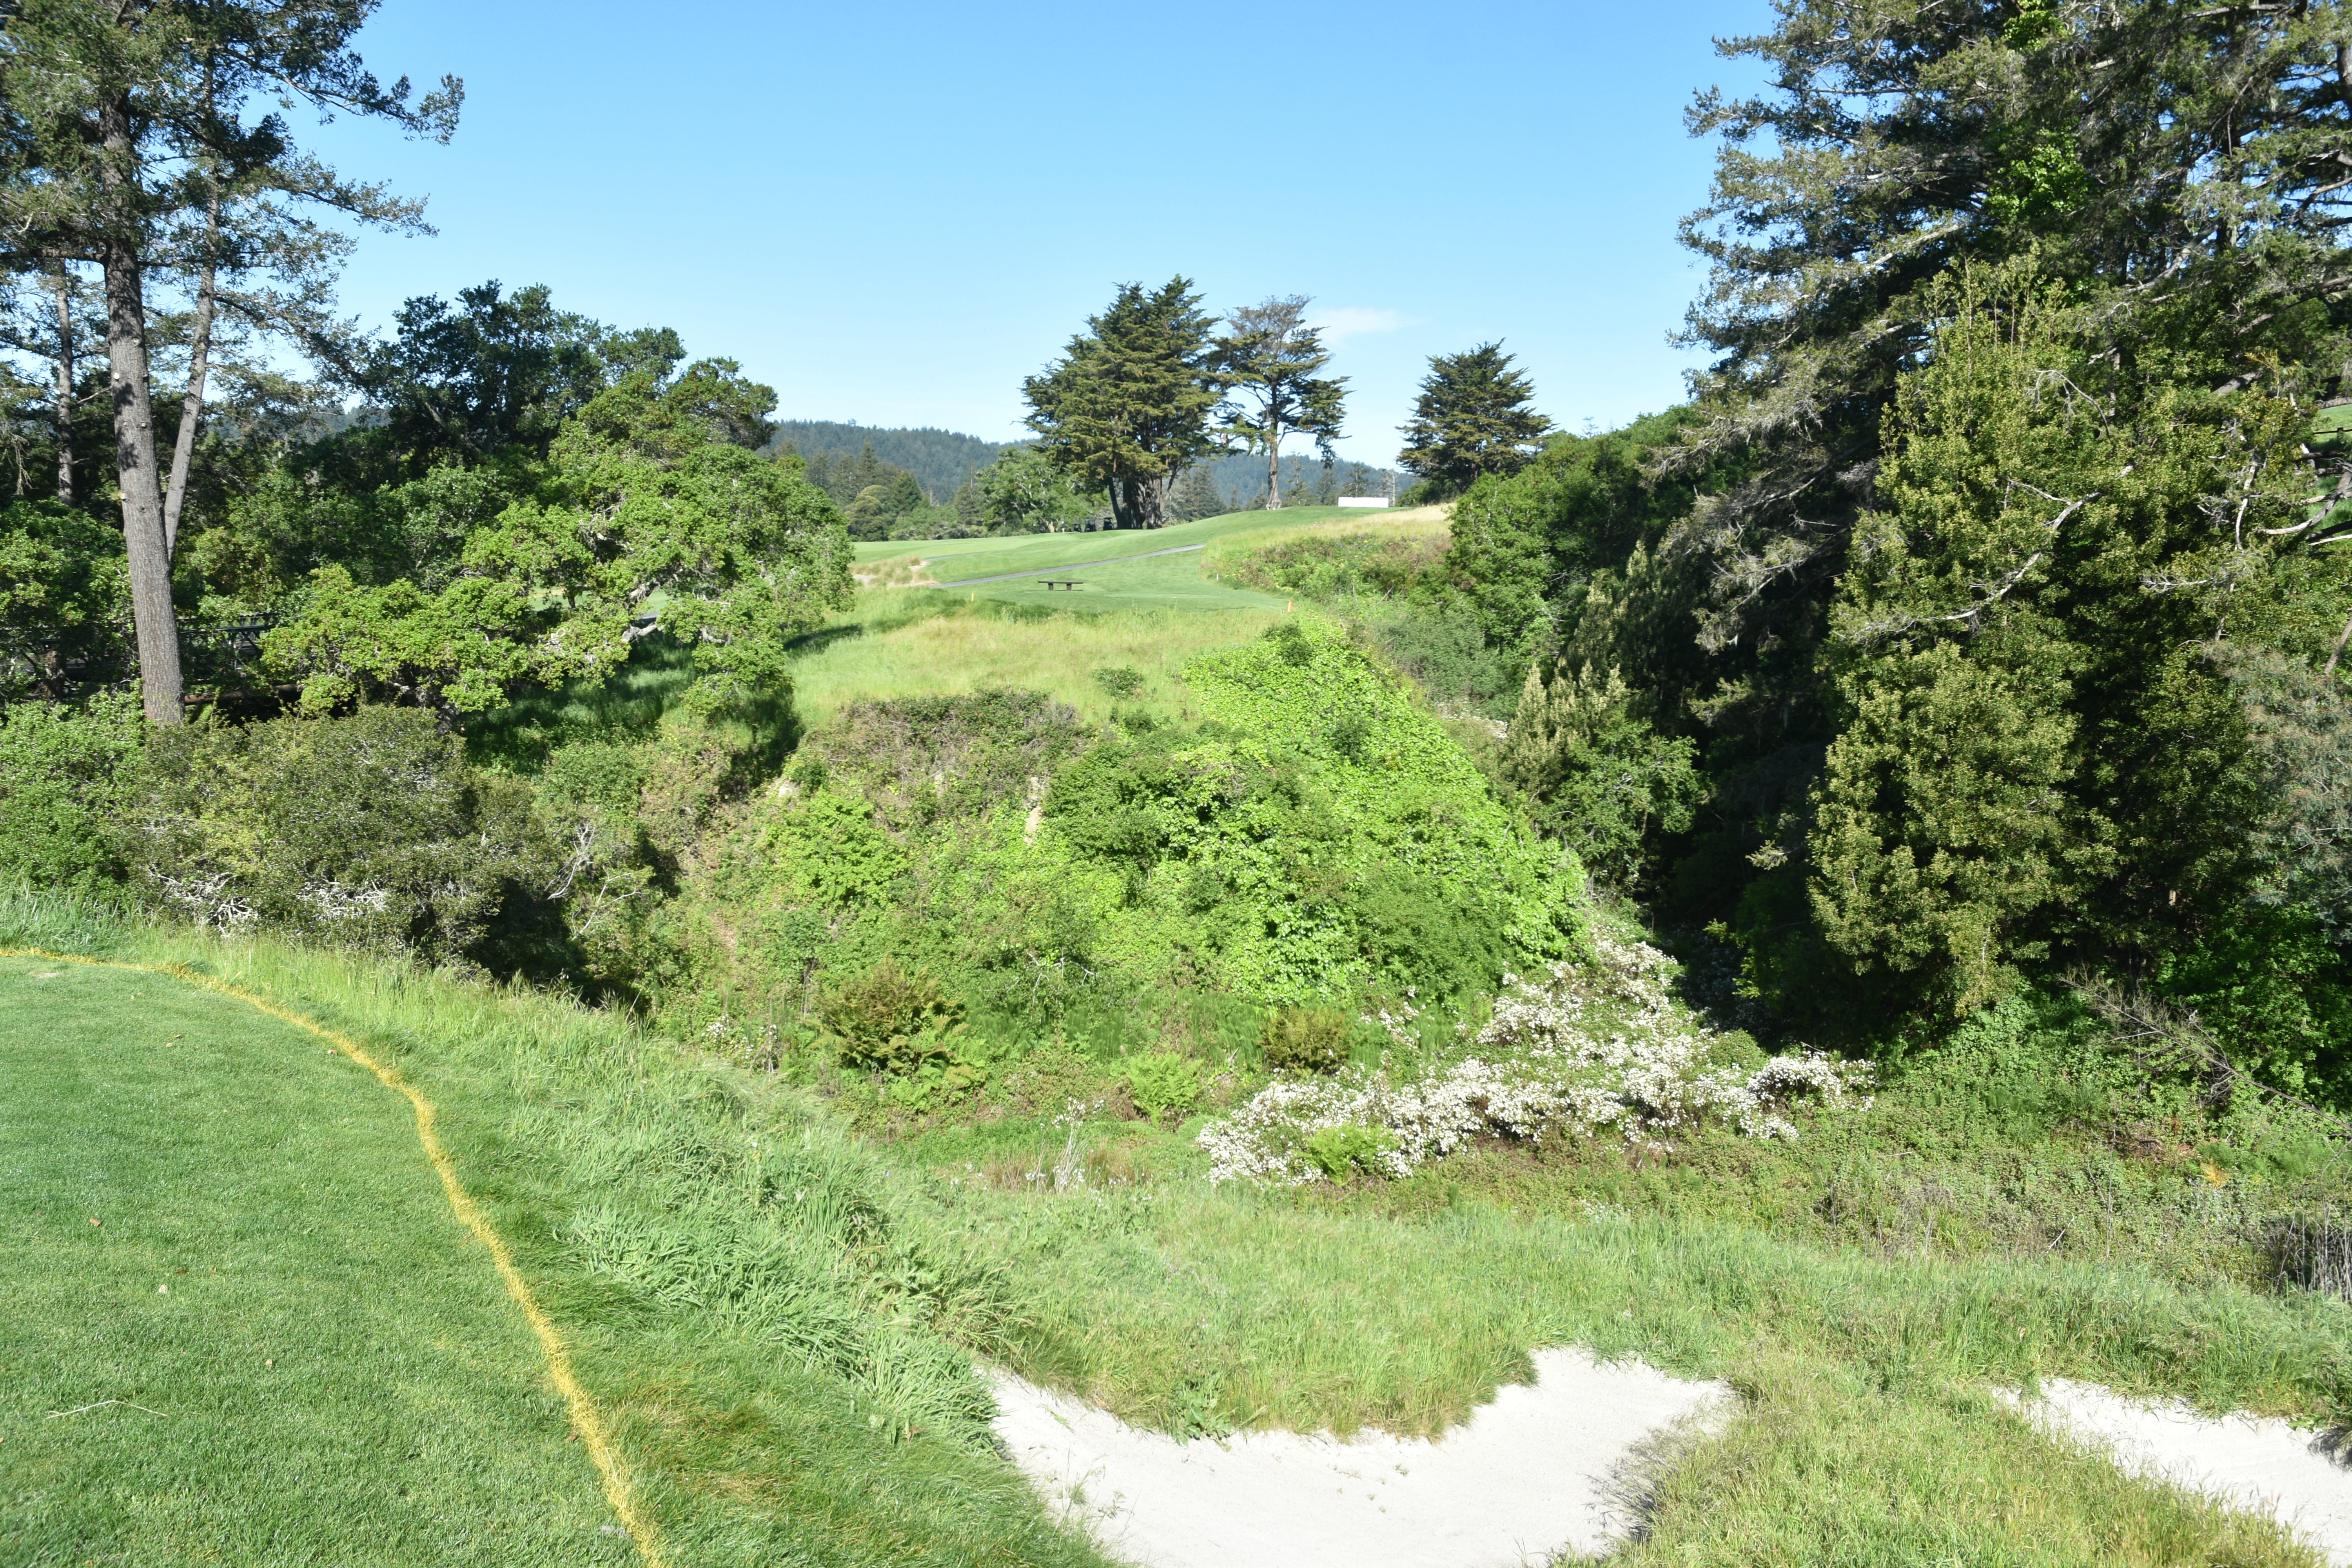
While never ideal to end a round on a par-3 hole, the 18th hole at Pasatiempo serves up a interesting final challenge with a very difficult green requiring a precise tee shot over the canyon
The 18th hole tee shot from the back tee box
The concern with the tee shot is not so much about carrying the canyon but where you leave the ball. Being below the hole is super important as this green is pitched severely from back to front and from left to right
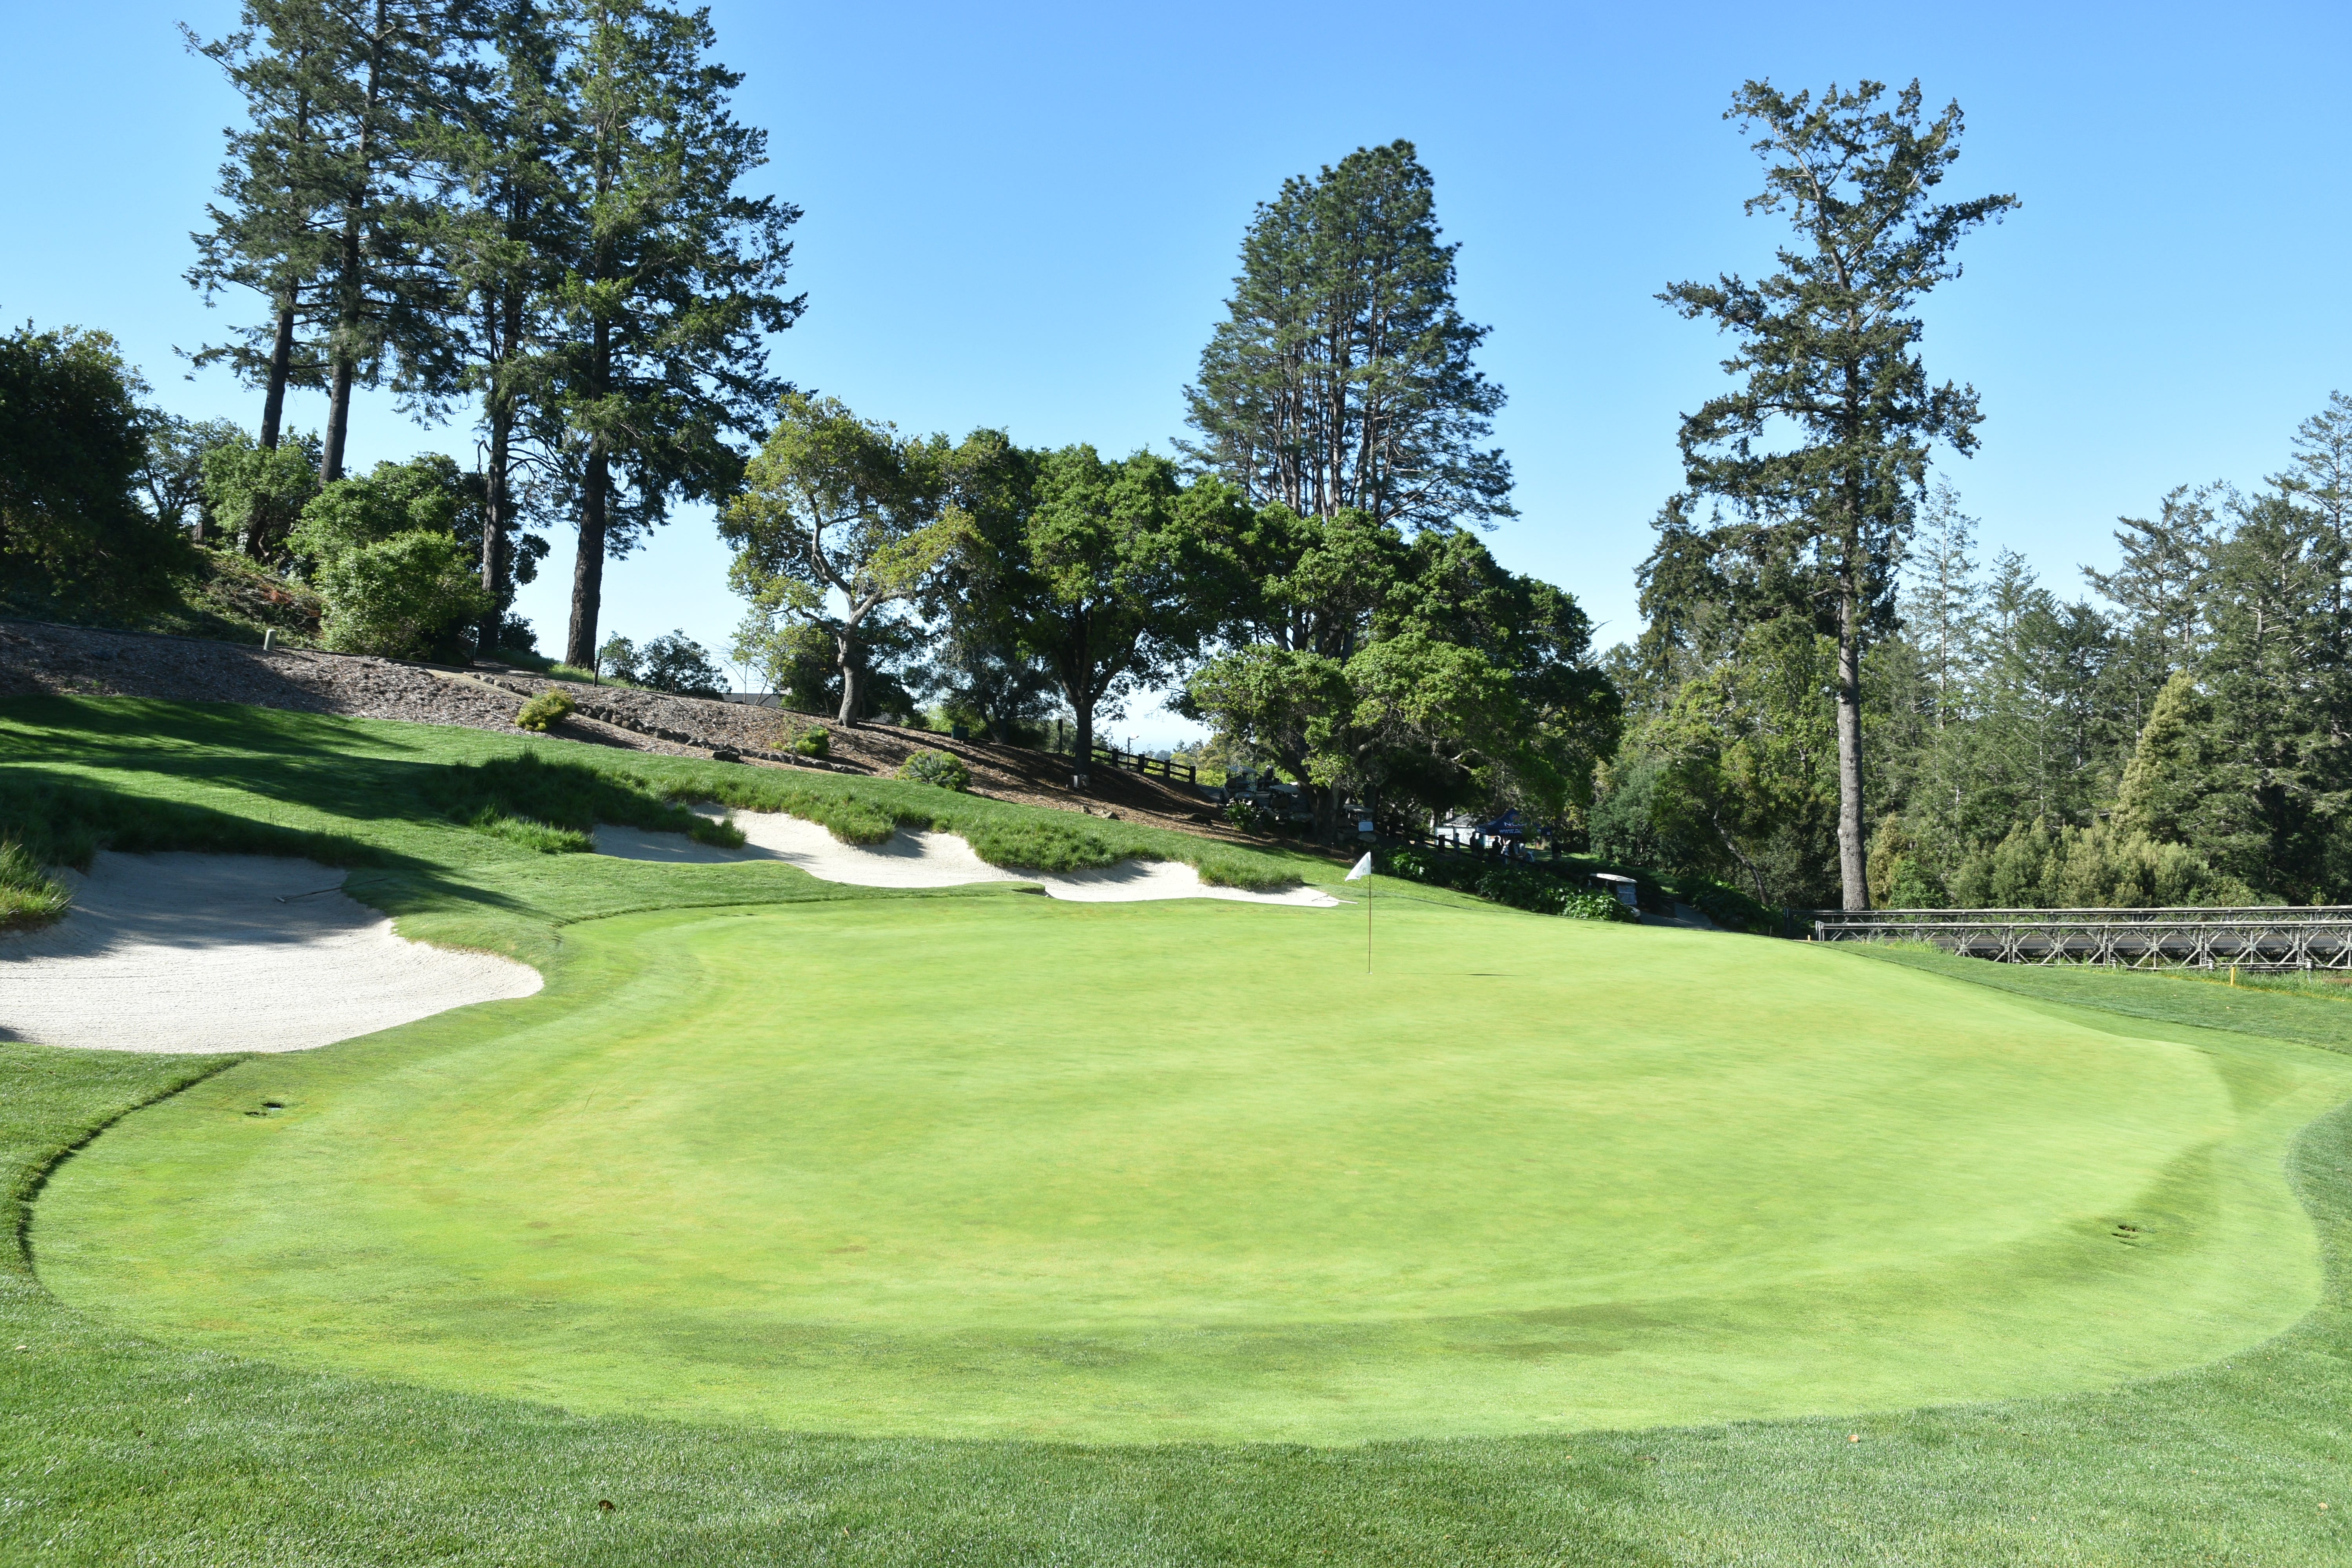
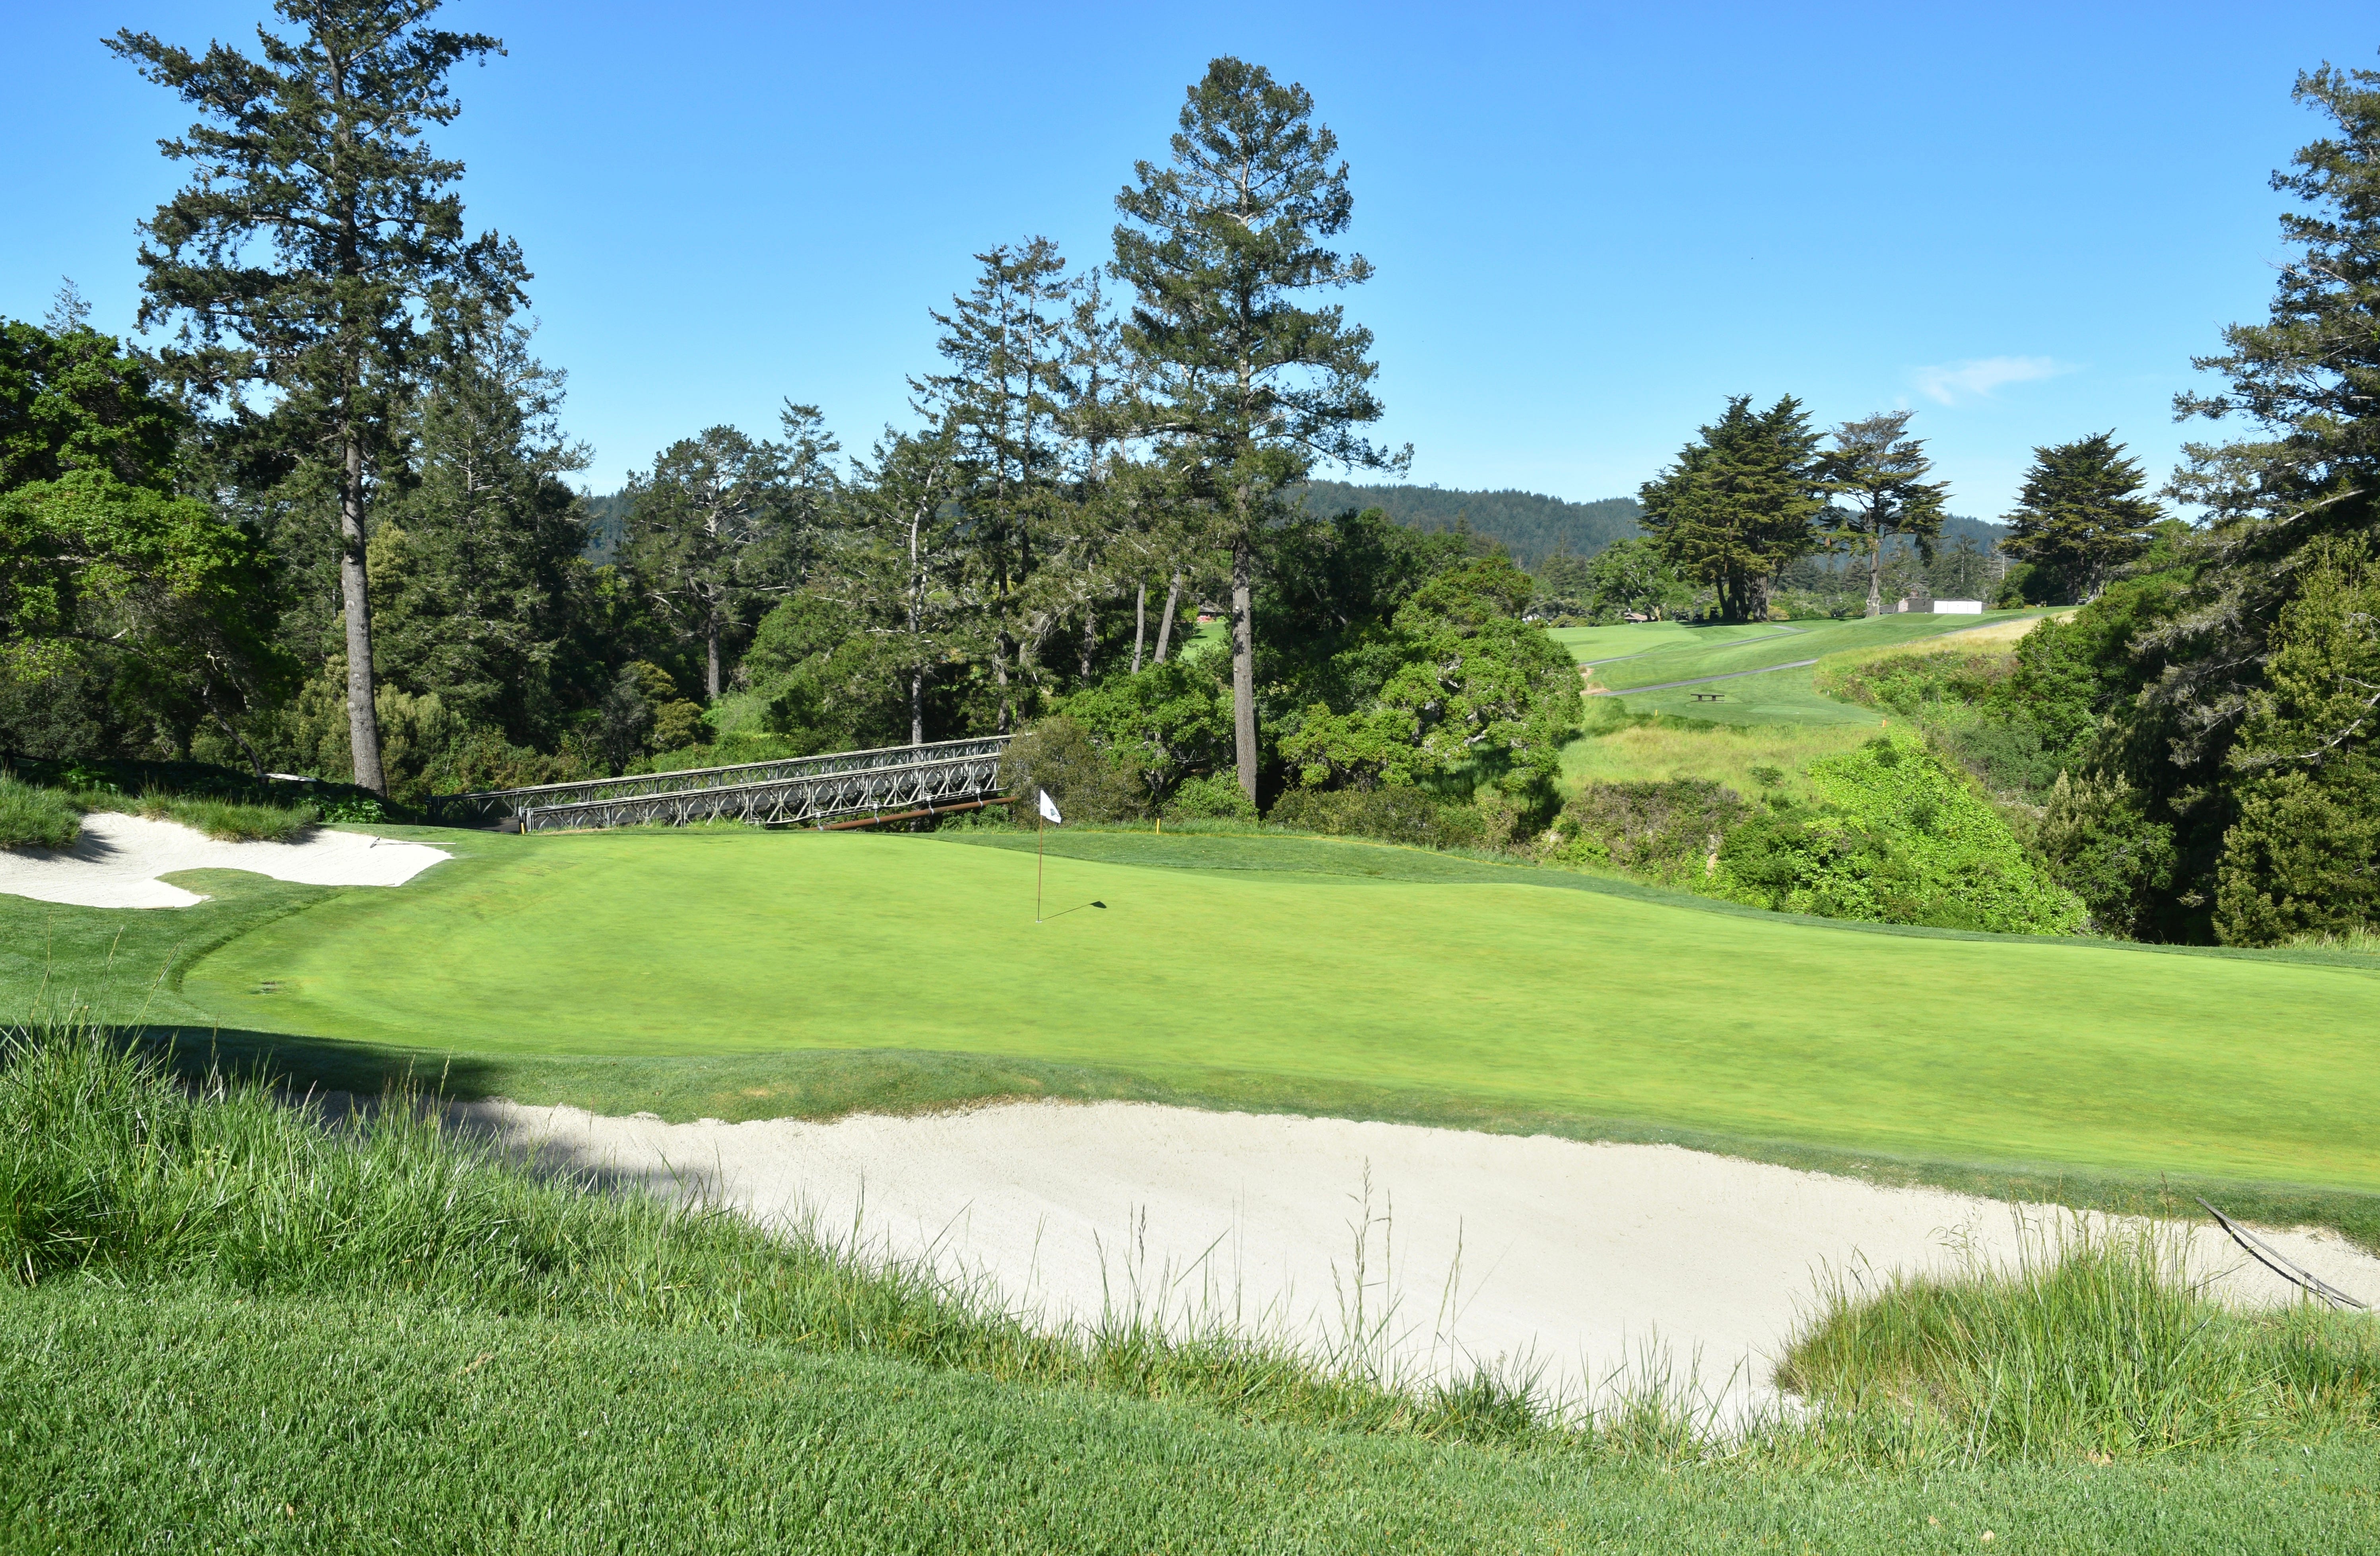
The 18th hole green viewed from the front right — the green has a false front and countless tee balls have frustratingly rolled back off the green
Various vantage points of the 18th hole green at Pasatiempo
The 18th hole green viewed form the back right
The 18th hole green viewed from the back left — hole locations in this area of the green tend to be the toughest — approach shots hit into this area typically repel away towards the center of the green
A look into the canyon of the 18th hole
The 18th hole finishes off a splendid design and a wonderful test of golf